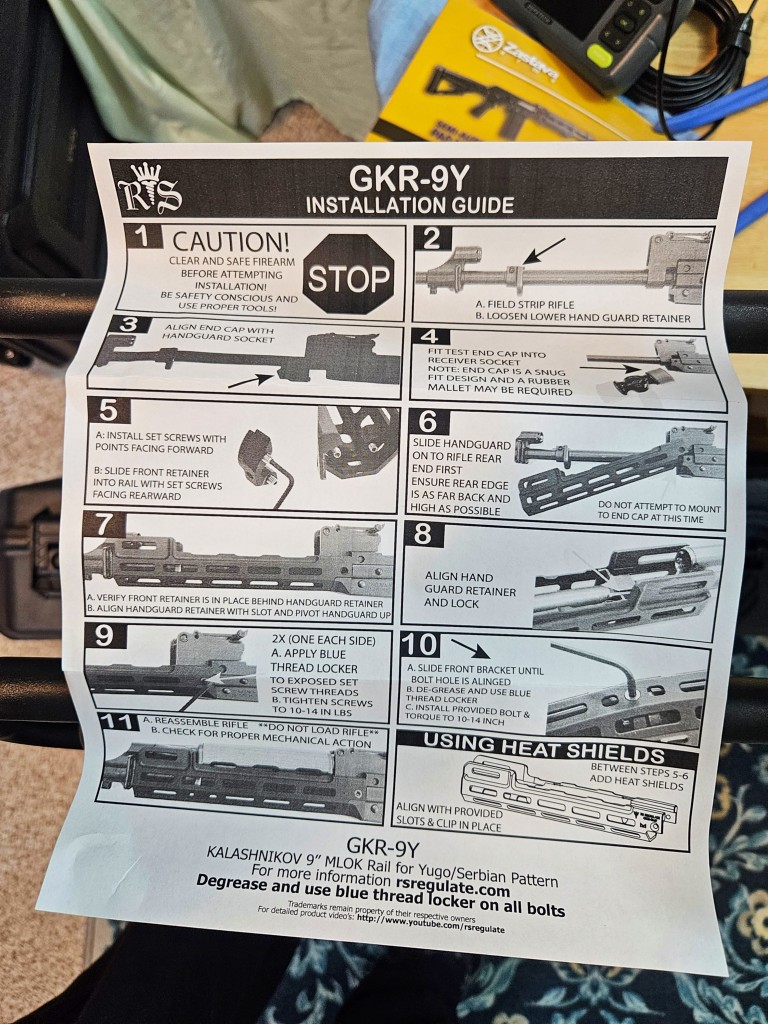
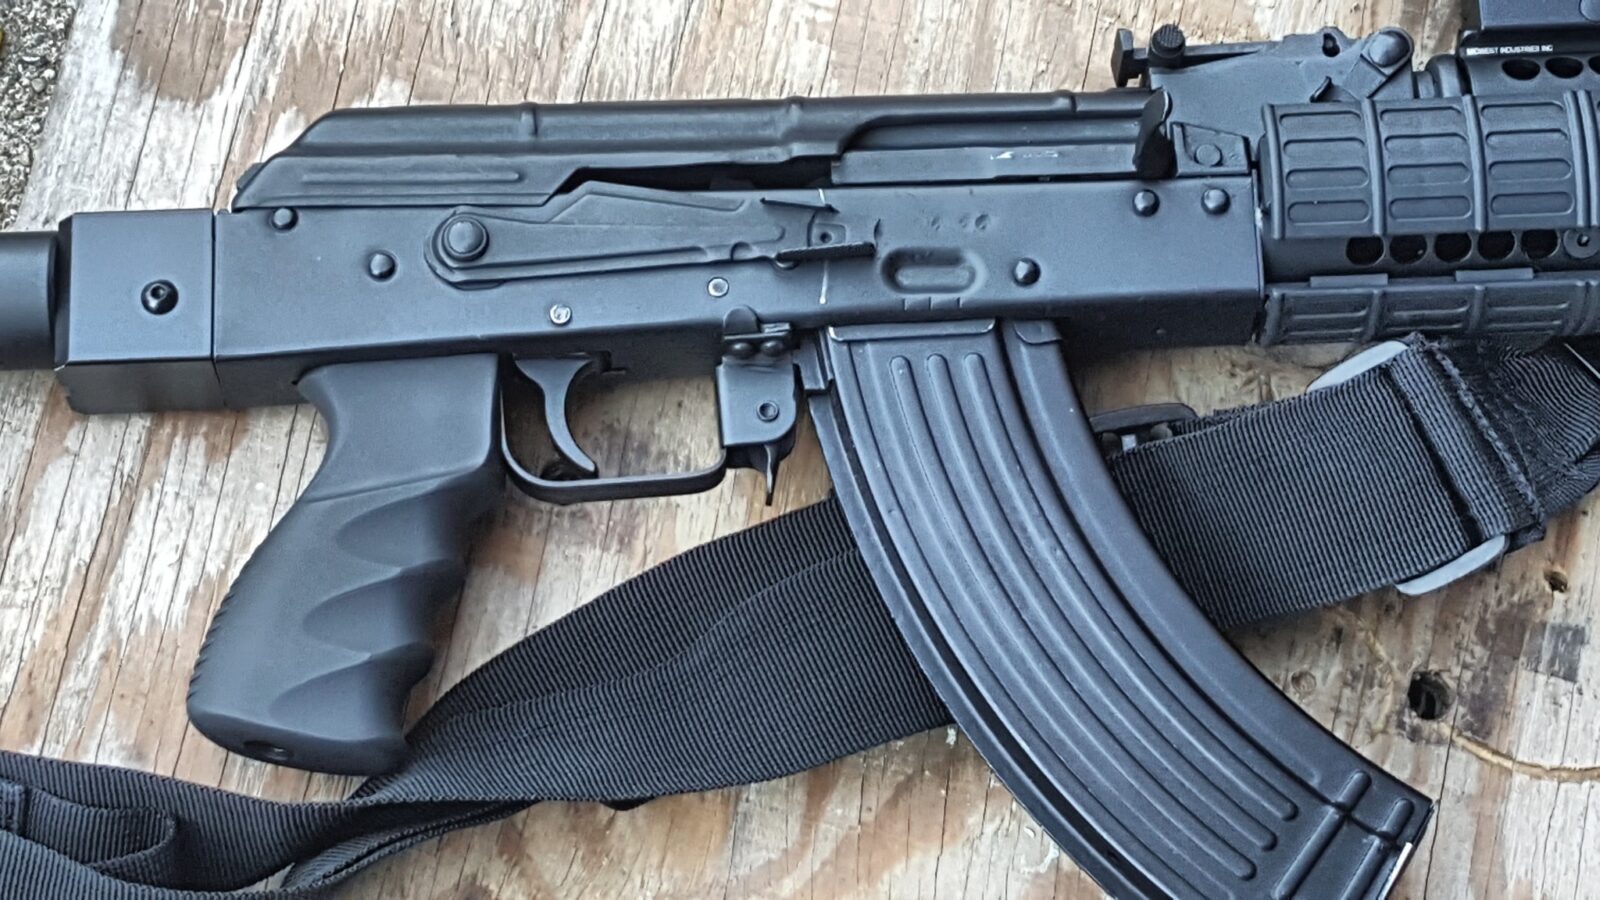
Scot Hoskinson owns RS Regulate and is a meticulous engineer. His products are top notch and one thing I would tell you is to always read the instructions. He puts a lot of effort into documenting what you need to do so find the instructions and follow them.
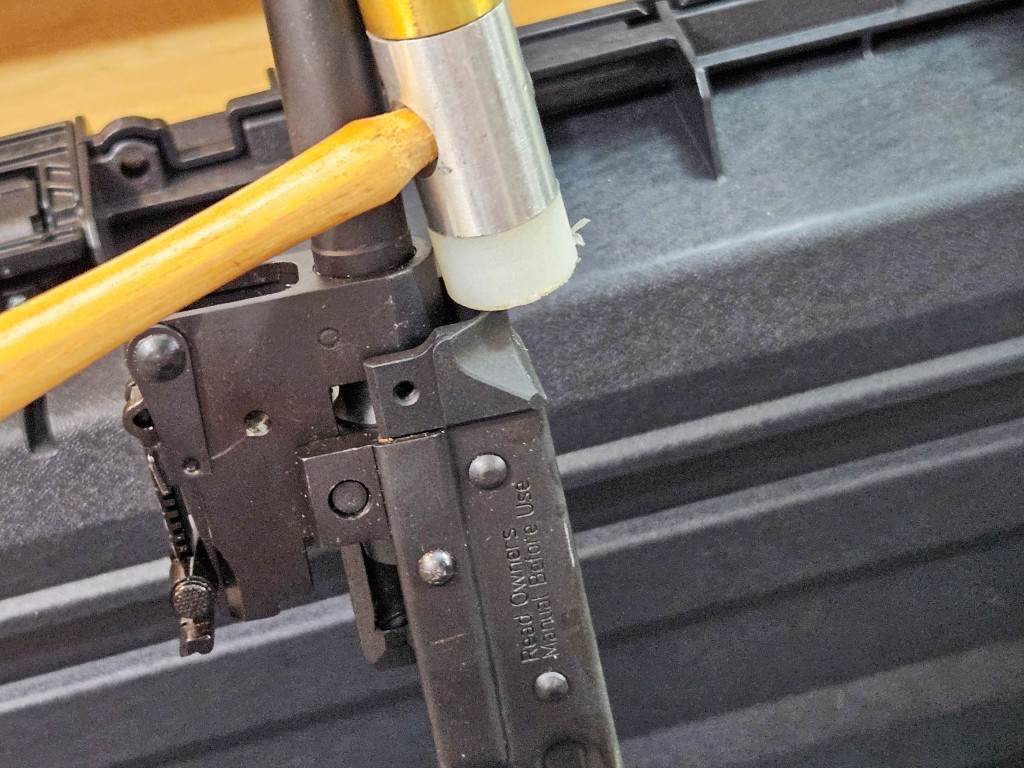
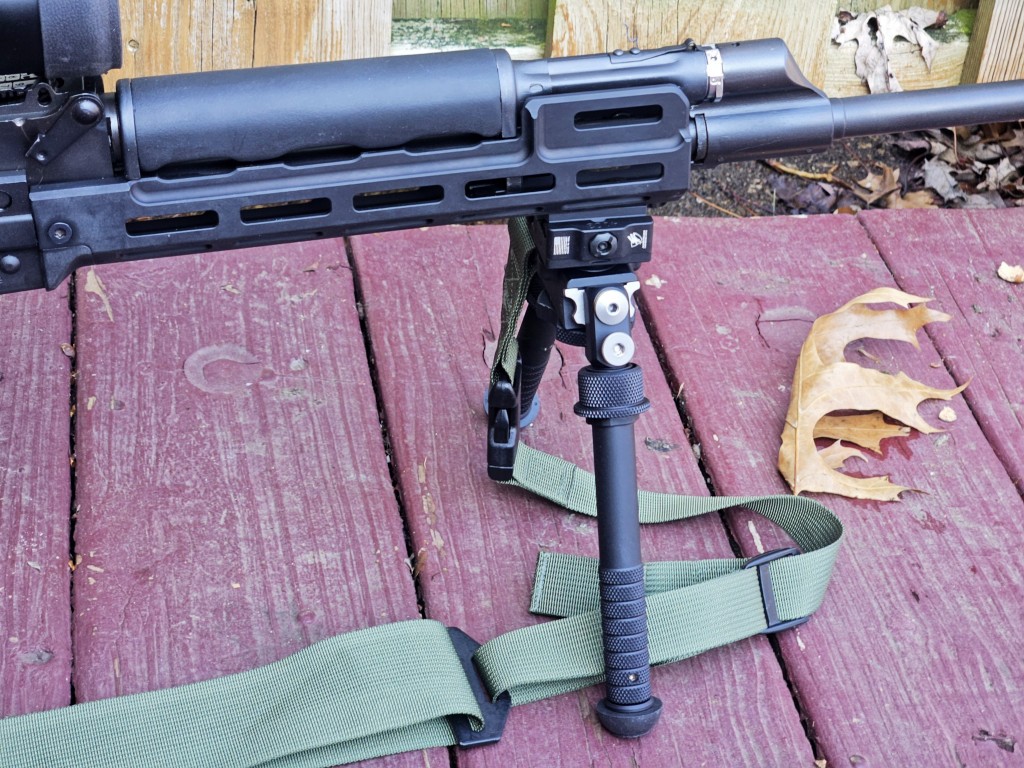
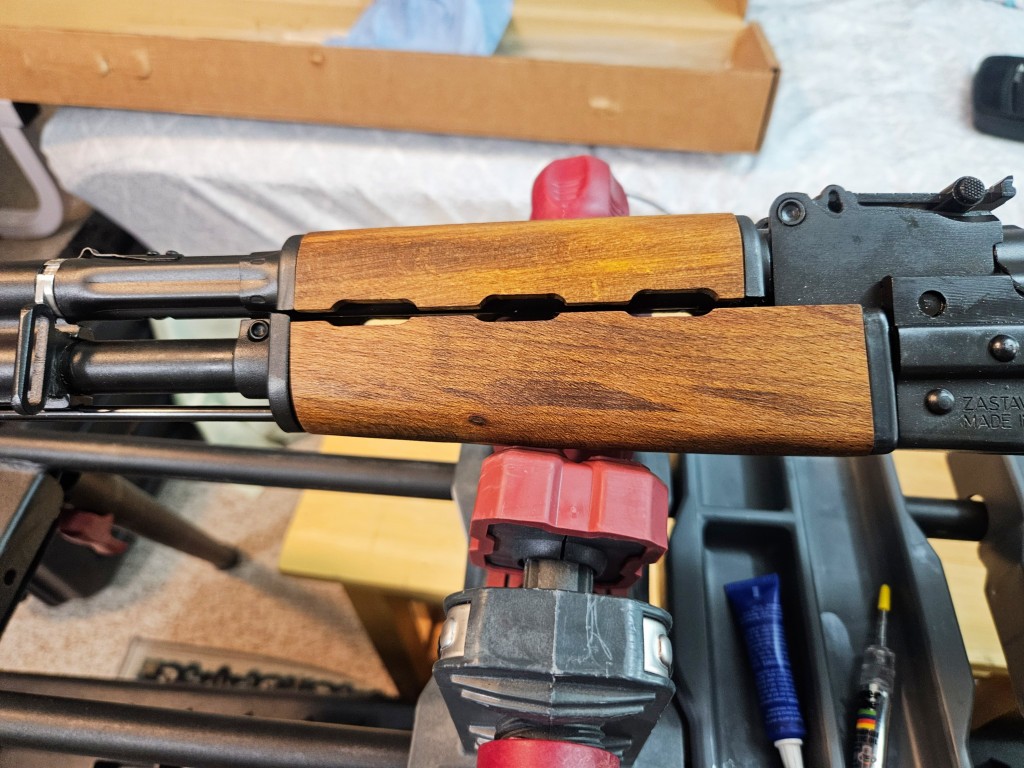
Trust me – read and follow the instructions to install a RS Regulate handguard. Note the instruction sheet is for the old part number GKR-9Y. Scot revised the part number and it is now the GKR-9DY — same handguard but different part number.Per the instructions in steps 3 and 4, I tapped the end cap into place. Note, you do need to test fit and make sure it will fit. You aren’t beating it into place with a ton of force. Mine went in without any filing needed but I did need to tap it to get it fully seated. You want the end cap to sit in the receiver firmly – not loose.
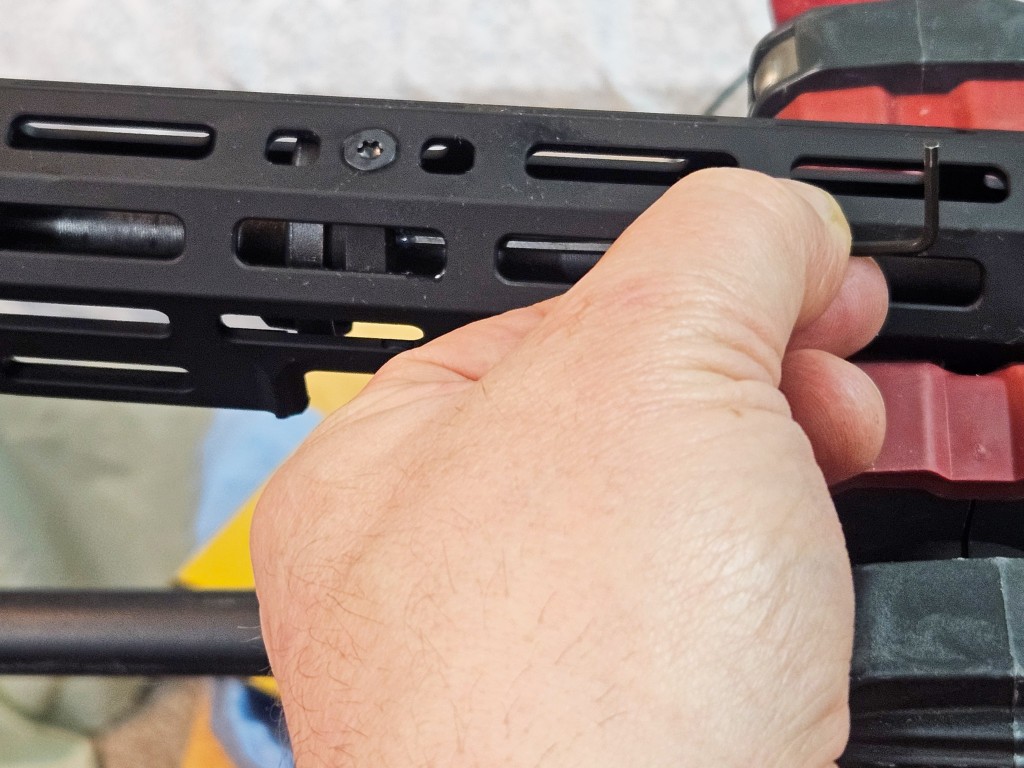
I don’t have photos of every step Scot lists, but I do want to mention step 5 – the front retainer set screws are backed out towards the receiver with the allen heads facing the rear. Once you have the front retainer in place and screwed to the handguard in step 10, you then tighten down the set screws to make everything nice and tight.
In all of his steps, be sure to follow the torque specifications and use blue loc-tite or your favorite medium strength thread locker. If you don’t, then the screws will risk coming loose and potentially falling out.
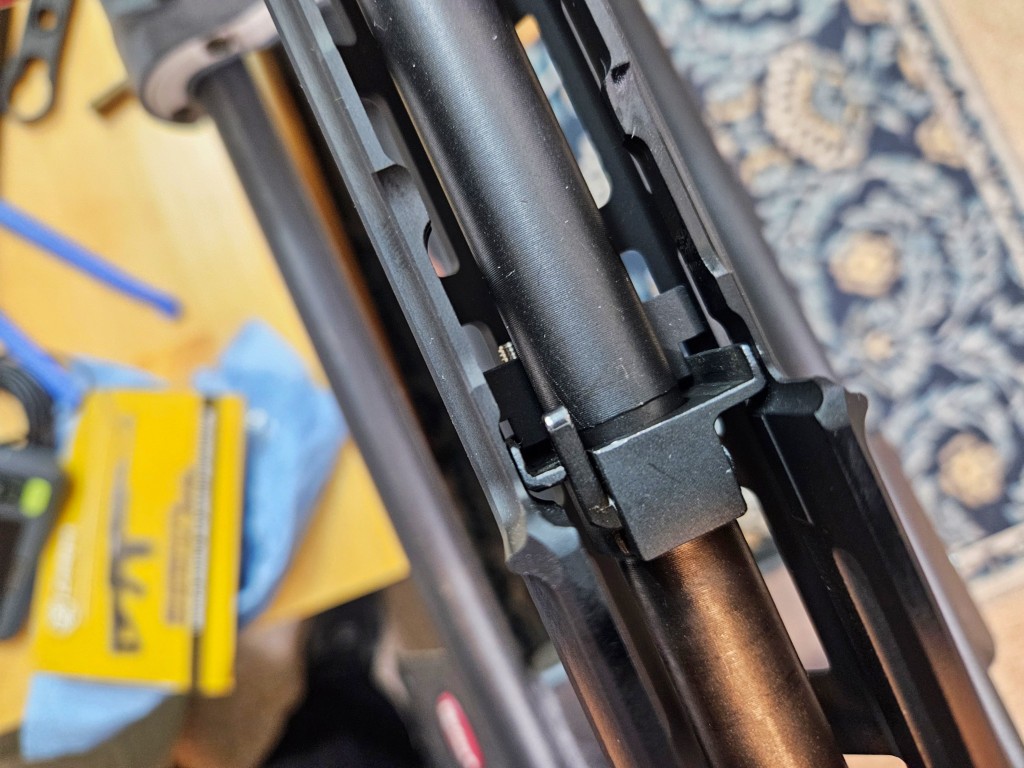
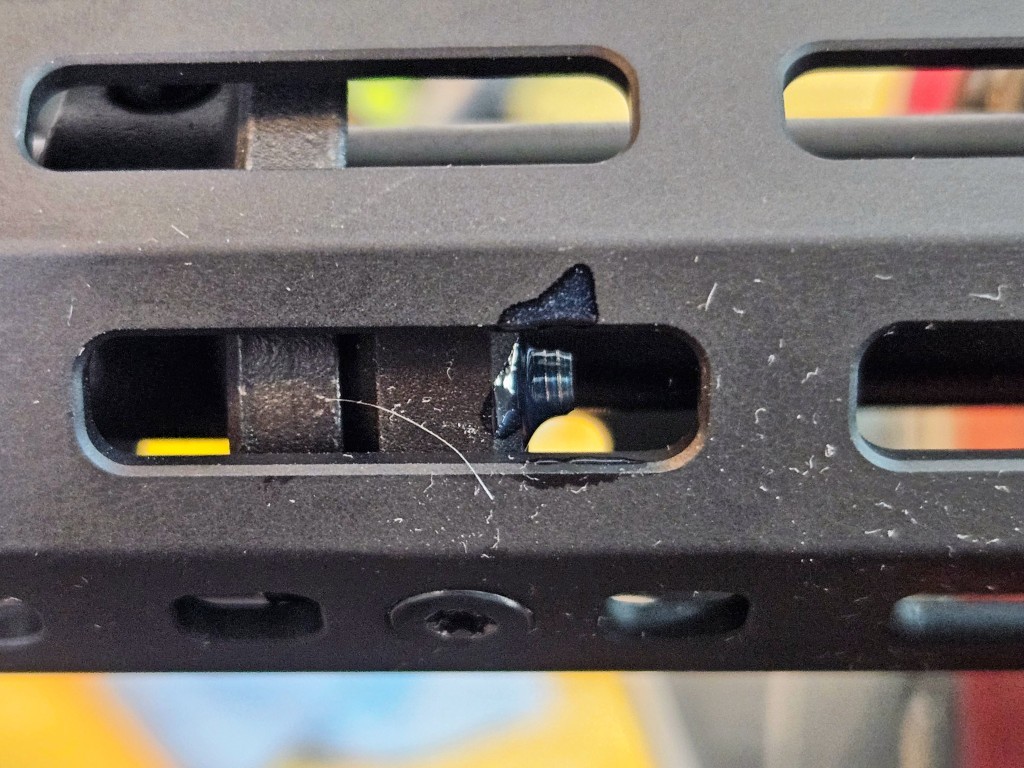
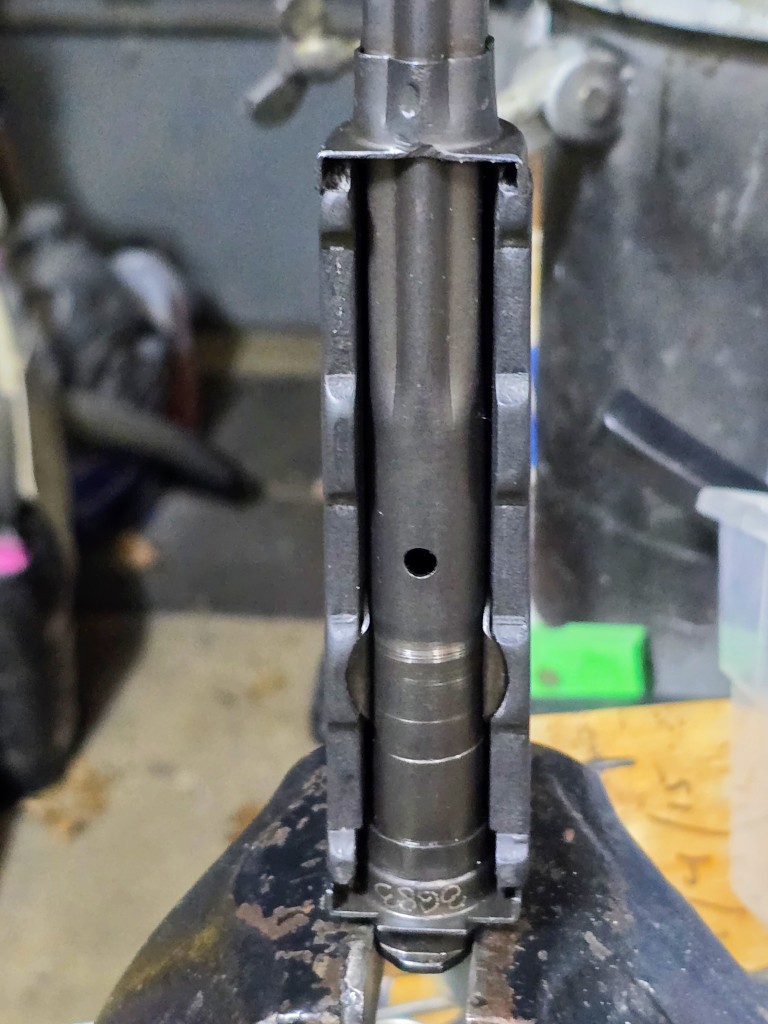
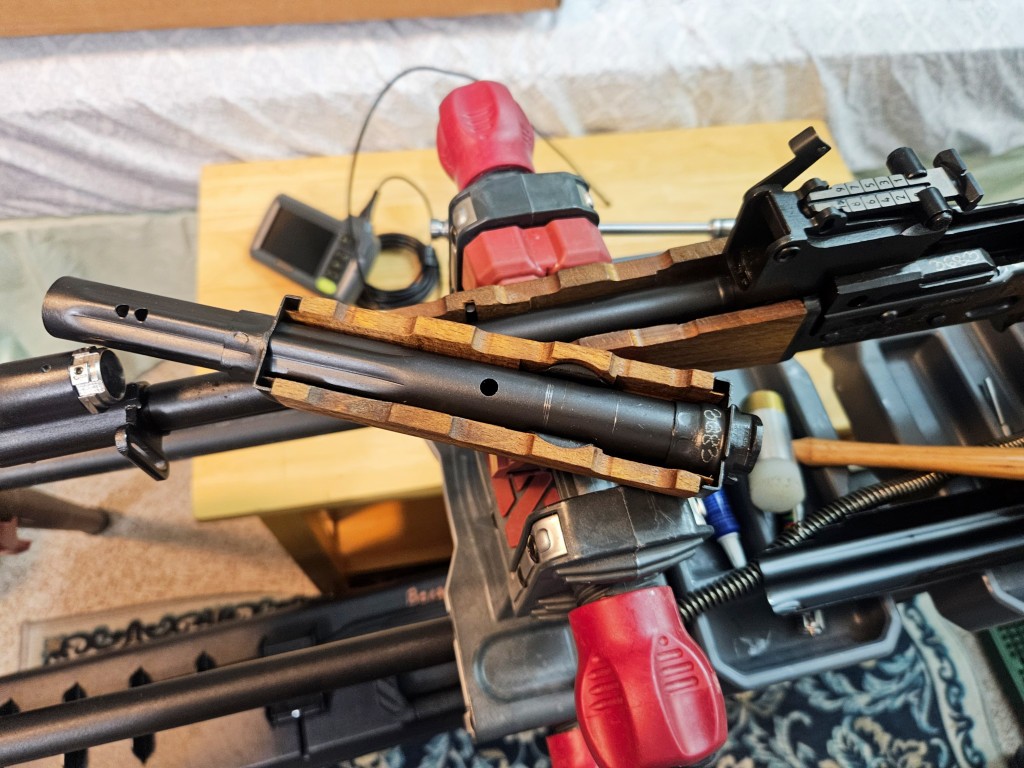
You can see the rifle’s handguard retainer is locked in place because the cam lever is rotated backwards. Looking down past the barrel you can see one of the two front retainer set screws waiting to be snugged down.I used a long Bondhaus ball head allen key to reach in and tighten the set screws. Let me spare you some future grief – buy quality sets of allen wrenches that properly engage your fasteners. The cheap import keys are prone to poor fitment and/or rounding over the edges and both will mess up your fasteners.I applied Blue Loc-Tite before I snugged down the set screws. I removed the residue with a shop towel.
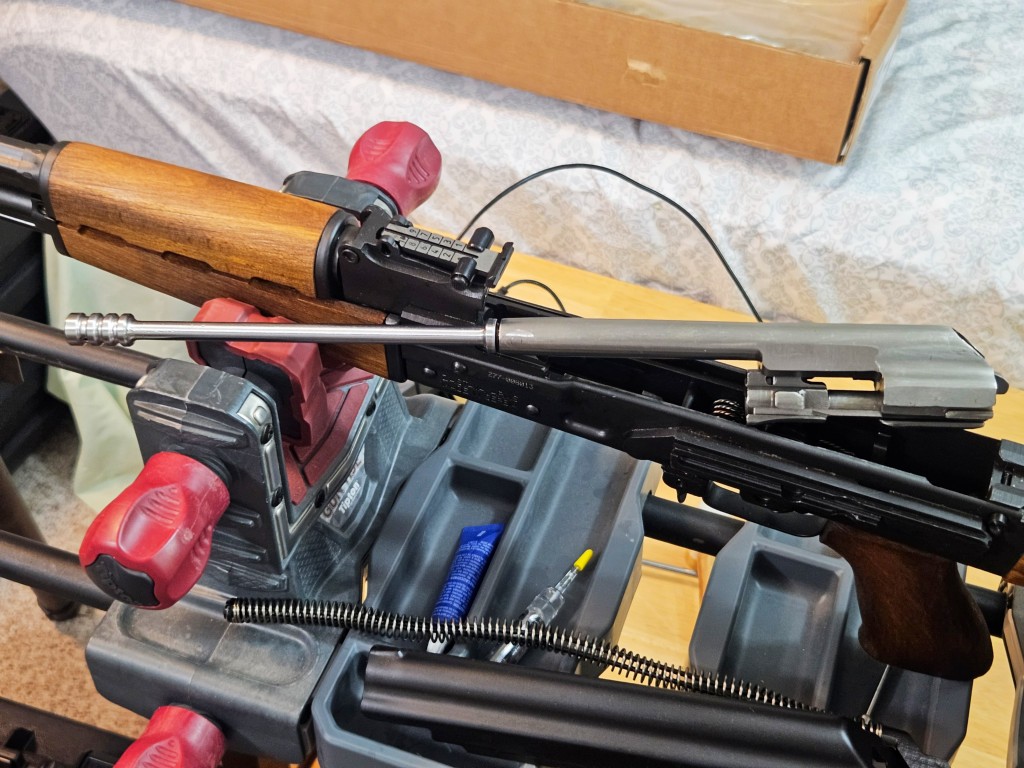
To remove it, rotate the locking lever on the rear sight base. Zastava is one of the makers that make that lever really tight. I use a large adjustable wrench’s jaws to hold the lever while I rotate it up. You can also use a hammer with plastic heads to tap the lever up. Once it is rotated, the rear of the tube closer to the receiver can be lifted up and the unit brought back just a tad to clear the front gas block. By the way, the bolt carrier must be removed or the long gas piston will be in the tube and block removal.
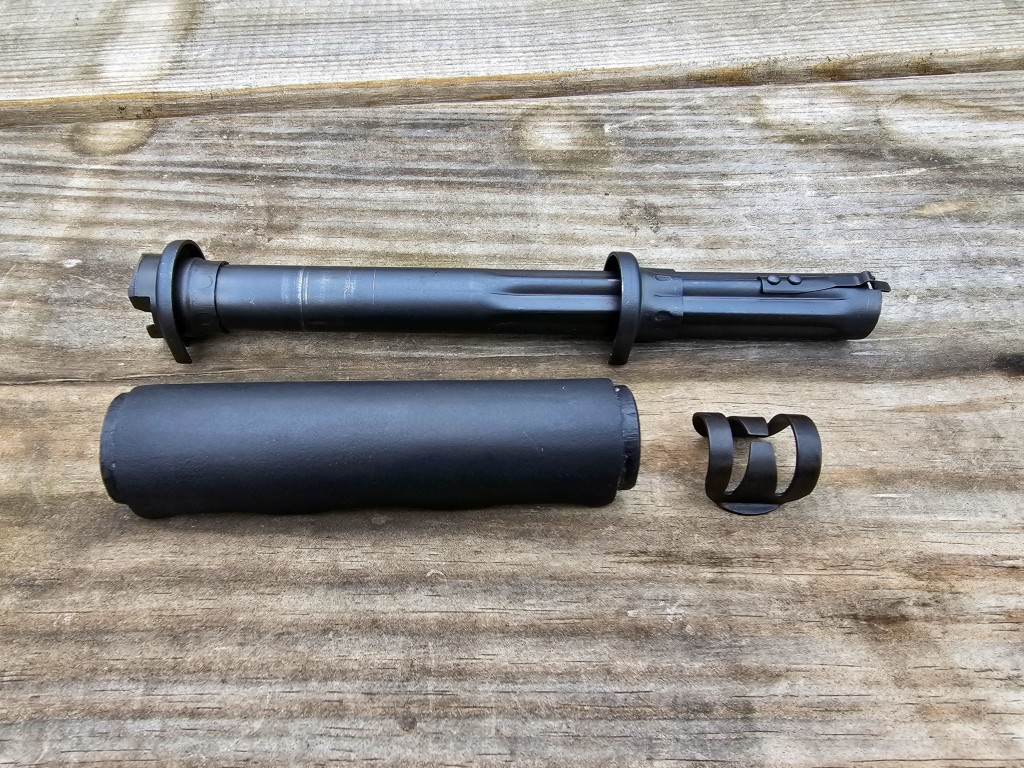
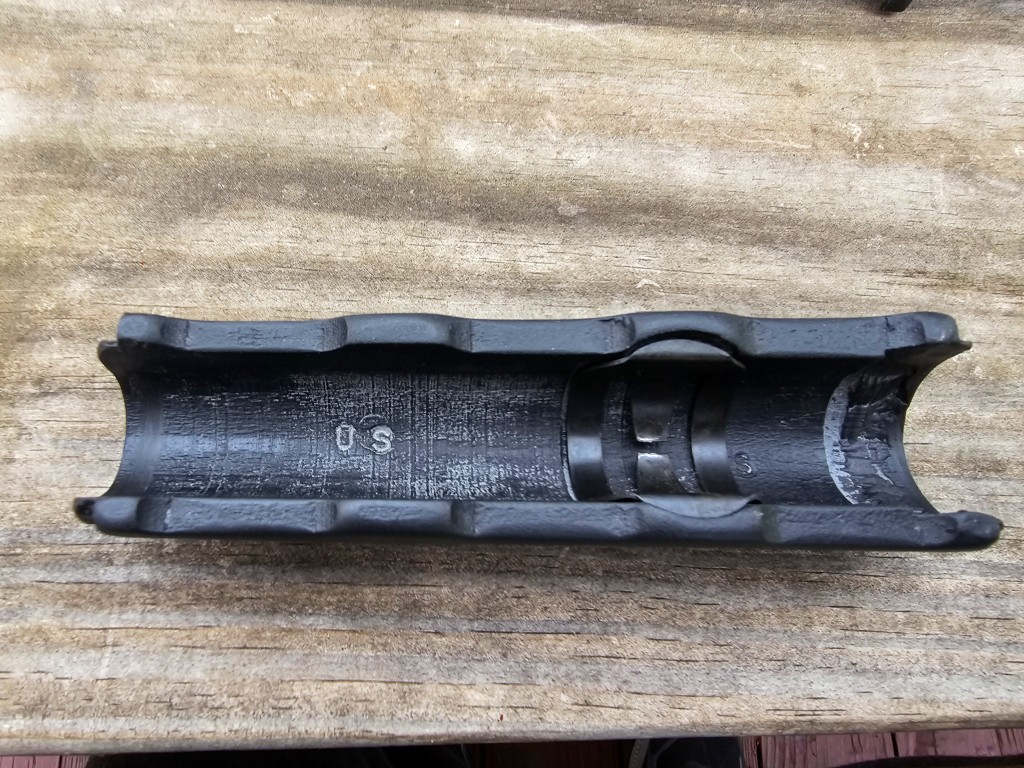
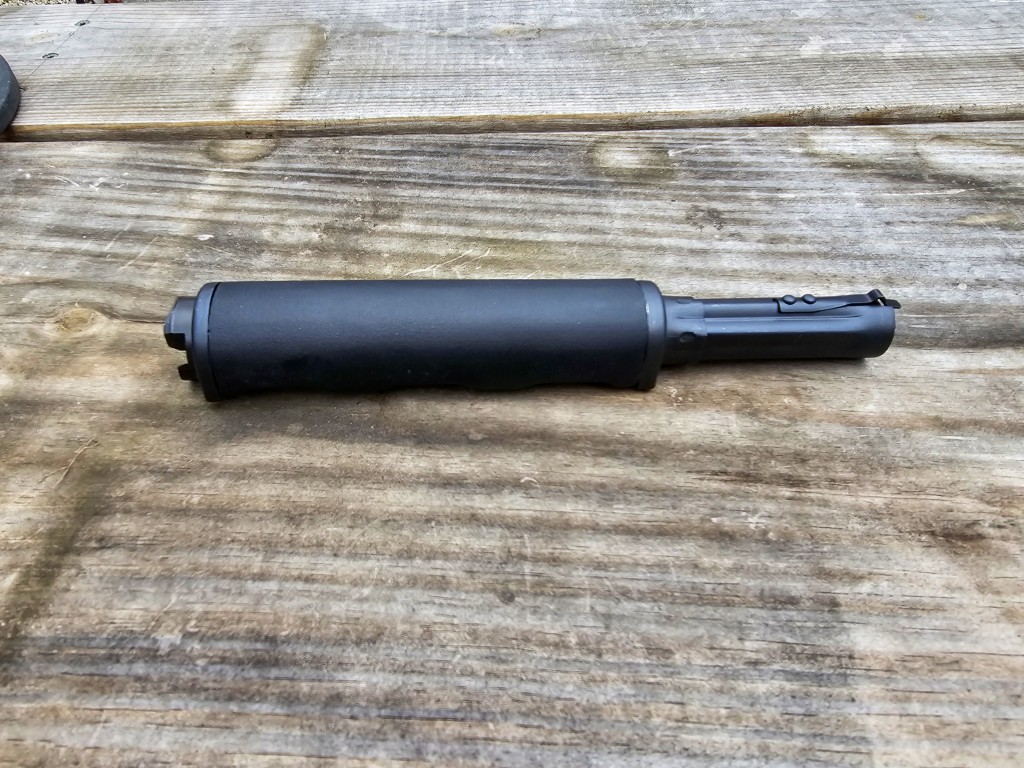
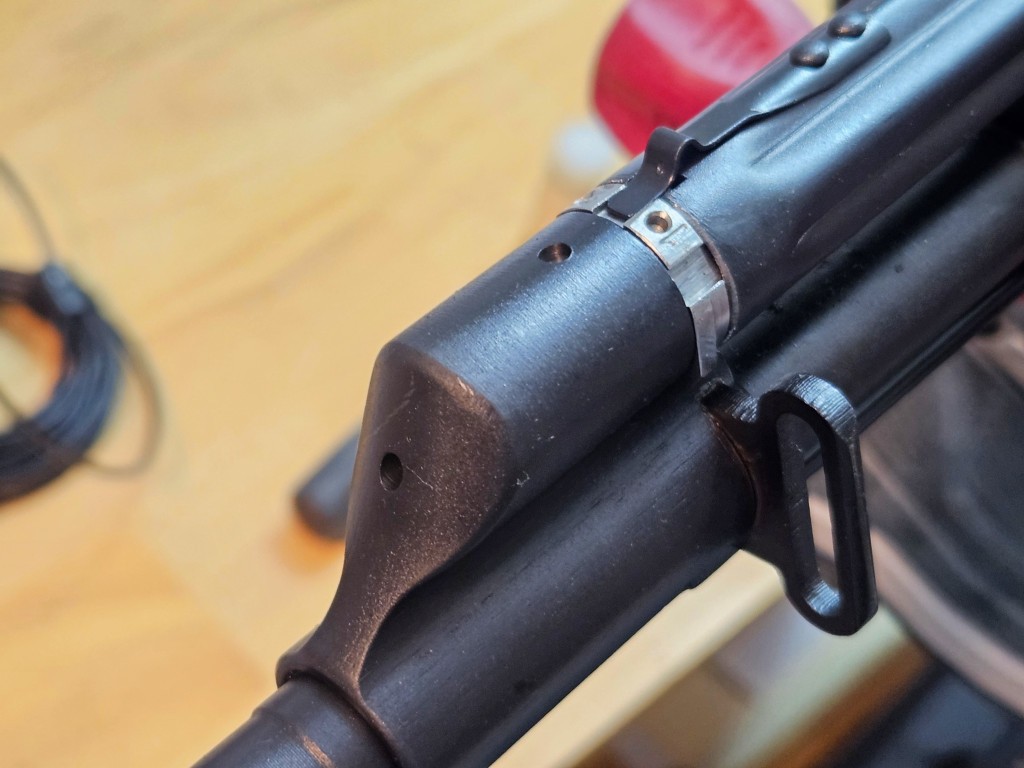
I didn’t get a picture of the gas tube with the wood before I removed it so we’ll just pick up here. This is one of our high-temp Yugo/Zastava gas tube covers. The spring clip is from the wood set and pops into the our cover to help provide tension and support. If you don’t have the clip, I would recommend buying one vs. skipping it. Check Apex Gun Parts, Robert RTG, Numrich, Centerfire, etc.The spring clip just presses into the pocket molded foir it in the cover.I like to use a vise to hold the forged end of the gas tube. DO NOT try and clamp the thing circular end or you will crush it. The vise you see has smooth jaws and will not hurt the forging – if your vise has aggressive jaws to hold material, use something to protect the gas tube like jaw covers, pieces of wood, etc. In this photo, the cover is fully rotated into position. You may find it easier to rotate your cover to the left or to the right when it comes to installation or removal. If it will not turn, carefully inspect why and remove a bit of material as needed with a file, Don’t rush – you want a firm fit and for it to look good.What it looks like when done.
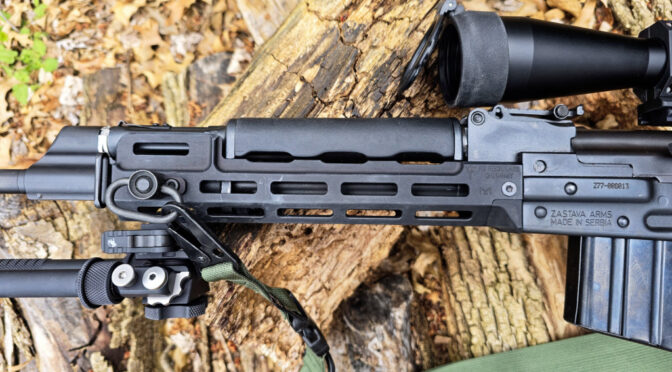
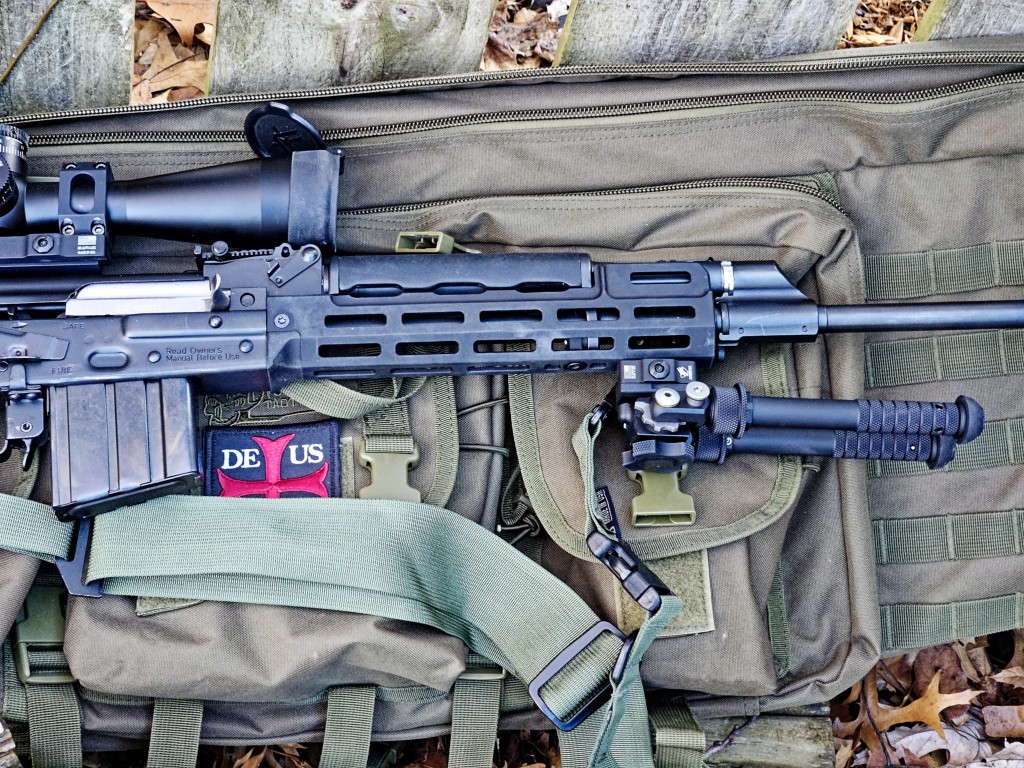
RS Regulate makes some great lower handguards for a variety of AKs including for the Yugo/Zastava M70 and M77s. It takes a little bit of effort to install and is very much worth it. You can optionally use your wood gas tube cover or buy one of our polymer units.
Note, I have to buy all of my parts – nothing here was paid for by sponsors, etc. I do make a small amount if you click on an ad and buy something but that is it. You’re getting my real opinion on stuff.
Years ago, I had a Zastava M77 and regretfully sold it back in 2014. It was one of those situations where I had to sell it to fund other projects but I didn’t even get a chance to shoot it. I also had a custom M76 (the 8mm version) for a while but I did sell that one – mainly because it was a primer popper. That is a known issue because the firing pin hole opened up out of spec due to corrosive ammo use and didn’t adequately support the primer as a result but I digress.
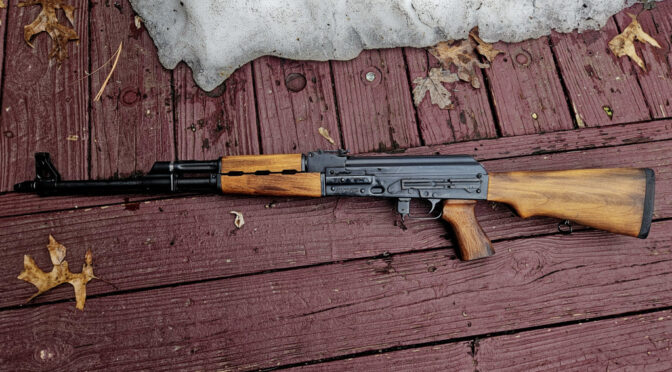
I had resisted buying another one until Zastava decided to release what they called the “Battleworn” model (ZR77308W) and I caved. On one hand, it comes with some really nice retro looking Europen beech wood furniture. What really got me was that it was way cheaper than their other models that had optics and/or polymer furniture at that time.
Why the M77?
So, I had wanted to get back into the Zastava designated marksman’s rifle (DMR) game for a while and was just biding my time. The reason I wanted the M77 was due to all of the quality match 7.62×51 and match .308 match ammo that is out there. In comparison, try finding affordable true match grade 8mm ammo for the M76 or match 7.62x54r for the M91. You can find it once in a while but it’s not cheap and choices are limited here in the US. On the other hand, match 7.62×51 and .308 plentiful and affordable.
So, the main reasons were the ammo and the second was the M77 Battleworn model being very affordable in the Late Summer of 2023. As I am writing this, a quick search on GunBroker shows the Battleworn model selling fro $1369 with one 20-rd magazine up to $1,499 with five 20 round mags plus the various models are a lot closer in price. I paid less last summer but you get the idea. (In 2014 I bought a M77 with a thumbhole polymer stock and polymer handguard set for $600 or 700 from Centerfire Systems but that’s the way pricing goes – any vendor will raise prices to what they think the market will bear to try and maximize profits.)
Taking a Closer Look
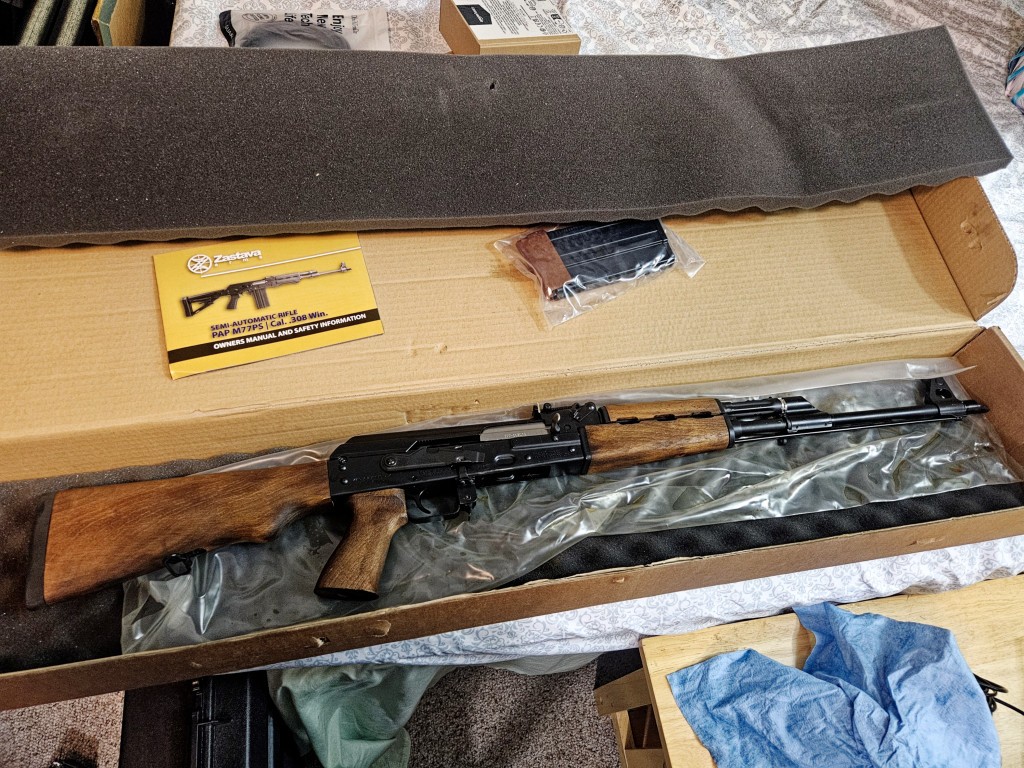
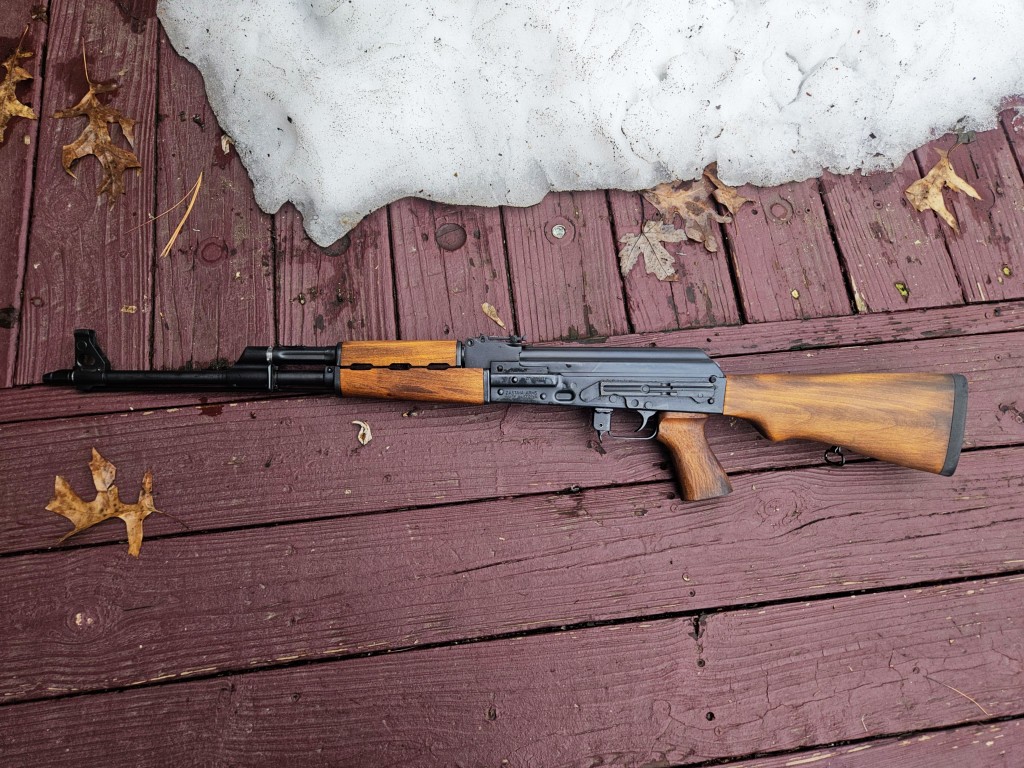
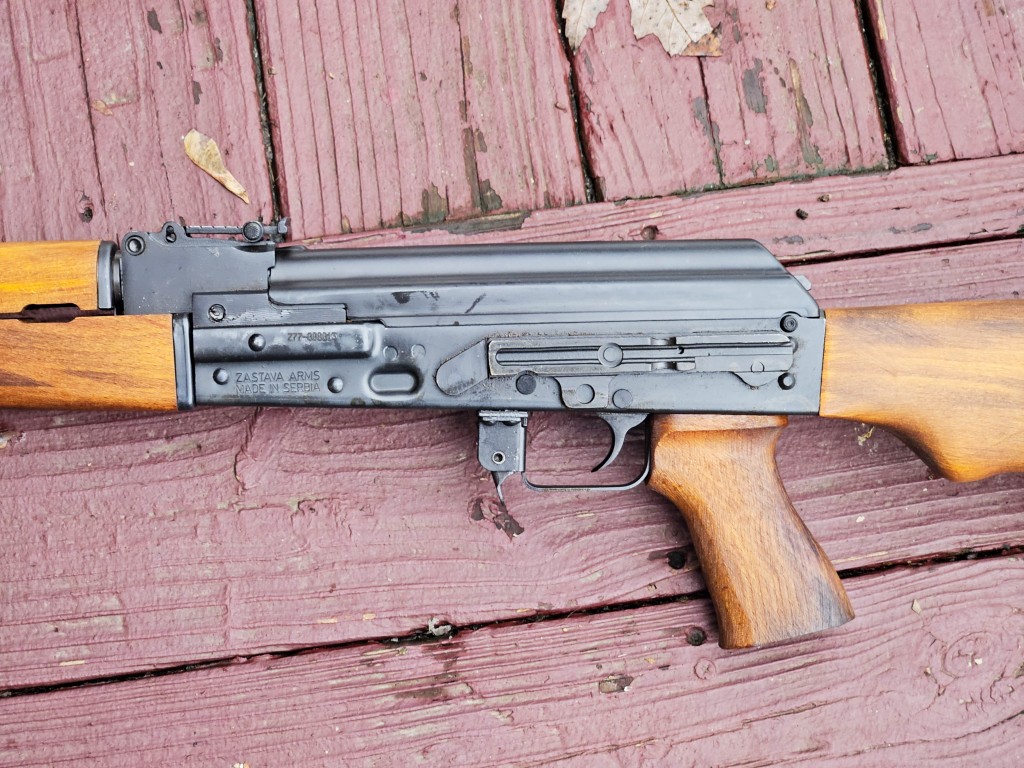
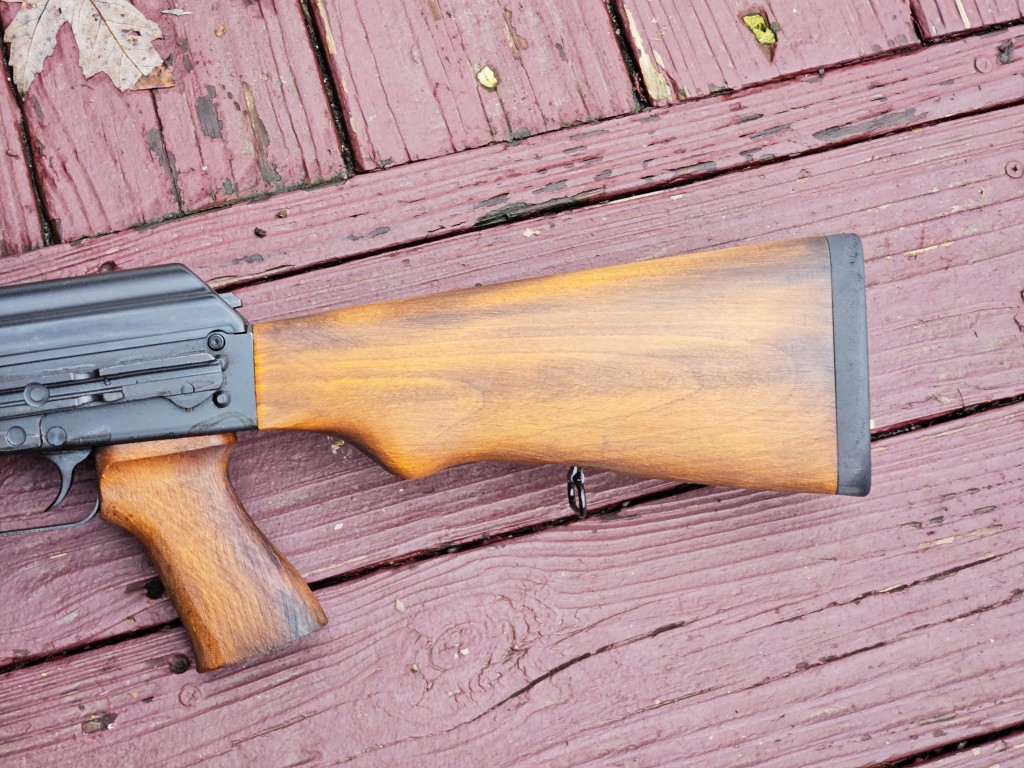
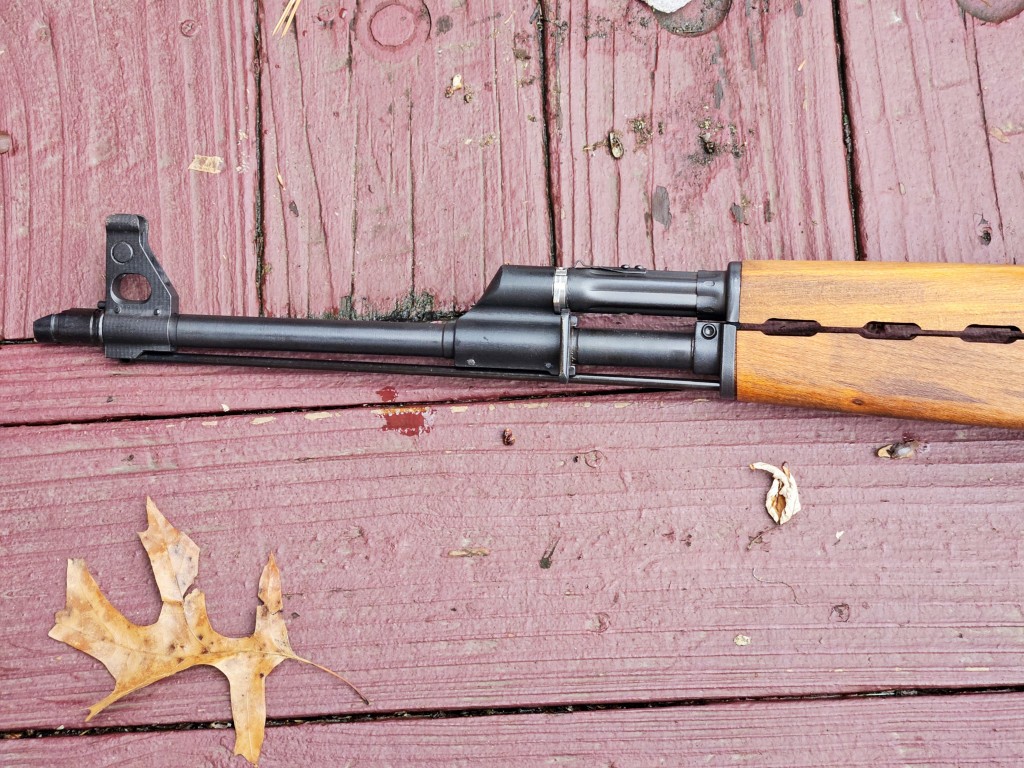
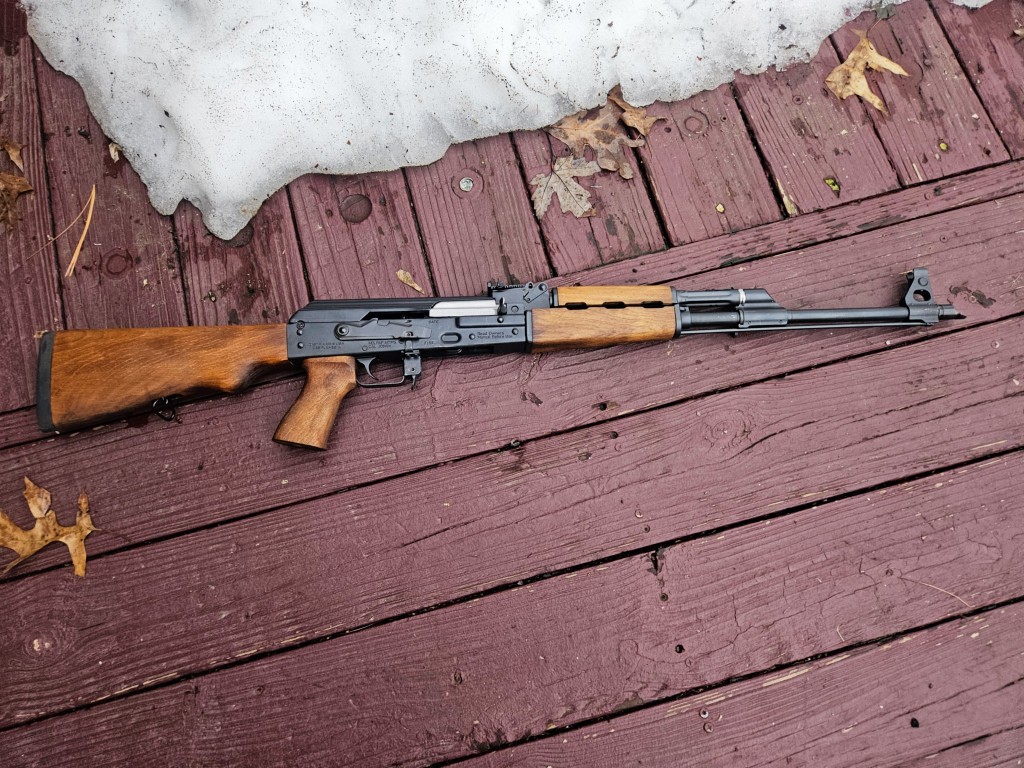
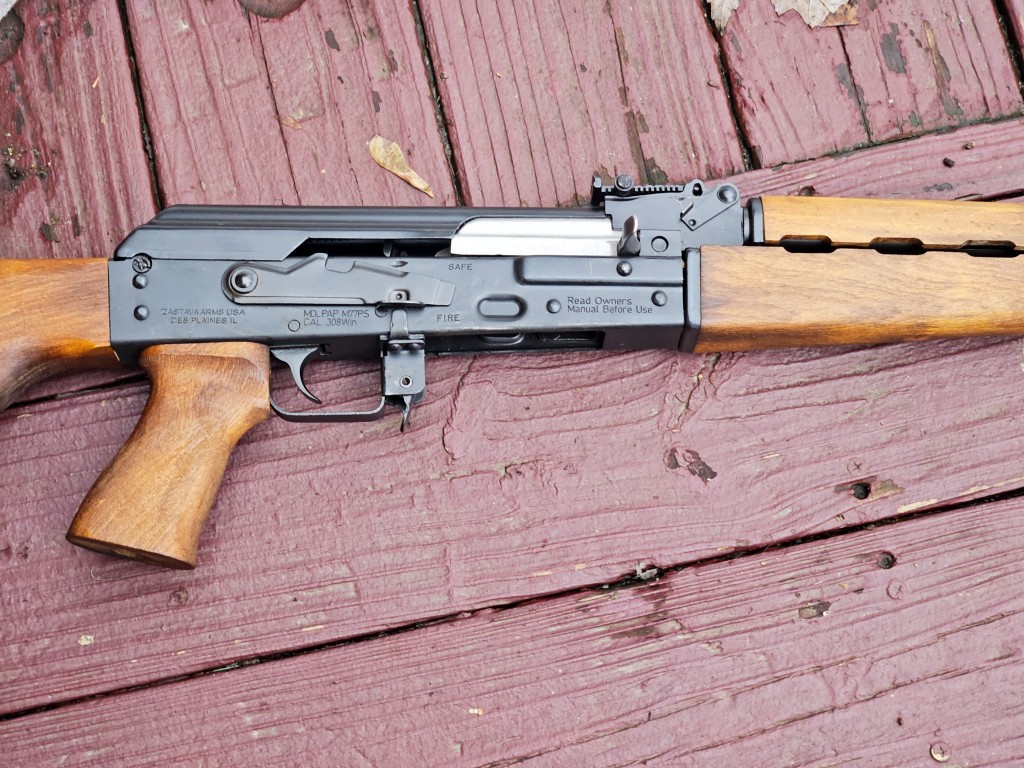
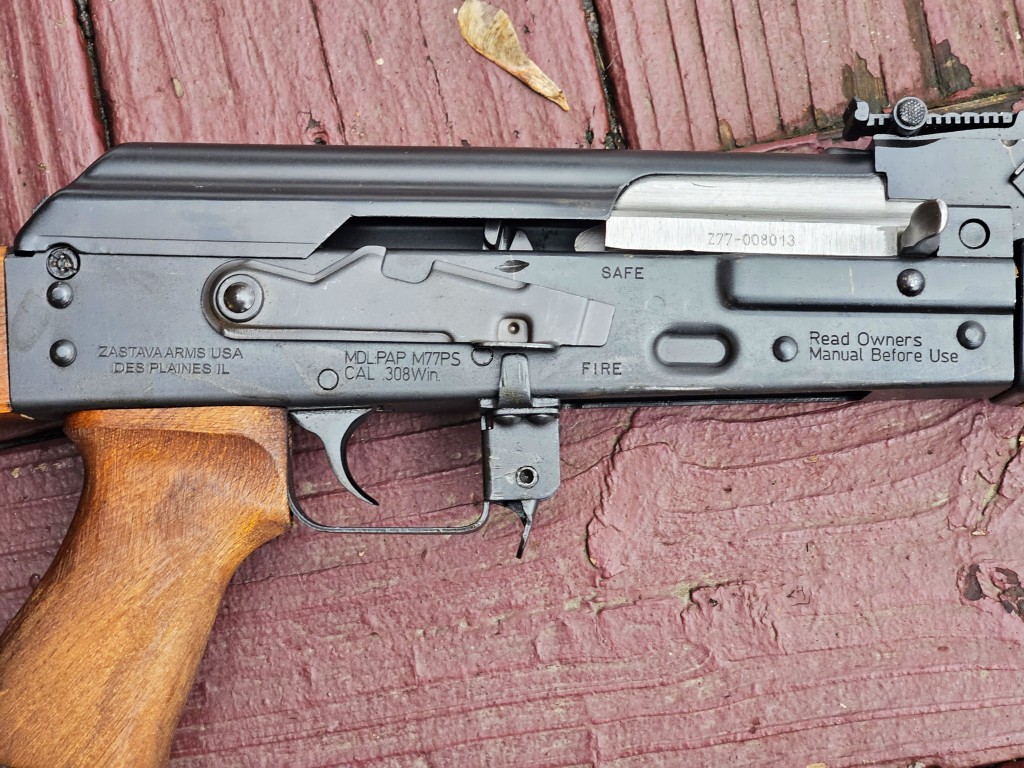
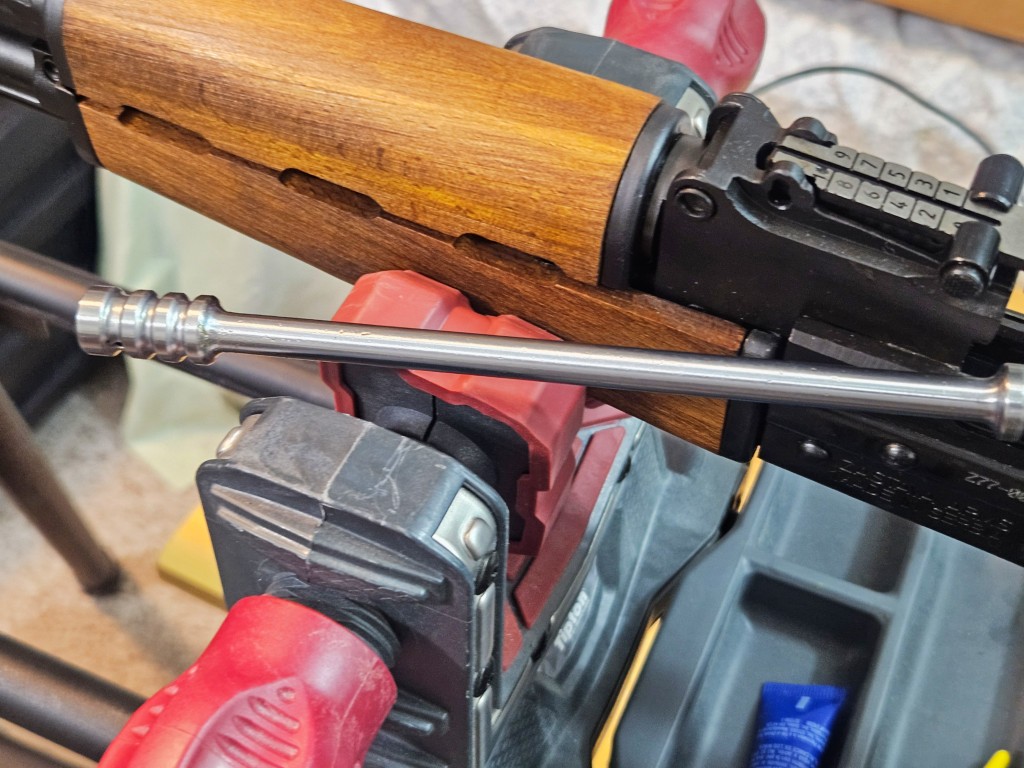
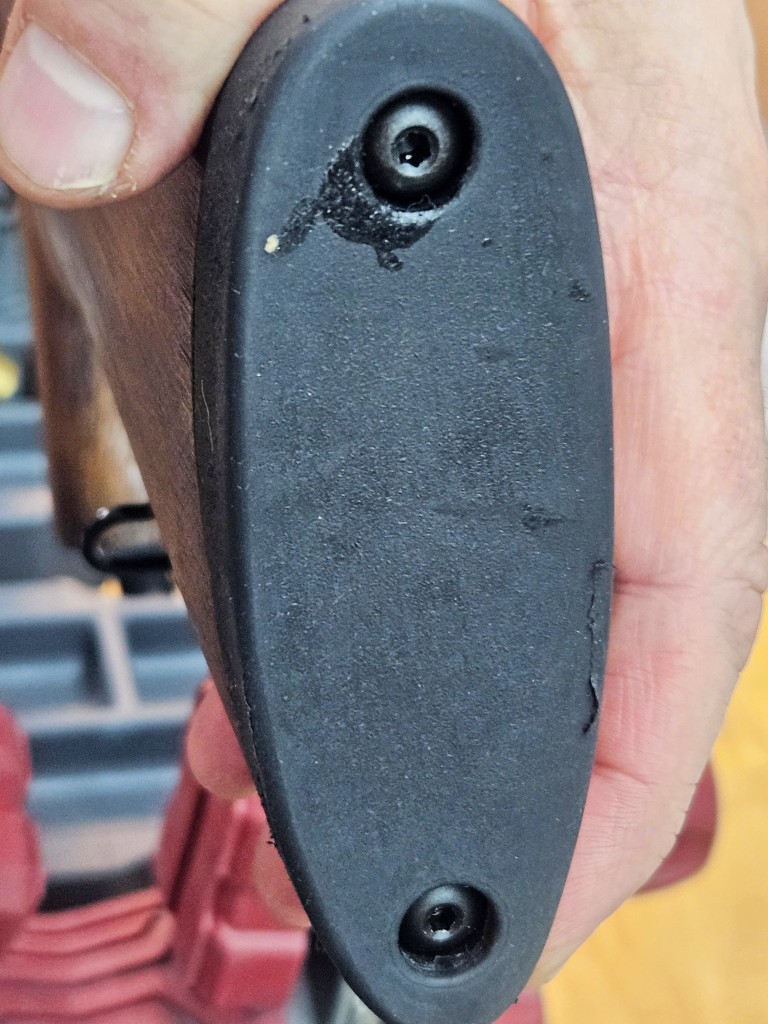
It’s well packed in an egg foam box. Note the CSSpecs 25 round magazine on the box cover. Honestly, the wood is really nice. It’s very reminiscent pf the M76 wood with a few minor exceptions – the grip does not have a ferrule, the recoil pad uses allen head screws and the stock bolt is one of their modern commerical shorter ones vs. the long Yugo military 8x1x260mm (about 10.23″ long).Like many aspects of the original designs, the Yugoslavs modfield their scope rails and how they mount The result is more to the rear and is often refered to as “rear-biased” so they need a scope mount vs. an AKM pattern rail.Honestly, the wood is cool. It has almost rough hewn look but better finished if that makes sense. The grip reminds me of one that Matt Shuster of Ironwood Designs came up with many years ago before he passed. I think he called it the “mini fat cap” – if someone remembers, please tell me. He made the M76 Fat cap patterned after the original wierd awkward really fat but oddly short M76 grip but without a ferrule. Then he came up with a far more elegant smaller one and this Zastava design reminds me of it. Folks, Matt helped me get started years ago and was a genius with wood. God rest his soul and take care of his family.It has the mile long 19.7″ cold hammer forged barrel. The silver disc on the gas tube is the three position gas regulator. It has a slant brake on it and 14x1mm left hand threads under it just like any other AK. A M76’s long flash hider is actually part of the front sight assembly but that is not the case with the M77 – you can install whatever you want. Also, note the cleaning rod.Here’s a view of the rifle looking at the operating side. The chromed bolt jumps right out in contrast.The M77 uses a bulged trunnion and the oversized AK receiver needs to accomadte it. These bigger 1.5mm thick receivers are beefy. They both hold the various component assemblies in position and the thicker receiver means more steel to compensate for any metalurgical or hardening shortcomings.Zooming in on just the receiver. Note the notched selector/safety lever and the relatively tall selector stop. In the top right you can see the other side of the operating rod lock.
Opening it up
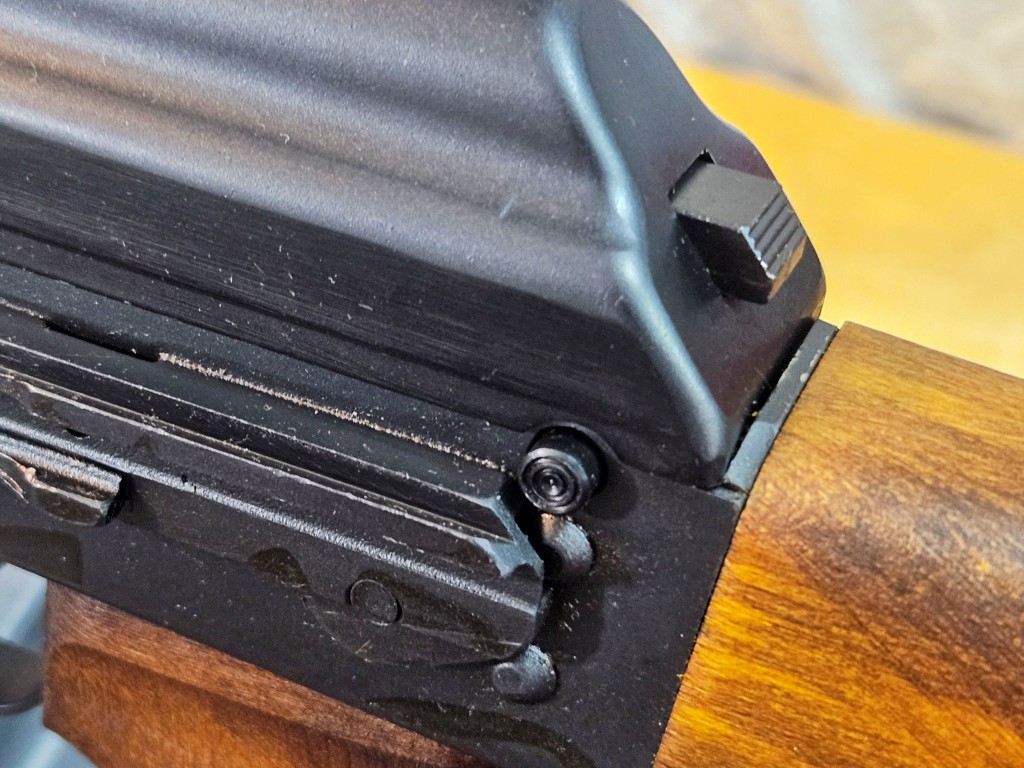
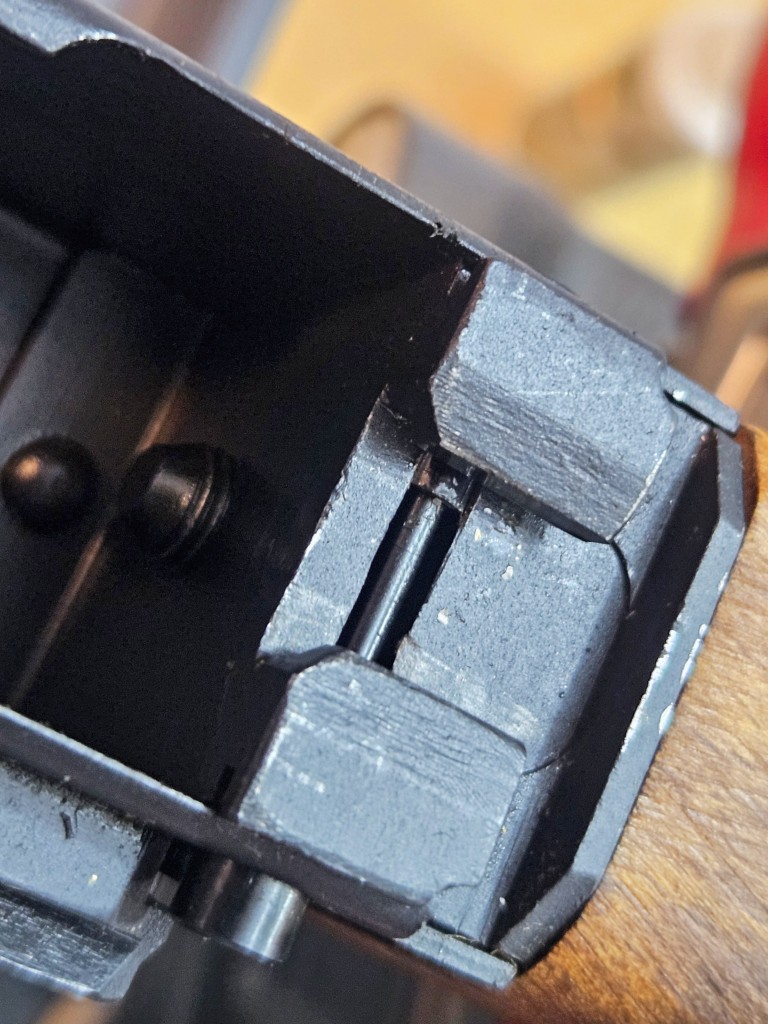
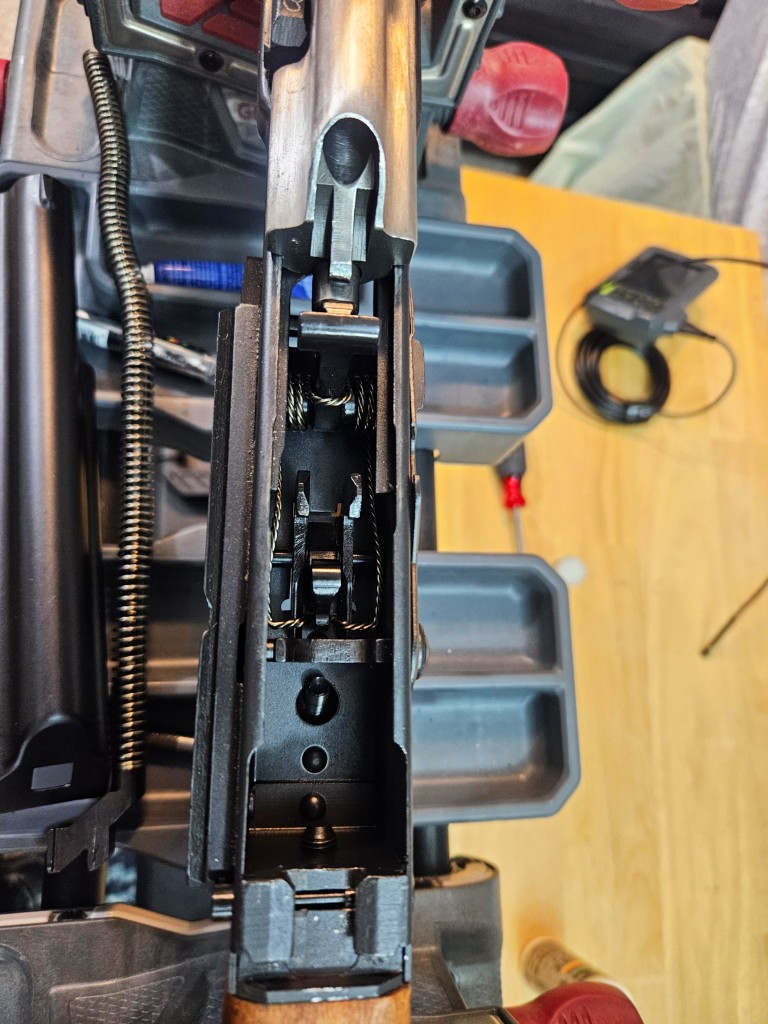
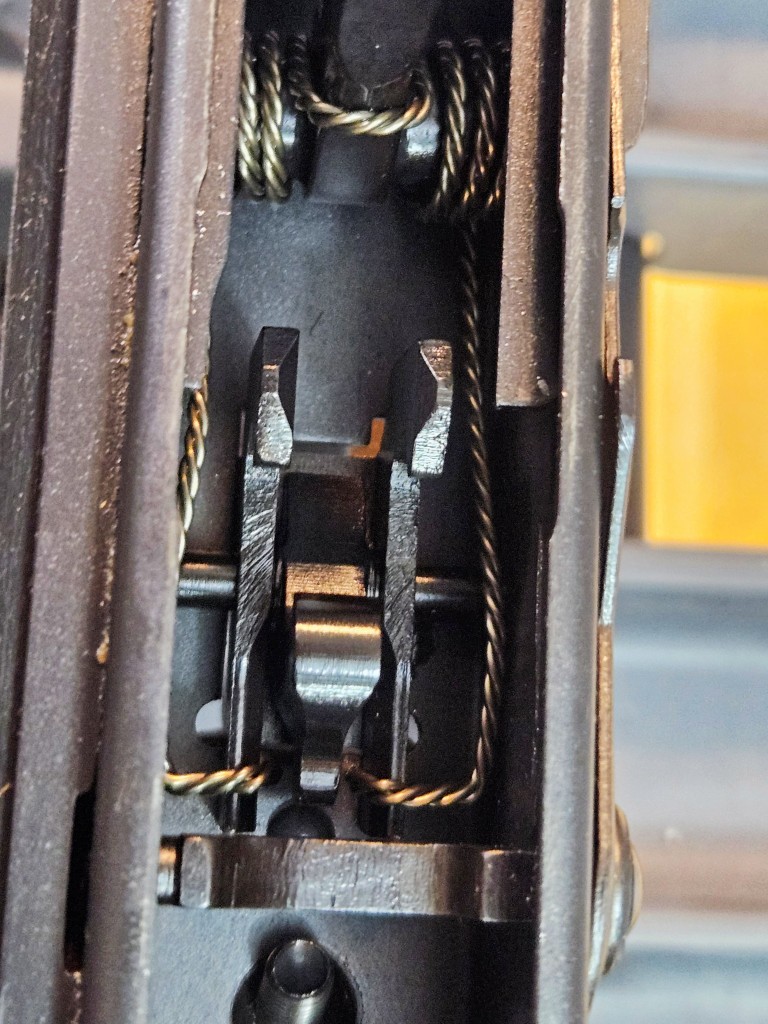
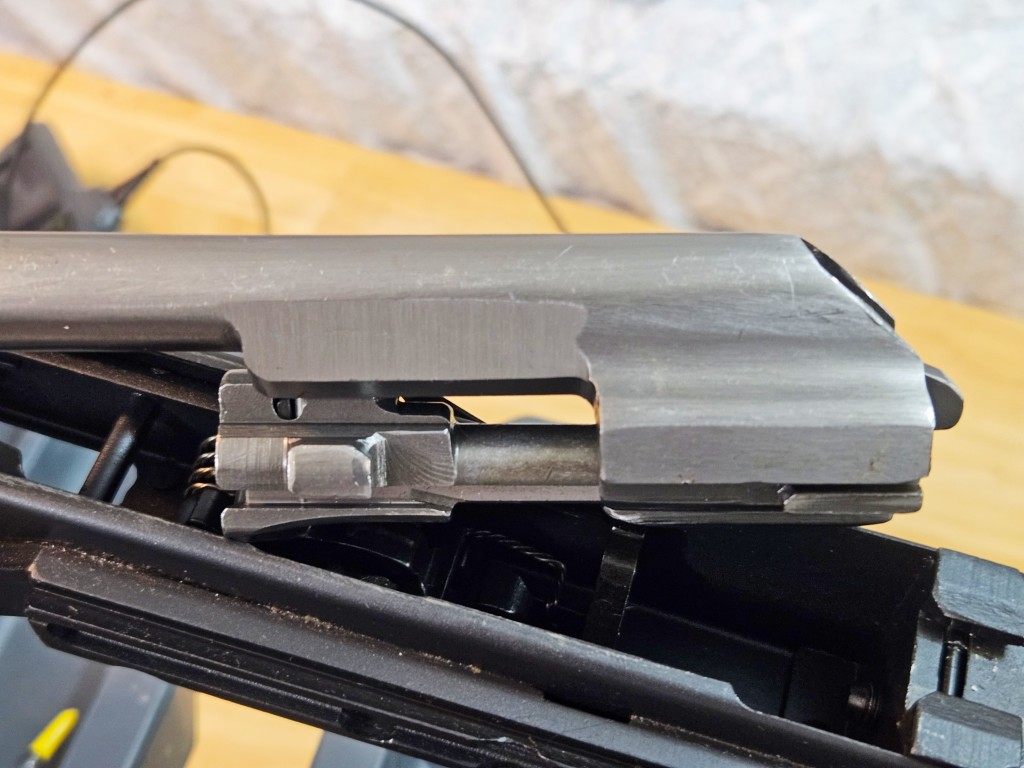
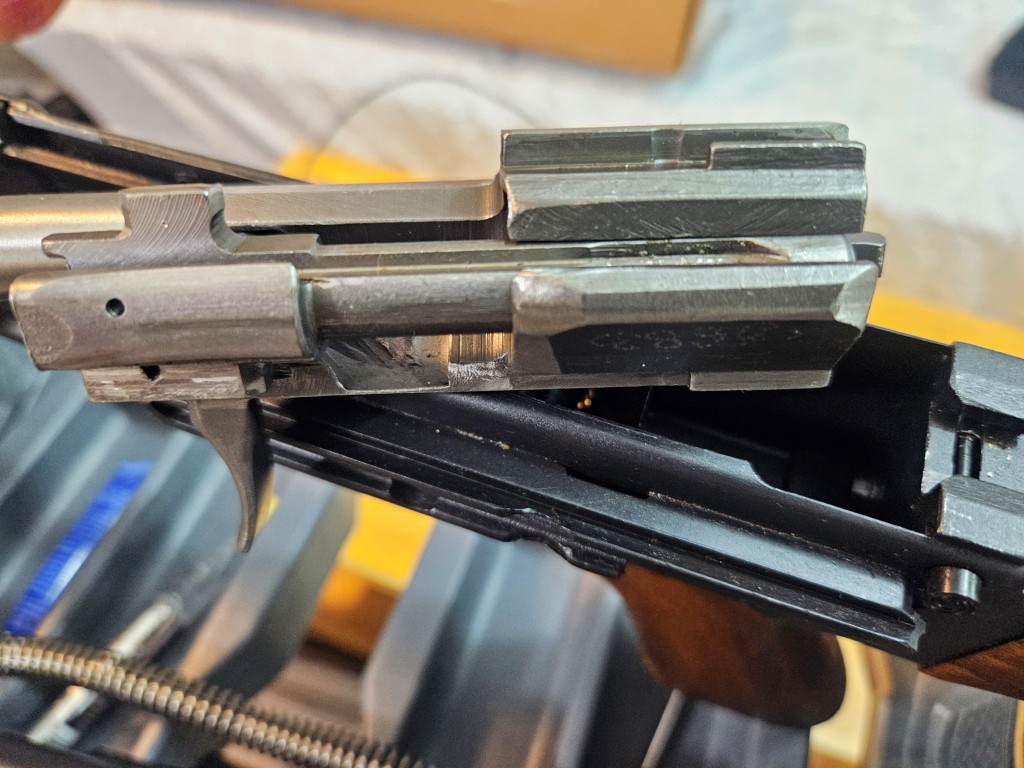
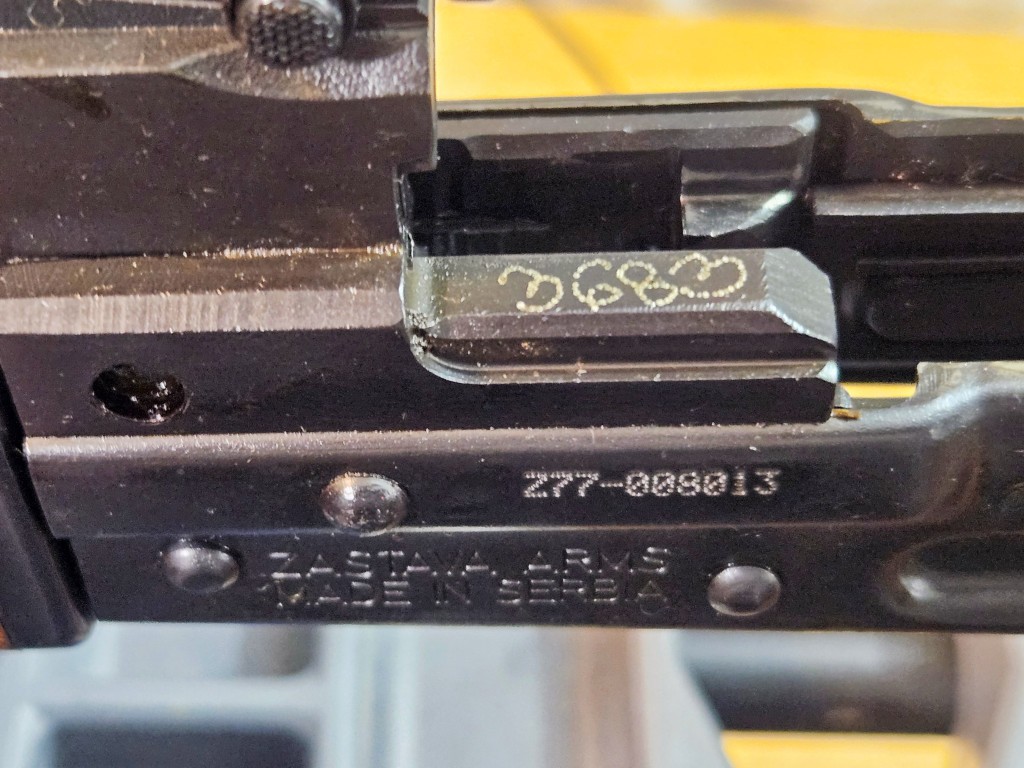
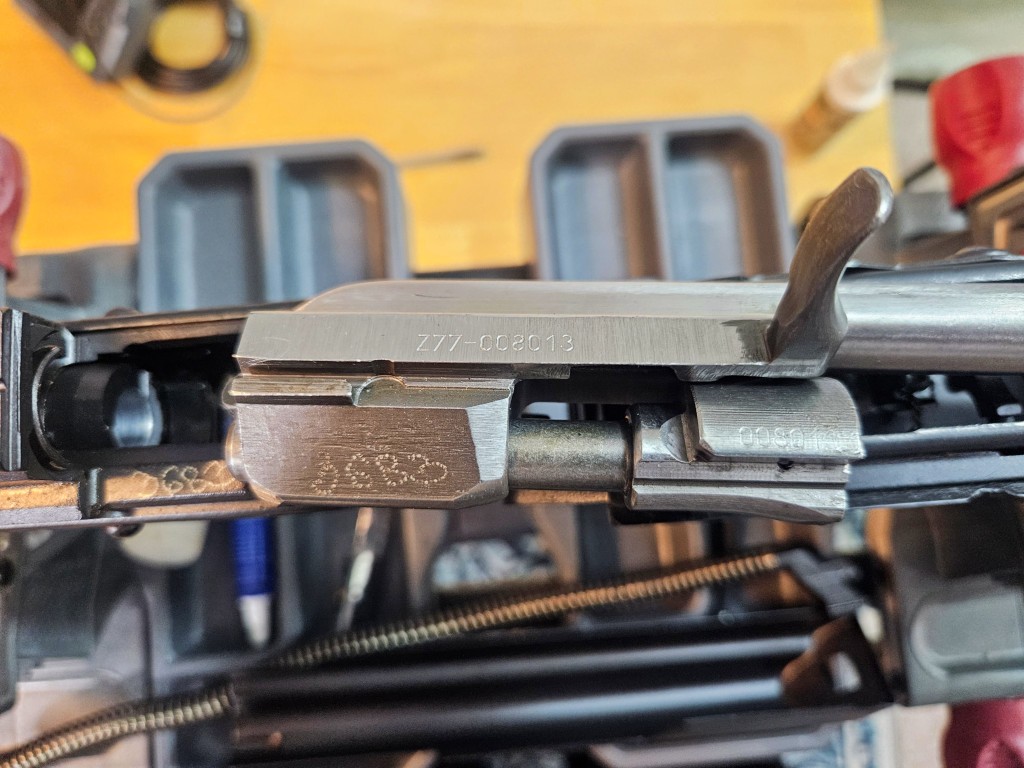
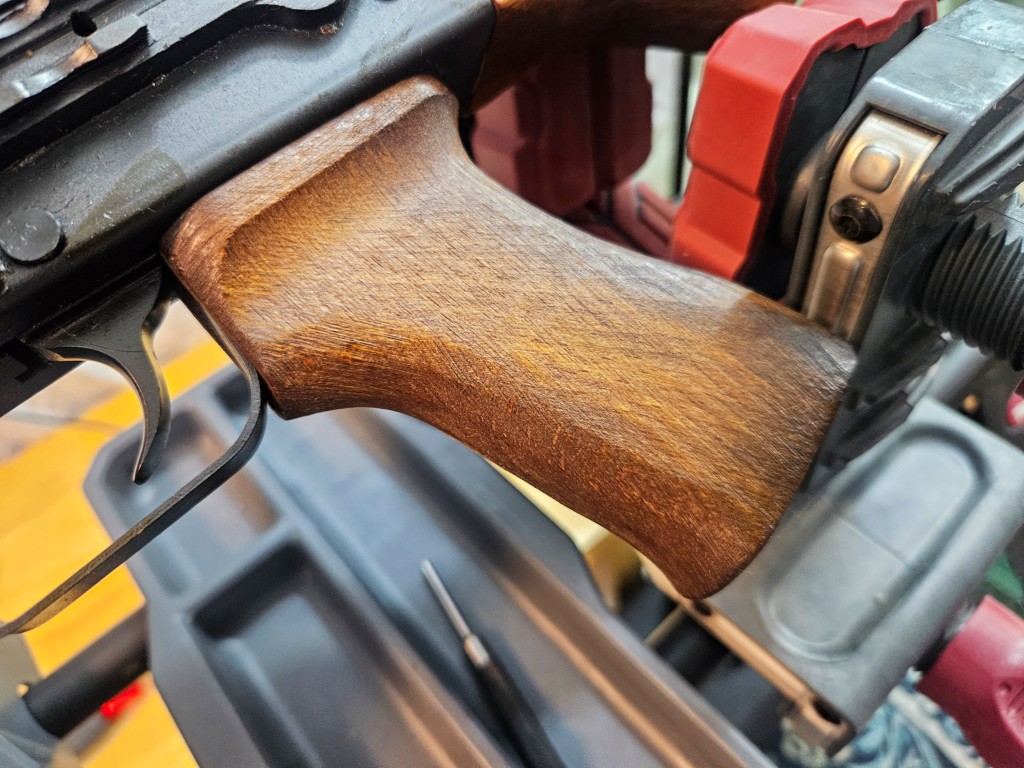
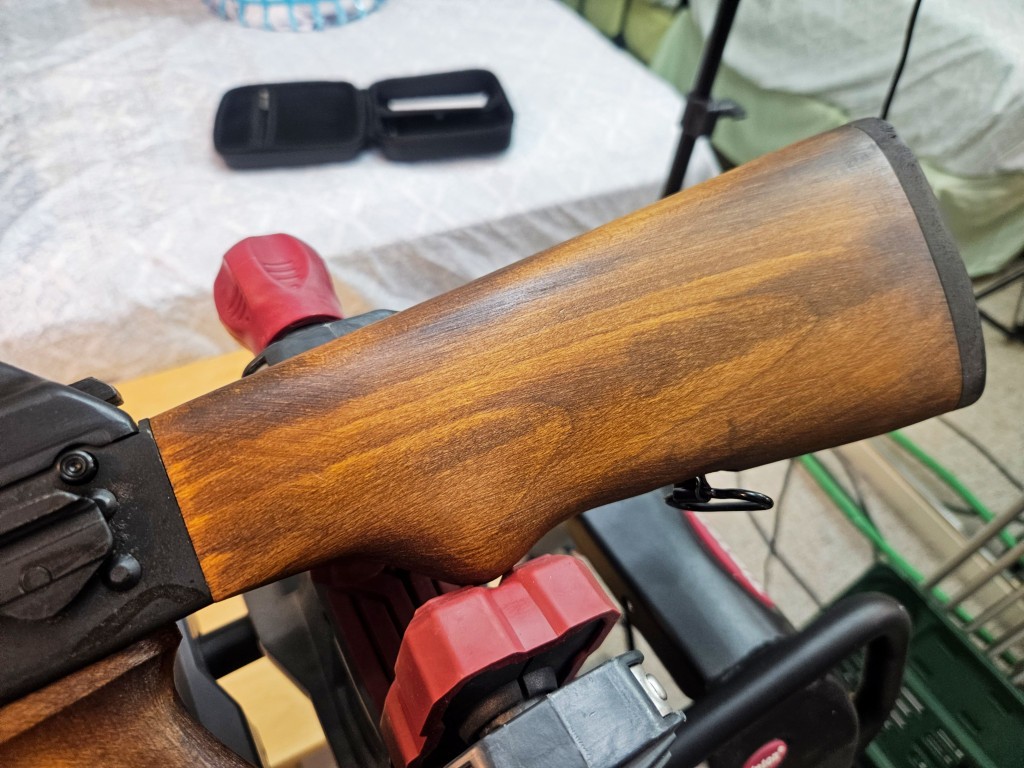
The locking dust cover was introduced in the M70 Yugo rifles because their doctrine made extensive use of rifle grenades. They didn’t want the cover top pop off so they added a sliding lock that holds the rear recoild spring assembly in place and, thus, the top cover in place. By the way, one of the really nice side benefits is that when you reassemble a rifle with one of these locks, you put the recol spring in front, install the dust cover without fighting the spring, push the button and the recoil rod pops out the back.Looking at the locking assembl, the plunger button the operator pushes is at the bottom of the photo. The slightly elevated portion under the top lip of the trunnion (top in this photo – right side in real life looking down – is what slides out of the way wehn pressed so the recoil spring assembly can come forward for removal. What you don’t see is the hidden compression spring. If you ever need these parts, CNC Warrior make and sells both the whole assembly.Looking down at the classic double hook AK trigger and double wound spring. I’ve had guys ask me why did they double these? The answer is fault tolerance. The second hook is there if the first should fail and the second spring winding is there should one of the two fail. In all of my years working on civilian AKs, I’ve never seen a hook fail but I have seen springs fail although very, very rare and usually from a surplus kit build.Look at those hooks! They are forged and not stamped. The bevels in the front and the back help the bolt carrier pass by.Here’s a better view of the three position gas regulator disc. Note the vent holes in the gas block itself.One oversized bolt assembly. Despite what some may tell you, the PSLs and these M76/M77/M91 families of rifles are oversized AKs. The SVD Dragunovs use very different bolt carrier assemblies.Longer than a normal AK gas pistol and chrome plated to improve corrosion resistance.View from the side. Some of the machining is crude but effective in places.Bolt extended in the carrier.I chuckled when I saw this. There are two numbering systems on some of the parts – crisp machined ones and ones done by hand with an electropencil like you would see on some kits.You an see the numbers of the key parts and they should all match.Interesting – more holes to vent propellant gasses.A better view of the upper and lower handguard assembly,A view of the grip.The buttstock has the distinctive grip area like you would see on the M76 military stocks. I have never had the purpose of that grip area explained to me.It uses a classic Yugo military sized recoil pad. What’s noteworthy is that they have ditched the old slotted screws for allen/head-head screws.
Summary
This gives you an overview of the M77 battleworn model right out of the box. Nothing really surprised me and the quality looked good. Sometimes I buy stuff and regret it but not this time.
If you know me, you also know I could not going to leave it alone and the customizations will be in future posts.
Note, I have to buy all of my parts – nothing here was paid for by sponsors, etc. I do make a small amount if you click on an ad and buy something but that is it. You’re getting my real opinion on stuff.
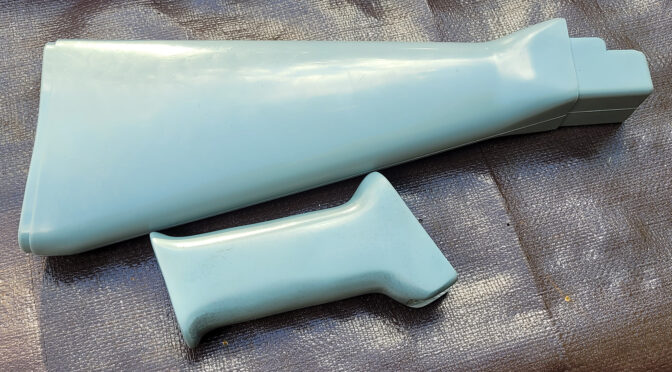
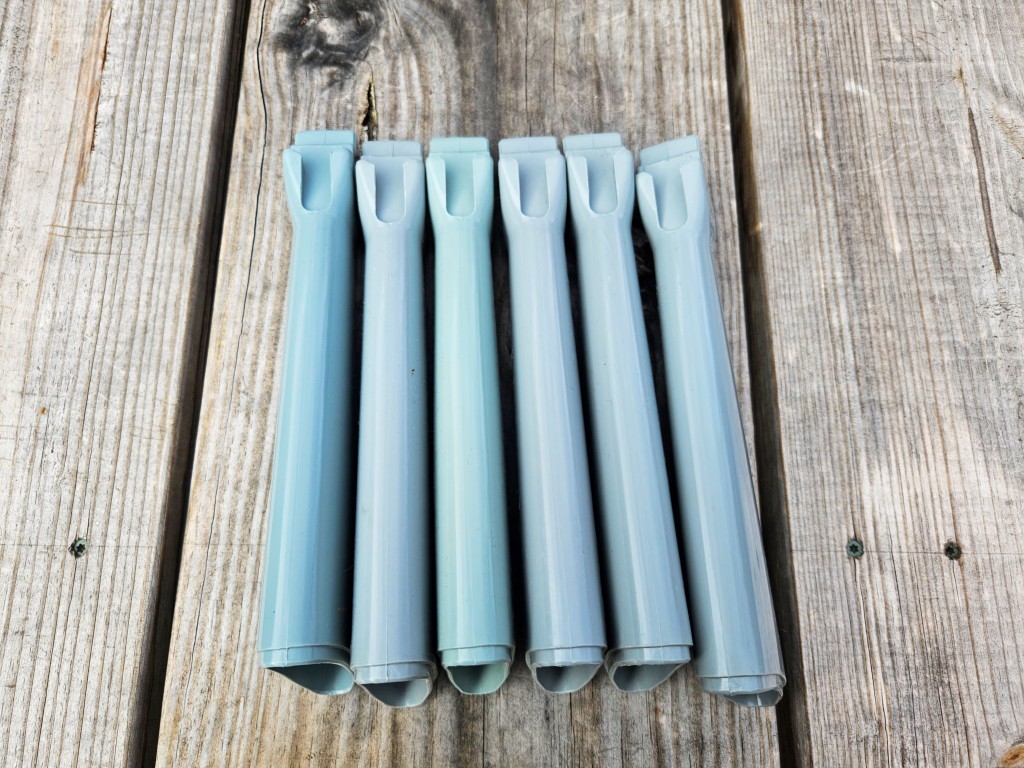
Have you ever heard someone refer to a stock color on an AMD-63 other Hungarian AK variant and they called it “Hungarian blue”? Well, I’ve had a lot of guys ask me to make AMD grips in that color but I could never get my hands on the original and the demand was never really solid.
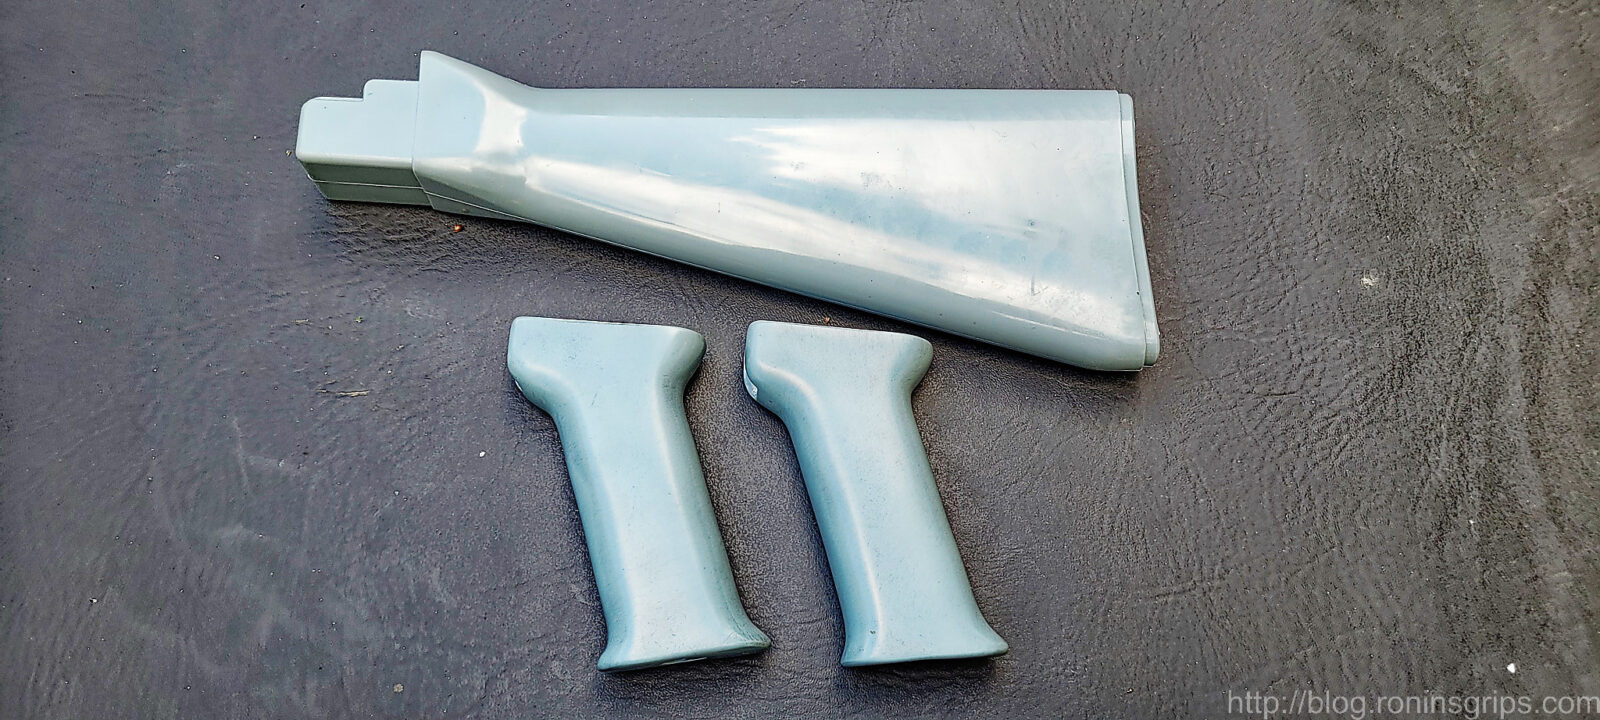
Fast forward to 2023 and Sean from Wolff Gunsprings convinced me there was enough demand and loaned me a grey-blue Hungarian butt stock for color matching. Over the years, guys always told me these things were light blue or Robin’s egg blue. Holding a real buttstock in my hand I would describe it as light to medium grey with a hint of blue. Big difference.
Wolff Gunsprings loaned me a grey-blue Hungarian butt stock for color matching. Over the years, guys always told me these things were light blue or Robin’s egg blue. Holding a real buttstock in my hand I would describe it as light to medium grey with a hint of blue. Big difference.
Here’s a photo I snapped when I was done. This is the approximate color I produce but it will vary and the color you likely see on your monitor may be different as well.
Now, here’s the big question I get asked – is the Hungarian Blue color a standard and the answer is a resounding “no” and I have evidence to back that up.
As I worked on Sean’s grips and pre-orders for the new color were coming in, I knew I better get a few stocks of my own for reference. Why? Very, very little in the Communist-era AK world is consistent, especially plastic colors, and I was betting these were no different.
Now this is where my memory gets fuzzy. I ordered three of GunBroker and then Arms of America got another batch in and I bought three more. Arms of America is great to work with my the way – I’ve bought from them quite a few times over the years. The stocks I got from them still had their factory wrapping paper on them and metal hardware – all unused.
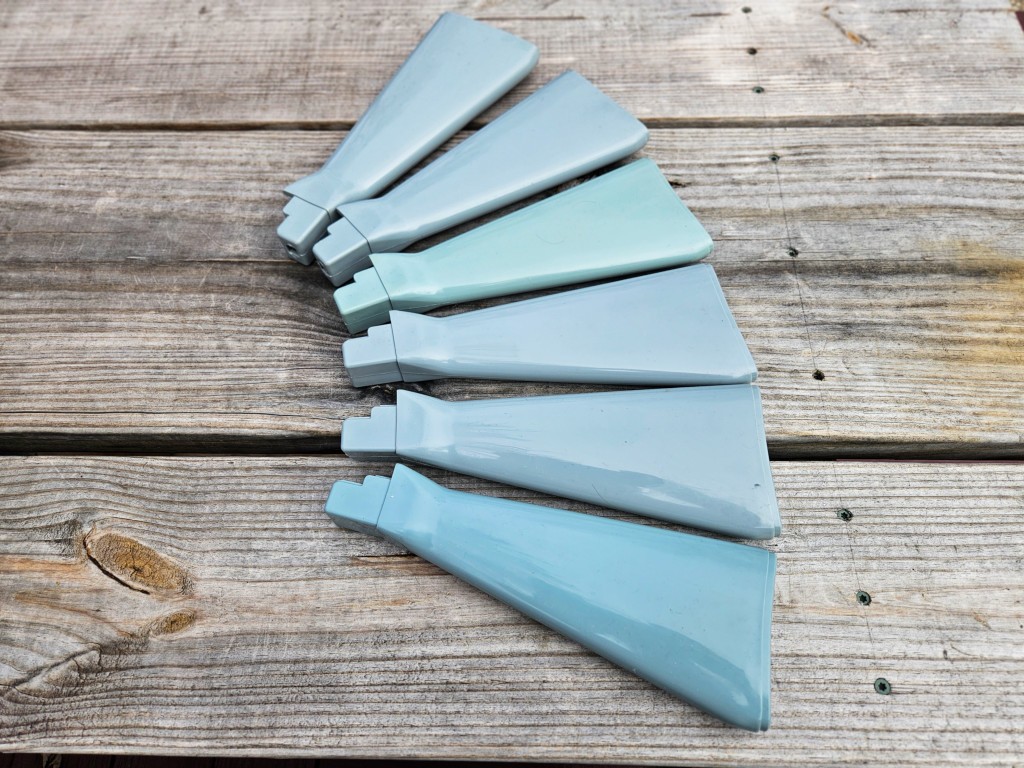
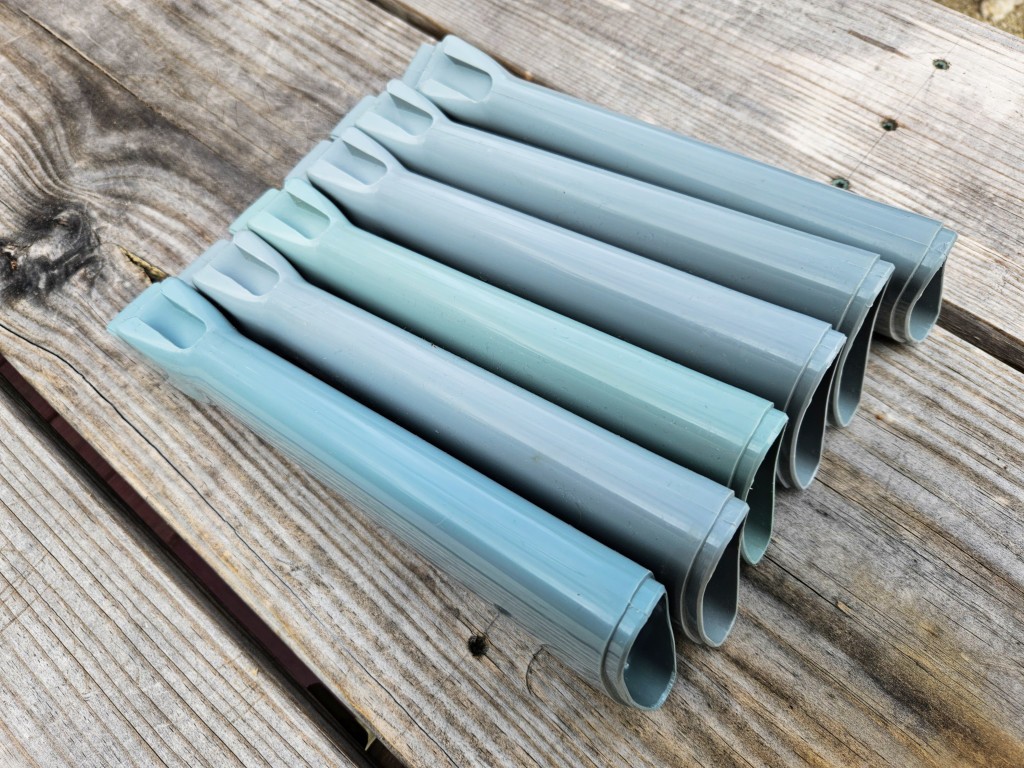
Regardless, here are photos I tool today of the six and you can see the color variations:
My color is more like the top two.
My color is more like the 4th and 5th stocks from the left.
My color is more like the 4th and 5th stocks from the left.
Summary
So, the Hungarian blue can look more grey, more blue and all points in between. My color formula will produce something close to what I did for Sean but because I count droplets of dye and a ton of factors can influence the size & shape of each droplet and thus the actual volume, my grips will vary as well. Sorry but I can’t custom match as a result.
Some time back in 2017 or 2018, I bought some original Beryl second generation grips – the larger one with finger grip cut outs. I then made a couple of molds based on the originals. I thought they would be popular right away, but I’d sell one here and there and then Arms of America started importing Beryls with the AKM-looking grip. Guys started buying my grip and reports started coming back to me this year that my grip was loose on their Beryl rifles. This really confused me as my mold was cast from an original. At first I thought it was occasional issues with the customer or the rifle but then more reports came back and I had to dig in.
A customer, Phillip, sent me a ton of photos and links to posts of guys sharing how they fit my grips to their rifles. Whoa! I had no idea! Thanks to Phillip’s help, I was able to figure out what was going on and write this post.
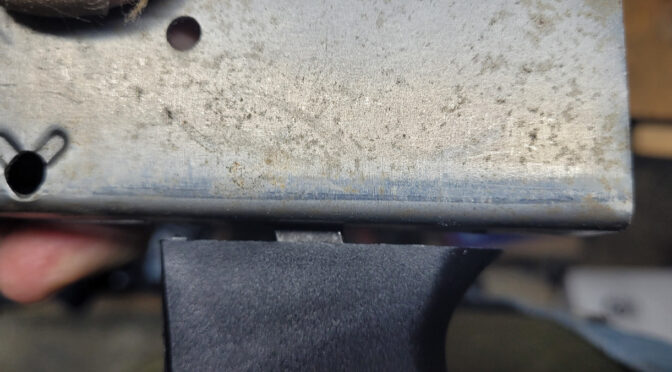
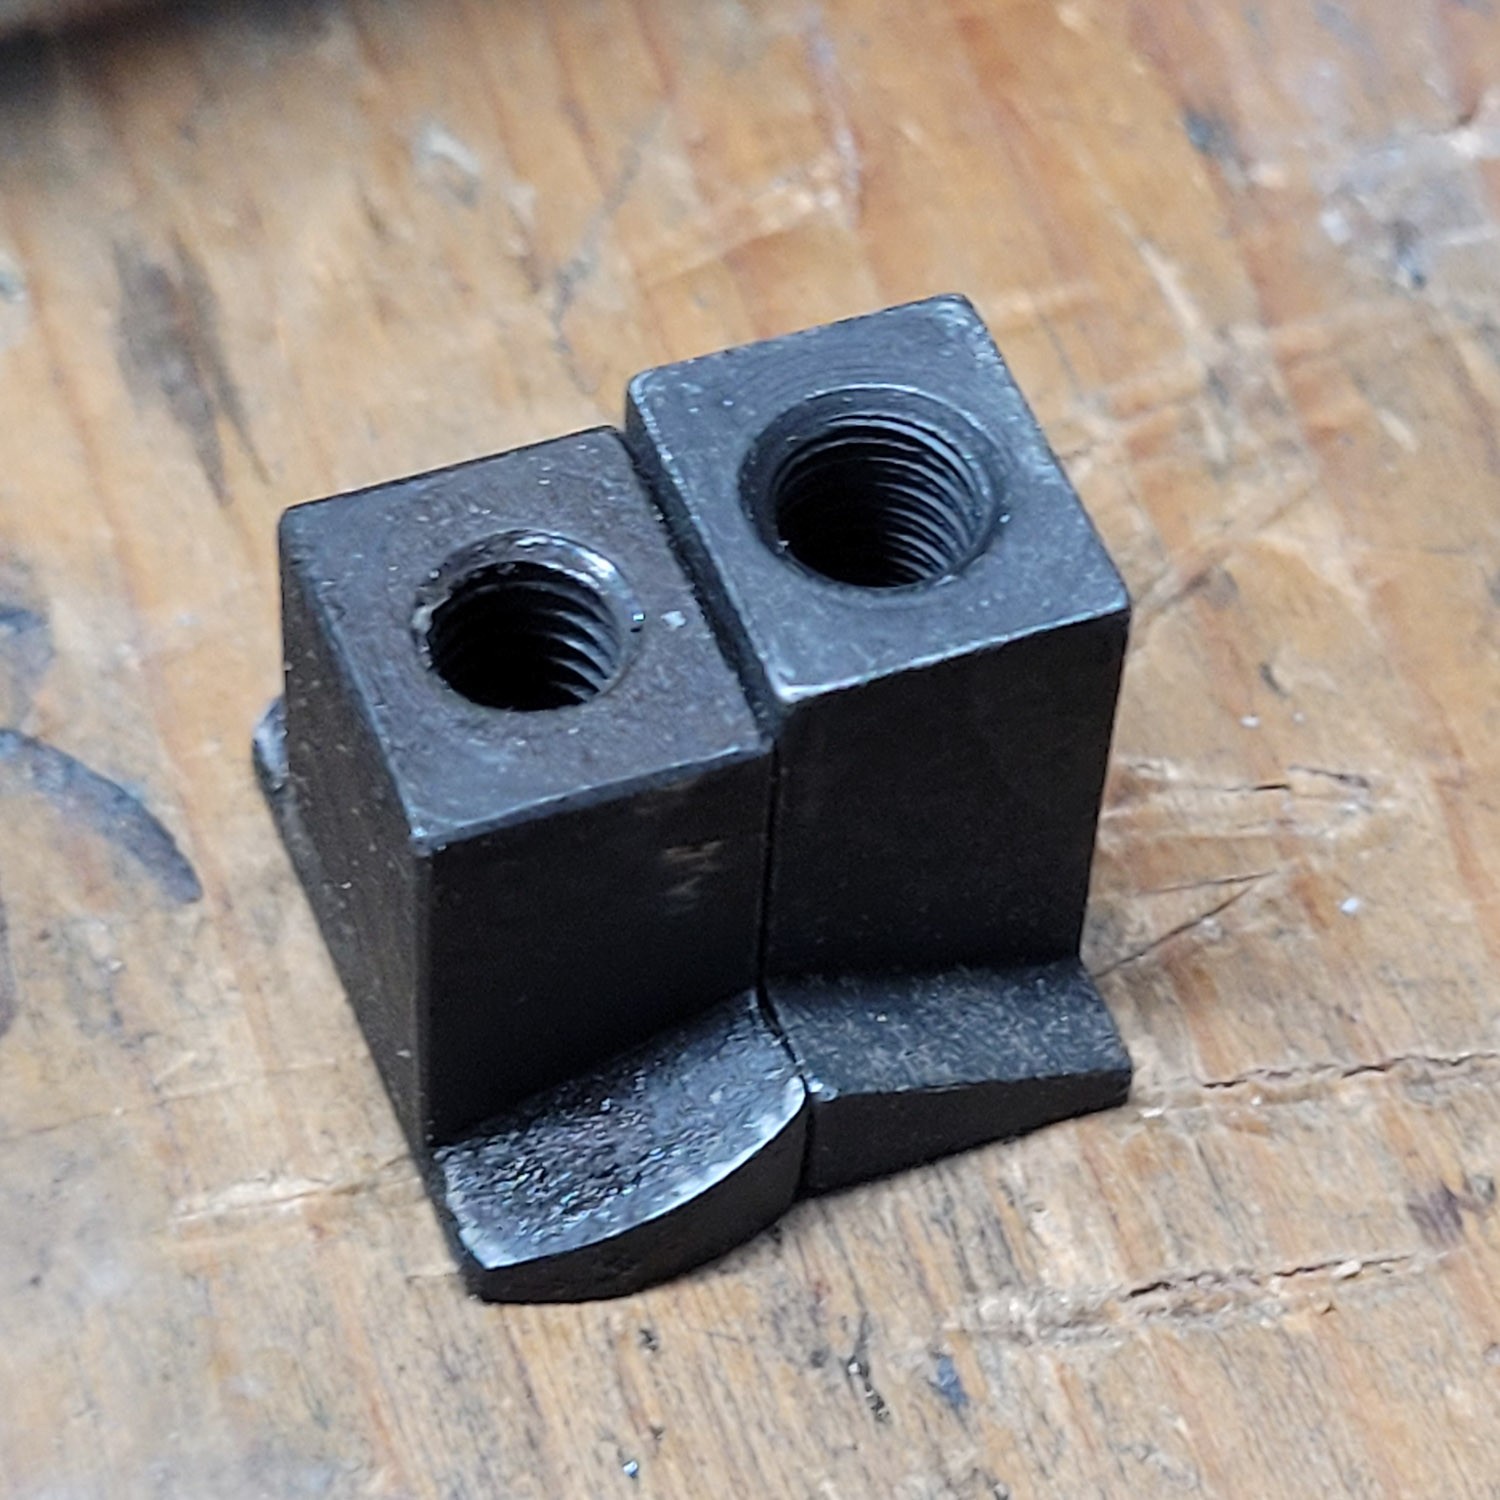
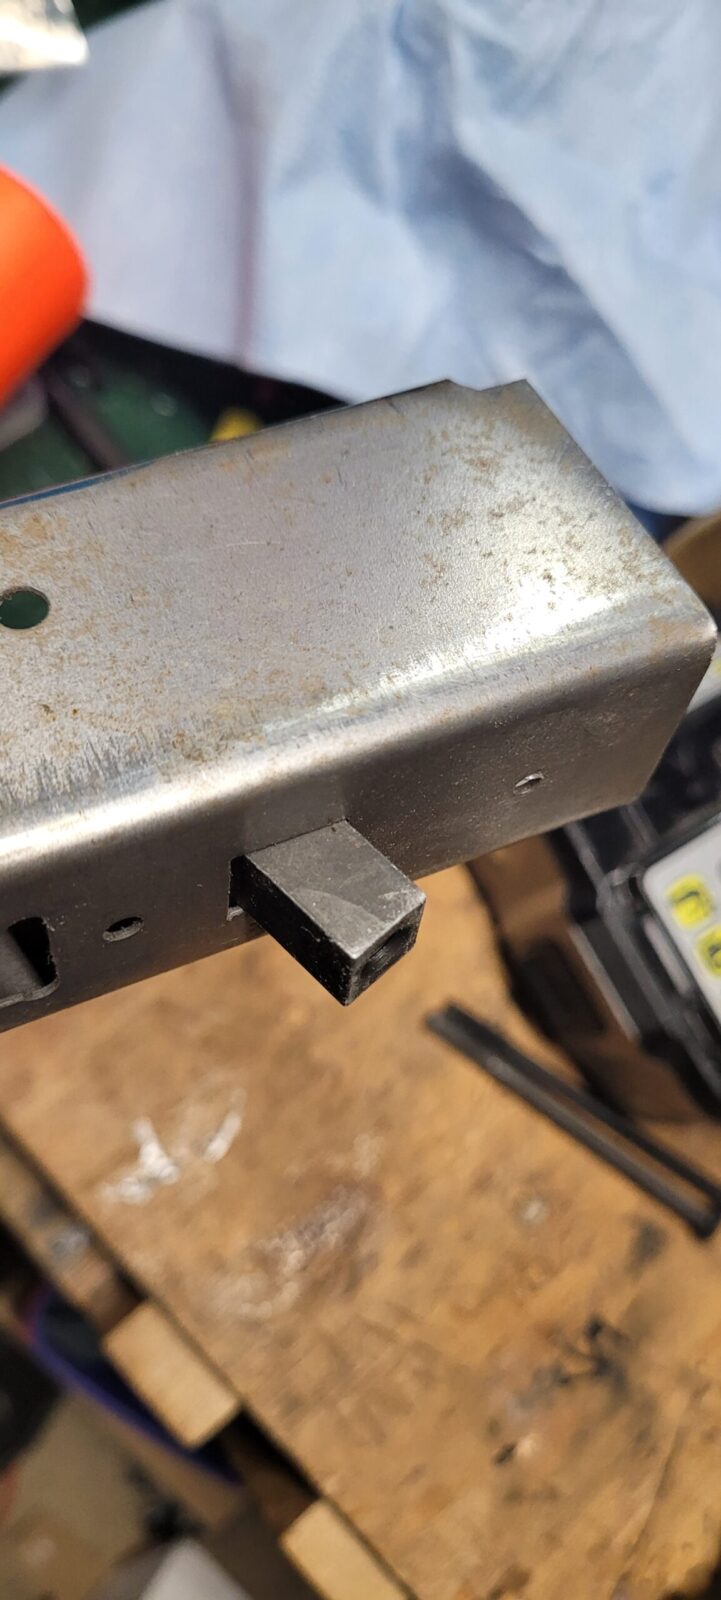
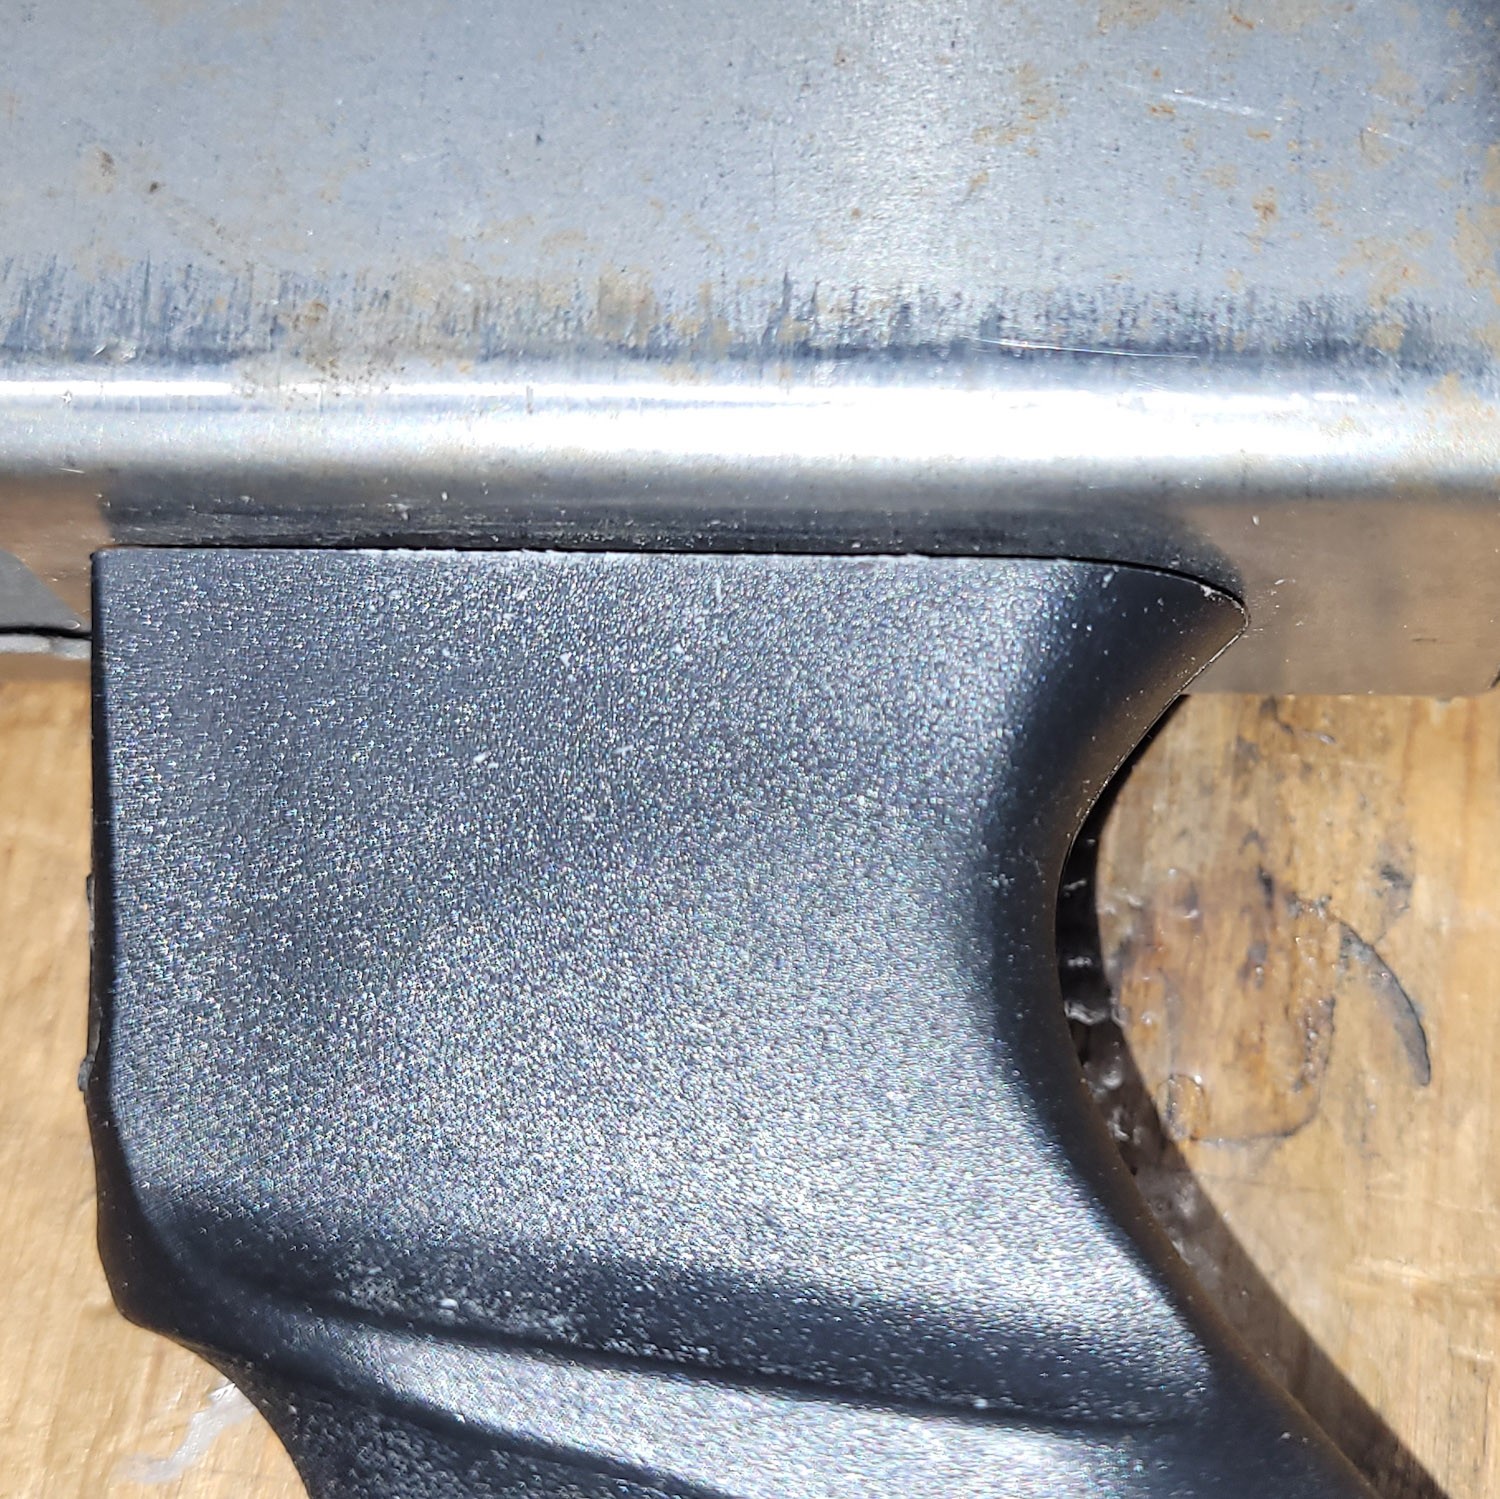
What is keeping the grip from sitting all the way is the grip nut – the small square forging that the pistol grip screw threads into for securing the grip against the receiver and trigger guard. It’s just a tad too long and the inside top of the grip is hitting it.
The grip nut is hitting the inside top of the grip. That inside top shelf was in the original grip. Maybe they had a grip reinforcement plate or shorter grip nuts when using this style of grip – I’m not sure.
Not all grip nuts are too long – this is a Romy G kit that I built way, way back sometime between 2004 and 2006. I know I did not need to trim the nut. This is what threw me off when guys said they weren’t fitting. In hindsight, different countries and makers of grip nuts having different lengths isn’t surprising – you often see a lot of differing parts tolerances across AK makers and models.
Trimming the Nut
At this point, I can’t change the mold so you need to make any adjustments on your end. You either need to carve open the inside top of the grip using a bur, sanding tip or even a small 1-2″ saw blade. That seems like a lot of work – the easiest seems to be to file or grind the grip nut’s bottom so it is a tad shorter.
If you want to save your original grip nut, you can buy another and trim it if you want. Any AKM-style grip nut ought to work. For the screw though, use the one we supply with the grip.
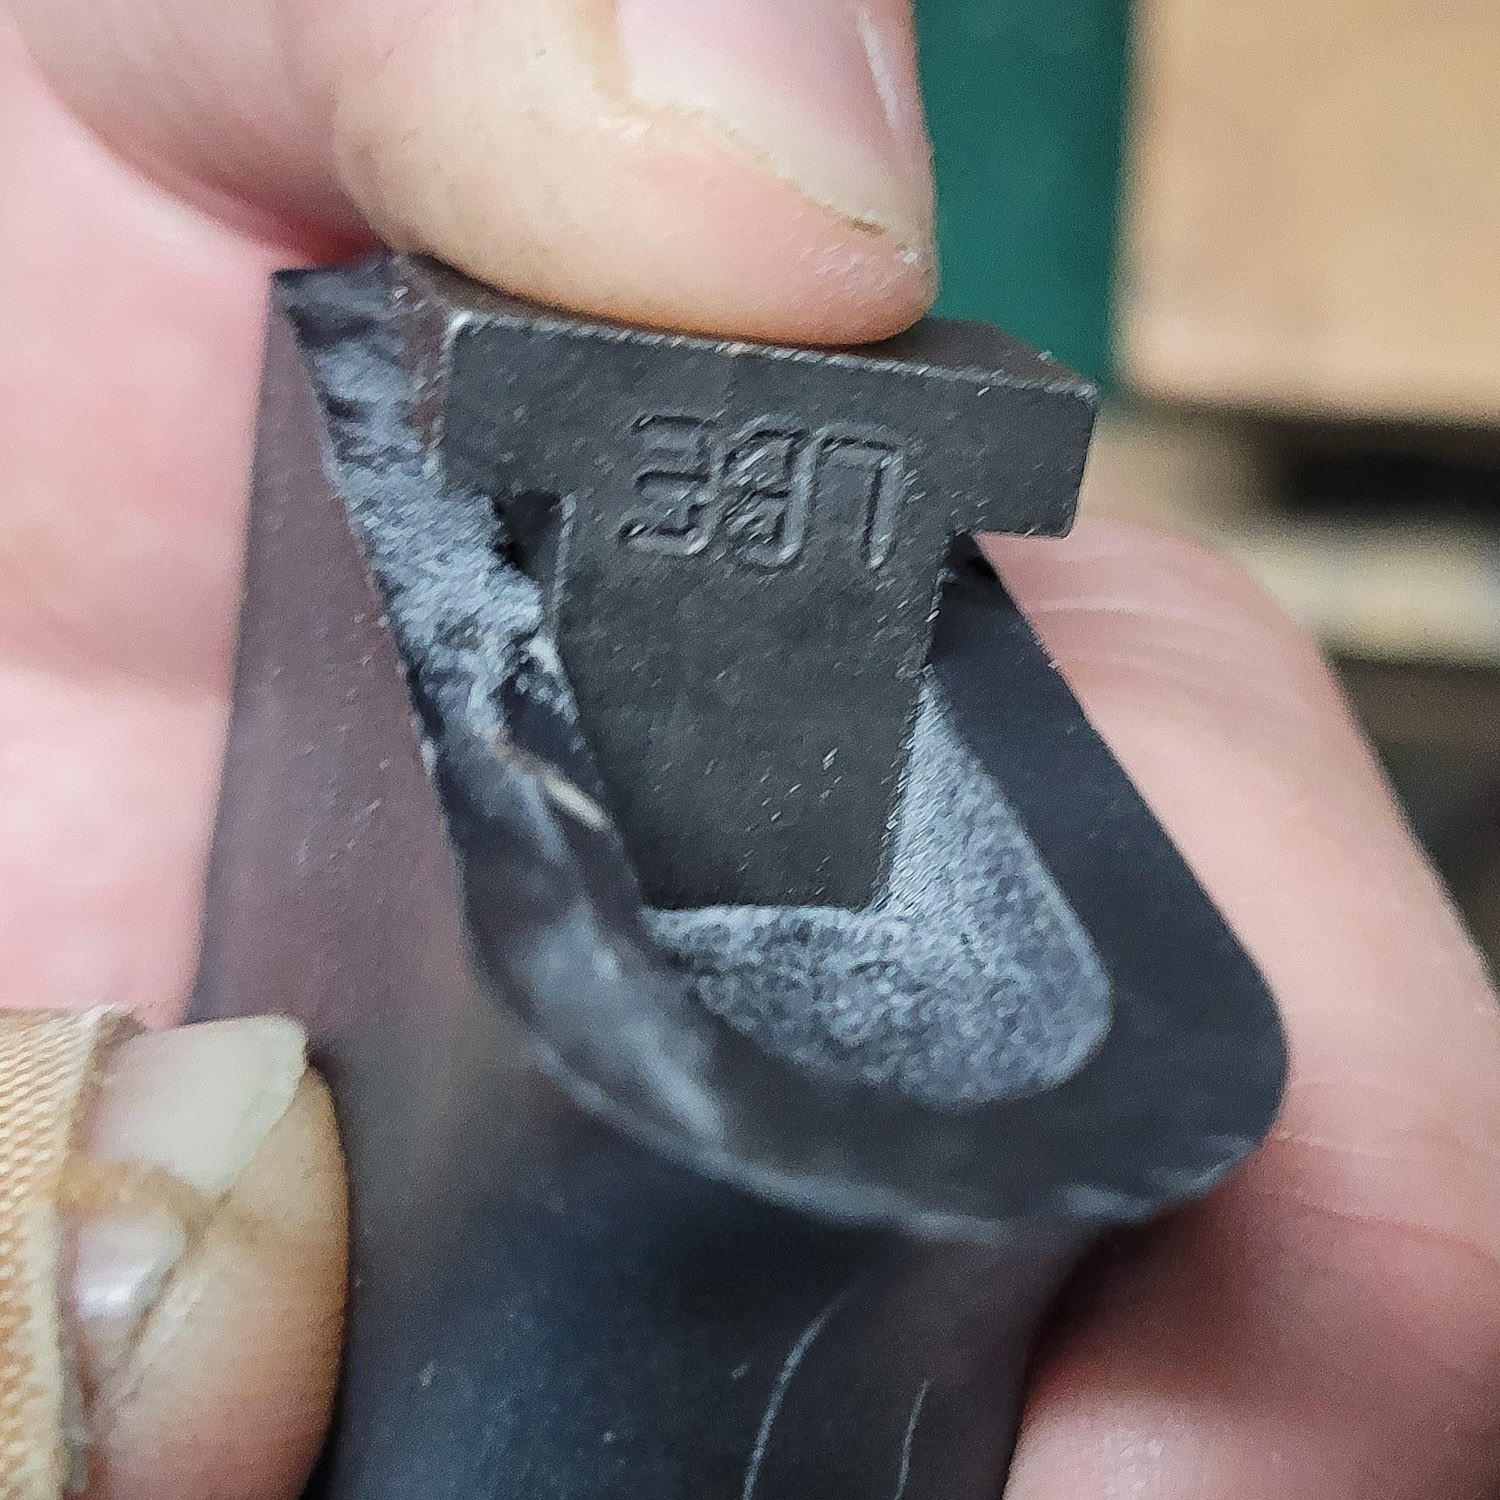
The left is a Romanian MD.63 nut and the right is a new slightly taller LBE Unlimited nut, The LBE is just a tad taller but either one would need to be trimmed to sit flush. Regardless, it is the part of the grip nut that is face up in this photo that you need to shorten via a file, sanding belt, end mill or whatever. Normally, this flat part is facing downwards the the grip screw slides into it.
It’s that bottom edge that needs to be trimmed.
To fit it, trim off a bit and test over and over. You don’t need to do it all at once. If the threads seem off at some point, run the grip screw in from the other direction to clear the threads.
Trim the bottom of the grip nut until the grip sits nice and flush against the receiver.
By the way, if you are wondering what the grip is against, it is an old AK-Builder bent flat where I messed up the top rails years ago and now use it for mocking things up.
Summary
I didn’t know the grip nut length was going to be a problem and don’t have a way to change the molds at this point. What I’d recommend is either trimming your nut or buying a replacement and trimming it as needed.
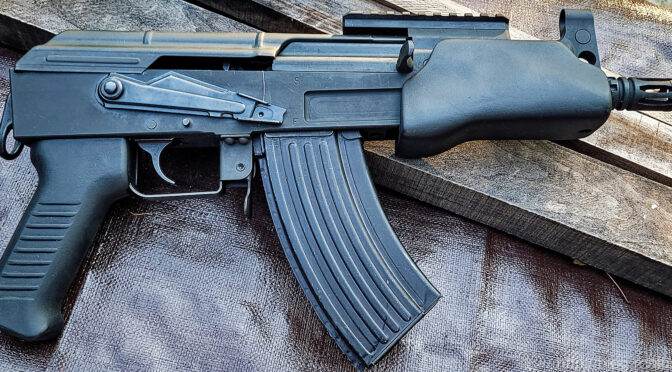
By popular demand we are bringing back our C39 Micro handguard that can also be fit to the Micro Draco. The purpose of this post is to share some fitment issues you need to be aware of and general guidance.
In my honest opinion, installing the Orca requires some expertise with woodworking or machining and is not something I would recommend to a novice. it is not just a drop in handguard like you would expect with an AR handguard for example.
Safe Use Is Your Responsibility – This is a short handguard on a short pistol. Please be mindful of safety whenever you are shooting it. Do not let anyone with a weak upper body, grip or who can’t control the pistol, fire the pistol.
Why You Must Fit the Handguard – A First-Hand Lesson
There are two reasons – first, there are a lot of things that can differ pistol to pistol and the pressure casting method we use has a tolerance that will require you to make some adjustments.
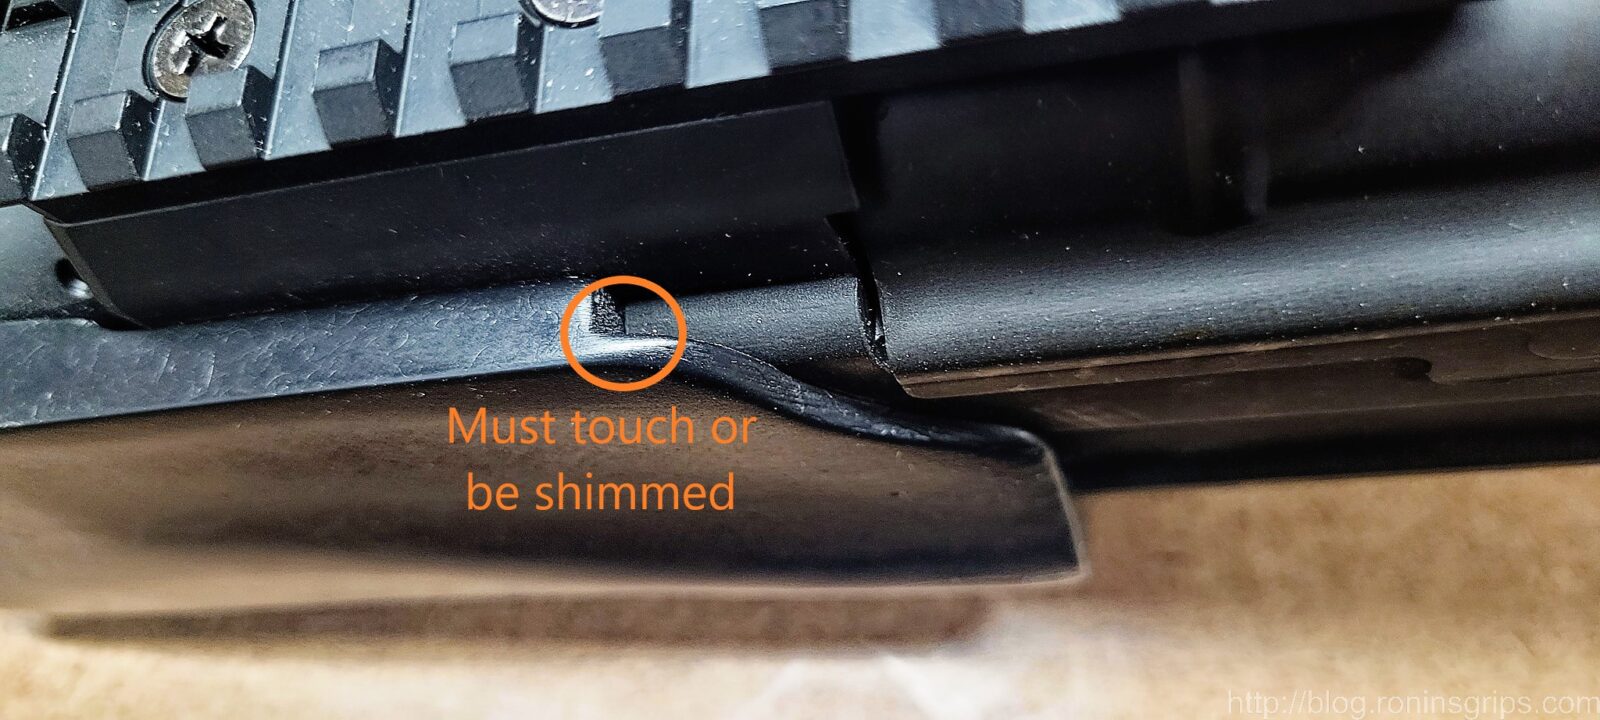
Second reason, the rear of the handguard must butt up against the front of the receiver to transfer the stress of recoil. If these surfaces do not contact each other, all of the stress will be placed on a small #8-32 screw that can’t handle the load and will shear off – I’ll show you what I mean.
Some time early this year, my friend Scott told me the screw sheared off when his wife was shooting his C39 Micro. This caused me to stop bringing the Orca handguard back until I sorted things out.
So, I finally had some time to look at it and the handguard wasn’t fully seated back against the receiver. His was the first Orca I made and I missed it. So, the Orca beat the heck out of the screw until it snapped off.
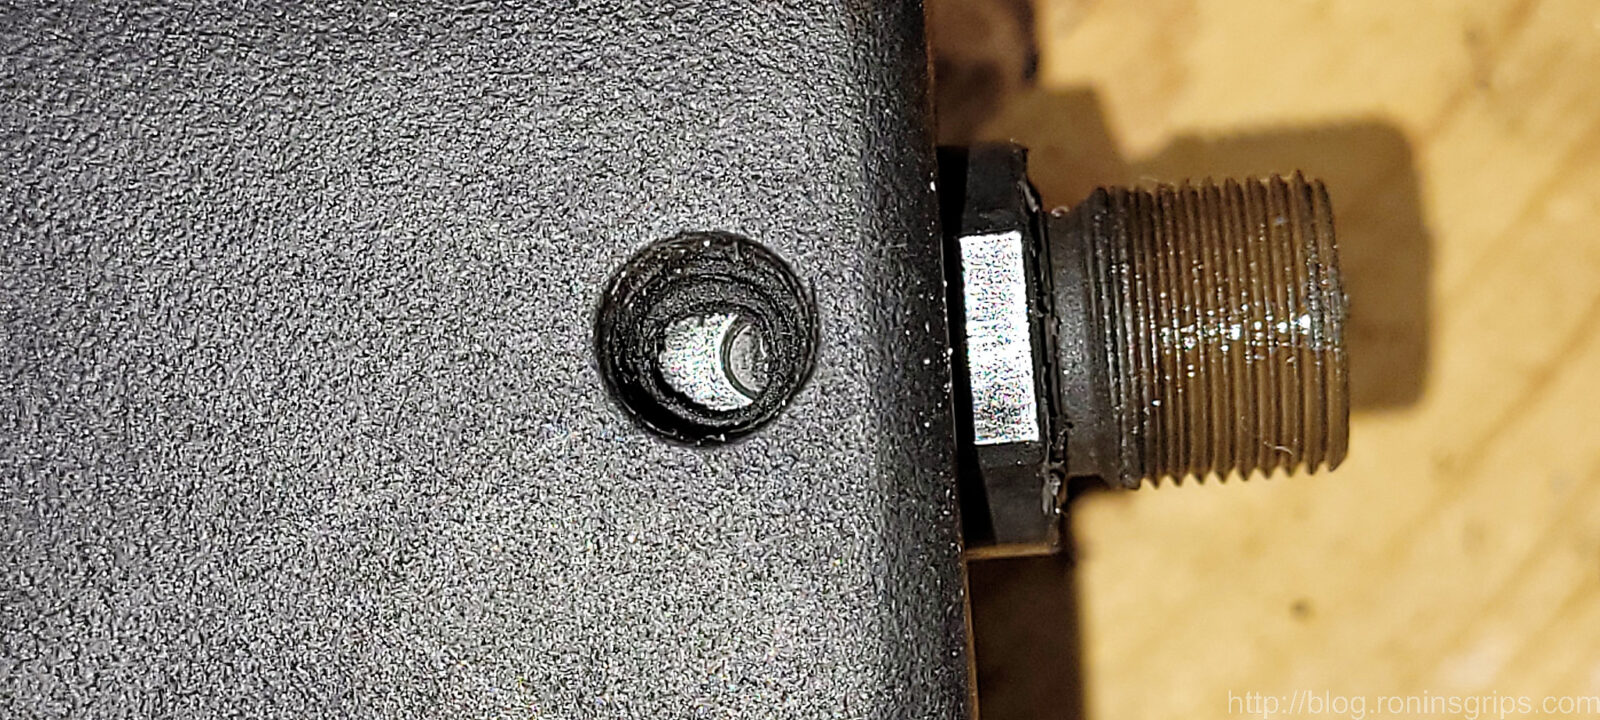
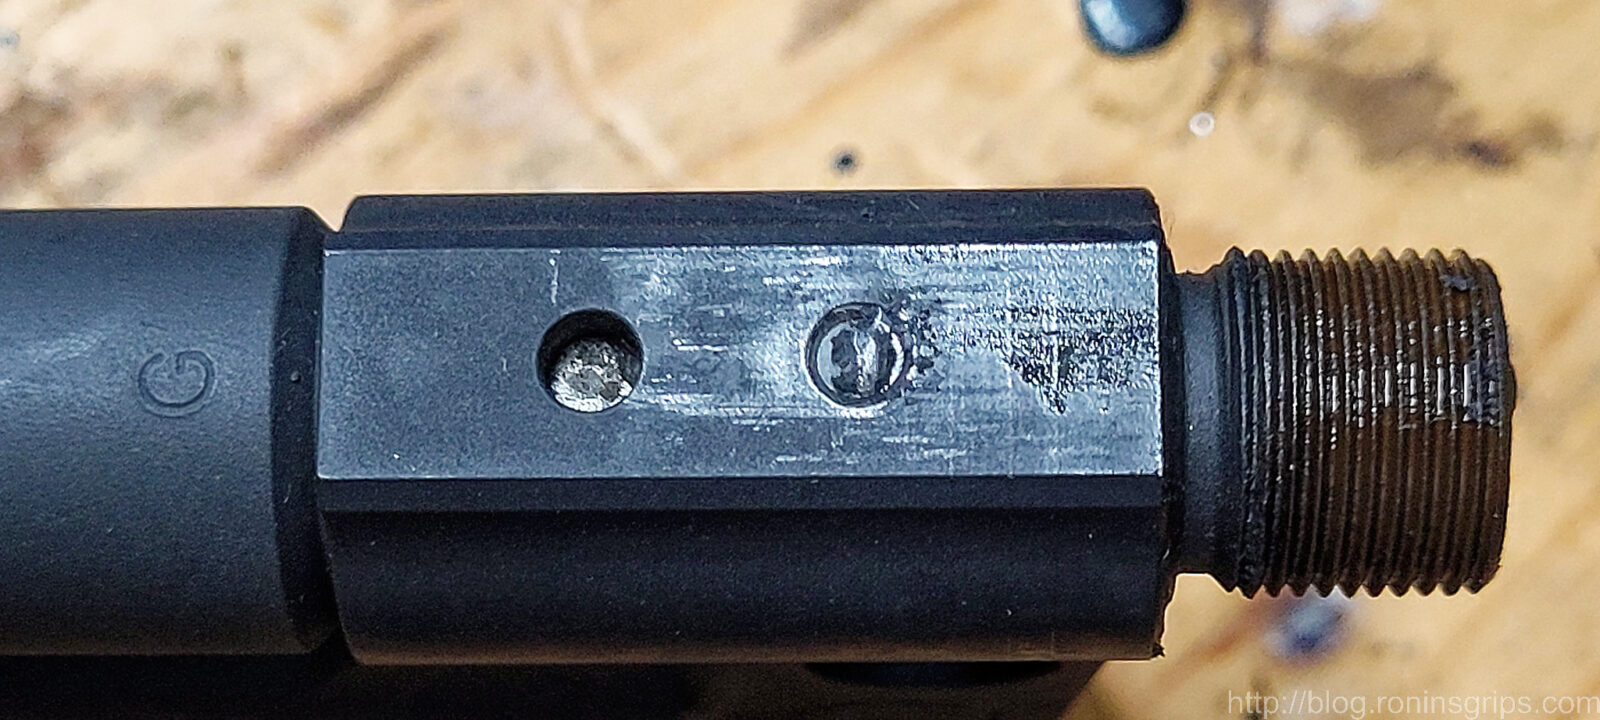
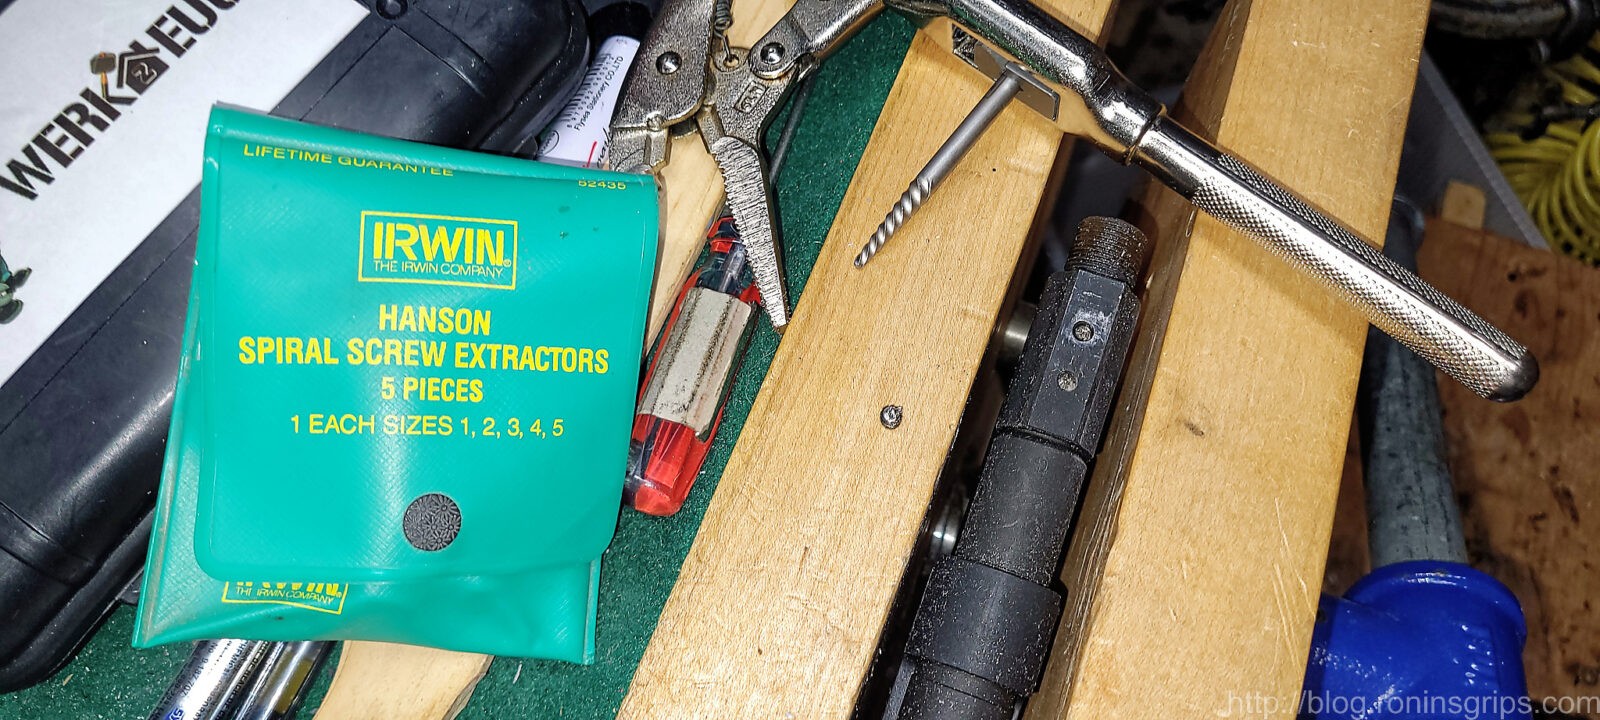
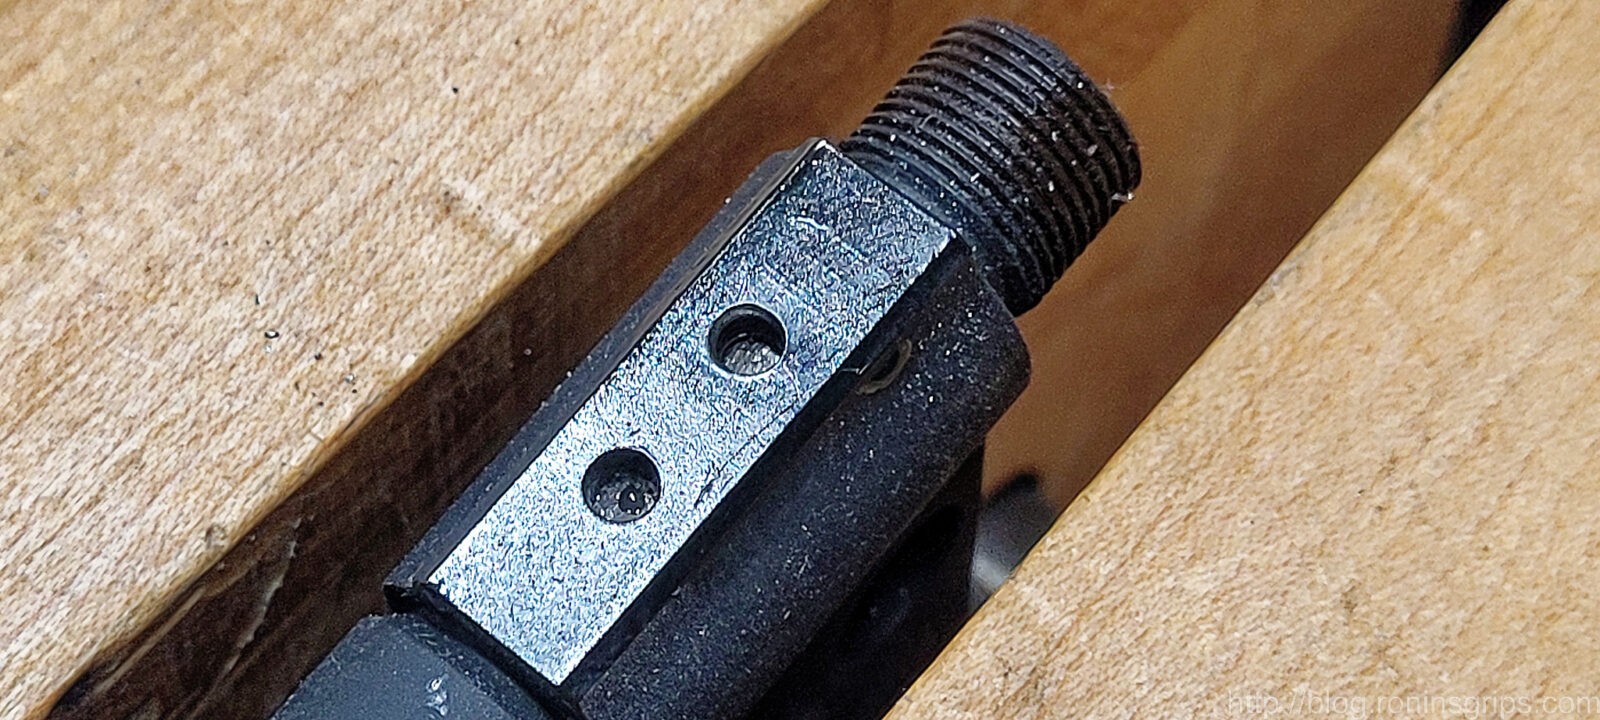
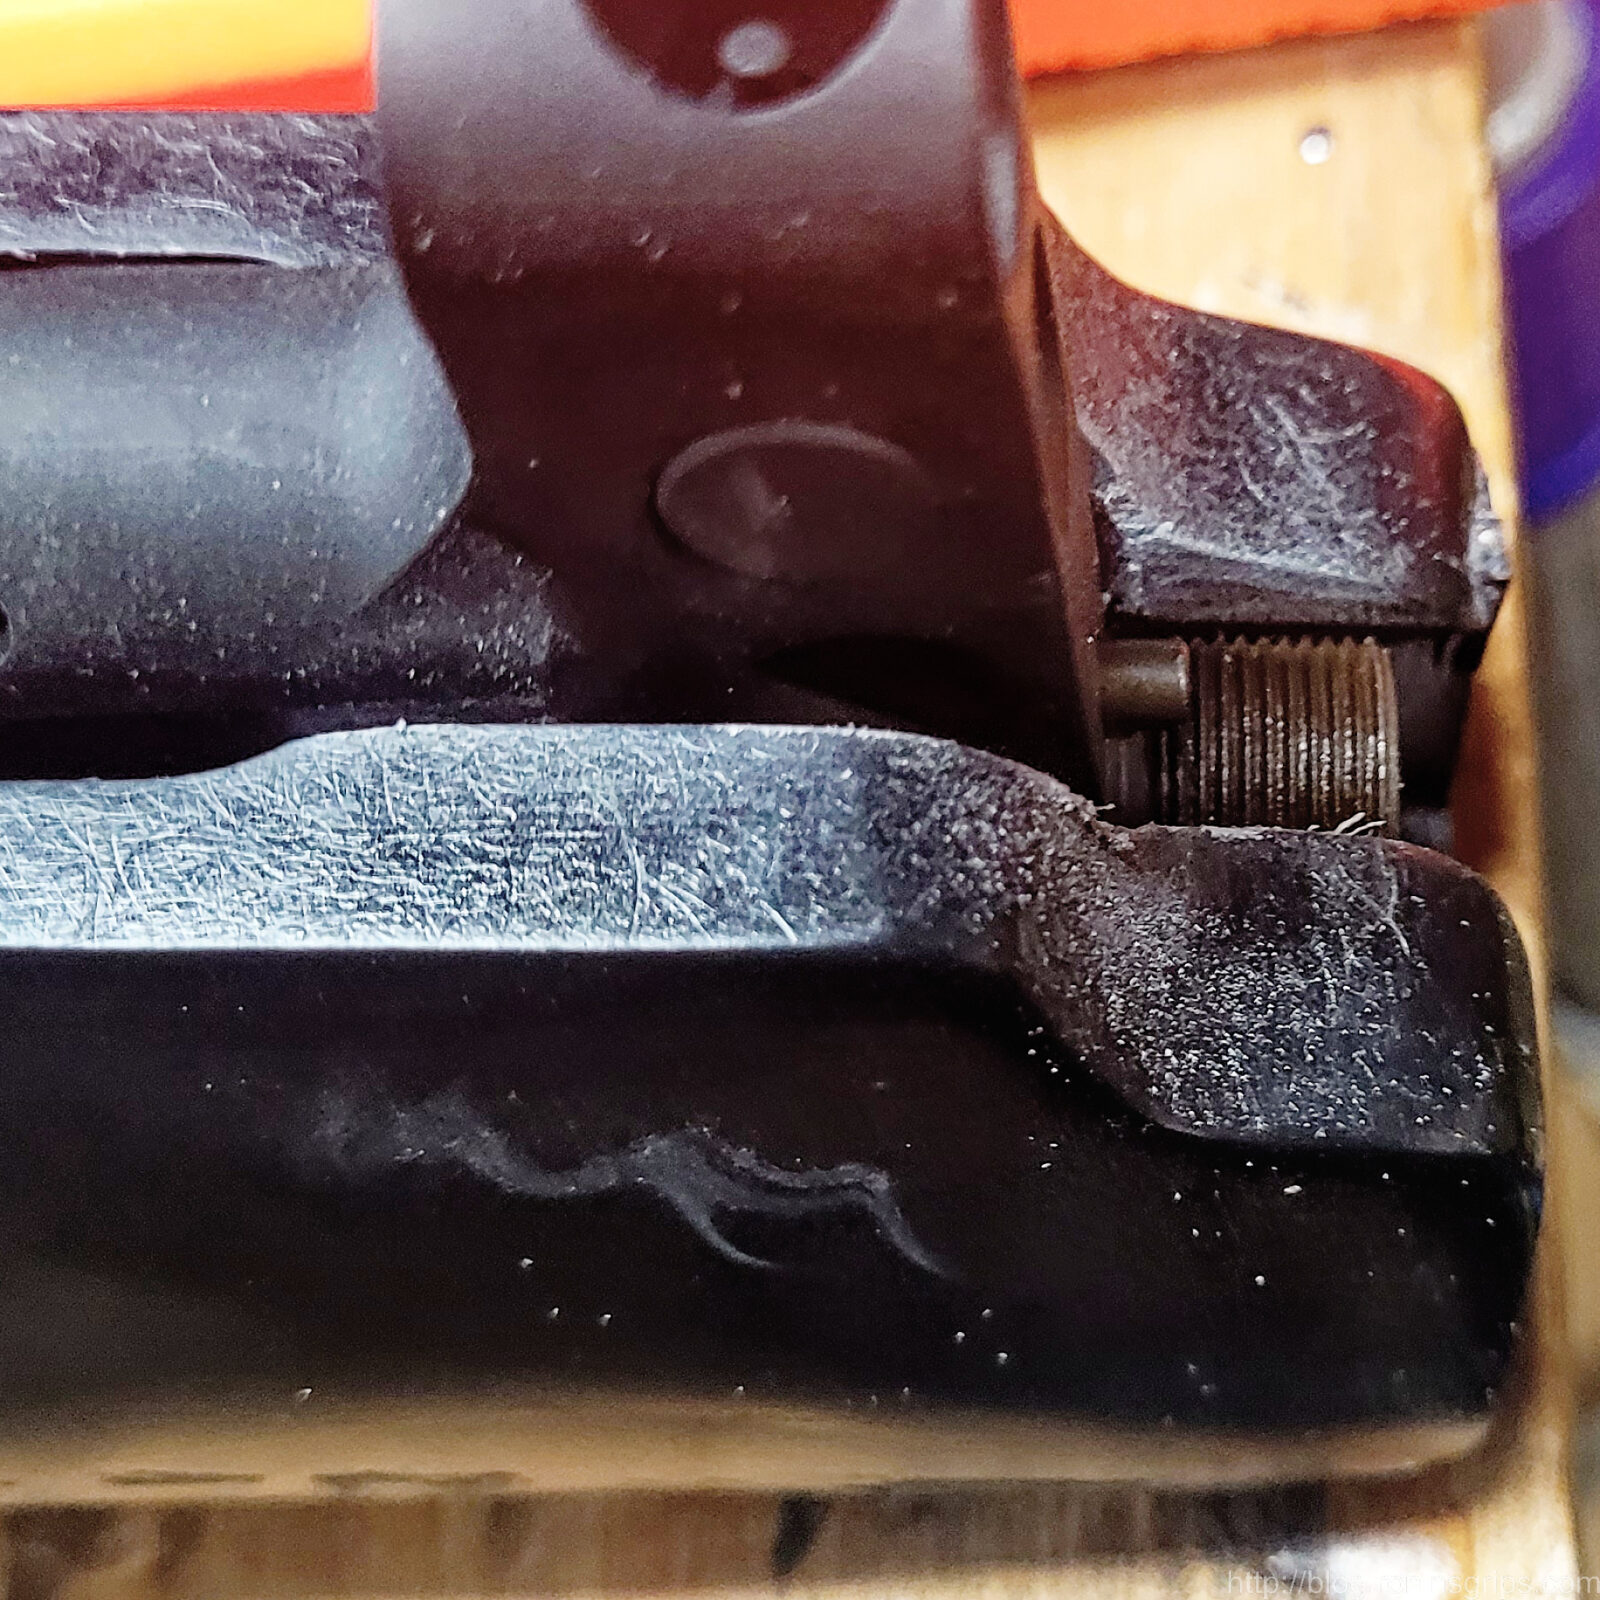
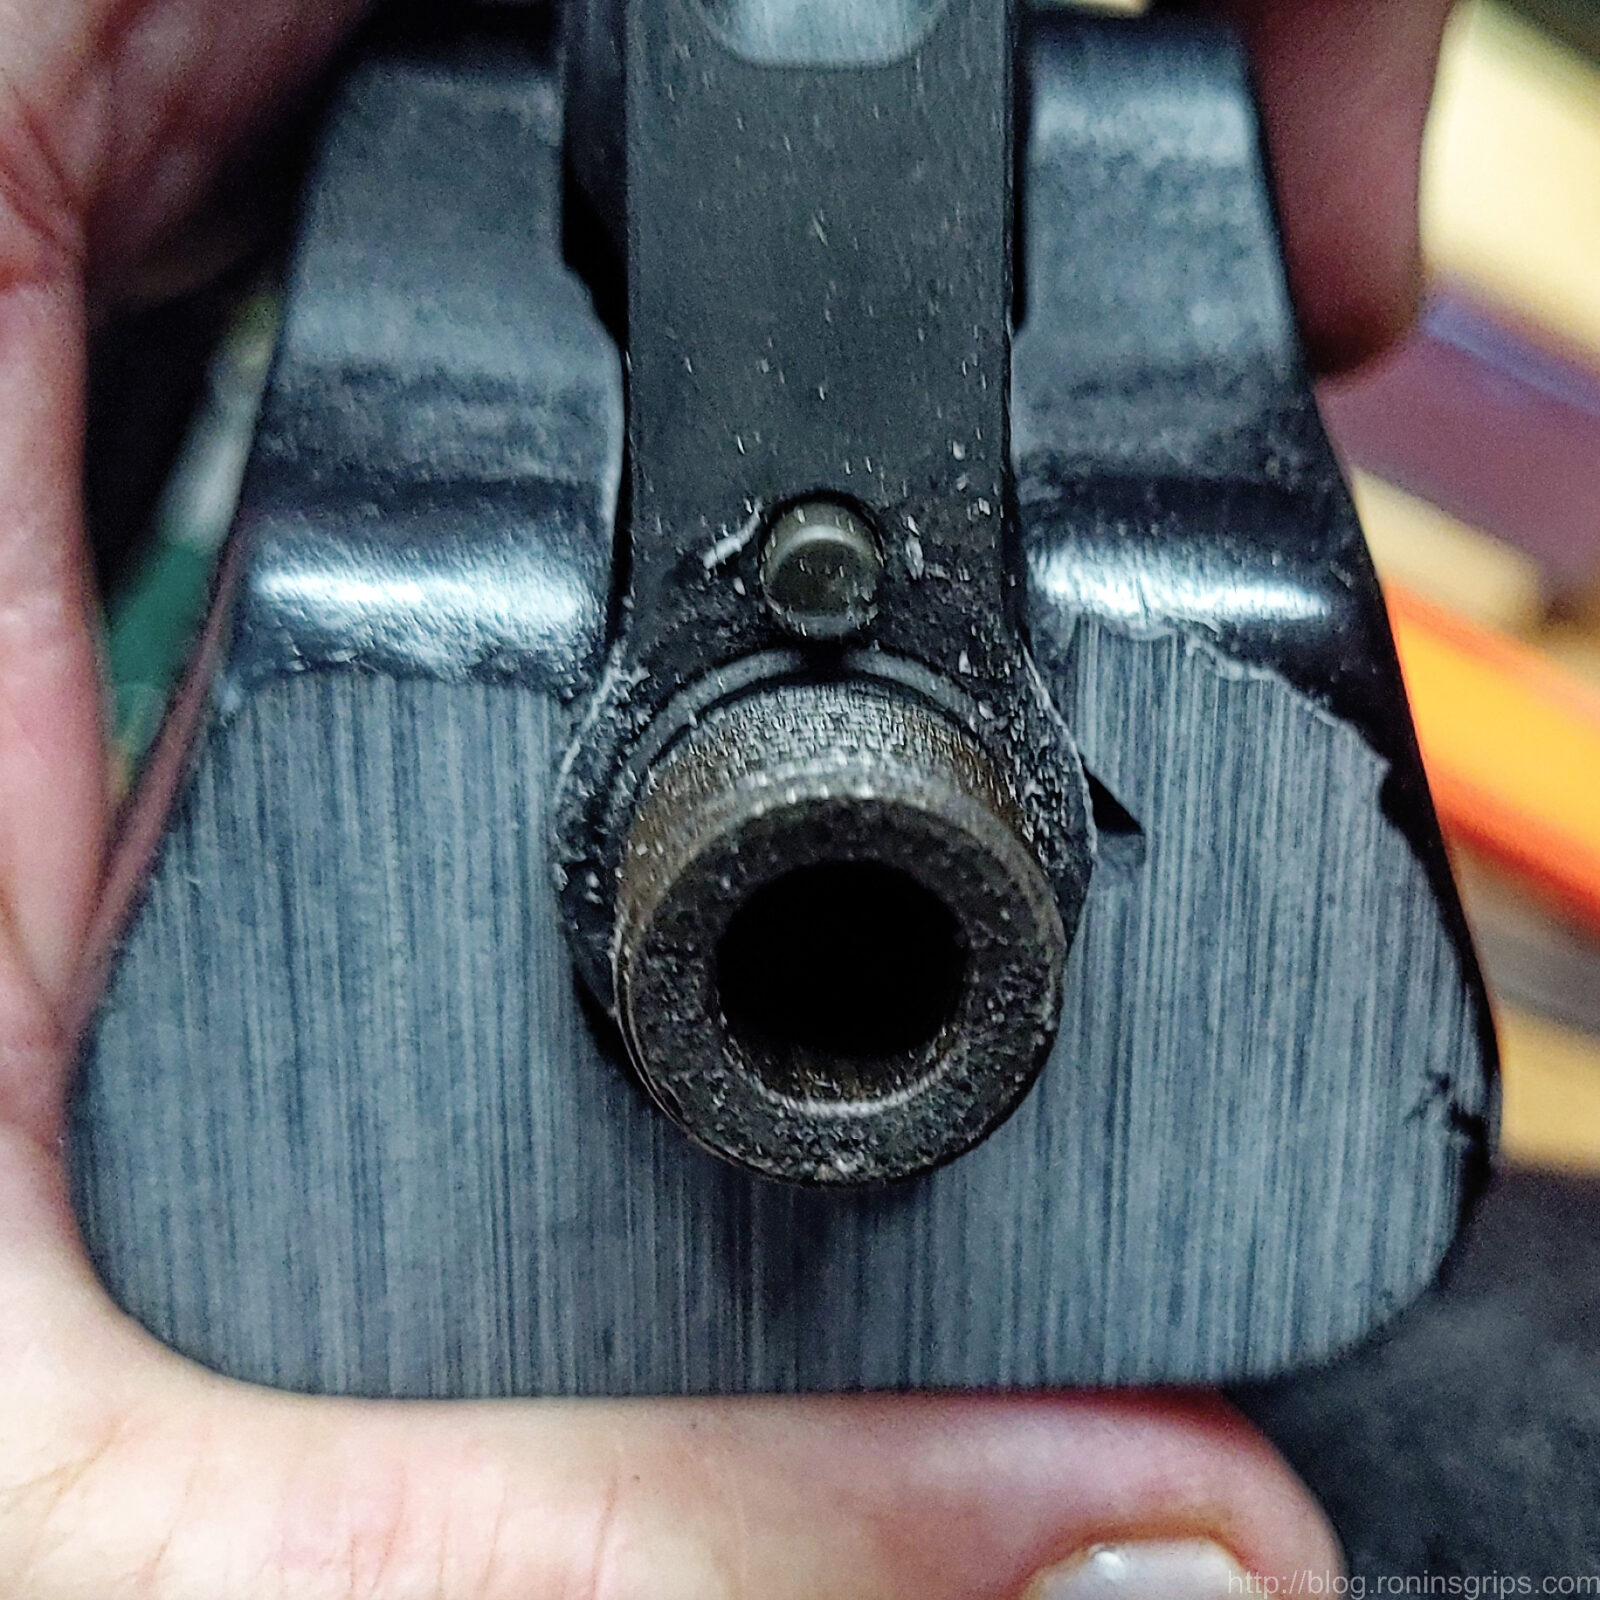
The handguard is firmly against the receiver and you can see what was left of the screw was towards the front of the hole. This tells you that I messed up installing it years ago and the #8 screw was taking all of the load.The screw sheared off right at the top of the hol.I sanded it flat, center punched the screw, drilled a hole and then used a Hanson screw extractor to back it out.Thanks to Brownell’s Oxpho-Blue, you would never know the original finish was missing.
Fitting the Handguard the Right Way to a C39 Micro
Armed with what went wrong, I dug in. I had the original handguard and I also cast two new ones to test with. For those of you reading this to install an Orca on a Micro Draco, read this for information but there will be a section further down with a video you need to watch.
Safety Brief: Before you do anything with your pistol, please make sure it is unloaded and safe.
Okay, the plastic used is a temperature resistant glass fiber reinforced urethane. It does not like to bend or compress. Think of it as a hardwood with an attitude. It can be sanded, filed, whatever you like. Wear a dustmask to avoid breathing the dust – you don’t want to do that.
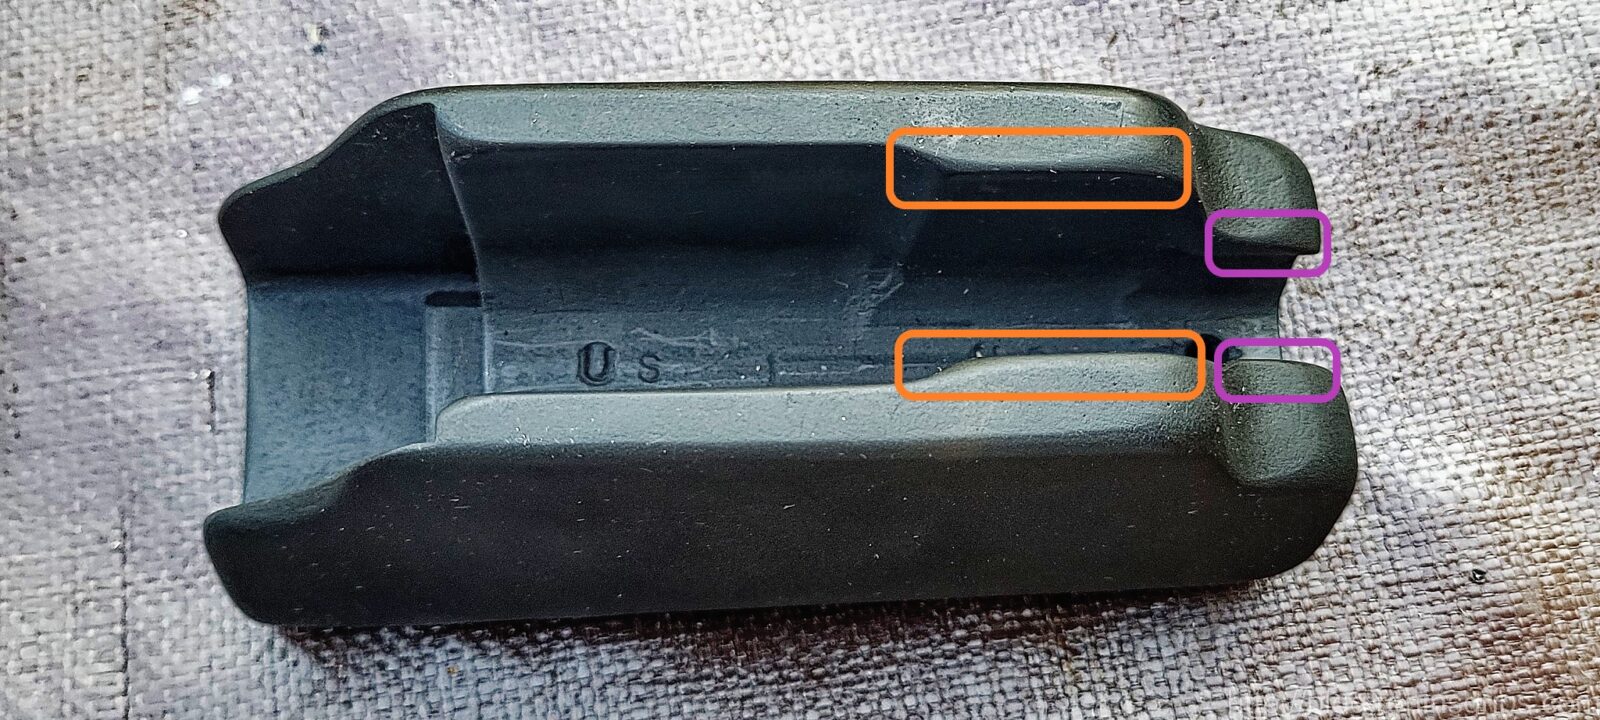
The orange areas will likely need trimming to clear your gas block and the purple areas may need adjusting to allow the area around the barrel to seat. The orange virtually always needs adjusting the but the purple may or may not.
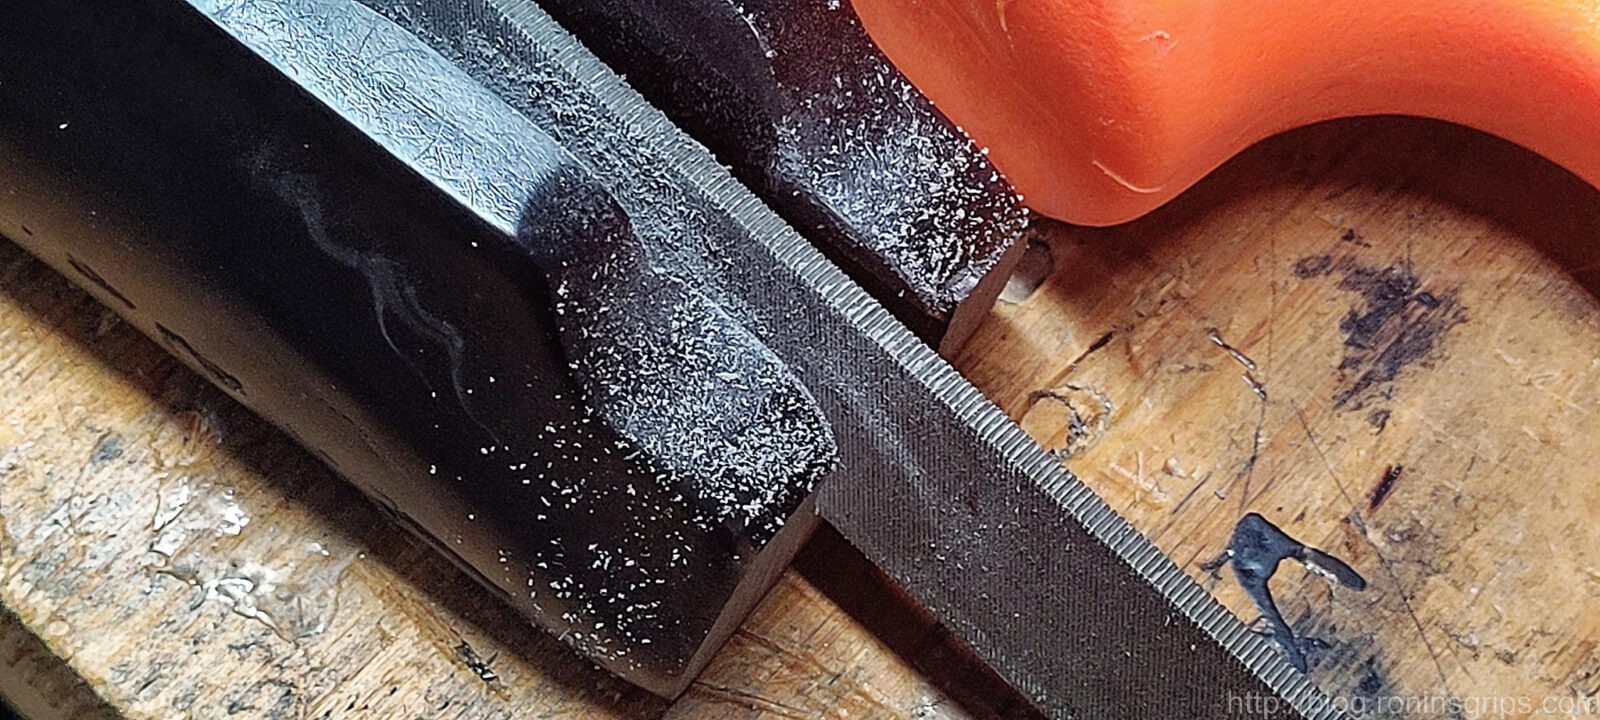
To fit the handguard, pretty much all you need is a file or sandpaper wrapped around a couple of paint stir sticks. I just use a file and you’ll see what in the photos.
I use a file and take the same amount off each side. Count your strokes and equal pressure. Don’t try and remove everything at once – take off just a bit and test over and over.
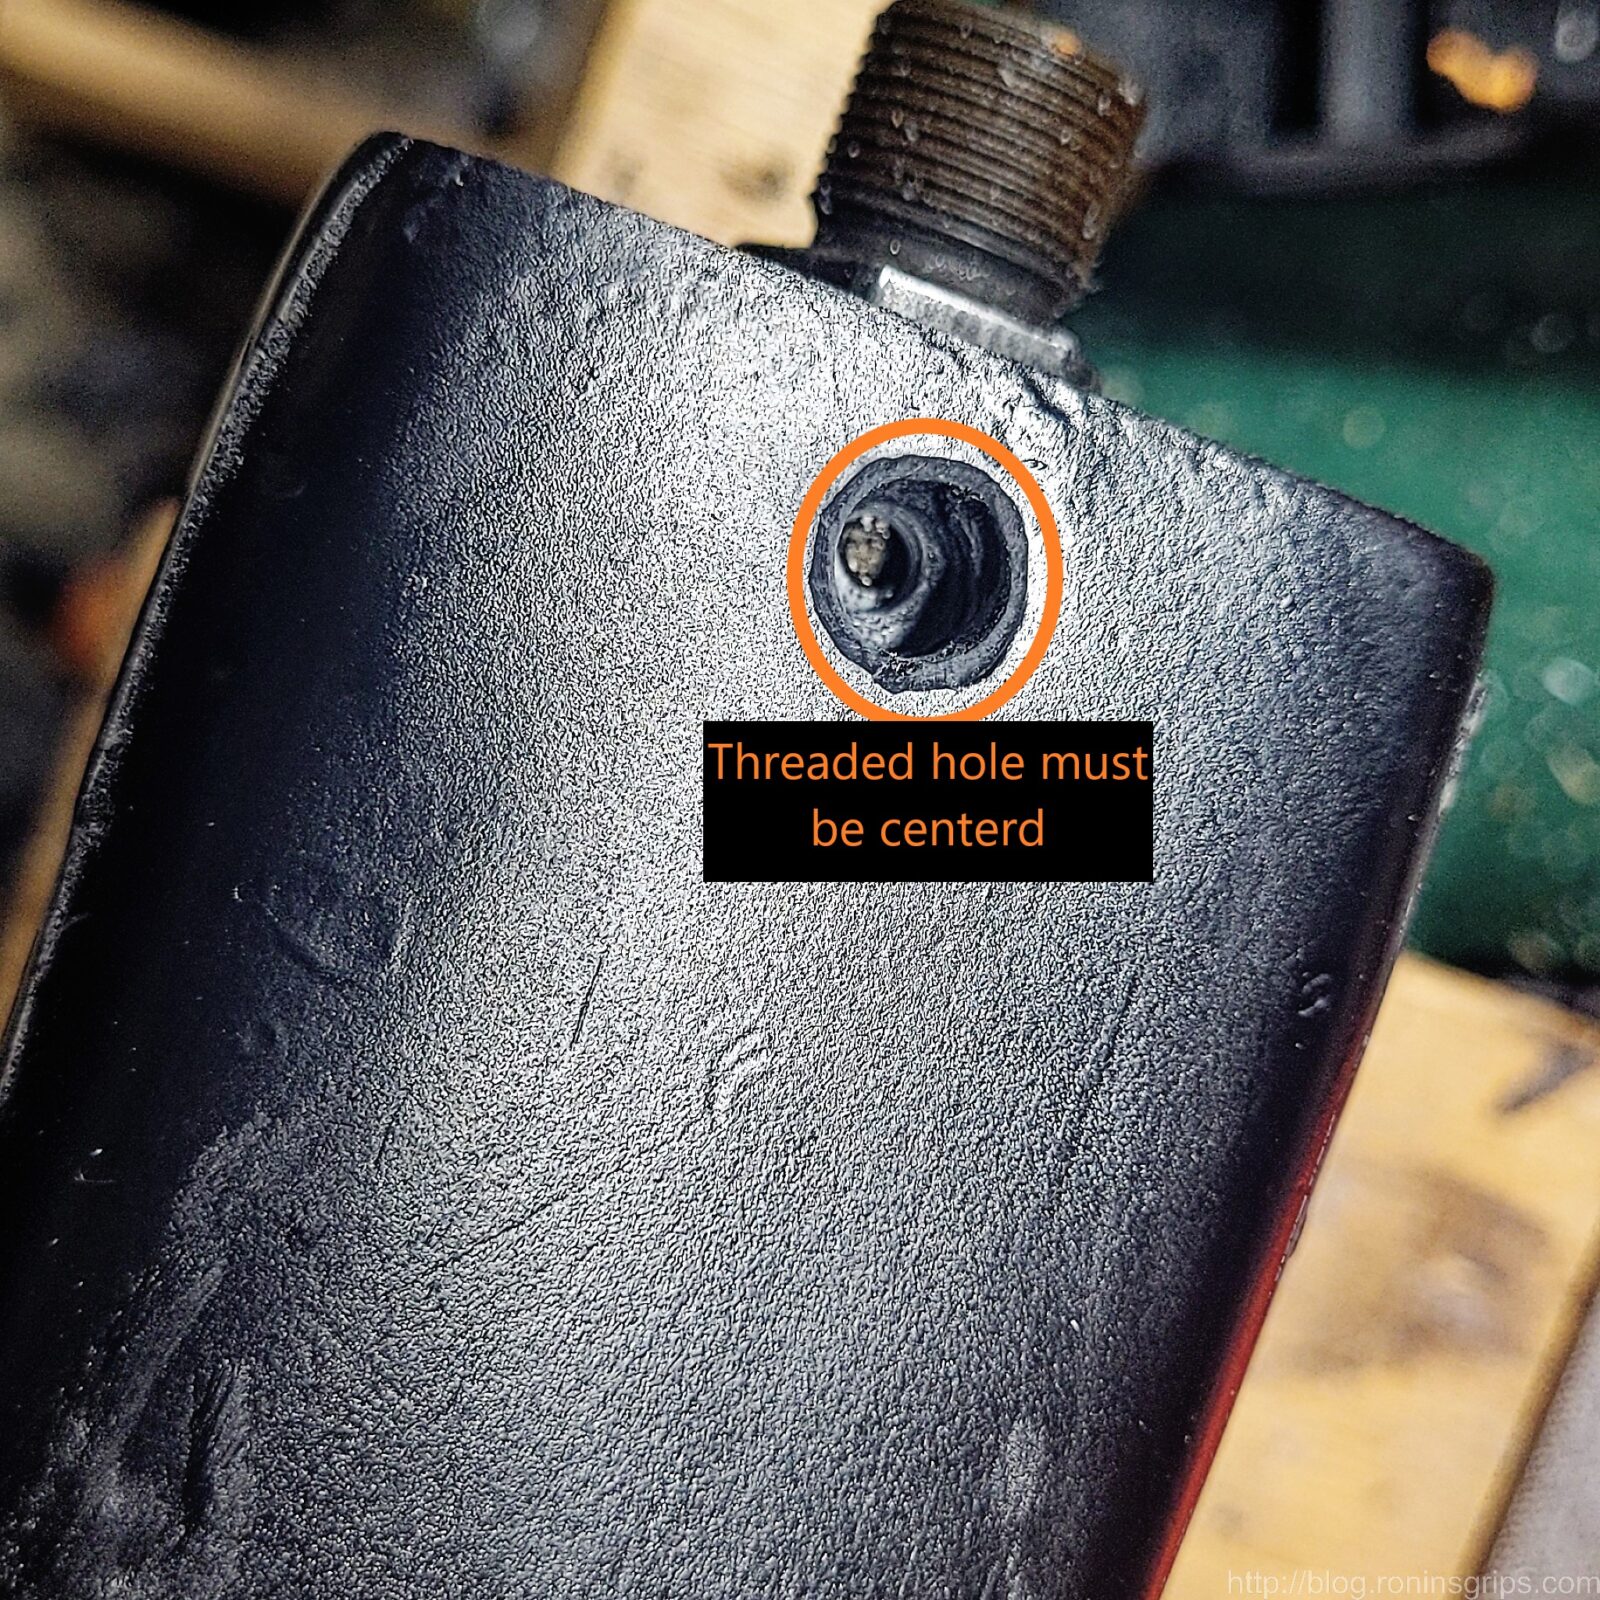
When removing material, do it equally with a few strokes from each side. If you slide the handguard on and the screw hole is off-center then you need to decide which side needs adjusting. Ideally, you don’t want to see that at all – remove material equally from both sides and do it slowly – don’t rush.
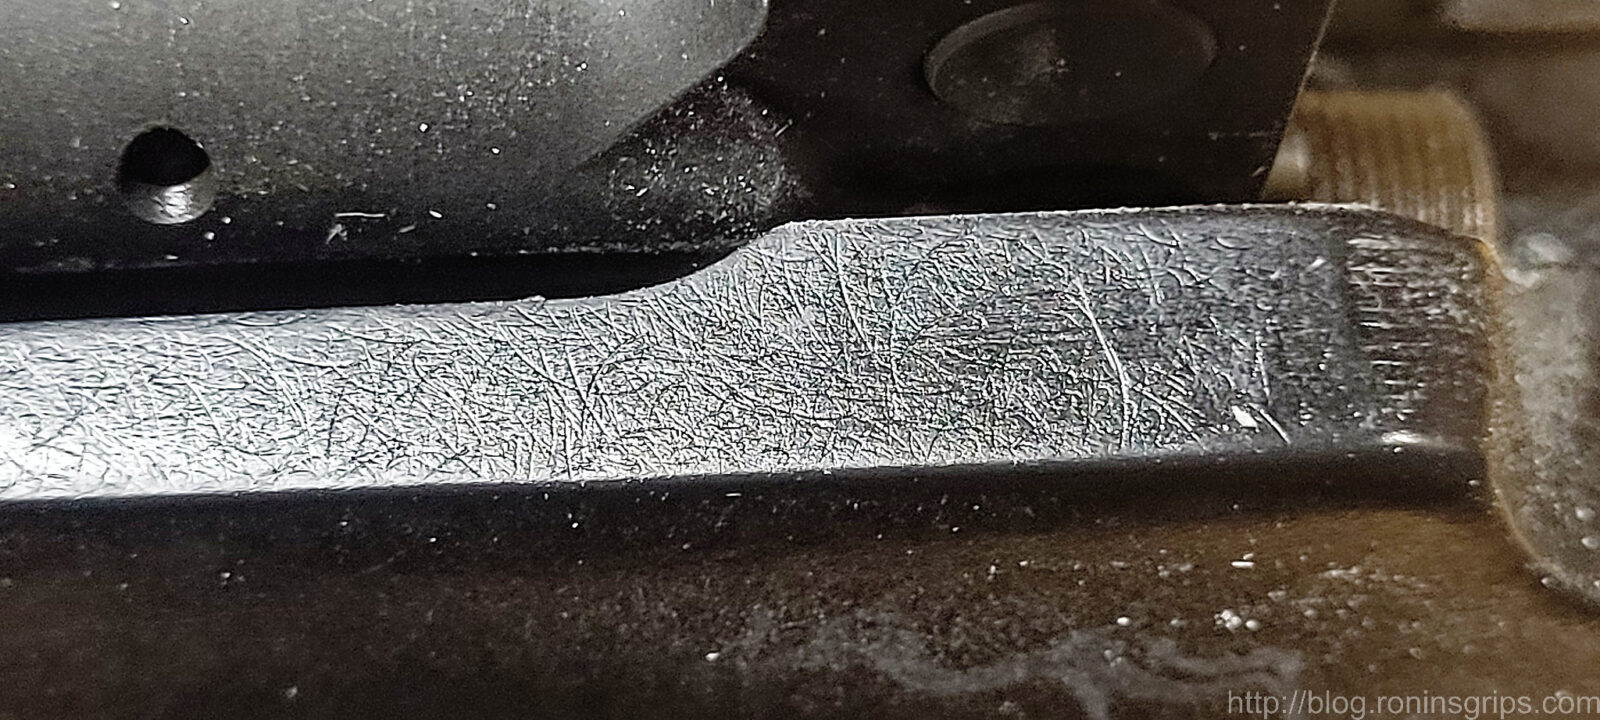
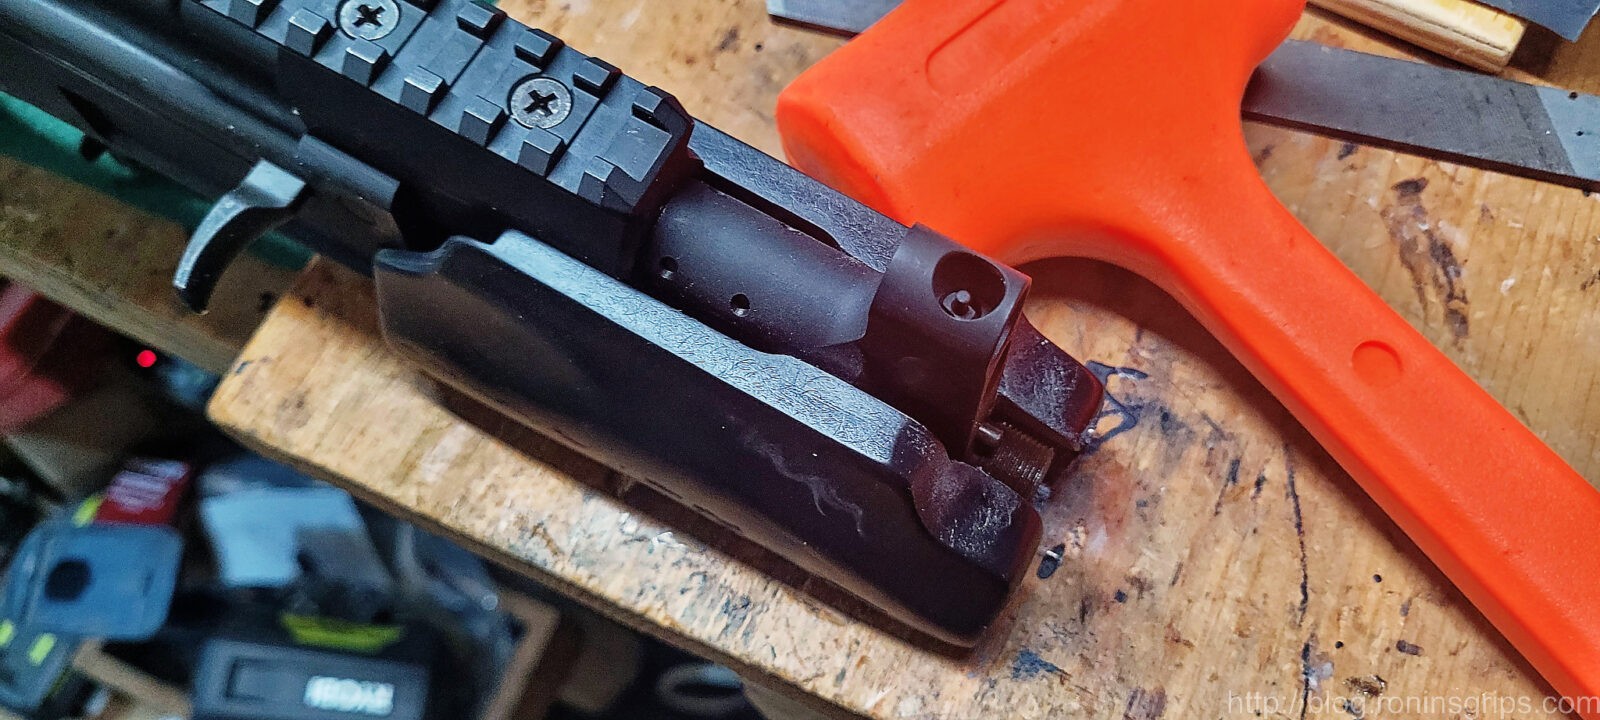
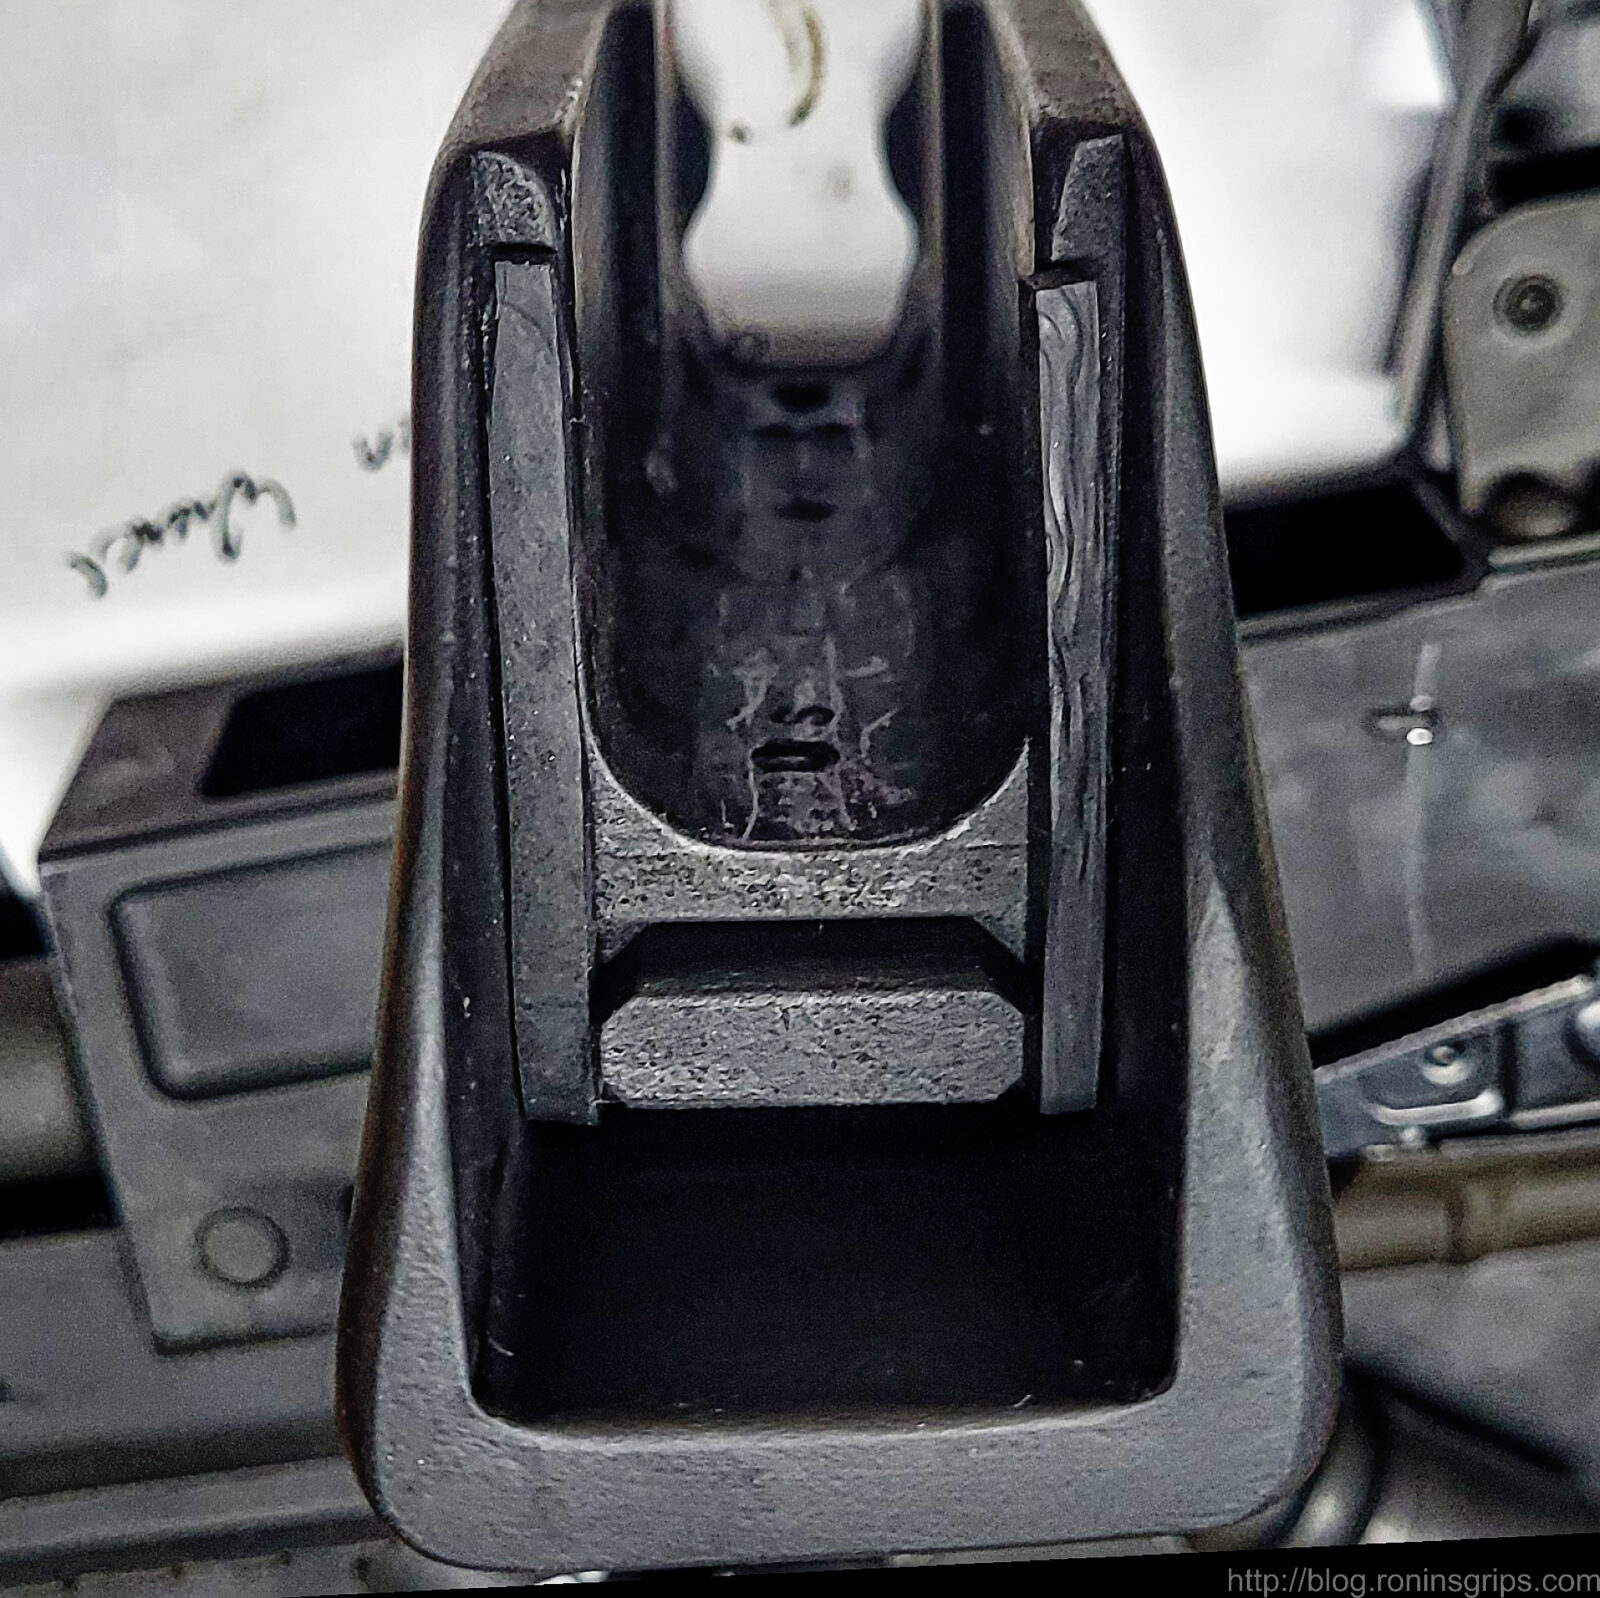
The sides need to clear the gas block and gas tube.When you are trying to clear the front, make sure the barrel is to the bottom of the handguard. Here, it is sticking because it is out of position towards the top.This test handguard had the waste plastic sawed off but no sanding that’s why the front looks so coarse. I wanted you to see that it is a snug fit up front and the barrel must sit down in the channel during fitting and testing.You will need the threaded hole to be centered.
The trick is to test fit, remove a bit of material equally and test again. I have a dead blow mallet to tap the Orca on or off but it is not done forcefully – you want snug. If you try and force it, the plastic will snap sooner or later.
The dead blow mallet is there to help me tap it on and off. It is not there for a “Mongo smash” level of force. You want a snug fit only.
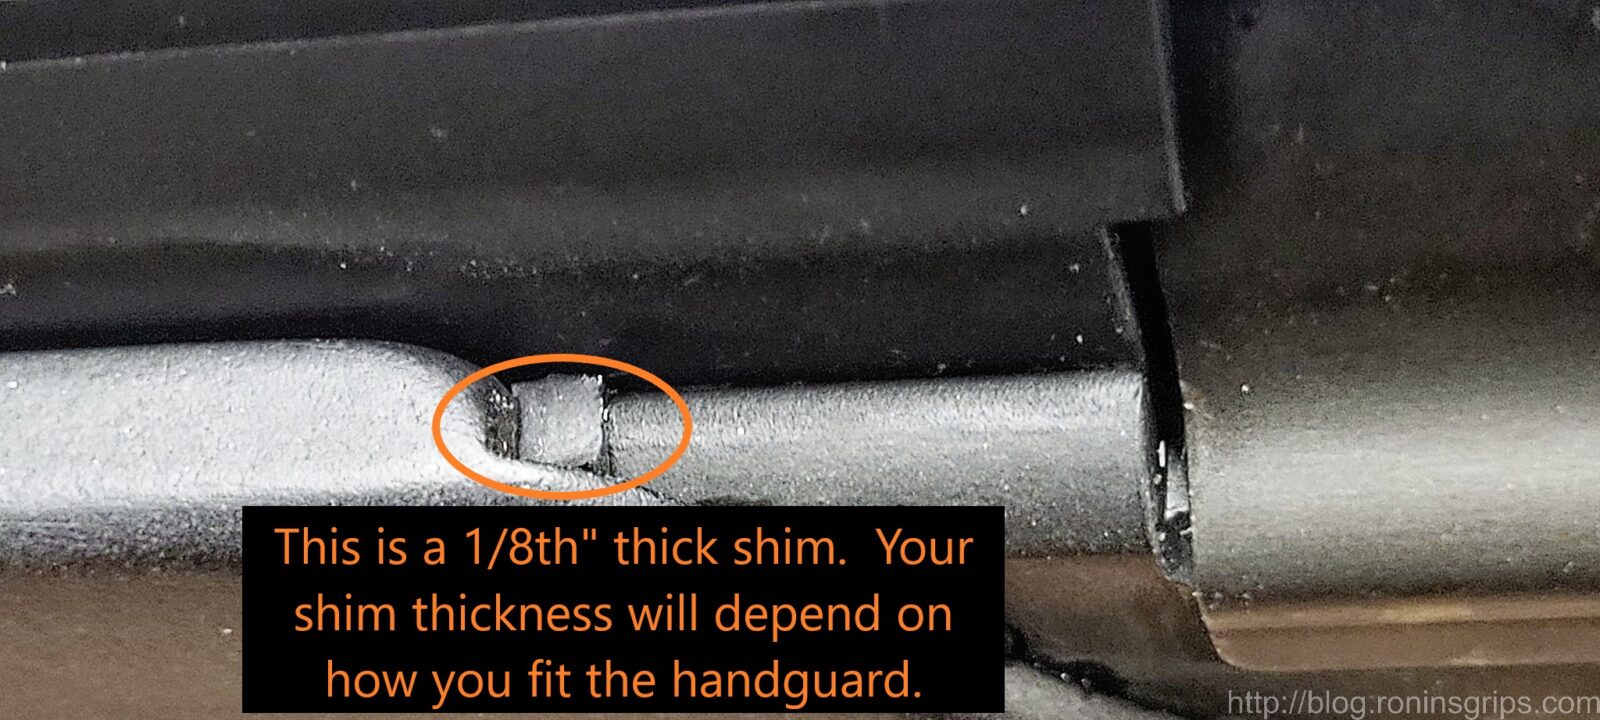
Depending on your pistol and how the fitting goes you may or may not need to add a shim. A shim is a thing piece of material that closes the gap between the handguard and the front of the receiver. It can be metal strips or a high temp gasket material. Just don’t use paper or cardboard or something that heat or oil/solvents can destroy.
I had three handguards during testing. One need an 1/8th in shim and the other two needed far less – somewhere between 1/32nd and a 1/16th. I made this one so you could see it.The shims are 2″ tall and 5/32″ wide – I cut them from a sheet of high-temp abrasion resistant Buna rubber. As mentioned, these are an 1/8th” thick. You just need the sides but if you want to go all around and shim every contact surface you could. You can leave them free-floating or but a dab of super glue or your favorite adhesive behind them once you know they are what you need. Don’t glue them in until you’ve done all the testing, etc.
So that’s pretty much it for the C39 Micro – get the handguard to slide on centered over the threaded hole in the gas block and shim if needed to it seats fully.
Fitting the Micro Draco
A fellow did a real nice job documenting how he converted the Orca to fit a Micro Draco. He created this video and put it on YouTube so everyone can benefit from it:
I’m sure there are a lot of shooters like me who buy and install back up iron sites on their weapons just in case the optic fails. Except for pure range toys that will never see use beyond having fun, I do think BUIS are a really good idea – optics fail for any number of reasons with batteries being dead quite possibly being the #1 issue – especially given how folks love their red dot, green dot and holographic sights. You need a backup for aiming your firearm.
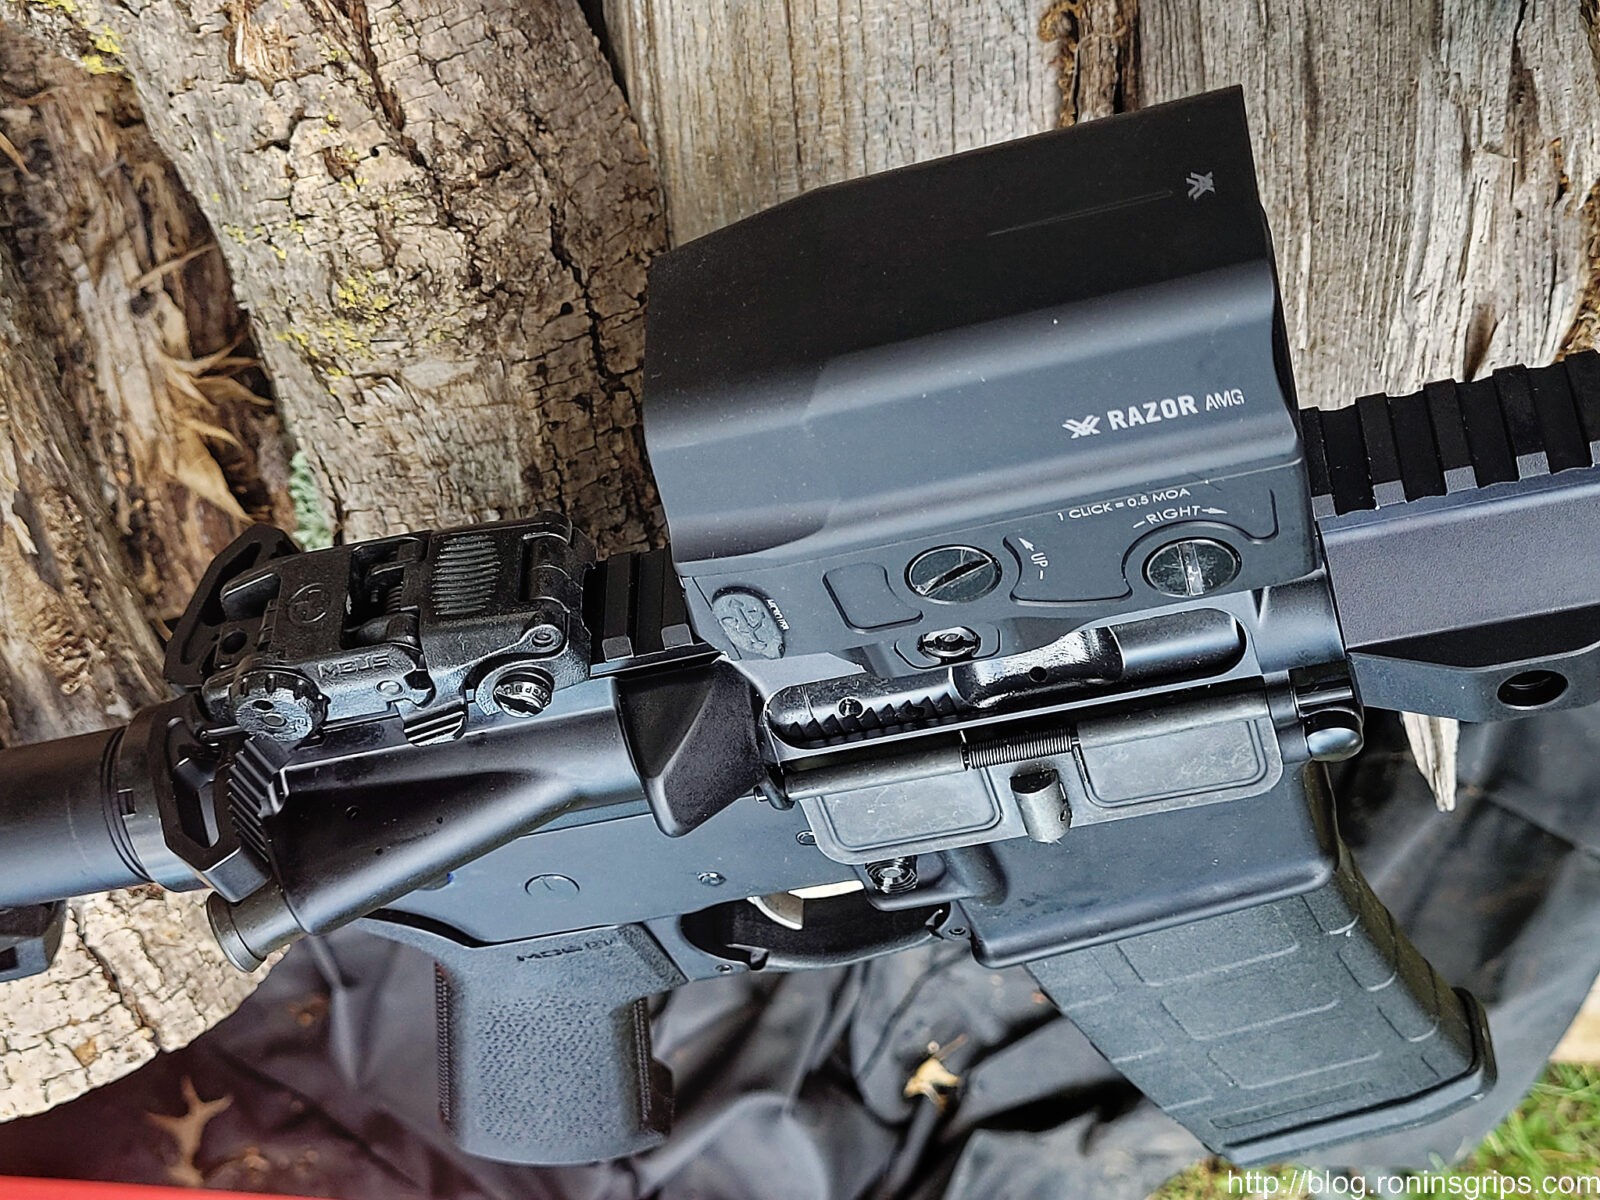
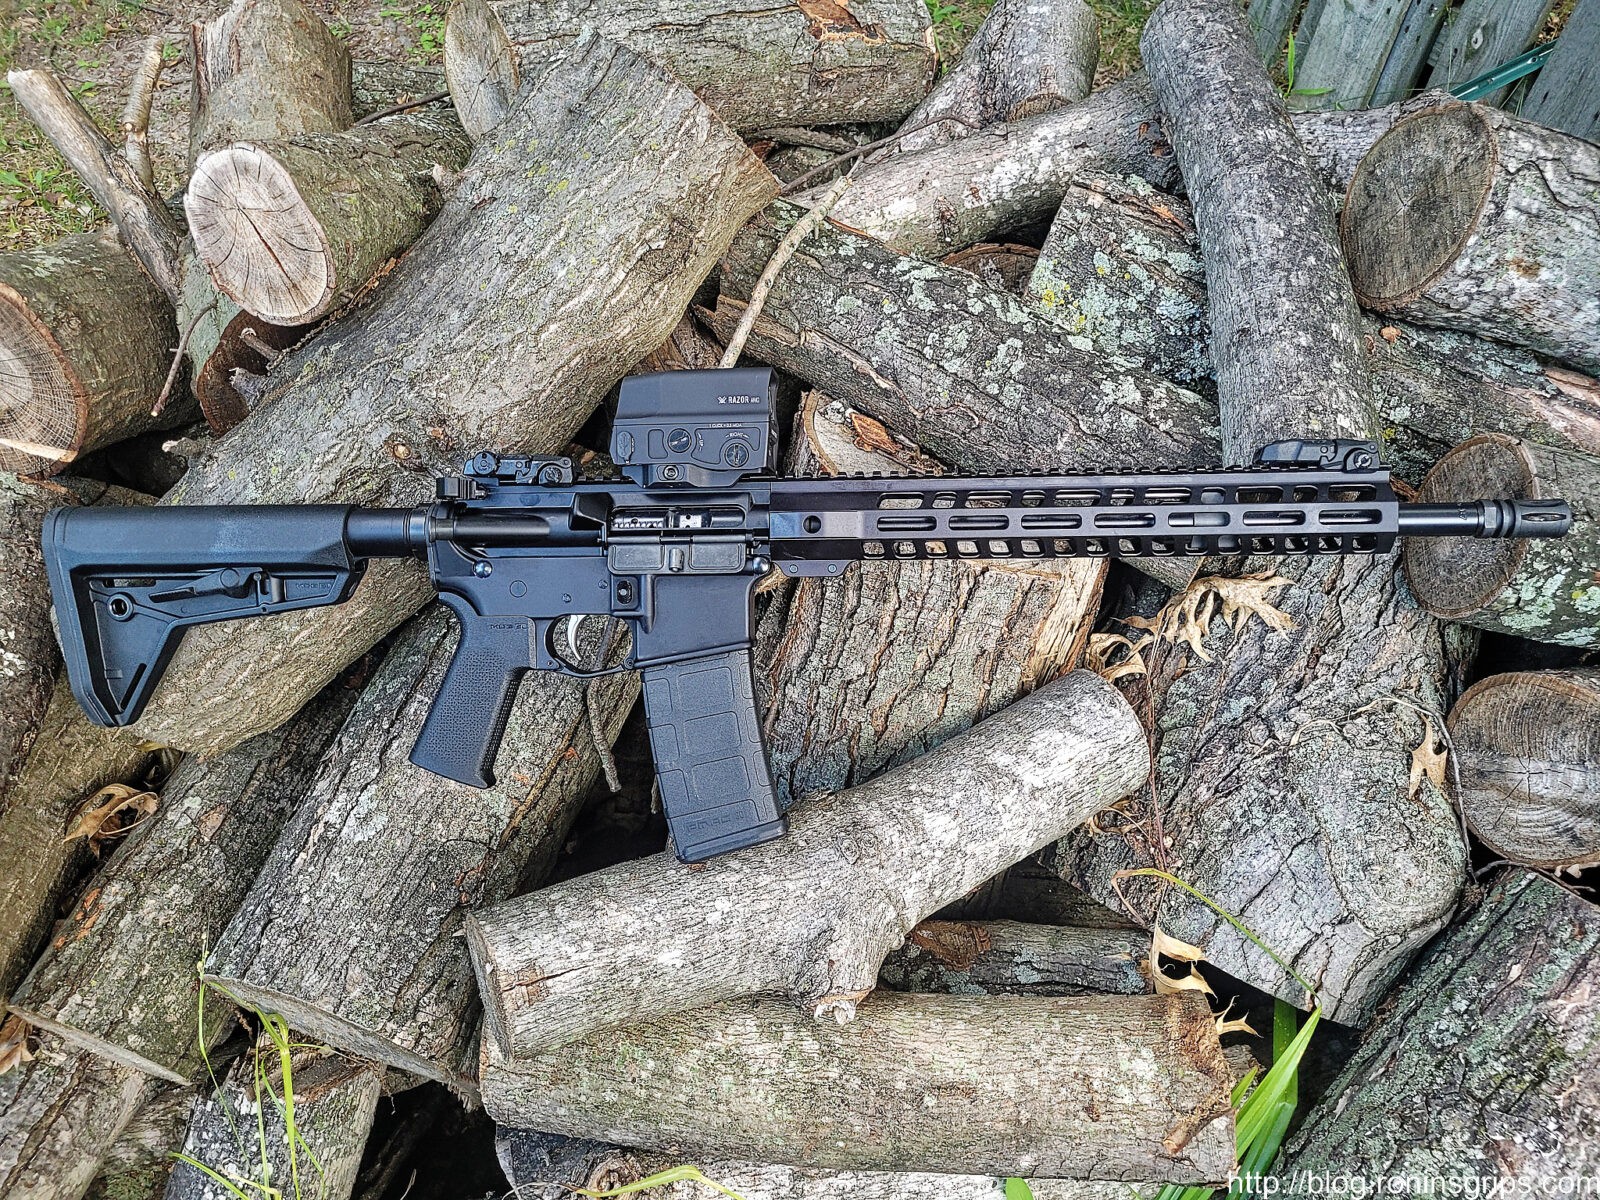
What happens if the battery in the Vortex dies? Well, I do have the backup Magpul sights … right?
A quick comment about “BUIS” – it stands for Back Up Iron Sights. I’m a creature of habit and that’s how they were first introduced to me but not everyone uses that term. For example, Magpul calls their units MBUS – Magpul Back-Up Sights. Other’s just say “back up sights” or even just “attachable” or “folding” sights. So, if you are wanting to search and see what your options are, it will take some searching.
Four Camps of BUIS Users
In talking with shooters, regardless of their firearm platform (AR, AK, Stribog, HK, etc.) about their BUIS, I usually find they fit in one of four camps:
Installed the BUIS and run them full time with their optic in a co-witness manner
Installed the BUIS and periodically use them in a co-witness model but fold them down when not in use
Installed the BUIS and only use them when needed but did sight them in. For example, if they need to remove the optic to deploy the sights or are using offset sights and tilt the weapon 45 degrees to use them.
Attached the units to the Picatinny rail, did not sight them in and have never actually practiced using them to hit targets at the range … “but have them just in case”.
With scenario #1, you know those sights will work – it doesn’t matter if the scope is powered off as long as you can see through the glass.
With #2 & #3 – the sights will probably work as long as you can see through the glass or otherwise see them. Hopefully the shooter has practiced enough how to use the units.
The last one is the most concerning – camp #4 – to be honest, a person in this camp doesn’t really have a backup. Yeah, they have the sights but they aren’t dialed in and lack experience with them. This is a gamble you do not want to take. If this describes you – please don’t take it personally and read the next section – I want to help.
As far as I know, all BUIS are two parts – a front sight and a back sight. In the above photo – I am using Magpul polymer MBUS folding units and are on each far end of the top rail. They fold down until needed and then spring p when you push a lever on each.
If You Are In Camp #4…
First off, I am glad you invested in BUIS – if you are reading this and you haven’t yet, then do so. With that said, do you have quality units or did you buy something dirt cheap off Amazon or eBay. I’d recommend going with a brand name and not cheap airsoft import stuff – I like Magpul (they have a ton of models so click here to see them) plus, in all fairness, there are other quality BUIS sets from the likes of ARMS, Bobro, DiamondHead, Troy and others. Cheap stuff may not hold their zero or break easily. Buy quality to have true BUIS that you can count on.
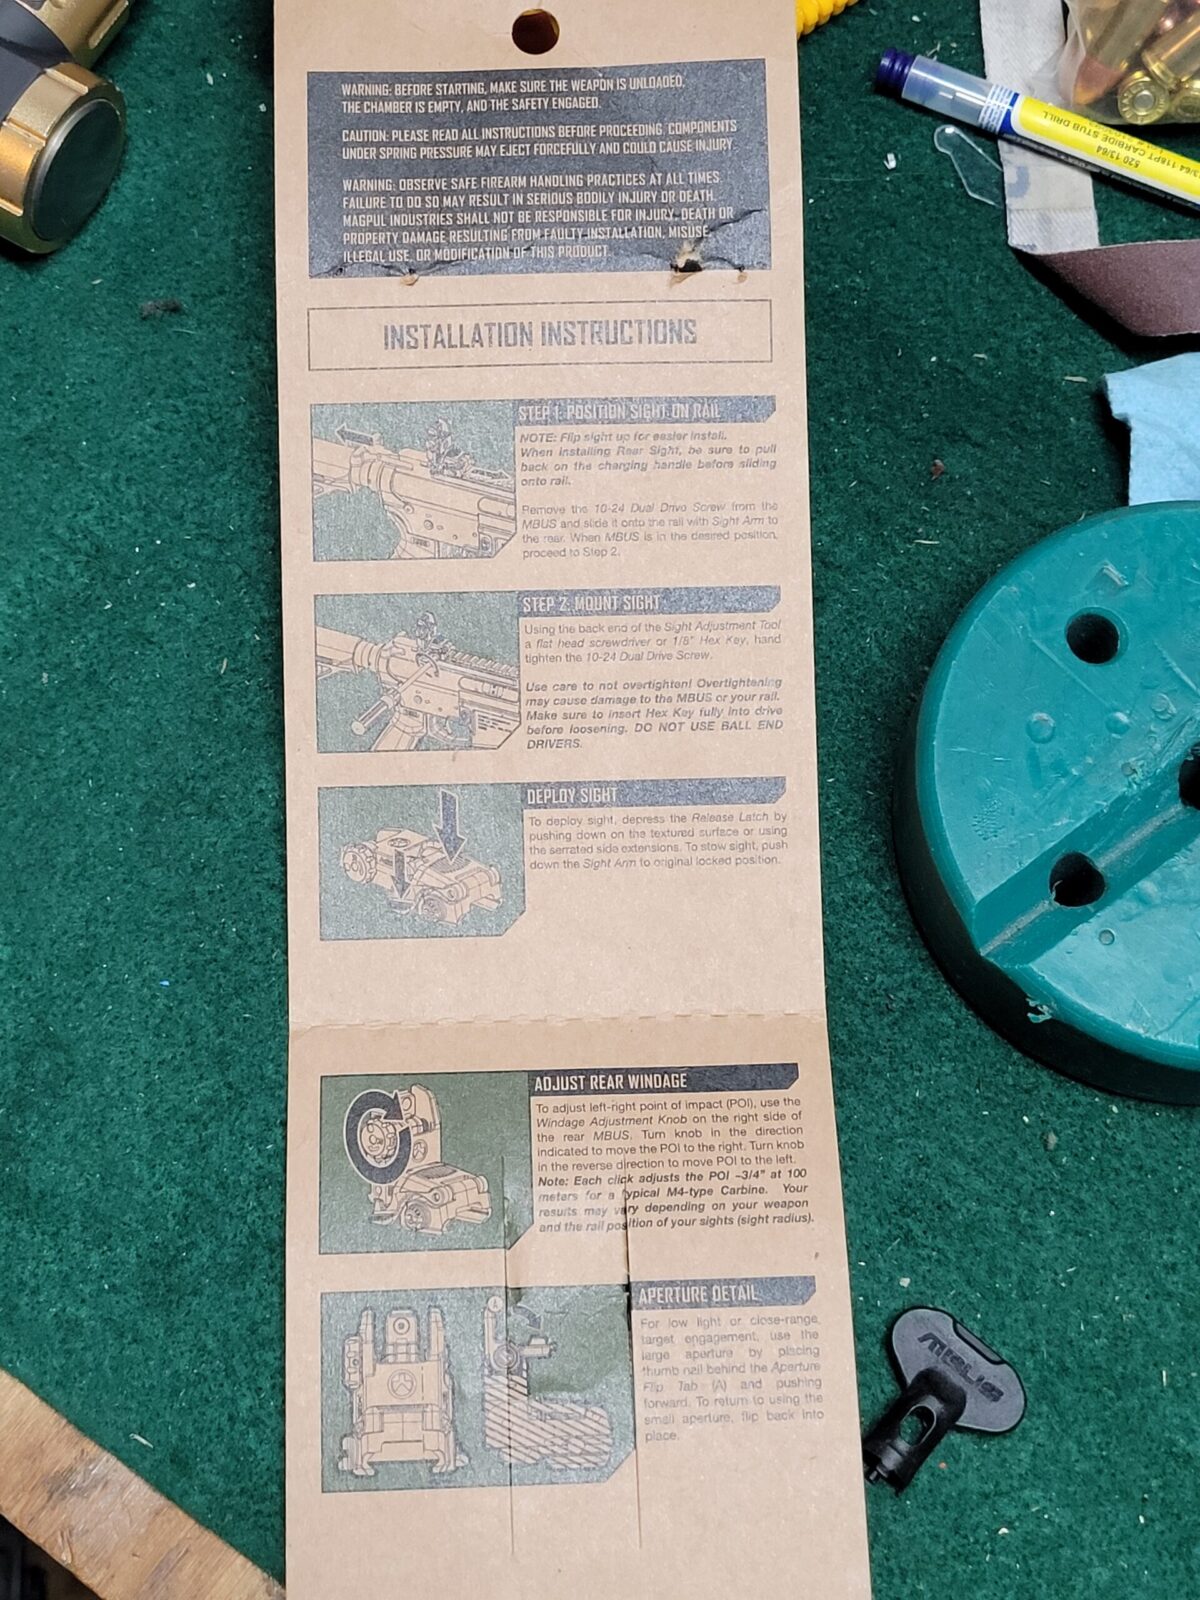
Second, make sure they are mounted properly. Did you follow the instructions from the vendor who made them? Sometimes there is more to do than slap them on the Picatinny Rail.
Your backup sights should have come with instructions and any specialized tools – be sure to read and follow them. The little black key you see is used for adjusting a Magpul front sight.
Second, you need to sight in the BUIS. I use a laser to help get in the ballpark in the shop and then I do the final tuning at the range. Read up on the recommended range for your firearm and type of optic. For rifles, I go for 50 yards because then you are then zeroed for 50 yards and at 200. The BUIS are just that – emergency backups. I look to be in the ballpark with them and am not looking for perfection but some guys are amazingly proficient with them.
Third, absolutely take them to the range and practice with them!!! Buying, installing and zeroing the BUIS are only part of the game – you must also know how to use them. If they fold, practice on opening and closing them while shooting. If they are offset, practice transitioning to them. Bottom line, you need to practice hitting targets with them and adjust the sights and what you are doing accordingly. The more you practice the greater the odds that things will work when you need them. If you don’t practice then you are taking a huge gamble both on the BUIS and your ability to use them – so don’t gamble.
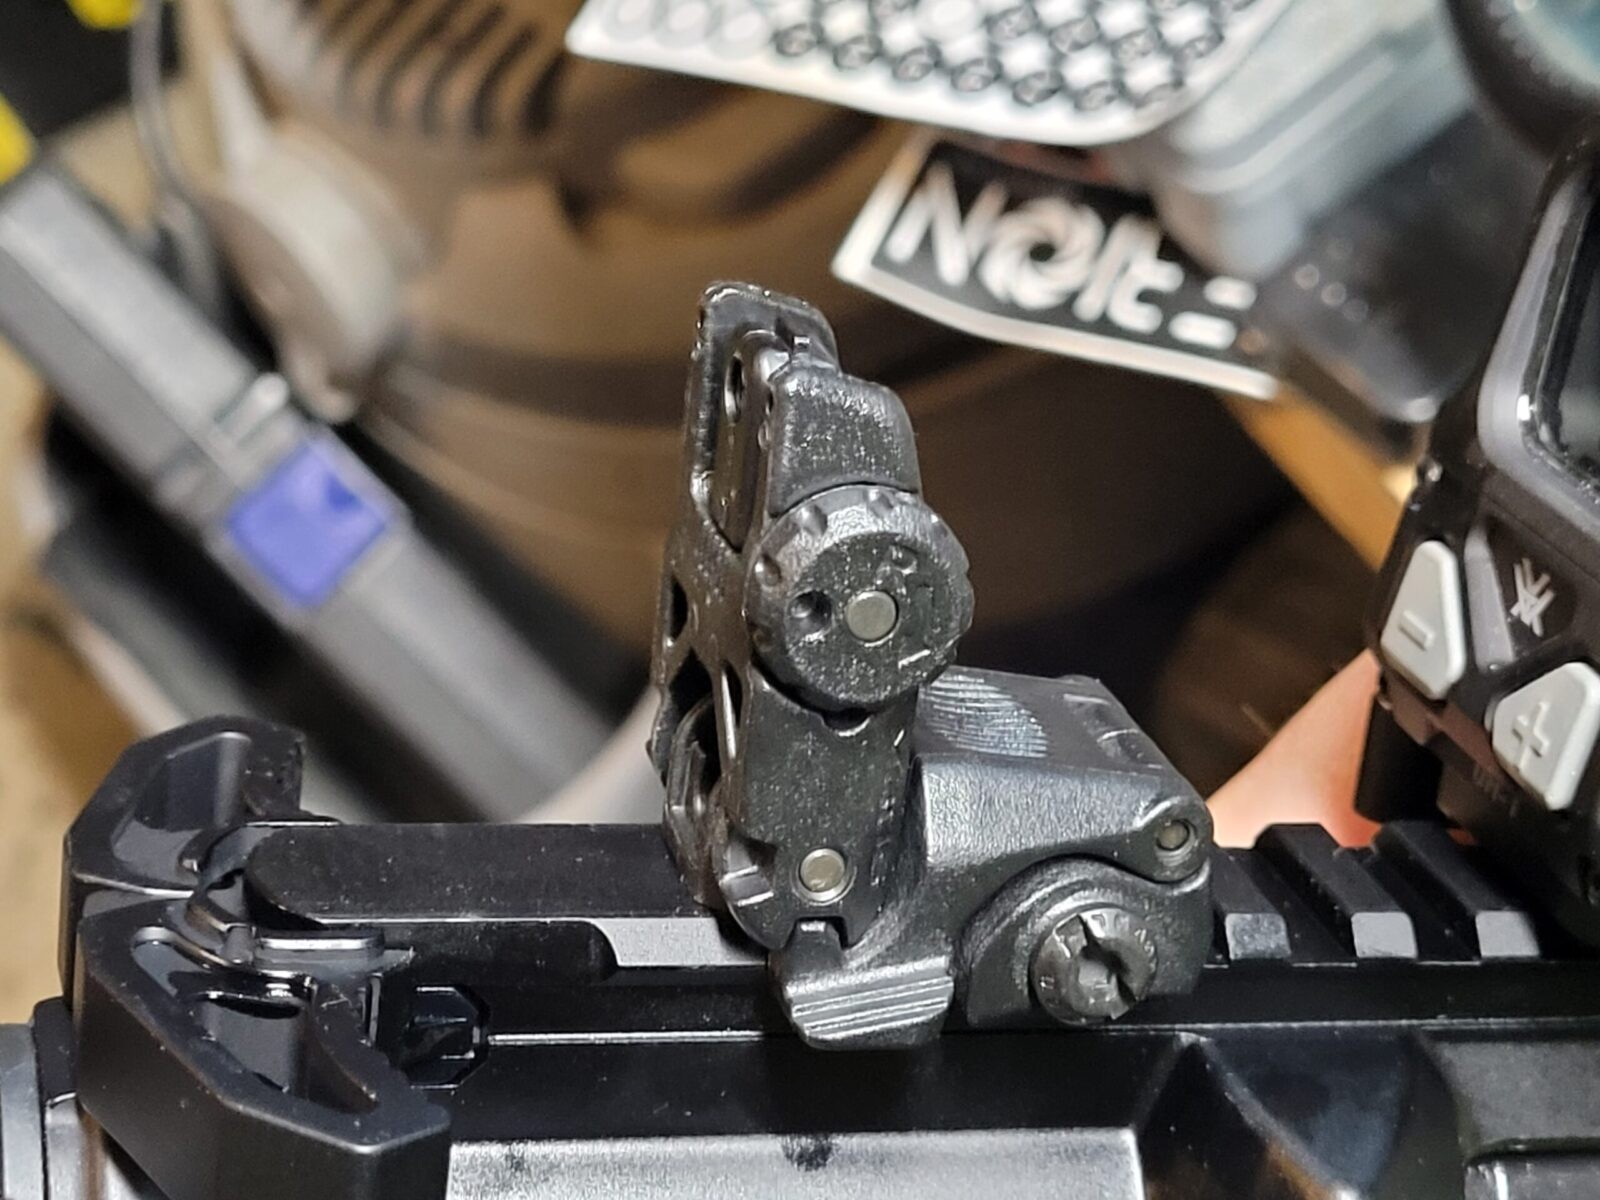
Magpul sells both basic polymer and pro steel versions of their MBUS. Above is a polymer rear unit on one of my ARs. I fold both the rear and front sights flat until needed – the small lever you see to the left of the mounting screw both releases the sight so it flips open via a spring and then locks up up right. I can count on them because they are zeroed and I practice with them.
Summary
The whole reason I wrote this is that it seems like I have encountered a lot of shooters this past year that had BUIS and fell square in camp 4 – they had never sighted them in or practiced with them. This is very concerning to me – they are gambling on something that shouldn’t be left to chance. So, yes, I think BUIS are a great idea but you need to sight them in and regularly practice using them also. If you don’t, then your backup probably isn’t a backup.
I hope this gives you some food for thought.
Note, I have to buy all of my parts – nothing here was paid for by sponsors, etc. I do make a small amount if you click on an ad and buy something but that is it. You’re getting my real opinion on stuff.
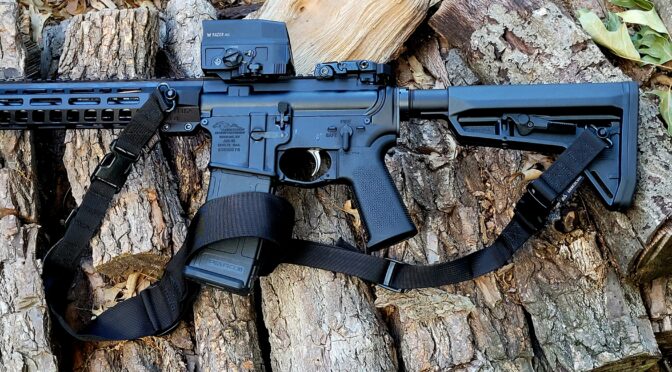
A good sling for a rifle is really worth it if you plan on carrying them around much. The challenge can be finding one that is quality made that doesnb’t break the bank in terms of cost. Over the past few years, I’ve found a vendor that makes their slings in the USA and does a really nice job – that group is S2Delta.
S2Delta was founded by two Marine Recon vets in Albuquerque, NM, that offers a variety of accessories includling slings, rifle rests and patches. It also looks like they are working on bringing a Remington 700 short action rifle chassis to market as well. My experience with them focuses on their two point modular slings. Let’s review a few things first.
What do they mean by 1-point vs. 2-point slings?
When you see companies refer to a sling being one or two-point, they are referring to the number of places the sling attaches to the weapon. A one-point sling connects only at one point and exactly where depends on the length of the weapon and the preferences of the operator. For example, a relatively short AR may be attached at the end of the buttstock and swung up into position as needed. I’ve also seen guys run connectors along the stock on purpose built end plates just in front of the castle nut.
A two-point slings connects to the weapon and two points – at forward and rear positions usually. I’ve seen guys run their forward position way out at the end of their handguard or even the front sight. The rear tends to be towards the rear of the stock.
Personally, I tend to run two point slings given how I like to distribute the weight of the weapon and how I swing it up into firing position. If I have something relatively small and light, I might run a one point sling but again, this really depends on what you prefer and you learn this over time.
What is a modular sling?
A sling has to connect to the weapon somehow. These days it might be strapped, clipped, a “mash hook”, snap gate D-ring or some form of quick detach (QD) swivel. Instead of dedicating one sling per method, a modular approach became popular that allows you to take a base sling and then pick the connector of your choice to use at one or both ends. You could also start one way and then change just the end vs. the whole sling.
This helps settle the debate of “what connector is best?” Instead, you let your needs dictate what to use. For example, with MP5s I would use HK hooks. With ARs and AKs with modern furniture, I tend to run QD swivels. Again, it’s up to you and what your weapon can support.
What makes a sling “good”?
Ah yes, the quality section. Years ago, I wanted to carry slings forRonin’s Grips and bought a bunch of import samples and all of them were junk meaning they were made from questionable materials and methods. It dawned on me that bringing another sling to market without a differentiator was pointless so I dropped the idea.
Ok, so what you want to look for is the use of wide heavy duty nylon straps, reliable connectors and slides, plus good stitching in a nutshell. So let’s look at each of these points.
Let’s start with the connectors that attach the sling to the weapon – the cheap no-name or import airsoft-grade slings have connectors of real bad quality. I’ve seen hooks snap, QD swivels jam or disintegrate… I dropped an AR on concrete once when the QD failed for example. The connector is very important.
By the way, remember the Die Hard movie scene withere Bruce Willis’ character is dangling from an HK strap? That was a pretty cool memorable movie scene but I wouldn’t say it should set expectations in reality.
These days, I tend to prefer the QD swivels as most of my rifles have them so I can move a sling around quickly if I need to. Also, if I am cleaning, working on the weapon or even firing from the bench, it’s super easy to disconnect the sling and set it to the side.
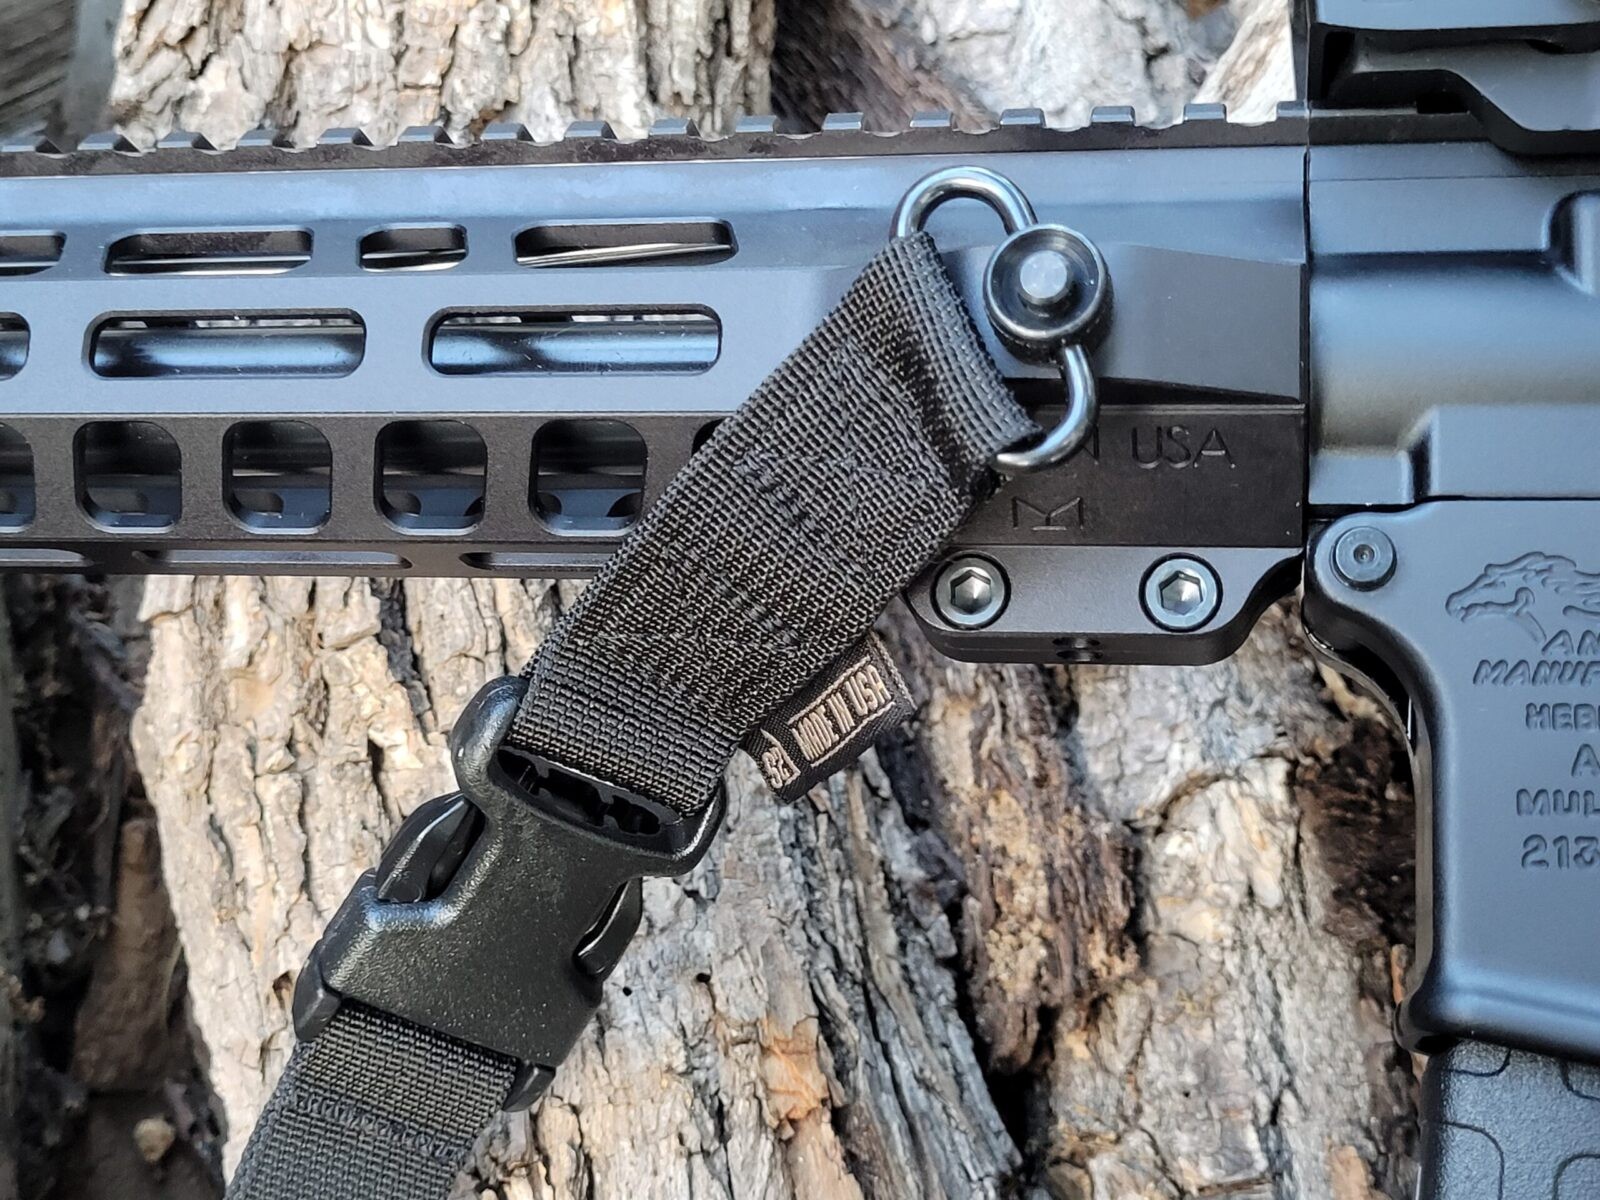
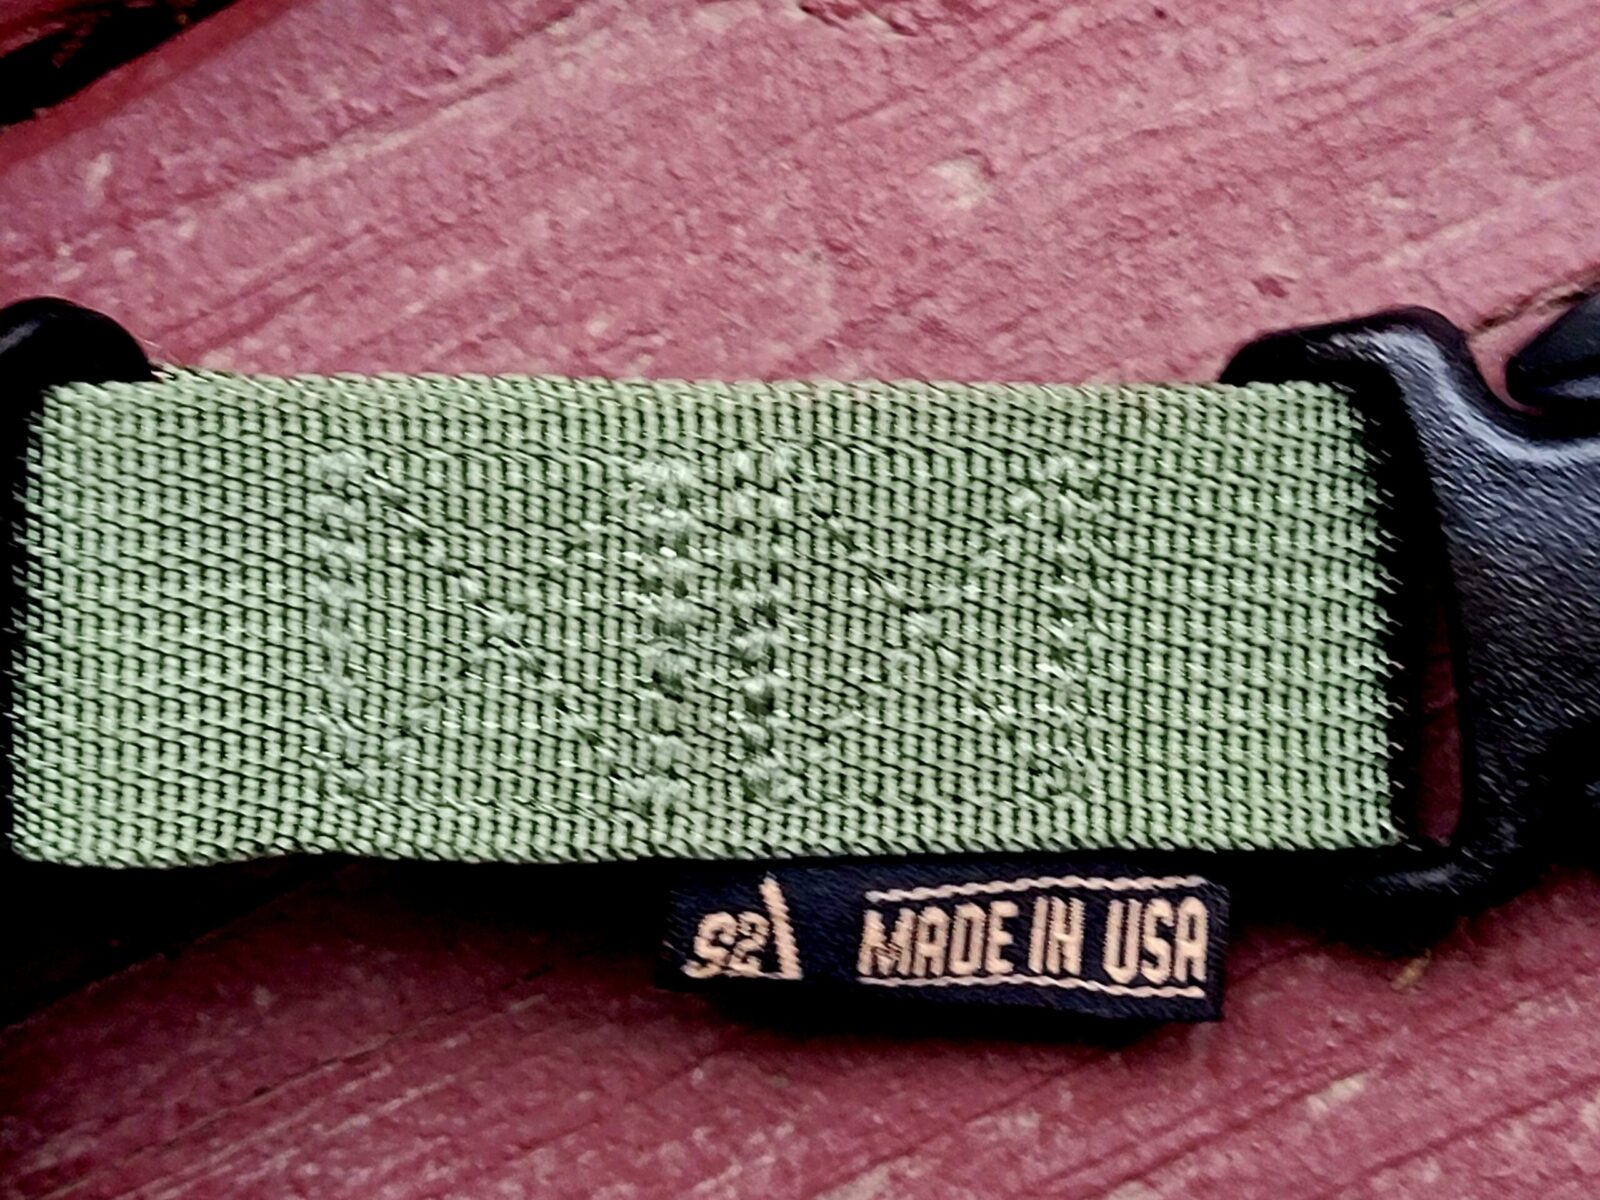
This is an S2Delta sling with one of their supplied QD swivels that is installed in the handguard of a 16″ AR. Note the beefy stitching and the clips they are using to secure the modular end to the sling.
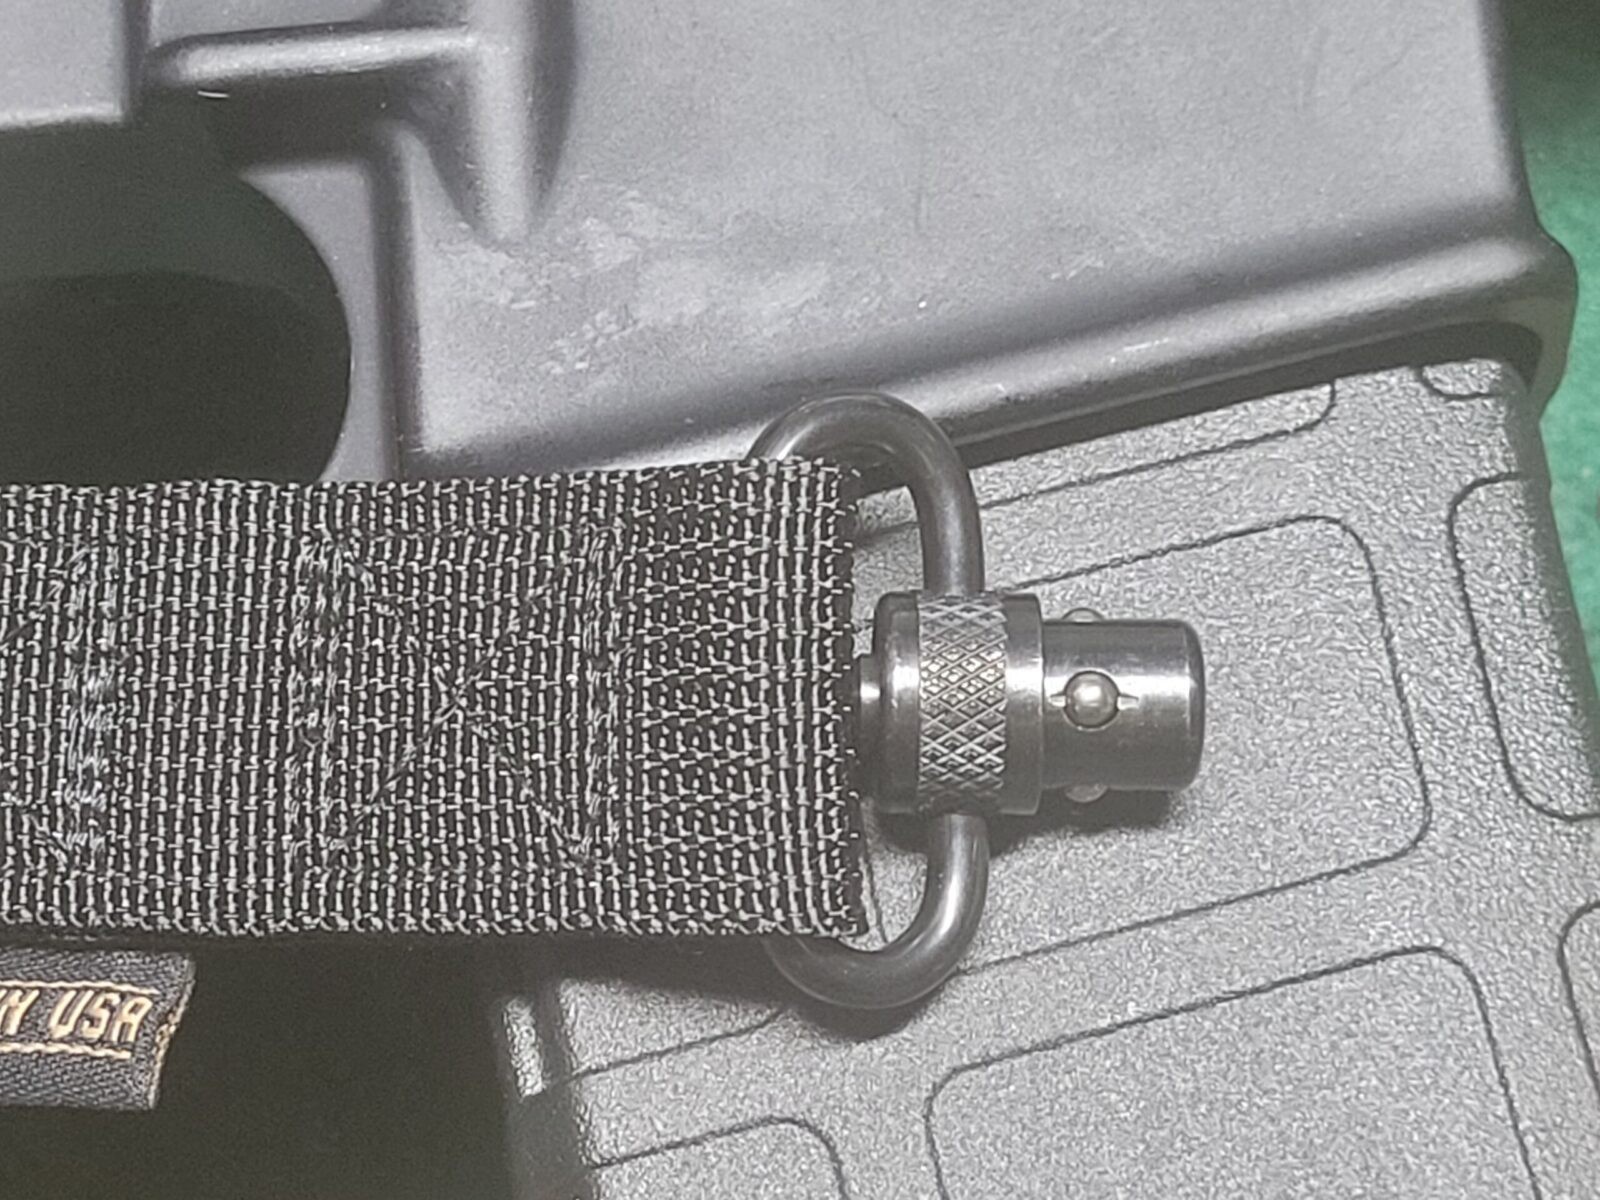
Here’s one of the S2Delta supplied quick disconnect swivels
For the straps, I prefer nylon and you need them to be at least 1″ to 1.25″ wide to fit swivels, etc. When you get up to the area that will be on your portion, look for 1.5-2″ or even having padding. If you are wearing body armor, the weight is distributed. If you aren’t then the weight of your weapon will only be distributed by the area of the sling that is in contact with how you have it slung on your body. A weapon can get uncomfortable surprisingly fast if the weight isn’t distributed. For heavier long range rifles, I will either get a sling with a pad or buy a pad to help spread out the load.
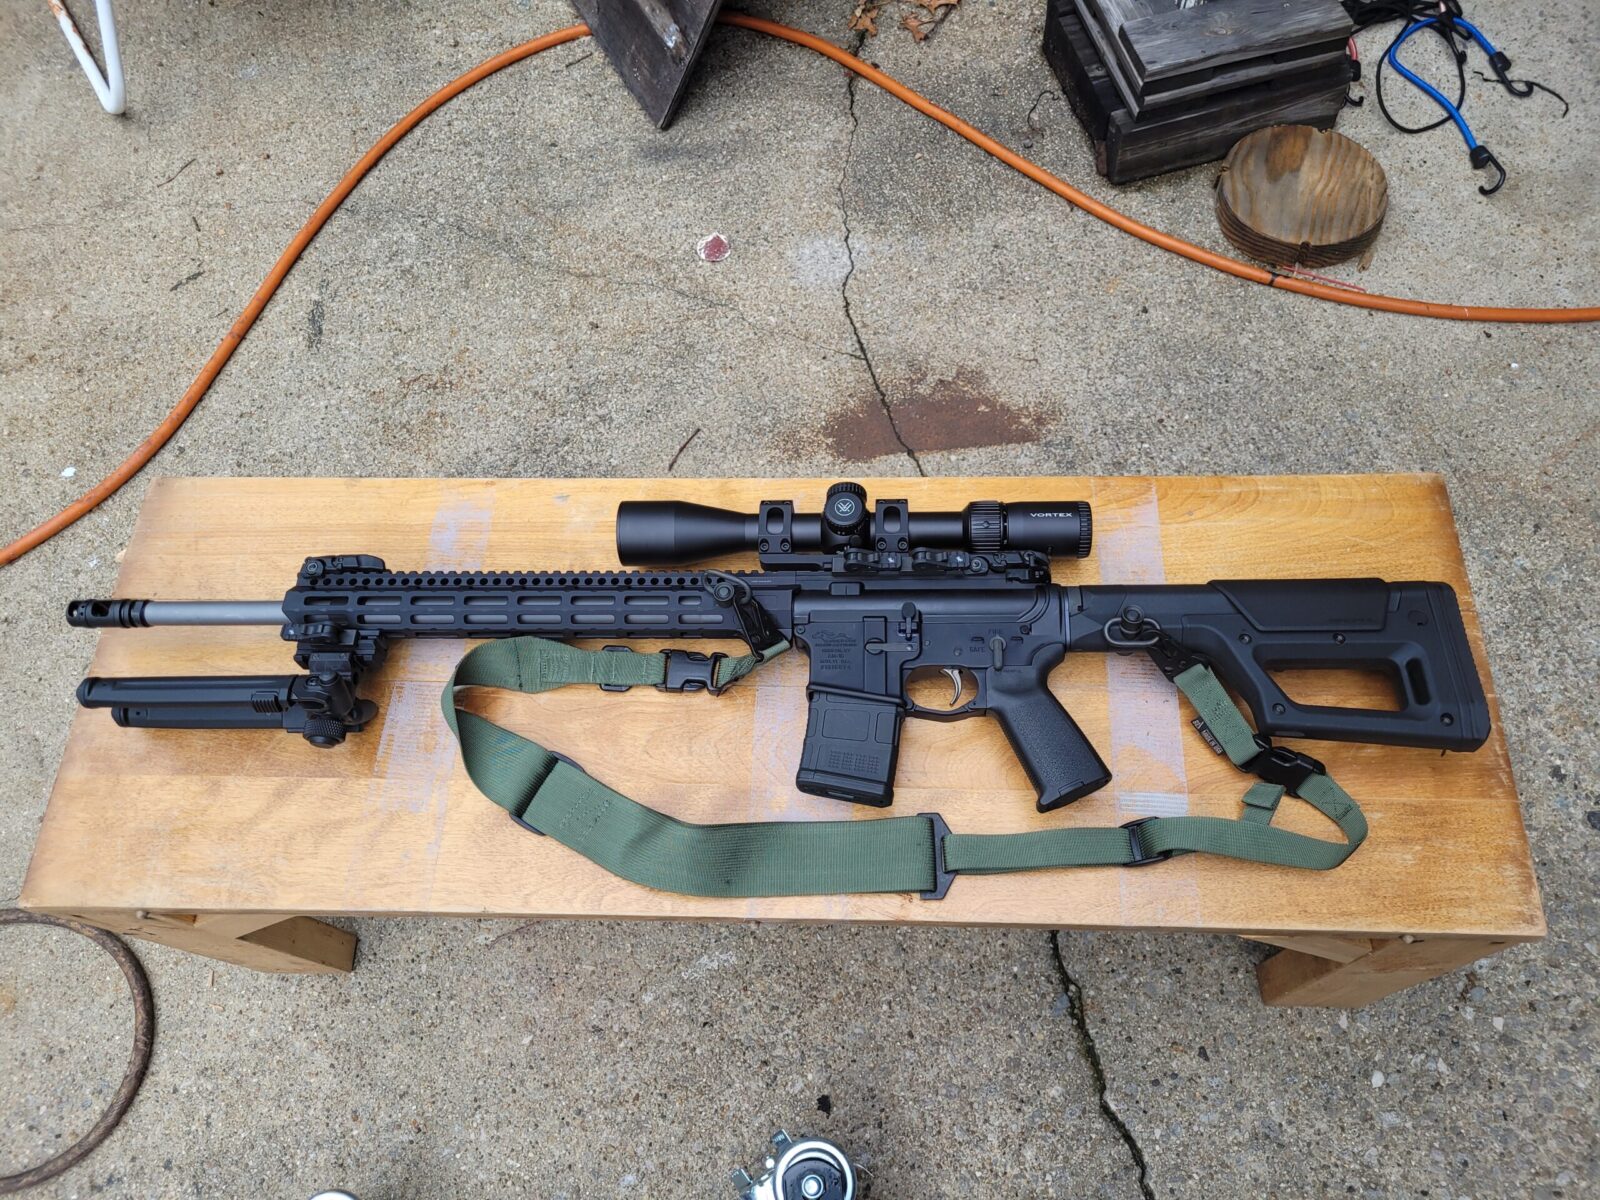
S2Delta modular sling on DMR with a 20″ Ballistic Advantage barrell, Magpul PRS Lite stock and Vortex Diamondback scope. Note the ample 2″ wide portion of the sling for the shoulder.
Another thing to consider are the slides, D-rings and other strap management parts – cheap ones tend to be thin and flimsy while the quality parts tend to be beefy and a reinforced plastic.
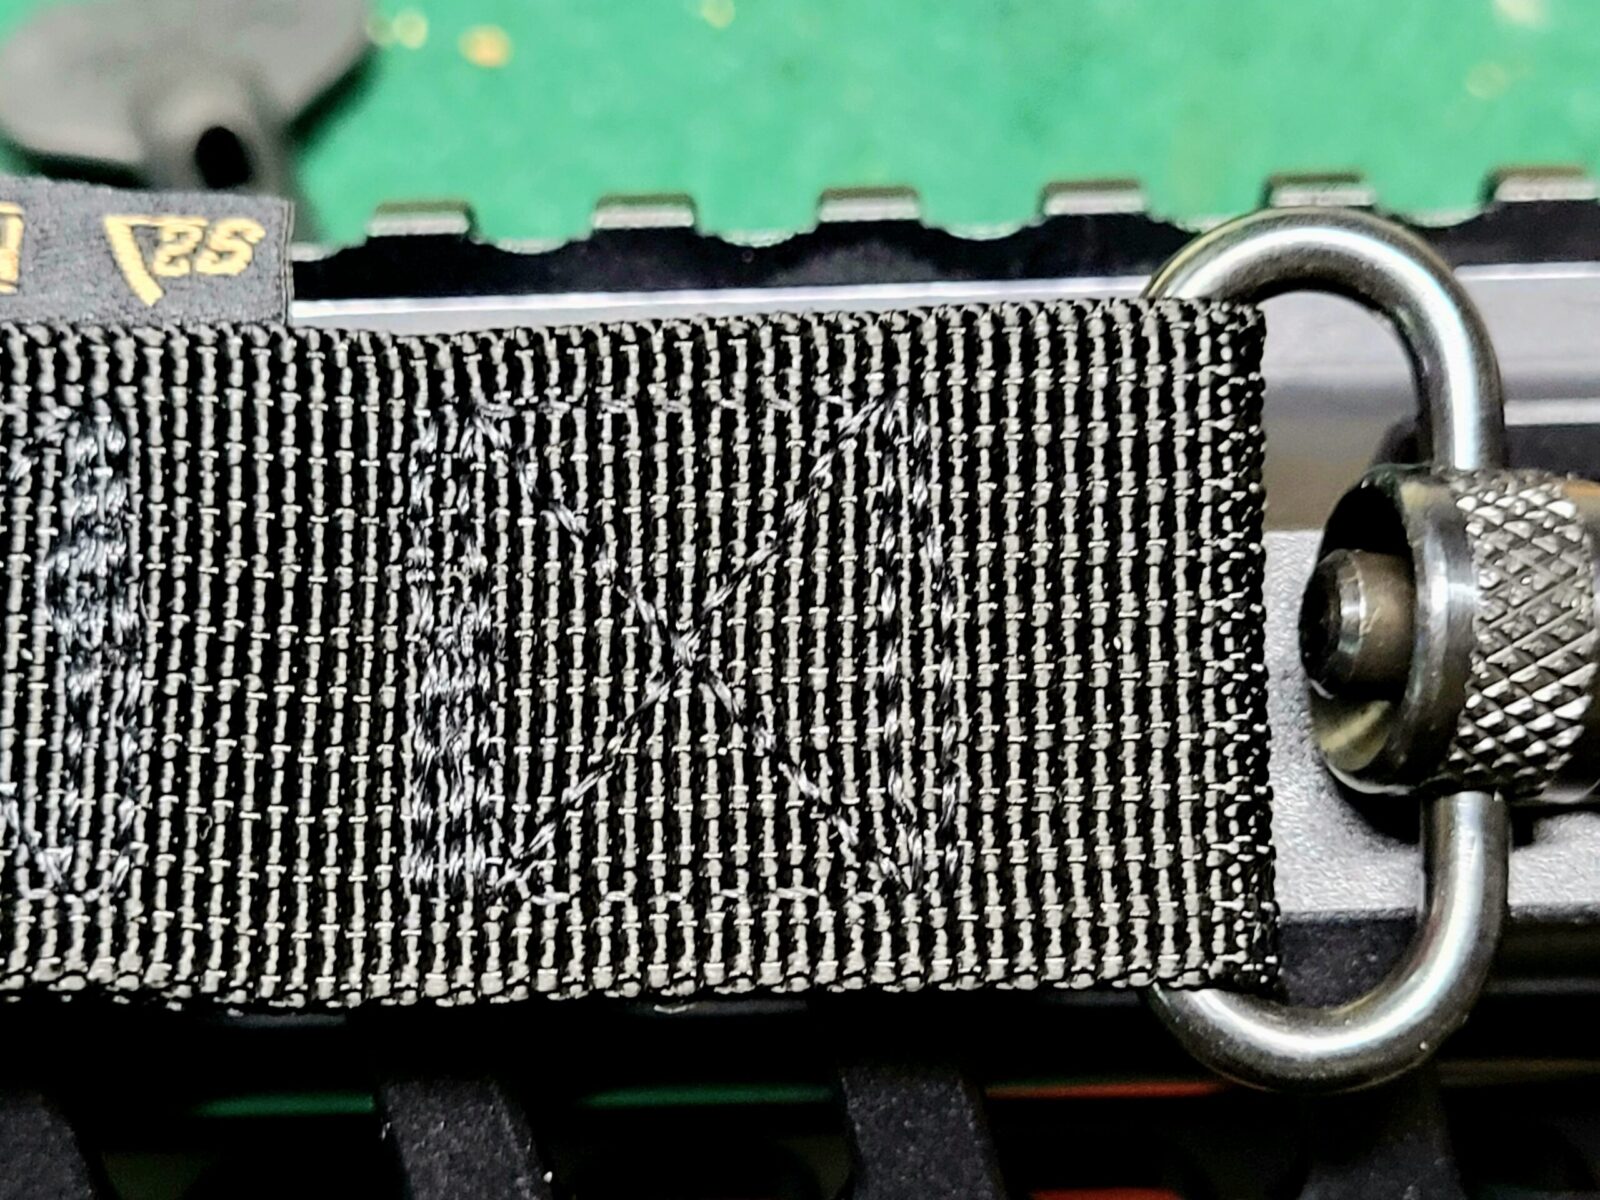
Last but not least, look at the stitching. Edges should be double stitiched and ends box stitched (think of a rectangular box with an X stitched inside extending to each corner.
Solid stitching for sure.
Another up close shot of the stitching.
The end of the day, the sling is only as strong as its weakest component.
Oh – I should mention length. For two point slings look for at least 50-55″. To short and you will not be able to carry the rifle in a patrol postion perpendicular to your body. A rifle over your shoulder may take too long to deply depending on what your use is.
By the way, before you take that comment to be purely tactical. A charter captain I met this summer in Alaska told me the story of his good friend who was nearly killed by a brown bear. The friend had the rifle on his back and couldn’t deploy it hast enough when the brown bear did a surprise charge from the brush. He would have bled to death from the mauling excepthe got real lucky that there just happened to be a helicopter nearby that could medevac him out. The friend still hunts but carries a .44 magnum in a Kenai-style chest holster and has his rifle much more accessible.
Conclusion
I am now using four of their two-point modular slings on a variety of AR configurations ranging from a 16″ defensive carbine up to a 24″ Criterion varmint barreled custom Aero designated marksman’s rifle with a Vortex PST Gen II scope that weighs quite a bit. The first time I tried one was back in 2019.
The S2Delta slings are made in the USA from good materials and I have not had any problems so far. You get a very good level of quality at an affordable price is what it boils down to.
Note, I have to buy all of my parts – nothing here was paid for by sponsors, etc. I do make a small amount if you click on an ad and buy something but that is it. You’re getting my real opinion on stuff.
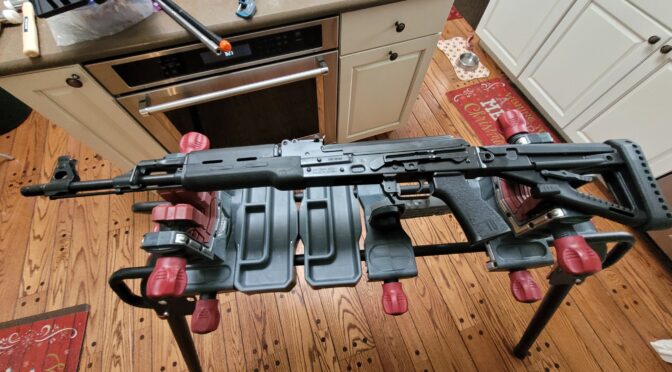
In my last review, I provided detailed photos of a M70 with maple furniture [click here for that review]. I bought this M70 at the same time and it came with a Polymer furniture set. In taking the rifle apart, I saw the same extensive tooling marks.
In this post, I’ll provide photos and observations for this rifle. In case you are wondering about the setting, it was 15 degrees outside so I did the review in our kitchen – my shop didn’t suddenly grow appliances 🙂
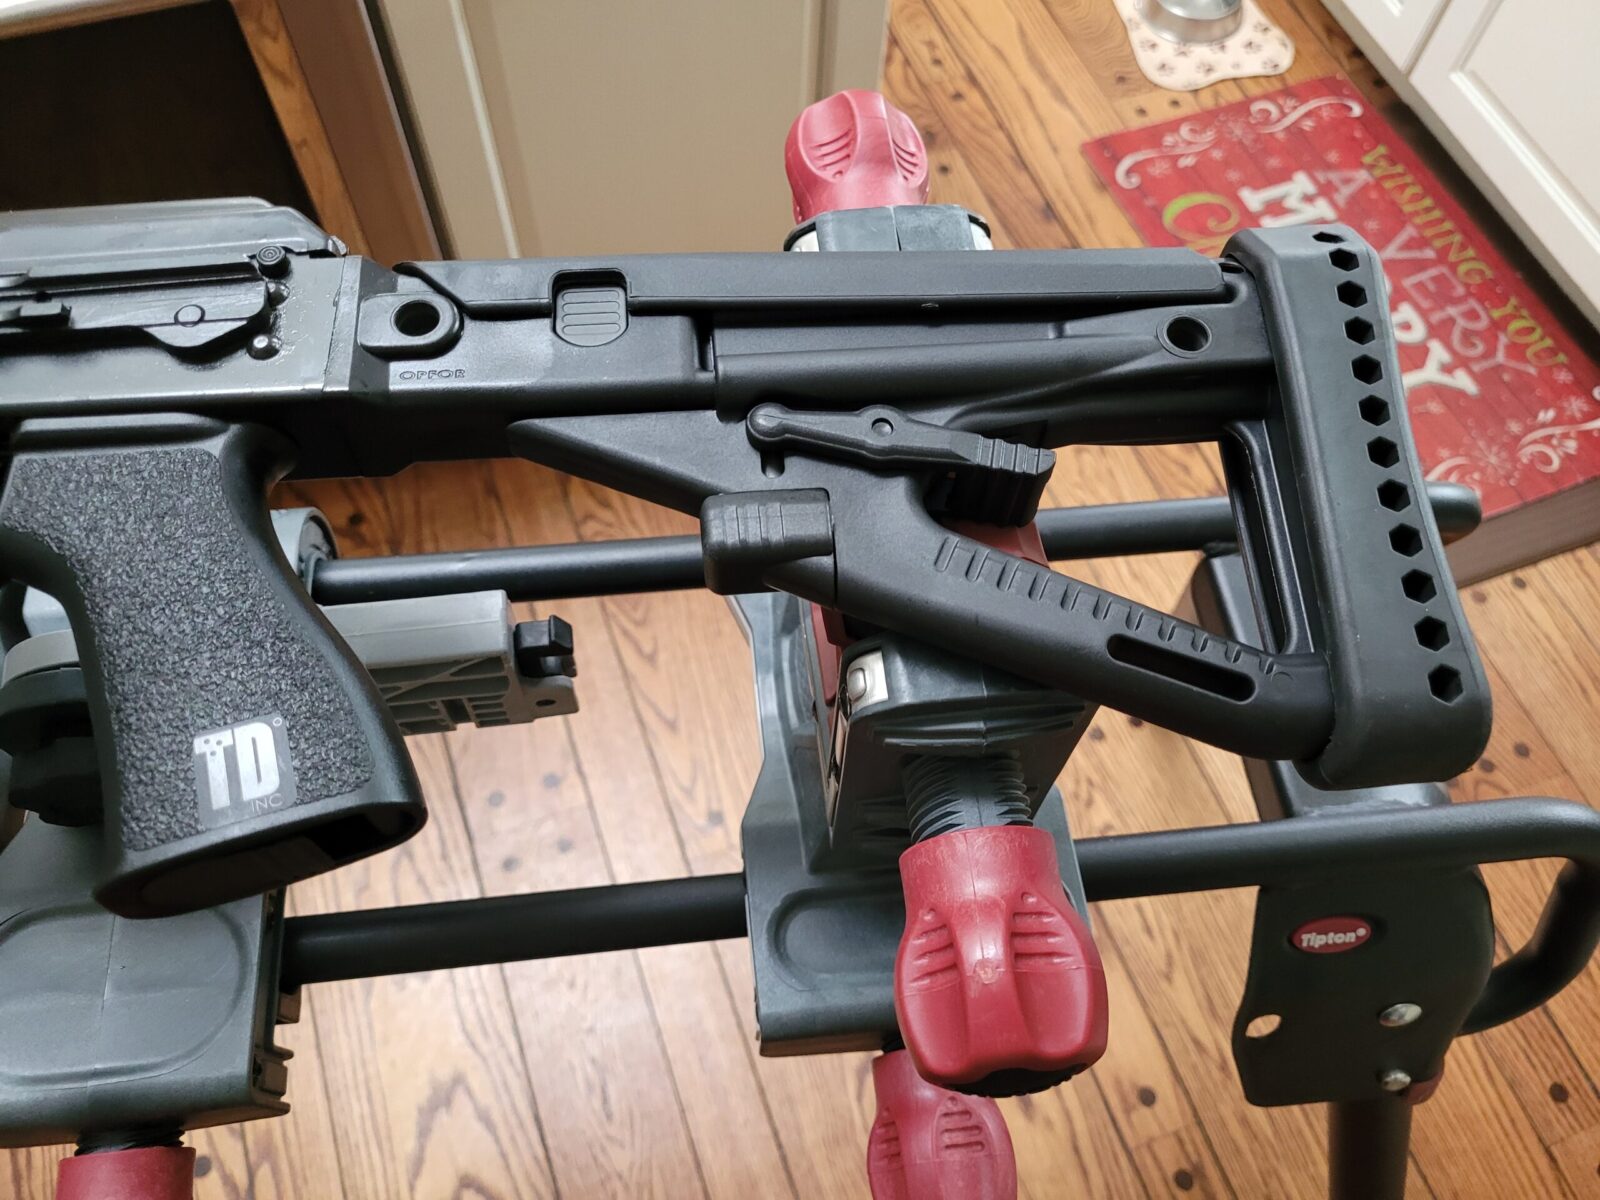
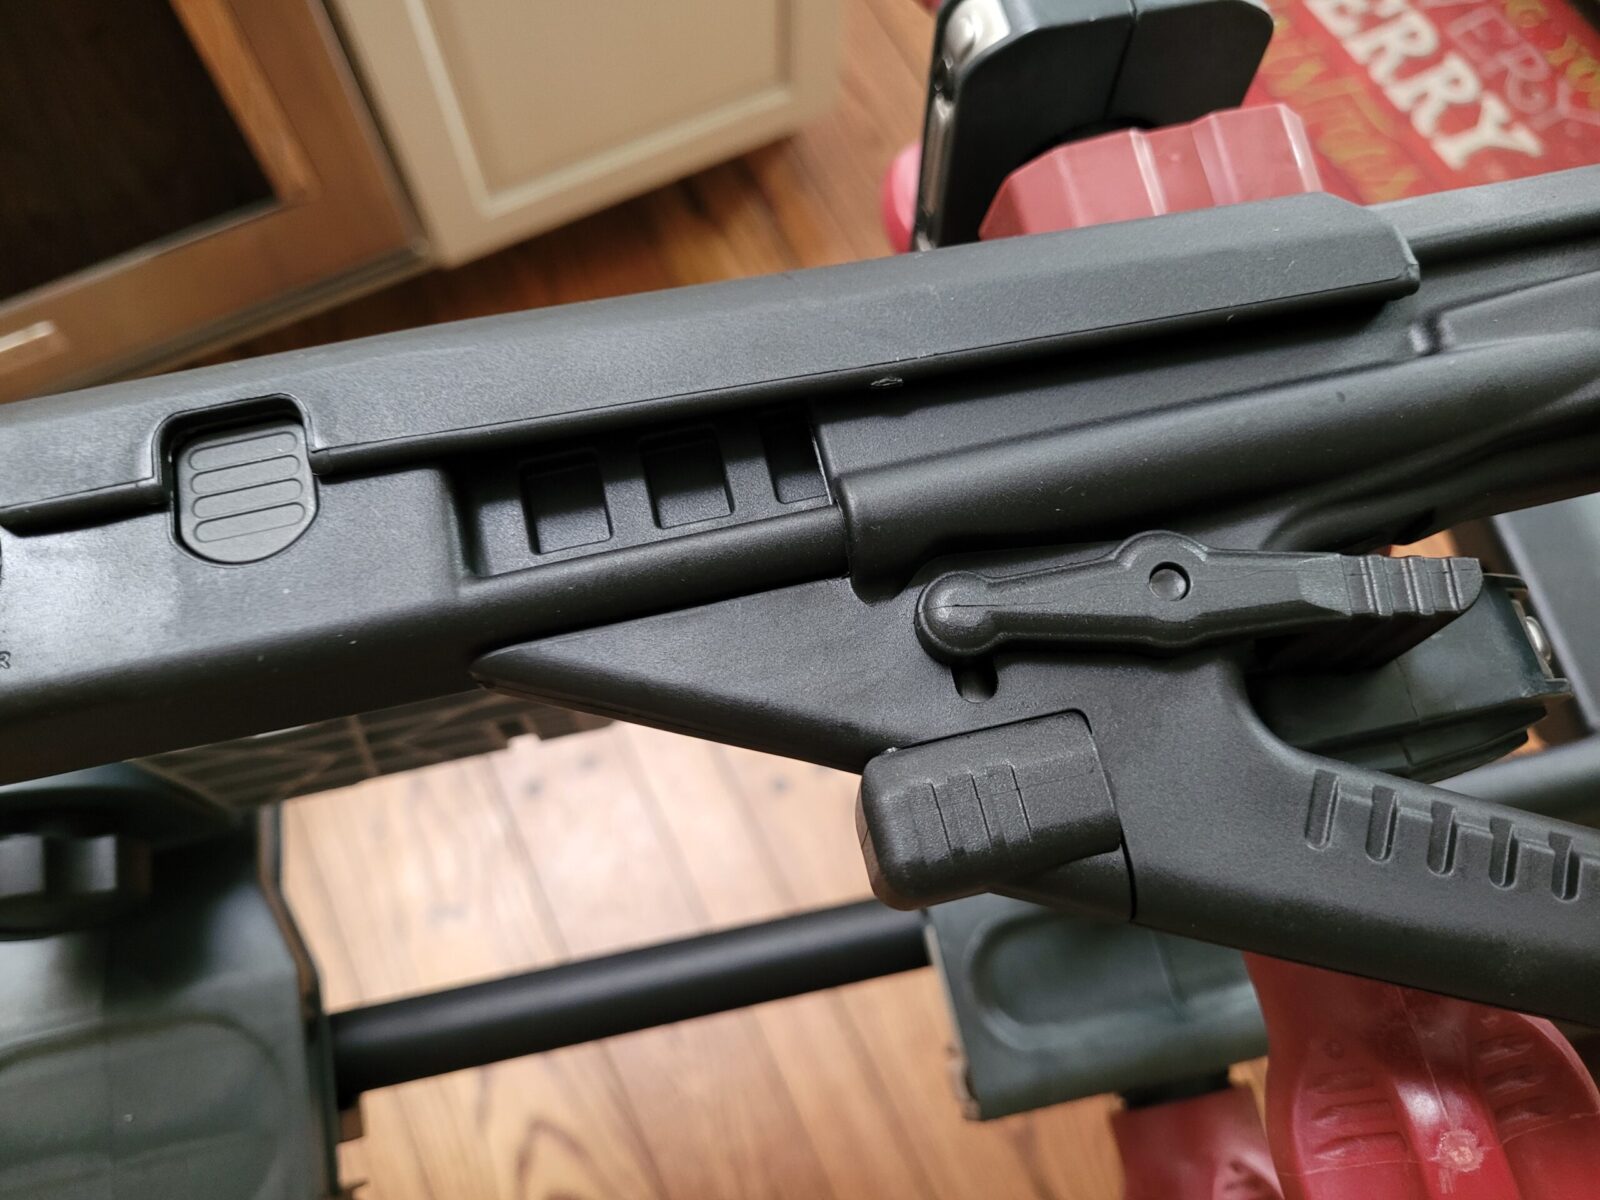
The stock is a Promag Archangel OPFOR four position stock with an adjustable cheekpiece. It’s solid, well thought out and didn’t rattle when I shook it. The pistol grip is a comfortable Tango Down model. Note the recoil pad on the stock.
The stock is adjustable four positions – here it is fully extended. The stock does not fold by the way.
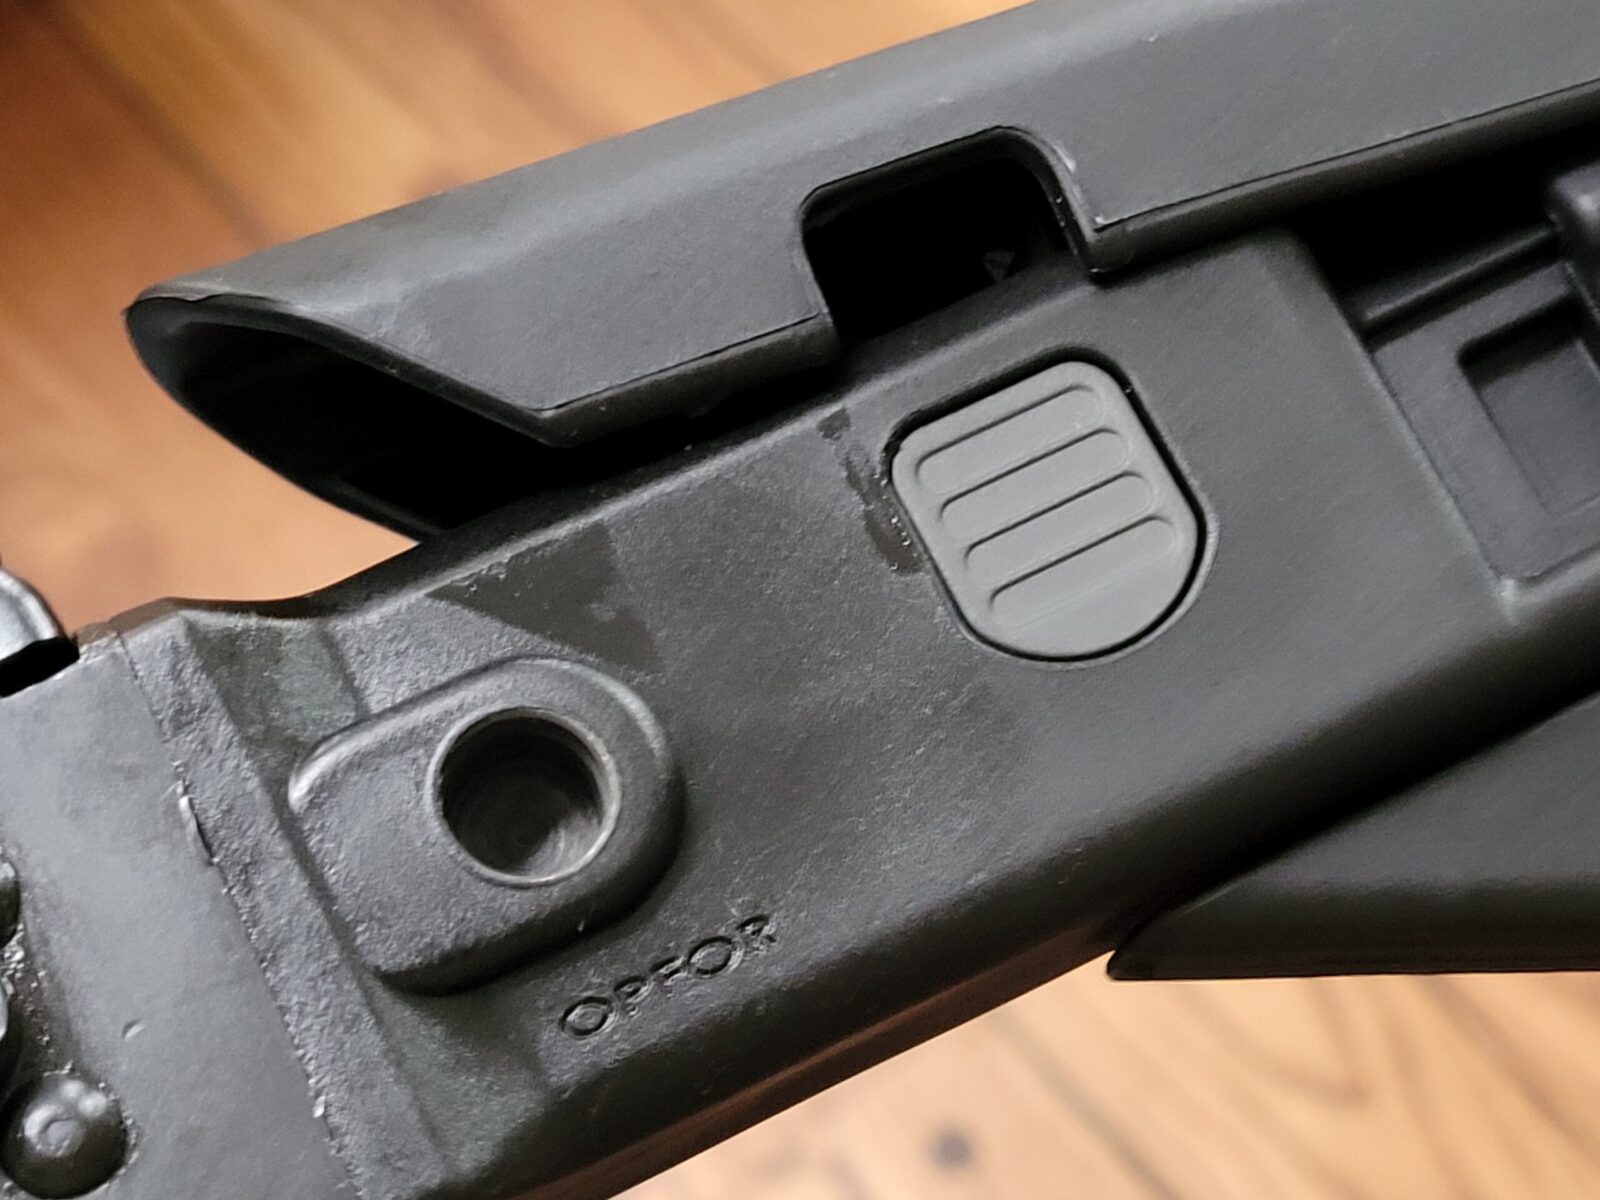
The cheek piece angles upwards in the front by pushiing the grey button. Note the sling swivel quick connect hole.
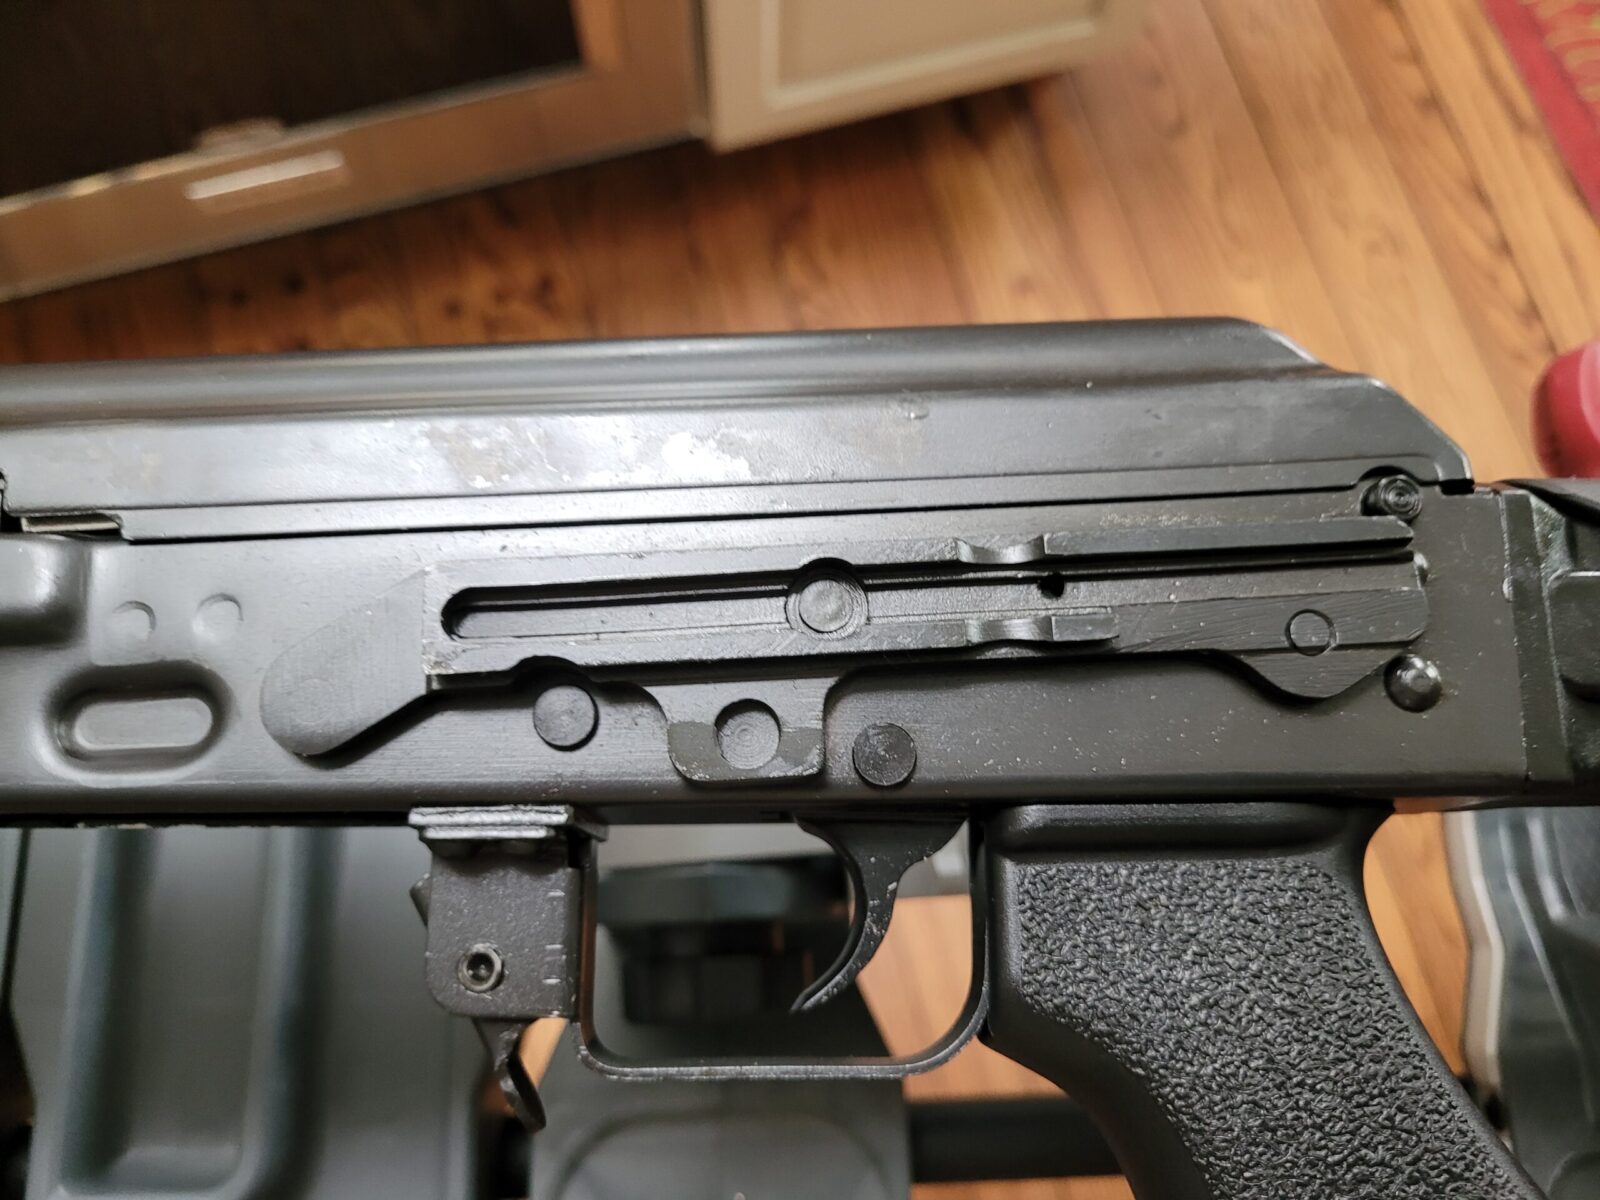
Top left, the dust cover doesn’t fit flush with the trunnion. The unique recoil spring assembly locking buttonm is just above the top right edge of the side mount rail. Speaking of which, I really wish someone would make and sell this side rail. Zastava USA doesn’t import it. You can see tooling marks on the back of the mag catch housing. The ZPAPs have tons of tooling marks but function well despite them.
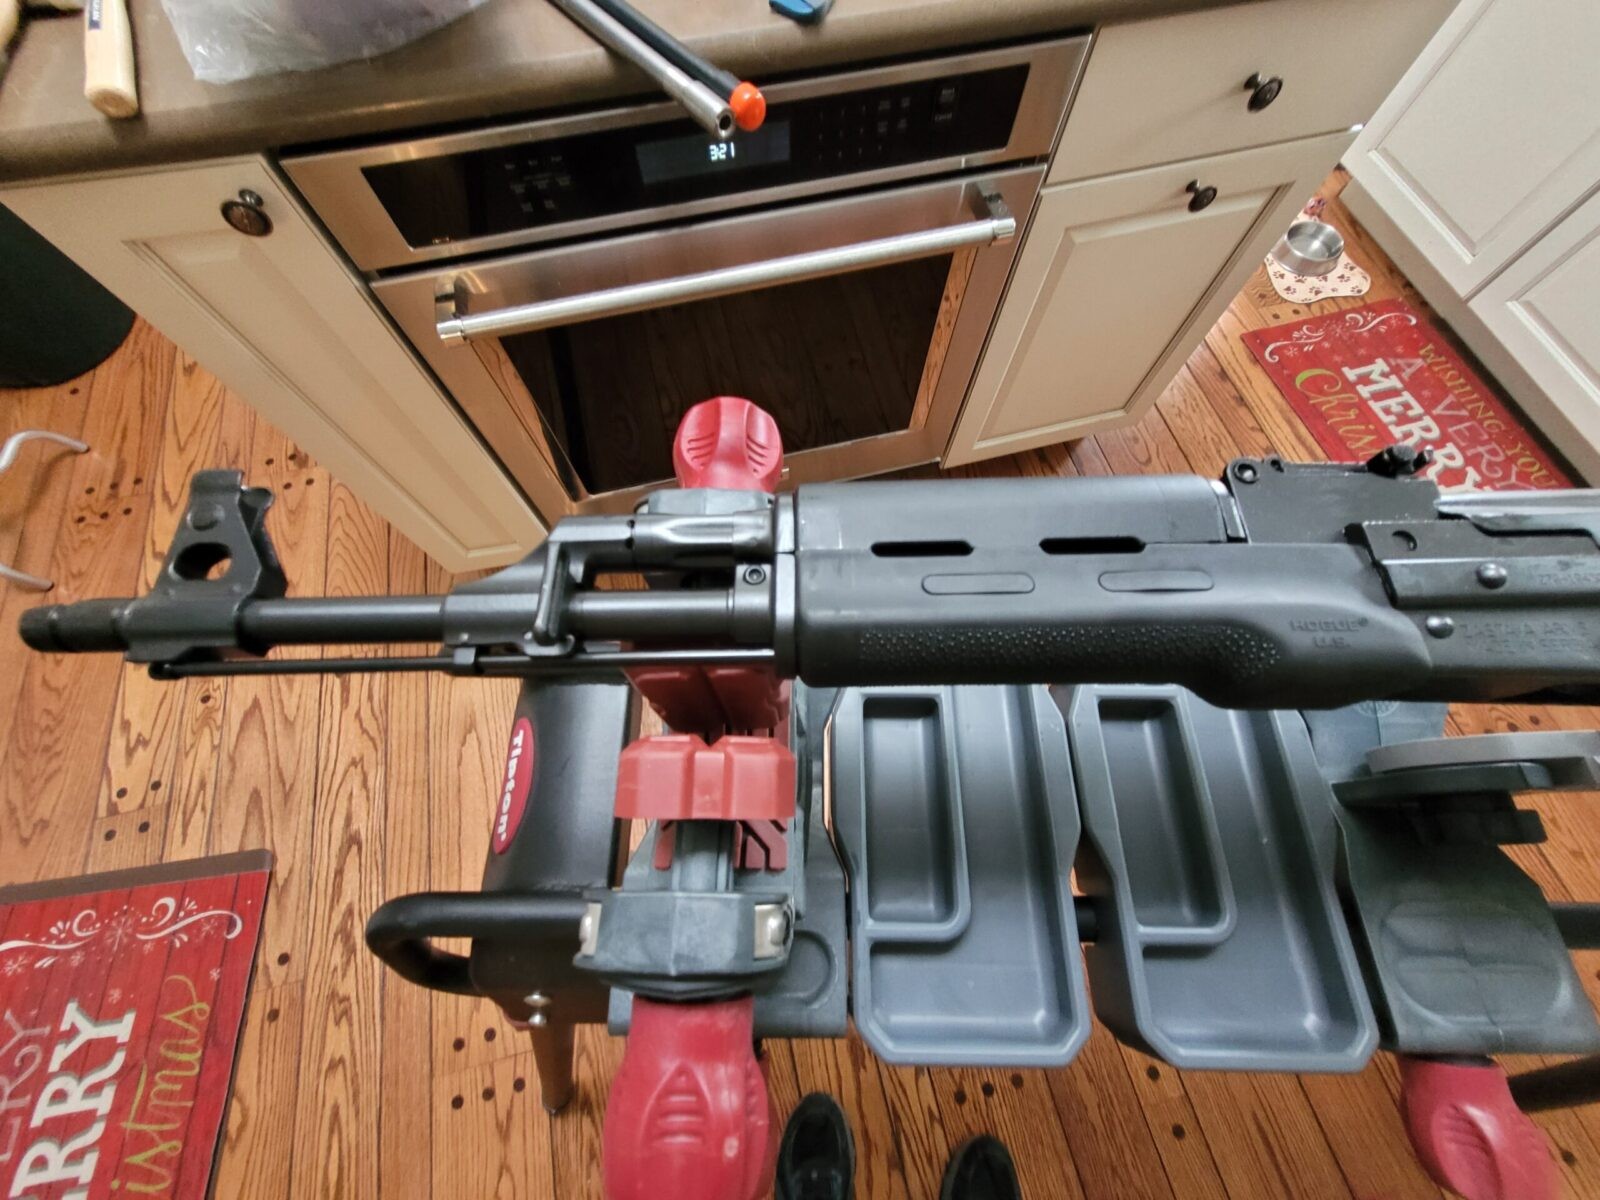
In general, I like Hogue’s products. This handguard with the overmolded rubber feels really good in the hand.
Conclusion
I thought about doing a big blog post with a ton of photos showing all the machining marks but decided against it. The rifle and furniture are solid but the metal working lacks refinement. If you’d like to see the detailed photos from a M70 ZPAP with a maple stock bought at the same time as this one, click here.
Zastava turned out a rifle probably to hit a price point and could have done better but at a higher cost. I didn’t expect to like the polymer stock set but I do – the buttstock, grip and handguard all feel solid and feel good when you shoulder the rifle.
Note, I have to buy all of my parts – nothing here was paid for by sponsors, etc. I do make a small amount if you click on an ad and buy something but that is it. You’re getting my real opinion on stuff.