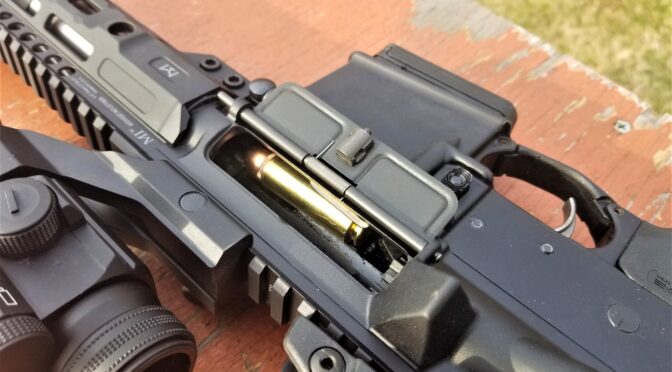
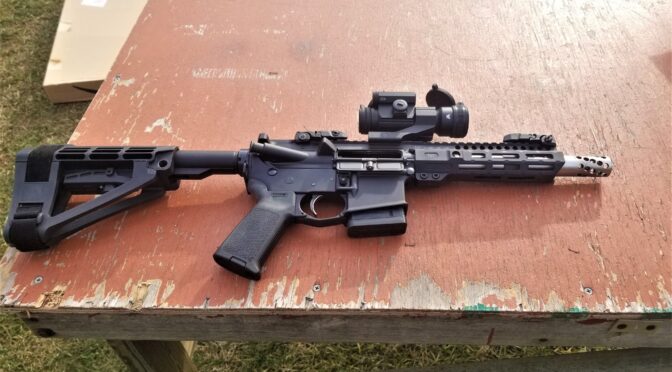
Okay, so the last range trip went a lot better. The new Lancer L5AWM mags with Tromix followers worked great. The reliability on the pistol was coming along but not where I wanted it and the rifle was disappointing still but I knew what was going on.
7.5″ Beowulf Buffer Spring
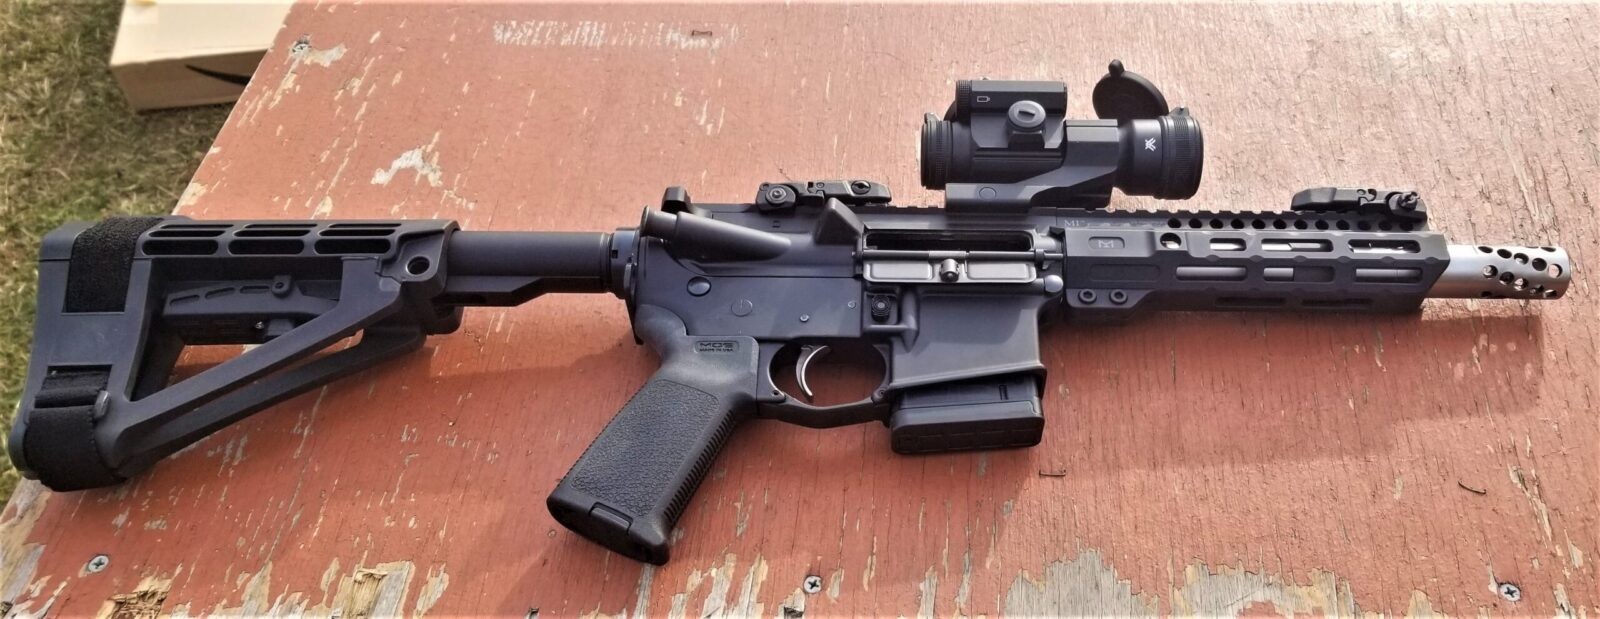
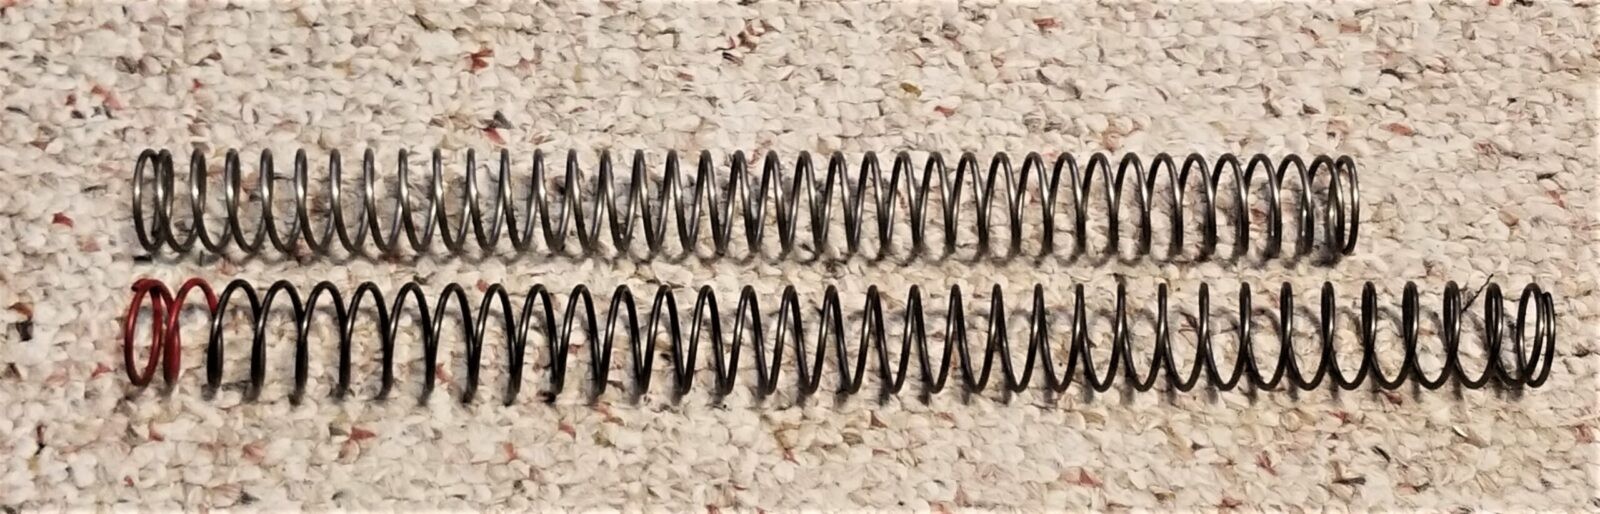
My 7.5″ Beowulf pistol is running pretty well but I wanted to increase the forward force of the bolt carrier to strip the next round and chamber it. I was already running an H2 buffer but an other wise normal carbine spring. I upped my game to a Sprinco Red Extra Power Carbine buffer spring that they say is made with the “thumper” cartridges such as the .458 SOCOM, .450 Bushmaster, .50 Beowulf. I bought mine from Primary Arms.
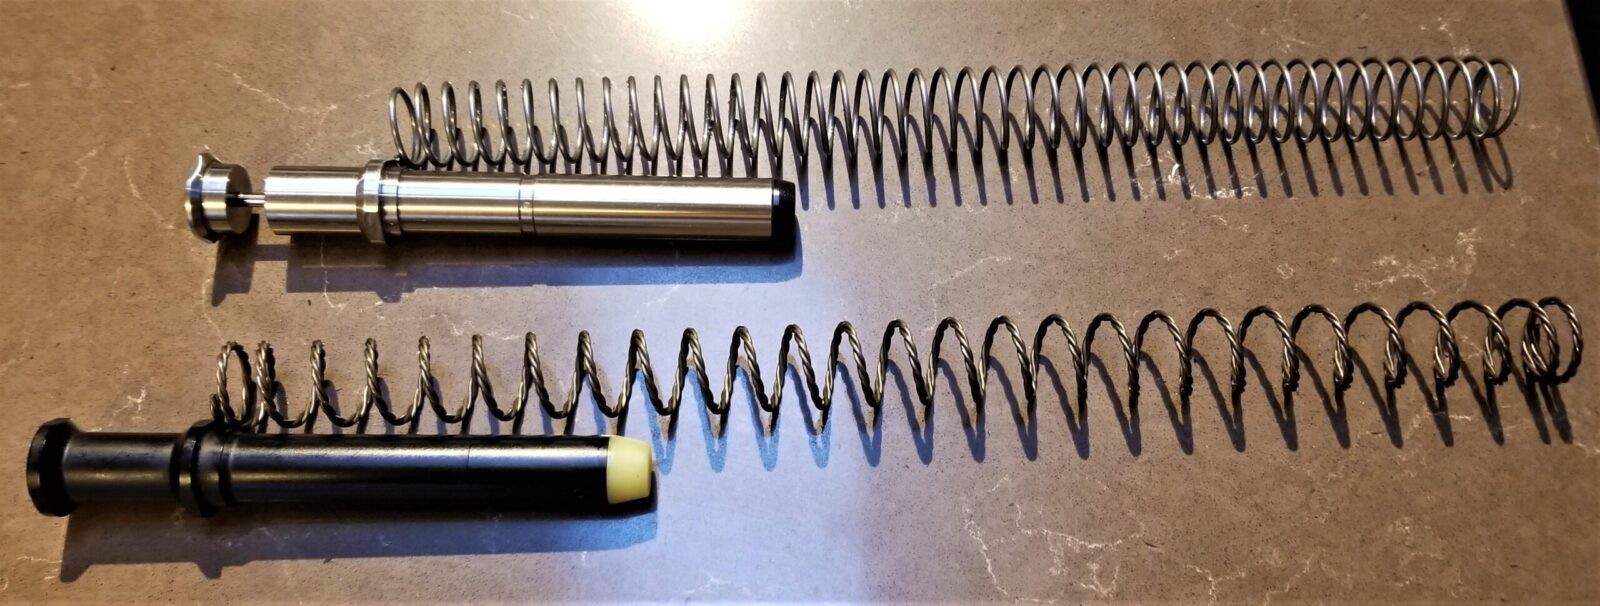
The Mil-Spec Carbine Buffer Spring is on top. The Extra Power spring is on the bottom with one end painted red. That’s handy for knowing what spring is in the weapon at a glance.
I cleaned the pistol, lubed everything and installed the extra power spring and the H2 buffer that was in there. It definitely slammed home harder when I released the bolt.
When we go to the range next, I’ll be taking a standard carbine spring, an enhanced Sprinco spring and the carbine already has the extra power spring already installed. I’m also taking standard, H2 and H3 buffers with me.
Changed the Spring and the Buffer on my Full Size Beowulf Rifle
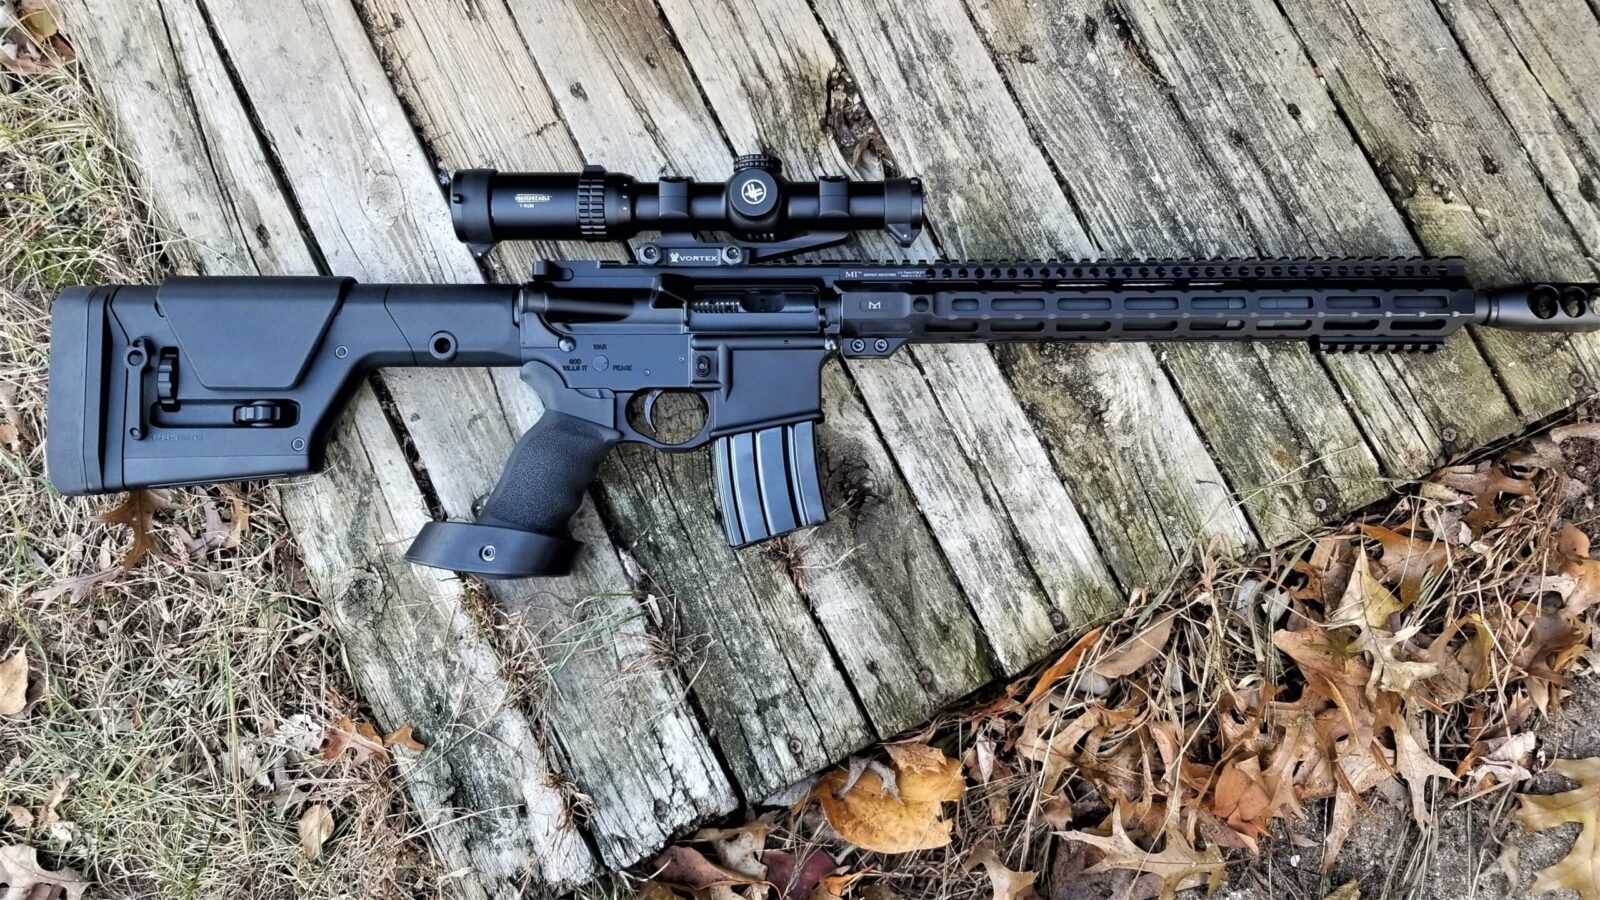
This rifle was built using an Alexander Arms DIY upper.
When we were shooting this, it had a hard time stripping the next round and chambering it. It dawned on me that they hydraulic buffer that I originally used wasn’t driving the bolt carrier forward hard enough. You see, a Hydraulic buffer has a piston inside that has a controlled leak down rate and, for whatever reason, it was dampening the stripping of the next round properly.
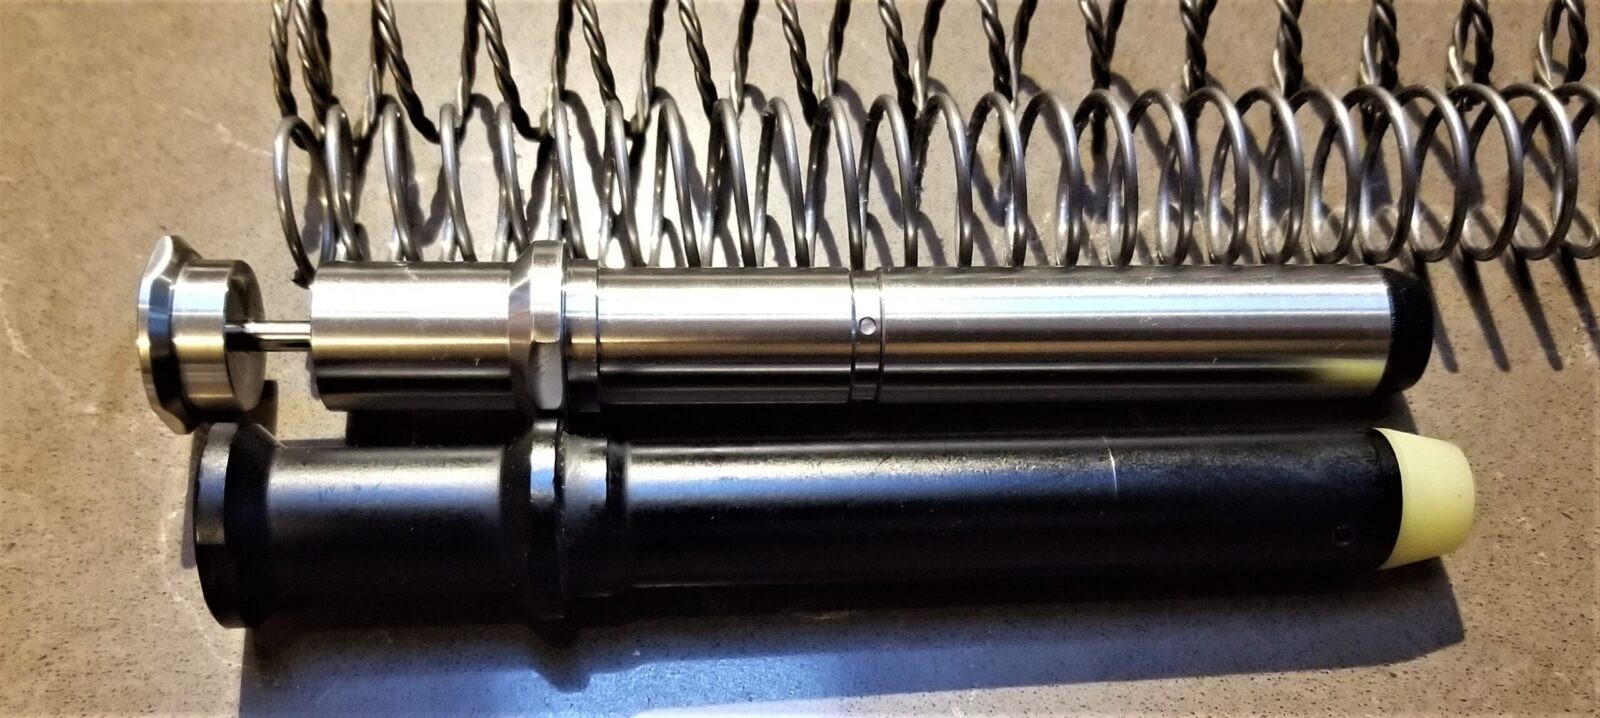
Top: KynSHOT hydraulic buffer and Mil-Spec rifle-length buffer spring. Bottom: Expo Arms 5.4oz buffer and Geiselle Super 42 Rifle-length buffer spring
The Kynshot buffer is very nicely made but I don’t think it’s the best choice for this application. I will save it for future projects.
When I cleaned the rifle prior to installing the new spring and buffer, the one surprising thing I found was that it was fairly dry. Why? I have no idea and this would have impacted functionality at the range also as I assumed I’d lubed it already before putting it away. Yet another example of my memory not being what it used to be.
Given that surprise, I went through and applied Super Lube oil and grease before installing the new Geiselle spring and Expo buffer. Afterwards, the action slammed home very easily.
I will take the hydraulic buffer with me back to the range for testing but am somewhat skeptical of it right now. The rifle is set for the next range visit at this point. Another Mil-Spec spring and buffer will be in the bag as well.
Conclusion
We have a ton of snow right now and I’ll have to wait to test my hypotheses. I expect that with the above changes, the two Beowulfs will run very well now.
I hope this helps you out!
Note, I have to buy all of my parts – nothing here was paid for by sponsors, etc. I do make a small amount if you click on an ad and buy something but that is it. You’re getting my real opinion on stuff.
A fellow emailed me the other day asking what I use to remove and install sights on my pistols. For those of you wondering what a “sight pusher” is, it is a device that is used to push sights around on a handgun and can be used to install, adjust or remove the sights.
Of course, one size does not fit all so you tend to see pushers that are pistol specific, ones that are designed to with modular shoes, and ones that really shouldn’t have been made in the first place. Yeah, unfortunately I am not joking on that last part. Investigate any pusher before you buy it. Some are sloppy and if the shift or slip, they can put one hell of a scratch in your otherwise nice pistol.
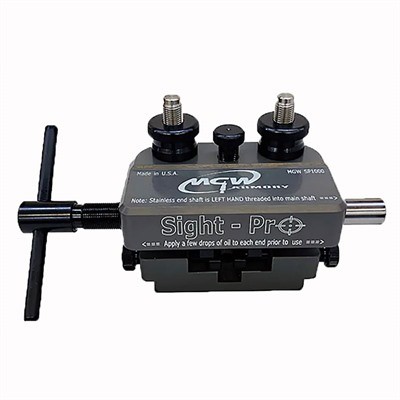
Option #1: For pros who need to support many different pistols, MGW makes the best modular pusher
My good friend, Scott Igert, owns Michigan Gun Exchange and has been changing sights for his customers for many years. Because he has to deal with a variety of pistols and the job must be done right, he swears by his MGW (Maryland Gun Works) Sight-Pro pusher. It’s modular and comes with a 30 degree block for Glock and HK sights. In addition, there are a number of different pusher blocks available for use on other pistols.
Here’s a video from MGW in case you’d like to learn more:
Note, MGW also has a number of pistol model specific tools that work on just the one type of weapon. I’ll include them at the end of the post – they are good and just too many to list.
Option #2: Personally, I use the Wheeler Armorer’s Handgun Sight Tool
I work mainly with Glocks and 1911s and the Wheeler unit has worked just fine for my needs. It costs around $138 and so it’s economical. It’s very well made and hasn’t let me down after maybe a dozen uses in two years – again, I’m not using a pusher practically every day like Scott is.
One important thing to consider is that it does not have the flexibility of the MGW – Wheeler advertises it for use with 1911s, Glocks and M&Ps but I have read of a ton of other pistols being involved so do some searching before you buy. Unlike the MGW’s shoes, With the Wheeler, you can flip a plate in the back and the pusher surface that goes against the sight is either straight or angled depending on what you need.
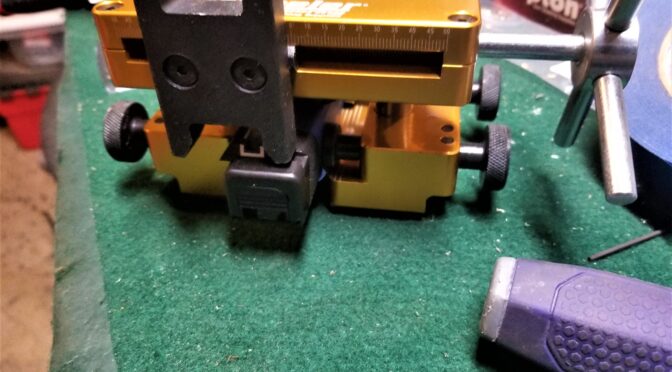
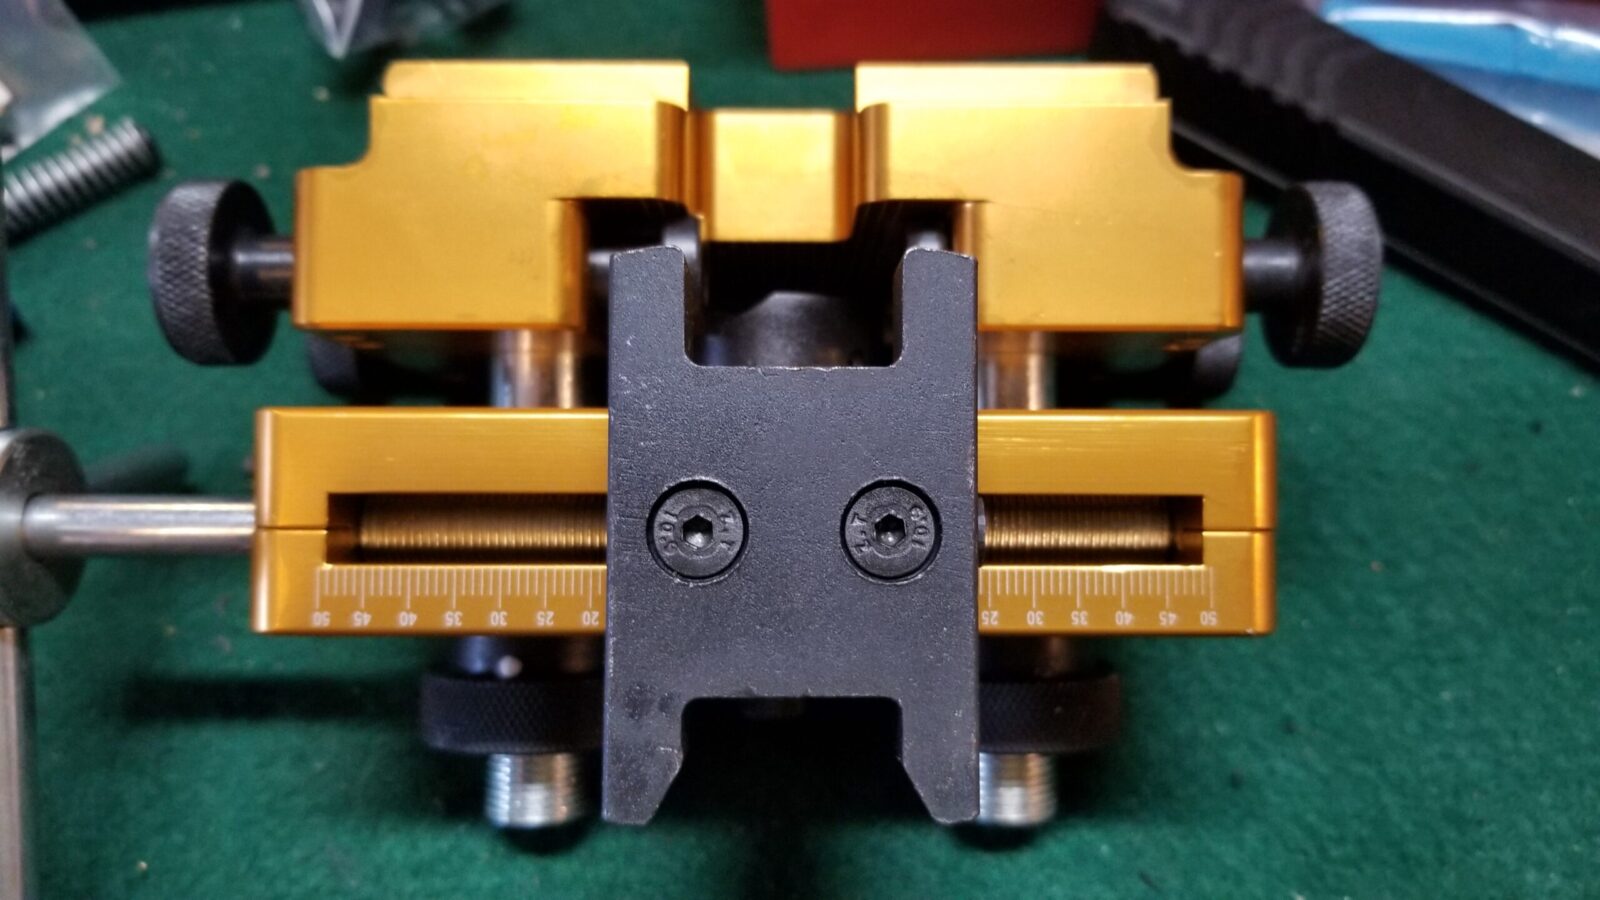
By removing those two allen screws, you can flip the pusher around to either be the side with angled or straight pushing surfaces.
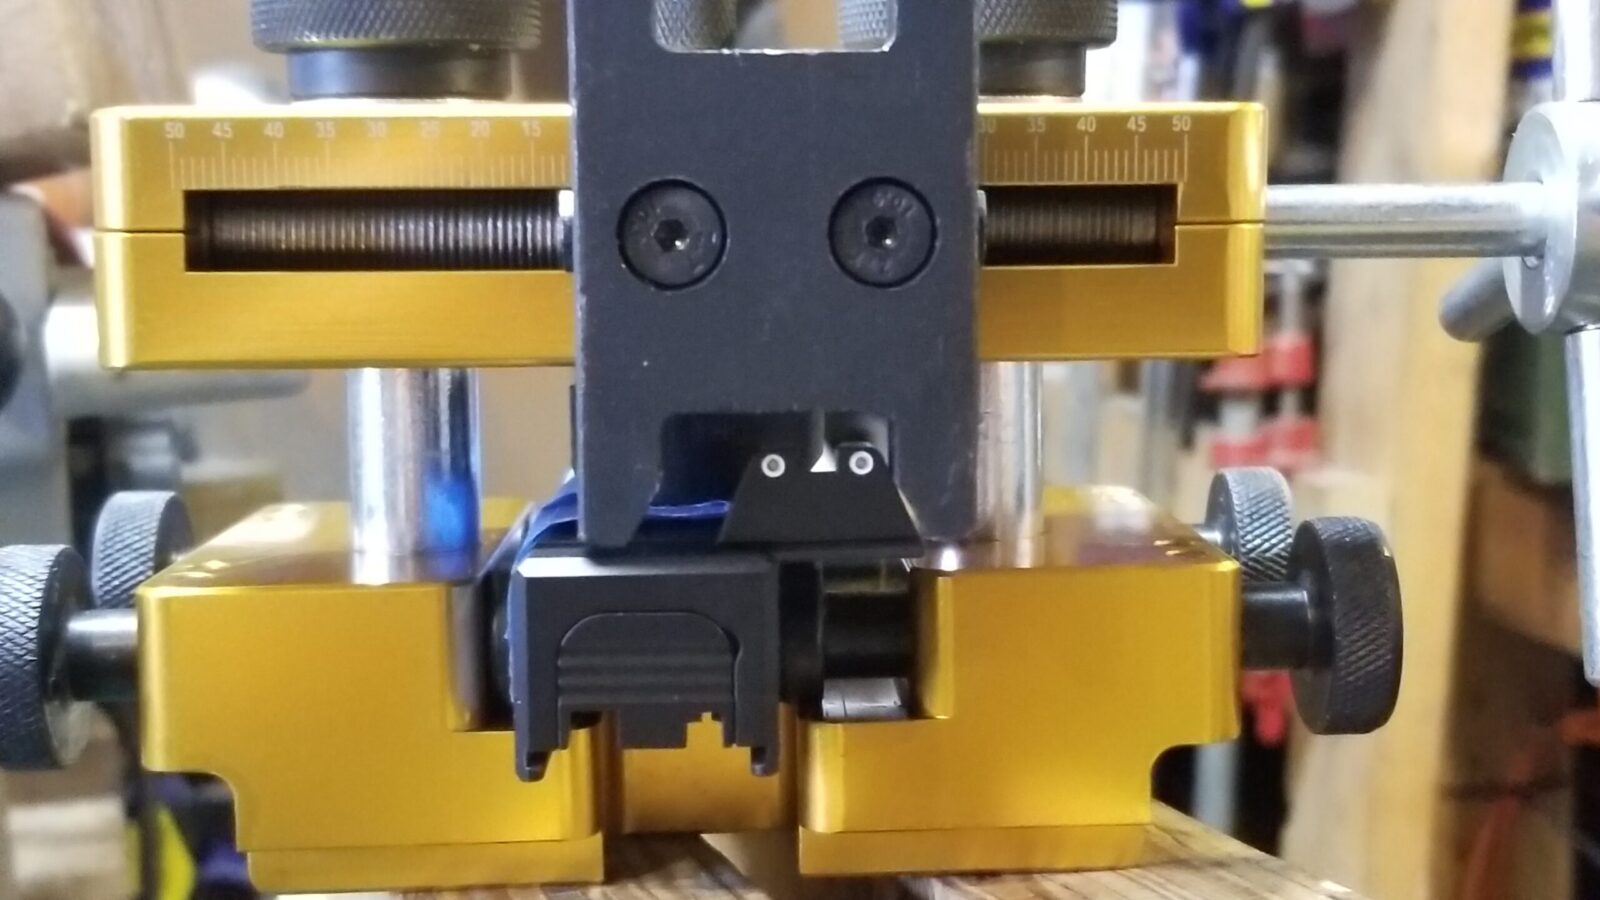
Here I am installing a suppressor height Trijicon sight on a Glock 34 slide.
The following photos let you see the Wheeler pusher from different angles – click on one to see them full size.
Here’s a video from Wheeler that will show you more about their tool:
You’ll notice that I am recommending two pushers for different audiences. For pros wanting to do this for a living, get the MGW Pro-Sight because of the need to support a variety of pistols. For people like me who have an occasional sight to do with a supported pistol, go with the Wheeler.
I hope this helps you out.
3/12/24 Update: The Wheeler is still working just fine. I have no hesitation recommending it.
Note, I have to buy all of my parts – nothing here was paid for by sponsors, etc. I do make a small amount if you click on an ad and buy something but that is it. You’re getting my real opinion on stuff.
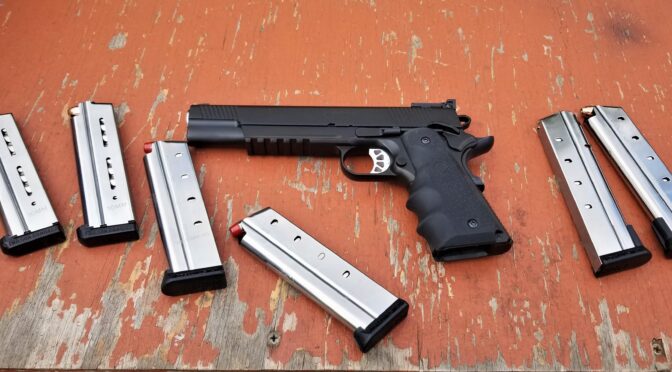
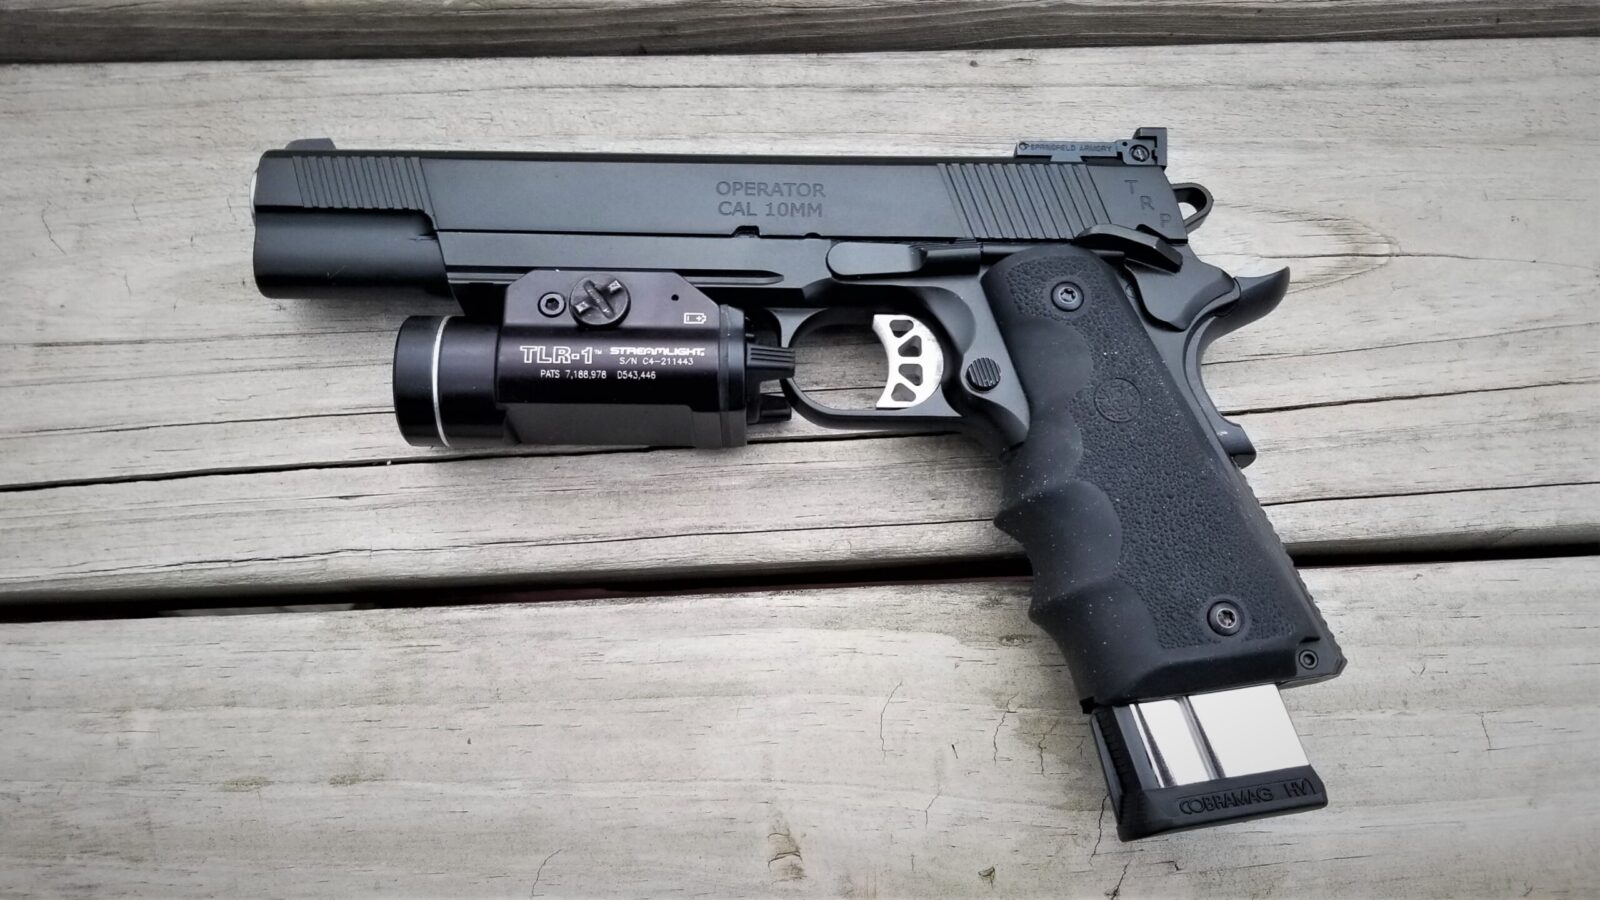
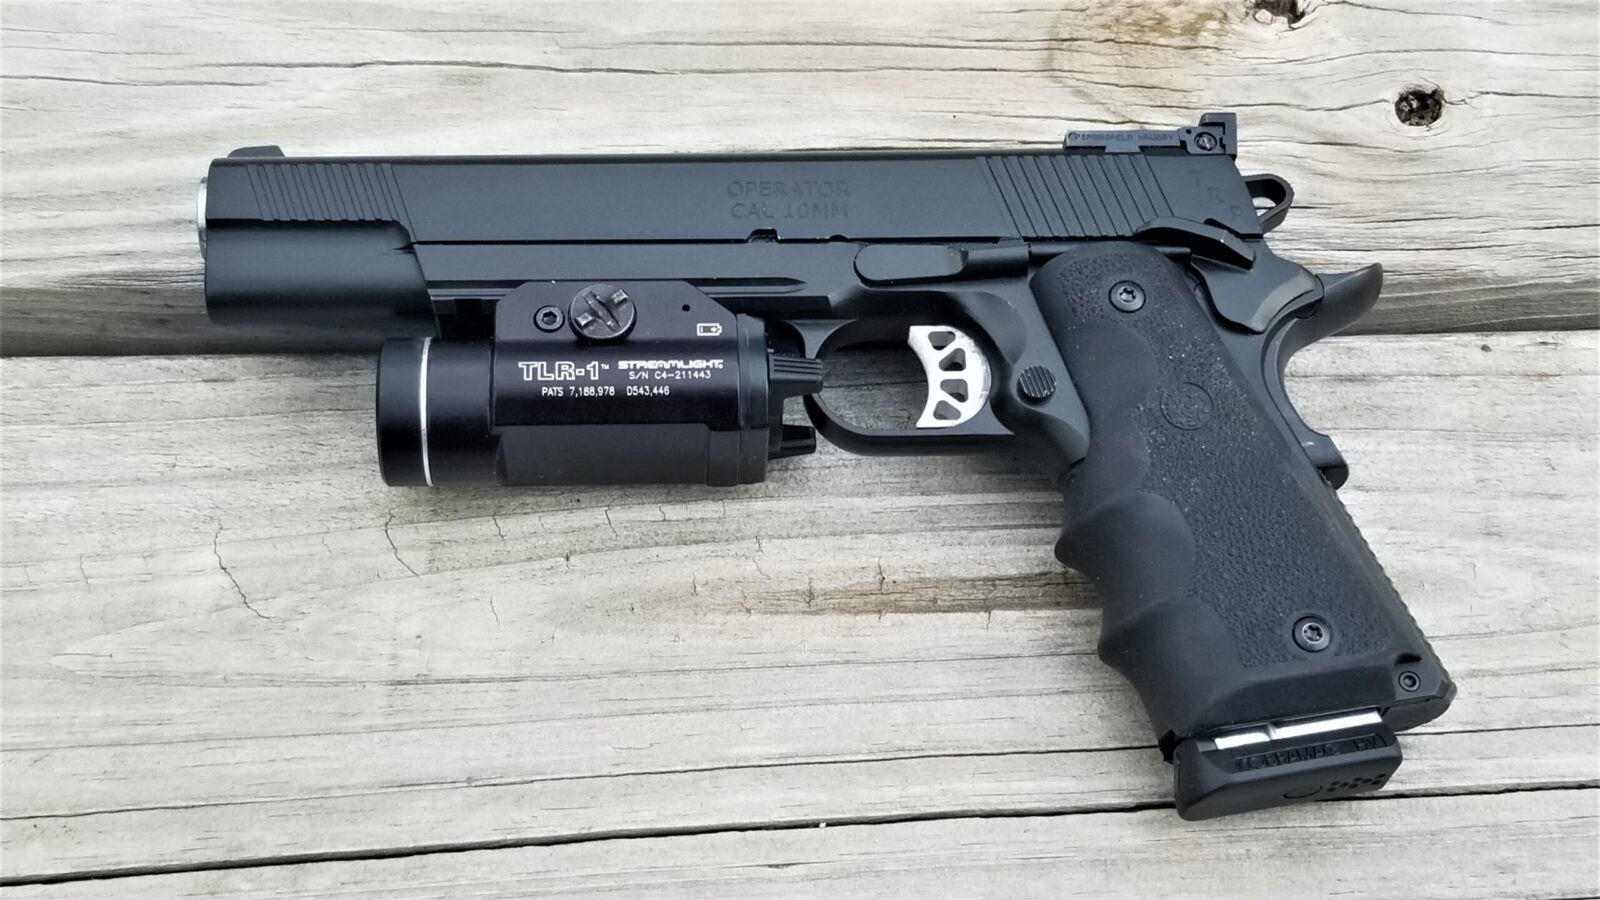
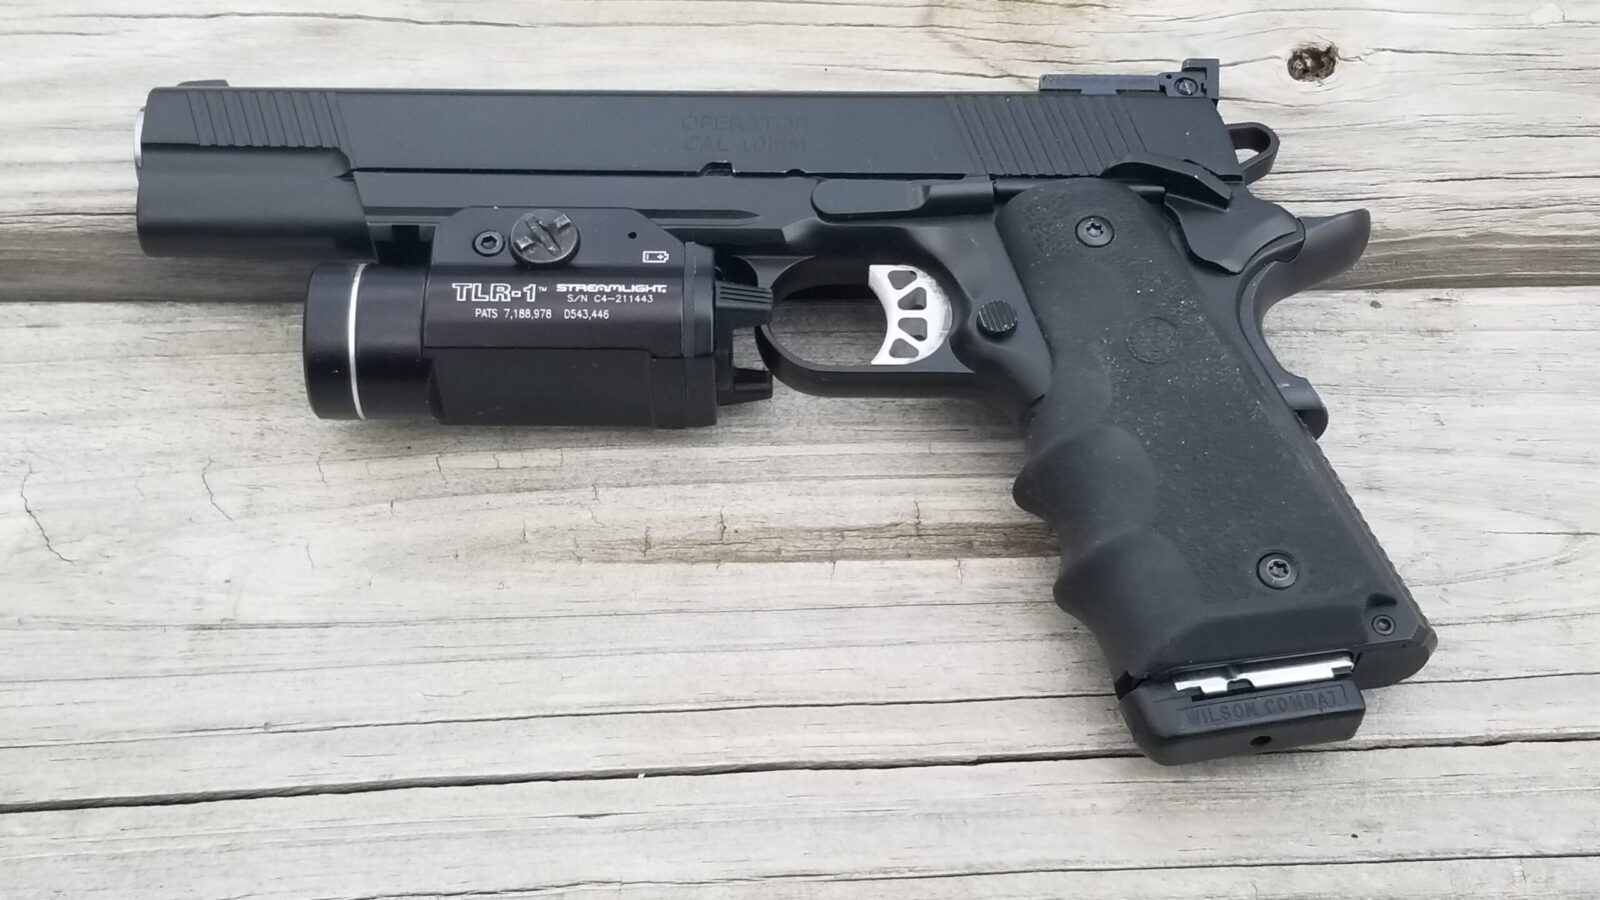
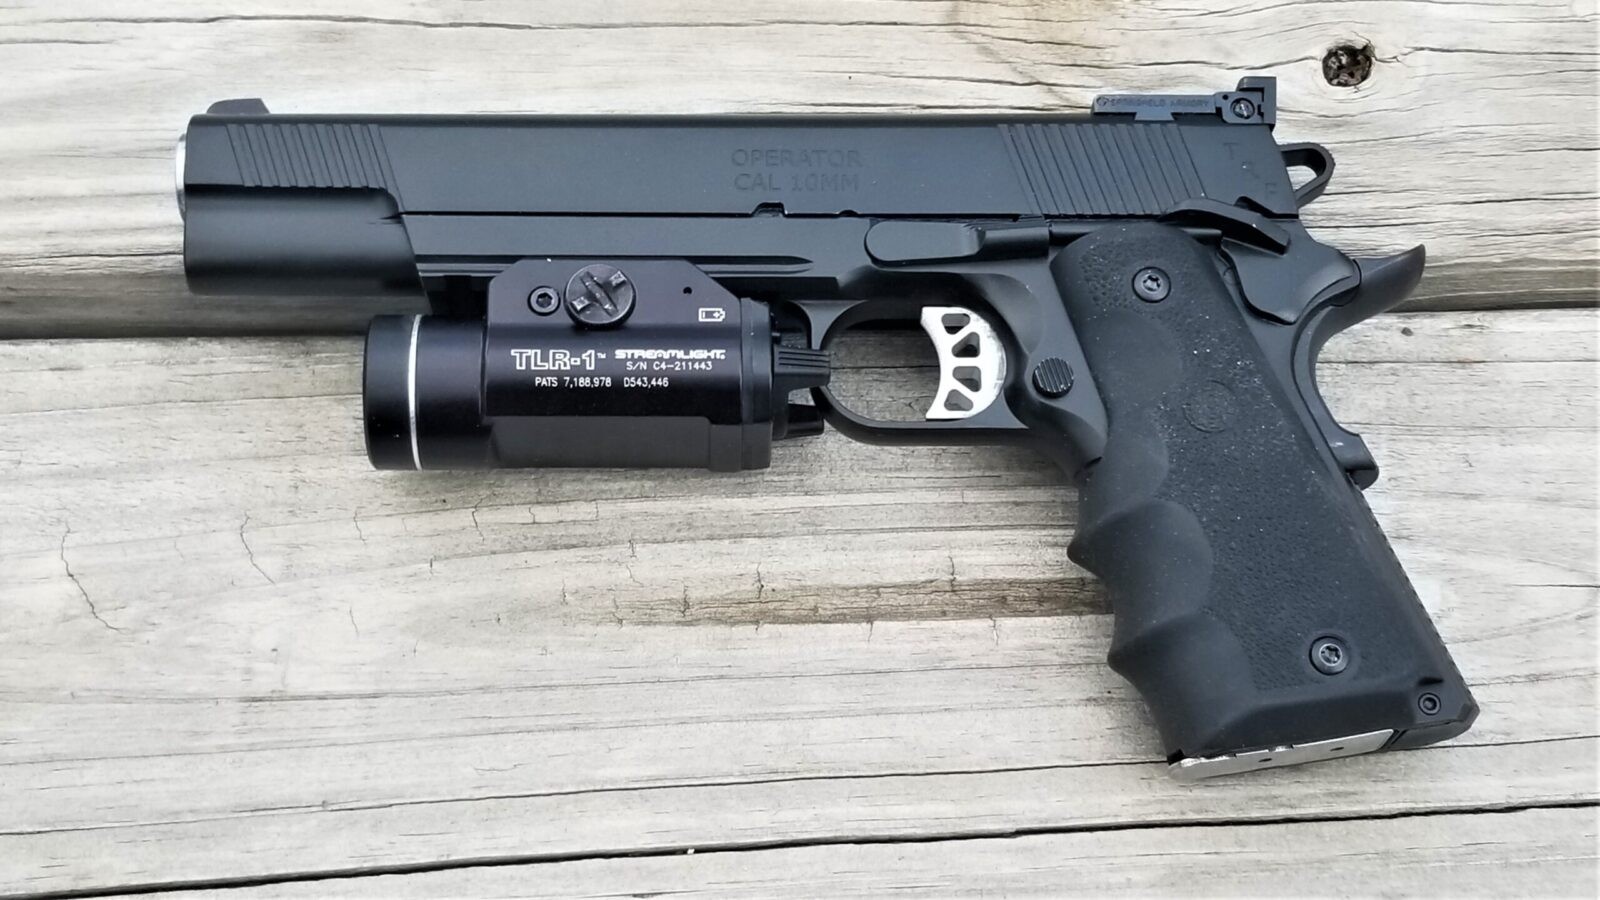
I’ve had a number of 1911-style pistols over the years from Dan Wesson, Rock Island, and Taurus. Now, I have a 10mm 1911 TRP Operator with a 6″ barrel. The one thing I learned years ago is that you need quality magazines to help with reliable feeding. I word it this way because there are many different design elements that need to be executed correctly and the pistol to be adequately cleaned and lubricated — it’s not just the magazines that cause the 1911s to either work or have problems. With that said though, they are an important piece of the puzzle and going cheap isn’t something I would recommend.
Over the years, I’ve had two 10mm 1911 magazines recommended to me that both work great with my TRP Operator. One is the Wilson Combat 47NX and the other are the Tripp Research CobraMags and I’ve used both their 9- and 10-round models. Both brands of mags work great and I have no reservation recommending either.
I’ve shot a variety of Underwood HP and hard cast rounds as well as S&B 180gr FMJ out of my mags without any problem and have no had to do any tuning to the feedlips, etc. They just work.
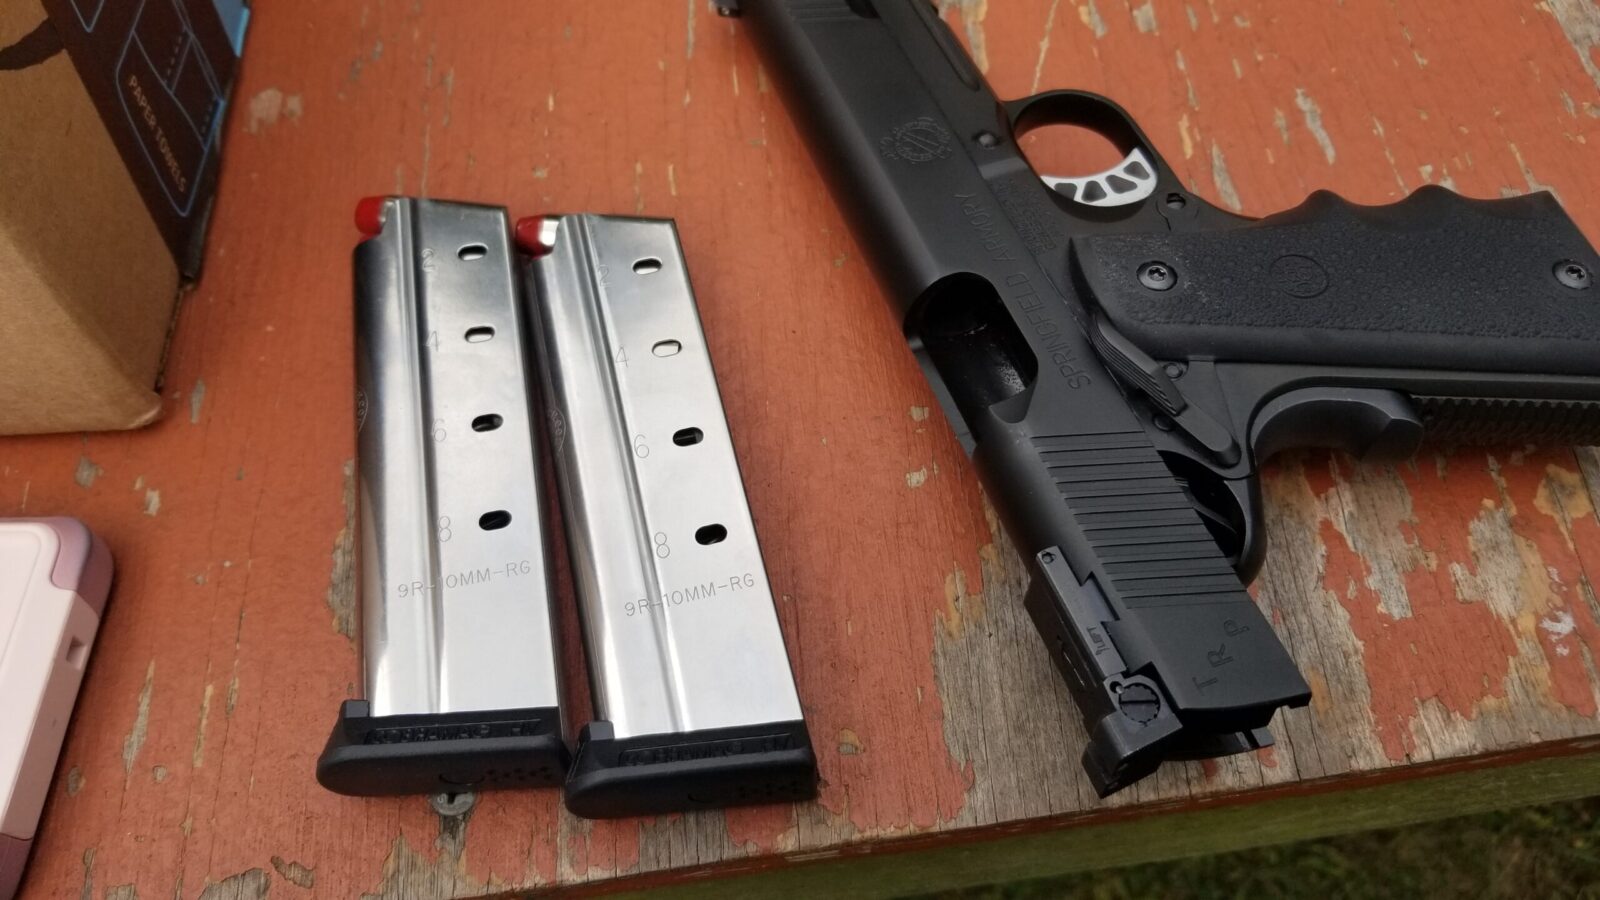
These are two of the 9 round CobraMags loaded with Underwood 220gr hardcast 10mm rounds. Note the part number on the mag body. 9R-10mm-RG.
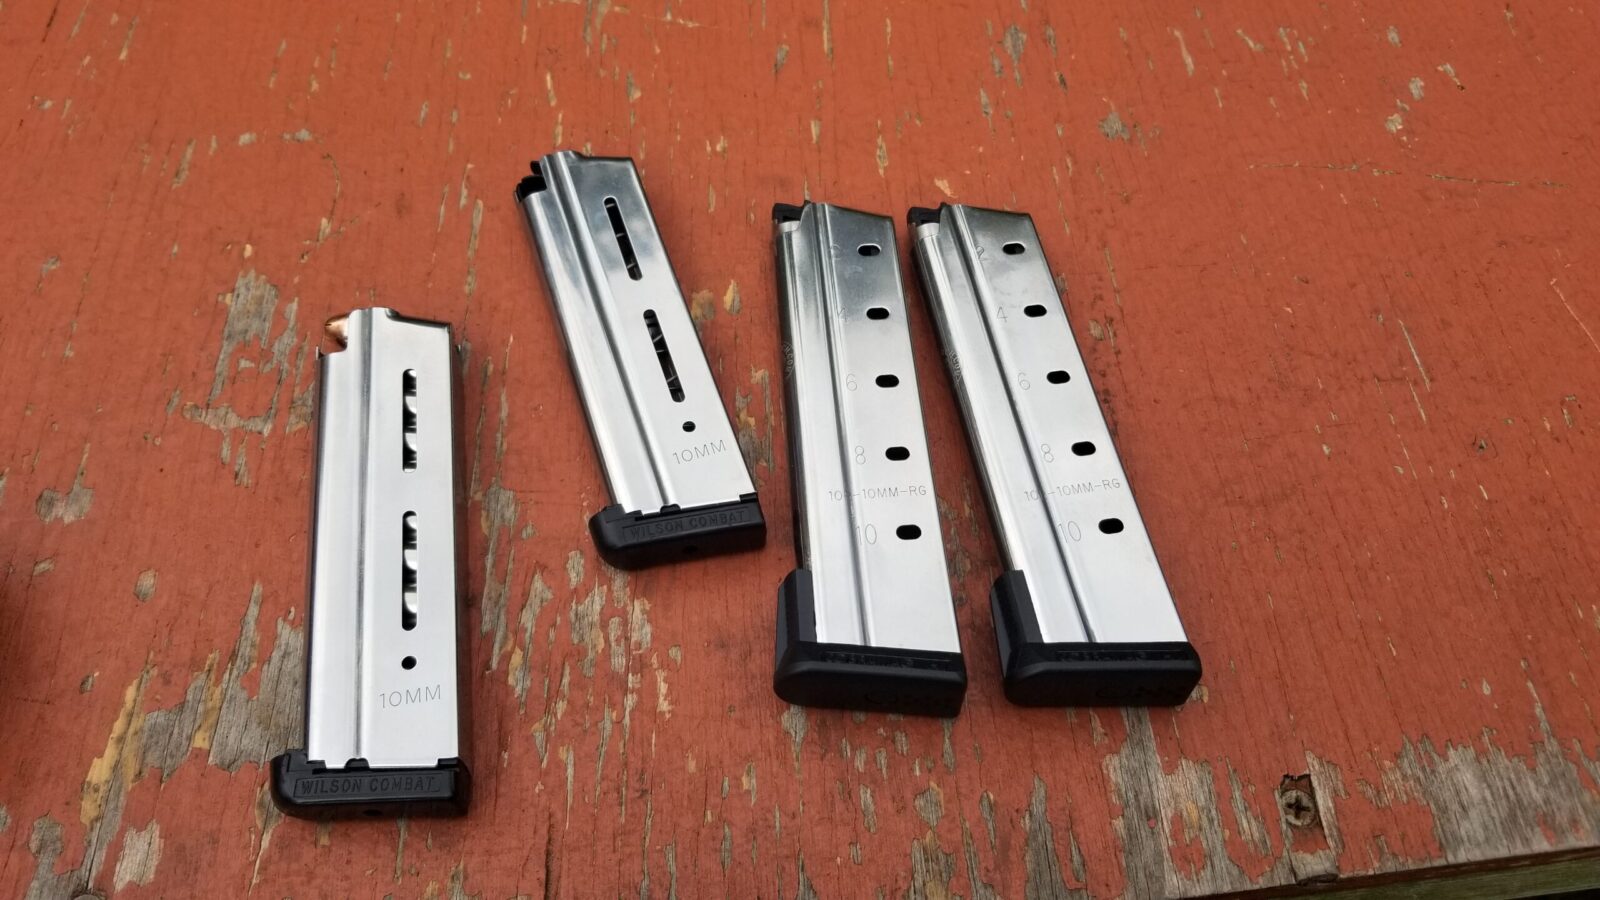
On the left are two Dan Wilson 9 round 47NX magazines and on the right are two 10 round CobraMags. By the way, they do sell a “tactical” 10 round magazines and the only difference is that they have a black finish to not reflect light – I actually reached out to Tripp Research and confirmed that.
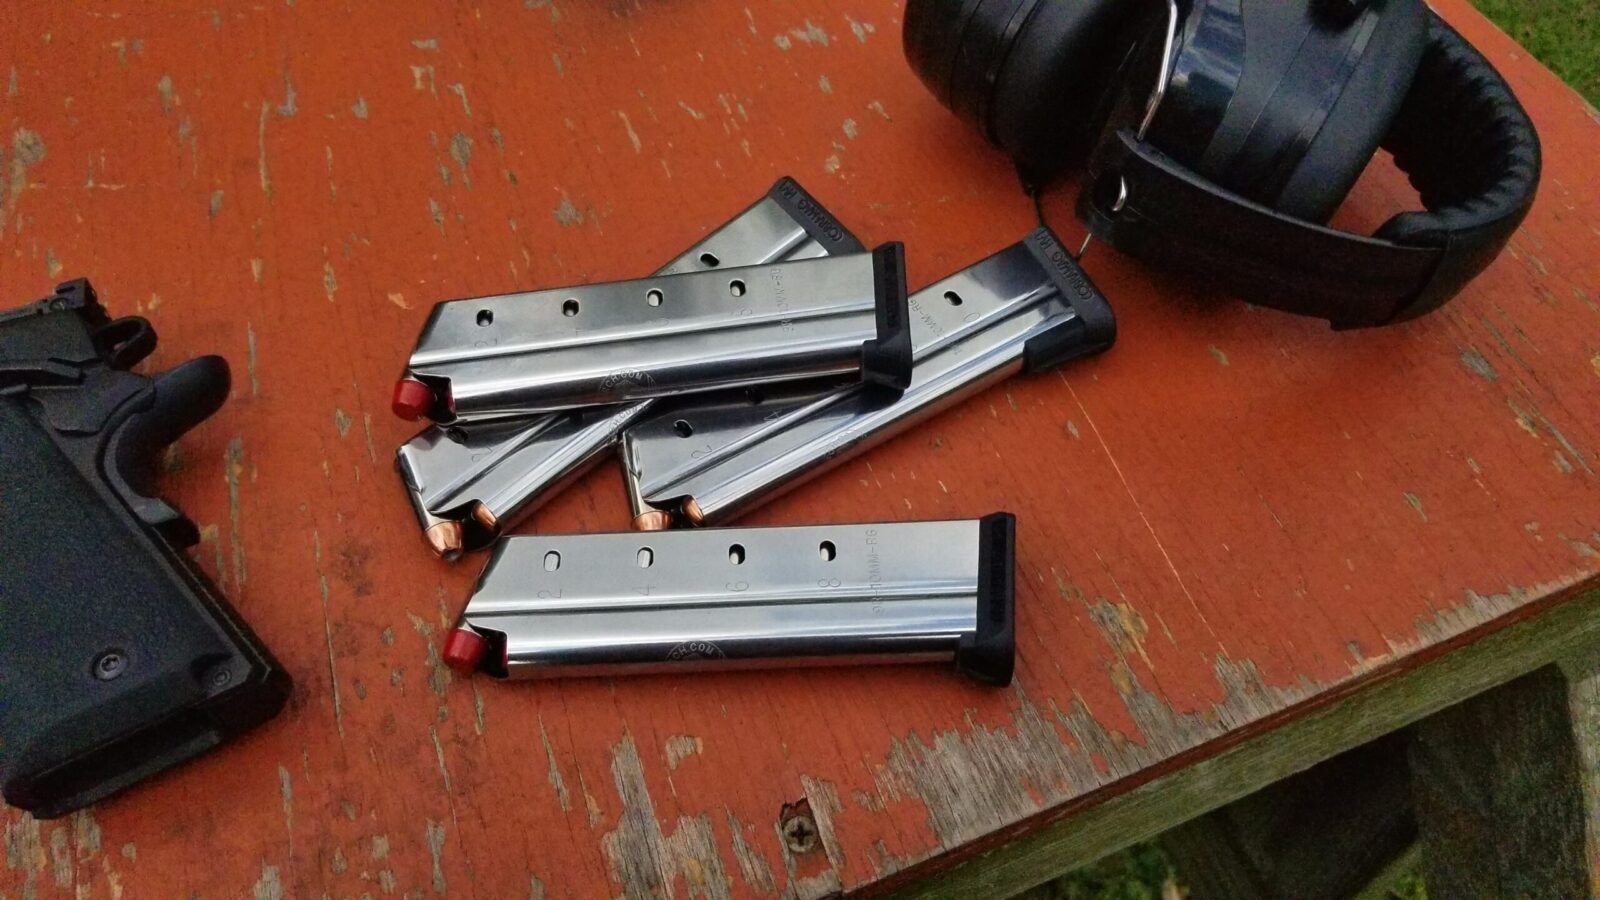
Here is a pile of 9- and 10-round CobraMags. The 9 round mags have the red hard cast Underwood bullets showing and the 10-round ones are loaded with 200 grain XTP if I recall right. I have a few different XTP loads and they all feed fine.
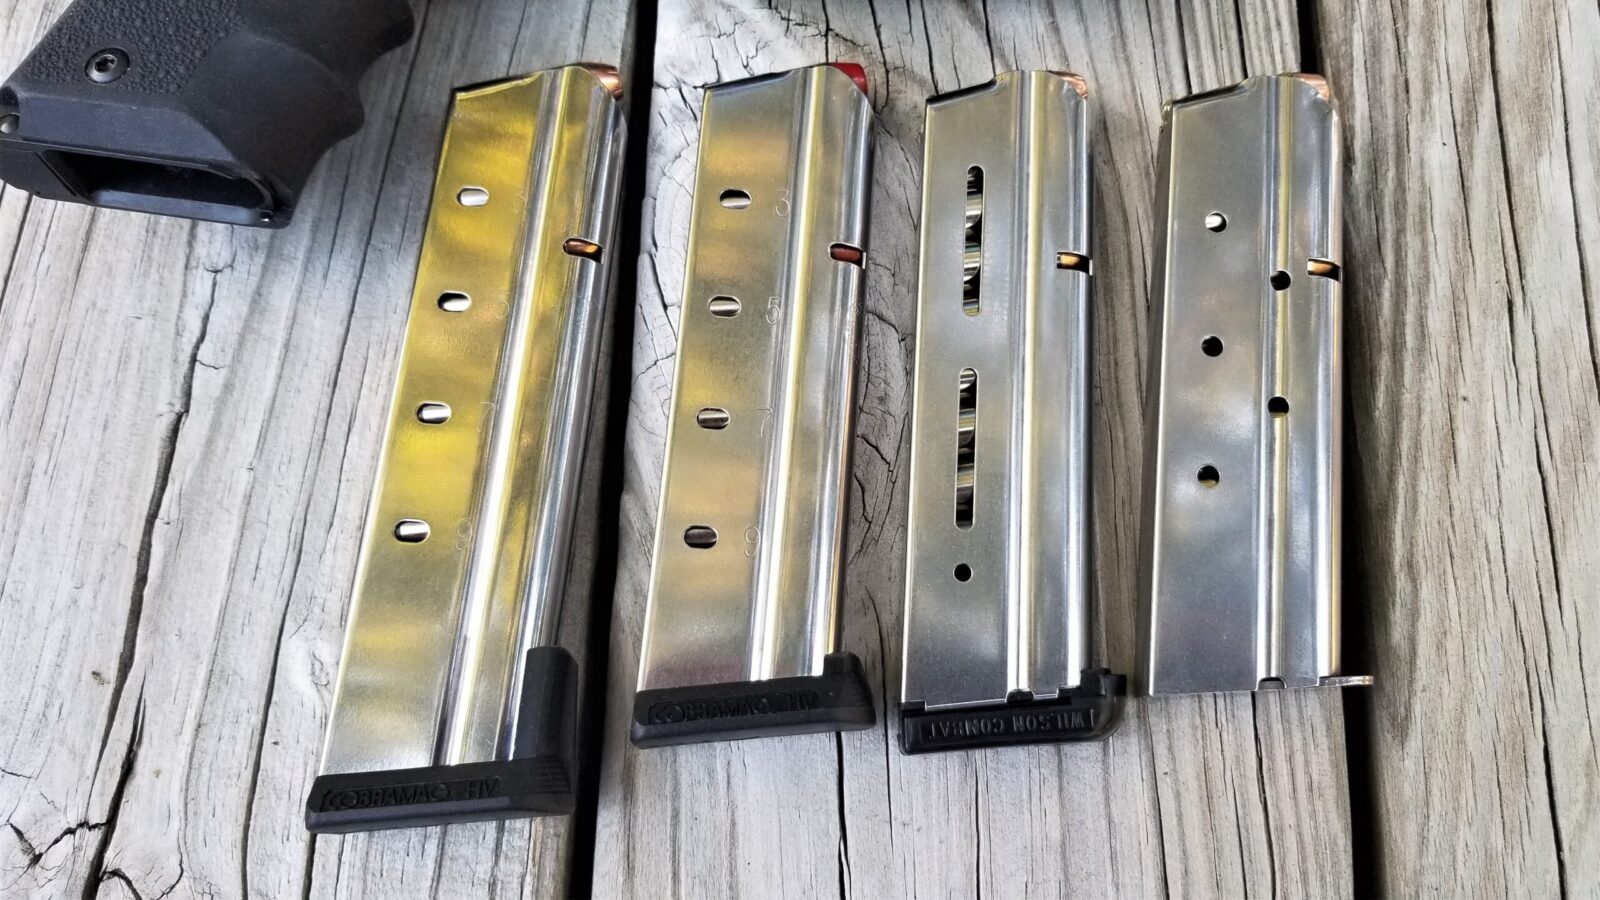
From left to right: 10-round CobraMag, 9- round CobraMag, 9-round Wilson and a flush fitting 8 round Springfield magazine. All work just fine.
This is how far the 10-round CobraMag sticks out.
This a 9-round CobraMag
This is a 9-round Dan Wilson
This is one of the flush-fitting original 8-round magazines that comes with the TRP Operator.
So what do I recommend?
Honestly, I’ve had very good luck with all of them. I prefer the 9-round magazines from both Wilson Combat and Tripp Research. The 10-round magazines stick out quite a bit and I save them for the range, hunting or some other situation where length doesn’t matter.
Note, I have to buy all of my parts – nothing here was paid for by sponsors, etc. I do make a small amount if you click on an ad and buy something but that is it. You’re getting my real opinion on stuff.
I’m still experimenting with my .50 Beowulf (12.7x42mm) rifle and pistol that I have posted about previously. I wanted to find better magazine options – both in terms of looks and reliability – than my modified D&H aluminum magazines. I tried a number of different options and then happened on using Tromix followers in Lancer L5 Advanced Warfighters Magazines (AWM).
Tromix Followers
A small cottage industry has popped up of people 3D printing followers to center the various big bore cartridges in a given model of magazine. I’m still tinkering with some of the 3D printed models but during my surfing, I came across a machined aluminum model from Tromix Lead Delivery Systems. Tony Rumore and his colleagues at Tromix specialize in the .458 SOCOM round but they came up with a really slick follower design that would work with the really slick Lancer hybrid AWM Magazines.
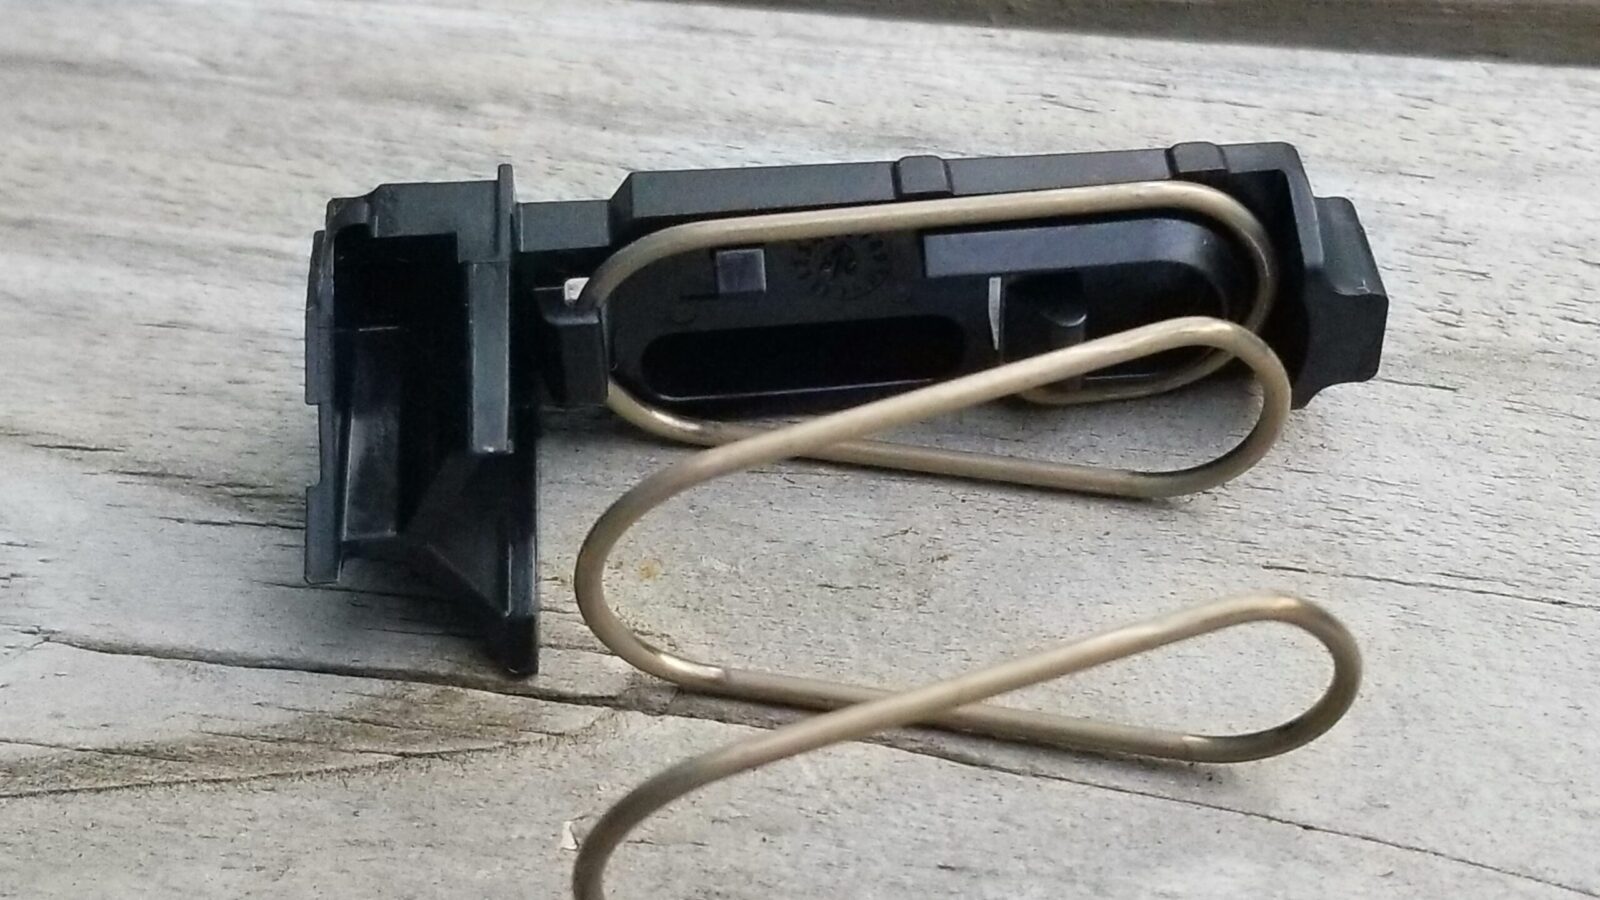
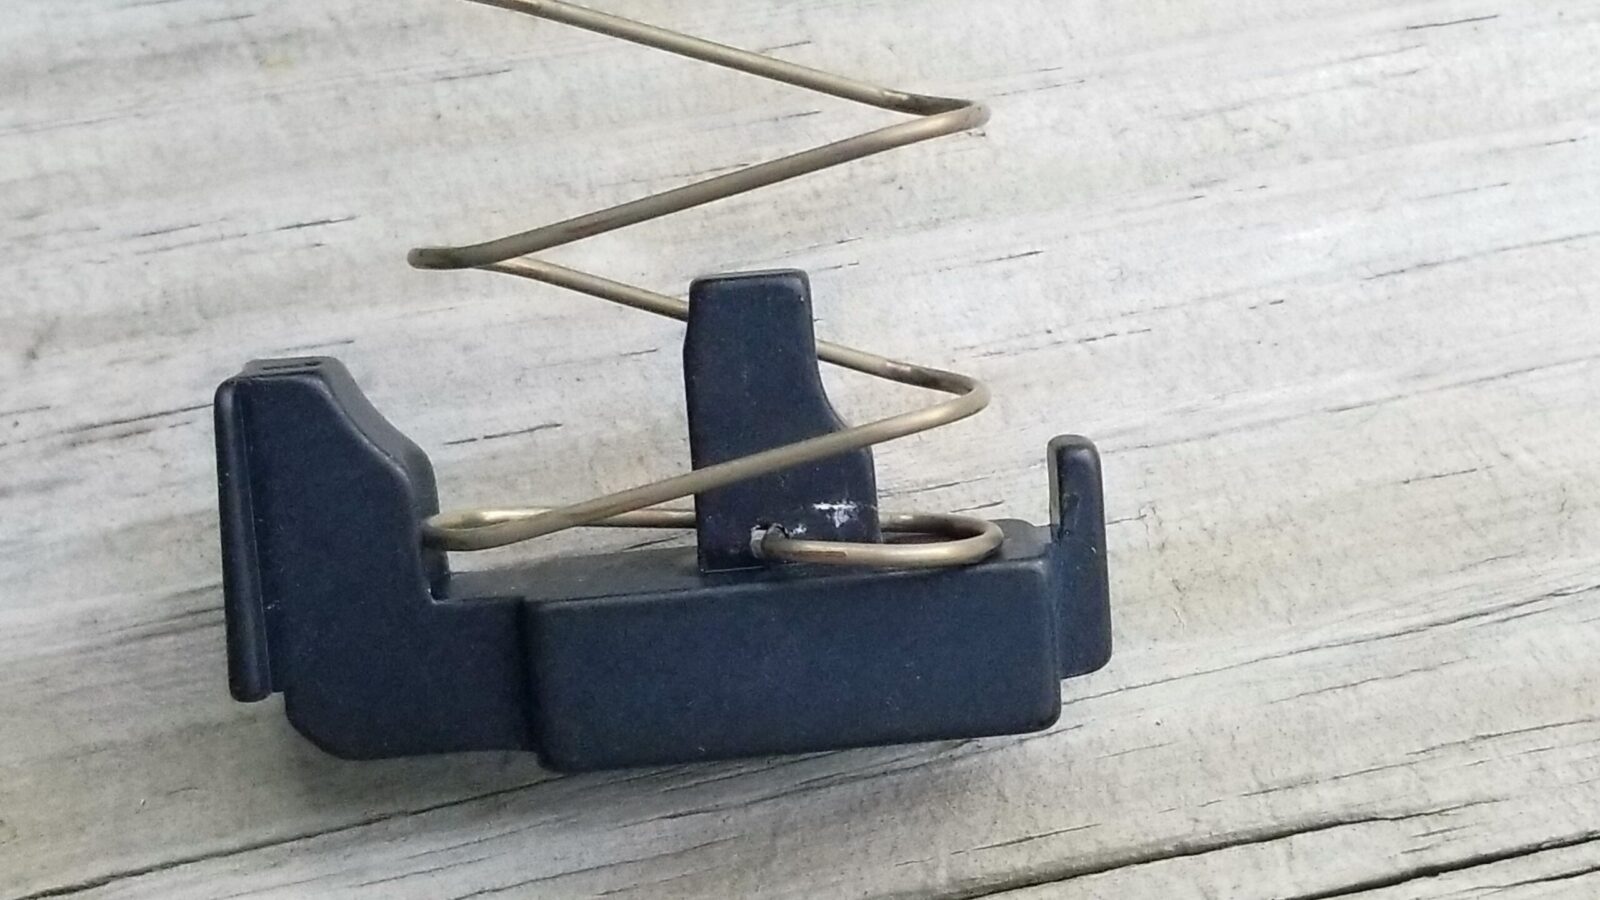
I ordered in a few for testing and they are really nice. Here are a number of views for you:
Lancer Hybrid L5 AWM Magazines
So the above Tromix followers are made specifically to work with Lancer L5 5.56/.223 AWM magazines. The AWM considered a hybrid design because the feed lips are steel The lips can be a weak point in the design of some polymer magazines.
At any rate, the AWMs are really nice. You have a bunch of colors and capacities and are a very nicely made. They also have a number of capacities *but* for the Beowulf, stick to the 10 or 20 round magazines. The Tromix follower is relatively tall and can’t negotiate the curve in the 30s. It can be made to work with the 20s and I’ll detail that more in a moment. I have some thoughts on how to modify the Tromix follower to get it to work in a 30 but haven’t had the time to tinker with it yet.
The 10 round 5.56/.223 magazines can hold 3 Beowulf rounds without any tuning. The slight curve to the 20 round magazines can cause the follower to jam and we’ll cover how to address that next.
Tuning and Installing the Follower
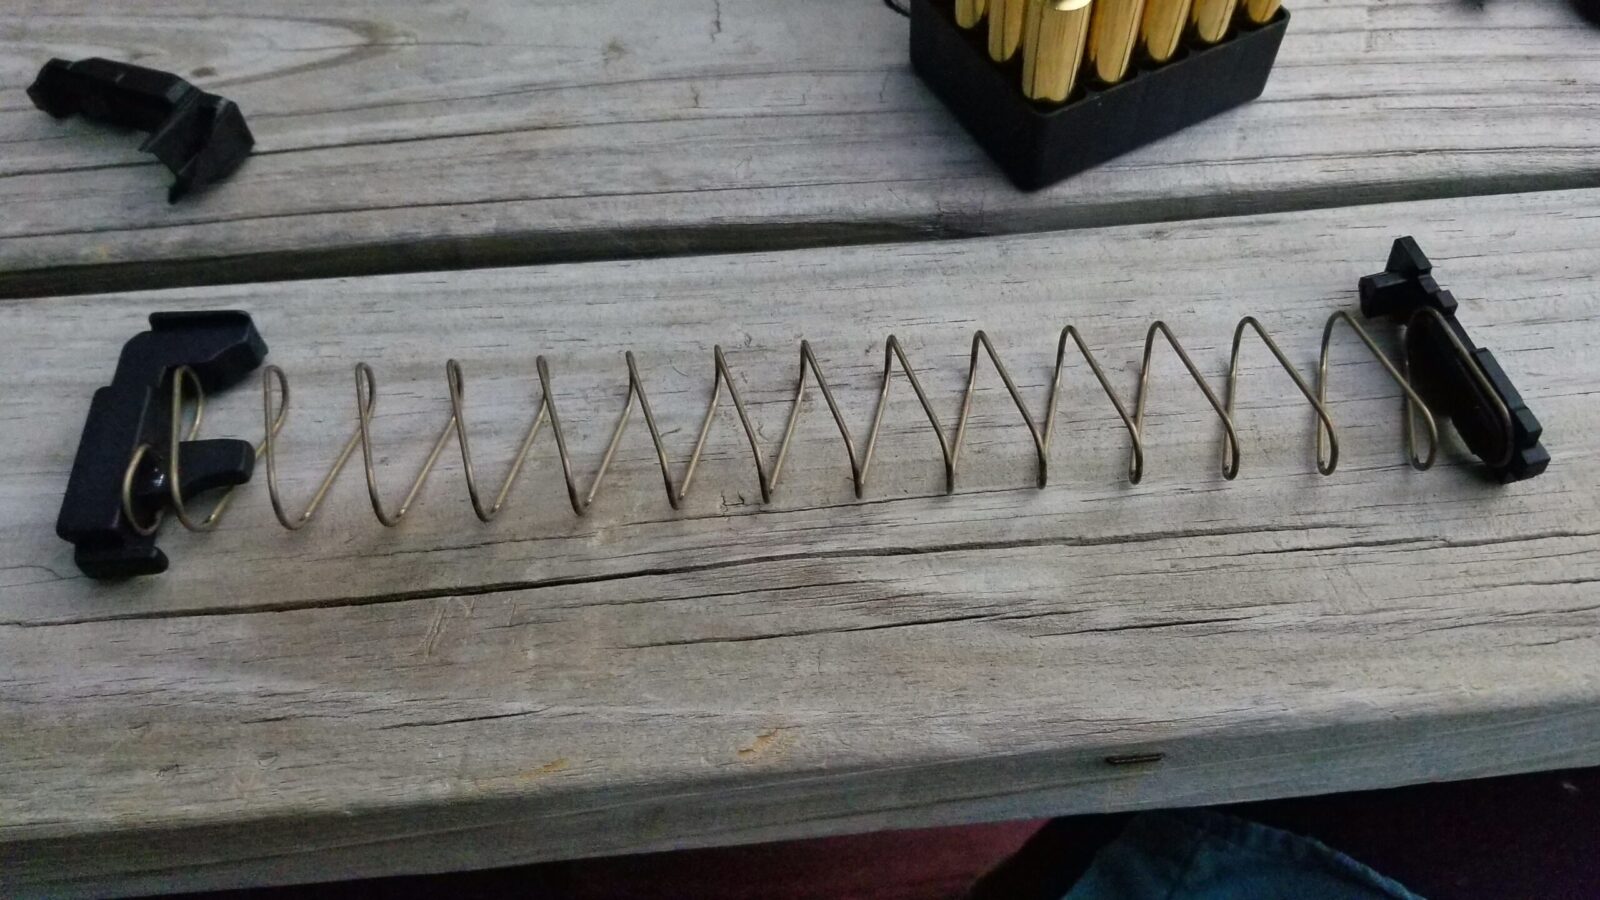
Push the the button on the bottom of the follower and slide the base plate off. Note, the magazine spring will want shoot out so just be prepared to control the spring’s expansion.
This is an original Lancer follower stull attached to the spring. It’s really hard to get the assembly oriented wrong due to the design. The follower can only go into the magazine body one way. and the spring can only attach to the follower one way.
The spring can only fit into the Tromix follower one way also.
You then slide the assembly back into the magazine and slide the base plate back on. It is that easy.
The tuning required has to do with making the follower slide as easily as possible in the 20 round magazine. If you don’t then you are going to find that the Tromix follower jams inside vs. reliably pushing the cartridges upwards the way it should.
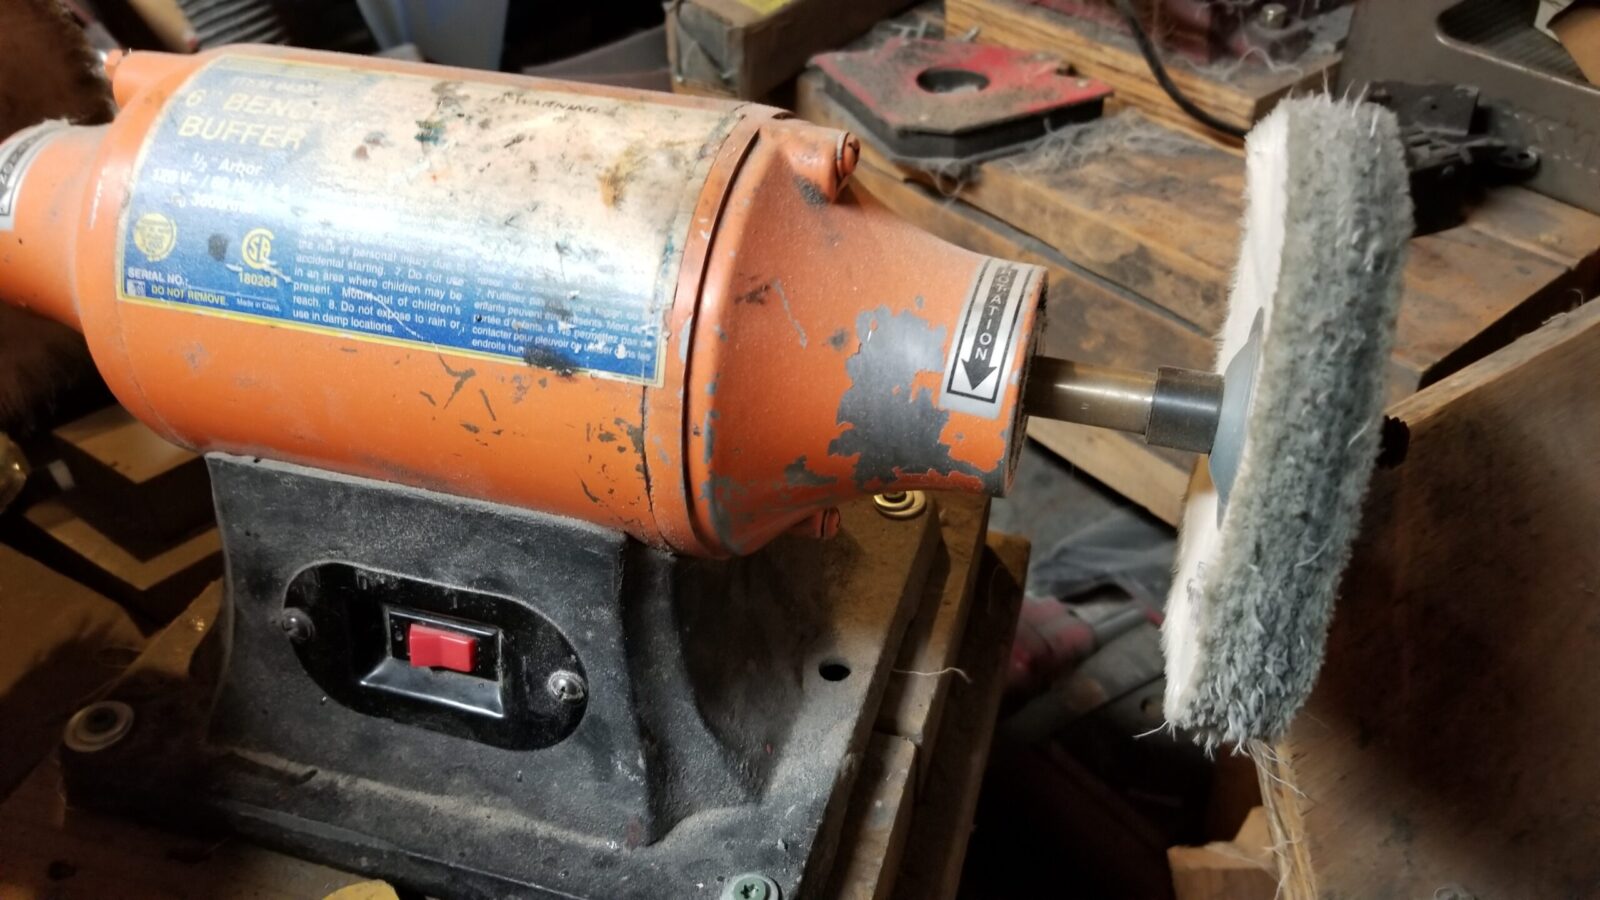
Now whether you do it before you install the spring or after, use a buffer and go all around the Tromix follower and make it nice and smooth. I used a 6″ buffing wheel with buffing compound. The reason I said you could either do it before or after is that I had already assembled four magazines before I realized I needed to do the polishing. Just rub off any buffing compound left behind. You’ll notice that the follower surface is far smoother to the touch than before.
I have used this 6″ Harbor Freight buffer a ton over the years as you can probably tell from the photo. It’s what I used along with some black/emory buffing compound to polish the followers.
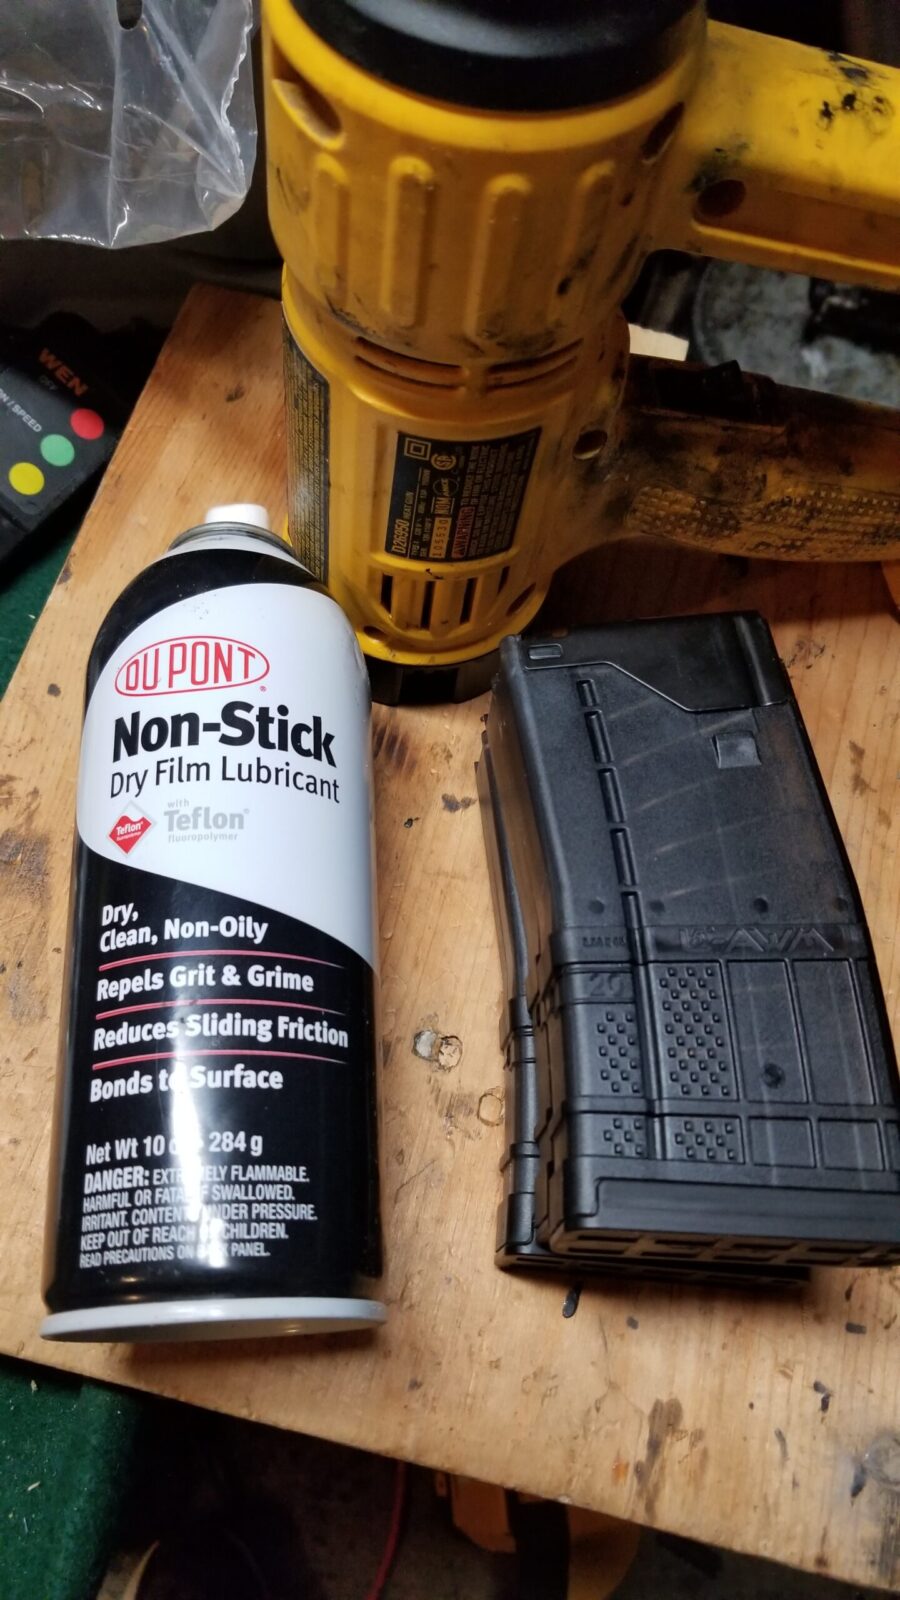
The next step is to apply three coats of Teflon to the follower and the inside of the magazine body. I’d recommend using a dry lubricant inside a magazine body so it doesn’t attract dirt the way a liquid or grease would.
My preferred lubricant for inside a magazine body is Dupont’s Non-Stick Dry Film. It sprays on wet and leaves a layer of Teflon as the solvent evaporates off. Be sure to shake the bottle before spraying so the Teflon is floating in the can when you spray.
Due to health and environmental concerns over Teflon, the Dupont formulation now uses a ceramic technology. It seems to work just fine and I have been using the ceramic-based product for several years now. Click here for the Dupont Dry Film Aerosol that I use now.
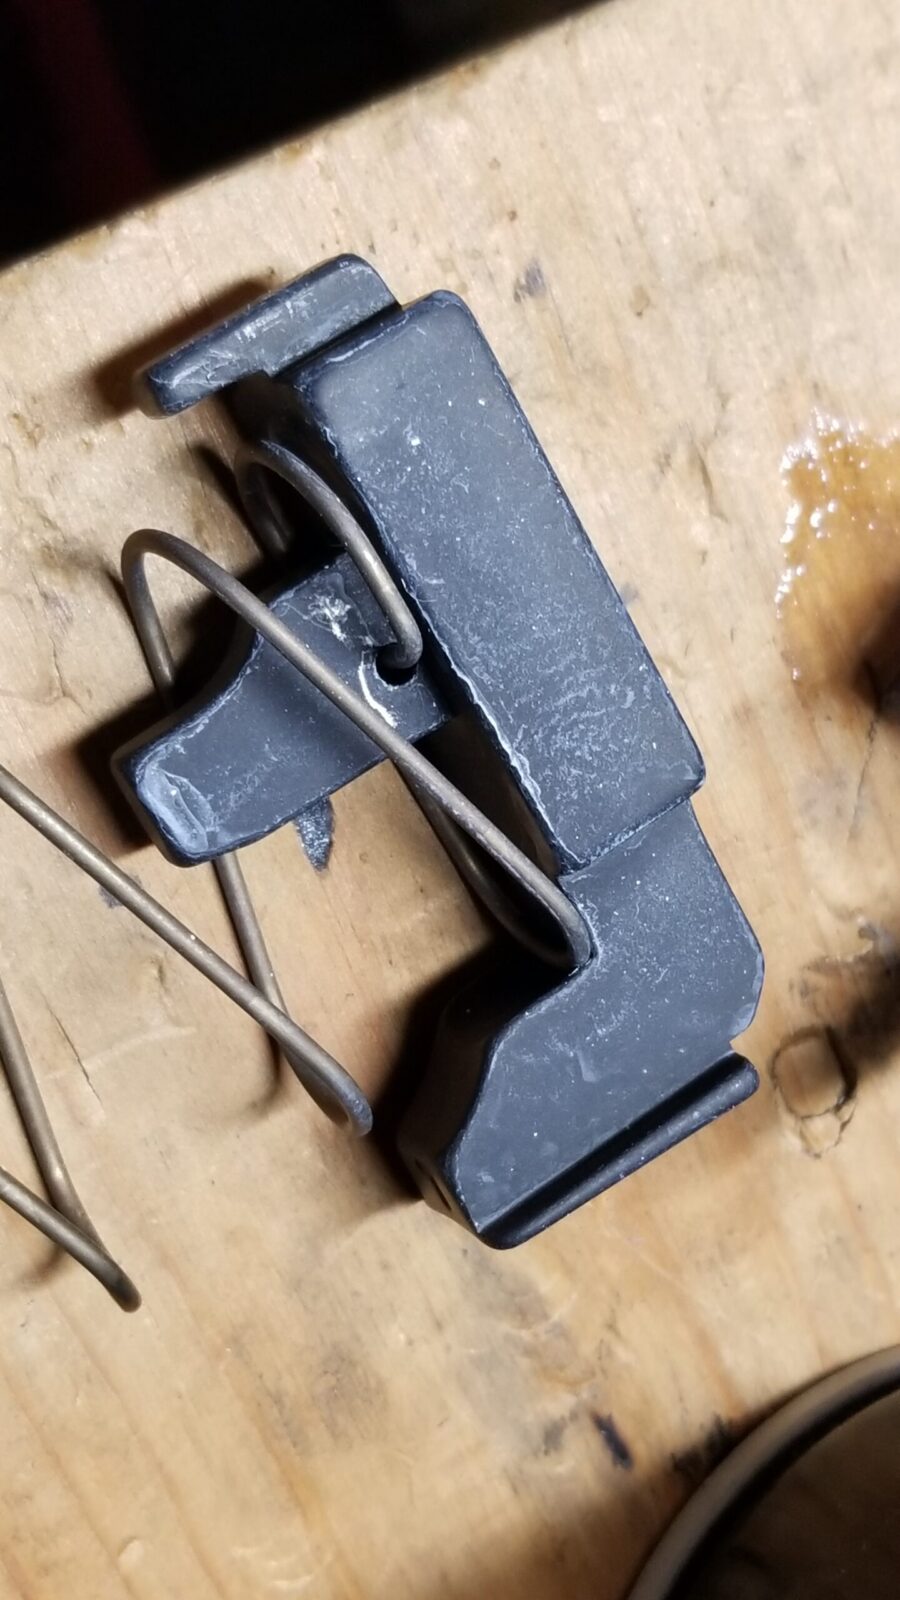
The trick I do is to use a heat gun to warm up the parts before I spray and then hit it with the spray lightly. I then warm it up again, let all of the solvent evaporate and then repeat for a total of three coats. I’ve hard far better luck getting a consistent thick layer of Teflon this way vs. trying to do it all in one spray.
The white dull look you see is the Teflon residue that will enable the follower to slide easier in the magazine body.
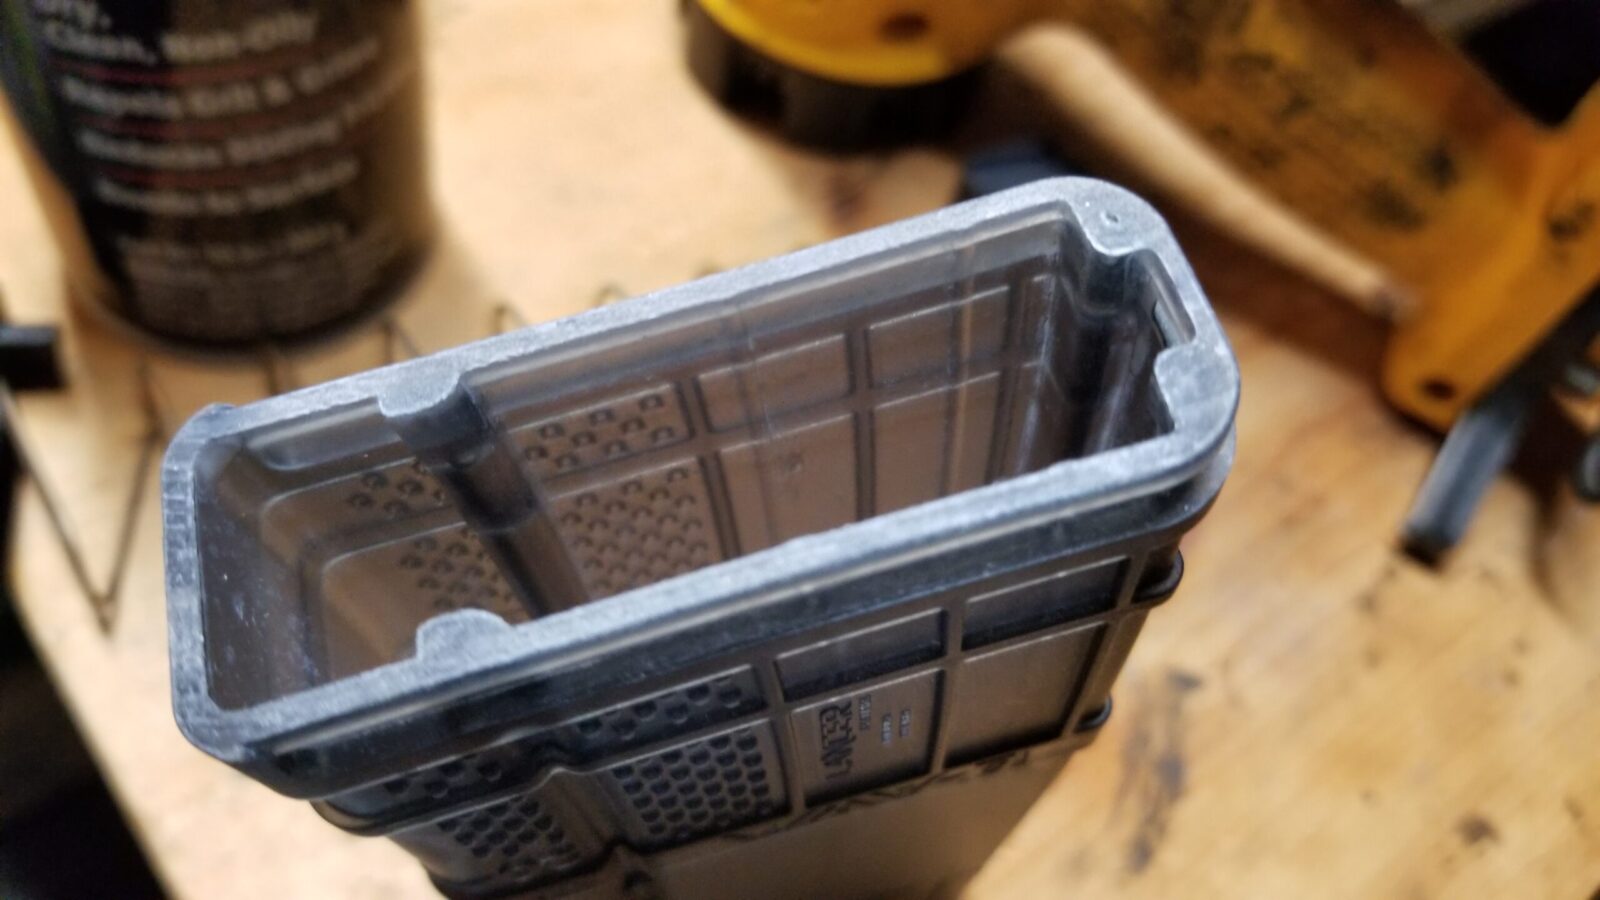
I spray the inside of the magazine body and all sides of the follower. Your goal is or there to be Teflon where ever the follower males contact with the magazine body. When everything is dry, reassemble each magazine.
Coat all four walls of the inside of the magazine body as well.
Testing
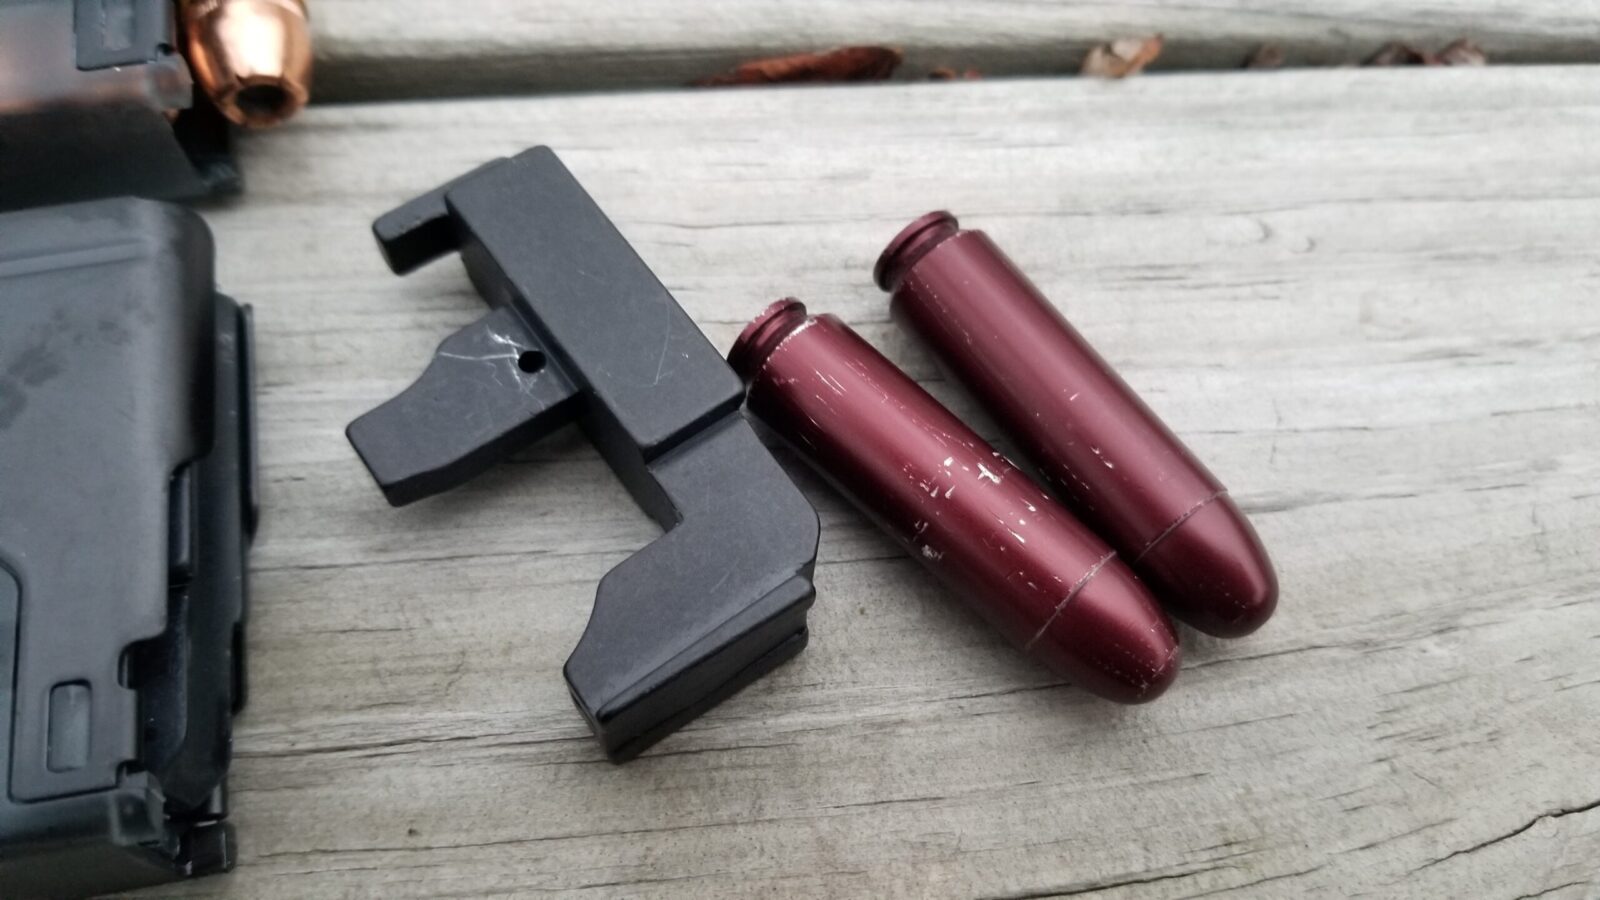
One quick comment – I do not recommend testing with live ammo. There are just too many things that can go wrong. I use A-Zoom 50 Beowulf Snap Caps to do my testing. They come in packs of two and I’d recommend having 4-8 rounds total for testing. Ideally, you’d like to load the whole mag you want to test so it really depends on what you plan on testing.
Get yourself 4-8 Snap Caps for testing. They are far safer than live rounds and hold up very well.
The Result
With the Tromix followers, the L5 AWM 10-round mags can hold three Beowulf rounds and the 20-round mags can hold seven. They are far, far more reliable than what I have been trying thus far.
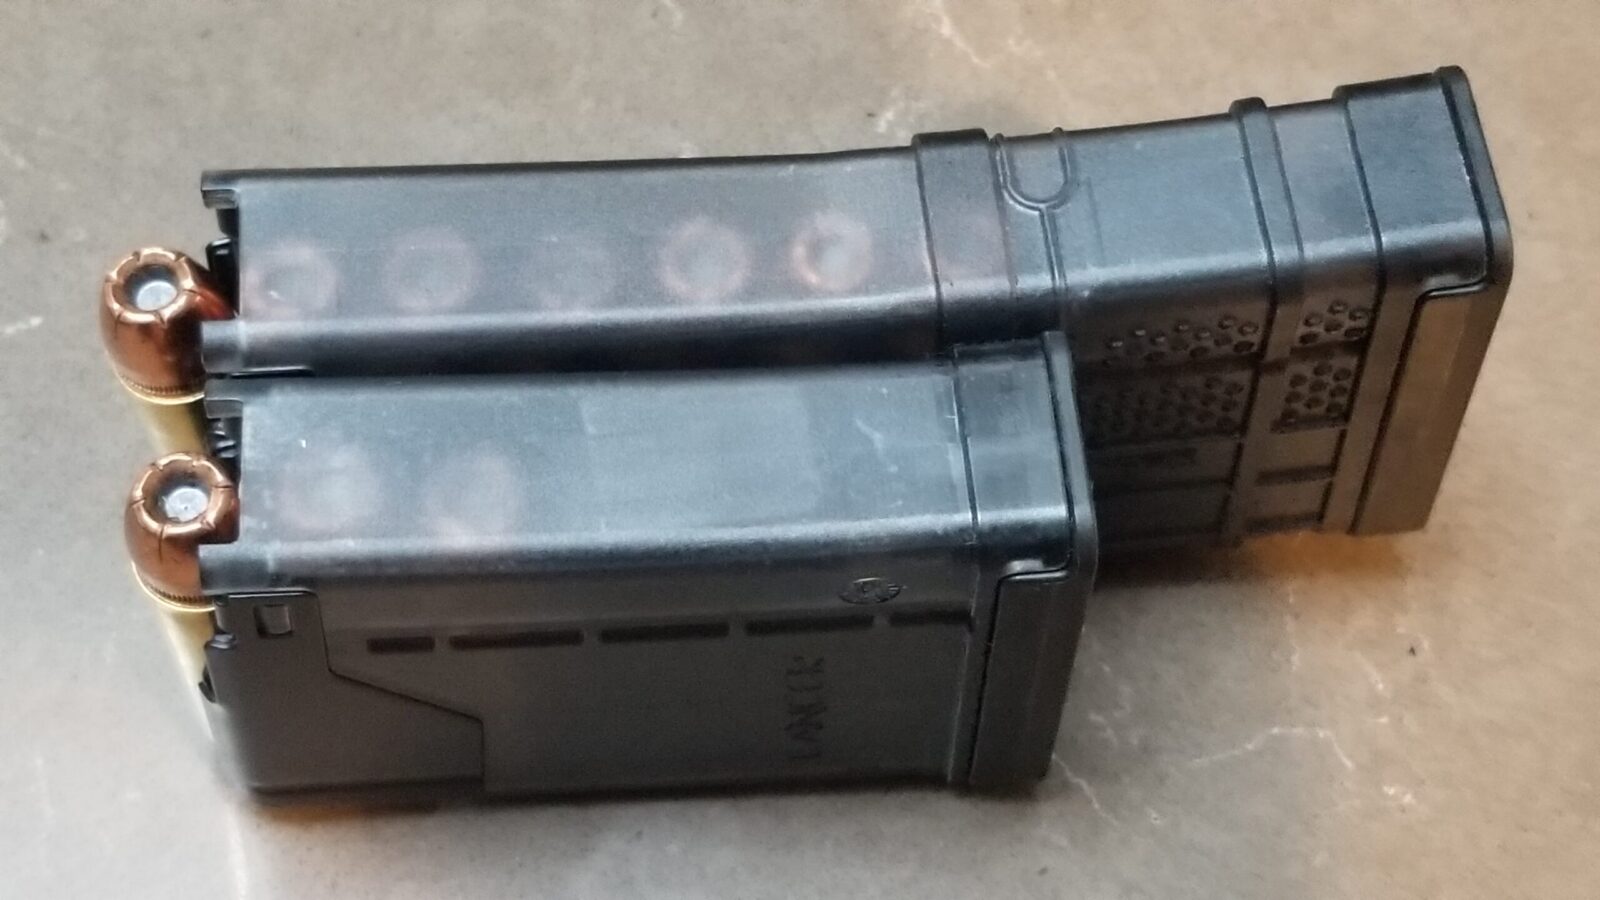
The 10-round L5 AWM is on the bottom and the 20-round model is on top. You can see the big Beowulf rounds loaded to the capacity of each.
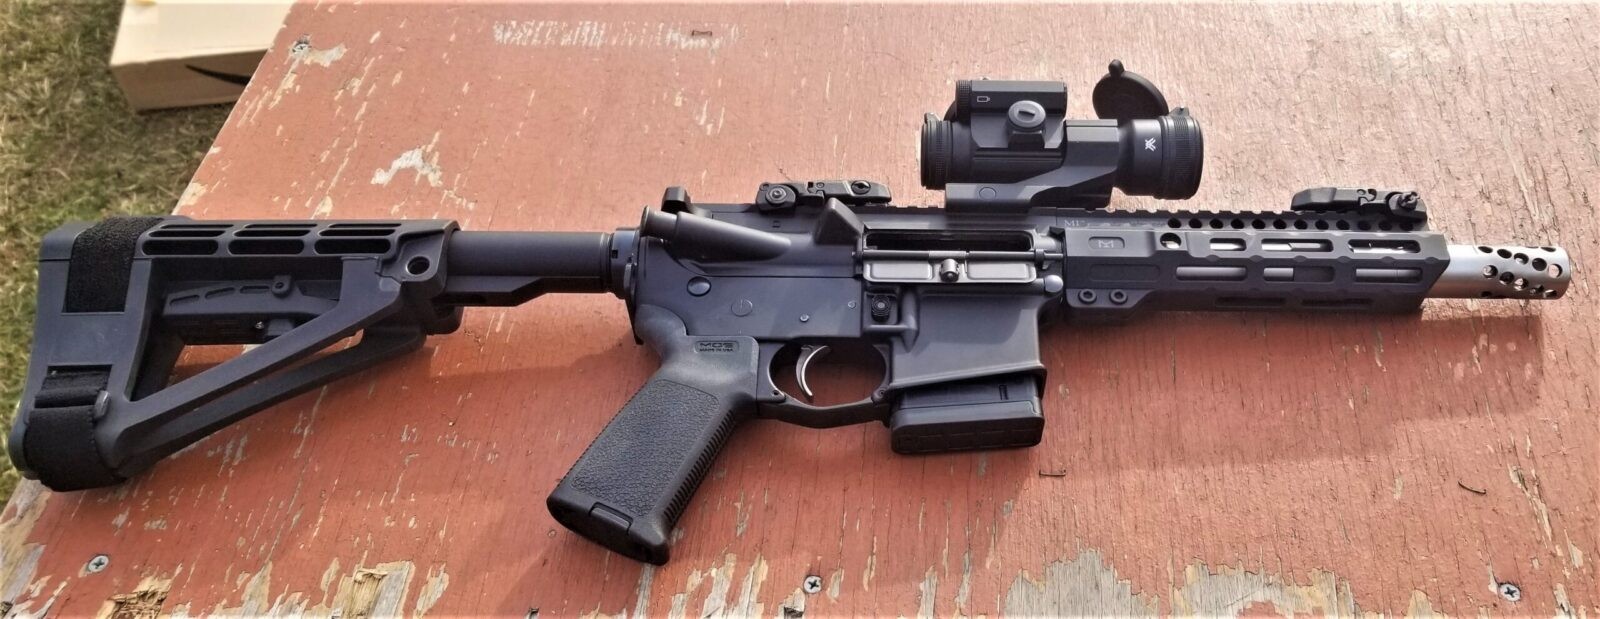
The weapon used first is this 7.5″ Beowulf pistol. Yeah, it bucks but I am trying to figure out the brake to use. There is a massive amount of unburned powder blowing out that pepper pot helical brake.
Target from 50 feet – rapid fire free hand. Yeah – feeding is way, way better.
The bottom line is that I am very happy with the pairing of the Tromix big bore follower with the Lancer L5 AWM 10- and 20-round magazines. I’ll experiment more to see if I can get the 30-round L5 AWMs to work but that is for another day.
I hope this helps.
Note, I have to buy all of my parts – nothing here was paid for by sponsors, etc. I do make a small amount if you click on an ad and buy something but that is it. You’re getting my real opinion on stuff.
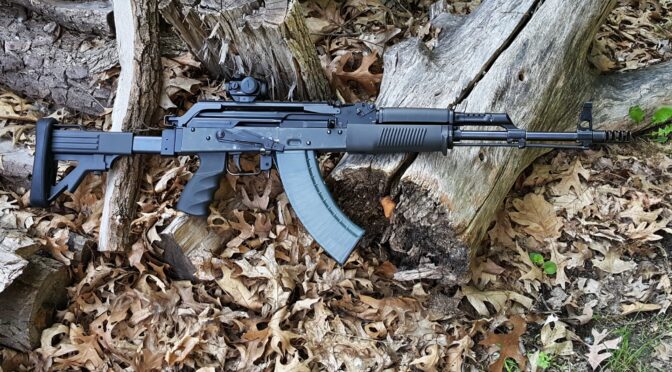
If you ever want to start an argument on the Internet, ask what is the best AK brand you can buy in the US or at least ask what is good a good brand. You’ll get a ton of opinions, hear say and even a few people with real experience will chime in.
The other day he sat down and took the time to create what I will refer to as “Paul’s List” to try and answer that question above:
Current 12-12-20 Question one: What new Ak do I buy? Current new production mass market AKs that are proven and a safe bet. Alphabetically · Arsenal, · Century imported WASR or Draco · IWI Galil ACE, · K-USA KP9p/r, · M&M Cugir AKs, · Palmetto State Armory GF3 – up, GF4, 103, AKv, 74 (the only 74 in new prod), · Riley Defense is hammer forged where it counts, should be ok? (test is not completed, ammo is expensive currently for just putting rounds through one for testing) · WBP Poland. Still pretty new, hard to say on this one. Maybe ok · Zastava should be ok, the ones Century imported were hit and miss. New ones have chrome lined barrels (yay and about time) and lets hope better metallurgy than Century imports. o Atlantic firearms often have decent kit builds to purchase, but are not mfg. new AKs. So do many kit builders, we have a list in announcements along with a list of where you can buy kits from. o Please let me know if I forgot any.
·Question two: What are good used AKs to buy? This is a great list Darryn Eugene compiled. AK variant buyers guide (models and variants G2G) 7.62×39 AKm/47 Variants · Mitchell Arms Imports, M-90/m-70 · Mitchell Arms Imports, M-72 · Zastava M-92 (inspect due to varying QC) · Zastava NPAP/OPAP (inspect due to varying QC) · Cugir/Romarm/Century AES-10B not to be confused with AES-10 (basically a long barreled wasr) · Cugir/Romarm/Century Sar-1 · Cugir/Romarm/Century Cur-1 · Cugir/Romarm/Century Wum-1 (check for “moon cuts” meaning a dish shaped portion cut out of the rear of the receiver to dissuade the use military stocks. · Cugir/Romarm/Century WASR-10 variants (only upon inspection) · Cugir/Romarm/INTRAC Romak-1 · Cugir/Romarm/INTRAC Romak-991 (dimple-less single stack pre WASR import. · FEG/Hungary/KBI/Kassnar Sa-85 variants post and pre ban. · FEG/Hungary/TGI Amd-65 builds (not to be confused with Clearview Investments builds) · Valmet, Literally any of them they’re all excellent. · Arsenal of Bulgaria/Las Vegas/Legion SLR 107 variants, SAM-7 Variants, SLR 101 Variants, SGL-21 Variants · BlueRidge/GordonTech/INTRAC SLR100h builds (Hungarian Type3 AK-55 kits on Bulgarian Receivers) · Norinco/Polytech AK47S series. · Norinco/Polytech MAK90 series milled and stamped models. (on stamped models identify whether it is slant cut or straight when figuring your price to pay. · Norinco/Polyech NHM-91 · Norinco/Polytech MAK-91 (20-inch barrel milled receiver rifle, neutered Polyech legend national match). · Norinco/Polytech Hunters. (great for galil/valmet conversion) · GSAD/Kengs/Siles Type 56, AK47S · Molot Vepr 1&2 models (model 2’s being the integrated front sight gas block set up) · Robinson Arms Molot Vepr Conversions · IWI Galil Ace series. · Izhmash Saiga series. · Intrac Maadi ARM · Century Maadi MISR SA (avoid MISR 90) · Intrac Maadi RPM, RML · Steyr Maadi 5.45×39 AK-74 Variants · Cugir/Romarm/Century SAR-2 · Cugir/Romarm/INTRAC MK-2 · Cugir/Romarm/Ratmil WUM-2 · Cugir/Romarm/Ratmil CUR-2 · 1st Gen Waffen Werks (identified by Nodak Spud receivers and Bulgarian barrels) · Arsenal of Bulgaria/Las Vegas SLR 105-104 variants · Arsenal of Bulgaria/Las Vegas/Legion FIME SGL 31 variants. · Marcolmar/InRange Ak-74/AKS-74 · Molot Vepr 1&2 Series · Robinson Arms Molot Vepr Conversions · Interams Tantal · Izhmash Saiga Variants AK-101/5.56 Ak variants · Romarm/Cugir/Century SAR-3 · Royal Tiger/FB Radom/ Beryl Archer · Arsenal Of Bulgaria/ Las Vegas SLR 106 series ( research serial number prefixes to identify potential problemed models) · Izhmash Saiga Variants · Norinco/Polyech 84S · Norinco/Polytech NHM-90 · Norinco/Polytech BWK-92 · Zastava/Century M85 (cannot verify quality of m85NP series) · Mitchell Arms M-90 · Arsenal USA (not to be confused with KVAR) K100 model. (Bulgarian milled receiver assembled with Bulgarian 5.56 barrel on 74 parts. · Arsenal Of Bulgaria SAM-5 · IMI/IWI Galil and Galil ACE variants · TENN Galil builds. · Valmet M72/65 variants. · Valmet Bullpup. M82? Can’t recall model during time of this list. And yes i know i could use google. Don’t judge me…
So for all you folks new to AKs, take a look a the above. The last AK I bought was an IWI Galil Ace and they are superb.
Interested in an American made AK? Consider Palmetto State Armory (PSA) as a source. Click on the following links for the associated webstore categories for AK-related rifles, pistols and parts at PSA:
I actually have a prime reason – safety. Back when I started SCUBA diving back in the early 1980s, 3,000 PSI 80 cubic foot air tanks were the rage. One of the things they drilled into us during our classes was that this much air pressure needed to be respected. You made sure your tanks were taken care, properly inspected every 5 years via a process known as ‘hydro testing” and you even loaded them in your care secured the valve forward because if the valve broke off then the main body of the tank would take off like a rocket as the air escaped and you didn’t want it coming forward towards you!
At any rate, I had safety top of mind when I started reading on HPA cylinders. Folks, there are cheap virtually generic tanks out there that I would not trust. As I visited the various PCP airgun vendors, I would note what brands of HPA cylinders they would carry and Omega was a brand that I saw repeatedly.
I’m not saying Omega is the only brand to look at by the way – it’s brand I decided on when I looked at price, reviews, and availability. The pandemic has thrown off supplies of just about everything these days.
Omega is a brand you ought to consider because they are owned by the Korean firm Inocom who has done a lot of R&D of carbon fiber HPA cylinders for fire and rescue, medical, SCUBA diving and even PCP airguns — which is what we are talking about today. Inocom produces over 150,000 cylinders a years that conform to a bunch of different standards and my point is that they know their stuff.
In the US, you can find Omega Air Cylinders at a number of different vendors including Airguns of Arizona, Talon Air, and many other places. I bought my particular 18 cubic foot tank from Airguns of Airzona (AofA) because they had them in stock — the relatively small 18 cubic foot tanks can be hard to track down.
Airguns of Airzona Video
AofA took the time to assemble a video review of the Omega tanks. There are a number of sizes and you can spend quite a bit before you know it.
But what about those cheap generic tanks on Amazon and eBay?
I’m not a fan of taking unnecessary risks when it comes to high pressure air. That is a ton of pressure to gamble with. I would much rather spend the money and buy a tank made by a reputable vendor. I suppose you could always a cheap tank to a dive shop that can do hydro testing and have them check it but why go to the extra work and expense?
Out of the box
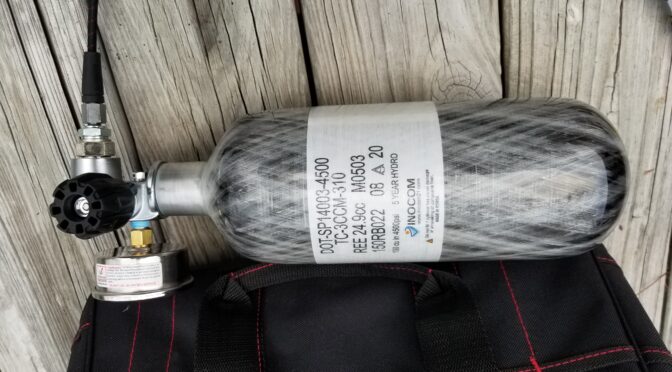
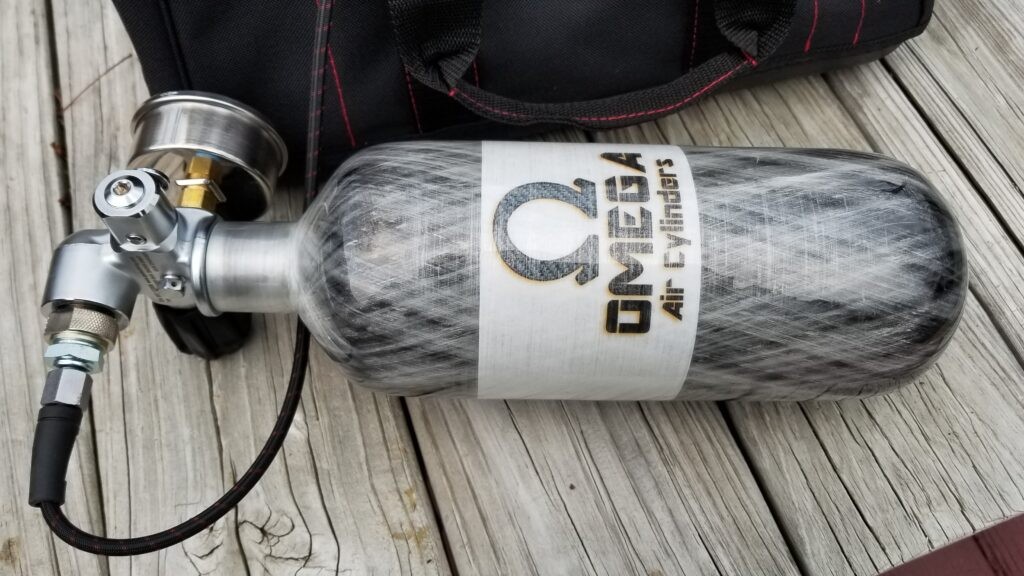
The Omega arrived just a few days after I ordered it from Airguns of Arizona and boy did it look nice. I’ve always liked the look of real carbon fiber and the tank looked awesome. It also comes with the meter long no-kink hose that also converts from the air tank fitting to a 1/8″ BSPP threaded end that comes with a foster fitting already installed.
The carbon fiber work is visually stunning. Wow.
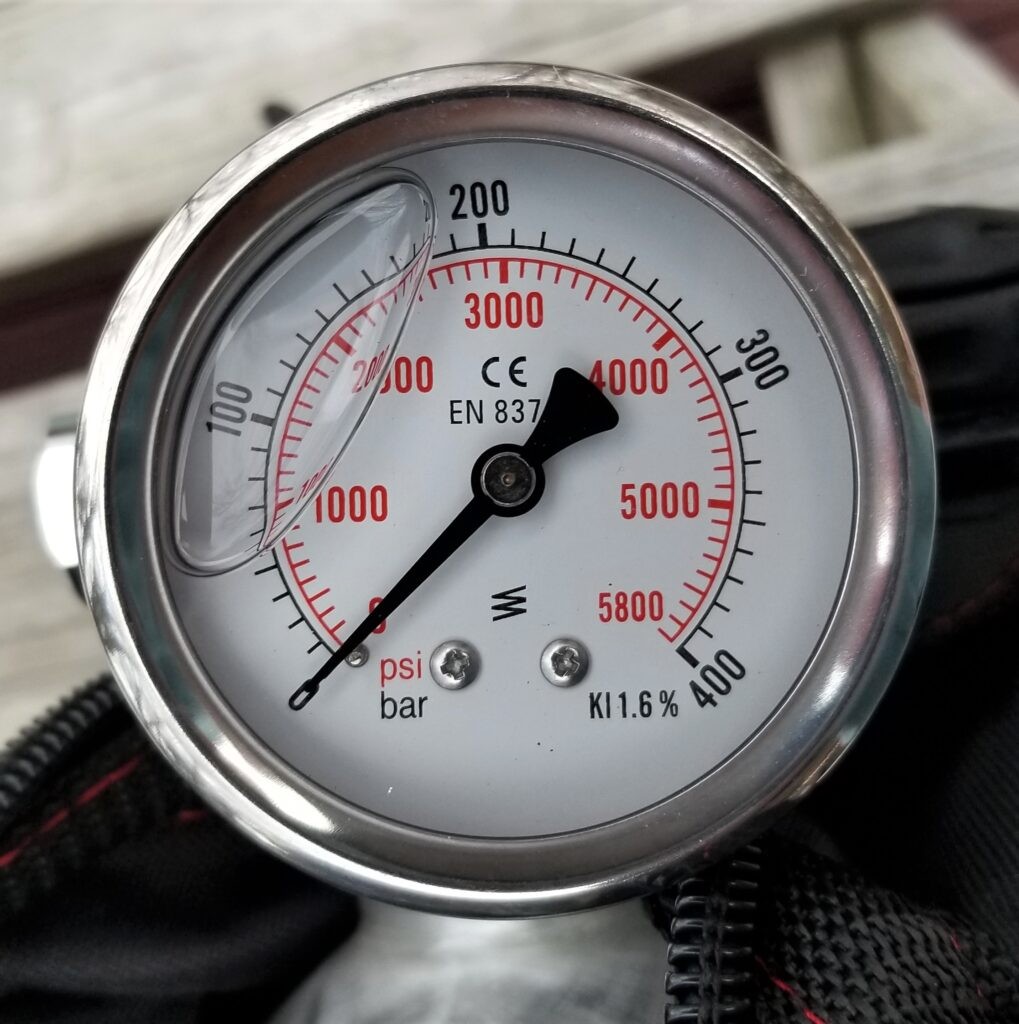
It comes with a really nice oil filled pressure gauge that tells you the pressure in the line – not the tank. If you want to know the pressure in the tank, you would need to put a dead-head, or test fitting, into the quick release foster fitting in the hose and pressurize the line.
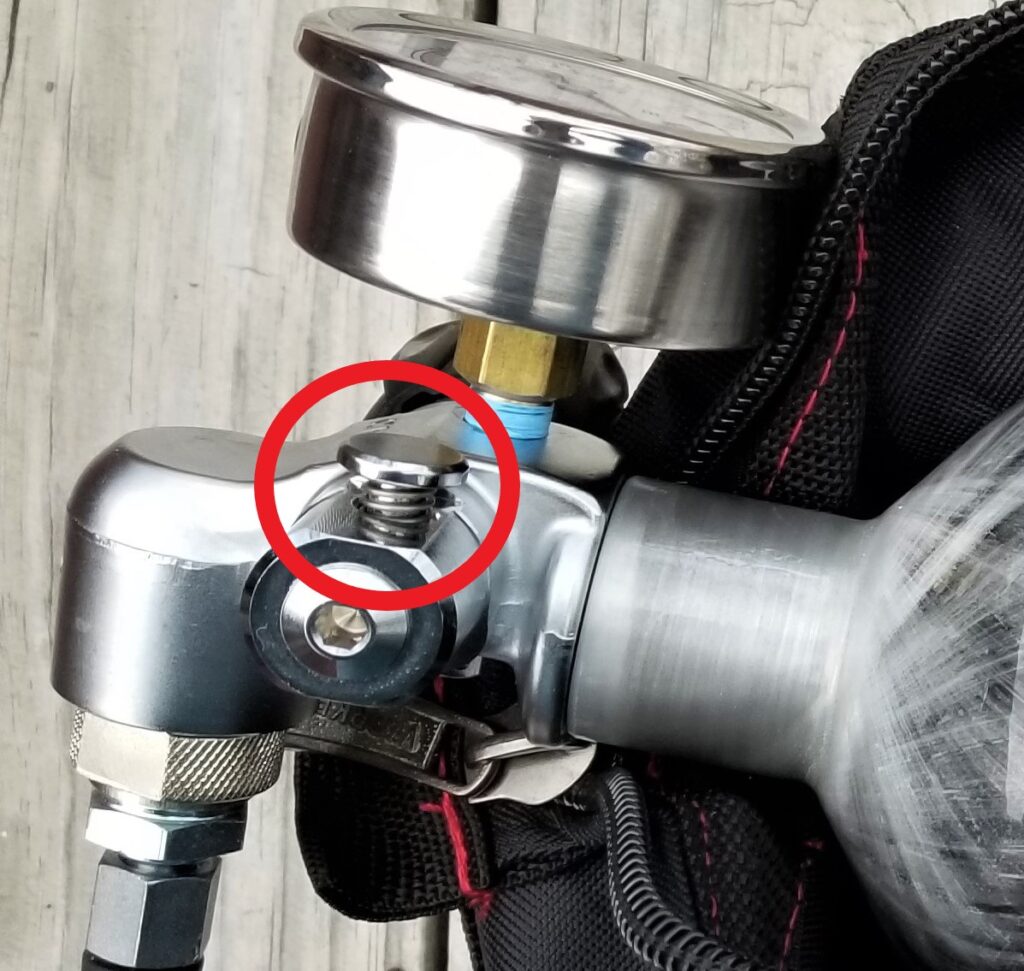
Inside the red circle in the photo is the pressure relief button that depressurizes the line when pressed.
Protecting Your Investment – Get a Bag
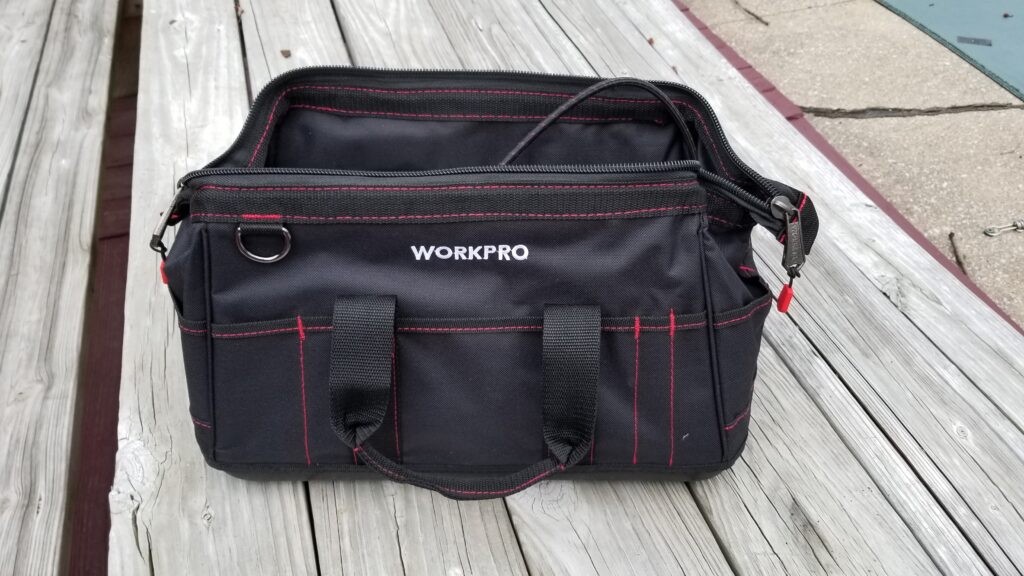
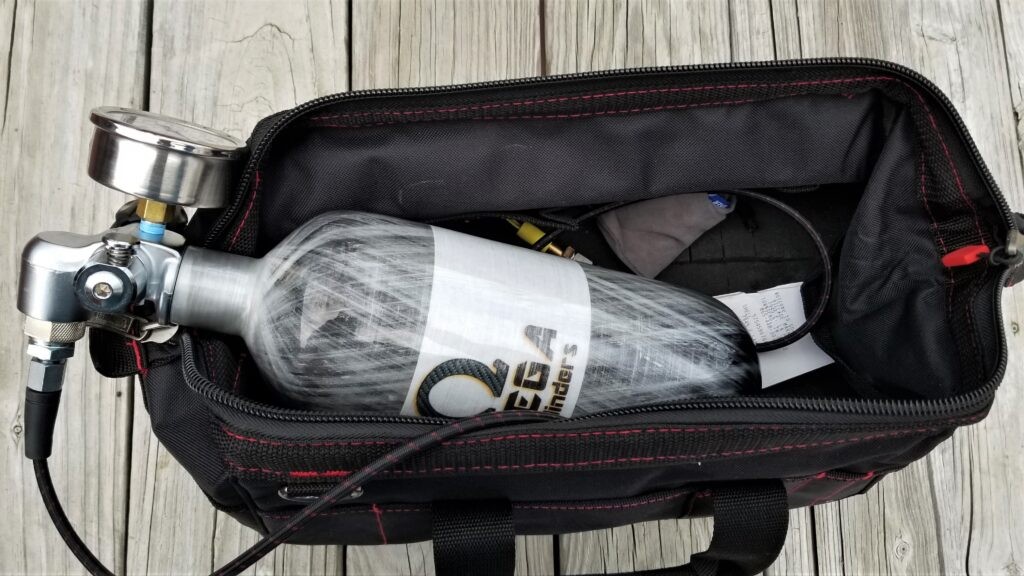
As cool as carbon fiber is, I would recommend protecting it from getting cut or gouged with a bag. I bought a Workpro 16″ tool bag off Amazon and the tank fits great. I did add old gun case foam to the bottom of the bag for some added protection.
I have the tank pulled part way out for the photo. It fits with the fill line installed, no problem. You can see the pluckable foam that I put in the bottom. The bag also gives me room for spare fittings – they are in that small grey pouch you see.
Filling the Tank – Remember Your Compressor’s Duty Cycle
Okay, first off, bear in mind that your compressor likely has a duty cycle. In other words, it was designed to run for a certain number of minutes and then be allowed to cool down for another amount of minutes. For my GX CS3, the duty cycle is to run for up to 30 minutes and then be allowed to cool for 20 with the cooling fan running.
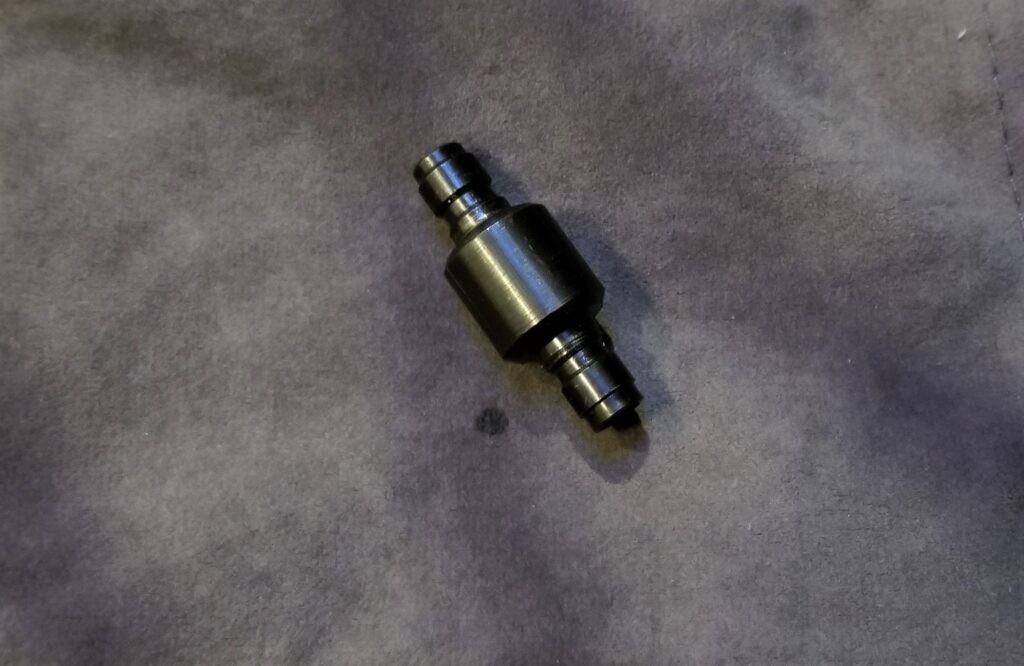
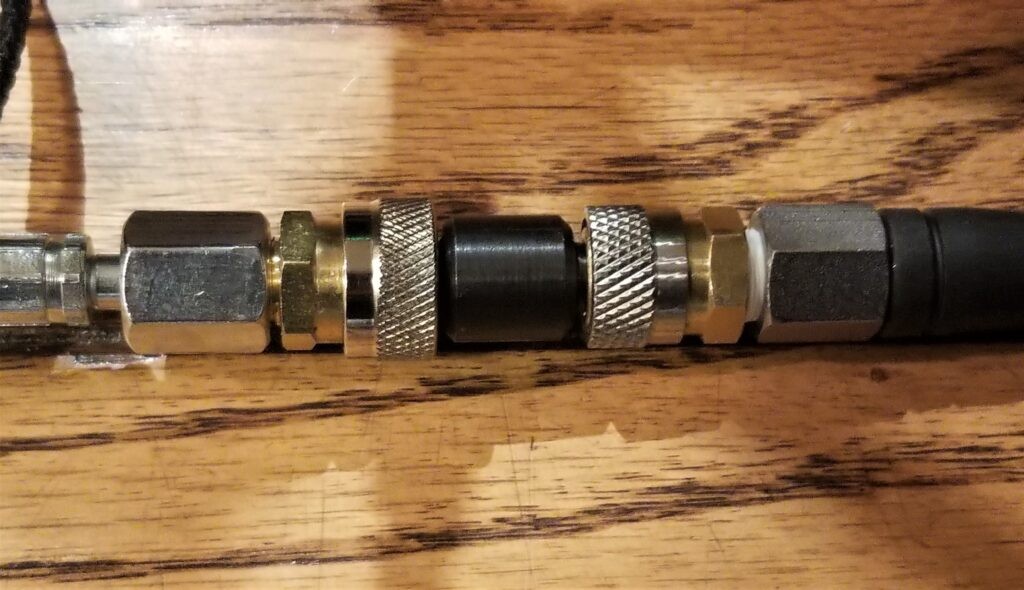
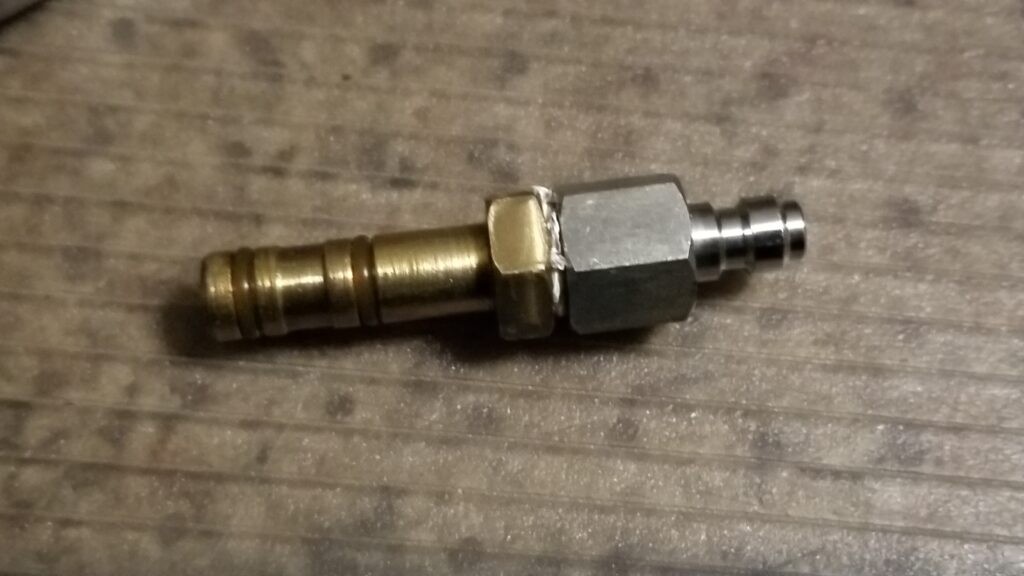
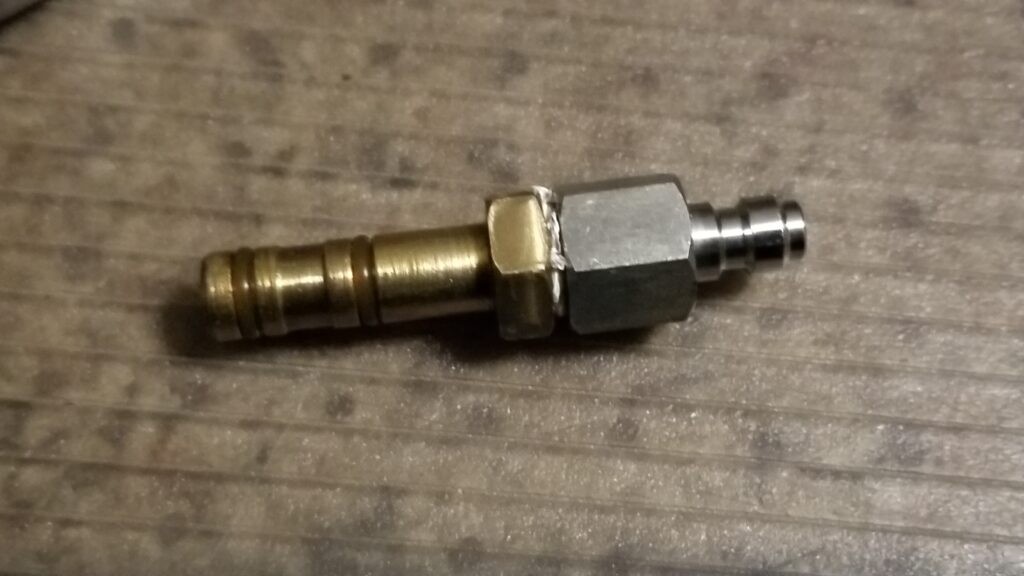
To connect the GX CS3 to the tank, I used an Air Venturi foster fitting male-to-male adapter plug. This fitting will allow you to connect the female foster fitting on the compressor to the female foster fitting of the tank.
This is an Air Venturi brand male-to-male Foster fitting adapter.
The male-to-make Foster fitting adapter allows us to easily join the two airlines together via their quick detach fittings.
So what do we do first? Test the lines
Assuming you tested your pump and know that it holds air, we need to next test the fitting and airline from the compressor to the tank. You do this by keeping the tank’s air valve closed and then pressurizing the airline only in steps.
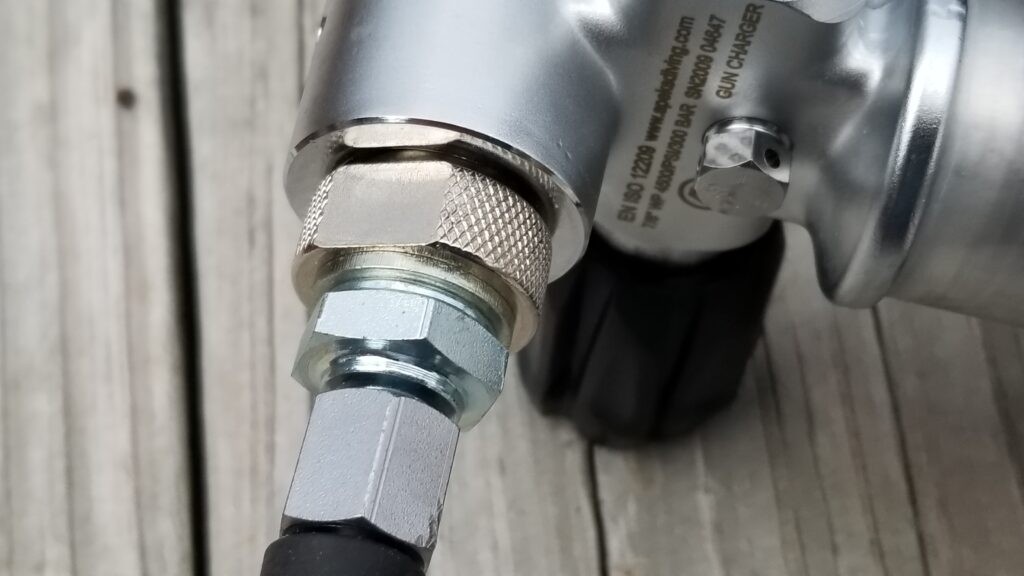
I found out immediately that air was leaking where the airline connected with the tank and used a wrench to snug the fitting down. Note, do not use your hand to look for high-pressure air leaks – use soapy water and look for bubbles.
During testing, I found that air was leaking out of this fitting. Some people say you can install this fitting by hand and it will seal. Due to carpal tunnel, I probably do not have the strength of many and I did use a wrench on the flat sections of the fitting to snug it up and everything sealed beautifully.
So, I pressurized the lined to 1,000 PSI after I fixed the above and watched the pressure gauge for a few minutes. It held. I then opened the bleed valve on pump and let the air out.
I repeated the above going to 2,000, then 3,000, then 4,000 and finally 4,500 pounds. In all cases the line held pressure after the initial tightening down of the air fitting to the tank.
Filling the tank itself
By now I was feeling comfortable with the compressor. I decided to run the compressor in 25 minute cycles to see how far it would get and how warm the exhaust air would get.
At 25 minutes, the tank had reached 2,200 PSI. I could hear the pump was making a different sound as it was operating under load but nothing scary like metal on metal grinding. I turned off the pump but let the cooling fan keep running for 20 minutes.
I restarted the pump and in another 25 minutes, the tank air pressure increased to 4,100 pounds. I used a Fluke IR thermometer to measure the exhaust vent and it was at 116F degrees (for reference, the floor measured 67F next to it. I measured temperature at a few other places too out of curiosity: Top of the case was 105.8F. Neck of the cylinder was 92F, the male-to-male coupling was 76F and the top of the power supply case was 86F. Nothing alarming in short.
I let the unit sit and cool for 20 minutes. The exhaust vent had cooled to 91F. Almost 3 minutes and 24 seconds after restarting the tank reached about 4,500 PSI and the compressor automatically shut off.
I watched the air pressure for a few minutes and it held. That was a good sign.
Interestingly, when I bled the line about a teaspoon of water came out of the pump. The GX CS3 does come with an internal water and oil separator. I do plan to add filters both to the pump and the tank just to be sure – I am real nit picky about having clean air – it comes from my plastics business. At any rate, I will report more on the filters later.
Conclusion
The Omega tank worked without a hitch and I am very happy. I filled my Hatsan Gladius Long from the tank and boy was that easy. My old Hill Mk.4 hand pump has served me well and is now a back up just in case but now that I have a compressor and tank, my life just got a whole bunch easier.
I did need to put a Foster fitting on my Hatsan fill probe. This has made the probe very portable as I can now put it on the tank, the compressor or the Hill hand pump. One recommendation is to stick with the same brand of Foster fittings – this is an Air Venturi female 1/8″ BSPP adapter to male foster plug.
I hope you found this post useful.
Here are the GX compressors from the CS4 down to the CS1
FastToBuy 30Mpa Oil Water Filter – Not a GX product but I recommend this filter and you need one between the compressor and your tank or PCP airgun. You will need an extra hose from it to your tank or airgun plus the proper fittings.
2/2/2021 Update: The tank is working great. It is incredibly convenient to have this tank around to top off airguns. I used to dread breaking out the hand air pump and now it’s just a matter of a few second and the gun is full again. The GX3 compressor has proven itself to be a great addition also.
Note, I have to buy all of my parts – nothing here was paid for by sponsors, etc. I do make a small amount if you click on an ad and buy something but that is it. You’re getting my real opinion on stuff.
Current Version Does Not Require Additional Water or Grease
Unlike other pumps, you do not need to add water or oil/grease to this pump. You take it out of the box and run it. I even contacted the seller just to confirm because they still include the old instruction guide that says to add grease and the Amazon listing says you do not need to do so anymore. In short, it’s ready to go out of box.
Take the time to read the very brief owner’s guide/instructions. If the Amazon listing still says you do not need grease and there is no grease supplied, that part of the guide is outdated. You can still see what they say about testing, their exploded parts diagram, etc.
Set up and Testing
Here’s what I did and would recommend to a new owner:
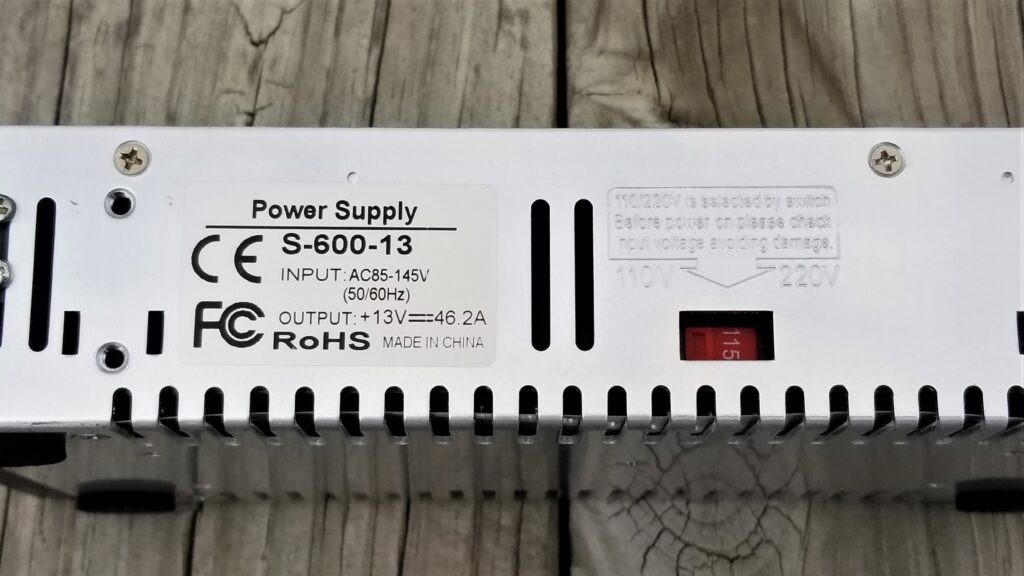
1. Make sure the AC power adapter’s input voltage switch is set accordingly.
If you are in the US, the switch should be on 110V. You only need to do this once.
Do not plug it into the AC power yet. You need to connect the pump first.
2. Connect the pump’s power cables to the adapter.
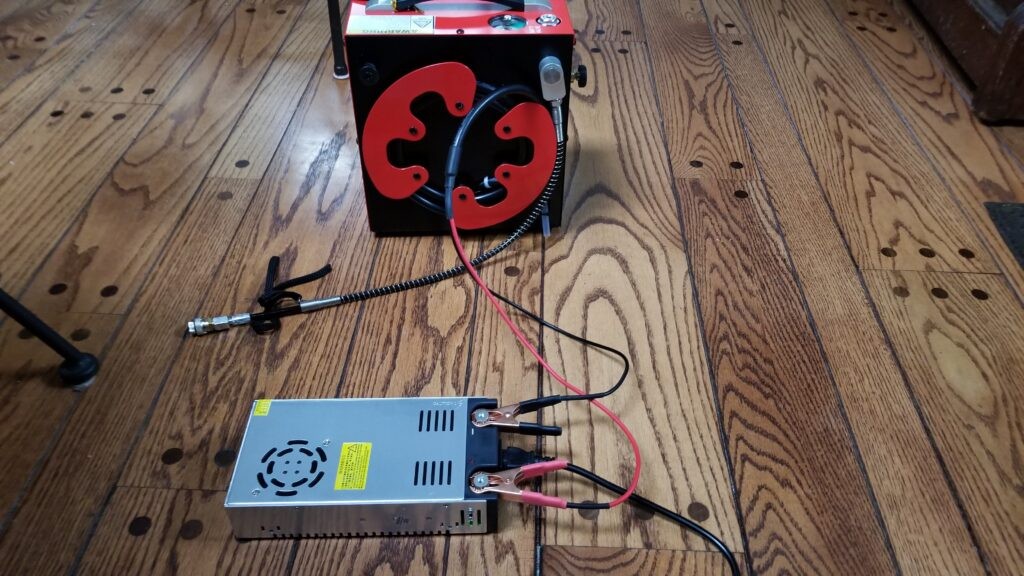
First, I connected the power clamps to the AC adapter and then plugged the AC adapter into the wall. I debated testing the power to see if I was getting 12-13 volts but decided to just run with it. Note, there is no power switch on the adapter so connect the clamps from the pump to the compressor and then plug the power adapter into the wall.
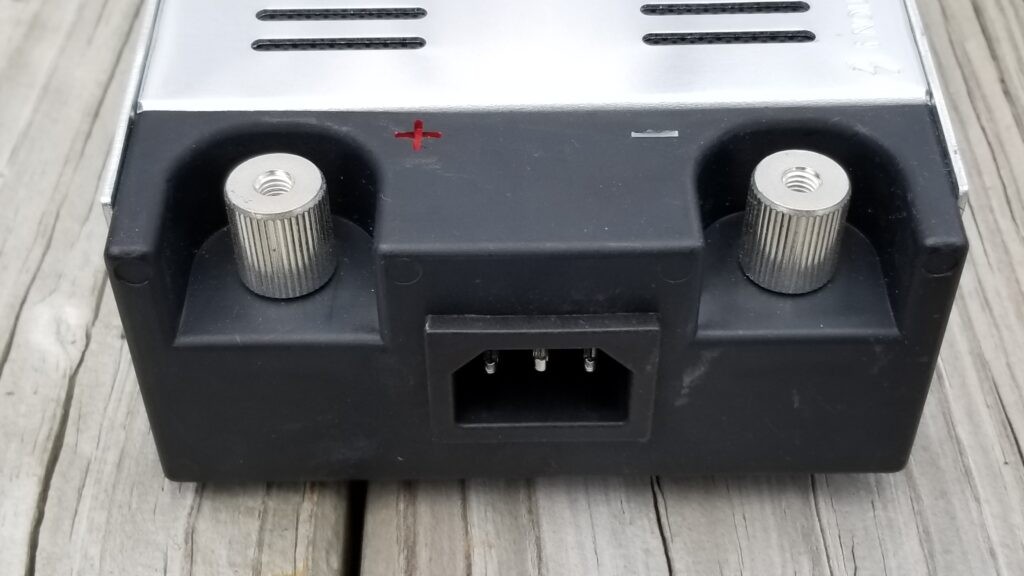
Important: Connect the pump’s power leads to the AC adapter first before you plug it in. Also, mke absolutely sure the red power line is clamped to the red “+” terminal and the black line is to the white “-” terminal. Do not reverse the polarities.
The power cord to the wall plugs into the bottom receptacles. The red clamp from the pump plugs to the red “+” and the black cord plugs to the white “-“.
You can see the lower AC cord socket. This is your normal office plug so you have tons of cord options if you need to replace the cord down the road. There are also lots of AC adapters on the market with a very similar set up – just make sure they output 13V and and least 46.2 amps to support the compressor.
So your setup should look something like the above at this point.
With the power adapter plugged into the wall, the cooling fan on top should start right away and that is how you know it is running. If it does not, use a test meter to check the AC power cord for 110-120 volts. If the cord is good then see if you have 12-13 volts at the terminals. You will need to contact the vendor as the fan is critical for cooling even if you do have power. If there is no output power then the vendor needs to replace the power adapter.
If the fan is running, let’s go to the next step.
3. Testing the pump and line
Set up really is that easy. At this point, it was time to turn on the pump and pressure test the line. To do this, the maker supplies a test Foster plug that goes into to supplied female Foster fitting.
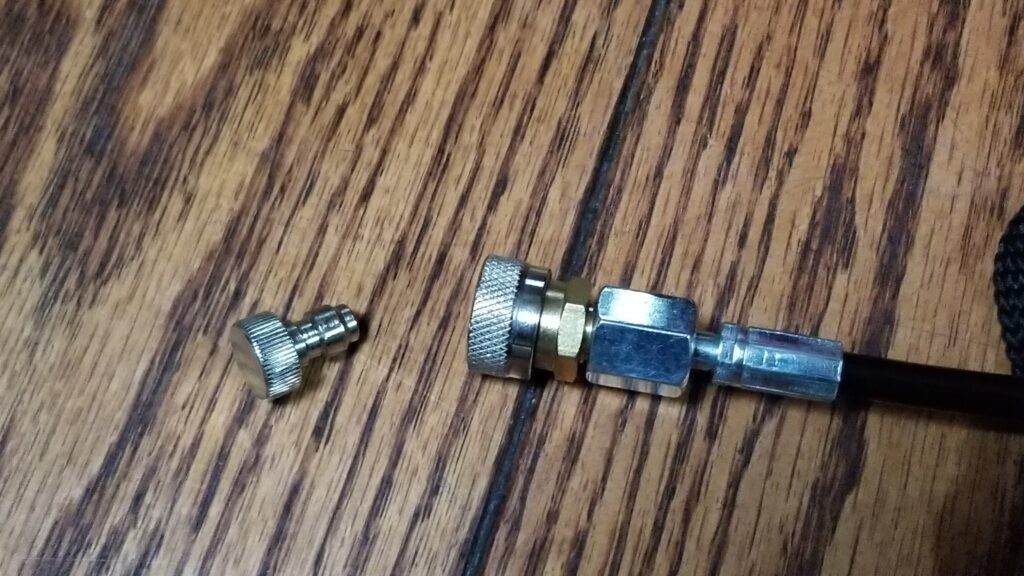
The test plug, sometimes called a dead head plug or dead head fitting is to the left. The female Foster fitting that is pre-installed on the pump’s airline is to the right. Pulling that silver collar back from the end will release whatever is inserted into the coupling.
Note, my test plug came already installed in the end of those. In general, I like the idea of keeping the test plug inserted when the pump is not in use to help keep the fitting clean.
Two things, the quick connect fittings on HPA lines, tanks and guns is known as “Foster” fittings and you have the make plugs and female couplers with a locking ring you slide back to release the male plug. They are a really handy means to switch between filling different things – tanks, guns, certain types of fill probes, etc. Just make sure you get fittings that are rated for the pressure you need. For example, I’ll be filling tanks up to 4,500 PSI so my fittings are all rated for 5,000 PSI.
If you mix fittings between vendors, there’s a risk of a leak due to tolerances stacking the wrong way. In other words, vendor X and vendor Y might have slightly different allowances during machining and when you combine them, there is enough of a gap for air to leak out. With this in mind, I try to stick with Air Venturi brand fittings and if I have a problem, I swap out the fitting in question with one from that brand and I keep spares on hand just in case. Note, they can also wear out from repeated use as well – another good reason to have a few spares.
This is my Hatsan fill probe with an Air Venturi foster fitting on it. Note, the pipe thread on these fittings and air lines is 1/8″ BSPP – British Standard Parallel Pipe. It is not NPT. Use quality pipe tape or a Dowty washer to seal the threads. Here, I am using quality pipe tape.
My Testing Procedure
I am paranoid. If something is going to break, I want it to happen with the lowest air pressure and volume of air behind it that I can get. Right now, we need to test the pump itself, the air line and fittings that came with tank.
WARNING: Never run your hand over a charged high pressure air line and fittings in search of leaks. You run the risk of injecting high pressure air into your blood and having an embolism. Either spray soapy water on the suspect and look for bubbles or even dip the area in soapy water.
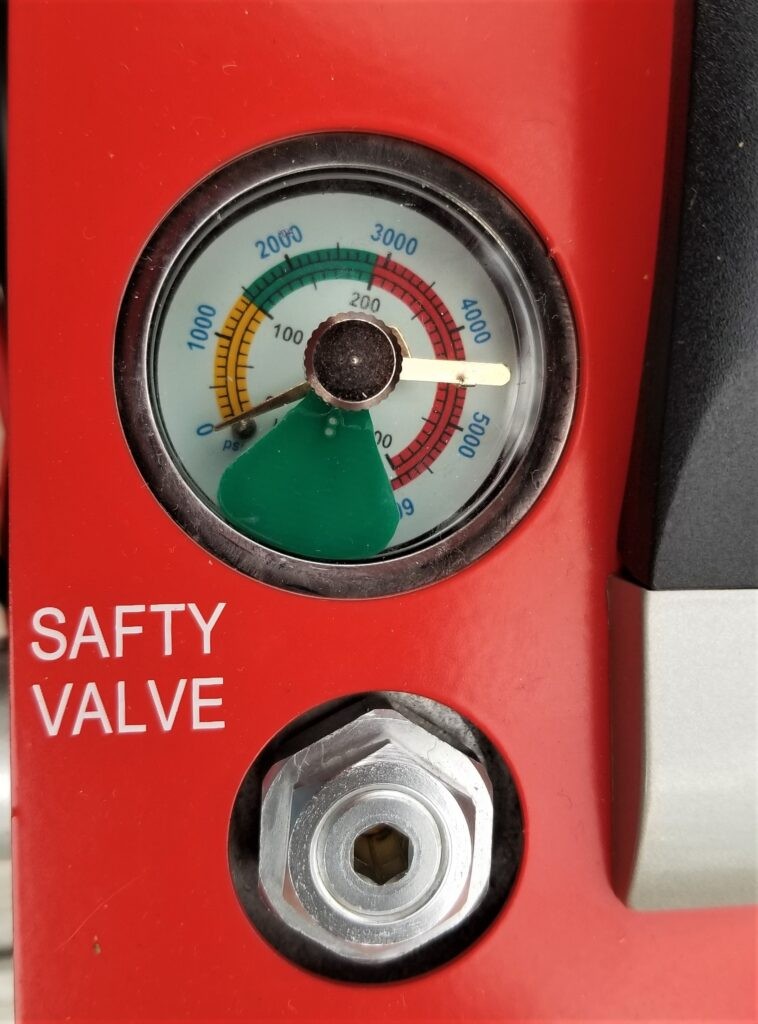
Please note that the gauge has a dial indicator you move around to the air pressure limit you want the pump to stop at. You can move this dial around by turning the silver knob at top. Here, my pump is set to turn off at 4,500 PSI. You would set your’s at the limit whatever you plan to fill. Note how the indicator has both PSI and bar settings. If your airgun has a limit of 200 bar, you would set it to 200 bar for example. You will likely find some difference between what the pump says the pressure is vs. your tank or airgun by the way. For safety, stick with whichever value is lower. If you set the pump to 200 bar and your airgun reports it is past 200 bar then stop the pump and bleed some air off. Adjust your dial so you do not exceed the maximum pressure of the device you are filling. When in doubt, play it safe.
Here is what I did to test my pump and fittings and if you are not comfortable with any of it, please do not do it (safety first):
Ensure the test fitting is installed in the end of the Foster fitting of the pump’s air line.
Set the air pressure limit on top to 1,000 pounds.
Flip the toggle switch as the base of the pump to On.
Push the start button on the front of the pump. If it does not turn on, double check the power connections. You should also hear the relatively loud cooling fan turn on in the pump at the same time. If it will not turn on or you don’t hear the cooling fan once it does, you will need to contact your vendor. My fan turned on when I pushed the silver start button on the unit.
The pump should start and in a few seconds pressurize the line to 1,000 PSI. If not, then contact the vendor.
By the way, the pump better shut off at the assigned 1,000 PSI limit. If not then this is a serious safety concern and you should contact the vendor.
With the pump off and the line charged, watch the pressure gauge for 30-60 seconds. If the pressure falls then that means there is a leak somewhere and you should contact the vendor. If it stays steady, go to the next step. If you want to wait for longer, you certainly can.
Open the bleed valve and release the air pressure. Water from condensation may come out the drain tube on the side and that is fine. It may, it may not.
Next, turn the dial up to 2,000 PSI and repeat the above test. We are increasing the pressure in steps testing the unit. You do not need to go higher than you plan to use the unit — stop where you want. For me, I am going up to 4,500 PSI for my carbon fiber tank so I drained and filled the line several times.
Also, none of these incremental tests should take more than 10-15 seconds to complete.
Do it again at 3,000 PSI.
Do it again at 4,000 PSI.
Do it one last time at 4,500 PSI.
I’m happy to say that my new pump system passed all the tests!
If you run into any problems with the above, contact the vendor. You do not want to void your warranty or get hurt so don’t go taking things apart – talk to the vendor first. I can’t stress that enough. HPA systems require knowledge to service safely and you will probably be far better off exchanging for a whole new pump vs. taking things apart.
That translucent tube is where condensation will blow out from when you open the bleed off valve.
Duty Cycle
Please note that this compressor has a duty cycle that you must keep in mind. It is designed to run for up to 30 minutes straight and then it needs to cool for 20 minutes. Leave the unit powered on so the fan can help cool it off. So, if you have a big tank to fill, keep this in mind. You can fill it but do so in however many steps you need to honor this duty cycle.
Video Of It Running
I’m going to put this video both here and in the introductory blog post. Today, I recorded a quick video as I topped off my tank today – January 7, 2022. It ran for about 20 minutes as I took that tank from about 3,000 to 4,500 PSI.
When done, I let the unit’s fan run for about 10 minutes until the air coming out was cool again. Since the unit is air cooled, give it time for the fan to do just that. I also bled off the unit to replace air pressure and get rid of any condensation.
Note the odd double filter rig I am running in the video – that’s just because the double-male Foster fitting will not seat all the way in the big filter’s female fitting. I need to replace it with an Air Venturi brand fitting some day when I have time.
Safety comment: Never try to force fittings apart after a fill. Most likely there is high pressure air that needs to be bled out of the lines. With that big inline filter, the output side from it to the tank stays under pressure so I need to bleed down both the compressor and tank sides before I can safely disconnect the various fittings. Just remember to think things through carefully before you force a fitting off – high pressure air dangerous.
Conclusion
Hopefully your system passed the tests and you are now ready to fill your tank or device. If you had problems, be sure to reach out to the vendor and ask questions. I found them both helpful and responsive.
FastToBuy 30Mpa Oil Water Filter – Not a GX product but I recommend this filter and you need one between the compressor and your tank or PCP airgun. You will need an extra hose from it to your tank or airgun plus the proper fittings.
2/2/2021 Update: The compressor is still working great. No problems at all!
Note, I have to buy all of my parts – nothing here was paid for by sponsors, etc. I do make a small amount if you click on an ad and buy something but that is it. You’re getting my real opinion on stuff.
Folks, I think Pre-Charged Pneumatic (PCP) airguns are awesome. They have an onboard high-pressure cylinder that holds enough air to shoot a certain number of rounds before needing to be recharged. After years of having your basic pneumatic and spring-piston air rifles, I bought my first PCP, a Hatsan Gladius Long in .22, back in May of 2017 and a Hill Mk IV hand pump. In this post I want to recap what your options are and then talk about move into the world of having my own compressor.
You Have Three Options To Fill PCP Airguns
To fill a PCP airgun, you have three options: own a hand pump, have an air cylinder or own a compressor. For almost three and a half years, I’ve used a Hill Mk IV hand pump to top off the Gladius and it has worked well. These pumps are like an old fashioned bike tire pump on serious steroids as they can enable you to fill a cylinder with thousands of pounds of air pressure. By the way, the secret to longevity with a hand pump is to keep the shaft lubricated to protect the O-rings with silicone grease and to not overheat parts if you are doing a lot of pumping.
The second option is to have an air tank that you would take to your local dive shop and have them fill it to 3,000 to 4,500 pounds. You would then use this to top off your airgun until it too was low and you’d go back to the dive shop to get the tank refilled. We do have a dive shop in the area but this never appealed to me because I didn’t shoot enough to need a tank vs. the hand pump. I also figured that I could use the hand pump any time day or night as needed. You can only refill an air tank if the dive shop is open or you own your own compressor.
Now, this brings us to the third option and that is to own a high pressure air (HPA) compressor. These are not what you get for a garage and air tools – those only go to 175-200 pounds. With PCP airguns, you are talking 3,000-4,500 PSI depending on the rating of the tank or airgun you are filling. What stopped many people for years was that these HPA compressors were a fortune and then crossed below $1,000 a few years ago and now you can see inexpensive units from China that are below $400 but they require water cooling, lubrication, and don’t always get good reviews (some do though).
In many cases, you get what you pay for. The decent HPA compressors start at $800 and go up from there. In 2019, I ran across an HPA compressor on Amazon that I had not heard about before – the manufacturer was Ankul and the model was the GX CS3 compressor. The price was around $500 and it was getting good reviews. At the time, I didn’t really need it so I added it to be “Save For Later” list in Amazon just in case.
Maybe 3-4 times since then, I would open up the listing and read the reviews. You know what? The reviews stayed solid over time. Ankul released an updated model that was air cooled – no more water to deal with – and it was self-lubricated and didn’t need the user to add oil or grease. What’s more, the reviews stayed positive – it scores a 4.6 out of 5 with 196 reviews. That’s pretty good. So guess what? I bought one.
Please note that I paid full price for the compressor. This was not a paid review and I’ve never been contacted by the seller. This is my honest opinion based on my experience with the compressor – I will get a small commission if you actually order one of Amazon but that’s it.
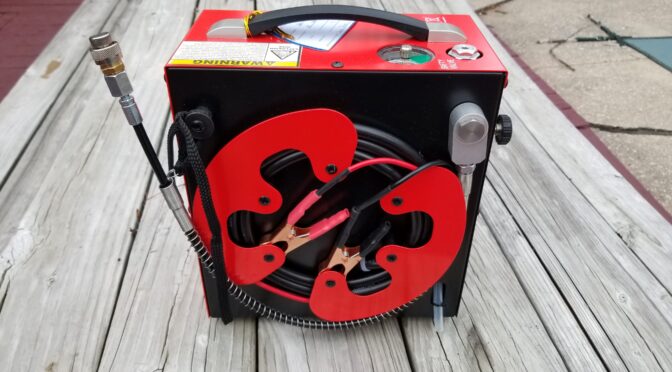
It can run off house current with the supplied inverter or it can clamp to a 12 volt vehicle battery
There is an automatic-off switch where you can set the pressure via a dial and when it reaches it, the unit shuts off. This gauge is labeled both with PSI and BAR increments.
It has an integral filter for oil and water
There are three over pressure safeties – the user sets the pressure on the dial plus there is both a safety valve and a burst disc to help prevent a catastrophe.
They claimed the unit ran fairly quietly at 75 decibels (this puts it somewhere between average street noise or being in a shower at 70 db and city traffic or a vacuum cleaner being at 80)
The unit is maintenance free – no water/antifreeze to deal with or oil or grease to add.
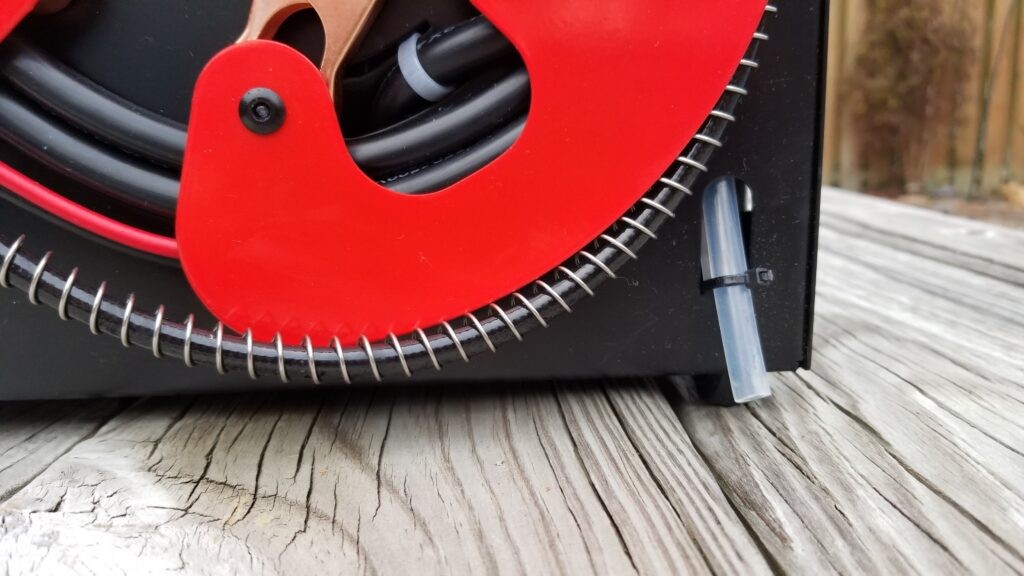
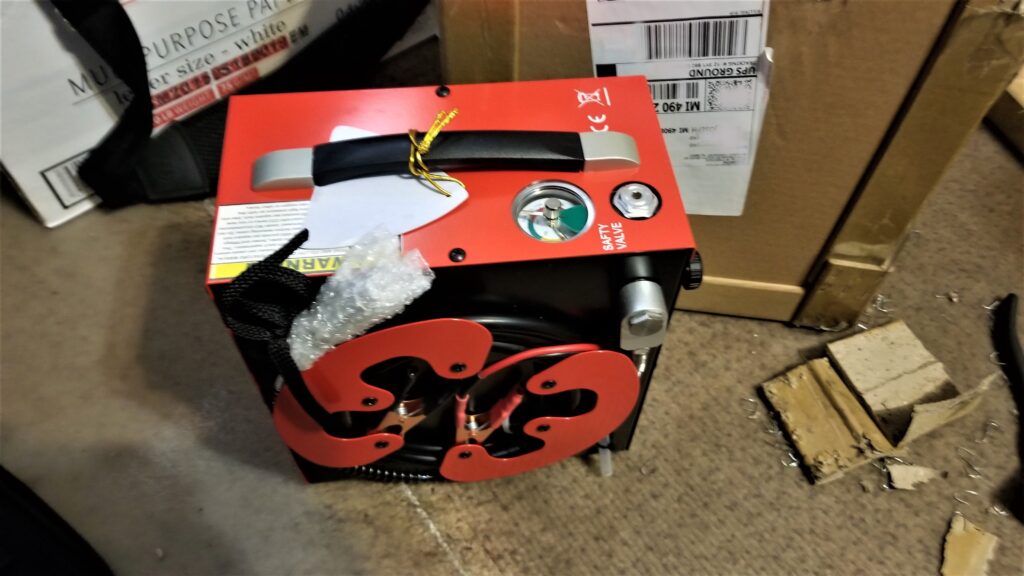
The design was elegant with a spool on the side to hold the power cable, the high pressure hose could rotate and there was a carry handle
The pump unit measures 10-3/4″ tall, 5-1/8″ wide and just under 9-1/2″ deep — it’s remarkably small – most of my laptop computer bags are bigger and these measures are based on my unit.
The duty cycle is 30 minutes run-time and then 20 minutes to cool
The unit only weighs 19 pounds 6 oz (I weighed my pump unit)
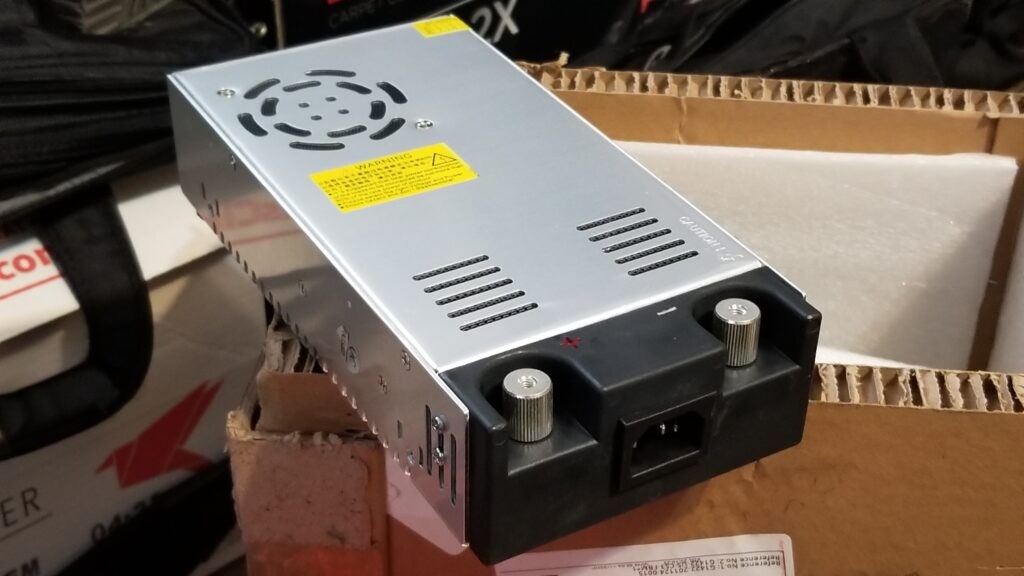
The AC adapter is separate and measures about 8.85″ long x 4.52″ wide x 2.36″ tall and weighs 1 pound 14 oz with the cord.
2/8/23 Update: GX is really taking the affordable PCP high pressure compressor market seriously. The CS3 model, that this blog post is about, is aimed at 1.5 Liter and smaller air cylinders. They now have a CS4 aimed at tanks up to 6.8 Liters (I now have a CS4 and really like it) and they even have smaller and larger capacity units. By doing this, they are giving you a bunch of selections that you can choose from given the air capacity you need and your budget. Click here for the GX lineup on Amazon.com.
Unboxing it
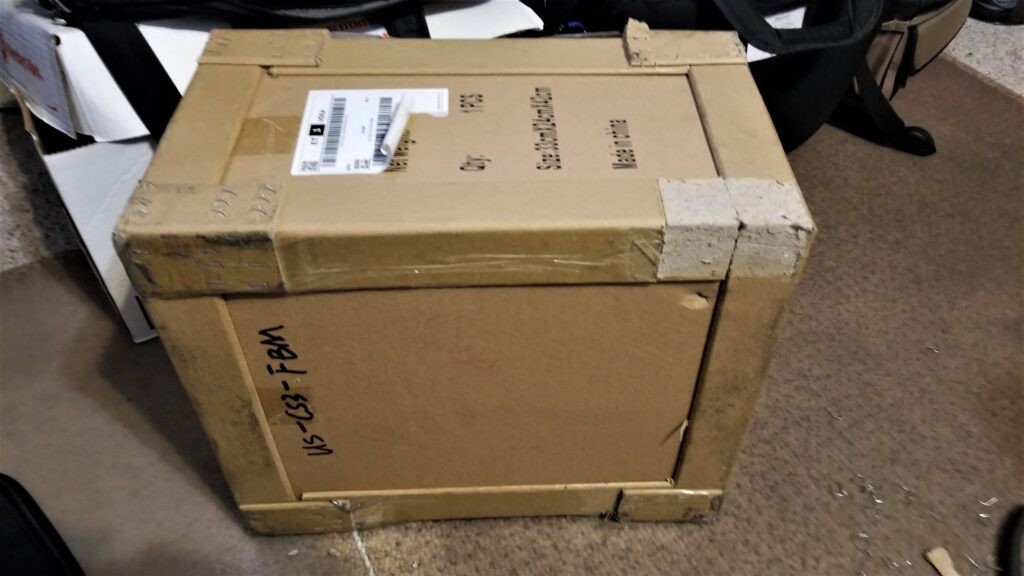
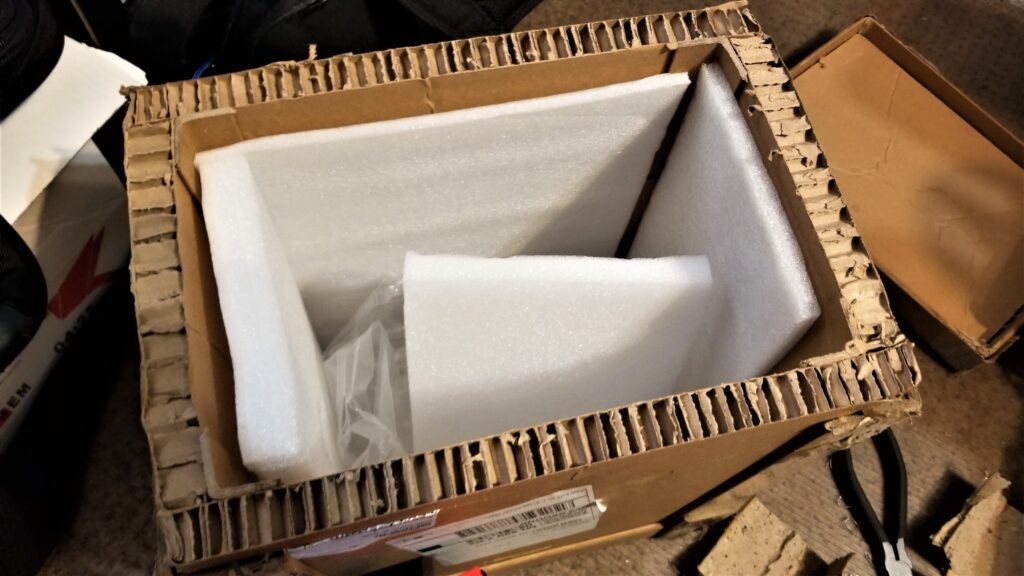
I ordered the unit on a Monday and it was delivered five days later on Saturday by UPS. The pump and power adapter were packed together in one amazingly well packed box. How often do you here somebody comment on a box? This thing was made from thick cardboard and was practically like opening a wood crate and inside was thick foam cushions protecting the air pump and power adapter from all angles.
I had removed the upper right corner reinforcement already when it dawned on me I better take a quick photo. Tip: Just remove the corner braces and the end cap will slide off. You do not need to disassemble the whole box.
I don’t know who the packaging engineer was but he needs some serious recognition, a beer or both. It was one of the best packed tools that I have seen in a long time. It’s no wonder that my unit arrived in great shape.
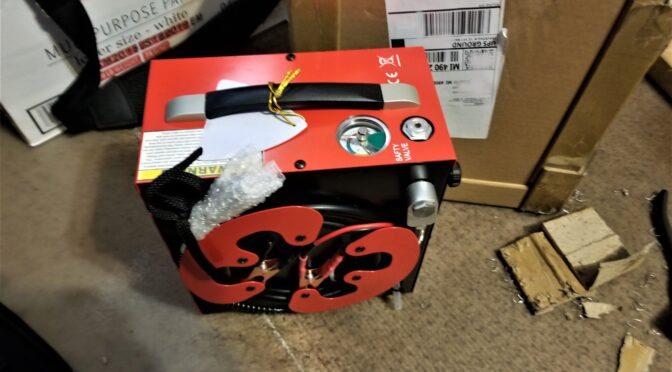
Here’s a quick photo of the unit out of the box. Everything was in great shape.
This is the 12 volt power adapter. It’s very straight forward – plug it in and it is running and the fan keeps it cool.
Video Of It Running
I’m going to put this video both here and in the set up blog post. Today, I recorded a quick video as I topped off my tank today – January 7, 2022. It ran for about 20 minutes as I took that tank from about 3,000 to 4,500 PSI.
When done, I let the unit’s fan run for about 10 minutes until the air coming out was cool again. Since the unit is air cooled, give it time for the fan to do just that. I also bled off the unit to replace air pressure and get rid of any condensation.
Note the odd double filter rig I am running in the video – that’s just because the double-male Foster fitting will not seat all the way in the big filter’s female fitting. I need to replace it with an Air Venturi brand fitting some day when I have time.
Safety comment: Never try to force fittings apart after a fill. Most likely there is high pressure air that needs to be bled out of the lines. With that big inline filter, the output side from it to the tank stays under pressure so I need to bleed down both the compressor and tank sides before I can safely disconnect the various fittings. Just remember to think things through carefully before you force a fitting off – high pressure air dangerous.
Conclusion
https://blog.roninsgrips.com/setting-up-and-testing-the-gx-cs3-pcp-air-compressor/The unit arrived in great shape and as described. In the next post, I’ll review how to set up, test and use the unit. Again, here’s the link on Amazon and I will jump ahead a bit and tell you that I recommend the unit based on my experience with it so far:
Here are the GX compressors from the CS4 down to the CS1
FastToBuy 30Mpa Oil Water Filter – Not a GX product but I recommend this filter and you need one between the compressor and your tank or PCP airgun. You will need an extra hose from it to your tank or airgun plus the proper fittings.
2/4/23 – GX has released the CS4. The CS3 is aimed at 1.5L and smaller cylinders. The CS4 can handle 6.8L cylinders as it is water cooled. You have two options now. Click here for a new blog post about the CS4.
01/07/2022 Update: Just topped off my tank. Still working just fine.Added a video above so folks can see and hear it run.
10/23/2021 Update: Still no problems. I’m very happy with this purchase. So you know, at this point I am using 1-2x per month to refill my Omega bottle. I’m not shooting as much as I was earlier this summer.
3/4/2021 Update: Still no problems at all. I use my Omega 18 cu ft air tank to top of the FX Compact Impact until it gets down and then I use the GX GS3 to top the bottle back off. I’m really pleased with how this has worked out.
2/2/2021 Update: The compressor is still working great. No problems at all!
2/4/2023 Update: Still working just fine!
Note, I have to buy all of my parts – nothing here was paid for by sponsors, etc. I do make a small amount if you click on an ad and buy something but that is it. You’re getting my real opinion on stuff.