Tag Archives: SpitJack

The SpitJack Rotisserie System – Part Two: Grilling Our First Pig Philippine Lechon Style

In the first post I told you about the buying the SpitJack rotisserie system. I told my wife we better cook a test pig because I didn’t want the picnic the day after the wedding to be my first time cooking a pig. She agreed we better cook a test pig and we decided on July 1st.

The first thing I had to figure out was where to buy one. I’d read you can often get them at Hispanic groceries and while we tried, there was a big language barrier so we decided to keep searching. One of my best friends, John, recommended I try a local butcher shop down in Buchanan, Michigan, named Lowery’s Meat and Grocery. I talked to a great lady named Wanda who patiently answered my questions and offered up advice. Whatever size pig I ordered was the minimum weight and I would pay for the final weigh when I picked it up.

We settled on a 60 pound pig at $2.99/pound to be picked up on Friday, June 30. It would be a freshly slaughtered pig and I would need to put a deposit down two weeks before. “Cool” I thought and we made the 22 mile drive and paid our deposit. We knew where the store was but had never gone despite living in the area for almost 30 years.

As time got closer, my wife realized we had invited a lot of people and maybe we better bump the pig up to 70 pounds. I called Lowery’s, talked to Wanda again and if I ordered a 75 pound pig I would get a discount and it would be about $2.74/pound but the pig would likely be at least 8 pounds as they were having problems finding smaller pigs. “Ok – cool” I told her.

What is the recipe for lechon?

To keep the timeframe somewhat right, let’s switch gears to the recipe. My wife and I watched videos on Youtube, read blog posts and recipe websights about how to do lechon. It dawned on us that the recipe depends on the family – even the individual. Like so many recipes it can vary tremendously – one family will add hot peppers to the stuffing and another will not. One will use banana leaves and another will not, etc. There are no measures because it depends on the size of the pig, how firmly you stuff it, what ingredients you prefer, the ratios you prefer, and so forth.

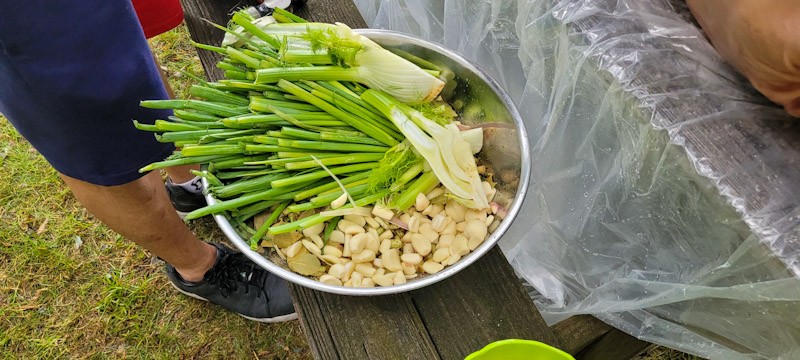
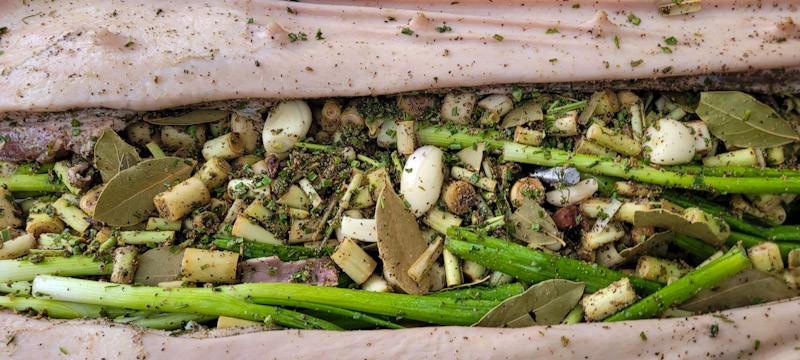
We knew our pig was going to have a pretty big cavity to stuff but really had no idea for sure so we bought extra of everything. Here is our list for the stuffing:

  • Coarse salt
  • Bay leaves
  • Black pepper
  • Garlic
  • Green Onions
  • We put in fennel but will not do so again
  • Lemon grass – it looks like thich stalks of green onion and has a slight lemon smell but without the acid taste of the citrus fruit
  • Shallots
  • Banana Leaves
  • Sinigang Mix – this is a tamarind soup mix and two popular brands are Mama Sita and Knorr. We used Mama Sita.

What to baste with was all over the board as well – evaporated milk, canola oil, olive oil, drippings, and even Sprite. Well, we figured we would rub the skin with salt and maybe some drippings.

Charcoal

This is something you are going to need a lot of. I was told to plan at least a pound of charcoal per pound of pig and have 20 pounds just in case. So, an 80 pound pig would take 80 pounds of charcoal plus 20 pounds just in case is 100 pounds. Well, I went to Sam’s club and bought 120 pounds of Kingsford hardwood charcoal.

Over the coarse of a week I also made about 40-60 pounds of charcoal from our own wood supply. I’d put 2-4″ logs in my smoker, get it good and hot and then close the dampners and smother the fire. I’d let it sit and then scoop out the big chunks and dispose of the ash and tiny stuff.

This means your’s truly had at least 160-ish pounds of charcoal on hand because I didn’t want to run out while cooking. I also figured I could use whatever was left over when we cooked the wedding pig in October.

By the way, a caution I read that makes total sense that I will pass on to you is to not get any of the match light charcoals. They have a fuel impregnated in the charcoal and will pass the taste on to the meat – only use all wood charcoal.

By the way, my youngest daughter’s boyfriend also hooked me up with a bunch of dried cherry wood that I cut into small discs/chunks and put in water on the 30th to let it soak so I could add it on the charcoal for more taste. In general, the trees we cut are oak and maple and they make great for great grilling.

June 30th arrived

Okay, Jeff Lowery, the owner of Lower’s called and told me the freshly slaughtered pigs had arrived and they were all over 100 pounds. “Holy shit” I thought. “So much for starting small and learning”.

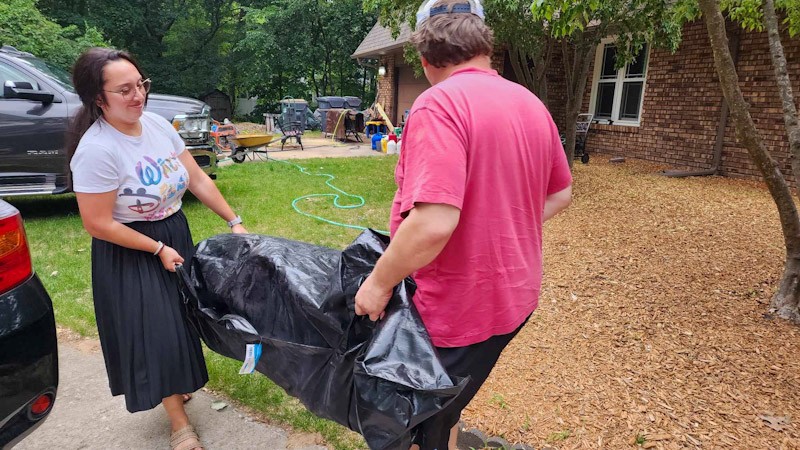
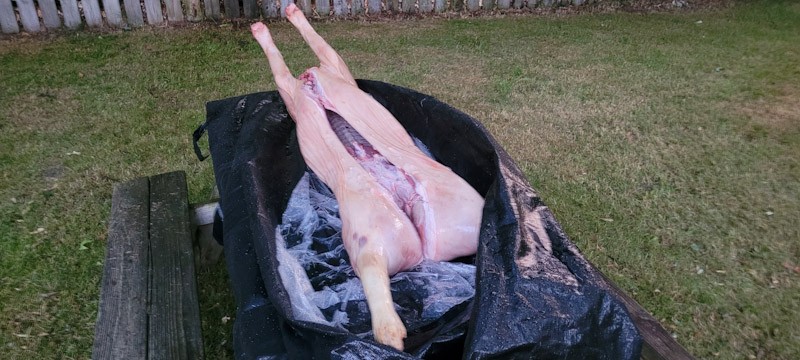
My wife, eldest daughter and I drove my truck down there. I had bought a body bag off Amazon to put the pig in and ice to keep it cold. I also had a few tarps to throw over it to help insulate and keep it cool.

A really nice fellow helped me take it out to my truck, slide it in the body bag and put it in the truck. I was really surprised how stiff the pig was. We poured in the ice, put the tarps on and drove home.

The pig in a plastic bag and then surrounded by four bags of ice were put in the body bag in the back of my pickup. The tarps were to help insulate it.
First we removed the bags of ice and then my eldest daughter helped me move the 101 pound pig from the truck to the kitchen.

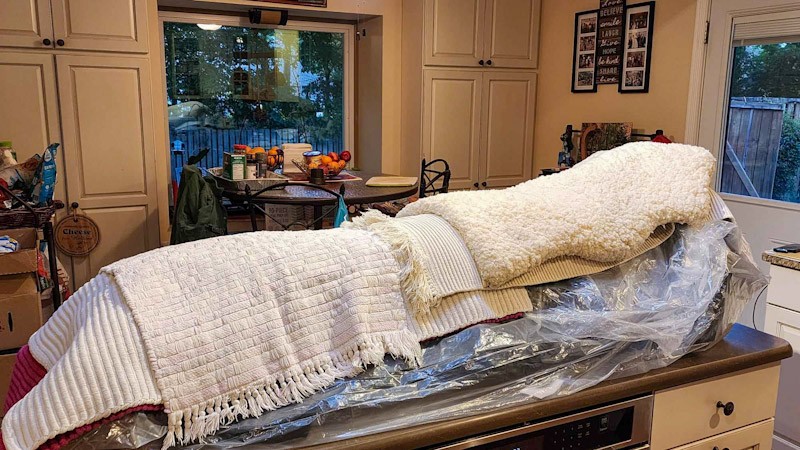
We took the ice bags out of the body bag and carried it into our kitchen where it spent the night on our big kitchen island with all of the ice bag in the bag and covered with towels. It was nice and cold – no worries there,

We covered it with towels and some clean throw rugs to help insulate it. When I walked in the next morning it startled me a tad because it looked like a body on the island before I turned on the light.

We cut up the vegetables for the stuffing as we knew we were looking at close to 12 hours of cooking and we got everything ready that we could. Repeated advice, that I will pass along because I can tell you it is critical, is to prep everything you can the day before.

July First Arrived

My wife is a night owl and had stayed up until almost 3 AM cutting the vegetables and getting stuff ready. I got up at 4:30 and read messages from her about some last minute stuff I needed to buy at the 24 hour grocery, which I did with coffee on hand.

I woke up my brother-in-law, Banduy, a tad after 5am to help me. He and his wife and come down from Toronto and, like me, he loves to cook. He has a natural gift for it.

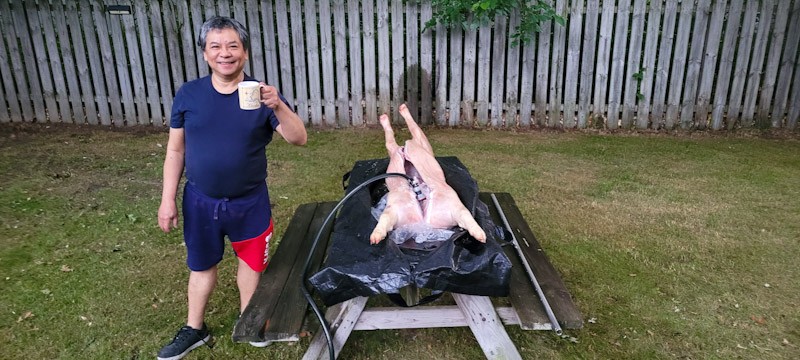
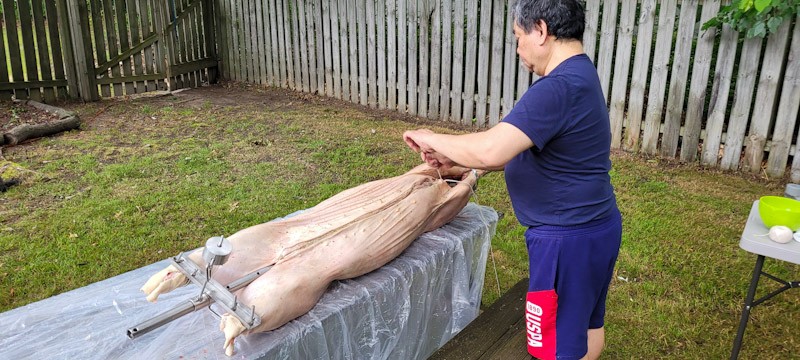
So, we take the pig in the body bag out to the picnic table in the yard near the grilling area to attach it to the spit and stuff it. Now this is where things went sideways.

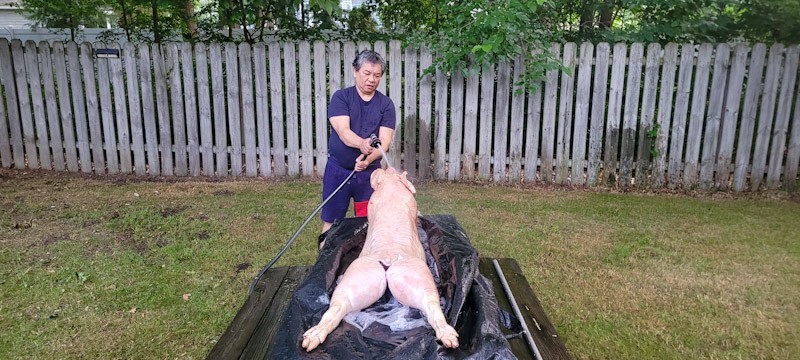
Remember how I said the pig was stiff? We cut open the plastic wrapping and the porker was frozen. I had a serious WTF? moment. We didn’t have time to thaw it but what choice did we have. We took a hose and just started hosing it down. In fact, that is what we did for the next three and a half hours. I was not a happy camper. My wife started contacting guests and telling them we wouldn’t be beating until closer to 7pm and that was a best guess.

Yeah, they are stiff when frozen. Sheesh. The body bag worked great. We only had some small leak on the end where the back legs were. I rinsed it out with bleach and water, let it dry and saved it for the next use.

Luckily running cold water is far more efficient at thawing than air alone – something like 9 times morre efficient if I recall right. At any rate, at about three and a half hours we attached the pig to the pole as best we could.

By 6amwe were chugging coffee and taking turn hosing down the pig.
Apparently smacking a pig on the butt and telling someone “that’s a firm butt” is a lot funnier before 7am than it is the rest of the day. There were a lot of jokes going on along with the coffee.

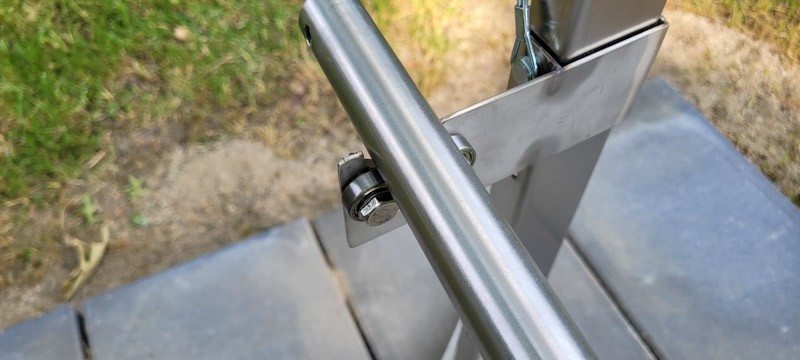
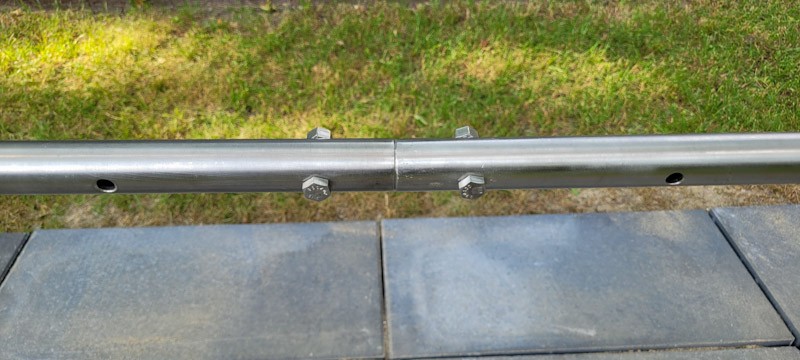
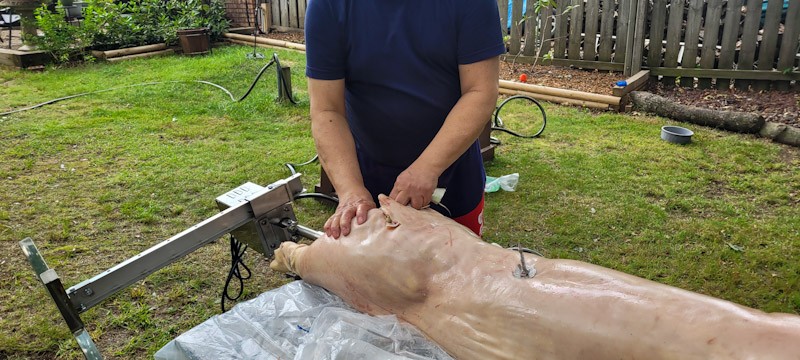
Attaching an animal to the spit is known as “trussing” and there are tons of ways to do it. We were supposed to be able to use some nice 5.5″ stainless U-bolts that came with the system to clamp the spine to the spit but they were too short. Well crap, another lesson – bigger pigs need bigger clamps. SpitJack sells 7.5″ U-bolts and I would recommend them. You can’t adequately secure pig without them. We did use one long threaded rod that came with the system to help secure it but it wasn’t enough. If we had two threaded rods it would have been better.

The 5.5″ U-bolts that came with the CXB85 were not long enough to clamp thhe pig’s spine to the spit. If we had bought the XB1225C it would have had the 8″ U-bolts plus two of these threaded rods. We only had one and centered it. If we had two of them we would have been fine. One rod along would, and did, let things shift.

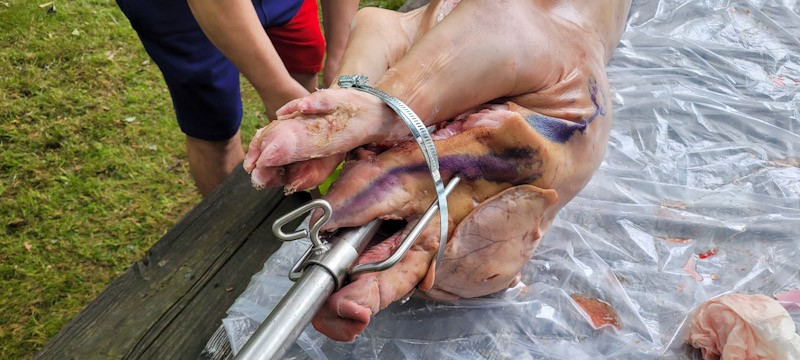
One of the interesting parts of the SpitJack is a shackle system for securing the back legs so they are splayed out. The front legs are secured to the snout via a large hose clamp. Now we ran into another issue, With the legs outstretched the pig was longer than the cooking area. We decided to amputate the pig’s rear legs at the knee to make it shorter.

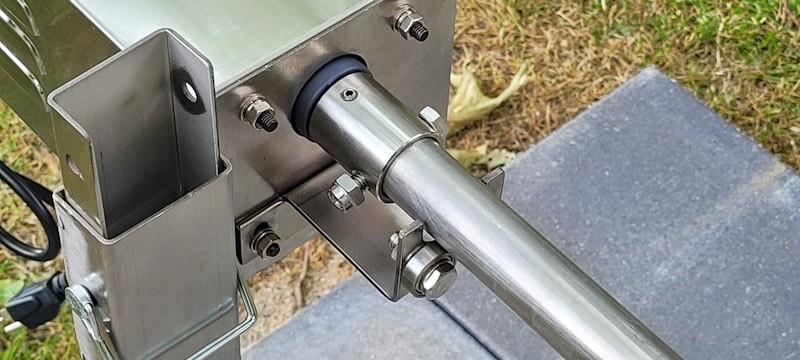
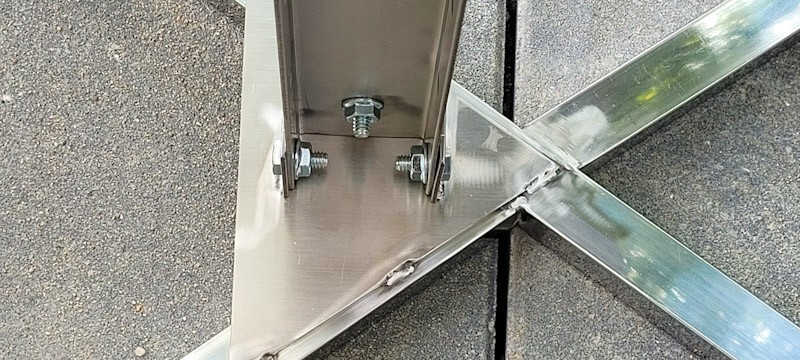
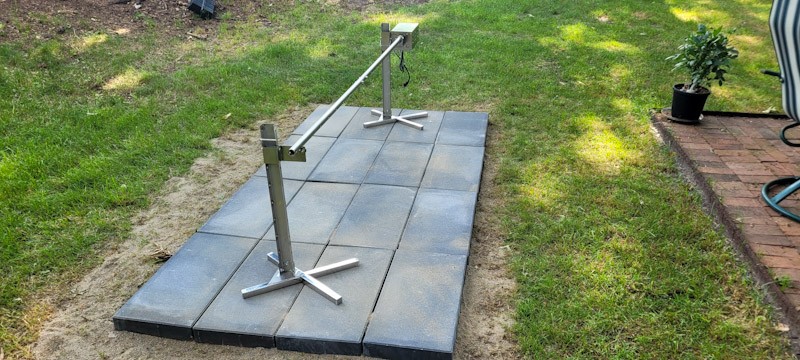
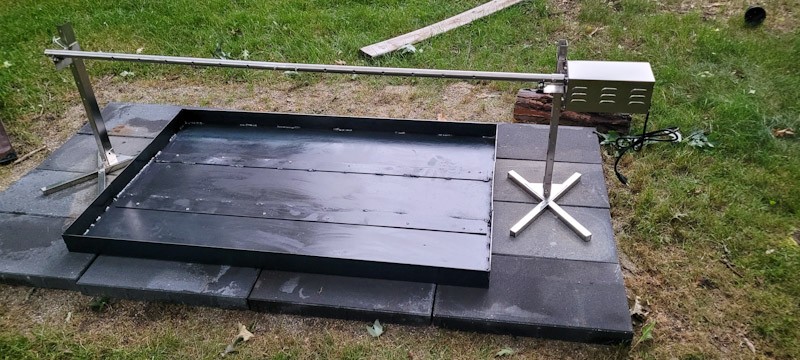
Given the size of the pig, we did install the recommended counter weight opposte of the bulk of the pig and moved the weight out as far as it would go on its retainer rod. This would help balance the load when properly trussed.

The rear legs were going to stick back past the cooking area so Banduy cut the rear legs off at the knees and we installed the shackle. You see the counterweight here too and it is used to help balance the relatively heavy big on the other side. The ball pein hammer was used to drive the threaded rod through the spine – we did what we could with what we had.
We used the large pipe clamp to tuck the front legs up under the jaw and pushed a large spit fork back to the head and front of the pig from moving. We eventually needed to put a piece of wire around to kleep the ears from flopping out. As the pig cooked and shrank, the for was just barely in the skin. We really needed the u-bolts.

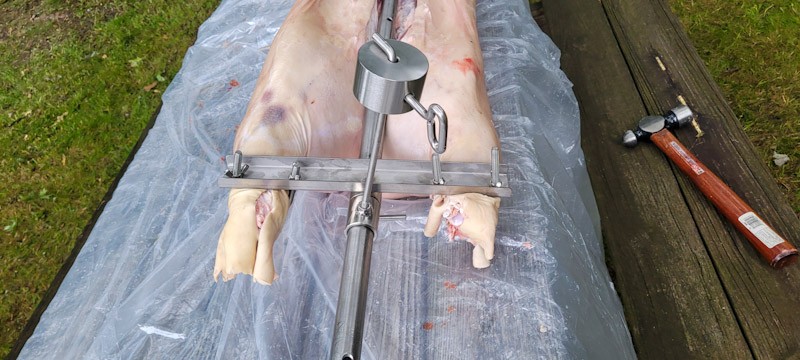
As we were trussing as best we could with what we had, we discovered the pig was a bit rear biased towards the motor. This is not a problem from a turning perspective but if we had looked a tad more carefully we may not have needed to cut the rear legs off below the knee. We were in a rush and just overlooked the bias. Lesson learned – center the pig on the spit, step back and look at it before you start trussing.

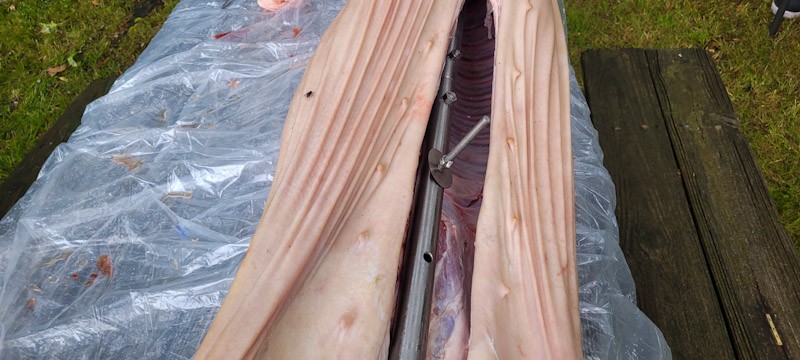
SkipJack gives you a spool of butcher’s twine and a giant needle. Banduy was a doctor years ago and had a ton of experience suturing. He stuffed the pig with the ingredients and then sutured it shut. I joking told him the pig wouldn’t have a scar he did such a good job!

Prepping all the ingredients the night before really paid off. Bandu rubbed coarse salt all over the inside of the cavity.
The big was stuffed full!
Banduy did an internal stitch and then a stitch across the top. There was no way that was opening up.

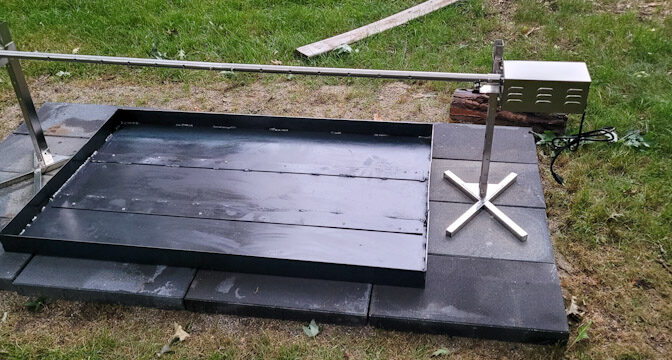
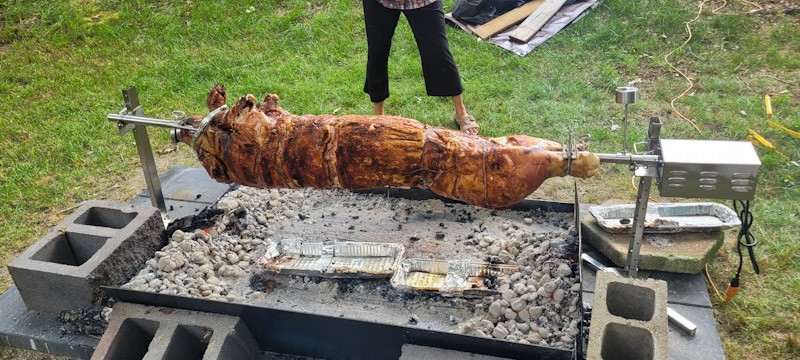
As he was stuffing the pig, I started the charcoal and let it get good and hot. I had an old landscaping rake for moving the coals around. The pig cooks from indirect heat from the sides – you don’t put them right under the pig or you will constantly be fighting flaring flames as dripping fats ignite.

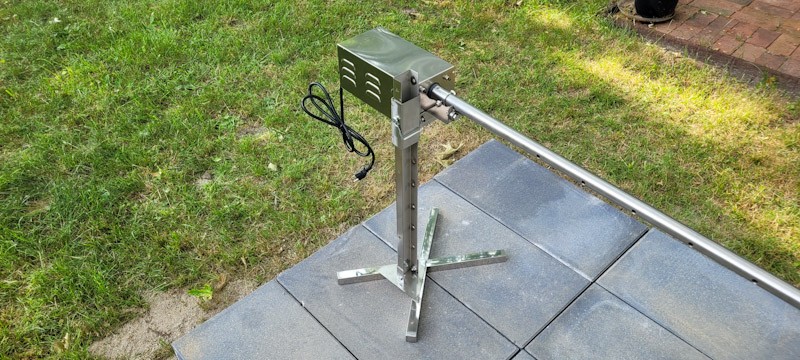
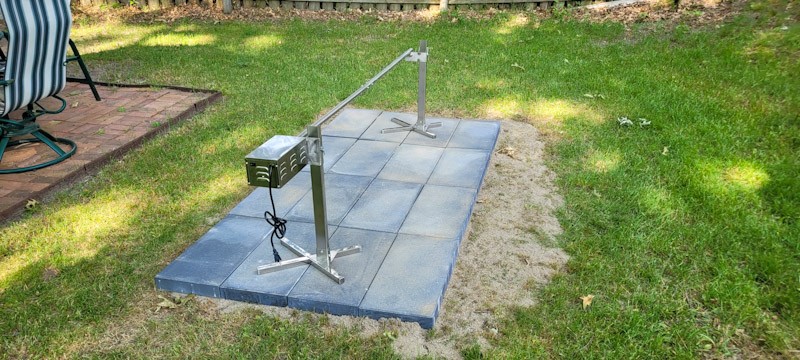
The SkipJack XB85 comes with one dual zone thermometer and we bought a second. They report to you the heat from the coals that is reaching the surface of the pig and the internal heat of the meat like a regular meat probe does. We stuck one on the thick shoulder and one in the rump. They are totally worth it.

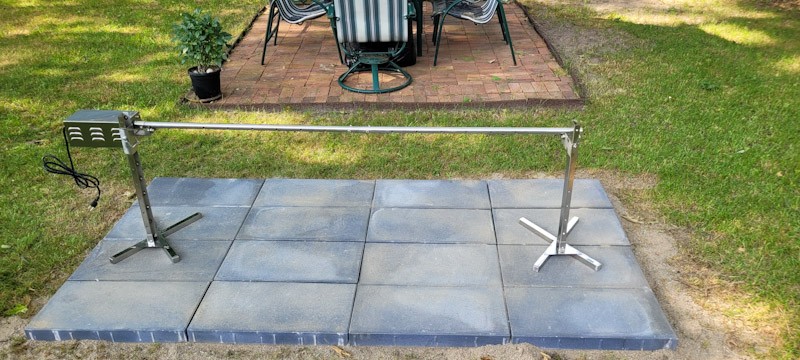
The big carcass weighed 101 pounds and with the stuffing and trussing I guessed it was pushing somewhere around 110-115 pounds. I knew there was no way we could safely attach the motor over the fire so we attached the motor to the spit. I did have to turn it off and on a few times to bump it around so the coupler would like up with the spit attached to the heavy pig.

We installed the motor with the pig on the table. Trying to line up the spit to go in the coupler with the heavy pig wasn’t something I wanted to try,

We then carried the whole thing over – pig and motor to the jack stands over the fire, Holy crap was it hot. We decided going forward we would move the stands and everything to the side before we changed anything vs. trying to work on them close to the coals.

Cooking the pig

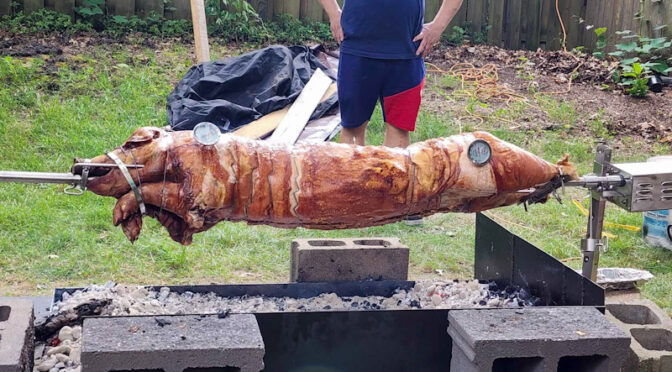
We turned on the power and the pig started rotating. As the bulk of the pig passed over the top it would shift slightly because it wasn’t adequately trussed. Oh man – what to do?

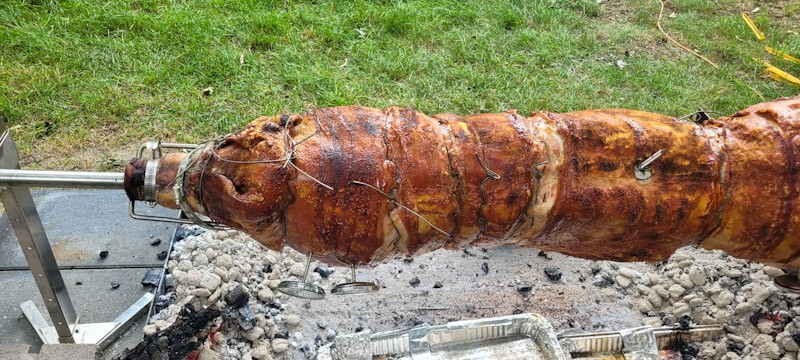
I had some really thick steel wire – maybe 1/8″ or thicker in the shop and thought maybe it would work. Some guys use chicken wire to secure their pig. So, we lifted the whole rostterie system off the coals and set it down to the side. We had high temp barbeque gloves so we could hold the hot metal. It was a three person job. Two people moved the pig, spit and stands and the third made sure everything lined up as we set it back down.

After some trial and error I found that I could put the wire on the pig, twist it down lightly and then use my big linesman’s pliers to twist the wire and form a jig or step about 3/4ths of an inch and what that did was take up some of the loose wire and make it tighter and tigher, So, after adding 4-5 of these impromptu bands on the pig, we put everything back. Also, to make sure the jack stands didn’t move we put a 25-40 pound patio block on the legs for each stand.

The wire bands are what you see going across the brown skin, They did help secure the pig against the spit but the trade off was that the skin tore around them vs, staying intact. Note the piece of sheet metal at the fair end serving as a heat shield to direct heat away from the motor.
See the wire with the kink/jigs bent into it? You can also see the SpitJack dual zone thermometers. The drip pans didn’t really work well. We wound up raking the coals to the sides and had a bare spot in the midde. We did have one tray for collecting some drippings – we may try a different approach next time. Note there are way too many coals we had the pig pretty low. We found a good happy height one hole from the top and fewer coals.

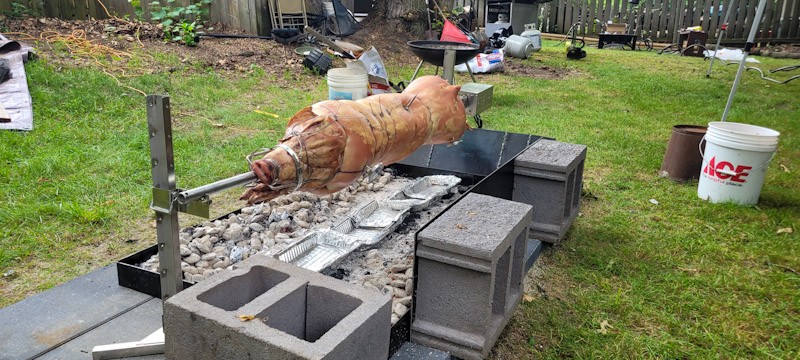
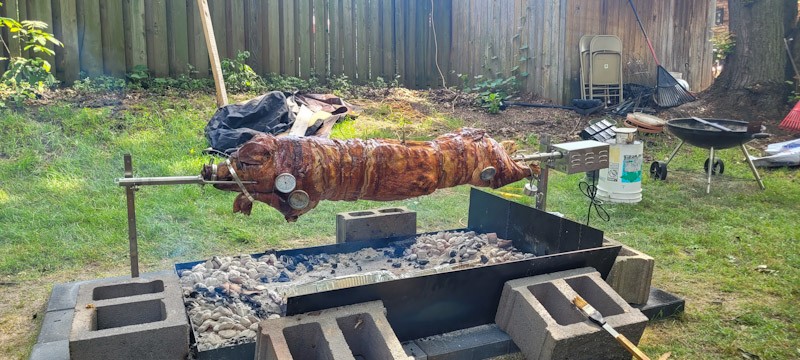
From here we started the long cooking process. You’ll hear guys say “low and slow” and I now know what they mean. The pig cooks over a low heat for a long time. I got the fire too hot at one point and burned some of the skin that we scraped off. The goal is to hit 160F internally – that is the target temperature recommended by the FDA for food safety. You don’t need an insane amount of heat – somewhere between 160 and 200F is fine. You can’t rush it.

We did experiment with the height a bit. You need to be about 8″ off the coals. We also moved two windshields around to block the breeze.

What was driving me nuts was that maybe a couple of hours in the thermometers still hadn’t moved off their minimum low-end pegged position. Were they broken? I went and got another basic meat thermometer from our kitched and shoved it into the shoulder – same thing. You know what? We had thawed most of the pig but not down deep in the thick shoulders and rump. Well, shit. It was what it was.

Around 10am I called Lowery’s and spoke to the owner, Jeff, and told him what happened. I could hear him shout out to someone named “Nate” and asked him if the pigs that were supposed to arrive fresh were instead frozen and I could hear Nate confirm they were. Jeff apologized profusely and gave me a discount. I really appreciated that.

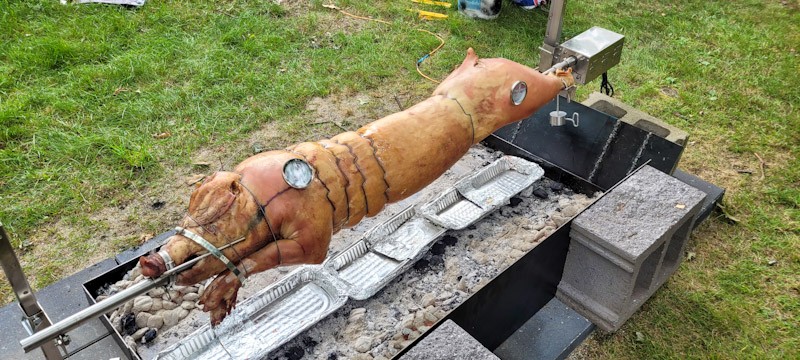
Back to the cooking – the pig actually shrunk dramatically as the fat between the skin and the muscle cooked and dripped off. We had to tighten the fasteners 2-3 times over the hours it cooked. Any hope I had of nice crispy lechon skin disappeared as the wire cut up the skin.

You can see the skin was tearing.
This was shortly after I got it too hot. Banduy scraped the burnt skin off with a knife. We started basting at this point. The Sprite did’t really work very well so we switched to drippings.

BTW, we did trying using Sprite for basting towards the end and it seemed to burn. So, while some may use it – we will not next time. I think we’ll stick with salt and oil to start and switch to drippings as we collectt enough.

We figured out the cold shoulder and rump really set us back. It took quite a while before the internal temperature started comking up. Note the third meat thermometer confirming that the insides really were taking forever to cook.

We cooked the pig for over 10 hours and then decided to pull it from the spit and anybody with rare meat who wanted it cooked more we would grill it the rest of the way on my CharGriller wood grill. So, with high temp gloves on, we carried it over to the picnic table and Banduy started carving off the meat and 90-95% of it was cooked all the way. The deepest parts of the shoulder and rump were the only ones that were rare so we set them to the side.

Weptu the pig back on the picnic table. We put a couple of pieces of cardbard and two layers of aluminim foil on top to hold the pig. The high-temp BBQ gloves were my best friends at this point. A big thank you to Ken for helpign me carry it over.
Banduy immediately started carving it up. We had a bunch of hungry people waiting on us by that time.
Here’s another view. He literally cut up the whole pig separating meat from bones.

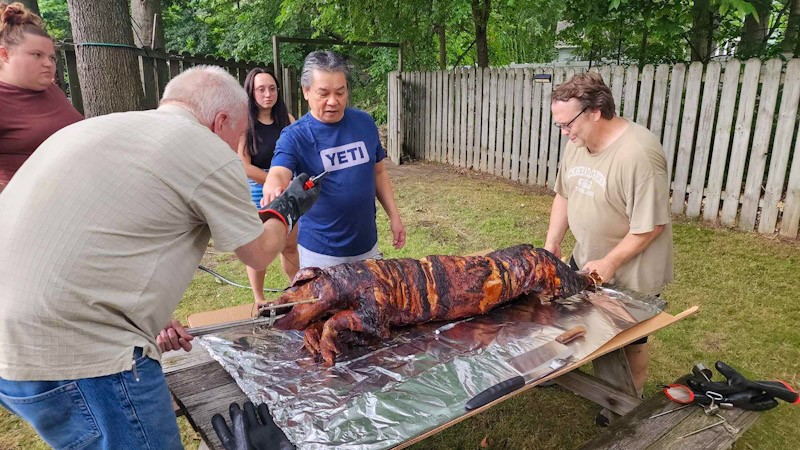
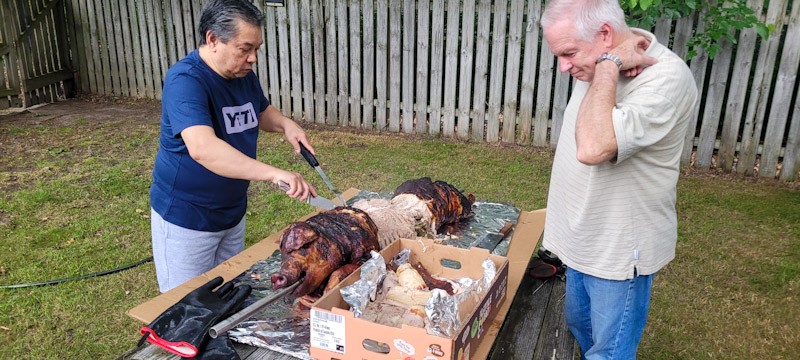
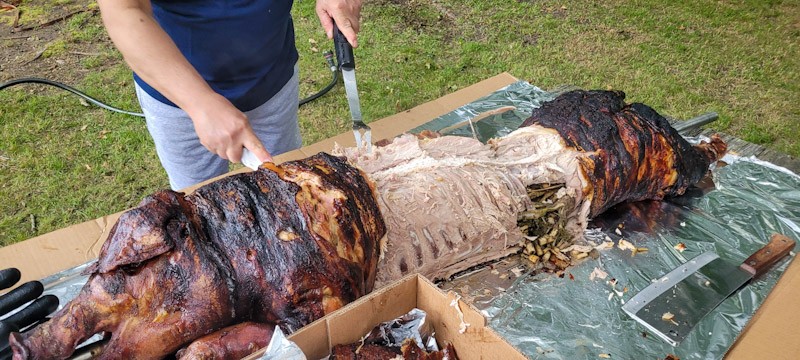
People were very happy with the results. The meat was moist and delicious. So, from a 101 pound pig, let’s say we got 50 pounds of meat. We only had about 10 pounds left when everyone went home for the night – some with to-go plates. Banduy then made a traditional stew from the rare meat and leftovers called “packsiw” that was absolutely delicious.

So, the day started out stressful but Banduy and I actually had a great time – I couldn’t have done it without him. I really did learn a ton and he said he did too – there are more things he wants to prepare in advance such as the lechon sauce. Both he and I are ready to tackle the wedding picnic pig now.

Lessons learned

Here is what I learned from doing this first pig:

  • First and foremost, inspect your pig and confirm whether it is frozen or not despite what the seller says. I feel pretty stupid on this one. The pig was stiff when we loaded it and I thought it was just the way they were. If we had known it was frozen we could have used cold water to thaw it overnight all of the way. A big chunk of my confusion and adding more heat than I needed stemmed from the pig being frozen in the deepest parts of its shoulders and rump.
  • Prepping all of the vegetables and stuffing ingredients the night before really helped.
  • The tip I was given to get a body bag off of Amazon worked amazingly well. Having the ice and towels, everything stayed cold which is ironic given it was mostly frozen. In hindsight we could have run a hose into the body bag and mostly sealed it so the water could circulate but ruin out thaw it overnight had we known.
  • Center the pig on the spit before you start clamping it.
  • Make sure you have the right size of clamps for your size of pig. The longer U-bolts or one or two more long clamping bolts would have done the trick.
  • We bought the CXB85 SpitJack and upgraded the spit and motor to save money. We should have bought the CXB125 to get the longer U-bolts and threaded rods. If you think you are going to do a pig that might be 100-124 pounds – get the CXB125. Bigger than that and you will need to get one of semi-custom or custom trailer from what I saw.
  • Do not try and rush things – you will only burn the skin. Towards the end, we raked the coals to the front and end of the fire tray / charcoal tray to concentrate the heat on the rump and the shoulders.
  • As the pig cooks it shrinks so the various clamps will need to be tightened down periodically.
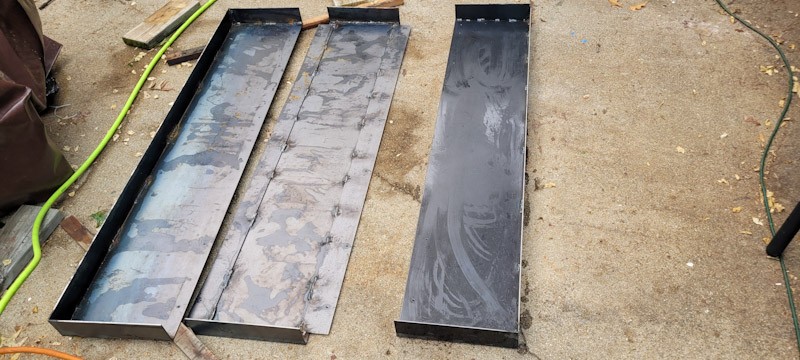
  • I think I will either get some cinder blocks or sheet metal to make side walls so we can capture more of the heat and direct it to towards the pig. We had a large heat shield and a smaller one that I made out of left over steel but they weren’t enough.
  • We used all of the home made charcoal and were on our last bag of the commercial charcoal. That means we used 120-140 pounds of charcoal. Note – the walls would have reduced that plus I wasted some making the fire too hot for a while but that is quite a bit of charcoal regardless.
  • We had two pair of high-temperature barbecue gloves that can be used for meat – they are some form of insulated rubber and allowed us to move things around. Due to the coating you can actually safely handle hot meat and was very happy we had them for moving the relatively hot spit around.
  • I need to learn the practice of “low and slow”. Getting frustrated that it wasn’t heating faster caused me to add charcoal and I should have just rode it out. Again, next time I will be sure to check out the pig and decide what to do if it is frozen or thawed/fresh.

Summary

Doing a test pig vs. cooking one for the first time at the wedding picnic was very much worth it. I would have hated to run into the above issues for the first time with a ton of people waiting. The SpitJack system worked without a flaw – the sizing issue with trussing was my inexperience vs. any equipment issue.

Cooking the pig on a spit rotisserie is one of those things in life where you can read and read but sooner or later you just need to do it and learn. I’d tell you to do a test one also before you really need to count on it. If I can do it – so can you.


If you find this post useful, please share the link on Facebook, with your friends, etc. Your support is much appreciated and if you have any feedback, please email me at in**@ro*********.com. Please note that for links to other websites, I may be paid via an affiliate program such as Avantlink, Impact, Amazon and eBay.


The SpitJack Rotisserie System – Part One: Getting Ready

For my daughter’s wedding, we plan to cook a whole pig on a spit with the spirit of traditional Filipino “Lechon” in mind. My wife is from the Philippines and we’ve been married for 28 years so I’ve met tons and tons of close and extended family. Over the years, there have been tons of barbecues and Filipinos seriously know how to grill. When my wife first brought up the idea of our cooking a whole pig and making lechon, I got excited because it would combine some things I really like doing – grilling, figuring out some mechanical stuff and bringing family together.

How do you cook lechon?

In the traditional manner, a bamboo pole serves as the “spit” rod. The pig is cleaned, filled with a stuffing that varies from family to family. The spit is rested on two posts and the pig is turned over a charcoal fire that is in the a trench in the ground. The family members will then turn the pig continuously for 4-6 hours usually while drinking alcohol the whole time :-). In the next post I will get into the details of the recipe but you get the idea – it takes a long time and the Filipinos will tell you “low and slow” meaning it is relatively low heat and it’s going to take a while – as in and hour and 15 minutes per 10 pounds of pig slow. Now, your’s truly can’t sit still for hours so I needed to figure out how to do this mechanically and that is really the focus of this first post.

How do you make a rotisserie big enough to turn a pig?

Okay, I have no experience with big spit rotisserie systems so I had to start reading and talking to people. They say you get about half the weight of the cleaned pig in meat – so if you get a 100 pound then you get about 50 pounds of meat. A number of folks told me to think of the pig as presentation and do extra meat via pork butts to keep things easier. At any rate, my wife was thinking 75-80 pounds – maybe 100 pounds so I figured I needed something that had a working load around 85 pounds.

In reading about rotisseries, I found guys either built or bought them. Well, I have never seen a rotisserie for a full size pig – just cooked pigs. I watched a few videos and decided I better buy one to get started. That way I could see one first-hand and learn what worked and what didn’t.

Since we were planning a 100+ pound pig, that ruled out all of the little rotisseries and we would also need the longest spit pole I could find – they tend to be 72″/6 feet max. If you plan to only do 40 pound pigs you can get a lot smaller units – including the enclosed ones that will cook the pig faster since the heat surrounds them kind of like an oven.

In my case, I couldn’t justify some of the beautiful trailers and the custom rotisserie systems that were out there but I did read the read-to-go units very carefully. I also decided to go with something largely ready to go vs. making it piece by piece – why? Again, brand new territory for me. Nobody had written a “here, now think about these things to build your rotisserie system” guide. I found some posts that touched lightly on it but not enough for me to gamble on building a machine I had never seen in action.

Moving on, I read just a tons of Amazon product ads, reviews, forum posts and Youtube videos about pig/hog rotisseries. One thing I noticed were recurring warnings that many Chinese rotisseries way overstated their weight capacity and also the capacity of the motor they used.

Need a quality motor

One of the things vendors do with the rotisseries is to brag about how many watts their motor is. That drives me nuts. “Watts” are a measure of energy transfer over time. A poorly made motor may draw more watts and have have less output power than a high quality motor that draws fewer watts but outputs more power to the spit. So, to brag that a motor uses 40 watts doesn’t help matters – you will see this a lot when vendors try to hype up whatever they are trying to sell with an electric motor – vacuums, tools, or in this case, spit motors.

The quality of the motor is extremely critical – it will need to turn whatever size pig (goat or whatever) that you plan to cook for hours and hours. By the way, a 100 pound pig / 10 x 1.25 hours per 10 # means it will be turning for 12.5 hours and need to handle a load that is relatively balanced while also being exposed to some degree of heat.

I read once that cook an animal on a spit is a big deal – if you fail then there are going to be a lot of hungry disappointed people who know it. Bottom line, don’t get a poorly made system or motor.

Some vendors fluff up the weight capacity of their rotisseries

The second thing some vendors do is to overstate the weight capacity of their system. This is where you need to read up on each vendor using Amazon and Internet in general to find out what people say. You also need to look very carefully at the design.

The capacity of the system will be limited by the motor, the spit (how thick and long it is) and how you support the loaded spit.

What is can you look for in photos to start to form an opinion about the quality of the rotisserie?

When I look at a product, I look at the design and look for weaknesses. If a person is going to turn a relatively heavy load, what would be critical? How the spit is supported and how it connects to the motor. Now this is how we can immediately set apart the serious contenders. If I were to design a rotisserie, I would put the spit on sealed roller bearings that at least contact it on the bottom and then I would have a way to take the strain off the shaft of the motor. Boom – immediately something I could look for in productt photos that would rule a model in or out. The cheap ones connect the spit pole straight to the motor shaft via a coupling and/or have the spit sitting on a piece of sheet metal vs. bearings.

I went with SpitJack

Now that you have some background, I went with a brand known as SpitJack. You can find many of their products on Amazon or deal with them directly. Spitjack was formed in 2014 by Bruce Frankel who has a passion for grilling and is a former chef and restraunteur in the Northhampton, MA, area. I called their 800# and Bruce himself answered the phone. He did a great job at answering my questions and you can see from all of the photos and YouTube videos that these are quality systems.

They have two models of complete systems that I considered – the CXB85 – rated for 85 pounds and the CXB125 – rated for 125 pounds. I wound up doing a bit of a hybrid. Since I was talking to Bruce, I ordered the CXB84 with the accessories that come with it but upgraded the motor and spit to the ones from the CXB125. In hindsight, I would tell you to get the CXB125 so you have more accessories for fastening bigger pigs – I found this out when we cooked our 101 pound pig that I will tell you more about in the next post.

While the SpitJack systems are more expensive than their imported competitors, the engineering and build quality are far superior plus Bruce and team support what they sell.

What arrived?

The system arrived very well packed and Bruce will tell you to inspect everything and test it. Their system comes with instructions and suggestions plus their videos help. As far as assembly goes, it was simple. Three screws and nuts to fasten the upright columns of the stands to their bases, I had to tighten the screws on the roller bearing assembly on the end column and that was it.

Now this is where customer services makes a huge difference. When I looked at the motor, they had shipped the standard 40 watt motor vs. the 125 watt model I had ordered. I called Bruce and he told me to use the 40 watt motor if I needed to, he would get the 125 watt model out that day via UPS and then send the 40 watt motor back. He would include a UPS label for that also. Wow. No hassle and he moved fast to make it right. Folks, that kind of customer service is worth a lot to me. No filling out forms, no arguing just a rapid correction of an honest mistake on their part.

Making a rotisserie grill area

One of Bruce’s recommendations was to just dig a slit in the ground for the charcoal and cook the first time to see how things go. My wife didn’t like that idea and wanted it to be neater so we did two things – we made a 4×8 area with patio blocks and I welded together a 36×54″ firebox from 1/8″ thick steel to hold the charcoal.

We picked an area, put down leveling sand and made a 4’x8′ area using 12″x24″ patio blocks from Lowes. They are nice and thick too.
We then brought out the newly assembled SpitJack system. I had plugged the motor in and turned it on in the house just to make sure it would start. The 125 watt motor had so much torque that I could not stop it by hand. I ran it for maybe 10-20 seconds and turned it off. Read the instructions that come with the unit – they have some warnings you need to be aware of – don’t run it without load or try to turn it by hand for example.
This is a view of the oppose end. The spit is basically on stainless jack stands. Note how the spit is on the roller bearings. On my unit, I did have to tighten down the bolts holding the bearings. I’m not sure if they were installed loose on purpose or not so just double check your’s.
Note how the load of the spit is on the roller bearings and not on the shaft of the motor. On cheaper models there are no external bearings and they make the motor’s bearings take the load. Not a good idea. By taking the load off the motor’s bearings, the motor will last longer. I had worried about vertical play in the spit but after having the pig on there it seems like most of the force is downward plus maybe a bit of left and right play due to the 4-6 RPM rotation speed. Note, the spit goes into the collar you see and is secured by the bolt and nut you also see. We found it easier to truss the pig to the spit and install the motor onto the spit on the table and then take it all over to the charcoal. It’s not a super easy fit so plan accordingly. Using a gear or chain would have made it so but the costs of such a design and price of the model would have jumped for sure. By the way, the motor assembly, bearings and mount were all pre-assembled. I didn’t need to do anything.
The motor must not be over the fire when you are grilling the pig so your actual cooking area is about 54-57″ long once you factor in the distance between the bases and how much of the spit you want to extend past the jack stand on the opposite end. The spit tracks true is what I found out but I want a safety margin of a few inches vs. having the last set of roller bearings being too close to the end of the spit and risk falling for whatever reason.
The spit comes in three stainless steel parts – the two tubes and then a solid stainless rod that goes inside and connects them. To handle the weight of the pig, the XB125 spit is heavier gauge stainless tube. Be sure to tighten these down with a wrench and not just by hand.
Each end of the rotisserie can be raised or lowered on the jack stand. Locking pins hold it in position so you can find your sweet spot.
I was relieved to find that assembling the jack stands just meant installing three bolts and nuts on each side of the stainless steel channel that forms the upright column.
View from one end
View from the other. By the way, 125 watts is not much draw – although probably higher when first turned on. I just ran a decent 15 amp rated extension cord from a nearby shed and didn’t have any problems at all.

Making a firebox

Again, to look cleaner, my wife had me fabricate a firebox. A pig is cooked via indirect heat so you have a 4″ wide gap or so right under the centerline of the spit with charcoal to the left and the right. I made mine 36″ wide, 3″ tall sides and you will need to confirm your length – it will likely be 54-57″.

I don’t have the strenghth to easily muscle around this much steel all at once so I made 12″ wide sections that I could bolt together.
I used my Miller 211 MIG to do the welds. I love this machine. I will tell you I ran out of my normal Lincoln .030 wire and tried some cheap PGN brand .035 wire off Amazon and it spattered so much that I thought I was running flux core wire. I’ve had very good luck with Lincoln wire and ordered another 10# spool after this project. The PGN will either go in a garage sale or the trash – yeah, I didn’t like the spattering.
Before I put the firebox in place, I applied to coats of grape seed oil and heated it up with a ground torch. Because food would be above it, I did not want to apply any paint that would bake off contaminate the meat. Grape seed oil is commonly used to season cast iron pans and in this case I just want to slow up the rust some. Combine the 1/8″ thick steel with the grape seed oil and hope it will be around for a while.

Summary

I felt really good about the SkipJack rotisserie. We had it assembled, tested, the firebox ready – now it was time to test cook a 60 pound pig so we invited some friends over for a cookout on July first. How did it go? How did we season the pig? What were my lessons learned? I’ll tell you in the next post.

By the way, jumping the gun slightly, I can tell you I now recommend SkipJack wholeheartedly and they sell just a ton of stuff for grilling – rotisserie-style and otherwise – check out their Amazon store.


If you find this post useful, please share the link on Facebook, with your friends, etc. Your support is much appreciated and if you have any feedback, please email me at in**@ro*********.com. Please note that for links to other websites, I may be paid via an affiliate program such as Avantlink, Impact, Amazon and eBay.