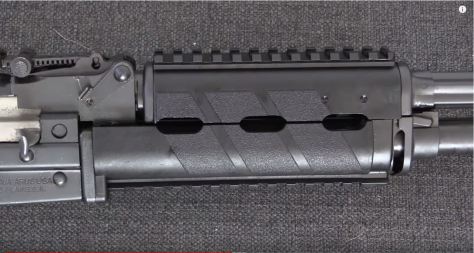
Ian, over at Forgotten Weapons, did a review of the new Zastava M91. In the end, you do wind up with a over-sized 7.62x54r AK variant filling a designated marksman role (DMR). As always, Ian does a provides a great commentary as he looks at and then disassembles the M91.
Stamped receiver with a unique extension at the rear to accommodate the longer cartridge. Note the POSP 4×24 optic.The M91’s unique handguardSkeleton stockA quick look down in the receiver – you can see the extension is riveted in place.
Please note that all images were extracted from the video and are the property of their respective owner.
If you find this post useful, please share the link on Facebook, with your friends, etc. Your support is much appreciated and if you have any feedback, please email me at in**@*********ps.com. Please note that for links to other websites, I may be paid via an affiliate program such as Avantlink, Impact, Amazon and eBay.
I can’t stand Biden and think this is absolutely hilarious – The” Angry Joe-14″ AR-14 Stripped Lower. LMAO!! Complete with a dog face pony soldier logo!
If you find this post useful, please share the link on Facebook, with your friends, etc. Your support is much appreciated and if you have any feedback, please email me at in**@*********ps.com. Please note that for links to other websites, I may be paid via an affiliate program such as Avantlink, Impact, Amazon and eBay.
Paul sent me in a photo of his custom M72 carbine with our handguards. It sure turned out cool. Here’s the info he shared about it:
M72 Unissued mint kit
AK Builder 16″ barrel
POSP 4×24 scope on AKM rail
4.5mm rear folder
JMac customs RRD 4C brake
Built by Mod Outfitters
If you find this post useful, please share the link on Facebook, with your friends, etc. Your support is much appreciated and if you have any feedback, please email me at in**@*********ps.com. Please note that for links to other websites, I may be paid via an affiliate program such as Avantlink, Impact, Amazon and eBay.
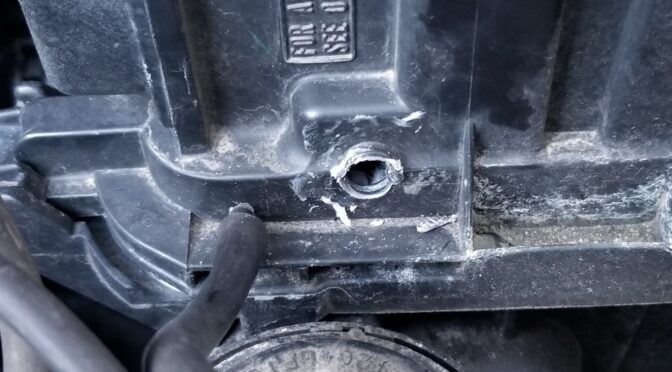
I’m going to leverage my inner Forrest Gump – used cars are like a box of chocolates. You never know what you are going to get. In this case, it was our 2008 Toyota Highlander. I decided to check the air filter just in case and noticed both that the vacuum lines had cracked and that someone had done a “creative” fix on a 4mm vacuum port that had snapped off.
So this vaccum line was just resting in the hole. There’s some white glue – maybe silicone and som odd metal insert.
If there’s one thing I have learned with modern computerized cars – don’t mess with their sensors or vacuum lines. You can get odd random codes thrown, lose performance, fuel efficiency, etc. So, I knew this needed to be fixed. The big problem – the vacuum fitting was cast into the airbox!! By the way, the air box is the car part that holds the air filter in this case – the air filter housing is another way of thinking of the part.
Let me start by telling you the expensive and time consuming way – buy a replacement air box. Yeah, this is going to cost you a bundle. A OEM Toyota air box will run you $275-400, used is about $100-185 and aftermarket tends to be under $60-90 and maybe iffy quality. Then there is the labor to do the actual swap – it’s going to either take your time or you are going to pay a mechanic to do it and the cost is going to go up fast. There is an easier and faster way.
My Recommended Approach
The magic fraction for today is 5/32″. Why? Because 5/32″ is almost exactly 4mm. If we get a small brass, aluminum or stainless barbed 5/32″ hose fitting with a threaded rear, we can easily fix this. I live in a rural area and this isn’t something I can easily walk into a hardware store and find so I did some searching for NPT to 5/32″ hose barb and found both 1/16″ NPT and metric fittings plus some were brass, aluminum and mystery metal. I discounted anything plastic/nylon because I wanted a stronger fitting.
Another reason I went with 1/16″ NPT is that it can fill a pretty big hole all by itself up to about 0.31″ given the taper plus I could then use a 1/16″ to 1/8″ bushing adapter if I needed to go larger.
After much digging around using Google and Amazon, I opted for an Aeromotive #15630 hose fitting made from 6061-T6 aluminum that I did order off Amazon [click here for the Amazon listing]. There was a no-name generic brass one but no spec so I didn’t go with it. By the way, searching for fittings like this really shows the limitations of general search engines to find parts. I spent a ton of time filtering through tons and tons of search results that turned up the wrong products. What a headache.
Aeromotive 15630 fitting that has 1/16″ NPT thread on ne end and a 5/32″ hose barb on the other.
Installation
The first thing to point out is that the molded vacuum fitting is above the air cleaner so you can safely work on the box without removing it from the vehicle! Any debris from drilling or sanding will land on the filter and you can vacuum it out later. If you have a used car, peak inside and make sure the air cleaner is there and intact.
If you have just the old busted remains of the hose fitting to contend with then Dremel or sand the area flat. You want the installed barb to be able to sit flat against the wall of the box.
Next, pick a drill bit that is just the same size as the tapered bottom of the thread. NPT thread is tapered so the bottom has a smaller diameter than the top. If the air box was steel, we would use a letter “C” drill bit to make a 0.242″ hole. Notice how this is slightly smaller than 1/4″ but I am betting most people do not have lettered drill bit sets so you pick a close size and run with it. We do want the hole slightly smaller in order to thread it. Because this is plastic, we are going to push forward with the metal adapter fitting while turning and let the thread on the adapter cut the thread into the plastic. We aren’t going to bother tapping it first. That’s right – don’t buy a tap to do this uness you are a tool junky and perfectionist, which is fine if you are – I get accused of that a lot.
I’d recommend you start with a bit smaller than 1/4″ where the bit is slightly smaller than the bottom of the adapter, drill the hole and see if you can press it in. If not, go to a bigger bit. If you mess up and have a slightly too big hole, all is not lost – read the “Well crap” section below 🙂
Let’s say that everything goes great and you can screw the fitting into the plastic – Once threaded in, it’s done. Just screw it in and quit. Don’t put too much torque or you can strip it. That works just fine unless the previous guy bubba’d it, which takes us to the next part of the story.
Well crap….
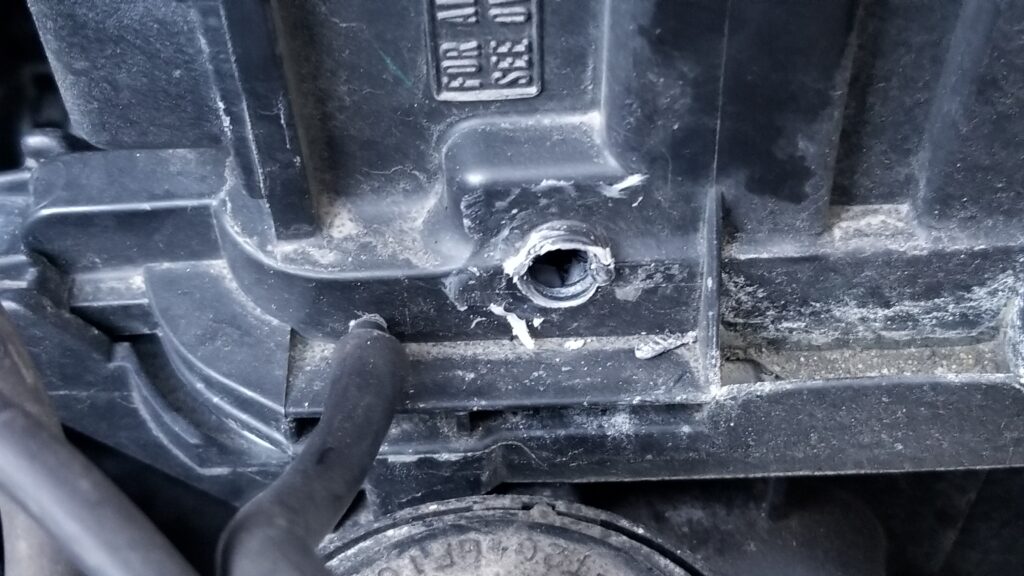
In my case, I had a box of chocolates moment. The previous owner or a mechanic had drilled the hole out and installed some small metal bushing that was hidden due to the white silicone on it. I have no idea what it was from. Once I discovered and removed it, the hole in the air box turned out to be just a tad bigger than the entire 1/16″ tapered thread. Argh… not what I wanted to deal with.
Dear bubba, thank you for hiding this under the white silicone. You just made my fix a bit more complex but not impossible.
Okay, I wanted to get this job and had three options, go to the hardware store and try and find a 1/16 to 1/8″ bushing, install a 1/16″ NP threaded nut on the back to hold it in position, which I also did not have, or glue the hell out of it and call it even.
This is what I had on hand at the time and worked great. I could have used any quality black silicone RTV glue/gasket maker and gotten the same results. I tend to either have Permatex or LocTite brand products that I use the most.
First, I scuffed the surface around the hole with 100 grit sand paper so the glue could get a better grab on the surface. The second thing I did was to spray brake cleaner on the area to remove any trace oils that might prevent a good bond.
I was wearing nitrile gloves and also sprayed brake cleaner on the fitting to make sure it was clean. Gloves both keep your hands clean and also prevent you from getting oils from your skin on the parts — assuming the gloves are clean of course. Having a clean surface makes a HUGE difference in terms of how well any glue is going to stick.
Next, I applied a bead around the top of the NPT thread of the fitting and pushed it into the hole. Since I was wearing nitrile gloves, I just took a finger and smoothed the glue out a bit and let it cure for about an hour or so. You want it cured enough to hold the adapter in place – you don’t need it fully cured yet. With warmer weather it will cure faster and in cold weather it my take a long time and need a hot light or something to warm it up above 70F to get things done. Depending on what I am working on, I try to get somewhere between 60-110F. The warmer it is, the faster it will cure but don’t burn it or melt the plastic either!
This is the first pass. It’s not pretty but it will dry strong enough to hold the fitting in place while the second thicker coat is applied.
I then put a second layer of black gasket maker on and fanned it out to get a good grip and to securely hold the fitting. I then let this all cure overnight. I’ve learned long ago not to rush faster than what the adhesive’s manufacturer recommends or you are liable to ruin an otherwise good job.
Here is the second heavier coat this was meant to reinforce the part.
So, once it was fully cured I then needed to change the cracked vacuum lines which are what I noticed in the first place.
4mm Vacuum Lines
What got me started on all this in the first place was noticing that two 4mm vacuum lines were very cracked where they slid onto their respective hose barbs. This happens as rubber ages and gets brittle so finding them wasn’t surprising.
This is one of the ends that was badly split.
Fixing this is easy. You just need either real 4mm vacuum hose or 5/32 vacuum hose. You can either go with one formulated from rubber or more expensive silicone. The advantage to the latter is that it ought to last longer.
You can see the two pieces I replaced because the new silicone hose is shiny black and a thicker diameter.
Conclusion
Going this route saved us a ton hundreds of dollars and has held up just fine. I did this repair last fall and have not had a single problem. Yeah, the glue does make it a big of a bubba fix but it is revsersible and the fitting isn’t going to fall out. The black gasket maker has held the little barb in just fine and the hose is very supple and shows no wear at all. I hope this helps you out as well.
2/12/24 Update: My repair is still just fine. A reader pinged me that none of the Amazon links worked so I went through and updated them.
7/28/2023 Update: Everything is holding up just fine and we’ve put quite a few miles on the car since this was written in March of 2020.
4/9/2021 Update: Still holding just fine. Not one problem to report.
If you find this post useful, please share the link on Facebook, with your friends, etc. Your support is much appreciated and if you have any feedback, please email me at in**@*********ps.com. Please note that for links to other websites, I may be paid via an affiliate program such as Avantlink, Impact, Amazon and eBay.
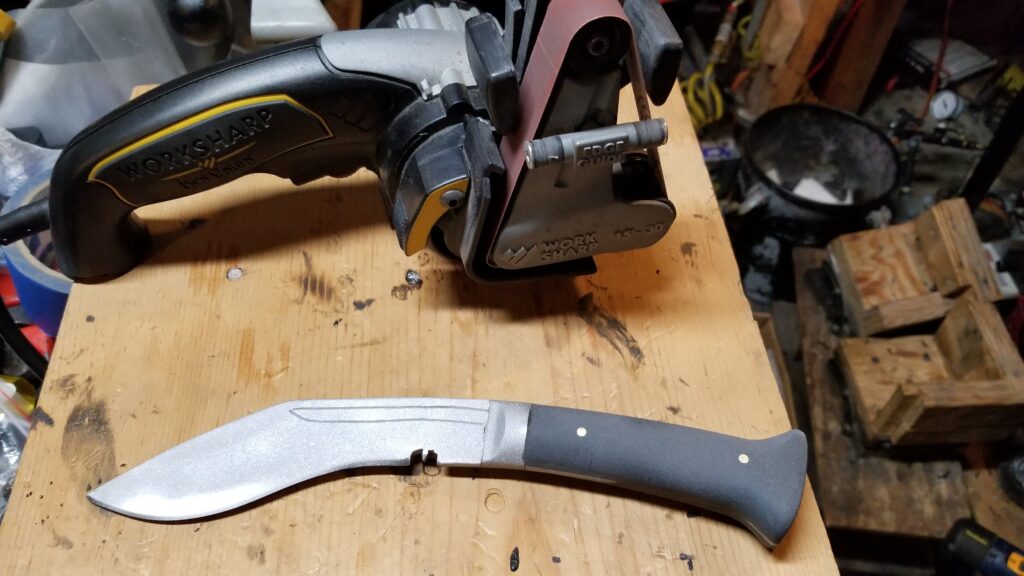
I recently did two posts about building a new heated tank out of PVC pipe and a digitally controlled heating element that is both effective and affordable. This also marked my first batch of blades where I moved from my traditional hot apple cider etching to using a mix of 70% ferric chloride and 30% apple cider vinegar heated to 90-94F.
The Chemicals
Let me give you a quick overview of the two chemicals I used to make my blade etching solution:
The second chemical is regular apple cider vinegar from the grocery store. They tend to be normalized around 5% acetic acid by volume. The brand I used was at 5% and there were other brands at 4% that I passed over – go for 5% because you need the acetic acid. I literally bought this at my local grocery store – nothing special.
The solution I made was 70% of the ferric chloride and 30% apple cider vinegar. I wore lab goggles, nitrile gloves, old clothes and am in a well ventilated area when I slowly add the ferric chloride to the relatively weaker apple cider vinegar.
The ratio was based on looking at the end results from other blade smiths and talking about what they learned. In my case, I can tell you that this combination makes for a very nice dark etch.
The Process
Heat the etching solution up to 90-94F before I put in the first blade. MG Chemicals recommends the operating range from 94F to 131F and not to exeed 131F. [Click here for their technical data sheet and MSDS]
The blades need to be at least 70F prior to dunking in the solution. The warmer the solution and blade, the better chemical reaction you are going to have.
Clean the blade with brake cleaner throughly
Abrasive blast the blade – I am using Black Beauty these days. It is a coarse coal slag based product. Note, not all guys blast their blades – some just clean them very carefully.
From this point on, wear nitrile gloves when handling the blades to avoid any oils and contaminants from your skin
I again use brake cleaner to do a final cleaning and make sure it fully evaporates. Some guys rub down with acetone – do what works for you but it must not leave a residue
Fully submerged the blade in the heated etching solution for 10 minutes
Remove the blade and wipe off the remaining solution with a paper towel [as a reminder, you must be wearing gloves to not contaminate the blade]
Used clean/bare 0000 steel wool to buff the surface of the blade and remove any loose particles. Note, this 0000 steel wool is bare wool – no cleaners or anything. You find these in woodworking / hardware sections of stores – not in the kitchen area.
Submerge the blade for another 5 minutes and again wiped and rubbed the blade down with steel wool. I think I repeated this process three times per blade but experiment and see what works for you.
Soak the blade in warm water with baking soda to neutralize the acid
Spray the blade down with WD-40 to displace the water
Apply finish – I like to use a 50-50 mix of boiled linseed oil and turpentine to apply severa thin coats. This gives my blades the worn post-apocalypse look. Many guys just coat the acid etched surface with oil to inhibit rust.
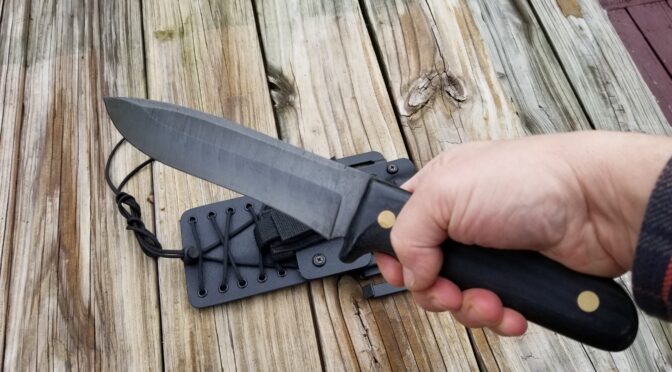
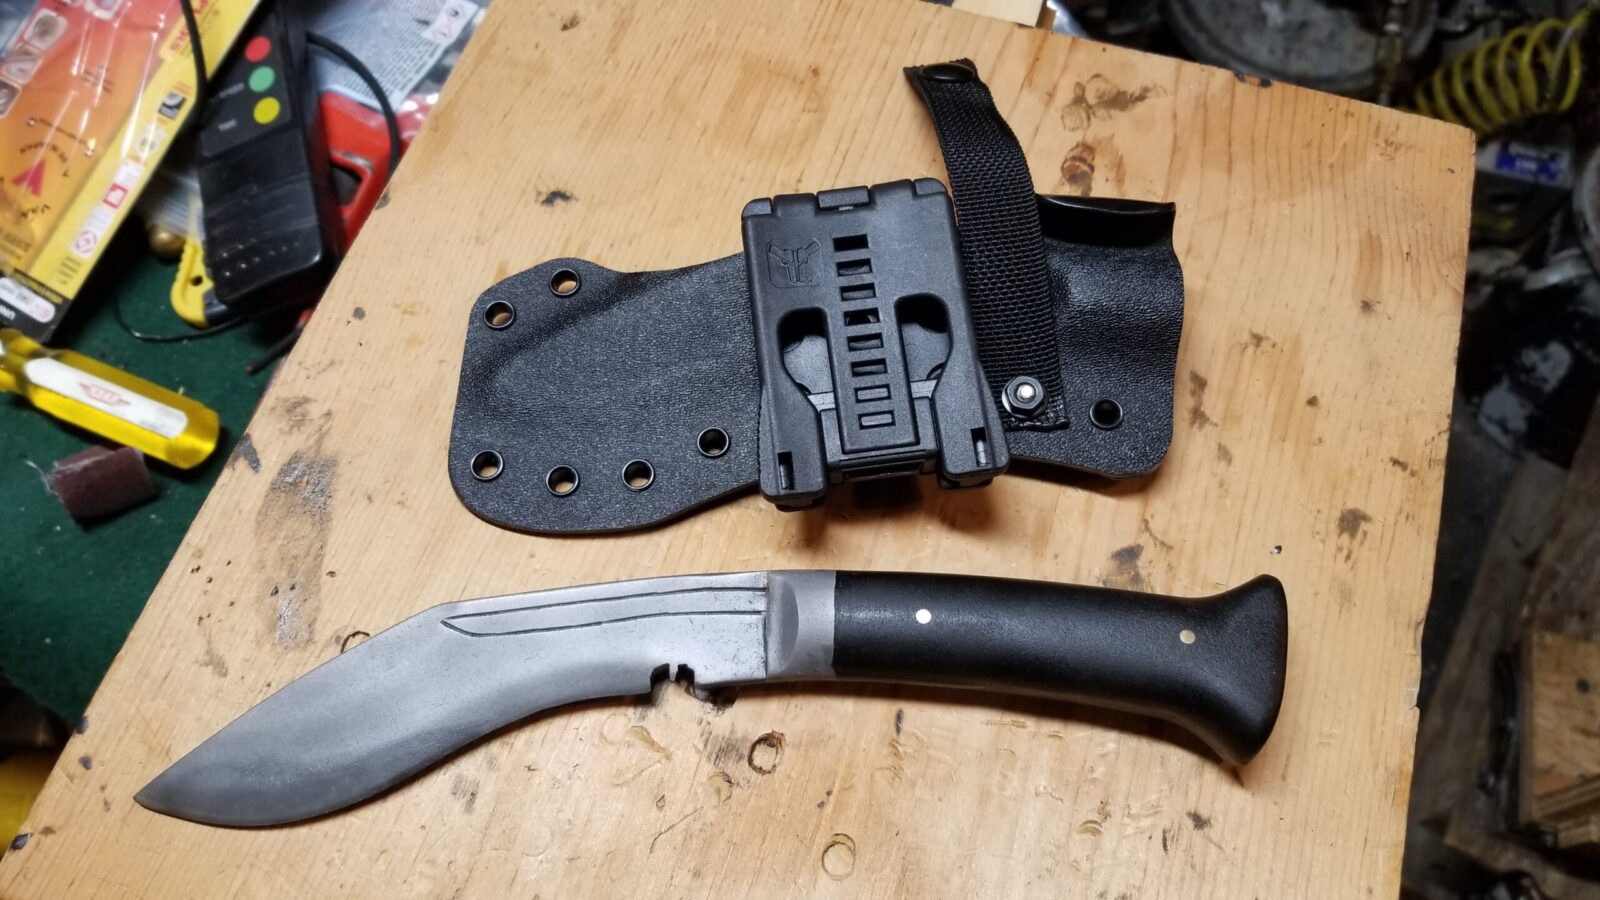
Here’s a small 5″ khukuri where all steel surfaces have been blasted.Here’s the finished khukuri just before I mailed it to its new owner.
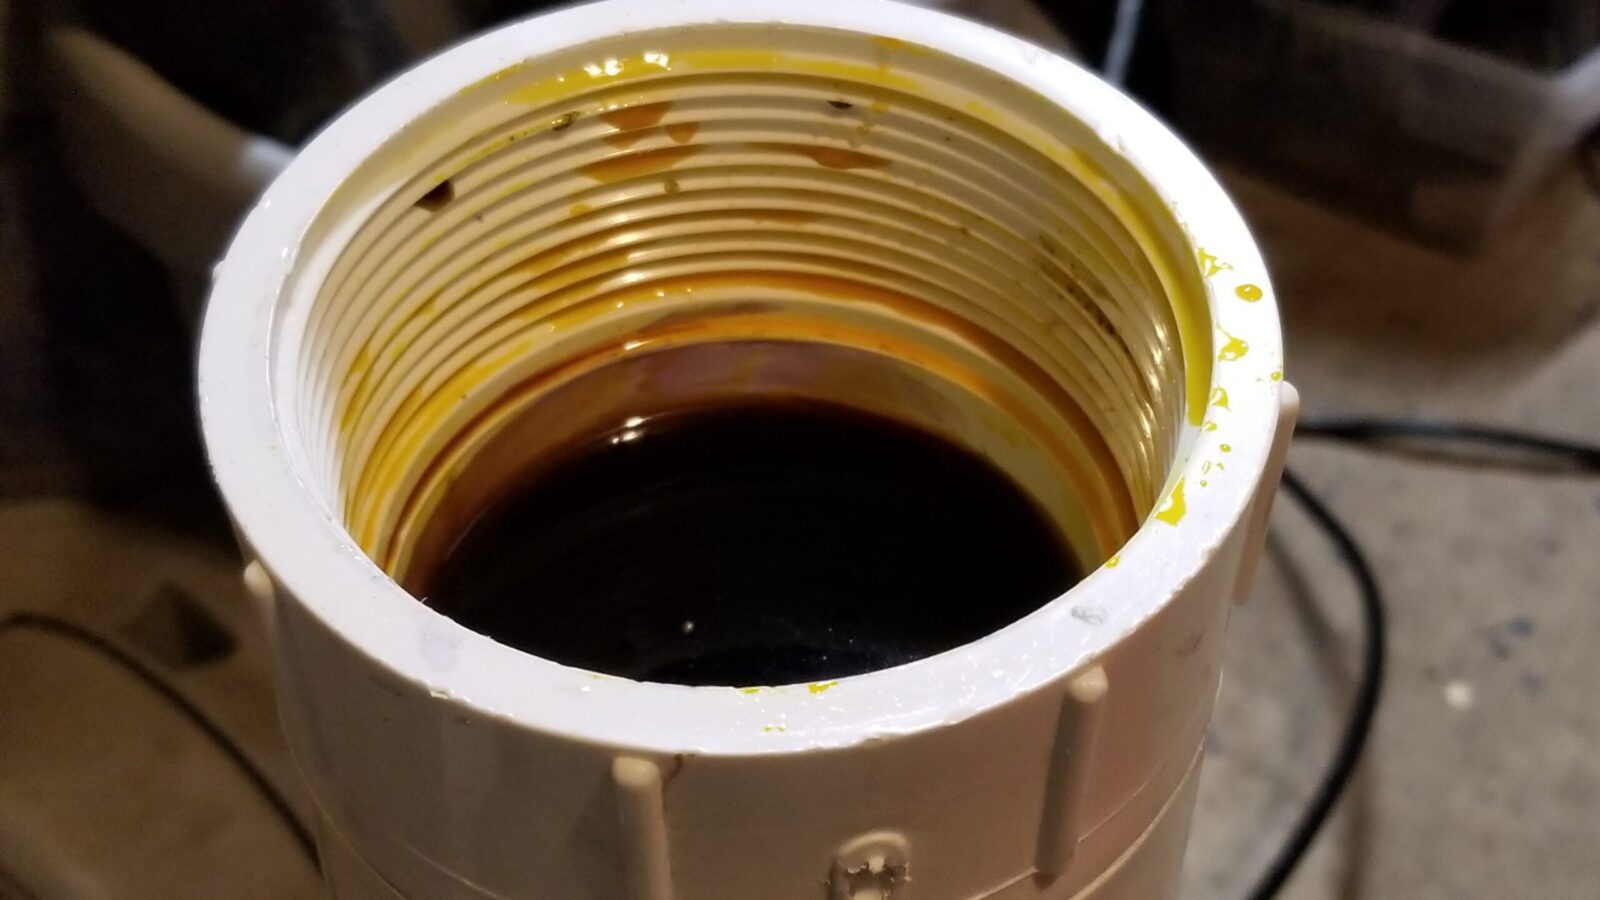
Here’s a look at the solution in the tank.
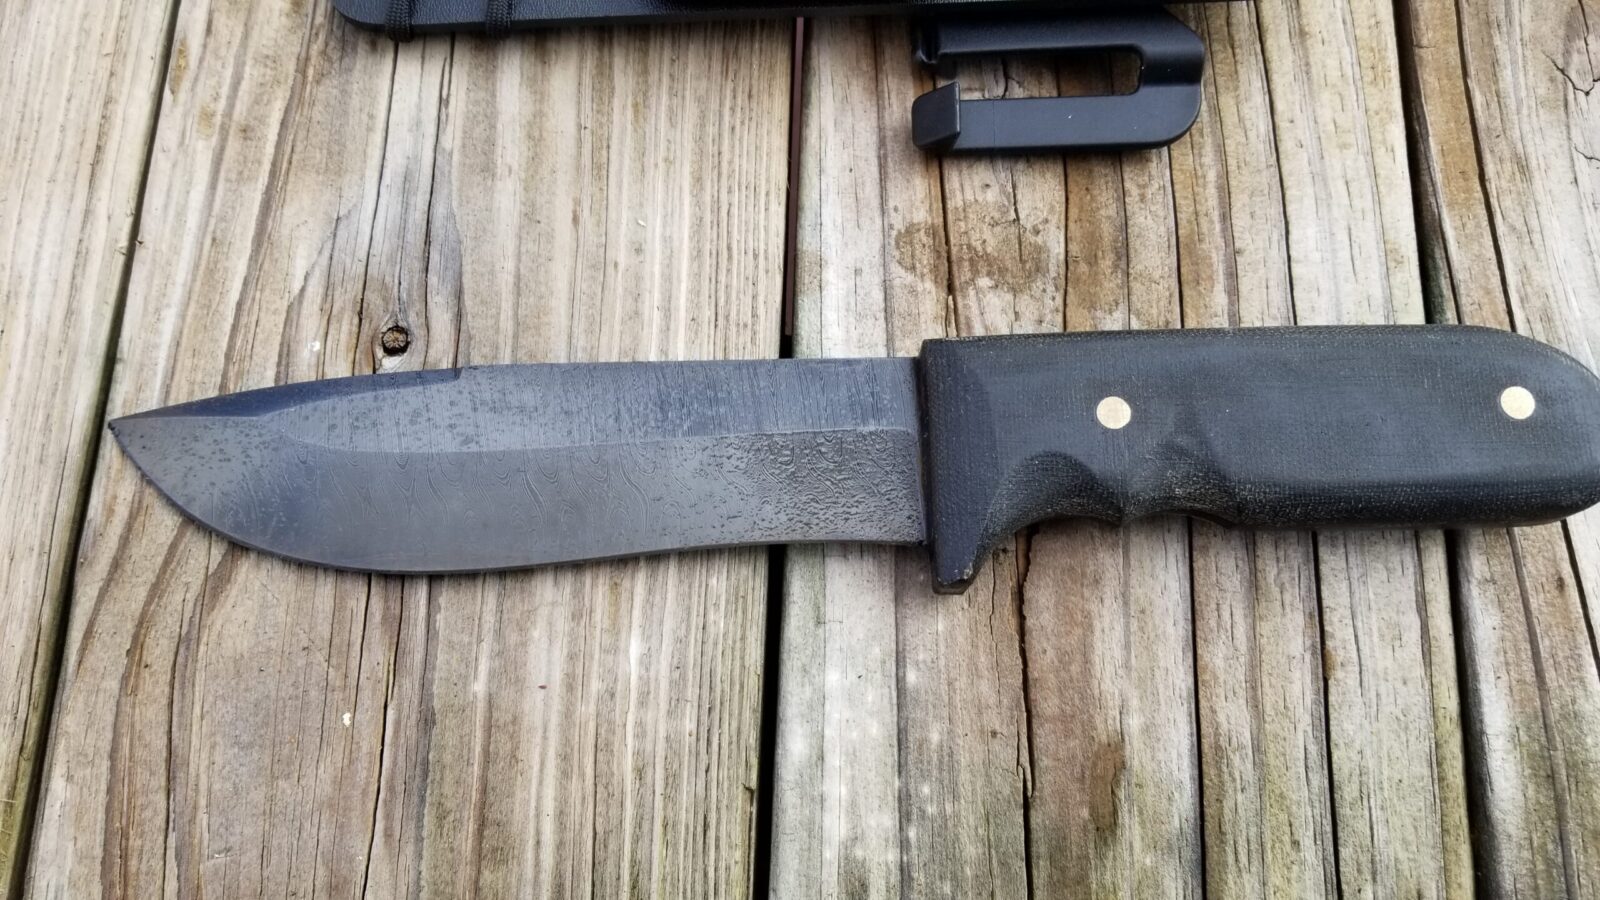
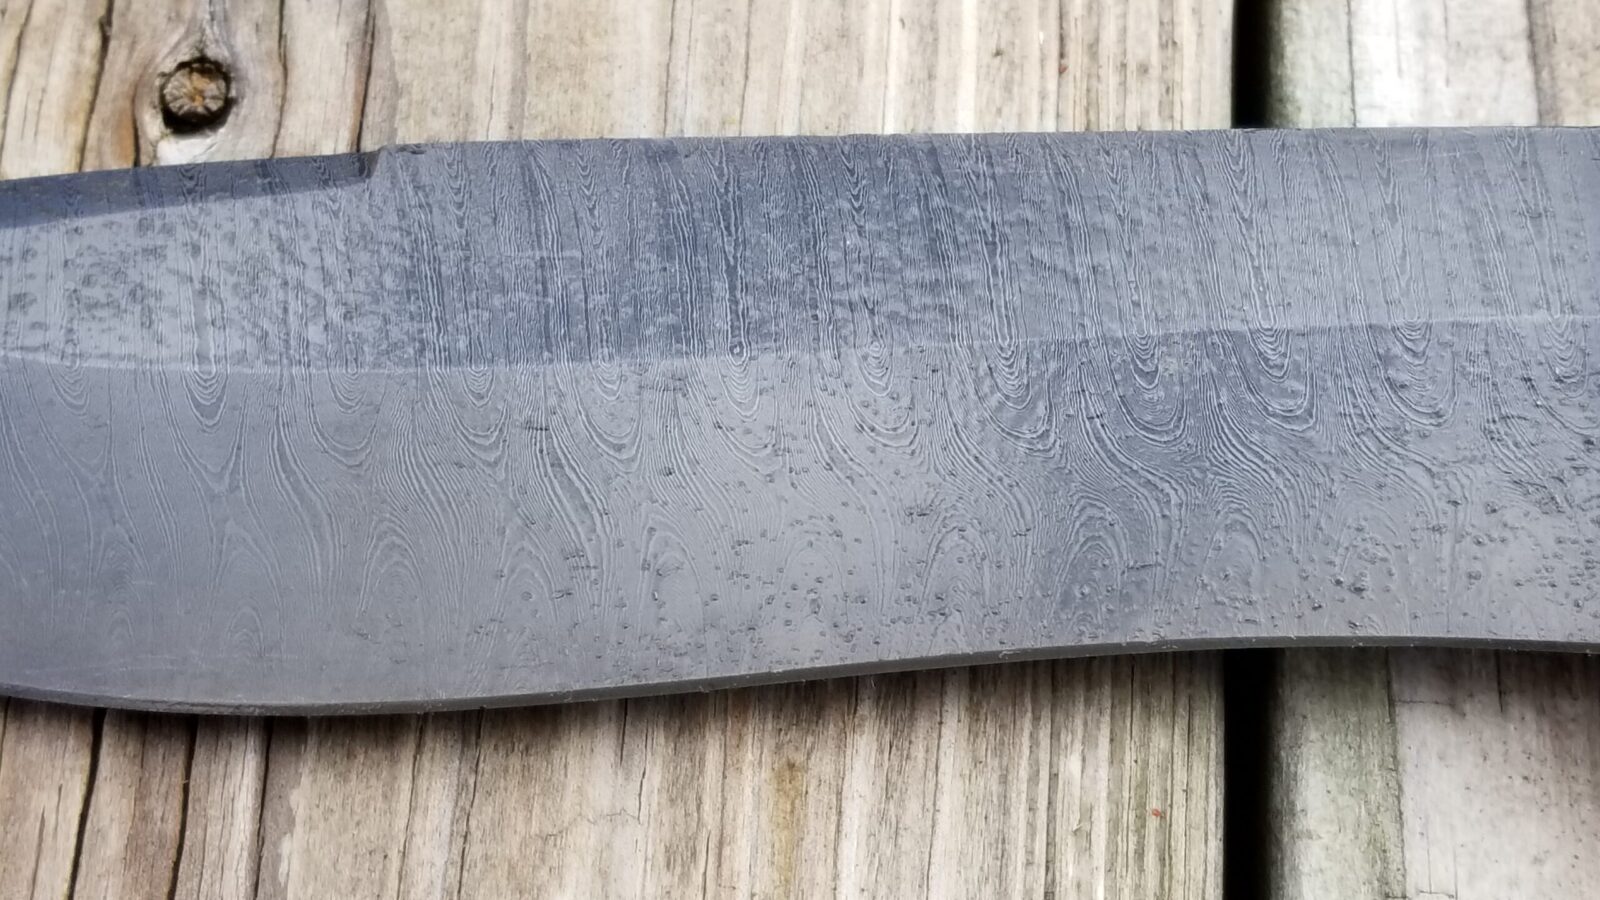
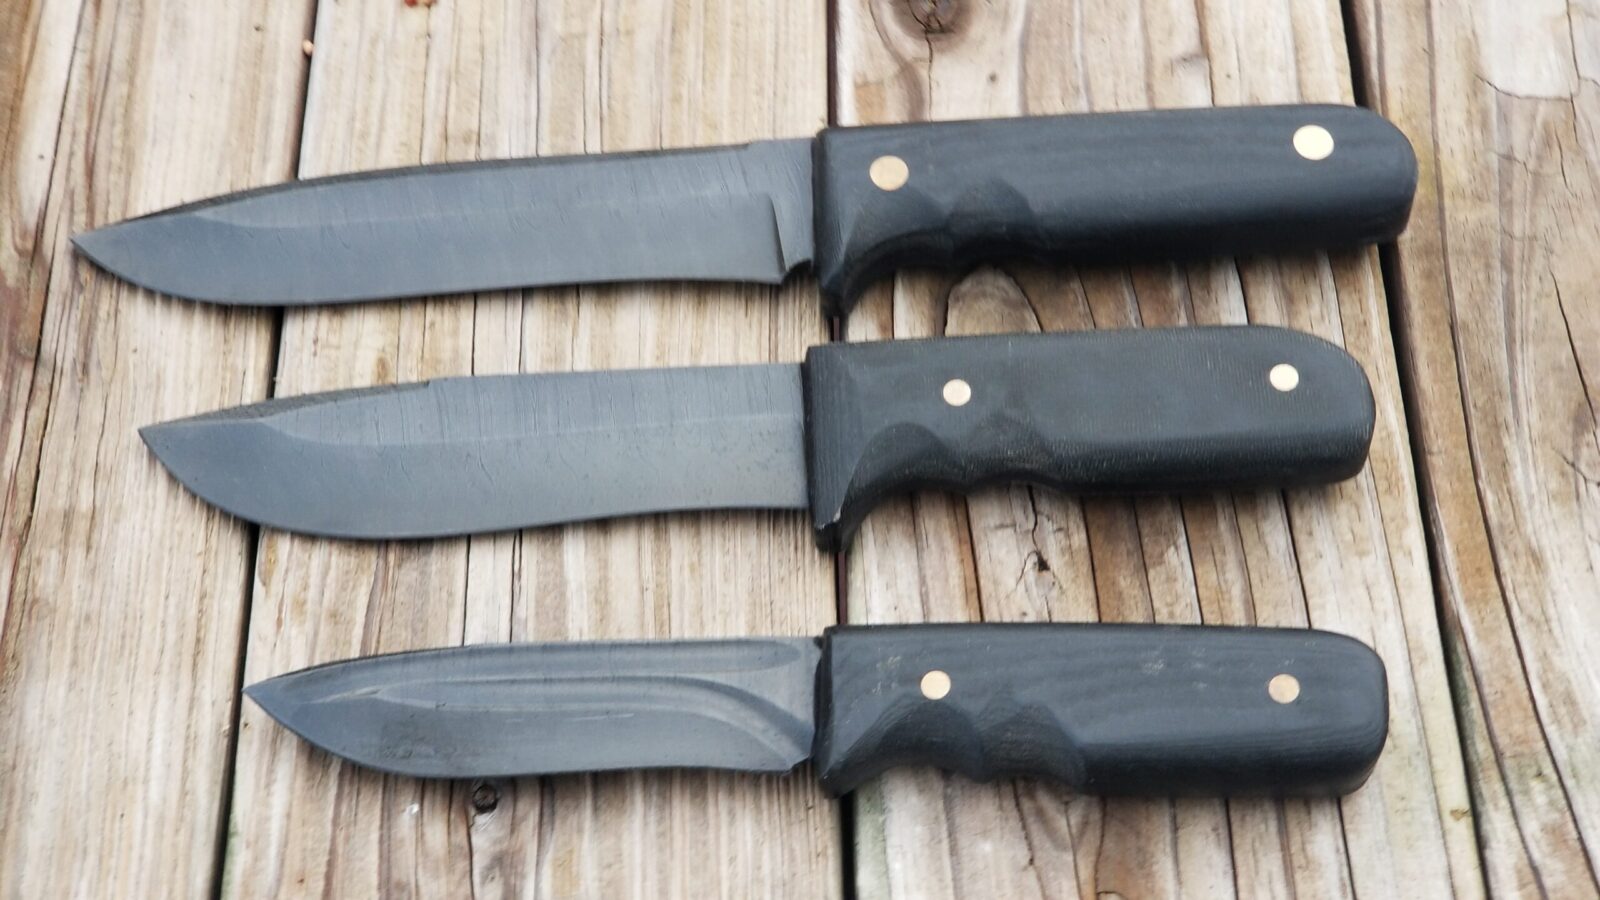
Here is one of the etched damascus blades. The beads on the blade are oil.Here’s an even closer look at the finished blade.
Summary
I’m definitely very happy with the results and will be using this solution going forward.
If you find this post useful, please share the link on Facebook, with your friends, etc. Your support is much appreciated and if you have any feedback, please email me at in**@*********ps.com. Please note that for links to other websites, I may be paid via an affiliate program such as Avantlink, Impact, Amazon and eBay.
I like to acid etch blades that I build using apple cider and/or ferric chloride. I also manganese park firearms and tools. Assuming the part is prepped properly, there are two common needs in all of the above – the part must be submerged and the solution heated. So you have two options, buy a stainless tank and heat source or build one using PVC pipe. These next couple of posts are going to dive into how you can build an affordable and very effective heated tank to finish you parts plus have some fun doing it.
PVC or CPVC?
We can use rigid PVC pipe as the container to hold the etching solution. It’s cheap, easy to find and easy to work with. I need to explain a few things first about what we can and can’t do with it.
In plumbing, rigid PVC pipe has an operating temperature of 140F degrees. The reason for this is that PVC is a thermoplastic and begins to soften with heat and will burst due to the pressurized water. We don’t have much pressure to worry about other than atmospheric pressure but you don’t want to push plain PVC towards 200F – it really isn’t designed for it.
If you want to do parkerizing at 190F, then you need to use CPVC pipe. CPVC rigid pipe has extra chlorination that allows it to withstand 200F while delivering water under normal household pressures. Fun trivia, CPVC was invented by Genova Products in Michigan.
If you are trying to figure out what you are looking at, if the pipe is white, it is probably PVC. If it is cream colored, it is probably CPVC. It ought to be labeled/printed on the side of the pipe also but be on guard for people putting stuff in the wrong bins at a store or clerks not knowing what is what.
In this post, I am working with regular PVC purchased from my local Ace Hardware because the tank is for acid etching knives and will the liquid will be 90-110F on average. If I ever build one for parkerizing, it would be in CPVC. The reason it’s an “if” is that I already have a big stainless steel parkerizing tank but it’s a headache to drag out and set up whenI need it.
The Parts List
Basically, we are going to build a tube with a cemented permanent cap on the bottom and a threaded cap at the top. You can go with any size you want. For most blades I work with, 3″ is plenty and I wanted it to be portable.
Let me give you a piece of advice – it’s aways better to be a little bigger than you think you need than to find that out later. When in doubt, make it wider and taller — within reason of course. Note, I knew a 3″ diameter and about 16″ tall would meet most of my needs but not all and I was fine with that. I’ll pull out my four foot stainless tank when I need to do something huge like a cleaver.
In terms of parts, you need the following:
A length of pipe of the diameter that is needed
A coupling for that size
A threaded adapter for that size – you cement it onto the end of the pipe and it gives you a national pipe thread on the other end
A threaded plug that fits into the adapter
An end cap of one type or another. If you use 3″ or 4″ pipe, you can use a toilet flange adapter to actually both plug the end and allow you to connect it to the wood if you aren’t making it very tall. I would be worried about torque on a tank with an overall length of 24″ or more. In those cases I would cement on a normal end cap and build up a crade around the pipe to support it.
You may want a drain for a big tank – I didn’t need one for this little unit because I can easily lift it even when it is full of the acid etching solution.
PVC cleaner and cement (note, PVC and CPVC use different cement)
Wood to form a base to keep the pipe from tipping over so it needs to be both wide and heavy enough. Really it’s up to you as to how you secure it to be vertical. I like a mobile base but you could tie it to something, etc.
A heating source and controller – we’ll get into more detail in the next post.
Weight Considerations and a Drain
Bear in mind that this tank can get pretty heavy if you plan on using really big piple (6″ or bigger). Water weighs 8.34 pounds per gallon. You will find that other liquids can weigh more. Apple cider vinegar may be around 8.6 pounds and ferric chloride might weigh 10-12 pounds per gallon depending on the concentration.
I bring the weight up because if you are thinking of building a big tank, the weight is going to add up and you may want to install a drain near the base. There are two big reasons you need to think about this – you may want to move the unit around plus you will need to change the solution as it ages and breaks down from use.
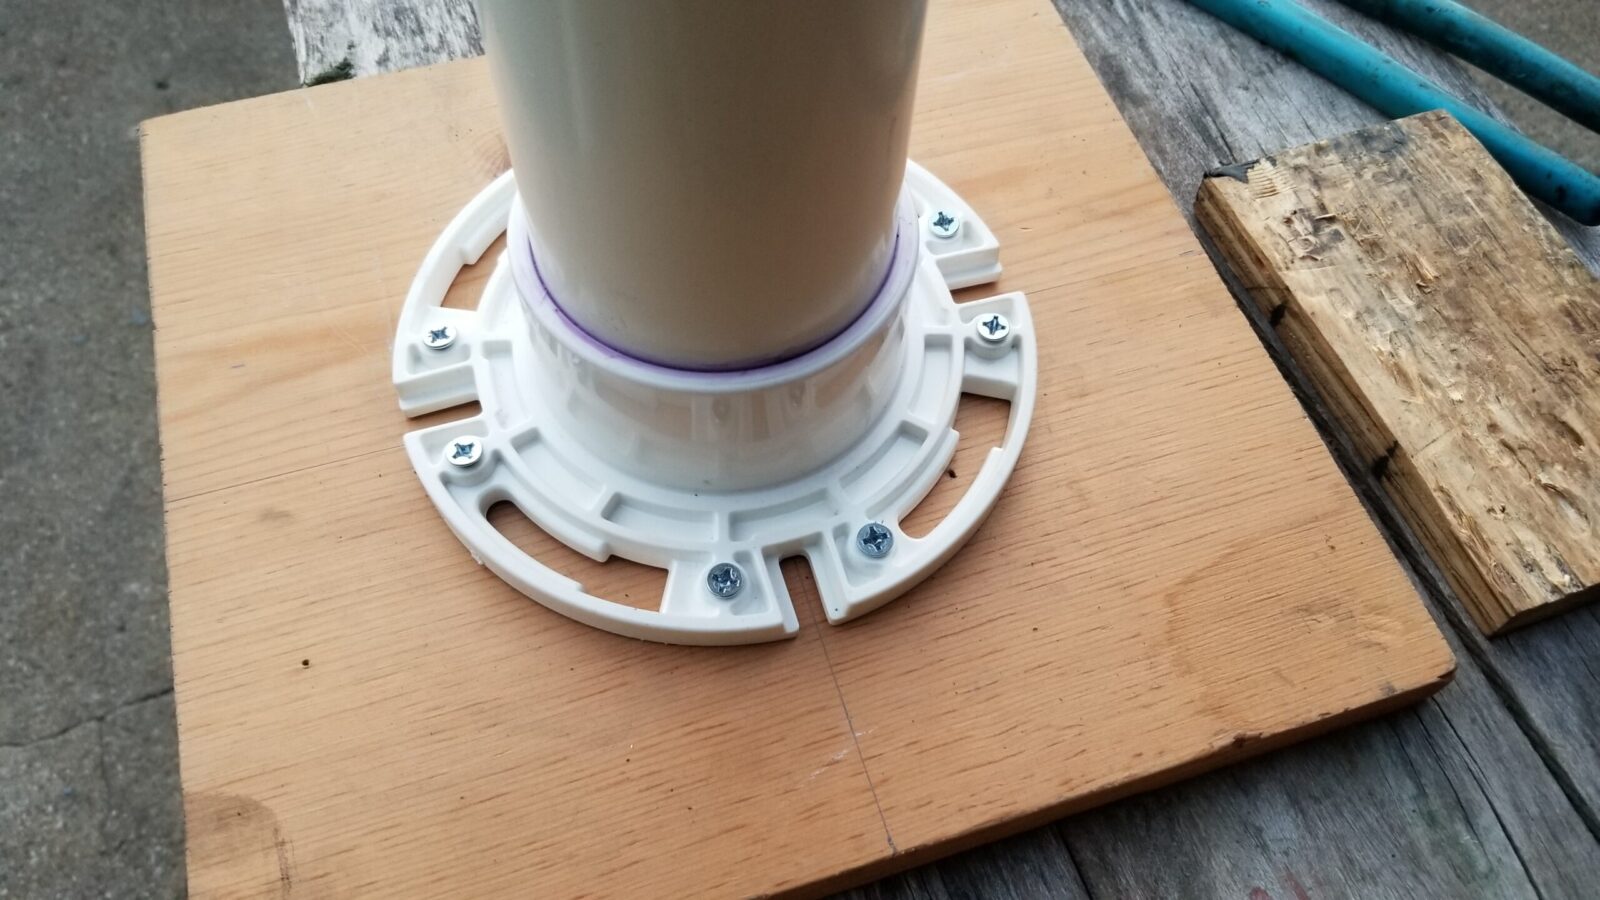
This is my 3″ tank I just built. The toilet flange us availab;e for 3″ and 4″ pipe and is handy for smaller tanks. I’d build a cradle/surrounding frame to support a bigger tank.
The pictured tank is about 16″ tall with 3″ pipe and has about a gallon of 70% ferric chloride and 30% apple cider vinegar in it. I can move it around very easily and portability was one of my design goals.
Assembling The Pipe
PVC is really easy to work with. You cut the pipe to the length you want or have the store do it for you. I use a big miter saw for stuff like this to get nice square ends and use an airline to blow all the loose plastic out (wear safety glasses).
To “glue” the pipe together, you first prime the surfaces and then apply the cement. Note, PVC and CPVC use the same primer but different cement. In this case,I use Oatey’s purple primer and clear cement. Read the directions on their box just to make sure. Bear in mind the solvent is really thin and is going to run everywhere – especially in cold weather.
I’m a creature of habit. I’ve had very good luck with Oatey products so I stick with them. There are other brands out there such as Ace’s own private labled stuff, but I stick with Oatey to avoid surprises. When following their directions and using their products, I’ve not had a joint fail/leak yet,
The Base
To make the tank stable, you need a big enough base both in terms of area and weight. I had some old 1×12 stock that I chopped into squares and stacked if four deep for weight. You can do whatever you want and your goal is stability, however you get it.
I centered the flange on the first board and screwed it in. I’m not sure I would trust the flange to handle the potential torque of a long pipe. For me, once I get around 24″ overall, I am going to build a cradle and not subject that flange to a ton of stress.I then applied epoxy and clamped the layers together. I was kind of experimenting as I went. Just one piece of wood wasn’t heavy enough so I then added the additional layers after. I could have glued the base and then used longer screws to secure the flange had I known more up front. I wound up with four layers of wood in the end.
I have another tank that is full of a boiled linseed oil an turpentine mix that I use for hydrating wood handles in khukuris and cleavers that I restore. It has a rounded end bap on the bottom and the base is more like a heavy cradle made up fo 2×4 lumber that gives it weight and then goes up the sides to provide support.
This is a 4″ pipe with a wood scaffold base. It’s very stable. This is a tankI use for moisturizing and treating long wood hanndles.
If you find this post useful, please share the link on Facebook, with your friends, etc. Your support is much appreciated and if you have any feedback, please email me at in**@*********ps.com. Please note that for links to other websites, I may be paid via an affiliate program such as Avantlink, Impact, Amazon and eBay.
In the last post, I covered the basic construction of the tank. In this post I want to talk about heating the tank. Thanks to mass production of digital temperature switches, you can build a digitally controlled heated tank for a very reasonable price.
Why Does Heat Matter?
In case you are wondering, heating the solution does matter. Years ago, in 1889, a chemist by the name of Svante Arrhenius proposed an equation that would later bear his name. Basically, a chemical reaction increases as the level of activation energy increases. The reason temperature enters in as that you are raising the energy in the liquid, more energetic particles are bouncing around and increasing the volume of reactions which means that more successful reactions will occur as well. We can use a rule of thumb that for each 10C increase in temperature, the reaction rate will double and for each 10C drop, it will be cut in half. To sum it up, cold=bad for chemical reactions. As a side note, this is also why marginal batteries fail when cold weather hits.
So what this means to acid etching is that in my cold unheated shop in the Winter, reactions are going to be real, real slow. Thus, I must have a way to heat the chemical and the submerged part to improve the reaction.
The Heating Element For The Tank
The first thing I wanted to do was to keep the cost down and the second was that I didn’t want something that would get so hot that it would melt the PVC. I had a 30 foot length of roof heating tape from when we cleaned out my dad’s garage that I had been thinking about for a while. It always makes me feel good when I use something that was my dad’s. (There are tons of options on Amazon – click here.)
These roof heating cables use AC voltage to warm up and melt ice are readily availble and are designed not to get so hot that they melt the shingles but also are designed to be spread out and not right next to each other so I was going to need to test the design. I planned to wrap the tape from the bottom of the tank until I ran out cable with each coil right against the previous. I was counting on convection of move warmer fluid up and cooler fluid down but I wasn’t really sure how it would sort out.
Another nice things about these heating cables, or heating tapes, is that they do not use a lot of electricity. The 30 foot model my dad had was spec’d to draw only 150 watts at 12 volts. That makes for a nice portable unit that you can run off just about any extension cord.
So, step one, I applied the tape to the empty tank and secured it just with 3M 3340 aluminum HVAC tape. This is the tape made for higher temperatures with an aluminum foil backing – it’s not dcut tape. I then watched the temperature with my Fluke 62 Max IR thermometer. You need an accurate thermometer and the Fluke has served me very well – it’s proved itself to be accurate, reliable and durable – it’s been bounched around a lot in my shop.
So, the temperature slowly climbed but made it all the way up to 170F before I shut it down. The PVC still felt pretty good but it was way hotter than what I wanted. Just plugging the tape in and calling it done was not the answer. Sure it would heat the liquid up fast but I couldn’t safey leave it unattended. I needed something to control the temperature but use the heat tape.
Please note that there are pipe heaters that are a different creature. Some of them need to be submerged in water or wrapped around a steel pipe. Do not use those types of heaters. There are a ton of different names buy you are looking for the cable or tape that is put on roofs to melt ice dams, etc.
Solution – Use A Digital Temperature Controller
I thought I knew the switch I was going to buy until I did some further research. Some controllers are very easy to set up and others seem a bit more confusing. I opted for the WILLHI WH1436A Temperature Controller 110V Digital Thermostat Switch. All you do set set the temperature for ON and the temperature for OFF. That’s it. If you want them, there are some more advanced settings that you can explore if you want but this seemed like just what I needed.
I undid the top few coils of the heat tape and rewound them with the temperature probe wrapped in them. I then used aluminum HVAC tape to secure the top. I set ON to 90F and Off at 95F and plugged the roofing tape into the controller.
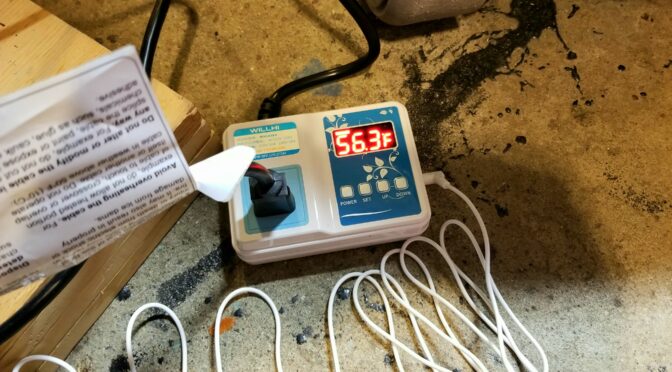
I inserted the temperature probe a few coils down and secured the top with 3M Aluminum HVACtape. Note the small cable clamp screwed into the wood base securing the bottom of the heater tape and preventing it from unwinding.
I started watching with the Fluke meter and since the temperature based on the probe was 40.2F, the controller turned on power to the switch and the tape heated. It did cut power around 95F but the tape continued to warm up even so by about 10F so the peak temperature was between 103-105F according to the Fluke. This was actually within my acceptable range. I was just ballparking 90F but even 105F was fine by me.
The digital controller works well. I’m going to leave it loose some I can move it around depending on what I am working on and were.
There was one minor hitch I noticed during experiments – the controlled heat took over an hour to warm up the fluid. If I unplugged the tape from the controller and plugged the tape straight into AC power, the fluid heated way faster and the pipe never felt soft – probably because the tape was heating part of it and the acid was cooling it. This was the fastest way but risky because if you forget, it’s going to get quite hot. I let the fluid get up to 160F during one run and decided that I would only do this if I was in a big rush and going to be there working the whole time. If I wanted to play it safe, letting the controller keep things safe was a better bet. I could have also sped things up by setting the OFF temperature higher, say at 110F and that’s something I will experiment more with.
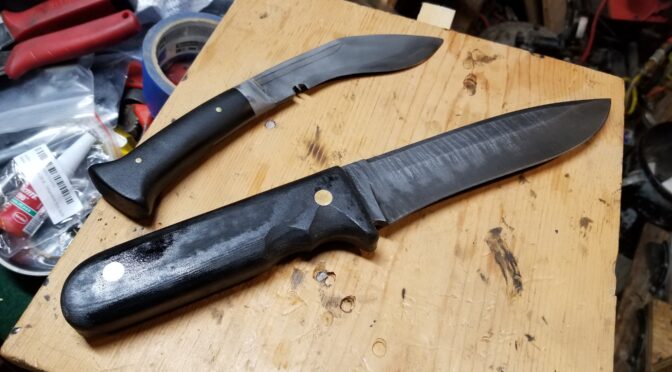
The temperature controlled tank worked out great on these high carbon steel damascus blades.
Operating Temperature Range
Do not heat ferric chloride past 131F. Remember that the heating element will still heat the chemical another 10 degrees or so past the upper limit you set as OFF.
The operating temperature range from MG Chemical is 95-131F. Based on my results, I don’t see a need to push the upper limit.
I had about $30 in the PVC and fresh glue, nothing for the base, the controller was $29.99 and the roof heat tape was free but if you bought it, the price would be around $30. This definitely falls in the affordable category plus I turned out some really cool etched damasus blades using the controlled tank. If you want to know a bit more about the chemicals and my process, click here.
When I was done, I let the tank cool down, screwed on the lid, cleaned things up, coiled the cords up and stored the tank for the next use.
If you find this post useful, please share the link on Facebook, with your friends, etc. Your support is much appreciated and if you have any feedback, please email me at in**@*********ps.com. Please note that for links to other websites, I may be paid via an affiliate program such as Avantlink, Impact, Amazon and eBay.
I think James’ M92 SBR looks pretty wicked!! That’s our handguard set on the front. It looks great James!
If you find this post useful, please share the link on Facebook, with your friends, etc. Your support is much appreciated and if you have any feedback, please email me at in**@*********ps.com. Please note that for links to other websites, I may be paid via an affiliate program such as Avantlink, Impact, Amazon and eBay.