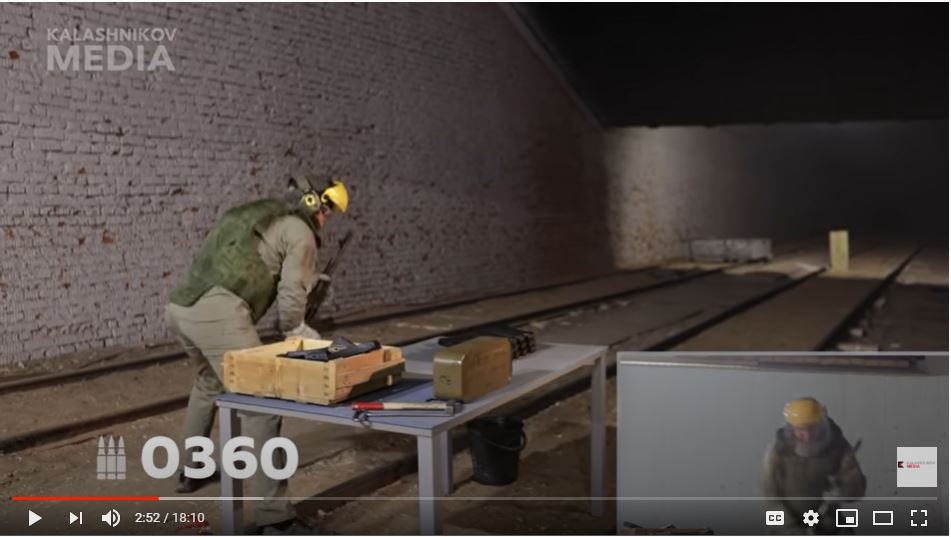
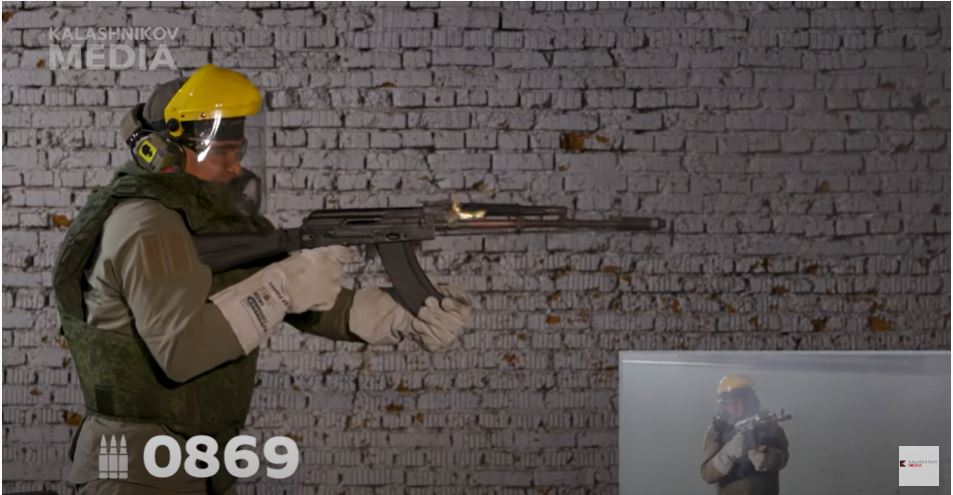
In this episode, Georgiy Gubich operates a 7.62×39 AK-103 built in 2019 on full auto trying to get it to fail. The AK-103 is a remarkable rifle as you will see in the video
He’s smelling hot plasticStarting here forward he really needs to struggle to get the bolt to exit the chamber. It seems to return and cycle just fine when firing.He’s seeing flame from the handguardsThe lower handguard had already fallen off during a previous reload but look at the barrel glowing red.The rifle survived through two spam cans, 1,400 rounds, of ammo!After all that, it could still shoot 2 MOA at 100 meters. Definitely a remarkable rifle.
Watch the Video!
Summary
I’m a fan of both the 7.62×39 round and the AKs that shoot it so I was rooting for the rifle the whole time. It’s pretty amazing that it still ran after 1,400 rounds.
I hope you enjoyed this!
Please note that all images were extracted from the video and are the property of their respective owner.
If you find this post useful, please share the link on Facebook, with your friends, etc. Your support is much appreciated and if you have any feedback, please email me at in**@*********ps.com. Please note that for links to other websites, I may be paid via an affiliate program such as Avantlink, Impact, Amazon and eBay.
PSA AK Webstore Links
Interested in an American made AK? Consider Palmetto State Armory (PSA) as a source. Click on the following links for the associated webstore categories for AK-related rifles, pistols and parts at PSA:
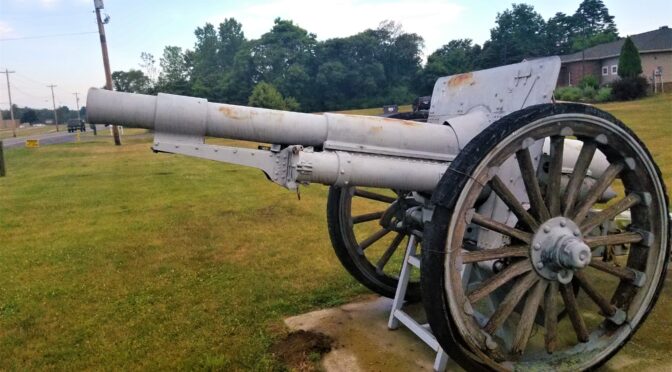
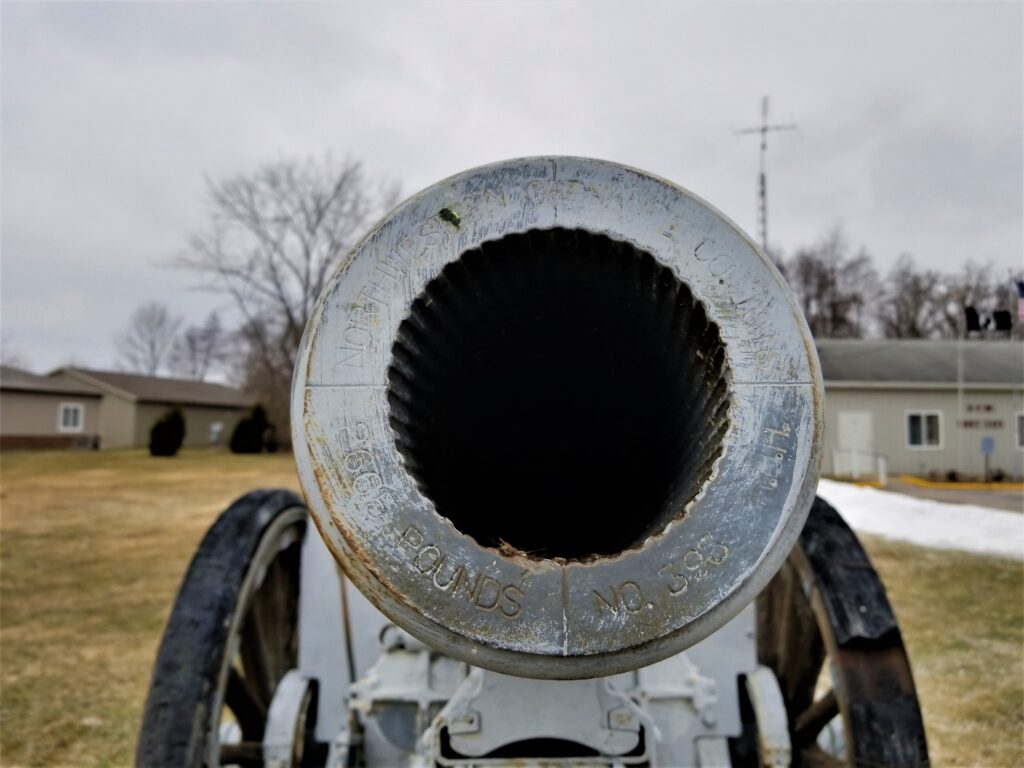
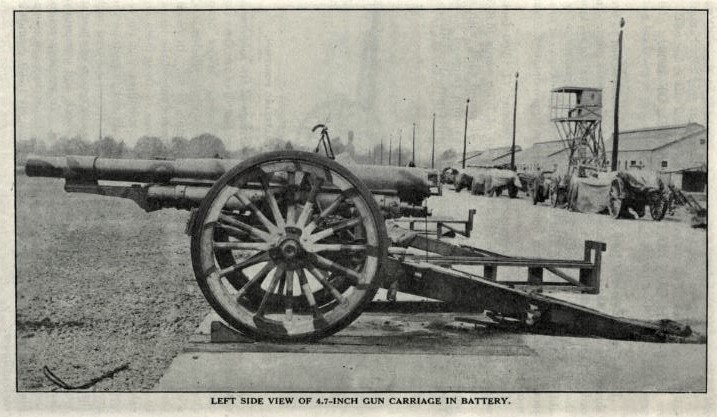
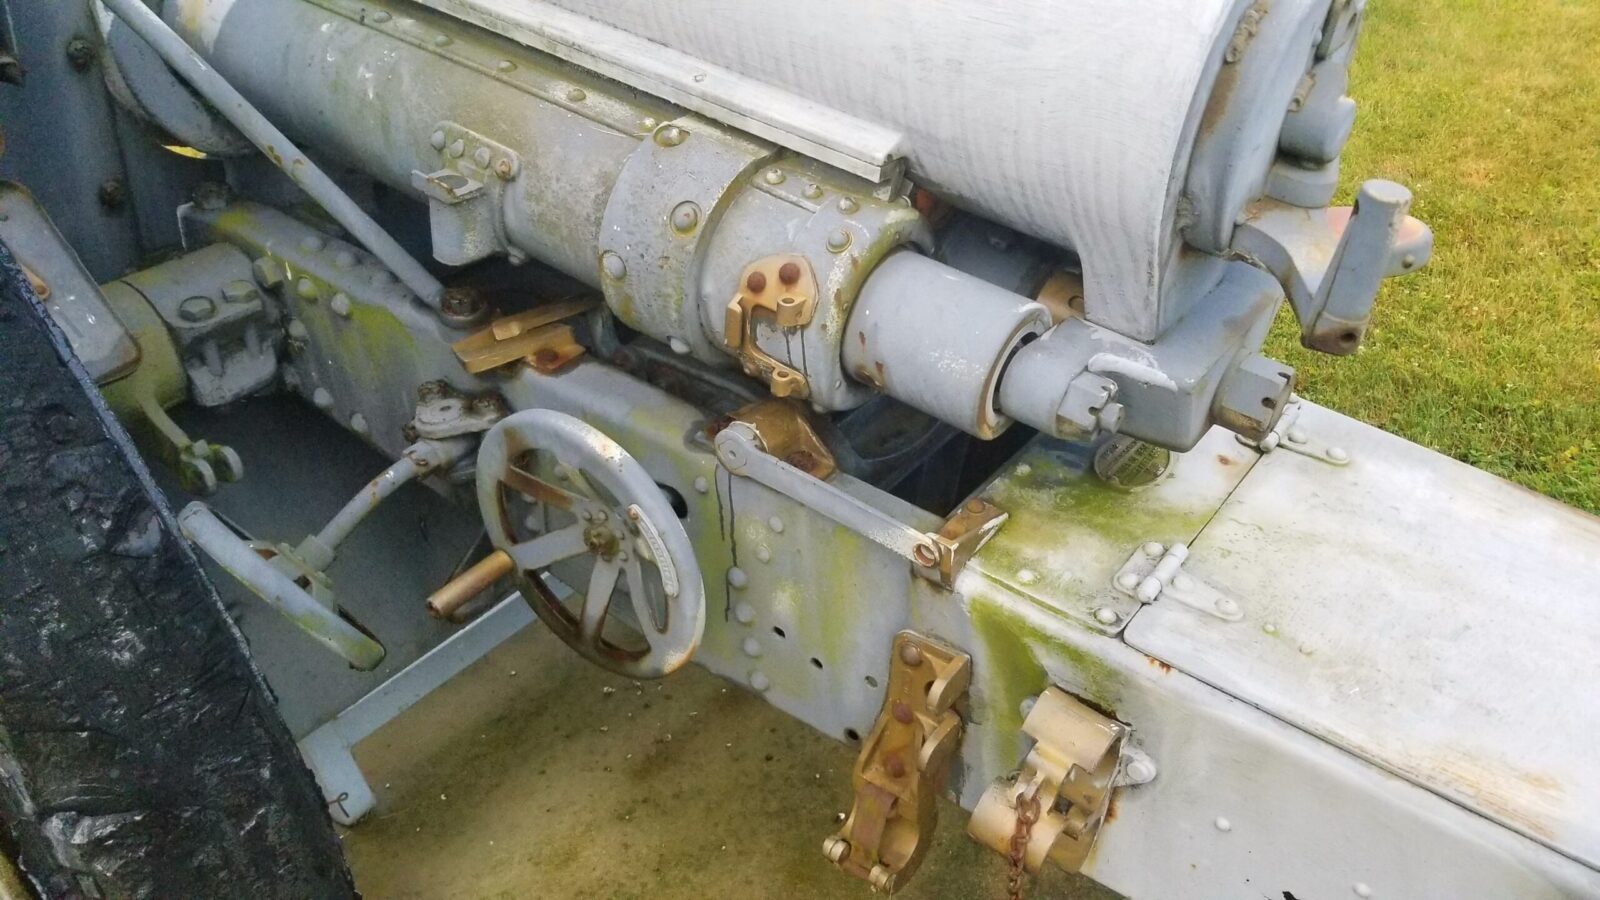
One day when we were driving around, a WWI-era cannon caught my eye. It was positioned in front of VFW post 1137 in Watervliet, MI. Artillery of that era has a number of distinct markings – notably wooden wheels! So, I stopped and took photos – two times actually. One time in the Winter of 2019 and again in July of 2020.
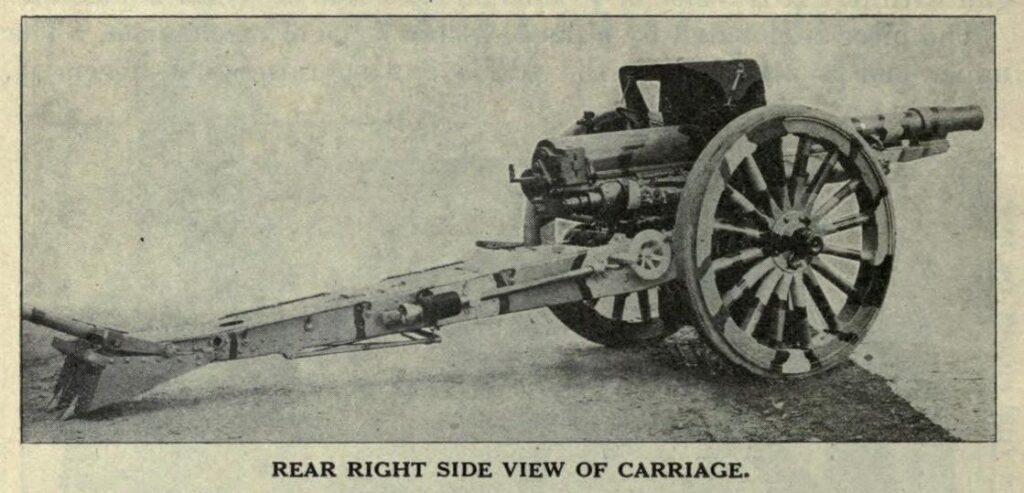
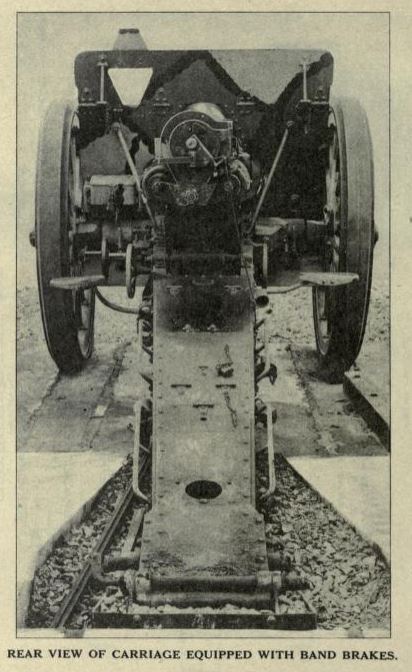
Well, age and the elements are taking their toll but you can still see the 4.7″ M1906 and get a pretty good idea of what it looked like in its prime. Kudos to someone for making a stand to take the load off the old wooden wheels that could never handle it at this point.
Getting The Clues I Needed To Research The Cannon
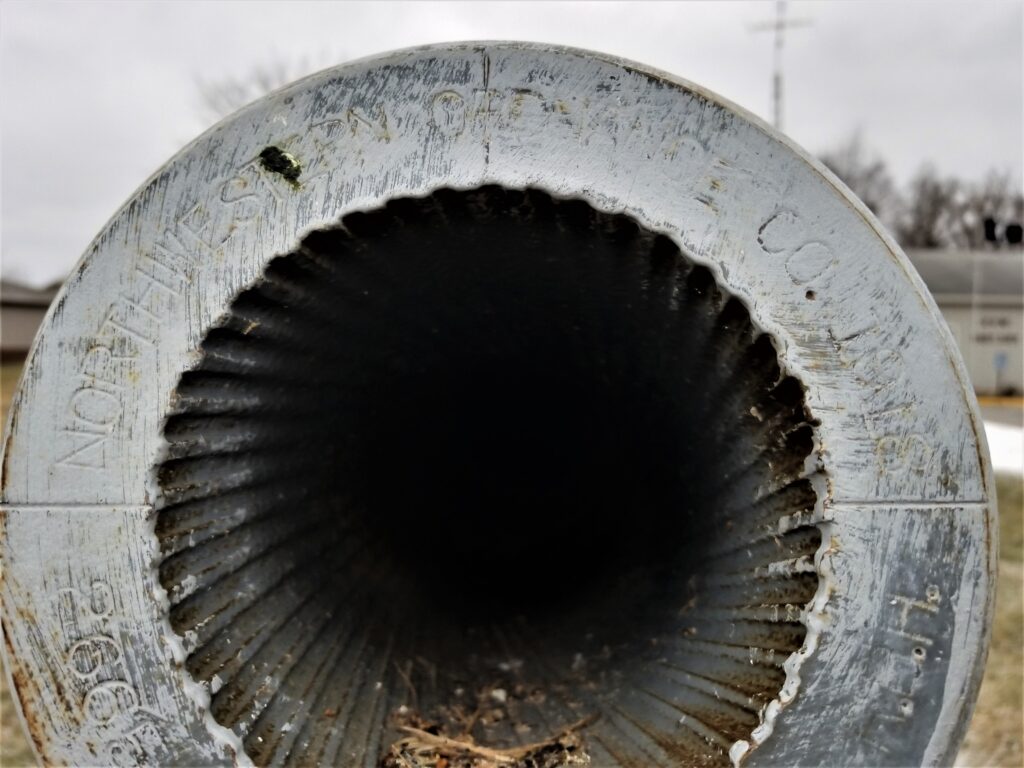
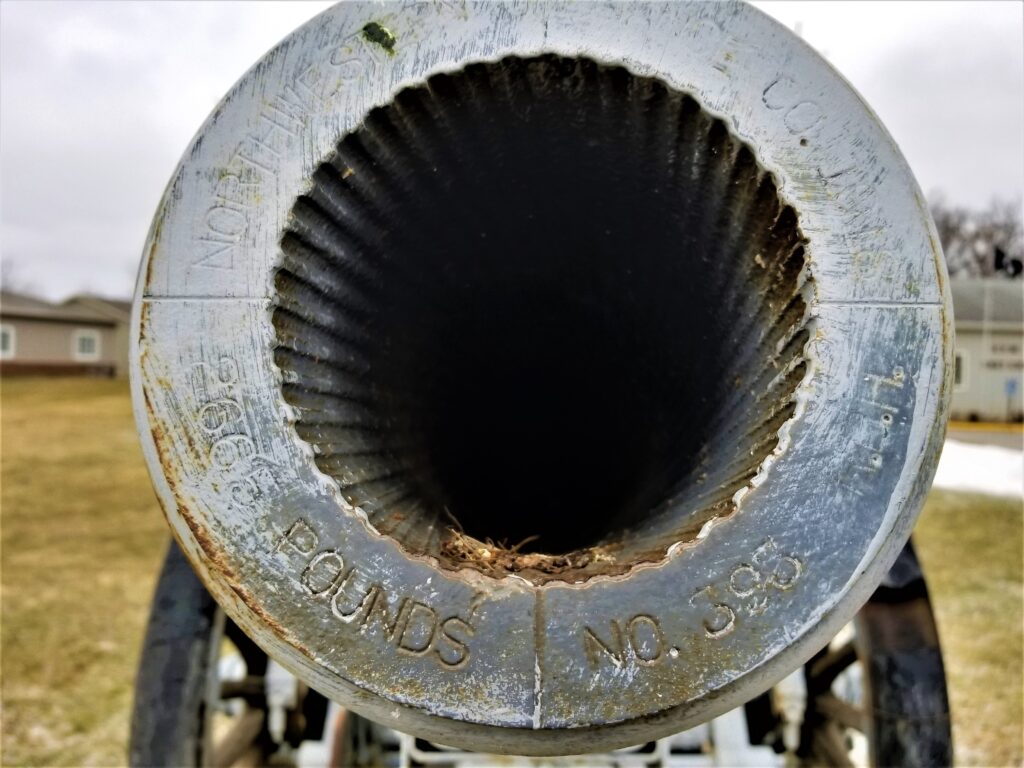
In most artillery of this age, you can find what you need to start digging on the muzzle and the carriage. With this in mind, I made sure to get some photos as best I could of the info at those points.
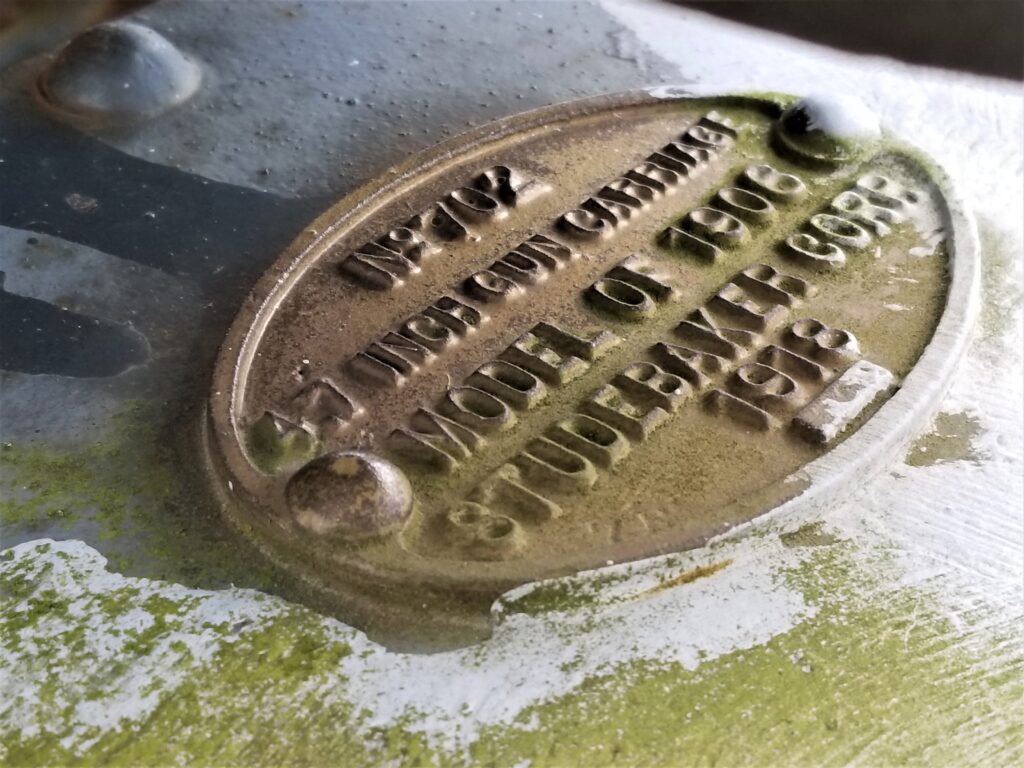
The markings were hard to make out with the naked eye due to paint but with some digital photo editing, I could pull out the details. Northwestern Ordnance Co. 2665 Pounds. No. 395. Getting in even closer and seriously tweaking the photo to enhance clarity, you can see that it says Northwestern Ordnance Co. 1918. The weight is definitely 2665. The initials in the lower right I am not sure of. I wonder if they were the inspector’s initials or some code. I can make out the letter H but not what is before it. You can see the bore area near muzzle still has its rifling.It looks like there were three initials to the right of the gun’s number – “NO. 395”. The first two initials are too worn for me to make out but the last one looks like an “H”. I’m guessing but “R.B.H” maybe?The emblem on the carriage was far easier to read and also our single best clue as to where to start digging. It was carriage number 702 for the Model 1906 4.7 inch gun. The carriage was made by Studebaker in 1918.
Doing The Research
From the carriage, I knew to start my Internet searching on M1906 4.7″ guns and Google immediately returned images, books and blog posts that confirmed that.
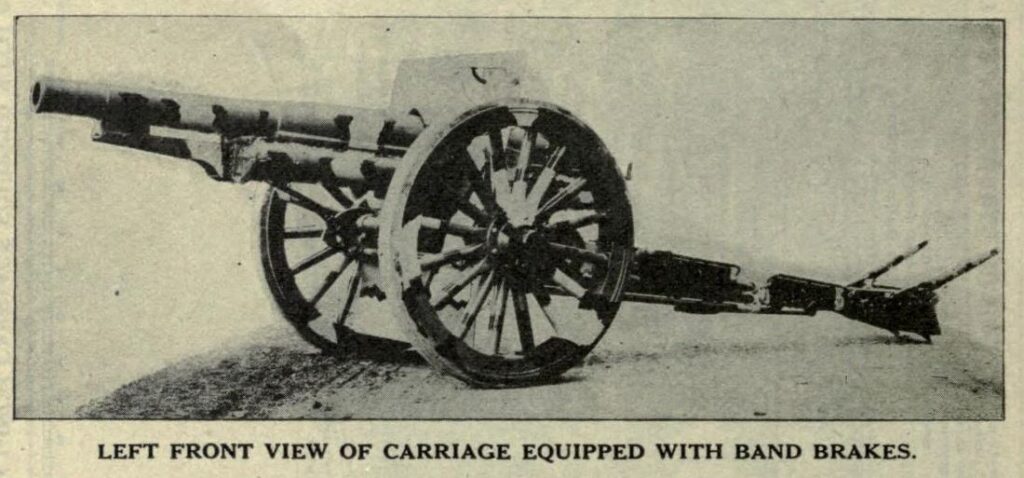
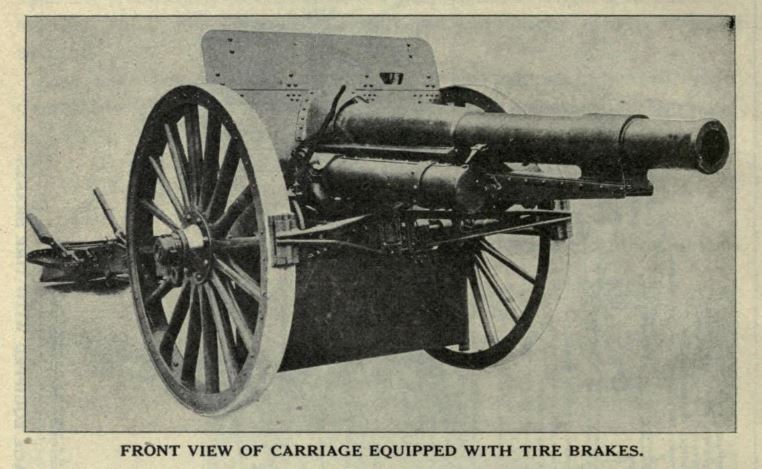
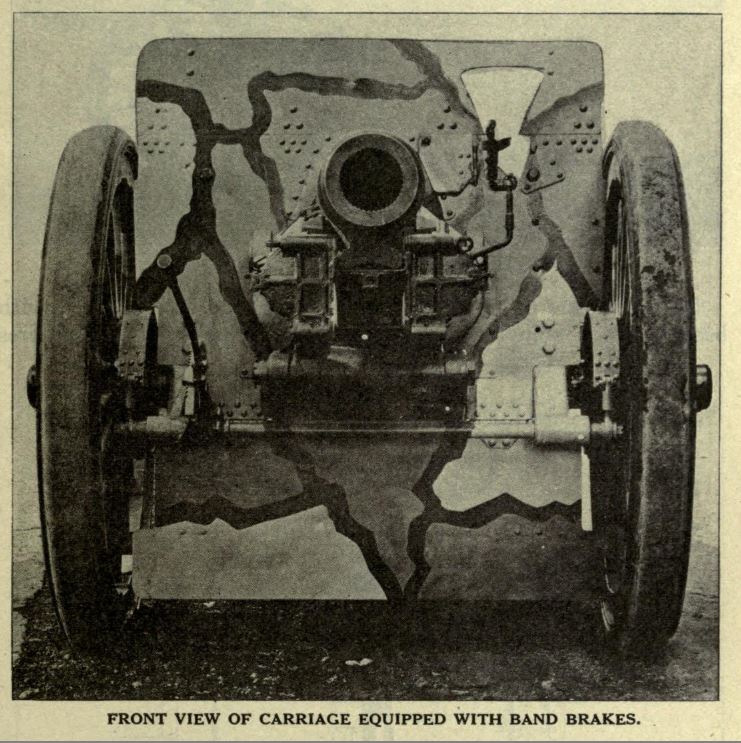
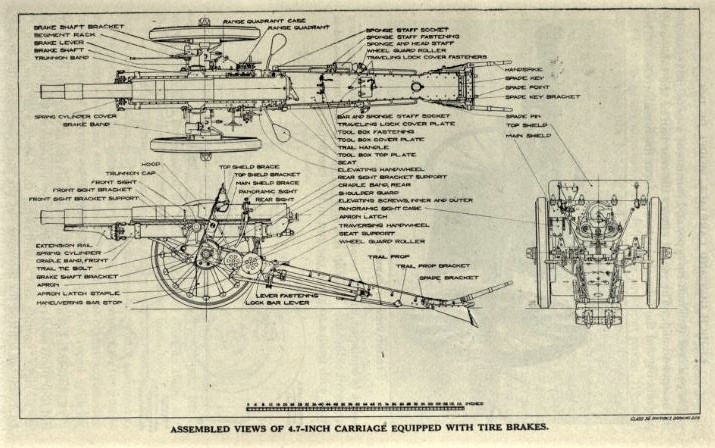
Wikipedia gave me some info but then thanks to the Internet Archive Project, I found two scanned copies of US Army books that had lots of old pictures, diagrams and really comprehensive information about the 4.7″ gun. There is so much detail in these books that I am just going to give a quick overview in this post and you can learn more from these books:
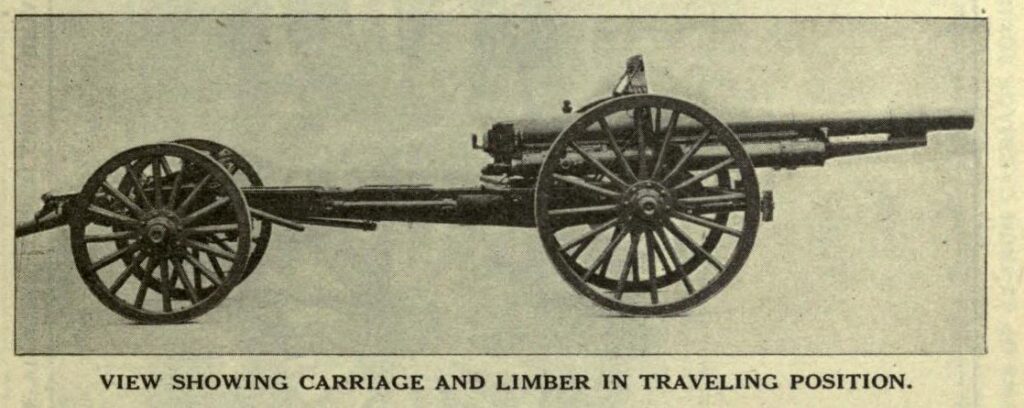
The 4.7 inch (120mm) field gun was designed and issued by the US Ordinance department beginning in 1906 with the first units being delivered in 1911. It was manufactured by the Northwest Ordinance Co and carriages were made by three firms groups: Rock Island Arsenal, Walter Scott Co and Studebaker Co.
Apparently there were logistical problems with the unique ammunition it used resulting in limited numbers being built. Despite larger orders being placed, only 209 guns and 470 carriages were produced. 64 of the units were sent to France. 994,852 of the 4.7 inch shells it used were produced. Most of the units were used for training and the guns stayed in reserve storage until 1932. [Source – Wikipedia]. Note, that Wikipedia link is pretty cool for a quick high-level summary of the 4.7″ gun.
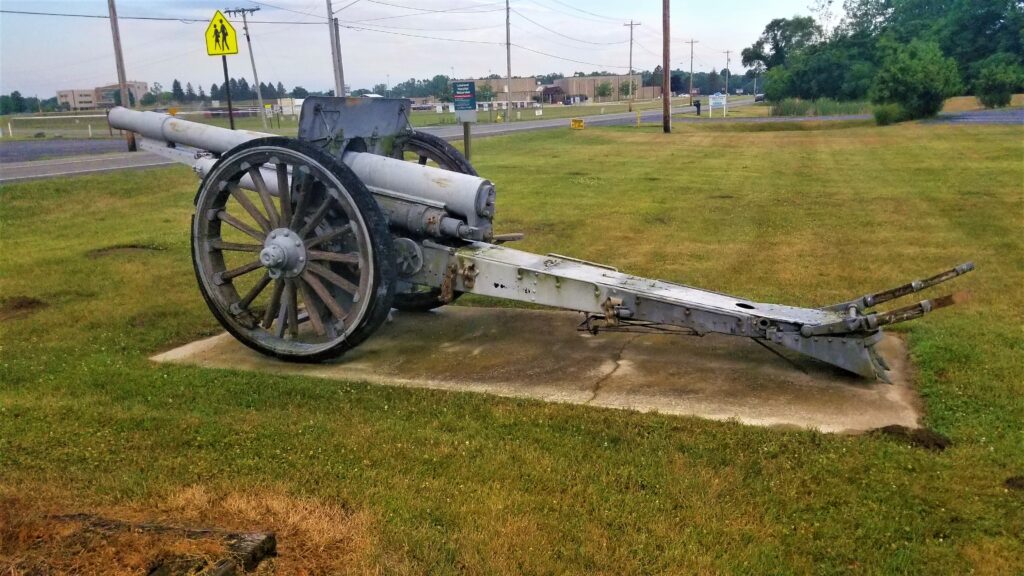
More Photos of Number 395
The photos below were taken on the two different visits mentioned above. If you click on one, you can see the full-size photo and navigate around as well.
Summary
I’ve heard from guys who grew up in this area and they tell me the gun moved around some over the years before landing at its current location in front of the VFW post. If anyone has more information, I’d sure be curious to hear it.
With that said, I now know a little bit more and hope you found this post interesting.
If you find this post useful, please share the link on Facebook, with your friends, etc. Your support is much appreciated and if you have any feedback, please email me at in**@*********ps.com. Please note that for links to other websites, I may be paid via an affiliate program such as Avantlink, Impact, Amazon and eBay.
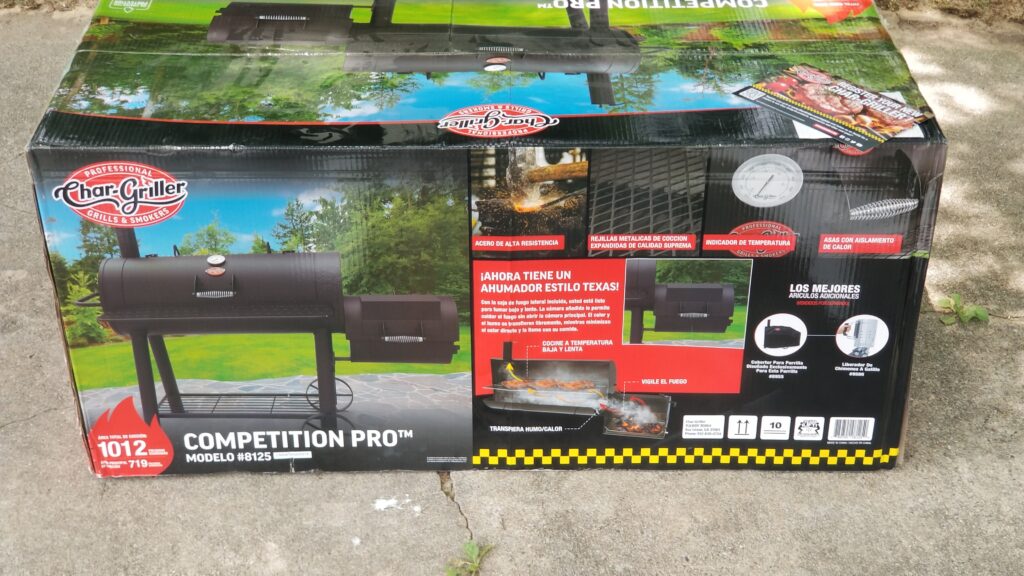
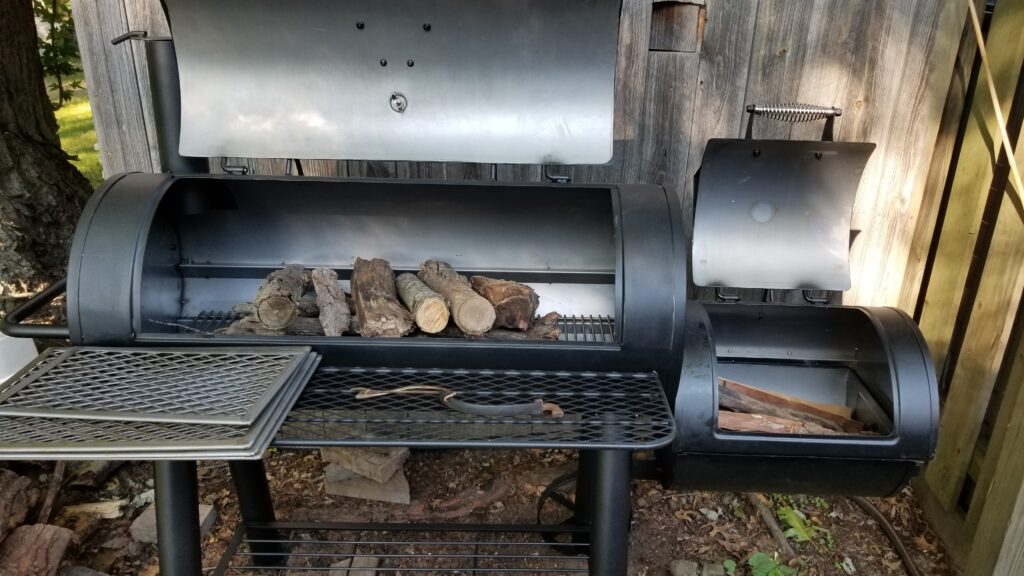
As a father’s day gift this year, my kids chipped in and bought me a brand new grill. My wife helped them hide it and together they surprised me. Man, that really touched me. I’ve had a Char-griller Super Pro 5555 grill for almost 10 years – we’re not exactly sure how old it is but it was rusting through in a number of spots. The kids know that I love to grill and decided to go in together to buy me a new 8125 Competition Pro Offset Smoker Charcoal Grill. I had made a few assumptions about that grill that didn’t quite turn out as expected but with a little bit of work I was able to make a grill I really like.
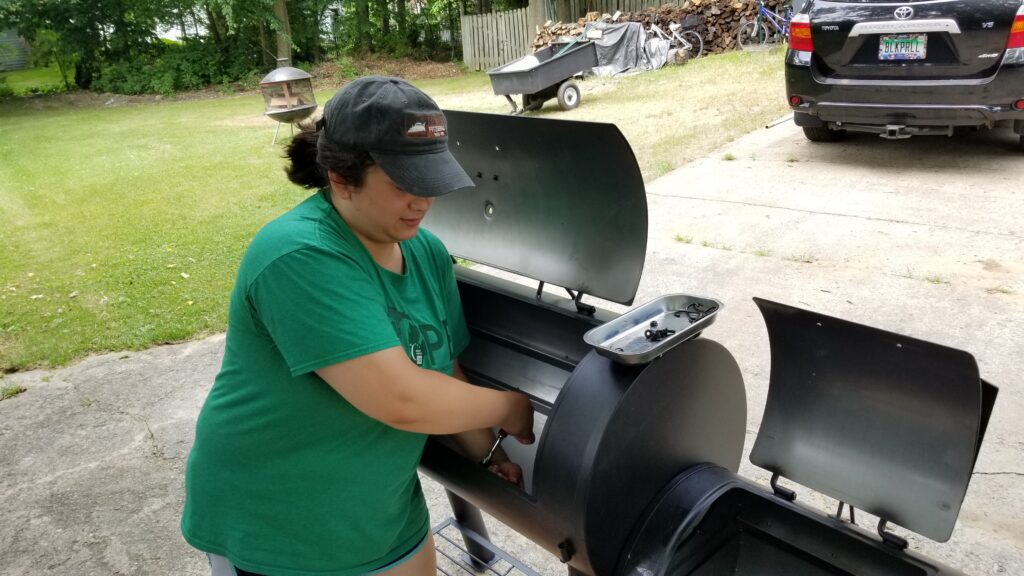
Eye catching packaging and it weighs a ton – 140 pounds.My two daughters helped me assemble it. The size and weight of the components really make it a two person job.
My biggest problem has to do with my preference to cook with wood and not charcoal and some usability issues this created. Here are my observations after using this for a few weeks:
#1 – The 8125 was really designed with charcoal in mind and they say that right up front. It has a fairly small fixed gap between the grate that holds the charcoal and the expanded metal cooking grates. It would work for a layer or two of charcoal but not for wood.
You can see there’s not much room between the lower rage and the shelf that would hold the cooking grates. Note the expanded metal food grates sitting on the left end of the shelf.
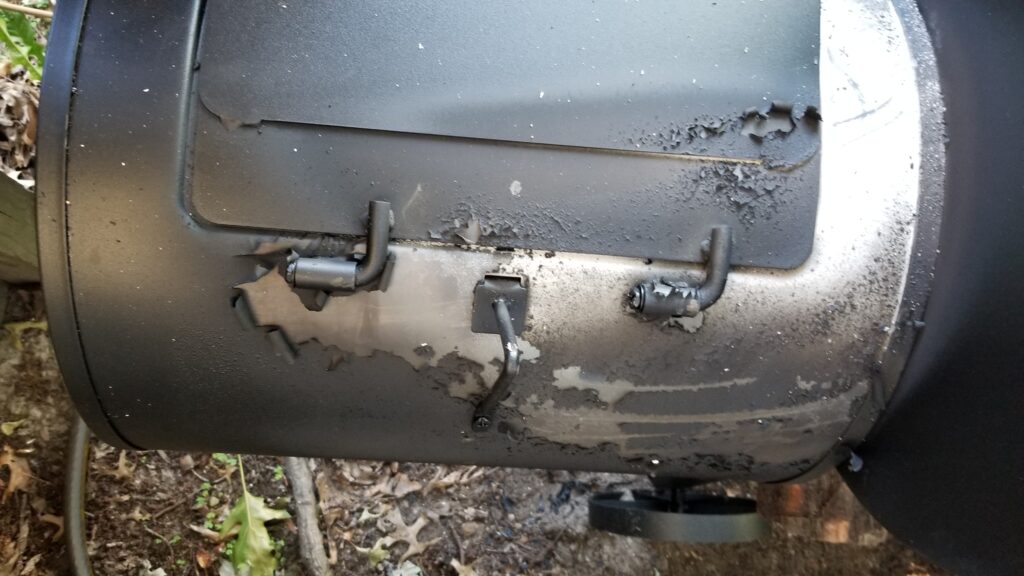
#2 – The paint they put on the 8125 flat out burns right off. What in the world were they thinking? I’m sure this is why the manual says not to exceed 400F but come on. My old grill never did that.
Yeah, the junk paint came right off where it got too hot. We read this might be a problem so it was entirely a surprise but for the price they could have used a high temp paint.
#3 – The expanded diamond-pattern sheet metal is really thin and doesn’t help at all when it comes to transferring heat. I prefer a heavier grate that will help conduct heat to the food.
#4 – Maybe because I am using wood but I can’t seem to run the little smoker piece as well as the big section. Not a big deal but definitely an observation. I’m not even going to worry about this and save the little side smoker box for when I do really want to smoke stuff.
So what did I do?
In looking at the grill’s performance there were three things that I needed to do – retrofit it to use wood, replace the thin expanded metal cooking grates with cast iron and to use a high-temp paint vs. whatever stuff Char-griller chose very poorly to use.
Welded Fire Plates To Burn Wood
Okay, my old grill had a relatively thin sheet metal cradle that you could raise and lower to adjust the heat. The nice thing was that I could lift it out and dump the ash. What was real important is that is shielding the bottom from the burning wood. I really wanted that.
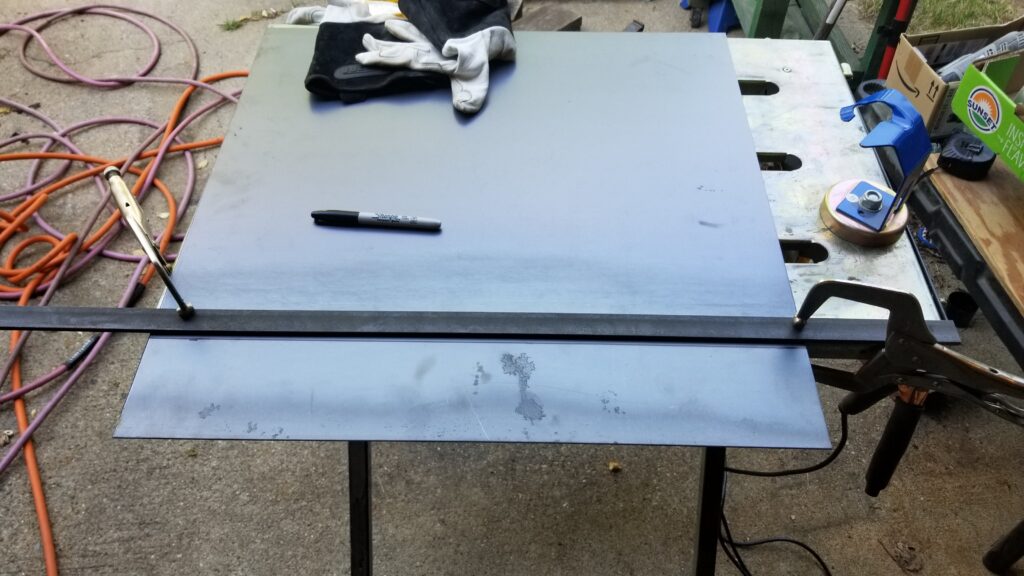
I bought some 14 gauge mild steel and cut it into strips. I did the wings at 4″ and the base at 5″ wide. If I had it to do over, I would have done the base still at 5″ wide but the wings at about 4-1/2″ to get a tad closer to the shelves that are tack welded from the maker. You could go in with a cutting disc, cut the tacks and remove the lower shelf supports really easily if you wanted to. I decided to just leave them.
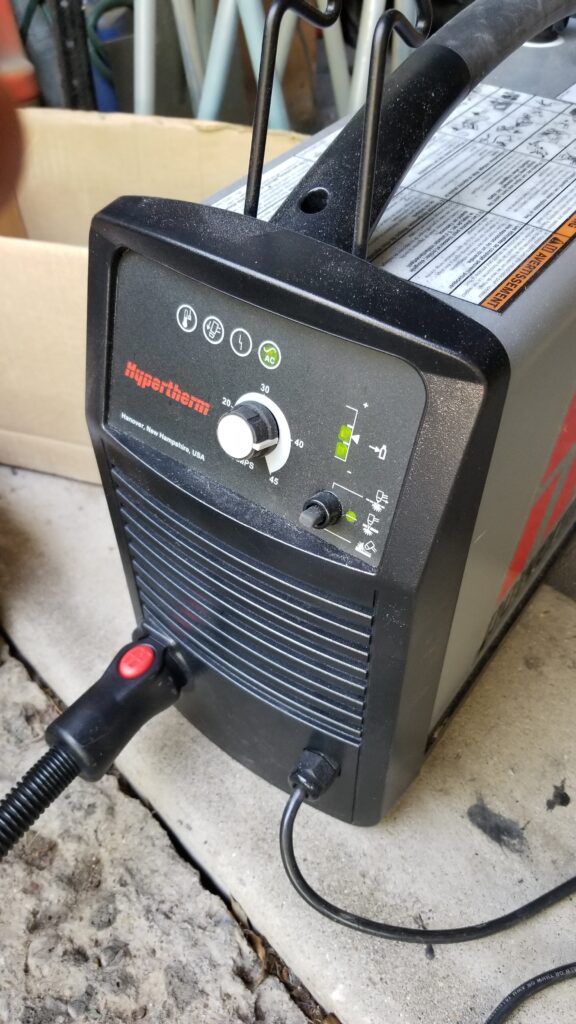
Laying out the 14ga sheet metal to cut my fire plates. The straight edge helps me make clean cuts with my Hpertherm Powermax 45 plasma cutter. I could have used a cut off wheel too but at this thickness, a plasma cutter is nice and fast. I tend to spend more time setting up than I do actually making the cut.I’m always impressed by how fast the plasma cutter goes through steel. Wow. The Powermax 45 is nice and straight forward. Amperage, air flow is indicated on the top right and the bottom three position toggle is for the type of cut you are doing.
Yes, I did think about doing more strips because the grill’s bottom is round. That would have let me follow the contour even more closely but I just wanted to keep it simple. If I were to go this route, I would cut the strips such that they came close to 14-15″ across or whatever you want really.
To form the angles, I actually took a simple short cut. I did three small tack welds to hold the plates together – one at each end and one in the middle. I then took the assembly to the grill and pushed/whacked it into place. This caused the sides to bend up and I got just the angle I wanted with the base plate centered. I then removed the unit and did the final welds all the way around.
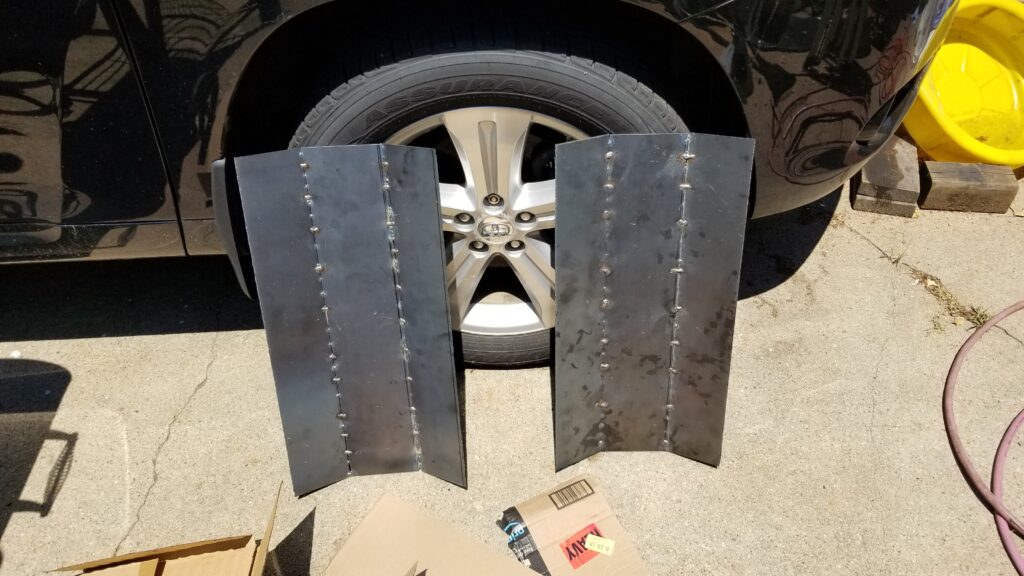
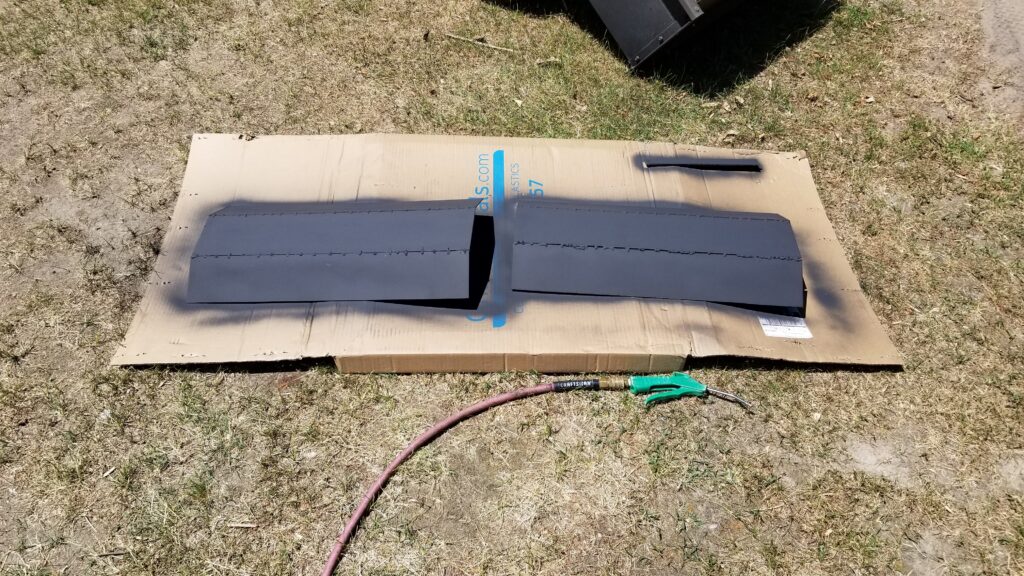
Here are the two raw plates. My next step was to paint them with 2000F paint – yes, there is such a thing.
Now the interior length of the grill is about 40-3/4″. The 14ga sheet metal I bought was 24″. I thought about cutting and welding the sheet metal but instead decided to let the two pieces simply overlap in the middle.
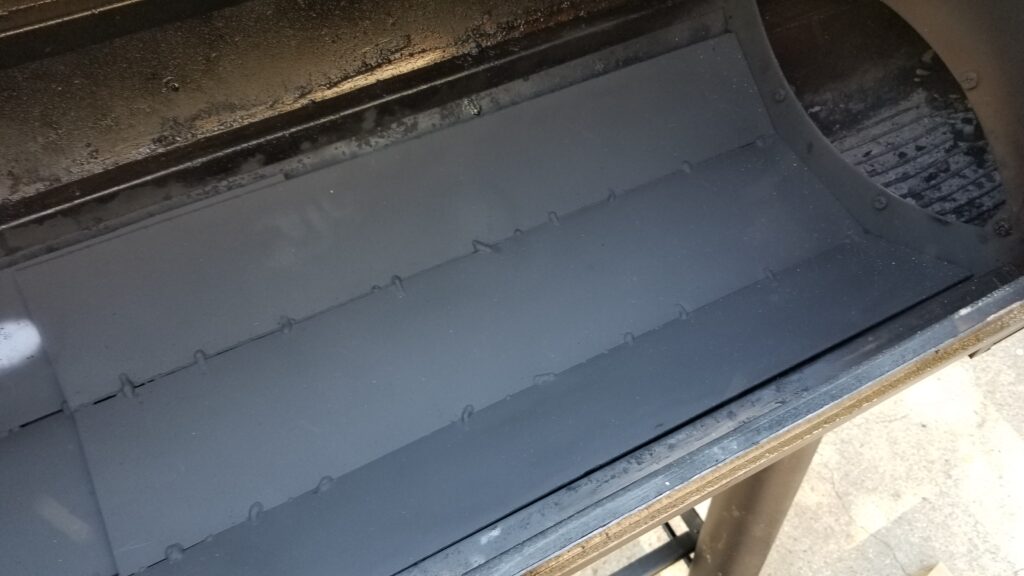
There are rivet nuts installed at each end of the grill to hold the legs. These stand that plates off from the bottom of the grill at each end. I put a spare piece of folded 14 ga sheet metal in the middle to lift the plates off as well.
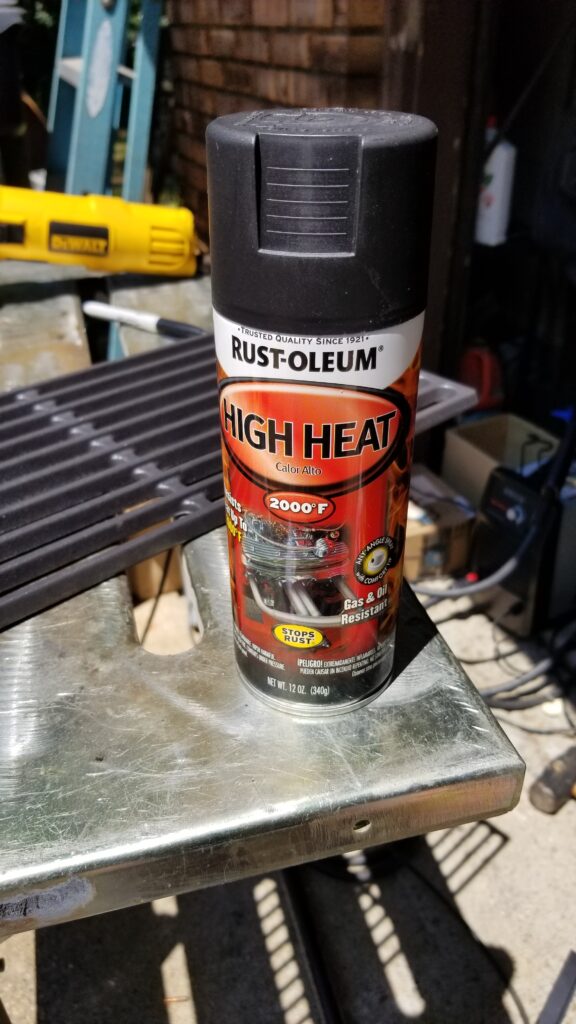
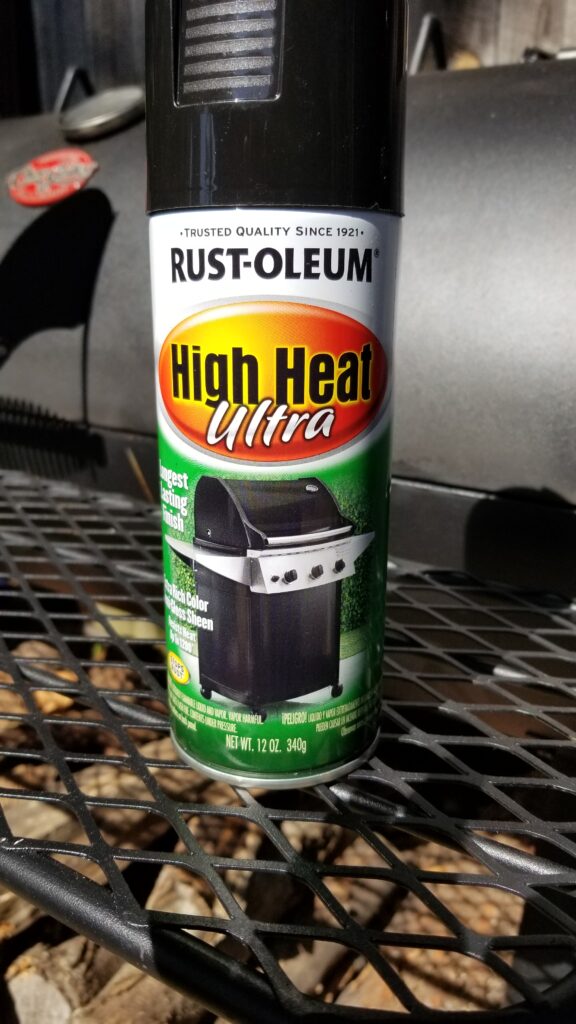
Yes, Virginia, there really is a 2000F heat resistant paint. This Rust-oleum High Heat paint is really interesting stuff and has a staged heating protocol you will need to follow to get the best temperature resistance.I first sprayed the plates down with brake cleaner to degrease them and put on rubber gloves to avoid contaminating them with oil from my skin. Boy, they got hot in the sun and dried really fast. There are four coats on each side of theI then installed the two plates into the grill. Next up was to load wood into the smoker unit and heat the grill up following Rust-oleum’s prescription.
Here’s what Rust-oleum recommends in case you have access to a big enough curing oven: “Bake at 400°F (204°C) for 30 minutes and allow 30 minutes to cool. Bake at 600°F (315°C) for 30 minutes and then allow 30 minutes to cool. “
In my case, I loaded the smoker up with wood and used it to heat the grill. I’d open both dampers and hit the recommended temp for at least the allocated time and then close the both dampers to smother the fire and let it cool down. My thinking, and time will tell if I am right, is that you need to hit the target temperature for bonds to be made and then cool down sets them — at least that’s what I think is happening. If it all flakes off then my assumptions will be proven flawed.
Note, I did install new grill plates and baked them at the same time so let’s talk about them next.
Bought Quality Cast Iron Grill Plates
Alright, the expanded metal cooking plates really are a joke. I’m sure they made sense to someone looking to cut cost but you really want a nice thick metal to sear meet and also to evenly spread the heat. My old 5555 grill had cast iron and they really did a nice job. Based on that, I really wanted to upgrade to heavy cast iron.
I did a lot of digging and hit on the perfect cast iron cooking grates on Amazon. These things are amazing!
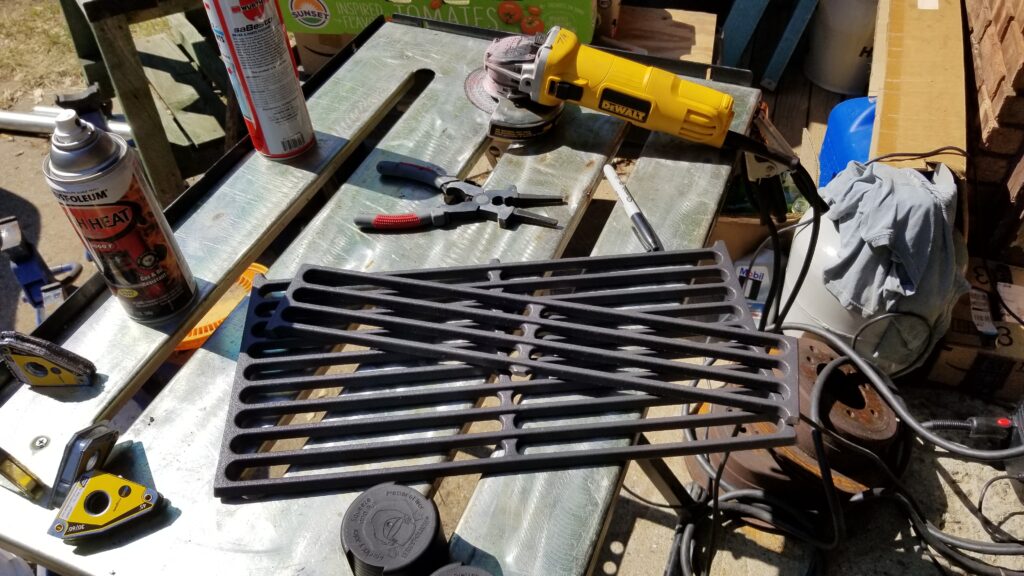
The replacement cast iron cooking grates I ordered off Amazon fit perfectly. They are very thick and heavy, which will help cook food evenly.
The grates are Vicool model 7526s https://amzn.to/3uWdwgwand measure just over 17-1/8″ deep and about 11-7/8″ wide and almost a 1/2″ thick — they are heavy! The grates come two per package and this meant I would need to order two sets to go the length of the grill.
The inside of the smoker has tabs to limit travel of the grates they installed. I could set in three complete grates. For the last grate, I marked where I needed to cut it and used a grinder with a cut off wheel to cut the last piece to size and drop it in. Since I don’t grill to the far left, that’s where I put the partial piece. It really turned out nice — I am very, very happy with these grates and definitely recommend them (the link is above or click here for the Amazon page).
I used a cut off wheel on my Dewalt 4.5″ grinder to quickly and easily cut the piece off the last grate. I cut the piece slightly too big and then sanded it down to fit perfect. Since I will need to remove the grates too add more wood, I wanted them to not slide all over the place but also easily lift out when hot and the metal has expanded.
Started Touching Up With Ruse-Oleum High Heat Ultra Spray Paint
The paint that Char-griller put on a supposed competition-grade smoker sucks. I’m not going to mince words – somebody made a very, very poor design decision. Yes, in their documentation they say not to go over 400F but why the low limit? Of course the cooking chamber or the side unit will go past that.
Rust-oleum High Heat Ultra is perfect for replacing the OEM paint that will literally curl and come off your grill.
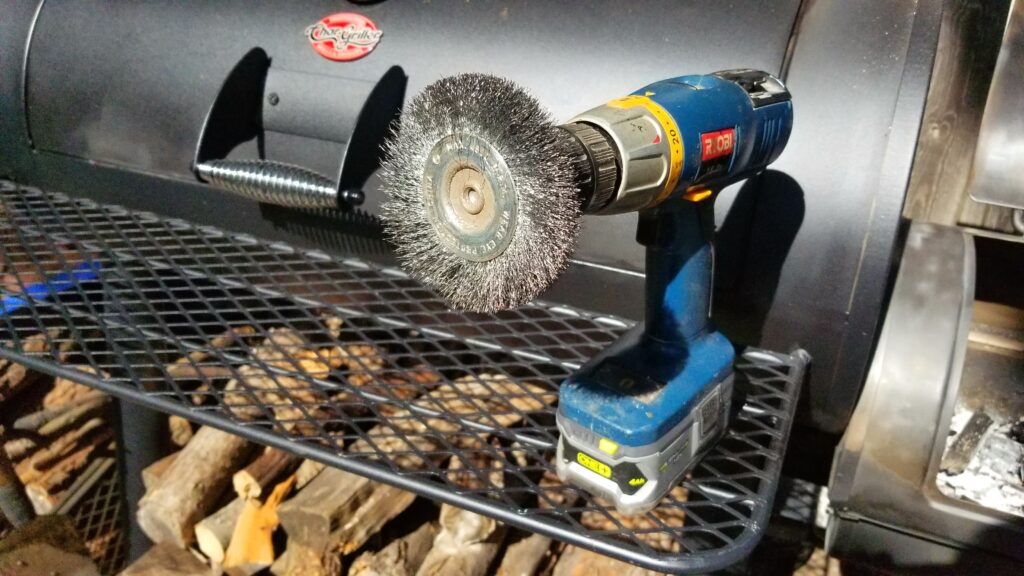
Dealing with it is a nuisance but not hard and there is a good paint to use to do the touch ups. Rust-oleum High Heat Ultra comes in a semi-glass black version that works great. I use a wire brush wheel on my cordless drill to remove the loose paint and then apply 3-4 coats of the High Heat Ultra. Let it dry for at least an hour and then heat it up to 400F to cure it. Note, they do not recommend it for direct contact with flames which is why I used the 2000F paint mentioned above on my fire plates.
I use a wire brush in my drill to remove the curling original paint. It’s happening less and less now that the high-heat areas have largely shed the original paint.
So far, this paint has held up with no problems. When ever the original paint curls back, I wire brush it and apply the High Heat Ultra. It’s annoying but I don’t feel like using a chemical stripper to remove all the old paint so I just keep doing this over and over.
If you have a BBQ or grill that you want to touch up, this stuff rocks and you’ll see why so many people recommend it.
A Cover
I do want this grill to last so I bought a cover that fits it pretty well. It’s made by iCover and is intended to fit 60″ offset smokers. I bought it due to reviews and wanted to save some money compared to the Char-griller cover and am happy with what I got. We’ll see how it holds up over time including Michigan winters.
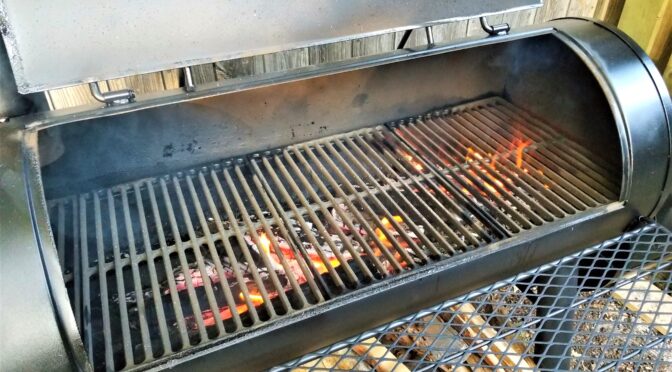
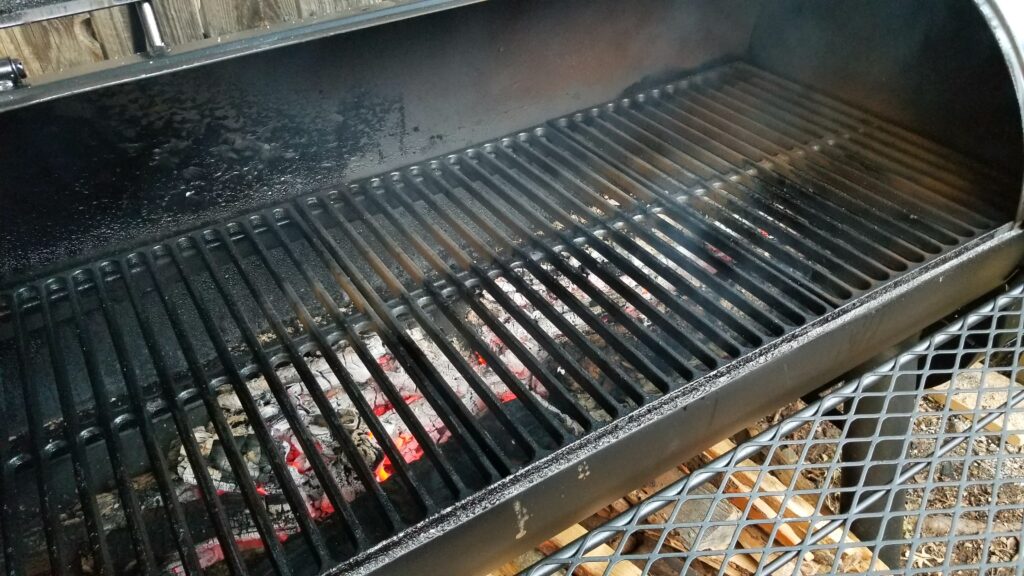
Hint: Break In The Grill
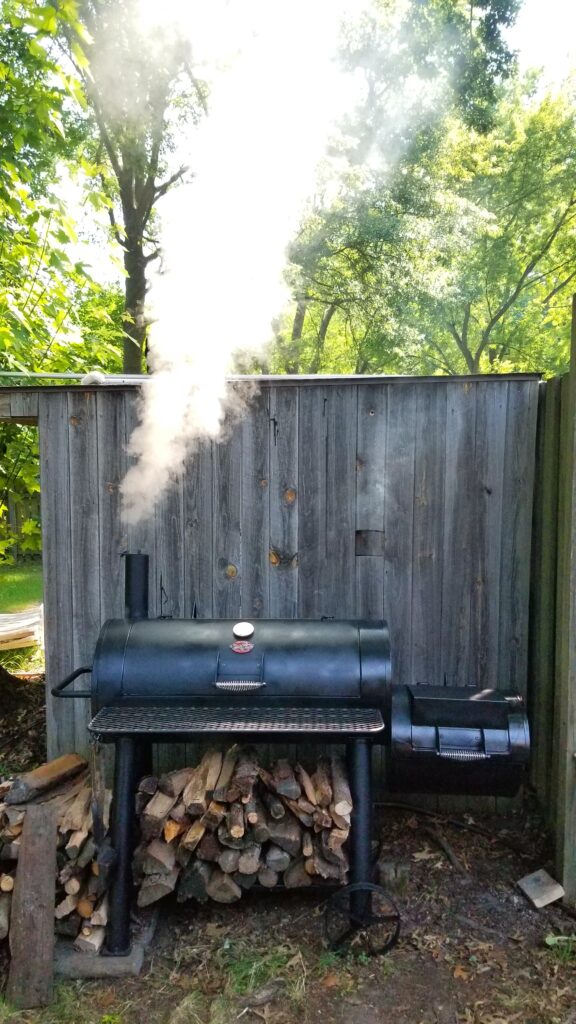
If you don’t break in your brand new grill, you run the risk of your food tasting funny not to mention eating some chemicals you really shouldn’t be. Before you use a grill to cook food, get it good and hot – 350-450F and hold it there for at least a half hour to get rid of paints, oils and what not. For example the 8125 came coated in some kind of oil or corrosion protection agent that needed to burn off. After that, I close the dampers and let a good coating of smoke go around and coat stuff inside and let it all cool down. After that, you ought to be ready to use it for cooking.
I’m seasoning the grill here. You can’t tell from the angle but there is over 6″ from the bottom of the grill to the wood. I’d stocked it up more than normal to season the grill and to get ready for cooking out that night. I split oak and maple from our property for cooking with plus whatever else my buddy John gives me such as cherry and hickory. The cherry is simply amazing to cook with.
Conclusion
My kids really surprised me this year. They knew my old grill was on its last legs and really wanted to get me something nice. They were way more upset than I was when the paint started coming off and that it really couldn’t handle the wood I wanted to burn. To be honest, the 8125 is a pretty good platform to make improvements on because they did use relatively thick sheet metal in the construction. You can take the base 8125 and make it do just what you want – that’s what I did and I honestly had some fun working out the details. I am thrilled with the result and want my kids to know they are awesome!!
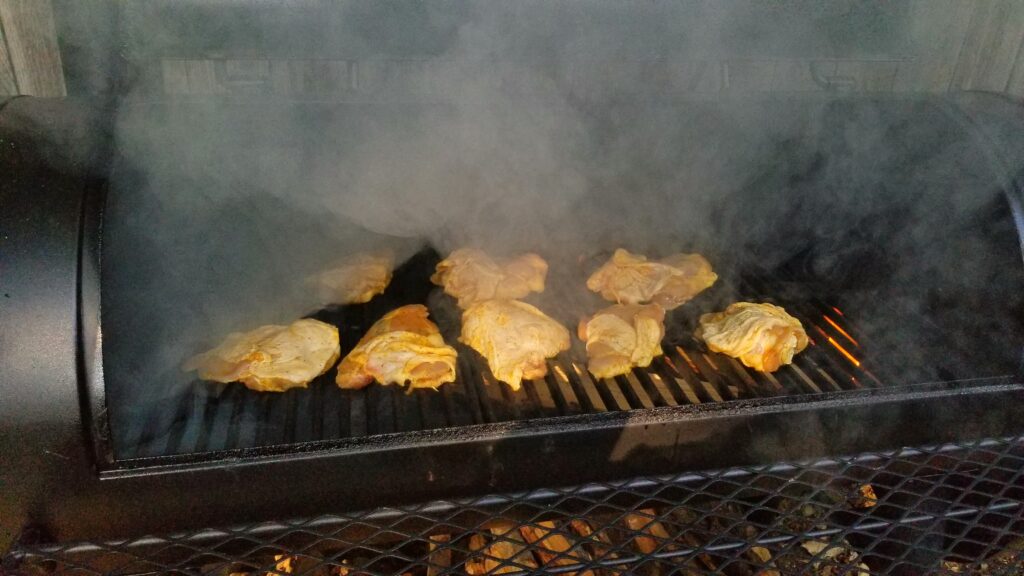
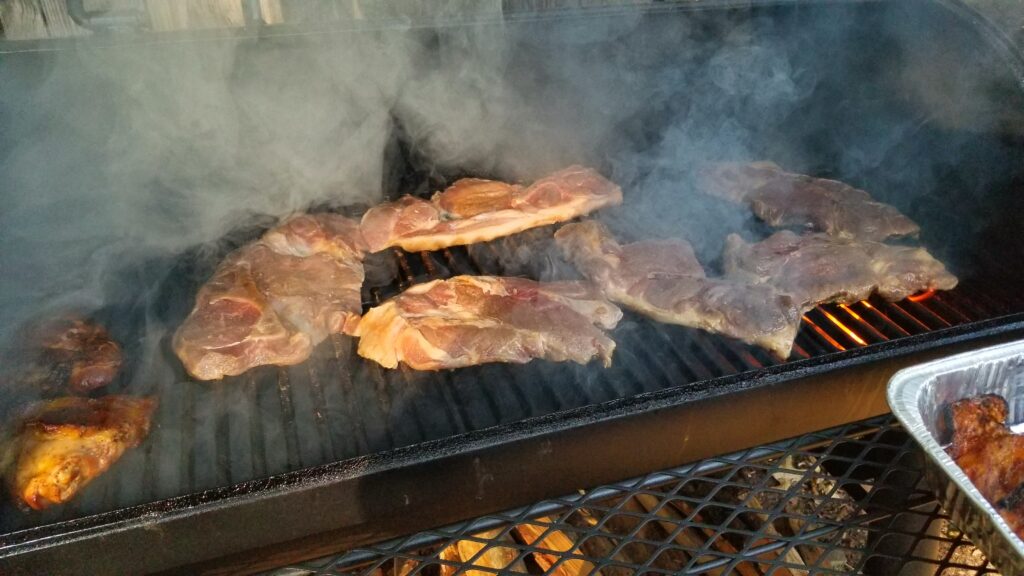
I have a nice bed of coals going on and am getting ready to do hotdogs the night of July 4th. It did a great job. Those thick cast iron grates do an awesome job of helping to both sear and cook the meat evenly thanks to their ability to conduct heat and thermal mass.It did a great job on this chicken. The thick grates seared the meat and I could dial in the temperature right where I wanted it.Pork steaks too!
If you find this post useful, please share the link on Facebook, with your friends, etc. Your support is much appreciated and if you have any feedback, please email me at in**@*********ps.com. Please note that for links to other websites, I may be paid via an affiliate program such as Avantlink, Impact, Amazon and eBay.
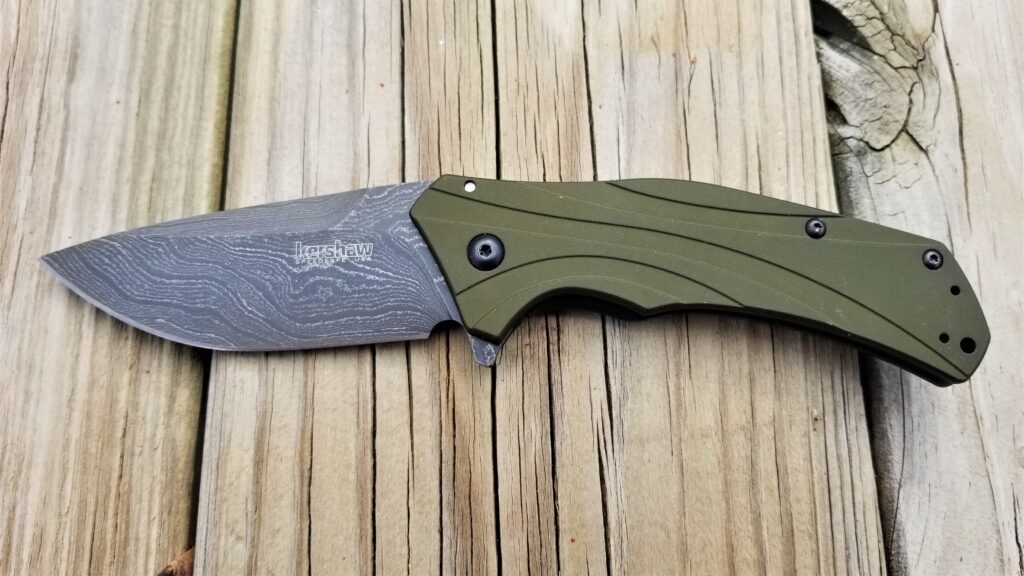
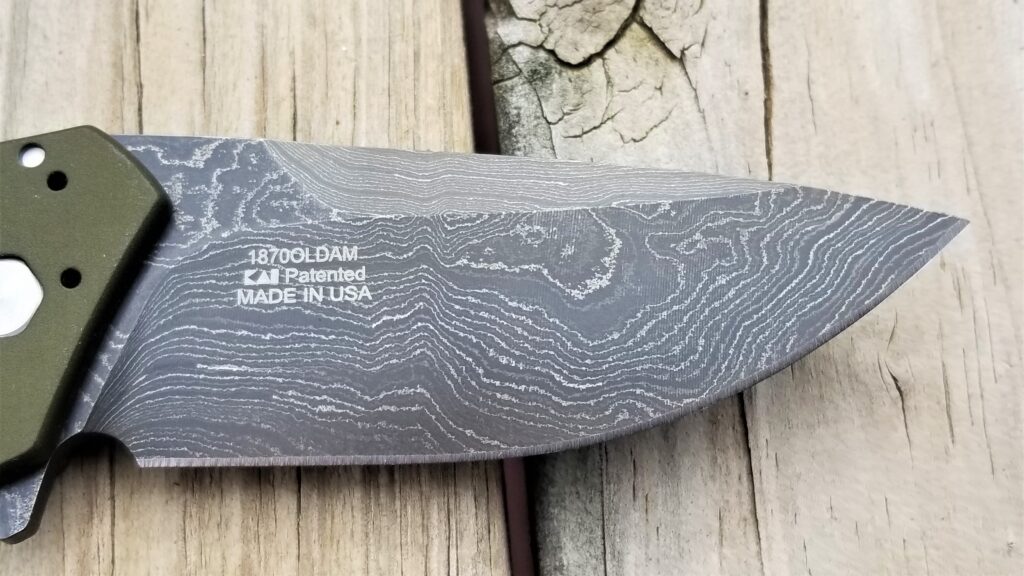
Last year, I bought one of the Kershaw Knockouts and really liked it. The fact it was one of their models that is made in the USA, the heft, the blade contour and how well it held an edge rapidly made it my EDC. Seriously, it’s a lot of knife without a lot of weight and I did a blog post about it – click here. I was reading on the web and came across a version of the Knockout with a damascus blade – I had to order it 🙂
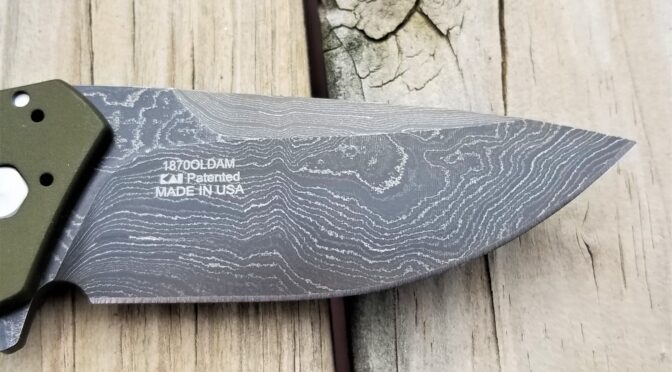
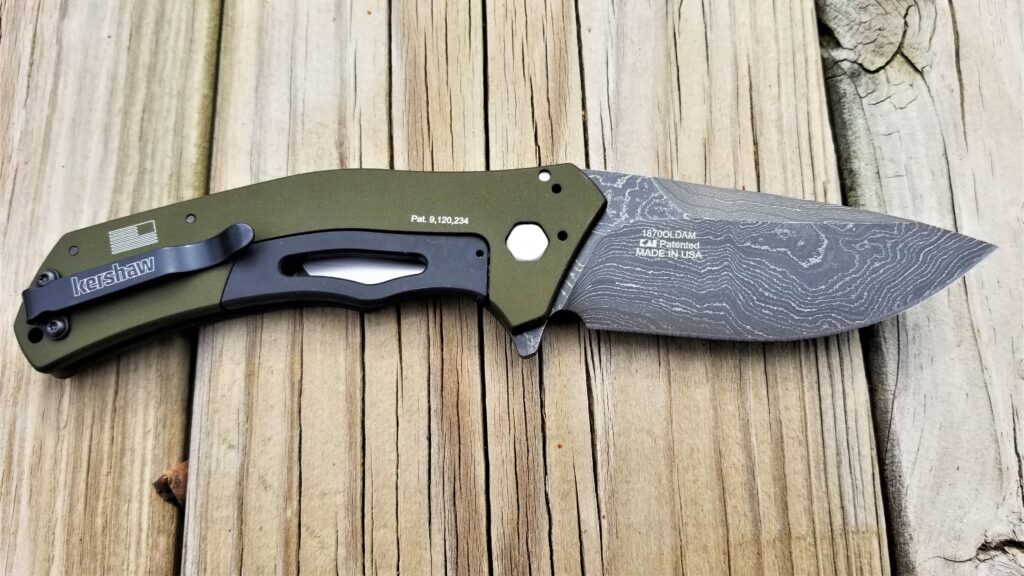
Basically, the 1870OLDAM is just like the 1870OLBLK but with a damascus blade. The name, “knockout” has to do with the riveted blade lock they insert in the handle. This makes for a knife that is slim, very easy to open but locks solidly open.
Here are the stats:
Length when open: 8.875″
Length when closed: 4.625″
Blade: Damascus
Blade length: 3.25″
Blade thickness: 0.12″
Handle: Aluminum colored olive drab
Liner: Stainless steel
Handle thickness: 0.40
Weight 3.88 oz
I bought the 1870OLBLK – the one with a monolithic blade – in December 2018 and have used it a ton. I bought the 1870OLDAM in March 2020, and so far it is holding up well. I’ve used it but not to the extent I have the older one.
Click on one of the thumbnails below to see the full size photos:
Good view of the 1870OLDAM
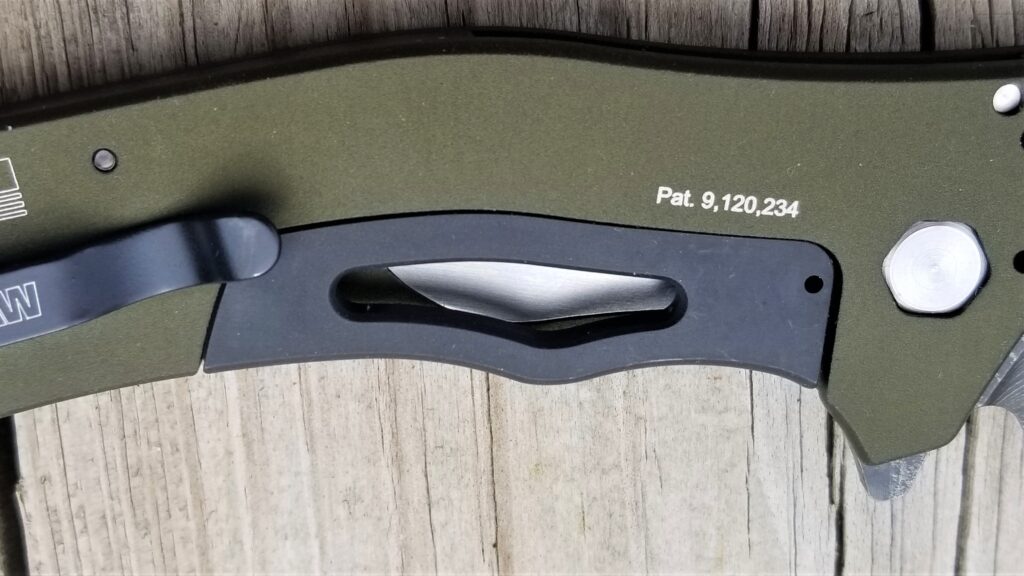
Here you can see the knock out in the handle
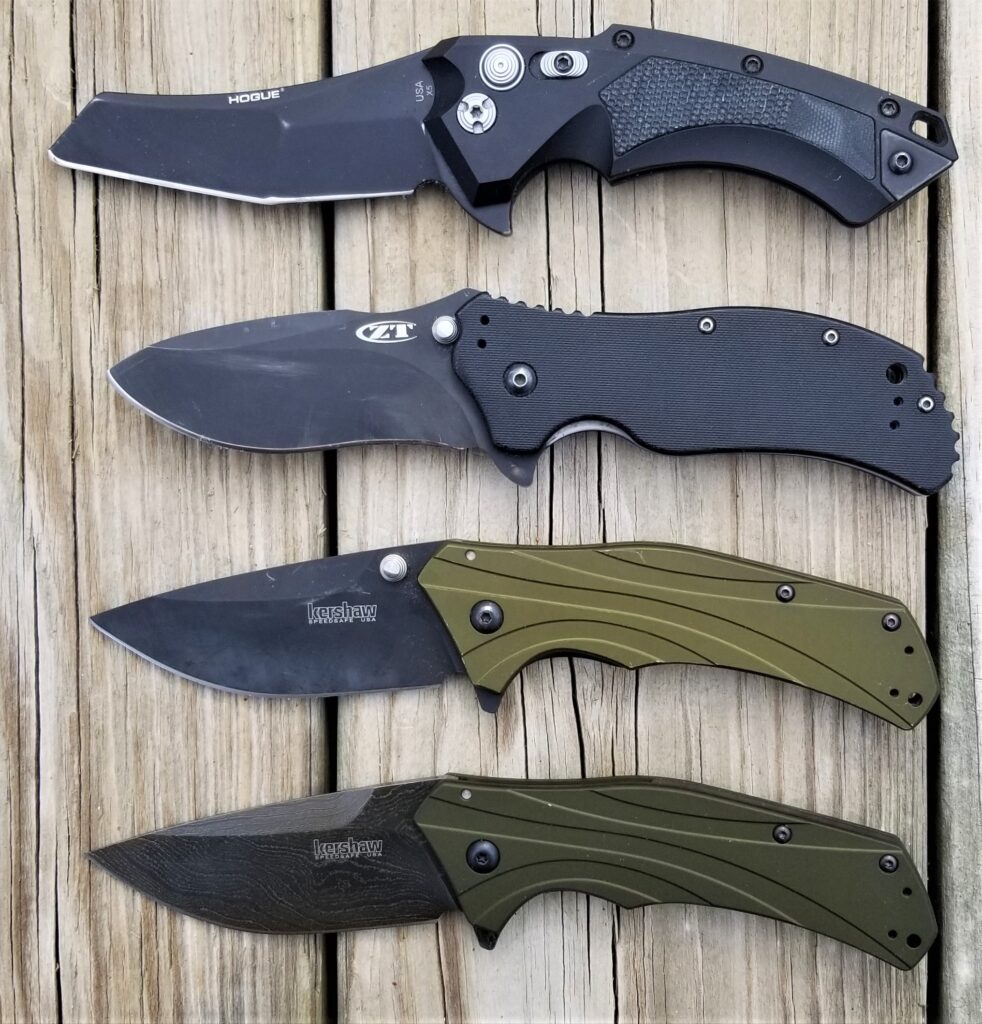
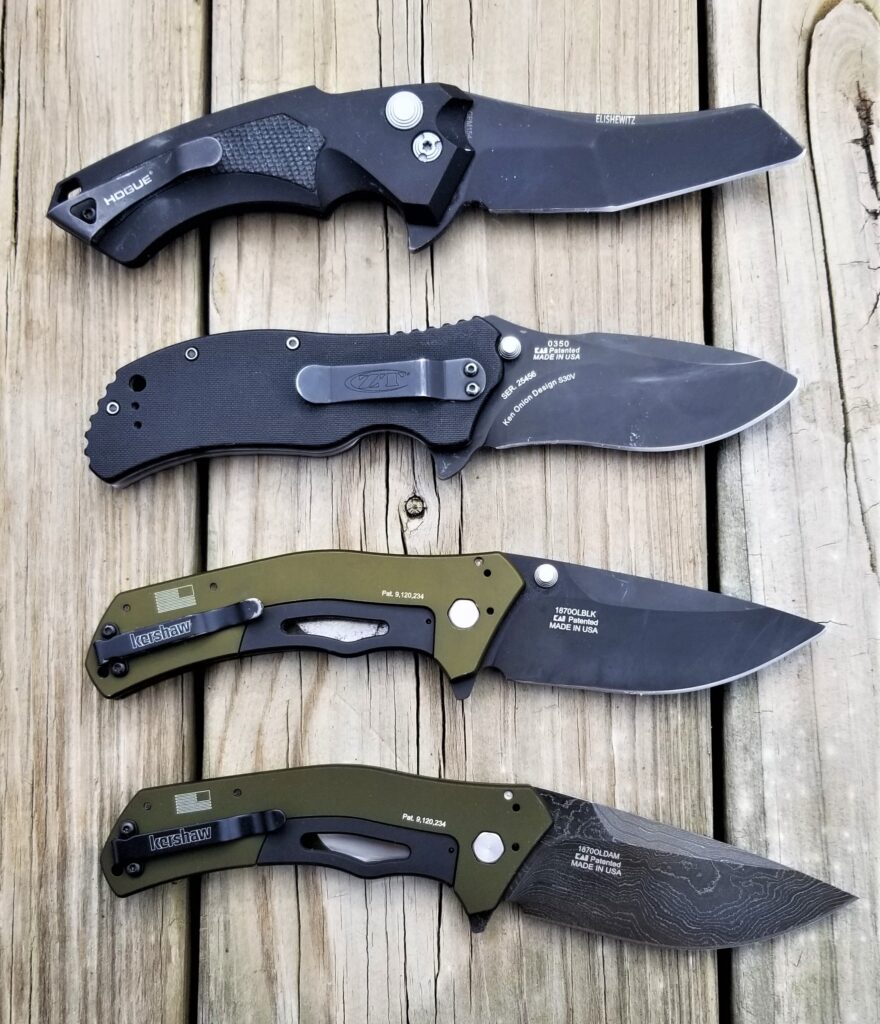
Comparing the two models
From the top down: Hogue X5 with a Wharncliffe blade, ZT 0350, the 1870OLBLK and finally the 1870OLDAM
From the top down: Hogue X5 with a Wharncliffe blade, ZT 0350, the 1870OLBLK and finally the 1870OLDAM
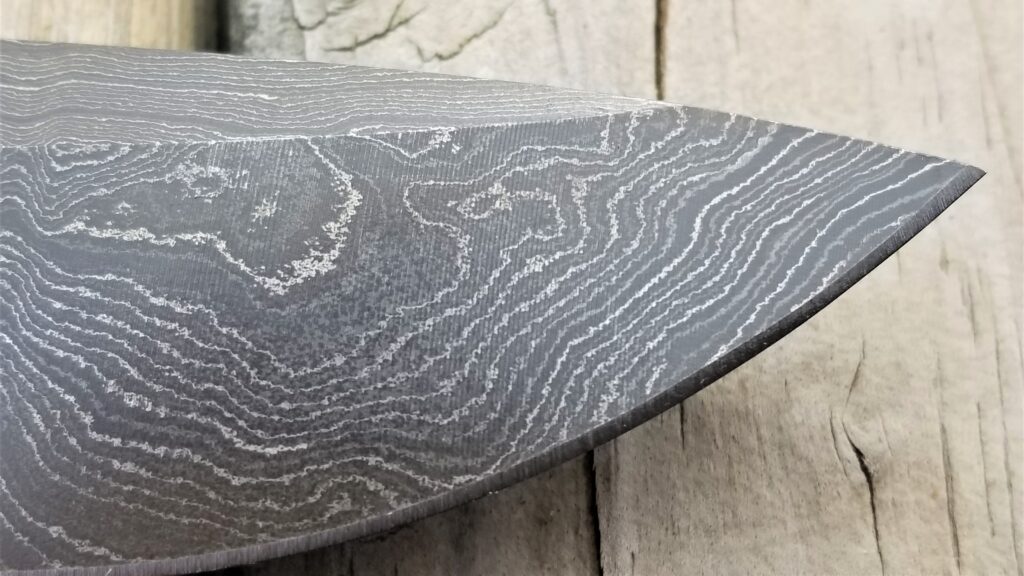
Looking at the damascus layers
Close up of the damascus at the tip
The knock out
Another view of the knock out in the handle
Summary
If you want a really useful knife that is made in the USA, get a Kershaw Knockout. If you really like damascus blades, get that one … or maybe both 🙂
If you find this post useful, please share the link on Facebook, with your friends, etc. Your support is much appreciated and if you have any feedback, please email me at in**@*********ps.com. Please note that for links to other websites, I may be paid via an affiliate program such as Avantlink, Impact, Amazon and eBay.
Everyone is trying to save money these days and that includes me. When you start talking about quality carbide end mills and cobalt drills, the costs rack up fast but there are options for you to save money and I’ll make this short and sweet.
To be clear, these folks did not pay me or even know I was going to do this blog post. I’m not getting a dime from them.
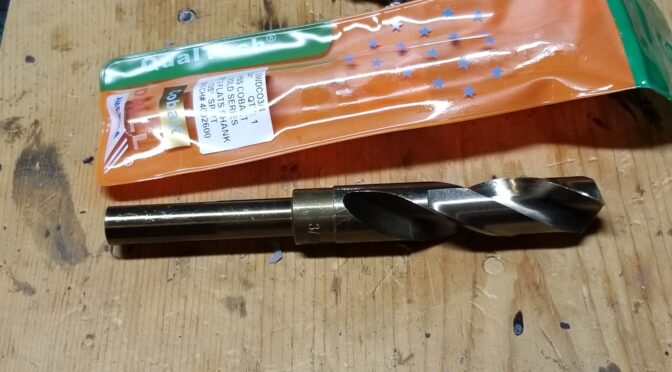
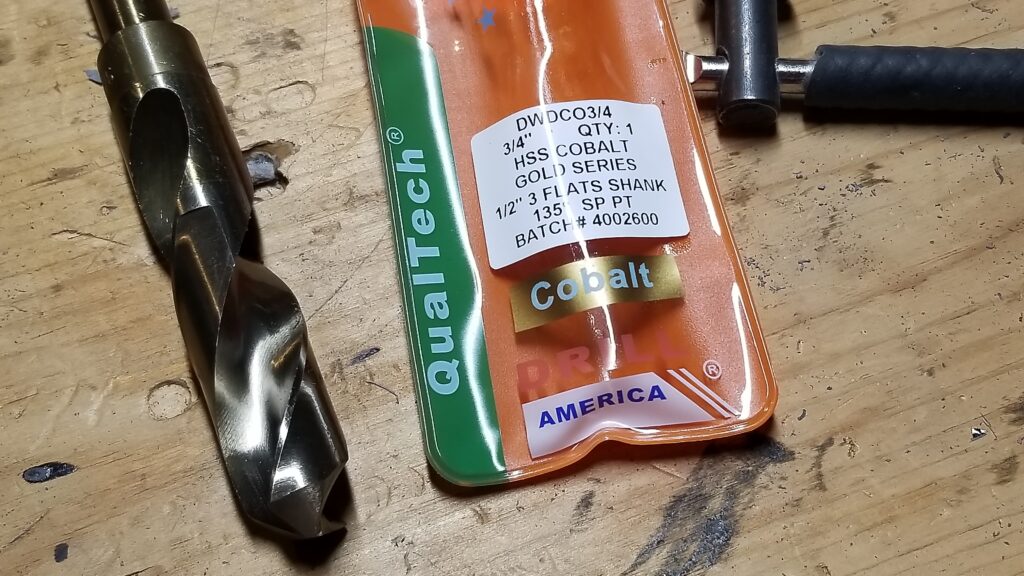
I needed to buy a 3/4″ reduced shank cobalt drill bit. These things are usually around $40-50/ea and I was able to get a nicely made Qualtech from Drills and Cutters for $32.91 out the door. I use this bit for drilling out the top of my AK-12 grips and the glass reinforced polymer shreds HSS bits so discount Silver & Deming bits don’t last. Spending the money for a quality bit made from cobalt makes a ton of sense because it will do hundreds of holes before it needs to be sharpened.
So, Drills and Cutters is a web store that you can buy from and they may have the manufacturer ship direct to you. I have found their pricing and shipping speeds very good.
They sell drill bits, taps & dies, cutters & saws, reamers, end mills, carbide burrs, annual cutters and more.
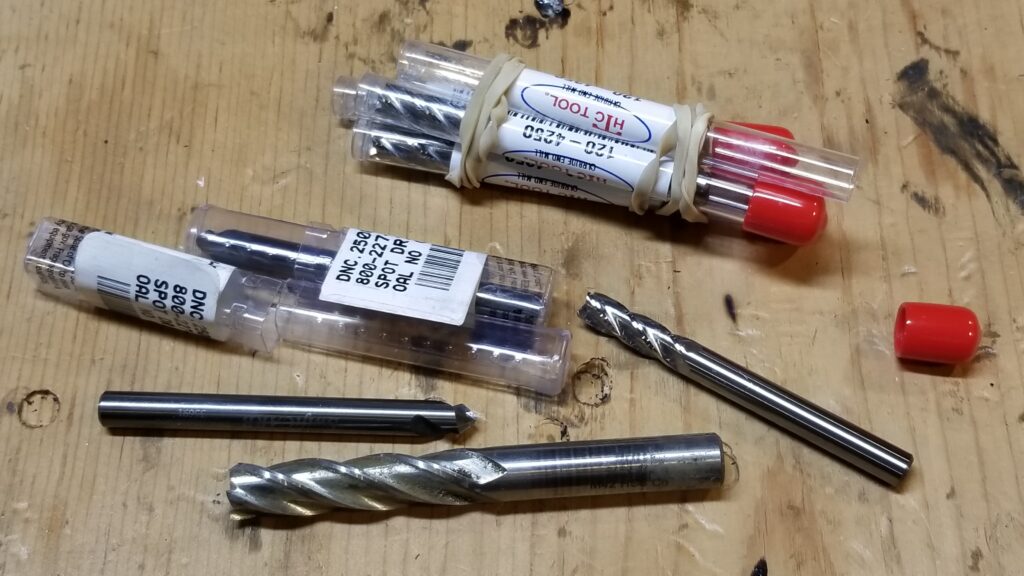
The second group I want to share with you is EndMillDiscount.com. Carbide is not cheap and “cheap” carbide tooling does not hold up. I go through a fair number of carbide end mills and carbide spotting/centering drills each year. When you need to drill hardened steel, there are situations where you simply need the hardness to cut. So, I needed to order in more 1/4″ bits and started shopping around. With the word “Discount” in the site’s name I was a little nervous but they had *really* good prices and I couldn’t find any negative reviews so I took the plunge.
I ordered 4 of the HTC 4-flute 1/4″ diameter end mills at $7.15/ea and 2 of the SwiftCarb Spotting/Centering drills at $16.98/ea and shipping was only $10.51. Wow, in just a few days the end mills arrived drop shipped from HTC and then the drills arrived drop shipped from SwiftCarb. I was very impressed.
Do you ever look at a photo and ask yourself “Why?” I don’t know why that big end mill is in the photo at the bottom. The smaller 1/4″ bits are what I ordered from End Mill Discount. They worked great by the way.
End Mill Discount sells end mills, drills, micro tools, cutters, cobalt tools, carbide burrs and more.
I definitely plan on buying from them again. Visit them at:
If you find this post useful, please share the link on Facebook, with your friends, etc. Your support is much appreciated and if you have any feedback, please email me at in**@*********ps.com. Please note that for links to other websites, I may be paid via an affiliate program such as Avantlink, Impact, Amazon and eBay.
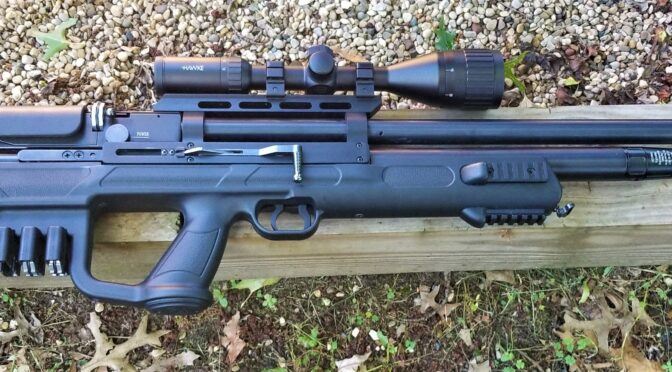
Folks, I am very impressed by my Hatsan airguns and have no problem recommending them. I’m rally a fan on the pre-charged pneumatic (PCP) guns that have an onboard air tank and can fire 10-20 rounds for hunting plus if you get one if their models with the Quiet Energy (QE) baffle system, they are on the discrete side for pest control.
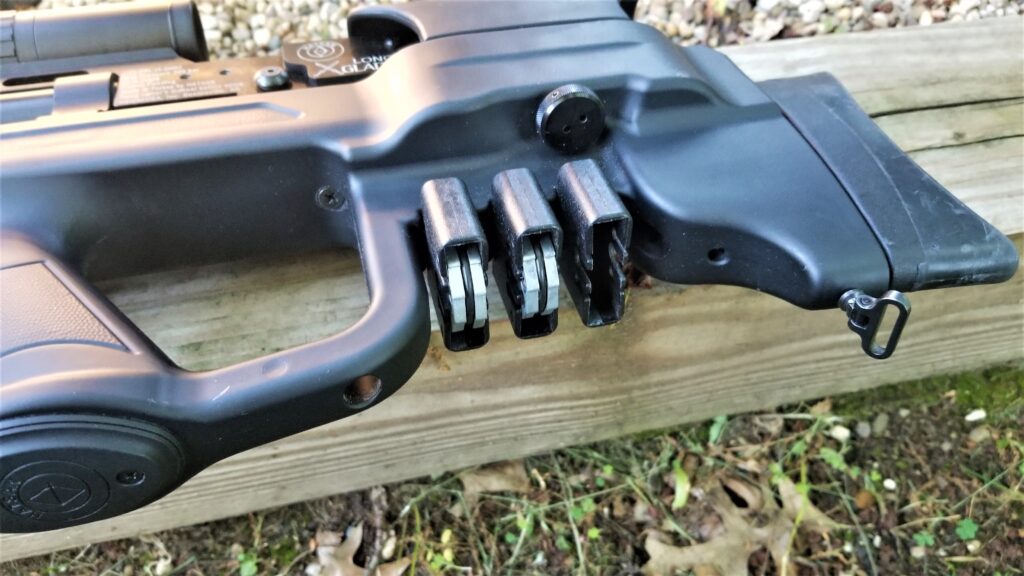
This is my Gladius Long in .22 and I use it all the time for pest control. Probably over 1,000 if not 1,500 pellets have been shot through that airgun now.
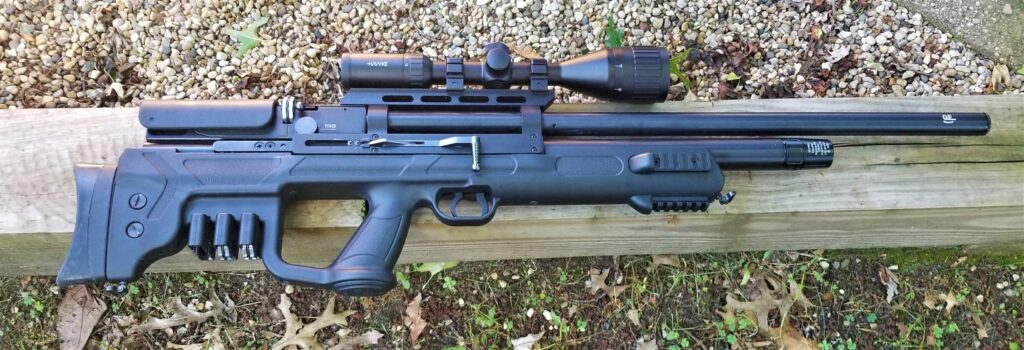
The Gladius .22 has a 10 round magazine and is a bolt action repeater. It carries three spare magazines at the rear under the stock and they come in handy when you need to rapidly reload. It does happen with pest control actually.
The Gladius comes with four magazines. I have one loaded in the receiver, two ready to go securely clicked into their storage bays and you can see I already have one magazine that needs to be reloaded.
If you find this post useful, please share the link on Facebook, with your friends, etc. Your support is much appreciated and if you have any feedback, please email me at in**@*********ps.com. Please note that for links to other websites, I may be paid via an affiliate program such as Avantlink, Impact, Amazon and eBay.
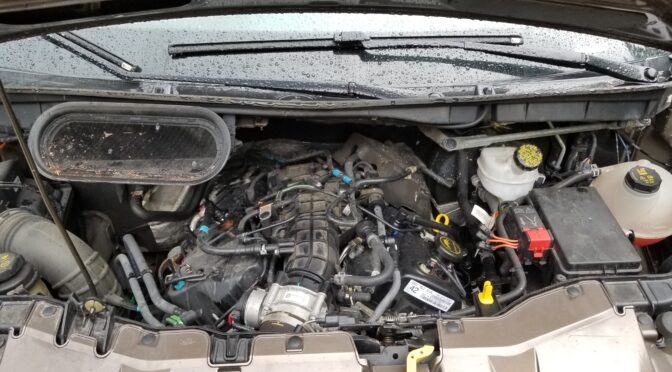
So, we have a 2016 Ford Transit F150 van with the 3.7 liter EcoBoost engine. It’s actually surprising how powerful that engine is because it can launch that big rectangle! However, there is an irritating recurring issue that we’ve had and that is the “P051B – Powertrain” message when the Check Engine Light (CEL) turns on. The posts and forum threads weren’t always very clear about what to do so I figured I would write about my experience to try and help people out.
Here’s the error code in Torque Pro. There is a free Torque version and a Pro without advertising. I find ads annoying so I paid some really small amount of money to go to Pro years ago and think it is totally worth it.
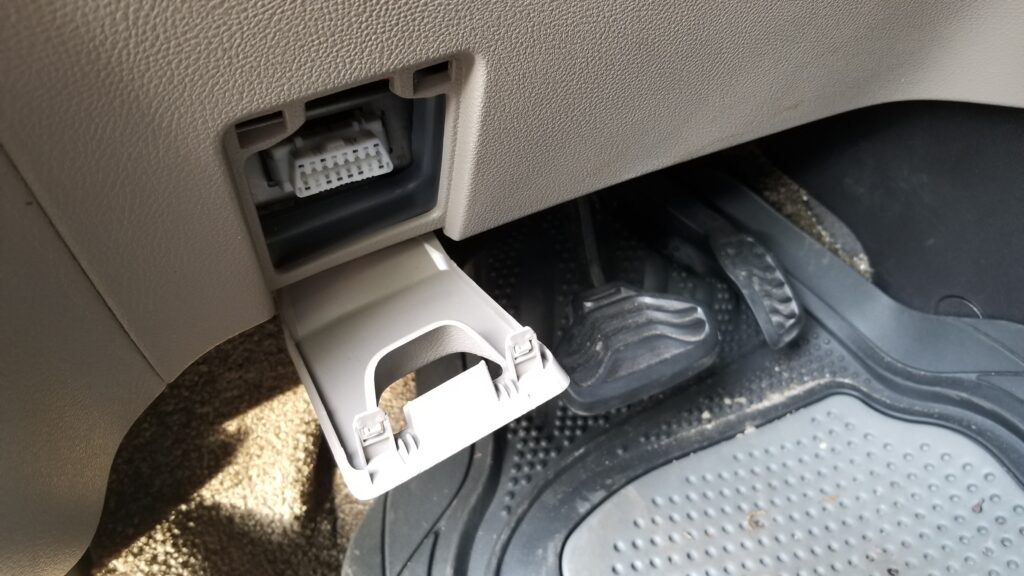
The ODB2 port is located just above and to the left of the brake pedal on the lower parts of the dash panel.
What is error code P051B?
The P051B code is returned when the engine control module (ECM), or the vehicle’s powertrain control module (PCM), has detected that the engine crankcase pressure sensor is returning values that are outside of normal operating limits. Isn’t that just great?
Remember the positive crankcase ventilation (PCV) valve and exhaust gas recirculation (EGR) system that cars had when you were younger? This is related to that – the fumes inside of the engine needs to be pulled out and burned. This improves both efficiency and emissions. The sensor is reporting back pressure changes of the EGR.
Now this is where things went sideways. I had a ton of rubbish posts to read through until I found out that Ford used a different name for the sensor plus it wasn’t exactly clear about where the sensor was located on what to order.
What does Ford call the crankcase pressure sensor?
No, they couldn’t call it something that obvious. Ford calls it the Delta Pressure Feedback EGR (DPFE) sensor. So, if you are searching all over for Ecoboost and something with pressure sensor in the search text, you’re going to find a ton of confusing crap. Try searching with DPFE instead.
One other comment – Ford has a lot of free reference information available online but you have to hunt for it. Click here and select the option for Free Resources – that includes OBD2 guides by model year, body repair and much more.
So what can cause the P051B error code?
There are a number of things that can cause this code so let me list them in the order I would check them starting with the easiest:
Is the dipstick fully inserted?
Is the O-ring that seals the cap in the tube intact on the dipstick?
Is the engine oil overfilled?
Is there water/coolant in the oil causing it to be too full? The oil will be frothy and colored like coffee with milk in it.
Are any of the PCV lines cracked or otherwise knocked off?
Look inside the oil fill cap – is there a ton of sludge? If so, pull off the lines and look at the valves to see if they are filled with sludge. You can pull them regardless if you want to be sure.
The pressure sensor might have failed… yeah….
For me, the last two times, it has been #7. It’s getting annoying. I’m now on my third sensor. Note, if it is the sensor then it is not critical but I do like knowing whether the check engine light is telling me something new or not so having it lit all the time is very annoying for me. In other words, you can drive with the sensor having problems but you will not know if a new code is being generated unless you hook up your scanner.
I think the sensor location was a poor choice
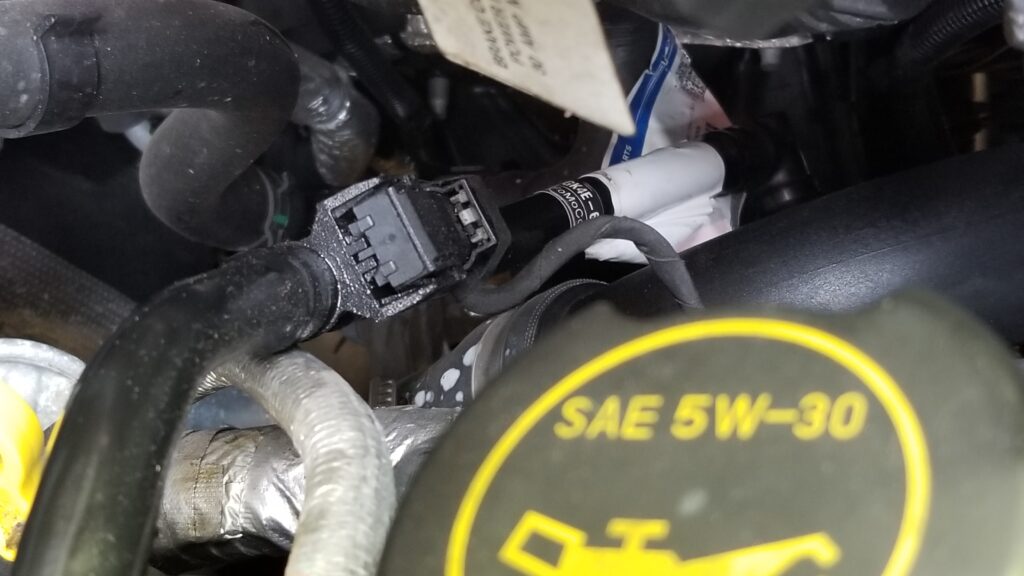
Let me tell you that it’s my opinion that the EcoBoost has a design flaw – the crankcase pressure sensor is sitting on a PVC hose and it gets fouled out by moisture and oil. The location can vary depending on your vehicle and which EcoBoost engine you have but on my 3.7L, it’s on the driver’s side of the engine,
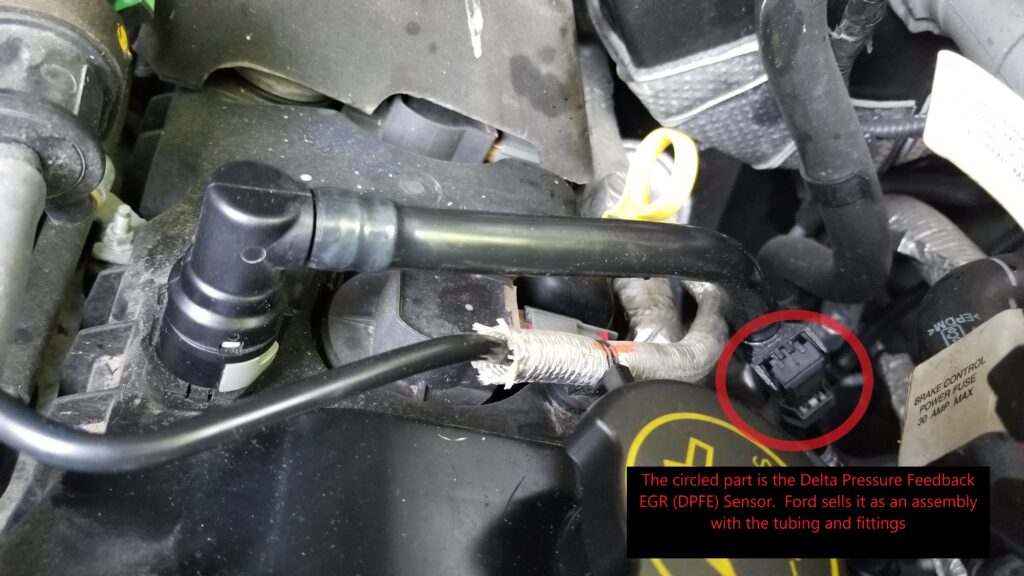
So that’s the Delta Pressure Feedback EGR (DPFE) sensor right there in the red circle. Note the oil fill cap in the lower right of the photo to help you get your bearings.
Why they did this, I have no idea and we are now on our third sensor. The first was replaced by the dealer right after we got the van because Ford had revised the design. That sensor then failed and I replaced it myself. It turned out to be real easy.
What to order
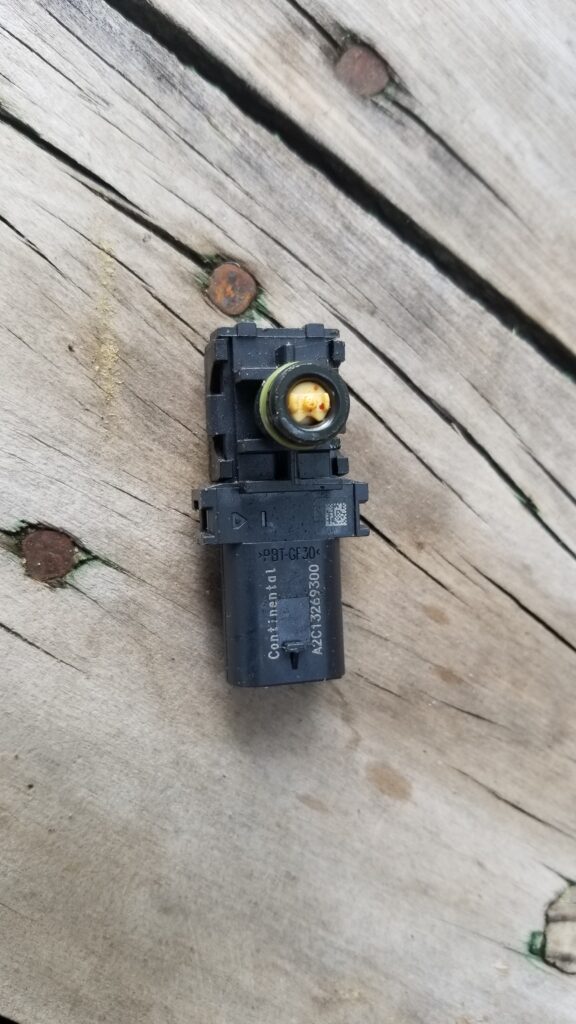
Now this is where things get confusing. If you search hard enough, you can find just the sensor unit itself and if Rock Auto is correct, it is the DPFE-30 unit part number FR3Z-9J460-A … but it has been discontinued. I know they revised the design of the sensor to try and reduce fouling and maybe this is the older version. I returned this to Rock Auto and did not install it. I can’t confirm DPFE-30 is the correct sensor just to be clear – I think it is the older design they revised. The part that goes into the tube looked different.
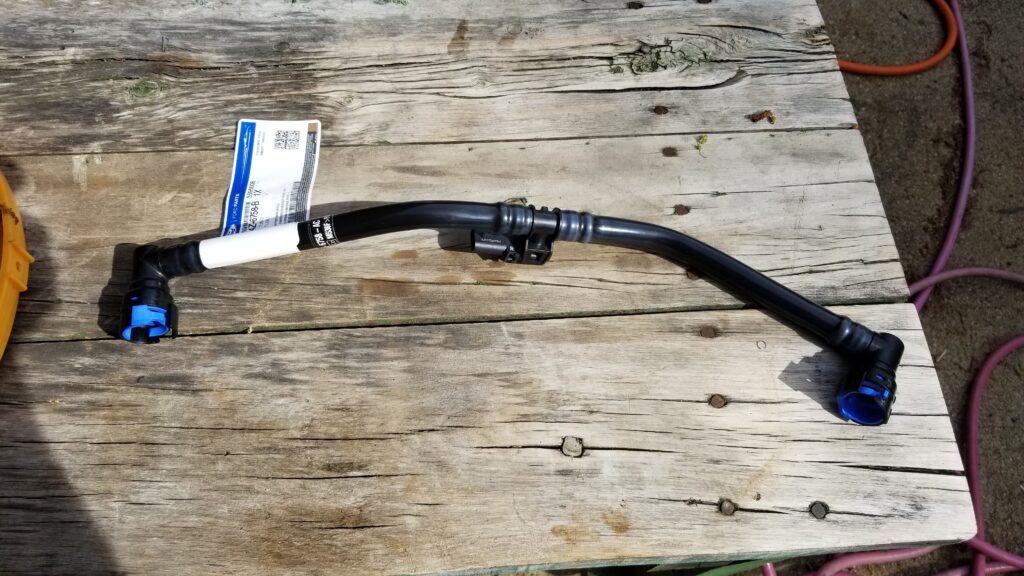
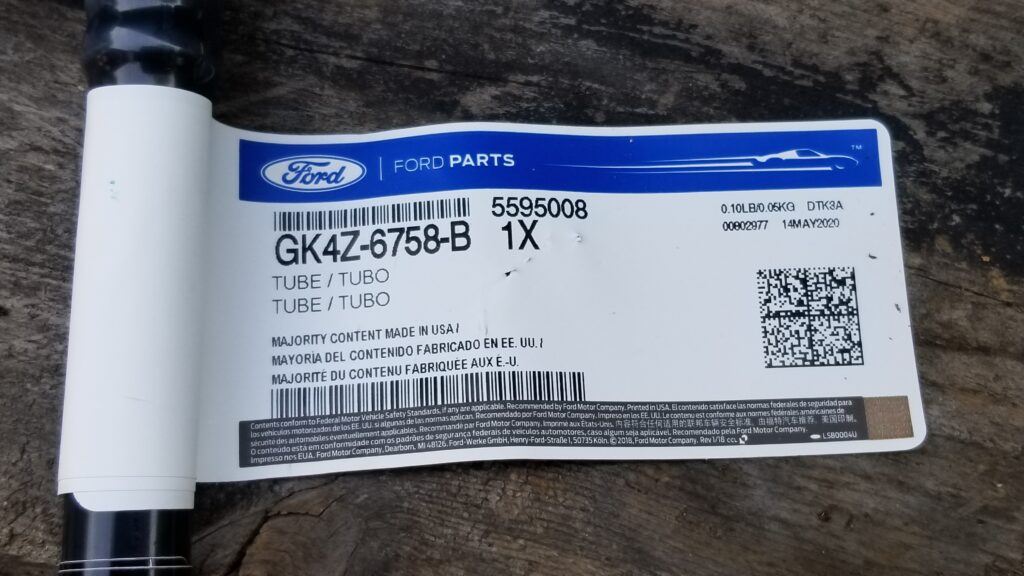
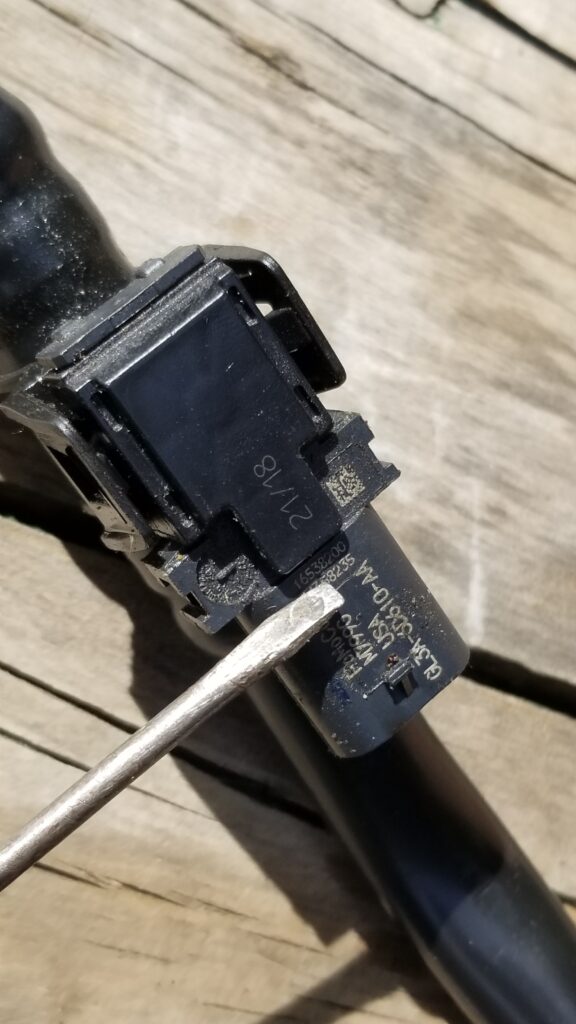
What you want to buy is the assembly that includes the tubing and the sensor. This is the current part number as of my writing this blog to the best of my knowledge: GK4Z-6758-B
Here is the brand new part fresh from the dealer – GK4Z-6758-BHere’s a close up of the assembly’s parts label.This is the sensor still on the tubes. It is held in place by the two black “Ears” – one on the top left of the sensor and one at the bottom left. Gently pry them up with a small blade screw driver and the unit comes right out.This is the part that goes into the hose.
Where to buy the GK4Z-6758-B Assembly?
Okay, you can get it from your local dealership for about $81 or you can buy it online for $38-42+S&H. We were going on a trip so I didn’t have time to wait and went with the dealer. While $81 may sound like a lot, if you mail order the part next day the price difference is less than it may first seem. [Note, prices have gone up considerably due to inflation – as of 5/18/22 it is $45-55 on eBay with free shipping.]
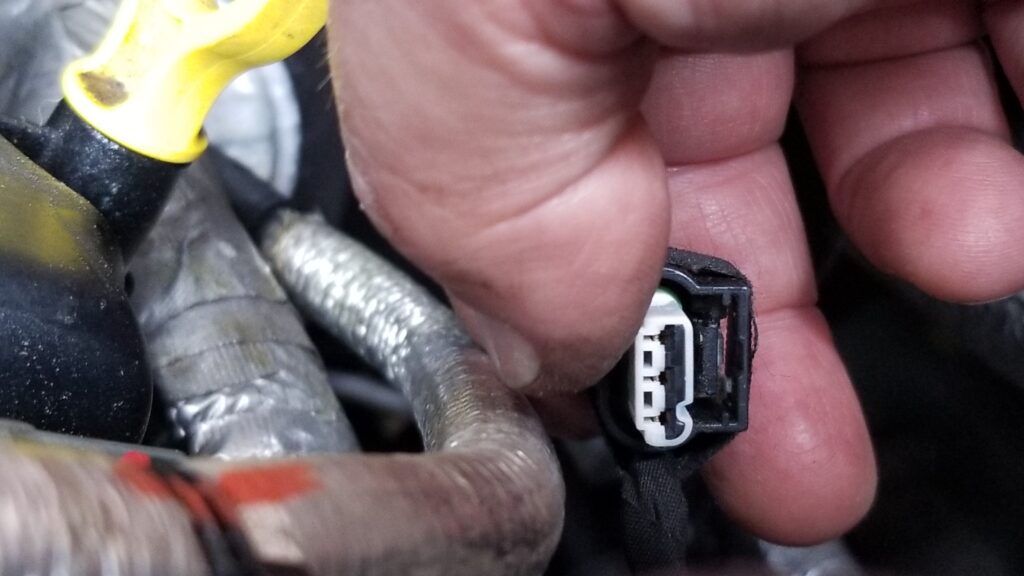
First, use a small blade screw driver to slide under the retaining tab and remove the wiring harness from the sensor. With the tab slightly up, it pulls straight back.
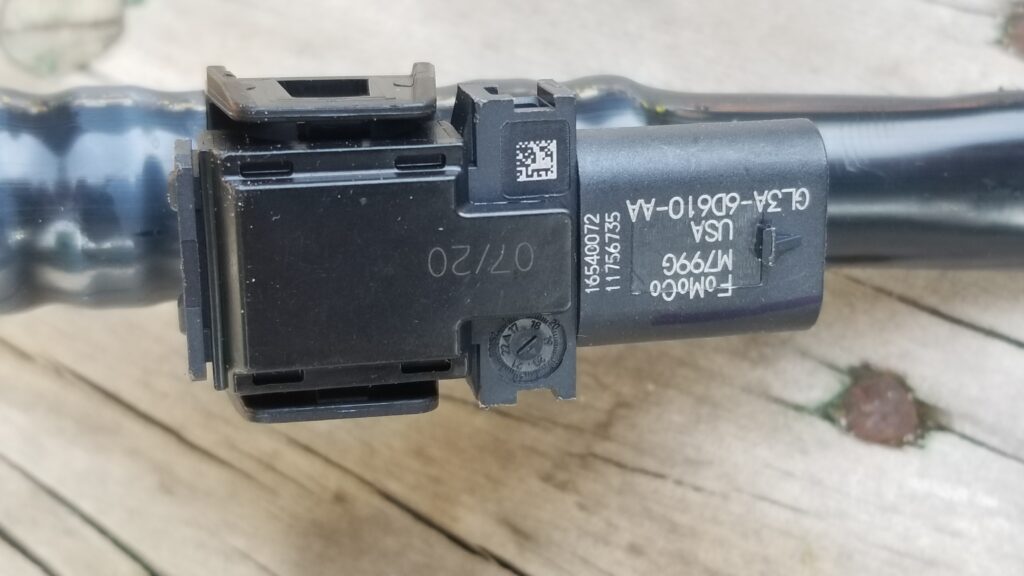
This is the opposite end of the sensor. You need to lift that tab up front just a tad with a small blade screw driver.
The tab just has to rise over that tiny nub just above the “GL3A” printed text near the right end to then slide off.
That little black tab above the white plastic just barely has lift up and then the plug can be pulled back off the sensor.
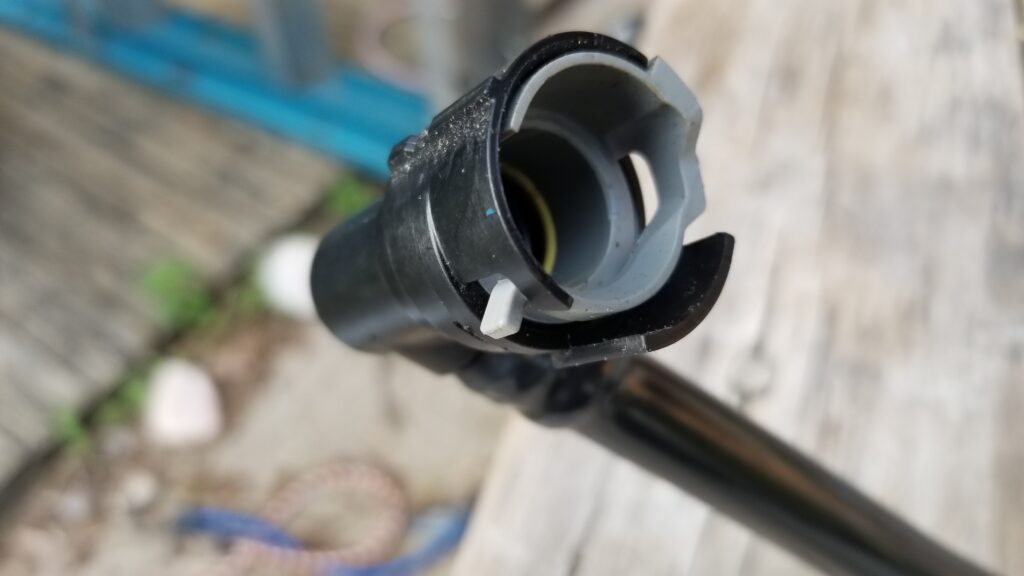
Next is to remove the tubing from the engine. There are quick connect fittings on each end. You just push the band’s tab out and the band moves out of the slot in the PVC fittings. It helps to look at the replacement hose first to see how the tab moves. With the tab held out, you can lift the tube straight up and off the fitting. It’s actually easy once you do the first one. Again, play with the replacement and you’ll see how it works.
It’s a novel design really. Push that little grey tab to the right and it will allow the fitting to be lifted straight up off the male plug. The one at the bottom of the engine you will need to do by feel but it is the same way – feel the tab, push it out and hold the tab out while you lift.
So, the replacement assembly took less than a minute to click back into place and reconnect the wiring assembly. Done. I cleared the code and a month later, it hasn’t come back.
Lessons learned – be careful while reading on the Internet. There are some people posting stuff that have no idea what they are talking about plus the super secret different name Ford chose to use for the sensor didn’t help matters.
Follow the troubleshooting list I wrote above and if it is the sensor, it is an easy fix. It took me about 10-15 minutes being real careful and I bet the next one will take 5 minutes max. I did have a hard time sorting through all the low-value posts and hope this helps you get your engine taken care of.
5/18/2022 Update: We’ve not had the problem again since replacing the tube & sensor assembly when I wrote this. One thing though is that I do my own oil now and only use Penzoil Platinum full synthetic. I’m not sure if the better oil is reducing particulates or not but just wanted to note that.
If you find this post useful, please share the link on Facebook, with your friends, etc. Your support is much appreciated and if you have any feedback, please email me at in**@*********ps.com. Please note that for links to other websites, I may be paid via an affiliate program such as Avantlink, Impact, Amazon and eBay.
I have two Hatsan precharged pneumatic (PCP) airguns – a full size Gladius .22 long and a compact ATP2. I recently needed to replace the O-rings and started researching what was needed.
The O-Rings
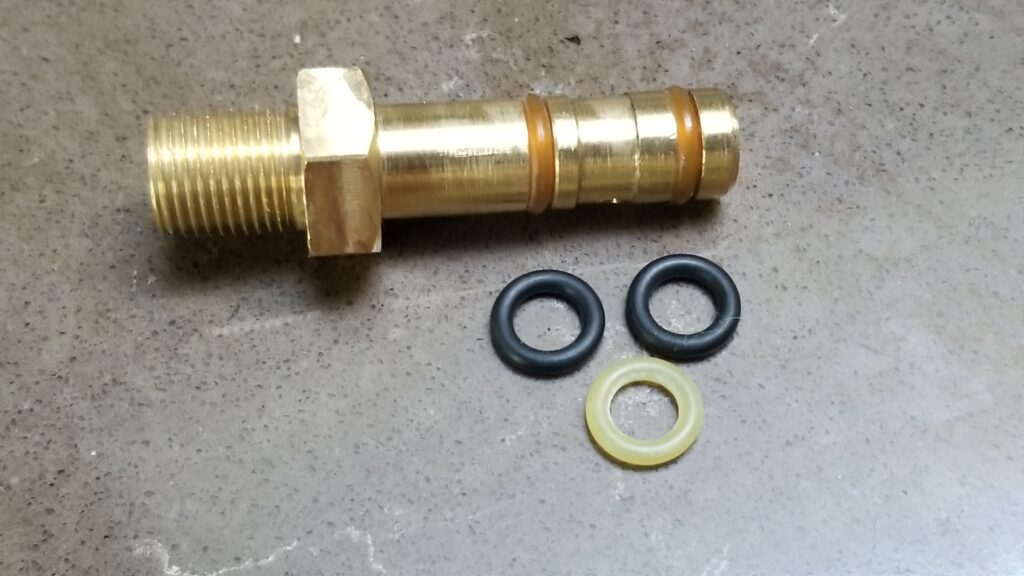
Here’s a Hatsan probe and the brownish/tan O-rings are their OEM rings. The black rings are the Buna-N rubber rings that we are now selling.
My two Hatsan’s get pressurized up to 300 bar, which is 4,351 PSI. That’s quite a bit of pressure that the fill probe’s O-rings need to contain plus they need to be flexible enough to allow for insertion and a good seal. One last consideration is the need to withstand the silicone grease that is used to lubricate them (never use oil-based grease on a PCP or it may diesel under pressure).
The O-rings are wear items meaning they will wear out for a variety of reasons and you can tell because when you go to fill the airgun’s tank, you will hear air escaping plus you probably will not be able to get very much pressure to stay in the line. So when mine went out and I installed the spare set that came with the Gladius, I had to think about getting more spares. Hatsan was out of stock at the time so I decided to dig.
So, I started researching what O-rings would work best and sourced some that work great. They are 70A on the shore hardness scale and made from Buna-N rubber which will withstand the silicone grease.
In addition to fitting Hatsan PCP fill probes, they will also fit the Air Venturi Halestorm, Evanix, FX, Hammerli Pneuma, Kral, Lgun and Raider probes.
While I was at it, I decided to tackle how to keep the probe clean. I’ve had my Hatsans and my Hill Mk4 air pump for a couple of years and have tried to keep bags on the probe to keep it clean. Those semi-rigid airlines flop everywhere and trying to keep dirt off the probe that is sticky with silicone grease is a challenge.
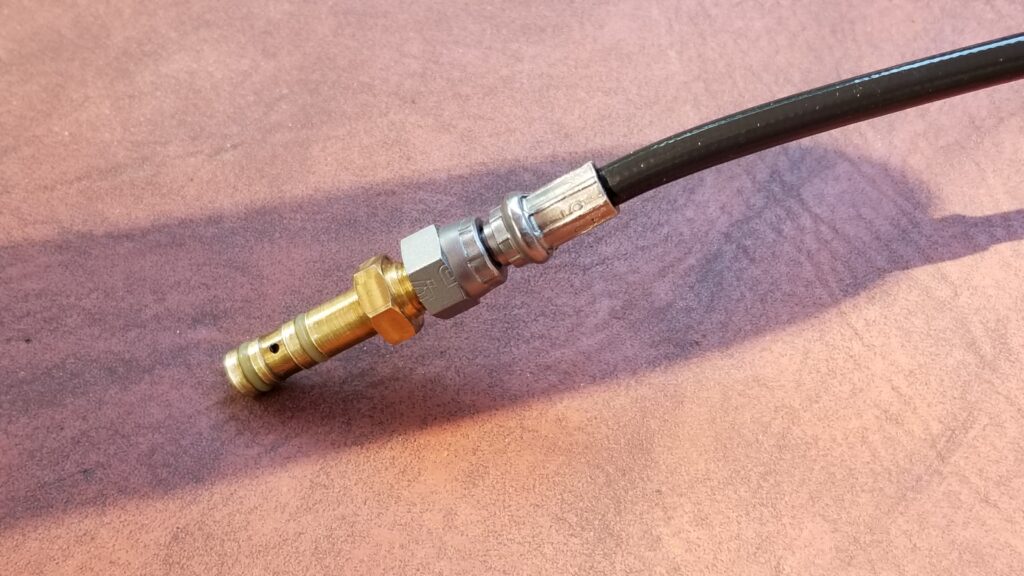
Here’s the uncovered probe begging to have dirt and debris stick to it.
So, after measuring stuff. I came up with two types of caps for people to choose from. The first is a yellow cap with a pull tab.
Here’s the yellow pull tab cap that extends just past the rear O-ring
If you find this post useful, please share the link on Facebook, with your friends, etc. Your support is much appreciated and if you have any feedback, please email me at in**@*********ps.com. Please note that for links to other websites, I may be paid via an affiliate program such as Avantlink, Impact, Amazon and eBay.