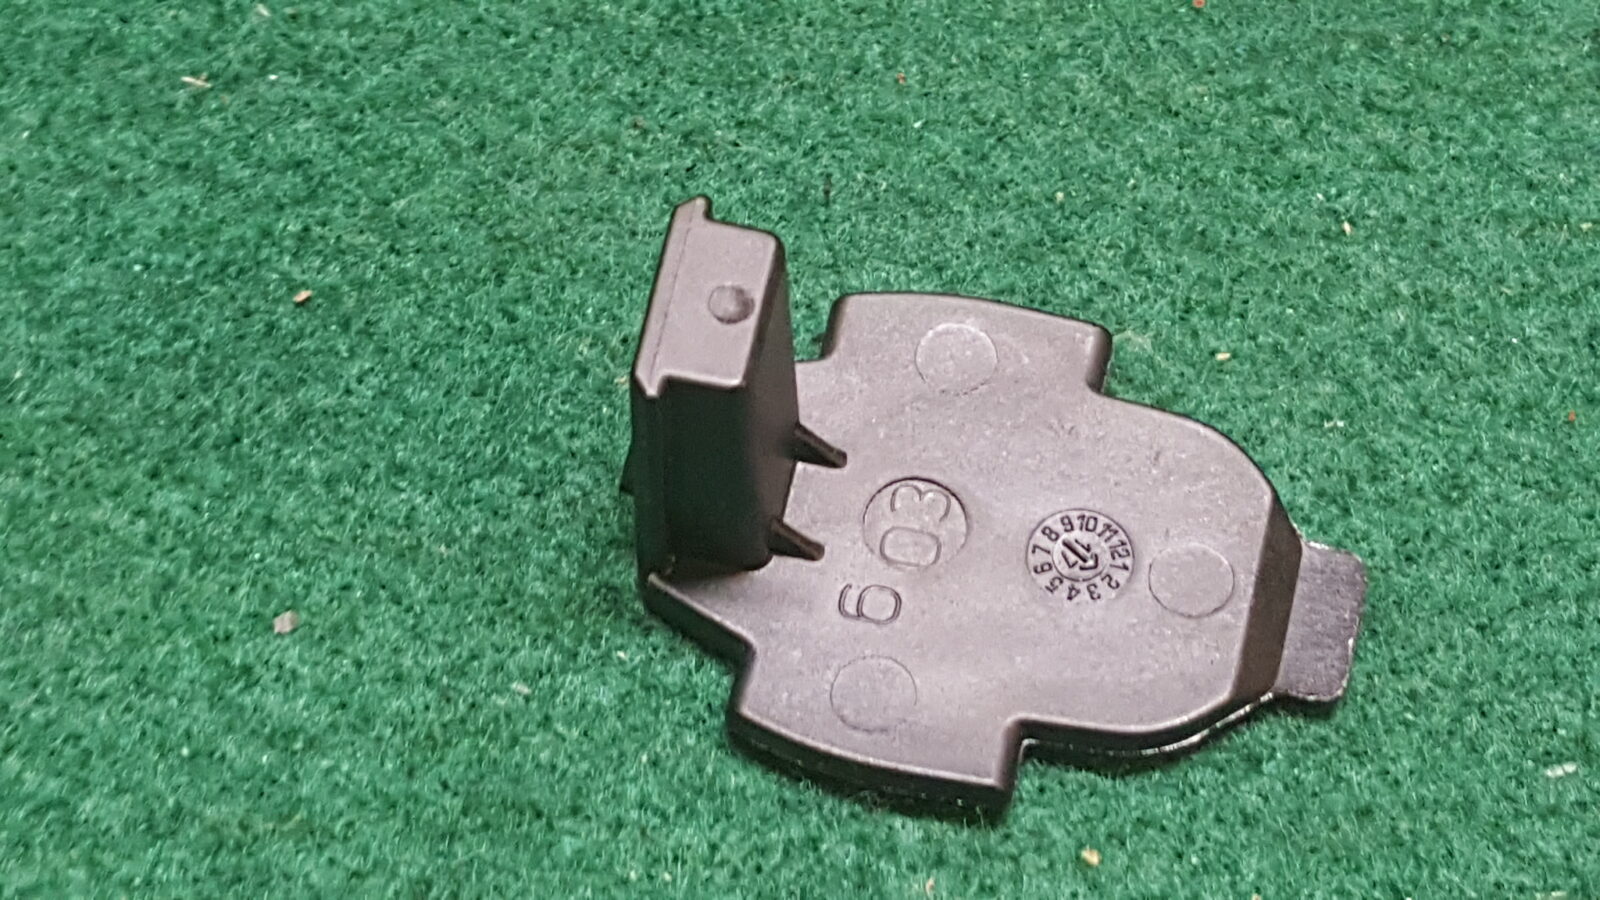
There are three types of buffer tubes for ARs and the one you pick depends on what you are building. There is the traditional long A2 fixed stock style buffer tube, the 6 position M4-style telescoping stock tube and lastly the pistol buffer tube. Since I am building a pistol, that will be our focus. The pistol buffer tube has no provision for a stock and is just a straight tube. Do not use a rifle tube on a pistol build just to be safe legally. Other than that, the installation is almost identical other than the backplate (shown below the buffer tube in the next photo) which is indexed for rifles but typically not for pistols.
Step one: Install the rear takedown pin assembly. Insert the pin from the right to left. Put a dab of Tetra Gun Grease in the detent hole and then push the pin and spring in. The grease will help retain it.
Step two: Put the backplate on the tube and thread it into the receiver almost to the end. Watch the detent spring and make sure it is compressing properly into the hole and not bending. On pistol builds I will push the plate down with one hand while threading the buffer tube on with the other. Stop in time to insert the buffer spring and detent in their hole. Push them down and thread the buffer tube on the rest of the way. Note, you can stake the tube into position or use a small dab of blue Loc-Tite to hold the buffer tube in position. Note how the front of the tube overlaps the detent pin just enough to hold it in position.
Step three: Install the Arm Brace. The SB Brace I got from Palmetto has a hollow rubber cylindrical hole for the buffer tube to go down. Of course that thing will not want to slide down the tube by itself. I lightly lubricate the buffer tube with silicone spray and then slide/hit the brace into place. Only turn the brace clockwise as you install it lest you unscrew the buffer tube. I did use a rubber mallet to help get it down the tube faster.
So with that the brace is installed. My next post will be about attaching the upper and finishing the assembly.
Sources For AR Parts
The following are all vendors of AR parts including barrels, handguards, triggers, magaziness and what have you that I use and recommend:
In this step we will install the selector spring and detent along with the pistol grip. As you can imagine, I am a grip snob. I do not like the Mil-Spec grip much at all but do like the MagPul MOE and MIAD grip. For me, the lower-cost MOE grip is just fine – it feels good in my hand and is durable. It’s pretty much all I use on ARs other than target rifles where I prefer the Ergo grip with a palm shelf.
So, first off, I need to point out that in this step we install the spring and detent pin for the selector lever. Both the spring and pin are unique. In the next photo, the selector spring and detent are on the left. On the right is a detent pin and spring for the pivot and takedown pins. Be sure to use the heavier detent and spring on the left for the selector. Also, consider getting spares from Brownells because they are really easy to lose.
Step one: Turn the receiver upside down, put a dab of Tetra Gun grease (or whatever brand grease you like) in the receiver’s detent hole and then insert the detent pin point first. The grease helps hold the pin in as you move things around plus lubricates it:
Step two: I like to put a dab of grease in the spring hole in the pistol grip to keep the spring from falling out. This helps reduce my lost springs. It’s way too easy for your mind to wander and have the spring fall out.
To install the grip, I lay the receiver on its side and push the grip into place. This grip was so tight that I had to tap it into place with a rubber mallet. Go slow and make sure that the detent spring lines up properly with the pin. If you go nuts pushing/hitting it together you can kink the spring and ruin it.
The Magpul grips come with a screw that can be installed via a slotted screwdriver or a hex key, which I prefer. Also note the yellow stuff on the screw – this is a pre-applied threadlocker so you do not need to add more. If you are installing a screw that does not have a lock washer or any threadlocker on it, you may want to apply a bit of medium strength Loc-Tite. Now, to get that screw down there, I angle everything back and slide the screw down the back of the grip just like a ramp and then I use my Allen wrench to tighten things down. Because I can’t get a good grip on the wrench due to my carpal tunnel, I use an adjustable wrench to give me just a bit more torque. Many of you may not need to do that. You are looking for firm – not Big Mongo torqued down tight. There are torque specs for everything but I do farmer ballpark tight on non-critical stuff.
Once the screw is installed, the bottom end cap is snapped on place and you are done. Note, this cover can also be replaced with toolkits that slide up in the grip if you so desire. I’ve not done it yet but am considering it.
The selector assembly is what allows a regular AR to either be on “Safe” by blocking the trigger’s movement or “Fire” my allowing the trigger to pass. It’s actually a very straight forward design and I like those. Now I like ambidextrous selectors and they are just like a normal one but have a small lever that is screwed on to the operating side after the selector is installed. This is a Palmetto State Armory (PSA) model that works just fine for me. Note, some guys like these and some don’t because you will feel it on the other side, which some guys find to be weird and not to their taste. Bottom line, use what you like. If you’ve never felt one before, try and hold an AR with and ambidextrous selector before you buy one.
To install it, first cock the hammer and insert it from left to right with the selector pointing in the “Fire” direction. You may need to wiggle the trigger some to let the selector pass. If you are using a Mil-Spec selector, you are done other than function testing. If you have an ambidextrous selector, most have a groove on the other side and you simply mate up the right side lever. Before install the small screw that holds in it place, put a bit of blue medium-strength Loc-tite on the screw so it is held in place. If you do not apply some form of thread locker, the screw will loosen and fall out.
To function test the fire control group (FCG) overall, you need to do the following but remember to NOT let the steel hammer slam into the aluminum magazine well – control the hammer’s movement with your thumb, fingers or whatever (meaning hold it – don’t put your fingers in front of the hammer and hit them – that hurts!!). Each test below assumes that you can accomplish the step – if not, something is wrong:
Cock the hammer back and the trigger should grab it.
With the selector on FIRE, pull the trigger while holding the hammer with your thumb to control its movement – the trigger should release the hammer.
With the selector on SAFE, pull the trigger and the trigger should not be able to move. If the hammer is released then something is very wrong.
Now, put the selector to FIRE, pull the trigger back and while holding the trigger back, cock the hammer – the disconnector should grab the hammer and when you release the trigger, the hammer should move from the disconnector to the trigger body. Now, pull the trigger and it should fire like normal.
Now, a word of caution – if you do not feel comfortable with any of this, please see a gunsmith. If you have any doubts at all, please see a gunsmith. I want you to enjoy assembling your AR but I want you to be safe even more.
That’s it for this step. Next up is installing the pistol grip, which also includes installing the detent and spring that hold the selector in place because the pistol grip holds them in position.
There are a lot of reputable AR parts vendors online but beware of eBay and bargain basement dealers that sell airsoft parts and tell you they will stand up to firearm use – they will not. At any rate, here are my top sources of AR parts:
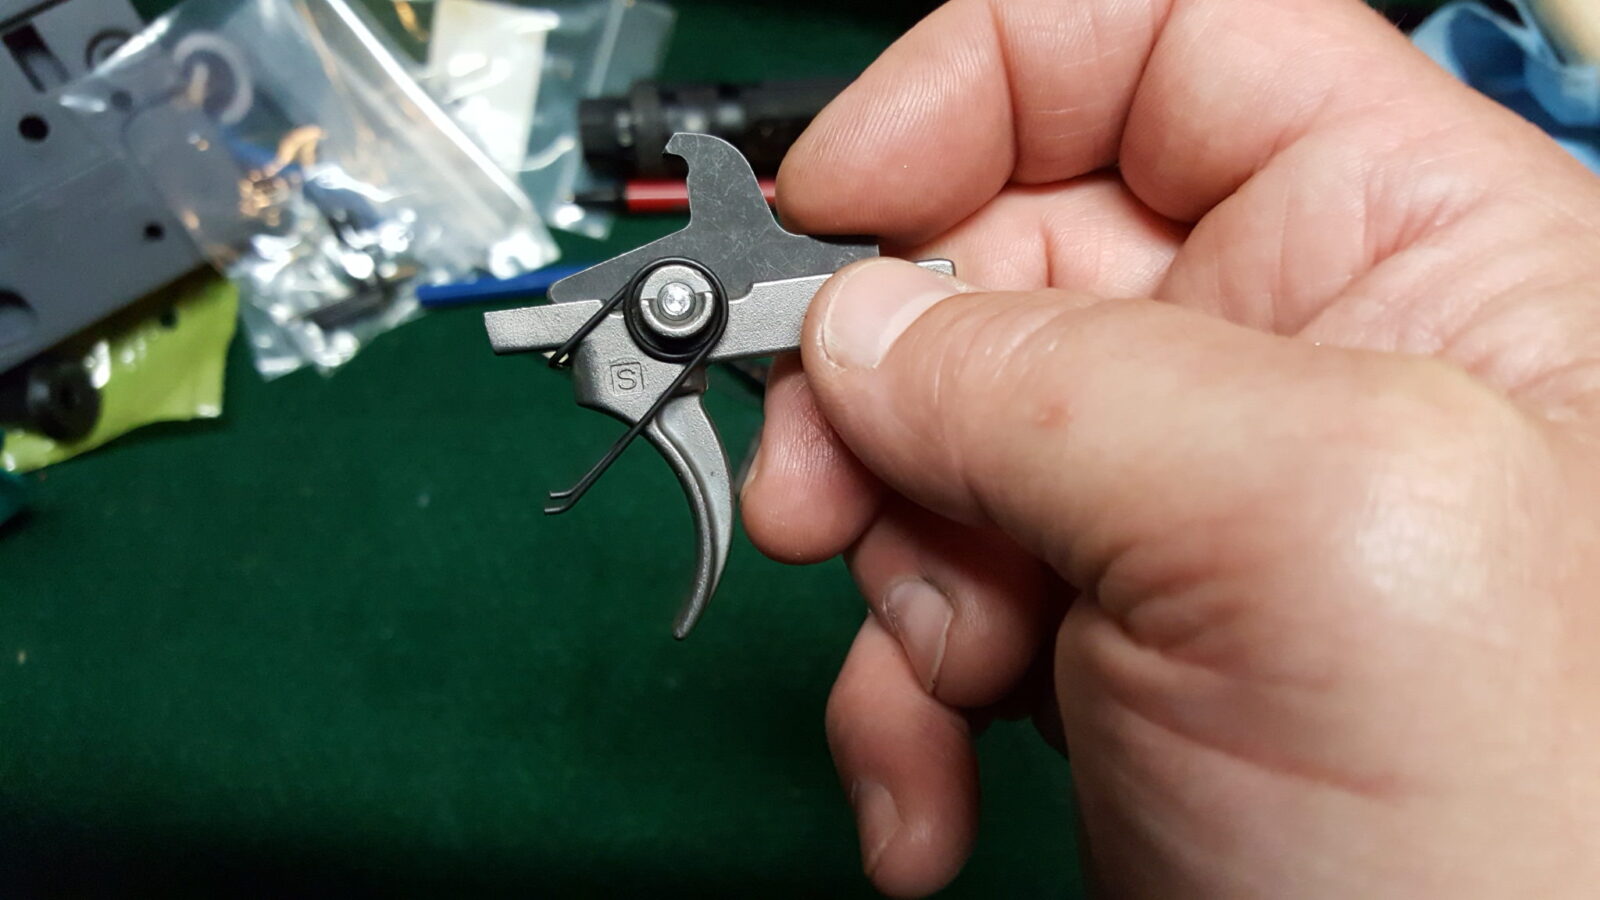
The hammer assembly includes the pin, spring and hammer itself. In the next photo, the hammer group is to the right. This is an enhanced trigger group from Palmetto State Armory (PSA) that I really like and recommend for people wanting a decent low-cost trigger for a basic build.
It’s straight forward to install with one important detail to get right – put the spring on so the loop is to the back and top of the hammer and the legs wind down clockwise off the hammer. Installing the spring the wrong way can have weird not always predictable results. I’ve had rifles that fired fine and others that doubled. Be sure to install the spring the correct way:
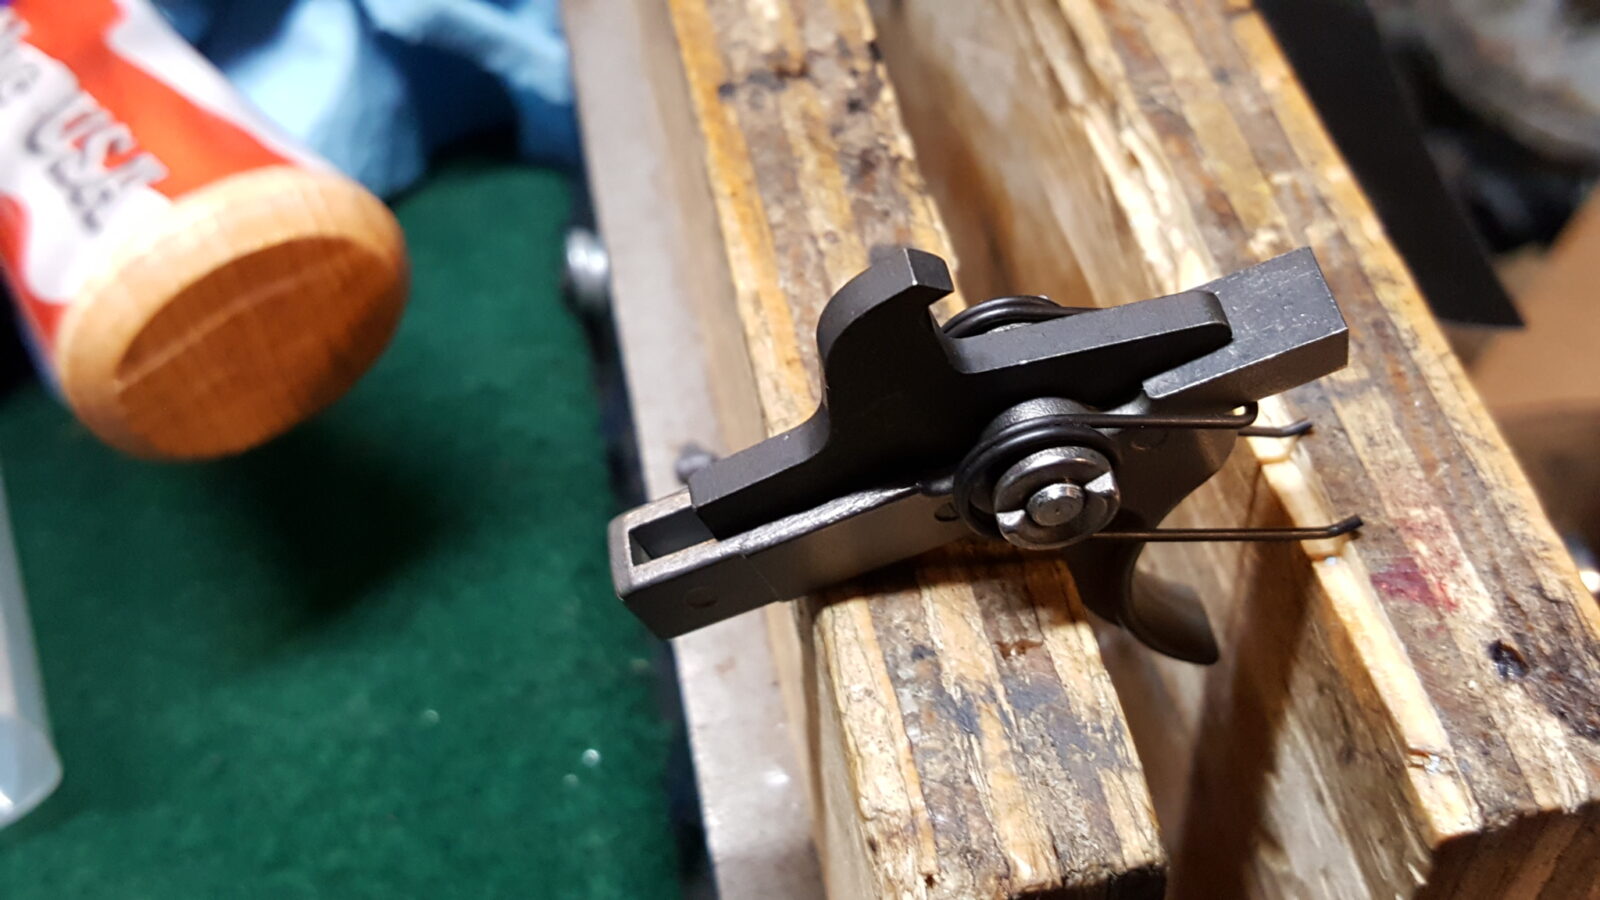
Now this next photo is of a fire control group installed in my Strike Industries jig that is great for tuning. It’s not the PSA enhanced trigger but I wanted you to see the way the hammer spring’s legs must sit in the trigger pin’s groove. This is very important as it locks the pin in place. You may need a pair of needlenose pliers to adjust the leg to make sure it does rest in that groove. By the way, the part the strikes the firing pin is the straight flat face so when you install the hammer, the face is forward as you see in the next photo.
To help line things up, I either use a punch or a little slave in. The hammer spring is pretty strong and something to help you line it up while you install the cross pin will seriously lower your stress level. Here, I am using my slave pin and you can see the actual hammer pin coming in from the left. As a reminder, the trigger and hammer use the same pins.
Next, you need to function test the fire control group. DO NOT LET THE HAMMER COME FORWARD AND SLAM THE MAG WELL!! You need to use your thumb or something to ease the trigger up. A steel hammer hitting an aluminum receiver’s magazine well is not a good combination. Pull the hammer back and the trigger should catch it. Next, pull the trigger while holding the hammer and the trigger should release the hammer letting it come forward.
There are a lot of reputable AR parts vendors online but beware of eBay and bargain basement dealers that sell airsoft parts and tell you they will stand up to firearm use – they will not. At any rate, here are my top sources of AR parts:
On the left is a RAS47.
K-VAR upper handguard
Magpul cheek riser
Ronin’s Bulgarian SAW grip in Dark Russian Plum
On the right is an AK74 NODAK SPUD.
Ronin’s Bulgarian SAW grip in Dark US Plum (Similar to the color of KVAR’s US plum furniture)
Russian mag and upper handguard.
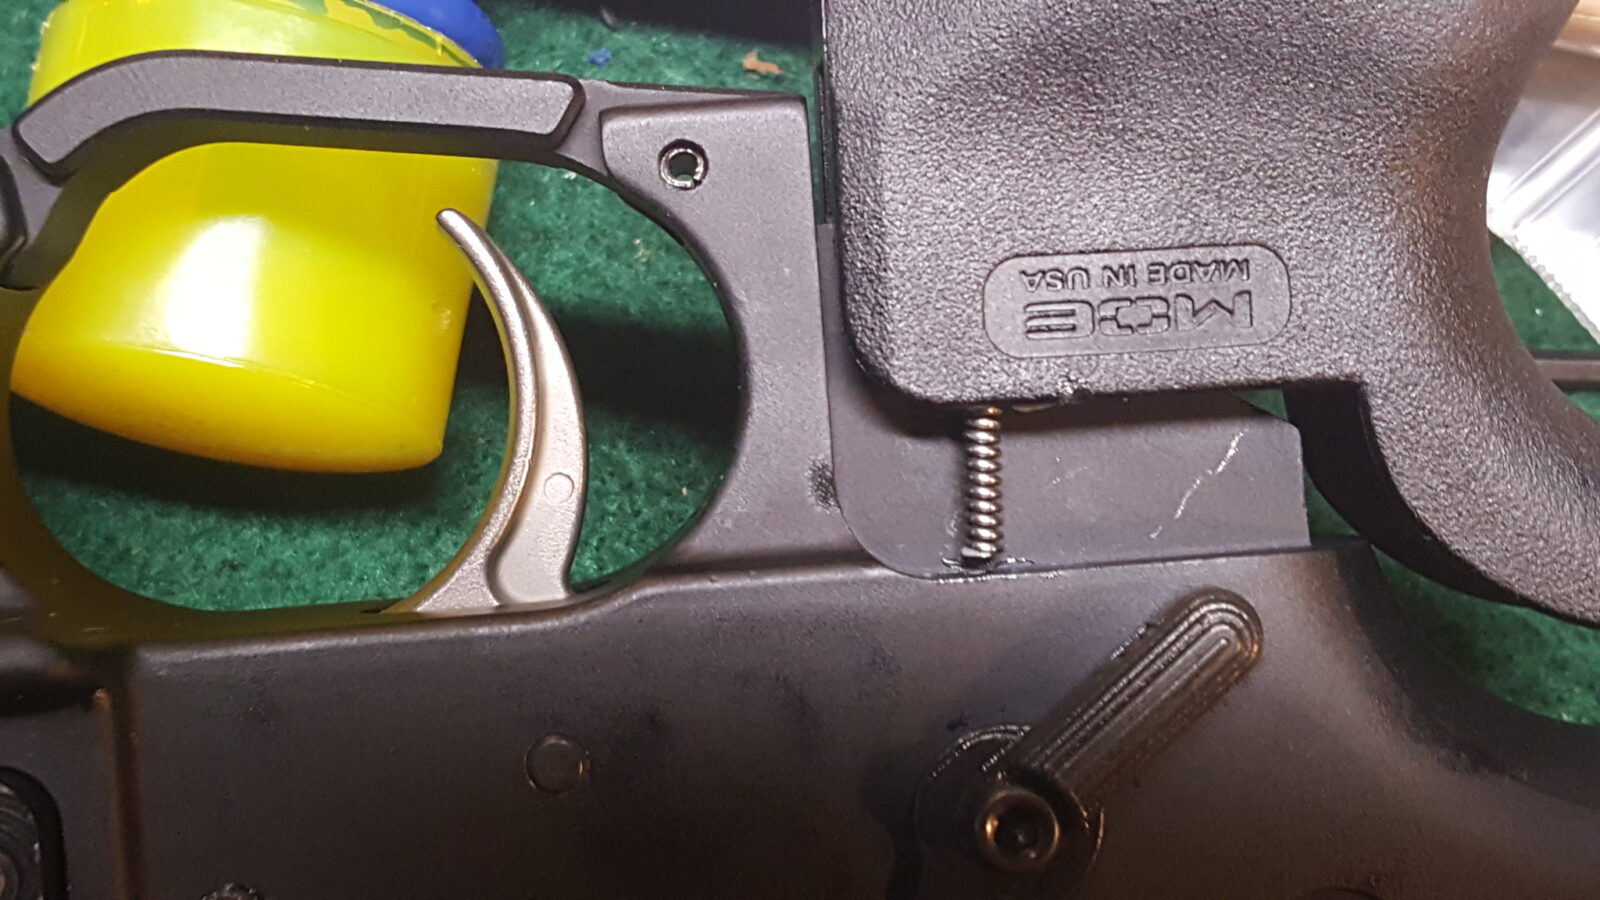
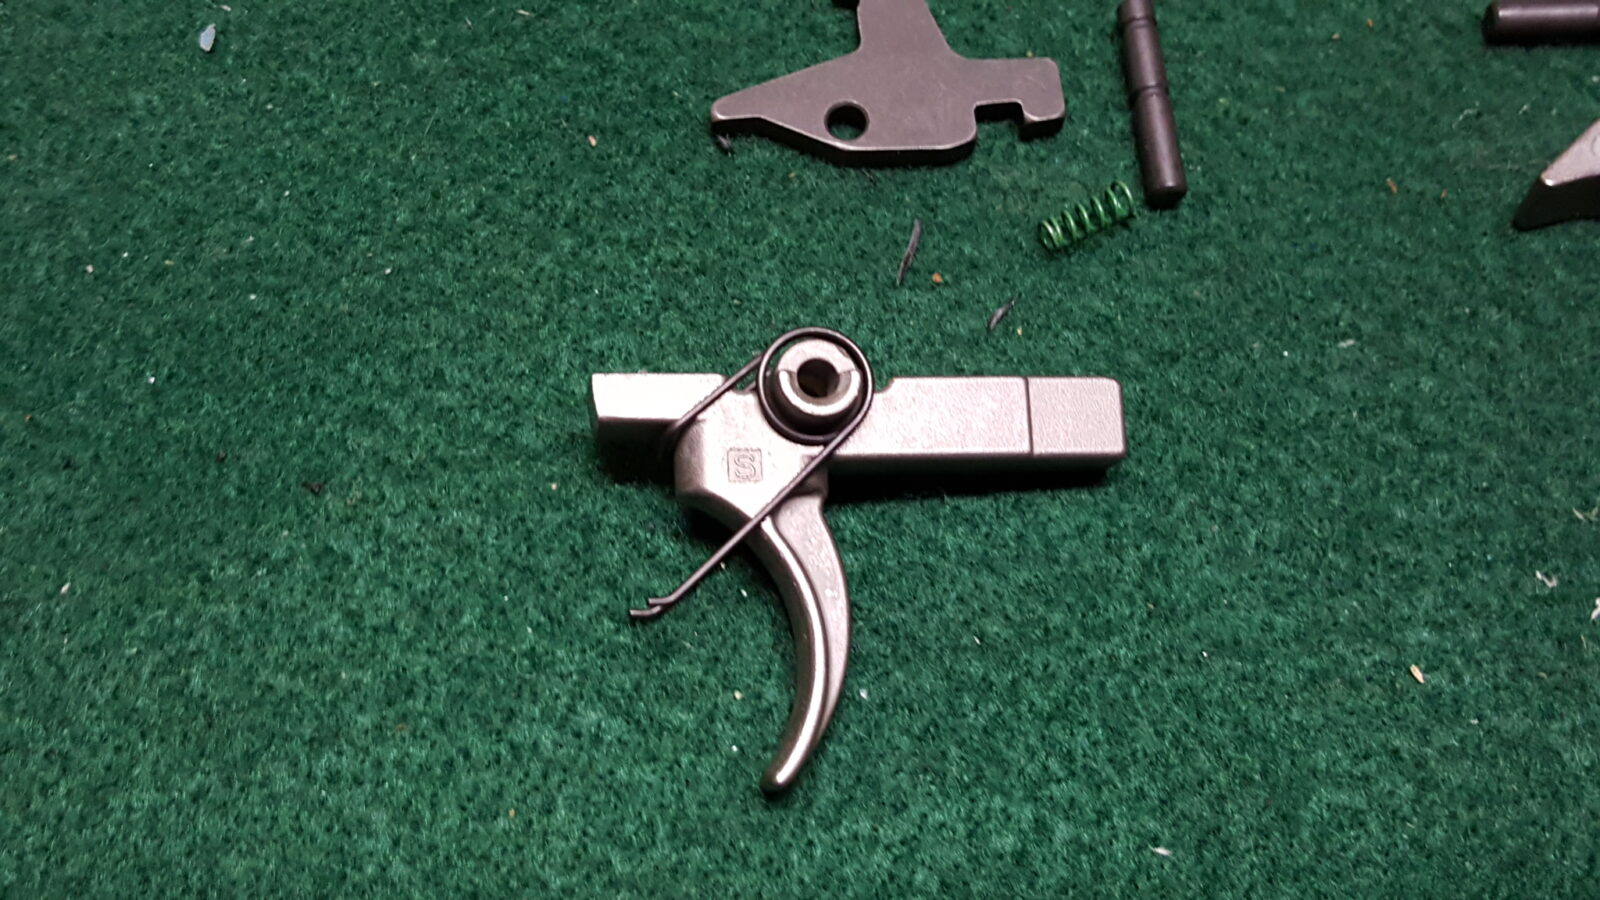
An AR trigger assembly is four parts not including the pin that holds the assembly in the receiver. I like Palmetto State Armory’s Enhanced Trigger Group that has a polished nickel boron finish for my basic AR builds. My favorite trigger manufacturer is Geissele and have used a number of their models over the years but they are pricey. The PSA enhanced trigger is $39.99 and a nice improvement over the normal Mil-Spec trigger. I should note that even the regular trigger from PSA is not bad. I have used build kits from others, such as Anderson, where the trigger felt very “gritty” until it wore in whereas the PSA triggers have not had that feeling out of the bag.
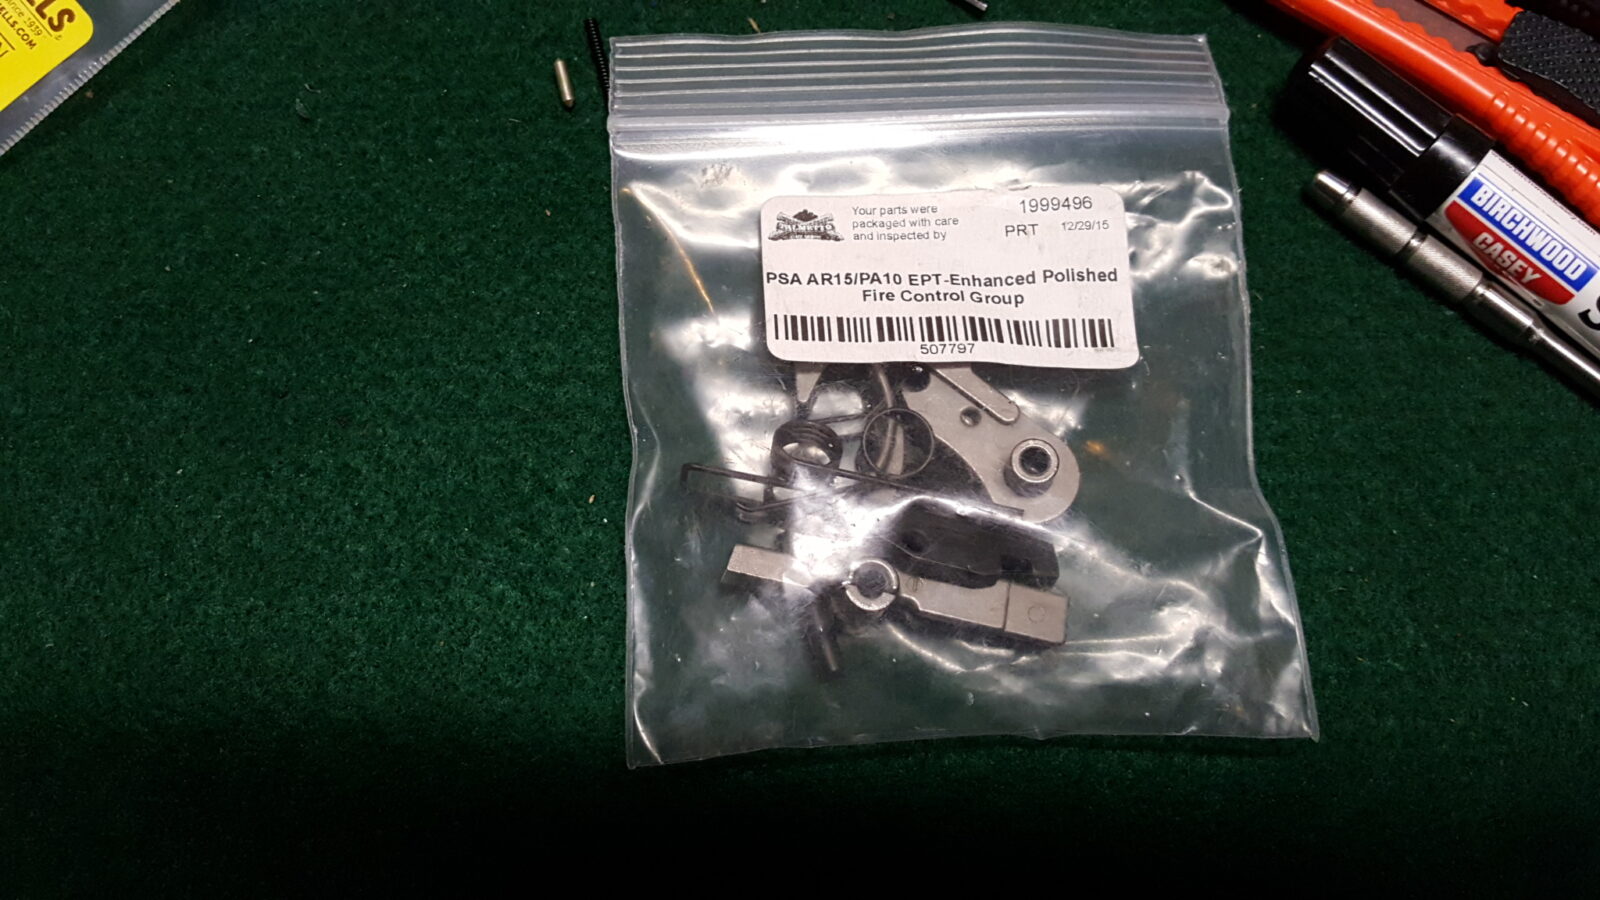
So, when you get a trigger group from PSA, as well as most other vendors, they will have the components in a bag. Pour out the contents and organize them to make sure all the parts are there. Notice I am using a green fabric work mat. These are made by several companies and the benefit is that the fine nap of the mat softens the impact of small parts so they don’t fly/roll all over the place. It helps keep stuff from getting scratched up.
In the next photo you will see the trigger and hammer assemblies and all the parts that should be there. On the left is the trigger assembly – disconnector, trigger pin, small green disconnector spring (note that the vendors do not always color this spring but it is uniquely shaped), the trigger itself and the trigger spring. On the right is the hammer assembly and starting at the top you have the hammer pin (the pins are identical by the way), the hammer itself and the hammer spring.
Even though this trigger is polished, I polish the mating surfaces to a mirror finish with a Dremel, felt wheel and a fine polish such as Flitz. I also remove any burs/rough endges that I encounter with a fine stone. I don’t change the geometries – my goal is just to get things nice and smooth. Note, if you skip this the trigger will need to wear in to smooth out.
Next, install the trigger spring. Note the orientation of the front of the spring under the nose of the trigger:
Now if you look at the disconnector spring and you will notice that one end is wider. You push that wider part down into the round pocket that is machined in the back of the trigger.
See how the bottom is wider? This particular spring is colored green. Rarely are the colored – you need to go by the shape.
Now you have an option that will make your life way easier – assemble the trigger group outside of the receiver using a slave pin. I’m just going to talk about modern ARs and not all the ban-era Colt hijinks or oversize pins for worn rifles. In general, the trigger and hammer pins have a diameter of 0.154″. This is the same size as a #23 drill bit. You can go, buy a cheap bit, cut the shaft off so the length of the pin is the same as the width of the trigger. I would recommend using sandpaper to round the edges of the pin so you wind up with the following:
The silver pin above is a slave pin. The purpose of the slave pin is to hold the trigger assembly together. When the actual fire control pin is inserted, the slave pin is pushed out the other side of the receiver and its job is done. We do make and sell slave pins – click here to open our store in another tab.
You can function test the disconnector and make sure that it smoothly rocks back and forth with the spring supporting it.
Now, if you do not want to go the pin route, you will need to juggle everything in the receiver but I would still recommend using a 9/64″ or 1/8″ pin punch to help line things up from the right side as you are looking down at the receiver. They are smaller than the normal pin so just expect to do a bit more positioning. This method works fine – it’s just not my personal preferred method any longer.
Ok, so let’s say you did take my advice – now place the trigger assembly down in the receiver with the trigger facing forward. Put some pressure on the top of the trigger assembly with your thumb, line up the slave pin with the hole and push in the real trigger pin from the left to the right. Note how I have the groove on the left side – one of the hammer spring’s legs will lay in that groove and lock the pin place. Now it just becomes a matter of wiggling thins around and pushing the pin all the way through. Be sure to catch your slave pin before it falls out. This does not take a ton of force. If the pin isn’t going in all the way and things are lined up properly, use a rubber or plastic faced mallet to tap it in.
Note how the slave pin is exiting the receiver as the actual trigger pin is inserted.
Once installed, squeeze the trigger and make sure to is going back and forth with the spring. Double-check also that the disconnector rotates also. In both cases you should feel the springs doing their job.
There are a lot of reputable AR parts vendors online but beware of eBay and bargain basement dealers that sell airsoft parts and tell you they will stand up to firearm use – they will not. At any rate, here are my top sources of AR parts:
Folks, I saw the Cold Dead Hands (CDH) ambidextrous charging handle ad on Facebook and figured for $34.94 delivered I might as well give it a try so I ordered it on 6/22/17. The first thing I noticed after I placed my order was that it was shipping from China but was hopeful that wasn’t a bad thing. Well, it arrived today (6/28/17) in a brown cushion mailer and I immediately noticed the bare bones generic packaging it was in and was still hopeful because it looked pretty good.
Here it is next to my favorite model of charging handle, the BCM Gunfighter Mod 3 Large Latch.
It fit just fine in terms of installation and locking in place.
The problem is the unlocking. It is a tad rough from the left side (the non op side looking down from the top where the normal handle release is) but it works.
From the right side (where the ejection port is), if you pull back slow using the right tab the handle’s catch hook pretty much digs in and locks the handle in place. If I yanked hard and fast from the right, it would release. If I went slow, it would not release. This pretty well defeats the ambidextrous function claim.
There’s nothing odd about the upper – just a normal Palmetto State Armory upper. In the next photo, I stopped the handle short on purpose to take the photo of the locking area on the upper.
So, the CDH handle was gritty on the left and unpredictable on the right. Out it went and the BCM Mod 3 went in. By the way, a Mil-Spec charging handle worked just fine as does the BCM. I had a Mil-Spec handle in there before trying the CDH unit.
Bottom line, based on my experience, I would recommend against buying the Cold Dead Hands model. Stick with Mil-Spec or a name brand charging handle.
The AR is a modular rifle system wherein the upper half connects to the lower half via two pins. The front pin is known as the “pivot pin” because when the rear pin is opened, the upper half can pivot up allowing for maintenance or to allow the operator to open the pivot pin also and entirely remove the upper for a different model thus allowing tremendous versatility. This is why AR owners can readily swap calibers, barrels, etc. to really tailor their weapon to the task at hand.
Now, when it comes to assembling the lower, there is one big headache when installing the front pivot pin. To keep it from falling out, there is a spring and a tiny detent pin in front of it that will want to launch like a rocket across the room if you aren’t careful. This is one step where I would tell you to wear eye protection – you may think this is a joke but it honestly is not. That detent is tiny and it seriously can come flying out. Some day if I clean out my shop, I will find a handful of these springs and detents hidden from when the flew across the room.
Let me give you a big tip – detent springs and pins are very cheap. Buy spares for those “where the heck did it just go” moments that inevitably happen. You get tired, your mind wanders and then it’s Houston we have a launch! I keep spares – plural – of all small AR parts in my AR parts bin.
Don’t even think about trying to install that pin without a tool to help. I am going to give you a real strong recommendation – buy a pivot pin assembly tool or at least buy a 1/4″ universal clevis pin if you are just doing a single build. The purpose-built tools are dirt cheap and you can find them everywhere – Amazon, Brownells, Primary Arms, Midway USA, etc. I think I bought my first off eBay but I have several because several armorer’s kits I have bought over the years included one. They all basically look like this:
I’ve used this on a ton of builds. It’s aluminum and I’ve since switched to a tool made from steel. I don’t recommend plastic.
If you don’t want to spend the money on the tool, a 1/4″ clevis pin works just fine. A regular 1/4″ clevis pin is $0.95/ea and a universal pin is a $1.50 at my local Ace Hardware & either will work just fine. You then use a punch or an allen/hex wrench to push the detent and spring down. Some of the commercial tools on the market are nothing more than a clevis pin with an allen key so it is up to you as to which to use. Note, if you go the clevis pin route, just go to your local hardware store and get one. They are a fortune on Amazon unless you are buying in bulk. For example, $6 for one from some sellers or $13.50 for 10 from others.
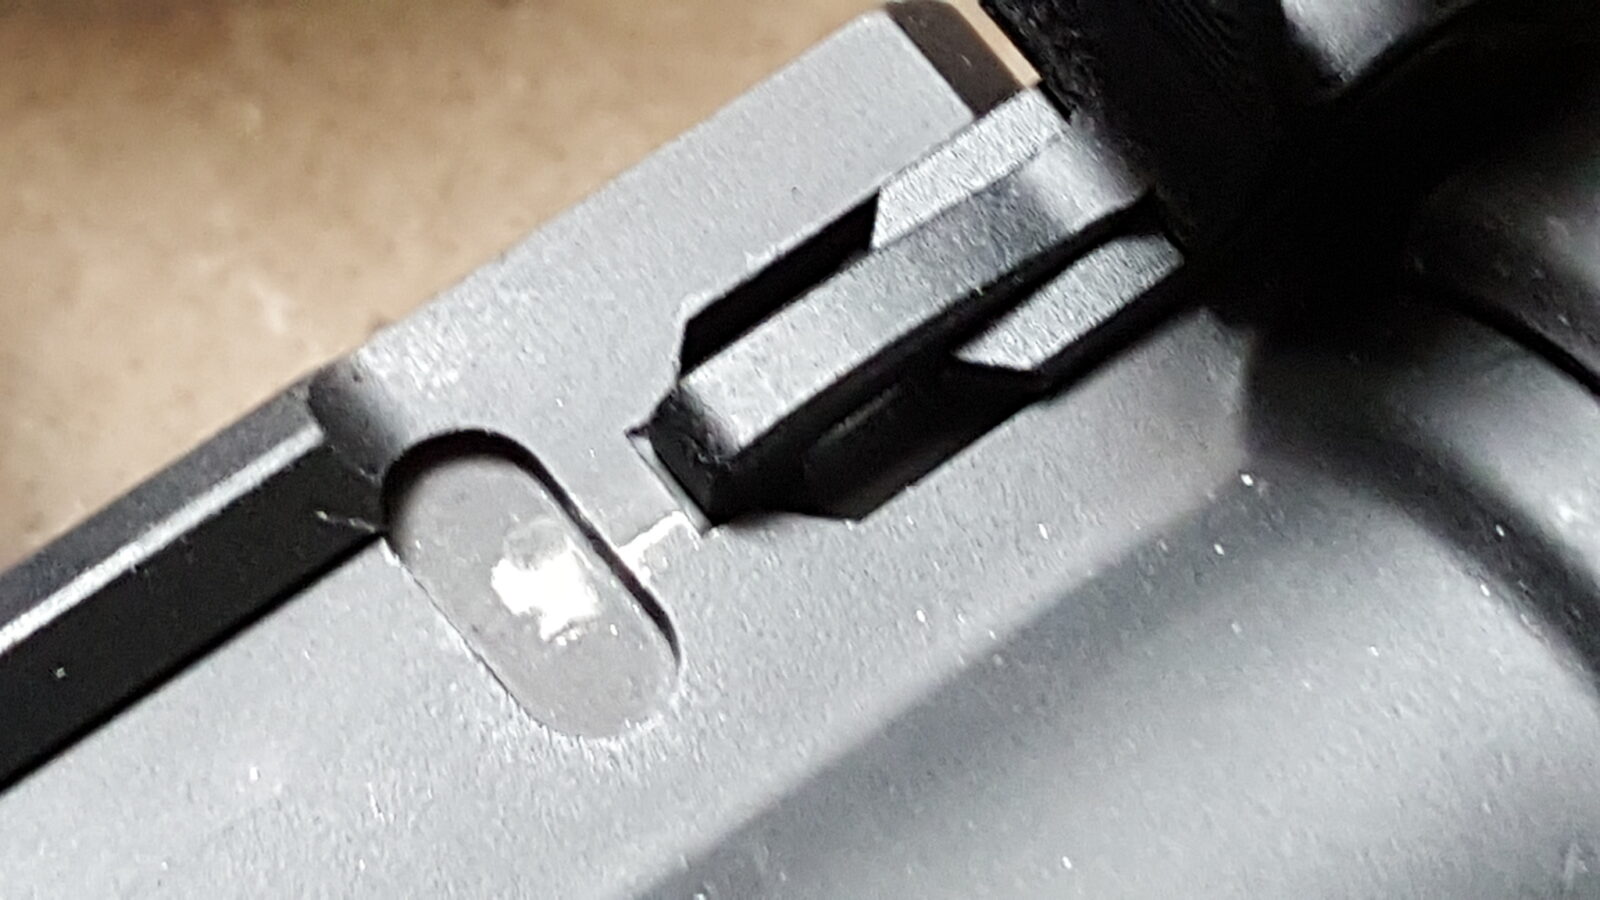
There are two sizes to reflect the two types of receivers that are out there and most AR receivers will use the smaller 1/4″ end. The bigger pin was a Colt ban-era move they did to try and prevent a M16 upper from being put on a sporting lower. For anyone doing a build today with a current upper and lower – it will be the 1/4″ size. You will see there are two pins with your lower build kit, The relatively flat one is for the rear and the one with the large shoulder is the front pivot pin. So in the next photo, the pivot pin is the lower pin. You can also see the small double ended detent – either end can be first down the hole – and one of the detent springs. Both takedown pins use the same detent and spring. By the way, I recommend buying one of the reputable spare parts kits and throw it in your tool box just in case. I can’t tell you how many springs, pins and small parts I have dropped and lost over the years.
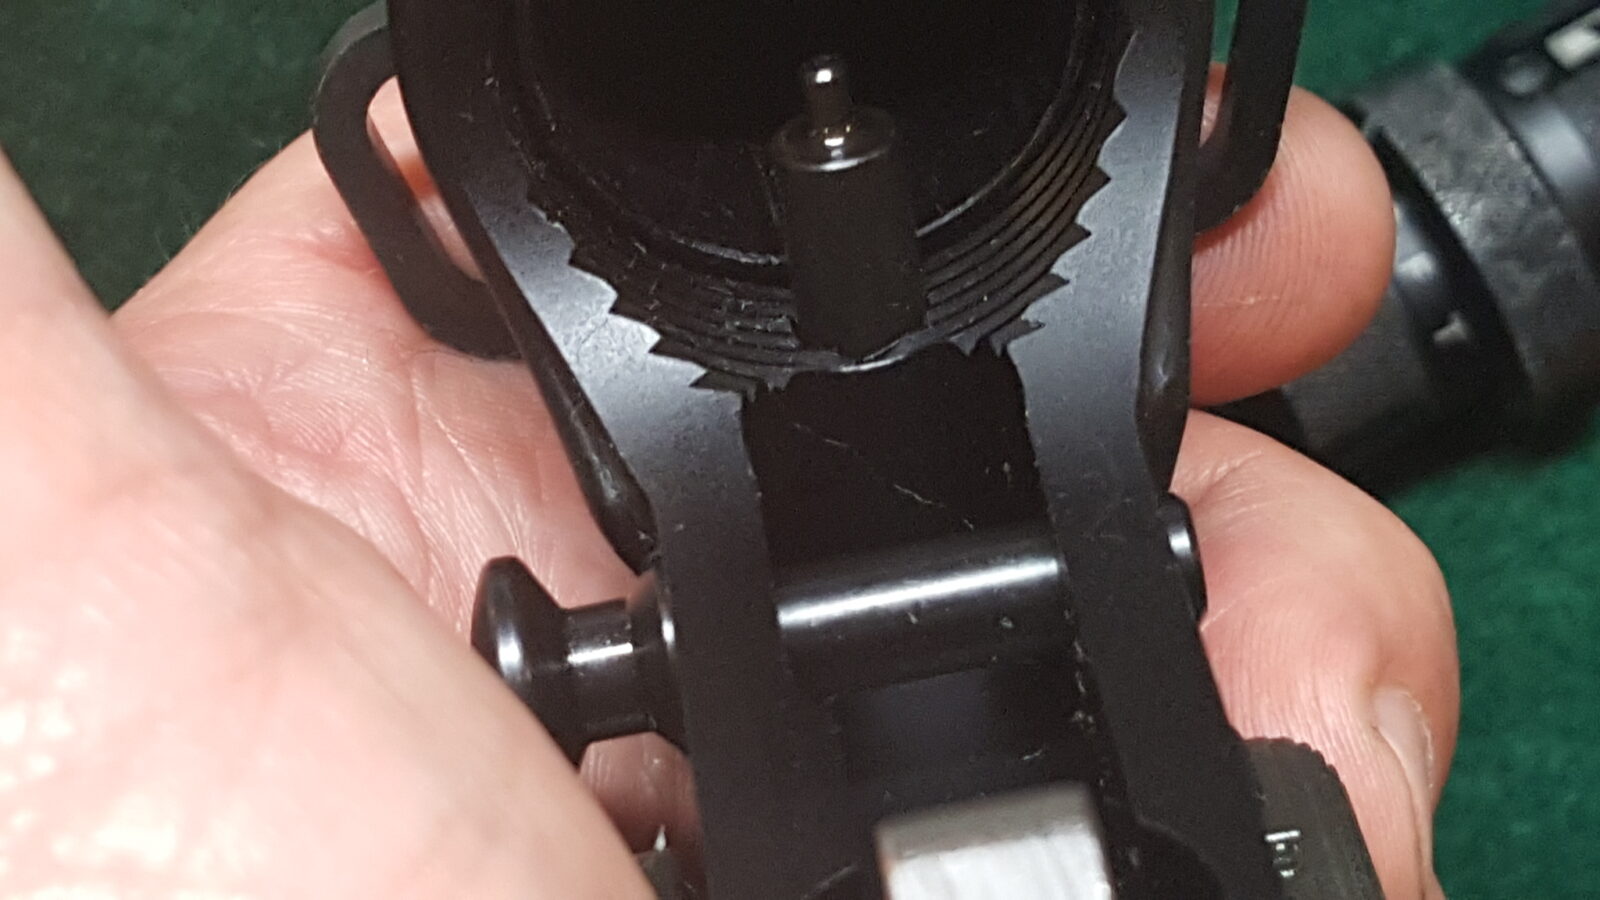
The top pin is for the rear, the middle pin with the large head that is flat on one side is the pivot pin and they use the same springs and detents.That tiny thing is a detent pin that hasn’t decided to launch into orbit yet.
To make life interesting, a detent spring is inserted into this receiver hole followed by a detent pin on top of it. The detent pin is what actually makes contact the pivot pin. This is always the case with AR rifles and it makes sense. If the spring contacted a rotating pin directly it would break down over time. In terms of pins, I prefer enlarged takedown pins. The ones I use the most are Yankee Hill Machine (YHM) pins that I get at Brownells. They just make it easier for me to disassemble whatever rifle or pistol I am working on.
The spring goes in first and then the detent. If the two will not easily go down, use a small drill bit by hand to clean out the hole. Sometimes there can be debris in there.The detent will slide into the small recesses at either end of the slot. Grease the channel for smooth movement. This is a Yankee Hill Machine pivot pin with an oversize head.Front and rear Yankee Hill Machine (YHM) pins with their oversize heads to make them easier to grab.
The actual installation is very straight forward if you have tool or clevis pin. Push the tool in so the hole of the tool is over the hole in the receiver and then insert the spring and the detent pin. The pin will stick up some so you then push it down with the little plunger tool. Simply rotate the tool and the spring and pin are adequately captured – now leave the tool there for the next step. Note, in the photo with the spring, it is at an angle just for the photo. To drop in, everything is straight up and down the axis of the receiver. Also, wear eye protection – if that detent pin comes flying out, you don’t want it to hit you in the eye!
All tools work the same. Insert them from left to right so the hole in the tool can line up with the hole in the receiver.When the holes are lined up vertically, drop in the spring. I turned the tool just a hair so you can see the spring. Normally it drops in out of sight. If not, the hole needs to be cleared/chased with a bit.Now the pin will go in part way and you need to use the plunger of your tool, 3/32″ hex key or something to push the pin in far enough that you can rotate the body of the tool thus trapping the spring and detent in place.The nice thing about purpose-built tools is that everything fits and works as intended.With the detent pushed down, slide the plunger out just barely enough to rotate the body of the tool. With most tools, the plunger can enter the receiver hole and you can’t turn the tool until you withdraw the plunger just a tad.
I always grease the channel in the pivot and rear takedown pin so they can slide easier. I like Tetra Gun Grease so that is what you see in the photo but you could use whatever grease you prefer. Always keep the old saying in mind – if it slides, grease it. If it rotates, oil it.
Grease the channel for smoother operation.
Now this is the only tricky part left. If you have not done so already, remove the plunger so the tool can slide back out but leave the main part of the tool in place with the spring and detent pin captured. Take the pivot pin with the channel facing up (so the pin will not engage it), carefully line it up with the tool, push down and forward to slide the tool out and replace it with the pivot pin. You need the slight downward pressure to keep the detent pin and spring from flying out. Once you see the pivot pin coming through the left lobe/hump, you can remove the tool and rotate the pivot pin into final position with the detent pin riding in the channel.
You need to carefully line up the pivot pin with the tool and slide the pin in while the tool is being pulled out. Honestly, this takes practice. As soon as you withdraw the tool enough, you will feel the detent and spring try to push the pivot pin out of the way. I just go slow and apply even pressure with the pin carefully butted right against the tool.At this point, the pin is being held in place by the receiver. I can then push the tool out the rest of the way and rotate the pin around such that the detent will snap into the channel – you can hear and feel it when it does.Done
That’s it! The pivot pin should slide open and closed with the detent catching at either end. Note, this may be a tight fit as the parts wear in. I would not recommend sanding the pin or reaming the hole unless you know for sure the hole is out of spec. Grease the pin and work it in and out. It should loosen up with time as the parts get to know each other.
I do like to grease the pin. It will likely be a very tight fit initially until the parts get to know each other a bit more.
For folks who choose to do this with a clevis pin, it is the same procedure but with the clevis pin and a punch or allen key to do the work. These next photos are just so you can get an idea of how it works. I simply grab whatever punch or allen key that will fit down the hole of the clevis pin to serve as the plunger. I didn’t grease the mil-spec pin as I just did this to take photos. Here I am just using a plain $0.95 clovis pin and a small punch to serve as the plunger. If I had rotated the pivot pin at the end, it would have been a done deal but I took it back apart as I will use the YHM pin when I decide how I want to build this next lower.
See, a dirt cheap 1/4″ clovis pin will work just fine.Done – I just need to grease the pin and rotate it.
So this step is done! I hope it helps. In the next step I’ll install the trigger assembly.
There are a lot of reputable AR parts vendors online but beware of eBay and bargain basement dealers that sell airsoft parts and tell you they will stand up to firearm use – they will not. At any rate, here are my top sources of AR parts: