An AR trigger assembly is four parts not including the pin that holds the assembly in the receiver. I like Palmetto State Armory’s Enhanced Trigger Group that has a polished nickel boron finish for my basic AR builds. My favorite trigger manufacturer is Geissele and have used a number of their models over the years but they are pricey. The PSA enhanced trigger is $39.99 and a nice improvement over the normal Mil-Spec trigger. I should note that even the regular trigger from PSA is not bad. I have used build kits from others, such as Anderson, where the trigger felt very “gritty” until it wore in whereas the PSA triggers have not had that feeling out of the bag.
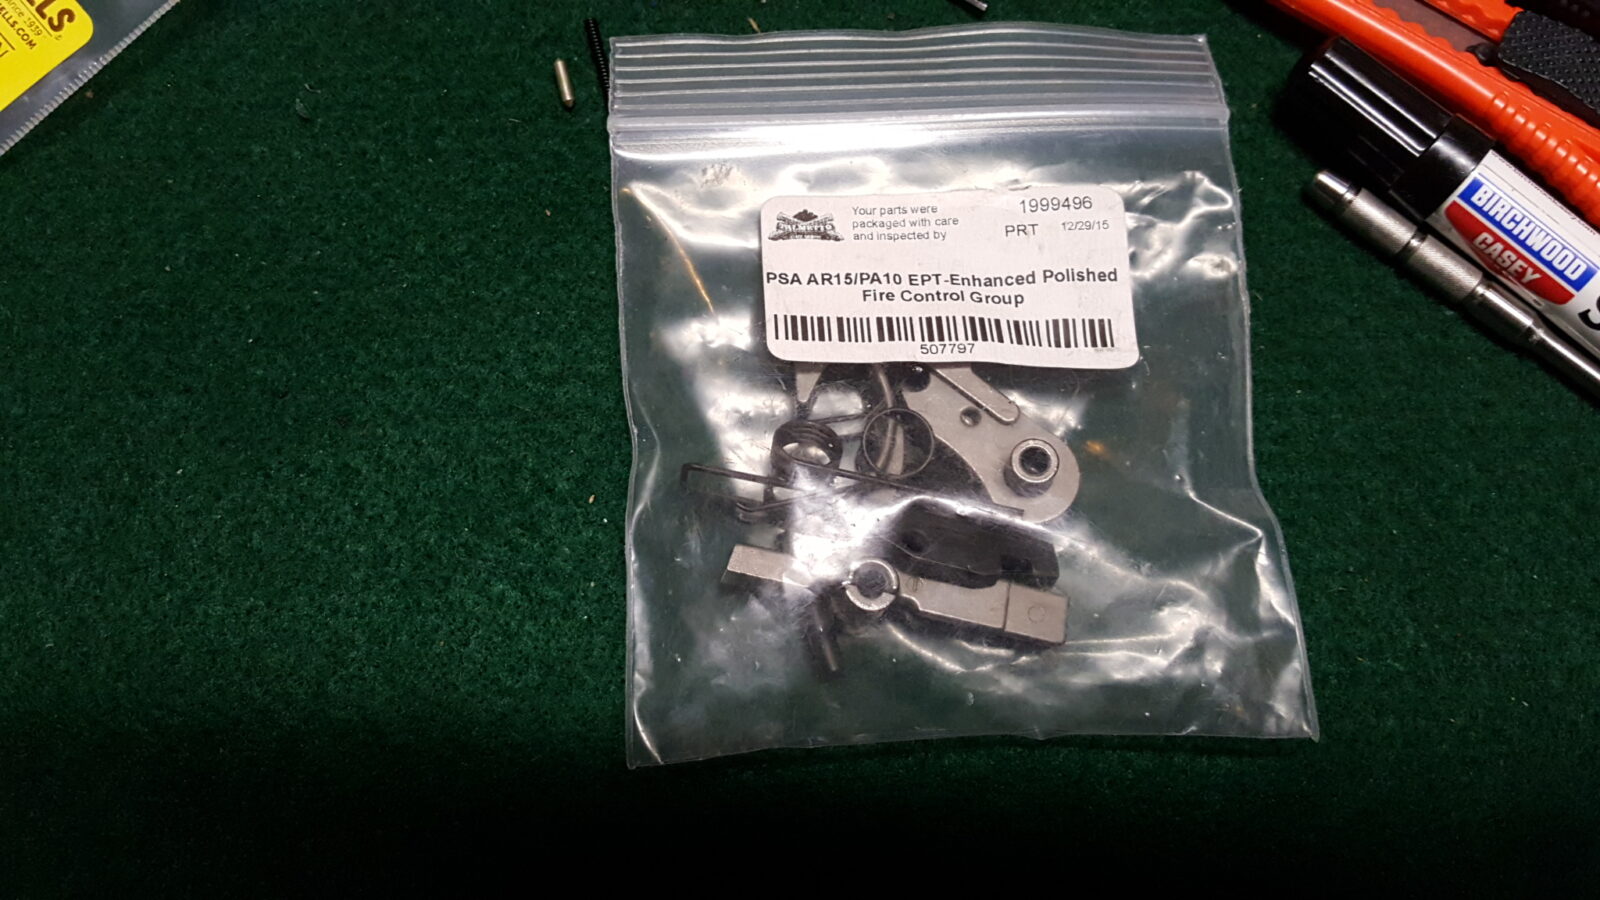
So, when you get a trigger group from PSA, as well as most other vendors, they will have the components in a bag. Pour out the contents and organize them to make sure all the parts are there. Notice I am using a green fabric work mat. These are made by several companies and the benefit is that the fine nap of the mat softens the impact of small parts so they don’t fly/roll all over the place. It helps keep stuff from getting scratched up.
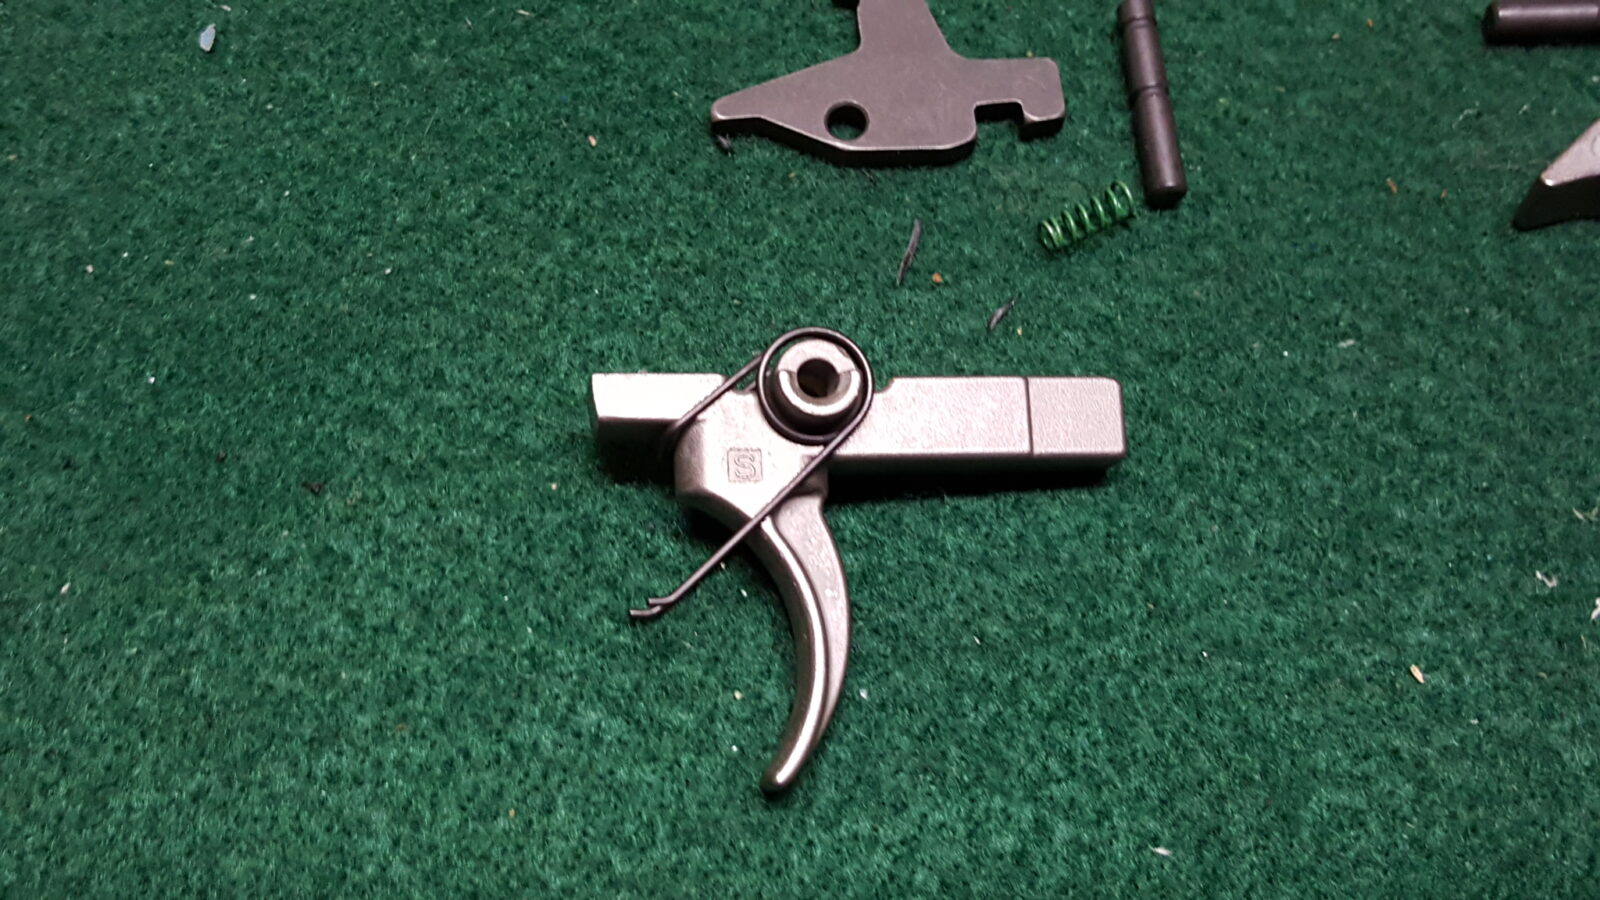
In the next photo you will see the trigger and hammer assemblies and all the parts that should be there. On the left is the trigger assembly – disconnector, trigger pin, small green disconnector spring (note that the vendors do not always color this spring but it is uniquely shaped), the trigger itself and the trigger spring. On the right is the hammer assembly and starting at the top you have the hammer pin (the pins are identical by the way), the hammer itself and the hammer spring.

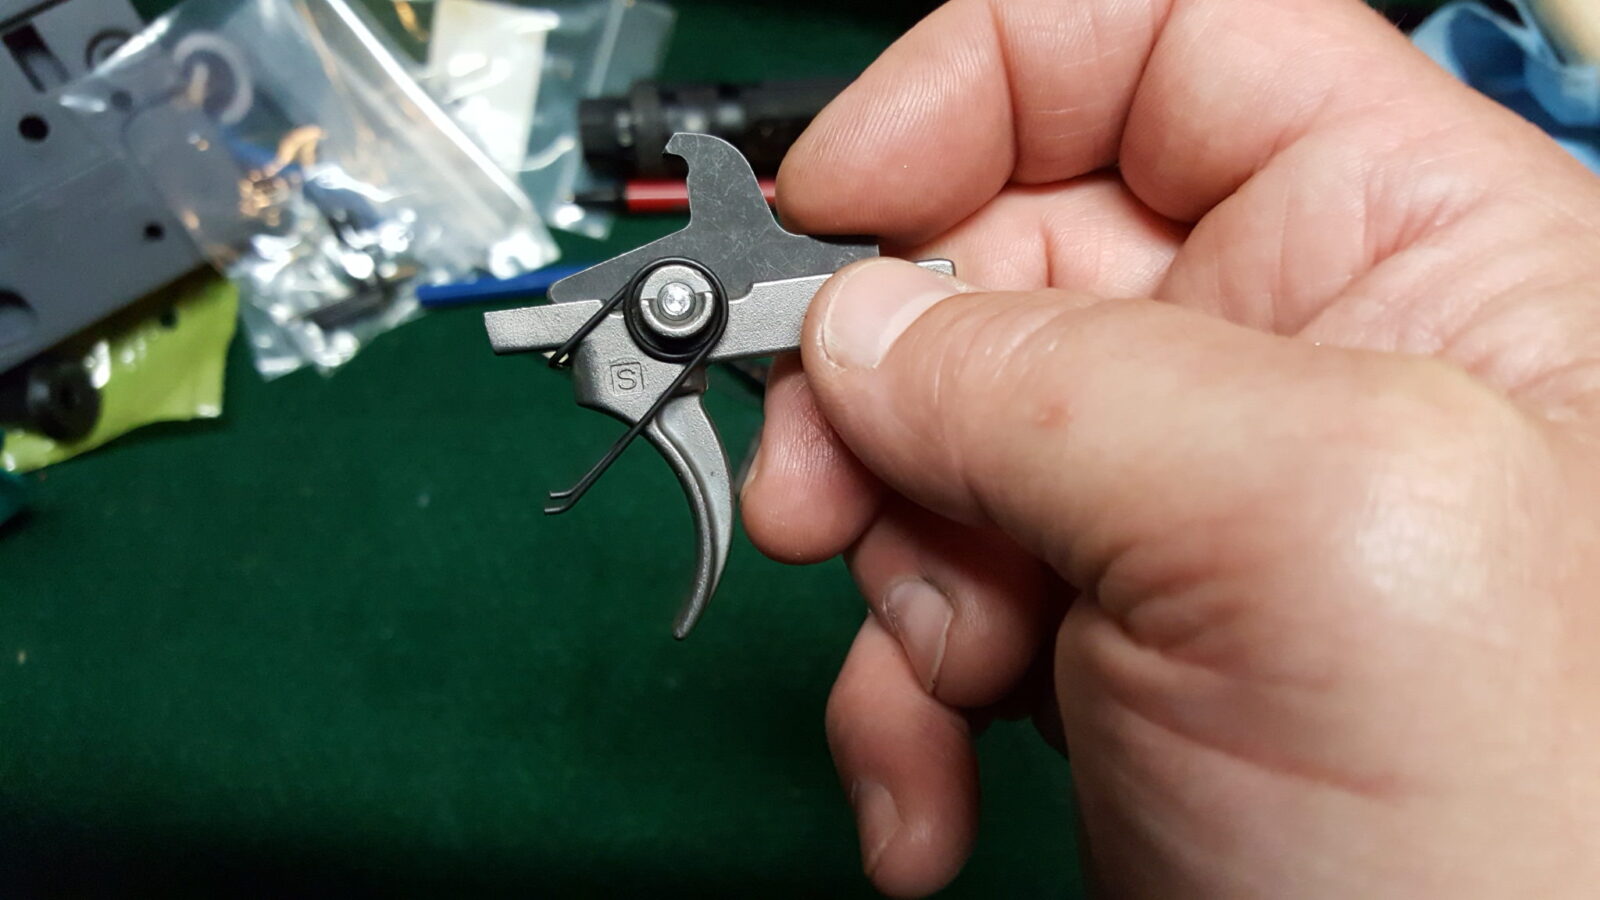
Even though this trigger is polished, I polish the mating surfaces to a mirror finish with a Dremel, felt wheel and a fine polish such as Flitz. I also remove any burs/rough endges that I encounter with a fine stone. I don’t change the geometries – my goal is just to get things nice and smooth. Note, if you skip this the trigger will need to wear in to smooth out.


Next, install the trigger spring. Note the orientation of the front of the spring under the nose of the trigger:
Now if you look at the disconnector spring and you will notice that one end is wider. You push that wider part down into the round pocket that is machined in the back of the trigger.


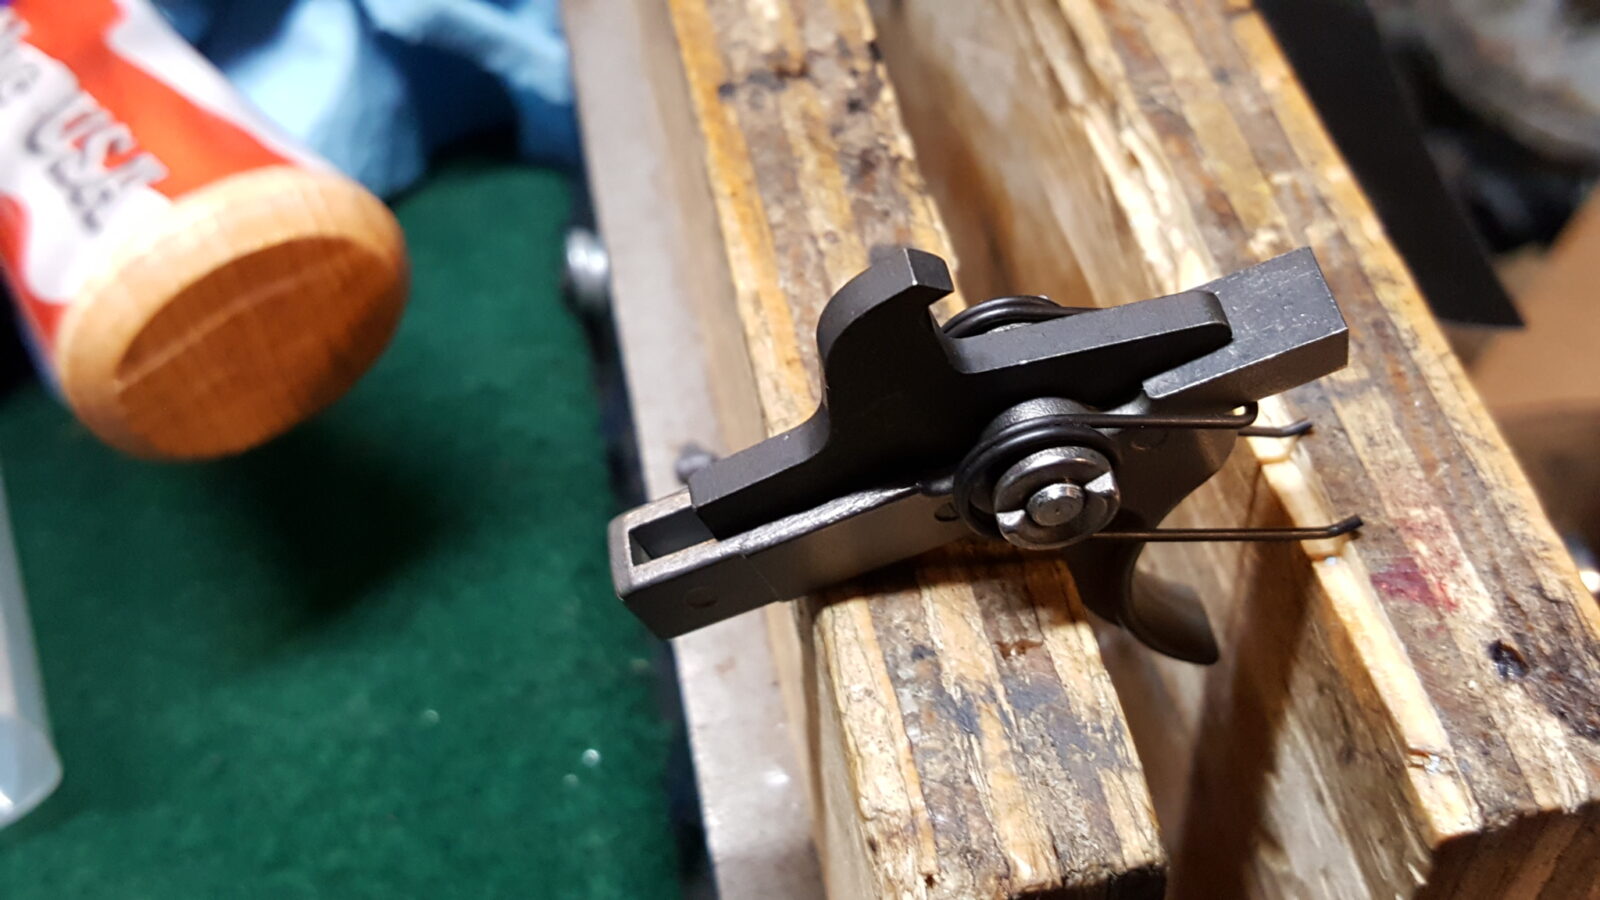
Now you have an option that will make your life way easier – assemble the trigger group outside of the receiver using a slave pin. I’m just going to talk about modern ARs and not all the ban-era Colt hijinks or oversize pins for worn rifles. In general, the trigger and hammer pins have a diameter of 0.154″. This is the same size as a #23 drill bit. You can go, buy a cheap bit, cut the shaft off so the length of the pin is the same as the width of the trigger. I would recommend using sandpaper to round the edges of the pin so you wind up with the following:

The silver pin above is a slave pin. The purpose of the slave pin is to hold the trigger assembly together. When the actual fire control pin is inserted, the slave pin is pushed out the other side of the receiver and its job is done. We do make and sell slave pins – click here to open our store in another tab.


You can function test the disconnector and make sure that it smoothly rocks back and forth with the spring supporting it.

Now, if you do not want to go the pin route, you will need to juggle everything in the receiver but I would still recommend using a 9/64″ or 1/8″ pin punch to help line things up from the right side as you are looking down at the receiver. They are smaller than the normal pin so just expect to do a bit more positioning. This method works fine – it’s just not my personal preferred method any longer.
Ok, so let’s say you did take my advice – now place the trigger assembly down in the receiver with the trigger facing forward. Put some pressure on the top of the trigger assembly with your thumb, line up the slave pin with the hole and push in the real trigger pin from the left to the right. Note how I have the groove on the left side – one of the hammer spring’s legs will lay in that groove and lock the pin place. Now it just becomes a matter of wiggling thins around and pushing the pin all the way through. Be sure to catch your slave pin before it falls out. This does not take a ton of force. If the pin isn’t going in all the way and things are lined up properly, use a rubber or plastic faced mallet to tap it in.


Once installed, squeeze the trigger and make sure to is going back and forth with the spring. Double-check also that the disconnector rotates also. In both cases you should feel the springs doing their job.
So you now have the trigger installed and next up is the hammer – click here to open the hammer post in a new tab.
Please share the link on Facebook, Forums, with colleagues, etc. Your support is much appreciated and if you have any feedback, please email us in**@*********ps.com. If you’d like to request a report or order a reprint, please click here for the corresponding page to open in new tab.
AR Parts Sources
There are a lot of reputable AR parts vendors online but beware of eBay and bargain basement dealers that sell airsoft parts and tell you they will stand up to firearm use – they will not. At any rate, here are my top sources of AR parts: