Guys, I remember tuning a car by ear with a timing light, vacuum gauge, feeling things out literally with my hands and so forth. Boy has the world changed. As the vehicles got smarter and smarter, someone decided to add On-Board Diagnostics (OBD) in the early 1980s first with the idiot “check engine” light and then it got more and more involved. Modern cars and trucks in the US have an OBD II jack where you can plug in, read and clear fault codes, access real-time information and so forth.
Back in 2013 I saved my pennies and finally bought my own Autel Autolink Scanner for $102. Wow – I thought was so cool. I used it whenever fault codes popped up to figure out what it was but I had to lug the thing around and it wasn’t something you could readily update, etc.
A friend of mine came over about a year back to check on one of our cars. He pulled a little black rectangle out of his jacket, plugged it into the car and then started looking at his phone. I asked him what he was doing and he showed me that he was accessing the codes. I was floored.
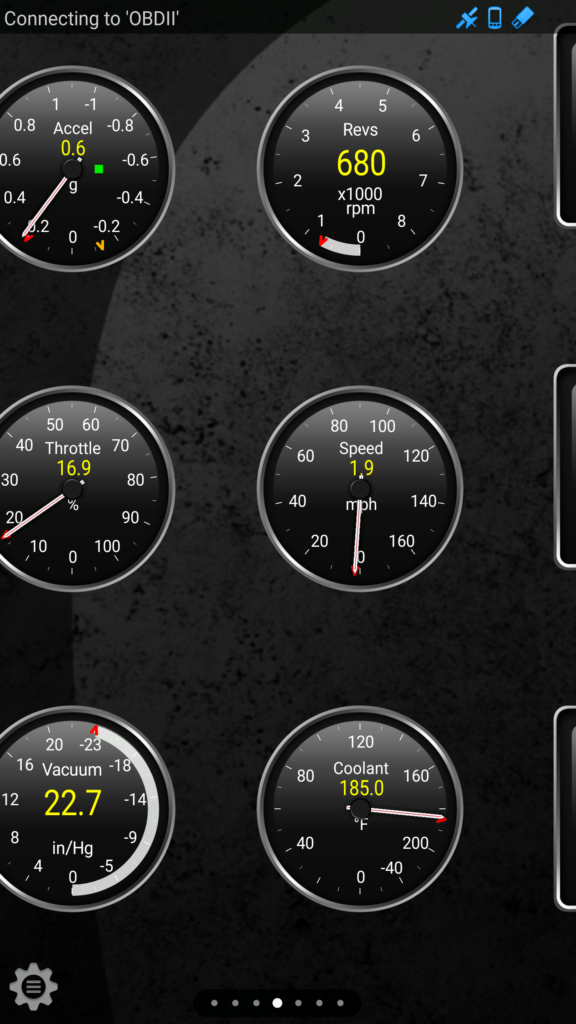
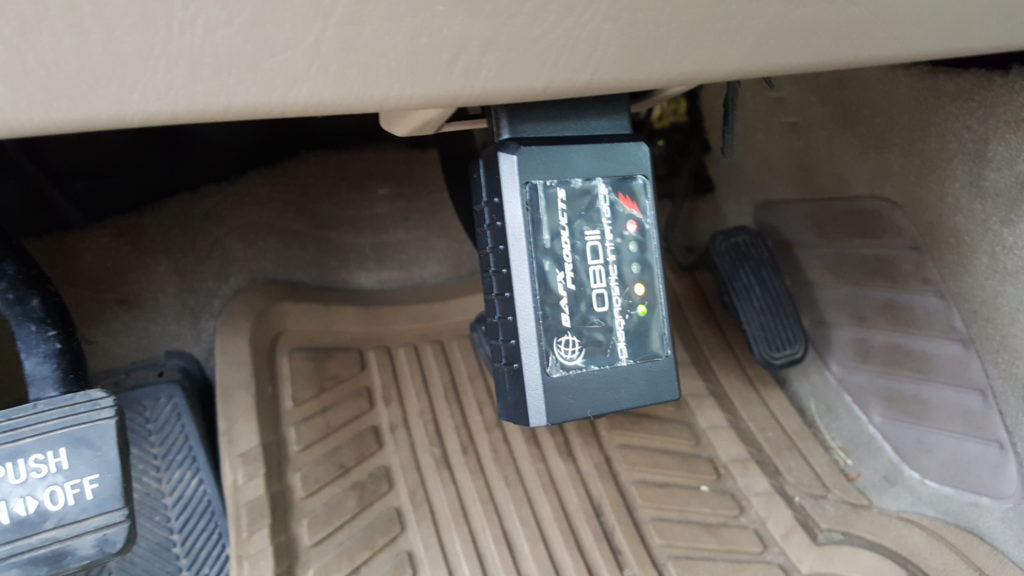
In June 2016, I decided to go the phone route to have a current scanner and a better interface. After digging, I bought a BAFX Products 34t5 Bluetooth OBDII adapter for Android phones (about $22) and I got the Torque software for my Samsung Note Android phone off the Google Play store for free. What a difference. The BAFX adapter was easy to carry around, I could customize the gauges I was looking at, and so forth. For me this combo rocks. It does all I need. I really like it being cordless – you can walk around and so forth and still see the data.
By the way, installation is simple. You follow the instructions to pair the scanner to your phone just like you would any other Bluetooth Device. I downloaded Torque from the Google Play store on my phone in a matter of minutes and it is pretty much good to go. You can create profiles for different vehicles in the software, change gauges you want to watch, their style, how they are grouped and so forth.
The following are screenshots from my phone plus you can see the little adapter that is a bit smaller than a cigarette box.


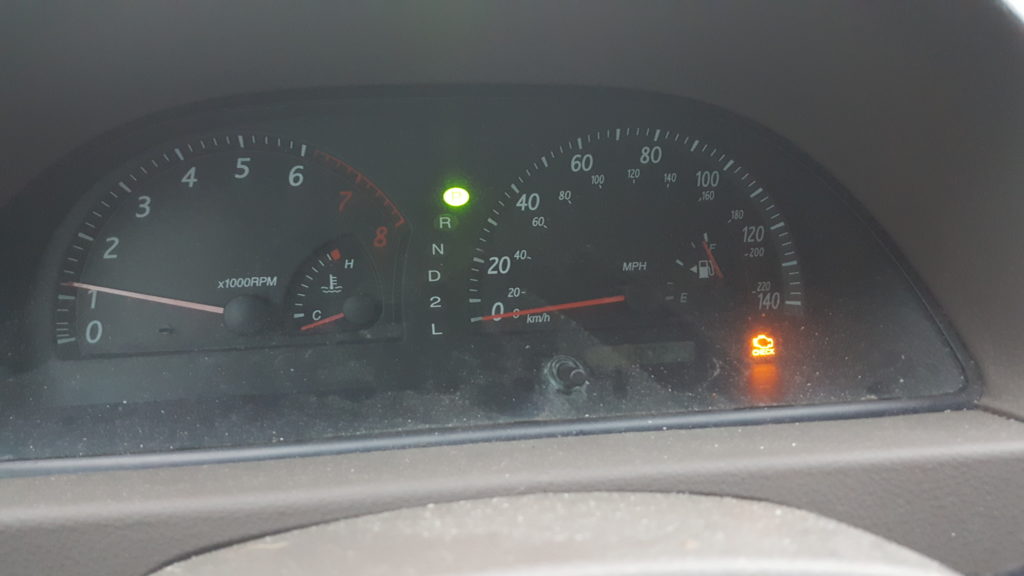
For example, my 2002 Camry’s check engine light is on and I could use the BAFX adapter and Torque to find out what the code was and then search using Google to decide what to do:

I really like the combination and recommend them. In general, I am amazed by all the functionality that is showing up where the smart phone provides the brain and display thus dropping costs dramatically. My recent GiraffeCam endoscope is another example.
By the way, I am so happy with this combination of BAFX scanner and Torque software that I sold my Autel scanner on eBay.
9/.29/21 Update: I still have the original two. They have saved my bacon many times and I always take one with us on trips. I highly recommend them. They have bounced around in the glove box, in the console, baked in the summer heat and frozen in subzero weather and they still work.
2/27/20 Update: I now have a couple of them and use them all the time with Torque.
Please share the link on Facebook, Forums, with colleagues, etc. Your support is much appreciated and if you have any feedback, please email us in**@*********ps.com. If you’d like to request a report or order a reprint, please click here for the corresponding page to open in new tab.


