Tag Archives: Installation

How to Install Ronin’s Grips M92 Handguards

This is another long overdue step by step guide.  We have been selling M92 handguards for over two years and people ask about how to install them so let’s try and take this step by step.

SAFETY STEP – MAKE SURE THE WEAPON IS UNLOADED.  NEVER ASSUME THAT IT IS – VERIFY IT IS UNLOADED BEFORE YOU BEGIN WORK.

1.  Open the dust cover so the gas tube can be removed.

Installing Ronin's M92 handguard grip on AK pistol Installing Ronin's Grips M92 handguard on AK pistol

2.  Take a look at the upper portion.  The gas tube cover is actually a semi circle held in a groove formed by sheet metal.  To remove the cover, secure the forged metal end of the tube (NOT THE SHEET METAL END OR IT WILL BEND) in a vise or use an open end wrench.  Turn the cover 180 degrees until it faces the opposite way and it will come right out of the retainer.

Ronin's Grips M92 handguard installation: close-up of wooden handguard parts. M92 handguard installation: wooden grip over metal components in a vise. M92 handguard installation: wooden jig holding barrel assembly in vise M92 handguard grip being installed in a vise, part of Ronin's Grips installation. Installing Ronin's Grips M92 handguard: wood grip removal M92 handguard part secured in a vise for Ronin's Grips installation.

3.  See the metal clip in the gas tube cover?  You will want to move that clip to our gas tube cover as it helps secure it in place.


Hand adjusting Ronin's Grips M92 handguards on a wooden rifle Ronin's Grips M92 handguard installation: close-up of black polymer grip Inside view of a black M92 handguard for Ronin's Grips installation.

4.  Next, look at the lower handguard.  In the front of the guard on the left side you will see a small lever that needs to be rotated inward.  Once that is done, the handguard retainer can be slid forward.

M92 handguard installation detail with Ronin's Grips Hand holding Ronin's Grips M92 handguards, close-up of black barrel Hand holding Ronin's M92 handguards with tools and paint in background Ronin's Grips M92 Handguards installed on a wooden gun stock

4.  The lower handguard is then pulled forward and down to be removed.

Installing Ronin's Grips M92 handguard: Close-up of wooden handguard assembly. Installing Ronin's M92 handguards on a firearm Hand adjusting Ronin's Grips M92 handguard on an AR-15 rifle

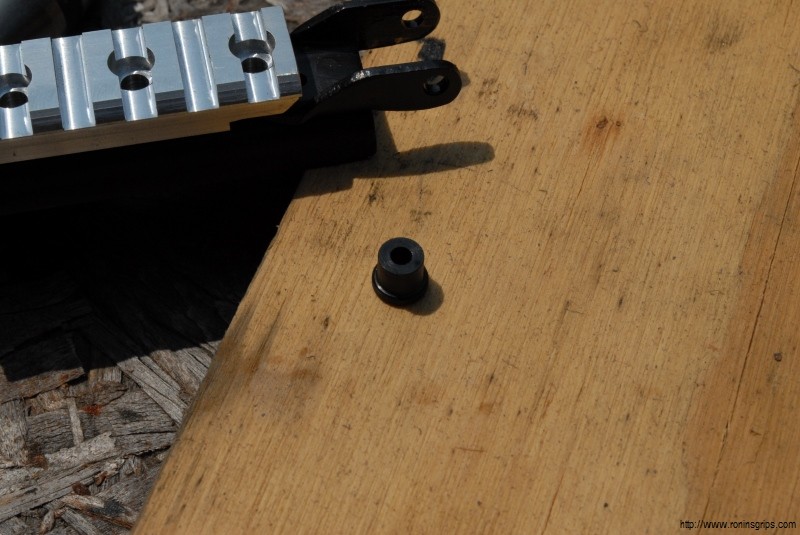
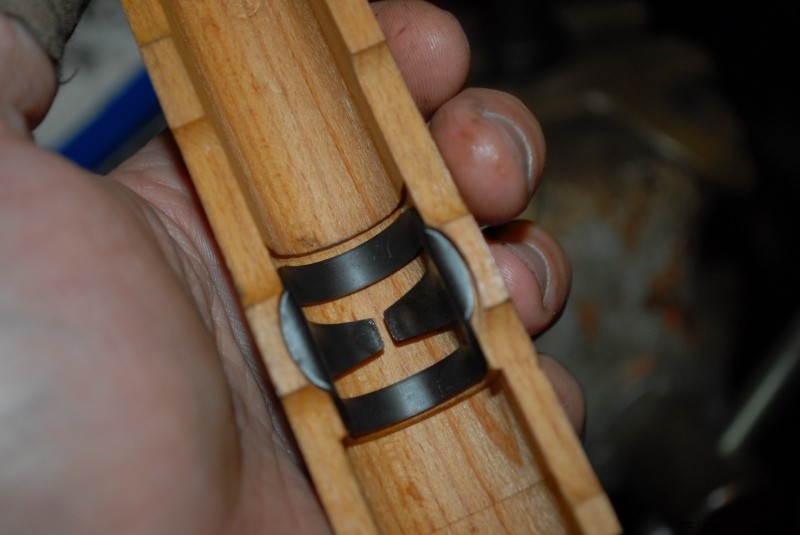
5.  I am asked regularly about what a ferrule is.  Folks, that black metal cap on the end of the lower is a ferrule.  It protects the end grain of the wood from being split open.  We sell a handguard that can use a ferrule if you like the looks of it plus we sell a version that does not need the ferrule.  It is entirely up to you.  I sometimes use the ferrule to accent whatever color handguard I am working with – for example, Dark Olive Drab to Dark Russian Plum.

Ronin's M92 handguard wood with damaged mounting bracket

6.  This only applies if you buy one of our handguards that uses the ferrule – you can use your existing ferrule by using a screwdriver to bend the tabs open on the receiver stub and then working the ferrule backward and off the wood lower handguard.  You can then glue it to our’s or even leave it loose.


Installing M92 handguard with screwdriver on wood surface Close-up of a tool removing wood from a M92 handguard for Ronin's Grips installation. Black plastic clip for Ronin's Grips M92 handguard installation

7.  When you install our lower handguard, you reverse the above steps.  We sell optional shims in case you need to tighten the fit.  The example shim here is a special orange material we tested and now we use a special hard black rubber.  You can buy our shims or make your own.  In either case, your goal is to add just enough material to get the retaining lever to turn down firmly and lock up the lower handguard.  Because AKs can vary, you may find that you need to either add or subtract material so take a careful look at your lower retainer and decide which way you need to move before you go sanding, cutting, filing, etc.

Split red rubber washer for M92 handguard installation

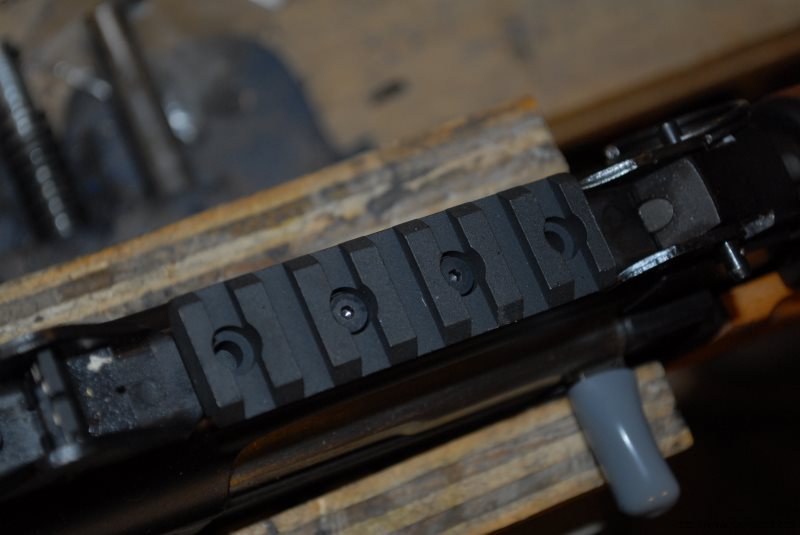
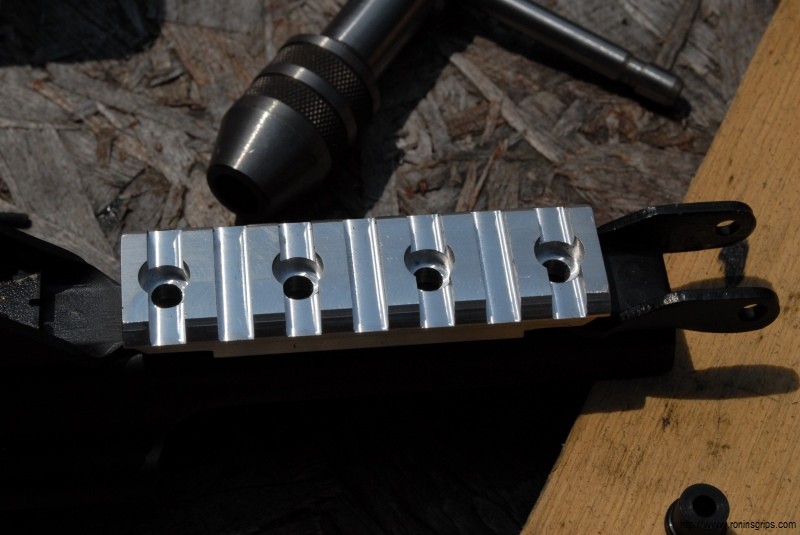
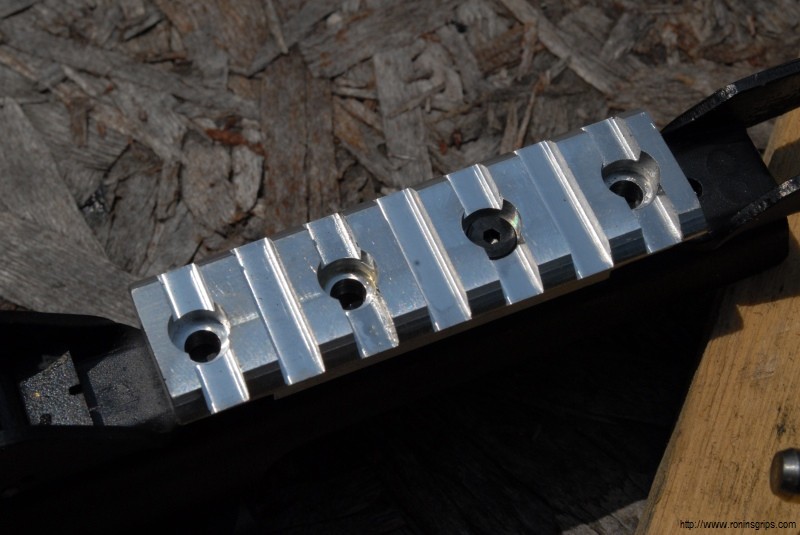
So that’s about it.  The following are photos of the M92 with the new ferrule cut handguards installed.

Black Ronin M92 Handguards installed on an AK-47 rifle on a wooden surface Zastava M92 with Ronin's Grips handguard installed, showing serial number M92PV030173

If you’d like to learn more or order our handguards, please visit our online store’s Yugo handguard section at:  http://shop.roninsgrips.com/Yugoslavian_c14.htm


Note, the following is a video a fellow did showing how he removes and installs M92 handguards in general.  I think this might help some of you who want to see the steps in more detail:


Please share the link on Facebook, Forums, with colleagues, etc. Your support is much appreciated and if you have any feedback, please email us in**@*********ps.com. If you’d like to request a report or order a reprint, please click here for the corresponding page to open in new tab.


Installing the CNC Warrior Picatinny Rail Scope Mount for the M92 PAP Pistol

Another great accessory for the Yugo M92 or M85 PAP is the slick picatinny rail kit that CNC Warrior sells.  This thing is a breeze to install and is the best means I have seen for adding an optic to the M92. Because the screws are inserted from the rail side, it is superior to other products that require the screws to come in from underneath the dust cover and risk being hit by the bolt carrier.

All you need is the pistol, a drill and some cutting oil to do the installation.

SAFETY STEP – MAKE SURE THE WEAPON IS UNLOADED.  NEVER ASSUME THAT IT IS – VERIFY IT IS UNLOADED BEFORE YOU BEGIN WORK.

1.  This is the top thick hinge of the M85/M92 dust cover.  See the faint circles?  Those are the spot welds and they are very hard!  Do not drill into them!  The new CNC Warrior mount has four holes and you only need to use two of them.  The reason there is four is so you can pick the best two that get you around/away from the spot welds.  Please note that my rail is only silver because it was a brand new design and they hadn’t applied a finish yet.  If you order one, you will get a black rail!

CNC Warrior Picatinny Rail Scope Mount for M92 PAP Pistol

CNC Warrior Picatinny rail scope mount installed on M92 PAP pistol

2.  Here you can see my fancy high tech tools.  My Ryobi drill, Tap Magic cutting oil to lubricate the drills and the taps.  Note, you will need to buy a tap handle if you do not have one.  Do not take the short cut of trying to start the tap with a regular socket or open end wrench.  You really want the tap to be firmly held so you can tap the threads at a right angle to the surface of the hinge.  Also, see that little black cylinder?  That is a drill guide that you put into the hole you select to guide the drill bit to the right place on the hinge.  Be sure to use the cutting oil!

Tools and parts for installing CNC Warrior M92 PAP pistol scope mount

M92 PAP pistol scope mount part on wood surface

CNC Warrior Picatinny rail scope mount for M92 PAP pistol installation

CNC Warrior Picatinny Rail Scope Mount for M92 PAP Pistol on wood

Drilling hole in M92 PAP pistol receiver for CNC Warrior scope mount

Drilled hole in M92 PAP pistol scope mount for CNC Warrior rail

Black drill bit on CNC Warrior Picatinny Rail Scope Mount

CNC Warrior Picatinny rail scope mount installed on M92 PAP pistol

CNC Warrior Picatinny rail scope mount installed on M92 PAP pistol

3.  As an aside, I blasted the mount and then sprayed on flat black Molyresin and baked it.  You’d never know it came to me unfinished.

Black and silver CNC Warrior Picatinny rail scope mounts for M92 PAP pistol

Airbrush tool resting on a cardboard box

Black Picatinny rail scope mount for M92 PAP pistol on wood

By the way, pictured above is a cheap Harbor Freight air brush.  I used to buy a bunch of them at a time and then throw them away when they hard problems.  I now use a Paasche H series air brush and am much happier with it.

4.  After you clean up the chips and are ready to do the final screwing of the mount, be sure to apply Blue Loctite so it does not come loose.

Blue Loctite applied to CNC Warrior Picatinny rail for M92 PAP pistol

CNC Warrior Picatinny rail scope mount installed on M92 PAP pistol

That’s it!  The mount is solid and it holds my Vortex Sparc red dot just great.  Note our quick takedown pin to make it easy to remove the cover and get the optic out of the way.

Vortex red dot sight mounted on CNC Warrior Picatinny rail for M92 PAP pistol

10/27/18 Note:  Vortex discontinued the Sparc red dot.  They sell a great 2 MOA red dot called the Crossfire that I really like.


Please share the link on Facebook, Forums, with colleagues, etc. Your support is much appreciated and if you have any feedback, please email us in**@*********ps.com. If you’d like to request a report or order a reprint, please click here for the corresponding page to open in new tab.