A M92 is screaming for an optic of some type. My preference is a red dot and I run a Primary Arms M4 clone on my first rifle and will use a Vortex Sparc on this new rifle.
As some of you may know, I have a Stormwerkz rail on my first M92 that I custom built and it has served me well. The only draw back with the design is that you install the button head screws from inside the dustcover. Because of this, you will notice the bolt carrier does hit screws. I have shot a ton of ammo – well over a thousand rounds – from this rifle and the bolt carrier shows no harm but you do see the scuffed screws.
When I heard that CNC Warrior had a mount, I had to take a closer look and sure enough, they had a different approach. Their screws go through the rail and screw into the thick steel portion of the dust cover that runs to the hinge.
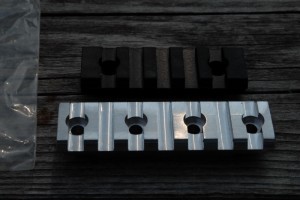
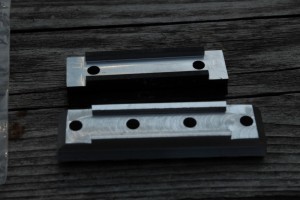
I talked to Denny, the owner of CNC Warrior, about my plans and he recently switched over to a four hole model that will give a person more options when installing the rail to work around the very hard spot welds — basically you just need two screws so with four holes, you pick the two you like that enable you to miss the welds.
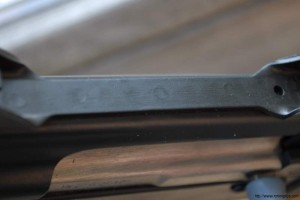
If you look closely at the next photo, you will notice small circular indents in the steel – those are the spot welds that are harder than the surrounding steel and can be an absolute bear to drill through. Thus, with CNC Warrior’s new four hole rail, you can slide it back and forth until you get two holes that clear these welds.

Please note that Denny sent me one of each – the old two hole rail and the new four hole rail – so I could show you folks the difference and he did not have time to have it finished so it is bare metal in the photos. I used Molyresin to finish it flat black but that is not something you will need to worry about. Going forward, when you order his mount you’ll get the four hole rail section already finished black.
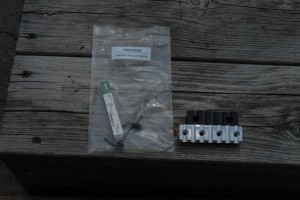
Included with the picatinny rail is their installation kit and instructions that makes installing it a breeze. In a future blog post I’ll show you just how easy installation is and how you can do it with a hand drill and some cutting oil.
The rail is on their website at: http://www.cncwarrior.com/ProductDetails.asp?ProductCode=26454
If you find this post useful, please share the link on Facebook, with your friends, etc. Your support is much appreciated and if you have any feedback, please email me at in**@*********ps.com. Please note that for links to other websites, I may be paid via an affiliate program such as Avantlink, Impact, Amazon and eBay.


