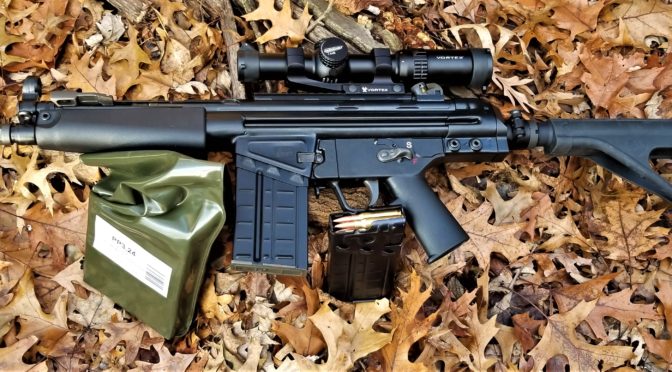
The lighting was right, the leaves were on the ground and it was a great chance to get some new photos of my PTR 105 PDWR pistol. This big pistol is the interesting brain child of PTR. It’s essentially a cut down HK 91.
The PTR 105 configuration has a PTR metal handguard installed. After messing with it some, I decided to install an MP5 handguard as I like the angle on the MP5 handguard more. This also means I should have just bought the PTR 110 that comes with that handguard.
Now, the only problem is that the MP5 handguard is not as rigid as I would like. I’ll experiment some with different handguards in the future.
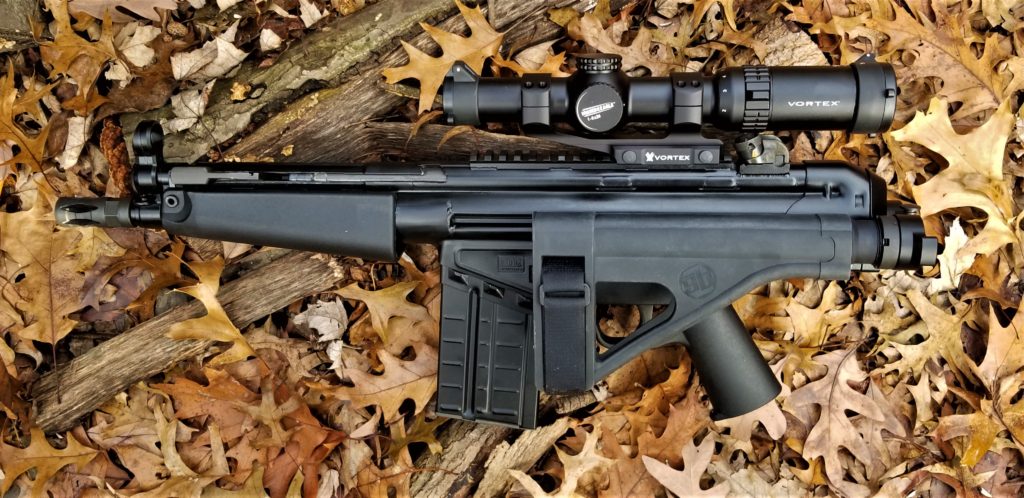
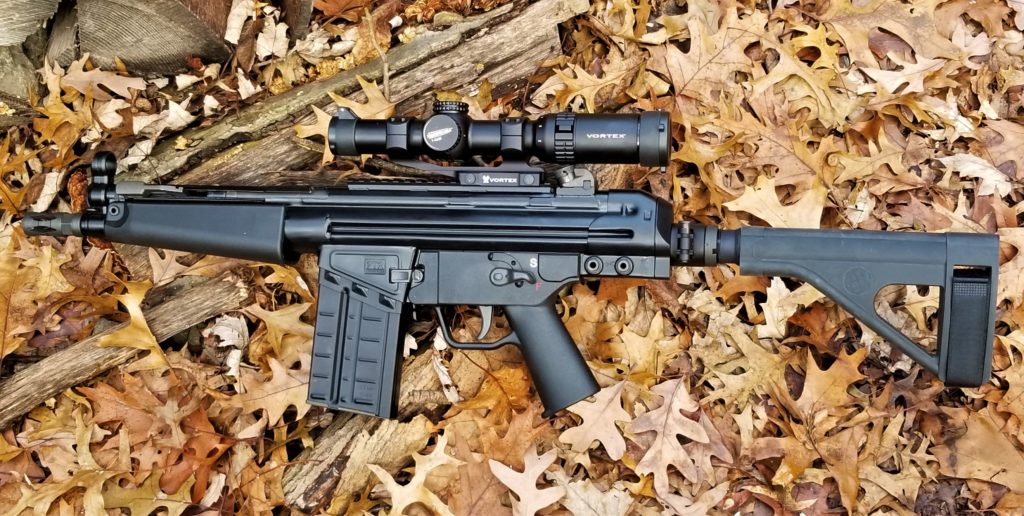
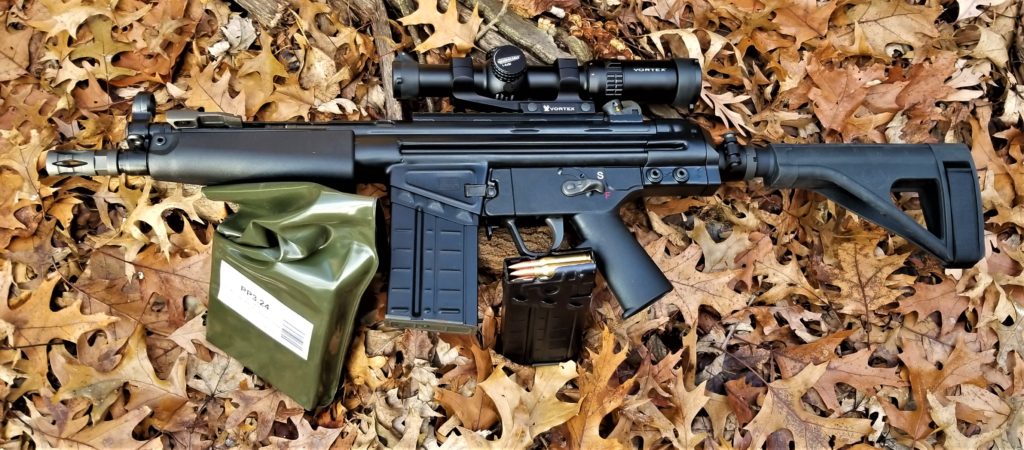
The PTR 195 and 110 are big pistols at 23.5″ overall, 8.5″ barrels and weigh about 8 pounds. I wanted to install a brace but needed to be mindful of Michigan’s odd 26″ maximum pistol length law. This isn’t legal advice, but my understanding is that the Michigan State Police say that a pistol with a brace is measured from one end to the other in the minimum operable condition. So, by installing a side folder, I could have a brace for when I wanted to use it but also had the minimum operable length at 23″. What you see in the photo is an SB Tactical BTFA folding mechanism, buffer tube and SOB stock. When open, the weapon measures 32.5″.
Thanks to the BTFA folding mechanism, I can swing the SOB brace to the left and it locks open. This keeps the brace out of the way of the ejection port. You can configure the BTFA to go either left or right.It definitely has clean lines.The PDWR definitely likes the PPU battle packs of .308 FMJBT 145 grain ammo. It works great and is plenty accurate within 100 yards. I’ll need to try and shoot the PDWR for accuracy some day and see what it can do.
As you can see, the brace is folded open and operating side of the PDWR is nice and clear of any obstructions.
Given the PDWR is chambered in .308 and uses 20 round HK G3 magazines, that is a lot of firepower in a small package. Overkill? Sure. Fun at the range? Absolutely.
If you find this post useful, please share the link on Facebook, with your friends, etc. Your support is much appreciated and if you have any feedback, please email me at in**@*********ps.com. Please note that for links to other websites, I may be paid via an affiliate program such as Avantlink, Impact, Amazon and eBay.
I like military tribute videos. This video has a catchy song and the real neat thing is that it is in high-definition (HD) video. It has footage of men and women from a lot of different militaries and branches including: Austria, Germany, Hungary, Norway, Poland, Russia and Sweden – probably more that I didn’t catch.
You’ll also get a chance to see quite a collection of ships, helicopters, uniforms, small arms, bases and what not – all in high def. Very cool. Here are some examples of the many cool videos they assembled:
Seriously, this is a cool video and a chance for a lot of folks to see other men and women serving their countries. At 1:41, I got a kick out of the Russian operator wearing an “Infidel Strong” morale patch.
Here’s the 2017 video:
If you find this post useful, please share the link on Facebook, with your friends, etc. Your support is much appreciated and if you have any feedback, please email me at in**@*********ps.com. Please note that for links to other websites, I may be paid via an affiliate program such as Avantlink, Impact, Amazon and eBay.
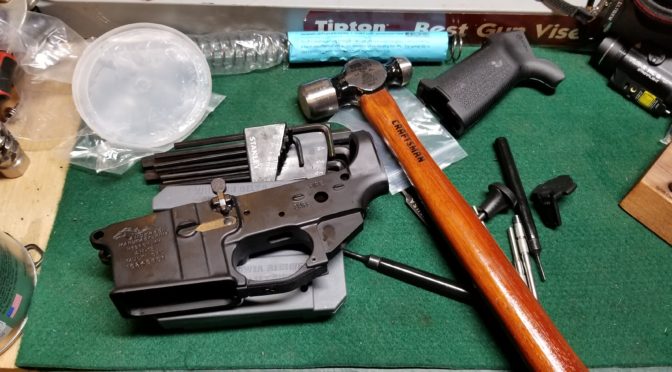
If you are new to building AR lowers, there is one step that is, in my opionion, the most risky in terms of making a mistake and scratching the finish if not even gouging the aluminum. That’s when you go to install the bolt catch. You must juggle the receiver, spring, detent, catch, punch and hammer all at the same time while being right against the nicely finished receiver!
The two ears that hold the cross pin of the bolt catch are just above the magazine catch. In the small hole will sit the spring and the detent pin.
Historically, you had to get ready for battle and would tape your receiver to protect it from slipping punches or glancing blows by a hammer.
I would apply duct tape, Gorilla tape or something thick to protect the finish. Note, if you are starting out, taping is always a good idea no matter what.
Installing the slide catch is way easier now with the right tools. I have really come to rely on three punches to get the job done. The first is a purpose specific punch set from Wheeler this is flat on one side and has a protective rubber coating.
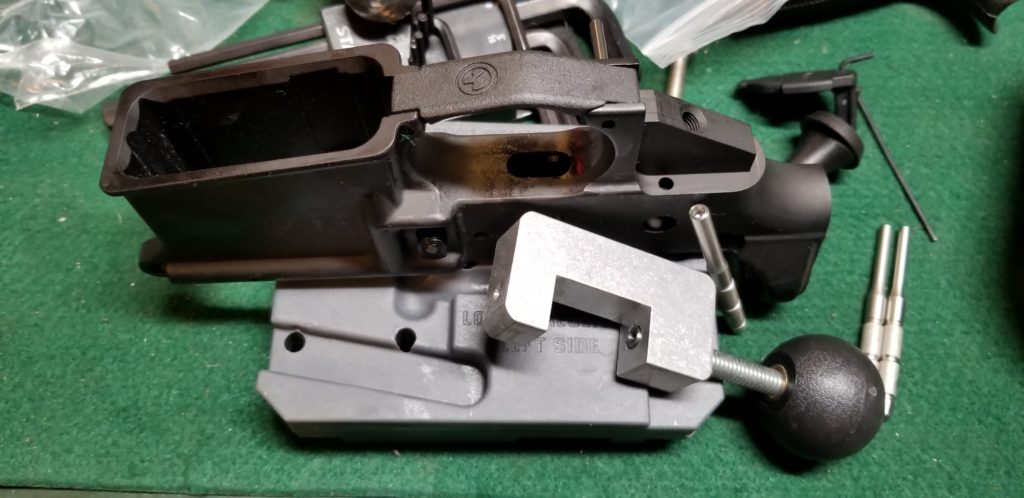
The Wheeler set has two punches. The starter punch has a hollow end that the pin sits in. This allows you to focus on the hole and hitting the punch with the hammer. The other is a roll pin punch that you can use to align the catch at the start and also drive the pin the final distance.Here the pin is being started.See, I use the roll pin punch on the left to align the bolt catch and also to capture the detent pin and spring. Once that punch is in, you can let go! Whew. You can then focus on tapping the starter punch on and making sure everything is aligned.
Now plenty of guys can get their build done with the above. Because of my tremor, I like to drive the pin in the rest of the way by using a really long roll pin punch that safely clears the receiver. I have a Tekton gunsmith punch set and the 1/8″ roll pin punch works great for me.
This is the nice Tekton gunsmith punch set that I really like. This is me with the 1/8″ roll pin punch.
I hope this helps you out. This is what I do every time now. It’s also what I use if I need to remove and replace an existing catch.
If you find this post useful, please share the link on Facebook, with your friends, etc. Your support is much appreciated and if you have any feedback, please email me at in**@*********ps.com. Please note that for links to other websites, I may be paid via an affiliate program such as Avantlink, Impact, Amazon and eBay.
In 2015, Larry Vickers had a great chance to visit the Central Armed Forces Museum in northern Moscow. While there, he had a chance to visit the museum’s archives and see an original Federov rifle, an early SKS and a preproduction AK-47 that was produced in 1946. He assembled this part of his visit along with a comparison of a German StG 44 and a Type I AK into a video.
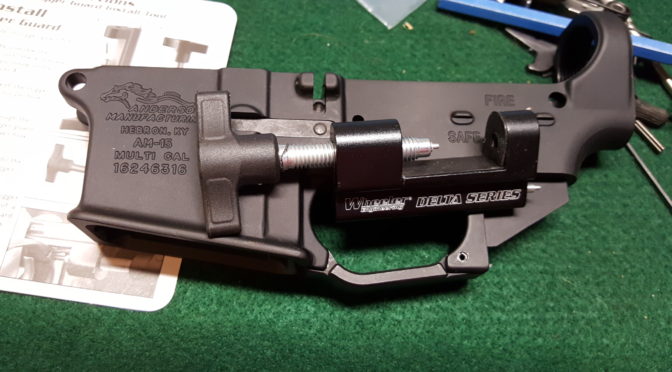
I was asked how I install AR trigger guards to minimize scratching up the receiver or even risking snapping an “ear” off. On one hand, you can use a solid backing block to support the ear and then use a roll pin punch to drive in the pin. That’s what I used to do but it’s a headache to be honest. As some of you may know, I have a tremor that makes fine motor stuff a headache so finding methods that are simpler really helps me get work done.
This is a Brownells Billet 7075 aluminum trigger guard (078-101-164) and it has a bulge to accomodate gloves. The set screw goes in the end with a blind hole. The roll pin goes through the end that is drilled all the way through.
Install the end of the triggerguard that uses the set screw. That’s the end with the blind hole – the roll pin goes in the end where a hole goes all the way through.
I lightly oil the pin to make things easy and tap it with a small hammer just to get it started.
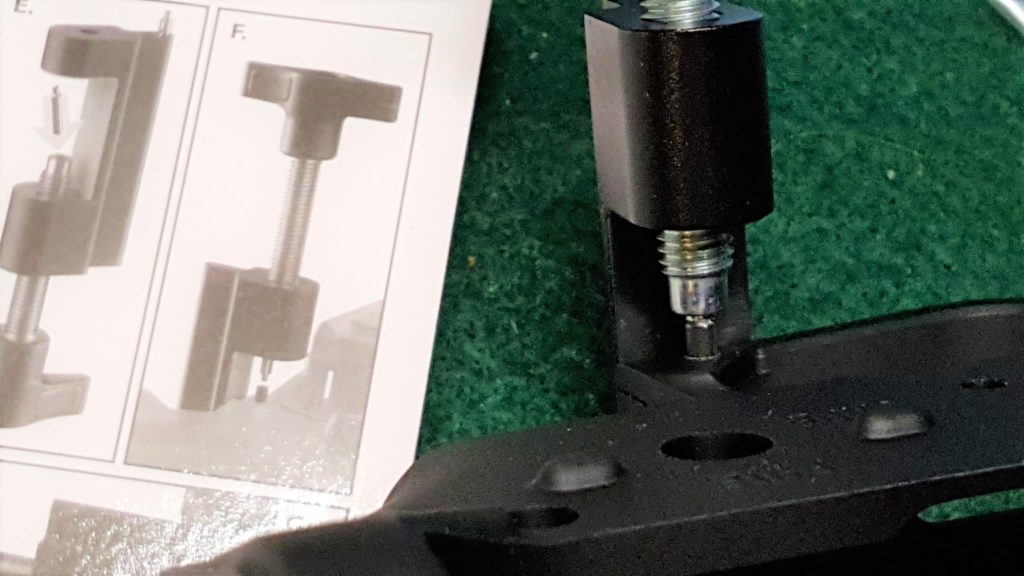
I then use the Wheeler tool with the shorter starter pin. The starter pin has a nipple that centers it on the roll pin.
Keep the parts aligned and turn the knob to drive the pin in.
Stop when you have inserted the pin – it’s that easy.
Note, Scott Igert of Modern Antique Firearms recommends you put a business card or something between the frame and your receiver to protect it from scratching.
It has two tips – here you can see one installed and one stored in the frame of the tool. The short one is for installing and the long one is for pushing a roll pin out.Simply stop once the pin is flush.
Note, I actually have one from another maker also. I’m holding it in my hand. It does the same conceptually but is heavier made. I’ve built probably 4-6 ARs with the Wheeler unit and it seems to be holding up fine. The other is a Little Crow unit from Brownells for about $39.99 + S&H and its built like a tank but you do pay more for it.
Little Crow Trigger Guard Pin Pusher
I hope this helps you out.
If you find this post useful, please share the link on Facebook, with your friends, etc. Your support is much appreciated and if you have any feedback, please email me at in**@*********ps.com. Please note that for links to other websites, I may be paid via an affiliate program such as Avantlink, Impact, Amazon and eBay.
I wish I had better news but Youtube cancelled the channel for the Kalashnikov Concern so the video is no longer available. I am leaving the post up so at least you can see the screen shots.
I am really enjoying these videos that Kalashnikov Concern in Russia is producing. In this video, Vladimir Onokoy, a technical consultant with the Kalashnikov and experienced AK armorer, discusses the Hungarian AK evolution with Pavel Pticin, founder of the AK-info.ru web portal, who has extensive AK knowledge.
I’ve always liked Hungarian AKs and found them to be high quality. Over the years I’ve built several AMD-65s and an AMMS. The kits all had original barrels and I was impressed by the fit and finish of the parts plus the rifles just ran and ran with no problems. They are definitely unique AK variants and I was actually really interested to watch this video and learned quite a bit.
Vladimir actually showed photos of a modified AK-63D that he encountered in Somalia. He mentioned how very impressed he was that it was still running with very little maintenance for close to 20 years.
This is one of Vladimir’s photos of the Somalian AK. Pavel noted it was likely an AK-63D with a cut down barrel, modified gas block and an AMD-65 muzzle break. One can’t help but wonder who did the work and why.
The video is just over 12 minutes and they discuss the early AK-55 rifle that is very similar to the Type 2 AK-47 with a milled receiver. They then move to a discussion of the AKM-63 (I’ve always heard it referred to as the AMD-63 in the US) with its distinctive handguard and grips plus other design differences.
As you may know, I own Ronin’s Grips and we make replica AMD grips. In one of the funniest gun video lines ever, Vladimir noted that the designer who decided to put an identical pistol grip at the front but simply reverse it deserved a medal! The Hungarians wanted to add it to improve accuracy and control under full auto fire.
Both Vladimir and Pavel noted that the front grip made reloading problematic and Vladimir pointed out that he had encountered rifles with the front grip cut down to reduce interference with loading magazines.
I finally got the best explanation ever as to why they used that bluish colored plastic. When the Hungarians decided to experiment with and move to polymer stocks, they lacked the ability to manufacture the base plastic. Because they were a Socialist country aligned with the USSR, the only plastic they could find that they could buy and import was a bluish plastic intended for dish making! You know what, that makes sense to me and what I will explain going forward.
The blue color is because the only plastic they could buy abroad was intended for dish making!
Lastly, they brought up some great examples of unique features you will see in the AKM/AMD rifles:
Distinctive pistol grip design
Metal lower handguard with no gas tube cover
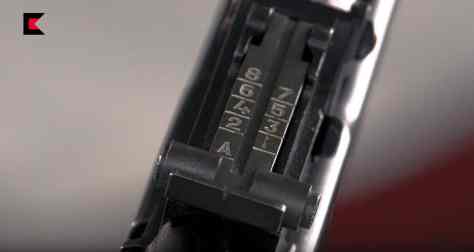
The selector notches are labeled with an infinity diagram for full auto and a “1” for semi-auto.
The rear sight leaf has an “A” on it
The Hungarians used unique selector markings – the infinity loop is for full auto and the “1” is for semi-auto.The rear sight leaf has an “A” on it.
This is where the video would have been. Too bad Youtube had to cancel the channel.
If you find this post useful, please share the link on Facebook, with your friends, etc. Your support is much appreciated and if you have any feedback, please email me at in**@*********ps.com. Please note that for links to other websites, I may be paid via an affiliate program such as Avantlink, Impact, Amazon and eBay.
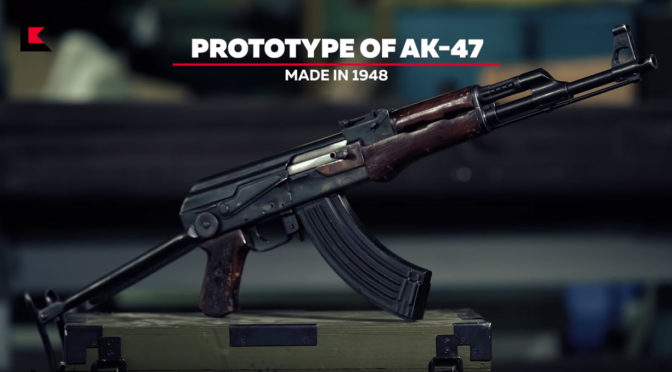
Kalashnikov Concern released an interesting short video of this prototype 7.62x39mm AK-47 that they say dates to around 1948. There are some interesting design features to point out:
A sheet metal receiver with no reinforcing center rivet/spacer visible.
The muzzle brake is integral with the barrel
The fire control group is permanently mounted
The cocking handle is a hollow tube
Source: Photo from the video Source: Photo from the video
Here’s the Video:
If you find this post useful, please share the link on Facebook, with your friends, etc. Your support is much appreciated and if you have any feedback, please email me at in**@*********ps.com. Please note that for links to other websites, I may be paid via an affiliate program such as Avantlink, Impact, Amazon and eBay.
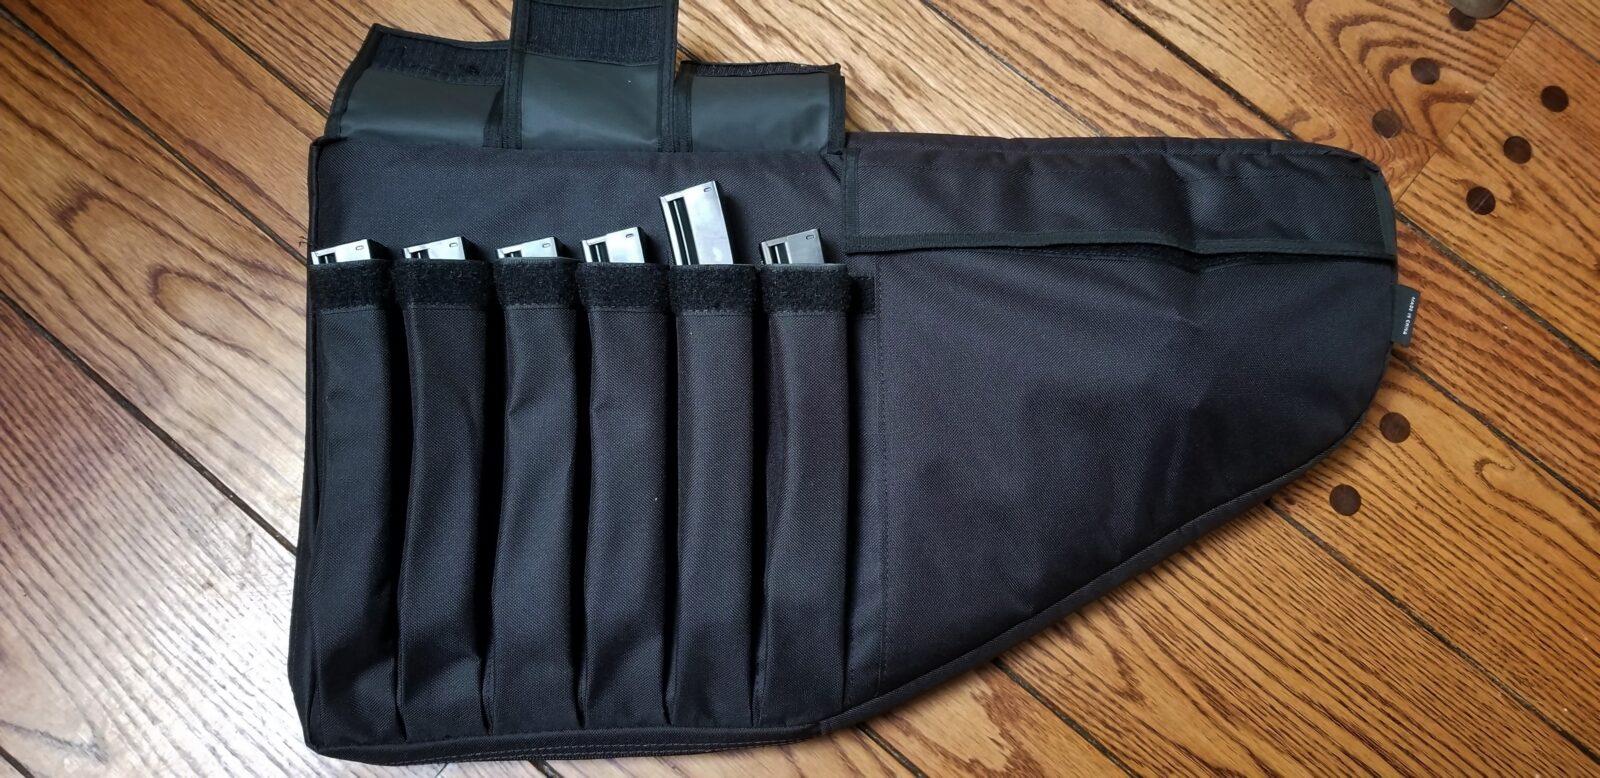
This is the front of the bag – six magazine pouches, one large flat pouch to the front and the rear mounted carry handle is visible.
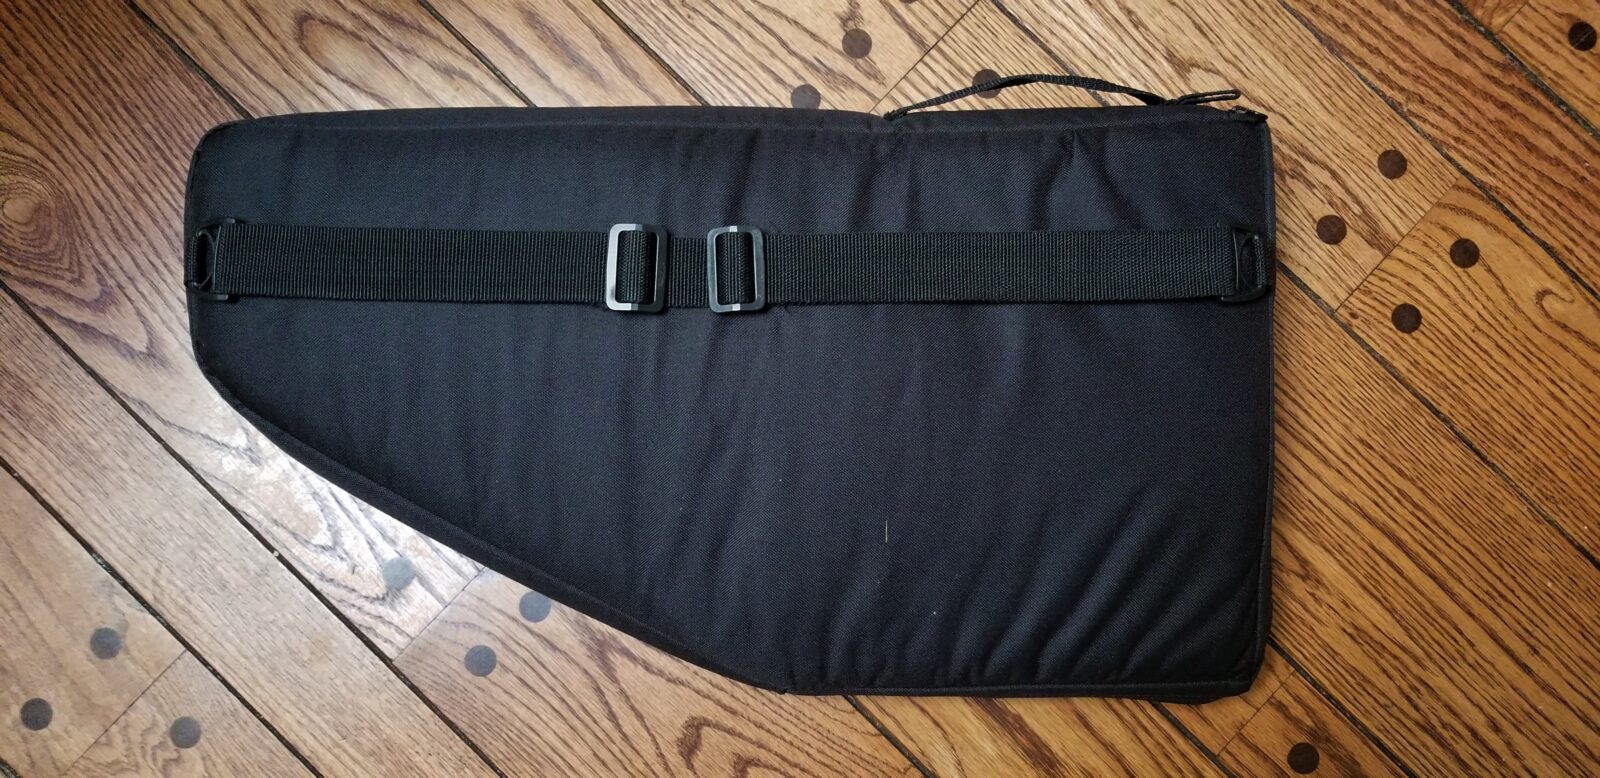
This is the back – you can see the shoulder strap and the carry handle at the top.
The case has a zipper at the rear of the bag and the SP5K simply slides in. This is one thing I dislike – it does not open and lie flat. Some folks may find this a plus but I prefer bags that open.
The exterior dimensions are 24.5x14x2 and I’d knock off about half and inch all the way around for the interior dimensions. It does have some padding but not a ton.
Another dislike I have is the way it holds the MP5 magazines. They slide down in the little pouches and I can’t pull them out. I need to push at the bottom to get them to slide up.
I pushed the magazines up so you can see them in this photo. Notice where the bulges indicating the actual lower part of the magazine in each pouch. In practice, the mags slide all the way down and are hard to get out. You have to press from the bottom.
On the topic of pouches, the front pouch just forward of the magazines is very tight. The bulge you see sticking out is a Mag Lula loader. While it can hold the loader, it’s really better suited for thinner items.
Okay, rounding out my complaints, the carry handle at the rear makes for an odd front-loaded unbalanced load. I don’t know why they didn’t center it.
Summary
It’s a decent entry bag and you can get it on Amazon [click here to see it]. Sure there are things I don’t like about it but does the job. I will be investigating other cases but this case is a solid performer at the price.
If you find this post useful, please share the link on Facebook, with your friends, etc. Your support is much appreciated and if you have any feedback, please email me at in**@*********ps.com. Please note that for links to other websites, I may be paid via an affiliate program such as Avantlink, Impact, Amazon and eBay.