Category Archives: Firearms Building and Gunsmithing

How to build and/or gunsmith on certain platforms.

Building a 12.7×42 (.50 Beowulf) 7.5″ Pistol – The Wulferine: Post 2 – The Forward Assist, Ejection Port Cover and First Look At The Barrel

In the last post, I gave an overview of the project and parts used. Rather than cover a lot of stuff again, here’s a link to my series of posts on building an AR Lower and rest of this post will be my covering the building of the 12.7×42 upper.

Stripped Upper Receiver

A Beowulf uses a standard AR upper receiver with an enlarged ejection port. My Alexander Arms (AA) upper has an ejection port that measures 3.02″ wide x 0.62″ tall. In case you are wondering, I grabbed on of my PSA 5.56×45 ARs and its port measures 3.02″ wide x 0.49″ tall.

The PSA’s port is about 0.35″ from the bottom of the base of the picatinny rail that has a casting line in receiver to the inside of the port. The AA still has the stepped lip for the ejection port door even though it doesn’t use one so I am measuring to the actual opening. I’m not sure how standard that measure is but offer it up – it does correspond with the top of the case deflector in the three ARs I looked at. The AA’s port is also about 0.35″. Note, this is an approximate. I’m trying to use caliper to measure a curved surface.

So this means you can either buy a standard upper and enlarge the port yourself or you can buy an upper that comes with the port already enlarged. Satern makes a big bore upper that supports the Beowulf round. Rather that bothering machining an existing upper, I went with the Satern receiver.
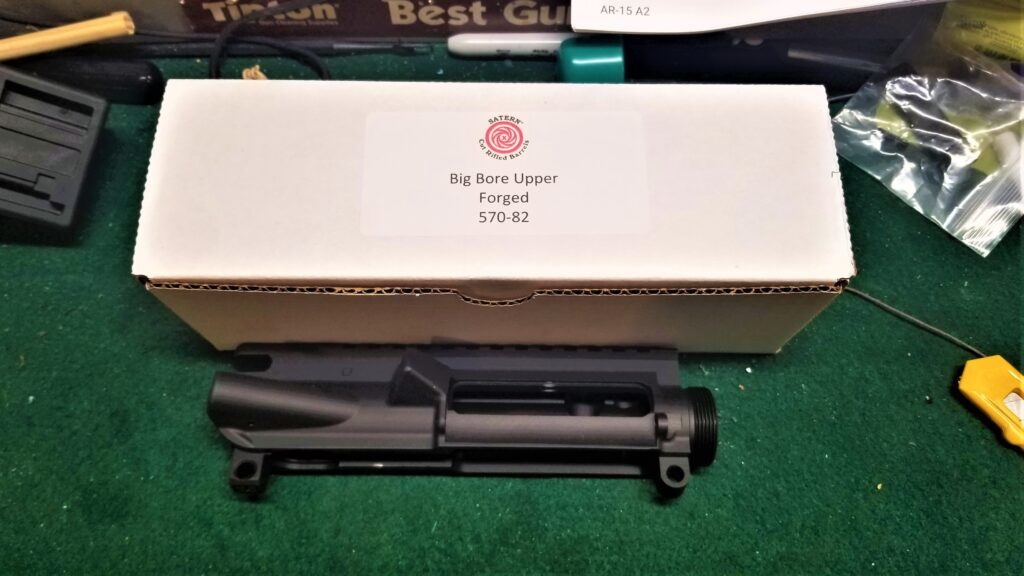
Satern Big Bore Upper Forged 570-82 for .50 Beowulf build
This is Satern’s stripped upper. They offer other options as well.

The Satern’s opening is 3.02″ wide x 0.62″ also. The slight difference is the measure from that casting mark under the rail to the entrance – it’s about 0.38″. Again – that last measure is a ballpark depending on the angle I hold the calipers. I can tell you for sure that it slight further down than the AA’s port.
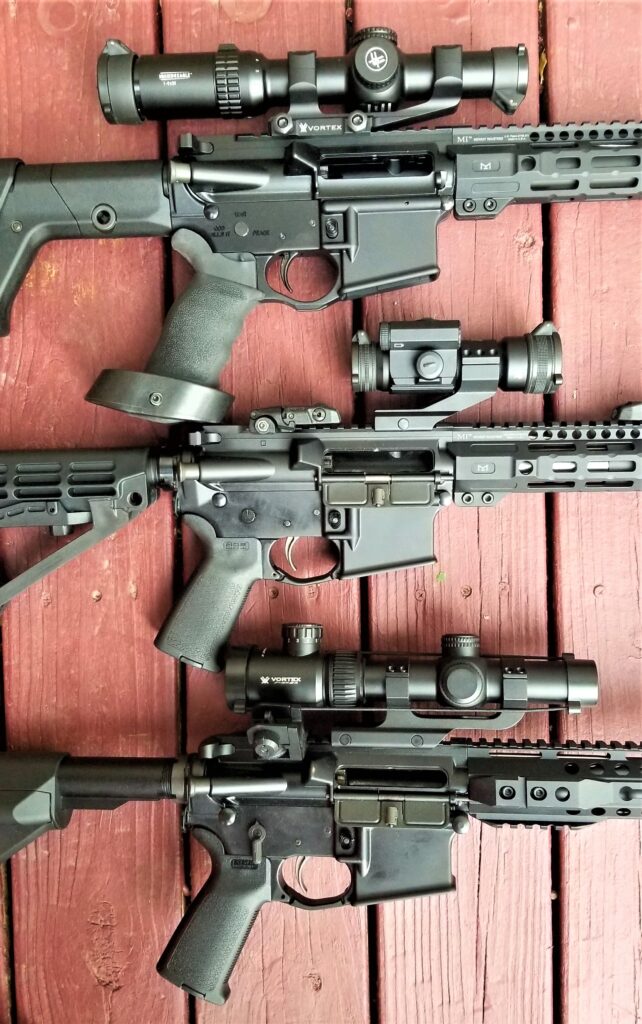
AR-15 upper receivers with Vortex optics, including a 50 Beowulf barrel.
A picture helps you compare. The top AR rifle is based on an Alexander Arms .50 Beowulf 16″ DIY Upper. The middle rifle uses the Satern Big Bore upper and other parts. The bottom is my 5.56 16″ PSA upper.

So, to assemble the base components on a stripped upper is easy. I’ll go cover each of the basic parts to make a complete upper.

Install the Forward Assist

It’s interesting when you read about the history of forward assists on the M16. Eugene Stoner, the original designer of the M16 platform, did not think one a forward assist (FA) was needed and that if one had to force the bolt to close then it would probably cause a problem later when it came time to extract. Colt, however, wanted to make government buyers happy. The US Air Force didn’t think the FA was needed but the Army demanded it have one and later claimed it was for psychological reasons.

I have a mixed opinion on them as do many people. If you must force the bolt closed then something is wrong. I’ve used it relatively little and there was, in all cases, underlying problems *but* it might help you fire that one round that makes a difference. So, I build with them, they are there but I very rarely use them.
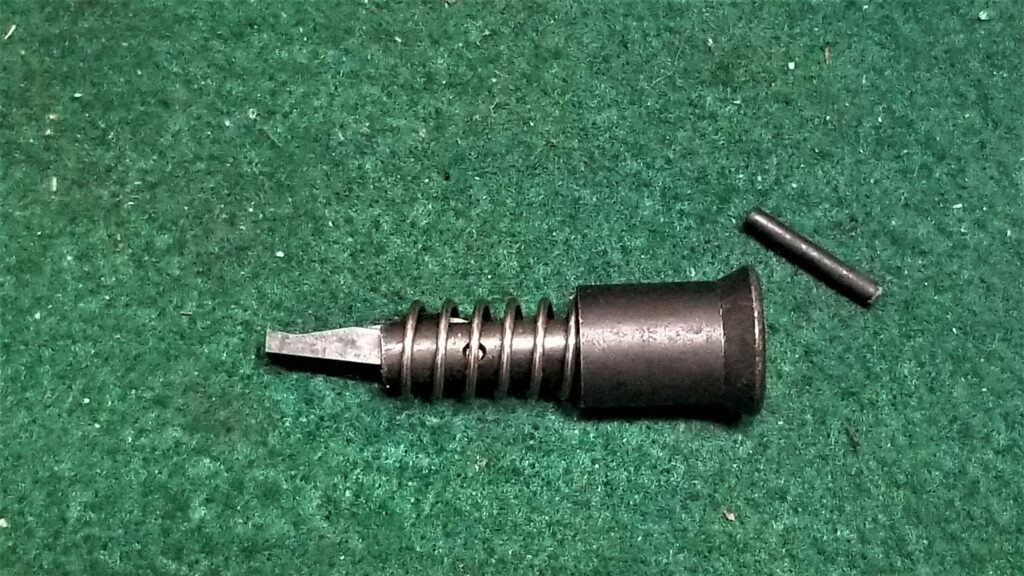
Wulferine pistol forward assist assembly with retaining pin
This is a basic forward assist. It’s only 5 parts – the pawl (the part sticking out), a pin that holds the pawl in the body of the FA plunger, a spring and then the cross-pin to hold it in place in the receiver. The CMMG unit comes with the pawl and pin already installed. See how the pawl is shaped at the top in this photo? That’s the part that must be rotated to properly engage the teeth in the side of bolt when the FA is pressed.

With that said, the Satern upper has a provision for a FA and you need to install one. I used a model from CMMG and installation is easy:

  1. Lightly greased it first with Superlub grease and then inserted the assembly in into the hole with the pawl (the little “foot”) rotated towards the bolt.
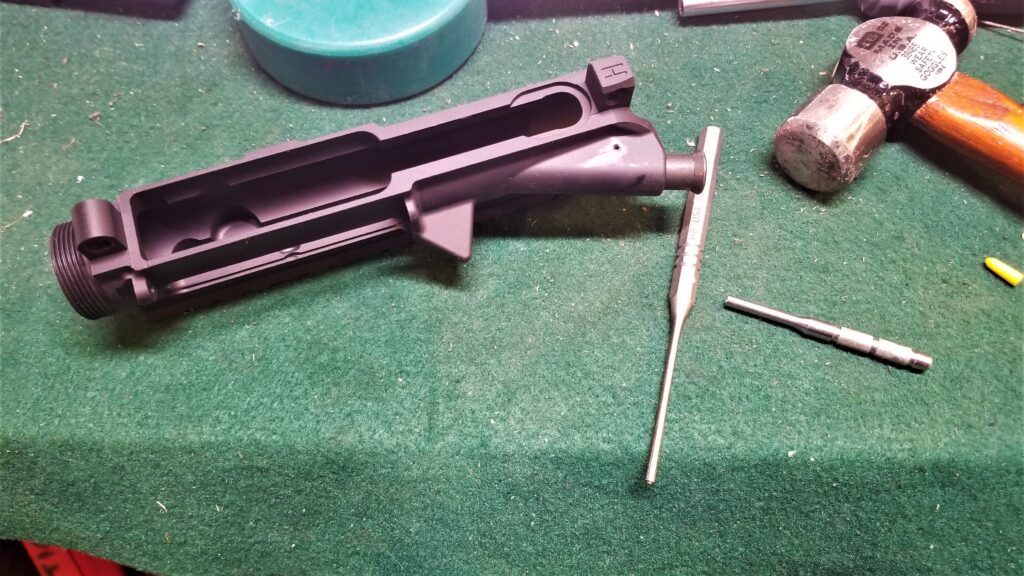
  2. Press the FA all of the way into the tube and while holding the FA all the way forward, use a roll pin starter punch to drive in the roll pin that will hold it in place.

    Note, have some wood or something under the tube that the FA is going into. Supporting it will make driving the roll pin into place much easier. The starter punch gets the pin into the hole and then the standard roll pin punch will help you tap it into place until flush. It does not require a ton of force.
  3. Test the FA – it should spring in and out.
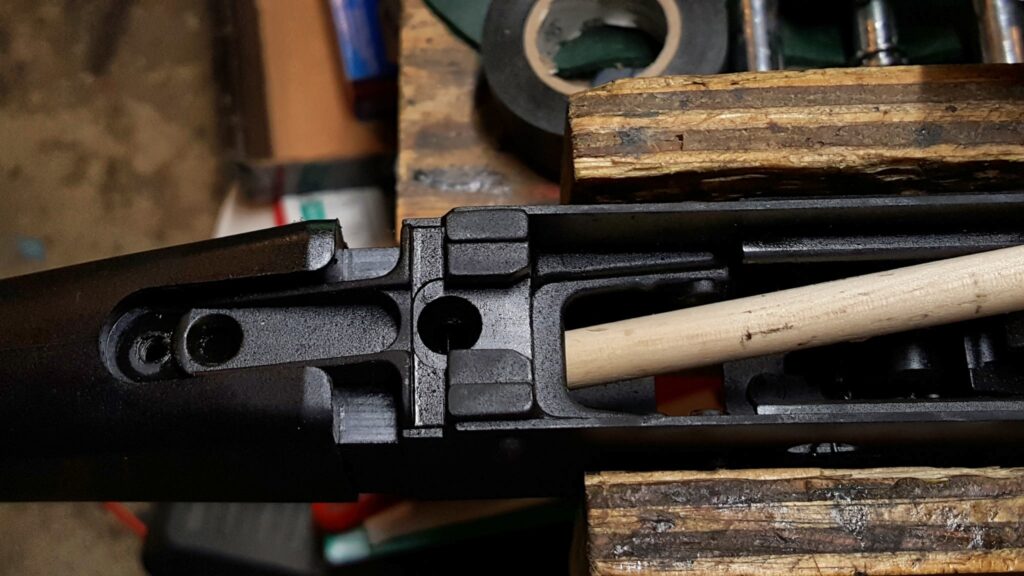
  4. Turn the receiver upside down and press the FA button again, you should see the pawl come out of it’s tube in the side of the receiver – it should be oriented/rotated to push on the “teeth” on the side of the bolt (yeah, that’s what those “ribs” in the side of the bolt are for.
Close-up of .50 Beowulf barrel end and a pin on a green surface
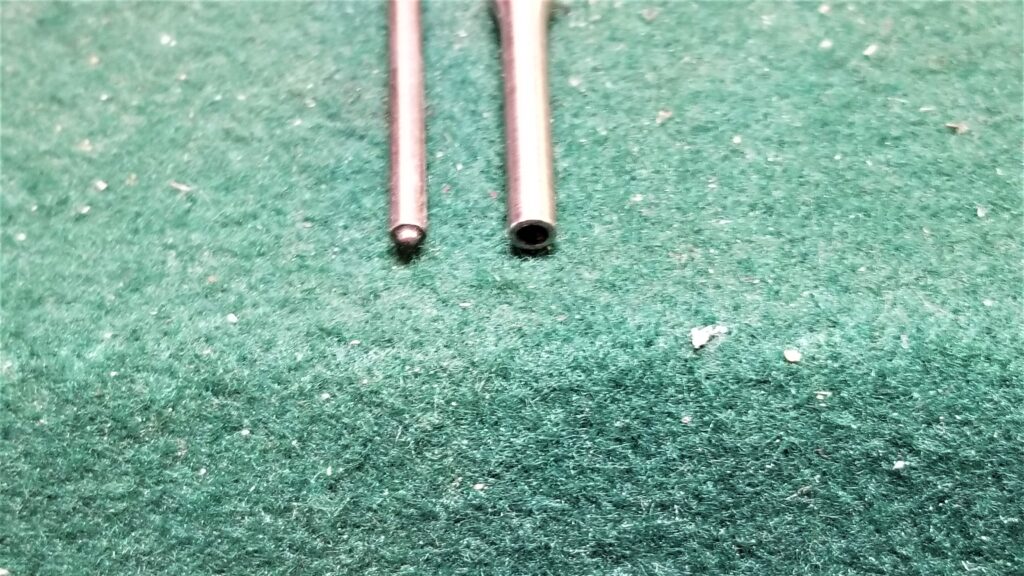
If you want to make your roll pin work way, way easier, then invest in a set of roll pin starter punches and a set of standard roll pin punches. The punch on the left is a standard roll pin punch. The dome in the middle helps hold the roll pin in place and centers the punch on the pin. The punch of the right is for starting roll pins. The roll pin is inserted into the hole and supports the pin while you tap it in place. Both of these types of punches are extremely helpful.
AR-15 upper receiver assembly with forward assist and ejection port cover installation tools
It’s installed.

Installing the Ejection Port Cover Assembly

As you read above, the Beowulf has an enlarged ejection port so a standard-sized 5.56 ejection port cover/door will not work. Okay, you have two options at this point. Either skip the cover or buy one. I went with the latter because Satern makes an enlarged cover that fits their receiver.
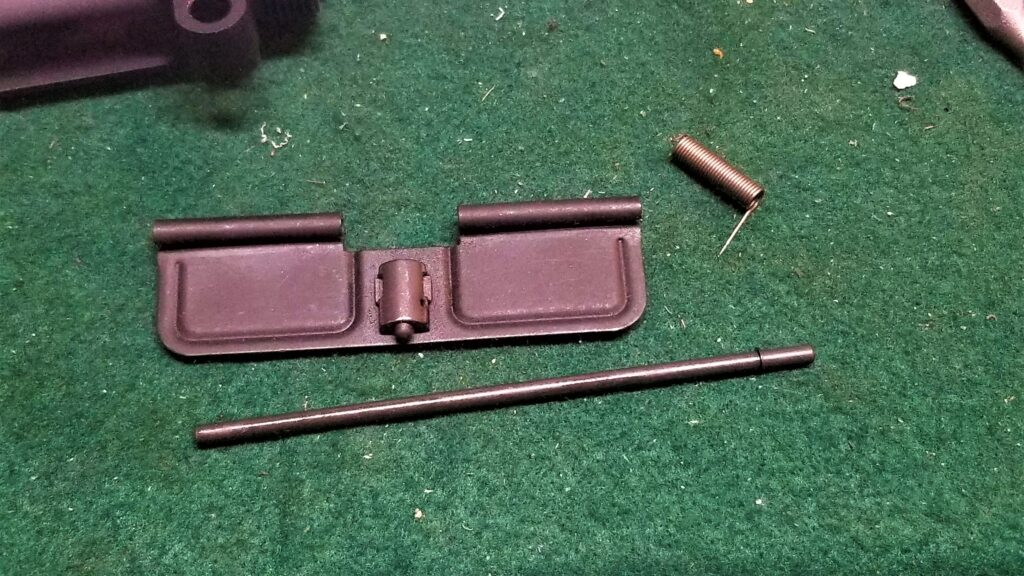
Forward assist, ejection port cover, and spring for a .50 Beowulf Wulferine pistol build.
The Satern comes with the cover, pin, snap ring for the pin and the cover spring. In my case, the clip was already installed on the pin as shown above.

In terms of installation order, installing the cover does need to be done before the barrel locking nut because the nut will block installation later. Here are the steps:

  1. If the clip hasn’t been installed on the pin yet, you need to tap it on square with a small hammer. I’ve had guys tell me they’ve used pliers for this step but I haven’t done that. Note, be careful and pay attention – the little clip can really fly away if it isn’t tapped into place squarely.
  2. Lay the upper receiver down with the ejection port up. I usually place it such that the barrel nut threads are to the right.
  3. Note the spring has a long and a short leg. The long leg will rest on the cover and the sort leg will rest on the receiver.
  4. The basic installation is to move the cover into place, slide the pin in from the left (back of the receiver) towards the right and sliding through the tube in the cover but stop just before the opening where you will put the spring.
  5. Note the spring has a long and a short leg. The long leg will rest on the cover and the sort leg will rest on the receiver.
  6. This is the part that drives me nuts – I pivot the pin away from the receiver just enough to install the spring. The short leg of the screw will go against the receiver and you need to twist the long end to create the tension.
  7. I then try and hold it all in place while sliding the pin the rest of the way in. There are videos out there on this and different people do it different ways. It can be frustrating so just be patient.
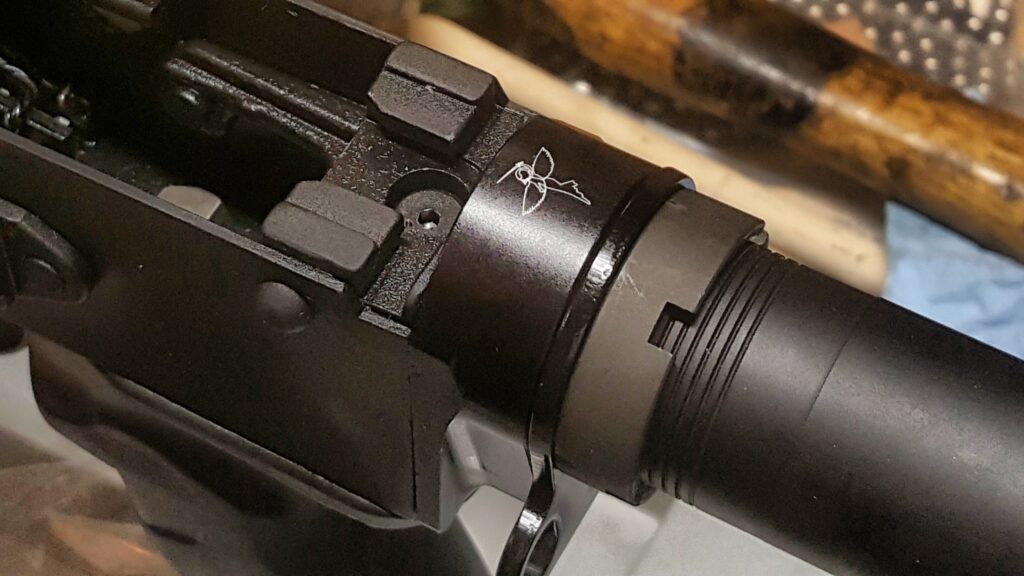
  8. Yes, the right end of the pin is just sticking out because once you install the barrel nut, it’s not going anywhere.
  9. You should be able to put a finger in from the bottom of the receiver well and pop it open. I do this as a quick test.
  10. To actually function test the cover, temporarily install the charging handle and bolt. Close the cover with the bolt closed as well. When you pull the charging handle back, the cover should spring open. If it does not, then you have most likely installed the spring wrong.
  11. Last step is to use some clippers and trim the small portion of the small leg of the spring that is sticking into the ejection port to get it out the way. Don’t do this until after you have the cover installed and tested.
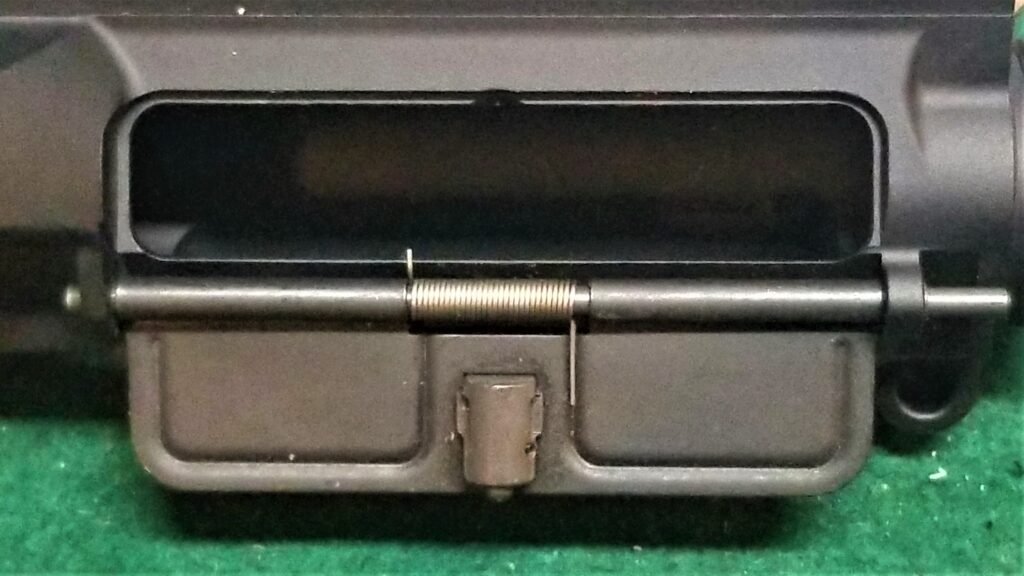
Ejection port cover and forward assist on a .50 Beowulf upper receiver
Here’s the installed ejection port cover up close. The pin was slid in from left to right. You can see the short leg of the cover spring is to the left against the receiver and the long leg is to the right. When you install the pin through the spring, stop part way and angle it so you can twist the long leg around. Then, hold it together, angle the pin back down and slide it the rest of the way through. It’s an unnatural act and takes some practice. Test the cover and once it works, use nippers to trim that small bit of spring that is sticking into the ejection port.

The Barrel

In my opinion, you’ve just finished the hardest parts of the upper. I hate that little demonic dust cover spring just to be clear 🙂 The next three are pretty much tackled together because aftermarket handguards come with their own barrel but that needs to be installed.

First off, I went with Satern because the barrel in my first 12.7×42 rifle was made by them and was very accurate. Second, I liked that they sold it with a matching headspaced bolt. My biggest problem with my first rifle was that Radical Firearms did not include the right bolt. [Click here for my post about that first build if you are interested.] A common misconception is that a 12.7×42/Beowulf cartridge uses a 7.62×39 bolt. This is not correct. The depth and extractor are different. 6.5 Grendel does use the same bolt as 12.7×42. So, when I bought my Satern barrel, I bought it with a matching bolt just to play it safe.
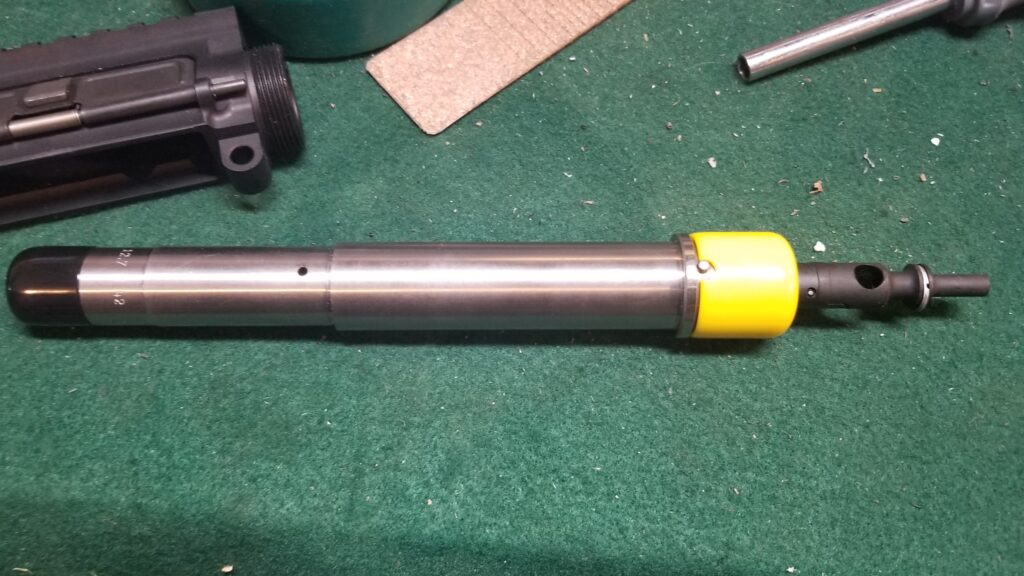
7.5 inch.50 Beowulf pistol parts on green surface including forward assist
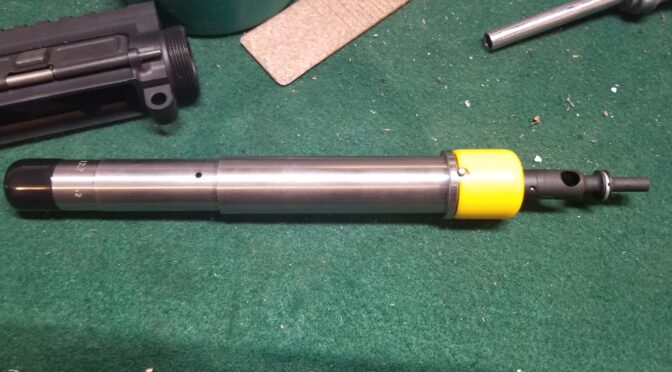
Satern not only shipped fast but they packed everything really, really well. here you can see the 7.5″ barrel with the black protective cover on the threads and the yellow cap is holding the matching bolt securely in place. You can also see the gas port towards the middle and the indexing pin in the notch of the yellow cover.
The barrel is threaded 3/4-24. This is not the same as an Alexander Arms barrel. I asked Satern why and they told me they wanted a thicker wall. Whatever the reason, you need to remember this thread size when you are buying whatever brake or muzzle device you plan.

One of the really cool design aspects of the AR system is that the barrel just slides into the receiver and is properly indexed by the pin shown above fitting into a corresponding notch in the upper receiver. The barrel is “locked” into place via a barrel nut. A gas tube then slides into place over the barrel with the gas tube entering the upper receiver above the locking at the top. I’ll come back to that shortly.
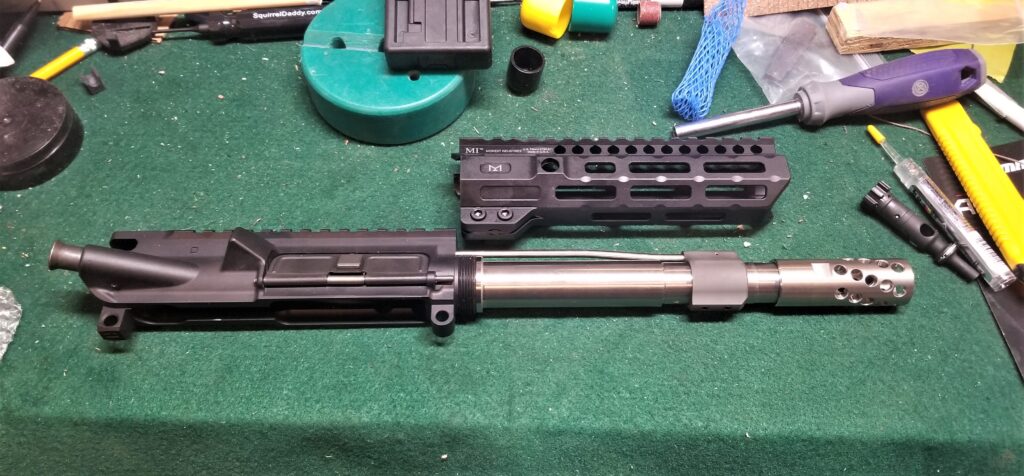
M1 7.5" .50 Beowulf barrel and handguard for Wulferine pistol build
This is just a mockup as the barrel nut has not been pulled out of the MI Combat rail yet. I will often do test fits to avoid surprises and make sure things are going to look the way I want them to – for example, I wanted to confirm the brake’s exhaust ports would clear the MI 7″ Combat Rail and they did. I also had planned to finish the barrel and brake a satin black Molyresin finish but was so taken with the stainless look that I changed my mind.

In Conclusion

After test fitting, it’s time to get into the installation of the barrel, nut, gas tube, handguards and brake. I’d say that’s enough to cover in the next post!


Please share the link on Facebook, Forums, with colleagues, etc. Your support is much appreciated and if you have any feedback, please email us in**@*********ps.com. If you’d like to request a report or order a reprint, please click here for the corresponding page to open in new tab.


Note, I have to buy all of my parts – nothing here was paid for by sponsors, etc. I do make a small amount if you click on an ad and buy something but that is it. You’re getting my real opinion on stuff.
Building a 12.7×42 (.50 Beowulf) 7.5″ Pistol – The Wulferine: Post 1 – Planning The Parts

My friends know I am eccentric so I’ll point that out right up front. I design and build firearms that are very practical and some that are pushing the fringe. I’ve liked the .50 Beowulf cartridge (also known by it’s metric designation as 12.7x42mm). Bill Alexander designed the Beowulf to operate out a fairly standard AR platform which included a 16″ barrel and normal buffer. With the huge popularity of AR pistols with braces, I got to thinking – how short can I go?

Well, there are a number of pistol length uppers now that are 12″. Alexander Arms themselves both a 12″ complete upper as well as a 12″ DIY upper waiting for you to add your handguards of choice. There are cheap builders out there and I would tell you to be very careful to research the vendor before you buy. Some of them have awful track records.

Know what? I wanted to go even shorter and I had no problem buying the parts and building one myself. You see, I wanted a howitzer. To me, a howitzer is a firearm with a barrel so short that it can’t burn all the powder before the bullet exits resulting in a spectacular flare. Useful? Not really. Cool? Oh hell, yes 🙂

Satern’s Liberty Barrels & Upper Parts

If there’s one thing I have learned about the Beowulf, you need the right combination of parts or reliability will suffer. So that really meant that I needed to go with a reputable vendor. There’s a barrel company that really knows their stuff that you may not of heard about – Satern. They are located in Estherville, Iowa, and operated by Debra and Steven Satern. I talked to Deb a few times while I was planning my build. They were great to deal with and shipped fast – even with all the COVID craziness these days.

Palmetto State Armory magazine catch assembly kit for AR lower receiver
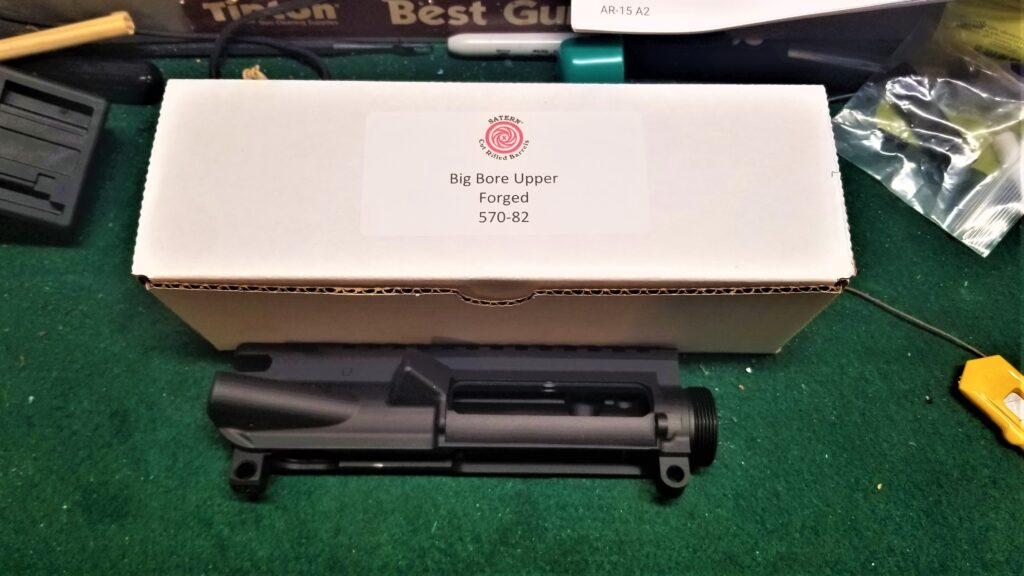
This is Satern’s stripped big bore upper that will work with 12.7×42 (.50 Beowulf), 450 Bushmaster and .458 SOCOM. The ejection port has been enlarged for the bigger cartridges. Note, they also offer a complete upper with the ejection port cover, forward assist, charging handle and bolt options as well as a complete upper without the bolt.

Satern has pretty much everything you will need to build a 12.7×42 upper. They have:

  • different barrel lengths – 7.5, 10.5, 14.5 and 16″ – note they come with the correct headspaced bolt. This is a big deal. Not all vendors use the right bolt and that causes reliability problems. Also, the thread is unique – 3/4-24 and not the 49/64-20 that Alexander Arms uses. This means you will need to either get your brake from Satern, Timber Creek or another vendor that supports a .50 cal with 3/4-24 threads. I went with Satern’s Heliport brake in part due to this threading.
  • They offer Barrel kits with brakes
  • Big bore forged uppers – basically a standard AR upper with the ejection port milled open larger. They offer uppers with the dust cover already installed or just a stripped upper
  • Gas tube assemblies

I went down their menu and bought the 7.5″ barrel, 3/4-24 Heliport brake, stripped upper, ejection port door, and pistol length gas tube from them. I just like doing my own thing is what it boils down to.

Other Parts

Once I had the main parts of the upper figured out, the rest was pretty easy. The lower is how-ever you want to build your lower. I planned for a pistol build using some of my favorite parts:

  • SBTactical’s SBA4 brace – it has six positions and the rear end is stiffer and better formed than the SBA3.
  • 12/28/2020: I am tinkering with the combination of buffer and buffer spring. Click here for a post about them.
  • Midwest Industries Combat Rail – these are very well made and finished. I especially like how the handguard fits onto their locking nut allowing for a ton of flexibility.
  • Vortex Strikefire II Red/Green Dot – these have a real nice wide field of view allowing for rapid target acquisition plus it can co-witness with iron sights out of the box.
  • BCM’s Gunfighter Mod 3B charging handle – I’ve become very fond if these over the year’s and the enlarged latch handle just feels right to me.

Summary

That’s it for now. The next post will start to get into the actual build.


Please share the link on Facebook, Forums, with colleagues, etc. Your support is much appreciated and if you have any feedback, please email us in**@*********ps.com. If you’d like to request a report or order a reprint, please click here for the corresponding page to open in new tab.


Note, I have to buy all of my parts – nothing here was paid for by sponsors, etc. I do make a small amount if you click on an ad and buy something but that is it. You’re getting my real opinion on stuff.

What are rear stock options for SDS Lynx 12 Gauge shotguns?

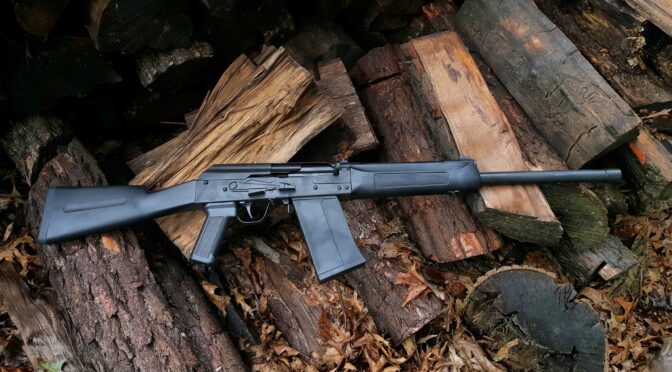
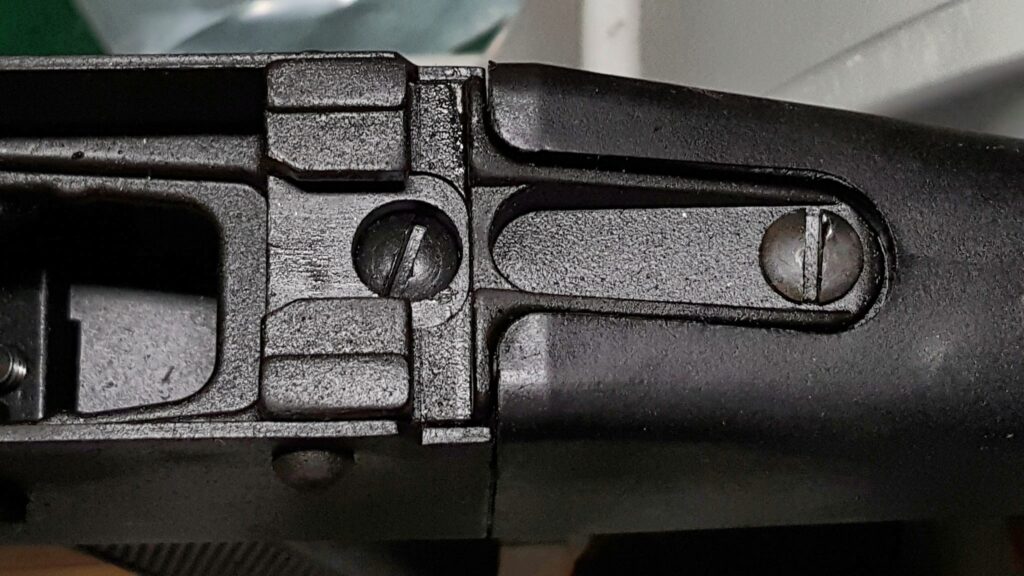
A fellow messaged me the other day and asked what options he had to replace the light fixed stock on his SDS 12 gauge shotgun. I told him that he has a lot. The rear of an SDS is very similar to an AKM or AK-74.

Magazine catch assembly for AR lower receiver installation
The rear piece that holds the stock in is called a “trunnion” they are what provide the real strength in the sheet metal receiver. The stock is held in place by the two screws you see. Be sure to use a blade screw driver bit that completely fills the slot. You can see that whomever installed the screws at the factor did not do this and slightly deformed both slots by using an undersized screwdriver or blade bit.
Magazine catch assembly for AR lower receiver installation
You may need to use a wood dowel, or whatever you have handy, to tap the stock out. I like using a hardwood dowel because it doesn’t bend or scratch things all up.
Magazine catch assembly for AR lower receiver installation
I used a Rifle Dynamics adapter that lets you convert from the AK-rear to an AR/M4 buffer tube. Both the Rifle Dynamics adapter and the one sold by PSA are very well made.

With the rear stock removed, you can use any AKM/AK-74 traditional wood or polymer stock that you want or adapter to use an AR-style stock. Read up online before you buy because there are tons and tons of options and combinations for you.

I hope this helps you out and here are a few examples for your consideration:


Please share the link on Facebook, Forums, with colleagues, etc. Your support is much appreciated and if you have any feedback, please email us in**@*********ps.com. If you’d like to request a report or order a reprint, please click here for the corresponding page to open in new tab.


What is the 12.7x42mm cartridge? Is it the same as .50 Beowulf?

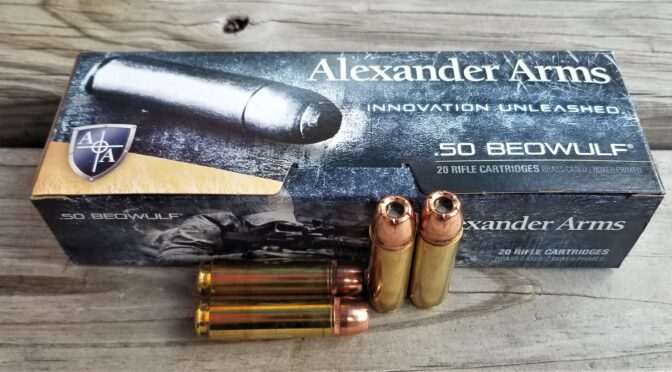
The short answer is that they are the same thing. The bullet’s diameter is 0.50″ which is 12.7mm and the case length is 1.65″ or 42mm. The reason you see some vendors say they have something to sell in 12.7x42mm is they are trying to avoid a trademark problem with Alexander Arms.

Bill Alexander, of Alexander Arms, did all the engineering to bring to life both the round and the AR components to use it. He also trademarked the term “.50 Beowulf”. As such, anybody who wants to sell something and refers to it as being for .50 Beowulf would need to get the permission and/or license the use of the term “.50 Beowulf” to avoid legal problems. So, a lot of vendors use the generic metric designation of 12.7×42 to avoid legal hassles.

With that said, bear in mind that not all engineering is equal. I have never had a problem with Alexander Arms parts but myself and others have had plenty of headaches with 12.7×42 components from budget AR vendors who haven’t done the engineering. In my case, it was poor extraction with a Radical Arms bolt and extractor. So, buyer beware and research a vendor and their offering before you buy plus make sure they are reputable in general in case you need support. For example, Satern worked great for me and I wrote a blog post about the build.

Conclusion

So, short post this time. 12.7×42 and .50 Beowulf are the same round with different descriptions but be cautious to check out vendors selling parts using the metric designation. Some of them are selling junk so search for current reviews of products before you buy them.


Please share the link on Facebook, Forums, with colleagues, etc. Your support is much appreciated and if you have any feedback, please email us in**@*********ps.com. If you’d like to request a report or order a reprint, please click here for the corresponding page to open in new tab.


ATF Letter June 2019: How to Measure The Overall Length Of A Pistol With A Brace

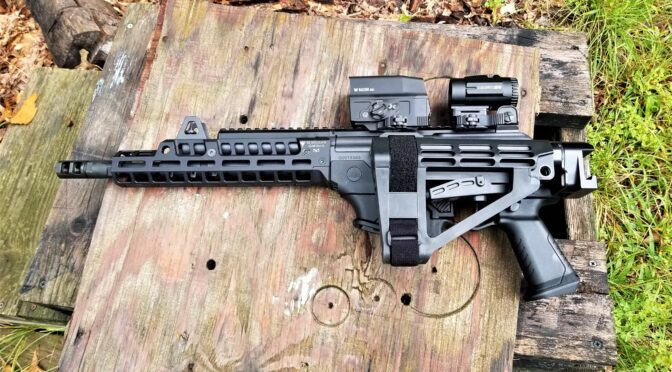
In June 2019, someone as the the Bureau of Alcohol, Tobacco, Firearms and Explosives (ATF), Firearms Technology Industry Services Branch (FTISB), what was the correct way to measure a pistol equipped with a stabilizing brace that has a folding adapter (like my Galil Ace in the photo above).

They said that the overall length is measured with the brace in the folded position. So you can confirm this for yourself plus see their reasoning, click here to read the scanned PDF copy that has the names redacted for privacy’s sake.

Please note that I am not an attorney and this is not legal advice. I’m just passing along the ATF letter for people to read and interpret themselves.

I hope this helps you out.


Please share the link on Facebook, Forums, with colleagues, etc. Your support is much appreciated and if you have any feedback, please email us in**@*********ps.com. If you’d like to request a report or order a reprint, please click here for the corresponding page to open in new tab.


A review Of my Swenson Glock 17 Slide – It’s Solid

I bought a basic Swenson slide almost two years ago and it’s been solid. Part of what attracted me to it was the beveled nose that allows for easier insertion into a holster. At any rate, I’ve had guys ask me if Swenson slides are any good and my experience has been positive plus from what I have read, most guys find them good. Let me put it this way, if I found a good deal on one to host a RMR optic today, I’d buy it.

The Slide You See

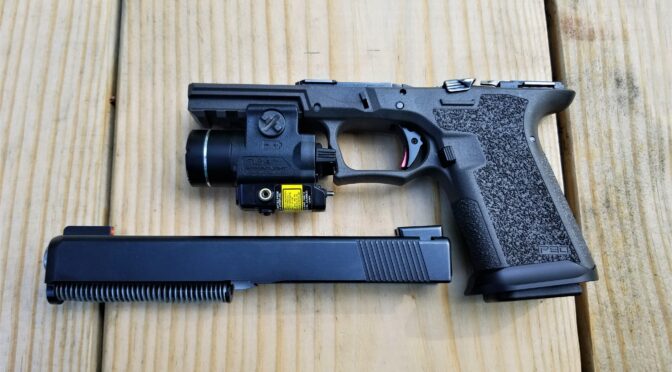
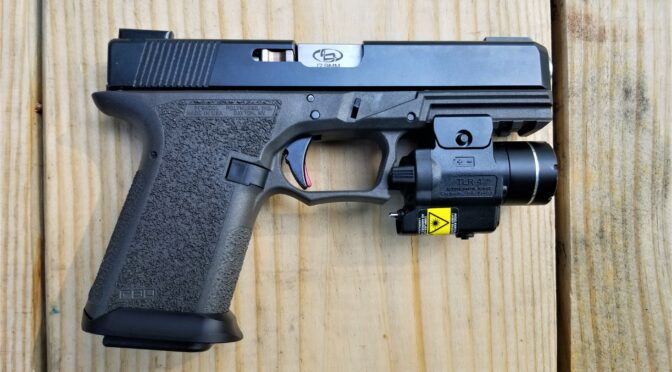
When I first installed it on my first Polymer80 PF940V2 G17, no fitting was needed. However, when I built the PF940CL that it is on now, I did need to use Goodson 400 and then 800 grit lapping compound to get a good fit. Initially there as some binding and now it is just nice and smooth. [Click here if you want to read more tips]

That is the only tuning I’ve need to do. The channel spring liner and all slide parts went in easily and I’ve not had any problems. It’s hosted both it’s current Storm Lake barrel as well as a threaded barrel that I bought from 80P builder with no problem. All in all, it’s worked just fine.

Man at shooting range with M70B1 rifle and dark Russian plum handguard
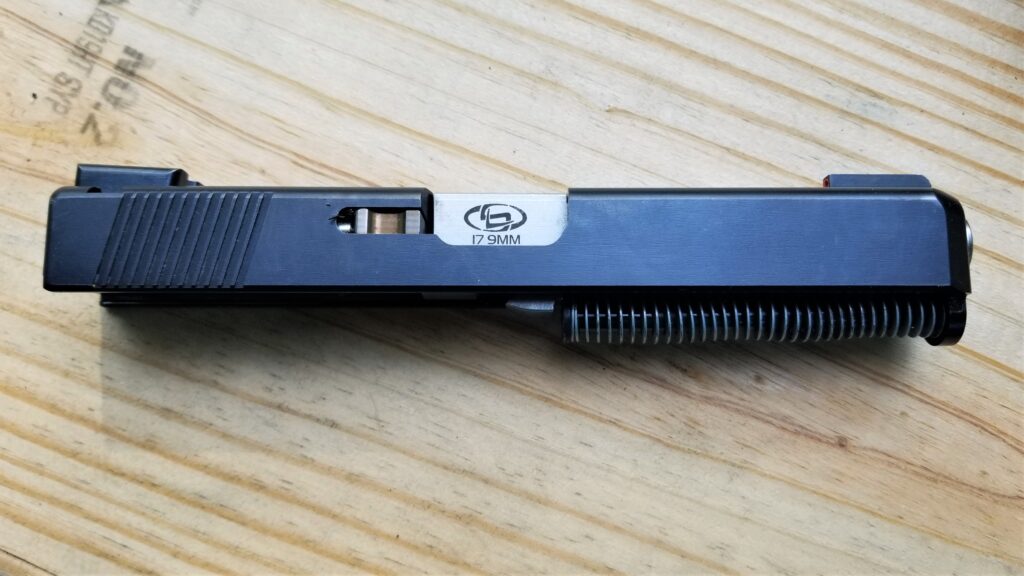
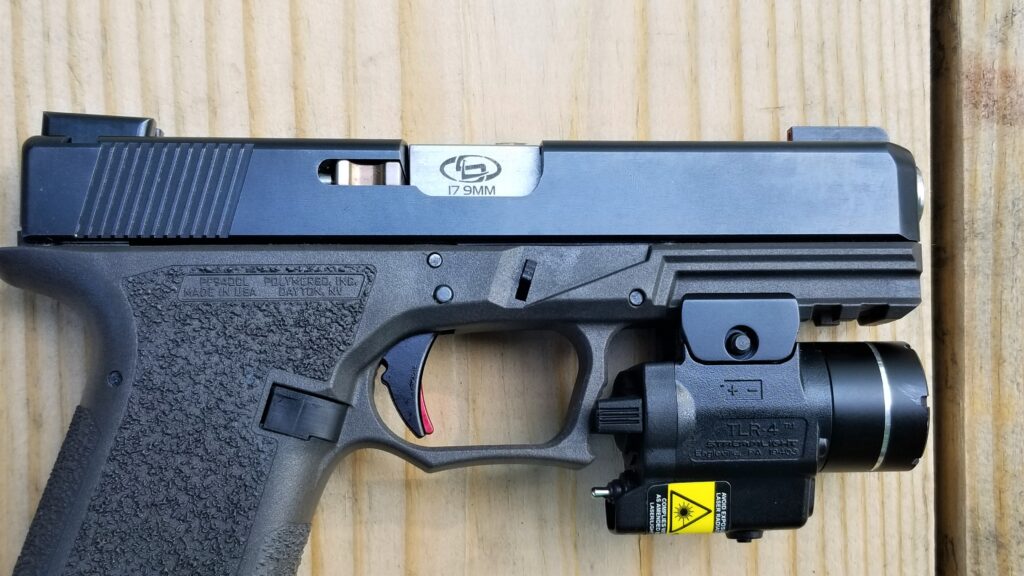
View of the ejection port side. Just a solid basic slide.
Man at shooting range with M70B1 rifle and dark Russian plum handguard
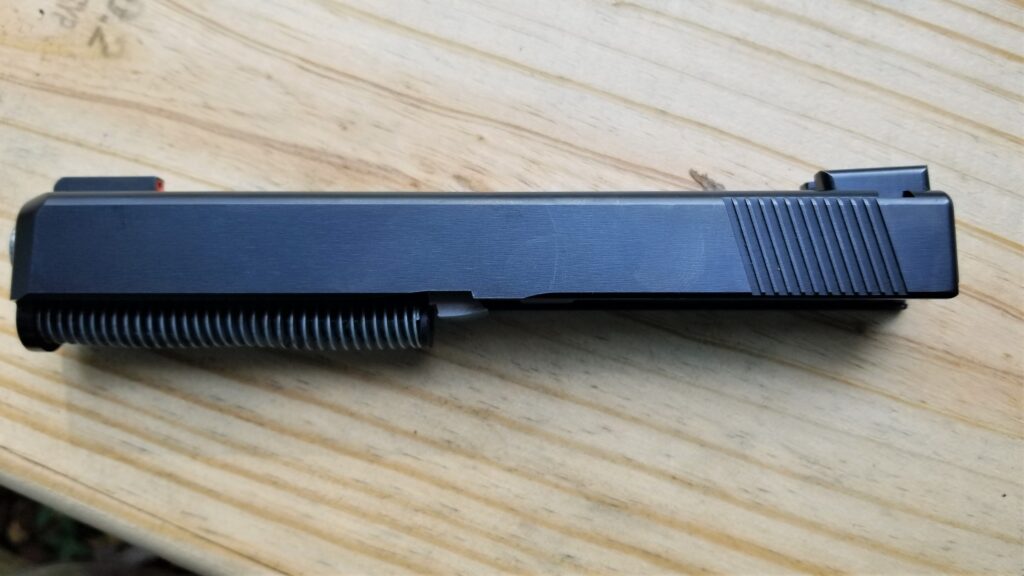
Here’s the other side.
Man at shooting range with M70B1 rifle and dark Russian plum handguard
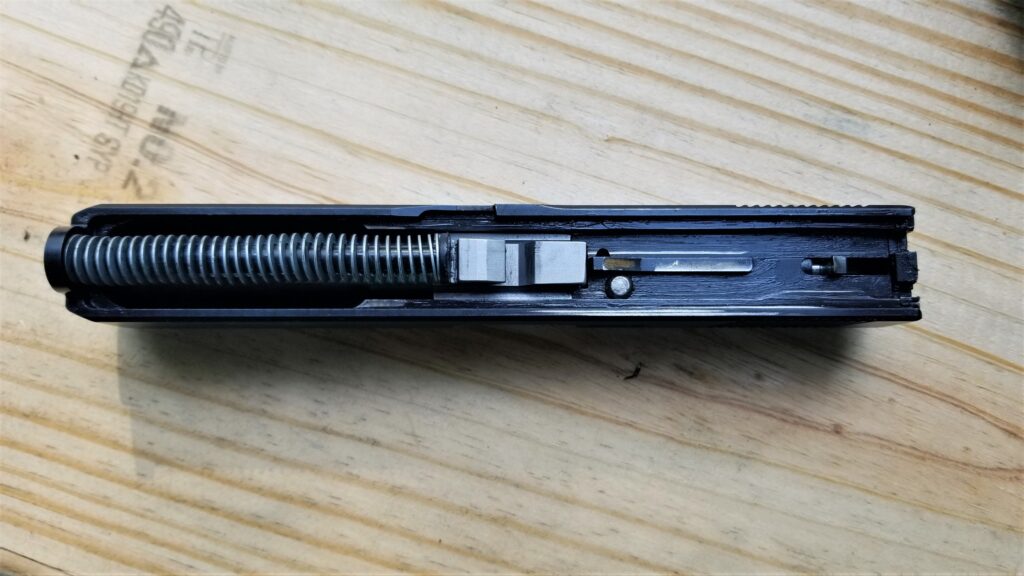
Here’s the bottom. Other than the Storm Lake barrel, I think all of the other parts are OEM Glock.
Man at shooting range with M70B1 rifle and dark Russian plum handguard
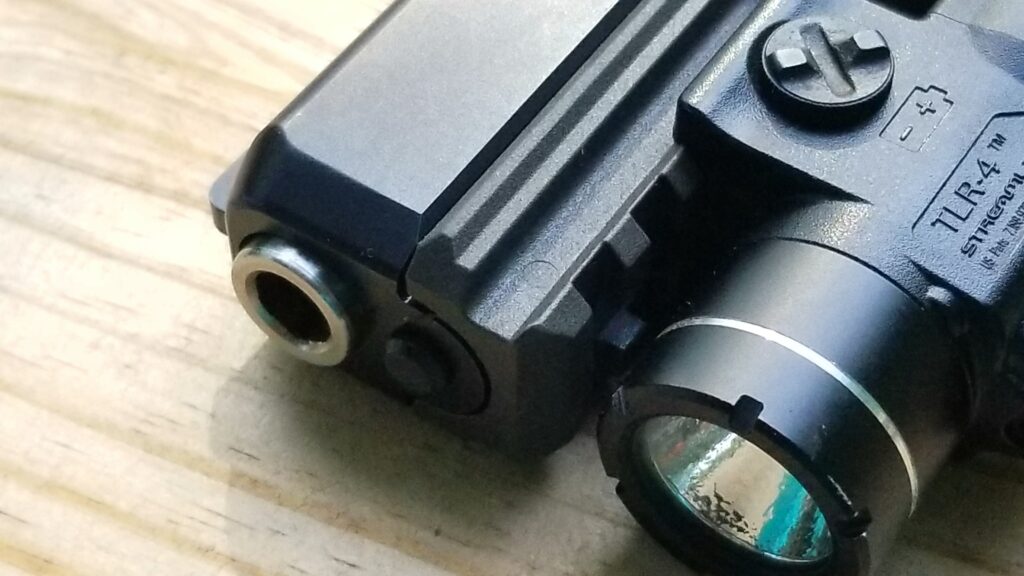
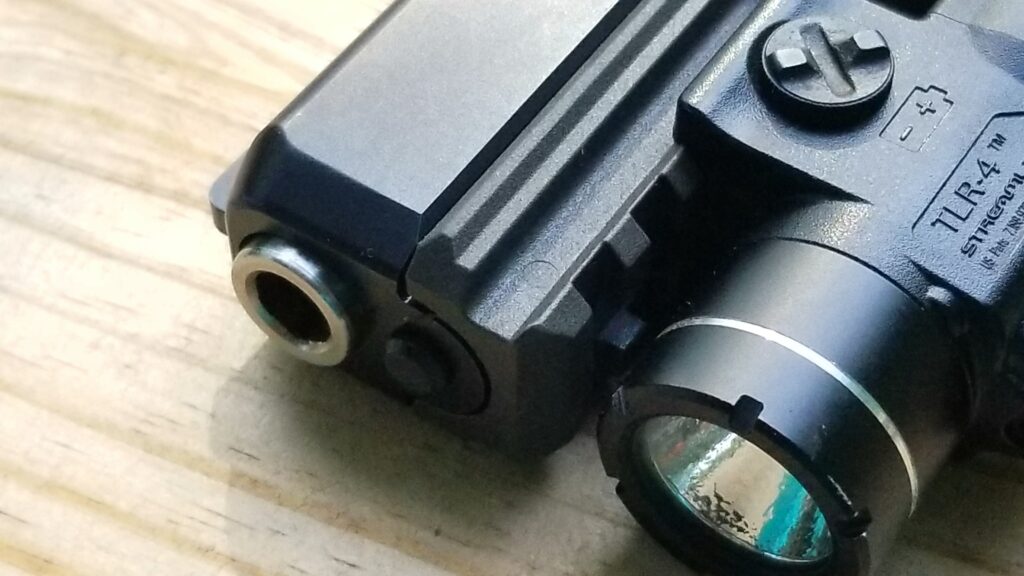
I really like the beveled nose and prefer it for carry pistols. Also, Streamlights are my go to brand for light and laser combos. The TLR-4 works great here and any of the TLR series would since this is a full size pistol. The CL just has the shorter G19 grip to aid with concealment.


So, if you are hunting for a slide for your Glock or Polymer80 build, take a look at Swenson models. They have quite a few designs to select from now including fancy windows and various optics cuts. Just remember, if you are doing a Polymer80 build, look at slides meant for Glock Gen3 models.

The problem these days is finding them. The whole market is in pandemic shock – either hit with supply chain problems or unprecedented demand for guns, ammp and parts. With that said, I did some searching and see Swenson slides either at Midway USA or on eBay and the following is a real time search of eBay for themL


I hope this helps you out!


Please share the link on Facebook, Forums, with colleagues, etc. Your support is much appreciated and if you have any feedback, please email us in**@*********ps.com. If you’d like to request a report or order a reprint, please click here for the corresponding page to open in new tab.


Storm lake Glock Barrels Are Good To Go – I sure Like Mine

I recently built a Polymer80 PF940CL – their compact long model. This is an interesting variant because it is a their Glock 19 grip but built to use the longer Glock 17 barrel. I had a threaded barrel I could have used but opted to get one of the Storm Lake model 34000 barrels after doing some digging around on their quality. I’m impressed and figured it made since to share a quick review with you.

Storm Lake barrels are made in Tennessee. While not everyone may know their name, they’ve been around since 1983 and sell barrels for 1911s, Glock, Springfield XLs and S&W M&Ps.

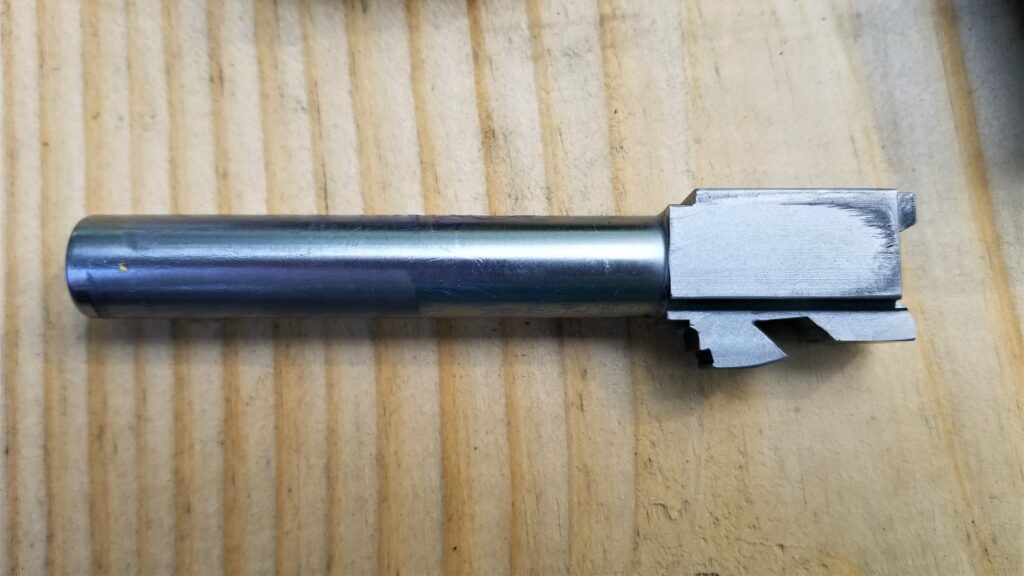
Their barrels are made from 416 stainless steel, are hardened to 40-42 HRC and rifling is 1:16LH. The rifling is broach cut to support both jacketed and lead bullets.

My Glock 17 Barrel

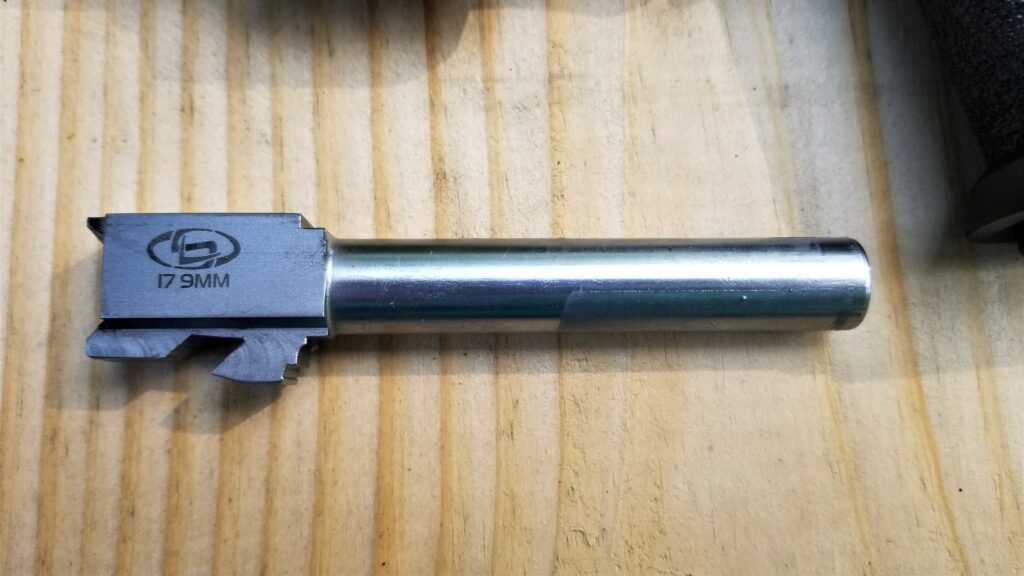
The 34000 is a 9mm 4.49″ long barrel with no ports that weights 0.30 pounds. I don’t plan on running a suppressor or a compensator so there was no real reason to have threading especially if I ever carry it.

Man at shooting range with M70B1 rifle and dark Russian plum handguard
Here’s my 4.49″ 9mm barrel.
Man at shooting range with M70B1 rifle and dark Russian plum handguard
The black stuff is carbon from shooting. It’s an accurate and reliable barrel.
Man at shooting range with M70B1 rifle and dark Russian plum handguard
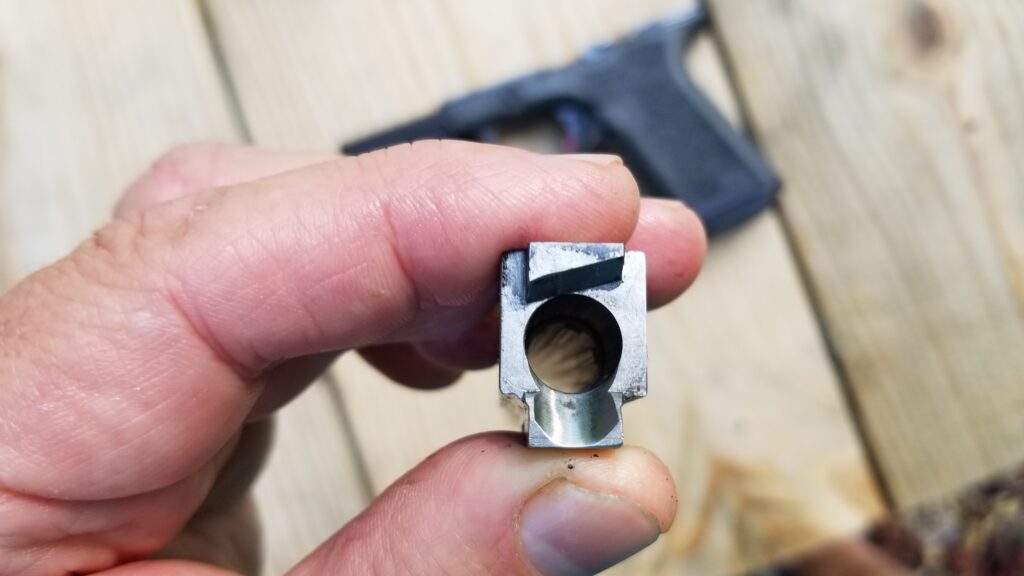
The feed ramp is nicely done. I don’t shoot unjacketed bullets but it worked great with S&B 124gr FMJ , 115 grain FMJ – not sure of the maker – and 124gr Hornady Critical Defense HP rounds.
Man at shooting range with M70B1 rifle and dark Russian plum handguard
There is a slight crown to protect the muzzle and rifling.
Man at shooting range with M70B1 rifle and dark Russian plum handguard
Here it is in the PF940CL

All in all, I have nothing negative to say. I am not some super duper target shooter. It’s accurate enough for me under 25 yards and I’ve not had any problems. Now part of that is the build and the magazines too but again, no problems!

I have no hesitation recommending Stormlake barrels. Best of all, I think they are very affordable and show that you don’t always have to spend a fortune to get good quality.

The best selection and prices are actually on eBay. The following are items live on eBay for the G17, 19 and 34 plus other models so just scroll down:


Conclusion

I hope this helps you out!


Please share the link on Facebook, Forums, with colleagues, etc. Your support is much appreciated and if you have any feedback, please email us in**@*********ps.com. If you’d like to request a report or order a reprint, please click here for the corresponding page to open in new tab.


Introducing 1/2″ and 3/4″ Pull Rings For Our Quick Takedown Pins

When I originally designed our Quick Takedown Pins for the Yugo M85/M92 and then also the Bulgy/Tula Krinks, PSA AK-V and Vepr 12 shotgun, I used my hand size as a gauge for making a pull ring big enough. Guys have asked me repeatedly over the years for smaller pins but I could never find them made well enough that I felt good about carrying them — until now!

Yugoslav infantry soldier with rifle, part of Yugoslav Infantry Weapons content
This is my AK-V with its quick takedown pin with the standard size 1″ ring installed.

This last time when I placed an order with the machine shop that makes my pins, I asked if they could do custom heavy duty 1/2″ and 3/4″ pull rings from stainless steel with a black oxide finish and they said they could! It cost a fair penny because I needed to order a boatload of each but here they are as an accessory if you want to purchase them … please purchase some 🙂

Yugoslav infantry soldier with rifle, part of Yugoslav Infantry Weapons content
Here are the three rings side by side. The pins all come with the 1″ standard ring installed.

The 1″ and 3/4″ rings are very beefy. We had to go to smaller gauge wire to do the 1/2″ rings but they should work just fine – it’s really the pin itself that does all the work.

Click here to go to the page with all of the pins and rings if you would like to place an order.


Please share the link on Facebook, Forums, with colleagues, etc. Your support is much appreciated and if you have any feedback, please email us in**@*********ps.com. If you’d like to request a report or order a reprint, please click here for the corresponding page to open in new tab.