Category Archives: AR & Related Rifles and Pistols

PSA AR Build Kits Are Affordable and Fun To Build

I’ve pointed thius out before – I really enjoy building firearms. I don’t have the hardcore machinist skills to build one from scratch – I wish I could though – but I do enjoy assembling and tinkering plus I don’t mind some fitting / fabricating. With this in mind, I have a lot of fun building ARs from PSA kits because they are affordable, reliable and accurate. I’m not going to waste time with the whole manufacturing tiering or the rediculous “poor” labels – that’s all they are. Now, if you are in the military and you need special weapons, you aren’t reading this post – it’s that simple. If you are like most folks and want to build an AR that you can enjoy with friends and family, then read on.

Founded in 2008

For those of you who do not know Palmetto State Armory (PSA) – they have been around since 2008. It was founded by Josiah McCallum after his Iraq deployment and he started it in his garage. To put it mildly, he has been growing PSA ever since into the powerhouse it is today. Folks, PSA has a ton of offerings now – ARs, AKs, pistols, ammo, parts … the list goes on and on. One thing you will notice is that they are constantly learning and evolving.

I’ve Only Had One Problem

So, I bought and built my first PSA AR many years back – I looked at my order history and it looks like it was 2014. In all the years, I can only remember one problem – they forgot to include the disconnector. I contacted customer service and had one a few days later. That was probably a year or two after my first one and I’ve not had a problem since. You’ll notice now they bag their parts by grouping so this probably helps with quality control considerably.

Have I ever had a part fail? No – not that I recall. I normally will put a few hundred rounds through a build, eventually get bored of it and have my FFL, Michigan Gun Exchange, sell it to fund another project. So all I can tell you is that my experience with their AR kits has been very favorable and have no reservations telling someone to use them – especially if they want to start and learn.

What options do they have?

Whew – they have tons and tons of kits and parts you can choose from. Different barrel lengths, handguards, furniture, triggers, and so forth. You can buy a kit with everything except for a stripped lower receiver or you can buy assemblies such as a build kit for a stripped lower to then use with whatever upper receiver you want.

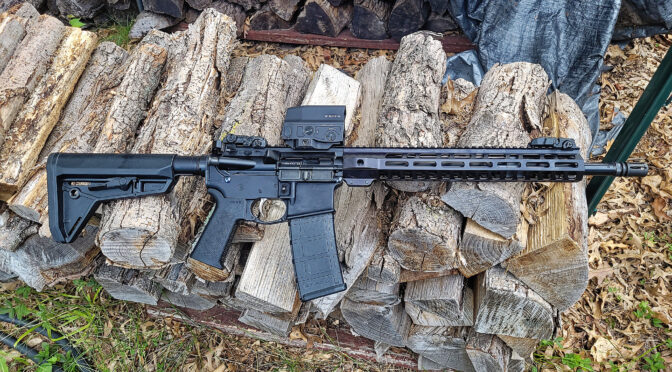
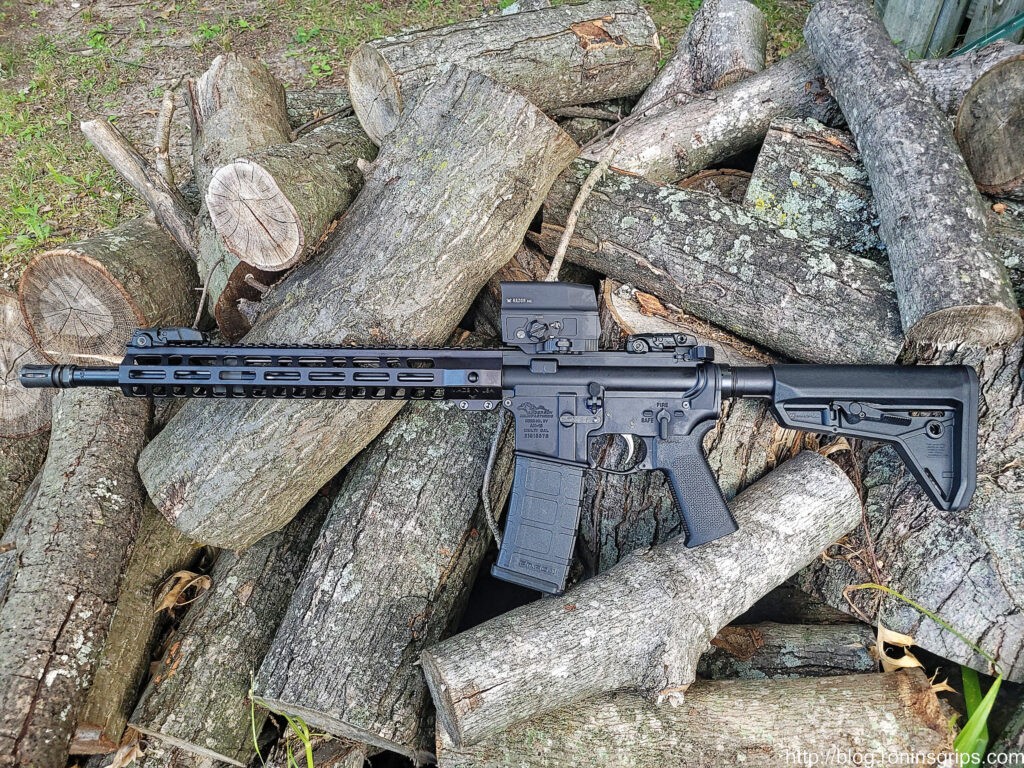
The point is that they have something for everyone and if you are patient and watch their Daily Deals (you can sign up for their emails) then you can get a great deal. For example, the kit I built this time is their “PSA 16″ 5.56 NATO 1:7 MIDLENGTH NITRIDE 13.5″ LIGHTWEIGHT M-LOK MOE EPT RIFLE KIT W/ MBUS SIGHT SET” – which means in has a 16″ barrel that is chambered for 5.56 NATO with a 1:7 twist and black nitried finish, has a 13.5″ M-LOK handguard, comes with Magpul MOE grip and buttstock, their enhanced polished trigger (EPT) fire control group and has a set of Magpul BackUp Iron Sights (BUIS). Yeah, they pack a lot into that description. The kit comes with everything you need except for a stripped lower receiver (I used an Anderson I already happened to have) and the best part was that it was only $479.99 vs. the list of $799.99.
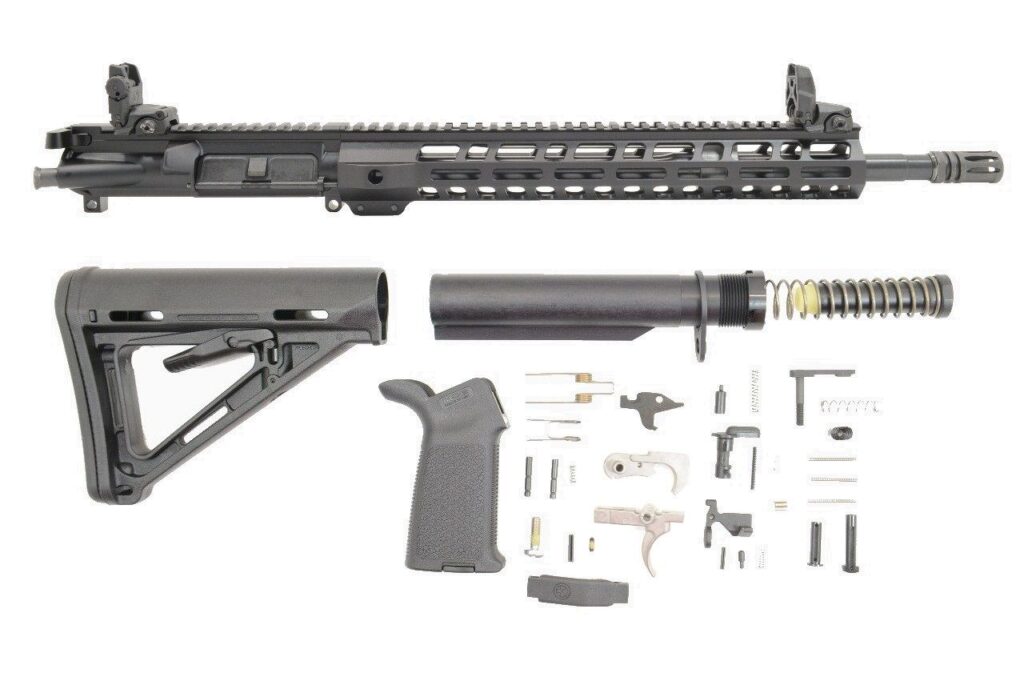
This is PSA’s Model 516446780 parts kit that comes with everything you need except for a stripped mil-spec lower receiver.

Serves as a foundation

The AR parts are all Mil-Spec – what this means is that rifles that use parts built to the original military specification dimensions can use other parts. For example, I prefer the Magpul ACS stocks – they just feel better to me. Because the PSA buffer tube is Mil-Spec, that meant I coul easily replace the MOE buttstock that came with the kit with an ACS.

My point is that a PSA kit can serve as a foundation that you can very readily build on. Down, the road if you want to change out barrels, triggers, uppers, etc. you can easily do so. If something has a problem and you need to replace, again, there will not be a problem finding parts.

By the way, I would recommend a spare parts kit regardless of brand AR you are using – they are usually relatively inexpensive and include wear items, such as the firing pin, plus parts that get lost – for example, the takedown detents.

A quick comment on the EPT triggers

The PSA EPT triggers are a decent. I recently did a test on a number of triggers and a Mil-Spec Aero brand trigger had an average pull of 6 pounds 12.4oz. The PSA EPT had an average pull of 6 pounds 12.3oz and that was with both lubricated by oil. So, not a huge benefit but I do like them – just don’t expect a world of difference is my point.

If you really want a remarkable trigger, buy the PSA 2-stage trigger that has an average pull of 4 pounds 9.5 oz when lubed. It’s a must-have upgrade for only $64.99 and yes, you can always change to it later.

How do you assemble these kits?

Really, the only thing you need to assemble is the lower. PSA has already done the upper and headspaced it just to be safe. In theory, Mil-Spec barrels going into Mil-Spec uppers should not need headspacing but the reality is that you better check it just to be safe and PSA does.

I did a whole series of posts back in 2017 about building AR lowers – click here for a list that will open in a new browser tab.

The reference source I used to learn how to assemble AR lowers way back when is the guide on ar15.com. There are now tons of videos out there as well and you can learn a great deal by investing a little time to watch them. For example, here is one from PSA and here is one from Midway USA.

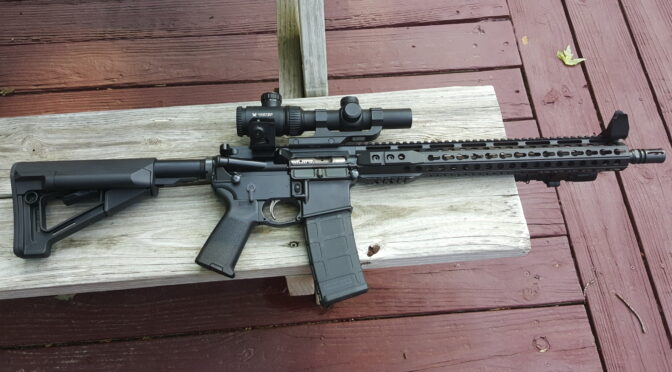
This is my latest 16″ PSA AR build. It has a MOE stock, Magpul BUIS and a Vortex Optics UH-1 sight.

Recommended Tools

Over the years, I have bought and tried quite a few tools but there are just a few that have stood the test of time that I still use. I figured it might help you to have a list so you can consider whether you want to pick them up or not.

  • Trigger Guard Jig – there are a ton of ways to do the trigger guard roll pin but a tool makes it really simple and reduces the odds of marring the finish or snapping an ear off the receiver.
  • Magazine Catch Punches – folks, Wheeler and others make long roll pin punches that have a vinyl coating to help install the mag catch. They are totally worth it. No more tearing up your finish or having to apply duct tape – these tools help you get it right the first time.
  • Front Pivot Pin Detent Jig – installing front pivot pin’s detent and spring is next to impossible without the right tools. Wheeler and others make a very simple pin set to help you save your sanity.
  • Trigger slave pin – greatly simplifies installation of the assembled trigger, disconnector and spring assembly. We make one 🙂
  • Magpul Castle Nut Wrench – I have used a wide variety of tools over the years ranging from the old GI tool to bizarre looking combination wrenches. If you want a solid tool that will hold up over time, the Magpul wrench is the way to go.
  • Gunsmith Punch Set – there are tons of makers. Basically you want a wide range of punches and roll pin punches. I have a mix of punches from Tekton, Weaver and Wheeler plus ones that I have no idea where they came from.
  • Non-Marring Hammer – You’ll need a small hammer from time to time that will not tear up your finish – I use Vaughan hammers.
  • Automatic Punch – I have a tremor so my hands shake. To stake the rear castle nut, I just use a good General brand automatic punch. It’s not as deep/good of a stake as a hammer driven punch but I do the automatic punch repeatedly to deform the surface and lock the nut.
  • Magpul BEV-Block – If you plan to install barrel nuts or muzzle devices, you will need a really secure means to hold the barrel and receiver securely. DO NOT use the blocks that just use the pivot and rear pin holes your you are apt to bend them. I did that once. Get a BEV block. It’s way, way easier and does a great job.

In Conclusion

If you are looking for something fun to do and there are tons and tons of tutorials out there – build an AR. The PSA kits are reliable and very affordable with different options to suit your tastes.


Note, I have to buy all of my parts – nothing here was paid for by sponsors, etc. I do make a small amount if you click on an ad and buy something but that is it. You’re getting my real opinion on stuff.
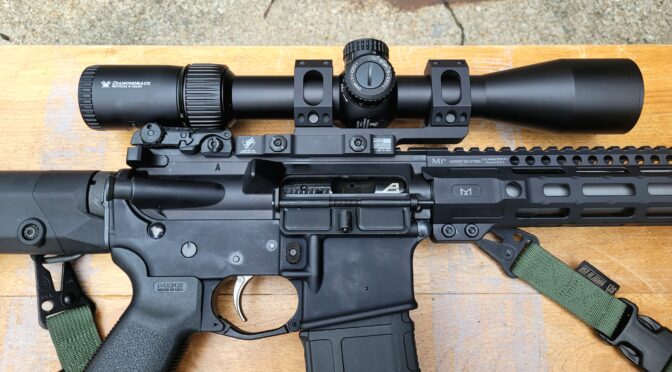
How to level a scope reticle

First off, I better explain that a recticle is the formal name for the cross-hairs or series of fine lines that are inside a scope that you use to aim with. There are a ton of different ones out there and one thing you want to do is to get them level with the rifle.

Let’s start with why this matters

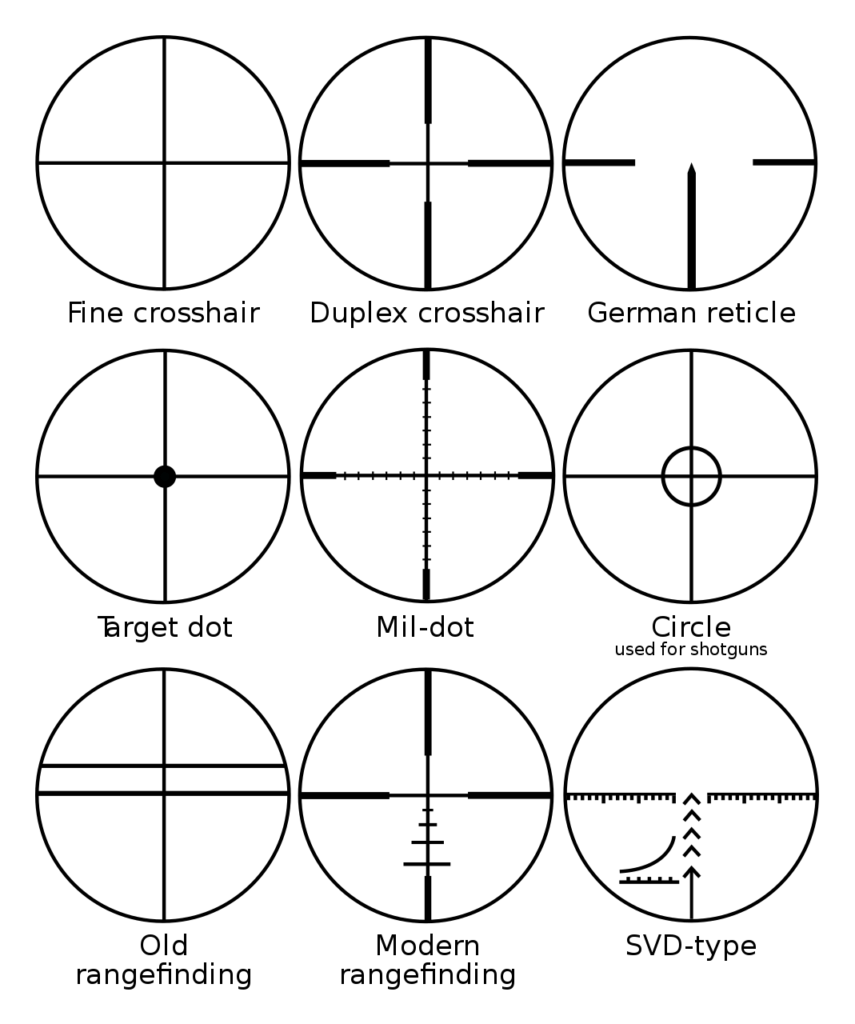
The reason for this doesn’t affect the old traditional cross-hair designs but it does the ones that have additional marks to help you better determine the range and the necessary hold based on Mil-Radians (Mils) or Minutes of Angle (MOA).

These are examples of reticles found in a very interesting post about the topic on Wikipedia.

If you search, there are tons and tons of posts about different types of reticles and how to use them. The important point I want to make is that for any of these more modern reticles with additional lines to help you accurately, the horizontal lines must be parallel with the rifle.

How do you level a reticle?

The first way is the old fashioned “eyeball” method. Hold the rifle and make sure the top of the receiver is as level as possible (meaning the rifle is not tilted left or right), look through the scope and adjust it in the rings until it is true to the top of the receiver and then start tightening down the rings while confirming nothing shifts. It’s not the most precise method but it does work, I’ve done a ton of rifles that way, but there is another approach using levels.

In it’s most form, you put a small level on the top rail or flat spot of your recever, tilt it until it is level and then put the level on the top turret and adjust the scope until it matches. Having something to hold the rifle in place while you work really helps as does having a second level so you can both confirm the receiver and scope are level as you work. You can often find single vial levels at hardware stores or through industrial supply houses. The one negative to this approach is that the levels can slide off if you don’t have things secure. I like to use a Tipton Pro Rifle Vise to hold the rifle in place while working.

Wheeler Engineering does offer a basic level set that works. I don’t use it though because it’s rear receiver piece has a magnet to secure it and that will not work in an AR or other weapon that is made from aluminum and not steel. For this reason, it wasn’t something I could use.

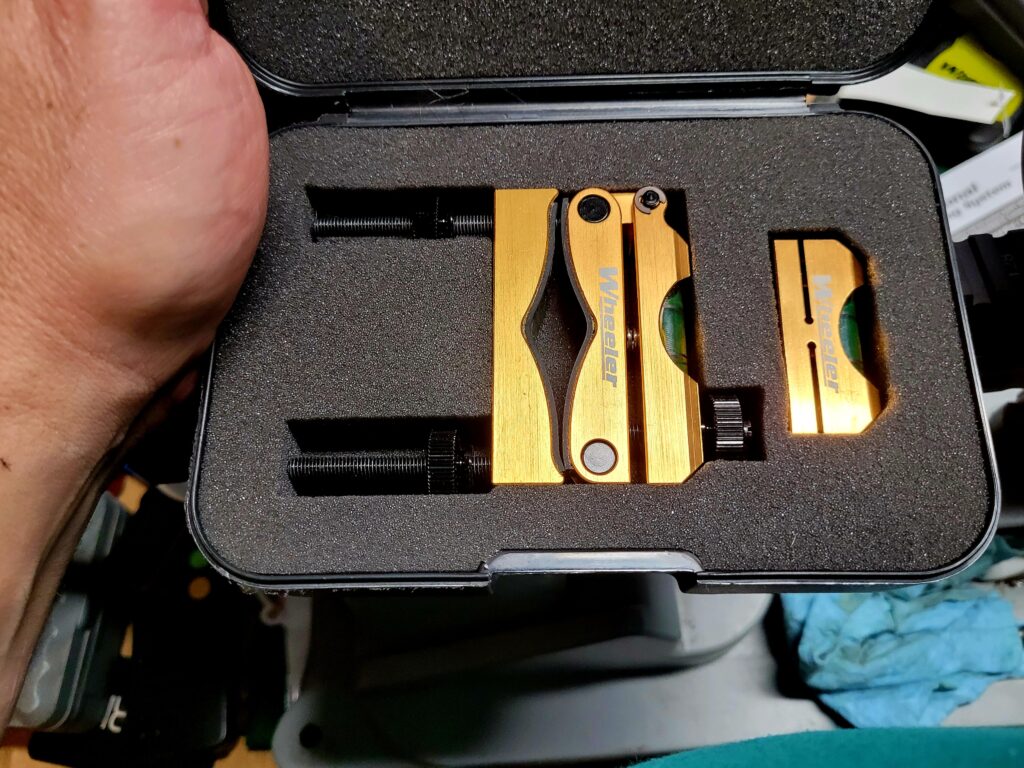
These days, when I have time and I want to try and get the scope as accurately positioned as I can on the first try, I use a Wheeler Engineering Profession Reticle Leveling System. It’s easy and fast.

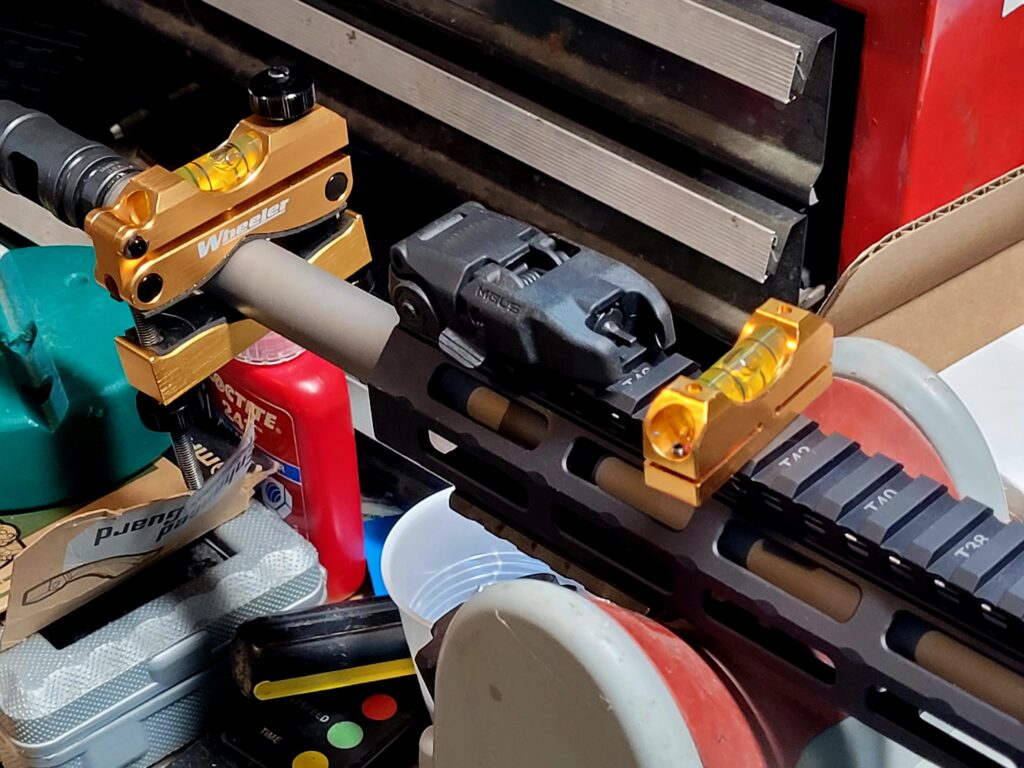
First, you put the level on your receiver/rail and level the receiver. Then you put the clamp on the barrel and level it – I compare both the receiver and the barrel bubble levels before I move the receiver level to the top scope turret. Once the level is on the top turret, I adjust the scope until the bubbles match and it’s done. I’ve used this for a number of years now and am very happy with it.

The professional leveling system has two parts – the barrel clamp and the separate level you use on the receiver and then the scope turret. The two parts are made from aluminum and come in a nice protective case. If it weren’t for the case, mine would look much more beat up. Protecting the parts makes sense for another reason – you don’t want things to get bent, gouged, dented or whatever and then throw off the readings or mar the finish of your weapon.
The first thing you do is to use the small level (shown behind the backuop sight) to true the receiver. Then you adjust the barrel clamp until it is level also. Just visible under the handguard is the front of my Tipton vise.
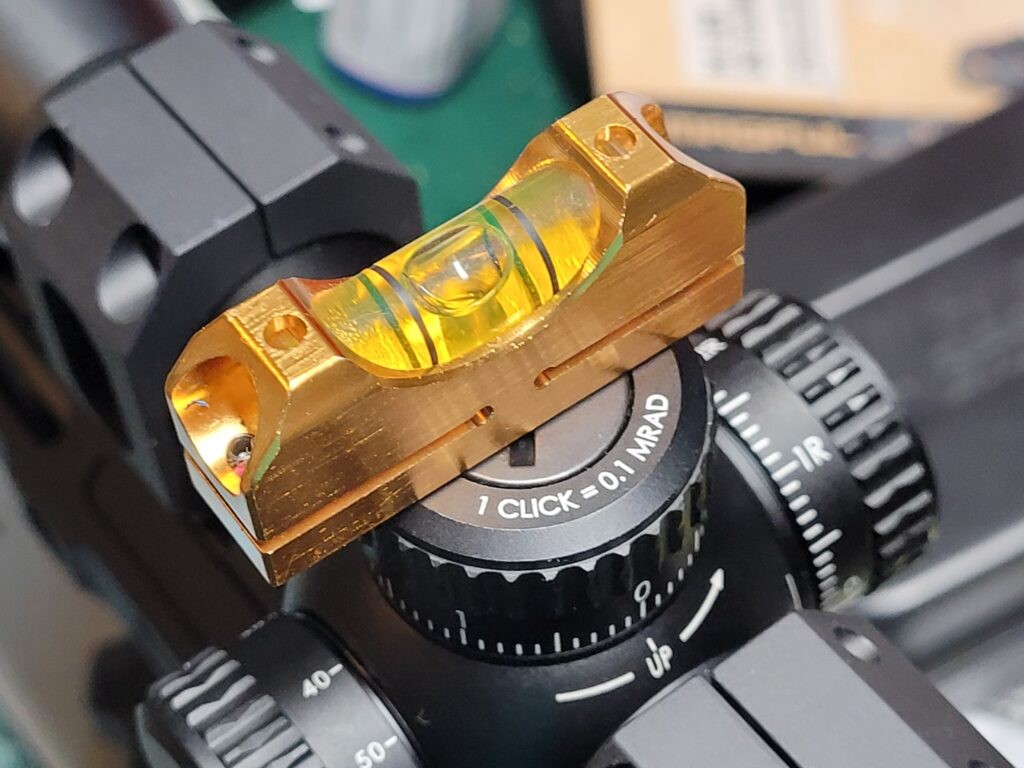
After the barrel clamp has been levelled, you move the small level to the flat top turret and then rotate the scope however you need to get it flat also. Compare this level to the barrel clamp level to make sure they agree. The more care you take to get the bubbles centered and matching, the better.

I do use a Vortex torquing screw driver to tighten the scope ring screws and am careful to confirm the scopes levelling does not shift in the process. Vortex scopes say not to torque them past 18 inch/pounds (please note that is inch pounds and not foot pounds just to be very clear – you don’t want to damage your scope but at the same time, you do want it secure).

Again, with any of these methods, it really helps to secure the rifle in a vise where you can adjust and then secure the rifle so the top is horizontally true.

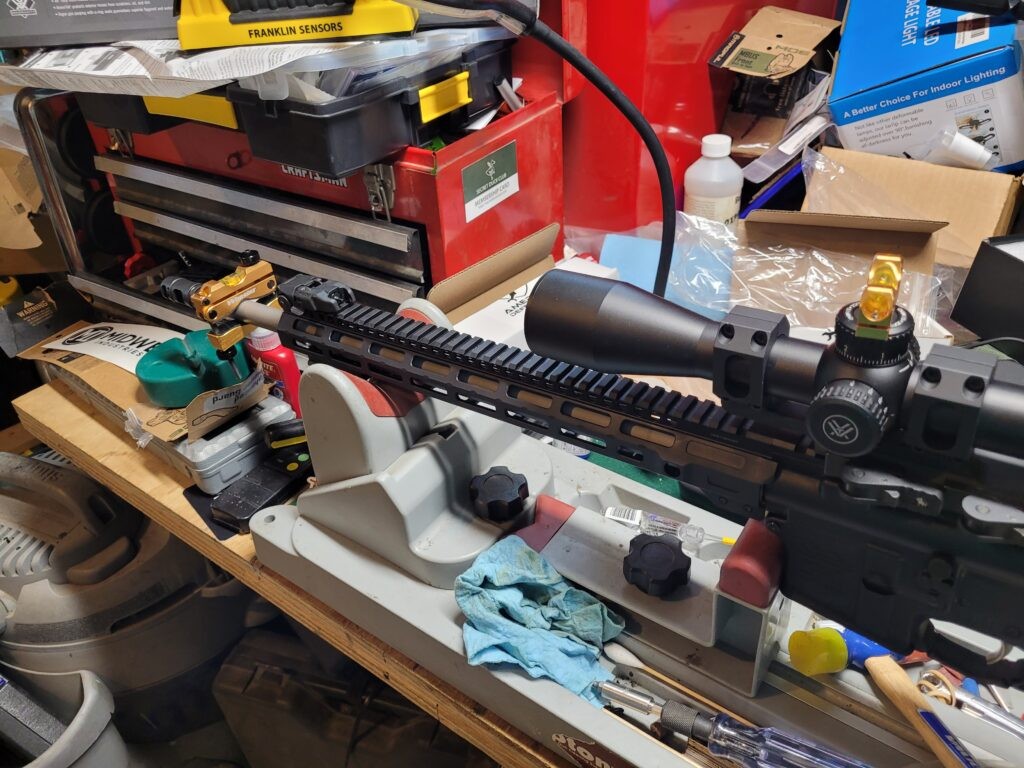
Yeah, this is my real work bench. It was worse than normal as I still had all of the packing from the scope,rings and upper on the bench. The Tipton gun vise has served me very well over the years. By the way, notice the level on the turret – you reall want that perpendicular to the rifle. In this photo it is slightly crooked and no longer perpendicular and risk the scope not bein accurately levelled to the rifle.

Conclusion

The Wheeler Engineering Professional Leveling System has served me well and I have used it on a number of projects over the years. I have no hesitations in recommending it to you as well.

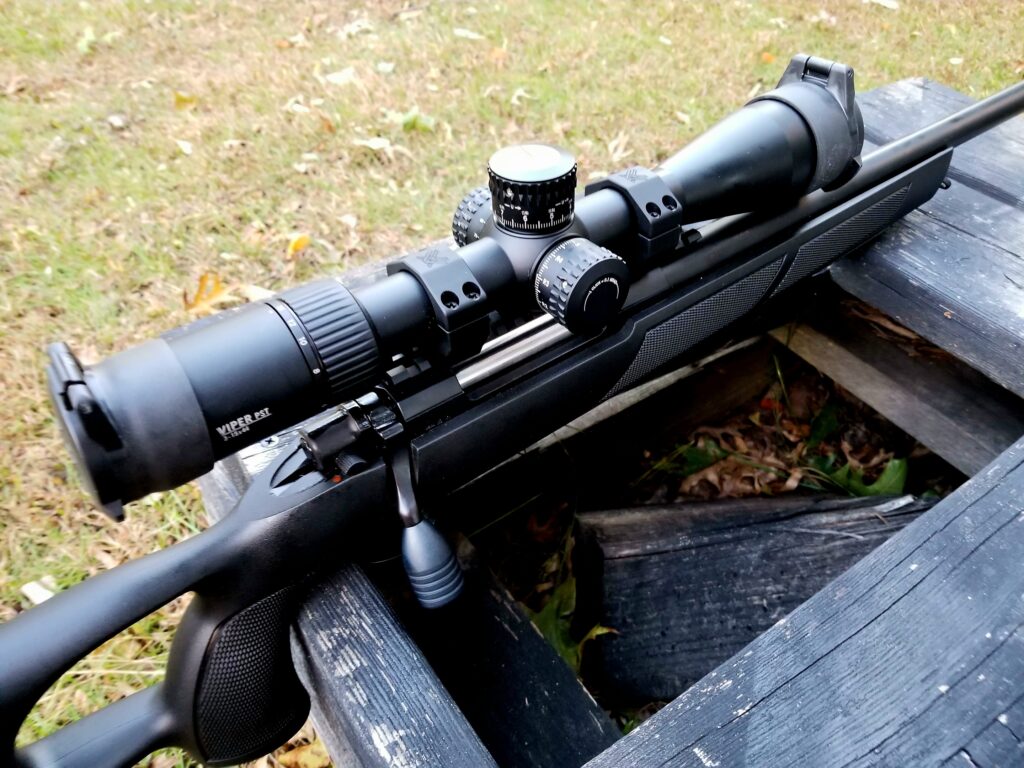
Sabatti Urban Sniper with a Vortex PST scope.
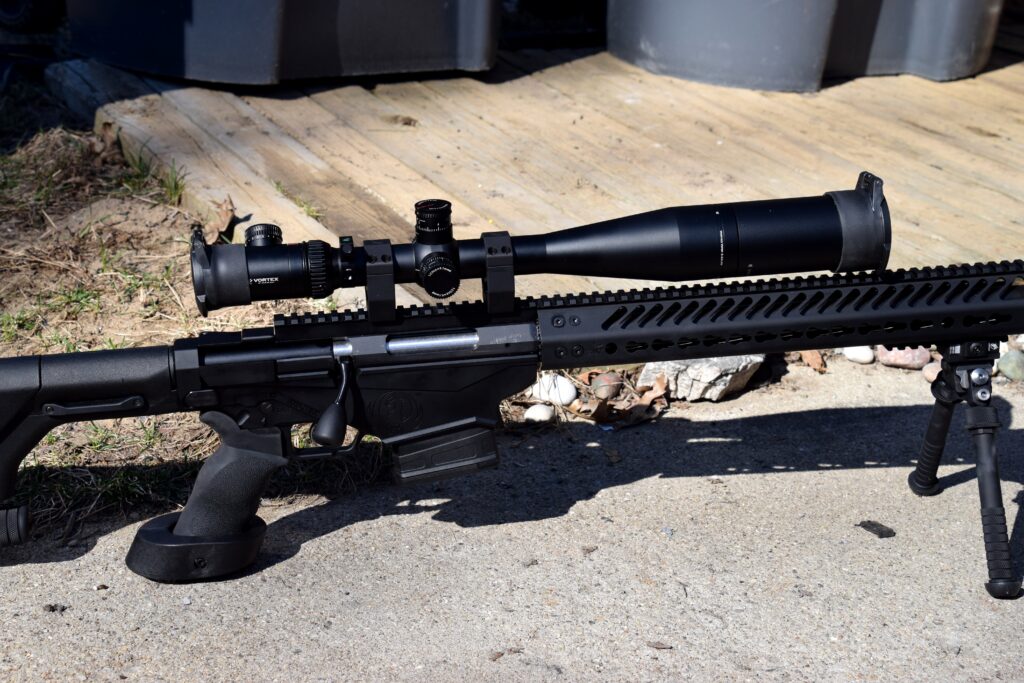
Ruger RPR with Vortex PST optic sporting its sun shade.
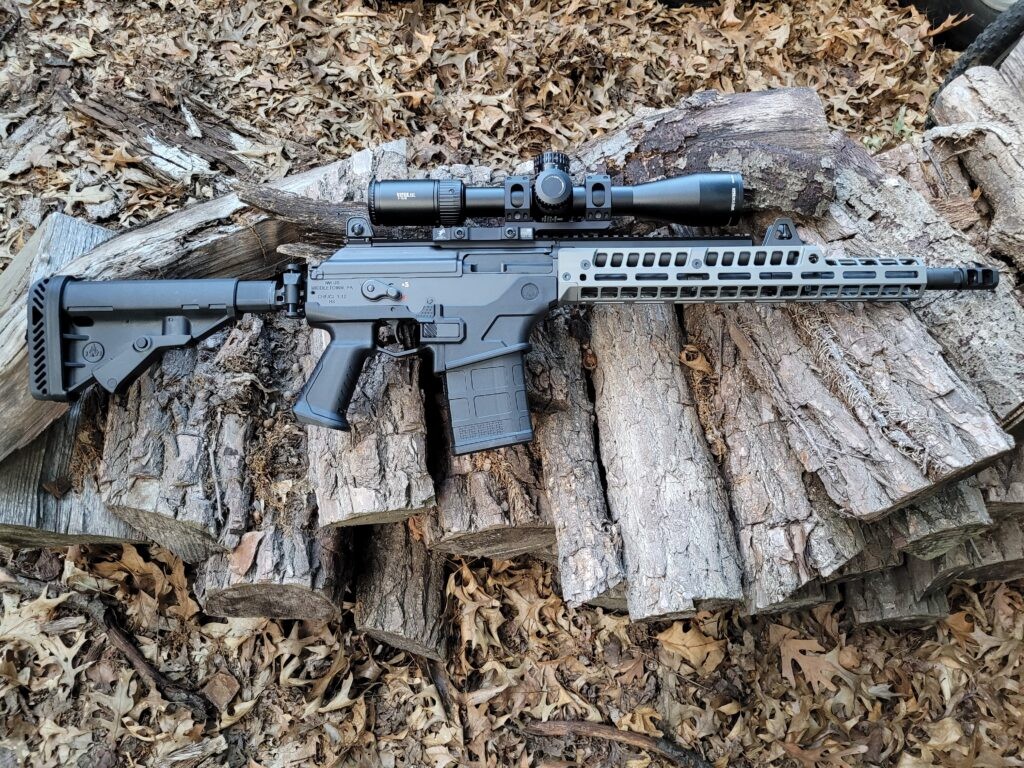
IWI .308 Galil with a Vortex PST Gen 2 Scope.

I hope this post helps you out.


Note, I have to buy all of my parts – nothing here was paid for by sponsors, etc. I do make a small amount if you click on an ad and buy something but that is it. You’re getting my real opinion on stuff.
If you find this post useful, please share the link on Facebook, with your friends, etc. Your support is much appreciated and if you have any feedback, please email me at in**@*********ps.com. Please note that for links to other websites, we are only paid if there is an affiliate program such as Avantlink, Impact, Amazon and eBay and only if you purchase something.


PSA Has A Really Good Deal On 36″ Black Tactical Rifle Cases

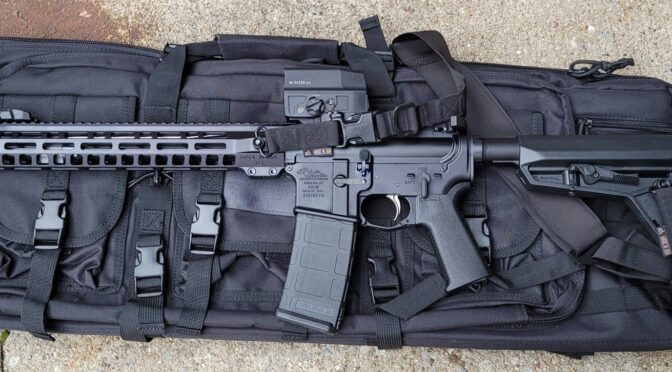
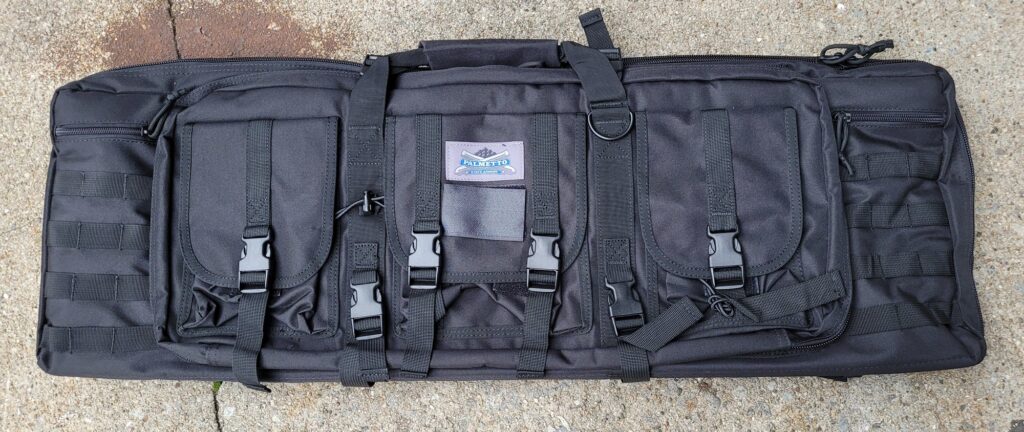
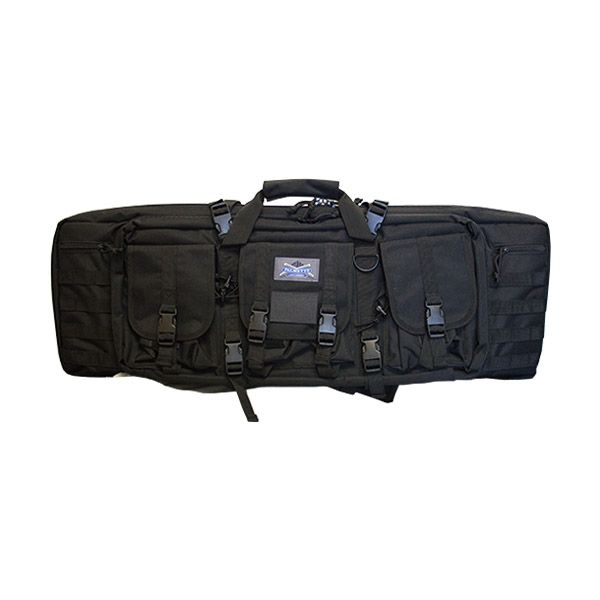
Palmetto State Armory has a lot of good deals on a variety of firearms and accessories. One that I like is their 36″ rifle soft sided rifle case. It follows the trend of tactical bags having a million pockets, straps and even shoulder straps. I have a few of them and use them for AKs and ARs primarily – they are well made and very affordable.

The nylon used seems solid – I’ve loaded them down with a lot of weight from whatever rifle is in the bag plus a bunch of loaded mags, bipod and any accessories such as flashlights, etc. Neither the nylong fabric nor the zipper has let go. When you look at the stitching, it’s pretty good as well – certainly for the price point.

One side of the bag has pouches where you can fit at least 8-30 round mags plus there is a big pouch behind the mags where you can put a bipod, light, etc.
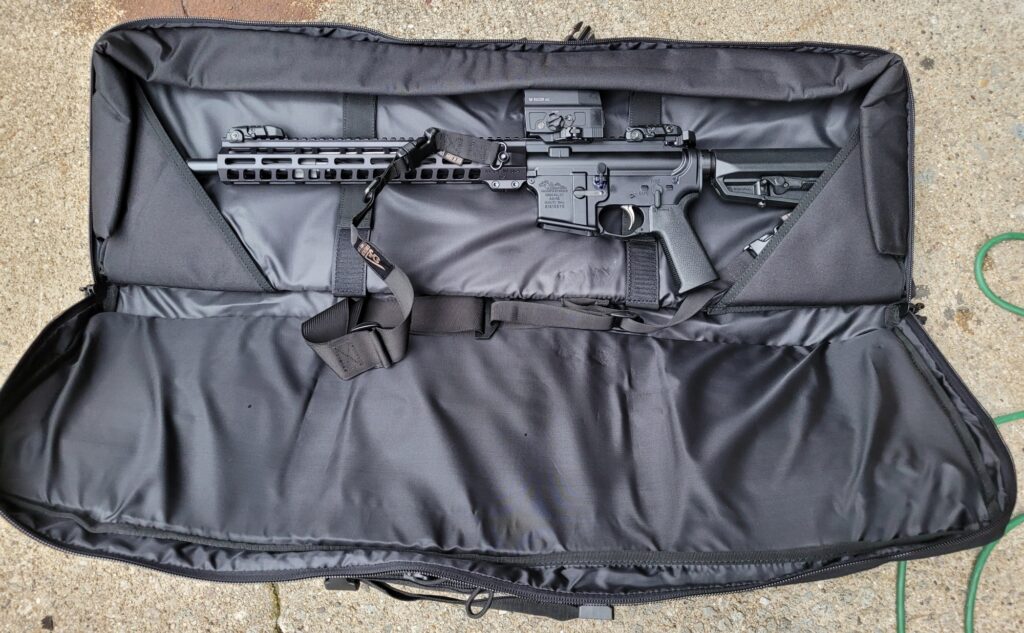
The main compartment protects your rifle very well. What you see is a 16″ AR that I built using a PSA kit and Anderson receiver with a standard bird cage muzzle device and Vortex UH-1 optic. There are straps there if you want to secure your weapon even further.
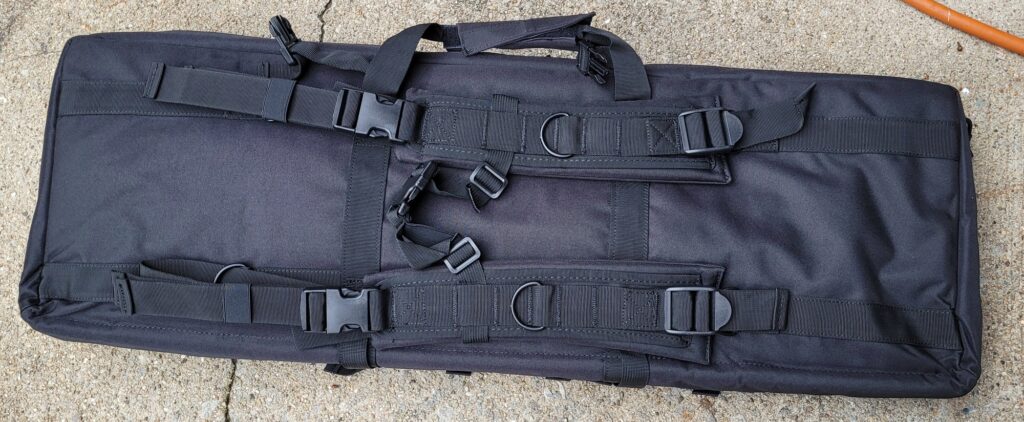
Like many tactical bags, these have the backpack should straps on the side opposite the mag carrier should you need them. The most I ever do is throw one strap over my shoulder and carry it but the option is there. You can also see all of the stitching that goes into the bag.
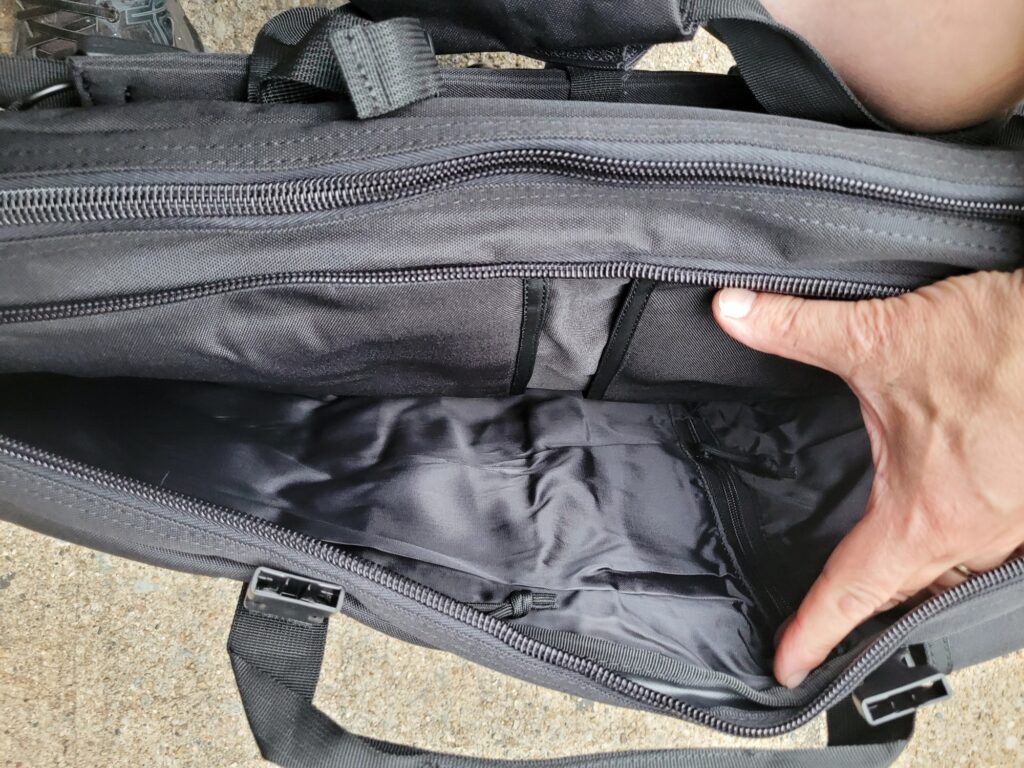
This is the compartment behind the mags and you can see even more pockets to hold paperwork / maps / notes on the rear wall where my thumb is.
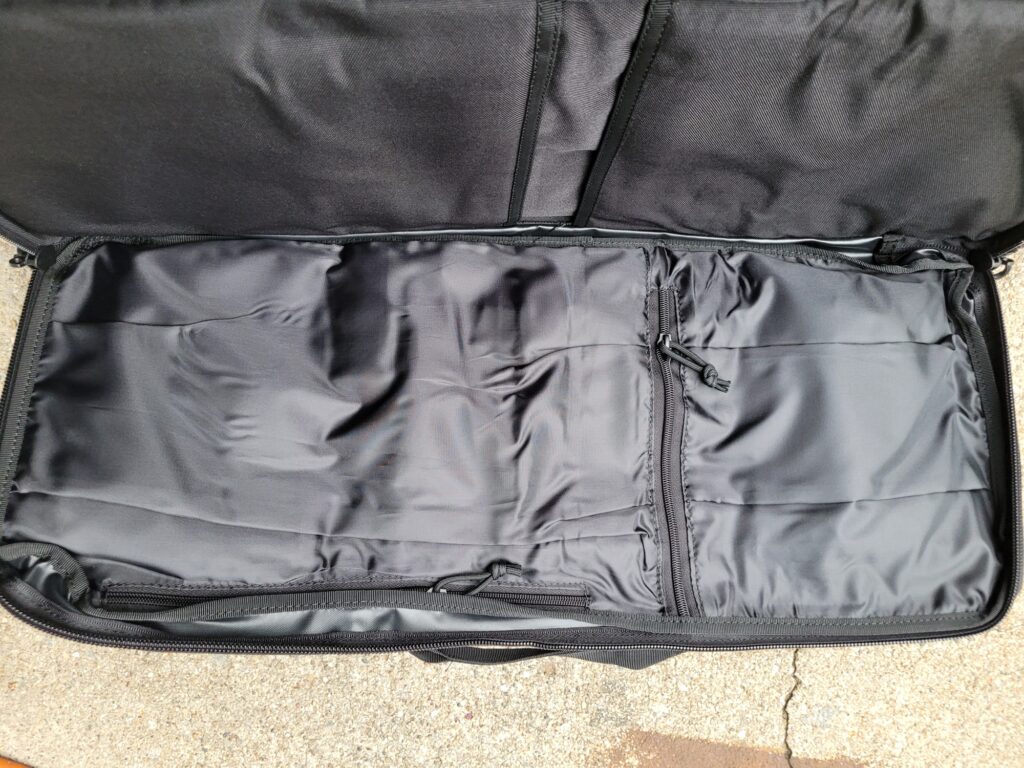
Look – more pouches! I am sure some of you are way more organized than I am. There is a zippered pouch directly behind the mag carrier. I have never used it – ever on any of my bags but it’s there 🙂
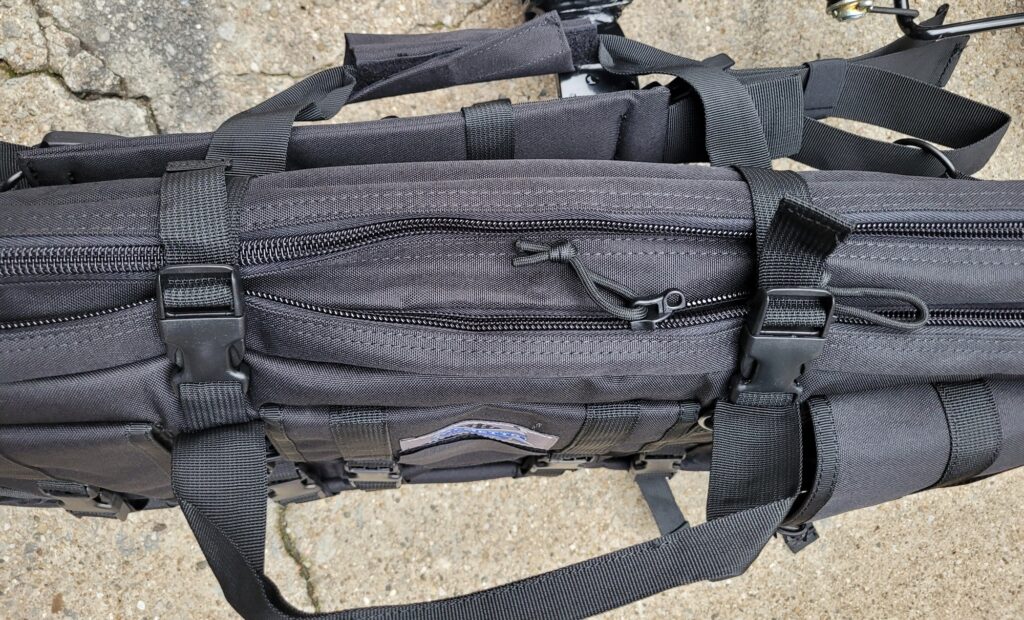
A weak spot in cases can be the zipper. On one hand, they do give you a very robust zipper but they also give you straps to compress the bag and take the load off the zippers if you really load the case down and are worried about straining them. I’ve not loaded a bag to that extent but I think it’s cool that they include them just in case. Also note the double stitching on the zippers. Really cheap cases will both use a junk zipper and single line of stitching.

Pricing

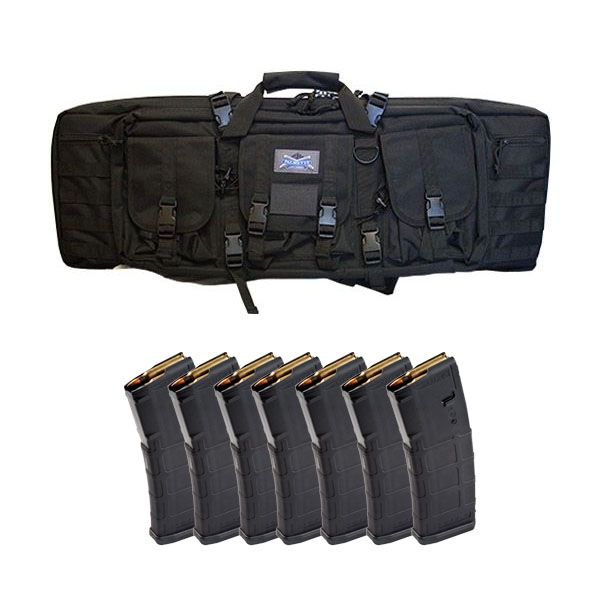
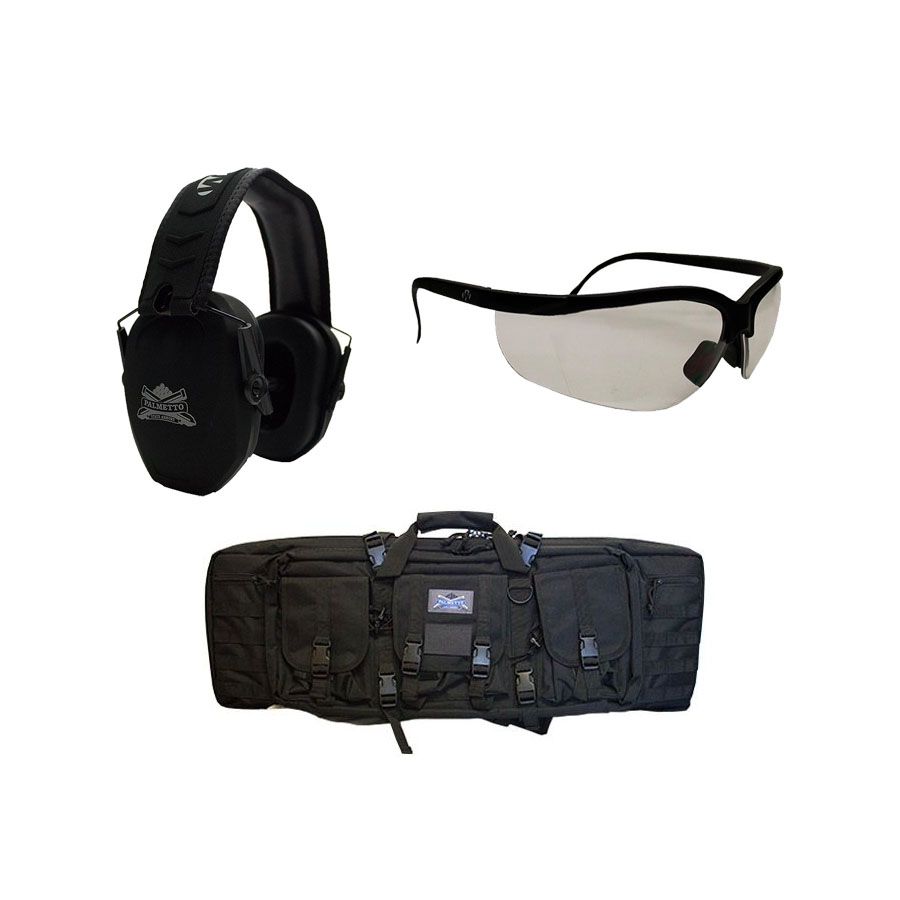
If you look for the bag alone, they often have it for $49.99 (they do right now and list is normally $69.99 which is still a pretty good price for what you get) and then they will run specias were you can get the case and some number of magazines for $99.99 – right now for example, you get 7 of the MagPul MOE AR 5.56 mags. They also have a combo deal that I haven’t seen them offer before – PSA branded Walker ear muffs, shooting glasses and the case for only $49.99.

Click on a photo to open the PSA listing in a new tab:
There are three 36″ case options that PSA currently offers on their website.

In summary

What I am trying to tell you is that if you have a rifle, pistol caliber carbine, shotgun or whatever that will fit in a 36″ case, you can’t beat the combination of price and quality. My normal go-to for soft-sided cases these days is Survivor Equipment brand on Amazon but when I need a black 36″ tactical case, I go with PSA because you often can score some great deals on them.


Note, I have to buy all of my parts – nothing here was paid for by sponsors, etc. I do make a small amount if you click on an ad and buy something but that is it. You’re getting my real opinion on stuff.
If you find this post useful, please share the link on Facebook, with your friends, etc. Your support is much appreciated and if you have any feedback, please email me at in**@*********ps.com. Please note that for links to other websites, we are only paid if there is an affiliate program such as Avantlink, Impact, Amazon and eBay and only if you purchase something.


Do You Want A Remarkable Two Stage Trigger For Your AR That Doesn’t Cost a Fortune?

I appreciate a good trigger – in firearms in general and definitely in ARs. To me, this usually means a two-stage trigger that doesn’t have a heavy pull and I can feel the second stage starting to engage with a relatively clean break. I can tolerate military heavy triggers (5-8 pounds usually with long pulls) but they are not my first choice and I really don’t like them in any form of rifle where I am trying to get a degree of precision.

I’ve tried many different triggers over the years and have typically gone in two directions – living with the stock trigger in the rifle / the trigger that came with the kit if it was for self-defense or I went with a Geissele SSA-E. That is an amazing trigger but is expensive even on sale.

I recently noticed that Palmetto State Armory (PSA) is now selling their own two-stage trigger and the reviews were very favorable so I ordered one in as an experiment to go in an AR DMR I was building using a mix of parts – the barrel was a 20″ model by Ballistic Advantage on an Aero Precision upper with a MI Combat rail handguard. I wanted a decent trigger for the rifle but really didn’t have the budget for a SSA-E but didn’t want to use a Mil-Spec-ish trigger either. Guess what I paid? $64.99 with free shipping!

The PSA 2-Stage AR Trigger

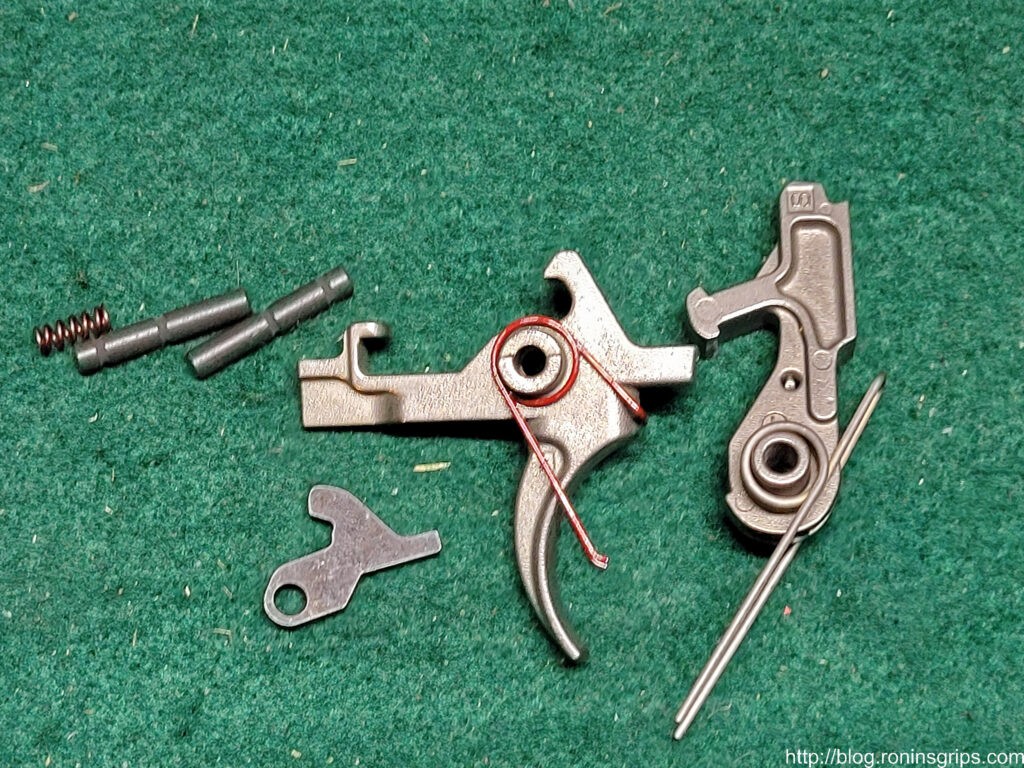
I’ve read in several places that Schmid is making the trigger for them. It has a Nickel Boron finish to enhance lubricity, the first stage breaks at 2.0lbs. The second is 2.5 pounds and the total comes in at 4.5 pounds. The trigger isn’t adjustable.

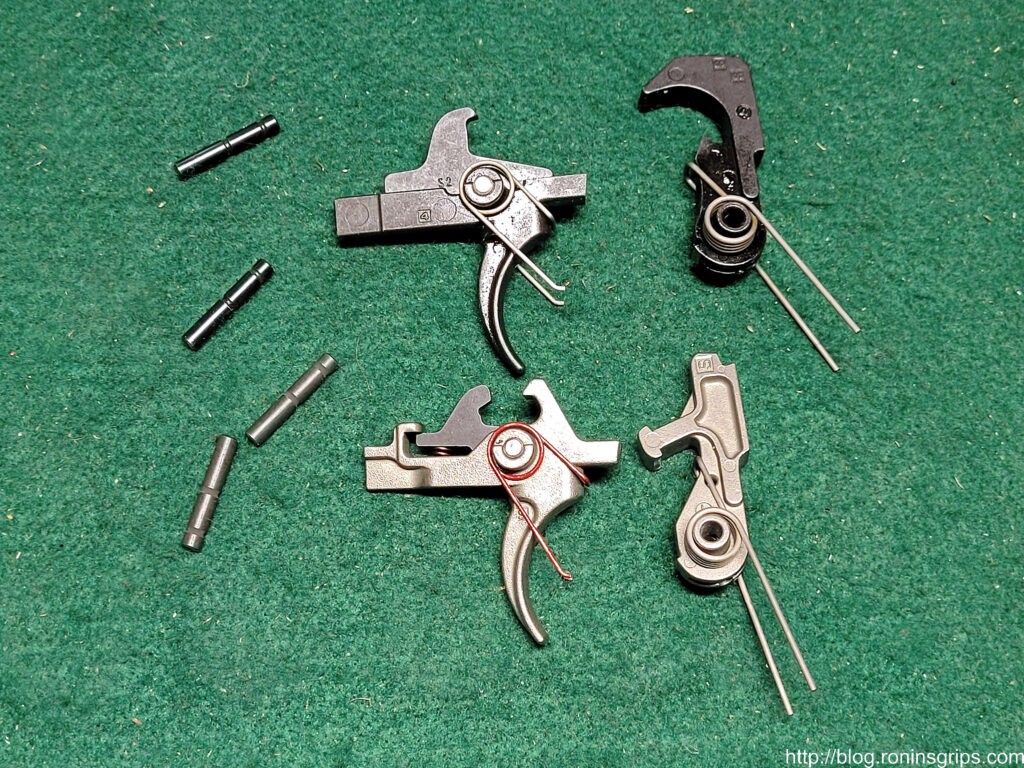
The trigger comes with everything you see – the trigger, hammer, disconnector, pins and springs.

Installation

The trigger installs just like any other AR trigger. Click here for a post I wrote some years back on installing an AR trigger and it will open in a new tab.

The reference source I used to learn how to assemble AR lowers way back when is the guide on ar15.com and has a section on the trigger. A good installation video is from Brownells:

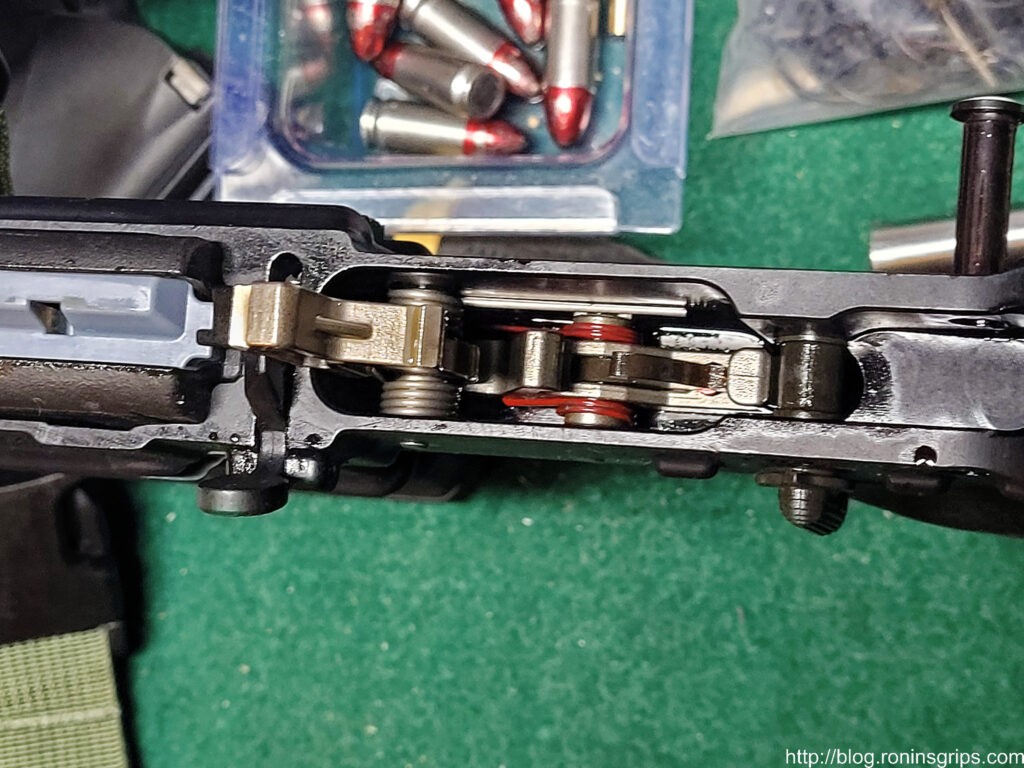
When you are done it will look something like this:

Comparisons

On top is an Aero Precision Mil-Spec fire control group. I’m using one of our AR trigger slave pins to pre-assemble the trigger, disconnector and the disconnector spring.

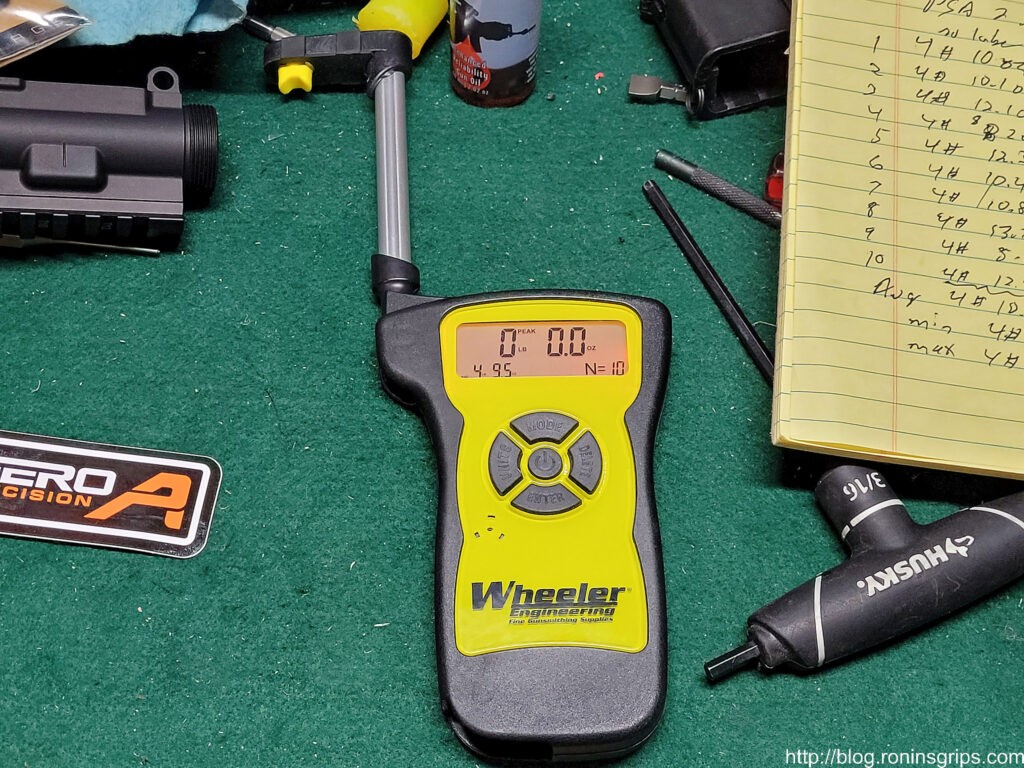
Okay, I had a couple of triggers that I could do pull tests on to give you some comparisons. Testing was done with a Wheeler trigger pull gauge that I really like.

This is my Wheeler Professional Digital Trigger Pull Gauge.

I created the following table by using the Wheeler gauge to do 10 test pulls of each trigger so you could see the average, minimum and maximum pull.

TriggerMinMaxAvg
Aero Mil-Spec6# 4.8oz7# 2.3oz6# 12.4oz
PSA EPT – Enhanced Polished
Trigger Group
6# 3.9oz6# 15.9oz6# 12.3oz
PSA 2-Stage Trigger4# 6.0oz4# 12.1oz4# 9.5oz
Minimum, Maximum and Average Trigger Pull in Pounds and Ounces Per Trigger

Conclusion

How did it feel? Well, there was a bit of pre-travel slack to pick up but then it broke pretty nicely. For $64, I was impressed! It’s kind of a no-brainer for me now that the next time I build a basic AR, I will use this trigger.

Maybe some day when I have time I’ll compare it to a Geiselle SSA-E side by side but for now, I’ll tell you that you can’t go wrong for the price. I actually ordered in another to replace the EPT trigger I have in another basic 16″ PSA AR that I have.

I hope this helps you out.


Note, I have to buy all of my parts – nothing here was paid for by sponsors, etc. I do make a small amount if you click on an ad and buy something but that is it. You’re getting my real opinion on stuff.
If you find this post useful, please share the link on Facebook, with your friends, etc. Your support is much appreciated and if you have any feedback, please email me at in**@*********ps.com. Please note that for links to other websites, we are only paid if there is an affiliate program such as Avantlink, Impact, Amazon and eBay and only if you purchase something.


Top Four PSA AR-15 Kits

Hi folks. I like building AR rifles and sometimes I just want a kit with all of the parts. Sometimes I will then swap stuff out and the original parts go in a bin but they are nice to have as spares and sometimes I will build the kit with the included parts – it just depends on my mood and budget to be perfectly honest. For years now, my main source for kits has been Palmetto State Armory (PSA) headquartered in Columbia, SC.

I almost always get my stuff off their website but they do have some very cool retail stores scattered around South Carolina. I had an opportunity to go to one a couple years back and it was very cool. Unfortunately, I lacked funds at the time and just picked up a couple of items. A person could put a serious dent in their credit card by going in one of their stores … or their website for that matter 🙂

People used to complain that they were slow to ship and to respond. First off, I always knew they were trying to keep costs low – they always shipped and they did respond – just not right away. For over a year now, I have noticed they are far faster at shipping – sometimes even the same day – and they are also faster at responding. So, if you hear bad stuff about this, I wouldn’t worry about it.

I’ve also heard people question their quality. Folks, if you want a tier one rifle, go buy a tier one rifle or the parts from them. Palmetto gives you a decent combination of quality and price. For folks planning on hunting and target shooting with their friends, I have no reservation to recommend them. If you are shooting in competition or planning to use this rifle in some kind if law enforcement situation or somewhere that requires high reliability, I think you probably need to look at the higher end ARs that are designed to handle tens of thousands of rounds. Look, I’m just being candid – the PSA AR rifles and pistols are solid but they have a different intended audience. There are reasons besides “coolness” where certain buyers must move to suppliers like Daniel Defense, BCM, Knights, LMT, H&K, LWRC, etc.

At any rate, back in April of this year (2021), I asked what their top four complete kits were (meaning everything except the lower receiver) and they had a list! If you like building AR kits like I do, I thought you might find this interesting in terms of what is included:

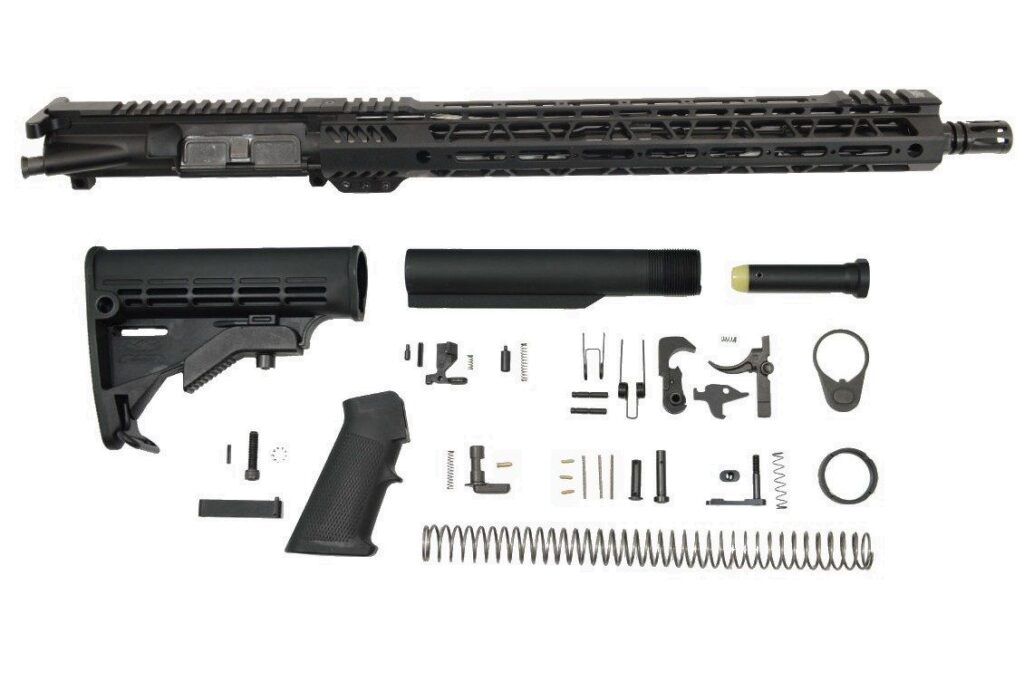
PSA 16″ 5.56 NATO 1:7 MIDLENGTH NITRIDE 13.5″ LIGHTWEIGHT M-LOK MOE EPT RIFLE KIT W/ MBUS SIGHT SET (Model 516446780)

Noteworthy here is the entry level Magpul MOE buttstock and grip plus Magpul MBUS flip up sights. They are also including a PSA EPT fire control group – this means that the trigger and hammer have nickel boron finish causing them to move easier because friction is reduced.

It has one of the PSA 13.5″ long handguards set for M-Lok attachments. Everything else is typically found in any of their AR kits with a collapsible stock. They make and restock these kits all the time.

The price as of this writing is $669.

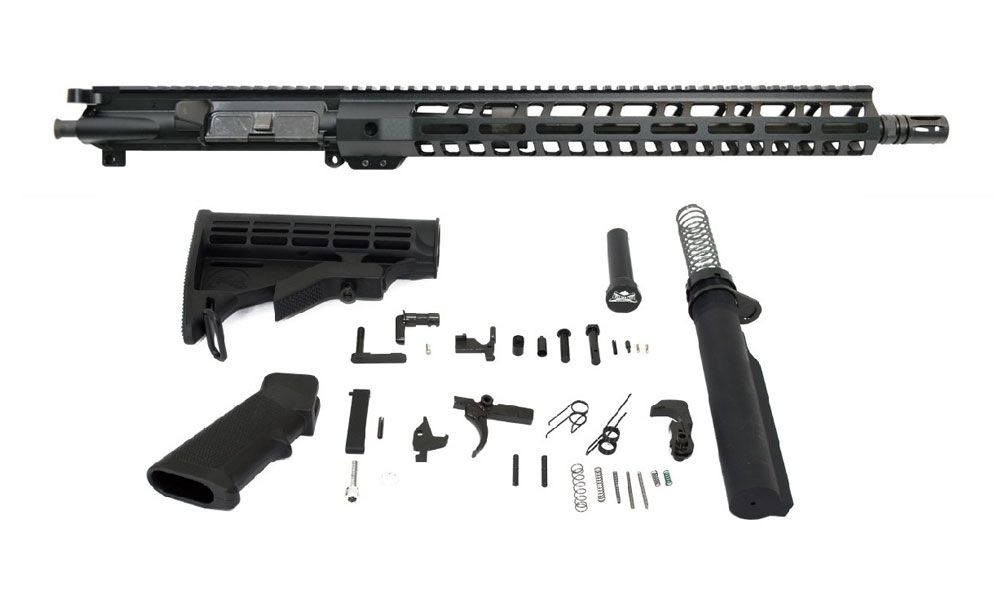
PSA 16″ M4 CARBINE-LENGTH 5.56 NATO 1:7 NITRIDE 15″ LIGHTWEIGHT M-LOK FREEDOM RIFLE KIT (Model 51655106915)

PSA Model 51655106915

Despite a cool looking 15″ handguard, this is a basic AR and you can replace the grip and buttstock later if you want. It’s selling so well that PSA is out of stock right now but you can be notified when it is back in stock. They tend to make and restock these kits all the time.

The price isn’t listed right now since they are out of stock but I would expect it to be slightly less than the first kit – unless they are charging a premium for that handguard.

PSA 16″ M4 CARBINE-LENGTH 5.56 NATO 1:7 NITRIDE 15″ LIGHTWEIGHT M-LOK FREEDOM RIFLE KIT (Model 5165450384)

Definitely a basic 15″ railed rifle kit. Everything looks entry level but you can always customize it down the road if you want.

Again, no price as they are out of stock. I’d expect it to be cheaper than the two kits above. You can sign up to be notified when they do get it in stock if you want. They tend to make and restock these kits all the time.

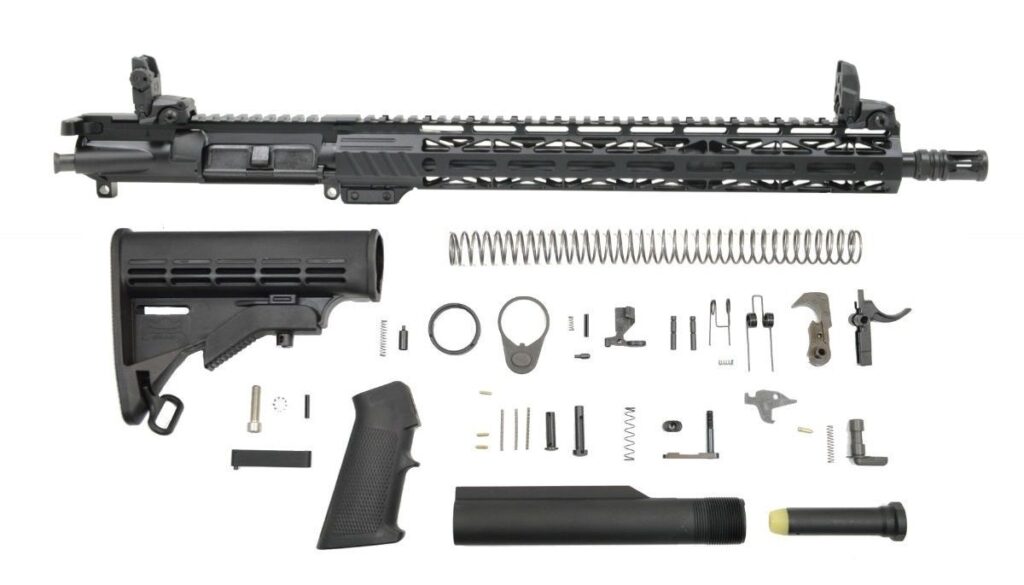
PSA 16″ MID-LENGTH 5.56 NATO 1:7 NITRIDE 15″ LIGHTWEIGHT M-LOK CLASSIC RIFLE KIT WITH MBUS SIGHT SET (Model 5165491598)

This one has the Magpul BUS sights, an interesting looking handguard … and that’s about it. Everything else is what you tend to see in any of their basic AR rifle kits with collapsing stocks.

The price as of today s $649.99

What rifle is in the top photo?

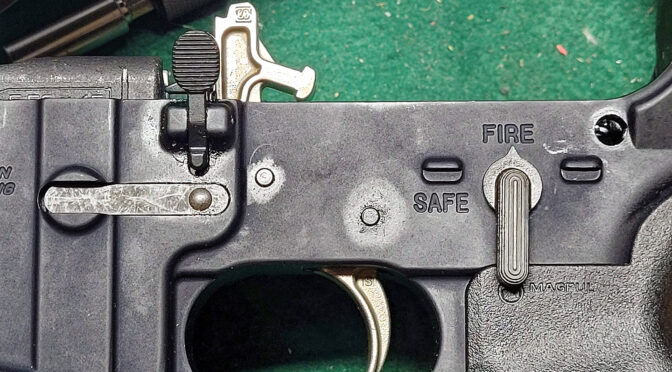
It started out as a PSA 16″ kit. It had an Anderson lower, WMD bolt, and a Magpul ACS-L stock – I like those because they lock in place and don’t rattle. It had a BMC Mod 3 charging handle, Vortex 1-6x scope on a Vortex 2″ offset mount, YHM extended push pins and a PSA ambidextrous selector lever. The fire control group is one of the PSA EPT sets – I do like them for basic triggers. I like Geissele SSA-E triggers the most though. I honestly don’t recall who made the offset sights.

Conclusion

If you’re looking to build a decent entry-level rifle from a kit with all of the parts you need other than the lower receiver, the above should work great for you. At a minimum, they will all give you a foundation to start with.


Note, I have to buy all of my parts – nothing here was paid for by sponsors, etc. I do make a small amount if you click on an ad and buy something but that is it. You’re getting my real opinion on stuff.
If you find this post useful, please share the link on Facebook, with your friends, etc. Your support is much appreciated and if you have any feedback, please email me at in**@*********ps.com. Please note that for links to other websites, we are only paid if there is an affiliate program such as Avantlink, Impact, Amazon and eBay and only if you purchase something.


ATF Letter June 2019: How to Measure The Overall Length Of A Pistol With A Brace

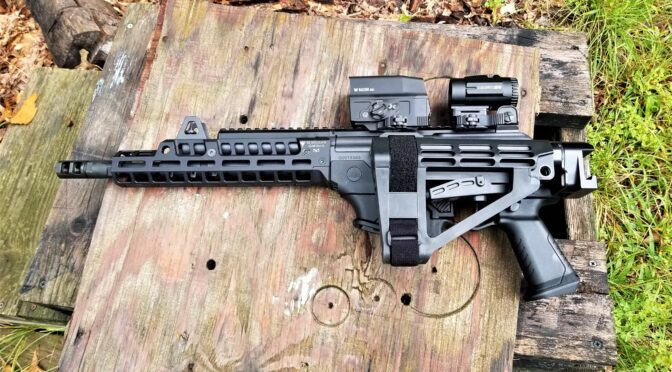
In June 2019, someone as the the Bureau of Alcohol, Tobacco, Firearms and Explosives (ATF), Firearms Technology Industry Services Branch (FTISB), what was the correct way to measure a pistol equipped with a stabilizing brace that has a folding adapter (like my Galil Ace in the photo above).

They said that the overall length is measured with the brace in the folded position. So you can confirm this for yourself plus see their reasoning, click here to read the scanned PDF copy that has the names redacted for privacy’s sake.

Please note that I am not an attorney and this is not legal advice. I’m just passing along the ATF letter for people to read and interpret themselves.

I hope this helps you out.


If you find this post useful, please share the link on Facebook, with your friends, etc. Your support is much appreciated and if you have any feedback, please email me at in**@*********ps.com. Please note that for links to other websites, we are only paid if there is an affiliate program such as Avantlink, Impact, Amazon and eBay and only if you purchase something.


Looking for a hell Of a .308 AR Platform Sniper Rifle? Brownells Has The HK MR762A1 LR Package For $1,000 Off List

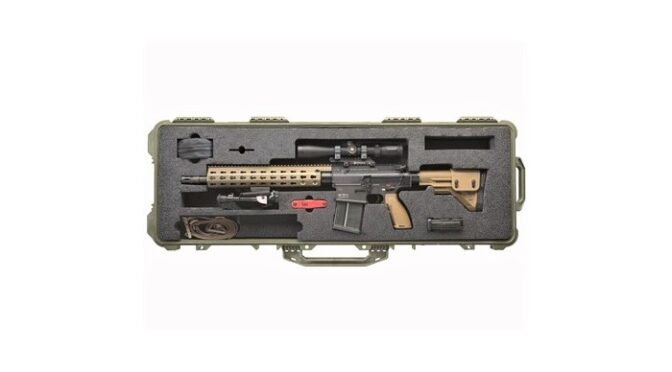
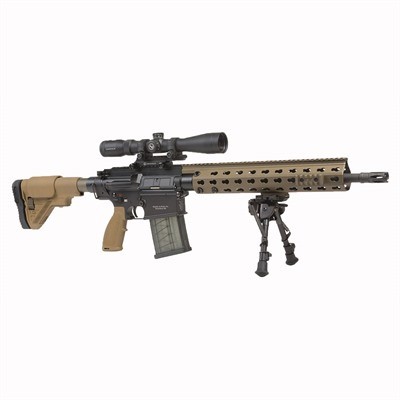
Folks, the HK MR762A1 LR is a heck of a rifle. I’ve been tracking them for a while and am always wishing I could afford one for myself. They are consistent sub-MOA rifles and reliable as well. Check out this great MAC review:

What is in the LRP package?

  • Leupold 3-9VX-R Patrol 3-9x40mm Scope and Mount
  • HG G28 Adjustable Cheekpiece Buttstock
  • LaRue Tactical BRM-S Bipod
  • ERGO Pistol Grip
  • Blue Force Gear Sling
  • OTIS cleaning kit
  • One 20 round and one 10 round magazine
  • 1720 Pelican 42″ case

Brownells Has A Deal That Can Save You $1,000

Brownells has the MR762LRPA1 Packages in stock.

Brownells has a good deal going for the MR762LRPA1 package. These LRP packages are not cheap by any means. List is $7,499.99 and Brownells is selling them for $6,499 and they have them in stock. Click here to go there now. Again, they have them in stock as well!

These MR762A1 LR rifles are really something and I sure hope to own one some day.


If you find this post useful, please share the link on Facebook, with your friends, etc. Your support is much appreciated and if you have any feedback, please email me at in**@*********ps.com. Please note that for links to other websites, we are only paid if there is an affiliate program such as Avantlink, Impact, Amazon and eBay and only if you purchase something.


Primary Arms Has WMD NiB-X AR 5.56 Bolt Carrier Groups On Sale

Folks, Primary Arms has WMD Nickel Boron bolt carrier groups (BCGs) on sale and in stock! These are my favorite AR-15 BCGs and I always recommend them. Note, they make a .308 BCG but I haven’t tried one yet.

Their Nickel Boron coating is excellent the lubricity is superb – even without any oil they move very freely. They also hold up great as well.

The following specs are from WMD’s website:

  • Bolt â€“ Carpenter 158 heat-treated, shot peened and magnetic particle inspected.  Manufactured to government drawings.  Milspec gas rings. NiB-X coated (40% more wear-resistant than chrome).
  • Extractor â€“ Manufactured, heat treated, and hardened per government drawings.  Black extractor buffer and heavy-duty spring. NiB-X coated.
  • Firing Pin â€“ Manufactured, heat-treated, hardened, chromed and certified per government drawings.
  • Carrier â€“ AR-15 or M16 style (heavy weight), 8620 material, heat treated and case hardened.  Manufacturing tolerances on inside diameters tightly controlled.  NiB-X coated for durability and ease of cleaning.
  • Gas Key â€“ Hardened to USGI Specifications and attached using knurled grade 8 hardened fasteners. NiB-X coated.  Staked per military specifications. The knurled screw heads further enhance the effectiveness of the staking.
  • Cam pin â€“ Manufactured, heat treated, hardened and certified per Government drawings.  NiB-X Coated.
  • Hammer – Manufactured, heat treated, hardened and certified per government drawings.  NiB-X Coated.  Can be semi-auto or full-auto.

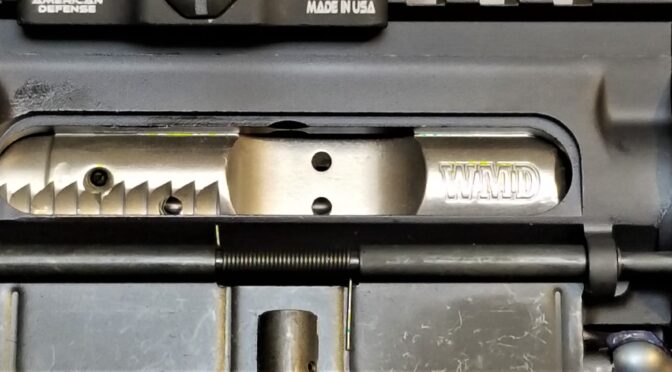
The photo above is of the WMD BCG in my 10.5″ AR pistol. Here are a few more photos for you as well.

The WMD BCG is at the top and a regular PSA BCG is at the bottom.

So if you are shopping for a BCG – definitely check these out – click here to open the Primary Arms page! I hope this helps you out – these really are my favorite BCGs for the AR-15.


If you find this post useful, please share the link on Facebook, with your friends, etc. Your support is much appreciated and if you have any feedback, please email me at in**@*********ps.com. Please note that for links to other websites, we are only paid if there is an affiliate program such as Avantlink, Impact, Amazon and eBay and only if you purchase something.