Valvoline Max Life ATF Works Great in 2002 Toyota Camry XLE

We are a Toyota family and most of our cars were bought either used or very used from private parties.  At any rate, a few years ago I bought a 2002 Toyota Camry XLE with a 4-Cylinder engine.  The other day my older daughter said it was making a funny noise in reverse so I checked the dipstick.  Wow.  Not only was it low but the ATF looked awful.  For comparison, the below photo with the brownish ATF on the white paper towel is on the left and brand new ATF is on the right.  Wow!!  (Yeah, I wrote wow twice because I was stunned.

M92 PAP muzzle cap removal with detent pin installation

So I told my daughter to ride with her sister in our old 92 Corolla and that I needed to work on their car.  First thing I did was to look at the fluid a couple of times – it was brownish but not black, no metal flakes and no bad smell.

In reading the manual, Toyota wrote that the transmission fluid should be good for the life of the car … right.  I guess it depends on how you view that, or at least how they view it.  I’m sure I checked the fluid when we got the car and it wasn’t this color but I’m not in a habit of checking it regularly unless I see drips or a puddle under a car or truck.

This car had almost 195,000 miles on it and we put about 50,000 of those miles on it.  I figured a change was past due.  So, before I did anything, I decided to do some reading first.

Picking Valvoline Max Life ATF

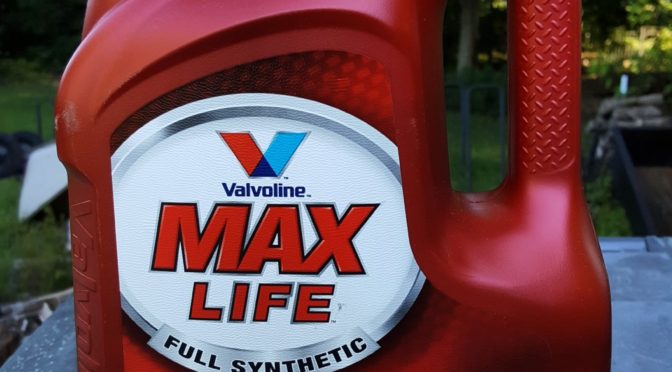
I knew there were a ton of different automatic transmission fluids (ATF) out there and that getting the right one was key.  The transmission was designed to use Toyota ATF T-IV and there are different brands that claim to meet the spec.  The problem is that the wrong one can cause headaches.  One particular formulation kept coming up as I read about what others used – Valvoline Max Life ATF:

M92 PAP muzzle cap removal with detent pin installation

M92 PAP muzzle cap removal with detent pin installation

Note in the next photo you can see that Valvoline says this can replace Toyota T-IV as well – it’s not just guys on the Internet.  By the way, if you feel uncomfortable with what I am saying, definitely do your own research and you’ll see tons of favorable posts about using this fluid.

M92 PAP muzzle cap removal with detent pin installation

Okay, so I bought two gallons of the above.  The automatic transmission in the car uses about 4.1 quarts.  I used a 10mm allen bit in my Onyx 3/8″ impact wrench and drained everything I could from the pan.  I then put the plug back in and added two quarts of fresh Max Life and let it run for about 30 seconds and shifted through the gears (I was up on 6 ton jack stands with rubber wheel chocks and the parking brake on).

I then removed the plug again and drained the fluid.  I then removed the return line, started the car for maybe 30 seconds if that – I turned it off when nothing else was coming out.  I then buttoned it all back up.

In  theory the transmission was empty.  I’ve had issues in the past where I assumed that was the case but it was not so I didn’t want to assume anything.  I added two quarts and moved it to a perfectly flat spot on my driveway.  I could just barely see a hint of ATF on the tip.  I added a bit more to get it short of the cold empty mark.

I don’t trust the cold measure on the dipstick.   With an automatic transmission it must be up to its operating temperature to get a good reading in the hot zone (the bottom mark is for cold is a ballpark – get it hot and then test as you absolutely do not want to overfill an automatic transmission).  As it gets hot the fluid expands hence my wanting to know at temperature where I was at.

How to Check the Automatic Transmission Fluid Level

Dremel tool removing M92 PAP muzzle cap detent pin

Now, to check the ATF level, Toyota does not tell you in the operator’s manual and I frown on that.  With the car flat, let it idle (or drive it 10 miles if you have fluid in it – I had an unknown level so I didn’t want to get on the road) and let the engine and transmission come up to operating temperature (158-176F).  Then, with your foot on the brake, shift the gear selector from park through all the gears, stopping at each one and then back up.  With the car idling and the transmission in park, check the dipstick.

To make sure the engine and tranny were hot enough, I used my BAFX plug in OBD II probe that connects to the Torque app on my Android phone via Bluetooth.

I kept adding smaller and smaller amounts of ATF and moved the selector lever per the above before I would test the level again.  I got it close to full in the hot range and then stopped.  As mentioned, I did not want to go past full.  By the way, when you are reading a dipstick with during filling, you must wipe it off each time to get a good reading and you may find that you get a better view of the fluid level on one side or the other of the dipstick.

In case you are wondering, I did not do the transmission filter.  It would have taken a ton of time and I figured I would start with the fluid and see what happened.

The end result – it shifts beautifully.  I could not be happier — even my wife thinks it shifts smoother and feels better.   To wrap this up, I wrote this post in case one of you has questions about what transmission fluid is a good substitute for Toyota Type T-IV, and also how to properly check the automatic transmission fluid level.

6/1/2019 Update – Still no problems.  Our 1992 Corolla sprung a leak in the transmission fluid cooling line so I had to both install some fuel like to patch the corroded line plus I had to refill the transmission fluid.  That was about 2-300 miles ago and that is working fine too.  Bottom line,  I do think this fluid performs just fine in place of Toyota Type T-IV fluid.

9/10/2018 Update – The Camry XLE has been on a number of 200-400 mile highway road trips at highway speeds and shows no signs of shifting problems.  The family agrees the car shifts smoother.  I have now replaced the ATF in our 2004 Solara SLE and 1994 Corolla with Max Life ATF also and all are running well.  The Solara has close to a 1,000 miles on it now.  I’m very pleased with Max Life and will continue using it in my Toyotas.  By the way, I now use an EWK Fluid Evacuator for getting the ATF exactly where I want it.  Here’s the post about that tool.

2/23/2020 Update – No problems at all with any of the vehicles we’ve used Max Life ATF in.  This includes a 2008 Toyota Highlander.


Please share the link on Facebook, Forums, with colleagues, etc. Your support is much appreciated and if you have any feedback, please email us in**@*********ps.com. If you’d like to request a report or order a reprint, please click here for the corresponding page to open in new tab.


Very Compact Astro 1828 ONYX 3/8″ Nano Impact Wrench Is Great For Tight Quarters

This past winter I had the fun of changing the starter motor twice in 15 degree weather in my Landcruiser.  It was a bear getting to the starter bolts with my full size Ingersoll Rand 1/2 Thunder Gun.  It’s an awesome impact wrench and I had trashed a few cheap Harbor Freight ones before taking the advice of my friends and buying it.  To make a long story short, with a long extension and a universal joint, I was able to get the two bolts out.

While working on the truck, it struck me that I really needed a compact impact wrench to get into tight spaces.  I did some digging and found the Astro 1828 Onyx for 3/8″ impact sockets.  I figured I wanted small and probably would not need 1/2″ most of the time.

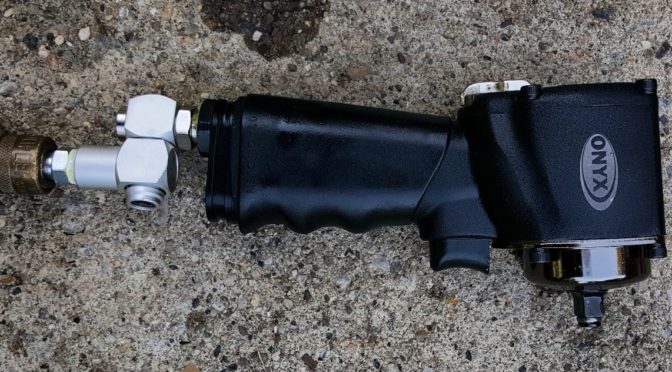
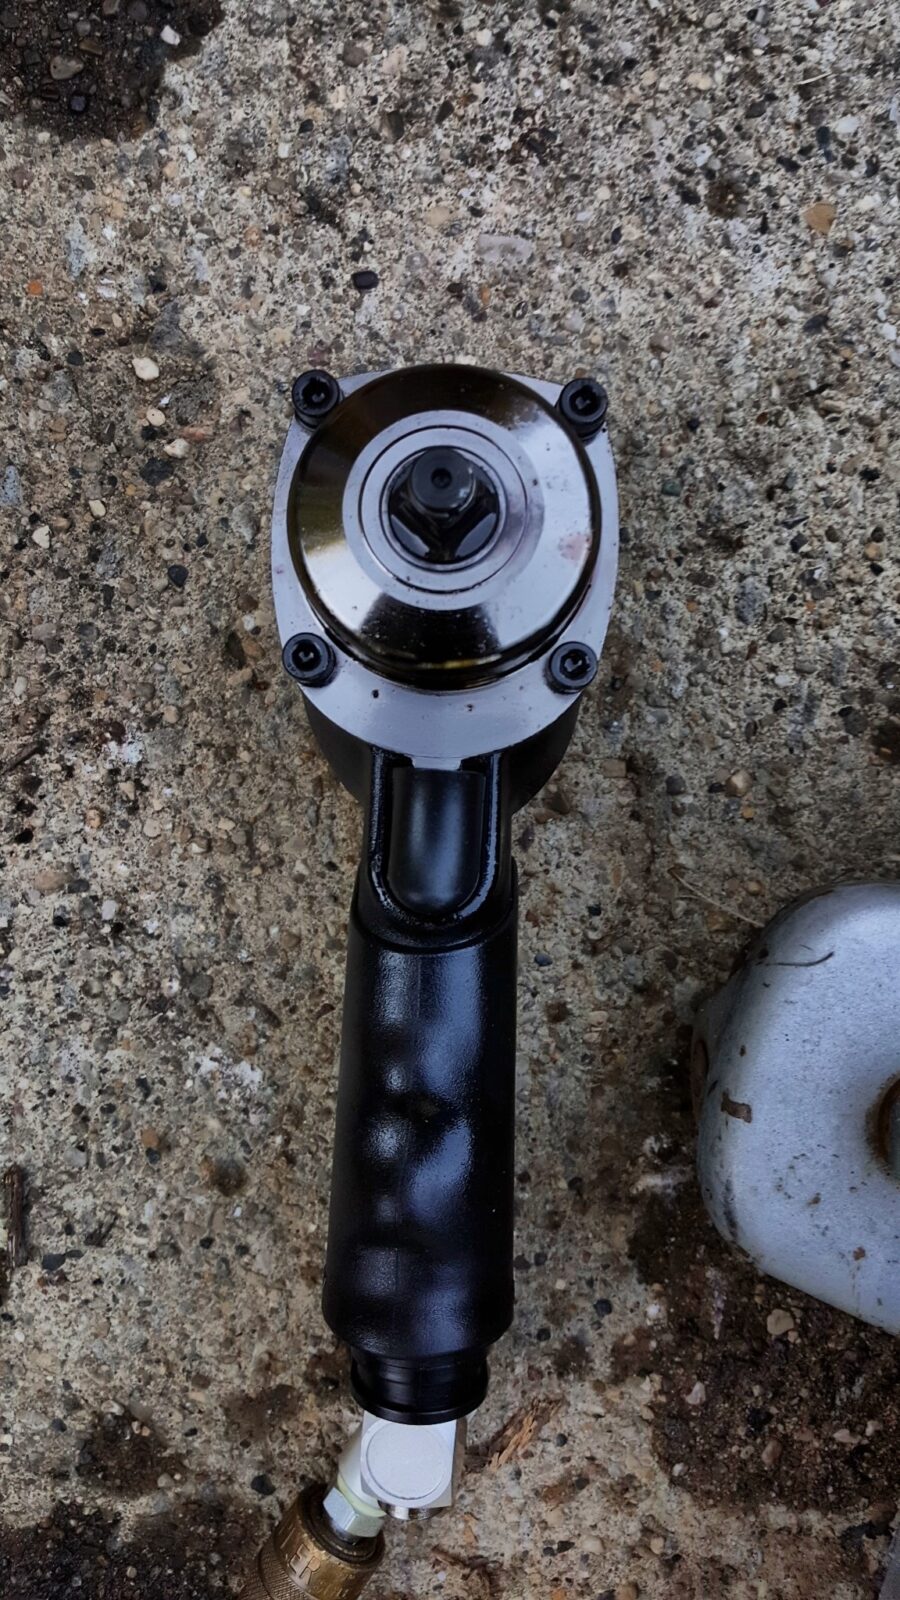
Astro 1828 ONYX 3/8" nano impact wrench for tight spaces. Astro 1828 ONYX 3/8" nano impact wrench on concrete Astro 1828 ONYX 3/8" nano impact wrench, ideal for tight spaces.

These next photos show how much more compact the Onyx is compared to the big Thunder Gun:

Astro ONYX 3/8" nano impact wrench next to a yellow Ingersoll Rand impact wrench Two pneumatic impact wrenches, including the compact Astro ONYX 3/8", on concrete.

The little Onyx gets great reviews – currently 4.6 out of 5 stars on Amazon with 148 reviews.  I bought it and a Hot Max 28083 Swivel adapter at the same time.   It arrived in a nice little cardboard box from Amazon and I promptly put good Teflon tape on the swivel’s fittings, installed it and then a Milton M-style plug.

So far, both are holding up great in my home garage use (I’m not a pro mechanic – more like a shade tree one with ADD and sleep deprivation).

Astro 1828 ONYX 3/8" Nano impact wrench fitting with a quick disconnect coupler.

What I find interesting is that it is a torquy little beast.  They claim 450 ft/lbs.  I have not bothered checking using a calibrated torque wrench but I can tell you it’s done a great job so far.  For big stuff / tight stuff, I still go to the Thundergun with its 625 ft/lbs of torque.  The Onyx is more of a special purpose tool for me.  By the way, if you notice it is shiny above, I had just used it to remove the drain plug off a 2002 Camry’s transmission.  They are about 18mm and use a 10mm Allen bit to come off.  My 10mm Allen bit is for a 3/8″ drive so I just stuck it on the Onyx and it whipped it right off.  Reinstalling, I set torque at 1 out of 3 and then checked it with a 3/8″ drive ratchet wrench after — it was in there solid.

In short, I am happy with the little Nano and Hot Max swivel combination.  I definitely still use my Thunder Gun for wheel lugs and big fasteners but the Nano is now my go to for tight spaces.

October 2018 Update:  I had a problem with the hog ring clip at the end of the nose.  It bent and would no longer hold sockets properly.  It took a while for the maker to get me the clips but they did take care of me and gave me a few spare.  Click here for the whole story.


Please share the link on Facebook, Forums, with colleagues, etc. Your support is much appreciated and if you have any feedback, please email us in**@*********ps.com. If you’d like to request a report or order a reprint, please click here for the corresponding page to open in new tab.


Check Out Jeff’s Cool M72B1 Built by Two Rivers Arms With Our Handguard Set

Check out Jeff’s cool Yugoslavian M72B1.  It was built by Two Rivers Arms and he used our custom Yugo M72B1 handguard set.  Our handguards are made from a special temperature resistant glass reinforced urethane, don’t require the ferrule, and enable a sure grip.

M72B1 rifle handguard set from Two Rivers Arms on a bipod

If you are interested, click here to learn more about our custom all polymer Handguards.


Please share the link on Facebook, Forums, with colleagues, etc. Your support is much appreciated and if you have any feedback, please email us in**@*********ps.com. If you’d like to request a report or order a reprint, please click here for the corresponding page to open in new tab.


The Hatsan Gladius Long Precharged Pneumatic (PCP) Air Rifle and Hill Mk.4 Air Pump One Year Later

I’ve had this Hatsan Gladius Long PCP rifle in .22 caliber and Hill Mk.4 air pump for just over a year now and am very pleased with it for pest control. I have a few observations to share but first if you wish to read any of the original posts, here are the links:

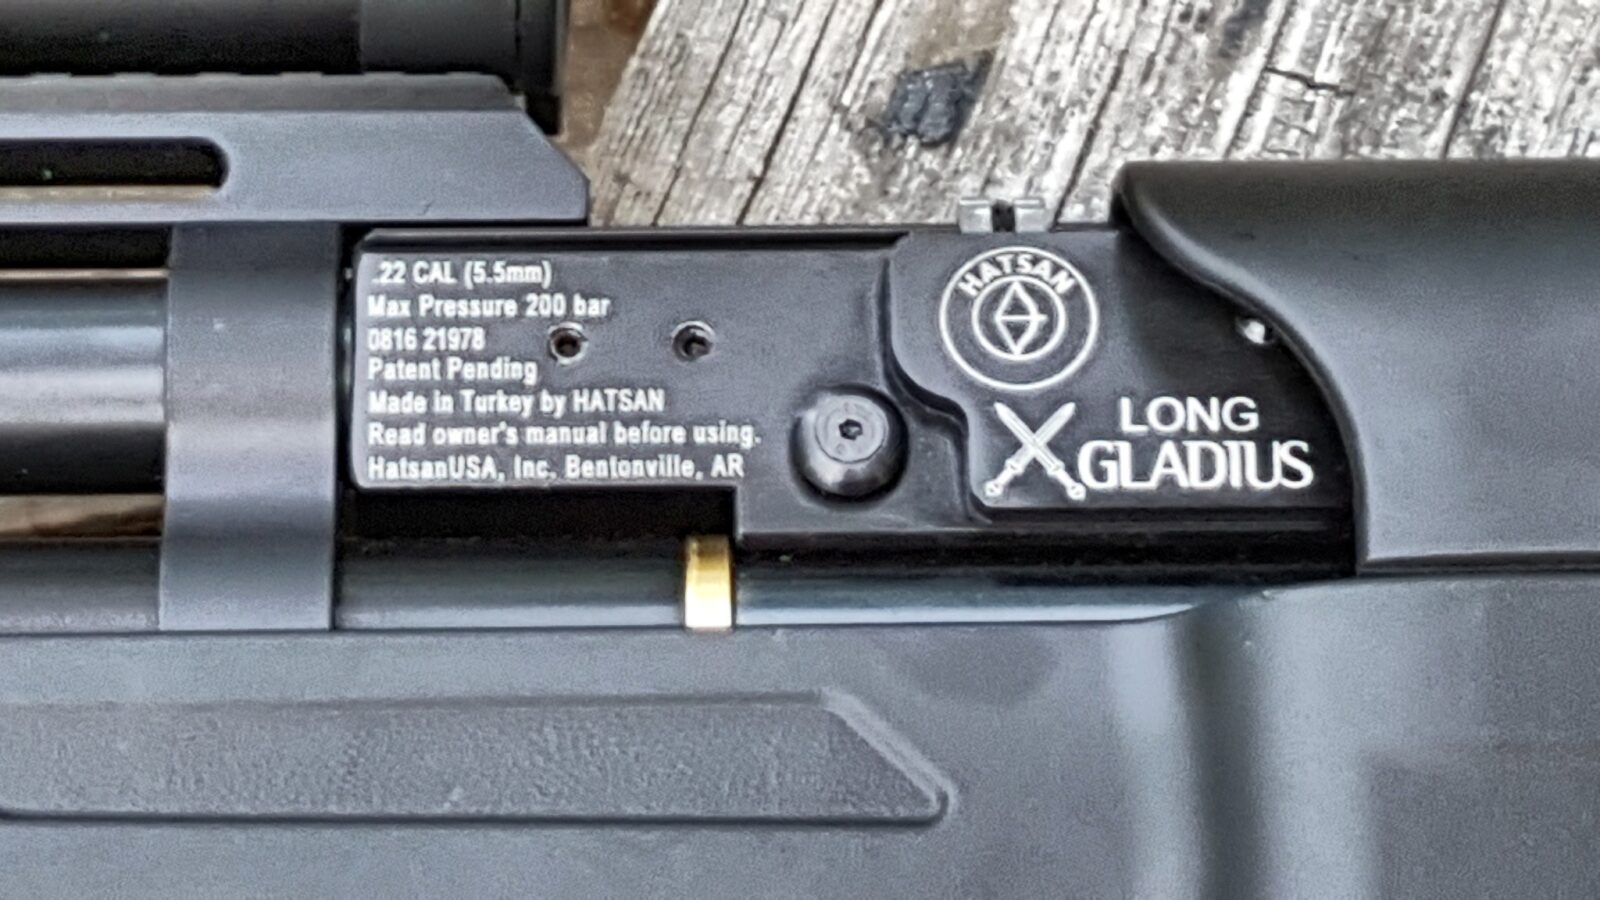
Hatsan Gladius Long PCP air rifle markings: 22 CAL (5.5mm), Max Pressure 200 bar.

At any rate, I’ve probably put about 750-1,000 pellets through this at least. It really likes the JSB Exact Jumbo Heavy Diabolo 18.13 grain pellets. I can shoot overlapping clusters of holes at 30-50 feet over and over. I have some other weight pellets but haven’t had time to test them. I’m hoping a lighter weight will shoot flatter, expand faster and reduce over-penetration.

From a pressure perspective, the sweet spot seems to be if I keep the cylinder between 170-195 bar, just short of 200. At 200 the first round is a flier. I am not running a regulator on this cylinder. My second cylinder with the regulator is leaking out the end due to some problem from manufacturing that I need to track down some day. It’s not on my top 2,000 list of things to do.

If I had it to do over again, I would not have bothered buying the spare cylinder. I am using this air rifle for pests – mainly squirrels, rabbits and ground squirrels. I can get 16-20 lethal accurate shots and then I refill using my Hill air pump. I never use the second cylinder not to mention the oddball leak out the very end (it’s not an o-ring).

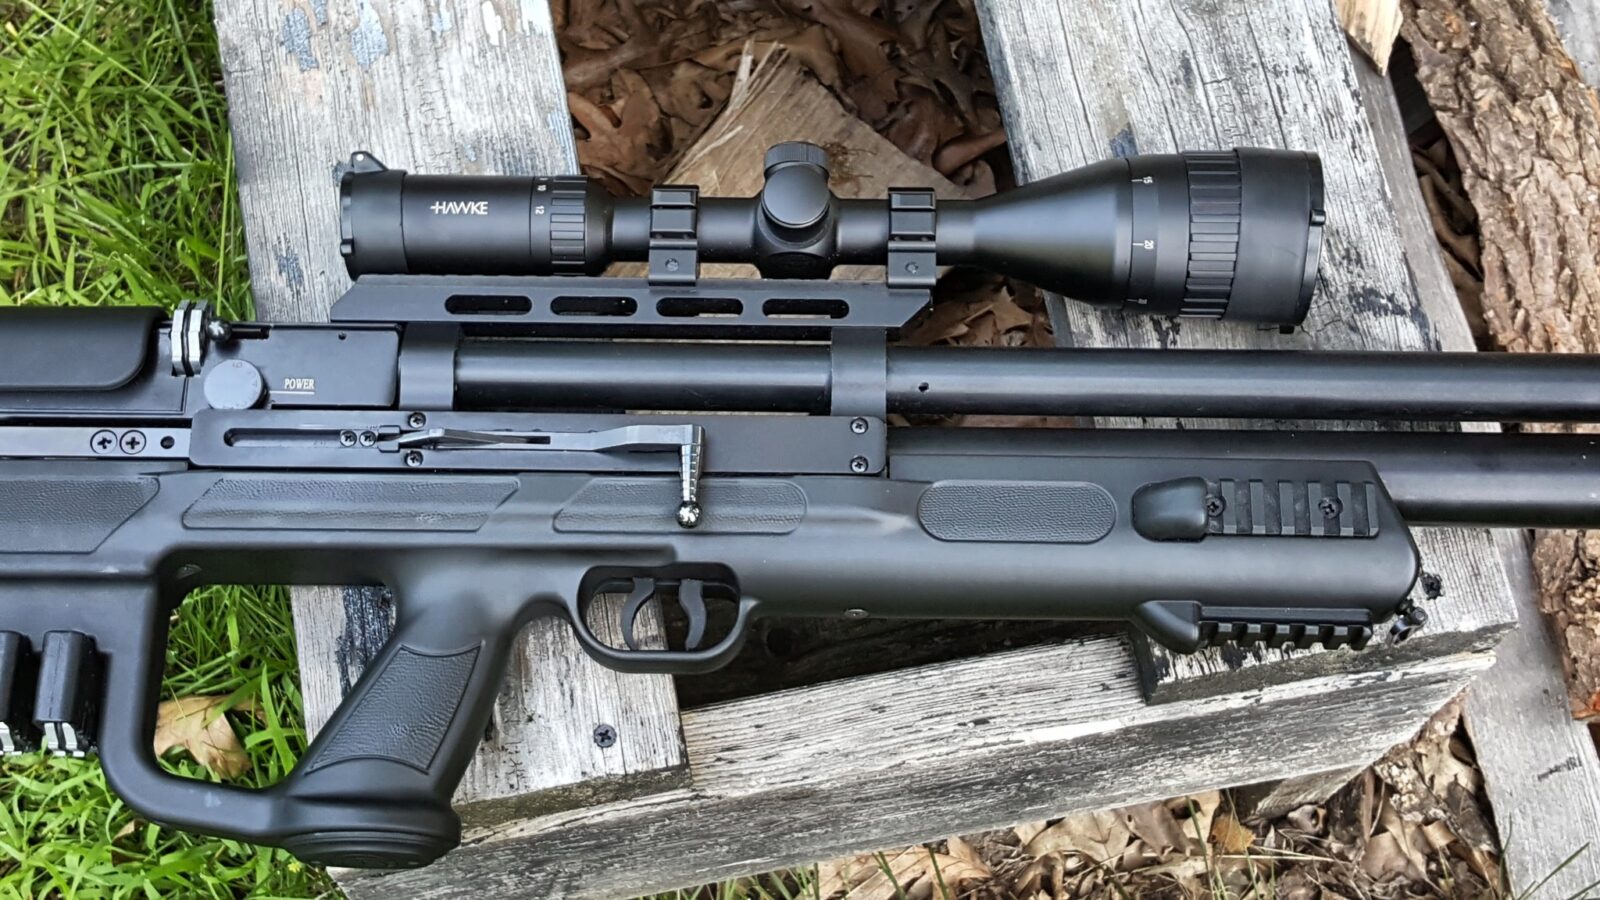
The scope and ring combination has held up great. The scope has held zero. I thought I would use the cheek riser and butt pad adjustments more but haven’t needed them much. I think the cheek piece is up just a hair.

Hatsan Gladius PCP air rifle with Hawke scope

You know, the magazine design is excellent. Some air rifles (Marauder) have real crappy plastic mags and these are metal and easy to fill.

Hatsan Gladius PCP air rifle power adjustment dial and pump mechanism

The Hatsan is relatively quiet. I shoot with power setting #4 most of the time and it will drop squirrels and rabbits no problem. There is definitely a muzzle report and I have to worry about over penetration. It blows right through squirrels. On #3, it is remarkably quiet but I have to be very careful with shot placement on a squirrel within 50 feet and I will not use #3 on a rabbit. So most of the time I am on #4 and am very, very careful of what is behind the target. My preference is a tree or something else solid.

Hatsan Gladius PCP air rifle barrel with QE marking and Hill Mk.4 pump

I really like the trigger and the safety. The trigger does the job – I haven’t checked the weight but I am able to stay on target with even ground squirrels. The safety lever in the trigger area takes a bit of getting used to but once you do, it is very easy to engage, disengage or check status.

Follow up shots are really nice to have. Up until the Gladius, I only had single shot air rifles. Now I have up to 10 rounds and a side cocking lever that you can quickly actuate while keeping the scope and your eye on the target.

The Hill Mk.4 pump has held up very well. Depending on my mix of #3 and #4 power setting shots, I can top off the cylinder in 25-45 pumps after 10-20 rounds. Because I fiddle with the power settings and I don’t always wait to shoot all 10 pellets I can’t tell you an exact count. By the way, it’s hard to tell if you are down to the last pellet so when I get down near the end of pellets, I will top of the magazine and either top of the tank then or after one more magazine of pellets.

Hatsan Gladius PCP air rifle pump setup with Hill Mk.4 air pump.

I do periodically put silicone grease on the shaft of the pump and the Hatsan quick connect air fitting. I did find a little zip lock bag and keep the on the air fitting to keep it clean.

I bought this good sized container of silicone grease that is Mission brand and has worked just fine for me. I use it on the Gladius, car work, etc.

In summary, I still like it and am happy with the purchase. Power and accuracy – it’s a great combo and the Hill air pump lets me easily top it off whenever I want to.

6/29/2020 Update: Still very happy with both the Gladius and the Hill pump. We now have replacement fill-probe O-rings and caps to keep your fill probe clean. Click here to learn more.


Please share the link on Facebook, Forums, with colleagues, etc. Your support is much appreciated and if you have any feedback, please email us in**@*********ps.com. If you’d like to request a report or order a reprint, please click here for the corresponding page to open in new tab.


How to Adjust an Uzi Top Cover and Fix a Bolt Blocking Latch Problem – Uzi Would Not Fire

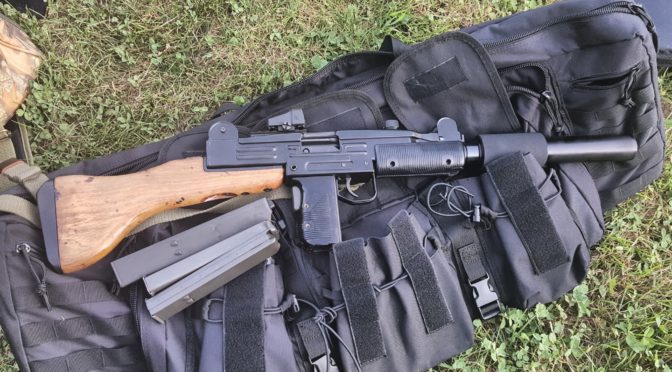
I built an Uzi a few months back and had trouble with it firing. A challenge a person has in the firearms industry is finding time to enjoy shooting! At any rate, I took it out the first time and had really light primer strikes with the firing pin – I’m talking you could barely see there was contact. So with the Uzi refusing to go bang, I had to do some digging.

I got into Uzis because of all the movies and TV shows in the 1980s. I decided to finally make one during the Winter of 2017/2018 and chronicled my efforts. The first time to the range resulted in a lot of good natured ribbing from my brother-in-laws as we could not get it to fire. We could hear the striker hitting real hard but no bang. Luckily I had other guns for us to shoot so I put the Uzi back in the bag and took it home where it then sat for a couple of months.

I did some digging and process of elimination and got it down to a few possibilities that in some cases I had already addressed. The following is my journey and what I did to sort matters out.

Lubrication

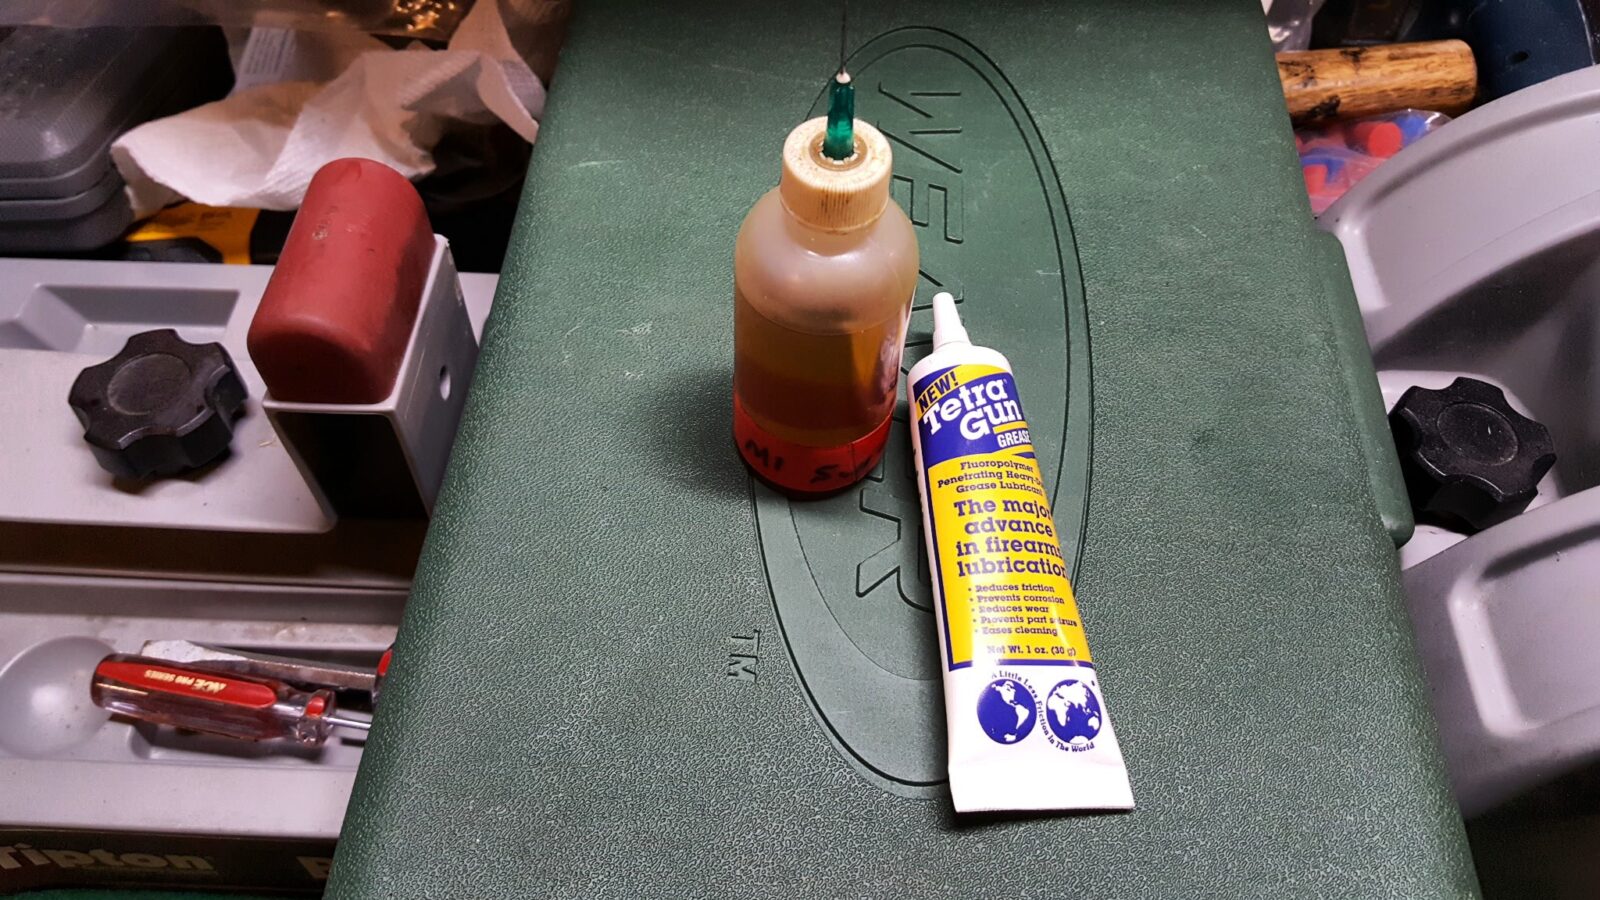
The Uzi closed bolt system is a huge chunk of metal and moving parts. When brand new, these parts still have their porous surface finishes on them, rough spots from machining and what not. You need to make sure everything is lubricated. Remember the old saying of it slides, use grease. If it rotates, use oil. I used Tetra gun grease on all sliding parts. I definitely wanted the big bolt body to slide easily. I also did put a light coat of Mobil 1 Full Synthetic 10W30 on the firing pin but really nothing rotates in there. In the trigger group, I used the oil also on all pivot points.

For me, I heard the need for this when I assembled the carbine for the first time. There was a very dry slow-moving sound and grating feel when I first ran the action during assembly. After lubrication it made a world of difference. I could feel and hear the striker hitting far harder. The important point is to lube your weapon. This definitely helped but it did not solve my problem in this case but I could tell it would definitely impact the operation of an Uzi.

Tetra Gun lubricant and oil bottle for Uzi maintenance

Note: When I wrote this I was using Tetra Grease but I am now using Super Lube and it works fantastic on my Uzi. Click here for the write up.

Top Cover Bent

To be honest, I thought for sure this was going to be my problem after a fellow at McKay suggested I check it. I always thought the cover seated hard and I could not release the latch without a tool. As soon as the fellow suggested it I put one and one together – I bet it warped when the third party welded on the Picatinny rail section.

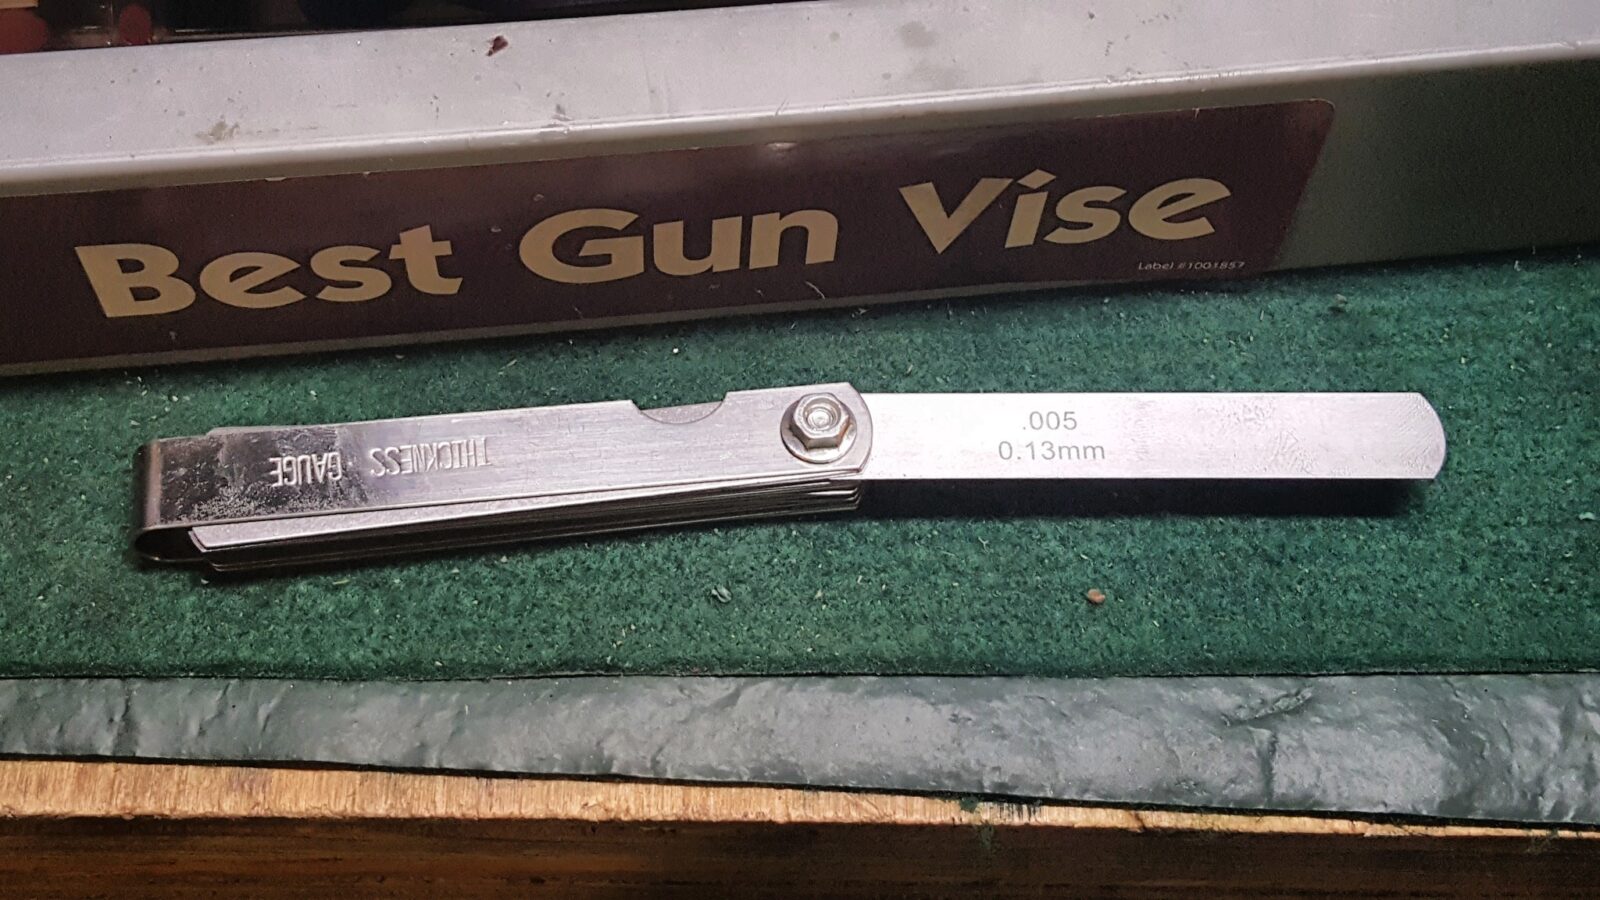
So, I did some digging on the web to figure out what to do. It turns out that you should be able to insert a 0.005″ feeler gauge between the bolt and the cover at the ejection port. Guess what? It wouldn’t go in – the first rib was tight and the far rib was impassable.

Uzi top cover adjustment with feeler gauge during bolt blocking latch repair
Feeler gauge set used for Uzi top cover adjustment and bolt blocking latch repair

Before I go further – one quick comment on feeler gauges. Not all are equal. I have a few in my toolbox but the one I use the most is is this ABN unit shown above. It is accurate enough and it has a ton of gauges.   I point this out because not all of these gauge sets are complete. For example, several of my gauge sets jump as the manufacturer just included the blades needed for their equipment. I’d recommend getting a set with a lot of SAE and metric blades so you have flexibility. For the Uzi dust cover, you need the 0.005 and 0.015 gauges.

Next was to take some plywood stock I had lying around and make a jig. Basically you want two pieces of wood (any wood to avoid marring) that are the same height. The top cover will be suspended between them so you can adjust the cover either up or down.

I then made two little punches. One is made by gluing and brad nailing two pieces of 1/2″ plywood together so I could hit both ribs of the top cover at once. I also made a punch out of a single piece of plywood to adjust just one rib. I then got out one BFH (big frickin’ hammer) to whack with.

Pneumatic nail gun and wood on concrete
Hammer and wooden blocks for Uzi top cover adjustment
Uzi top cover and bolt blocking latch repair jig with hammer

If there’s one thing I have learned – don’t go crazy hitting stuff. I put the jig right on the floor for good support and then the dust cover on it. Note that on the front part, I pushed the wood block back until it was supporting a thicker part and not just the thin neck.

So, I gave it a tap – not a very hard one with the thick piece on both ribs and took it over to test. It sure went on the receiver easier. Wow – it overshot the mark. I could now very easily insert the 0.015″ feeler gauge too. My understanding is that you don’t want it that loose or you risk the bolt jumping the sear and resulting in an uncontrolled mag dump. No joke – I don’t need that in my life ever.

Uzi bolt blocking latch adjustment with a 0.015-0.38mm feeler gauge.
Thickness gauge set with .015 inch / 0.38mm blade for Uzi adjustment

I took the cover off the Uzi and flipped it with top now facing up and I tapped down even lighter. It really is surprising how easy the dust cover bends. I thought given the thickness of the sheet metal and the two ribs it would be much stronger but no.

I then took it back and installed it on the Uzi. It was starting to fit better. I definitely noticed that the ribs were different in terms of their gap so I switched to the smaller 1/2″ plywood punch and focused on one rib at a time. Tap and test, tap and test. If I went too far one way, I would flip the cover and tap it the other way.

After about 15 minutes I had it dialed in. The 0.005″ gauge would slide in and the 0.015 gauge met just a bit of resistance.

Uzi top cover and bolt blocking latch detail for firing repair

In working the action you could both feel and see the improvement. As always, there was a nice firm thud of the striker. Problem solved? No – it wasn’t. Argh. It was a definite improvement in operation but did not solve the problem.

The Uzi Bolt Blocking Latch

The web is a wonderful thing. I continued to surf around and read more about peoples’ experiences with Uzis not firing. Finally I read one that caught my eye – the striker has a particular orientation that must be followed to clear the bolt blocking latch. Wow. I knew I didn’t know about that when I installed it because the light strikes definitely indicated the striker wasn’t reaching the primer and this would explain a lot.

Uzi bolt blocking latch assembly: bolt carrier, pin, and firing pin

Okay, #31 in the above diagram is the bolt blocking latch and #30 is the spring. The bolt blocking latch’s purpose is to reduce (not eliminate) the chance of an out of battery firing. It does this by blocking the striker’s base. In normal operation, it is depressed and the notch in the base clears the latch as it travels forward to touch off the primer. Now there are three key things here and I’ll tell you what I messed up.

  1. The spring must be installed correctly.
  2. The latch must move freely
  3. The striker must be rotated such that the notch is in the right place- you can install it 180 degrees opposite.

So, your’s truly bombed the last one. I did not realize there was an orientation issue. The model B striker’s base is a half circle. The notch must be at the bottom to clear the latch. In this next photo, you can see I have it installed backward:

Extech IR thermometer and Ronin's polymer grips for heat testing.

The following photo shows the installed Uzi bolt blocking latch. See how the bottom part sticks out? That is what will need to clear the notch when it is depressed during normal operation.

Uzi bolt being filed during semi-auto carbine assembly
Uzi bolt assembly detail: close-up of the bolt and firing pin mechanism.

Note, I was working on a full size Uzi with a McKay semi-auto receiver and bolt group. Your bolt group may look a bit different.

When installed correctly, the striker sits in its seat and the seat sits in the striker guide like so:

Uzi bolt blocking latch adjustment tool on bolt

You can see in the above photo how my latch was chewing on the improperly installed striker. As a visual reference for the correct orientation, see how the striker’s base is facing the part of the guide that has a depression in it. When installed, it will look like this:

Yugo M85/M92 dust cover quick takedown pin installation.

You can see an immediate difference because when you depress the latch, the striker can fully travel forward and sticks out of the bolt face ever so slightly. That’s what we want!

Uzi bolt blocking latch and bolt in receiver, detail of firing mechanism.

Verdict – problem solved and fun was had at the range yesterday. The Uzi is still wearing in and smoothing out. We put about 100 rounds of 124 grain S&B FMJ through it.

Uzi owner adjusts top cover while troubleshooting firing issue.
Woman at shooting range adjusting Uzi top cover, bolt blocking latch issue
Woman firing an Uzi rifle at a shooting range, demonstrating a fix for the bolt blocking latch.

The carbine was accurate and a lot of fun. If you didn’t read my other posts, there is a rifle length 16″ barrel hidden under the fake can. The weight of the carbine made it really soft to shoot so the girls and I had a lot of fun.

I am going to find a bit bigger optic for it – probably the Vortex Crossfire like I am running on my POF-5.

Regardless, I hope this helps you out!


Please share the link on Facebook, Forums, with colleagues, etc. Your support is much appreciated and if you have any feedback, please email us in**@*********ps.com. If you’d like to request a report or order a reprint, please click here for the corresponding page to open in new tab.


How to Clean Up Oil On A Cement Driveway

I’m a gear head and am always working on a car or tractor it would seem.  Like many, I have a concrete drive way and it seems like no matter how hard I try, I get engine oil, grease, gas or whatever other crud on the cement.

I’ve seen guys post asking about how to get oil and what not out of a cement drive way and I have a simple answer – I use a degreaser called “Purple Power”.  I know it is a crazy name but it works.  I’ve been using it for probably 10 or more years and buy it by the gallon jug at Autozone.  I can’t recall who recommended to me or just when – but I’ve used it for a long time and vouch for it.

My approach is simple:

  1. If you have standing oil, pour clay cat litter or oil absorbing pellets and let it sit for a few hours to a day and then brush it up and save it to be used again.  We don’t have cats so I usually just keep a big bag of the oil absorbent stuff from Autozone and use it over and over until it gets real oily.  I just keep it in an old pail.
  2. Pour on the Purple Power full strength and let it sit 15-30 minutes.  I would recommend doing it in the morning or evening because you do not want it to dry out.
  3. Use a hose with a pressure nozzle (just something to focus the spray coming out of the hose) and rinse the stuff off.
  4. Let it dry and see how it looks.  If there is still some dark spots in the cement, you may need to do it a couple more times.  For me, it usually does the job in two passes but sometimes I need a third.

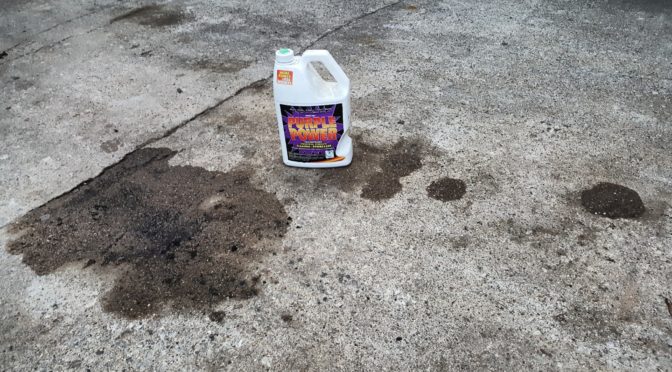
Okay, here’s a photo of my drive way after working on a car and a tractor.  The big “blotch” is a combination of gas and oil.  I changed the fuel pump on my tractor and then cleaned the engine up with brake cleaner and it went on the drive way.  The four smaller blotches to the right of the Purple Power jug are soaked in oil from working on the car.

Yugo M85/M92 dust cover quick takedown pin installation detail

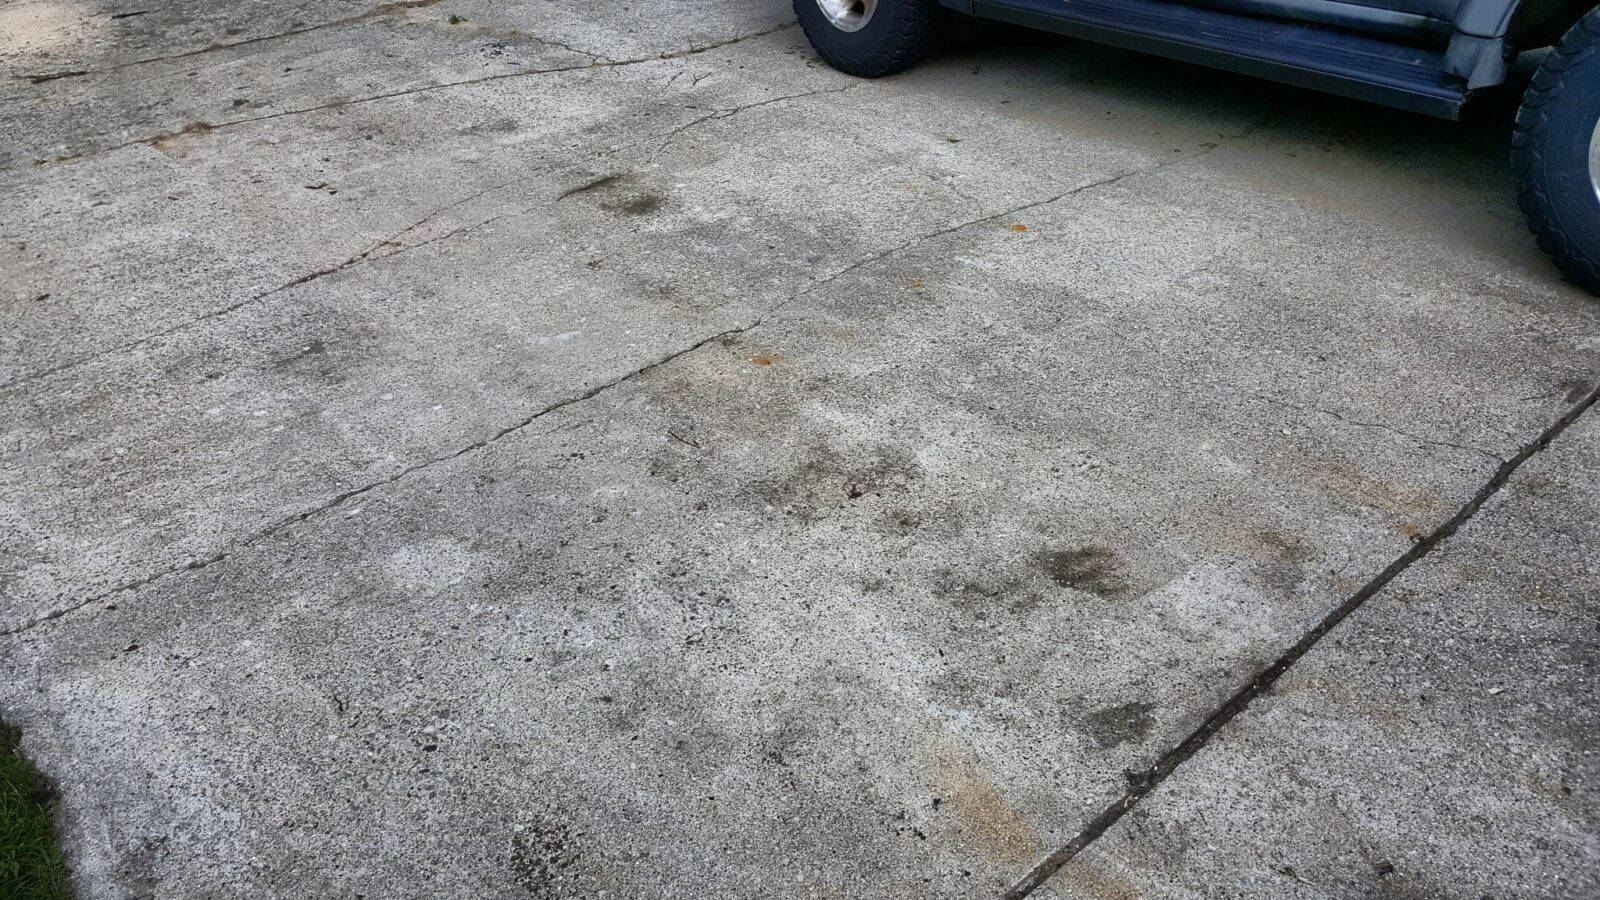
This photo is after three passes with Purple Power and letting it sit 15-30 minutes each time.  If I had done it a fourth time it would be even brighter but I literally ran out of cleaner.  You can see the big blotch is entirely gone.  Really, just a bit is left.  At some point this weekend, I’ll run up to Autozone and get another gallon and finish the job.

Yugo M85/M92 dust cover quick takedown pin installation.

If I didn’t use Purple Power, my driveway would be an absolute mess.  I go through about a gallon per year sometimes two – it just depends on what all I am working on and how often I clean up my driveway.

I hope this helps you out!


Please share the link on Facebook, Forums, with colleagues, etc. Your support is much appreciated and if you have any feedback, please email us in**@*********ps.com. If you’d like to request a report or order a reprint, please click here for the corresponding page to open in new tab.


Finding Parts and Accessories for Norinco Firearms

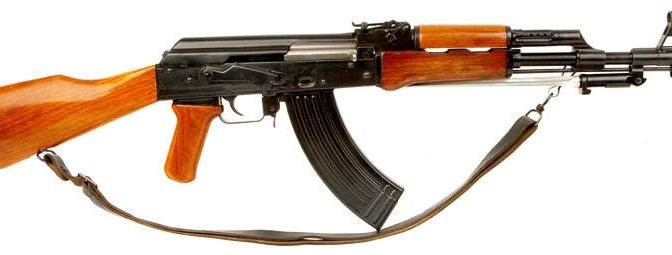
Because I make and sell a variety of AK furniture, I often get asked about where to find parts and accessories for a given type of firearm.   One brand that comes up quite a bit is Norinco.

Yugo M85/M92 dust cover quick takedown pin installation detail

Norinco, or China North Industries Group Corporation Limited (中国北方工业集团有限公司), is a huge defense conglomerate and makes everything from small arms to big weapons systems such as tanks and missle systems (click here if you want to visit their site).  They were established in 1980 and began selling small arms to the US domestic market not long after that.

Unfortunately, they ran into a number of legal problems.  In 1993, importation of most of their firearms and ammunition was blocked other than sporting shotguns and shotgun ammo.  In 1994 US Customrs conducted a sting on the importer and in August 2003, sanctions were imposted that effectively blocked their remaining lines of firearms and ammunition not already banned.  In short, Norinco is very much still in business in China and exporting to clients elsewhere – just not in the US.

This unfortunate series of events leaves US owners of Norinco firearms such as their Type 56 SKS carbine, Type 56 assault rifle (and specifically the civilian MAK-90 and NHM-90 rifles), the NDM-86 Dragunov clone DMR, their various other rifles, pistols and shotguns wondering where to find parts.  As for myself, I wish I could afford an NDM-86!

There are two reputable businesses I have dealt with who carry Chinese firearm parts – one is Numrich and the other is PolyTechParts.  Of course, there is Gunbroker and the many sellers who use it as well.

There is another surprising source – eBay.  Below is a live feed of Norinco parts for you to peruse plus they have much more:


Just to be clear, I am not a Chinese firearms expert.  I get asked questions and have done some searching to try and help clients but that’s it.  I created this blog post to have a quick link to email people when they have questions about where to find parts and I hope this helps you out.


Please share the link on Facebook, Forums, with colleagues, etc. Your support is much appreciated and if you have any feedback, please email us in**@*********ps.com. If you’d like to request a report or order a reprint, please click here for the corresponding page to open in new tab.


Photo of the Type 56 is by Dhalikar – Own work, CC BY-SA 3.0, https://commons.wikimedia.org/w/index.php?curid=25006497

Got a Hogue X5 3.5″ Pocket Knife with a Wharncliffe Blade for Father’s Day!!

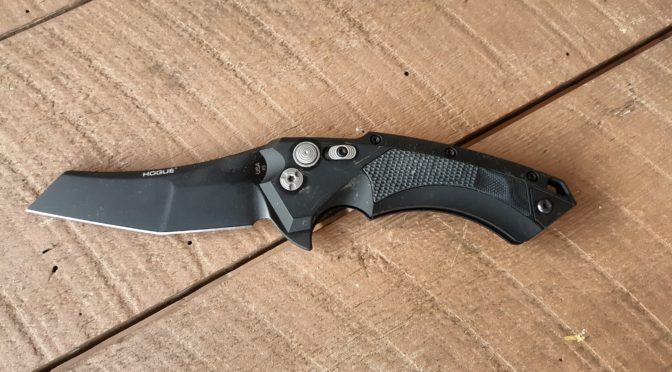
Well, my wife sure surprised me this year — she bought me a Hogue X5 pocket knife (SKU 34569) at Smoky Mountain Knife Works when we stopped at the store on Father’s Day. I carried it every day until we returned home on Wednesday.  For some reason I did not get more photos of the knife new out of the box.  The photos I am showing are all after 2-3 days of being in my pocket with keys walking all over the place.

I must say that I am disappointed that the finish on the frame scratched in a few places but this knife was always intended to be a working blade and not a shelf queen.  Standing up to keys is the least of my worries really.  It is interesting to note that the top of the blade that was exposed to the keys also shows zero wear relative to the frame.   We’ll see how the finish holds up over time.

I’ve been a fan of Hogue knives for a while – especially after a good friend bought one of their fixed blade models.  I had a chance to look it over carefully when it was brand new about three years ago and it was very well made.  He took it to Alaska and California used it a ton camping and climbing.  As for me, I’ve wanted a Hogue but the right opportunity never seemed to pop up until now.

So this is a almost new out of the box review 🙂  Let me start by saying that the X5 family of blades are very well made.  I was trying to decide on whether to get another Zero Tolerance (ZT), a Benchmade or the Hogue and finally settled on the Hogue that you see.

Yugo M85/M92 dust cover pin installation: close-up of takedown pin.

The 3.5″ blade is 0.15″ thick and is made from CPM154.  This is the CPM manufactured version of Crucible’s 154CM that folks into knives like – it’s relatively easy to sharpen, tough and corrosion resistant.  In short, the business end of the knife is made of excellent steel that is 57-59 on the Rockwell scale hard.  The blade was cryogenically treated and then finished in a black Cerakote.  By the way cryo treatments are fascinating.  Click here to read a great write up about them.

Yugo M85/M92 dust cover pin installation: close-up of takedown pin.

Yugo M85/M92 dust cover pin installation: close-up of takedown pin.

The profile is a stunning looking wharncliffe style.  Wharncliffe profiles have always caught my eye and there is a bit of history to them.  The Viking Seax blades are the first knives I have seen with this profile that is the reverse of most knives.  In terms of the name we often use today, the first Lord of Wharncliffe came up with the design in the 1800s and had Joseph Rodgers & Son him some pocket knives.

The blade is a spring-assisted flipper and it opens very smoothly.  You can see the round blade release button and a sliding lock behind it.   When the lock is engaged, the button can’t be pushed and blade is securely locked open.  I like spring-assisted blades by the way as I am always in some weird position trying to open boxes, working on machines, etc. where I can only get one hand free.

The frame of the handle is aluminum with a black G-mascus  G10 insert.  When closed, the knife is 4.75″ overall yet weighs only 4.66 oz.  I really liked the combination of size and light weight. Plus, the frame is remarkably thin so it fits in your pocket nicely and doesn’t feel like a boat anchor.

Yugo M85/M92 dust cover pin installation: close-up of takedown pin.

Yugo M85/M92 dust cover pin installation: close-up of takedown pin.

Yugo M85/M92 dust cover pin installation: close-up of takedown pin.

Now this knife is pretty new to me right now.  I haven’t cut anything yet but definitely will be as I have quite a list of stuff to get done and I’ll be cutting open boxes, plastic tubs, etc.  I’ll post updates plus I want to compare it to my ZT 350, my favorite EDC blade but I want more mileage on the X5 before I do that.

6/28/2018 Update:  Used it to cut 4″ diameter corrugated drain tube and a bunch of boxes.  It is very sharp – I didn’t touch the blade up.  Still going strong.  Like all flippers, when I got dirt in the action it wouldn’t flip until I blew it out.  Last comment – it has a real nice feel when I am using it – not awkward at all.  I wear XL sized gloves just for reference.

10/6/2018 Update:  This blade rocks.  It has really held an edge and the finish on the blade has held up remarkably well.  Only the handle shows evidence of scuffing so far.

If you are interested in how I lubricate my flipper knives, please click here.


Please share the link on Facebook, Forums, with colleagues, etc. Your support is much appreciated and if you have any feedback, please email us in**@*********ps.com. If you’d like to request a report or order a reprint, please click here for the corresponding page to open in new tab.


When Strength and Quality Matter Most