When I have time, I like to watch videos of foreign militaries. Some dedicated folks create motivational videos that have catchy music and often some very interesting clips set to the music. One of these gifted groups is Military Forces XXI Century that has a channel on Youtube.
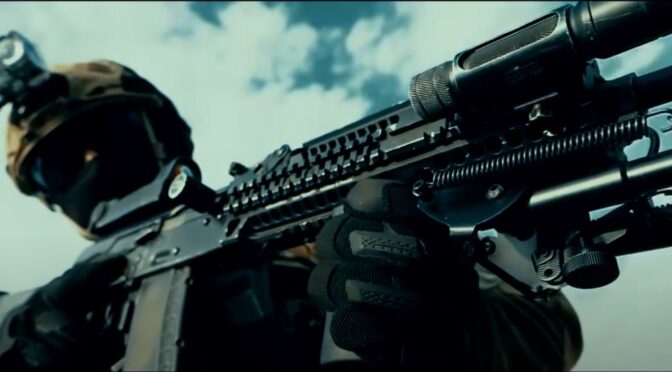
They have a new one featuring some very interesting clips of Russian Spetsnaz teams training entitled “Russian Spetsnaz – Into Battle”. What especially caught my eye was the extensive use of optics – both red dots by themselves and with magnifiers – on their PKP Pecheng machine guns. The PKP is the modernized PKM.
PKP with both a red dot and a magnifier.That’s either a large red dot or some form of prismatic scope — it’s big enough.
Here’s The Video
Be sure not to miss when they are throwing their famous shovels 🙂
I hope you enjoyed the video as much as I did.
If you find this post useful, please share the link on Facebook, with your friends, etc. Your support is much appreciated and if you have any feedback, please email me at in**@*********ps.com. Please note that for links to other websites, I may be paid via an affiliate program such as Avantlink, Impact, Amazon and eBay.
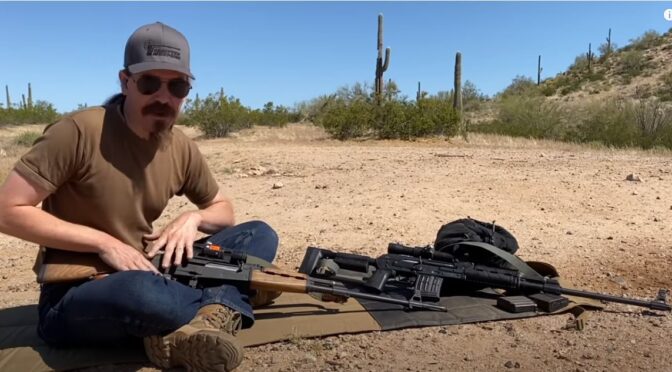
In previous videos, Ian McCollum of Forgotten Weapons has reviewed the Zastava M76 and M91 (here’s the range video for the M91) independently. In this video, he takes them both to the range.
Ian likes the handling and feel of the kit-built M76 but the reliability of the Zastava-built M91 wins him over.
I wish I could afford a M91 but they are just to pricey for me – hovering around the $3,150 mark. So, I’ll just have to watch Ian’s video and wish I had one.
Please note that all images were extracted from the video and are the property of their respective owner.
If you find this post useful, please share the link on Facebook, with your friends, etc. Your support is much appreciated and if you have any feedback, please email me at in**@*********ps.com.
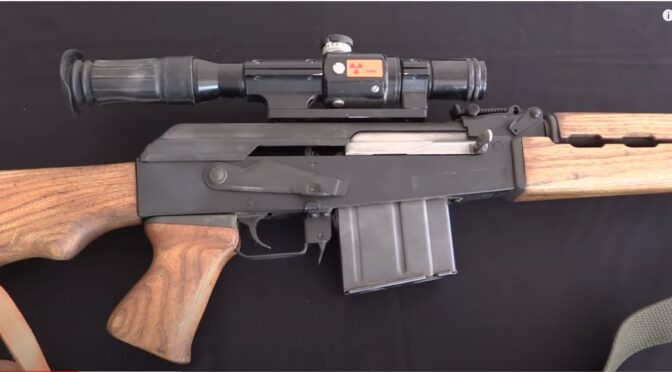
Ian McCollum, of Forgotten Weapons fame, just did a review of a Yugo M76 designated marksman’s rife (DMR). I like the M76 and own one built for me by Two Rivers Arms so I was listening intently.
Ian’s M76 was built by Century Arms from a kit and he’s happy with it.
Two things I picked up that I didn’t know was that the odd looking muzzle brake’s ribs at the pack are actually threads for a suppressor, Huh… that’s interesting.
Those are interrupted threads at the back of the flash hider for mounting a suppressor.
Second off, I’d heard about the ATF mixup wherein they approved 2,000 M76s to be imported with the full-auto sears installed because the rifle used it as a safety and was never full-auto so it stands to reason it was never a machinegun. Well, the ATF decided later on that these rifles were indeed machineguns because they included the evil full-auto sear and mandated that all rifles had to be collected. What I didn’t realize was that they chopped up the receivers and created all the parts kits that we see today. Ahhhhh,,,, now I know.
Please note that all images were extracted from the video and are the property of their respective owner.
If you find this post useful, please share the link on Facebook, with your friends, etc. Your support is much appreciated and if you have any feedback, please email me at in**@*********ps.com. Please note that for links to other websites, I may be paid via an affiliate program such as Avantlink, Impact, Amazon and eBay.
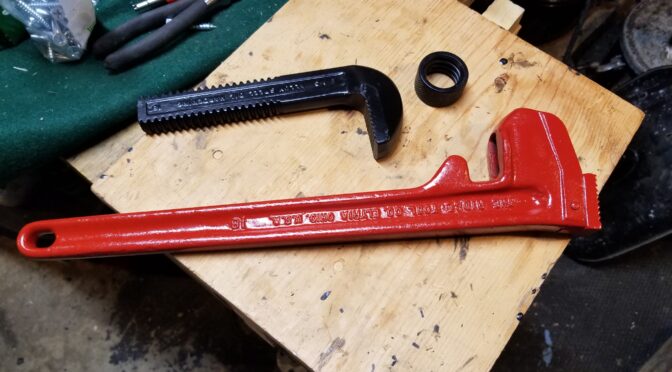
In the last post I told you about removing the rust from the old Ridgid pipe wrench using a solution of apple cider and Prep-N-Ethc. Now we’ll go over painting it. I considered three options – using a durable bake on weapons paint, a spray on epoxy paint or a basic spray paint. I went with the latter simply to save money. It just so happened that I had cans of Fusion All-In-One Gloss Red Pepper and Satin Black Krylon in stock. All-in-one meaning it contained both the primer and the paint.
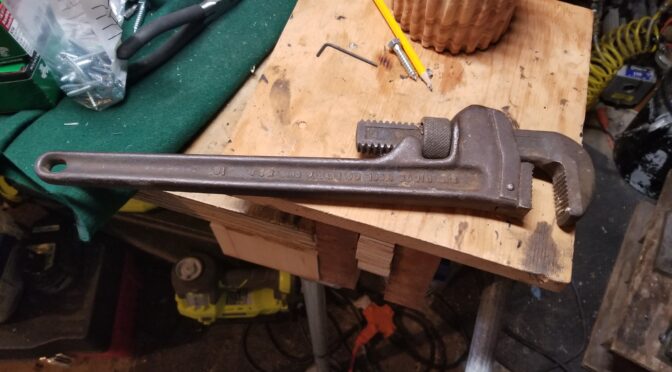
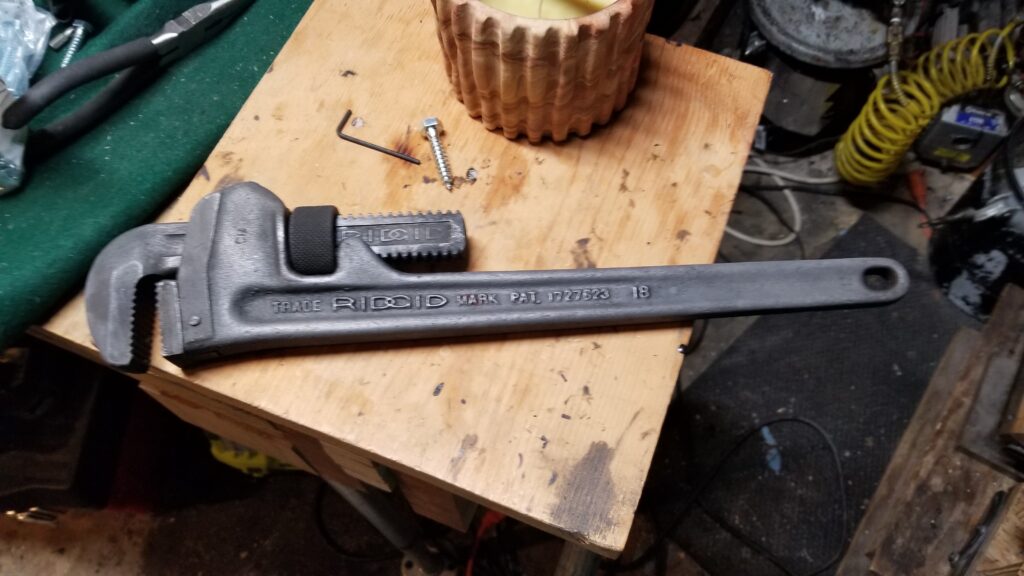
As a reminder from the last post, this is what the wrench looked like after I cleaned it up and ran it through the hot apple cider bath.
What is Krylon?
Krylon is an acrylic laquer and not an enamel. In case you are wondering about the unique name, it comes from the founder’s first two letters of his last name – Krester – and that he was so impressed by Dupont’s discovery of nylon that he dropped the “n” and called his paint Krylon. This was a marketing move because he’d developed the basic formula in 1947 and nylon was introduced shortly after.
I like Krylon because it dries fast. I hate waiting for Rustoleum to dry and that pushes me in the direction of Krylon. With that said, Rustoleum’s enamel paint tends to be more durable. If I had it in stock, I would have used Rustoleum and baked it on.
Applying The Krylon
I took the wrench, disassembled it again and sprayed everything down again with brake cleaner to make sure there wasn’t any oil. A side benefit of acid rust removal is that it does acid etching of the surface as well creating little pockets/surface imperfection all over that give an excellent surface for finishes to adhere to.
I like to paint in the sun and use it to heat up the parts. I typically use old boxes to hold the parts to catch the overspray.This is the handle after the first or second coat.
When spray painting, you need to be patient. You build up to the final color you want by spraying successive coats of paint. Follow the directions for drying time per coat and the maximum time to wait to apply the next coat.
Because I acid etched the surface, I didn’t apply a primer plus Krylon’s Fusion series claims to have some primer in it. I noticed on the can they still recommended primer for a bare metal but I skipped that. I typically waited 15-20 minutes between light coats based on the instructions on the can. Light coats reduces the risk of runs and making a mess.
Be sure to let the paint have plenty of time to set before you turn it over. Either wait until just before the maximum time before next coats or you will need to wait until the first side fully cures. I would rather try and do it together to get the best adhesion that I can. If it fully cures then you either get a less than ideal bond or you have to scuff it. Some folks will hang their parts to avoid some of this.
So, I put the parts in my curing oven for a couple of hours at 175F to help stuff dry fully and let it sit overnight before reassembly. With enamel, a lot of folks say that baking helps. I don’t think it makes a big difference with Krylon but I do know that it pays to let parts have the full time to cure based on the instructions on the can. If they say 24 hours, give it 24 hours. I’ve ruined a ton of paint jobs being in a rush.
Here are the three main parts. In some original ads it looks like they did not paint the jaws. I painted the jaws for expediency and to retard rust. I figure it will wear off with use where it needs to.
So here is the refinished wrench:
From the top – 1. Another old one of my grandpa’s. The rivet holding the thumbscrew and top jaw is really loose. 2. The wrench I just refinished. 3. A Craftsman that was my dad’s. 4. Guess who bought the cheap Harbor Freight wrench when we first got a house 20+ years ago – me 🙂
Conclusion
Well, it was interesting to learn about Ridgid and to bring some color back to the old wrench. I’ve already used this to tighten a pipe since I tool the photo. The paint did come right off the jaw as I knew it would but I’ll definitely be using it more in the future and remembering my dad and grandpa who passed it down.
If you find this post useful, please share the link on Facebook, with your friends, etc. Your support is much appreciated and if you have any feedback, please email me at in**@*********ps.com. Please note that for links to other websites, I may be paid via an affiliate program such as Avantlink, Impact, Amazon and eBay.
Like so many of my stories, this one begins as so “One day I was in my shop and ran across and old rusty tool that was still functional”. Let’s start with a bit of backstory.
My grandfather immigrated from Quebec along with his brother to the Boston area to improve their lot in life. They’d grown up on a farm near Compton, Quebec, and somewhere along the line had picked up the skills necessary to service heavy machinery. He’d tell my dad stories of working on various machines who then relayed some of them to me.
My grandfather had a family, including by dad of course, somewhere near Rockport and eventually bought a farm in Derry, NH, sometime in the late 1930s or early 1940s where he raised dairy cattle, grew hay and what not. Along the way he amassed quite a few tools that then passed on to my dad.
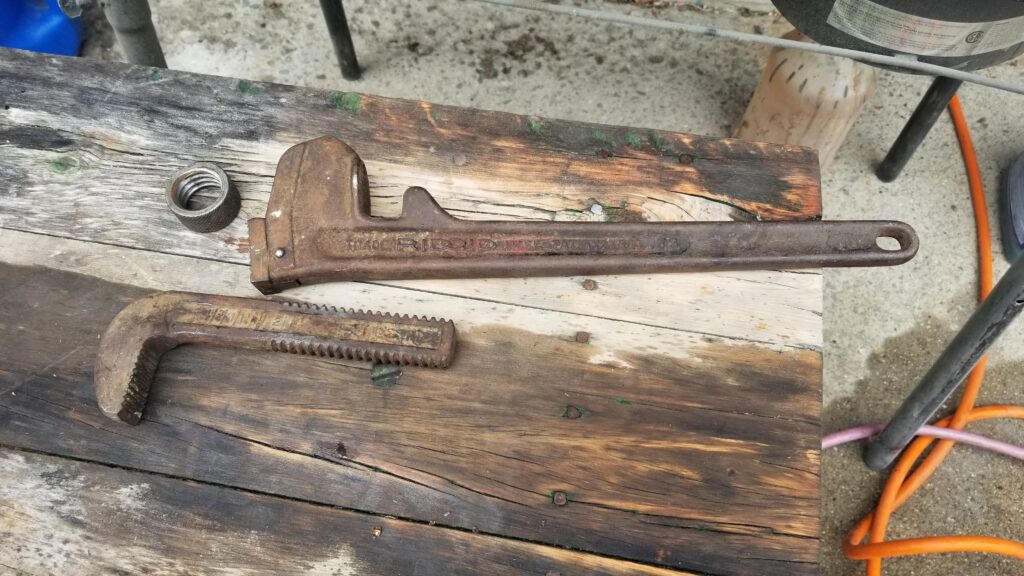
One of these tools was a rusty 18″ pipe wrench that I recall my dad using on a number of occasions and when my dad passed away, I got the tools, including this old wrench.
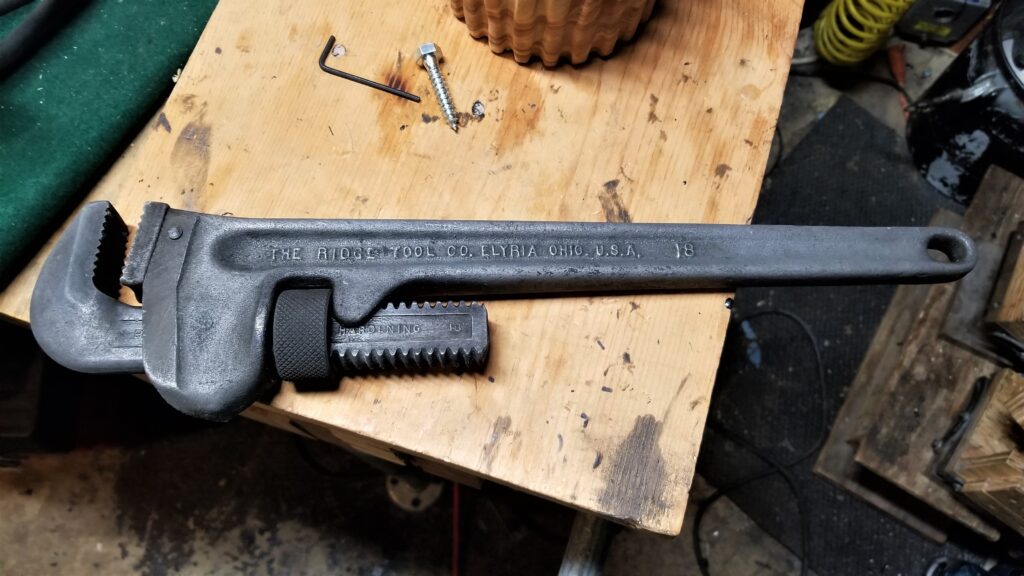
So, I’m in my shop moving stuff and uncover this big 18″ pipe wrench that I then took a lot closer look at. Interestingly enough, it was made by Ridgid.
Ridgid and the 18″ Pipe Wrench
For years I thought Ridgid was a made-up Home Depot house brand. Actually, it was founded in 1923 in North Ridgeville, Ohio, and moved to Elyria, Ohio, in 1943. What got them started was the invention of the modern pipe wrench. In 1966 it was bought by Emerson Electric and today it sells a lot of different tools including hand tools they make, power tools by Techtronic Industries of Hong Kong and Wet Dry vacs made by Emerson.
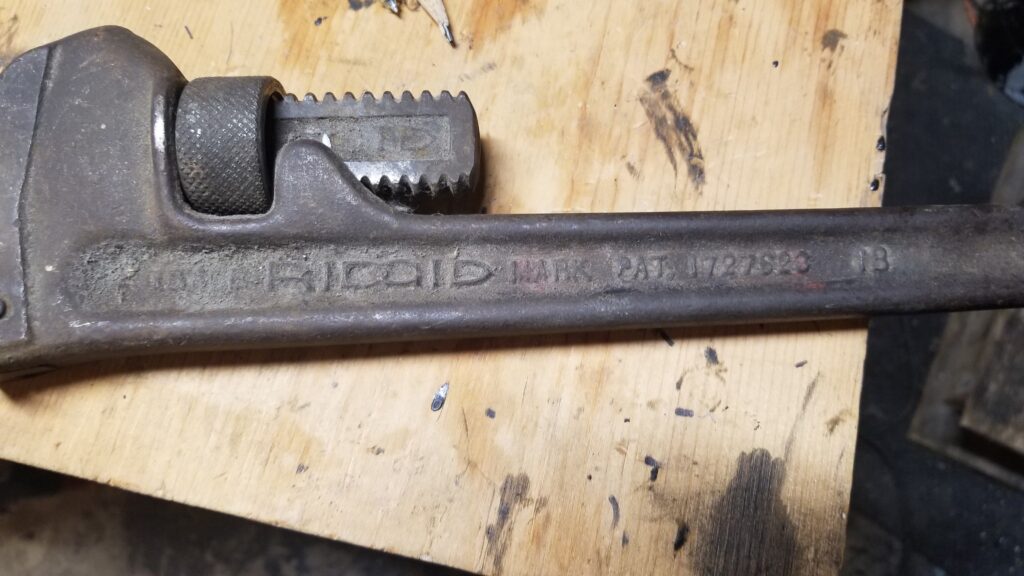
This 18″ pipe wrench was rusty but solid. The jaws were still sharp and nothing was cracked or bent.You’ll notice it does identify the Ridge Tool Company as being in Elyria so that tells us it was made after the move in 1943.The original patent was 1549164 from August 11, 1925, and was then updated to patent 1552091 dated September 1, 1925. Now the patent tells us a bit more. 1727623 was filed on September 10, 1929. The next pipe wrench patent was 2051755 filed on August 18, 1936. [A big thank you VintageMachinery.0rg having this info online.]
Now if you read the caption of the photo above, the 1727623 patent was in 1929 and 2051755 filed in 1936. That patent was actually split into two and an additional patent 2076830 was filed in 1937. I’m going to go out on a limb and bet that wrench was made somewhere between 1929 and 1937. The compression spring in the wrench is a leaf design and not conical so that does put it prior to 1937 patent.
In reading, guys report the markings as not being very reliable and company records incomplete so the above is really a best guess but it does basically align with when my grandfather would have been buying tools.
So I had a decision to make – leave it alone and let it rust or clean it and apply paint. Well, it’s not like these wrenches are rare collector pieces and this was a tool I would use going forward – seriously, other than being rusty it was good as new.
Removing the Rust
I considered three options – abrasive, electrolytic or acid. The rust was actually pretty light and I opted to go with acid – notably a combination of apple cider and phosphoric acid.
The first step was to spray down the wrench with brake cleaner liberally to get rid of oils. Next, I put a wire brush in my hand drill and removed all of the loose rust and dirt from the wrench body, nut and jaw.
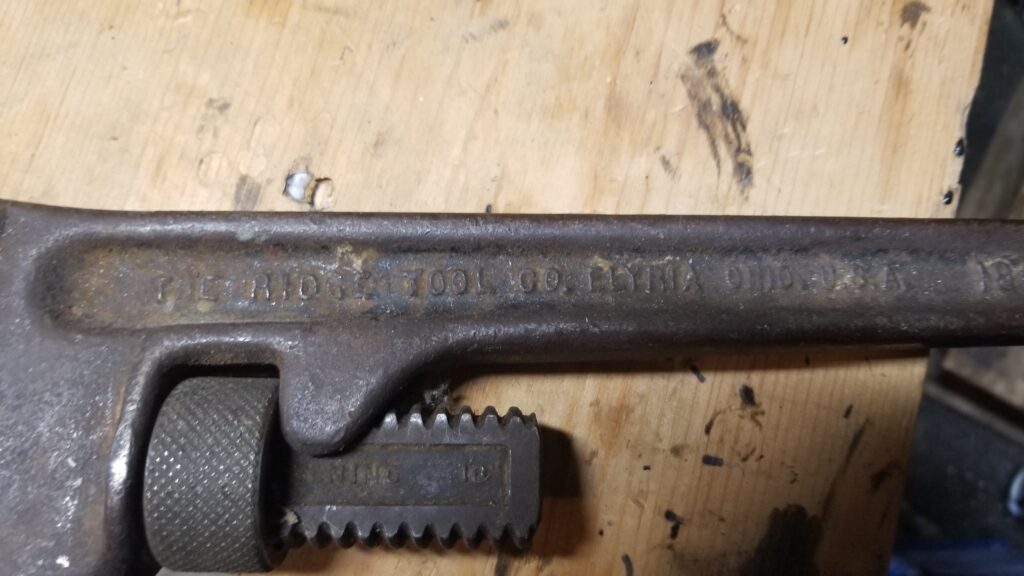
I used brake cleaner to remove the initial oil as well as just before I inserted the wrench into the acid bath.Getting in a bit closer, note the sole remnant of red paint to the right of the RIDGID logo on the handle of the wrench.
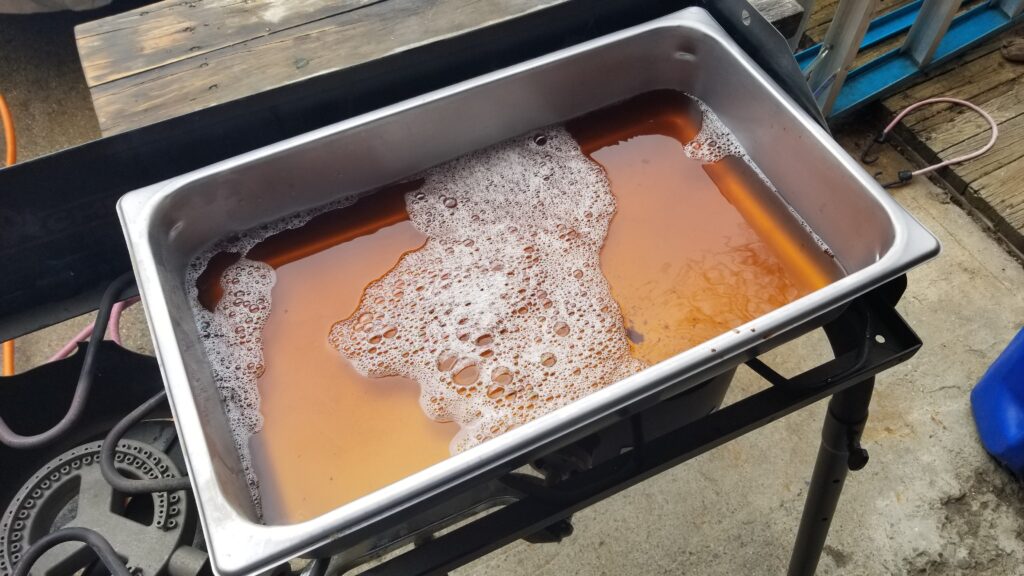
The acid bath was a gallon of grocery store bought apple cider vinegar plus about a quart of Prep-N-Etch phosphoric acid. Apple cider alone would do the job but I was re-using apple cider and I wanted to make sure there was enough acid to do the job.
Now a trick to really get things done is to heat up the apple cider bath and get it warm – you don’t need to boil it. I don’t bother with a thermometer for this – just hot to the touch. The reason why is that heating up a solution speeds up the chemical reaction. If it’s cooler then it just takes longer and if it is boiling off then you are losing liquid needlessly.
This is a full size stainless buffet / chafing pan that I use for acid etching and parkerizing – I clean it after each use of course. Underneath it is my big two-burner Camp Chef Explorer stove that is awesome for heating up tanks with acid or park solution. There are all kinds of different sizes of chafing pans by the way full, half, third, etc. and you can see them first had at restaurant supply stores like Gordon Foods, Sams Club sometimes has them, etc.
Please remember something – do this in a well ventilated area or outdoors or the condensation will cause exposed steel to rust. It’s a very weak acid solution and while the vapors aren’t something you should be breathing, I would be more worried about causing rust if I were you.
Before I put the wrench parts in the warm/hot acid bath, I really hosed them down with brake cleaner one more time while wearing nitrile gloves. The reason for the gloves was mainly to keep oils from my skin from contaminating the otherwise clean surface. Oil will block the acid. The hot bath will remove some oil but it is contaminated at that point and must be discarded.
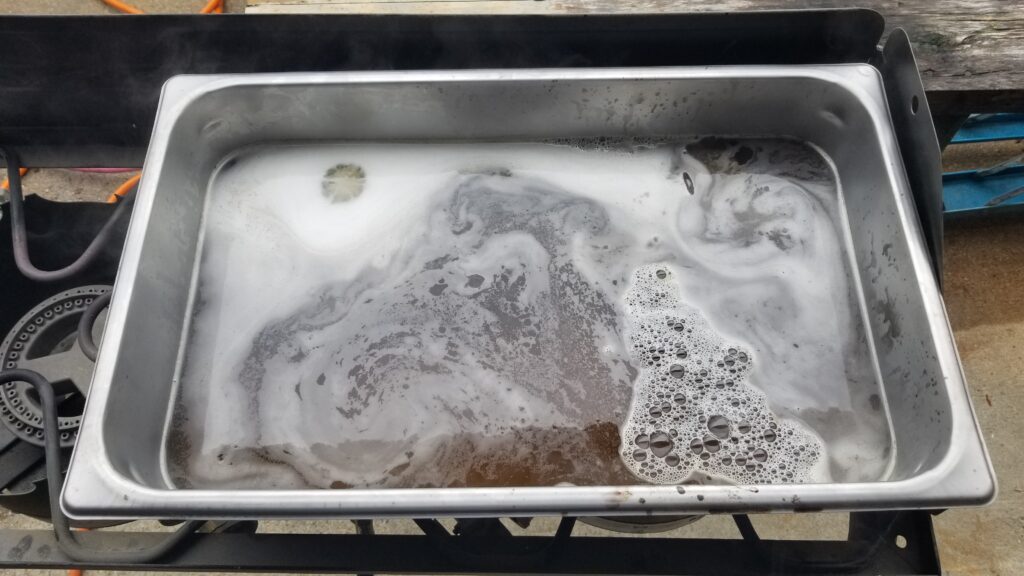
The bubbles are caused by the chemical reaction between the rust, steel and acid.
I checked it every few minutes and when all the rust was gone, I pulled it out, hosed it down liberally with water and then used WD40 to displace the water and reduce the odds of rusting. This is what WD40 was meant to do – water displacement formula 40.
If you find this post useful, please share the link on Facebook, with your friends, etc. Your support is much appreciated and if you have any feedback, please email me at in**@*********ps.com. Please note that for links to other websites, I may be paid via an affiliate program such as Avantlink, Impact, Amazon and eBay.
And here’s one from SIG directly giving you an overview:
So you get the idea. It’s a pretty cool little pistol for concealed carry! If you are thinking about picking one of the models up and some magazines, the below links can take you to various seller’s web pages:
If you find this post useful, please share the link on Facebook, with your friends, etc. Your support is much appreciated and if you have any feedback, please email me at in**@*********ps.com. Please note that for links to other websites, I may be paid via an affiliate program such as Avantlink, Impact, Amazon and eBay.
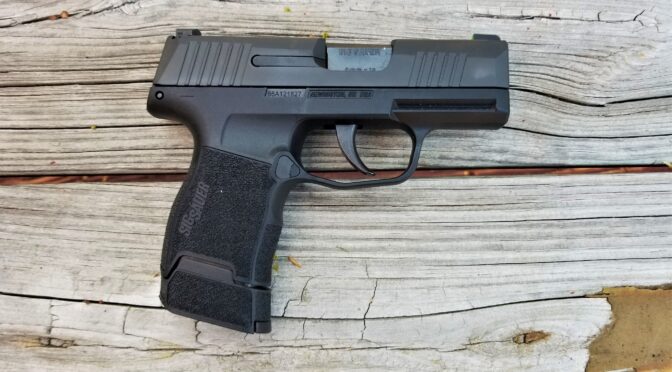
Given my work with tactical weapons I guess folks expect me to carry some exotic pistol. My every day carry (EDC) is a SIG P365 that I picked up some time in the early Summer of 2019 from my friend and FFL, Scott Igert who owns Michigan Gun Exchange. I don’t claim to be a concealed carry expert but Scott is. As a retired police officer and trainer, Scott knows his way around firearms.
He and I have known each other for years and he knows what I like. After I got my Michigan Concealed Pistol License (CPL), I asked him what pistol he would recommend given my preferences. He thought about it for a few seconds and then recommended that I take a look at the SIG P365.
The P365 trail blazed the category of micro-compact 9mm semi-auto pistols that was rated for +P ammo. The designers intended it to be very small, reliable and pack a punch. I’d say they succeeded. Yeah, there have been small pistols in the past but they had some very anemic chamberings and/or were low capacity such as the single or double-barrel derringers that could larger calibers.
The P365 has received a ton of rave reviews including Handgun of the Year from Guns & Ammo in 2018, NRA Golden Bullseye Award 2019, Ballistics Best Winnter 2018, 2018 Industry Choice Award and more. The reason is simple – it small, light, reliable and can deliver a hell of a punch.
The Magazines
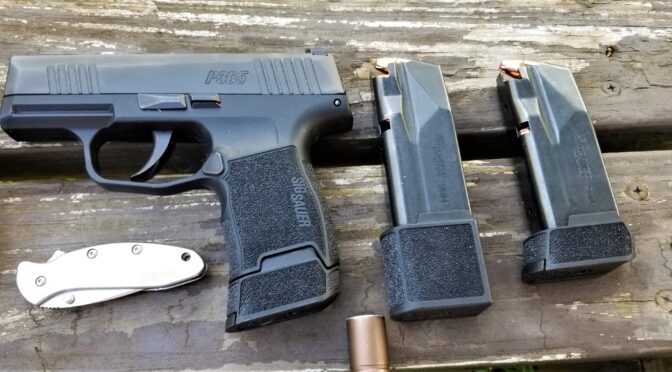
The P365 has a novel way of stacking the rounds inside the magazine wherein the can fit 10 rounds in a very short magazine. The pistol comes with this 10 round magazine but you can also get 12 and 15 round magazines as well.
My P365 with the three magazine sizes – From left to right: the 15, 12 and 10 round models plus you can see the Desantis #106 Sof-Tuck holster that I have been using for a few months now. I like it more than Kydex because it doesn’t poke me.Here’s a close up of the three sizes of magazines. I own two of each so I have a lot of flexibility in terms of what I am going to carry. That’s Hornady Critical Duty 135gr +P ammo peaking out.
I wear XL-size gloves and the pistol with the 10 round magazine has a very short grip. It’s not comfortable for me and I wouldn’t target shoot with it but it makes for a very concealable pistol. I was told once that the best pistol in the world will not save you if aren’t carrying it for whatever reason – it’s too heavy, it’s too long, it sticks out, etc. My point is that there do need to be trade-offs at times. There are definitely times I carry with the 10 round magazine due to the weight and size reduction.
Here’s the P365 with the 10 round magazine installed.
For me, the 12 round magazine is ideal. It’s just a tad longer and they’ve added a small grip extension to the bottom. This is what I use most of the time because it adds just a bit more weight and size plus I find it far more comfortable to hold.
They do offer a 15 round model and while I may have it as a backup somewhere, it is longer and heavier than what I really want to carry around. I have carried with it but rarely. The nice thing besides the higher capacity is that you basically have a full-sized grip.
Here’s the P365 with the 15-round magazine inserted. Plenty of grip space but it is heavier and longer.
The Holster
I’ve experimented with a few holsters and the most comfortable one I have is the Desantis Sof-Tuck model 106NA8JZ0 – this is the right handed model at it first the P365 and P365 SAS (the model with recessed sights and a ported barrel).
What I like is the softness – it doesn’t poke me when I sit down, bend over, etc. It keeps the pistol secure in my pants and really meets my needs for a basic holster.
Here’s a closer view of the Desantis #106 Sof-Tuck holster and the belt clip.Here’s what I had with me the other day – you see the P365 in the holster with the 12 round magazine, one of the Streamlight 66608 350 Lumen USB rechargeable lights and a Kershaw 1600 Chive pocket knife. In the back are spare mags that were in the car.
Ammunition
What I am using is Hornady Critical Duty 135 grain +p ammo. Yes, it is rated for +P ammo but I wouldn’t shoot it all the time at the range. Critical Duty is not for everyone as it is designed with a degree of barrier penetration in mind. (Hornady has a nice summary on their website if you are interested click here.) I have run a number of types through the P365 including Federal HST 124gr and a variety of 115gr FMJ loads and the little pistol handled them all just fine.
I really want to put one thing out there for you to bear in mind though – always, always, always test your pistol with the ammo and magazines you plan to use. I can’t tell you how many times I have seen a pistol not function correctly due to some combination of magazine and ammo but work perfectly fine with others. Sometimes folks new to shooting don’t realize this and it would be devastatingly bad in a self-defense situation to have your pistol jam when it tries to cycle.
How many rounds should you try? You’ll get a ton of answers on this. Statistics would tell you that at least 30 rounds is a fair sample and going past that is better in my opinion. Some guys will tell you 100 rounds, some will say 200 … they are all right in my honest opinion – shoot as much as you need to in order to become familiar with your pistol and that a given combination of magazines and ammo is going to work.
Also, to put it bluntly, shit happens. Practice clearing your pistol plus slapping in a new mag and continue firing. You just never know and if you’ve not practiced enough you are liable to fumble around under stress.
Again, this is my concealed carry that I entrust my family’s safety to. My Glock stays at home now because the little SIG is easy to carry, reliable and packs a punch. The P365 has proven to be so wildly successful that SIG released a larger XL model plus the SAS that has integral sights and barrel porting. While I don’t have first hand experience with them what I hear is very favorable and I definitely recommend the P365 to folks looking for solid concealed carry pistol.
If you find this post useful, please share the link on Facebook, with your friends, etc. Your support is much appreciated and if you have any feedback, please email me at in**@*********ps.com. Please note that for links to other websites, I may be paid via an affiliate program such as Avantlink, Impact, Amazon and eBay.
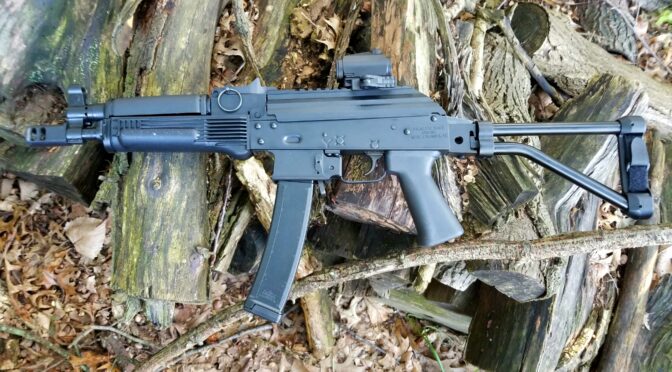
This is my AK-V with its quick takedown pin with the standard size 1″ ring installed.
This last time when I placed an order with the machine shop that makes my pins, I asked if they could do custom heavy duty 1/2″ and 3/4″ pull rings from stainless steel with a black oxide finish and they said they could! It cost a fair penny because I needed to order a boatload of each but here they are as an accessory if you want to purchase them … please purchase some 🙂
Here are the three rings side by side. The pins all come with the 1″ standard ring installed.
The 1″ and 3/4″ rings are very beefy. We had to go to smaller gauge wire to do the 1/2″ rings but they should work just fine – it’s really the pin itself that does all the work.
If you find this post useful, please share the link on Facebook, with your friends, etc. Your support is much appreciated and if you have any feedback, please email me at in**@*********ps.com. Please note that for links to other websites, I may be paid via an affiliate program such as Avantlink, Impact, Amazon and eBay.