Tag Archives: restoration

Painting the Cleaned Up 18″ Ridgid Pipe Wrench

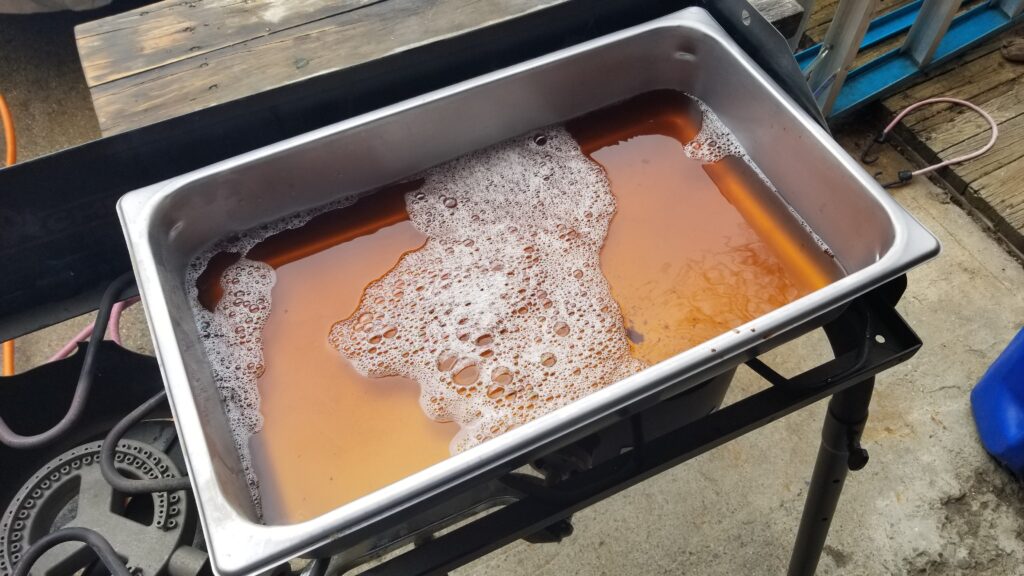
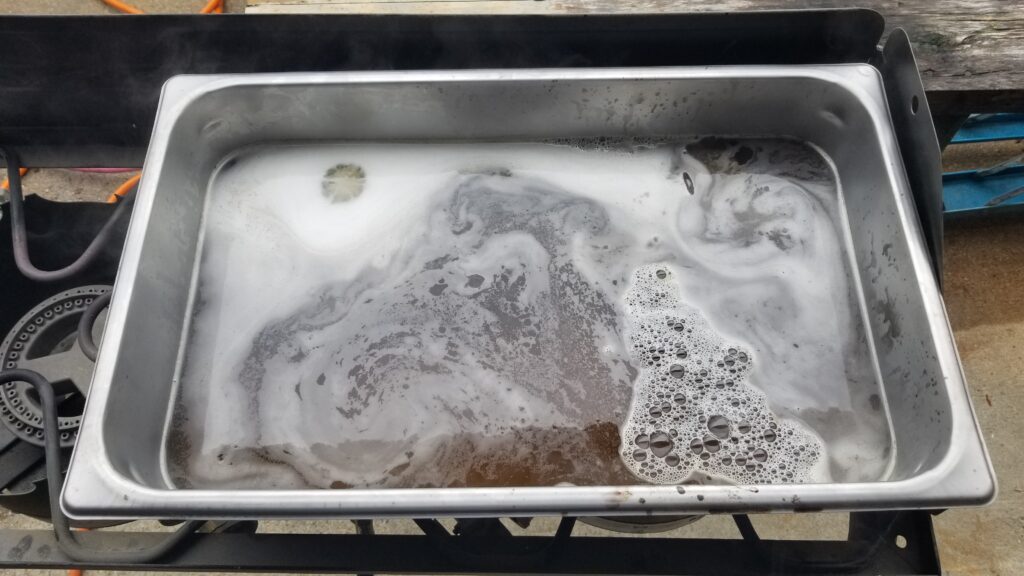
In the last post I told you about removing the rust from the old Ridgid pipe wrench using a solution of apple cider and Prep-N-Ethc. Now we’ll go over painting it. I considered three options – using a durable bake on weapons paint, a spray on epoxy paint or a basic spray paint. I went with the latter simply to save money. It just so happened that I had cans of Fusion All-In-One Gloss Red Pepper and Satin Black Krylon in stock. All-in-one meaning it contained both the primer and the paint.

As a reminder from the last post, this is what the wrench looked like after I cleaned it up and ran it through the hot apple cider bath.

What is Krylon?

Krylon is an acrylic laquer and not an enamel. In case you are wondering about the unique name, it comes from the founder’s first two letters of his last name – Krester – and that he was so impressed by Dupont’s discovery of nylon that he dropped the “n” and called his paint Krylon. This was a marketing move because he’d developed the basic formula in 1947 and nylon was introduced shortly after.

I like Krylon because it dries fast. I hate waiting for Rustoleum to dry and that pushes me in the direction of Krylon. With that said, Rustoleum’s enamel paint tends to be more durable. If I had it in stock, I would have used Rustoleum and baked it on.

Applying The Krylon

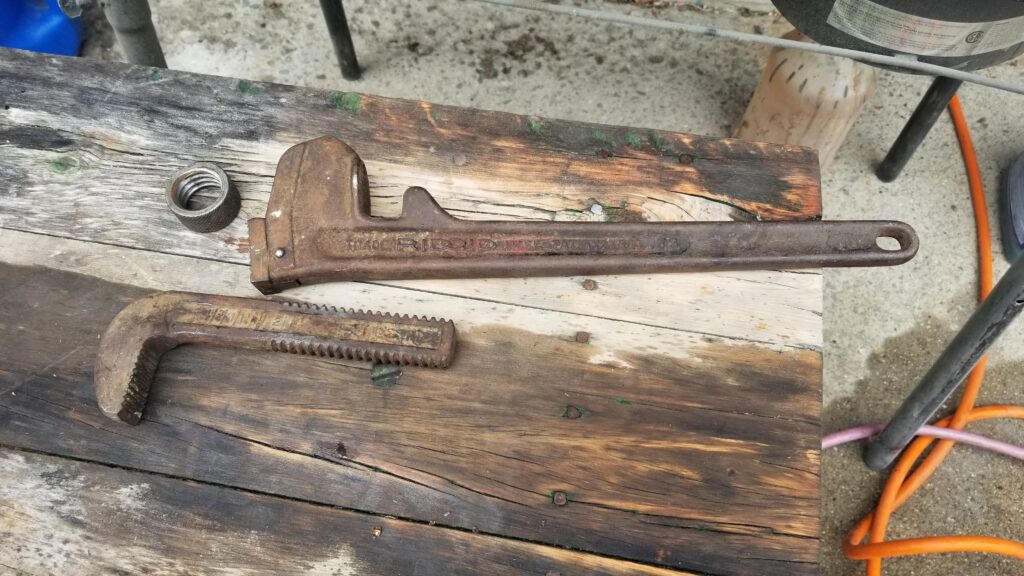
I took the wrench, disassembled it again and sprayed everything down again with brake cleaner to make sure there wasn’t any oil. A side benefit of acid rust removal is that it does acid etching of the surface as well creating little pockets/surface imperfection all over that give an excellent surface for finishes to adhere to.

I like to paint in the sun and use it to heat up the parts. I typically use old boxes to hold the parts to catch the overspray.
This is the handle after the first or second coat.

When spray painting, you need to be patient. You build up to the final color you want by spraying successive coats of paint. Follow the directions for drying time per coat and the maximum time to wait to apply the next coat.

Because I acid etched the surface, I didn’t apply a primer plus Krylon’s Fusion series claims to have some primer in it. I noticed on the can they still recommended primer for a bare metal but I skipped that. I typically waited 15-20 minutes between light coats based on the instructions on the can. Light coats reduces the risk of runs and making a mess.

Be sure to let the paint have plenty of time to set before you turn it over. Either wait until just before the maximum time before next coats or you will need to wait until the first side fully cures. I would rather try and do it together to get the best adhesion that I can. If it fully cures then you either get a less than ideal bond or you have to scuff it. Some folks will hang their parts to avoid some of this.

So, I put the parts in my curing oven for a couple of hours at 175F to help stuff dry fully and let it sit overnight before reassembly. With enamel, a lot of folks say that baking helps. I don’t think it makes a big difference with Krylon but I do know that it pays to let parts have the full time to cure based on the instructions on the can. If they say 24 hours, give it 24 hours. I’ve ruined a ton of paint jobs being in a rush.

Here are the three main parts. In some original ads it looks like they did not paint the jaws. I painted the jaws for expediency and to retard rust. I figure it will wear off with use where it needs to.

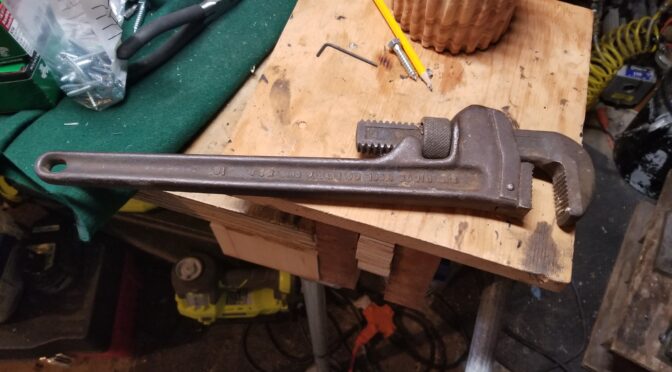
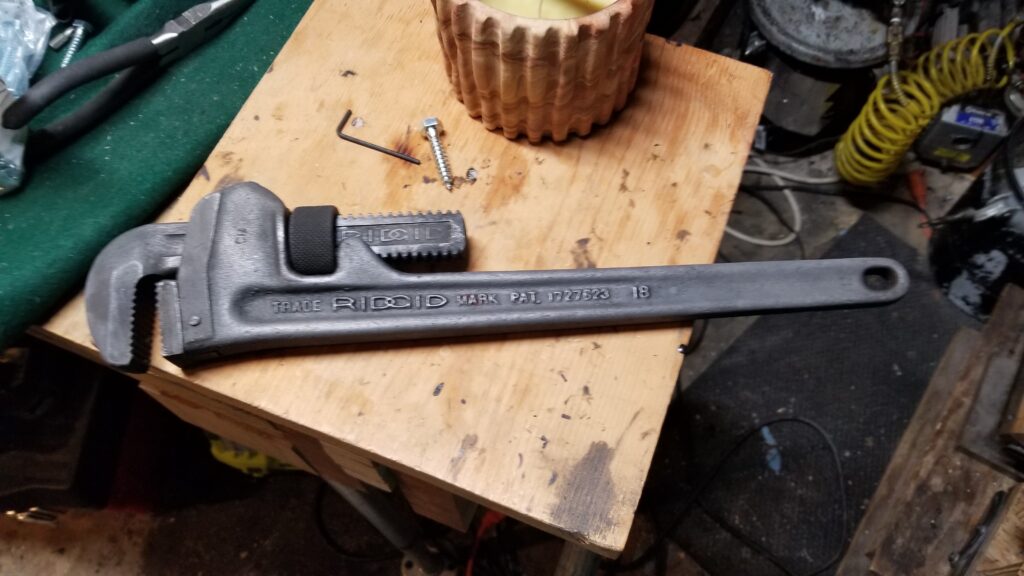
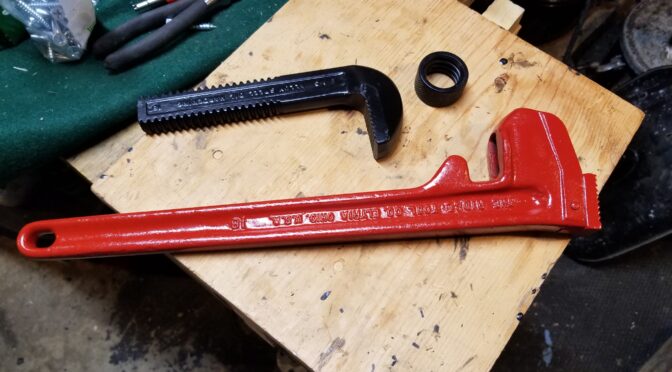
So here is the refinished wrench:

From the top – 1. Another old one of my grandpa’s. The rivet holding the thumbscrew and top jaw is really loose. 2. The wrench I just refinished. 3. A Craftsman that was my dad’s. 4. Guess who bought the cheap Harbor Freight wrench when we first got a house 20+ years ago – me 🙂

Conclusion

Well, it was interesting to learn about Ridgid and to bring some color back to the old wrench. I’ve already used this to tighten a pipe since I tool the photo. The paint did come right off the jaw as I knew it would but I’ll definitely be using it more in the future and remembering my dad and grandpa who passed it down.


If you find this post useful, please share the link on Facebook, with your friends, etc. Your support is much appreciated and if you have any feedback, please email me at in**@ro*********.com. Please note that for links to other websites, I may be paid via an affiliate program such as Avantlink, Impact, Amazon and eBay.


Cleaning Up My Grandfather’s 18″ Ridgid Pipe Wrench

Like so many of my stories, this one begins as so “One day I was in my shop and ran across and old rusty tool that was still functional”. Let’s start with a bit of backstory.

My grandfather immigrated from Quebec along with his brother to the Boston area to improve their lot in life. They’d grown up on a farm near Compton, Quebec, and somewhere along the line had picked up the skills necessary to service heavy machinery. He’d tell my dad stories of working on various machines who then relayed some of them to me.

My grandfather had a family, including by dad of course, somewhere near Rockport and eventually bought a farm in Derry, NH, sometime in the late 1930s or early 1940s where he raised dairy cattle, grew hay and what not. Along the way he amassed quite a few tools that then passed on to my dad.

One of these tools was a rusty 18″ pipe wrench that I recall my dad using on a number of occasions and when my dad passed away, I got the tools, including this old wrench.

So, I’m in my shop moving stuff and uncover this big 18″ pipe wrench that I then took a lot closer look at. Interestingly enough, it was made by Ridgid.

Ridgid and the 18″ Pipe Wrench

For years I thought Ridgid was a made-up Home Depot house brand. Actually, it was founded in 1923 in North Ridgeville, Ohio, and moved to Elyria, Ohio, in 1943. What got them started was the invention of the modern pipe wrench. In 1966 it was bought by Emerson Electric and today it sells a lot of different tools including hand tools they make, power tools by Techtronic Industries of Hong Kong and Wet Dry vacs made by Emerson.

This 18″ pipe wrench was rusty but solid. The jaws were still sharp and nothing was cracked or bent.
You’ll notice it does identify the Ridge Tool Company as being in Elyria so that tells us it was made after the move in 1943.
The original patent was 1549164 from August 11, 1925, and was then updated to patent 1552091 dated September 1, 1925. Now the patent tells us a bit more. 1727623 was filed on September 10, 1929. The next pipe wrench patent was 2051755 filed on August 18, 1936. [A big thank you VintageMachinery.0rg having this info online.]

Now if you read the caption of the photo above, the 1727623 patent was in 1929 and 2051755 filed in 1936. That patent was actually split into two and an additional patent 2076830 was filed in 1937. I’m going to go out on a limb and bet that wrench was made somewhere between 1929 and 1937. The compression spring in the wrench is a leaf design and not conical so that does put it prior to 1937 patent.

In reading, guys report the markings as not being very reliable and company records incomplete so the above is really a best guess but it does basically align with when my grandfather would have been buying tools.

So I had a decision to make – leave it alone and let it rust or clean it and apply paint. Well, it’s not like these wrenches are rare collector pieces and this was a tool I would use going forward – seriously, other than being rusty it was good as new.

Removing the Rust

I considered three options – abrasive, electrolytic or acid. The rust was actually pretty light and I opted to go with acid – notably a combination of apple cider and phosphoric acid.

The first step was to spray down the wrench with brake cleaner liberally to get rid of oils. Next, I put a wire brush in my hand drill and removed all of the loose rust and dirt from the wrench body, nut and jaw.

I used brake cleaner to remove the initial oil as well as just before I inserted the wrench into the acid bath.
Getting in a bit closer, note the sole remnant of red paint to the right of the RIDGID logo on the handle of the wrench.

The acid bath was a gallon of grocery store bought apple cider vinegar plus about a quart of Prep-N-Etch phosphoric acid. Apple cider alone would do the job but I was re-using apple cider and I wanted to make sure there was enough acid to do the job.

Now a trick to really get things done is to heat up the apple cider bath and get it warm – you don’t need to boil it. I don’t bother with a thermometer for this – just hot to the touch. The reason why is that heating up a solution speeds up the chemical reaction. If it’s cooler then it just takes longer and if it is boiling off then you are losing liquid needlessly.

This is a full size stainless buffet / chafing pan that I use for acid etching and parkerizing – I clean it after each use of course. Underneath it is my big two-burner Camp Chef Explorer stove that is awesome for heating up tanks with acid or park solution. There are all kinds of different sizes of chafing pans by the way full, half, third, etc. and you can see them first had at restaurant supply stores like Gordon Foods, Sams Club sometimes has them, etc.

Please remember something – do this in a well ventilated area or outdoors or the condensation will cause exposed steel to rust. It’s a very weak acid solution and while the vapors aren’t something you should be breathing, I would be more worried about causing rust if I were you.

Before I put the wrench parts in the warm/hot acid bath, I really hosed them down with brake cleaner one more time while wearing nitrile gloves. The reason for the gloves was mainly to keep oils from my skin from contaminating the otherwise clean surface. Oil will block the acid. The hot bath will remove some oil but it is contaminated at that point and must be discarded.

The bubbles are caused by the chemical reaction between the rust, steel and acid.

I checked it every few minutes and when all the rust was gone, I pulled it out, hosed it down liberally with water and then used WD40 to displace the water and reduce the odds of rusting. This is what WD40 was meant to do – water displacement formula 40.

At this point it was getting dark and I decided to wait until the next day to point the wrench but here’s what it looked like at that point. The next post will be about painting the wrench and the end result.

By the way, I’ve written on using apple cider to remove rust from tools as well as formal manganese parkerizing before this so you can click on one of the links to learn more.


If you find this post useful, please share the link on Facebook, with your friends, etc. Your support is much appreciated and if you have any feedback, please email me at in**@ro*********.com. Please note that for links to other websites, I may be paid via an affiliate program such as Avantlink, Impact, Amazon and eBay.


Restored An Almost 100 Year Old Samson 5263 3.5″ Machinists’ Vise For Regular Use

Growing up, my dad has this big rusty vise on his work bench and we’d use it for all kinds of stuff ranging from holding mower blades and axes during sharpening to bending metal for brackets and so forth. I knew it came from my grandfather’s farm in New Hampshire but not much else., When my parents moved near us, my dad brought the vise with him and installed it on a tool bench in their new garage.

Life can be harsh. I have a lot of good memories about my parents but nothing really prepares you for when they pass away. I was close to my dad and to this day, when I use one of his old tools, it makes me feel good – kind of like he’s still here and happy to see me using something of his – hopefully the right way.

At any rate, when we had to sell their house and clean stuff out, I snagged the big old vise and stuck it on the floor in the corner of my shop and really didn’t think much about it for almost five years. One day I started thinking about installing a second vise in my shop near another area where I do a lot of work that requires both work holding and a vise that can withstand 50-100 ft/lbs of torque. I figured I had two options – I have a 6″ Harbor Freight unit somewhere buried in my shop that I could dig out or I could go find my dad’s and take a closer look at it.

So. I dug out the old vise from under a work bench and blew off a ton of dust and dirt. The first thing that I noticed was that it weighed a ton and the second was that it was remarkably beefy and actually in really good shape other than surface rust. The action moved fairly well albeit a little gritty. Everything felt fairly tight meaning nothing seemed to be bent or broken. Last but not least, other than missing the handle on the locking nut, everything seemed to be there.

Where did Samson vises come from?

I did some searching on the web and found mention that Samson vises were sold by Sears from about 1908 to 1939 based on searching for “Samson Machinists” on ancestry.com. This page is from a 1923 Sears catalog and was copied from Vintagemachinery.org:

There it is down in the lower-left – 99N5263. A 3-1/2″ jaw width with a 5″ opening, weight was 37 pounds and cost a whopping $9.30!! Wow! Now, when my grandpa actually bought it, I have no idea. If my dad knew, he never said or I don’t recall – at this point, I’m really not sure.

By the way, in the catalog ad above, look at the weight of the 5266 5″ vise – 93 pounds! That would be a fun one to find. It must be enormous – I’ll have to keep my eye out for one 🙂

By the way, I couldn’t find a definitive answer about who made the Samson vises for Sears. Some people thought it was Reed but I haven’t confirmed that. If you search on Reed Vises, you will see some similar designs but I did not see an exact match. I emailed both Reed and Yost to see if they can share any insights. If I find out, I’ll update this post.

8/25/2020 Update: I got a very nice email from James about Samson vises based on some research he did: “Samson Vises were the Sears house brand before Craftsman took over in 1927. Samson Vises were made by Rock Island Vise Company for Sears and Roebuck out of Rock Island, Illinois.”

Restoring the old vise for regular use

Other than quite a bit of surface rust, it was really in very shape and I decided to use the old vise. The next thing I had to decide was what to do with the finish – it was rusty my whole life so I thought about just oiling the rust and sealing it. Another part wanted to fix it up. I honestly thought about it for a few days because I couldn’t do anything right away. In the end, I decided to refinish it. From what I could tell the vises were originally black and either partially or fully painted. My vise had zero paint on it anywhere.

Note: I am not doing a 100% overhaul to make it look like when it shipped from Sears. I wanted to clean it up some have it be functional. I just want to be clear in case any purists take issue with my use of the term “restoration”.

So, the first step was to disassemble the vise both to make sure it was indeed salvageable and also to clean everything. The weather wasn’t cooperating so you’ll some photos were taken indoors and some outdoors so bear with me.

Before I took the vise apart, I mocked up where I wanted it on the bench and drilled the holes. I planned to use 3/8″ bolts to secure it and they are in the photo. The bench it is on has a top made of 1-1/2″ of plywood and weighs 5-600 pounds because of the massive steel frame I built for it.
The first thing you do is to remove the sliding jaw. This is usually done by rotating the handle until the screw exits the spindle nut in the body of the vise and the sliding jaw then pulls out. Be aware that the sliding unit can be surprisingly heavy depending on the design of the vise.
The greasy looking thing is the spindle and it was in great shape. There were remnants of old grease protecting it, the screw and the ways where the sliding jaw slid (the clear tracks on the body. There were no signs of cracks – just dirt and rust in non critical areas.
To the right of the main body of the vise is the lock nut. Normally there is a small handle on it but it’s long gone. This is basically threaded onto a bolt that protrudes us from the clamp in the base. It simply unthreads. The shiny 3/8″ grade 1 bolt to the right of it will become the new handle for it.
This is the bottom of the slide. As you can see, the machined surfaces and screw are in great shape.
Somehow I always manage to miss taking a photo. The top part of the vise is secured to the base by a heavily made axle bolt. It’s the beefy chunk of steel sitting between the base and my ball pein hammer. Surprisingly, it came out very easily with a simple adjustable wrench – I just reached in perpendicular and turned the bolt not expecting it to come loose and it did. That was a very pleasant surprise. So you can also see that the bottom surface of the static jaw assembly and the top of the base are in remarkably good shape compared to the exterior.
Here’s an even closer view of the base and the locking pad bolt. You can also see the axle nut off to the back right by the back ear of the vise even better.. I think they greased it well almost a 100 years ago and that saved the inside parts. I suppose it’s possible my grandfather or dad took it apart and lubed it but I can’t ask them now.
The weather cooperated and I took the parts outside to degrease and wire brush them.
I could have punched out pins and removed the spindle nut but I figured the vise was really solid mechanically so I took a shortcut and didn’t tear the static or sliding jaws down further.
Here’s a zoomed in photo of the static jaw’s pad. I think I can barely see a screw down on the right but it would be a heck of a chore to remove them. Honestly, the jaws were in good enough shape for me.
“72C” is marked on the base. It was the only other marking I found in addition to “Samson 5263” on the side of the static jaw’s body.
After cleaning up the static jaw, the model number was clear as day – 5263.
For the really thick rust, I used my Ingersoll-Rand needle scaler to knock it off. The external surfaces on the base of the vise were the worst.
Here’s everything after degreasing with lots of brake cleaner and the paint will be Satin Black Krylon Fusion.
Here they are from another angle.
I applied four coats of paint following the directions on the can. By the way, when a paint tells you to allow two days for it to cure and you expect it to be rubbing a lot – give it the two days. I have messed up so many finishes over the years that I now follow the directions on timing between coats and how long until a full cure.
This will be my new locking nut handle. I had to grind down the nut so it would clear the body of the vise and then I abrasive blasted the surface so the black pain will stick. It was not blasted or painted yet for this photo.
From left to right – Locking nut, locking pad, and then the axle bolt.
I found it funny to set a modern cheap 4.5″ vise next to the big Samson. Look at the difference in slides! My dad always told me to be careful and not bend the slide on the Samson. Being a kid, I did what he said without knowing much. I look at the Samson’s slide now and it would take a hell of a lot of force to bend that slide!
I greased everything with Super Lube grease. I use it a lot now because it doesn’t dry out fast and has fine particles of PTFE in it to help with lubrication. I kid you not, I coated threads, surfaces, everything!
Boy did it turn smoothly on the base!
It looks and feels like new – with some character marks of course. She is around 100 years old!
The purplish tinge is the Super Lube grease. I literally coated all sliding surfaces to try and get stuff coated. I then wiped it down after this photo. Note that it also shows at the back that the vise is not perfectly concentric. It’s still tight but not perfectly centered on the base – my guess is that it never was. We’re talking being off center by about a 1/16th of an inch or less.
Here’s the locking nut with the finished 3/8″ bolt that serves as the new sliding handle. I applied blue LocTite to the nut to secure it. Note that I can turn the vise and use it from either direction on the bench. Right now it is rotated away from the side of the bench where I primarily plan to use it.
From McMaster I ordered 3.5″ copper Wilton jaw pad covers. My 4″ Wilton has original brass covers that are beefier but these copper units will work.
So you put the pads in your vise and then tap down the surfaces including the small ears on the left and right sides. The Samson is asymmetrical so I labeled the front pad so when I remove them I don’t have to fumble around figuring out which pad goes to the front and which to the back.
I also bought some Mission Automotive plastic pads that are held in place by strong magnets. These come in handy for delicate surfaces.

Conclusion

So the vise is back in use. Every time I use it, I feel good about it and hope my dad approves.


If you find this post useful, please share the link on Facebook, with your friends, etc. Your support is much appreciated and if you have any feedback, please email me at in**@ro*********.com. Please note that for links to other websites, I may be paid via an affiliate program such as Avantlink, Impact, Amazon and eBay.


How to restore cloudy headlights using toothpaste – This really works!

When car companies moved to plastic headlight lenses they opened the door to them oxidizing over and majorly reducing the transmitted light.  I’m surprised they haven’t been sued yet actually.  I really do not like the fact that light is reduced and people are driving with less and less visibility at night – that seems wrong to me.  However, if they don’t correct this problem we can at least fix it with annual polishing of the lenses.

For badly deteriorated lenses, I use Meguiar’s Heavy Duty Headlight restoration kit. It comes with sandpaper and polish to really let you get through the yellow oxidized plastic.  I have sworn by that kit for several years now and you can do a number of vehicles with each package.  It was also a pretty good price considering you could avoid having to buy new lenses for at least 3-4 cars.

I just learned a trick from my son who was home for a visit.  He uses toothpaste to fix lightly oxidized headlights.  Yes, plan old Crest toothpaste.  Now this isn’t some odd chemical fix that disappears in a few hours.  Toothpaste has a very mild abrasive in it for cleaning your teeth.  Apparently it does an awesome job on car headlight lenses also.  The following is my wife’s Camry that has gone about a year since I last polished it:


Basically he would pour water on the headlight, get the toothbrush wet, added the toothpaste to the old tooth brush and then vigorously rubbed all over the lens.   He’d then pour water, wipe it off, look at the results and repeated it about three times per light until he got it just the way he wanted it.  I’m impressed.

He really didn’t use much toothpaste either.  This is real cheap and effective on light oxidation.  I’m doing this for now on and saving the Meguiar’s HD kit for lenses that are badly damaged.


If you find this post useful, please share the link on Facebook, with your friends, etc. Your support is much appreciated and if you have any feedback, please email me at in**@ro*********.com. Please note that for links to other websites, I may be paid via an affiliate program such as Avantlink, Impact, Amazon and eBay.