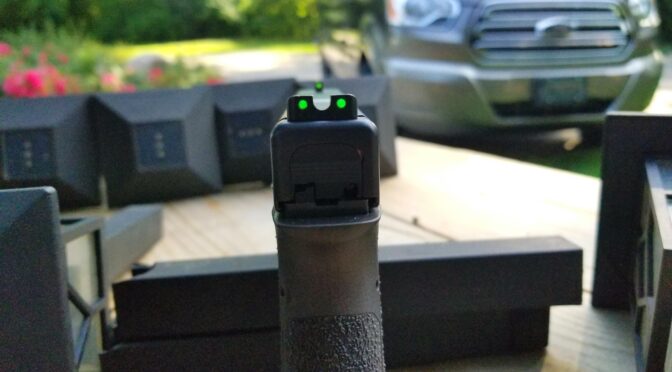
A fellow emailed me wanting to upgrade his from the generic OEM Glock sights that I don’t think really excite anyone to something that would be more visible in general and also work in the dark. My answer was immediate – go with the TRUGLO TFX Pro Tritium and Fiber Optic Xtreme sights.
The featured photo above shows how bright they are on my G17 slide on it. I bought these sights by the way – so you are getting my honest opinion.
Folks, these are my hands down favorite sights for a number of reasons:
They are CNC machined from steel and have a durable black nitride finish — they are not soft plastic.
They do not need batteries – the lit dots are via fiber optics when there is light and sealed tritium when it is dark so you are covered regardless of the light available. The tritium ought to fluoresce (emit light) for about 10-20 years and I’ll worry about replacing them then.
I really like the three green dot configuration – two on the rear sight and one on the front. The front also has an orange ring that you can see when there is light but is green when operating off the tritium only.
The rear sight goes into the slide’s groove very easily and is then secured with a set screw. Some sights can be a bear to install but not these.
The rear sight is big enough that it can help you rack the slide one handed in a one-handed emergency.
They have a 12 year warranty.
They are assembled in the USA – the tritium capsules are made in Switzerland.
What Glock models are supported?
Because these are so popular TRUGLO is making a variety of models to support the different Glock configurations that are out there. I assembled the following table and you can also check their webpage if you want:
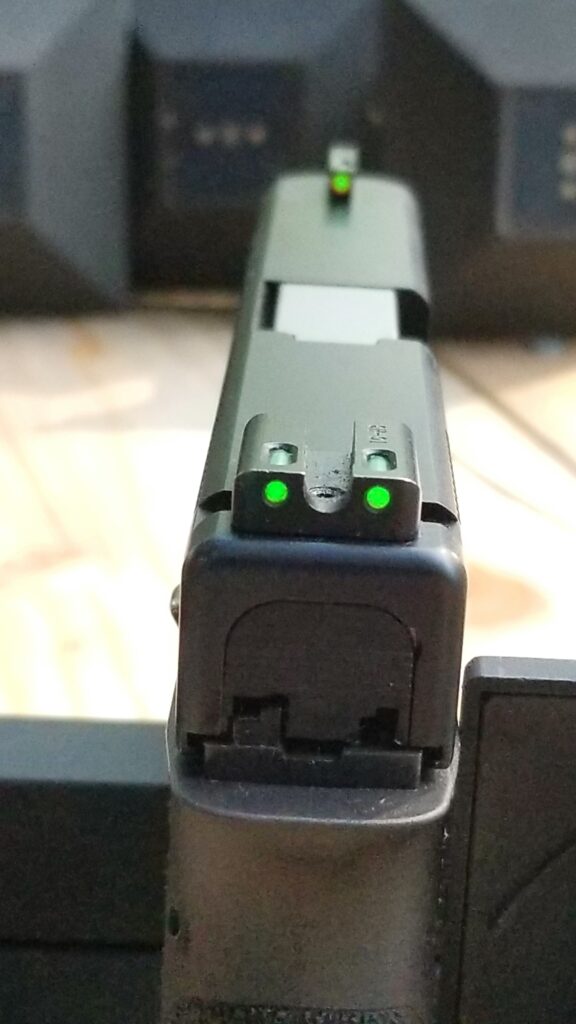
This gives you a better view of the sights overall. This is the TFX Pro TG13GL1PC with the fixed rear sight. I really like the sight picture these give day or night.
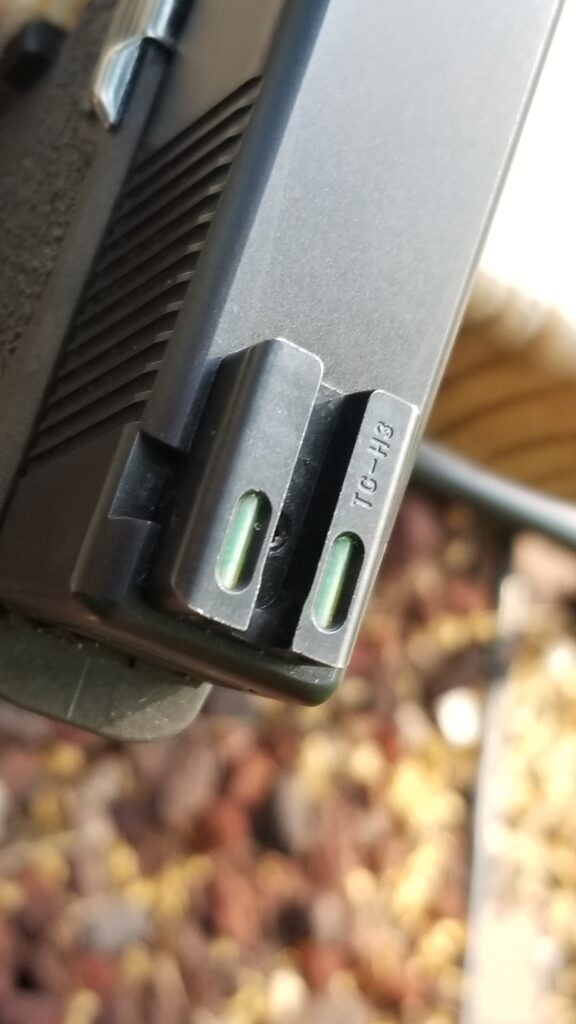
Here’s the rear sight and you can just barely see the set screw that secures the sight between the two “ears”. The slot at the top of each fiber optic is where it collects light to illuminate the dot. If there isn’t any light then that is where the tritium capsules take over.
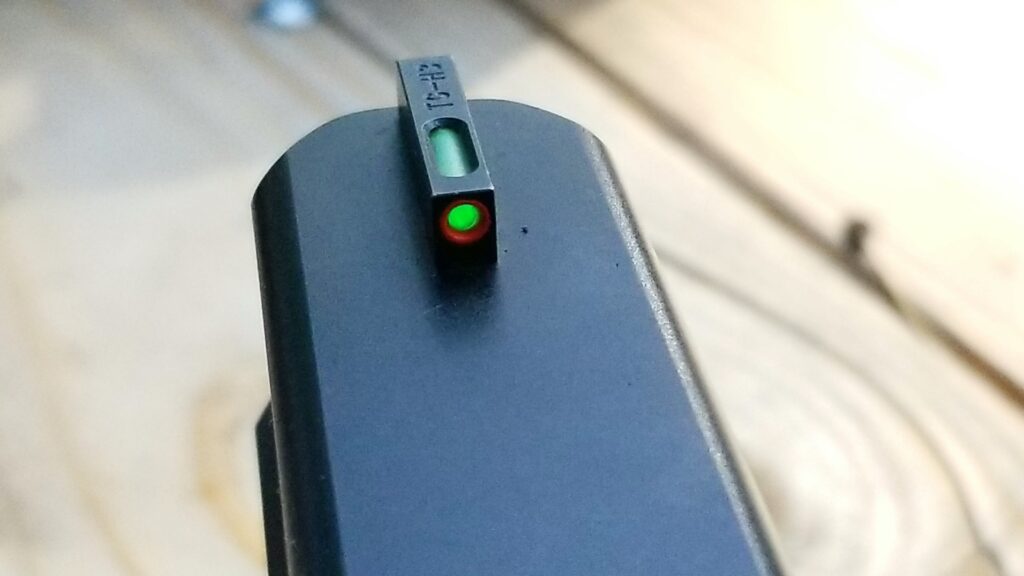
Here’s the front sight. The orange ring is nice during the day and you only see the green tritium dot in the dark.
Well, trying to take a photo in the dark of three green dots with a cell phone camera was an experience. I went in a basement room and shut the door to cut off light. It’s fuzzy but you get the idea – all three dots are nicely lit in any lighting condition.
Do they have lower cost models also?
Yes, they do. The Tritium series just has the tritium for illumination in the dark and show as bright white dots during the day.
They also make a Tritium Pro series that builds on the Tritium base model and adds an orange ring to the front sight plus the back sight is bigger and that makes it easier if you need to rack the slide with one hand.
I find these sights to be an incredible improvement over the plain Glock sights – they are easy to see and aid with rapid aiming. I really do like these sights and use them personally. I strongly recommend them.
I hope this helps you out.
Note, I have to buy all of my parts – nothing here was paid for by sponsors, etc. I do make a small amount if you click on an ad and buy something but that is it. You’re getting my real opinion on stuff.
If you find this post useful, please share the link on Facebook, with your friends, etc. Your support is much appreciated and if you have any feedback, please email me at in**@*********ps.com. Please note that for links to other websites, I may be paid via an affiliate program such as Avantlink, Impact, Amazon and eBay.
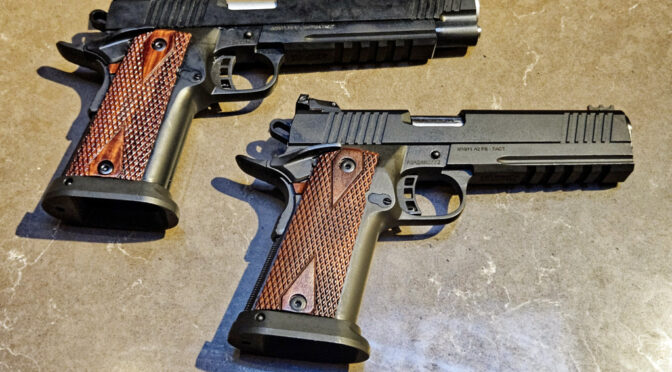
In early March 2023, I picked up my second RIA 52000 Pro Ultra Match 6″ HC 10mm pistol – more affectionately known as “The Big Rock”, which is exactly what it is. I sold my first Big Rock many years ago because I needed the funds and regretted it once I started making custom 10mm mags for whole family of high-cap 10mm and .40 S&W RIA pistols. I couldn’t buy a new one at the time because Armscor, who owns RIA, only seems to make them periodically. Maybe 2-3 years later after I wished I had it and was looking, 52000s started popping up on my saved searches – Gunbroker alerted me first and I bought one about a week later. [A number of places have them now including GrabAGun – click here]
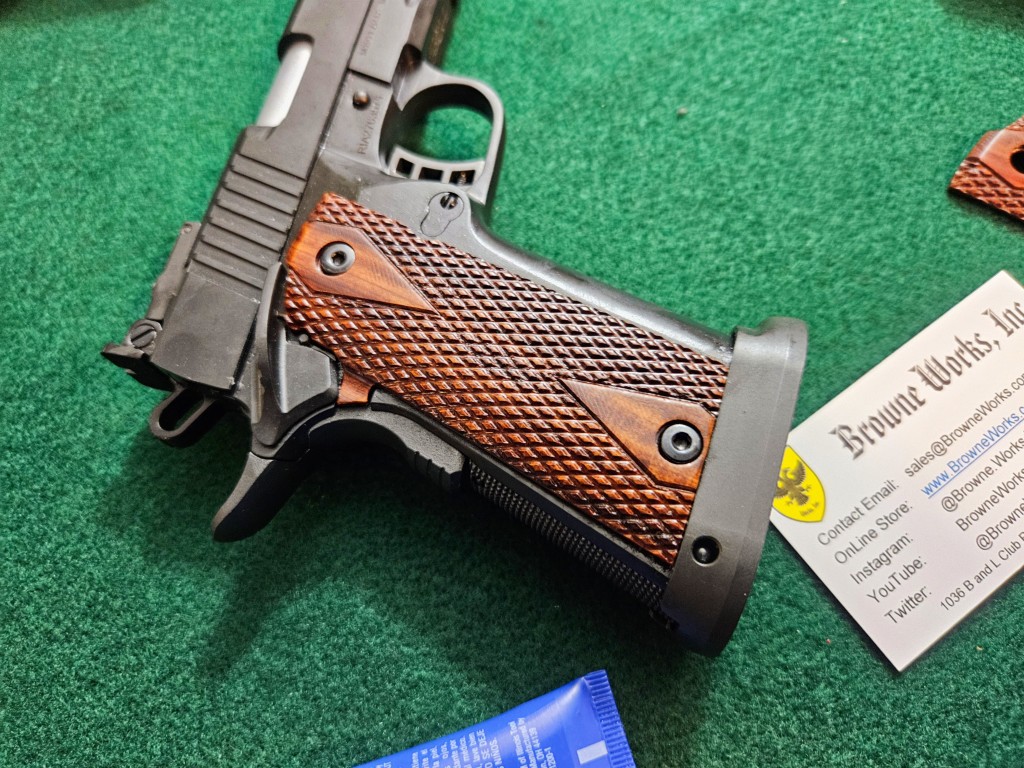
I should add that as soon as I ordered the pistol, the next thing I did was to order another set of grip panels from Mark Browne. His grips just look and feel great compared to the rather boring but durable G10 composite grip panels that come with the pistols.
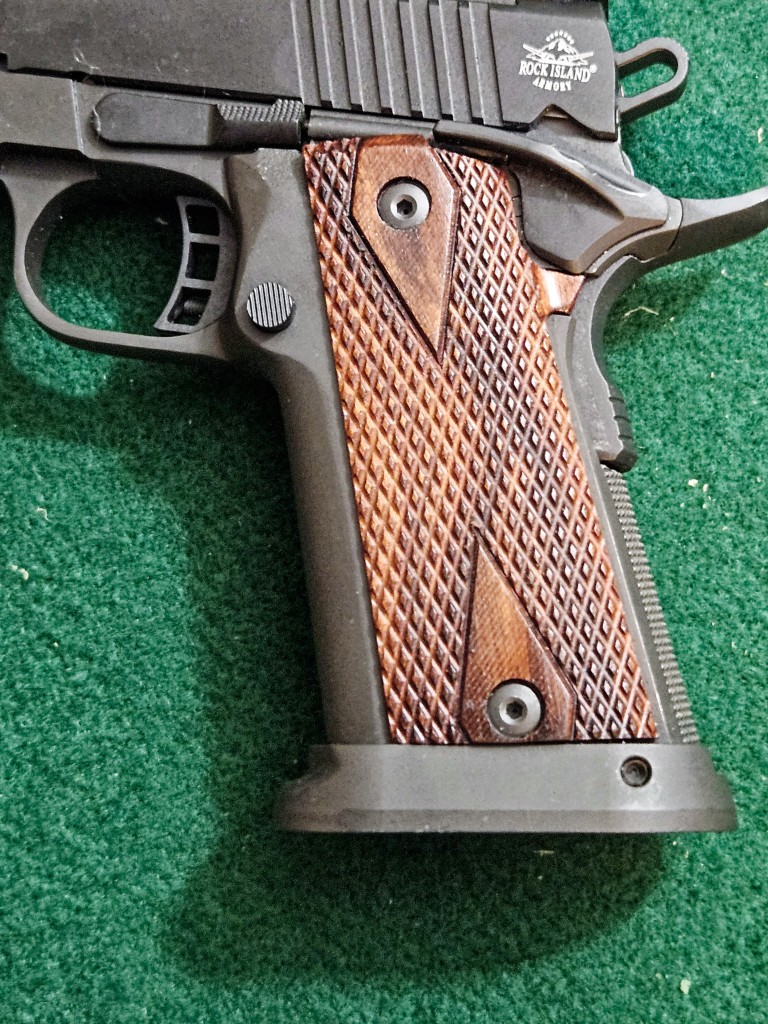
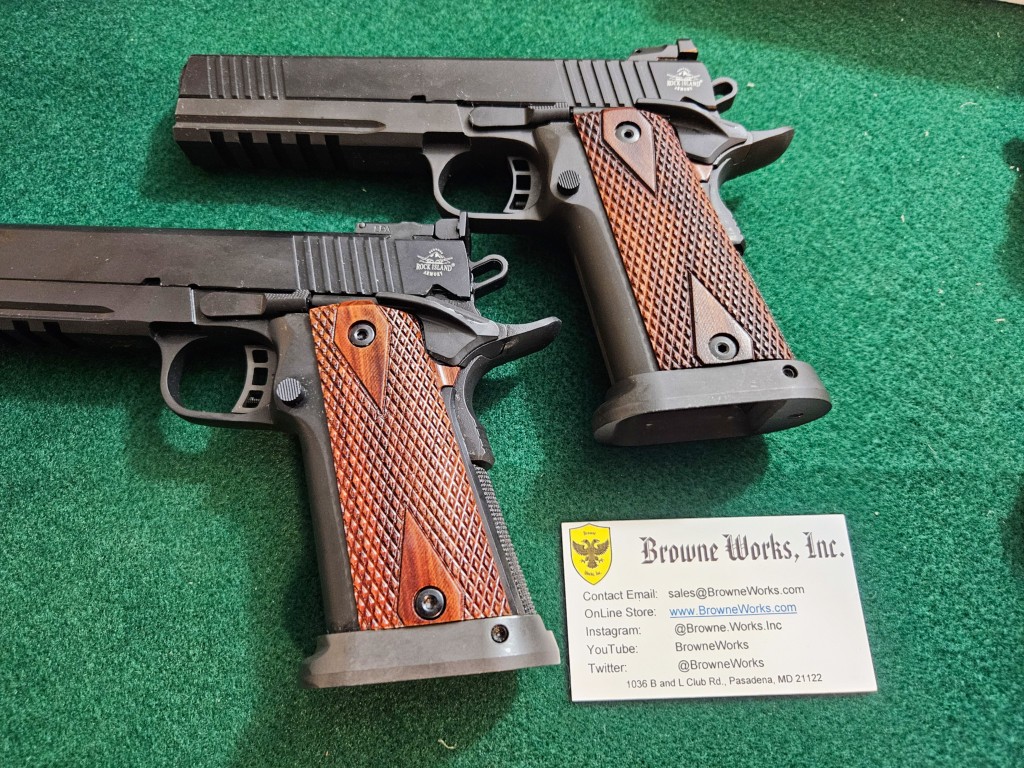
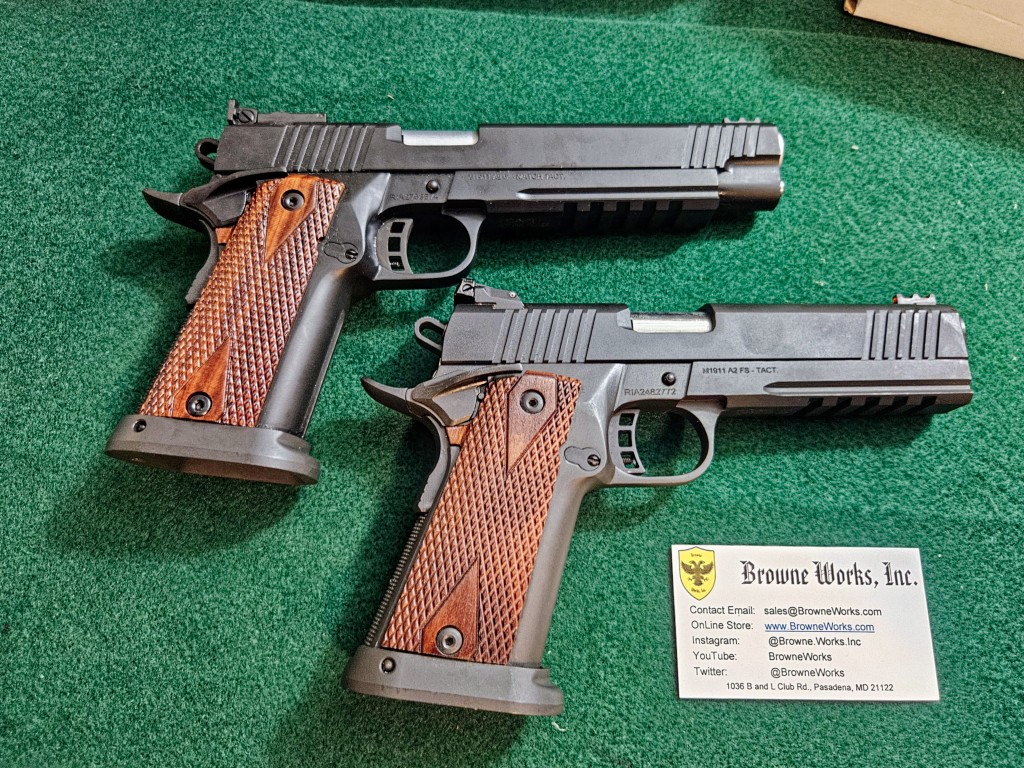
Bottom left is the new Big Rock with its factory grip Panels. Above it and to the right is the 51679 with Mark’s wood panels. The lighting doesn’t do the wood justice.Here is a better view of the wood on the 51679 plus you can always go to the blog post about it and see more.
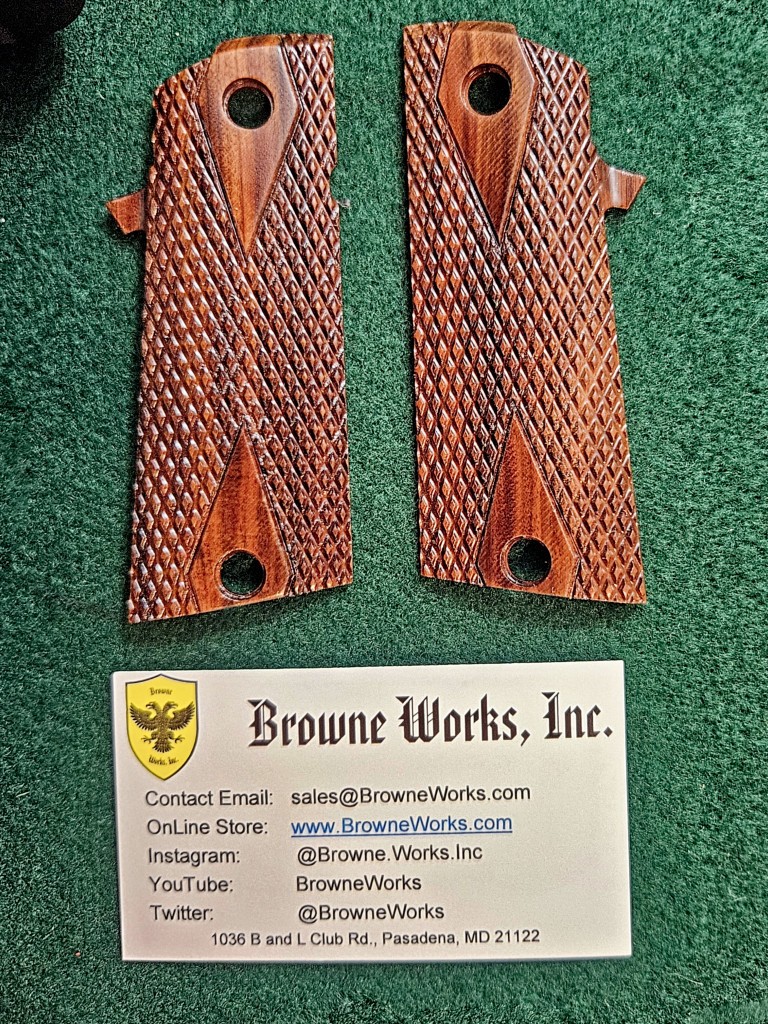
The new panels for the Big Rock arrived
I emailed Mark and told him how much I liked the first set and he said he’d look for one with plenty of grain and contrast. What showed up was awesome.
…Wow…
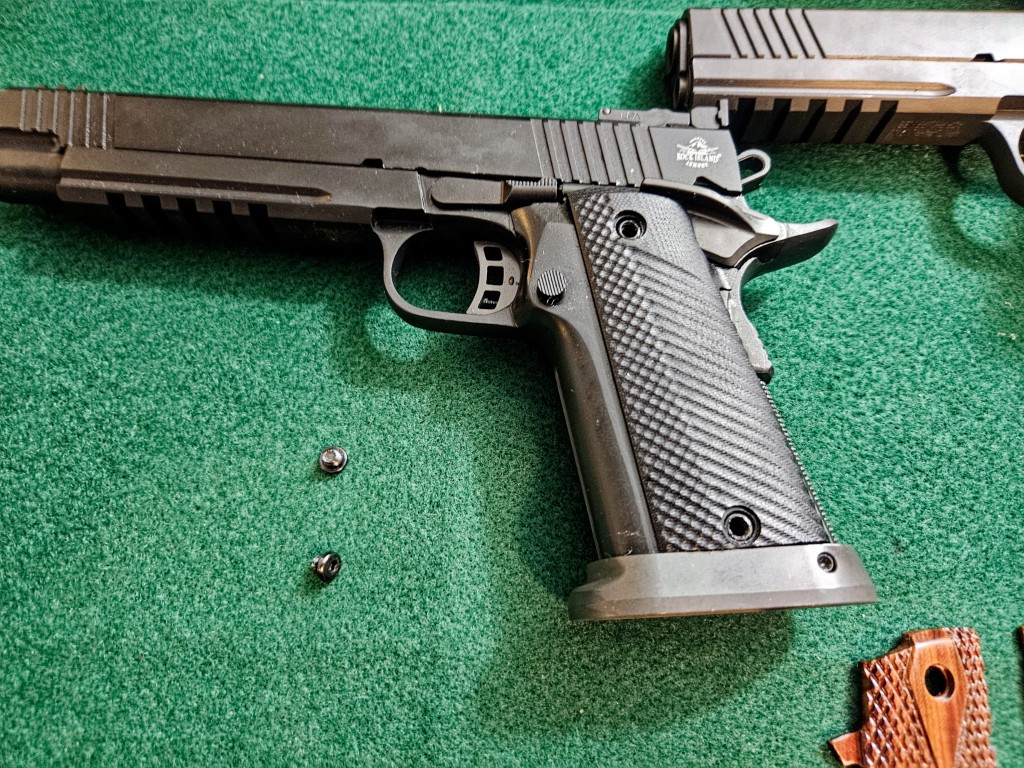
Fitting them to the Big Rock
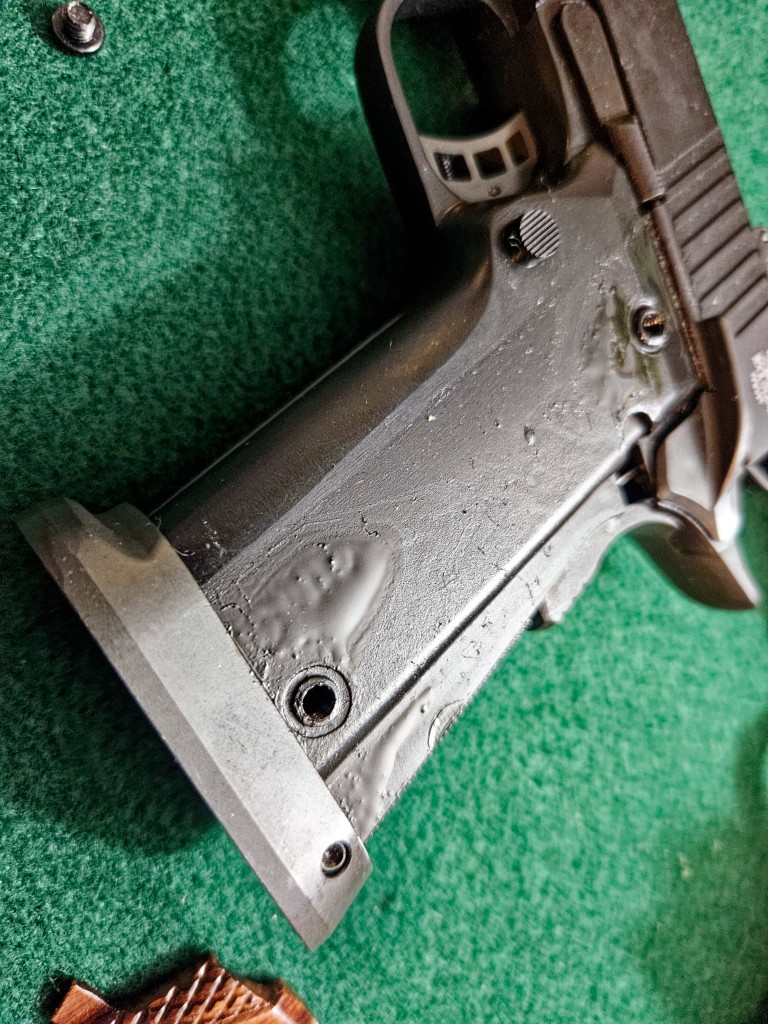
While RIA does use modern CNC machines to make the frames, the funnel fitment can vary – I know this based on clients that have fitment issues with the relatively shorter 9mm mags using Dawson Base Plates. Either they do not use a jig or it moves and wheter the funnel sits exactly can very. Why this matters is that you may find the panels go right on or you may need to fit them. DO NOT FORCE THEM! So let’s step through this.
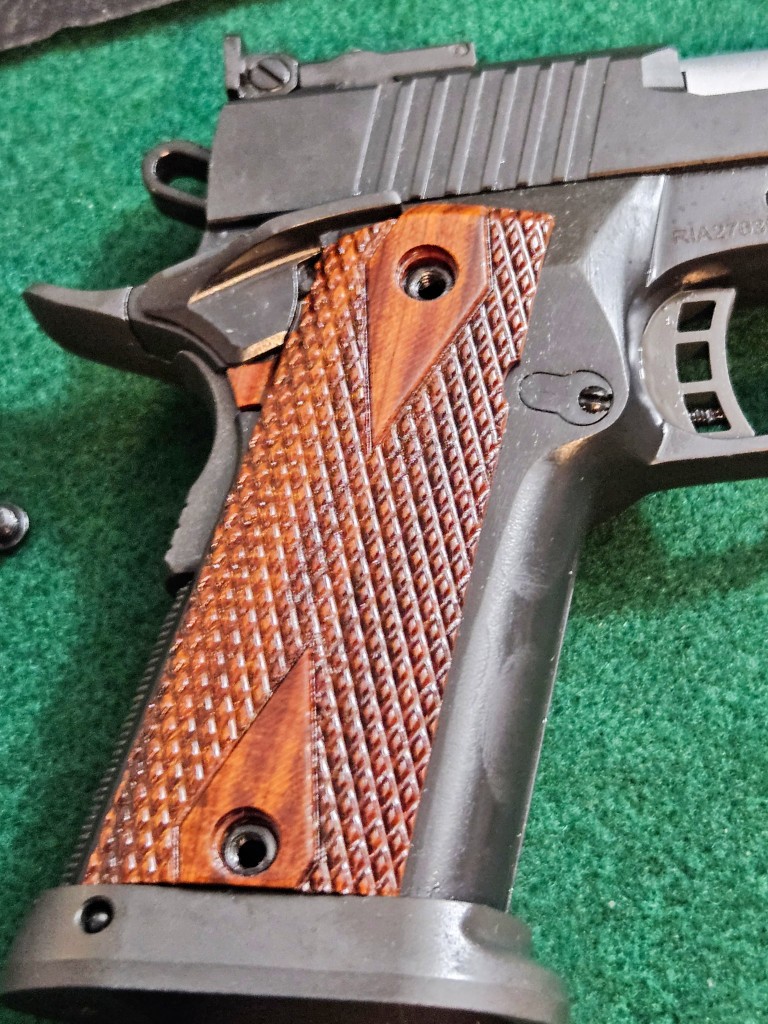
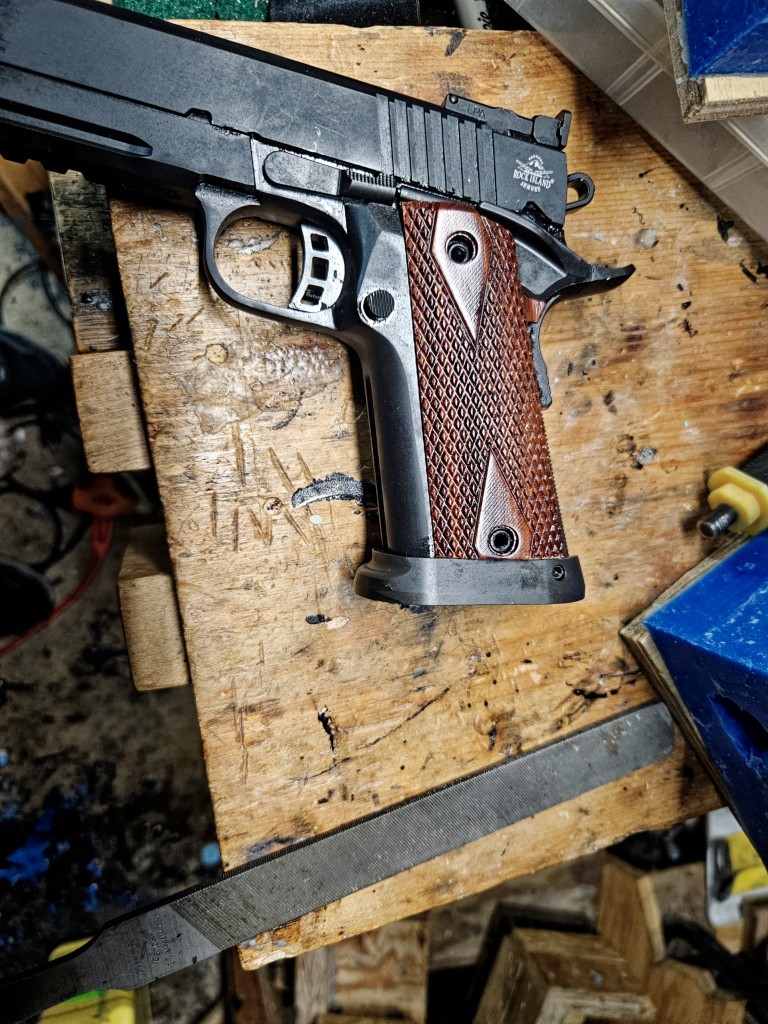
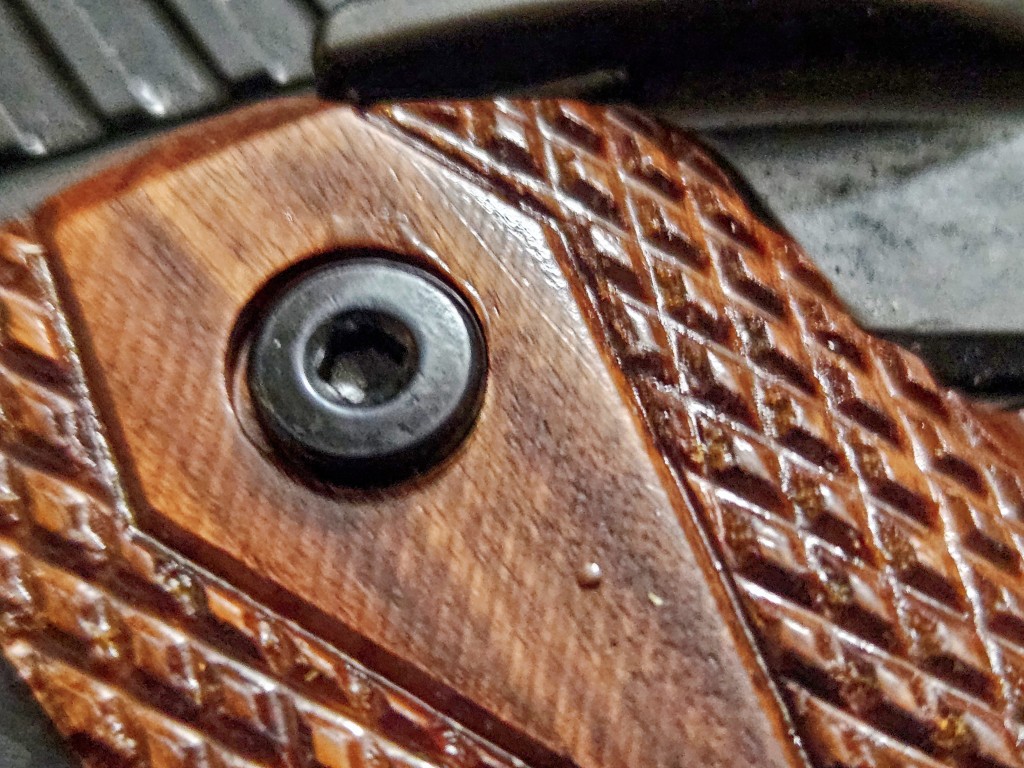
Each OEM grip panel is held in place with two unique Allen head screws. Remove the screws and the panel lifts right off. Note in this photo how very little material is between the grip screws hole and the funnel – that’s tight. The pistols are made in the Philippines and then need to travel across the Pacific. They liberally coat these pistols in preservative oil and this is one example of how much they use. Have a towel or rag handy to wipe this stuff off before you start installing the wood panels. By the way, this is typical of all the RIA 1911 pistols and again highlights why you need to clean them.This side went right on without adjustments being needed. That was an unexpected pleasant surprise. They panels need to seat fully without pressure being needed. If you try to force them in, something will snap.Everything is nice and flat and the screws went in without forcing them. The screws are installed until they are firm – not so tight the wood snaps – they just have to keep the grip panel in position, You do need to use a dab of medium-strength screw threadlocker such as Loc-Tite Blue to keep the screws from backing out.The other side had issues. Teh funnel was riding high here and the panel would not even seat fully. To adjust the wood, take a single cut file and remove a bit of wood from the bottom and try over and over.Fitting is slow work with wood. It is better to be able to take more off than wish you could put it back on. After maybe 5-10 minutes I thought I had the panel good to go but it was still riding too high and the screw could not seat properly. So, more fiiling and testing until it fit completely. Take your time and you will get a nice fit without a gap. This is a great example of time, patience and handwork can generate a far better end result than being in a rush with a sander and taking off too much. The bottom is the new Big Rock.The top is the new Big Rock with it’s 6″ barrel and slide. I really like the gloss finish. It really brings out the contrast in the wood.
Note, I have to buy all of my parts – nothing here was paid for by sponsors, etc. I do make a small amount if you click on an ad and buy something but that is it. You’re getting my real opinion on stuff.
If you find this post useful, please share the link on Facebook, with your friends, etc. Your support is much appreciated and if you have any feedback, please email me at in**@*********ps.com. Please note that for links to other websites, I may be paid via an affiliate program such as Avantlink, Impact, Amazon and eBay.
As some of you may know, we make custom magazines for the Armscor Rock Island Armory (RIA) A2 HC family of .40 and 10mm pistols. Once in a while I get to talk to a new owner before they go to the range and either they ask for advice or I give it regardlesss 🙂 I will tell anyone that will listen that they need to clean, lubricate and cycle their pistols 200 times before they go to the range. I’ve been sharing this advice for years but never really had evidence. Guess what? Now I do and I truly hope people will take this to heart and do it.
I recently purchased a RIA 52000 Big Rock – this is their 6″ barrelled 10mm match pistol. I had one years ago that I sold when I needed money and regretted it – especially after I started making the custom mags. What I am going to show you is true of all Rock Island 1911-style pistols – not just the A2 HC models – and for almost all semi-automatic factory-produced firearms. They are not ready to go out of the box and if you take them straight to the range they are going to fail a lot, you’re going to get frustrated, blame the gun/ammo/mag/dealer and it’s not their fault so please read the following and heed the advice.
Opening the Factory Box
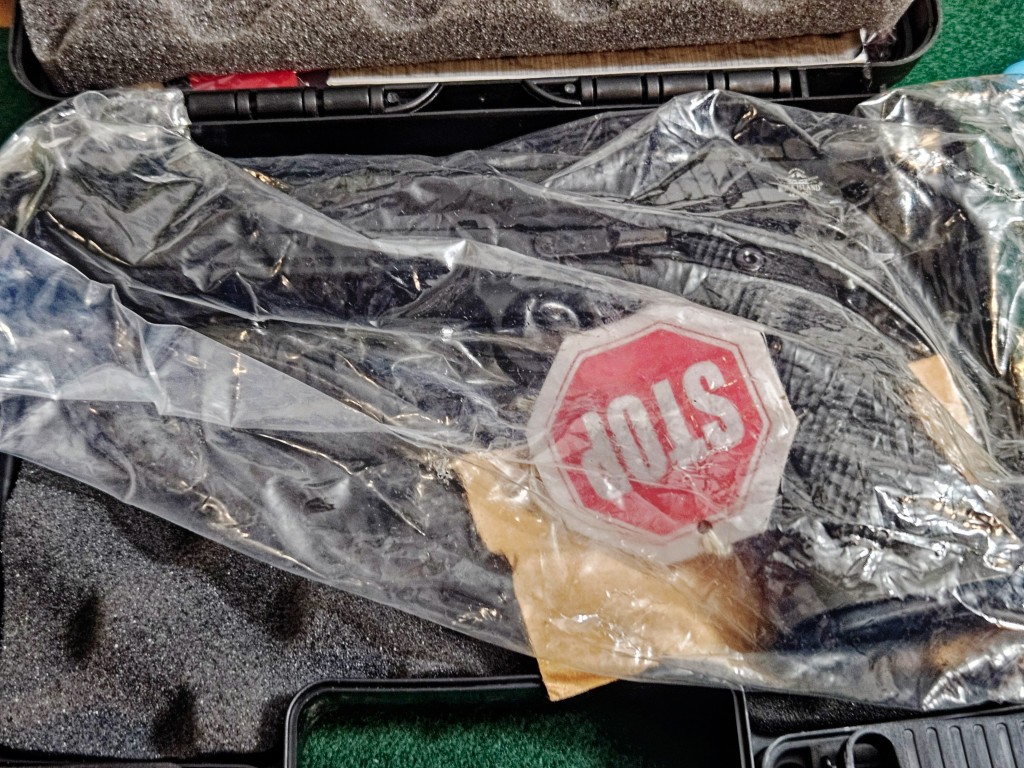
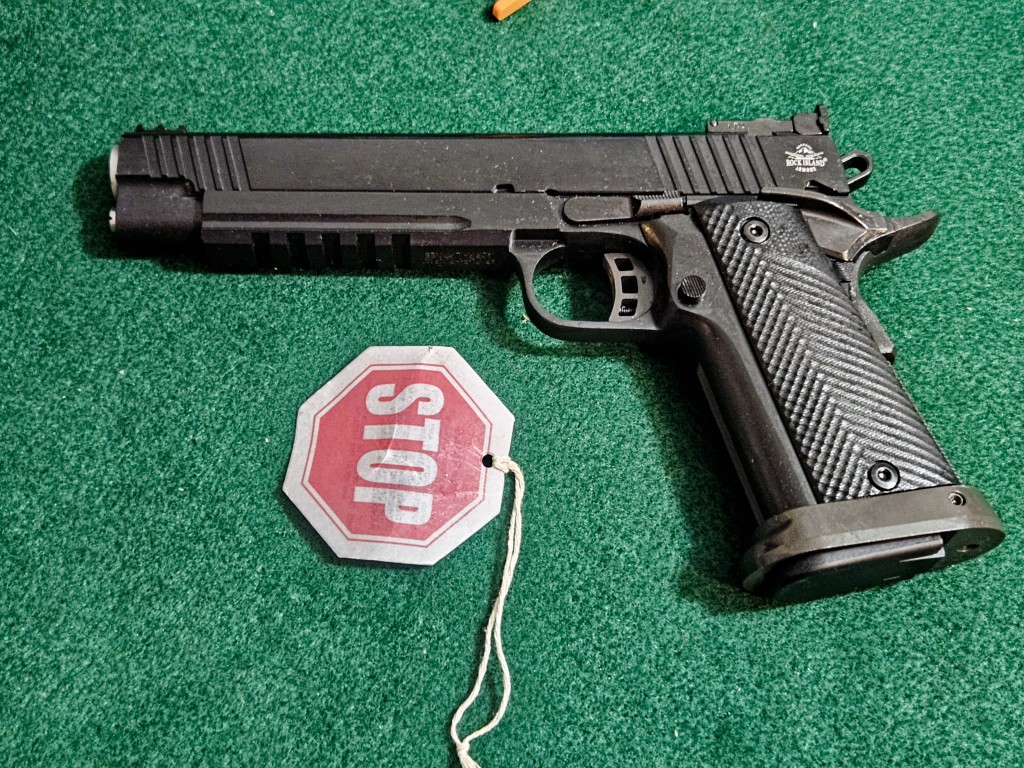
For RIA 1911 pistols, they ship them in a bag absolutely coated in some kind of oil – just what I am not sure. Do not look at that and think it is all lubricated and ready to go. It absolutely is not and it is actually pretty dirty – you need to get rid of all of that including the junk in the bore.
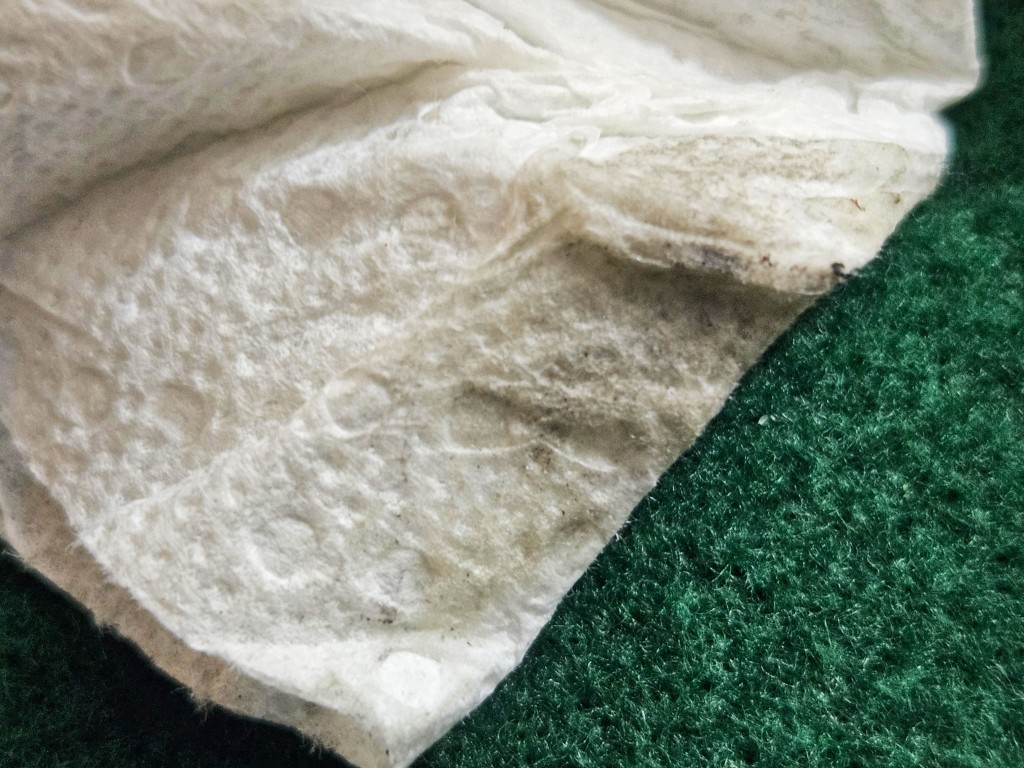
STOP is right. What is in the bag is not ready to go.First off, wipe it down. It will be drenched in oil to keep it from rusting. The 52000 Big Rock is definitely big.This is what your white towel will look like. Note it is not just clean oil – there is debris in it and it’s not inteded to lubricate but to prevent rust. This stuff is everywhere in the pistol and we need to field strip the pistol, clean and oil it to ensure proper functioning.
Now you may be thinking your Glock was pristine compared to that and while it was cleaner it was also pretty dry and needed to be lubricated. The Rock Islands are decent but they need to be cleaned up.
How about the barrel?
The anti-corrosion “oil” and grime are everywhere in the pistol.
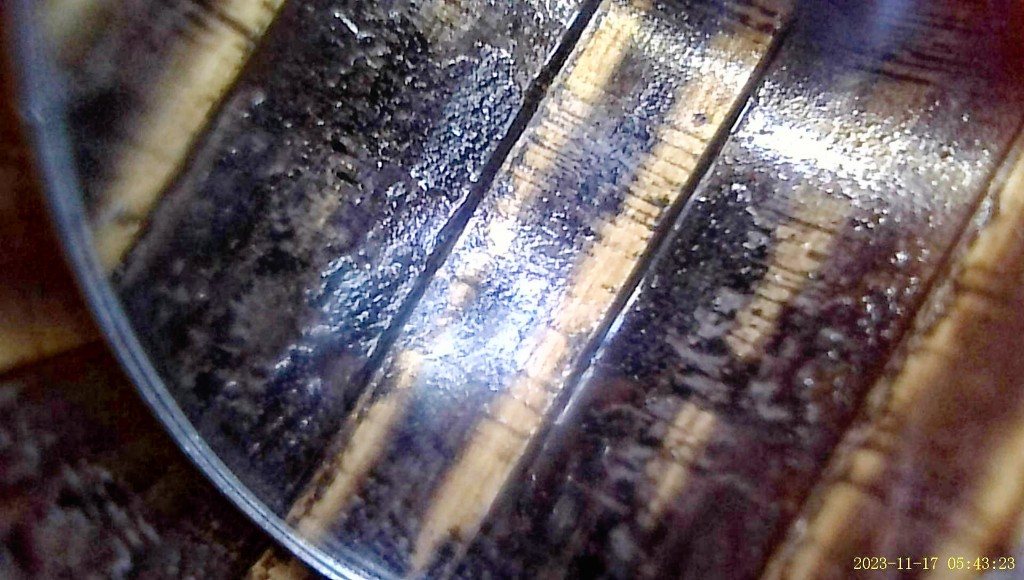
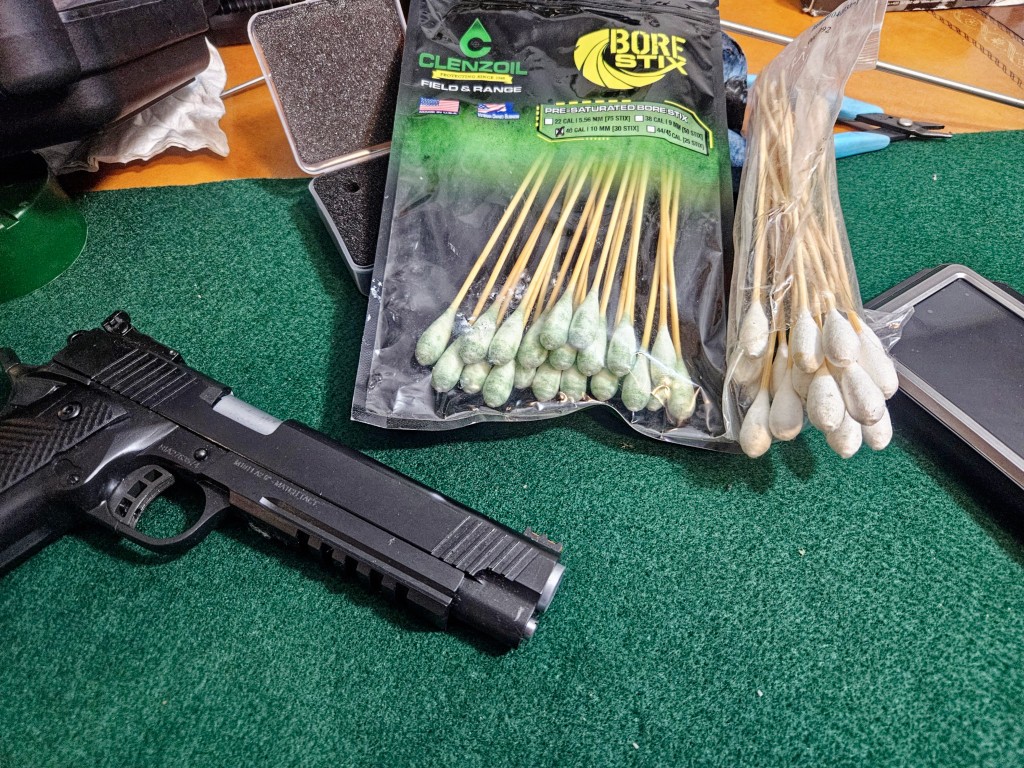
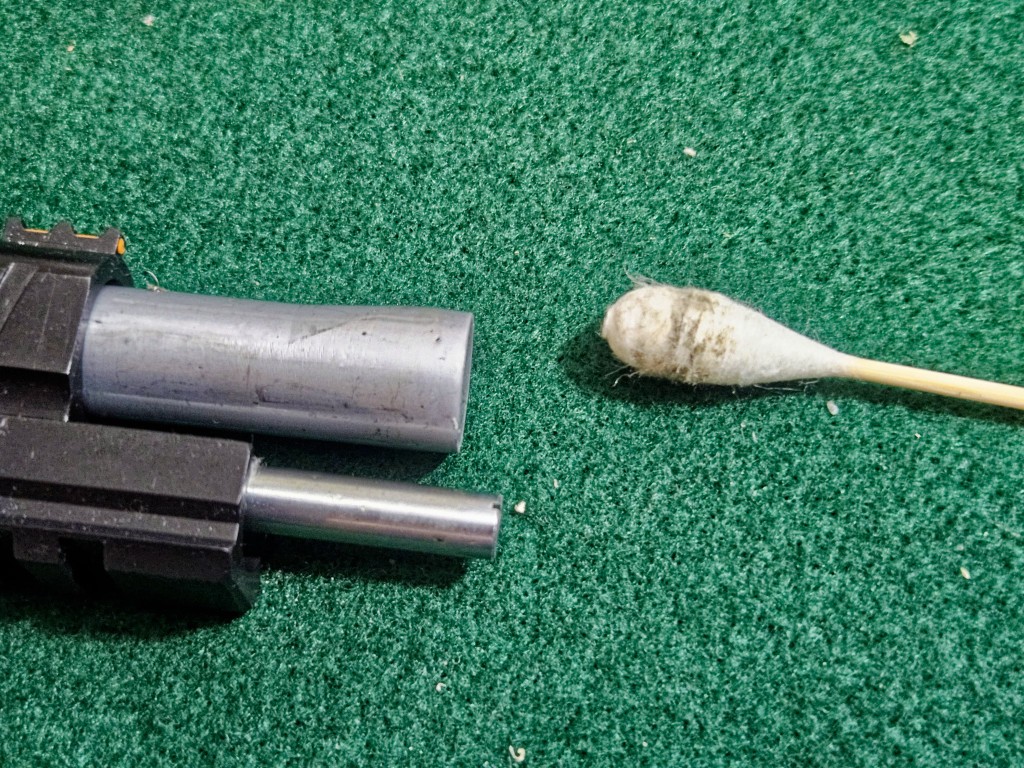
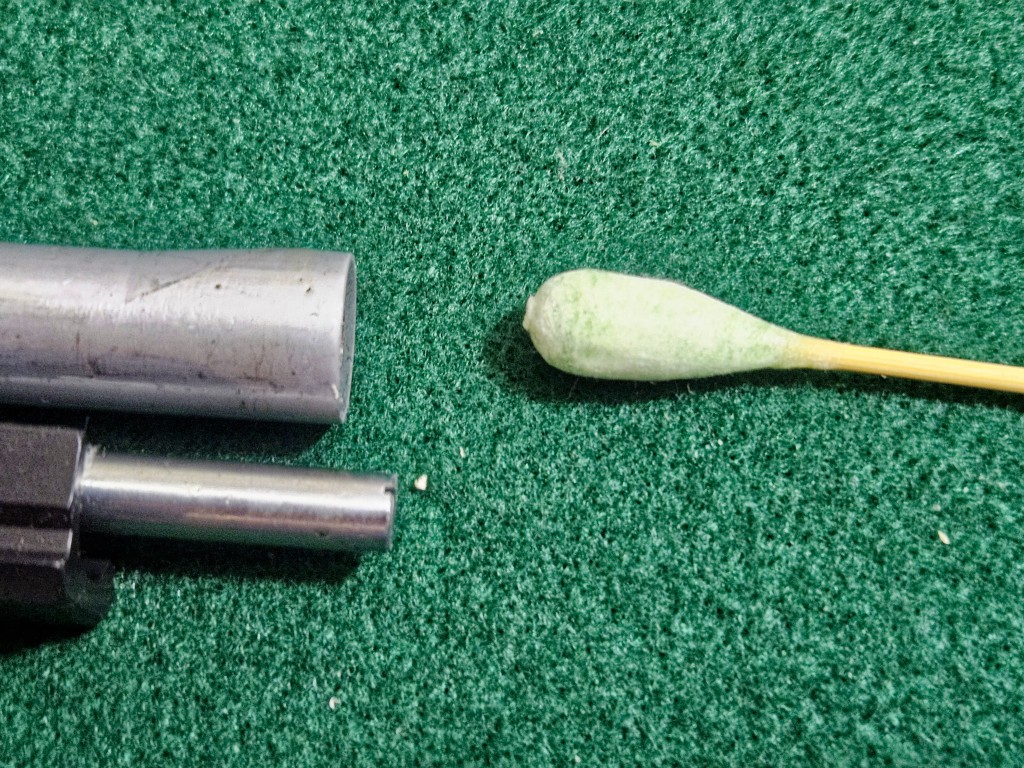
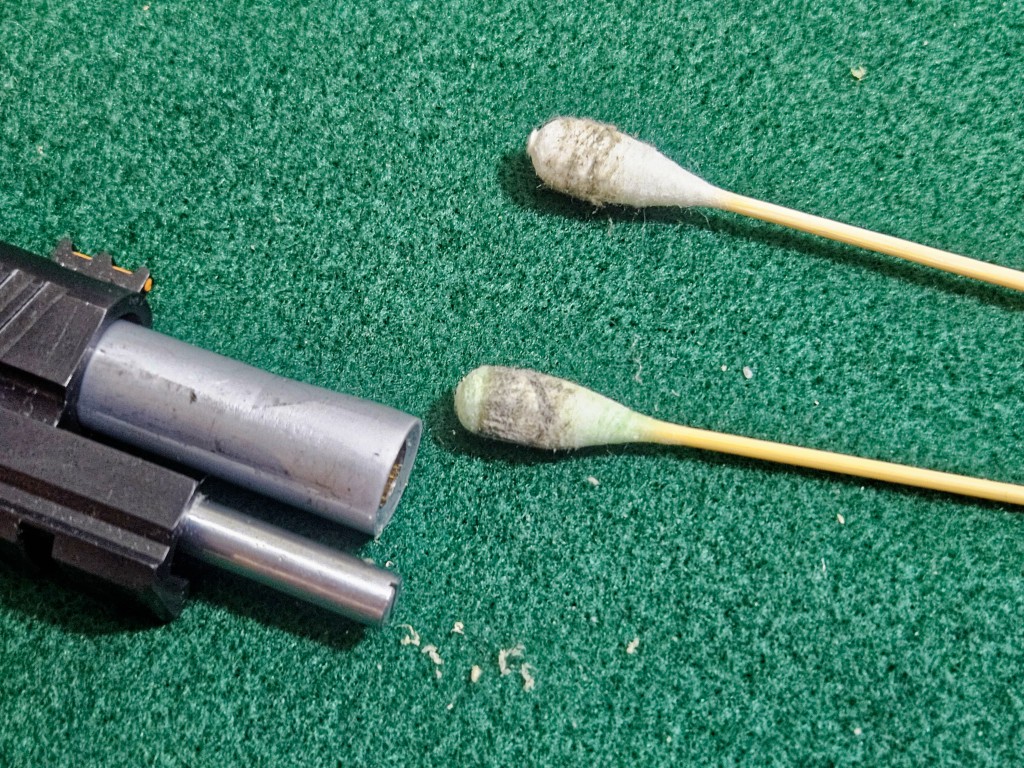
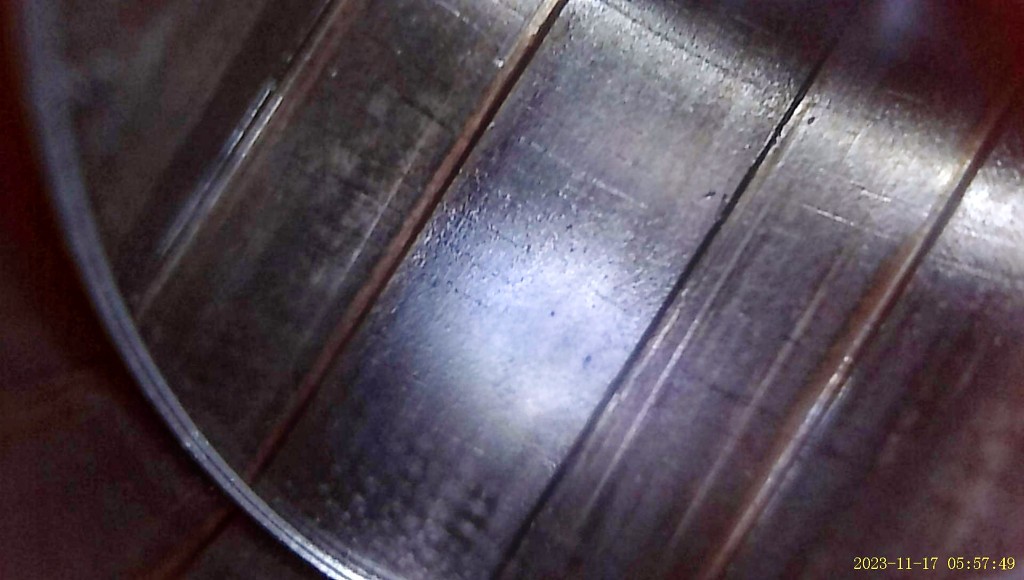
This is a real photo of an area of the bore before cleaning. It was captured with my Teslong borescope. The brass or copper color is probably from the test firing they did but the main thing for you to see is all of the preservative and grime in there, You do not want to shoot with this junk in there as it could adversely affect the pistol in any number of ways including affecting accuracy, By the way, the Teslong Rigid Rifle Borescope with 1080P resolution is pretty remarkable. I really like mine – it’s many times better than anything I have experimented with that I could afford.I have used Ramrodz for years – the giant Q-tips on the right – to clean pistols. I just started trying the Clenzoil Bore Stix (on the left) and they seem to be decent with the advantage of having a cleaner/lubricant on them already. The Ramrodz being unprepared let me decide what I want to coat them with given the situation at hand so pros and cons with both. BTW- the sticks can snap easily so you hold them close up by the “bulb” when you insert them and then run the back and forth with the stick.Here’s what the first Ramrodz looked like after I ran it up and down the bore a few times. It was coated with Kroil penetrating oil to help break things free. You can see the grime that came out. I then decided to try a Bore Stix with just its normal coating.The Clenzoil BoreStix seemed to remove even more grime than the Ramrodz but it is hard to say because the Kroil was in there working as I switched from the RamRodz to the Bore Stix.This is after cleaning and lubricating. Again, the Teslong borescope is a game changer for me in terms of actually seeing the bore in considerable detail.
What I want you to take away from this section is to clean the bore – you can absolutely use your favorite method – patches, boresnake, whatever – but definitely clean it.
Field Stripping the Pistol
Armscor includes a half-way decent manual about how to field-strip your 1911 and I recommend you read it. Some of their models have barrel bushings and they have at least two models of full length guide rods that I know of. You just need to break the pistol down into its major groups – do not start taking apart the frame unless you seriously know what you are doing or you are going to get a hard lesson in how a 1911 goes together internally and it is not simple enough for the average shooter in my honest opinion. If you are a person that assembles 1911s from the bare frame – go ahead and do it. Have fun. If you have never disassembled and reassembled a 1911 – don’t. You don’t have to at this point is the bottom line.
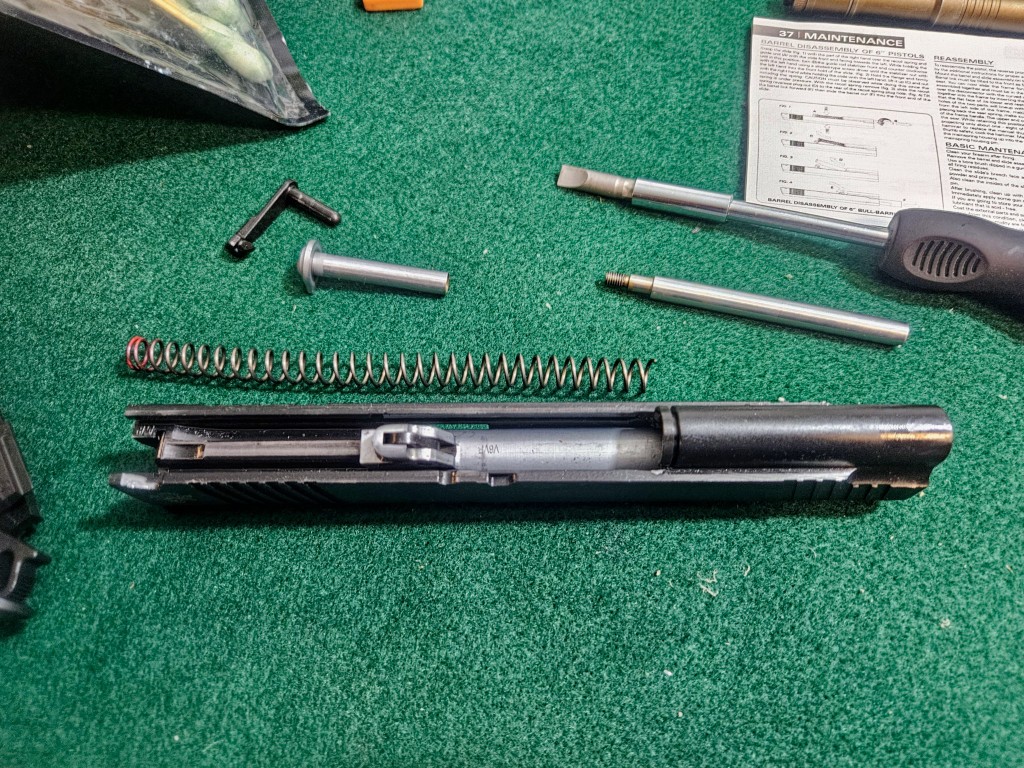
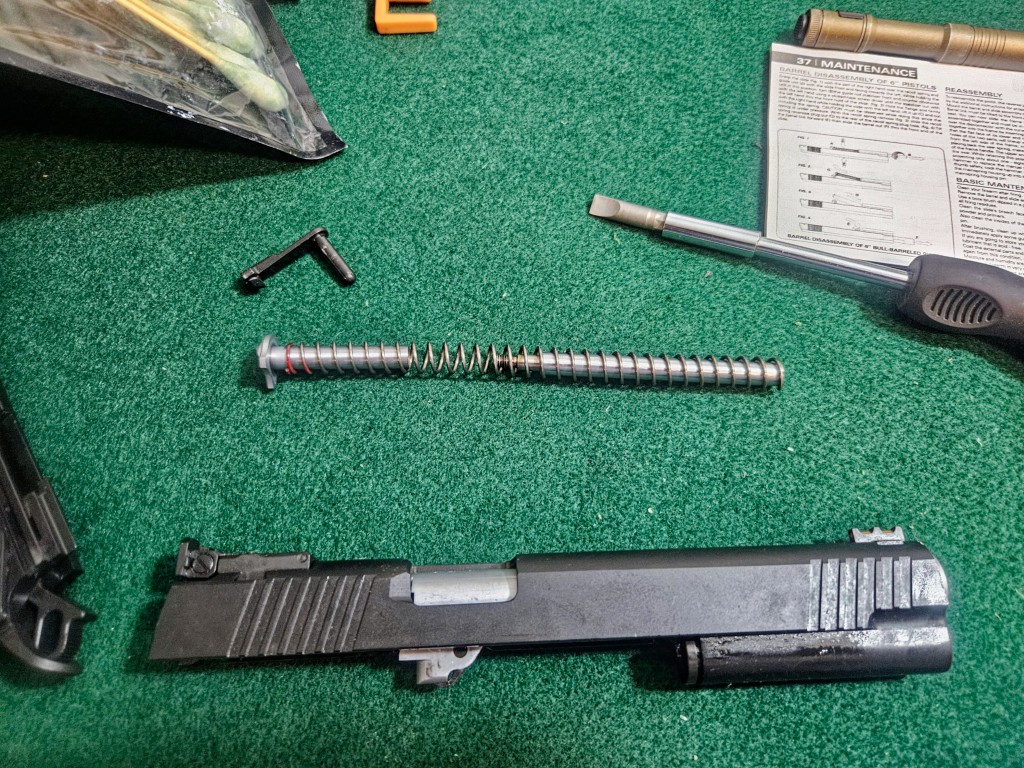
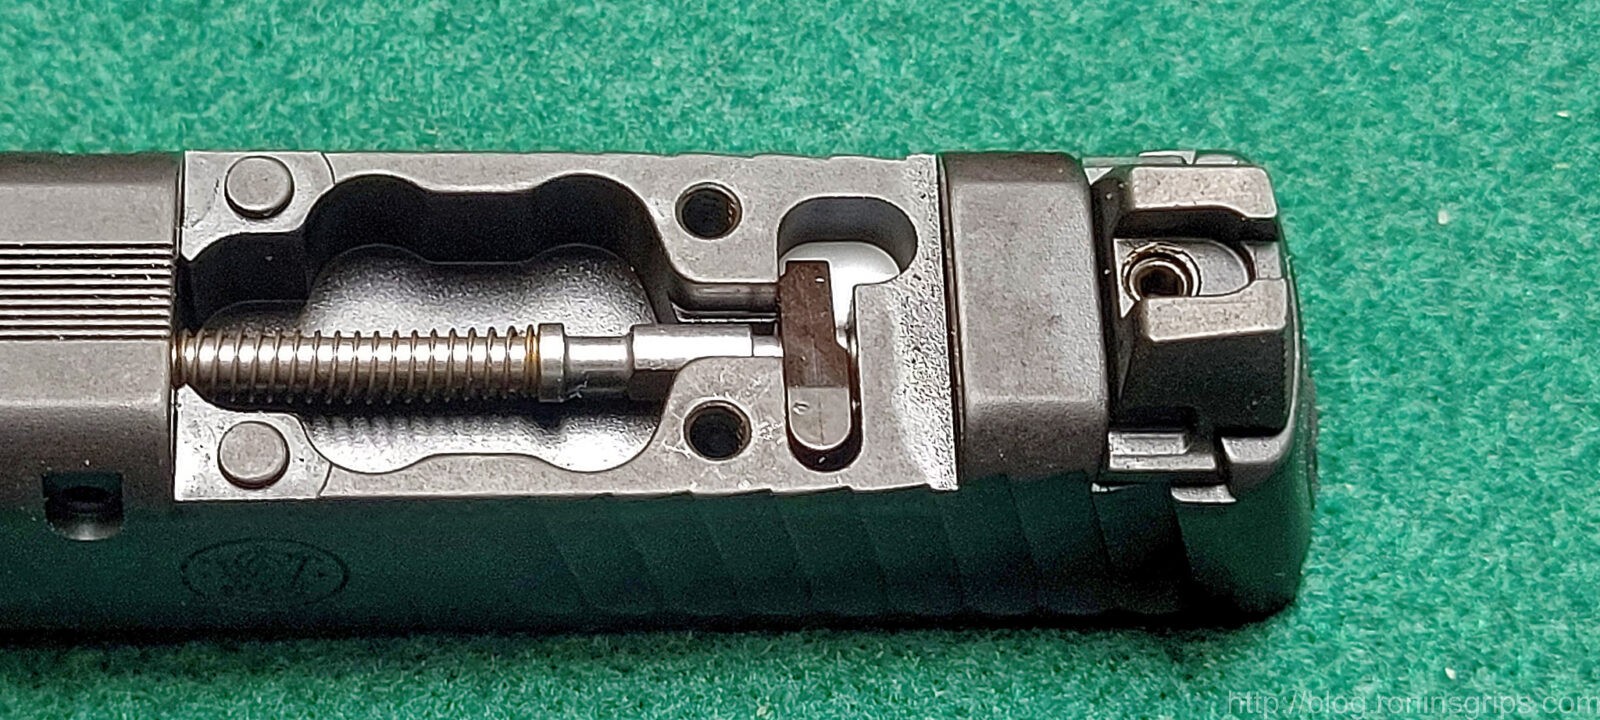
One unique thing about the Big Rock you need to know is the unique full length guide rod (FLGR) they used and as far as I know, it is not in any other RIA pistol. If you have one of the 10mms, you are aware of the FLGR design which uses a pin to capture the two halves of the FLGR from separating, The Big Rock’s FLGR is threaded. To remove it, you turn counter-clockwise quite a few turns to unscrew the two halves and separate them. Now pay attention – that is a 20 pound spring in there and it will launch one half or the other so capture or retain the assembly by securing it with your other hand to prevent you from digging around for a launched part.
That slotted part is the FLGR and it is removed by turning it counter clockwise. I was taking pictures here – remove it with the slide closed so there is less tension on the spring. Notice the dent in the outer edge of the barrek at about the 5 o-clock position. The crown was fine and that’s what really matters. I’m not going to bother sending it back.
I’m not going to write a comprehensive guide to lubricating a 1911, read your pistol’s manual. I will tell you I now use ALG’s Go-Juice which is a thin grease on anything that slides. Before the ALG, I used Super Lube Synthetic Grease applied with an acid brush and before that I used wheel bearing grease. I would at least recommend doing this while the weapon breaks in. If you want to go to an oil later after it has worn in, then do it by all means. Right now though, you need the extra lubrication the grease brings. If surfaces slide together, use grease.
If they turn, use oil. I am all over the place trying oils. Right now, I am using ALG’s biosynthetic stuff. Don’t ask me what is in it. Before that I have used a ton of different oils – MGW, Super Lube, Mobil 1, etc., etc., etc.
Getting a jump on breaking in the pistol
You will hear guys call it “breaking in”, “wearing in”, “letting the parts get to know each other” – they all refer to any firearm needing to smooth out parts through their normal cycling. Expensive guns, such as customs and semi-customs, an experienced gunsmith used huning stones, rubberize abrasive bits or whatever was their preffered tool, to get rid of the tooling marks and sharp edges to give you a smooth weapon right out of the box.
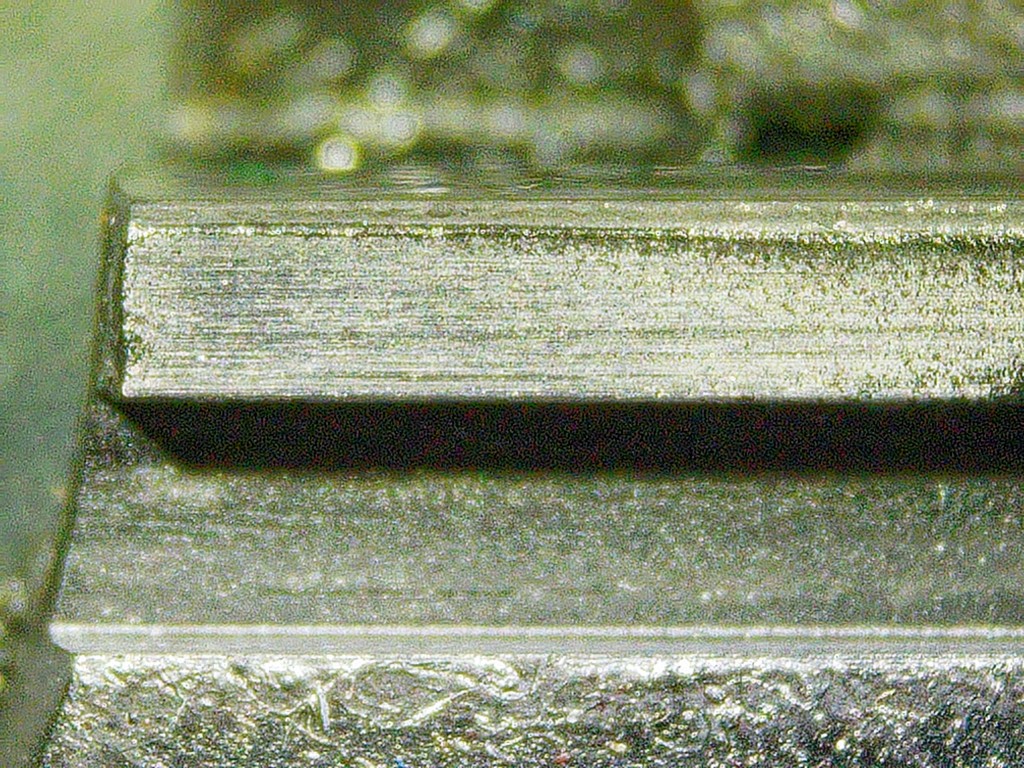
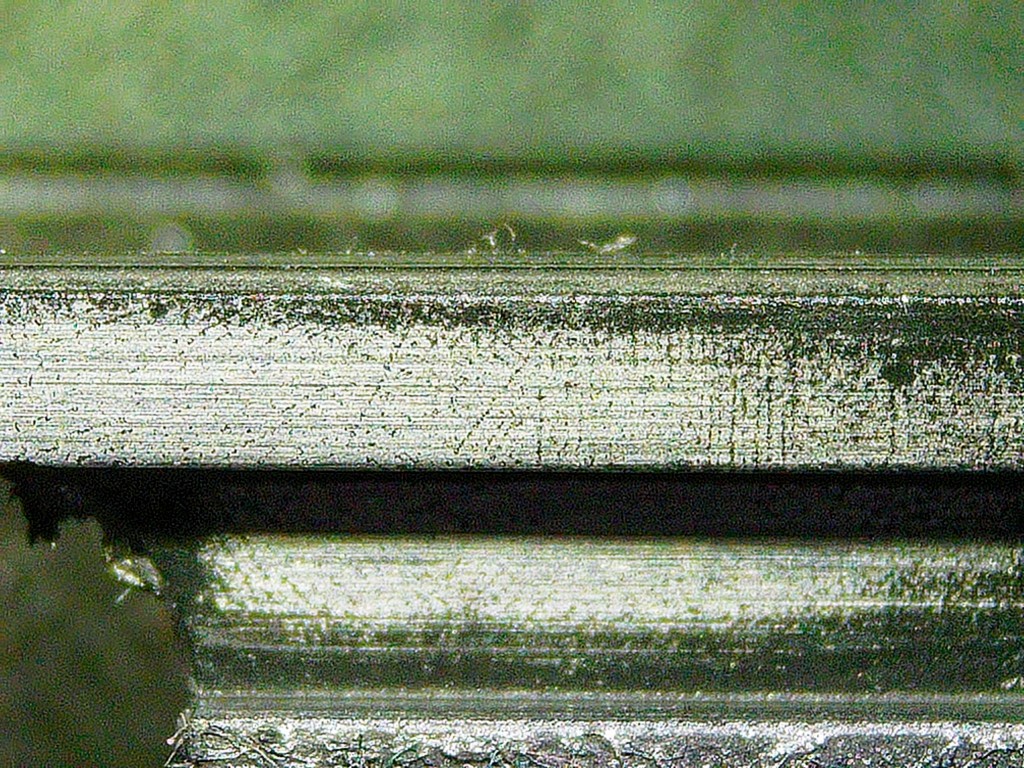
Well, RIA is not expensive and they don’t spend a ton of time fitting and tuning their parts for a perfect fit. You know what? I’m fine with that – it’s easy to smooth things out but first I want to show you why you need to do this via some digital photos courtesy of an Andonstar AD246S-M digital microscope.
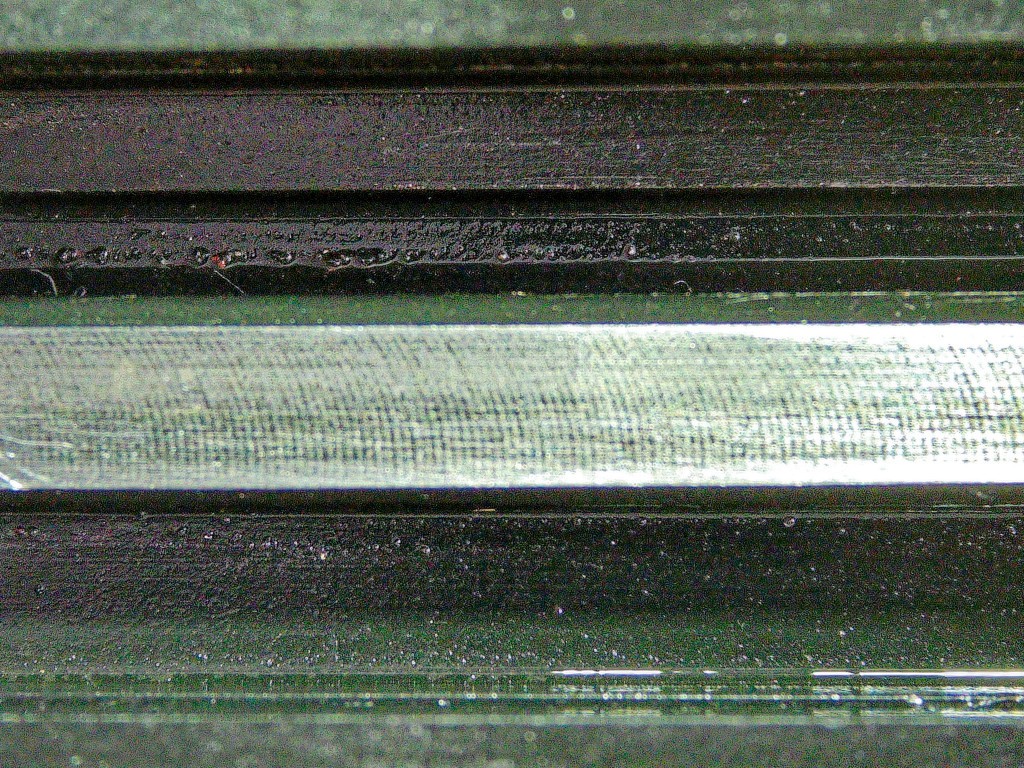
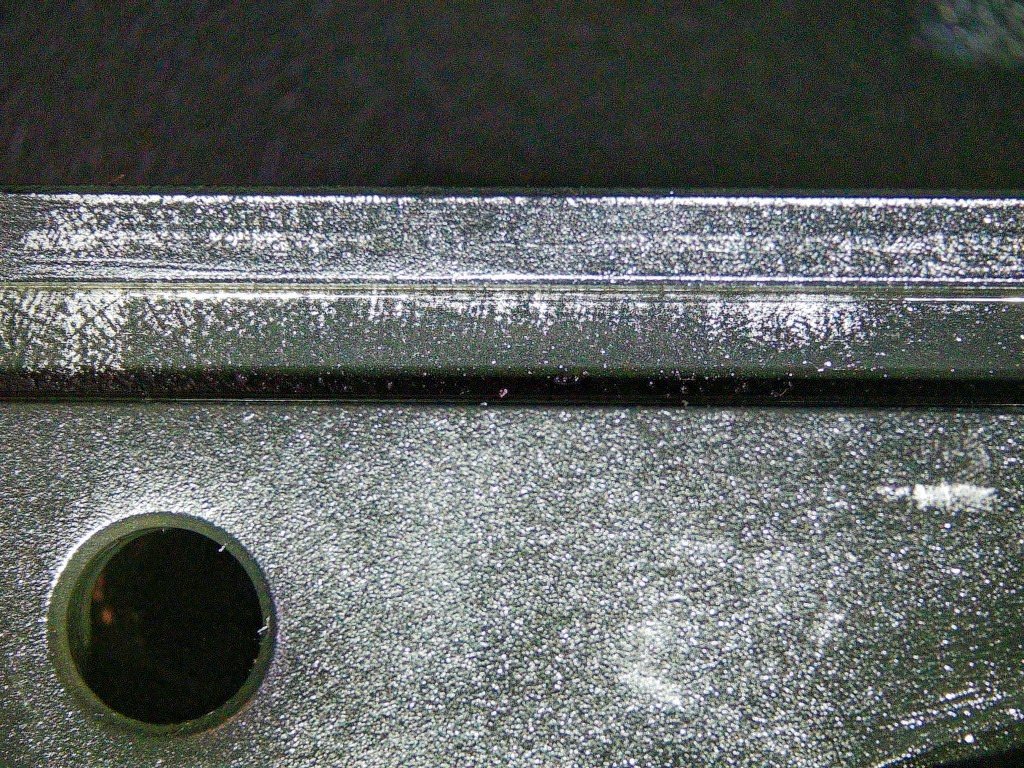
The following are example photos showing the tooling marks on various areas that need to slide freely. The tooling marks are everywhere and cause friction until the places where surfaces contact start to wear down the protruding areas:
Bottom of slideSample of tooling marks on slide rail areaTooling marks on the receiver’s slide area.Front of the left side of the receiver – the shiny areas are already making contact with the slide and wearing in.
Again, the above are all examples. Areas starting to shine are wearing in and starting to smooth out. I’d maybe cycled the slide a dozes or so times before the above photos were taken as I wanted to show before.
Now, there are tons of things you could do with honing storines, rubberized abrasive bits and even with lapping stones. If you want to do one or more of those, go for it. I have an even simpler solution – rack the slide open and closed a couple hundred times. Literally, don’t have a mag in it and work it back and forth over and over. It’s a workout with that 20# spring but it will accelerate wear-in dramatically. Think about it, a lot of firearms get more reliable just under a 100 rounds. You are really smoothing things out at 200, What you will notice is that if you do the above, you will not waste a lot of time and money dealing with jams.
How do I know this? I have owned a number of RIA pistols over the years. My test pistols that I use to test each mag before they leave have been handcycled thousands of times and the slide feels like that of a high-end pistol – like it is sliding on glass.
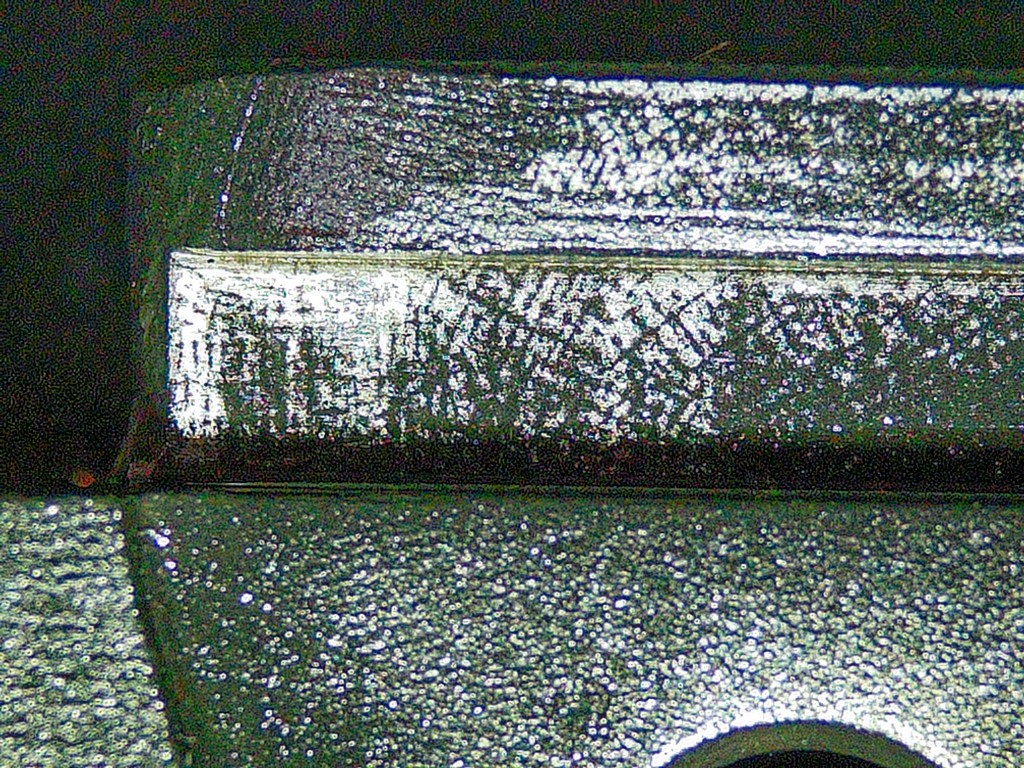
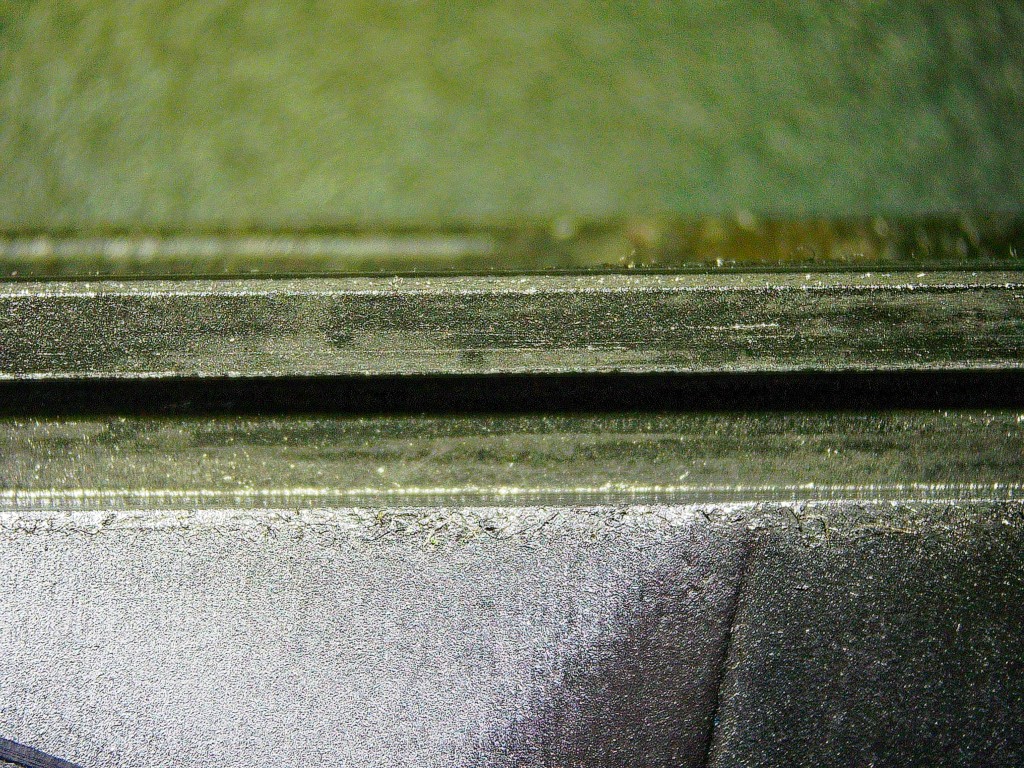
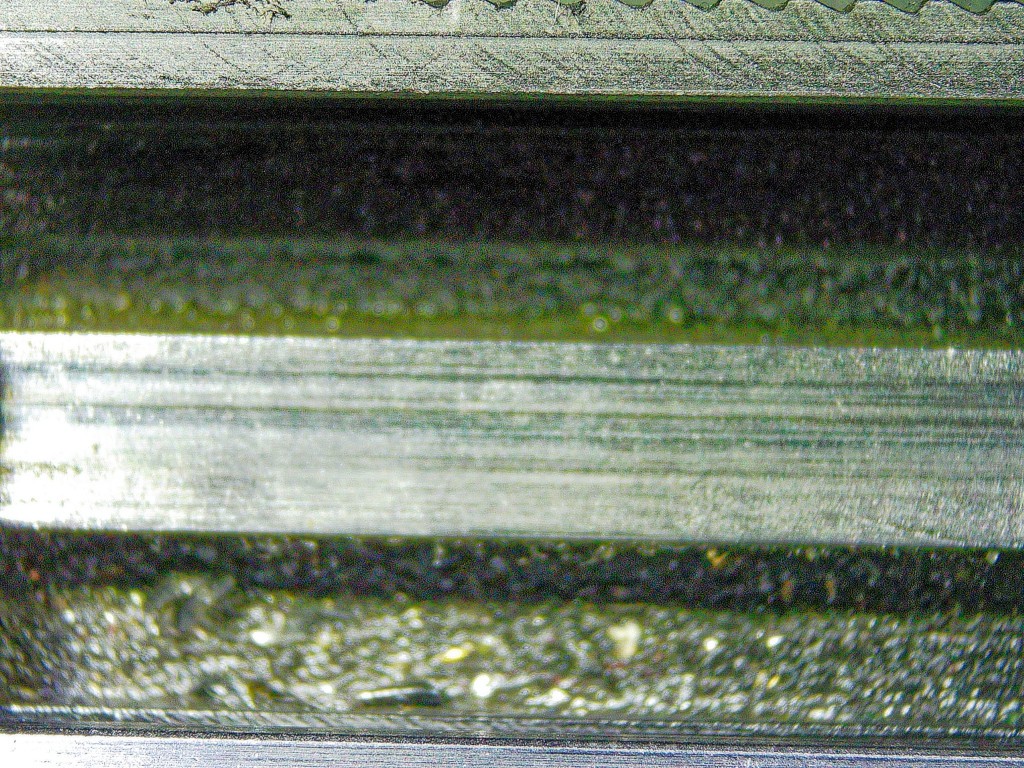
The following photos show contact areas after thousands of cycles:
Shiny areas neans the parts wore together and smoothed out.In this area the tooling marks are all but gone.Again, lots of wear – only the deepest tooling marks are still there.The bottom of the slide is worn smooth.
Guys are always surprised how smooth these pistols are and then even more surprised when I tell them they are unmodified RIA pistols that have had their slides cycled thousands of times.
So, do you need thousands of times? No, just go for 200 and you can do more if you really want to.
Last comment on the FLGR and reassembling it
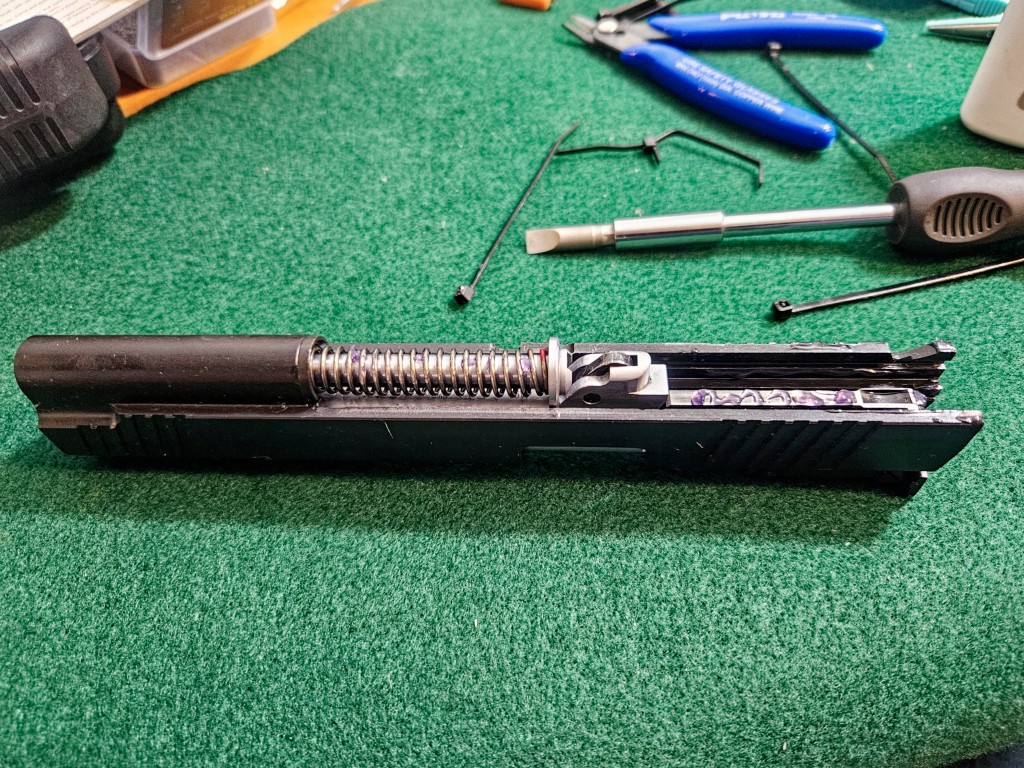
I seriously started hating on the unique Big Rock FLGR design when it came time to put it back together. You are fighting a 20# spring and I couldn’t remember how I did my last one years ago or find any tips or tricks about how to do it. The best thing I can tell you is that you need to secure the back half against the barrel link with the left hand. Insert the front section with the right and try to get front threaded insert into the hood of the back, try to hold them in approximate alignment as you try to screw the front half back in. Translation – it sucks and I have no tips.
I haven’t gotten this frustrated iin a while. The FLGR assembly is those three parts – the 20# spring and the two sliver rods. The one saving grace, the only saving grace for that matter, is the design of how they come together. The two shafts need to line up with the front long part with the slot sliding into the short stubby back part hat has a hooded opening. This photo was mere seconds before I launched the back half six feet away where it luckily hit a wall and dropped in plain sight because I wasn’t keeping it secure enough with my left hand. Note, I still have a 1911 recoil spring plug somewhere that launched in my shop and was never found.This is just to prove it is possible to get them back together. Note the purple ALG thin grease on the slide.
Summary
I hope this post helps impress on you the need to clean, lubricate and cycle your pistol, or whatever firearm, before you go to the range the first time. I do this myself and have shared it with many, many folks over the years and the feedback has always been positive.
By the way, the majority of guys who contact me hating on the RIA pistols did not break them in so I walk them through this. The second largest majority are really frustrated with the OEM magazine.
If you find this post useful, please share the link on Facebook, with your friends, etc. Your support is much appreciated and if you have any feedback, please email me at in**@*********ps.com. Please note that for links to other websites, I may be paid via an affiliate program such as Avantlink, Impact, Amazon and eBay.
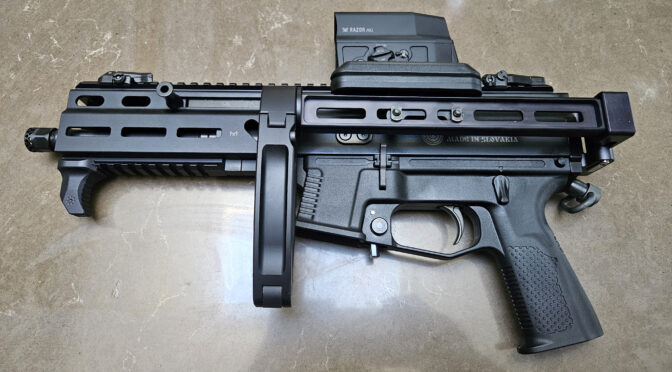
When I built our a pistol with recoil, I worry about my hand slipping off the handguard and going in front of the muzzle. I recently bought a Stribog 10mm and that was running through my mind – so I started digging for hand stops that could mount on a picatinny rail.
I should point out I don’t like angled fore grips (AFGs) or anything that incorporates that design aspect. I like the bottom of the handguard to be flat. I also like hand stops that are small from an aesthetics perspective plus I don’t want the ATF, or whomever, arguing that I actually have a vertical grip which is illegal on a pistol.
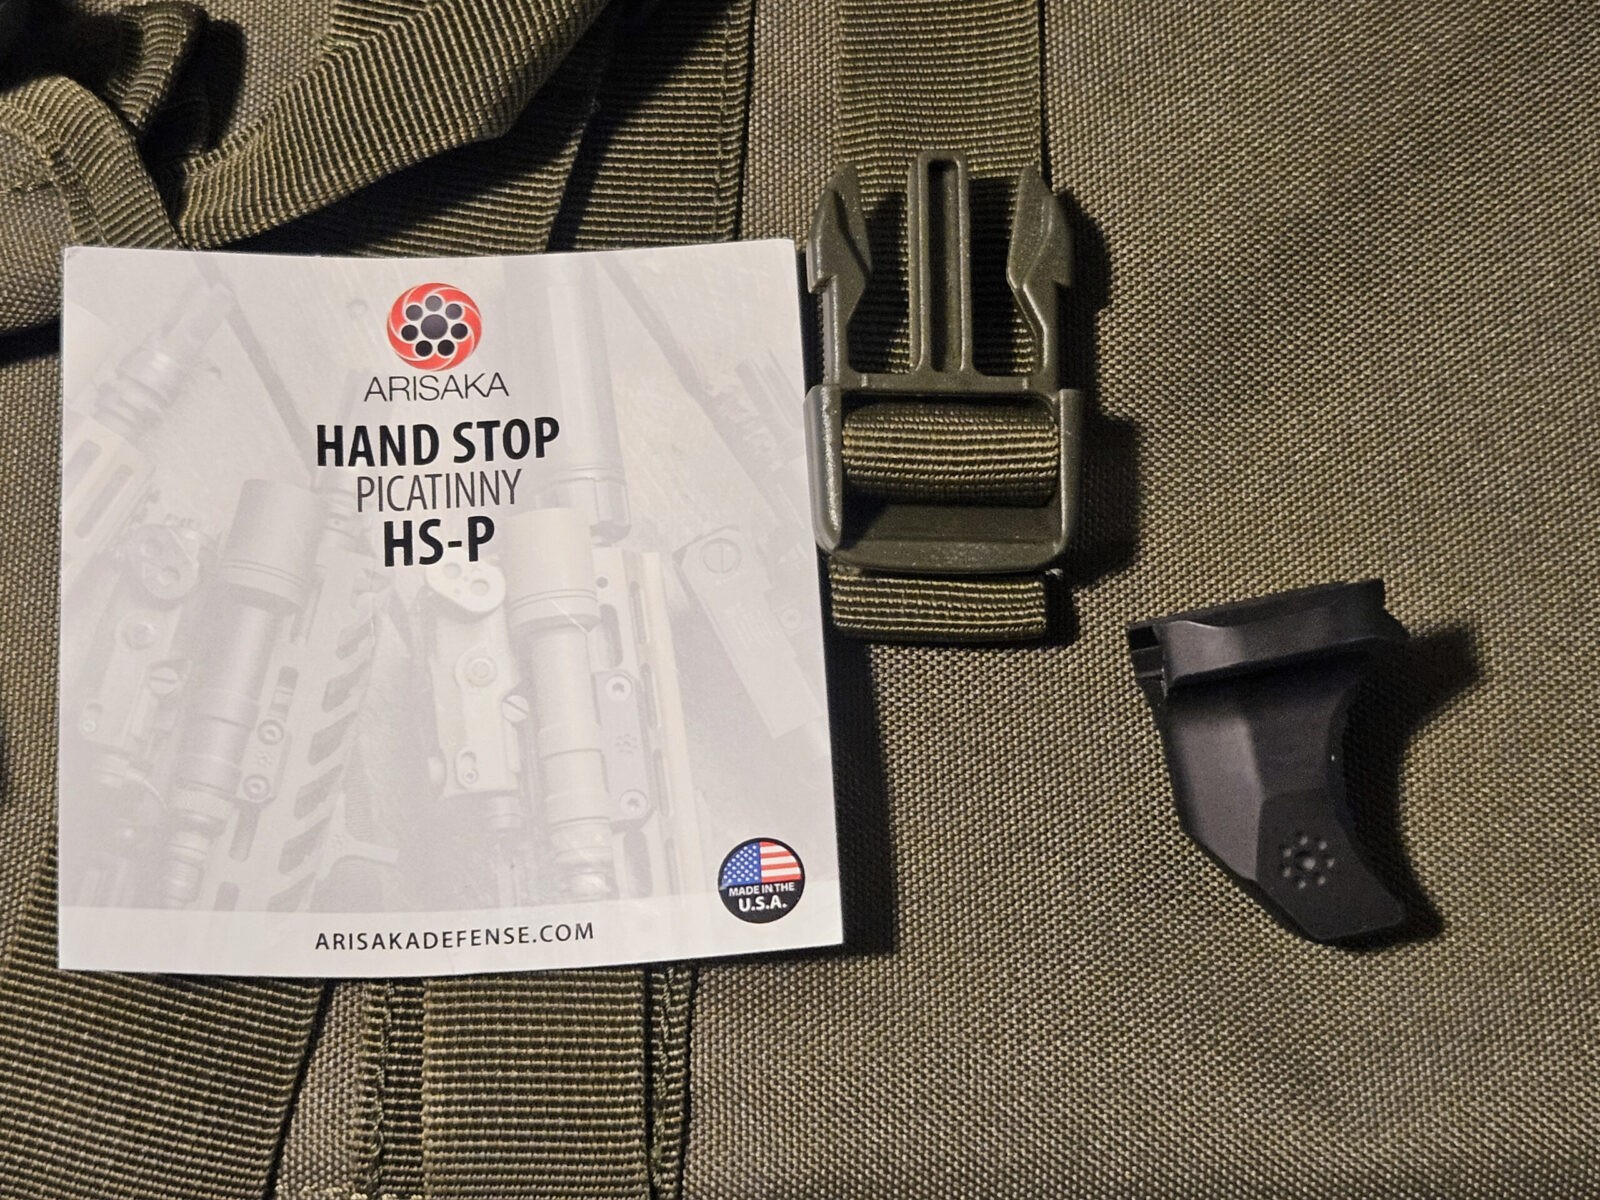
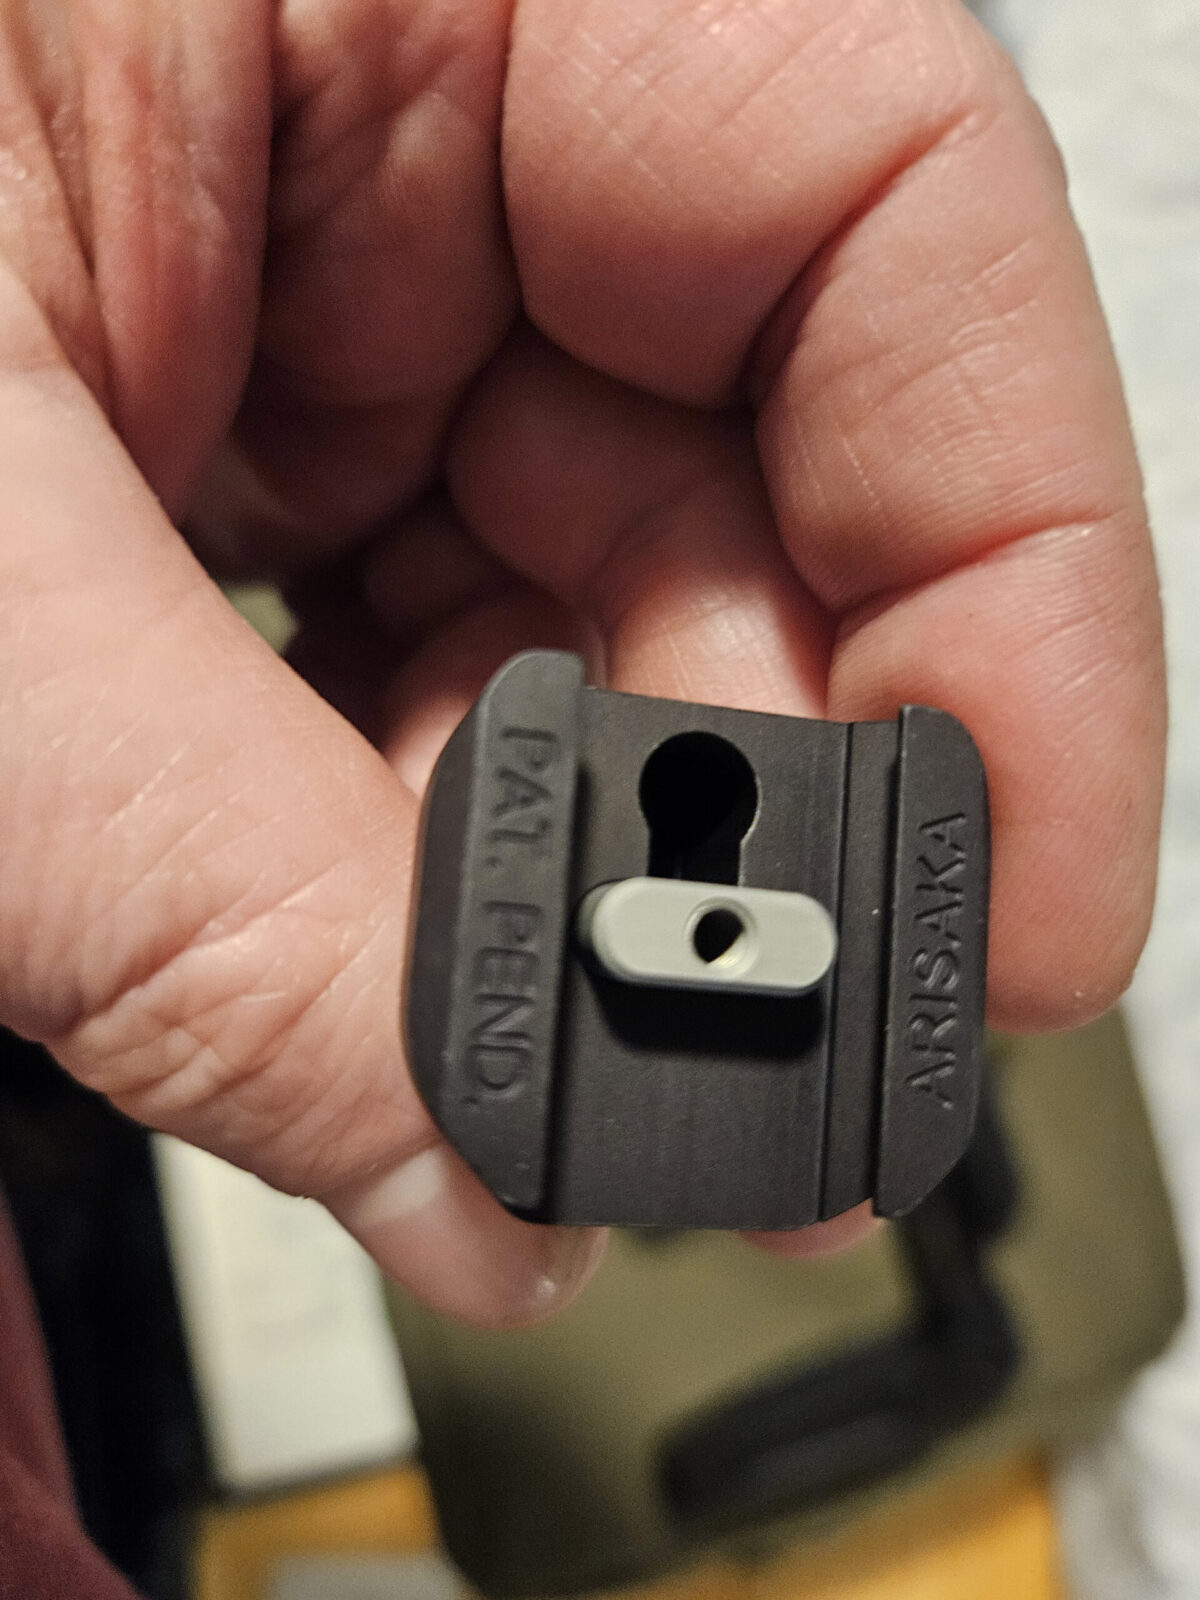
I ran across an ad for Arisaka Defense’s HS-P handstop. It mounts on rail though I couldn’t quite figure out how from the website photos. Because I’ve had good luck with Arisaka products in the past, I gambled and ordered one. Guess what? I really like it and figured a quick post might be of interest to others.
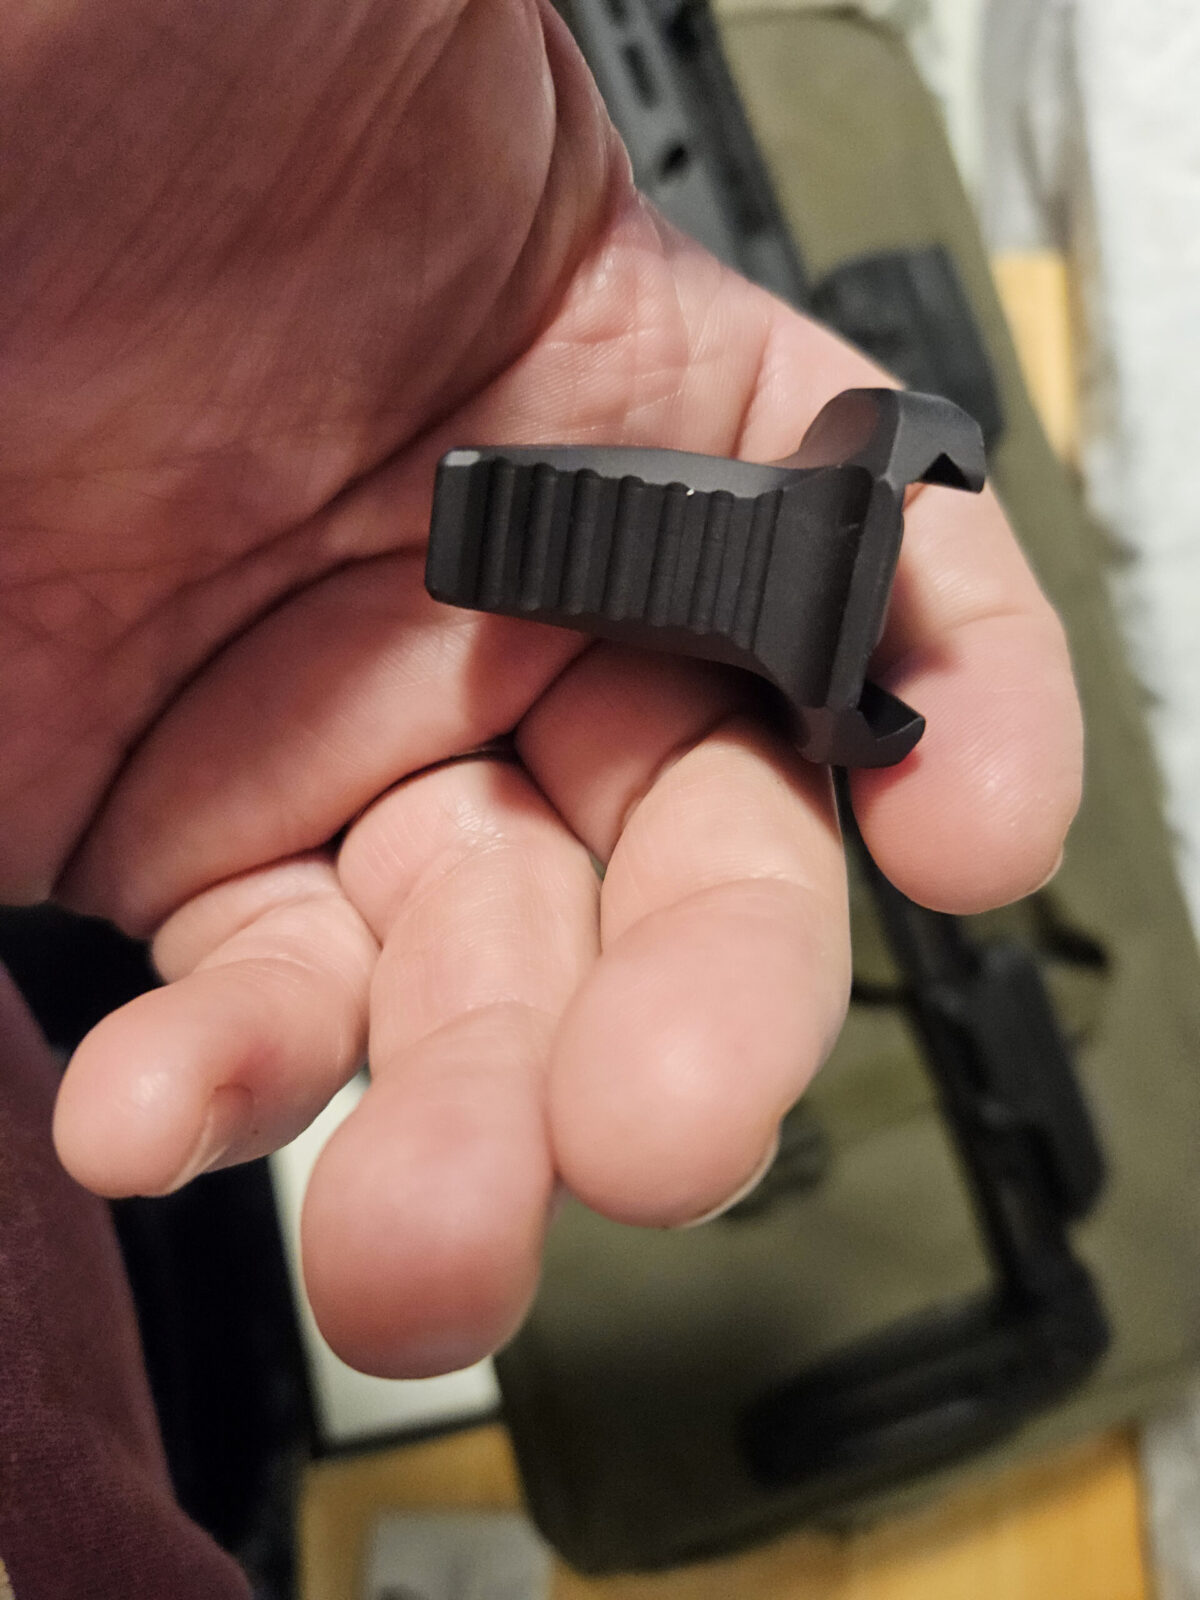
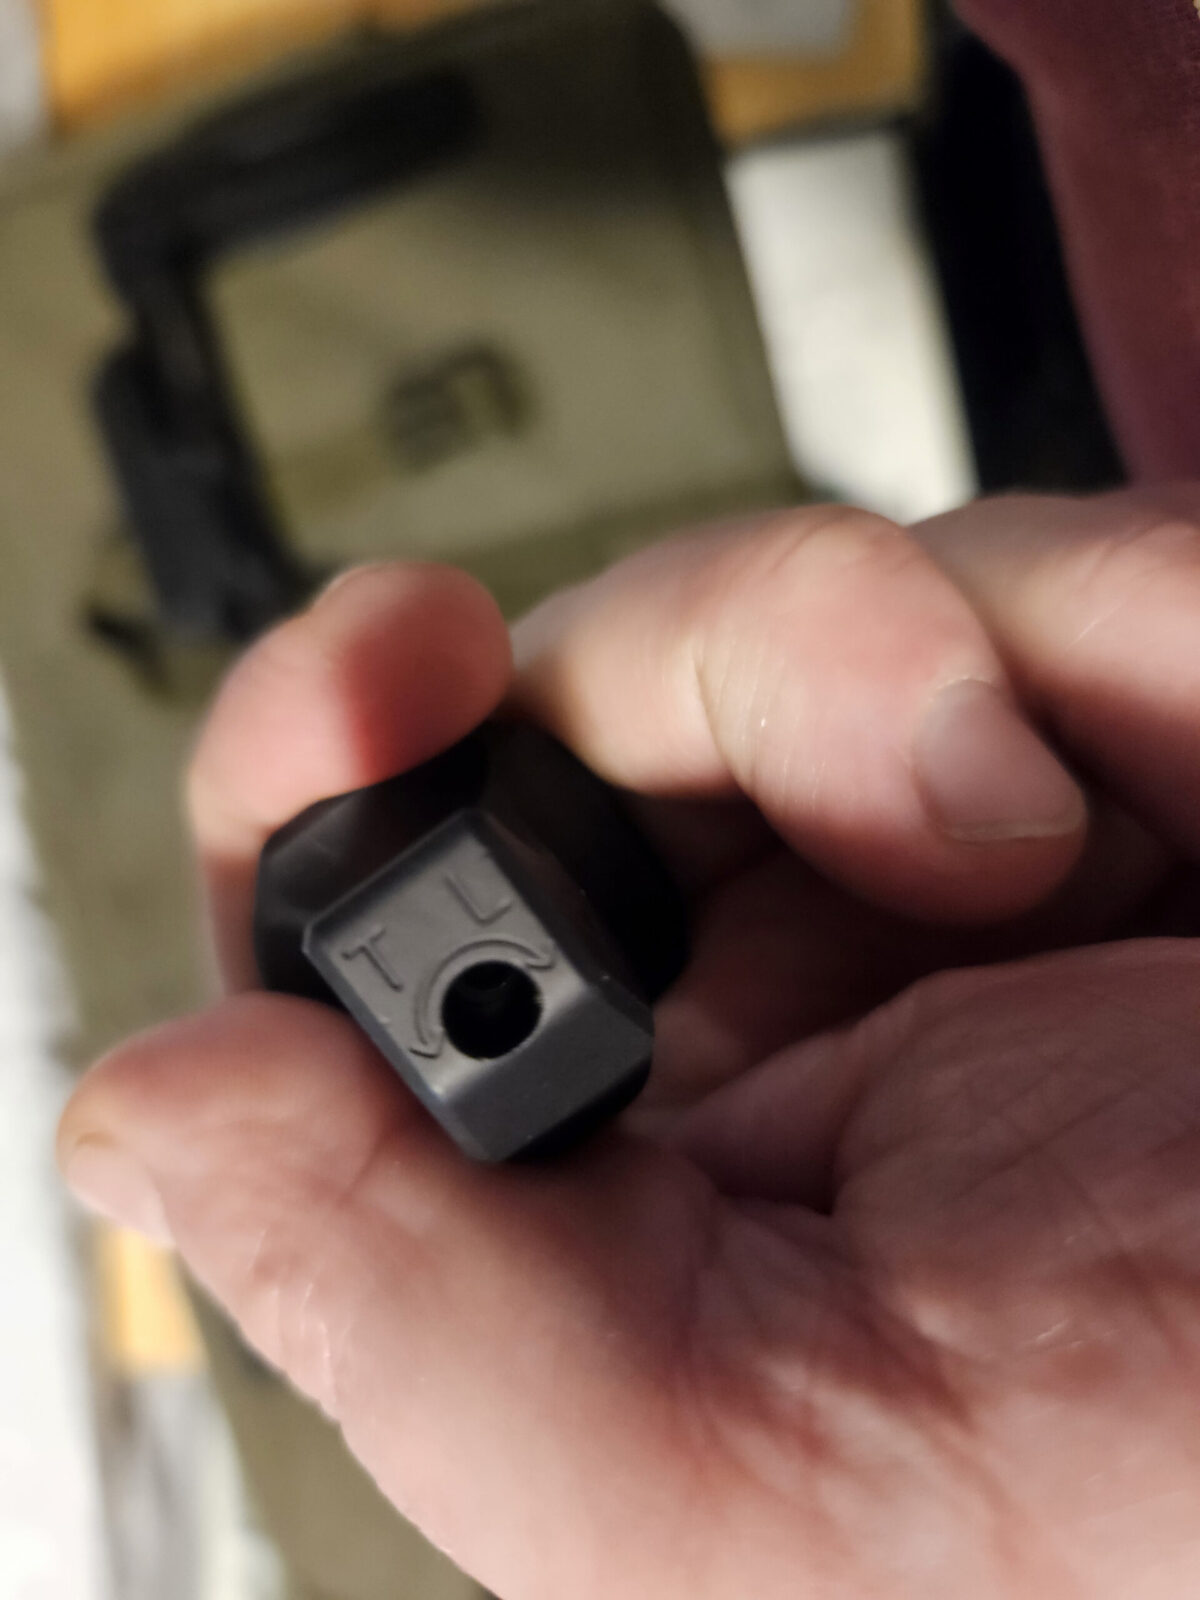
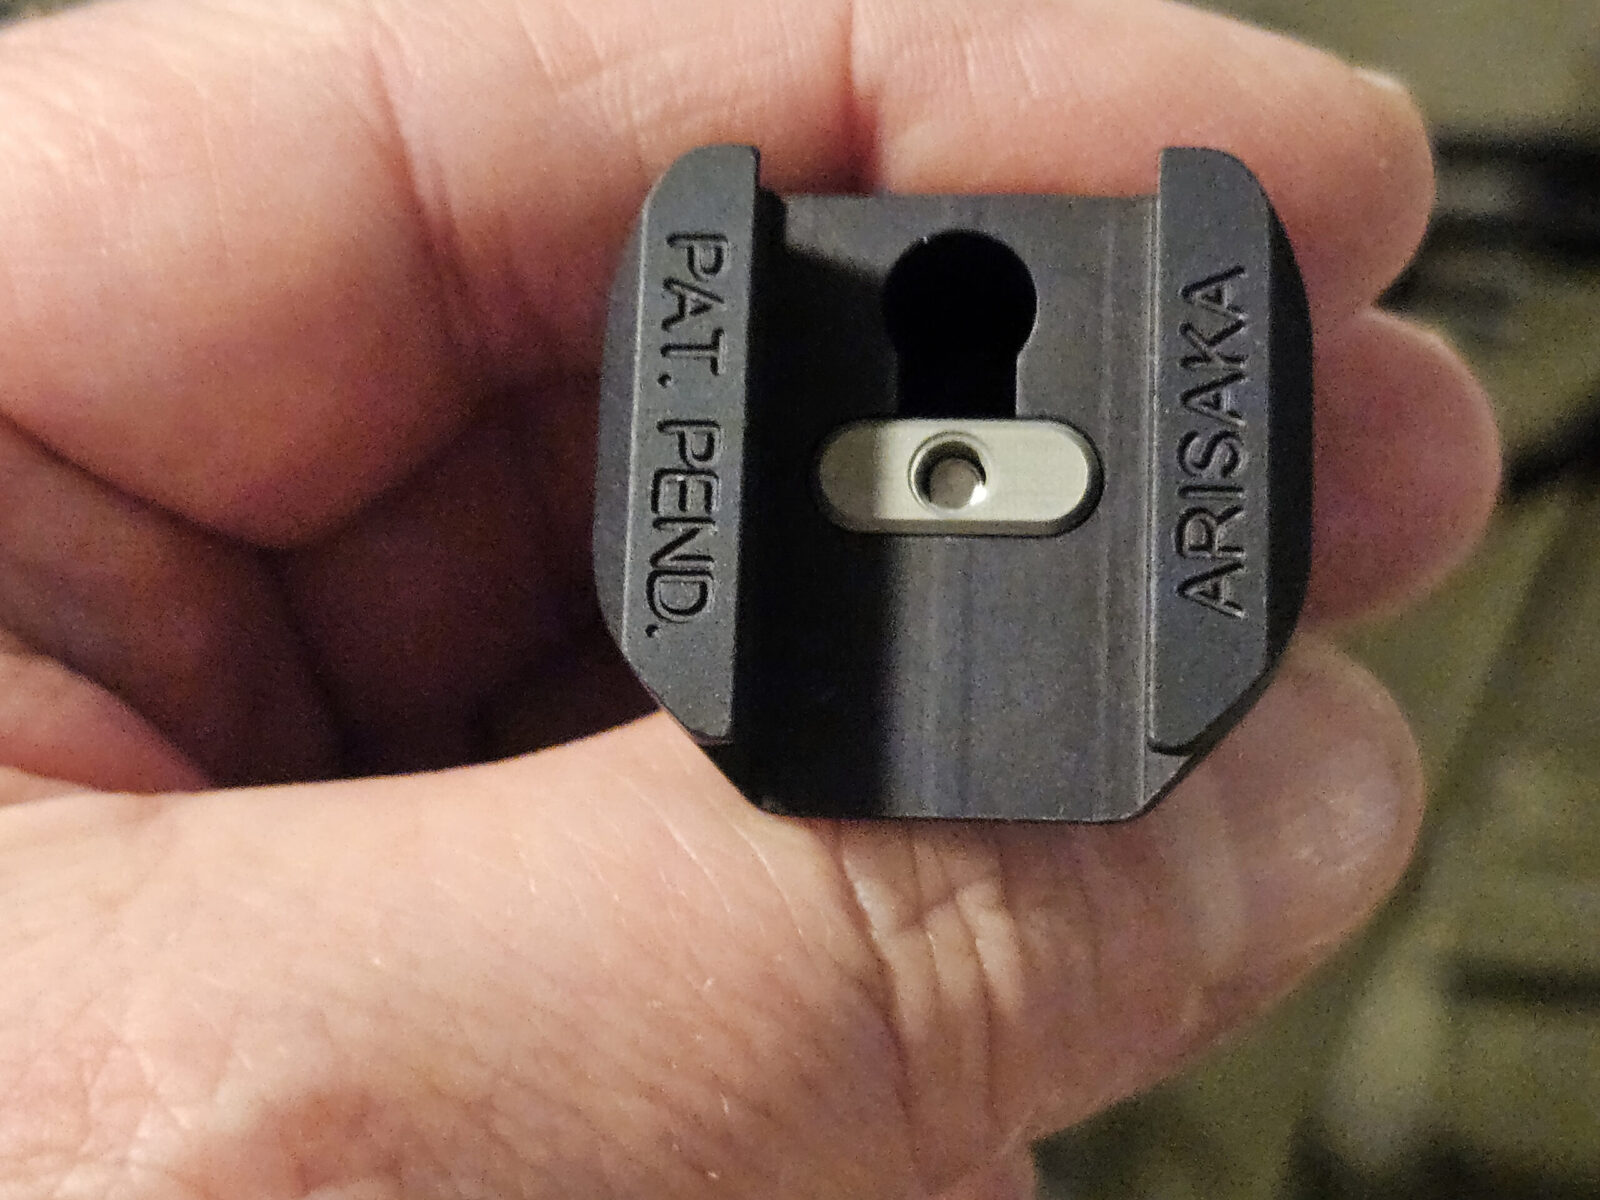
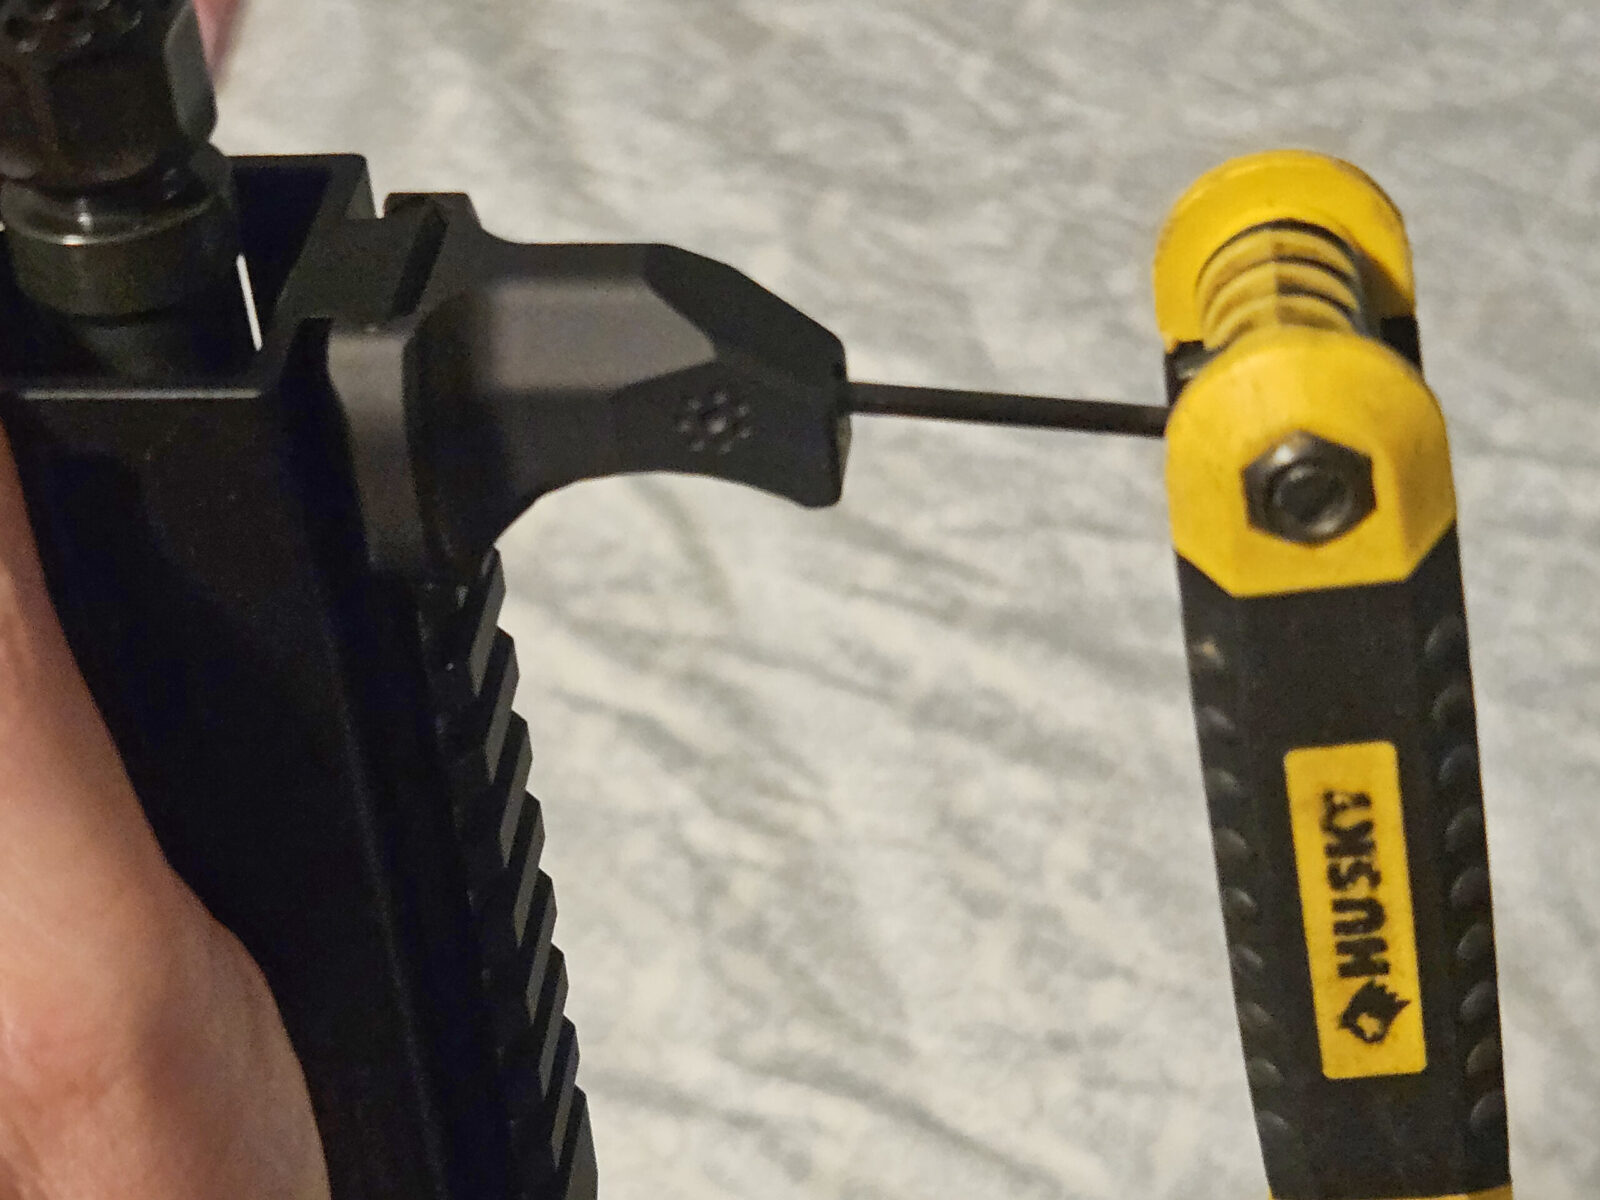
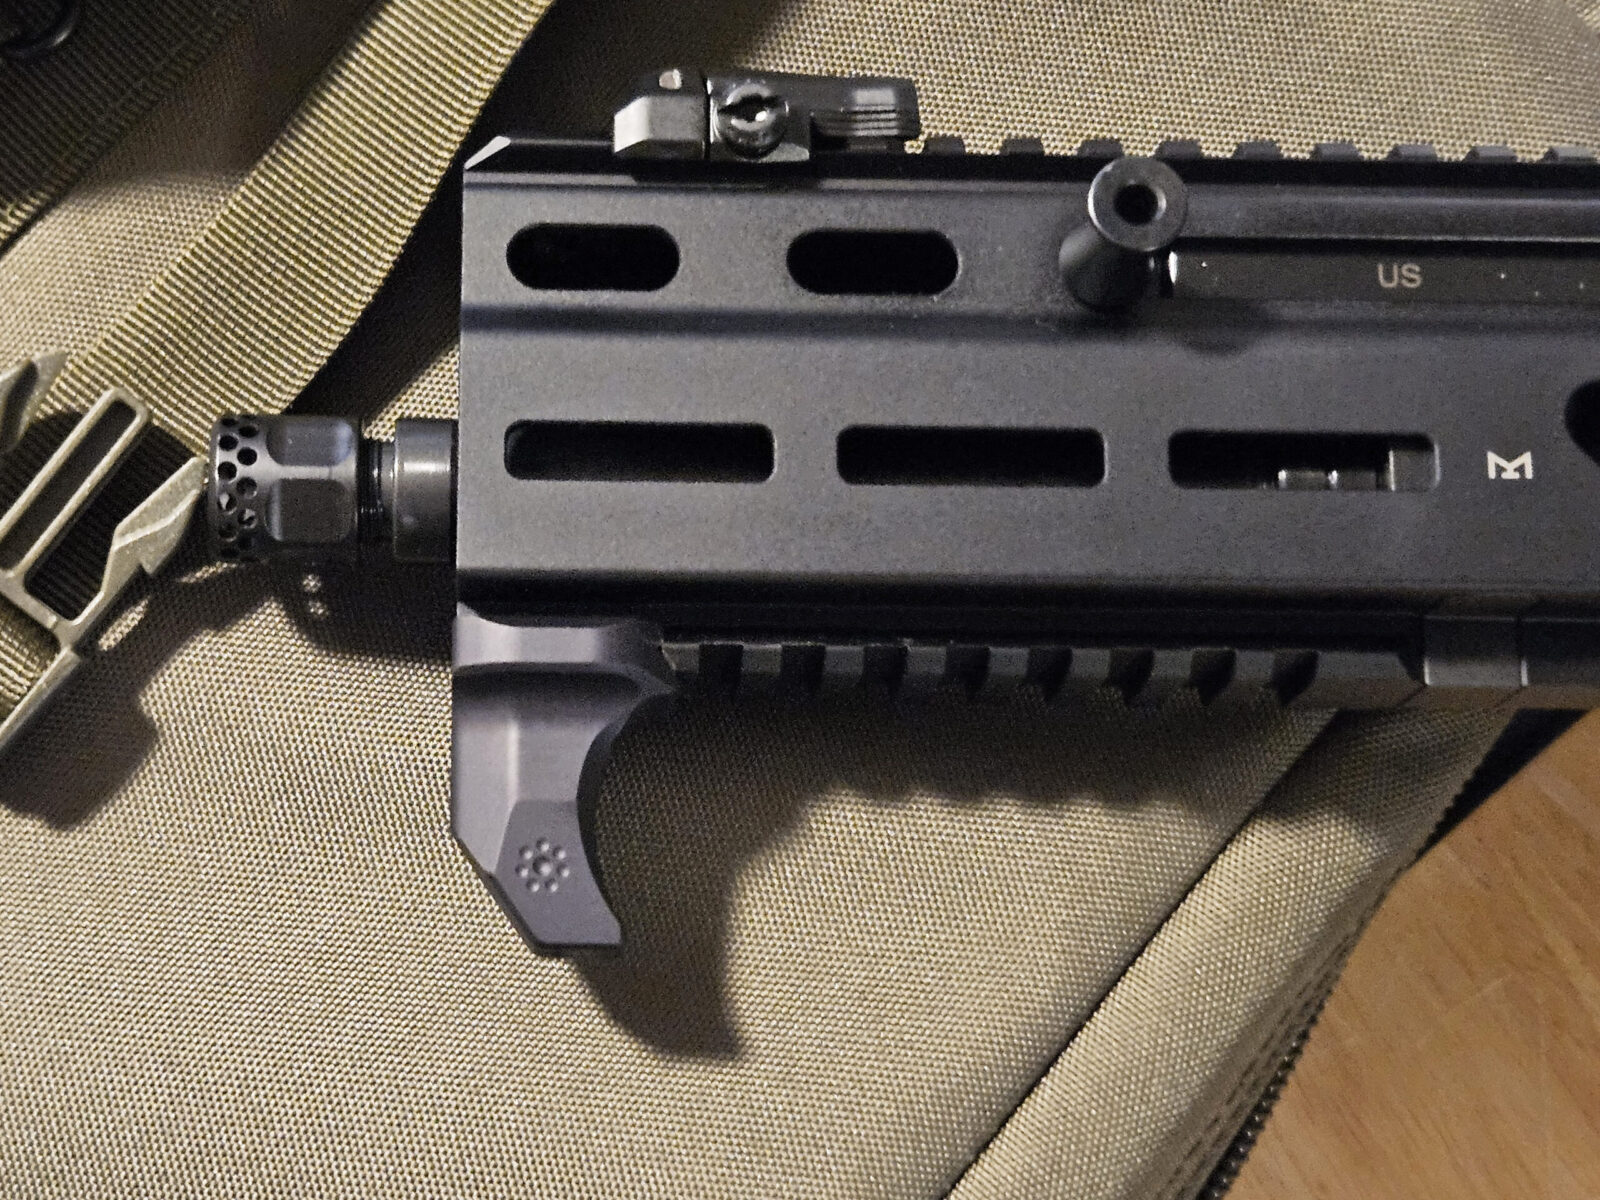
So the HS-P is CNC machined from 6061-T651 aluminum and MIL-A-8625 Type III hard coat anodized.The secret sauce that makes this so cool is that grey aluminum recoil lug. There is a screw attached that you can’t see that raises or lowers it into whatever Picatinny rail slot you want locking it in place. Simple and slick!The front has slots cut into it. I suppose that could help if you want to use it on a barrier.On the bottom is the hole for the screw. Use a 7/64″ allen key to tighten (push the lug up) or loosen (lower the lug down). Torque is 15 in/lbs – please note that is inch/pounds and not foot/pounds.In this photo, you can see the retracted recoil lug. I then just slid the HS-P onto the handguard’s rail to where I wanted it.I slid the HS-P on and then used my closes allen set with a 7/64 key to raise the lug into position. I brought it up firm but not crazy tight – I didn’t have a long enough key for my torquing screw driver handy (meaning it is “temporary misplaced”) so I opted for ballpark tight. They don’t include a 7/74″ allen key by the way. It doesn’t bother me because I have a bunch. Also, often times the “free” keys that come with something aren’t very good – I’ve torn things up many times in the past trying to use marvel mystery metal included keys so I don’t do it any longer.The HS-P is rock solid.
Summary
It you are looking for a solid small hand stop that mounts on a rail, the Arisaka HS-P is great. I have no reservations recommending it.
Yes, I actually bought this. I was not paid to write this.
Note, I have to buy all of my parts – nothing here was paid for by sponsors, etc. I do make a small amount if you click on an ad and buy something but that is it. You’re getting my real opinion on stuff.
If you find this post useful, please share the link on Facebook, with your friends, etc. Your support is much appreciated and if you have any feedback, please email me at in**@*********ps.com. Please note that for links to other websites, I may be paid via an affiliate program such as Avantlink, Impact, Amazon and eBay.
The Stribog line of subguns, pistols and pistol caliber carbines are really cool. When the brace fiasco erupted, I sold my 9mm SP9A1 and regretted it. When Grand Power said they were coming out with a 10mm, I was an early buyer. One question popped out though – what was out there to help load the 20 round 10mm magazines? I hate loading magazines with stiff springs as many hands start to cramp so I needed to find a loader.
First off, they are HK UMP pattern magazines
The Stribog 10mm mags are nicely made, beefy as hell and based on HK’s UMP magazines. I like that – I am really tired or proprietary mags where you have one and only one option. Using an existing mags opens up options. Now, are UMP magazines all over the place and cheap? No, they aren’t – especially not 10mm mags. HK doesn’t make 10mm UMP magazines any longer.
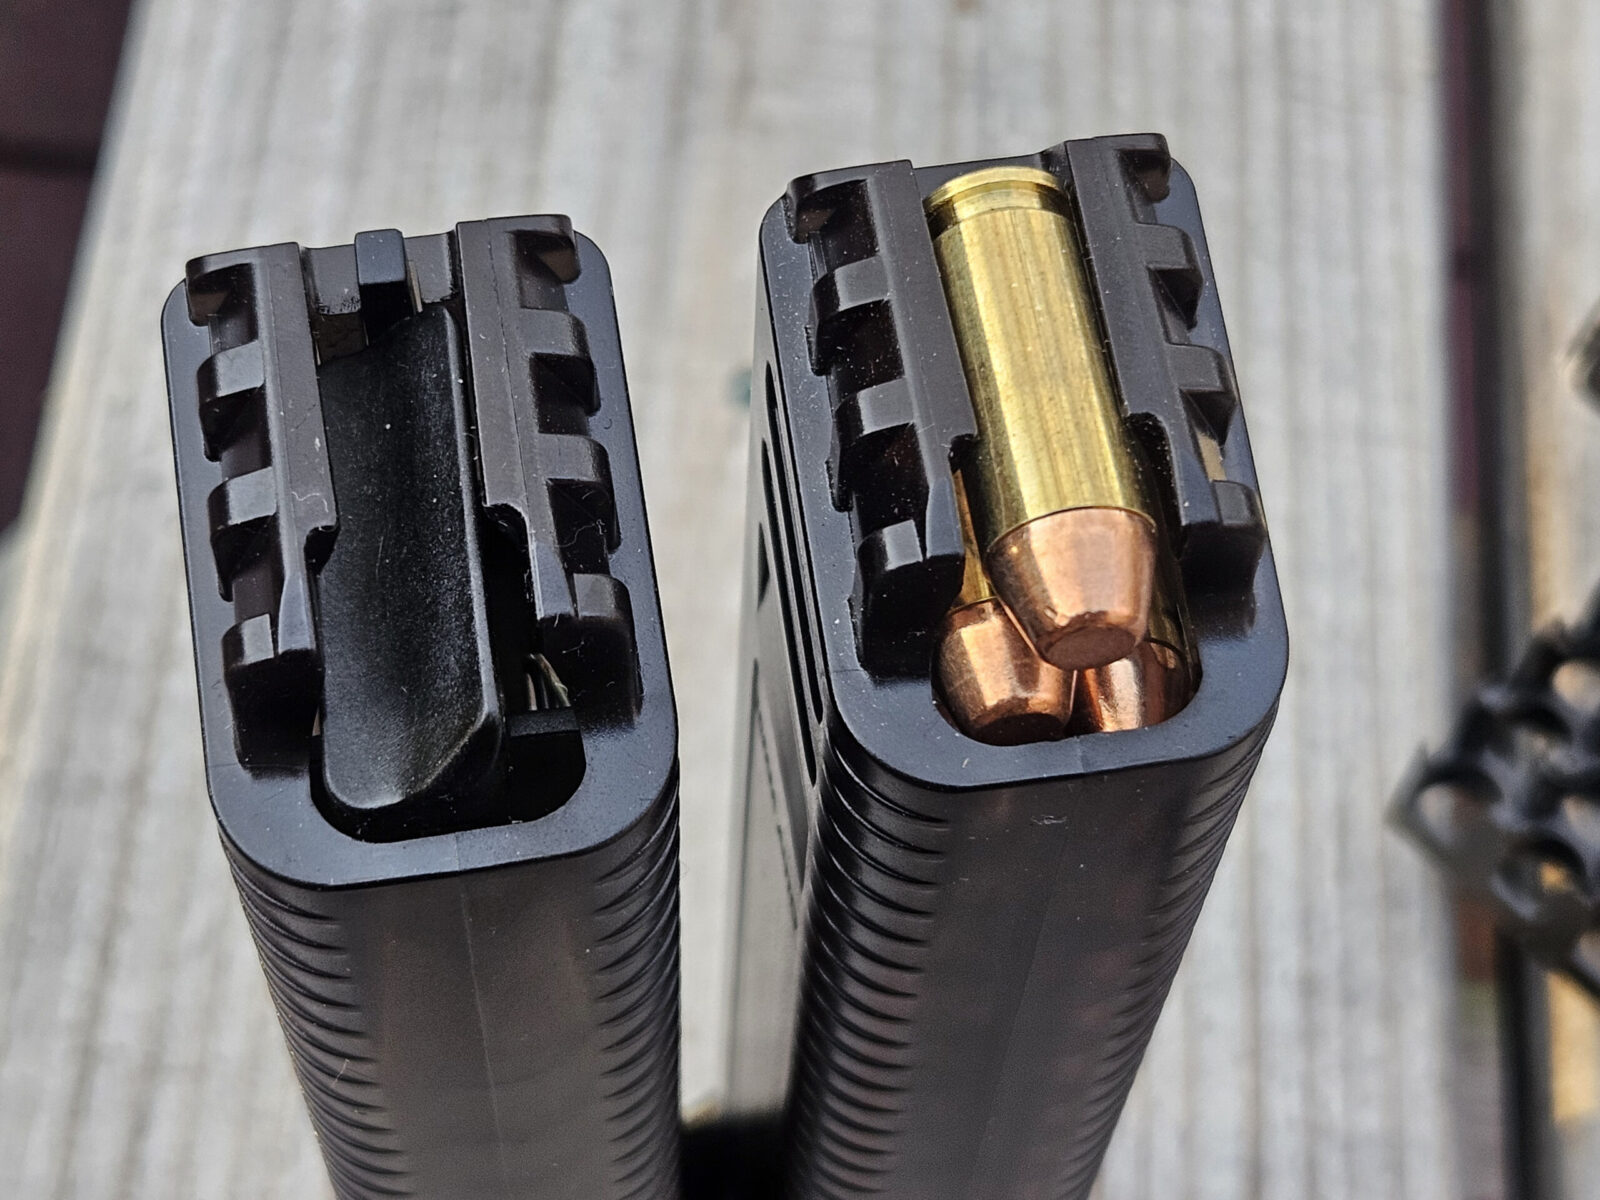
The 20 round magazines have stout springs and it takes a lot of work to manually insert cartridges
Real HK 10mm mags have starting costs around $139 but are 30 rounds so there is a perk for the price. Considering Stribog mags list at $45 and can sometimes be found for $39.99, I’ll stick with Stribog mags.
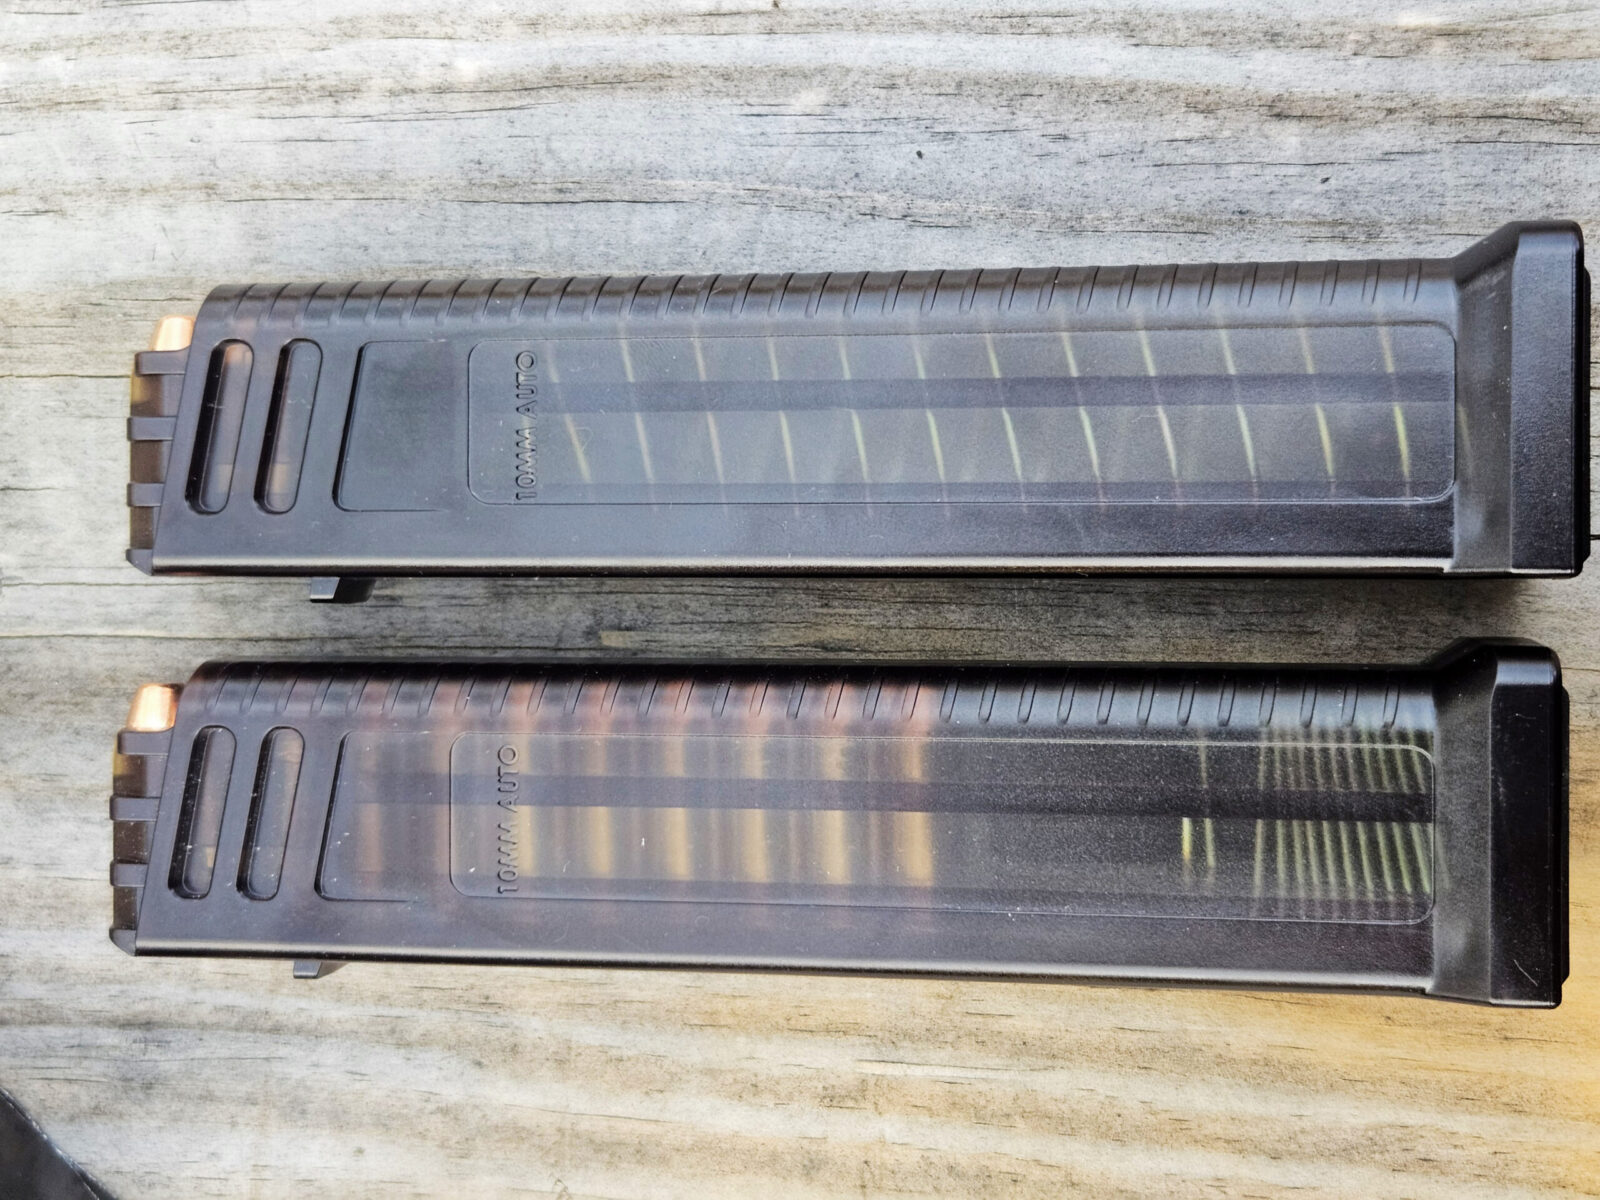
Stribog 10mm magazines are built like a tank
This is both a pro and a con. The top sports a lot of reinforcements making for a quite a large magazine in terms of circumference. They will not fit inside a Maglula Universal loader – I had hoped they would but it is a no-go.
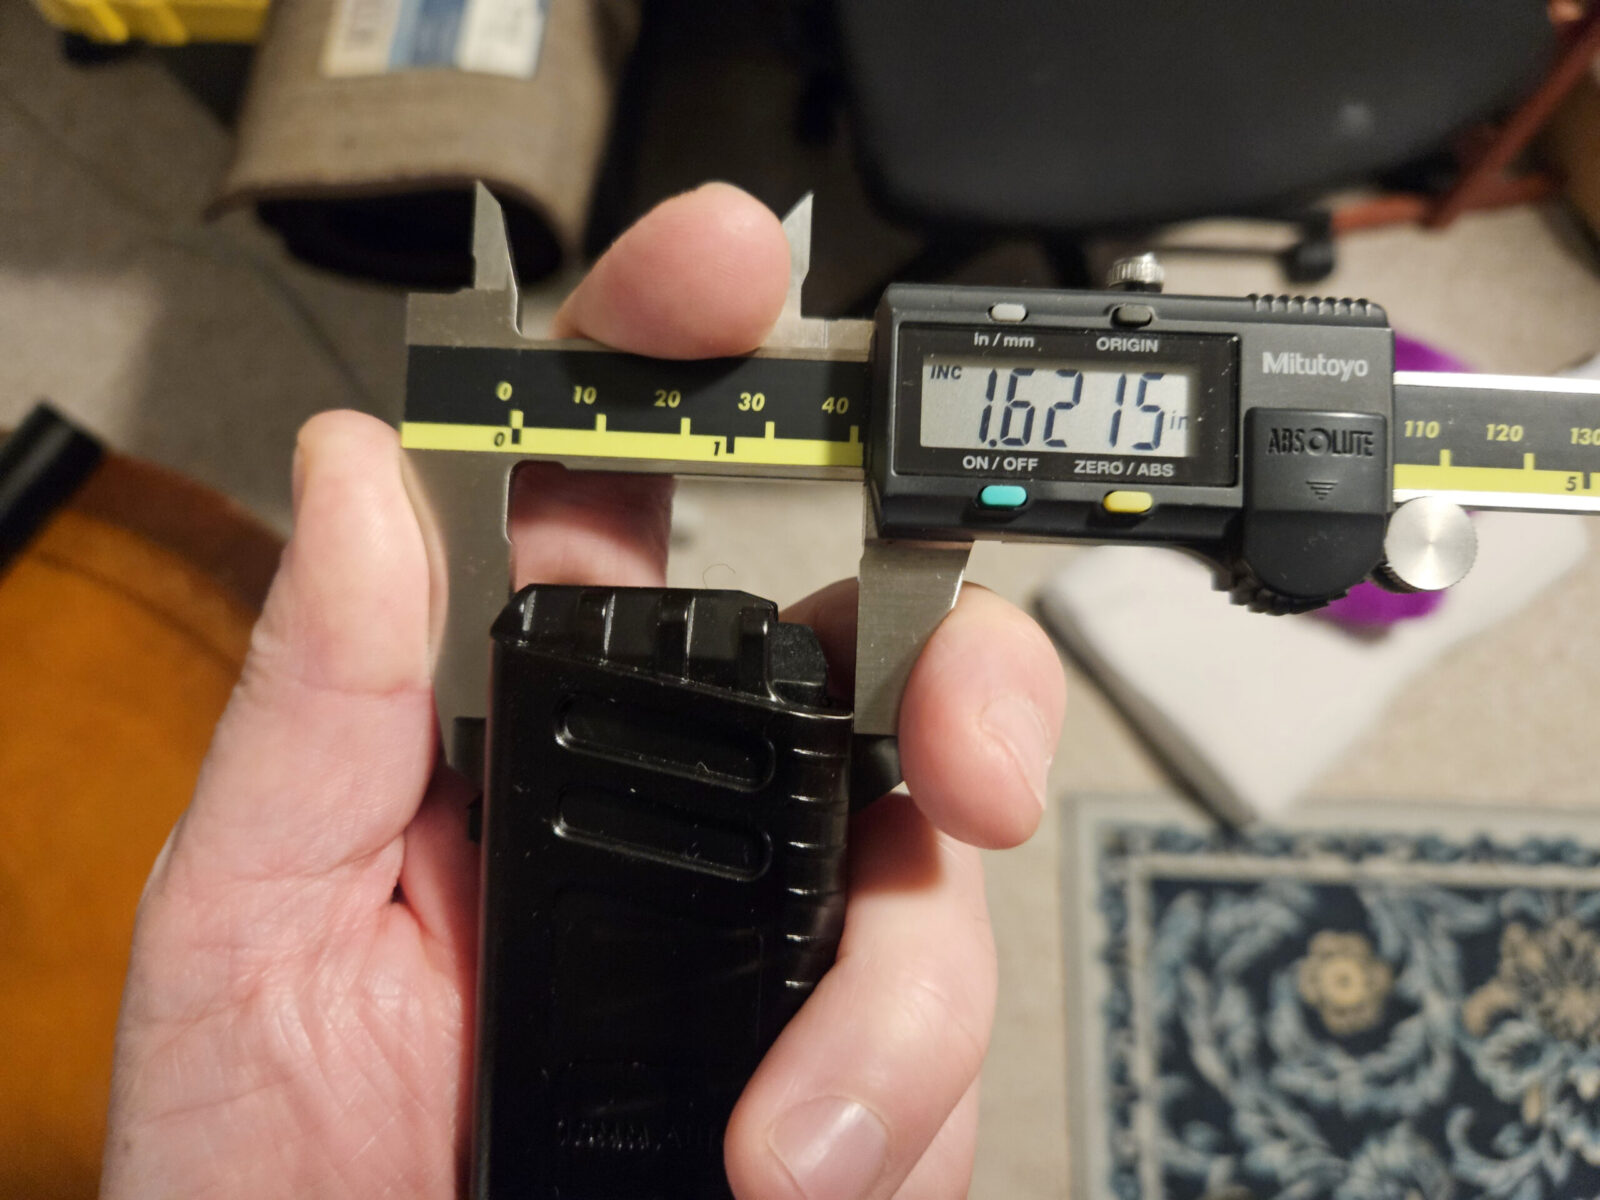
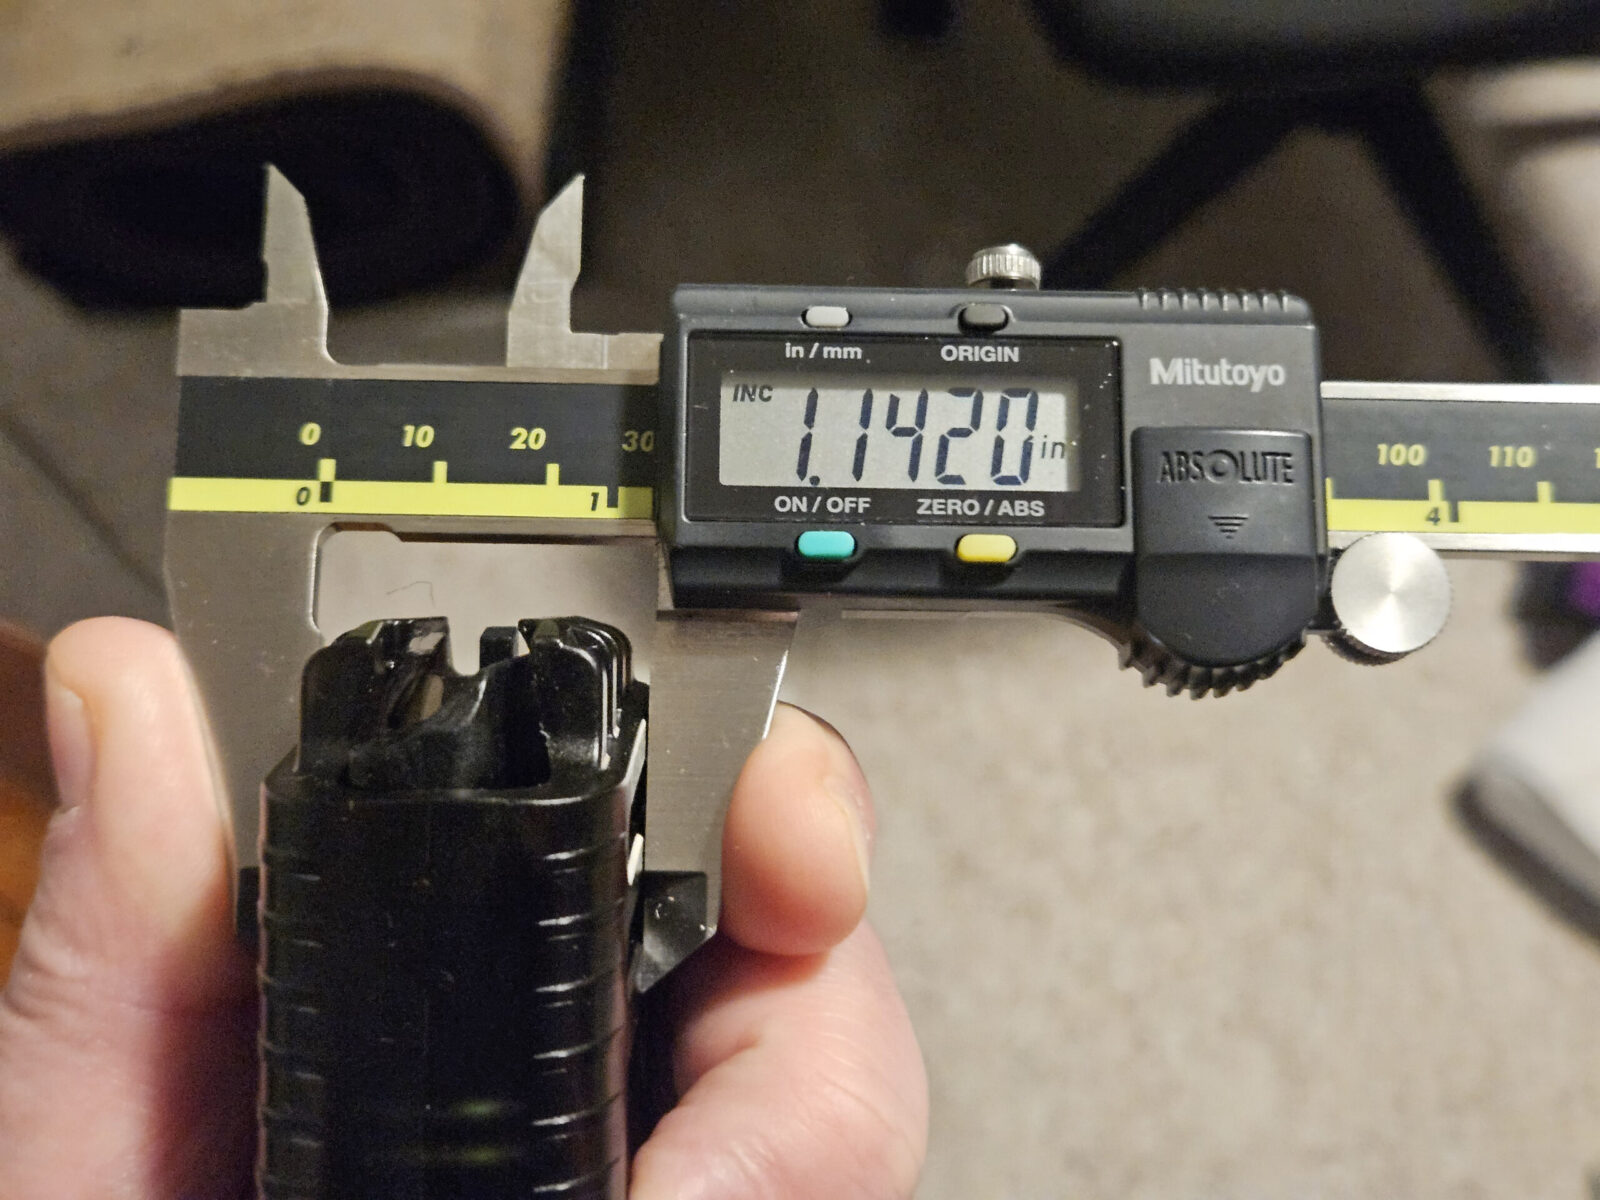
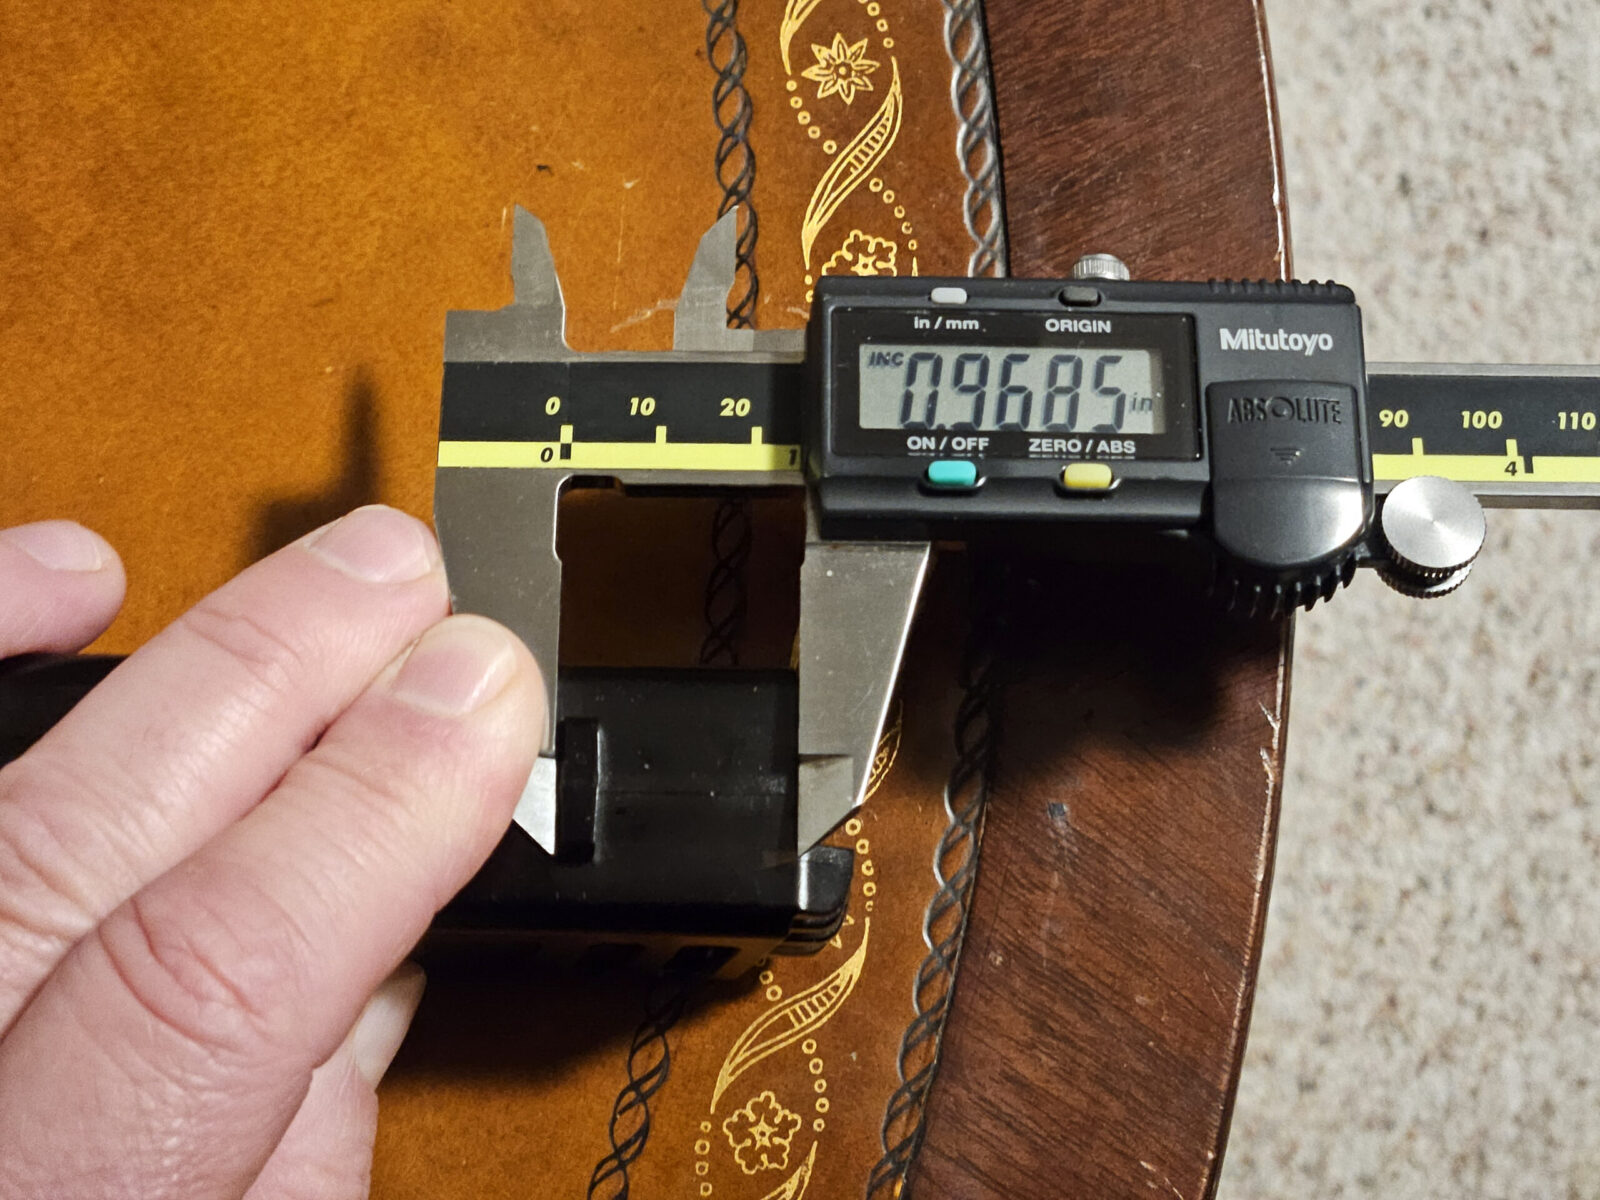
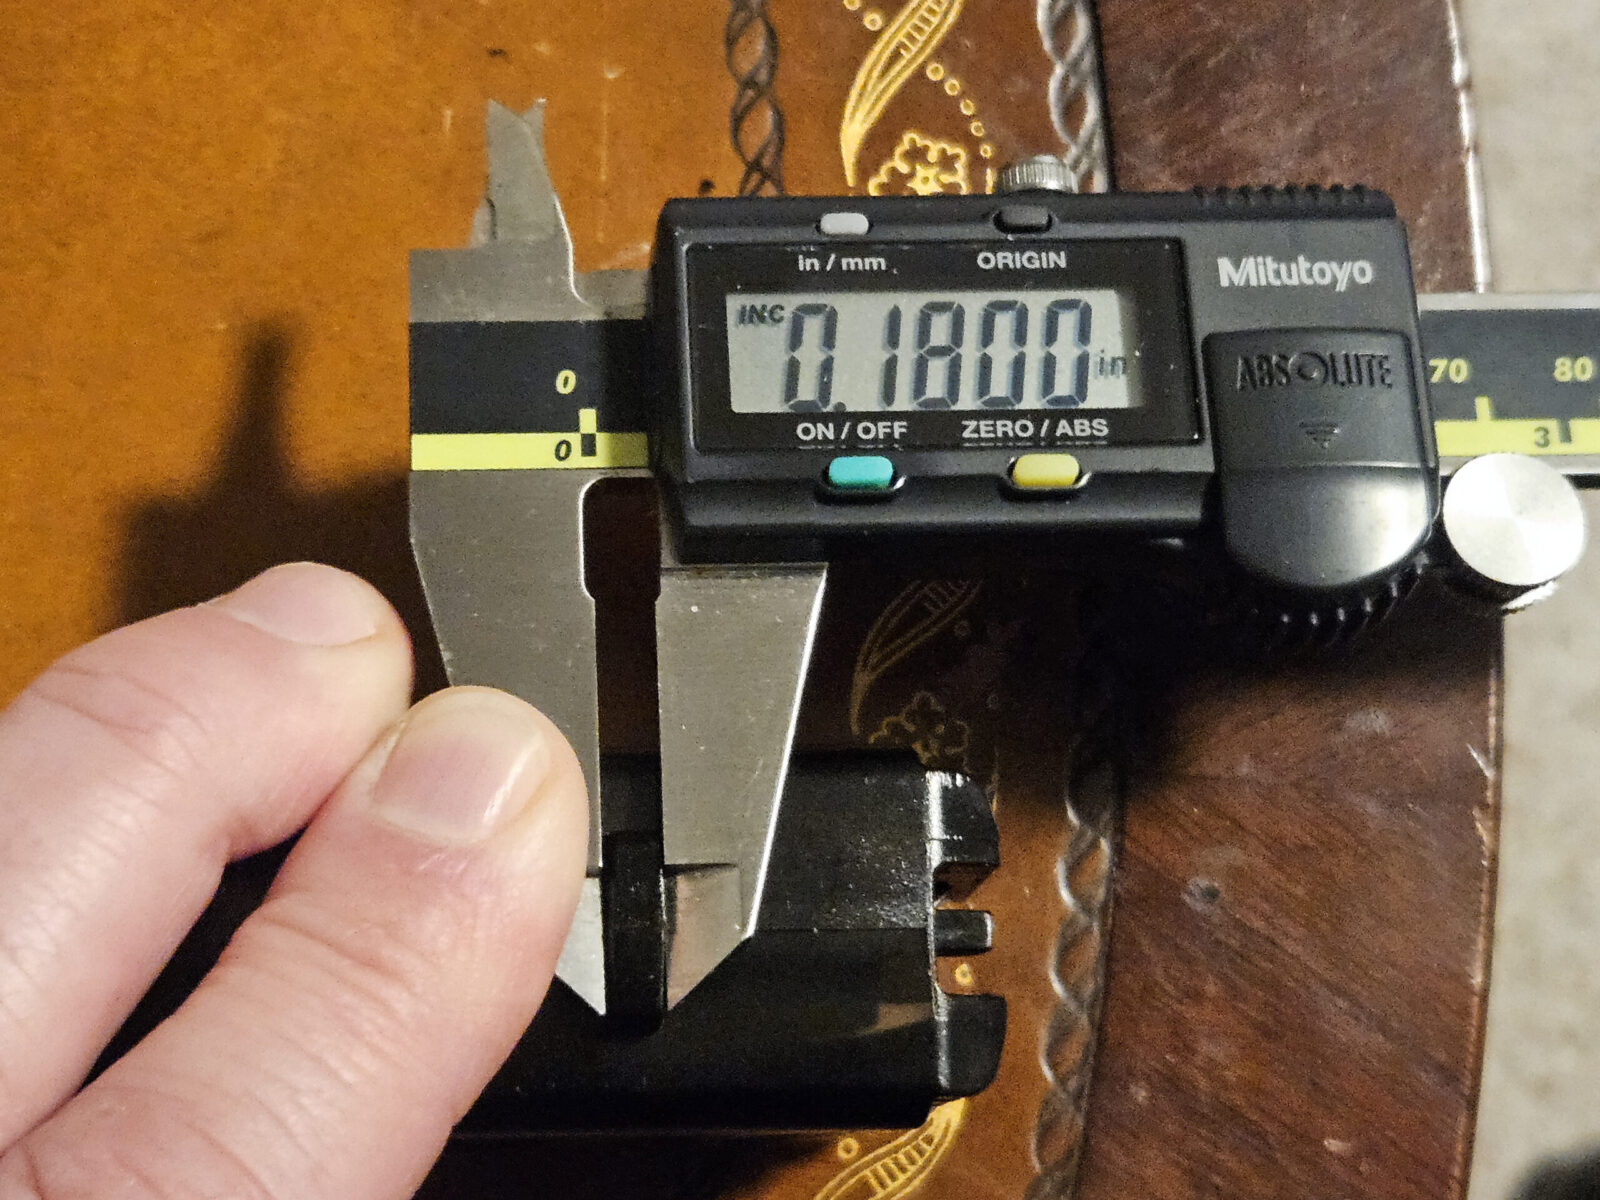
The girth of the heavily built mags means most loaders will not fit them. On the other hand, those are some impressive reinforcements on the mag lips and thick walls.Front to back is about 1.62″Left to right is approximately 1.14″Distance from the botttom of the locking tab to the top of the magazine body is about 0.96-0.97. It’s molded so there’s a bit of ballparking as to the exact top.The magazine locking tab is about 0.18″ thick.
Playing a hunch
Ok, so I did some searching on .40 caliber and 10mm UMP loaders and then played a hunch. I make magazines for Rock Island Armory’s A2 HC .40 and 10mm pistols. They use a staggered magazine and my source tube for the custom mags I make is actually a Mec-Gar .45 mag. What if a UMP .45 loader would work? I had a pretty good hunch it would so I started researching them.
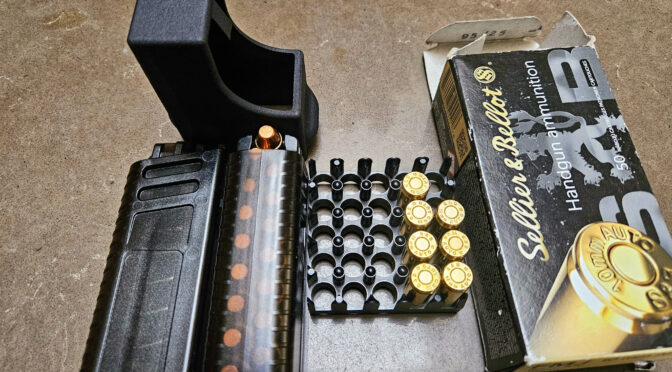
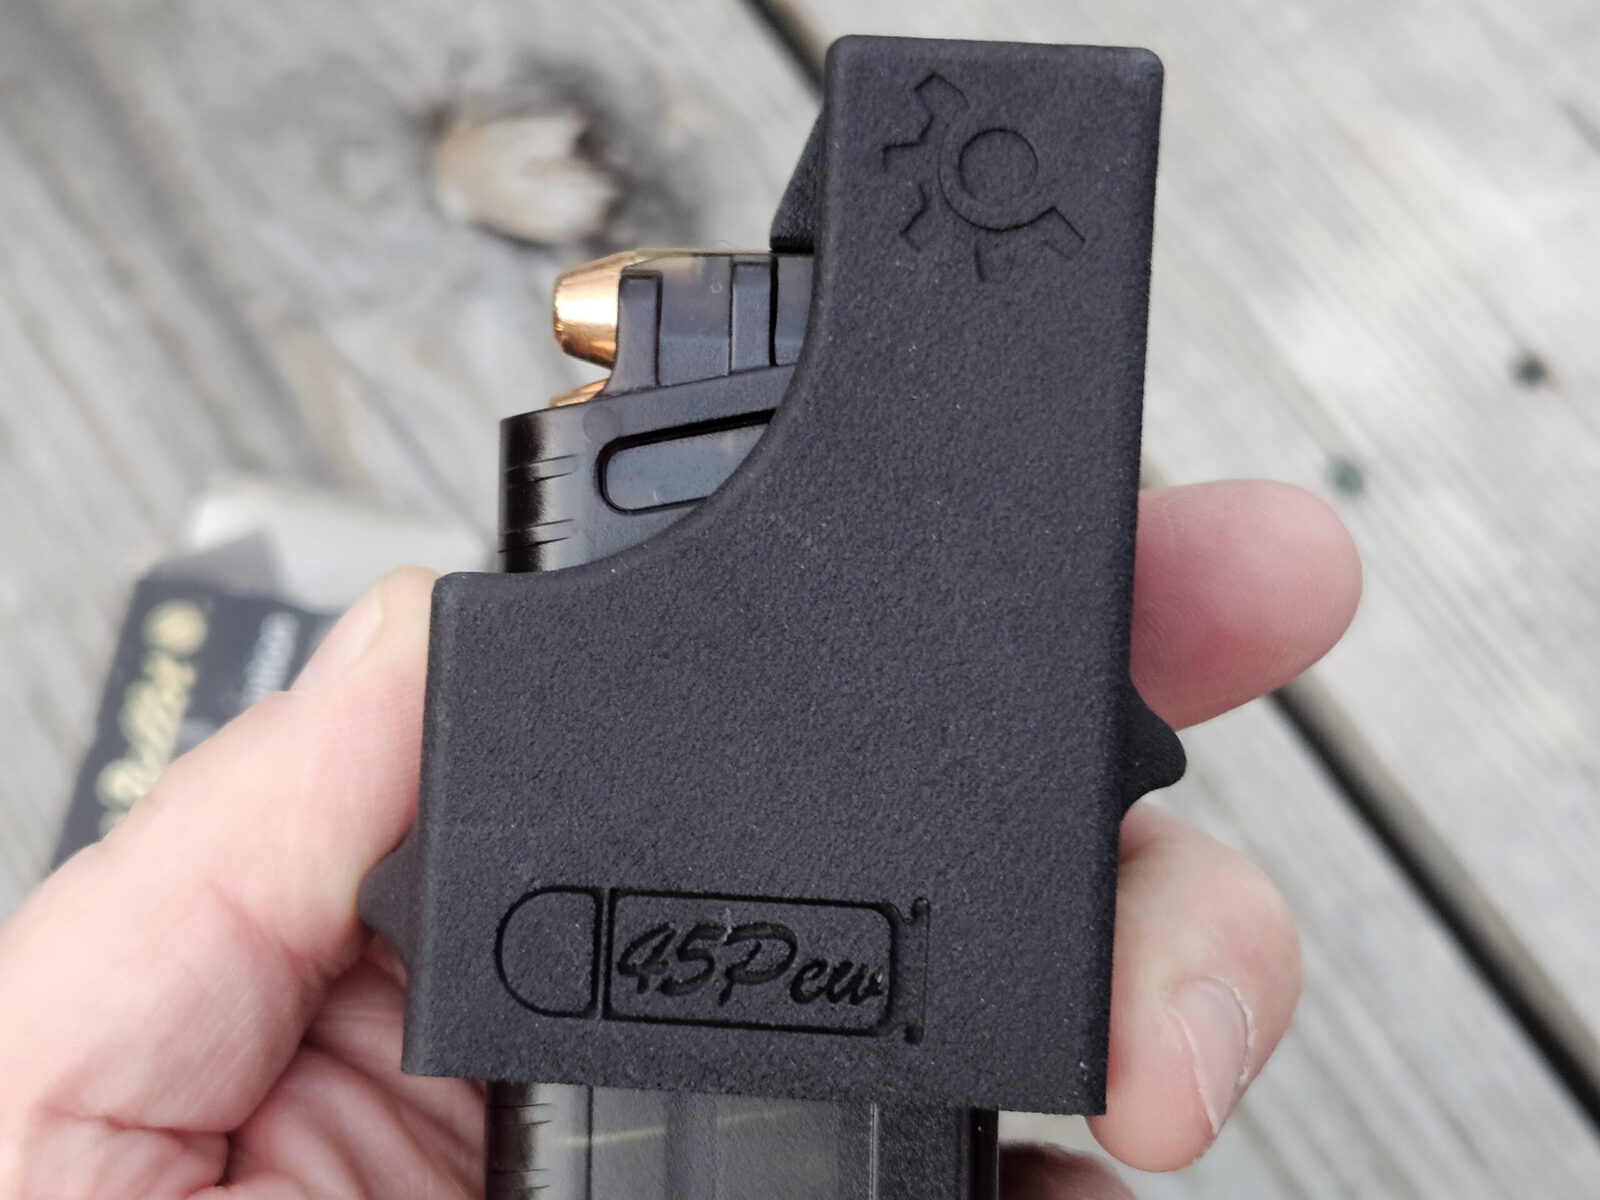
The UMP .45 is much more common so I had options. The one that caught my eye was from Custom Smith so I ordered it and must say I am impressed.
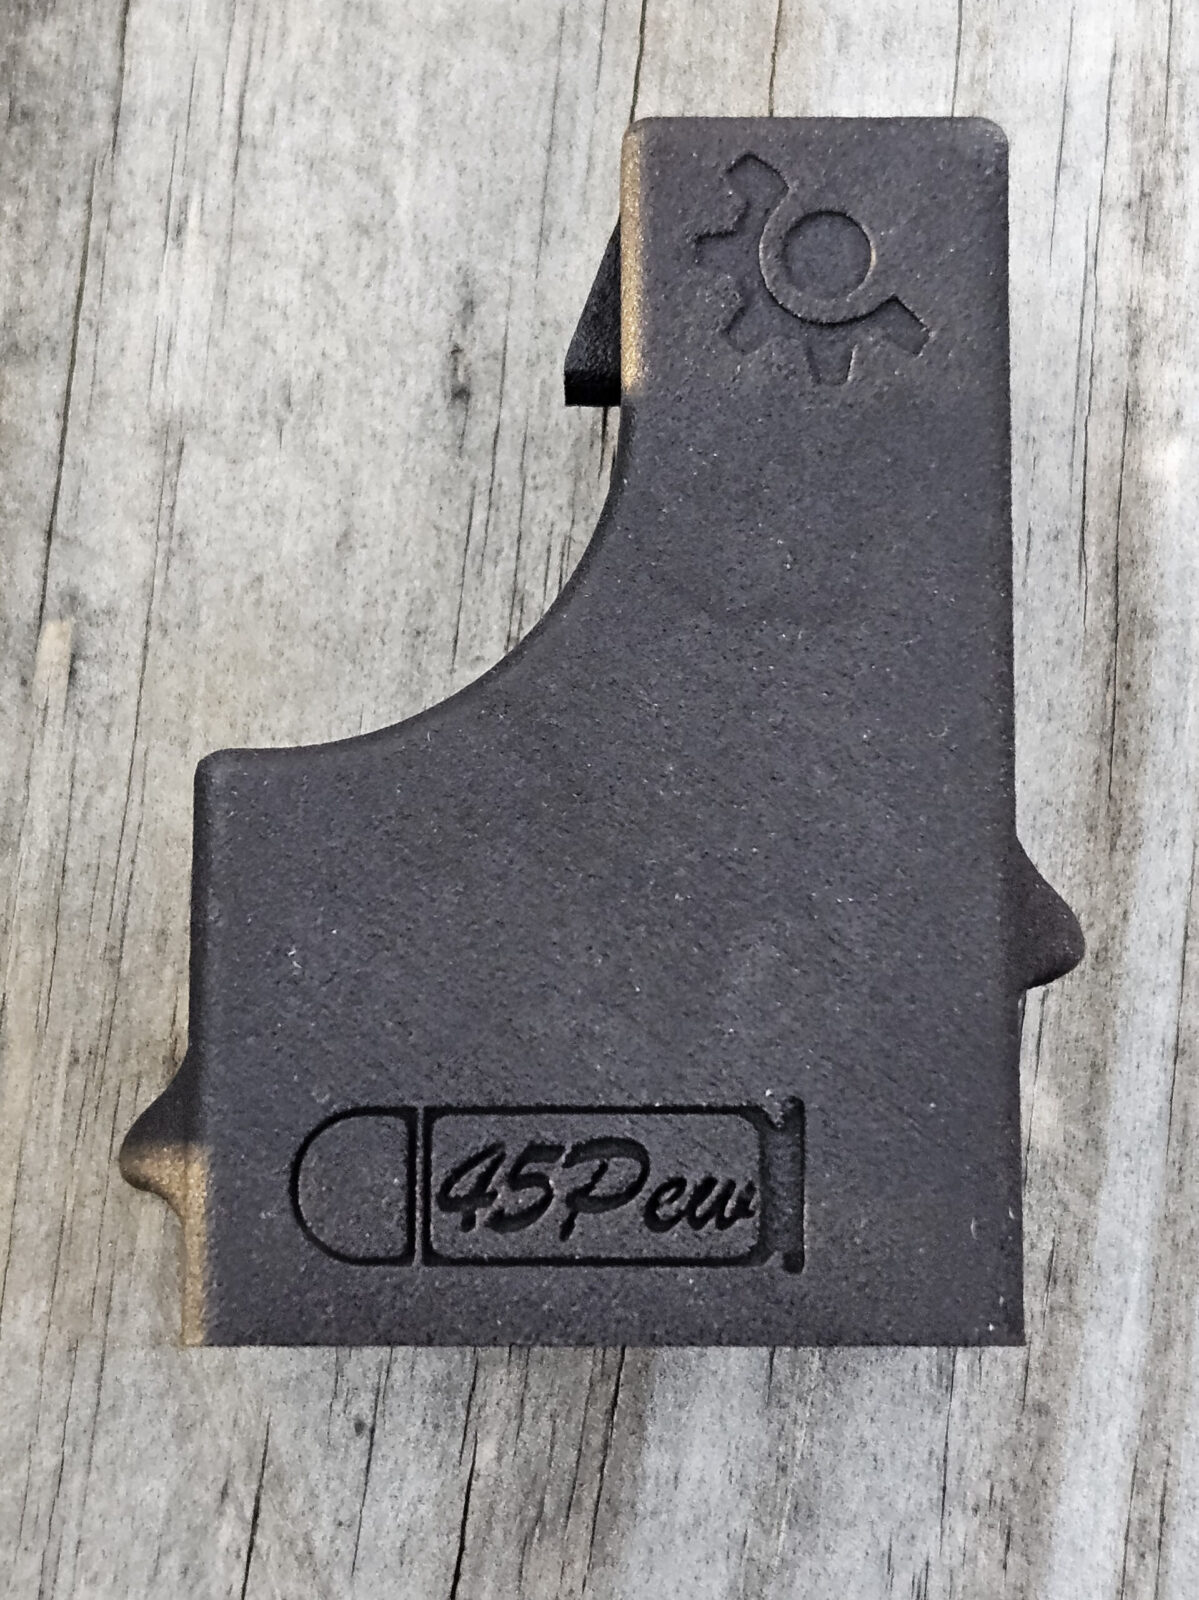
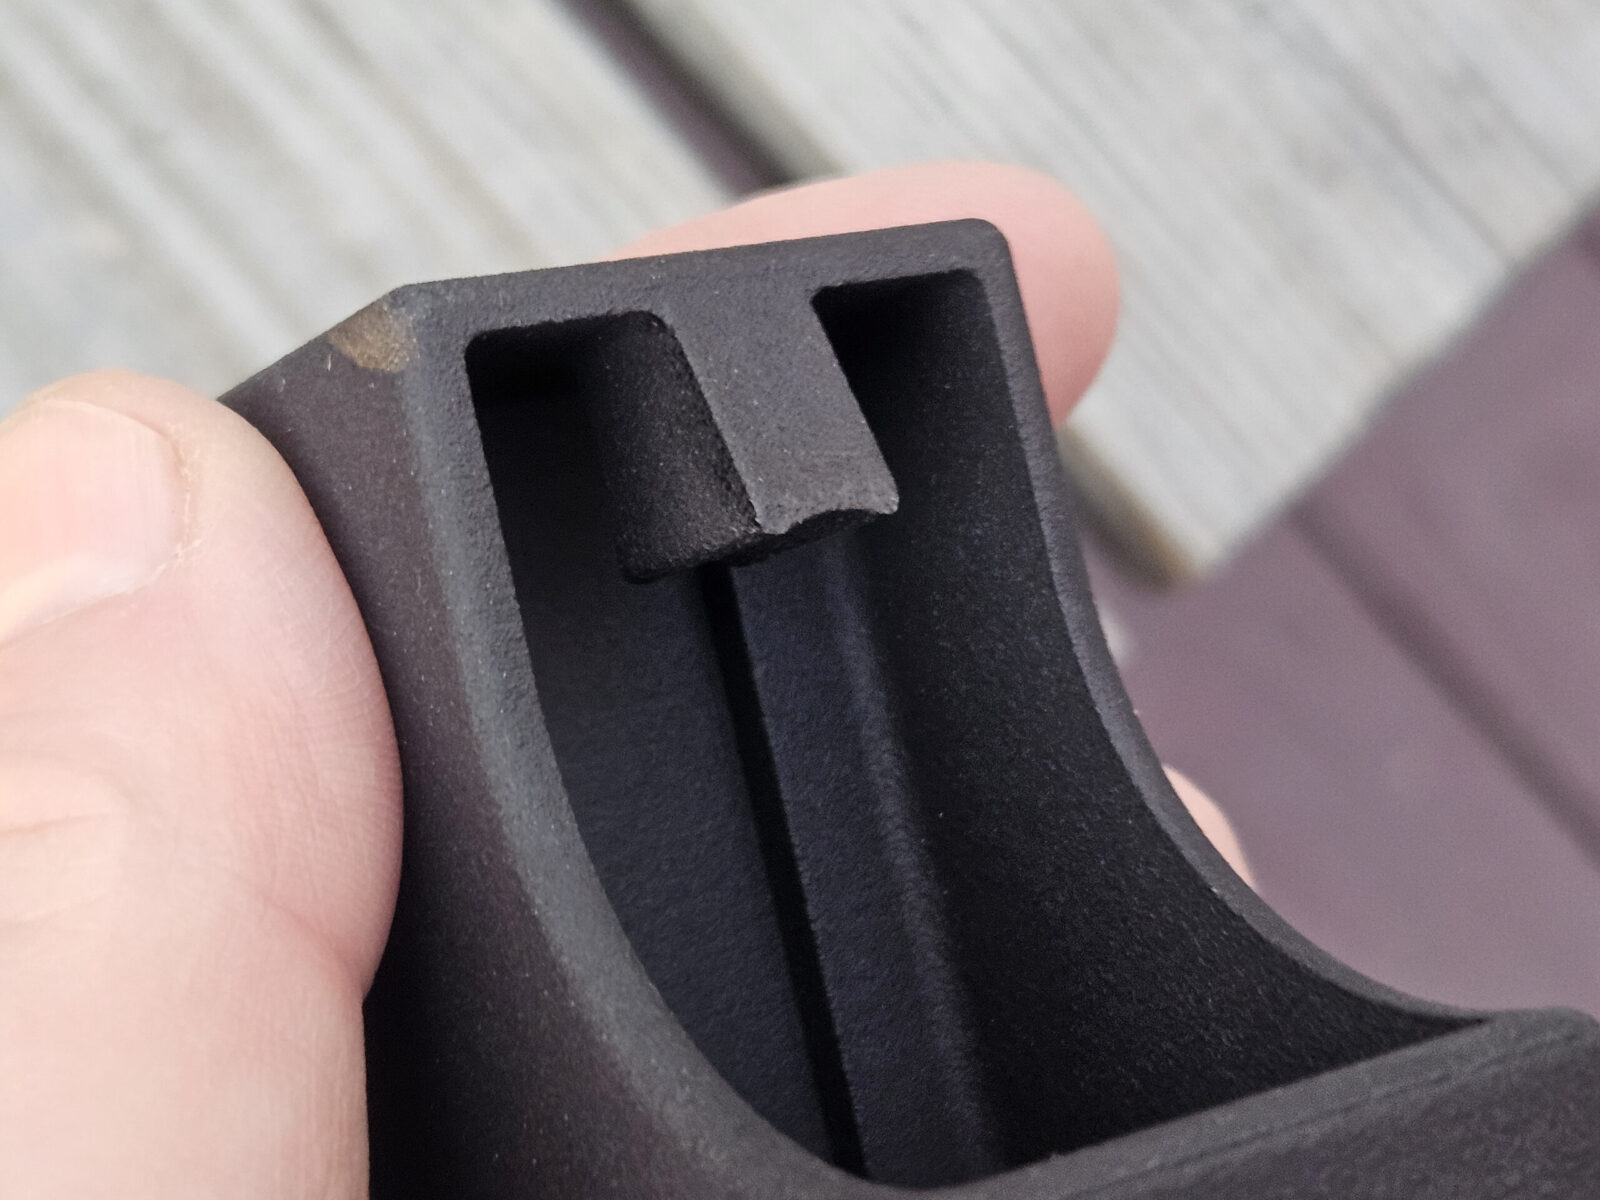
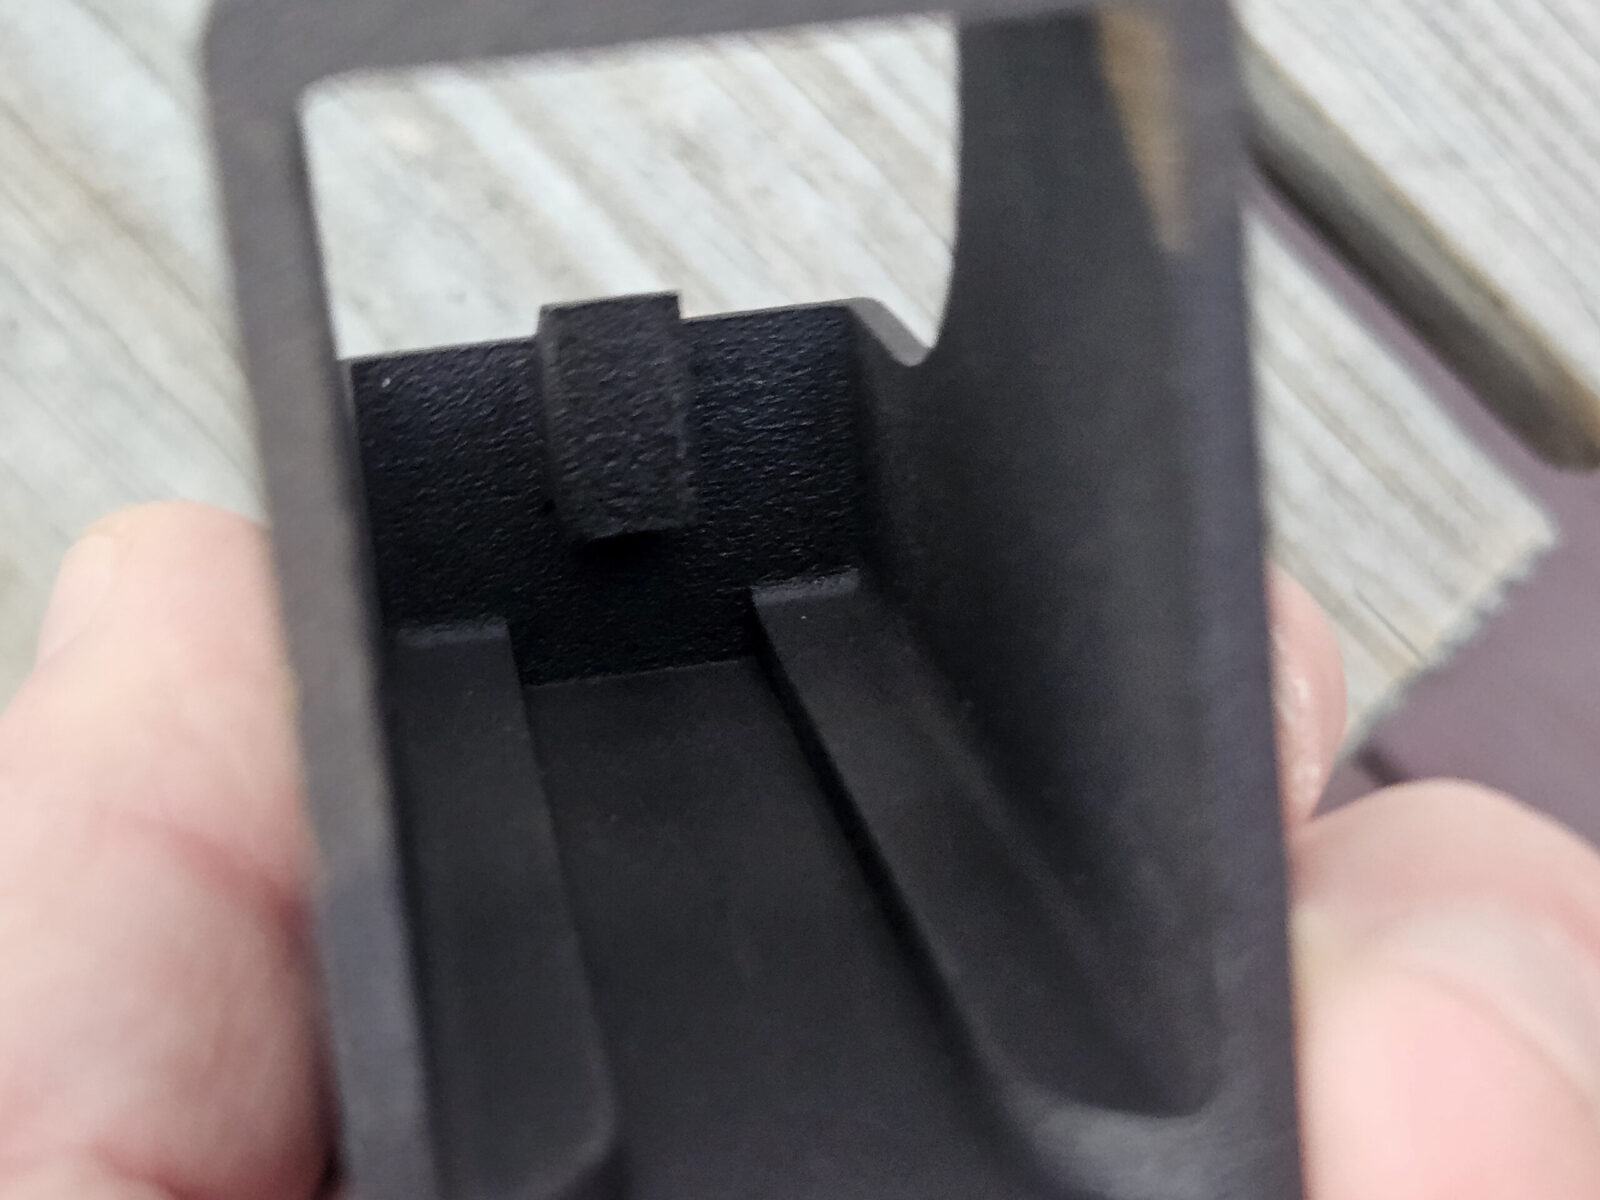
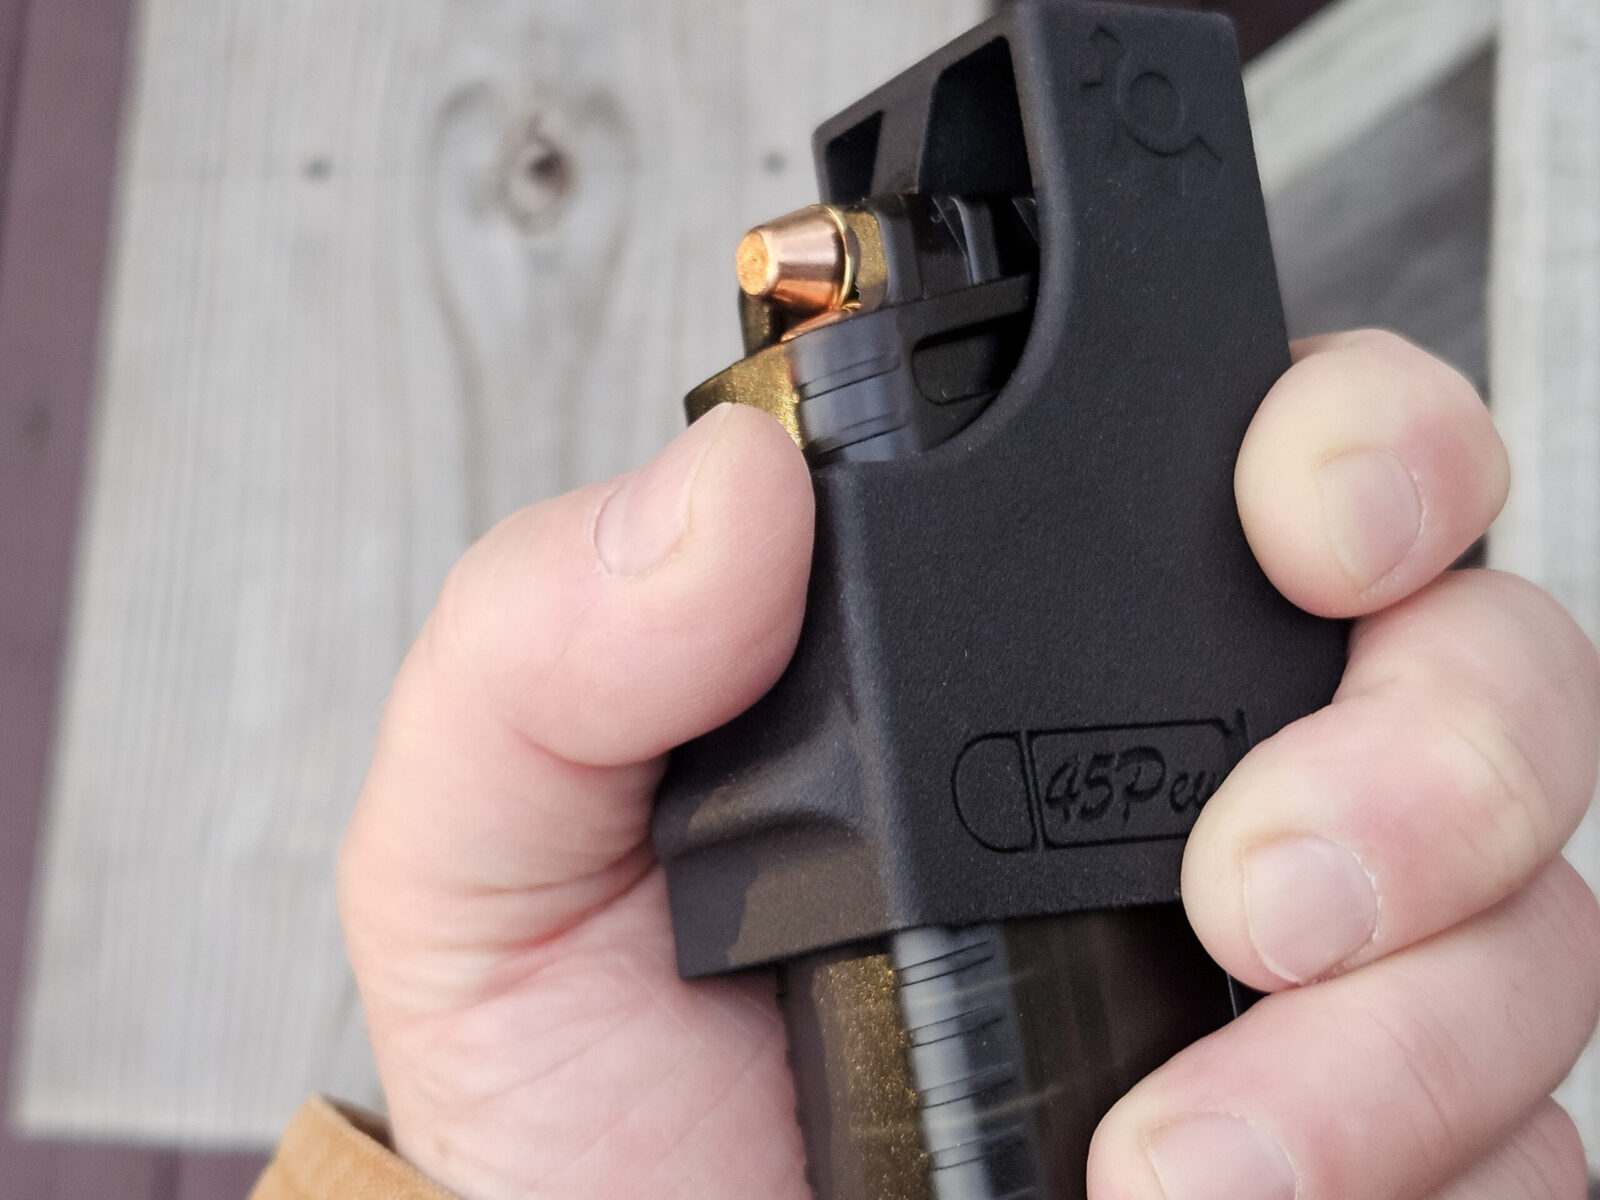
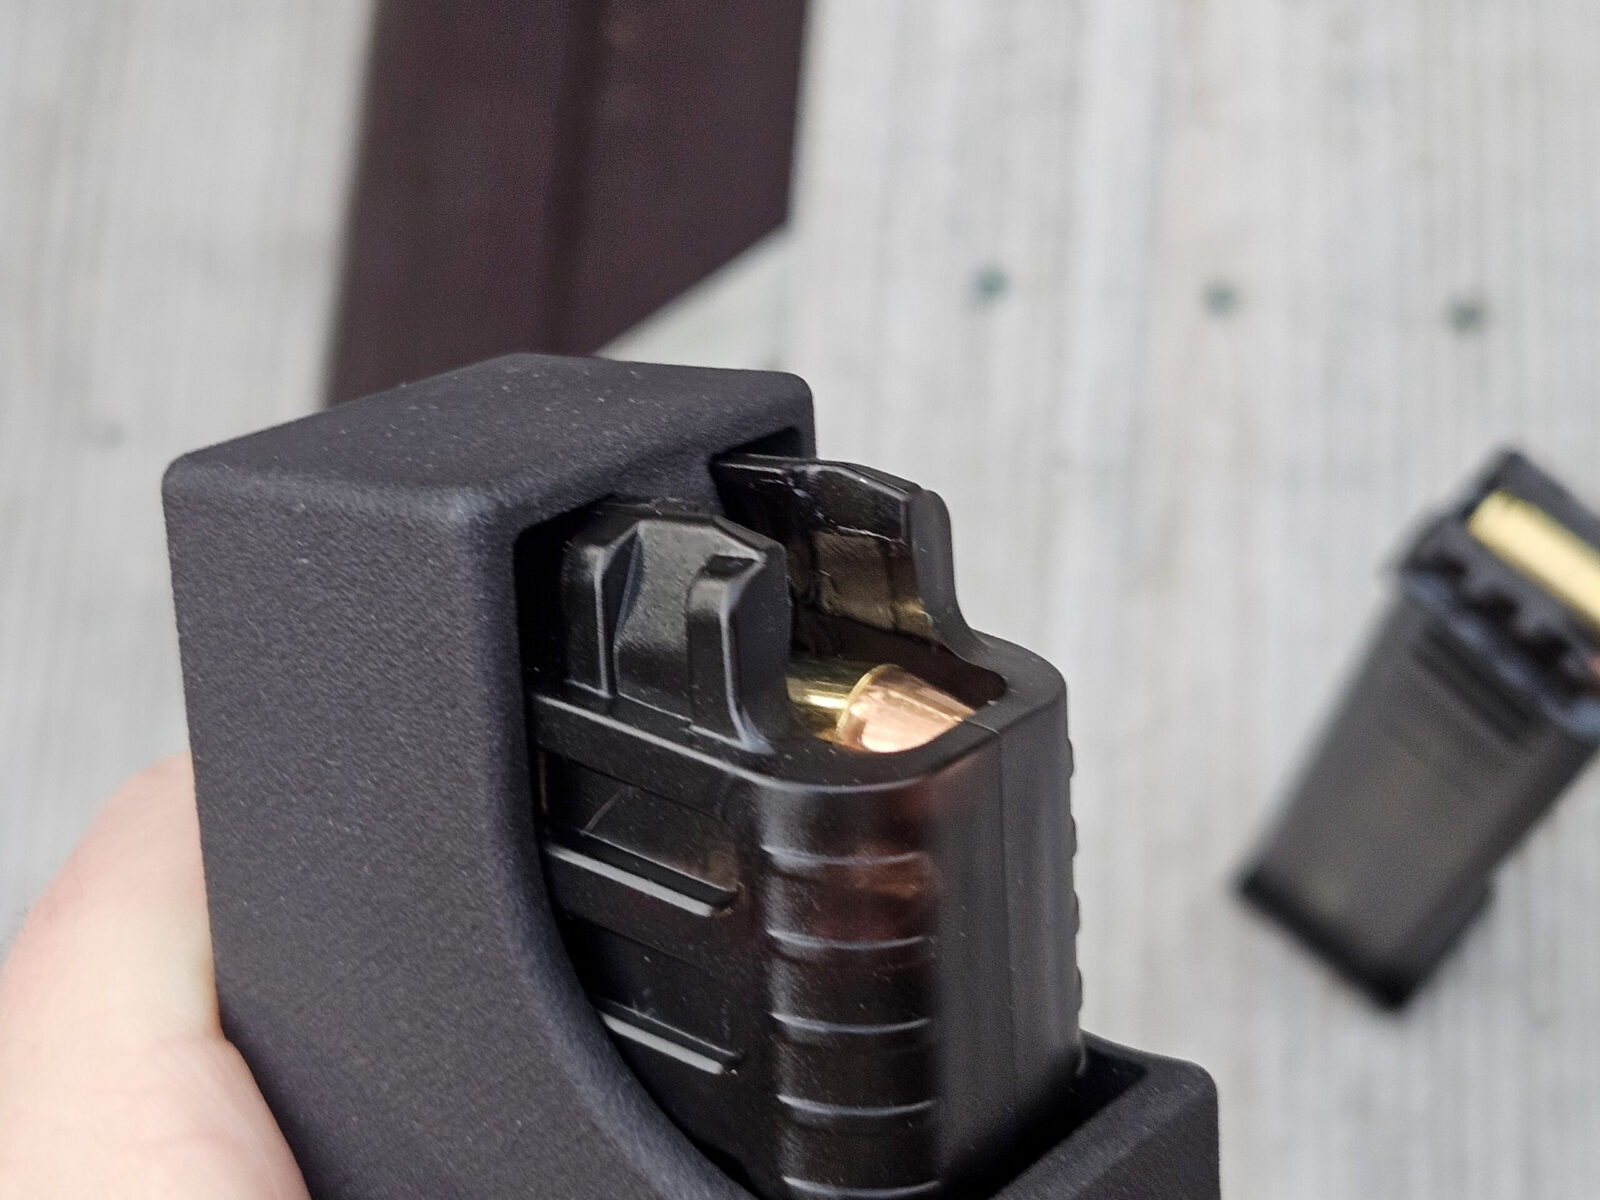
It is 3D printed and nicey done. Everything seems thick enough to have proper rigidity. I like finger rests on the sides to give your hand something to get hold of. I promptly loaded two mags super easy. You push down, slide the cartridge in part way, lift the loader up, slide the cartidge in the rest of the way and repeat.
Side shotThe ram that pushes the cartridges done is beefy and nicely done.Inside is nice and clean also.The UMP .45 loader fits great.The ram does a great job pushing the last cartridge down so you can slide the base of the next cartridge part way in. You then move the loader out of the way, push the cartridge all of the way in and move on to the next round.Parting photo – it works great.
Summary
Grand Power Stribog’s 10mm model uses magazines based on the HK UMP design. The Grand Power magazines are affordable and relatively easy to find. You may need to dig just a bit as the 10mm Stribog sales are outpacing magazine availability but I am sure the mag availability will catch up.
No, I wasn’t paid to write this – I had to buy it because I wanted the 10mm Stribog and manual mag loading kills my hands.
By the way, S&B 180 grain FMJ 10mm is my goto range ammo. It’s affordable and runs great. I use it for breaking in and target practice with all of my 10mms.
If you find this post useful, please share the link on Facebook, with your friends, etc. Your support is much appreciated and if you have any feedback, please email me at in**@*********ps.com. Please note that for links to other websites, I may be paid via an affiliate program such as Avantlink, Impact, Amazon and eBay.
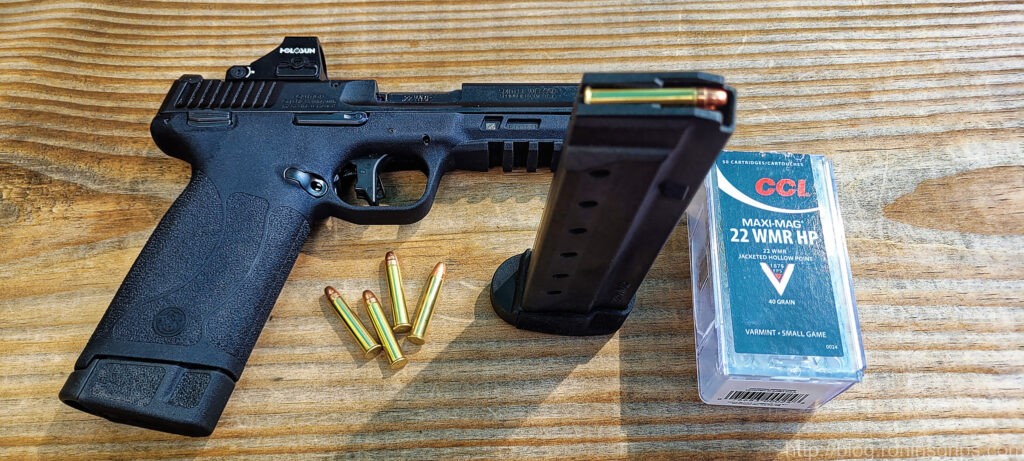
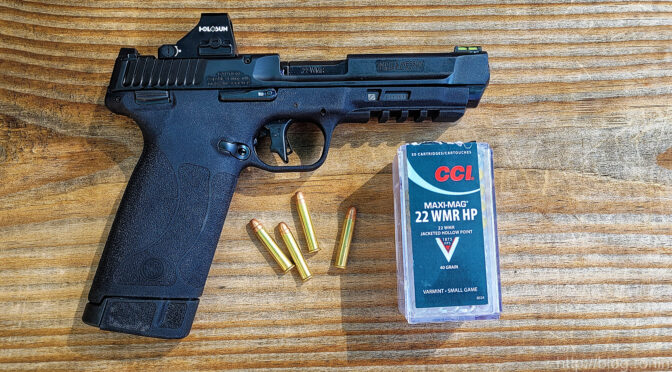
As I mentioned in the last post, I am a new owner of a S&W M&P .22 WMR pistol. It wasn’t really planned – I had young nieces coming to visit and nothing really that I would consider a good pistol for them to start with. It worked great – I have no hesitation recommending it based on my experience.
Click on one of the photos and you can navigate around and see others:
I hope you find the photos helpful. I am very impressed by the pistol – that’s for sure.
Note, I have to buy all of my parts – nothing here was paid for by sponsors, etc. I do make a small amount if you click on an ad and buy something but that is it. You’re getting my real opinion on stuff.
If you find this post useful, please share the link on Facebook, with your friends, etc. Your support is much appreciated and if you have any feedback, please email me at in**@*********ps.com. Please note that for links to other websites, I may be paid via an affiliate program such as Avantlink, Impact, Amazon and eBay.
My nieces were coming to visit from the Philippines, and it dawned on me that they wanted to go shooting but I didn’t have a 22 caliber pistol anymore. It just so happened that Smith & Wesson had released their M&P 22 Winchester Magnum Rimfire (WMR) pistol to the market and my good friend and FFL, Scott Igert, had one at his shop – Michigan Gun Exchange – so I headed over and picked it up.
I had a few reasons for moving fast. #1, I was to take the girls shooting in two days. #2, my nieces were 10 and 12 years old and I was worried about the recoil of any of my 9mms #3, I like the S&W M&P series and it gave me an excuse to try one of their new .22 WMR pistols that held 30 rounds!
Believe it or not – that really was the order of things. I he didn’t have the M&P, I would have gone with a Ruger Mark IV, Browning Buckmark or whatever he had in that I could make work. My original idea was to get a pistol chambered in .22 long rifle because I wasn’t in a rush to add another caliber.
Folks, I don’t know about you but for me, adding nother caliber is expensive. I can’t just buy a rifle or pistol in a new chambering and get a few rounds of ammo – I need at least a thousand rounds to feel comfortable that I am not going to run out. I am certain a lot of anti-gun people simply do not understand that you can have family fun at a range and go through hundreds of rounds easily in one day. They must have a mental image of a bag of musket balls or something.
Bought a Holosun HE507K-GR X2
I wanted the girls to have fun and the only green dot scope Scott had in was a battery powered Holosun HE507K-GR. On my bigger pistols and carbines, I prefer the dual powered Holosuns that have solar panels also but this was going to be a range gun primarily and the battery life of these optics is phenomenal plus they automatically turn off and on based on movement.
By the way, I have had very good luck with Holosun Optics. None have failed on me so far.
One Small Speed Bump
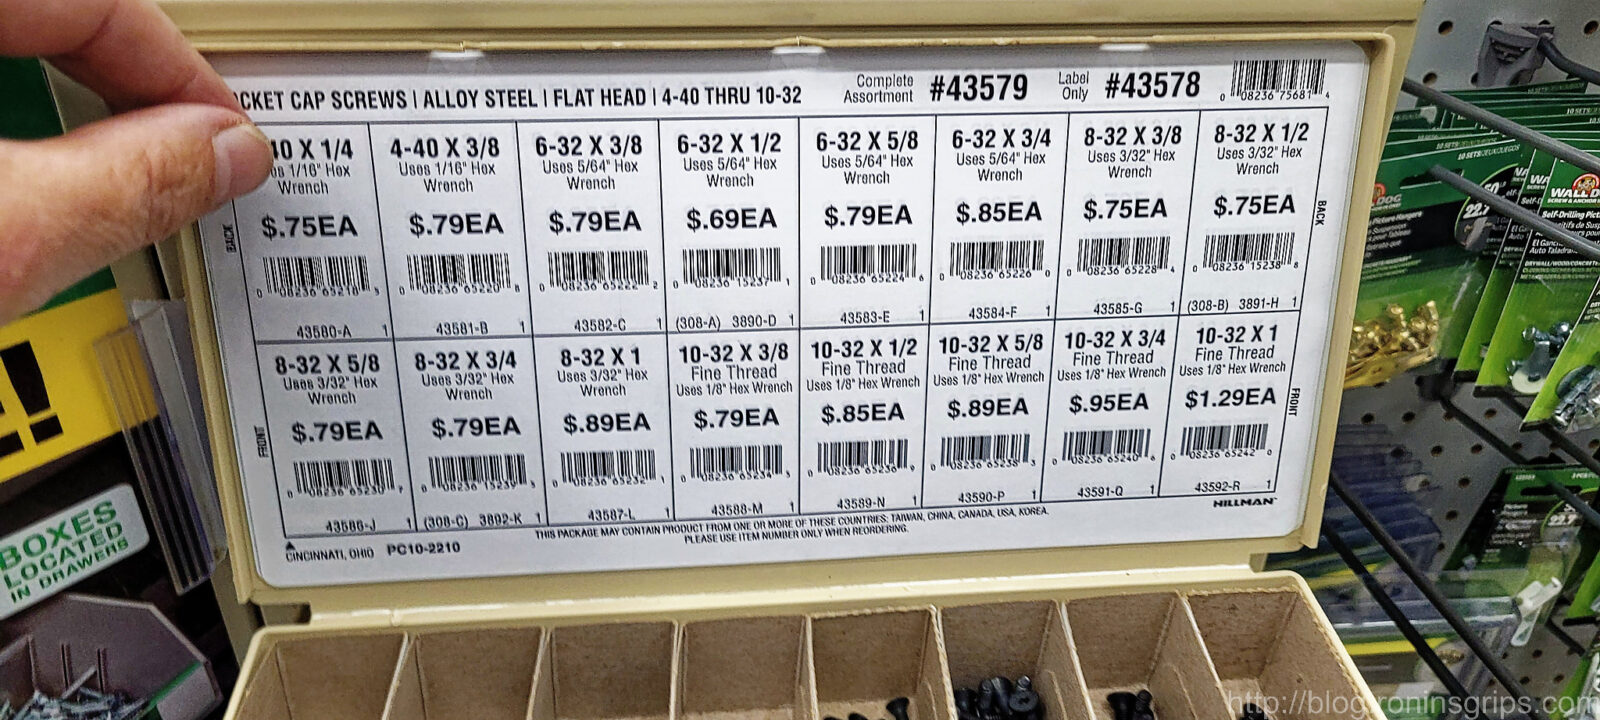
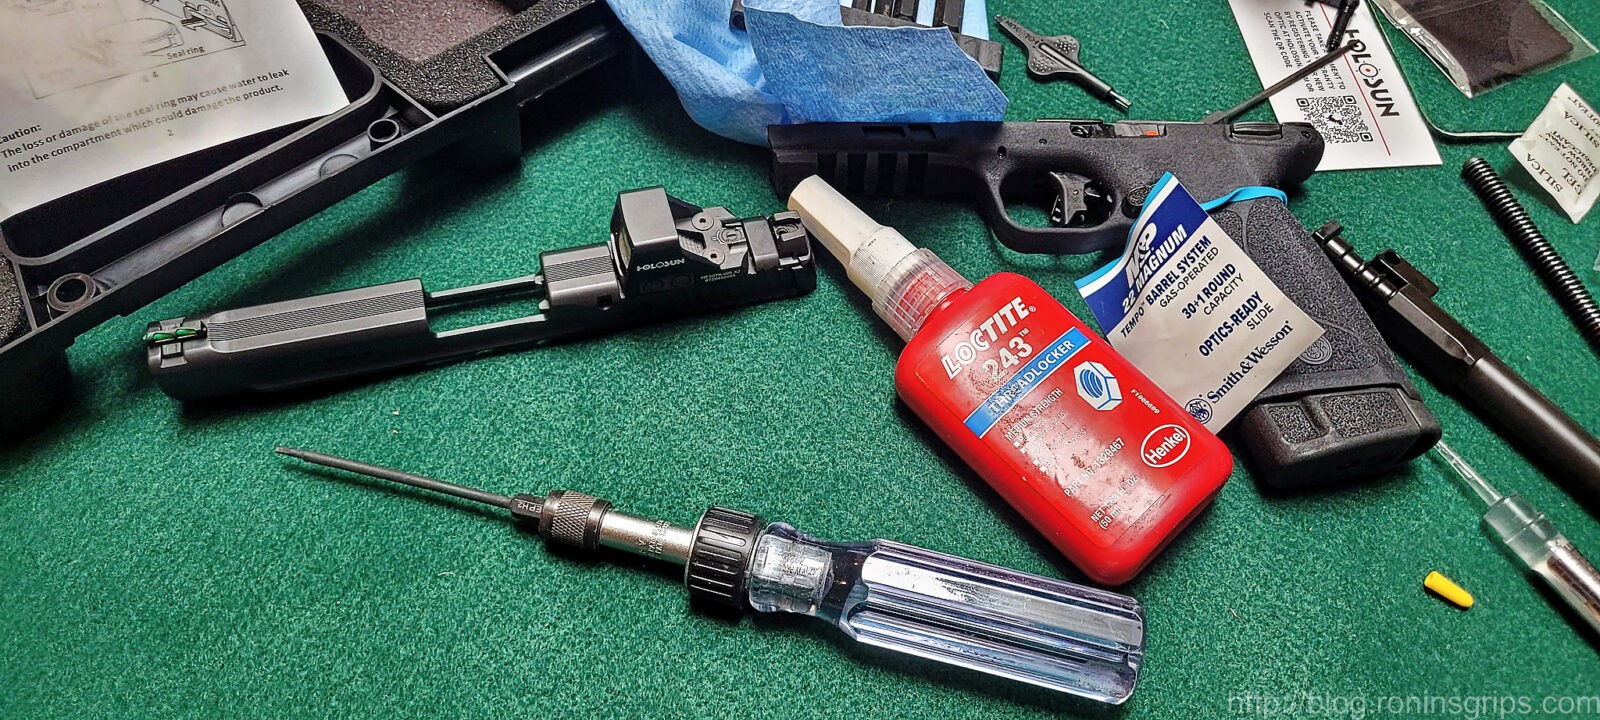
Scott knew I was in a rush so he asked me if I wanted him to mount and sight in the optic while I worked on some rifle he had in. I said sure and oddly enough, none of the screws that came with the Holosun HE507K-GR X2 green dot optic would fit the M&P slide nor were the screws that held the protectve cover on the slide long enough. Hmmm….. The manual didn’t specify the screws to use… great. Ok, so I took it home with a quick stop my Ace Hardware with just the slide in hand to not freak anybody out.
If you are going to mount an optic on a M&P 22WMR pistol. you need to get two #6-32×1/2″ alloy hex head screws. Also, if you don’t already have it, get some blue medium strength thread locker. I am turned off any of the fine screws used for optics that already have the threadlocker attached. I have an M&P 10mm that will likely take an act of God for me to get the screws out if I ever need to.
Ace hardware to the rescue – two #6-32×1/2″ screws were needed.
Read the Manual & Be Safe
I have read so many forum posts over the years where people got themselves in a bind because they didn’t read the manual. Read the manual. Watch a video or two if you want but don’t just dive into trying to disassemble a weapon you know nothing about.
The M&P .22 WMR is relatively unique and the manual does a good job covering ammo, known issues (such as challenges with extraction if it gets too hot), how to disassemble, clean, lubricate and re-assemble the pistol. Of course, you have red lawyer-approved comments all over the place but you do need to read it and all and all, it is a decent manual.
Last but not least, be safe. Make sure your pistol is unloaded before you do anything.
Mounting the Holosun Optic
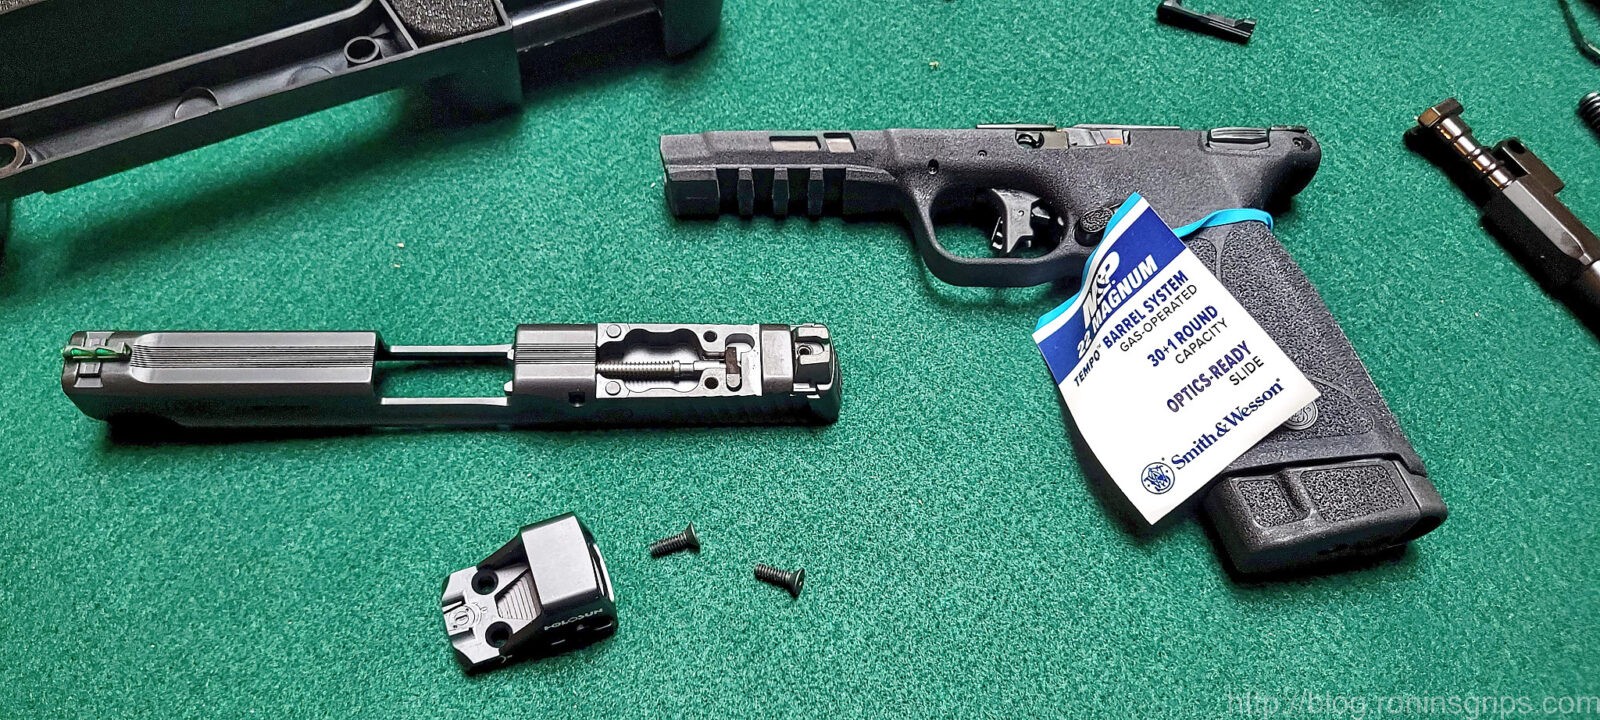
With the pistol and parts in hand, I set up the kitchen counter to install the optic. I like a nice wide open table to work on small parts and put down a green fiber mat. Folks, those matts are for more than looks – the small fibers absorb the energy of a small dropped part and reduce the odds of a small screw or whatever flying across the room. Out in my shop, I even have a magnetic mat under the green mat but in a rush in the kitchen, I set up shop using just a small parts mat.
The M&P .22WMR comes apart very easily. Here, I have removed the slide, barrel and optics cover – well, technically, Scott removed the cover. You can see the firing pin where the cover was at and the two screws holes that will be used to secure the optic on the slide.
By the way, if you are thinking “why did he take it apart just to add an optic?” First, Scott and I pulled the slide and removed the barrel so I could walk into Ace Hardware with it and not scare anyone. Second, I would have taken it apart to clean and lubricate it before the first range trip. Folks, always, always, always do this before you take a semi-auto pistol, rifle or shotgun to the range or you will likely get frustrated fast by malfunctions.
Here’s a closer look at the RMR-footprint cut out the slide has. Any red dot that shares the same footprint as a Trijicon RMR will go right on the scope. Holosuns, for example, have a RMR footprint. I always find it indicative of the degree of overall quality when you see really clean machining done on surfaces most people will never see. The machining on my M&P .22WMR was really well done.
Installing the optic is easy – set the optic in the cut out, put medium strength thread locker on each screw and then screws them in with a hex driver.. I go for snug and then use a torque screw driver to take each down to 15 inch-pounds – not that is inch-pounds and not foot-pounds. That torque recommendation comes from Holosun. Other optics makers have different specs – for example, SIG recommends 9 inch-pounds and others say 12 inch-ounds. Bottom line, bring it down to whatever spec you are comfortable with and let the threadlocker do its job.
Again, read the manual for details. With the M&P apart, I ran cleaning patches through the barrel, wiped down all of the parts and then lubricated where indicated.
When I first get a pistol, I do use grease on the slide rails and barrel to help with break in. Grease tends to accumulate gun powder and dirt faster than oil but my goal is to have things slide smoother during the initial break in knowing that I will need to clean and oil it later.
Also, I would highly recommend you cycle the slide 200 times by hand. Some guys, typically new guys, look at me skeptically when I tell them this but think about it. When we talk about wear-in or break-in periods, what are we talking about? Almost any firearm needs the parts to move a certain number of times to get rid of burrs, smooth down finishes, etc. By hand cycling 200 times you are jump starting the process. Given how nicely done the machining looked and how the pistol’s action felt after lubrication, minimial break in was probably needed but I cycled it 200 times anyways.
A lot of jams and frustration can be skipped entirely by doing the above. Guess what? My nieces and I did not have any problems of any kind and I attribute that to the above and proper ammo.
Use Approved Ammo
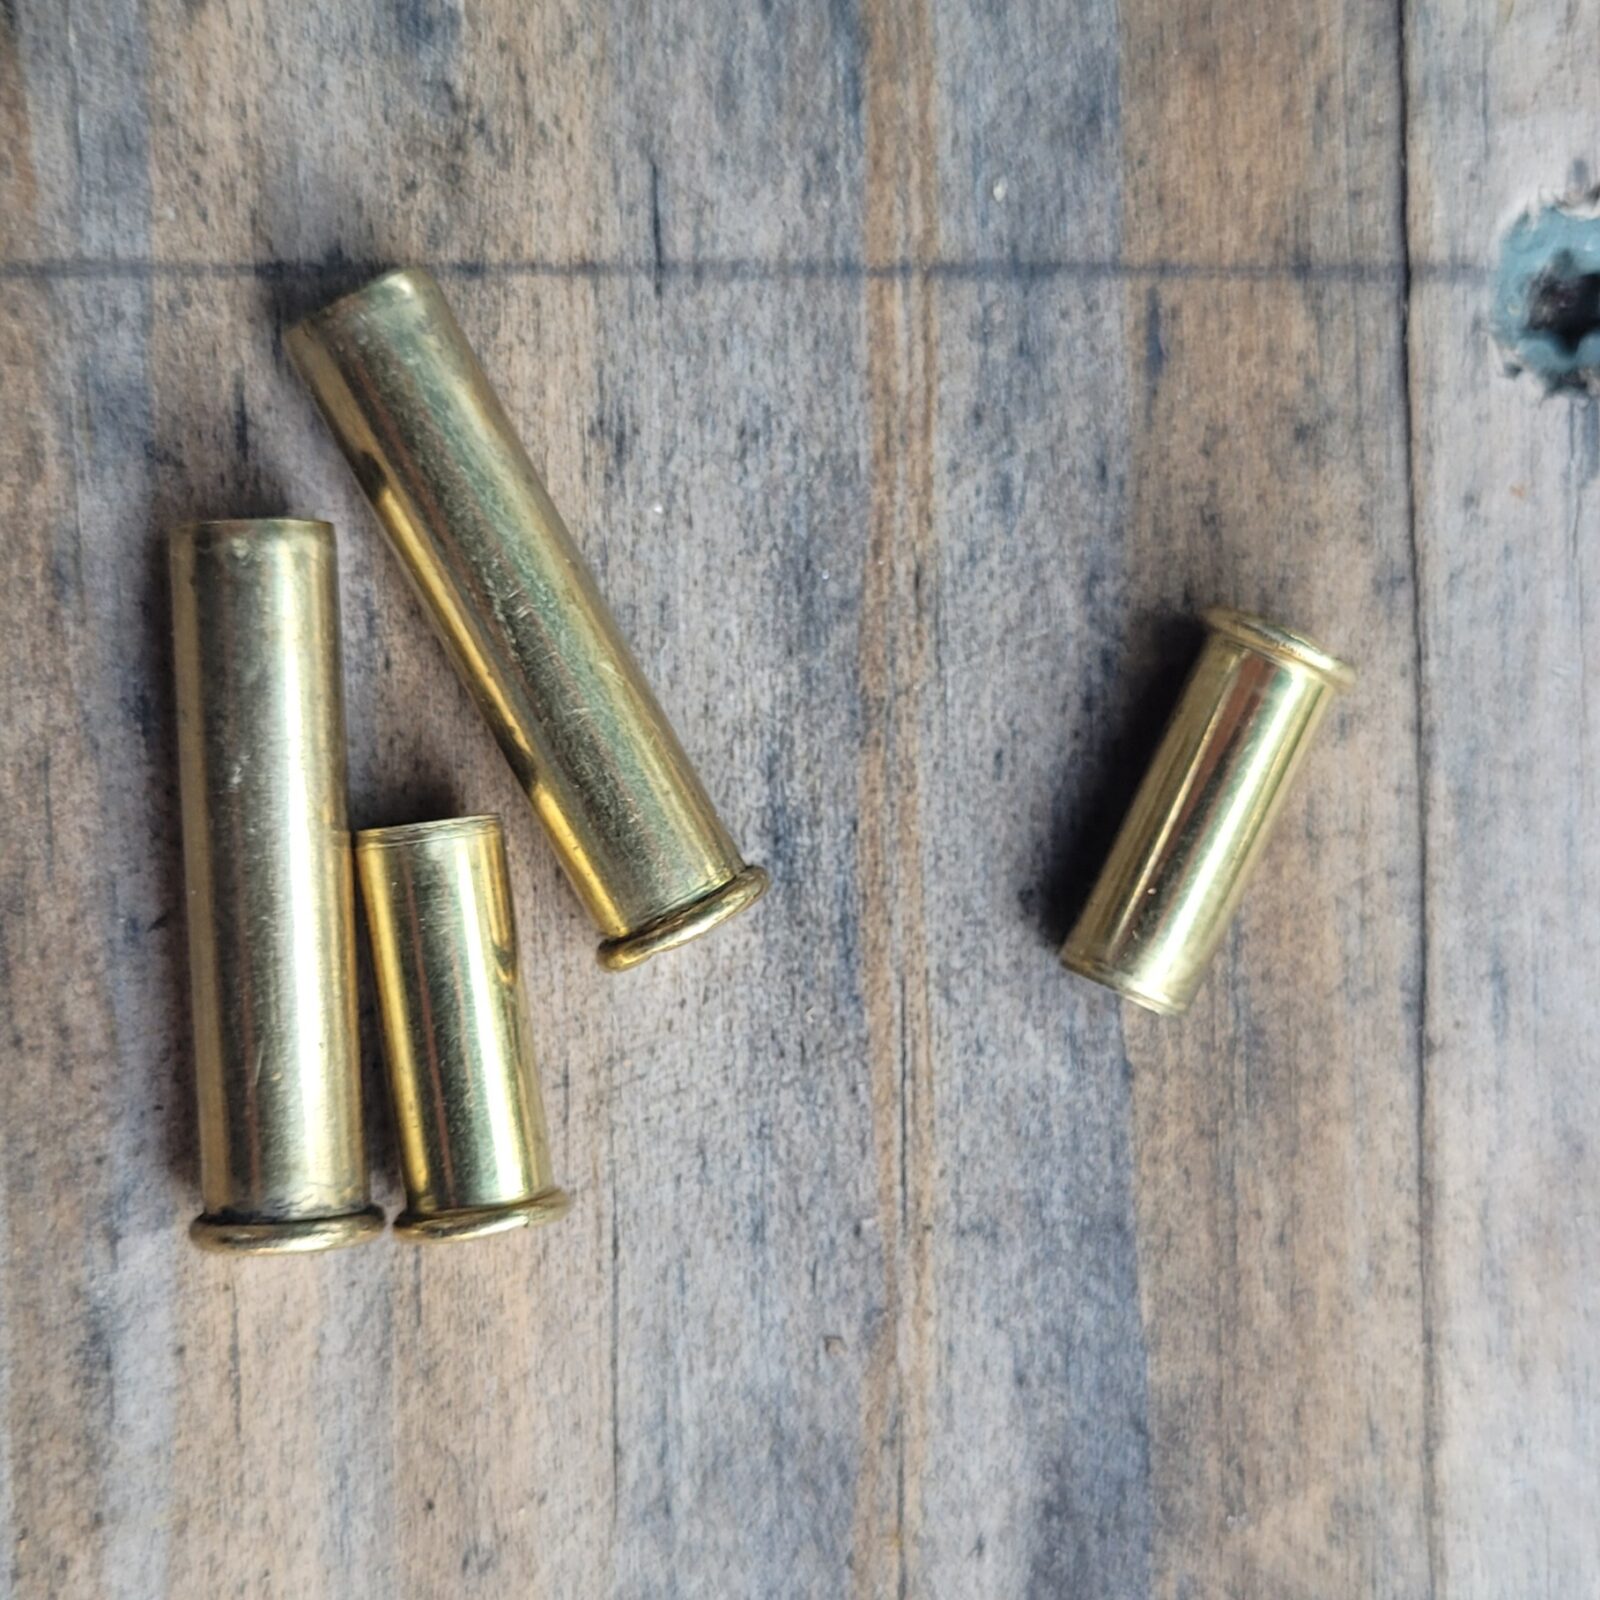
I really wasn’t looking forward to adding another type of ammo. .22WMR is basically a stretched .22 long rifle (LR) rimfire case with twice the charge. .22WMR ballistics are roughly double that of it’s smaller .22LR cousin for that reason.
When I took my nieces to the range, I started them on a .22LR single shot Savage Cub rifle and then we moved up to the M&P pistol. At any rate, I snapped this photo of the longer .22WMR brass right next the .22LR case so you can see what I mean – the case of the .22WMR is twice as long.
Because of the TEMPO gas system, they recommend the use of jacketed rounds only and not ammo that is bare lead, copper washed, copper plated, etc. If the jacket isn’t present, the TEMPO gas system will foul faster and stop working reliably.
Scott had CCI Game Points (which is a jacketed soft point round) and CCI Maxi Mags that are jacketed hollow points. Both are on the approved ammo list and I must mention that I’ve always had great luck with .22 rimfire ammo of all types from CCI.
Range Time
My wife and I, my two nieces and sister-in-law piled in my truck and headed to the range. A few days before I had printed out a 10 commandments of firearm safety that we had talked about and even practiced with the rifle and pistol we would use. During the drive we want over them again – they were nervous but I wanted them to know that a fun time at the range always has safety at the center.
We arrived at the Berrien County Sportsman’s Club on a pleasant day and were able to secure my favorite shooting lane. They all helped me take targets, guns and ammo down to the 25 yard line.
They started with one of our old Savage Cub rifles. We bought two – one for each of our girls when they were maybe 8 and 10 years old – about 15 years ago. I dug one of them out and cleaned it before we went. It’s not been out of the case in years and years so I was very pleased to see it was still sighted in and worked great.
The girls did great with the Savage Cub and were very excited to see their scores on the target. They had to learn the importance of a consistent cheek weld, trigger control, breathing, etc. I like starting kids on a single shot .22 because there is no recoil and I can make sure everything is safe at all times.
Once they were feeling good with the rifle, it was time to move up to the M&P .22 WMR pistol and I fired it first just to make sure everything was good to go. I loaded a magazine with one round and shot it – no odd sounds, barrel was clear, etc. I then loaded up three and shot them slow fire – no problems.
The pistol is very soft shooting. Yeah, it barked a bit louder than the .22LR Savage Cub rifle but I was sure the girls would have no problem controlling it.
We spent a lot of time talking about stances, grips and keeping their trigger fingers off the trigger until ready to shoot.
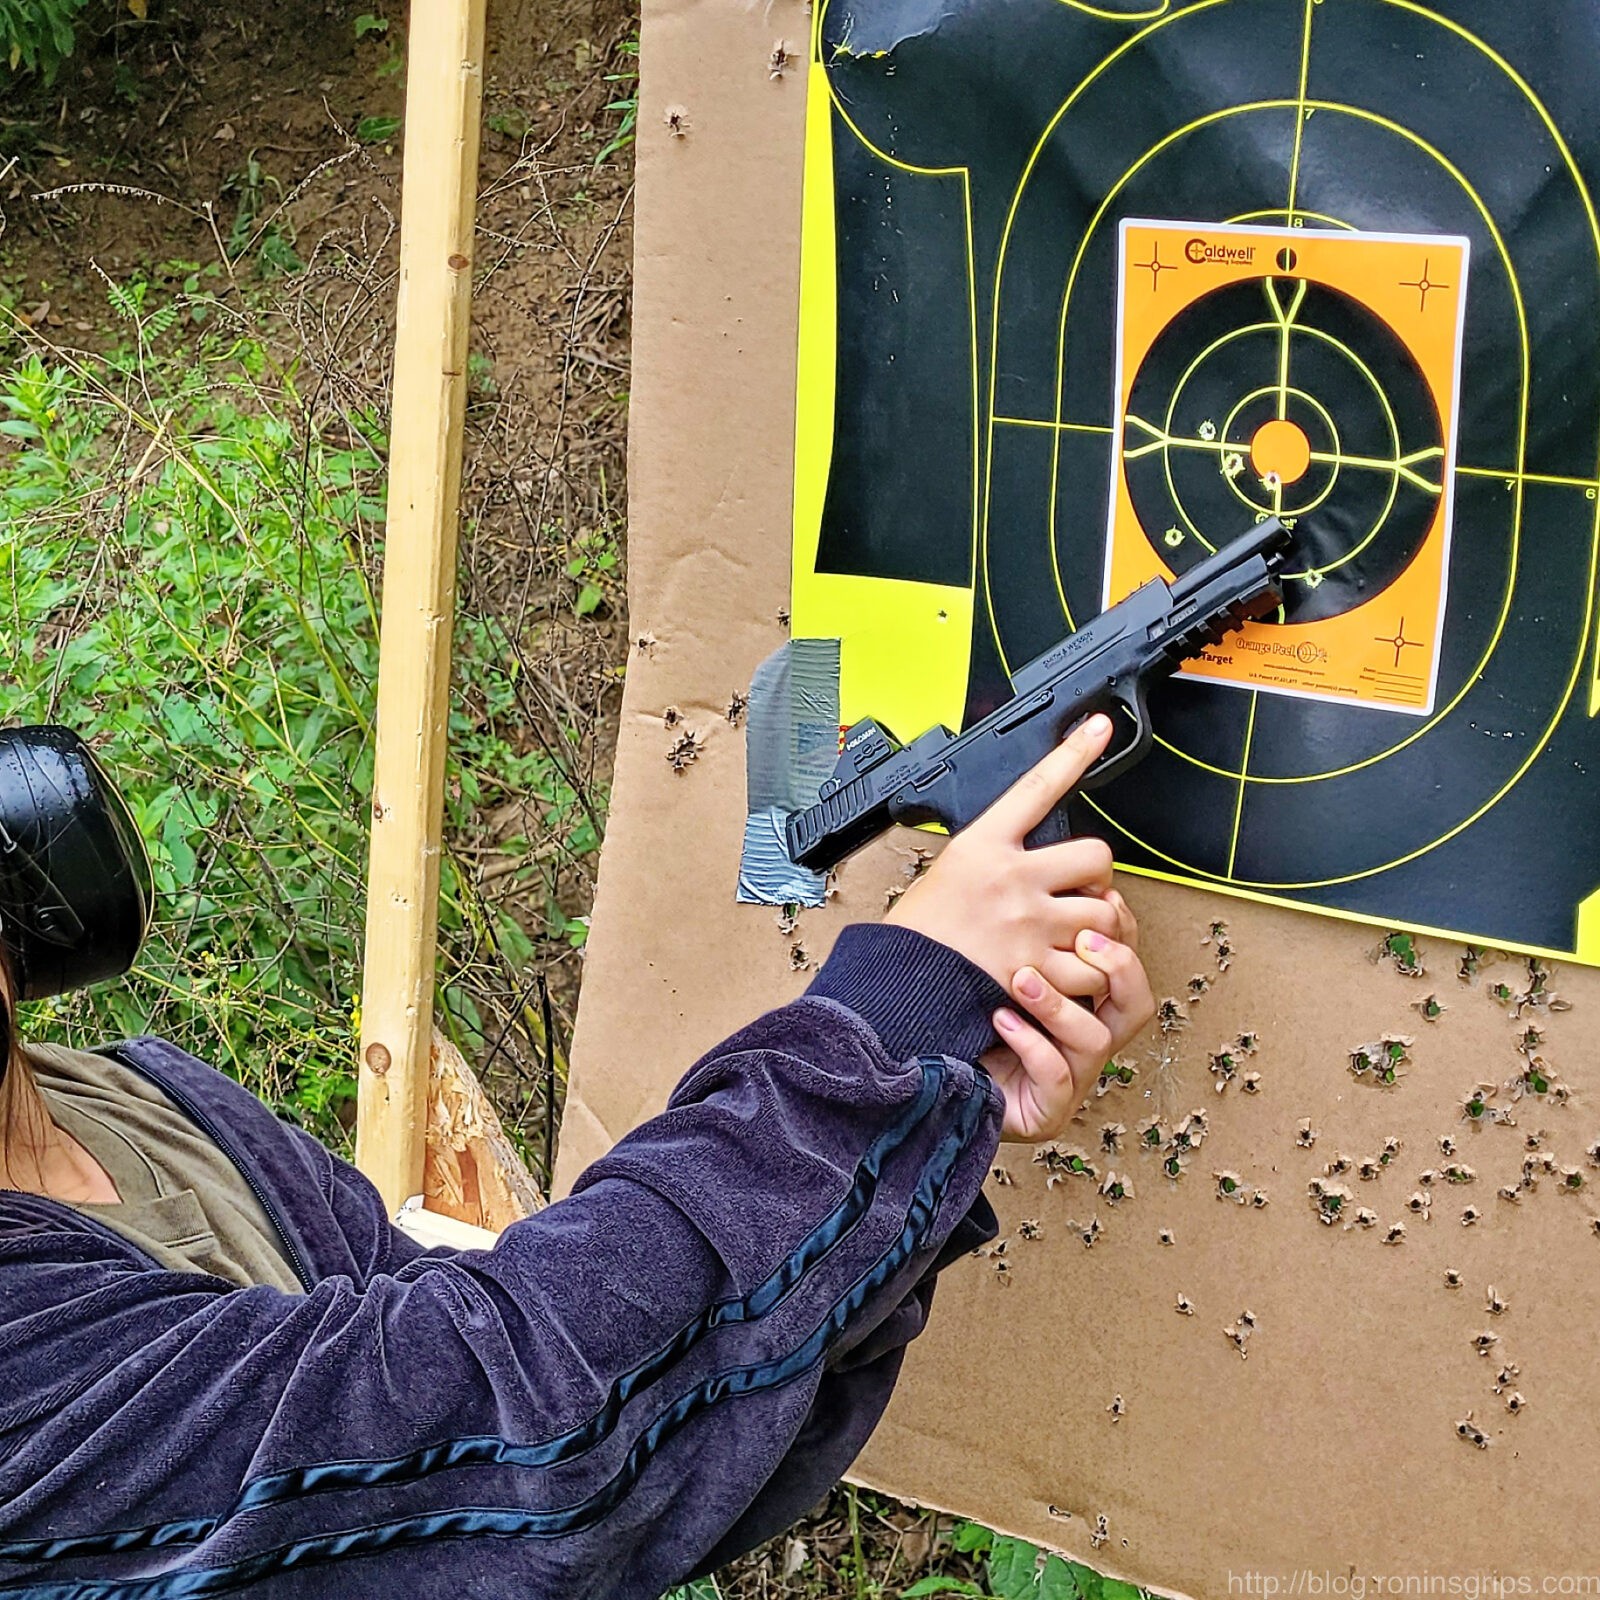
This is my 12 year old niece and she might weigh 100 pounds. She had no problem controlling the M&P. We were shooting from about 15-20 feet away. Even in the Philippines there are liberal moms who would question why we took them shooting so I am not showing their faces even though I am very proud of them!
This is my 10 year old niece and I’d be surprised if she is 80 pounds. She did a great job by her! This photo was staged by the way – I made sure the pistol was clear and carried it down to the target. She only held it long enough for this photo – what you don’t see is a huge grin going ear to ear.
Here’s the pistol from another angle so you can see she had no problem holding it.
We only put about 30 rounds of the MaxiMag hollow points through the pistol – I forgot about the Soft Points. Unfortunately, we ran out of time and had to pack up to get home in time for dinner at their Lola’s house – Lola means grandmother in Tagalog by the way.
Summary
I really didn’t plan to buy a M&P .22WMR. Now that I have one I am thinking about keeping it. The action cycles smooth, it’s reliable, the trigger is good enough and it holds 30 rounds!! It’s very manageable – even the girls had no problem holding and controlling the pistol.
The range trip was a big success and we all had fun. The reliability and accuracy of the M&P helped make it possible. I have no reservations recommending one and plan on taking it to the range again.
Note, I have to buy all of my parts – nothing here was paid for by sponsors, etc. I do make a small amount if you click on an ad and buy something but that is it. You’re getting my real opinion on stuff.
If you find this post useful, please share the link on Facebook, with your friends, etc. Your support is much appreciated and if you have any feedback, please email me at in**@*********ps.com. Please note that for links to other websites, I may be paid via an affiliate program such as Avantlink, Impact, Amazon and eBay.
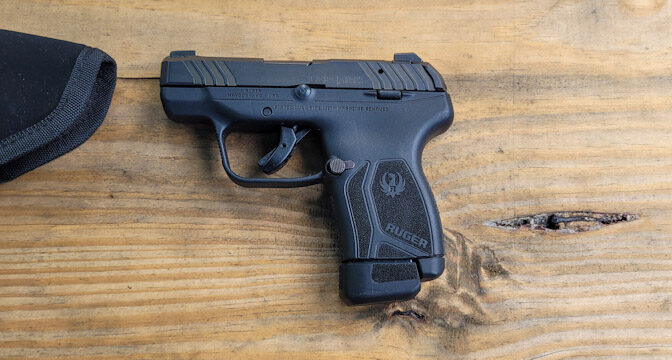
Back in the Fall of 2021, I bought a Ruger LCP Max chambered in the small .380 Auto cartridge and wrote about it in January of 2022. I figured it was time to give you folks an update because I rarely hold on to a firearm for very long. In the case of the LCP Max, I still have it and it is the pistol that I carry most.
When you look at a firearm, you need to think of it as a tool. As a tool, it has certain situations where it should be used and others where it should not. For example, would you use a claw hammer to remove lug nuts from your truck? No, you would use a lug nut wrench, imact sockets or something along those same lines.
For me when it comes to self-defense, I have to think about the situation and how I need to carry a pistol. For you folks who are lean, mean and can wear and inside the waist band (IWB) holster – that’s great. I’m 5′ 8″ tall, over-weight at 225 pounds and and an IWB is not comfortable and an outside the waistband (OWB) holster isn’t concealable.
Look, I love my Sig P365 and carry that if I think I need more firepower but that usually means either under my seat or in a shoulder holster. If I need a pistol to slide into the pocket of my shorts or sweat pants without a bulge and causing them to droop way down, it’s the LCP Max.
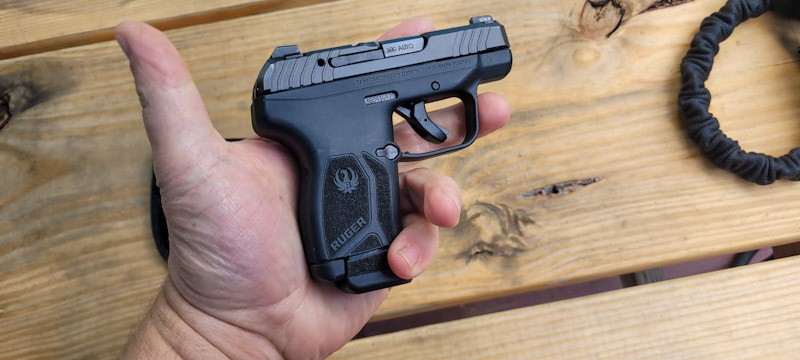
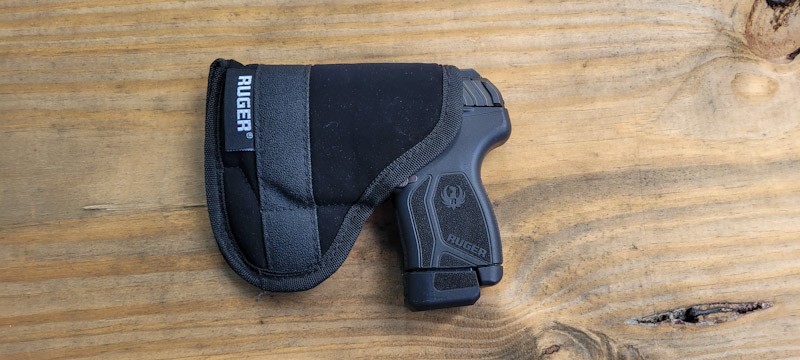
Folks, it is small but not too small. I wear XL sized gloves and find it very easy to hold.
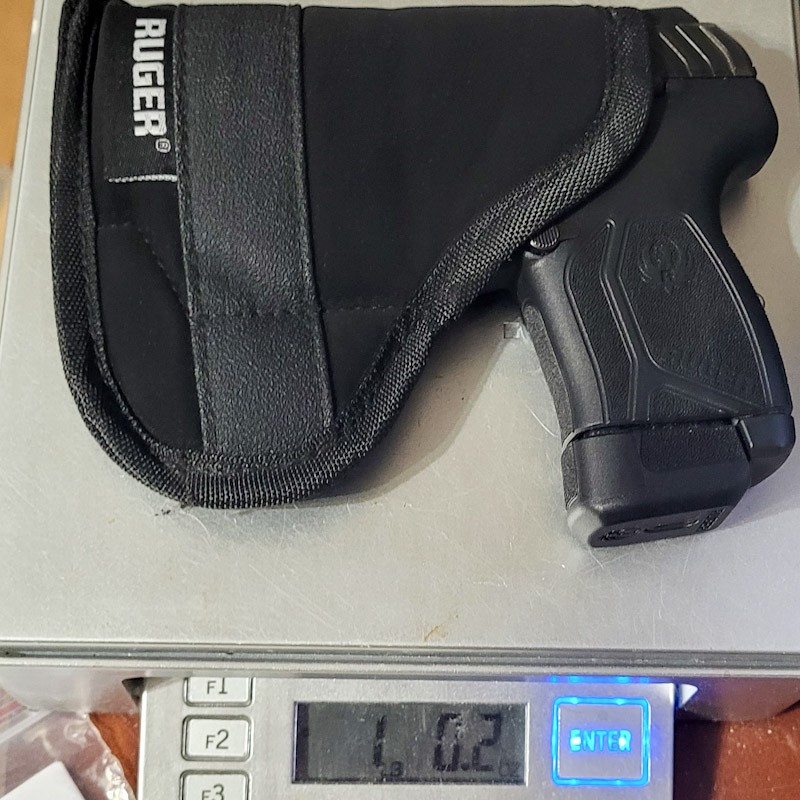
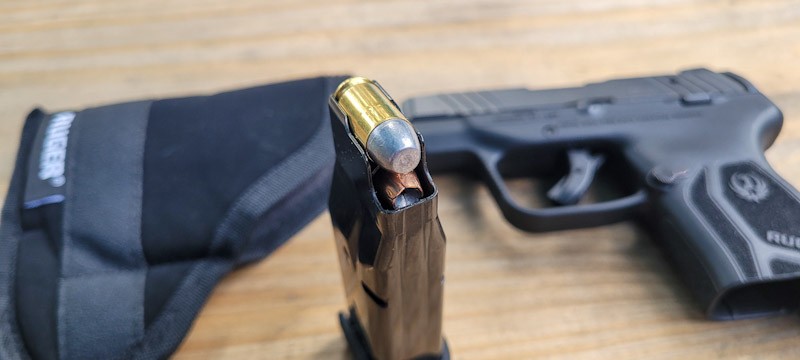
With 12 rounds of alternating hard cast ammo for penetration and hollow points and in its holster, the whole package only weighs a hair over one pound. That is my postal scale and that is 0.2 ounces. It doesn’t cause my shorts, pants, sweatpants or whatever to sag. At first I was skeptical of a pocket holster but now really like it.
Another view of the pistol in its pocket holster. That is a 12-round magazine you see mand what I almost always carry.
It’s Proven to Be Very Reliable
Second, it just runs. I’ve taken it to the range and put a lot of the self-defense rounds and FMJ range ammo through it with no failures to feed, failures to extract, etc. It’s very reliable.
It holds 10-12 Rounds
I bought a Bond Arms derringer once thinking it would give me a small concealed carry option and was surprised at how big and heavy it was yet it only held two rounds. Some guys are of the opinion that they want one or two large caliber rounds in a self-defense situation. Others, like myself, want as many as they can carry taking weight and size into consideration.
I have 10 and 12 round mags for the LCP Max. Both sizes seem to be equally reliable as I haven’t had a problem with any of my mags of either size.
Note, always test a pistol with your combinations of magazines and ammo. So far my LCP Max has fed through the various brands and types of ammo that I have with no problem. Don’t assume your’s will – you must test it before you rely on it.
Yes, It Is “Only” A .380
In the first post, I recounted Kyle Lamb’s story that just about any pistol being carried when you need it beats a supposedly better pistol not being carried due to whatever reason. Folks, there is a lot to be said for that. Let me put it another way – it is better to have a pistol than wish you had a pistol if you need it.
The .380 will never be known for stopping power. I load it with alternating Buffalo Bore hardcast rounds for a degree of penetration and various hollow points such as Sig V-Crowns.
Am I going to carry it for bear protection? Of course not, I will carry a 10mm either in a fanny pack or a shoulder rig. The little .380 pistol has more energy than a .22 long rifle and the LCP Max carries enough of them to do the job.
Summary
I continue to use the LCP Max because it is small, light and reliable. I’ve not found something better so far so I continue to use it in situations where I need to carry a pistol in my pocket without it being blatantly obvious I am doing so. It’s light weight also makes it very comfortable to carry all day, while fishing, driving, walking around, etc.
By the way, the LCP Max is so popular that there are tons and tons of color options now. Prices start around $325 and go up from there.
Note, I have to buy all of my parts – nothing here was paid for by sponsors, etc. I do make a small amount if you click on an ad and buy something but that is it. You’re getting my real opinion on stuff.
If you find this post useful, please share the link on Facebook, with your friends, etc. Your support is much appreciated and if you have any feedback, please email me at in**@*********ps.com. Please note that for links to other websites, I may be paid via an affiliate program such as Avantlink, Impact, Amazon and eBay.