Thanks to the US government restricting the imports of firearms from the Kalashnikov Concern in Russia, I pretty much gave up on my hopes of owning a Civilian Vityaz clone – or at least one from Russia.
In case you don’t know the submachine gun I am referring to, the Vityaz-SN PP-19-01 is a 9x19mm submachine gun that is basically a scaled back AK-74M that uses a blowback operating method vs. gas, It was designed in 2004 and in production from 2008 to the present day.
Photo obtained from Wikipedia and used under Creative Commons license.
Photo obtained from Wikipedia and used under Creative Commons license.
At any rate, I got excited when PSA released their AK-V and then fixed the initial bugs that surfaced – I respect a firm that listens to customers, acknowledges the problems and fixes them. I purposefully held off buying the AK-V initially but once word started spreading of the improved model, I bought one and wrote series of blog posts:
- Reviews I watched that influenced my purchase
- First impressions out of the box
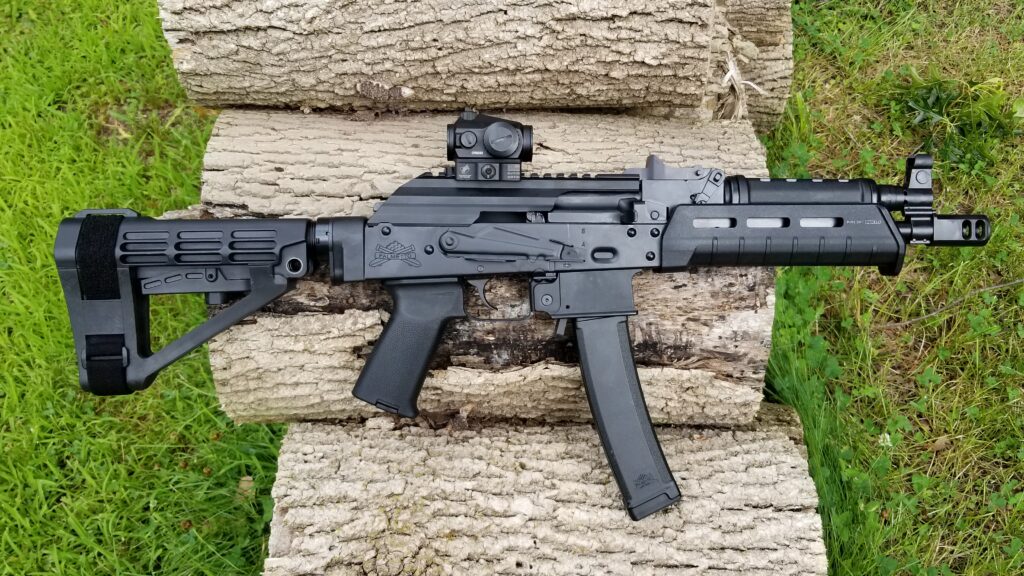
- Changing to a SBA4 brace, adding a Vortex Crossfire Red Dot and a Ronin’s Grips Quick Takedown Pin
- Lubricating the AK-V and picking a soft carry case
- Taking the AK-V to the range – it ran great!
Click here to go to the Palmetto State Armory AK-V homepage. This is a great place to see all the models and accessories that they are now offering.
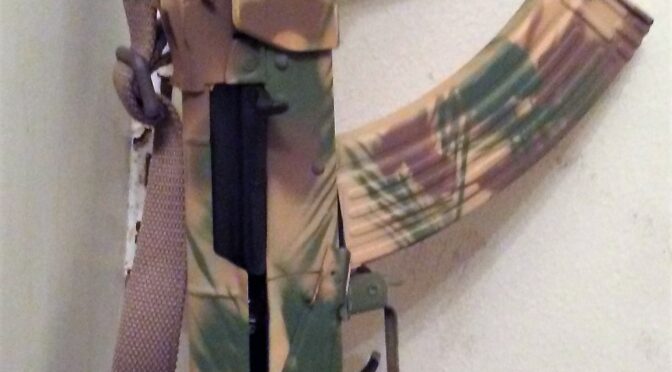
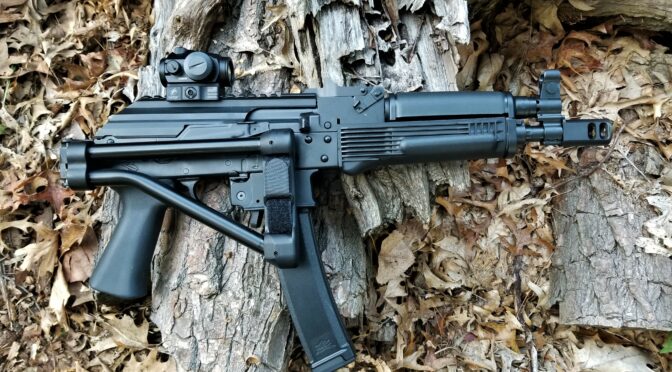
Well, I thought I was done – the AK-V didn’t look like a Vityaz-SN with the Magpul grip and handguard plus the SBA4 brace but it was very comfortable to shoot and the furniture was solid. I was fine until Paul Popov posted photos of his converted AK-V in the Facebook AK-47 Group using the new CNC Warrior side folding brace and it look far more like a Vityaz – yeah, I had to change.
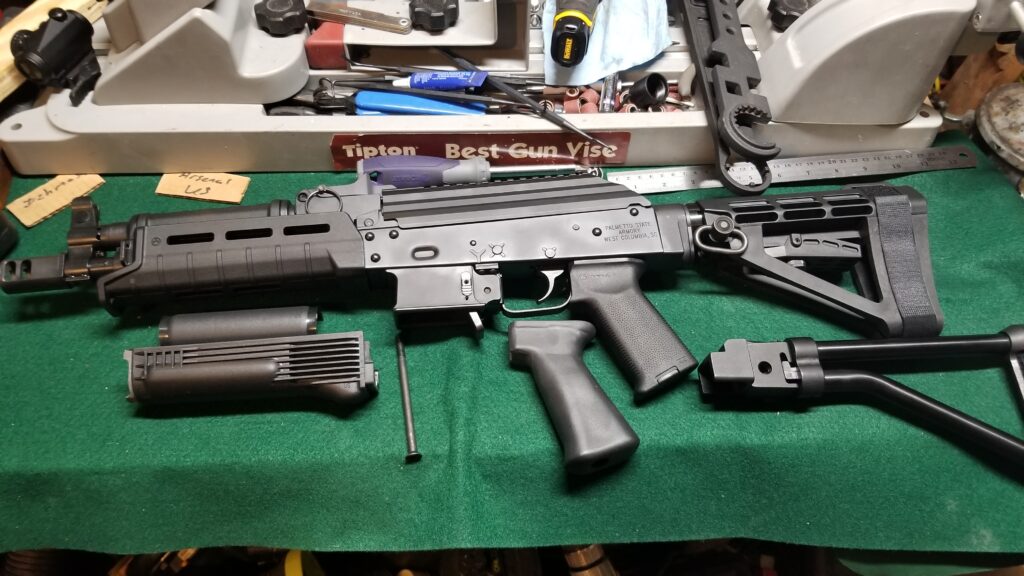
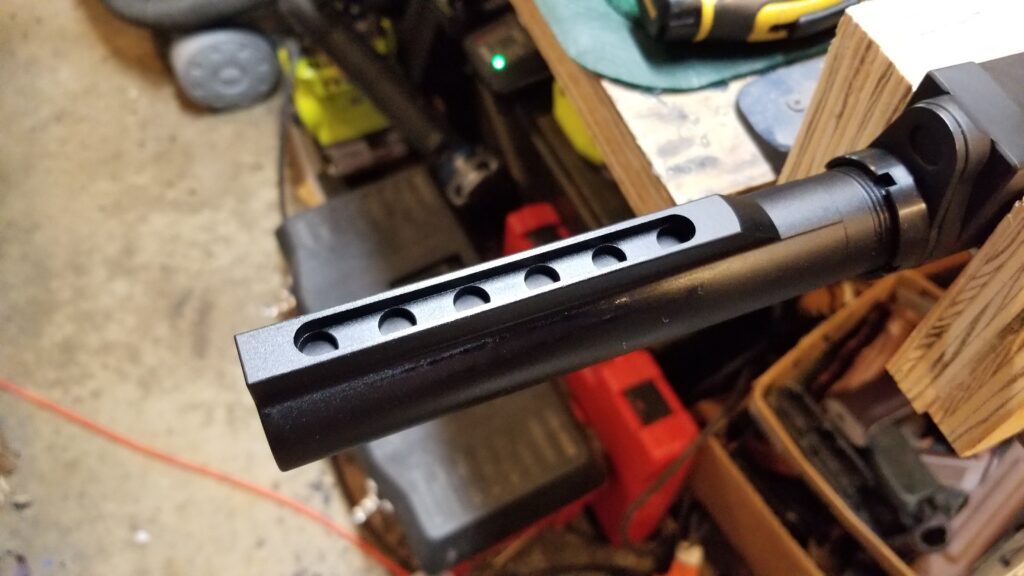
The conversion is really straight forward – change the the brace, the handguard and the grip. While I do plan on changing out the muzzle device at some point, I’ve not done so yet – just FYI,
Always make sure your firearm is unloaded and safe before you work on it. Check that chamber one more time.
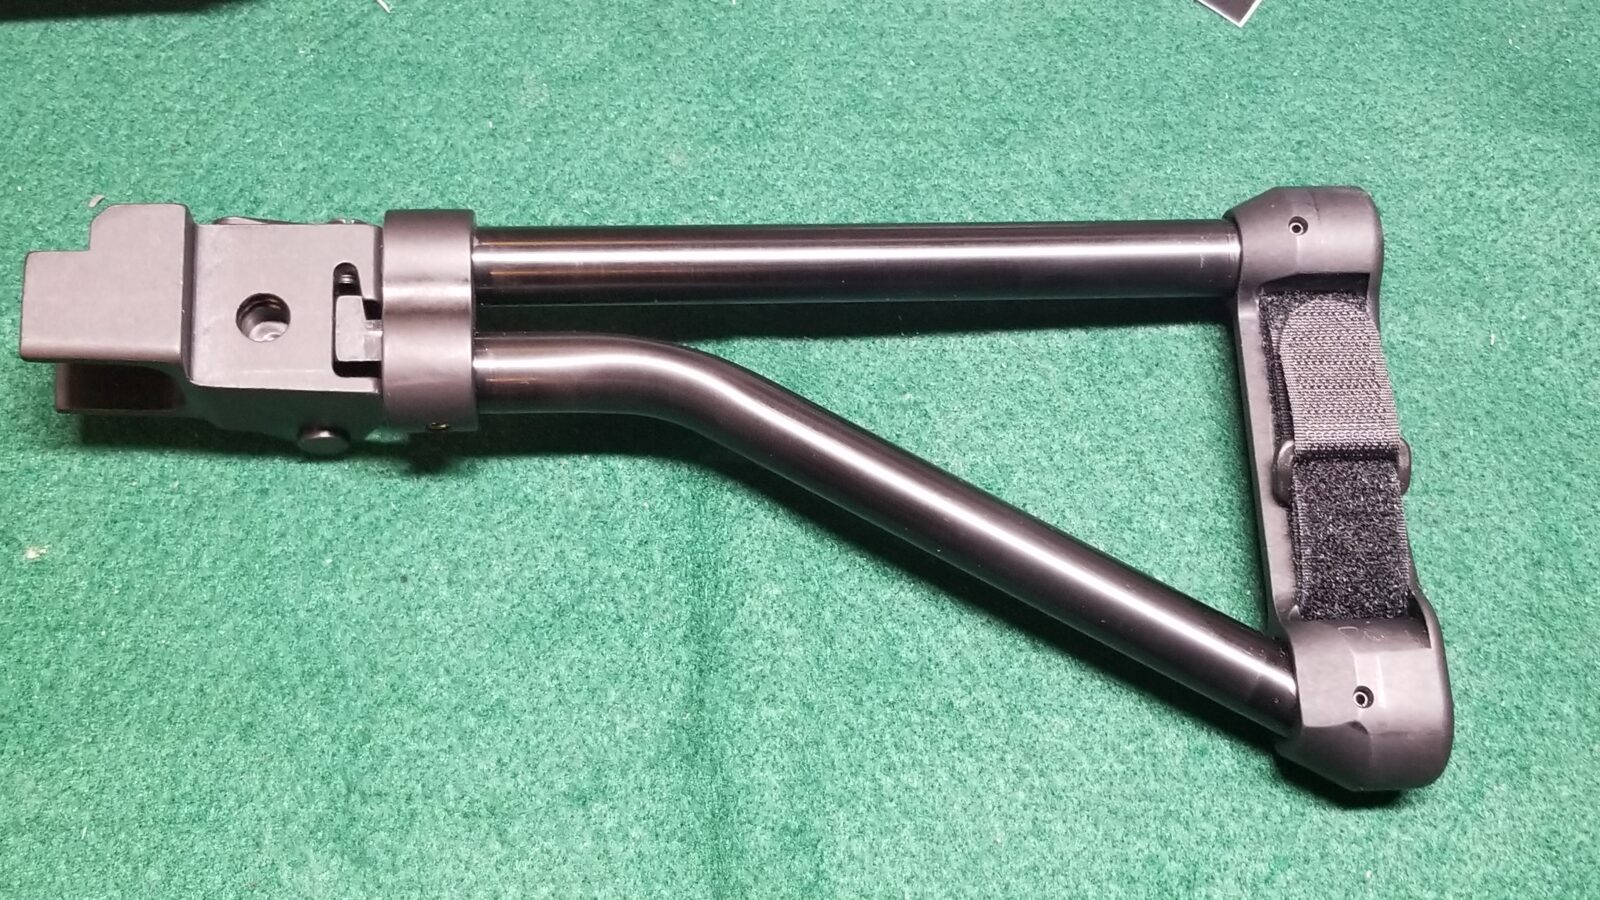
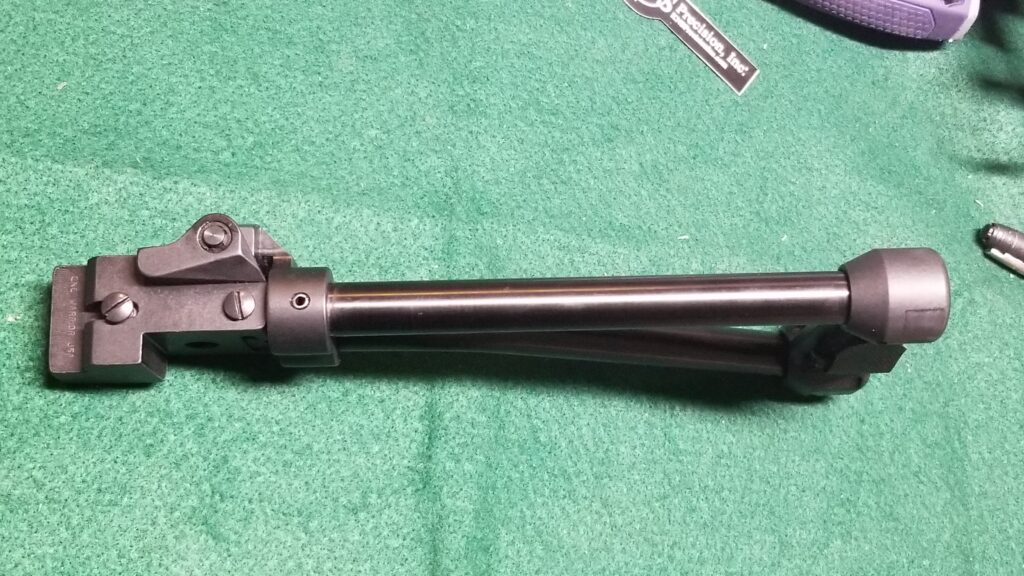
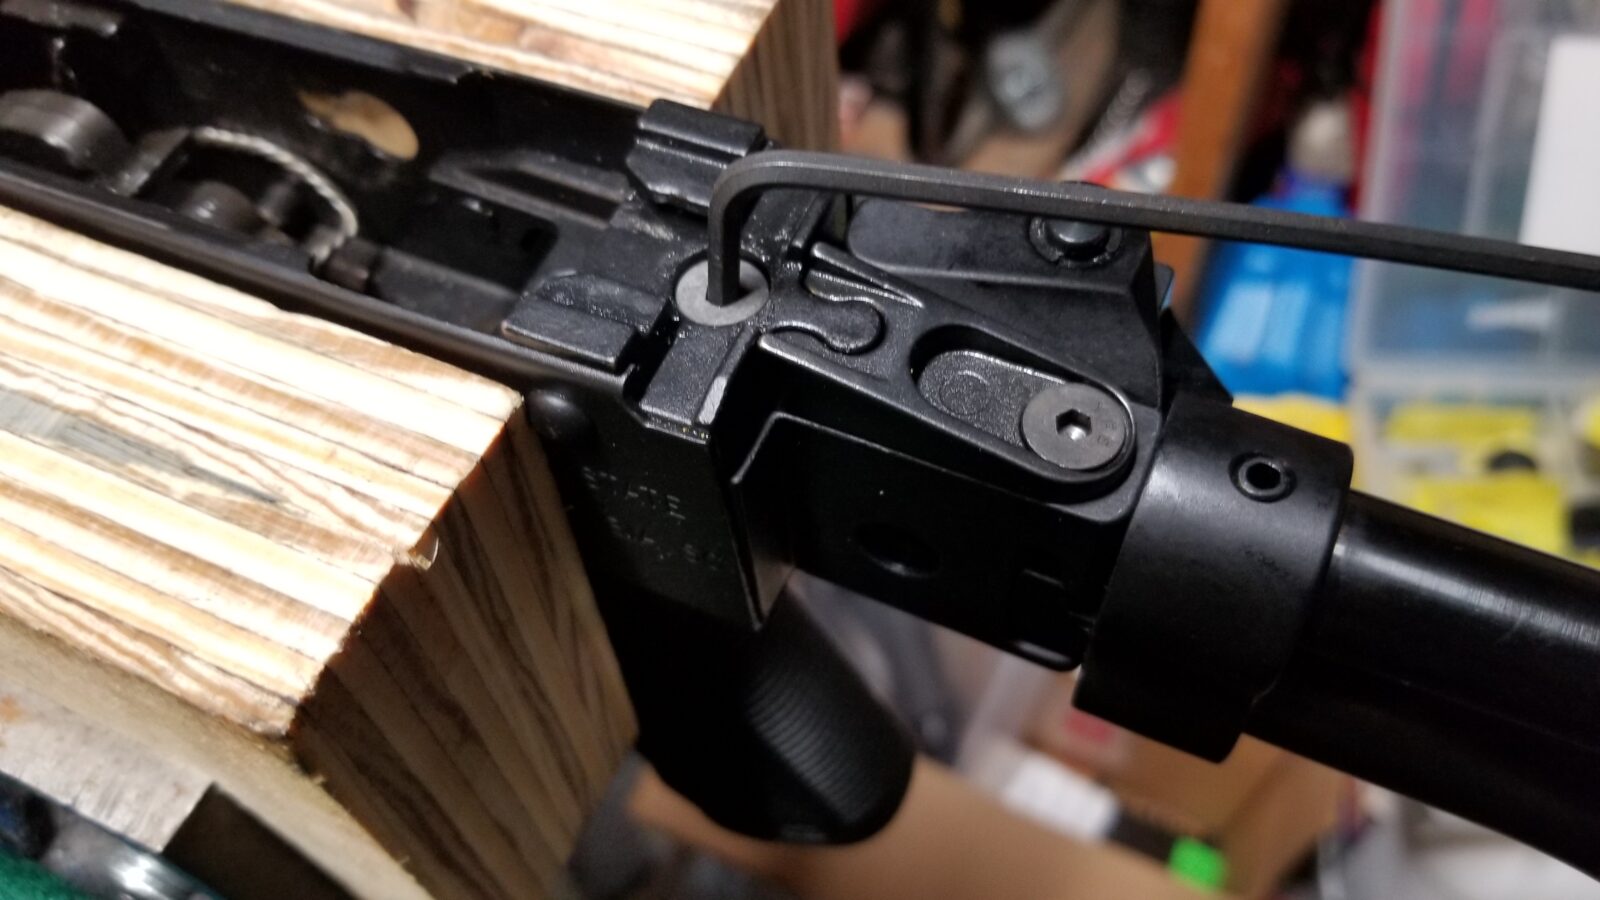
The CNC Warrior Brace
Chris Bonesteel, of Bonesteel Arms, and CNC Warrior have been working together for years turning out high quality Galil-style folding stocks. I did not know they had created a brace design until Paul posted his photos and I immediately ordered one. Why would I jump? Simply put, the team turns out excellently executed designs and no, they did not pay me to say that. It just happens that I’ve known both groups for a long time – the US AK parts maker community started out small way back when.
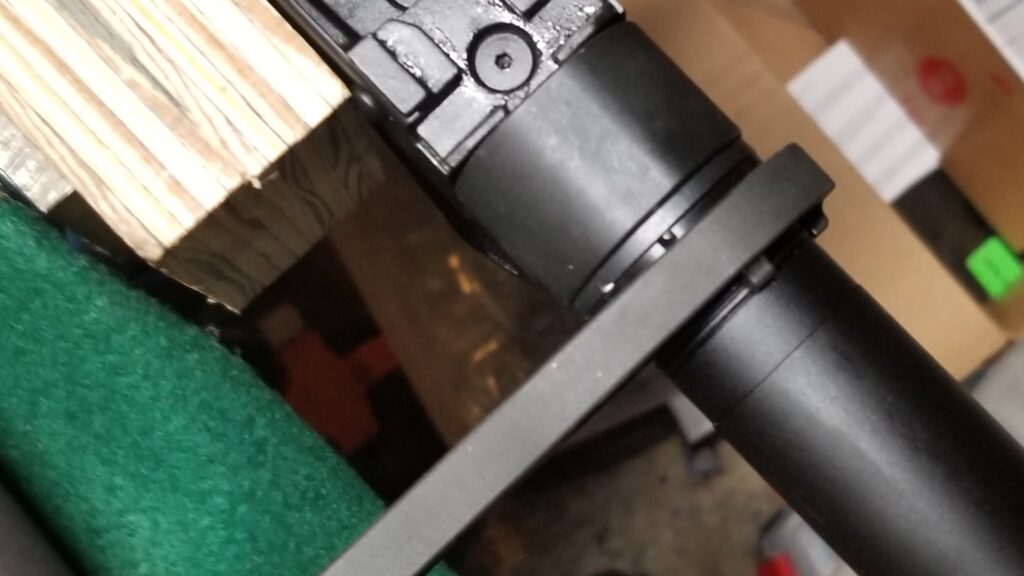
Here’s the link so you can take a look. The AK-V uses a stamped AK style trunnion and then you can choose either a left or right side folding model. They were out of stock of a left folder so I bought a ride-side folding model. It looks like the AK-V will still operate folded but I haven’t tried it yet.
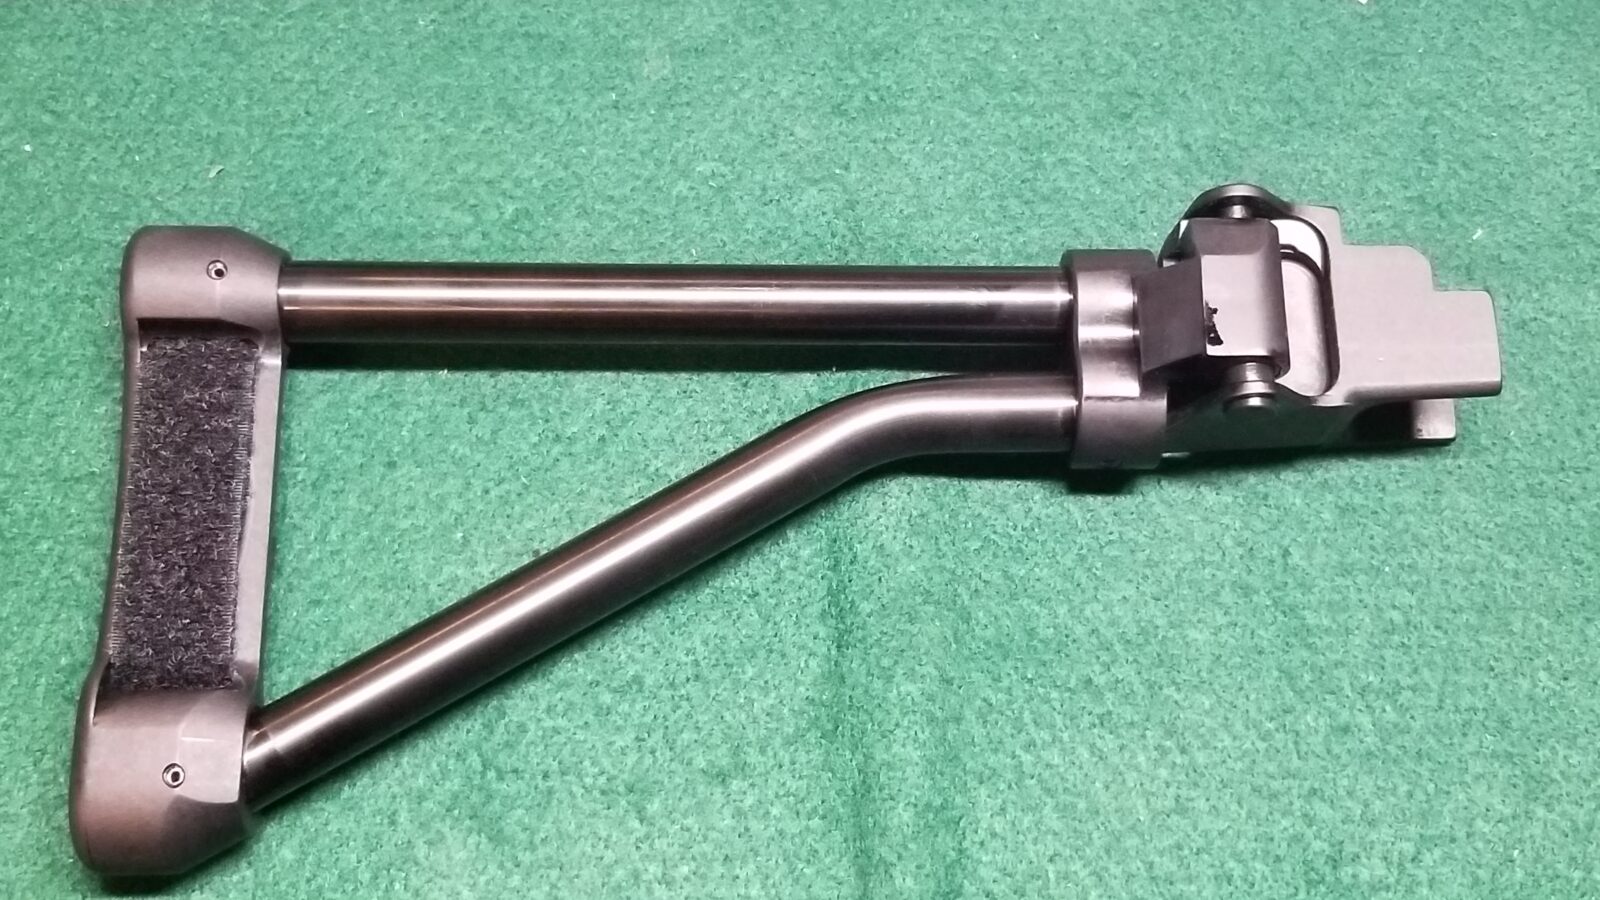
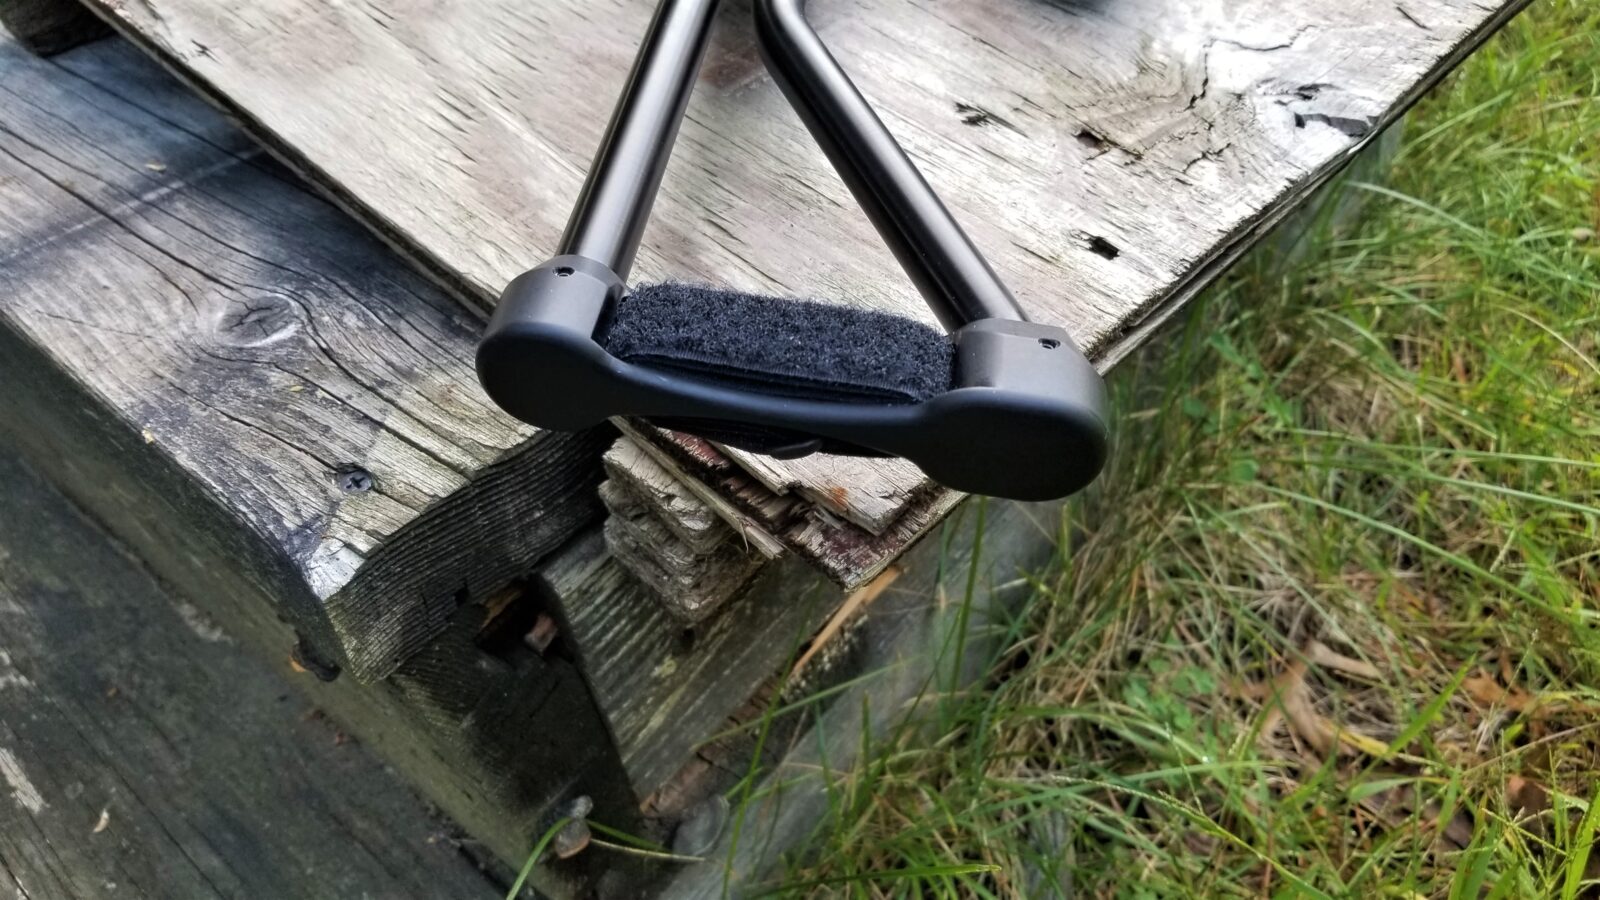
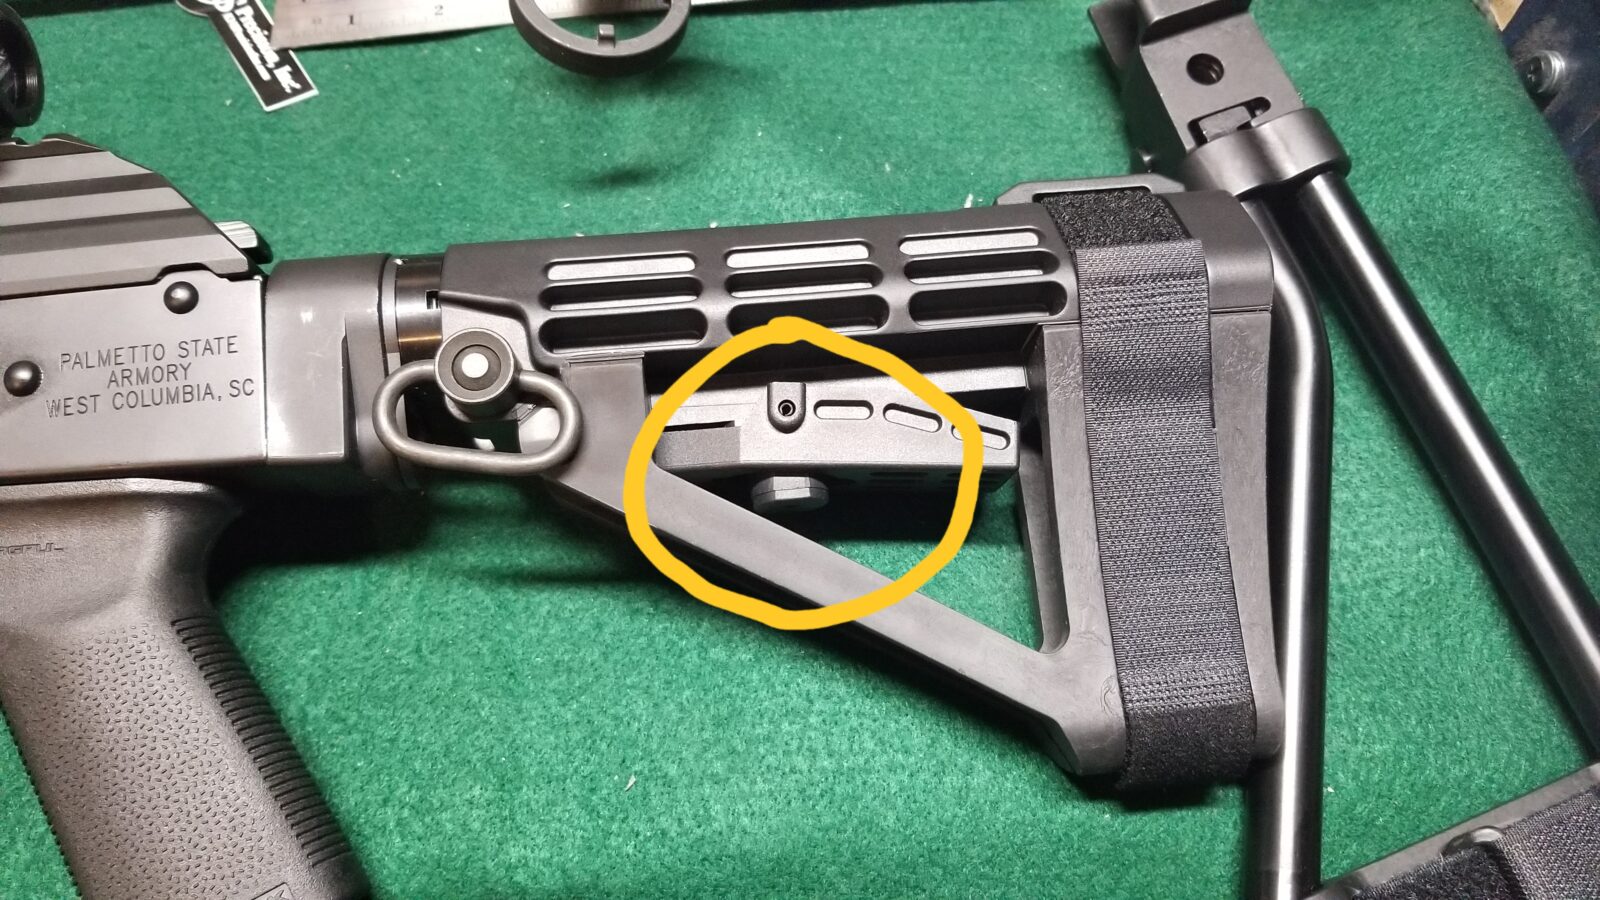
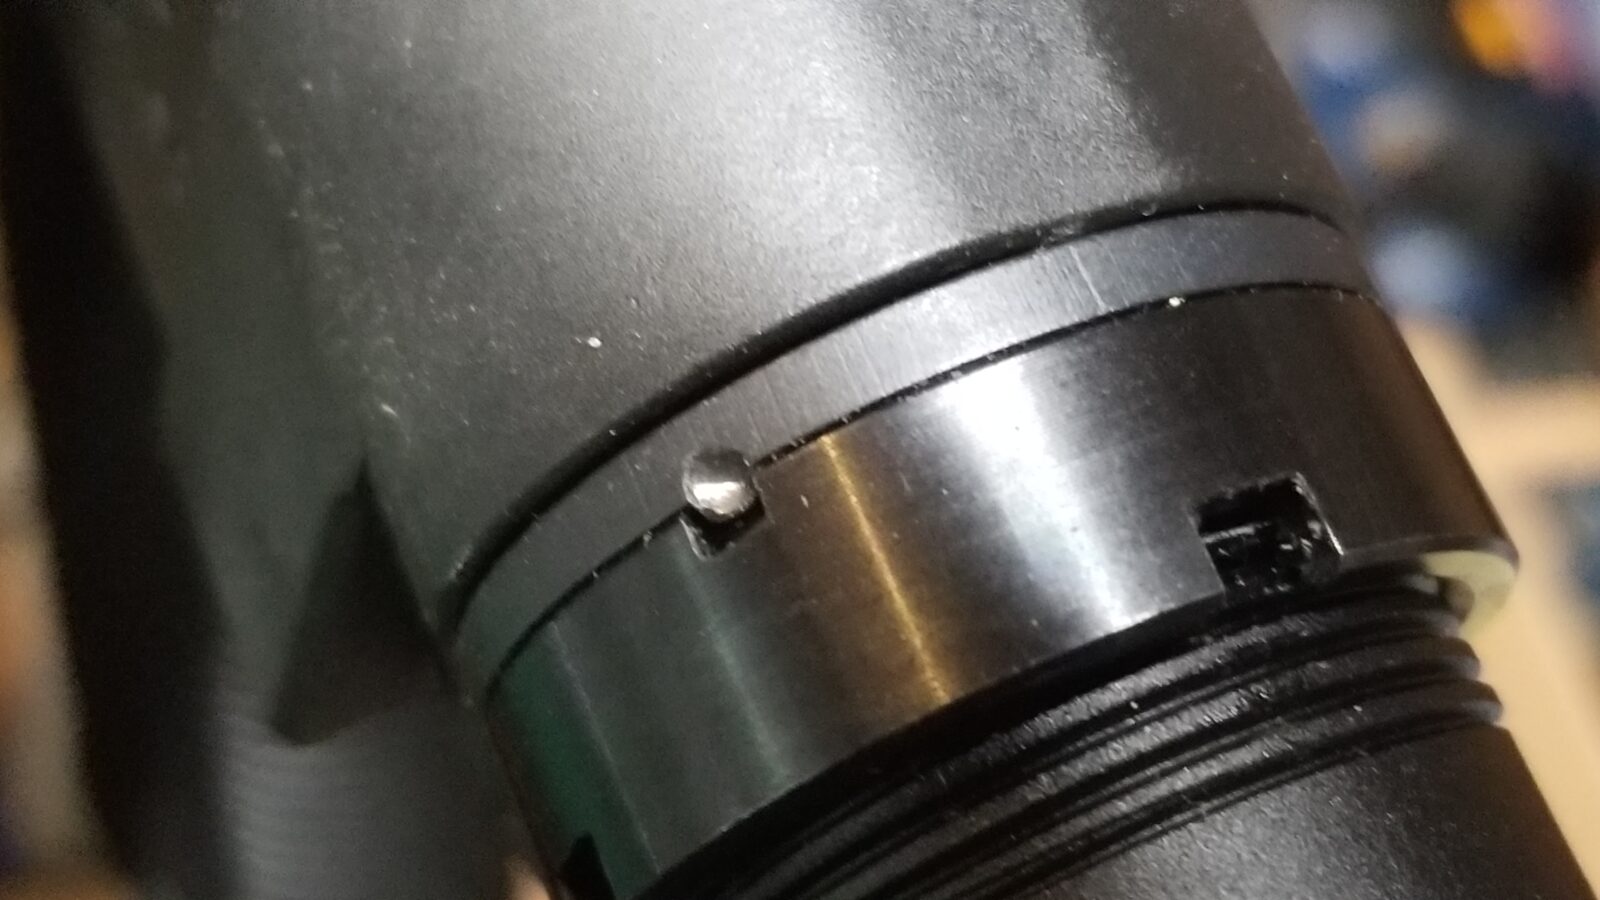
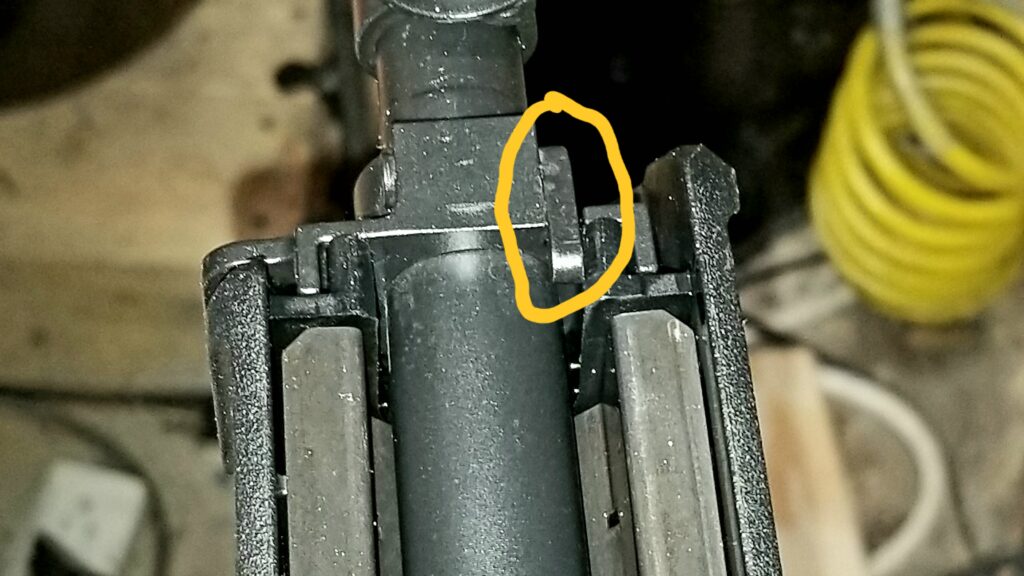
Now, to change out the existing SBA3 brace or, in my case, an SBA-4 brace, you will need to first remove the stock by pulling up on the adjustment latch and sliding the stock to the rear. You need to pull the latch so it can clear the groove’s walls it is captured in.
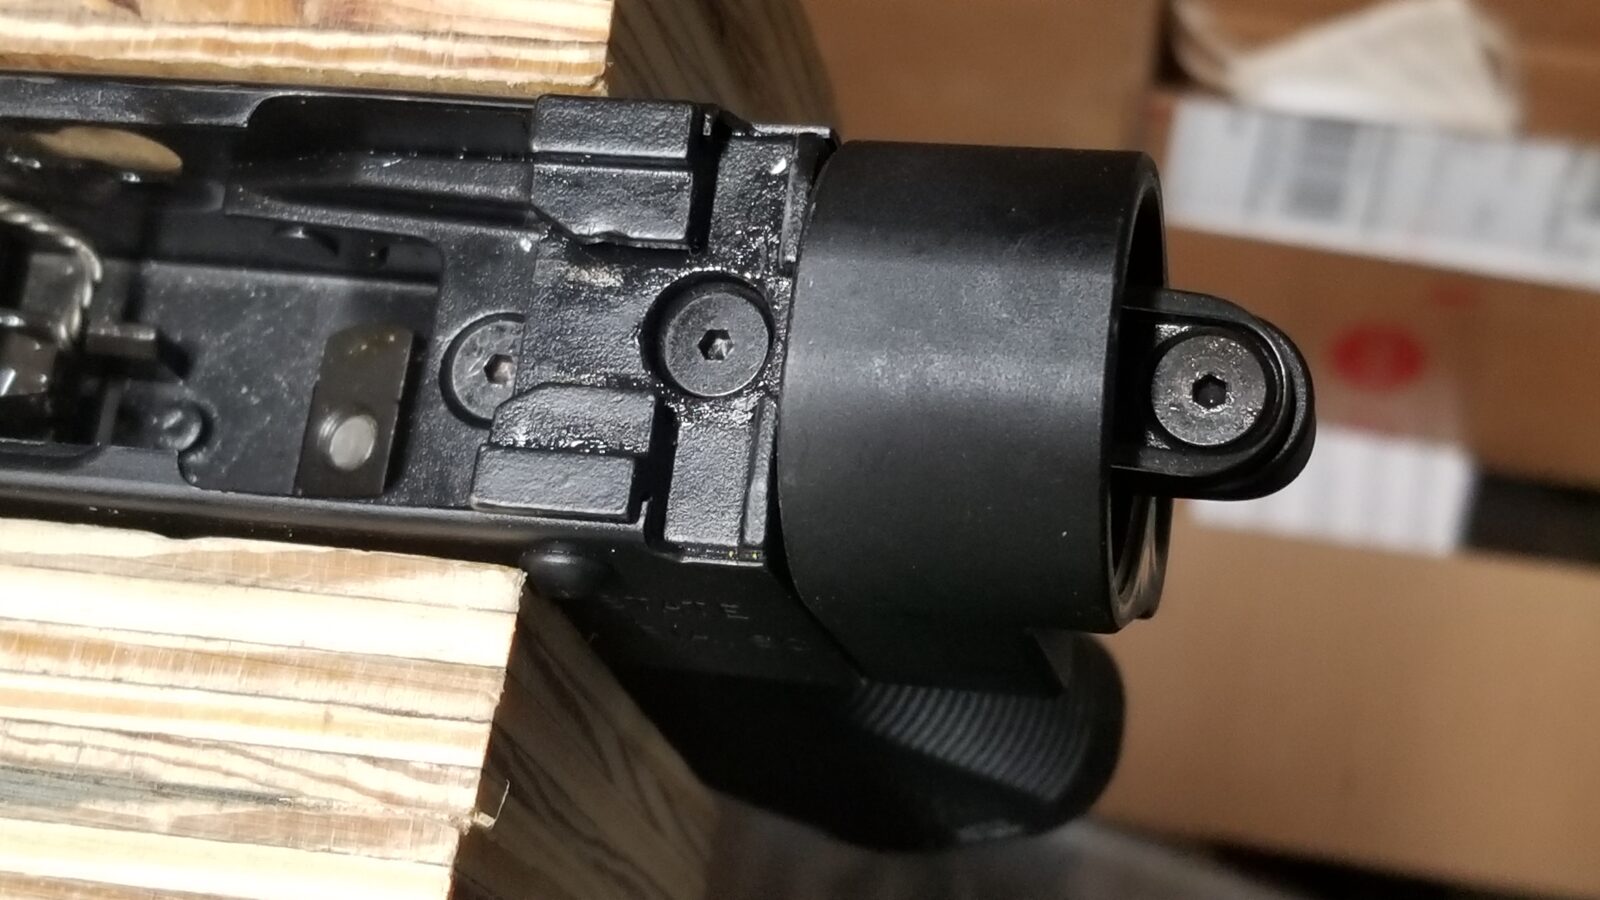
I didn’t get a photo of the next two steps but to remove the M4 adapter, I used a wood dowl and hammer to give the unit a few taps from the inside and it came right out. I was surprised by PSA’s use of a two-piece rear trunnion. It’s innovative and makes sense. If you ever built an AKM and then used the Ace universal modular stock adapter that did not require cutting the rear tang, you may recall that block is huge as a result. I used it because I didn’t want to permanently cut the rear tang off.
By creating this two piece unit, PSA can effectively have rear trunnion that can either accomodate a folder or modular block without the tang in the way or simply insert the tang and then use a fixed-stock style screw arrangement.
To install the CNC Warrior brace, I simply tapped it into the receiver. I did make sure the front retaining nut did not slide out of its slot during the process. Once the stock was fully seated, I checked the install of the supplied screws and I could not reach the captured nut. So, I ran down to Ace Hardware and bought a few different lengths of #10-32 allen head screws. I used 3/8″ long for rear screw and 9/16ths” for the front. I’ve not seen others mention they needed a longer screw in front but that is what worked for me. It seemed to tighten down fully – if it had not,I would either have tried a shorter screw or ground down the tip just a tad.
After I published this post, Paul Popov pointed out to me that he examined the two screws that came with the brace and noticed the heads had different tapers. The one for the front has more of a taper/slightly smaller head that allows it to indeed get down far enough for front screw. So, take a look at your screws and see if this helps.
Note: I coated the screws with Blue Medium Loc-Tite just to be sure and then tightened them down. It’s very important you use your favorite thread locker here – Vibratite, Loc-Tite, etc. Because the block is aluminum, I would not use anything stronger than a medium-strength locker.
That’s it for the brace. It was actually really easy and trying to take the photos took longer than the actual work.
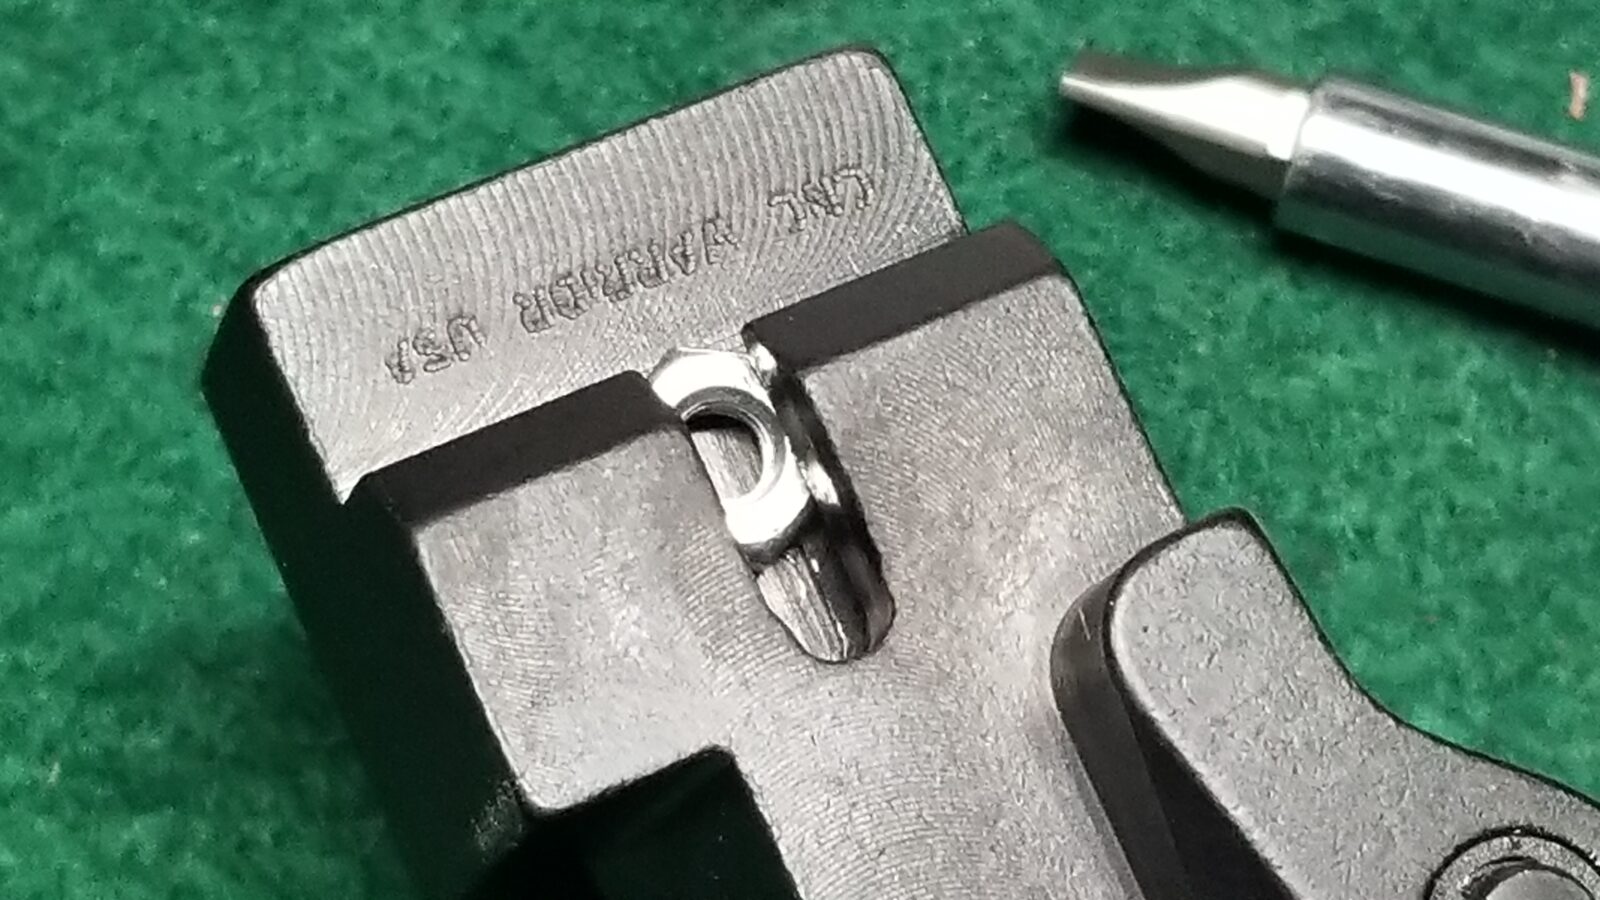
Ronin’s Grips Izhmash Molot Grip
The Vityaz-SN uses Izhmash’s copy of the Molot grip – what I like to call the Molot Gen 2. In my honest opinion, the Izhmash copy is a better design, The original had a weaker nose, was slightly smaller and did not have as big of a tail between the web of the thumb and the receiver. For all these reasons, I’ve always liked the Izhmash grip more and made myself one for this build. [Click here to to go our product page from the Molot Gen 2]
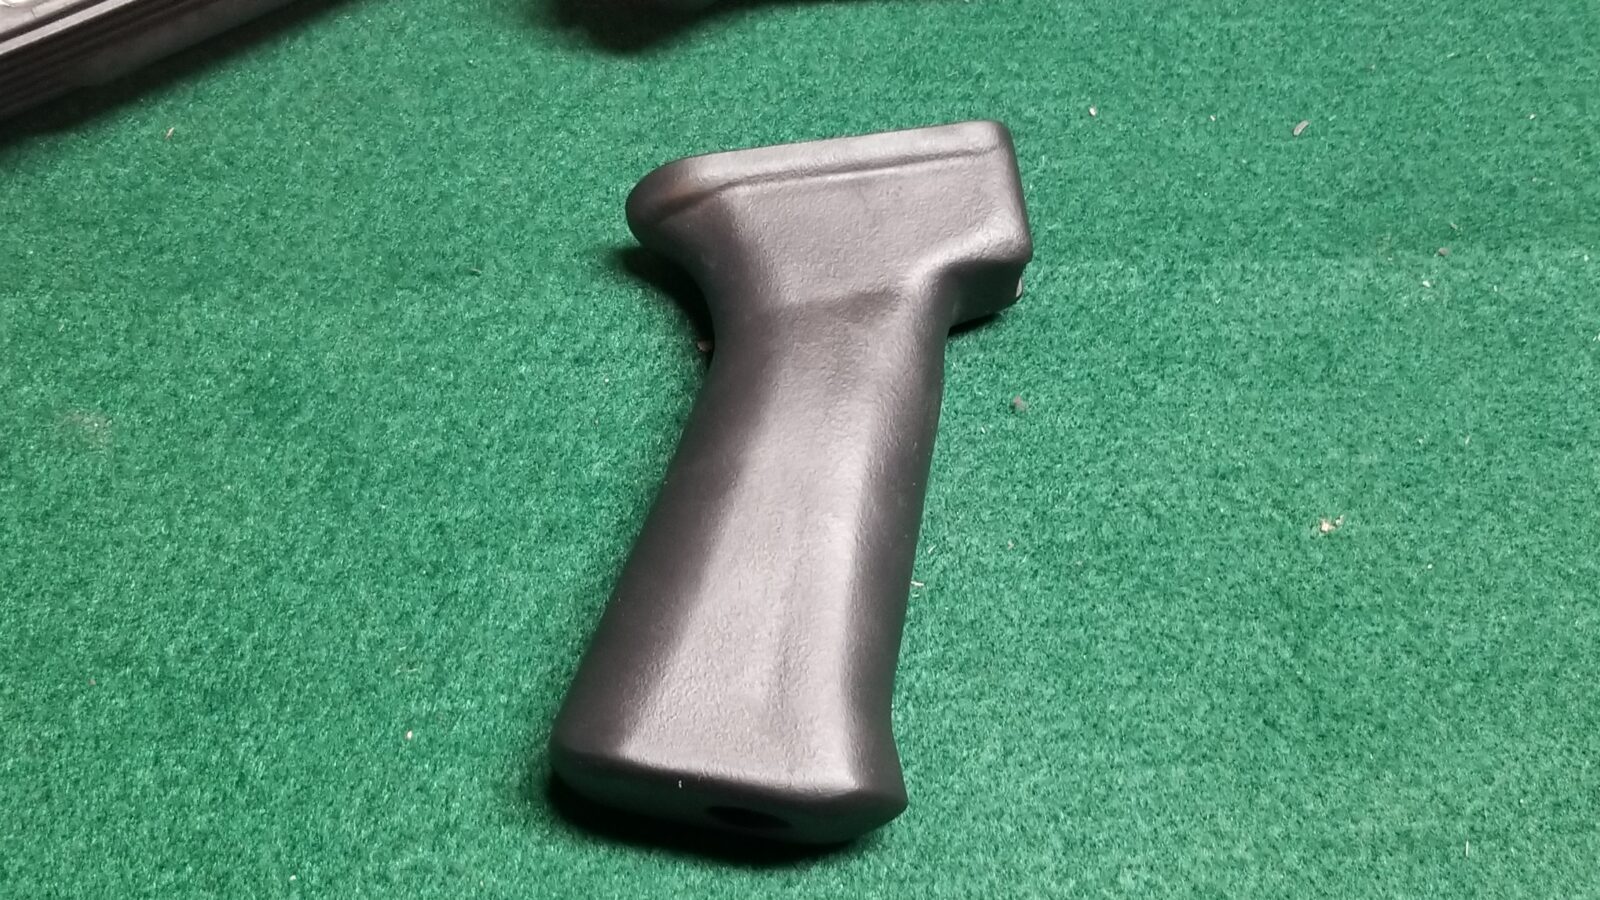
Installing the grip is the same as every other AK. I didn’t take photos but you can google and find a ton of videos and instructions with photos.
- Remove the dust cover, recoil spring assembly and bolt carrier [that last one is optional] to get easy access to the back of the receiver where the grip nut is located.
- Remove the existing Magpul grip. Squeeze the tab to remove the bottom and expose the screw. Use either a large blade screw driver or an Allen wrench to remove the screw.
- Make sure the grip nut is in the receiver and angled backwards.
- I use one hand to reach in and hold the grip nut in place. I then flip the gun upside down, put the grip on, insert the screw and wiggle it around until it catches the thread.
- The grip should sit square all the way around. If it does not, then use a file or sandpaper to make it flat. Go slow, take your time and test over and over – don’t try and do everything at once or you may take off too much.
- I tighten the screw down firmly but I don’t use a thread locker and I also do not go crazy torquing it down either.
- Re-assemble the weapon and function test it.
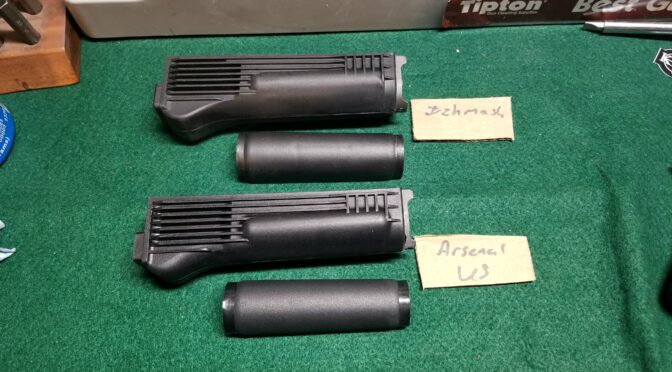
K-VAR US Handguard Set
The Vityaz-SN uses the same handguards as the AK-74M and they will also fit AKM-pattern handguards as well. I’ve used K-VAR’s US-made furniture many times so I went to their website and they had both their US handguards and original Izhmash furniture. I thought it was a neat opportunity to see the differences first hand so I did a blog post with tons of photos showing the small differences between the two – click here to read it.
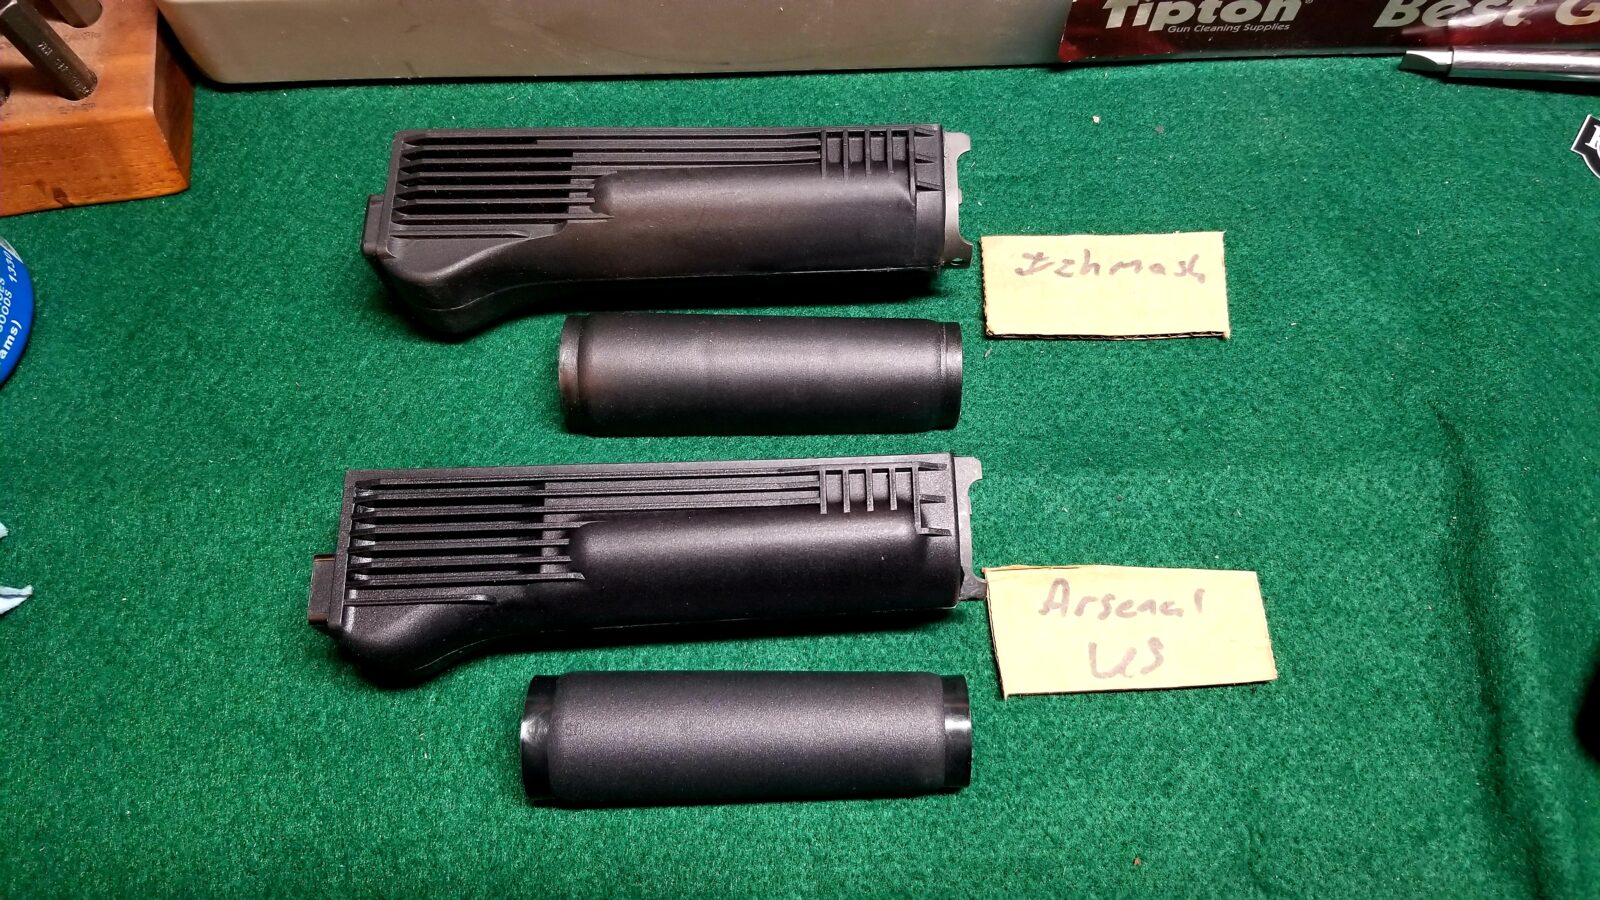
My first thought was to use the Izhmash set but I found I needed to remove just a tad bit of material off the metal nose for it to lock up fully into the retainer. I didn’t want to modify the real Russian lower so I opted to use the K-Var US lower and modify it as needed.
When it comes to fitting a new handguard to a rifle, you want the lower to lock in firmly and not be loose but you don’t want to impossibly tight where you break the cam arm lever off trying to tap it down.
If I were to make a broad generalization, I find that if I need to trim a brand new lower to fit a rifle, I usually need to shorten the handguard. Maybe it’s just my luck but usually that is what I would find with new lowers. If it was a surplus lower from another rifle then all bets were off because there was no telling how it was trimmed to fit.
Again, tons of photos and videos on the Internet but here are the basic installation steps:
- Remove the dust cover
- Remove the recoil spring assembly
- Remove the bolt carrier assembly
- Swing the gas tube locking lever up and remove the gas tube assembly
- Flip the cam lever on the lower handguard retainer to unlock the lower.
- Slide the lower forward and down to remove it.
- Reverse this to install the new one. Fit the lower if needed. It took 2-3 test fittings before my lower would go on because I removed such a small amount each time.
- To remove the gas tube cover, I like to secure the forged part of the gas tube in a vise so you can twist the gas tube cover 180 degrees and remove it. Never, never clamp the circular end of the tube – it is so then that it will probably bend/crush.
- Installing the gas tube cover is the reverse. Note, I did not need to trim my gas tube cover – it went on. If you need to, take off a little with sand paper or a file and test – repeat until it fits.
- Reassemble the weapon and function test it.
The Results
I really like how the converted AK-V looks and how it feels. I really think PSA did a great job with the design and build and heartily recommend the AK-V.
Click on any of the thumbnails below to open the full size photo and enter the slide show:


PSA AK Webstore Links
Interested in an American made AK? Consider Palmetto State Armory (PSA) as a source. Click on the following links for the associated webstore categories for AK-related rifles, pistols and parts at PSA:
- PSA AK-74 – PSA, just released their 5.45×39 rifle
- PSA AK-47 GF4
- AK-V (their Vityaz-inspired wicked 9mm) – [click here for my blog posts on the one I bought and converted] – this includes accessories
- Accessories including magazines, handguards, grips, triggers and more
- They are also selling individual parts such as springs, barrels, bolt carriers, furniture sets, repair kits and more
Note, I have to buy all of my parts – nothing here was paid for by sponsors, etc. I do make a small amount if you click on an ad and buy something but that is it. You’re getting my real opinion on stuff.
If you find this post useful, please share the link on Facebook, with your friends, etc. Your support is much appreciated and if you have any feedback, please email me at in**@*********ps.com. Please note that for links to other websites, I may be paid via an affiliate program such as Avantlink, Impact, Amazon and eBay.