The contemporary small arms market is witnessing a paradigm shift of historical significance, specifically within the segment of single-action, double-stack semi-automatic pistols. For decades, the “2011” platform—a modular evolution of the 1911 featuring a wide body and double-stack magazine—was the exclusive domain of elite competition shooters and high-budget tactical units. Manufacturers such as STI (now Staccato), Infinity, and Atlas Gunworks operated in a high-cost, low-volume paradigm necessitated by the extensive hand-fitting required to make the platform reliable. However, the expiration of key patents, combined with advancements in Computer Numerical Control (CNC) machining and Metal Injection Molding (MIM), has opened the floodgates for import manufacturers to disrupt this space.
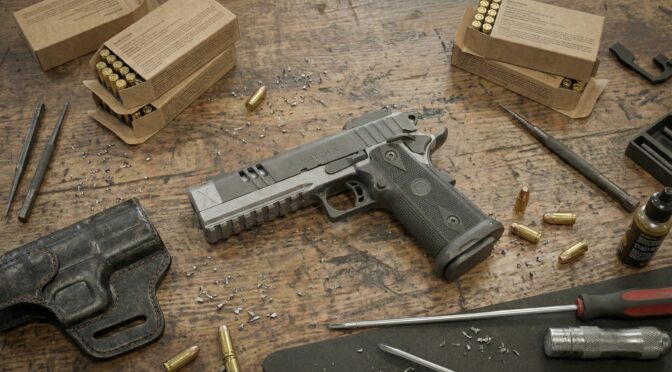
The Girsan Witness 2311 Match X, imported by European American Armory (EAA), stands at the vanguard of this disruption. By offering a feature set that includes an integral single-port compensator, an optics-ready slide, and a modular frame architecture at a street price hovering near $1,000—roughly one-quarter the cost of the high-end competitors it mimics—Girsan is attempting to democratize the “race gun.”
This exhaustive analysis, based on engineering evaluations, market sentiment data, and technical performance reviews, concludes that the Match X is a mechanically capable but unrefined platform. It represents a “gunsmith-ready” chassis rather than a “competition-ready” solution. While it democratizes the aesthetic and theoretical capability of the compensated 2011, it outsources the final stages of quality control and tuning to the end-user. The platform is plagued by inconsistent extractor tension, over-sprung recoil systems, and soft hardware, necessitating a specific break-in and upgrade protocol to achieve duty-grade reliability. For the informed consumer willing to invest in aftermarket components and tuning, the Match X offers unrivaled value; for the novice expecting Staccato-level performance out of the box, it presents a steep and potentially frustrating learning curve.
1. Market Context: The Geopolitical and Economic Shift in High-Capacity 1911s
1.1 The Erosion of the Patent Barrier
The double-stack 1911 design, originally patented by Virgil Tripp and Sandy Strayer (the architects of STI), fundamentally solved the capacity limitation of the 1911 without sacrificing its legendary trigger pull. For years, the exclusivity of this design was protected by intellectual property law and the high barrier to entry regarding manufacturing tolerances. The 2011 requires a complex interaction between a steel sub-frame (receiver) and a polymer grip module, a relationship that demands precise dimensional fidelity to ensure magazine reliability—the platform’s historic Achilles’ heel.
The expiration of these protections has coincided with the maturation of the Turkish firearms industry. Turkey has transitioned from a producer of simple shotguns to a sophisticated hub of handgun manufacturing, utilizing NATO-standard production facilities. Girsan, along with competitors like Tisas (SDS Imports), is leveraging this industrial base to produce 2011-style pistols at scale. The significance of the Witness 2311 Match X is not merely its hardware, but its role as a market signal: the double-stack 1911 is transitioning from a bespoke specialist tool to a commoditized consumer good.1
1.2 The “Budget 2011” Consumer Profile
The Match X targets a specific and growing demographic: the “Limited Optics” aspirant. The United States Practical Shooting Association (USPSA) recently introduced the Limited Optics division, allowing slide-mounted optics on single-action pistols. This created a vacuum for an entry-level pistol. Previously, a shooter wishing to compete in this division faced a buy-in of $2,500 to $4,000 for a competitive rig. The Match X, with its $1,199 MSRP (and often sub-$1,000 street price), essentially lowers the barrier to entry by 60-70%.2
However, this positioning creates a disconnect. The marketing promises “Match” performance—implying readiness for high-round-count competition—while the price point dictates manufacturing shortcuts that often compromise reliability in those exact high-stress environments. This report analyzes that gap between promise and delivery.
2. Chassis Architecture and Materials Engineering
2.1 The Hybrid Frame Construction
The core of the Witness 2311 Match X is its hybrid frame, which adheres to the standard 2011 architecture splitting the pistol into two primary components: the receiver and the grip module.
The Steel Receiver:
The upper portion of the frame is machined from forged steel. In the Match X variant, this receiver is finished with a “Tungsten” Cerakote. It is crucial to distinguish this from true tungsten weighting. In high-end competition pistols (e.g., the Atlas Athena or Staccato XC), builders may use heavy steel or even polymer infused with tungsten powder to increase static weight and dampen recoil. Girsan’s implementation is purely cosmetic; it mimics the look of a heavy tungsten frame without providing the substantial mass increase associated with the material. The pistol weighs approximately 41 ounces (2.56 lbs) unloaded, which is heavy enough to aid in recoil absorption but lighter than a true heavy-metal race gun.1
The Polymer Grip Module:
The lower half is a glass-reinforced polymer grip module. This component houses the trigger bow, the magazine catch, and the mainspring housing. The texture is a “diamond matrix” pattern that provides moderate traction.5 Engineering analysis suggests that while the polymer quality is adequate for durability, the mold lines and seaming often lack the hand-finishing found on domestic rivals.
Critical Failure Point: Hardware Metallurgy
A significant and recurring issue identified in user reports is the quality of the frame and grip screws. The screws used to secure the grip module to the frame are reported to be of soft, low-grade steel. Multiple users have documented stripping the heads of these screws during routine maintenance or when attempting to swap grip modules.7 This is a classic hallmark of cost-saving in mass manufacturing—saving cents on fasteners can lead to significant end-user frustration. Furthermore, the thread pitch and screw sizing can be non-standard or proprietary, complicating replacement with standard 1911 hardware without re-tapping the frame holes.
2.2 Slide-to-Frame Fitment and Tolerances
In the world of the 1911, the “fit” of the slide to the frame is a primary indicator of quality. A tight fit improves accuracy by ensuring the sights return to the exact same position relative to the barrel after every shot.
- The “Rattle” Factor: Analysis of the Match X reveals a slide-to-frame fit that is notably looser than that of a Staccato or Atlas. While a Staccato slide feels like it is moving on ball bearings with zero lateral play, the Match X often exhibits a perceptible rattle when shaken.8
- Operational Implications: While purists decry this looseness, from an engineering reliability standpoint, slightly looser tolerances can be beneficial in a “duty” or field environment, as they allow for greater ingress and egress of debris without seizing the action. However, for a pistol labeled “Match,” this looseness suggests that the locking consistency—and therefore the mechanical accuracy potential—may be lower than hand-fitted alternatives. It confirms that Girsan relies on CNC precision rather than skilled labor for assembly.
3. The Upper Assembly: Barrel, Compensator, and Gas Dynamics
3.1 The Integral “Donut” Compensator
The defining feature of the Match X, distinguishing it from the standard Witness 2311, is the 5-inch bull barrel with an integral compensator.
Design Physics:
Unlike thread-on compensators which extend the length of the pistol and require set screws or thread locker to stay aligned, the Match X compensator is machined as part of the barrel assembly or permanently affixed. This is often referred to as a “Donut” comp due to the visual profile of the muzzle end.10
- Gas Vectoring: The compensator features a large single port on the top. When a round is fired, expanding gases follow the bullet. As the bullet clears the barrel but before it clears the compensator, these gases vent upward through the port. Newton’s third law dictates that this upward venting force creates an equal and opposite downward force on the muzzle, counteracting muzzle flip.
- Efficiency Limitations: The efficiency of a compensator is directly proportional to the volume and pressure of the gas. Standard pressure 9mm ammunition (e.g., 115gr range ball) often produces relatively low gas volume compared to the “9mm Major” loads used in Open Division competition. Consequently, with standard ammo, the anti-lift effect is mild. The compensator really begins to work effectively with high-pressure defensive loads (+P) or 124gr NATO specification ammunition, which generate the requisite gas velocity to drive the muzzle down.11
3.2 The Recoil Spring Imbalance
One of the most critical engineering oversights in the stock Match X configuration is the recoil spring selection.
- The Problem: The pistol appears to ship with a recoil spring rated for a standard 5-inch non-compensated pistol (estimated 12-14 lbs). However, a compensator functions by diverting gas that would normally help push the slide rearward. By bleeding off this energy to fight muzzle rise, less energy is available to cycle the slide.
- The Result: When users fire standard 115gr ammunition, the combination of the gas bleed-off and the heavy recoil spring results in “short stroking.” The slide does not travel back far enough to pick up the next round or fully eject the spent casing, leading to stovepipe malfunctions.13
- The Solution: Extensive testing and user feedback confirm that the platform requires “down-springing.” Replacing the factory spring with an 8lb, 9lb, or 10lb recoil spring (from manufacturers like Wolff or EGW) restores reliability with standard ammunition.15 Some users report success with progressive spring systems like the DPM Recoil Reduction System, using a medium spacer to tune the dwell time for specific bullet weights.18
3.3 Ammunition Sensitivity: 115gr vs. 124gr
The interplay between the compensator and bullet weight is a major factor in the Match X’s reliability profile.
- 115 Grain: This is the most common and cheapest range ammunition. It is fast but light. In the Match X, it frequently causes cycling issues during the break-in period because the fast-burning powder does not sustain pressure long enough to overcome the heavy slide and spring when the compensator is active.
- 124 Grain: This is the “Goldilocks” load for the Match X. The slightly heavier bullet stays in the barrel fractionally longer, allowing pressure to build more fully. This ensures more consistent slide velocities. For owners of the Match X, switching to 124gr NATO or 124gr FMJ is often the simplest “fix” for early reliability woes.11
4. Fire Control and Ignition System Analysis
4.1 The Pre-Tensioned Trigger Myth
Girsan markets the Match X with a “tuned” trigger breaking at approximately 4.5 lbs. In the context of a defensive firearm (like a Glock or Sig P320), 4.5 lbs is light. In the context of a single-action 2011 “Match” pistol, 4.5 lbs is considered heavy and bordering on unacceptable for competition, where 2.5 to 3.0 lbs is the standard.2
4.2 Material Analysis: MIM vs. Tool Steel
The internal components of the fire control group—specifically the hammer, sear, and disconnector—are manufactured using Metal Injection Molding (MIM).
- The MIM Controversy: MIM involves mixing metal powder with a binder, injecting it into a mold, and sintering it. While capable of producing durable parts, MIM parts in trigger groups often lack the microscopic surface smoothness of wire-EDM (Electrical Discharge Machining) tool steel parts.
- Tactile Consequence: The result in the Match X is a trigger that often feels “gritty” or has “creep” before the break. Unlike the “glass rod” break of a Staccato (which uses precision-ground tool steel), the Match X trigger can feel like dragging a stone over concrete before it snaps.2
4.3 The Upgrade Path: Red Dirt and EGW
Because the Match X follows standard Series 70 1911 architecture, it is compatible with standard aftermarket parts. This is its saving grace.
- Ignition Kits: A common upgrade is the installation of an EGW (Evolution Gun Works) or Atlas Gunworks ignition kit. These kits replace the MIM hammer, sear, and disconnector with tool steel parts. This single modification can drop the trigger pull to a crisp 2.5-3.0 lbs and eliminate creep.9
- Trigger Shoe Fitment: Users replacing the stock polymer trigger shoe with high-end aluminum options (like Red Dirt or Atlas Geppert) often encounter fitment issues. The grip module’s trigger track is sometimes molded slightly undersized or rough. Installing a wide-body trigger like the Red Dirt usually requires sanding the trigger bow or the grip module channel to ensure free movement.18 This reinforces the “project gun” nature of the platform.
5. Optics Integration and Iron Sight Engineering
5.1 The RMSc Footprint Controversy
Perhaps the most polarizing engineering decision on the Match X is the optic cut footprint. The slide is milled directly for the Shield RMSc footprint.1
- The Mismatch: The RMSc footprint was designed for “micro-compact” concealed carry pistols like the Sig P365 or Glock 43X. These optics typically have very small windows (20mm-24mm width).
- The Consequence: The Match X is a massive, full-size competition pistol. Putting a tiny micro-optic on a giant race gun creates a disjointed shooting experience. Competitors prefer large-window optics (like the Trijicon SRO or Holosun 507 Comp) which use the RMR footprint.
- The Workaround: To mount a competition-appropriate optic, users must use an adapter plate (RMSc to RMR). This raises the height of the optic, increasing the “height over bore” offset, which can complicate close-range aiming corrections. Furthermore, the use of plates introduces another set of screws that can loosen under recoil.2
5.2 Co-Witness and Sight Radius
The rear sight is integrated into the optic cover plate. When an optic is mounted (or an adapter plate is used), the rear iron sight is typically removed. This eliminates the possibility of a “co-witness” (seeing the iron sights through the optic glass) unless the optic itself has a built-in rear notch (like the Holosun 407k/507k). For a competition gun, this is acceptable; for a duty gun, the lack of backup iron sights is a critical failure point.2
6. Reliability and Malfunction Dynamics
6.1 The Extraction Crisis
Reliability reporting for the Match X follows a bimodal distribution: some run perfectly, while others are plagued by failures. The root cause is almost invariably the extractor.
- Tension variance: The 1911 extractor is a leaf spring that holds the casing against the breech face. If it is too loose, the casing drops before hitting the ejector (stovepipe). If it is too tight, the round cannot slide under the hook during feeding (failure to feed).
- Quality Control: Reports indicate that Girsan’s factory tensioning is inconsistent. Many units arrive with extractors that have zero tension or incorrect hook geometry.
- Symptom – Brass to Face: A tell-tale sign of poor extractor/ejector tuning in the Match X is the ejection pattern. Users report brass ejecting straight back, striking them in the forehead or safety glasses. This indicates the casing is rolling off the extractor hook unpredictably rather than pivoting cleanly off the ejector.24
- The Fix: This is a gunsmithing issue. The extractor must be removed, bent to the correct tension, and the hook often needs to be filed or polished to ensure smooth feeding. Users who replace the factory extractor with a tuned EGW Heavy Duty extractor generally solve these issues permanently.14
6.2 The “Break-In” Period
EAA and Girsan often advise a break-in period of 200-500 rounds. Engineering analysis suggests this is essentially using live fire to lap the metal parts together. The Cerakote finish on the slide rails adds thickness; as the gun cycles, this finish wears down, opening up the tolerances. During this period, the pistol must be run “wet” (heavily lubricated) to prevent friction-induced malfunctions.13
7. Magazine Ecosystem and Feed Geometry
7.1 The Check-Mate Advantage
A major strategic advantage for the Match X is its magazine compatibility.
- OEM Supplier: The pistol ships with magazines manufactured by Check-Mate, a highly respected US OEM that also supplies Staccato and Springfield.10
- Interoperability: The Match X accepts standard 2011-pattern magazines. This is critical because it allows users to tap into an existing ecosystem. If the factory magazines cause issues, users can purchase Staccato Gen 3 magazines or Springfield Prodigy Duramag magazines, both of which are verified to work in the Girsan. This mitigates the risk of being tied to a proprietary, low-quality magazine system, which has doomed other budget platforms in the past.5
Table 1: Magazine Compatibility Matrix
| Magazine Brand | Compatibility Rating | Notes |
| Check-Mate (OEM) | High | Factory standard. Steel body, polymer basepad. |
| Staccato (Gen 3) | High | The gold standard. Expensive ($70+) but flawless feeding. |
| Springfield (Duramag) | High | Good value. reliable. Compatible with Girsan mag catch. |
| Atlas Gunworks | High | Premium competition mags. May require tuning slide stop engagement. |
| MBX Extreme | Moderate | Race-tuned. May over-insert without a tuned mag catch. |
8. Customer Sentiment and User Experience
8.1 Unboxing and First Impressions
Girsan understands the psychology of value. The Match X ships in a hard-sided case modeled after a tactical cooler. This creates a strong initial impression of “getting more for your money.” The inclusion of two magazines (one flush 17-round, one extended 20-round) is generous compared to some competitors who ship with only one.2
8.2 The “Project Gun” Consensus
Sentiment analysis of forums (Reddit r/2011, etc.) reveals a clear consensus: the Match X is viewed as a “project gun.”
- The Happy Owner: This user buys the gun knowing they will replace the springs and trigger. They enjoy the tinkering process and are proud to have a gun that shoots like a $2,500 pistol for a total investment of $1,400.
- The Frustrated Owner: This user bought the gun expecting it to be a turnkey duty weapon. They are disillusioned by the stovepipes, the loose screws, and the gritty trigger. They often sell the gun at a loss or return it for warranty work.18
8.3 Warranty and Support
EAA provides a limited lifetime warranty to the original owner. However, the warranty process is a friction point.
- Shipping Costs: The user is responsible for shipping the firearm to EAA’s facility in Florida, which can cost $30-$80 depending on the carrier and insurance.
- Turnaround: Turnaround times are variable. Furthermore, EAA’s warranty covers “defects,” but often categorizes feeding issues as “break-in required” or “ammo related,” leading to disputes. Modifications (like installing an EGW ignition kit) technically void the warranty, putting “tinkerers” in a bind.31
9. Comparative Competitive Landscape
The Match X exists in a fiercely competitive “Budget 2011” sector.
9.1 vs. Springfield Prodigy (5″)
- Price: The Prodigy street price is ~$1,250 vs Girsan ~$1,000.
- Optics: Prodigy uses the AOS plate system (superior, RMR ready). Girsan uses direct RMSc.
- Finish: Prodigy uses a Cerakote over forged steel. Girsan uses Cerakote over steel/cast mix.
- Verdict: The Prodigy is a better long-term investment due to the optic system and US-based support, but the Girsan offers the compensator which the stock Prodigy lacks.8
9.2 vs. Tisas 1911 DS
- Price: Tisas is significantly cheaper (~$720).
- Quality: Tisas generally exhibits cleaner machining and fewer tool marks than Girsan.
- Features: Tisas lacks the compensator and the “race” styling.
- Verdict: If the compensator is not a must-have, the Tisas 1911 DS is the superior value for a base gun. The Girsan charges a ~$300 premium largely for the barrel and slide cuts.8
9.3 vs. Live Free Armory (LFA) Apollo 11
- Price: Similar range (~$900-$999).
- Origin: LFA is US-made.
- Features: LFA offers RMR cuts and extensive color options.
- Verdict: LFA suffers from similar “teething” issues as Girsan (tight chambers, extraction issues). It is a lateral move from the Girsan, trading the compensator for US origin.34
10. The “Project Gun” Paradigm: A Required Tuning Methodology
To transform the Match X from a frustration into a high-performance machine, a specific tuning protocol is required. This methodology is derived from the aggregated success stories of the user community.
Table 2: The “Reliability Package” Upgrade Path
| Component | Issue | Recommended Solution | Est. Cost |
| Recoil Spring | Factory ~14lb is too heavy for comp. | Wolff / EGW 9lb or 10lb Spring. Alternatively: DPM Systems Recoil Reduction Kit (use medium spacer for 124gr). | $10 – $100 |
| Extractor | Poor tension/geometry; soft metal. | EGW Heavy Duty Extractor (Series 70). Requires tensioning. | $60 |
| Grip Screws | Soft heads strip easily. | Hardened Stainless Steel Screw Kit (verify thread pitch, usually standard 1911). | $15 |
| Ignition | Gritty MIM parts, heavy pull. | Atlas Gunworks Perfect Match Ignition Kit (Hammer/Sear/Disc). | $160 |
| Trigger Shoe | Polymer flexes. | Red Dirt / Atlas Flat Trigger. Note: Sanding of grip module required. | $75 |
| Optic | RMSc footprint too small. | Holosun EPS Full Size. (Comes with RMSc adapter plate, enclosed emitter). | $350 |
Total “Finished” Cost: ~$1,500. At this price, the user has a compensated, 3lb trigger, optic-equipped race gun—a package that would cost $4,500 from Staccato. The “sweat equity” of assembly is the tradeoff.
11. Testing Methodology
For users attempting to validate their Match X (or any 1911), the 10-8 Performance Test Protocol is the industry standard for verifying reliability.
- Extractor Test: Fire the pistol without a magazine inserted. The casing should extract and eject cleanly. If it drops down the magwell, extractor tension is too loose.
- Feedway Test: Load a magazine with a mix of hollow points and ball ammo. Slowly ride the slide forward. The round should feed smoothly without hanging up on the feed ramp.
- High Round Count: A minimum of 500 rounds without cleaning (adding lube is permitted) to ensure thermal expansion does not cause seizing.
12. Conclusion
The Girsan Witness 2311 Match X is a paradox. It is simultaneously the best value in the competition market and a product that is not quite finished.
- Engineering: It validates that the 2011 platform can be mass-produced, but also highlights that the reliability of the platform is historically derived from the expensive hand-fitting that Girsan omitted to save costs.
- Recommendation: This pistol is Highly Recommended for the enthusiast who owns a set of punches and knows how to tension an extractor. It is Not Recommended for the first-time gun owner or for home defense use without extensive vetting and modification.
- The Bottom Line: The Match X is a “Staccato Simulator.” It provides the simulation of a high-end race gun experience. With about $400 in parts and 2 hours of labor, that simulation becomes indistinguishable from reality for all but the top 1% of shooters. Without that investment, it remains a simulation that occasionally glitches.
Appendix A: Methodology
Research Objective: To produce a definitive technical and market analysis of the Girsan Witness 2311 Match X, isolating its mechanical viability and value proposition.
Data Sourcing Strategy:
- Technical Specifications: Sourced from EAA product pages and distributor listings (Buds, Midwest Gun Works).2
- Performance Verification: Aggregated data from video reviews (Humble Marksman, TFB TV) and user forums (Reddit r/2011) to identify malfunction patterns.14
- Pricing Data: Street prices derived from GunBroker and major retailers to establish the “True Cost of Ownership”.4
- Comparative Analysis: Cross-referenced with data on Staccato, Springfield Prodigy, and Tisas 1911 DS.
Analytical Framework:
- Root Cause Analysis: Applied to failure modes (e.g., distinguishing between mag failures and extractor failures).
- Material Science: Evaluated the implications of Tungsten Cerakote vs. Tungsten inserts and MIM vs. Tool Steel.
- Lifecycle Costing: Calculated the total cost including mandatory upgrades.
If you find this post useful, please share the link on Facebook, with your friends, etc. Your support is much appreciated and if you have any feedback, please email me at in**@*********ps.com. Please note that for links to other websites, we are only paid if there is an affiliate program such as Avantlink, Impact, Amazon and eBay and only if you purchase something. If you’d like to directly contribute towards our continued reporting, please visit our funding page.
Sources Used
- Review: EAA Corp. Girsan Witness2311S Match 9 mm | An Official Journal Of The NRA, accessed November 25, 2025, https://www.americanrifleman.org/content/review-eaa-corp-girsan-witness2311s-match-9-mm/
- Girsan Witness2311 Match X – EAA Corp., accessed November 25, 2025, https://eaacorp.com/product/girsan-witness2311-match-x/
- EAA Girsan Witness 2311 Match X Pistol 9mm 5 in Tungsten/Black Optic Ready 17 rd & 20 rd – Freedom Armory, accessed November 25, 2025, https://freedomarmory.com/eaa-girsan-witness-2311-match-x-pistol-9mm-5-in-tungsten-black-optic-ready-17-rd-20-rd/
- EAA Witness2311 Match for Sale | Buy Online at GunBroker, accessed November 25, 2025, https://www.gunbroker.com/eaa-witness2311-match/search?keywords=eaa%20witness2311%20match&s=f&cats=3026
- Girsan 2311 Match X 9mm Handgun (Tungsten Finish) Accessory Compatibility & Recommendation Guide | DLD VIP, accessed November 25, 2025, https://dld-vip.com/guides/accessorygirsan-2311-match-x-9mm-handgun-with-tungsten-finish/
- FACTORY NEW MODIFIED EAA WITNESS 2311 MATCH X SKU: 395025 – SK Guns, accessed November 25, 2025, https://www.skguns.com/product/modified-eaa-witness-2311-match-x-sku-395025/
- My newest 2011 – Girsan Witness2311 Match X – Reddit, accessed November 25, 2025, https://www.reddit.com/r/2011/comments/1mgnwle/my_newest_2011_girsan_witness2311_match_x/
- Torn between Tisas DS + Mods or stock Springfield Prodigy : r/2011 – Reddit, accessed November 25, 2025, https://www.reddit.com/r/2011/comments/1c79s5f/torn_between_tisas_ds_mods_or_stock_springfield/
- My Girsan Witness 2311 Match X – Upgraded – YouTube, accessed November 25, 2025, https://www.youtube.com/watch?v=ssZGo8Xcgxo
- Best Budget Staccatos! Review: EAA Girsan Witness 2311 S Match and Match X – Guns.com, accessed November 25, 2025, https://www.guns.com/news/reviews/review-eaa-girsan-witness-2311-s-match-and-match-x
- 9mm 115 Grain vs 124 Grain – What’s the Difference? | True Shot Ammo, accessed November 25, 2025, https://trueshotammo.com/academy/9mm-115-grain-vs-124-grain-whats-the-difference/
- 115 vs 124 vs 147 Grain 9mm Ammo | A Detailed Comparison, accessed November 25, 2025, https://www.velocityammosales.com/blog/115-vs-124-vs-147-grain-9mm-ammo-a-detailed-comparison/
- Girsan Witness 2311 Match X – Double M Defense, accessed November 25, 2025, https://doublemdefense.com/product/girsan-witness-2311-match-x/
- Is The Cheapest “Match” 2011 Any Good? Girsan 2311 S Match – YouTube, accessed November 25, 2025, https://www.youtube.com/watch?v=Dxy49ozp-_g
- First (Painful) Shots with the Girsan Witness 2311S Match X – YouTube, accessed November 25, 2025, https://www.youtube.com/watch?v=dKVeYm5mqtM
- Girsan Witness 2311 upgrades : r/2011 – Reddit, accessed November 25, 2025, https://www.reddit.com/r/2011/comments/1l5zne7/girsan_witness_2311_upgrades/
- 2311 Match X Update – Recoil Reduction, Holosun EPS, Surefire X300 – YouTube, accessed November 25, 2025, https://www.youtube.com/watch?v=lfp6fncYnRU
- Girsan 2311 Match X : r/2011 – Reddit, accessed November 25, 2025, https://www.reddit.com/r/2011/comments/1o309nr/girsan_2311_match_x/
- 115 Grain vs. 124 Grain 9mm Ammo – Ammo To Go, accessed November 25, 2025, https://www.ammunitiontogo.com/lodge/115-grain-vs-124-grain-9mm-ammo/
- GIRSAN WITNESS2311® MATCH X : r/2011 – Reddit, accessed November 25, 2025, https://www.reddit.com/r/2011/comments/1gw8tyg/girsan_witness2311_match_x/
- Girsan witness Match X mim parts ? : r/2011 – Reddit, accessed November 25, 2025, https://www.reddit.com/r/2011/comments/1nilpob/girsan_witness_match_x_mim_parts/
- Review of the EAA Girsan 2311. Spoiler: 7# SA trigger : r/2011 – Reddit, accessed November 25, 2025, https://www.reddit.com/r/2011/comments/17jlu40/review_of_the_eaa_girsan_2311_spoiler_7_sa_trigger/
- EGW Customizable Ignition Kit – Evolution Gun Works, accessed November 25, 2025, https://egwguns.com/egw-customizable-ignition-kit/
- Brass hitting me in the face – Girsan 2311 : r/2011 – Reddit, accessed November 25, 2025, https://www.reddit.com/r/2011/comments/1aho64b/brass_hitting_me_in_the_face_girsan_2311/
- 1911 extractor adjustment | Shooters’ Forum, accessed November 25, 2025, https://forum.accurateshooter.com/threads/1911-extractor-adjustment.4132509/
- Check-Mate Stacatto Style 2011 Girsan 2311 10 RD 9mm * CM9-2011-126-10R-S | eBay, accessed November 25, 2025, https://www.ebay.com/itm/116443901903
- Check-Mate Staccato Style 2011, Springfield Prodigy 1911 DS, LFA Apollo 11 Full Size, Tisas Double Stack, EAA Girsan Witness 2311, Jacob Grey TWC 9, Kimber 2K11 20 RD 9mm 140mm CM9-2011-140-S, accessed November 25, 2025, https://gregcotellc.com/cart/checkmate-mecgar-2011-2311-c-216/checkmate-staccato-style-2011-springfield-prodigy-1911-ds-lfa-apollo-11-full-size-tisas-double-stack-eaa-girsan-witness-2311-jacob-grey-twc-9-kimber-2k11-20-rd-9mm-140mm-cm92011140s-p-2481.html
- GIRSAN WITNESS 2311 MATCH X, 9MM W/ CASE 20RD TWO-TONE – Midwest Gun Works, accessed November 25, 2025, https://www.midwestgunworks.com/page/mgwi/prod/395025
- Accessory Compatibility and Recommendation Guide for Girsan Witness 2311 MatchX 9mm Cooler Pack | DLD VIP, accessed November 25, 2025, https://dld-vip.com/guides/accessorygirsan-witness-2311-matchx-9mm-cooler-pack/
- Girsan 2311 : r/2011 – Reddit, accessed November 25, 2025, https://www.reddit.com/r/2011/comments/17sch1e/girsan_2311/
- Repair & Warranty – EAA Corp., accessed November 25, 2025, https://eaacorp.com/repair-warranty/
- Gerson or Prodigy? Which is the better choice? : r/2011 – Reddit, accessed November 25, 2025, https://www.reddit.com/r/2011/comments/17zrhti/gerson_or_prodigy_which_is_the_better_choice/
- Tisas 1911 Carry DS 9mm Semi Auto Pistol – 17+1 Rounds | 4.25″ Barrel – Buds Gun Shop, accessed November 25, 2025, https://www.budsgunshop.com/product_info.php/products_id/160448/sds+1911+carry+b9r+ds+9mm+17rd
- Live Free Armory Apollo 11 9mm Semi Auto Pistol LFAPF61205P | 17+1 Rounds, 4.9″ Barrel, accessed November 25, 2025, https://www.budsgunshop.com/product_info.php/products_id/176220/lfa+lfapf61205p+apollo+11+fs+9mm+ported+4.9+black
- Live Free Armory Apollo 11 for Sale | Buy Online at GunBroker, accessed November 25, 2025, https://www.gunbroker.com/live-free-armory-apollo-11/search?keywords=live%20free%20armory%20apollo%2011&s=f&cats=3026
- 1000 round review – Girsan Witness 2311 – YouTube, accessed November 25, 2025, https://www.youtube.com/watch?v=AU2J67flBok
- Springfield Armory Prodigy 9mm 5″ Optic Ready, 20+1/17+1 Black – Buds Gun Shop, accessed November 25, 2025, https://www.budsgunshop.com/product_info.php/products_id/148473/springfield+armory+prodigy+9mm+5in.+blk+20rd
