I recently needed to find new small LED lights that had four key characteristics – reliable, acceptable brightness, decent battery life, and small size. Let me explain the reason for them:
Reliable – to be honest, a lot of the “miracle” lights that are advertised are total pieces of crap. Everything from poor switches, low quality soldering and, believe it or not, weak springs that break down with use and no longer make reliable contact with the battery. When I need a light, I need a light.
Acceptable Brightness – there is a trade-off between brightness and battery life. There always has been and always will be. Now LEDs have really helped push that envelope but even they have trade offs. For most use, you’d be surprised just how bright 45-100 lumens really is and the cheap lights are misrepresenting about what they put out anyways. Americans especially seem to think that brighter is better. Well, for me, I really need to figure out the balance. I’ve found that 45-100 lumens is pretty darned good for stuff within 100 feet. No scientific studies were done – I just walked outside and shined different lights around.
Decent battery life – I needed a light where the battery would give me at least two hours of light per battery set. This magical number is based on having easy access to replacement batteries. Out in the Styx, you may find decent priced AAA batteries but not CR123As for example.
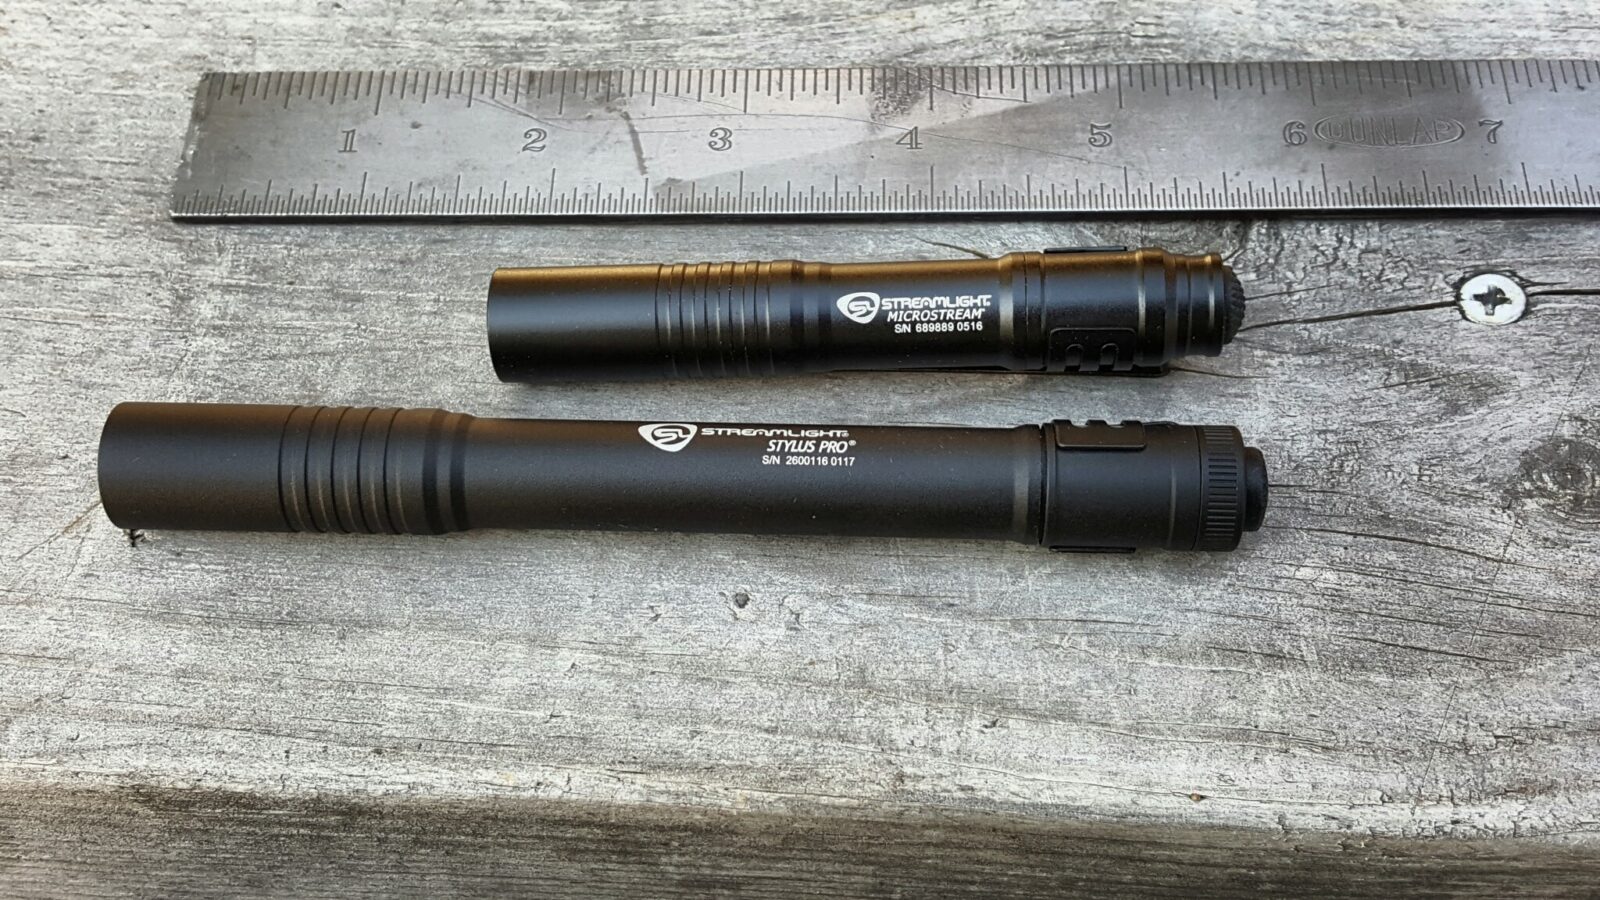
Small Size – I need a flashlight that fits in my pocket and does not weigh a ton.
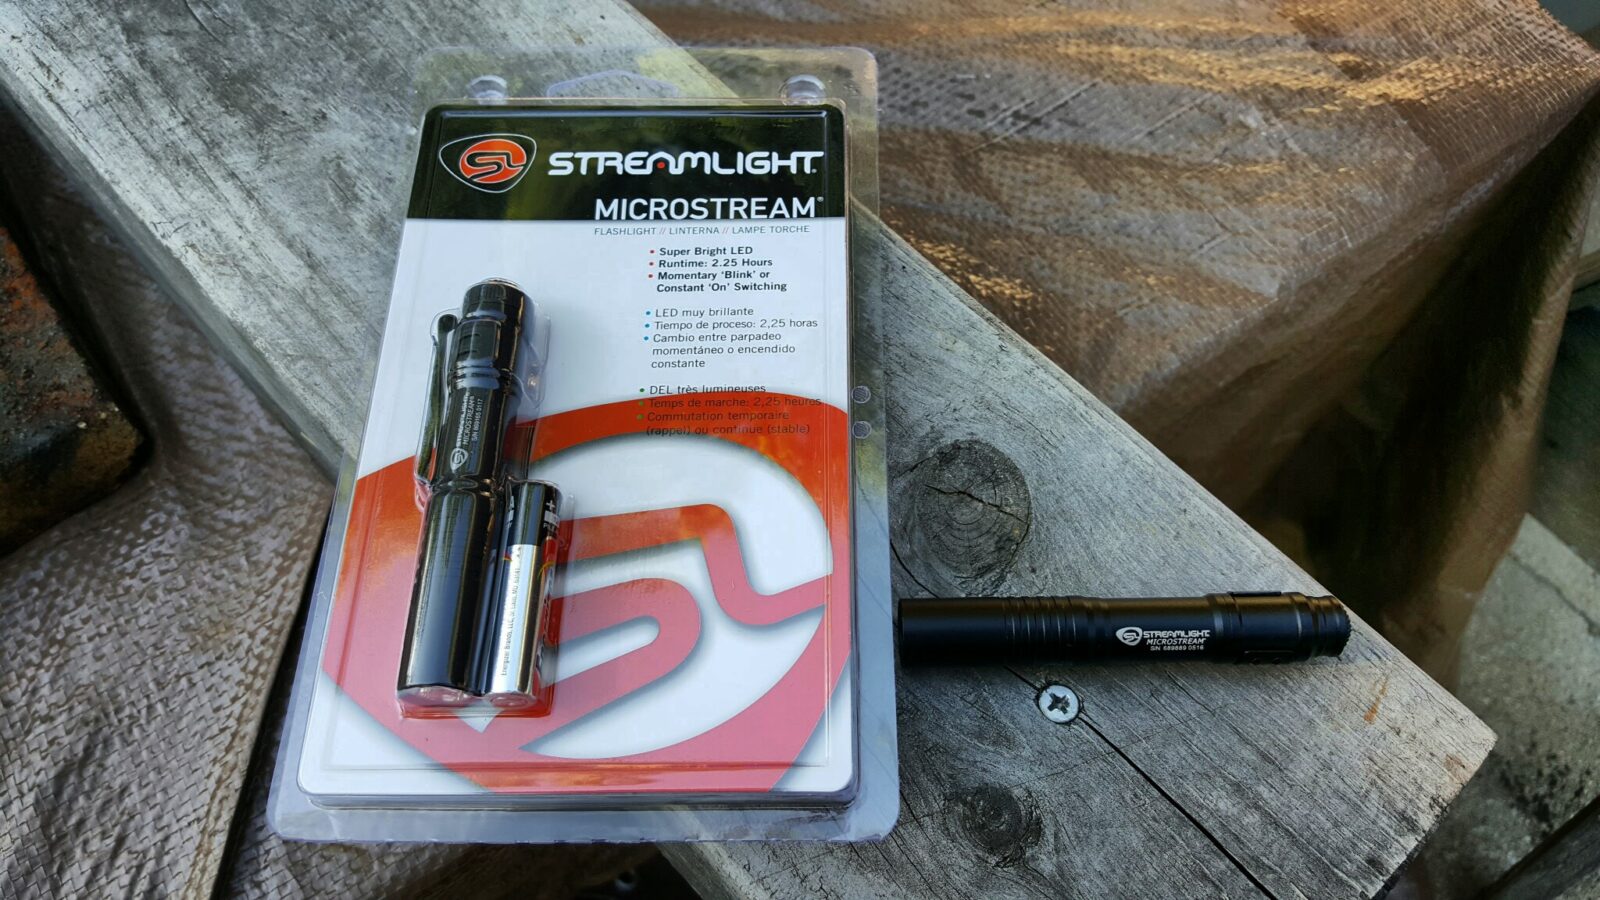
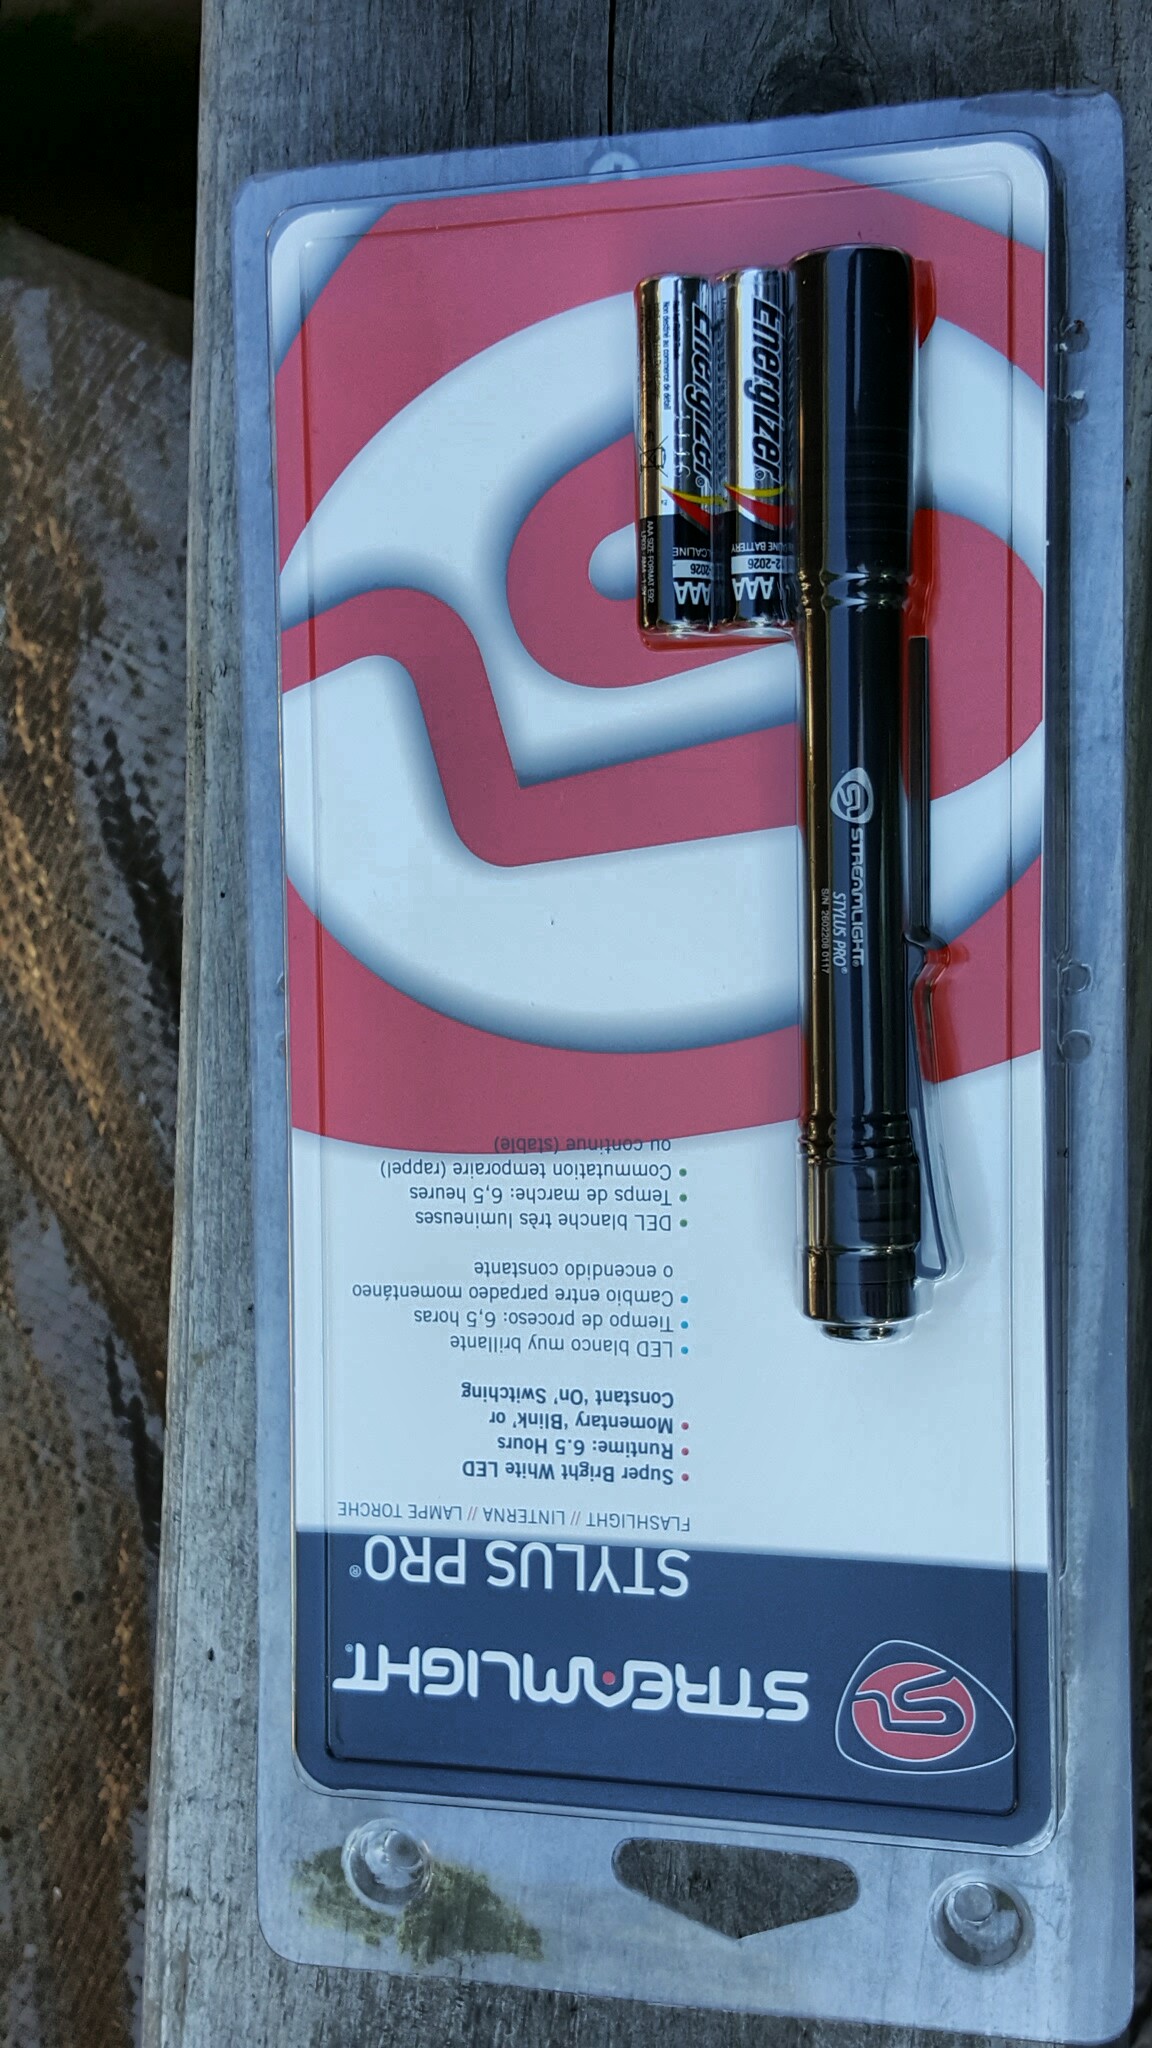
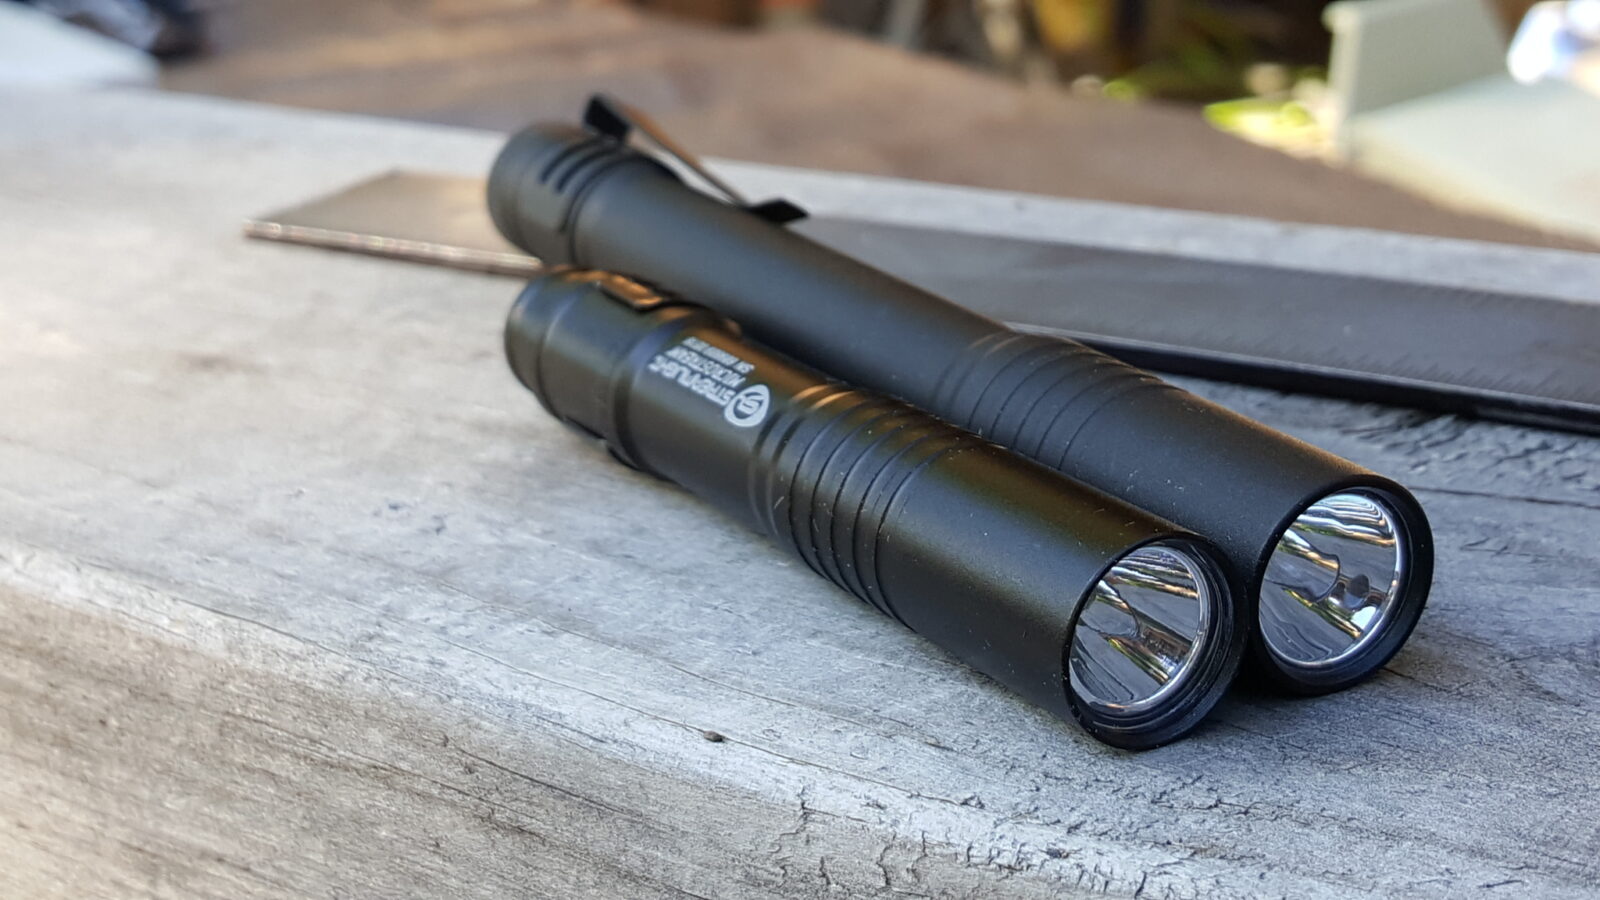
So, armed with this, I started digging around. I have no affiliation with Streamlight so when I tell you I like their stuff, I actually like their stuff. I have been using their TLR weapons lights for a number of years now and never had one fail. Armed with that, I started looking at their small lights and decided to get both the Microstream (single AAA battery) and the Stylus Pro (two AAA batteries) to try out.
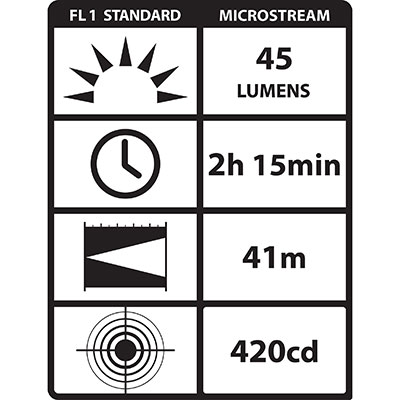
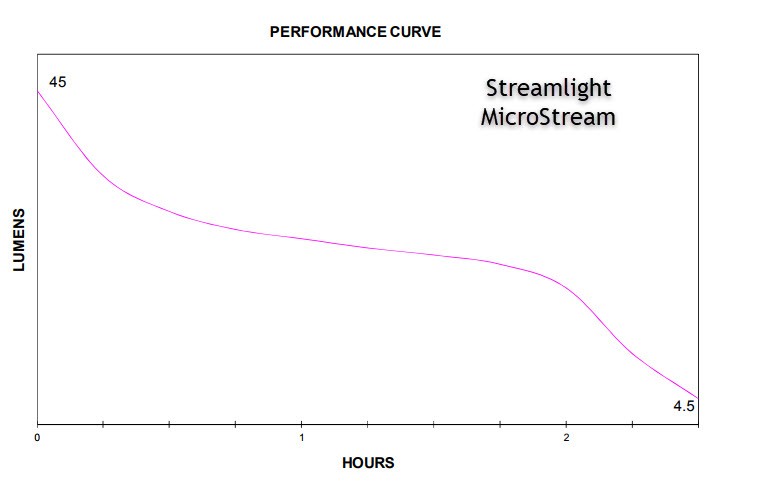
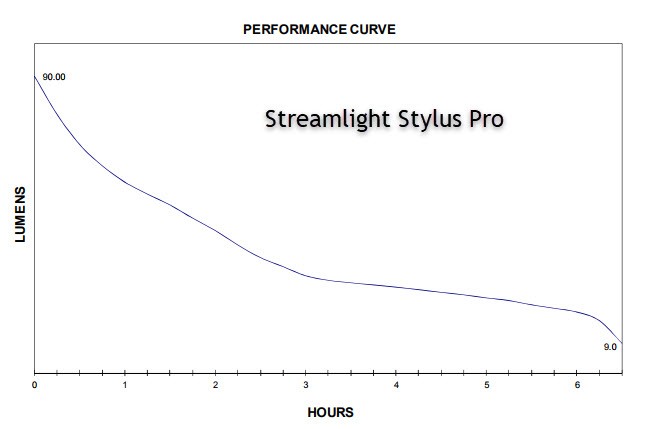
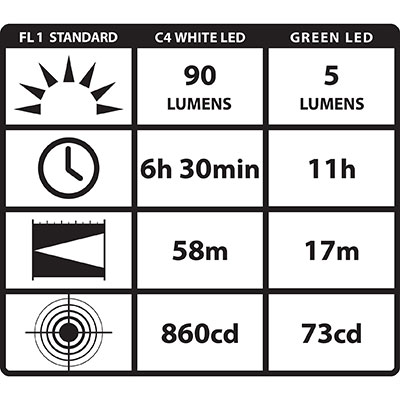
Now the specs are pretty good for both. Look at the battery life relative to Lumens:
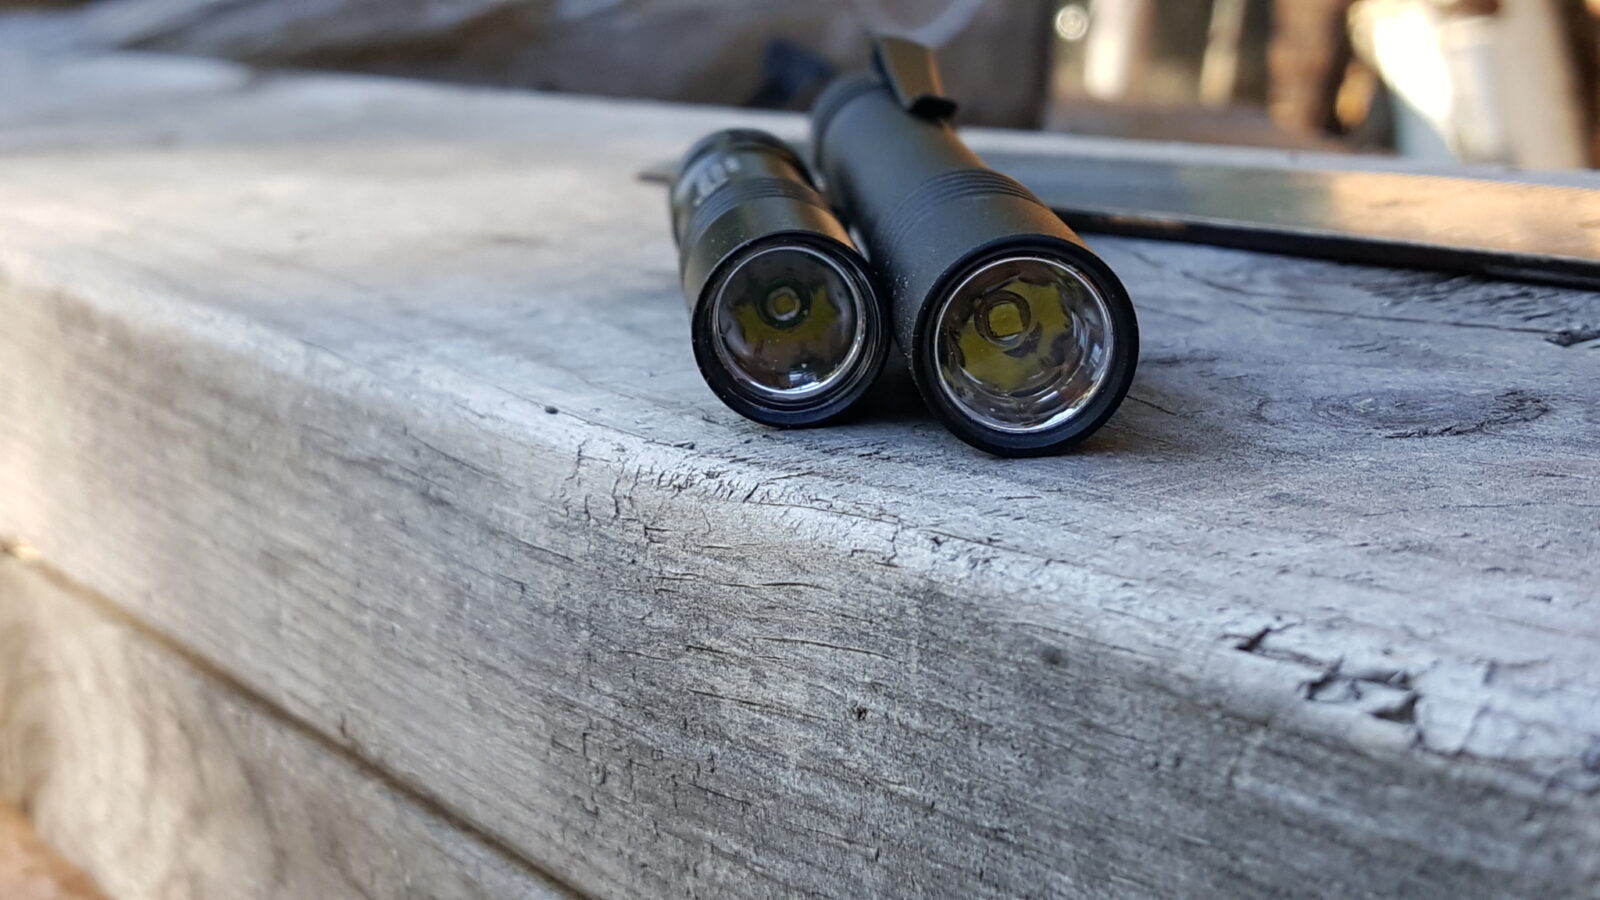
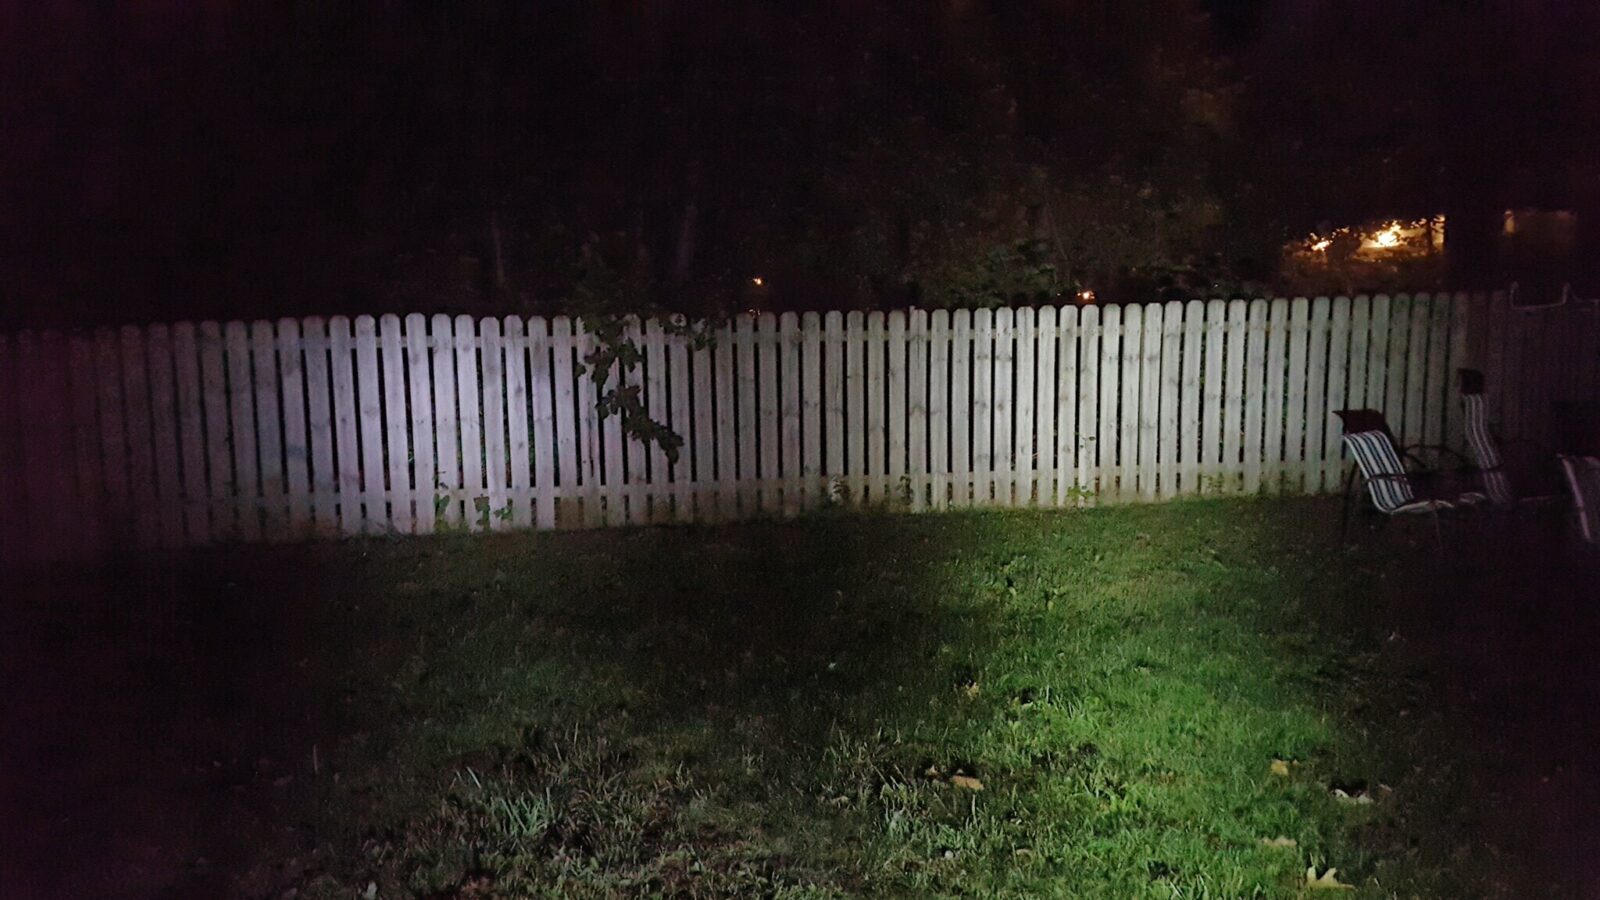
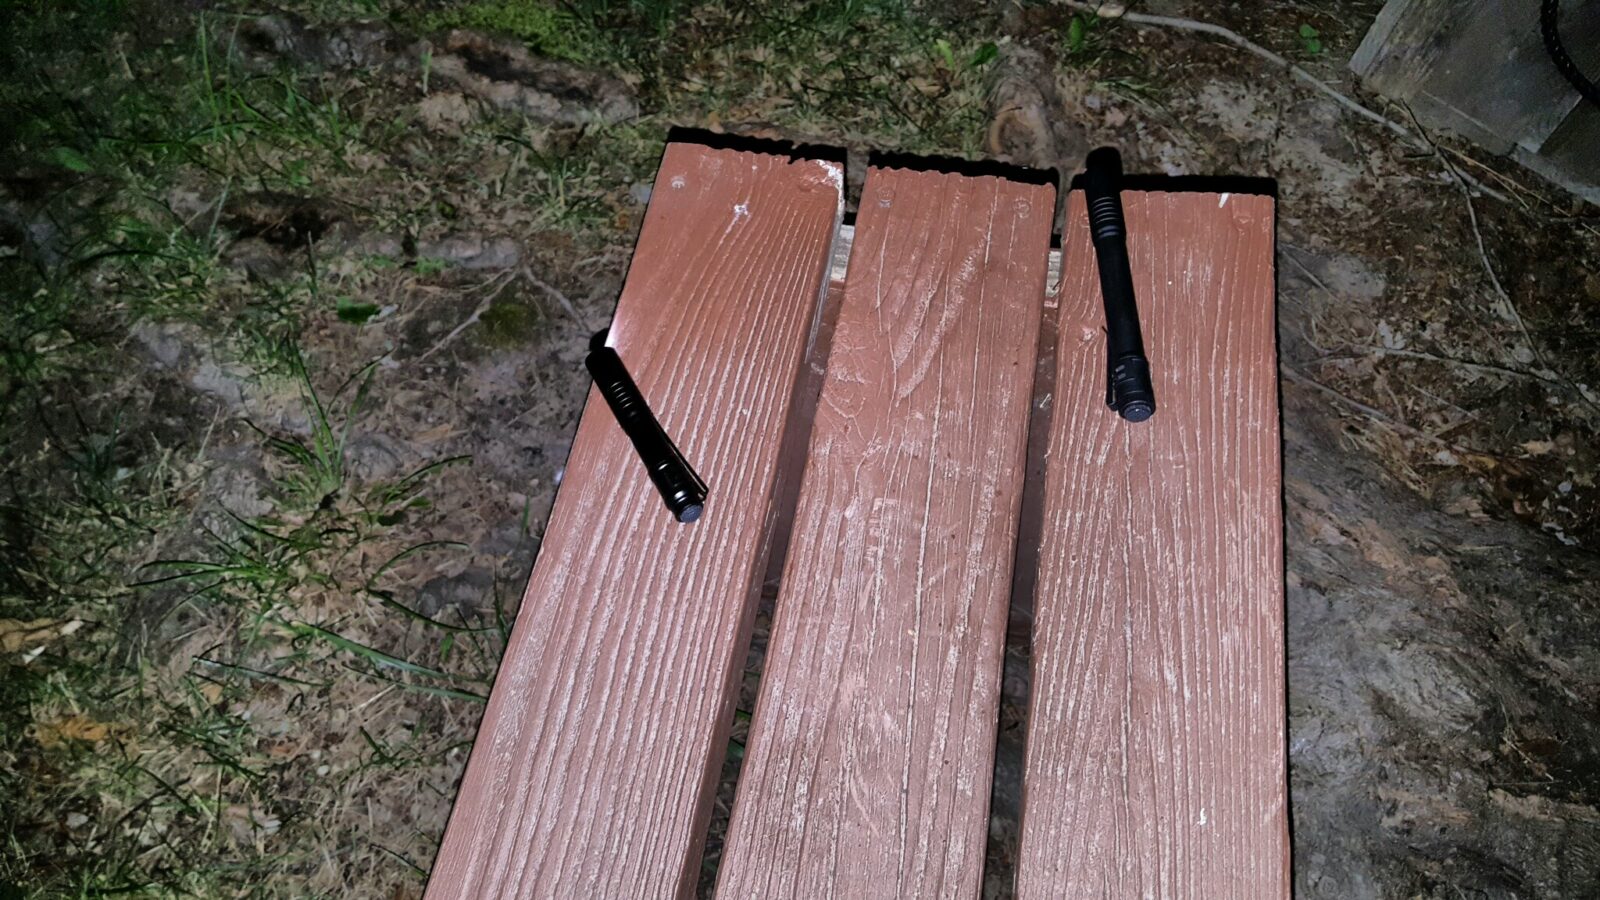
So, I installed the supplied Duracel AAA batteries and spent some time playing with both. The switches are solid, no rattles, and the light is pretty good. This is me running the lights side by side at a fence about 30 feet away. The Microstream did surprisingly well compared to the bigger light – it seems to be a tighter beam vs. more of a flood from the Stylus Pro. The Microstream is on the left and the Stylus Pro is on the right.
Bottom line, both seem like they will meet my needs. I’m going to carry the Microstream for regular use and the Stylus Pro when more light is needed for a longer time.
2/22/2018 Update: These lights have held up great. I even accidentally put one through the clothes washer without any problem -nothing happened to the finish and no water got inside! I actually have four of the little single battery Microstreams and they are pretty much my every day carry when working in the shop, travelling, etc.
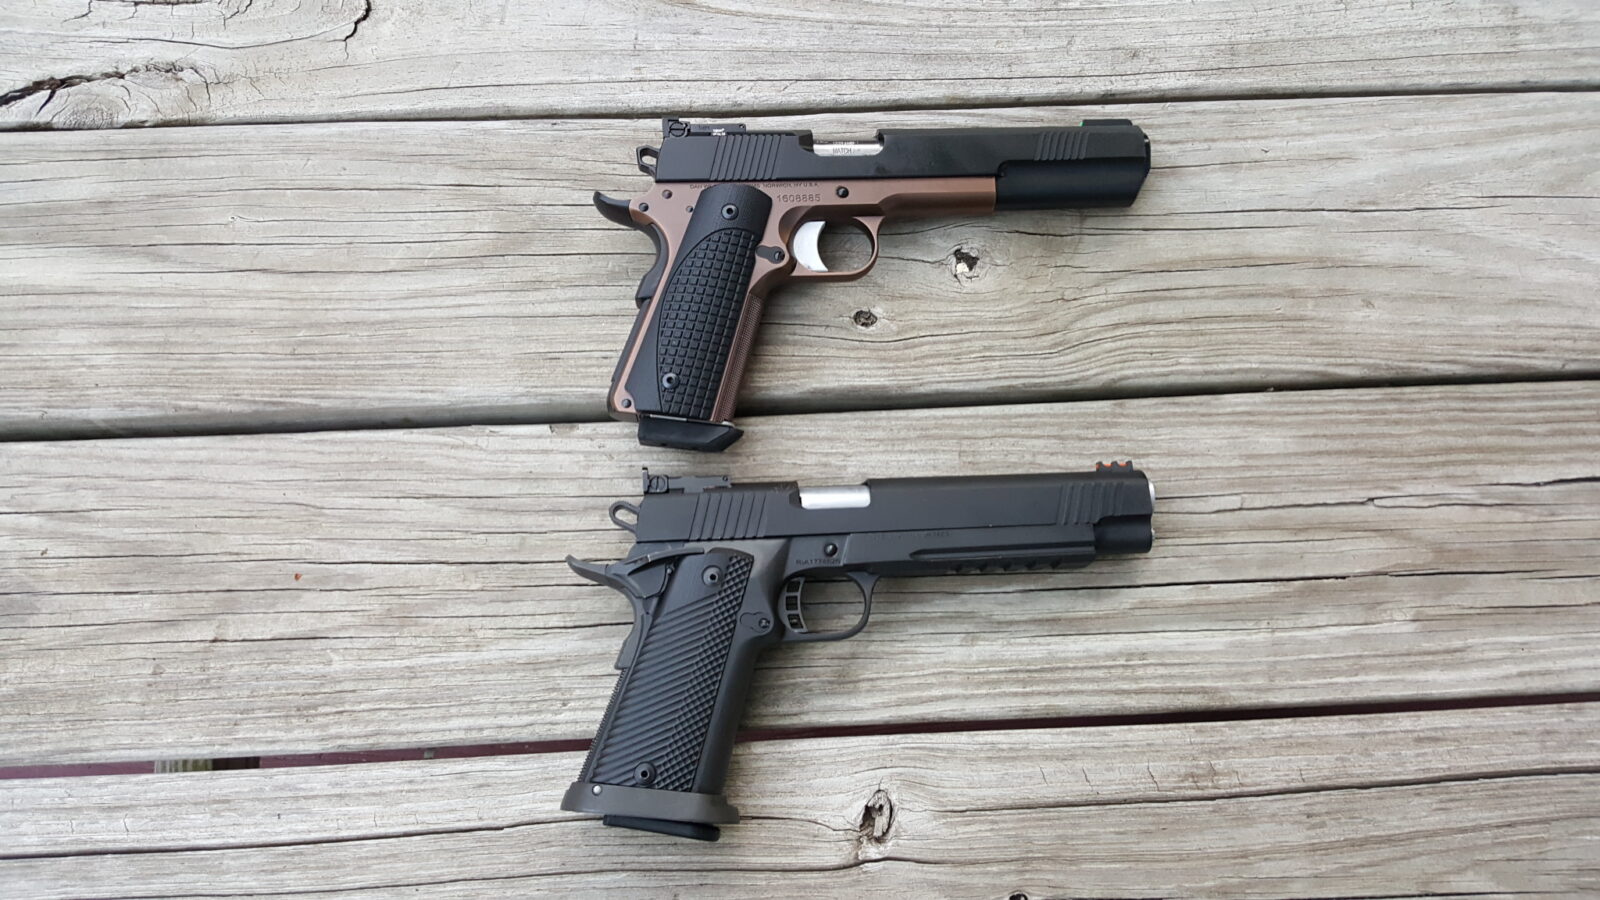
I am still trying to sort out which of the 10mm pistols to keep. The Dan Wesson Bruin is refined and functions beautifully but only holds 8 rounds. The Rock Island Armory (RIA) 52000 10mm ” Pro Match HC “Big Rock is not as smooth and doesn’t like all ammo but it holds 16+1 rounds, has a bull barrel and ought to smooth out the more it is fired. I suppose I am leaning towards the Big Rock right now but haven’t decided for sure.In the mean time, I thought you might like to see the two pistols in more of a side-by-side manner for comparison.
I recently made a sheath for a khukuri with serrations on the back of the spine and it was a bit of a learning experience compared to how I normally make a khukuri sheath and though I would share what was done. The khukuri in question had a nicely done blade and fitment was good. It had about a 10″ blade, 6″ handle and 16″ overall. The spine was between 1/4-3/8″ thick. All in all, it was a medium weight nice khukuri though I am not really sure who made it
Now for this weight range, I could go with .080 or .093″ Kydex. I went on the heavy side and used .093″ thick black Kydex that I buy in 12×24″ sheets – usually from www.knifekits.com.
So, first up I do two layers of blue painters tape on each side to allow for some “wiggle room” between the blade and the Kydex. If you want it tighter, use just one layer. I would recommend having this space to allow for dust, dirt, etc. Next up is to trim the Kydex so it is long enough to have a bit of material past the end of the blade, a few inches onto the handle and then an about 1.5″ or so on each side when the Kydex folds over. If you want to use two pieces, you certainly can. The final sheath I did for this khukuri uses two sheets of Kydex trimmed to size.
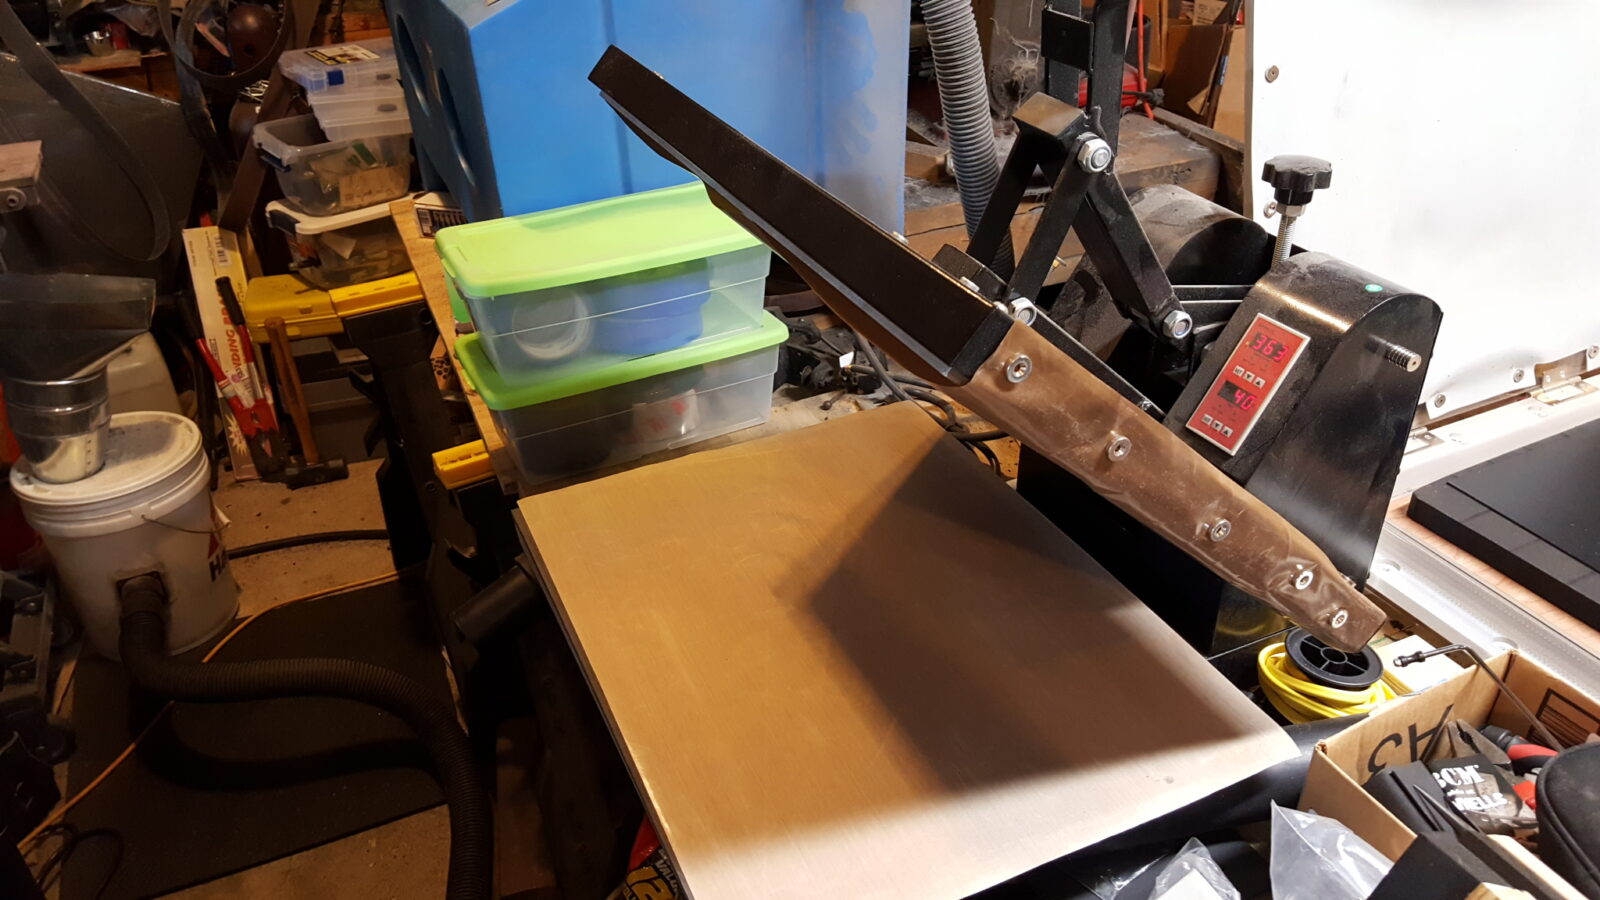
Once the Kydex is trimmed to size, you need to heat it to around 360F but less than 400F. I Use a 16×20″ MPress Heat Press with a digital controller to set the temperature at 360F and to heat the Kydex for 40 seconds. Note that I also have Teflon/PTFE sheets attached with rare earth magnets to protect the press’ faces if the Kydex were to melt.
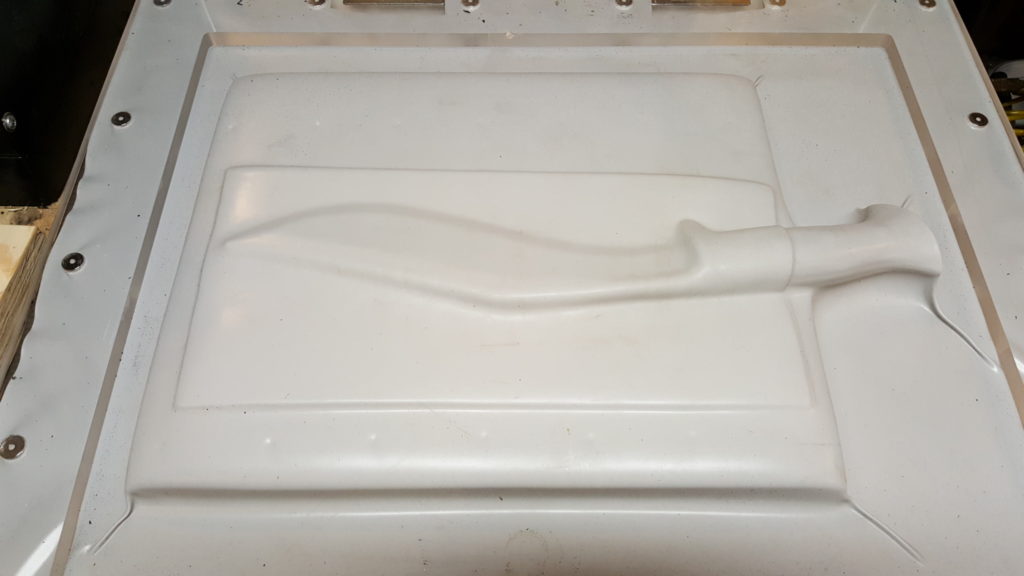
In years past, I used a modified hot plate / electric griddle to heat my Kydex. For a tad over two years now I have had the MPress and really like it. At any rate, once the Kydex is hot and pliant, you need to mold the Kydex to the blade. In this first take, I used my HD Industrial vacuum press to do the work. You draw the vacuum down and let the membrane do the work and cool down so the Kydex stiffens again.
Next up, draw your planning lines around the blade. You need to figure out your rivet pattern and then drill the holes. I do 0.75″ centers to accommodate large Tek-Lok belt fasteners among other options. Notice the big flap drawn at the top above the handle. That creates the “funnels” that will guide the khukuri into the sheath and then lock it into place.
Next, debur the holes with a deburring tool such as the Mango II in the above photo. Then, install the correct size rivets in the holes. Orient the larger factor finished end of the rivet to be facing viewers when the blade is carried. It looks better than the small end that results after compressing the rivets. After that, use a rivet tool to flare and secure the rivets. I use purpose-built dies in my 1/2 ton arbor press to do that but there are cheaper manual units for use with hammer. If you plan on doing many sheaths or holsters, go with the arbor press.
Here’s the result. Note that the round tools are what I use to form the funnels.
Next, I use a band saw to cut close to the outside cut-off line I drew.
I then use a Rigid Oscillating End Sander to do the shaping. I bought thebunitat Home Depot two years ago and it works great for this. I use a 40-60 grit belt to quickly do the grinding.
Now I did the test fitting and had an “oh crap” moment. I normally expose the blade to allow for quick insertion and extraction but I couldn’t do that with this model due to the serrations. They were exposed and would clearly hang up on everything so it was time to come up with a plan B. It dawned on my that I needed something to serve as a “sheath” for the serrations that would give me work room inside the sheath once it was formed. So after thinking about for a few minutes, I took some 3/16″ fuel line, slit it down the middle and pulled it onto the khukuri.
I also wanted the khukuri to push a lot further into the rear piece of Kydex so that meant I needed to use the khukuri press that I designed just for this. It is built like a tank from layers of 3/4″ plywood and uses four 500# Quick Clamps to compress the Khydex. The results is tight uniform clamp around the handle and blade of a khukuri.
Next, it was time again to mark, cut and rivet the sheath. Again, note the tabs drawn above the handle to form the funnel.
After cutting, I use a heat gun to heat each tab and bend it over a round mandrel. I have a 1/2″ round piece of aluminum that I normally use. Note, I have burned out a number of cheap heat guns. The DeWalt is over two years old and still going strong.
I use MEK solvent on a rag to smooth over the edges of the Kydex and make it look good. If you use MEK, be sure to wear solvent gloves and work outdoors or in a very well ventilated area. That stuff is hot – meaning it evaporates fast and is not something you want to be breathing.
I used 1″ heavy duty nylon webbing for the retention strap along with a snap stud and quality heavy-duty #24 snap head. I heat an old small screw driver to melt a hole in the strap for the stud and the snap head and then a purpose built die in my arbor press to actually open the rivet head inside the snap.
The Tek-Lok is secured to the sheath via slotted posts, screws and rubber spacers cut to the length needed. Note, use Vibra-Tite or blue Loc-Tite to secure the screws and nuts or they will work lose and fall off.
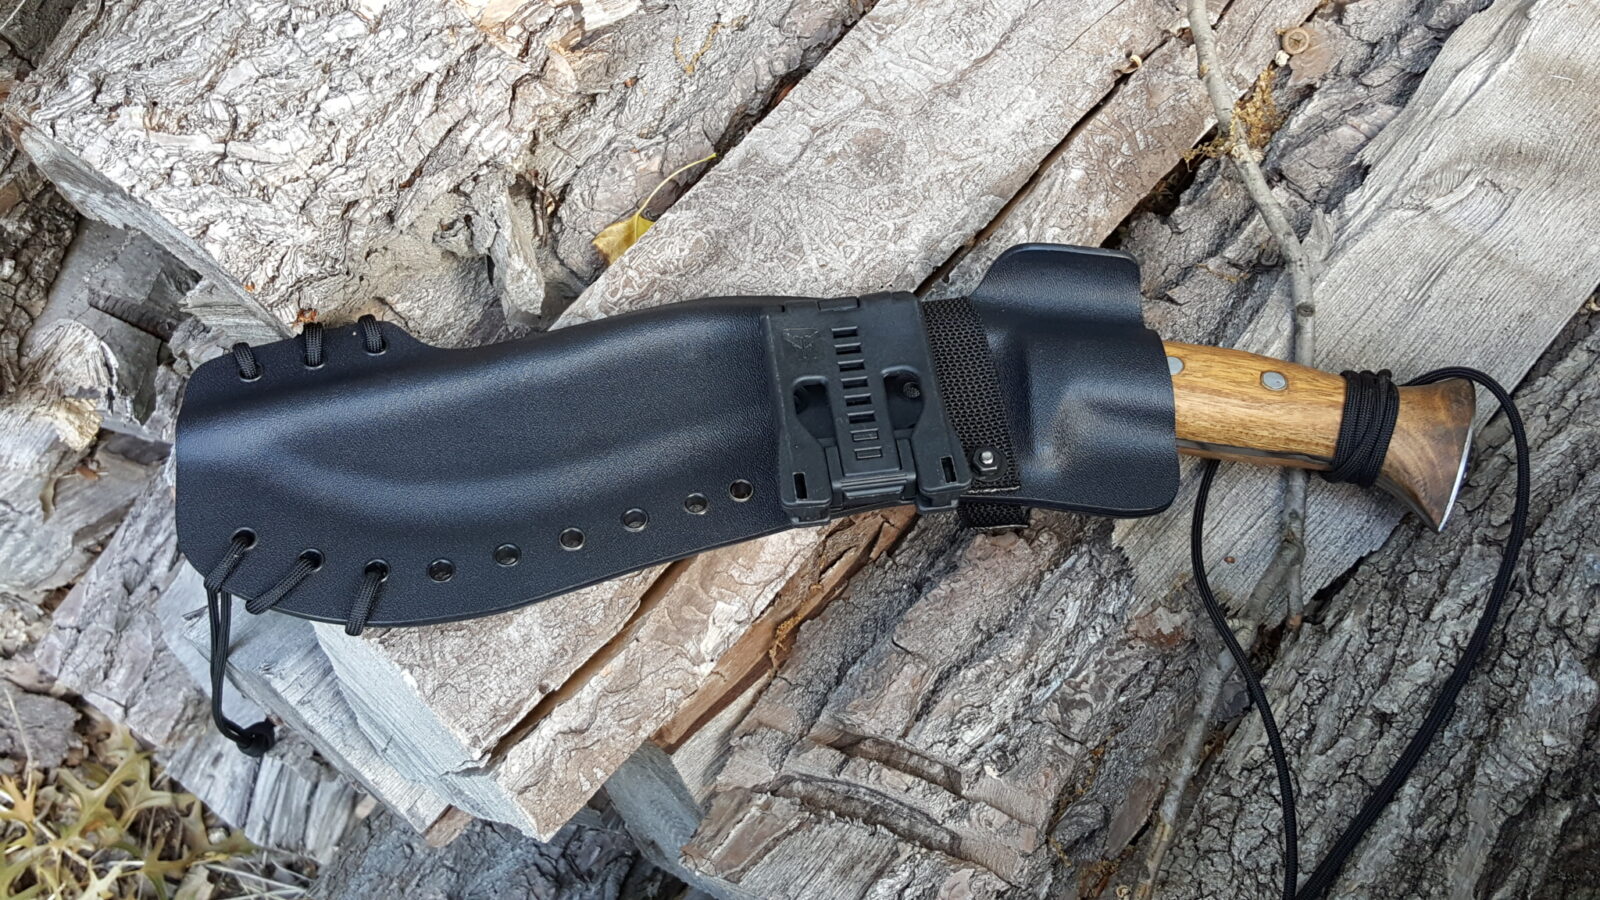
Here is the end result. The old buffalo hide and wood sheath is above for reference. I like adding paracord for lashing and survival use.
In the next photo you can see the opening for the tip of the khukuri to slide into – that pocket is essential. Once the tip is inserted, the handle is pushed towards the funnels that open, allow the handle to pass and then spring closed locking the handle in. To truly lock it in and protect against brush, you need a retention strap that serves to keep the sheath closed – if the sheath is held shut then the blade can’t come out.
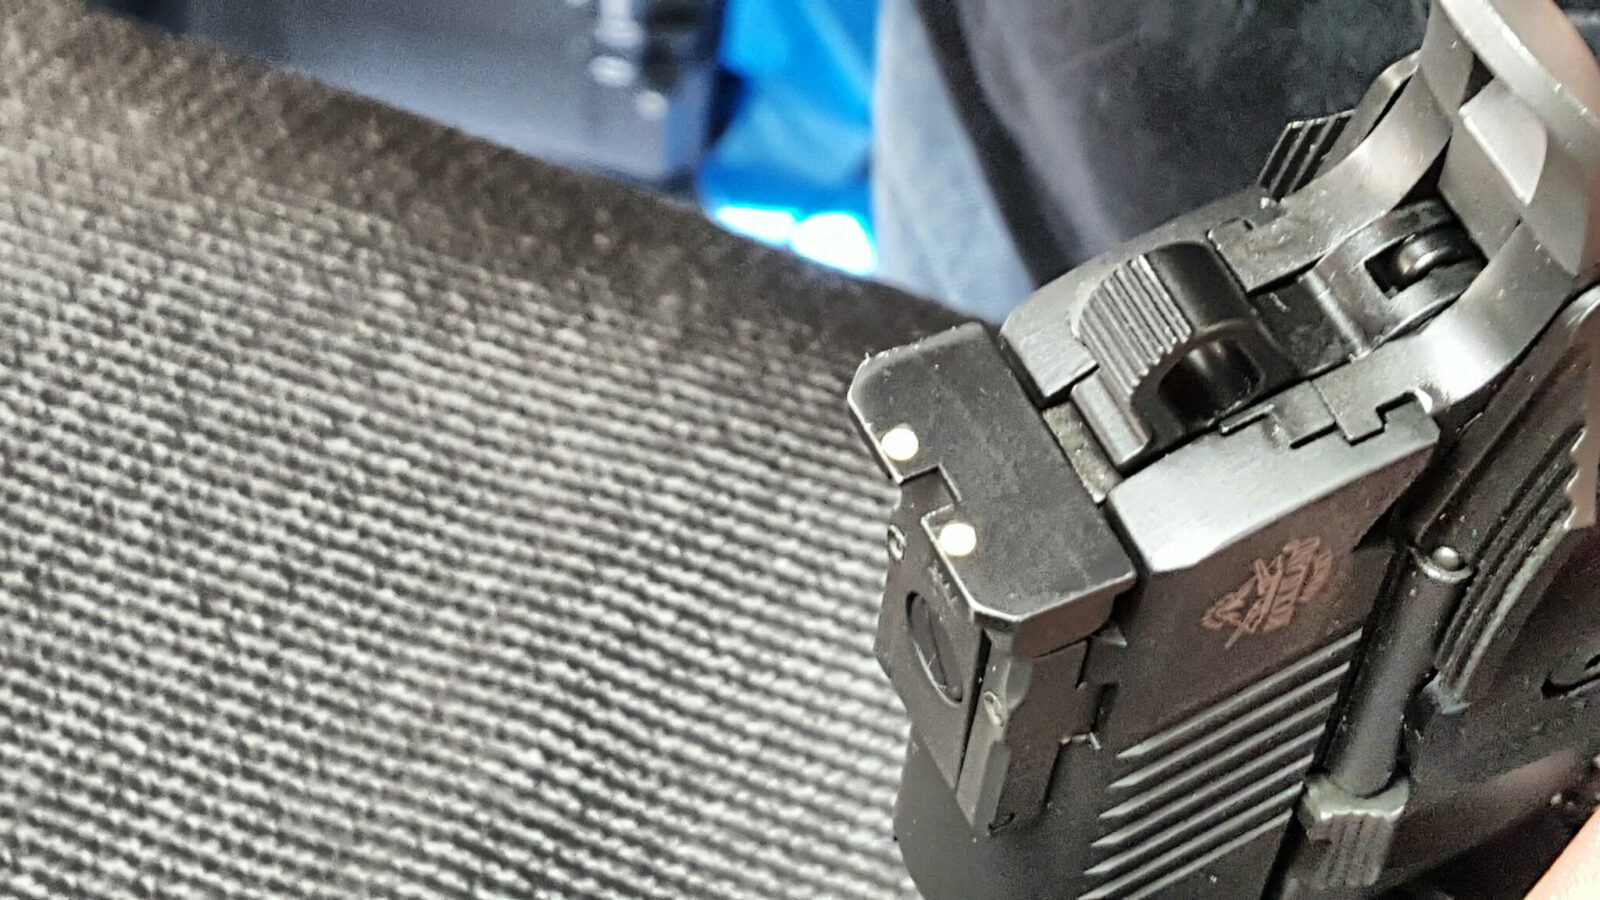
The Rock Island Armory Model 52000 Pro Match Ultra 6″ – 10mm pistol is affectionately known as the “Big Rock” to folks who own one. When I got mine, one of the few things I wanted to improve were the sights. The front fiber optic segment was a dim red and the back white dots were just paint. When I’d sight down the pistol, the sights didn’t really “jump” out and catch my eye the way I would like.
Scott Igert, owns Modern Antique Firearms, in Benton Harbor, MI, and is a good friend of mine. I told him about the sights because I knew he could upgrade them to be more visible. So, one day I ook the pistol to his shop and and snapped some photos while he worked his magic. Now Scott does this all the time so he has all the supplies on hand and knows exactly what to do, which was real obvious as I watched and he explained what he was doing.
First up was to replace the front fiber segment. He showed me how the fiber is held in place by flared ends that were created by heating the fiber. He simply snipped the fiber in the middle being careful not to hurt the rest of the sight that held it in place and then just pulled it out.
Next, we talked about the color of fiber I wanted and it was bright orange. He had these big lengths of fiber in different colors and diameters that he picked through to get the one that would fit the Big Rock, cut it longer than needed and scraped it until the outside diameter was such that it could slide into the old sight base’s holders for the fiber.
Scott gave the fiber segment a quick spritz of weapons oil to get it to slide into the holder. He then trimmed the fiber so there was still enough protruding to melt into the bulged shape needed to secure the fiber in place. With that, the front was done.
For the rear, he selected a very eye catching yellow paint to fill the two round depressions that were painted white. He used a small rod to apply the paint and a business card to wipe away the excess and let it dry.
Wow – what a difference now. The combination is eye catching and a huge improvement. I’ll need to get an after picture that does the new sight justice. If you are disappointed with your pistol sights, definitely contact Scott.
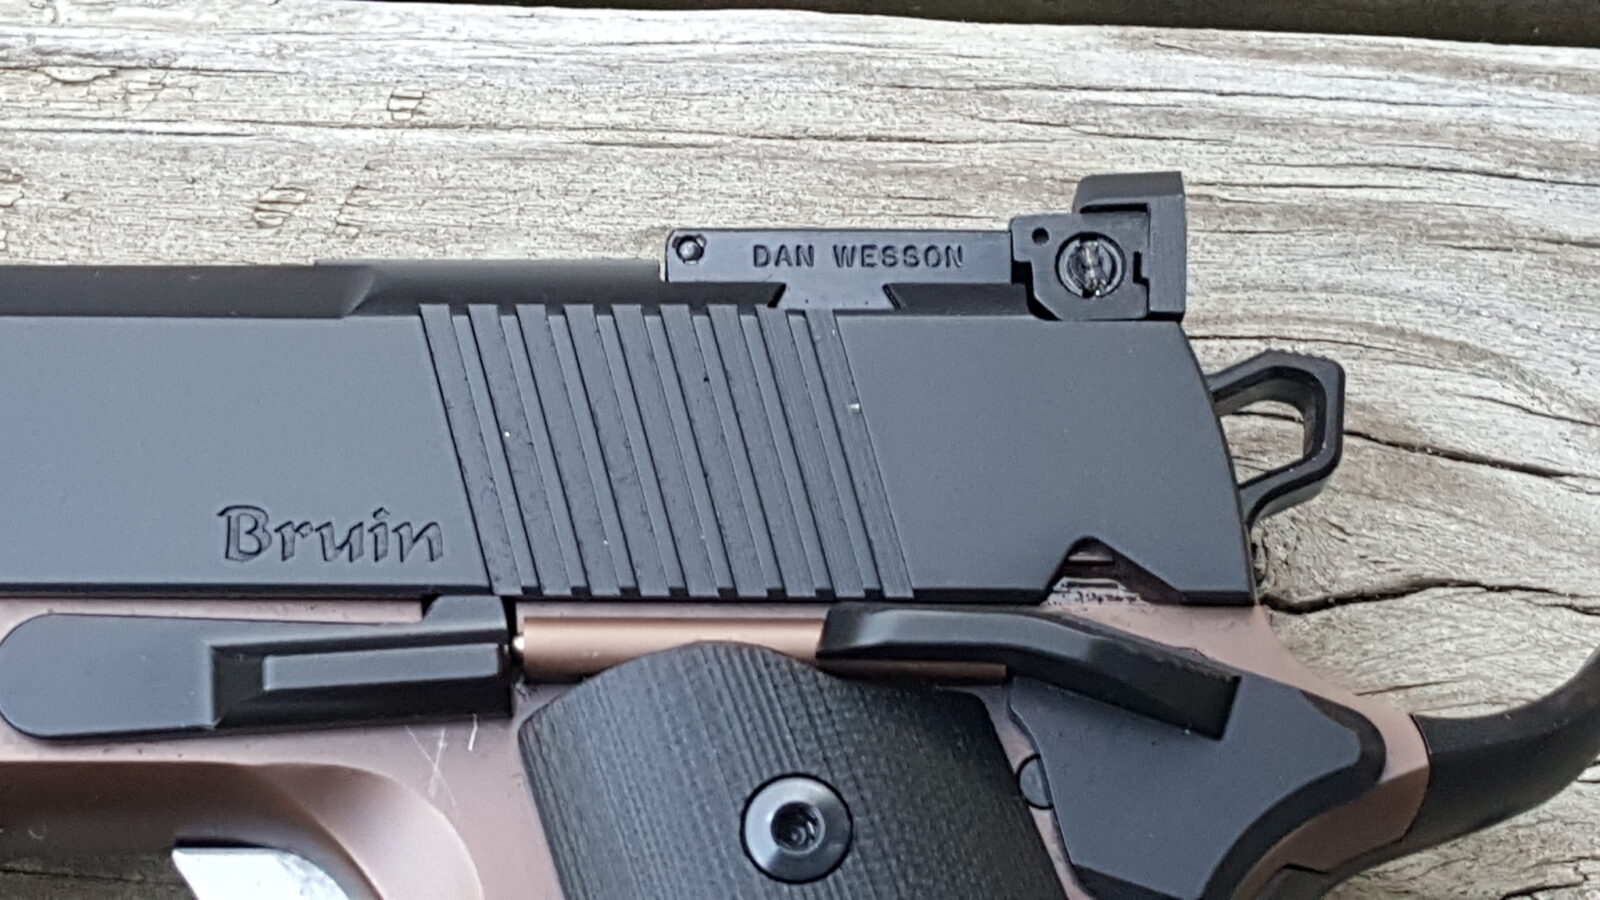
As part of my foray into 10mm pistols, I picked up a Dan Wesson Bruin with the help of Scott Igert of Modern Antique Firearms. The Bruin intriqued me based on reviews and that this was a Dan Wesson pistol! I have liked Dan Wessons since the days they made the revolvers with exchangeable barrels. Not too long go they were acquired by CZ but the quality is still there based on everything I have heard. I sure liked their Titan but at $4-4,200, it was way, way outside my price range compared to the $1,800 Bruin.
Now I bought the Model 1880 10mm Bronze Bruin before my Big Rock because we found it first and the more I read, the more I wanted to get one. In my opinion it is excellently built. Here are the off-the-shelf specs:
Magazine Capacity: 8 rounds
Frame: Forged Stainless
Overall Length: 9.7″
Barrel Length: 6.03″
Width: 1.5″
Weight: 2.74 pounds
Trigger: Single Action
Front Sight: Tritium Fiber Optic
Rear Sight: Adjustable Night Sights
When the pistol arrived, Scott, his cousin Andrew and myself were all very impressed. It was coated in a ton of oil in a bag but the first thing we all noticed was how smooth it was – no grittiness anywhere. She slide and trigger were all so slick. The trigger is probably the best feeling of any pistol I own.
I field stripped the Bruin, wiped off the packing oil, lubricated it and took the pistol to the range. It shot like a dream. No problems of any kind with 180 grain S&B FMJ loads or either 155gr or 180gr JHP loads from Underwood. The Bruin handled everything smooth as silk and its weight really made recoil a non-issue. It’s there but it’s not a big deal is how I would describe it. Normally my carpal tunnel will act up and tell me when recoil is too much but I really just had fun. I’m so used to having to fiddle with guns that when one works just the way it should out of the box, it is a real treat.
Given the magazine capacity, I went ahead and bought two more magazines giving me a total of four mags. Interestingly, the website said they were out of stock but when I called their parts department they said they did have them and the gentleman I talked to mentioned that the website quantity onhand vs. actual wasn’t that reliable. So if you need mags, call them. Don’t just go by the website plus they have mags both with and without the rubber bumpter. I like the bumpers personally – they add a bit of weight to help the empty mags drop plus help protect the floor plate when they hit the ground.
One little detail I really like is the extended slide release lever. It has a little extended shelf that gives you a tad bit more leverage to push down and release the slide despite the heavy recoil spring.
Obviously I am a big fan of this pistol. I do have one con to mention – the Bruin has a distinctive angled front barrel plug that makes field stripping a bit tricky as you try and get things lined up. To be honest, I would chuck that angle and field stripping would become much easier. That is my only complaint.
At this point I am debating whether to keep the Bruin, the Big Rock or both, It may take me a while to decide 🙂 The Big Rock is a wicked brute and the Bruin is very refined. Both are better pistols than I am a shooter so more thinking is required. In the mean time here are some photos:
I must admit I have a fascination with the 10mm auto cartridge. First, it has cool ballistics. Second, it can be found in a number of semiauto pistol platforms including my favorite 1911/2011 platform. Third, I’ve wanted one since Miami Vice in the 1980s 🙂 Honestly, it is the first two reasons – the ballistics of the 10mm are pretty amazing and I wanted something in a 1911/2011 style pistol.
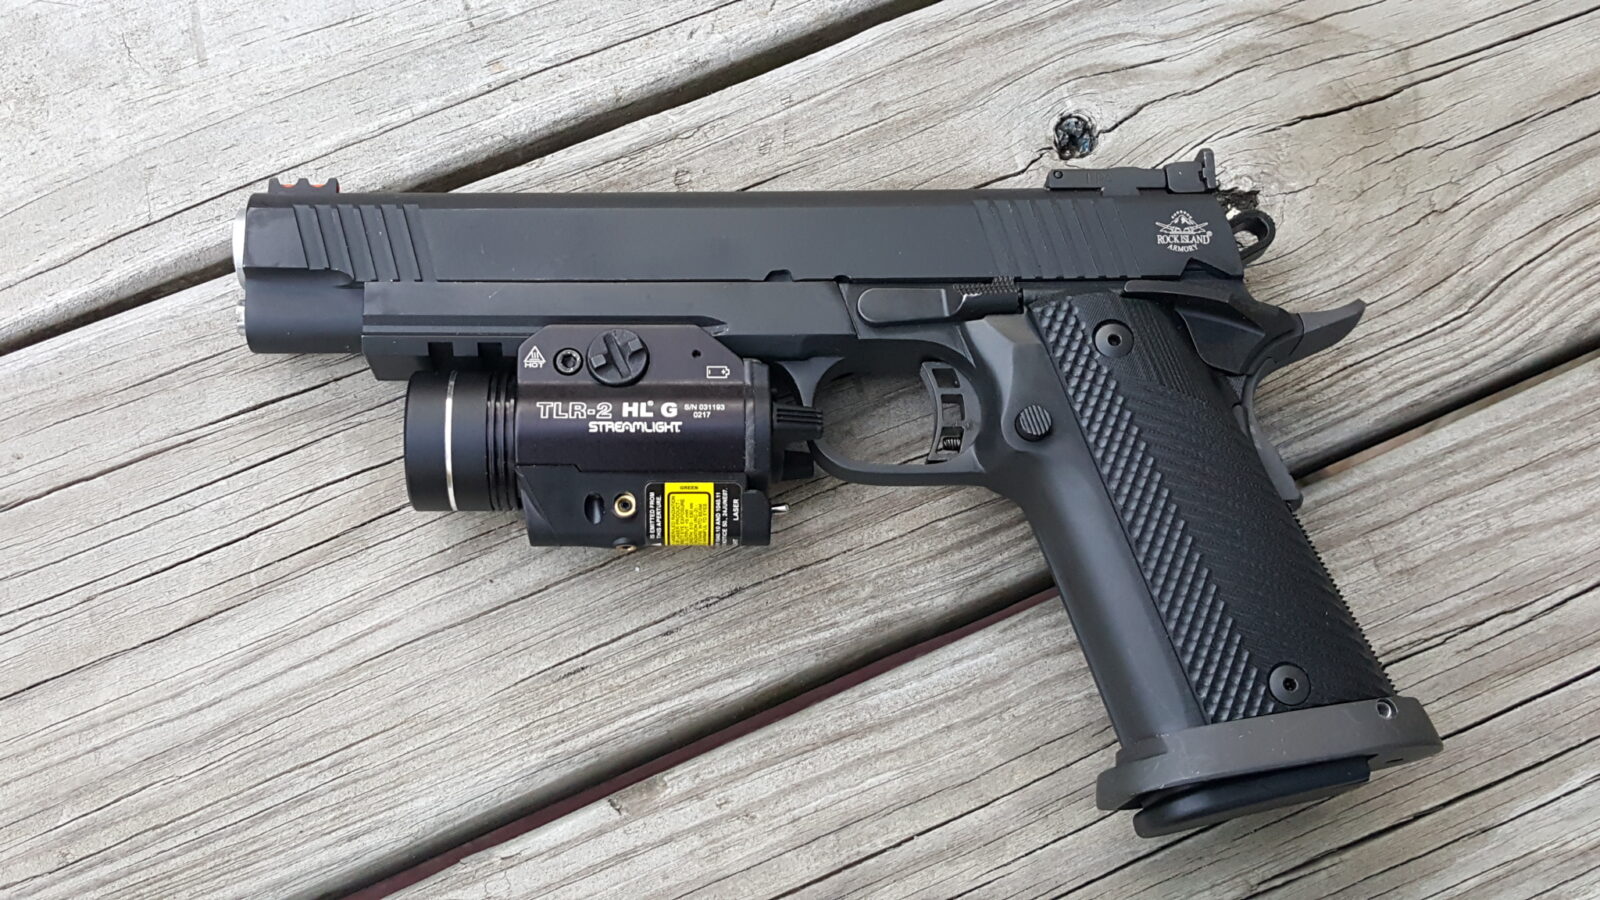
Over the past year, Scott Igert, of Modern Antique Firearms, has helped me track down two 10mm pistols that I want to share with you including the Rock Island 52000 6″ Pro Match Ultra (some call it the “Big Rock”) and the Dan Wesson 6″ Bruin. In this post, I’ll focus on the Big Rock.
My first choice was a STI Perfect 10 but they had stopped the 10mm model I wanted in 2016. I wasn’t too keen in buying an out of production model so I continued digging around and wound up reading about the Big Rock. Now I realize you can’t compare STI and RIA pistols so let’s just shelf that right up front. What did intrigue me about the Big Rock were very good reviews and a very affordable price point for a true double stack 16+1 10mm pistol with a 6″ match barrel.
In case you aren’t that familiar with RIA pistols, they are made by Armscor of the Philippines. Armscor is the biggest producer of 1911 style pistols in the world including making pistols for Auto-Ordnance, High Standard and even the STI Spartan. These folks know their way around a 1911 and the Philippines has a big time gun culture either equal to the US or only second to the US.
While their manufacturing has traditionally been in the Philippines, my understanding is that some production may be moving to the US, but the Big Rock I bought was made in the Philippines by gunsmiths in their Medallion custom shop. The Medallion gunsmiths hand select and assemble each pistol resulting in a pretty solid pistol with an excellent prive:value combination.
Now, value really depends on the customer – either me or you. So let me tell you key features that mattered to me:
4140 Ordnance Steel that is CNC machined – folks, read up on the first batches of 10mm pistols including the Deltas. They would shoot themselves loose. Metallurgy has come a long way. I read good reports of the fitment and functioning before I bought the pistol and mine arrived snugly assembled. I loathe loose slides and barrels – the Big Rock is solid.
2.5 pounds unloaded and 2.9 pounds loaded – I wanted it to soak up the recoil of the pistol plus heavier pistols always work in my favor when it comes to dampening my tremor.
16+1 rounds – because you don’t buy toilet paper a square at a time 🙂 Seriously, I prefer more ammo and I like thicker grips. Years ago I had a Desert Eagle .44 Mk.V and loved the feel. This is the same way. I wear XL-sized gloves due to big palms and relatively short fingers. I really like the feel of the 2011 family. In the event I were to ever use this pistol in a self-defense situation, I would prefer the extra rounds.
On a related note, the pistol has G11 grip panels that aren’t overly aggressive cut. G11 is basically a family of epoxy refinforced fiberglass laminates. They are strong, durable and aren’t going to split, warp, or wear like wood. Havin worked with it on knives, I knew this would be a solid route to go. My first preference in a 1911 single stack are the rubber Hogue grips but he Big Rock’s grip would be too big for me. I didn’t even try changing the G11 panels out once I received it. The big frame and these G11 panels work well together,
6″ bull barrel with 6 grooves, a 1:16 twist and integral feed ramp – this barrel will be more accurate than I ever will be. I liked the fact it did not use a bushing, that the feed ramp was there and it had the right twist rate for 10mm. As an aside, I went with the 6″ barrel because this will be a range or hunting pistol. If I wanted something for carry or duty, I would have gone with the RIA Tac Ultra FS (Full Size). RIA also makes a Tac Ultra MS (Mid-Size) with a 4.25″ barrel. You’ll notice I didn’t mention Glock or SIG and that’s just because I wanted a 1911/2011.
Adjustable trigger pull from 4-6 pounds and adjustable over travel – I am a trigger snob. The Big Rock’s trigger is pretty decent but the trigger on my Dan Wesson Bruin is fantastic. When I have time, I want to dial the pull down some. The over travel is set right I just wish it broke a bit lighter, It’s a tad gritty but I expect that to wear in and smooth out as the parts get to know each other.
Fiber optic front sight and adjustable LPA-TRT rear sight – as I get older, I find simplicity more and more appealing. The problem with optics is that they break, the point of impact shifts, batteries die, you have to fumble to turn them on in a high-stress situation, etc. I wanted good reliable sights. Now I will tell you the front fiber optic sight was too dark for me out of the box and I had Scott work his magic on upgrading the sights but that’s a story for another time.
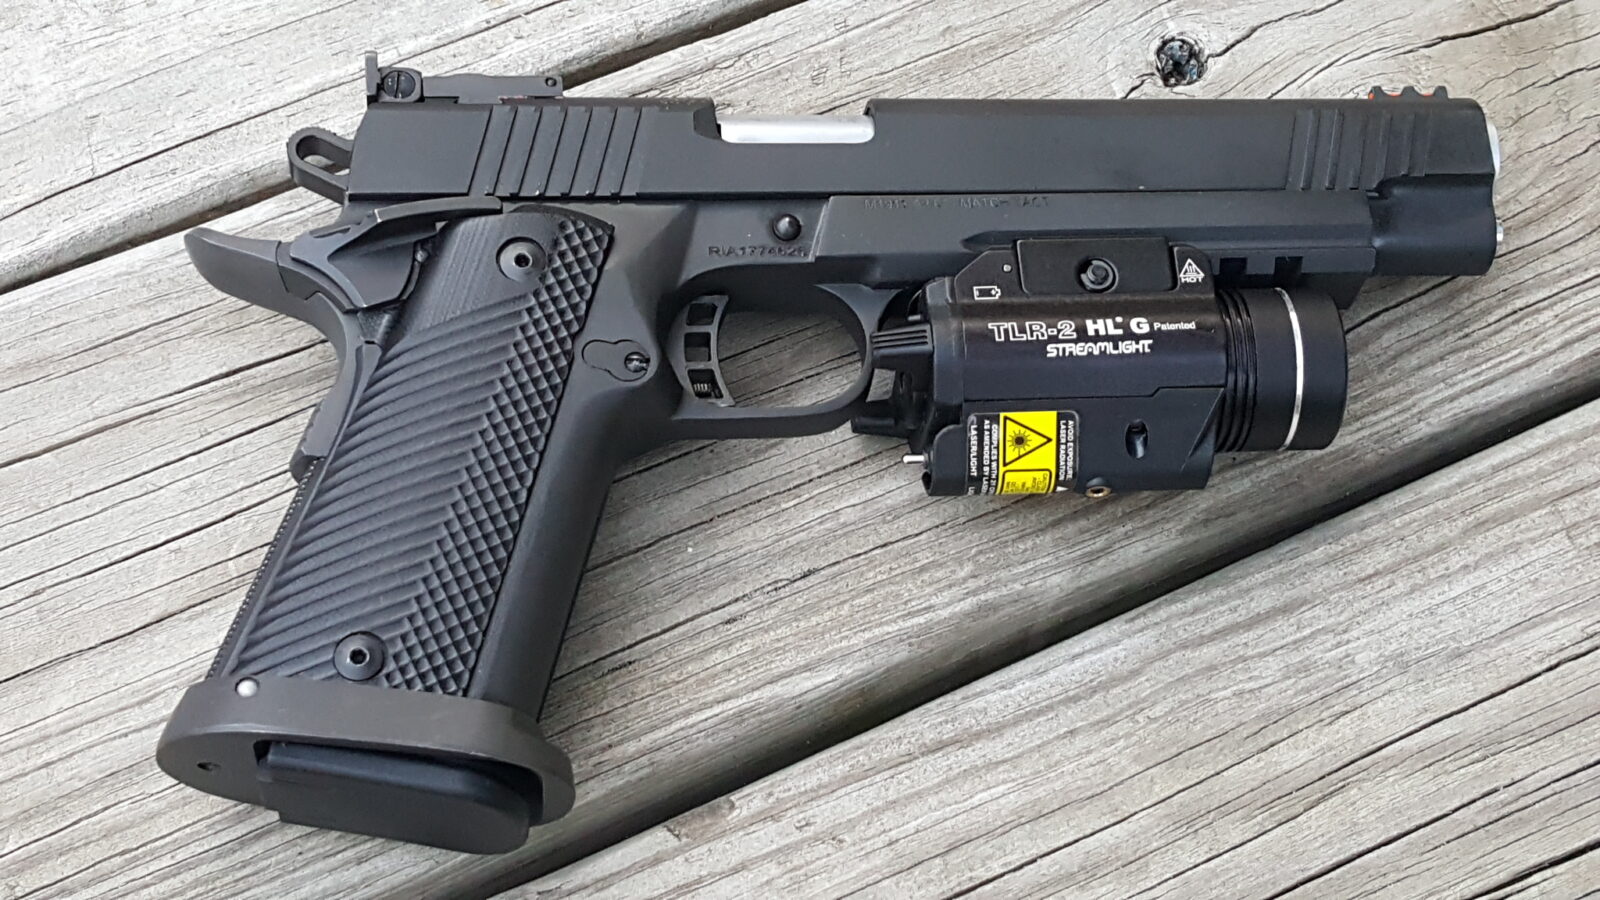
Picatinny Rail – on pistols that I may use for self defense, I like to mount a true weapon light and laser. The Big Rock has a nice long steel rail to do whatever you want. I mounted a Streamlight TLR-2 HL G, which is a reliable 800 lumen light with an integral green laser. I’ll tell you more about that in a future post.
Magazine funnel – when I am in a rush, I want a nice big magazine well to shove the next mag into. I find them more forgiving and faster than having to slam a magazine into a tiny opening.The Big Rock comes with a nice big funnel already installed
Parkerized finish – I do manganese parkerizing and like the dull black look. Keep it oiled and you are good to go. Note, Parkerizing isn’t a rust proofing – it modifies the surface layer of steel allowing for other things to get a good hold. For example, parkerizing and grease, parkerizing and cosmoline or parkerizing and then a weapons finish such as Molyresin.
Now you notice I didn’t list the dimensions as important considerations and that was because I didn’t really care how long (9.75″), wide (1.41″) or tall (5.5″) the pistol was. If these are important to you, great – they just weren’t important to me when I bought this pistol.
In buying this pistol, it was not easy to find and required some serious online hunting at Able, Buds, etc. Honestly, the biggest problem with the Big Rock is finding a dealer that has it in stock. Scott was looking for me and I also had a number of automated searches set up on GunBroker and finally one showed up for sale by Elk County Arms & Ammo of St. Mary’s,PA, for $1,2339.49 out the door. These folks were professional and a delight to deal with. They promptly processed Scott’s FFL information and shipped the pistol just a few days later. If you see something listed by them on Gunbroker you’ll notice a ton of positive reviews and one of them is mine!
To break the pistol in, I bought 500 rounds of S&B 180 grain FMJ and then Underwood 155gr XTP and 180gr bonded jacketed HP ammo. I also bought three more magazines direct from Armscor’s website. I had to call them and confirm the magazine so here’s the link if you want to do the same.
So, the pistol comes seriously covered in oil. When I was taking it out of the bag,I couldn’t help but think “Wow – this is awesome!” Getting ready to go to the range, I field stripped it, cleaned the barrel and lubed everything just like I would any other 1911 with the exception that you have to unscrew the guide rod and there is no bushing to deal with.
March 2024: I bought a second 52000 Big Rock and carefully documented why cleaning, lubrication and getting a jump start on breaking the pistol in are so critical for a stress-free first range trip. The pistols are not ready to go right out of the box. Click here.
We set up the target and the pistol functioned great with the S&B 180gr FMJ rounds. With the Underwood, things got ugly fast. Literally every 3rd to 5th round the pistol would fail to feed (ejection was fine but not feeding). This happened regardless of magazine or Underwood load.
So, I took it home and contacted Underwood and they questioned the recoil spring. I bought Wolff 22# spring and started monkeying around with stripping the frame further and got the mainspring and trigger jammed – this was totally my fault and I decided to have Scott send it back to RIA to fix both my mistake and to check about feeding HP ammo. I was fully prepared to pay them for my mistake but they took care of everything in about 2-3 weeks and sent the pistol back to Scott noting that they could find nothing wrong with the pistol that would affect its ability to handle JHP ammo.
Now Scott is a good friend of mine and has been around guns and reloading his whole life plus is a career police officer so he is very pargmatic about everything. Scott was also intrigued about what was going on with the Big Rock and took a closer look at the Underwood Ammo. He noticed there was quite a lip at the top of the case and that almost all the Underwood ejected cases had a scrape/gouge created during feeding, He then speculated that the match chamber of the Big Rock probably needed a more of a taper whereas the Underwood ammo was all straight. The next photo shows the scrape and gouge in one example Underwood round:
Scott took home a box of the Underwood ammo and put a slight taper on all and I met him the next day with my pistol – they all fed. We also took a box of SIG V-Crown 180gr JHPs which came from SIG with a visible taper and they fed just fine as well. In the next photo, the Underwood round is on the left and the SIG is on the right – you can see the difference!
I contacted Underwood and told them about my findings and was a bit disappointed that they blamed the pistol and did nothing to compensate me for all the hassle – heck, I would have been happy to get a couple of more boxes of ammo from them. By the way, my 10mm Bruin feeds the Underwood ammo no problem so the issue is with that particular pistol and ammo combination. Underwood did say they would take my findings into consideration and potentially change their production method but it did not sound certain at all. Bottom line, I will not be ordering more Underwood ammo for this pistol.
So, a very valuable lesson was reinforced again — it pays to test ammo and find what is reliable in your pistol. As the saying goes, practice, practice, practice. Scott is going to take the balance of my 500 rounds of Underwood ammo and put a taper on them so I am not out my investment plus make me some ammo. I’m also going to finally get into reloading myself based on his recommendations plus will contact some of the other ammo companies to find out who else tapers their ammo just in case.
The Big Rock is a very cool pistol and I am impressed. Their customer service also was a very pleasant surprise — I would have been more impressed if they had resolved the problem. My problems were just with the Underwood ammo but others do not report this problem so it was a case where the pistol and ammo didn’t work together and this does happen. A ton of people read this post so I want to be candid with you so you can learn from what I experienced. I’ve sold the pistol as it was interesting for a time but decided to move on to other projects. With that said, I’d recommend it if you want a big double stack 2011-style 10mm.
I have a lot of fun experimenting with stuff. I tend to need punches fairly regularly and what I had was a mishmash of sizes and models from Craftsman, Astro, Harbor Freight and who knows what else. I was working the other day and had stuff laying everywhere and thought to myself that there must be a more organized approach plus some of my punches were looking pretty abused (I’ve bent the crap out of some of the real small ones trying to start pins) so I started digging on Amazon. Interestingly enough, TEKTON makes an 18-piece gunsmith punch set that gets very good reviews on Amazon – 4.6 stars with 181 reviews is pretty remarkable. So, I ordered it and was pleasantly surprised at what arrived – it was very well done.
The set was well packed and includes a walnut bench block that is laser etched with what punch is to go in what hole. Now for a slob like me, that is a God-send.
The punches have a nice heft, feel good, are well finished and have worked fine so far. TEKTON claims they are high carbon heat treated steel and seem to be holding up just fine.
(8) roll pin punches: 1/16, 5/64, 3/32, 1/8, 5/32, 3/16, 7/32, 1/4 inch
(2) solid punches: 1/16, 3/32 inch
(1) center punch: 5/16 inch
I have it sitting to the side of my bench and now I can move the whole set right to where I need it vs. digging for whatever punch I need.
So if you are shopping for punches with a stand, take a look at this set. It is a great deal when you look at the cost relative to the quality you get.
2/27/20 Update: I’ve beat the heck out of mine and most punches are still holding up. I’ve bent a few of the smaller ones but I have really beat the hell out of them trying to free stuck pins so I am not surprised. Guess what I did, I bought a second Tekton set for spares. I’m still happy with it. All the sizes let me grab one for use as a slave pin as well like what you really need to align all the components with Glock hammer pins.
My dad raised honey bees when I was growing up so we had a lot of wax. One year, my mom and dad bought some molds and we cast candles. For wicks, we used heavy cotton string. When you put string in hot liquid wax, capillary action occurs and the wax is “wicked” into the string. The candle then cools and away you go. Now I had pretty much forgotten about this for about 20 years until I saw our growing collection of almost empty candles or candles in glass bottles that had burned the way around wick but left a ton of wax on the jar walls. It was one of those “Gee, I bet I can fix that” moments.
Here are some supplies and tools to gather up: #36 cotton twine (it has to be cotton and not a synthetic), a washer to serve as weight, gloves to handle the hot containers, needlenose piers, a screw driver, cutters and a piece of cardboard to protect the table in case I spilled wax.
Also, your work area should be near the microwave. The counter I used was about eight feet away. Make sure there are no trip/fall hazards between the microwave and work area and that you have a drop cloth, piece of card board, newspaper or something to deal with spatters and spills. You do not need to be in a rush – indeed, take your time!! It takes wax a while to cool off. I just want the work center close by to reduce the chances of dropping the hot wax.
So, step by step if you just want to melt the wax down into the bottom and add a new wick:
Use a cloth to firmly rub the glass rim and remove any waxy soot (the black junk on the glass). It will come off.
If the current metal weight/anchor is exposed, remove it with your needlenose pliers. If you don’t, you’ll see arching in your microwave and potentially hurt the microwave. Seriously, this is not a joke – you can ruin your microwave my putting exposed metal in it.
Microwave the candle in the glass jar until it all melts. The time to melt will depend on the formulation of the wax, how strong your microwave is and how much wax there is. On one candle it took about 5-6 minutes and on another it was much longer. Go for a minute, check, go for a minute, check, over and over – don’t try and do it all at once. You don’t want molten wax bubbling all over inside your microwave as it will be a HUGE mess to clean. Have you ever heated water too much in a microwave and had it bubble over everywhere? This is the same thing but when the wax cools it is a bear to get off. So, be careful and go slow. Don’t heat it any more than you need to.
Tie a weight to the end of the string so it will sink to the bottom – I used an old washer I had laying on my bench
Take the candle out wearing gloves. The glass can be very hot so you don’t want to get burned or drop the molten wax as it will be a bear to clean up. Just be careful and have a good grip. I wear lined work gloves. You only need to hold the container long enough to get it from the microwave to your work area that should be close by.
If you haven’t done so already, use your pliers and remove the old wick.
lower the weighted end of the string into the center of the candle. When the string bends, it has reached the bottom so lift up slightly until the string is straight
Lay your screw driver or something else across the mouth of the jar and make sure the string is still centered. Put something on the ball of string / extra string so it stays in position. I found I could move the ball around and the weight of the ball was usually enough. Another time I put a pair of pliers across the string so the weight of the pliers would hold the string in place.
Now if you want to consolidate candles, do the above to the first candle, let it cool (if you want), and then heat the next candle and poor it into the first one. Don’t forget to remove the old wick and weight. Take your time, be safe, the wax will not cool fast. So here is the second candle. The wick weight is buried under the wax so I will remove it once the wax is molten. If it were exposed or close to the surface, I would dig it out.
Here is is after I melted it, removed the anchor and poured it into the first candle.
After a little over an hour, the candle has cooled enough that I could cut the wick. The wick will burn down to whatever height the wax can reach and burn so don’t worry about it being too long. You do need to be patient and let it cool or you will make a big mess while trying to cut it (I made that mistake with another candle where it looked solid but was still way too soft and I made a mess). You just need to be patient and let it cool all the way is the bottom line.
That’s it. I like this kind of stuff. It’s a great distraction from the normal work. You can combine waxes, try different thicknesses of cotton string, etc. Have fun!
Note, go to Ace or your local hardware store for the cotton string. It should be $4-6 for a ball that will last you a long time considering you are using maybe 6″ at a time.