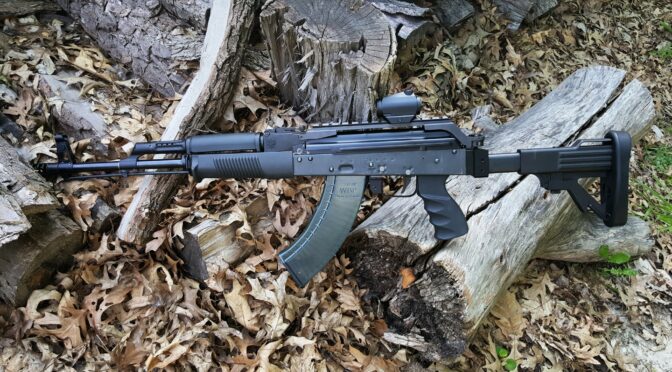
What To Do When Your AK’s Barrel Is Too Big For Your Front Trunnion?

A few years ago, I bought a 1969 Polish Radom Circle 11 AKM kit from Arms of America. It has laminate furniture, matching parts and they populated a new Polish Chrome Hammer Forged (CHF) barrel with the front, gas and rear sight blocks. Furthermore, it was headspaced. I double checked that before I pushed out the barrel pin and then the barrel – that’s where things got interesting.

Pressing Out The Barrel

I have a 30 ton H-style hydraulic press with a 20 ton air-over-hydraulic bottle. The thing is a brute and have used it many, many times over the years on gun and car projects. There are a few things you learn over the years – 20 tons is 40,000 pounds and is a serious amount of pressure – steel parts can bend, break or even shatter under those loads. You learn to go slow, watch carefully feel the pump and listen. I also learned long ago to use the air to move the ram quickly but always do the real work by hand for those very reasons – I’ve bent the crap out of stuff in years past because you can’t tell what is going on.

I wear a full face shield when working with a press. I’m not joking when I say things can go bad fast when there is a lot of pressure. When you push out a barrel, you just don’t expect a ton of pressure from a new kit – at least I don’t. I’ve had some real hairy barrel pins and barrels in years past when dealing with surplus… but not on a new kit with a populated barrel … not until now.

Pressing Out the Barrel

As you can guess, the barrel did not press out easily. I had to apply a boatload pressure – way more than average. So much that I put a 3/4″ piece of plywood between me and the trunnion/barrel assembly. I was also checking and double-checking that my barrel press tool squarely on just the barrel and not a part of the trunnion – guys I was nervous.

I reached the point where I knew I was squarely on the barrel and something had to give. I was whacking on the press trying to shock the barrel out and I kept upping the pressure – pump, whack, pump, whack… Finally the barrel came free like a gun shot. Guys- do you remember the old Romy kits where the pins and barrels sometimes felt like you were taking your life into your own hands? That’s what this felt like.

I actually inspected the front trunnion very carefully looking for cracks. I then inspected the chamber end of the barrel – nice and smooth – remarkably smooth. No signs of galling. Ditto on the inside of the trunnion. I suspect that someone was using some kind of press system that included a barrel support and slammed that new barrel in using a level of force I couldn’t do without damaging parts. I noted to myself that reassembly was probably going to be just as colorful.

Building The Kit

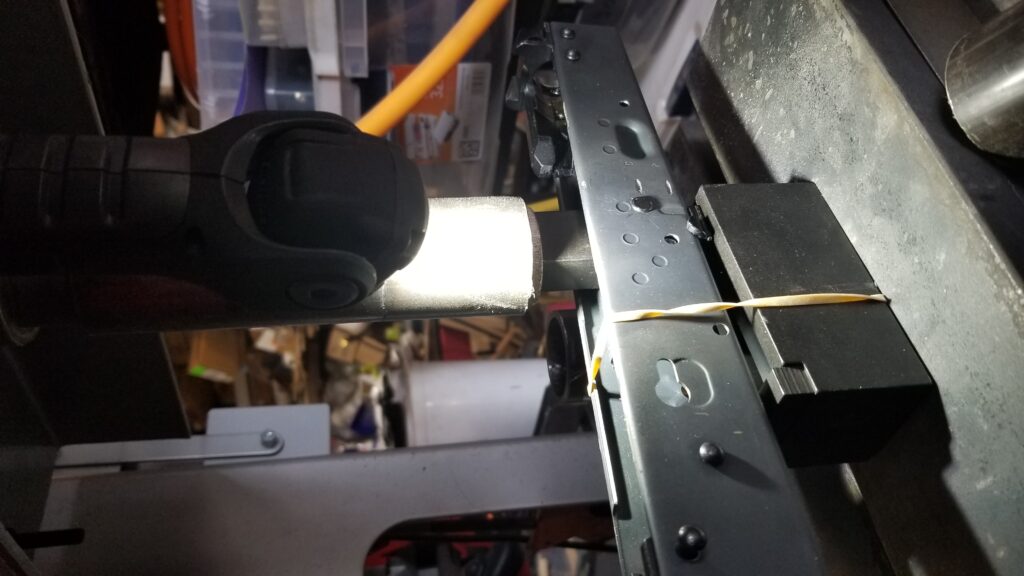
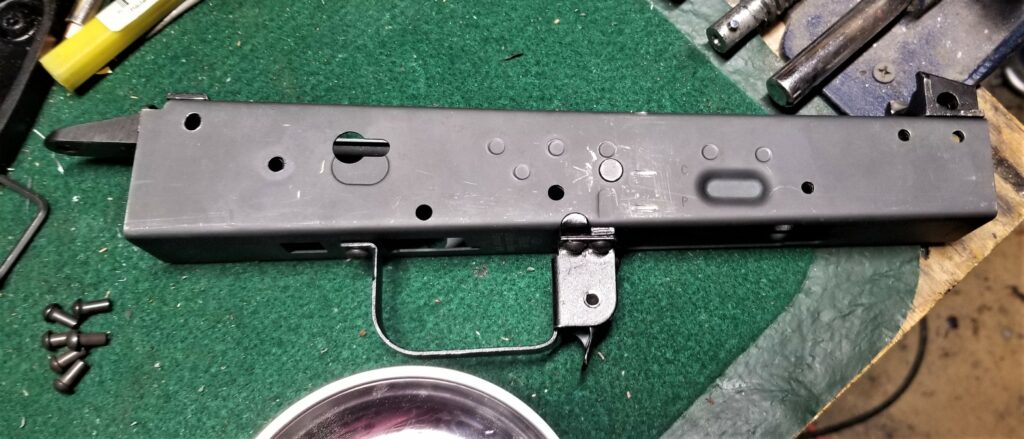
Nothing new about building the kit – I had fun. In the below photo, the front trunnion and rivets are just sitting there. I was mocking things up and they are not actually set. I installed the trigger guard taking care to orient the selector stop properly and using a rubber band to keep the assembly together as I used my press and an AK-Builder trigger guard rivet jig to do the job.
LiteXpress LXL439001 flashlight head with rotary selector and filters
The rubber band keeps the receiver down on the trigger guard jig so the rivet, selector stop and trigger guard all stay in place while you move around. The AK-Builder jig really does a nice job.
LiteXpress LXL439001 flashlight head with rotary selector and filters
Here, everything is drilled and seems good to go.

So let’s get back to the main point of this blog post and why you are probably reading this – what do you do when the interference fit is too tight and the barrel will not go into the trunnion all the way.

Life Got Colorful Trying to Press The Barrel Back In

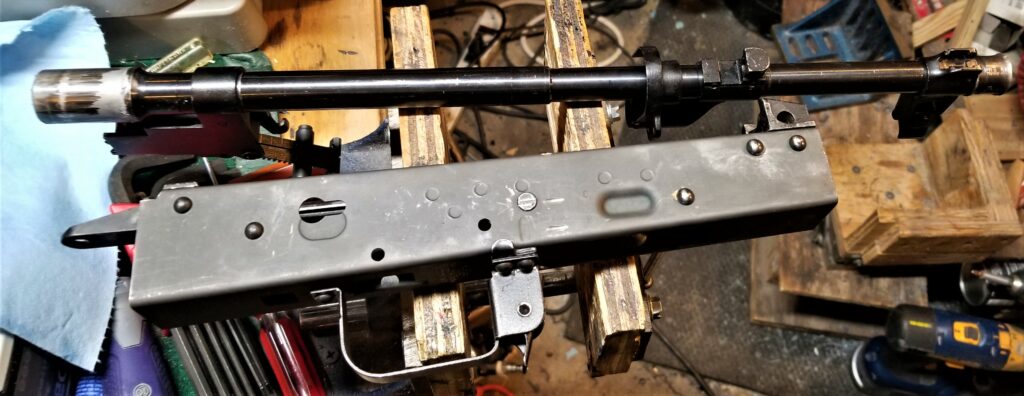
Yeah, that tight fit came back to haunt me. I tried polishing the trunnion and applying non-seize. Usually this works for me but when I went to press the barrel back in, it would not go. I saw the barrel begin to deflect in the press and immediately stopped. Let me explain what I mean by deflect – a material will bend so much and spring back into place. When I saw the barrel begin to deflect, I immediately stopped – it was taking way too much pressure and I was risking bending the barrel permanently. It was time to press the barrel back out and rethink the situation.
LiteXpress LXL439001 flashlight head with rotary selector and filters
Here’s my barrel and my receiver. I double-checked the barrel to make sure I did not bend it – I got lucky. I always get worried if I see the barrel start to deflect/bend — they don’t always return to true.

So, what this confirmed for me was the someone slammed this thing together – hard. An AK barrel is press fit into the trunnion. To do this, the barrel is a tad bigger than the hole made for it in the trunnion by about 0.0010-.0026″ (0 .025-0.065mm) according to Robert Forbus who is a true machinist and has shared a ton with the AK community – click here for his page). At the tighter end (around 0.002″) it is getting hard, if not outright impossible, for someone to press the barrel into the front trunnion without the proper specialized barrel press equipment that supports the barrel. I have a big press but nothing to properly support the barrel in these high-pressure situations. It would likely warp like a wet noodle if I just kept adding pressure.

I don’t own a machine shop but I am a redneck with a shop. I needed to open up the barrel channel in the trunnion and opted to use an OEM brand brake hone. Why? Because I’ve used these small bore hones in the past for other things and was pretty sure it would work for this too.

There are tons of brake hones on Amazon. Click here to open a tab and see them.

I also need to point out that I have no way to accurately measure the barrel or the trunnion so I figured I would remove a bit and try to install the barrel, remove a bit and try, over and over until it went in. The next picture shows my OEM hone (and the Lisle is virtually identical):

Take a look at the above picture – by tightening the knurled nut at the base of the spring, you can apply more and more pressure to the 220-grit stones at the end of the arms. (The Lisle tool’s stones are 240 grit purely FYI – not a big difference.) I just used the basic pressure and did not increase it. Life lesson for me years ago – it’s easier to take more material off than it is to put it back on.

LiteXpress LXL439001 flashlight head with rotary selector and filters

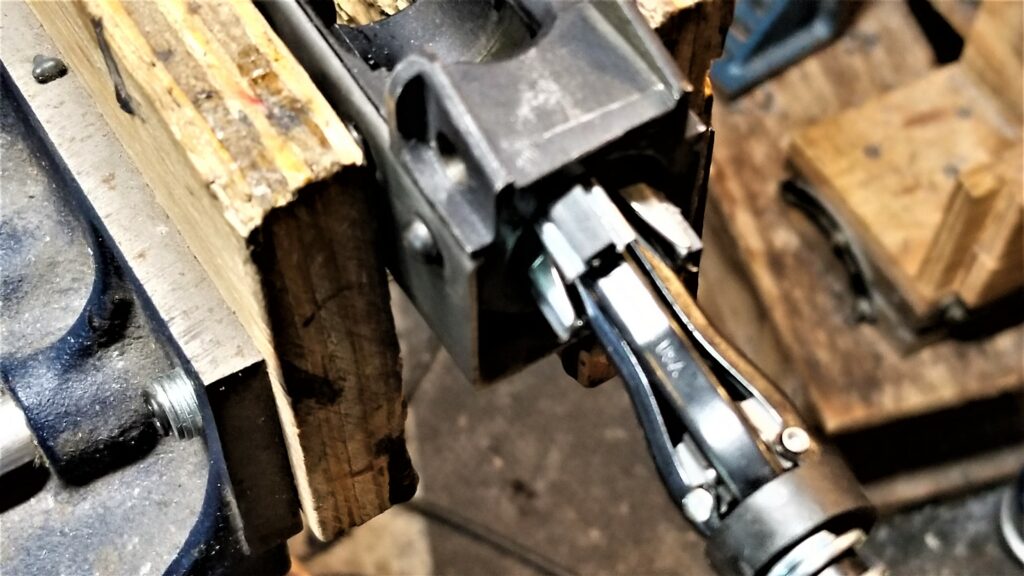
I applied cutting oil to the trunnion liberally and then slid the hone in and out with my drill on slow speed. I would do this for a bit, clean stuff, and then tested how far the barrel goes into the trunnion by hand and then keep removing more. This is not the time or place to get impatient.

By the way, OEM makes fine 400 grit stones that you can swap into place and use to polish the interior further if you . I got the job done with the 220 grit stones and silver Permatex anti-seize compound. If I had the 400 grit stones handy at the time, I would have done so but I did not. Also, be sure to clean out the grit/dust before you try to reinsert your barrel.
LiteXpress LXL439001 flashlight head with rotary selector and filters
My one action photo and it was blurry! You get the idea. Keep it lubed with the cutting oil and keep moving the unit in and out so you are polishing the whole barrel channel.

This is a down and dirty “git ‘er done” approach and will make machinists cringe. I go slow and test — I would push the barrel in, test and the press it back out if need be. [Click here to see how to make a barrel backout tool].

*IF* you see a bur or squished rivet protruding in the trunnion, then carefully grind that down with a Dremel and polish with the hone. Don’t try to do it all with the hone or you will be removing material elsewhere that you may need – the arms are spring loaded and independent so they will go where ever they can. This is a pro and con.

After a couple of tries, the barrel went all the way in with the press. To be safe, I confirmed the head space using real Manson brand 7.62×39 gages (use real gages folks and treat them well – don’t go cheap). The barrel headspaced just fine so I pressed in the pin and finished the rifle up.

Bottom line, a brake hone can help you carefully remove steel from the front trunnion and get a tight fitting barrel to go in. It worked wonders on this 1969 cold warrior that is now ready to go to the range.
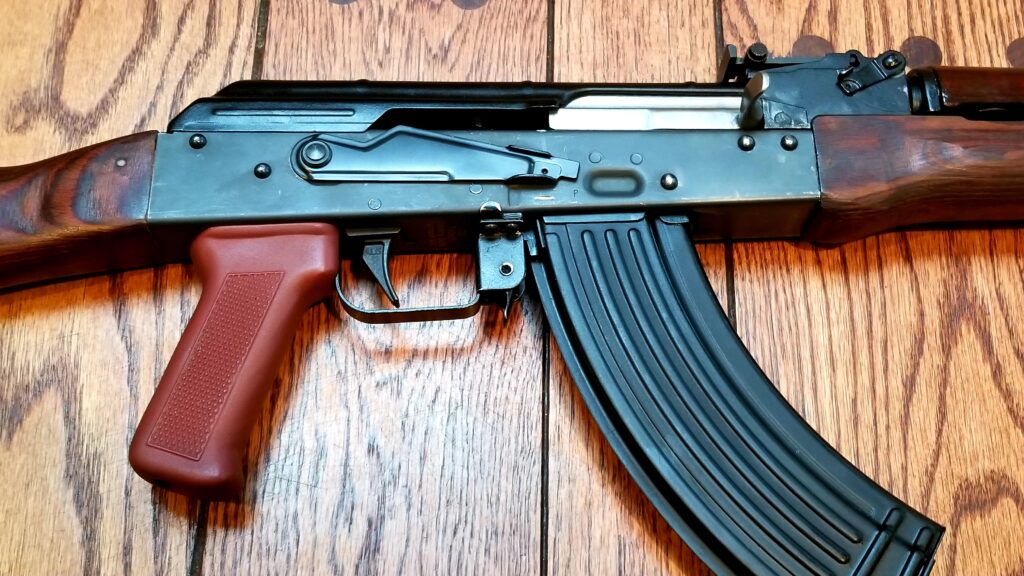
LiteXpress LXL439001 flashlight head with rotary selector and filters
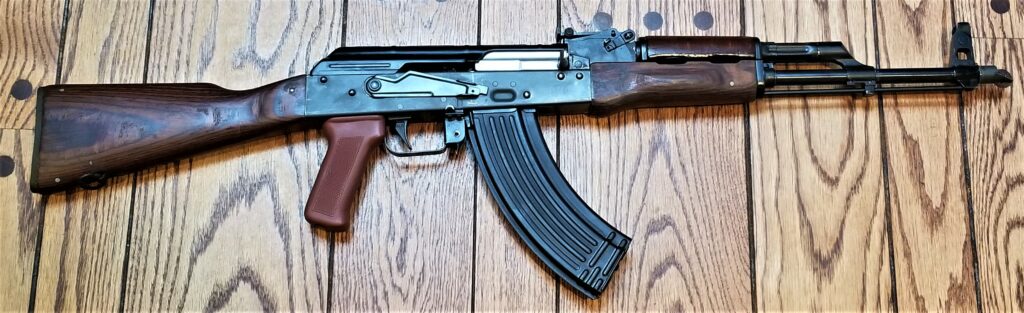
The 1969 Polish AKM rebuilt and ready for the range!
LiteXpress LXL439001 flashlight head with rotary selector and filters
The rifle is wearing one of our Polish Tantal/AKM grips as a 922r compliance part – we make them by hand here in Michigan from a glass fiber reinforced polymer.

Click here to learn more and order one of our Polish Tantal/AKM grips.

LiteXpress LXL439001 flashlight head with rotary selector and filters

One of our fire control group retaining plates. that fits all AKMs and rifles that use standard AKM fire control groups.

It also has an ALG fire control group – they are awesome triggers – and one of our fire control group retaining plates. Click here for our fire control group retaining plates.


Please share the link on Facebook, Forums, with colleagues, etc. Your support is much appreciated and if you have any feedback, please email us in**@*********ps.com. If you’d like to request a report or order a reprint, please click here for the corresponding page to open in new tab.



Video of Spectre, Spooky II and Stinger II AC-130 Gunships – Both internal and External Views. So Cool.

I’ve always found the gunships of interest and always like videos that show the AC-130s. This is the first time I have seen this particular high definition video that shows three models: The AC-130H Spectre, AC-130U Spooky and AC-130W Stinger.

AC-130 gunship fires its cannon in flight, with US Military logo
AC-130 gunship internal view shows large ammo feed for Spectre gunship
AC-130 gunship crew member loads ammunition for Spectre gunship

The AC-130s pack a serious punch with their firepower. For the three models in this video, here is an armaments list:

AC-130H Spectre From 2000 onwards

AC-130U Spooky II

AC_130W Stinger II

Here’s the Video


Please share the link on Facebook, Forums, with colleagues, etc. Your support is much appreciated and if you have any feedback, please email us in**@*********ps.com. If you’d like to request a report or order a reprint, please click here for the corresponding page to open in new tab.


Details on the armaments were obtained from Wikipedia where there is a great page that outlines the AC-130 gunships. Click here to visit it.


Ian McCollum Interviews Max Popenker Who Shares His Deep Knowledge On The History Surrounding the Design of the AK-47

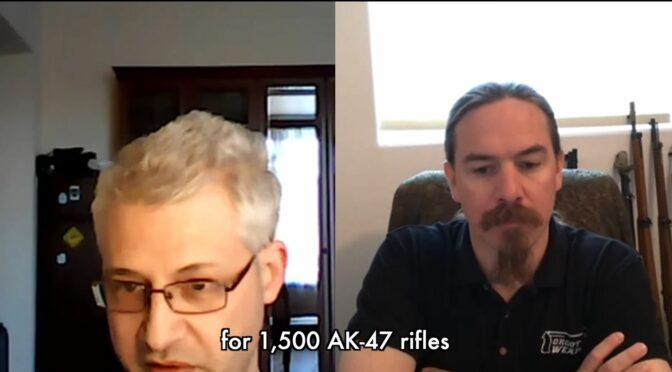
I’m definitely a fan of the AK-47 rifle and am always looking for more insights about the history and design. Ian McCollum of Forgotten Weapons recently hosted Max Popenker, who is a Russian small arms researcher and publisher of Modern Firearms – one of the original firearm research websites. Between the two of them, there is a ton of knowledge.

Compressed air tank connection with tape, ready for draining
The AK-47 design was the result of collaboration and competition amongst designers and didn’t happen magically overnight.

Now the video portion is ok but what is really cool is listening to Max unravel the history that led up to the AK-47 rifle’s design – the desire by the Soviets to develop a system of small arms, the influence of German small arms, and other Russian designs.

Here’s the Video


Please share the link on Facebook, Forums, with colleagues, etc. Your support is much appreciated and if you have any feedback, please email us in**@*********ps.com. If you’d like to request a report or order a reprint, please click here for the corresponding page to open in new tab.


AK-203 Reliability Testing Video From Kalashnikov Media

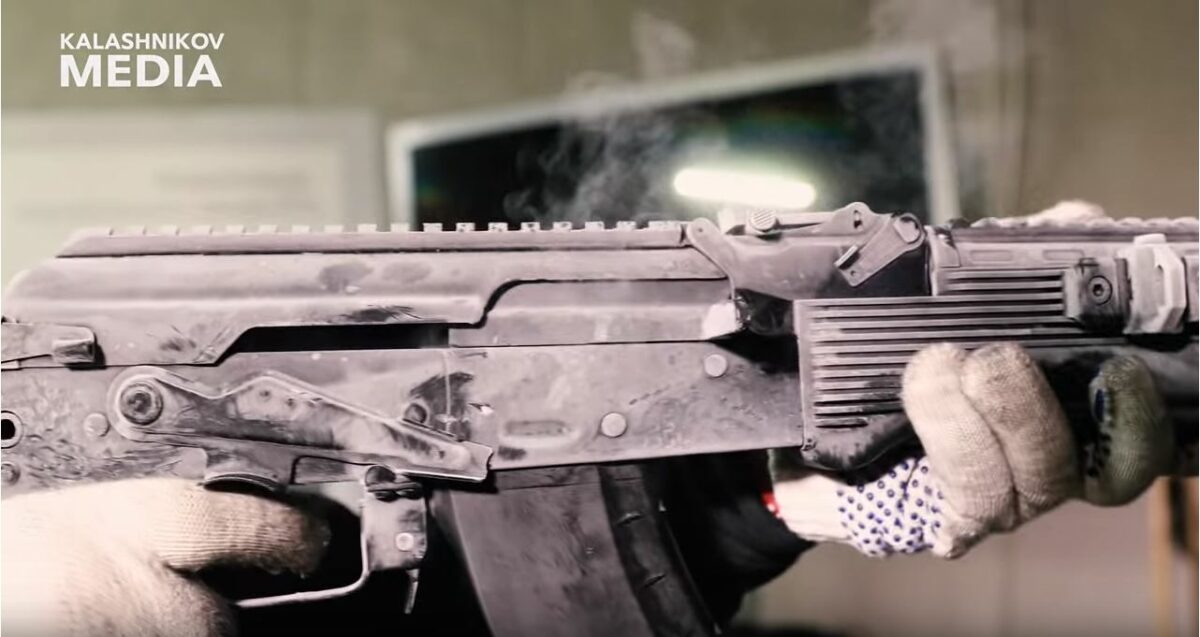
Here’s an interesting but short video of Vladimir Onokoy, who is a Technical Advisor with Kalashnikov Media, showing the AK-203 undergoing environmental testing – freezing cold, desert sand, rain and a combination. Vladimir is speaking in Russian but there are subtitles and it’s not surprising that the AK-203 performs well.

Brass air valve with quick connect fitting for dryer shop compressed air system
Going from the freezer to the test range
Brass air valve with quick connect fitting for dryer shop compressed air system
Covered in very fine sand that is blown on and into the weapon
Brass air valve with quick connect fitting for dryer shop compressed air system

Here’s the Video


Please share the link on Facebook, Forums, with colleagues, etc. Your support is much appreciated and if you have any feedback, please email us in**@*********ps.com. If you’d like to request a report or order a reprint, please click here for the corresponding page to open in new tab.


Forgotten Weapons Reviews Two Galils in 5.56 and 7.62mm

The Galil rifles have always fascinated me. Israel designed and adopted them following the disappointing performance of FAL rifles in the desert. The history is pretty interesting and Ian McCollum of Forgotten Weapons gives you a brief overview in this video.

To learn more, check out these additional resources:


Please share the link on Facebook, Forums, with colleagues, etc. Your support is much appreciated and if you have any feedback, please email us in**@*********ps.com. If you’d like to request a report or order a reprint, please click here for the corresponding page to open in new tab.


My Favorite AK / Kalashnikov T-Shirts – May 2019

As my wife will tell you, I like T-shirts and, of course, I like AK rifles so the two go together! There are so many cool designs out there these days, I thought you might like to see them. Plus, since they are on Amazon, you know you will have their excellent customer service backing you up.


I hope you have some fun looking at the photos at least plus it is time to get ready for summer and having fun outdoors!


Please share the link on Facebook, Forums, with colleagues, etc. Your support is much appreciated and if you have any feedback, please email us in**@*********ps.com. If you’d like to request a report or order a reprint, please click here for the corresponding page to open in new tab.


Upgrading To Truglo TFX Pro Sights On Your Glock Compatible Pistols Including Polymer80s

The factory sights on Glocks leave a lot to be desired in my opinion. I like fiber optic sights but also want sights that generate their own light at night. Fortunitely, TruGlo has upgrade sights for Glocks that can do just that. They are the TFX Pro model sights.

The fiber optics use daylight and are very nicely visible. I know there is a trend for red dot optics on pistols but I would rather opt for simplicity. The other really nice thing about these sights is that they use tritium to generate their own light at night – some sights make you charge them with a flashlight but not these. The only issue to bear in mind is that the Tritium isotopes with flouresce for about 10 years and then be dead. My thinking is that is a loooonnnngggg time from now plus it just would affect the night use at that time.

So, let’s get to it, Installation has two discrete steps – replacing the back sight and then the front sight. Both of these can be done by most home gunsmiths because the Glock design is pretty forgiving. Some pistols require a top notch MGW sight pusher to be removed but not the Glocks. The below is based on my experience installing these sights both on my Polymer 80 based Glock 17 and 34 Gen 3 compatible pistols.

Tools & Supplies

I’m kind of like Tim The Toolman Taylor, if you remember the show Home Improvement. I like tools and don”t need much an excuse to buy one in order to try and do the job the right way. When it comes to the rear sight, some guys use a 3/9″ piece of Delrin or wood dowel to tap the old sight out. Because of my hand tremor, that’s risky for me so I looked into sight pushers and decided to go with the Wheeler Engineering Armorer’s Handgun Sight Tool.

For the front sight, a dedicated Glock front sight tool can make the job a ton easier because they are shallow and have a magnet that will hold the tiny screw in position while you get it started. A regular nut driver is too deep and the tiny screw will fall into it vs. being held nicely in position.

You will need some medium Loc-Tite to secure the front sight screw.

Tape to wrap the slide and protect it is a recommended. I use painter’s tape.

Getting Started

  1. Make sure the weapon is unloaded and clear – no magazine and nothing in the chamber.
  2. Remove the slide
  3. Remove the spring and the barrel to get them out of the way – you don’t need to remove anything else.
  4. Wrap slide with painters tape to protect it from scratches leaving the two sights exposed.
  5. I did my back sight first and then my front sight.

Procedure – Back Sight

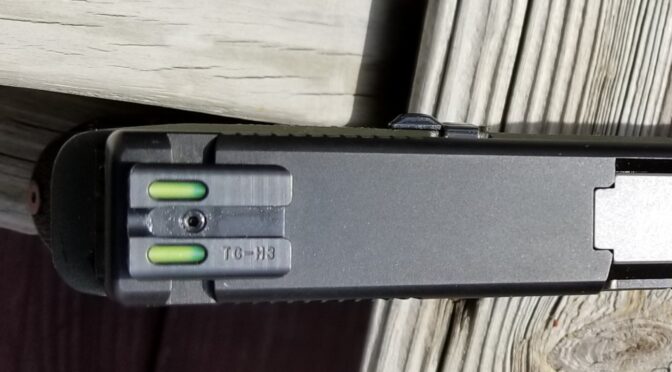
Truglo TFX Pro sight installation tool for Glock compatible pistols
  1. To remove the back sight. I followed the instructions with the Wheeler unit and flipped the pusher over to use the angled face. Mine was set for straight-edged sights from the factory.
  2. I also oiled all of the threads on the Wheeler.
  3. I secured the slide in the Wheeler unit taking care to make sure the slide was the right height so the pusher would engage the sight and not bind on the slide.
  4. The factory Glock rear sight pushed out incredibly easily. I can see why some guys just drive them out. However, I really liked the control the Wheeler gave me.
  5. I then lined up the replacement sight and pushed it into place – checking over and over and making minor adjustments to ensure it was in the center.
  6. The Truglo has secured by a set screw that I backed out, put a dab of blue/medium Loc-Tite on and then tightened down.
  7. That was it for the back now on to the front.

Procedure – Front Sight

Close-up of a Glock rear sight with Truglo TFX Pro sight post
  1. Turn the slide upside down and you will see a small hex head screw that must be removed. I used my Glock Front Sight tool for that.
  2. Push or tap out the original sight.
  3. The replacement TruGlo unit is a tight fit I had to firmly press it into position. It is an interference fit so don’t remove a ton of material so it just falls into the slot cut in the slide. It needs to be pressed in as this helps with alignment and retention.
  4. Put blue/medium Loc-Tite on the screw before reassembly. This is mandatory. If you do not, it will shoot loose over time and you will lose your front sight.
  5. Use the Front Sight tool to reinstall the screw with the Loc-tite and tighten it down.
  6. Done.

Conclusion

I really like the TruGlo TFX Pro sights. They are very visible both during the day due to the fiber optics and at night due to the Tritium. They were well worth the investment. I hope this helps you out.


Please share the link on Facebook, Forums, with colleagues, etc. Your support is much appreciated and if you have any feedback, please email us in**@*********ps.com. If you’d like to request a report or order a reprint, please click here for the corresponding page to open in new tab.

Three Simple and Inexpensive Must Have Upgrades on Glock 17 Gen 1-3 Type Pistols To Improve Handling

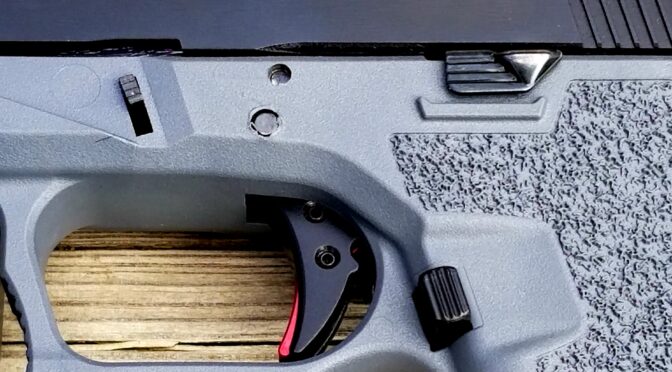
I am learning a great deal about Glocks via the Polymer80 frame based Gen 3 model 17 and 34 pistols I built. In working with the pistols, I found there are three upgrades that were required immediately for me to more readily operate the pistols. Anybody can do these three – replace the slide stop, slide release lever and the magazine release. Fortunately they are relatively inexpensive so let’s step through each in this post.

Slide Lock Lever

Okay, when I started the Glock 34 compatible pistol using the Polymer80 PF940v2 frame, I had never really stripped a Glock before. As soon as I was working with the slide I absolutely hated the barely protruding OEM Glock slide lock lever. Because of my carpal tunnel and years of abusing my hands, I could barely feel the blasted thing let along get enough grip to easily pull it down. Seriously – I hate that little part. It turns out that I’m not alone. A ton of groups make a replacement unit and they just make the slide stop a hair longer and it makes all the difference in the world.

This will take about five minutes. Procedure:

  1. Ensure the weapon is clear, meaning unloaded and no cartridge in the chamber.
  2. Remove the slide
  3. Before you remove the slide stop, note which way the depression is oriented at the top of the slide stop – the new one will need to face the same way.  The hooked face should face rearward.
  4. Use a Glock takedown tool or a small screw driver to reach in and depress the spring that pushes the slide stop up.
  5. When you push the spring down, the existing slide stop can slide right out
  6. While continuing to press the spring down, slide the new one in.
  7. Confirm the orientation is correct – the hooked surface should face rearward.
  8. Test by pressing down on the release – it should spring back up. If not, look to see if the spring fell out or there is debris in the spring channel preventing it from pushing the release back up.
  9. Re-assemble and test your pistol.

Slide Release Lever

The Glock 17 has one of the worst slide releases I have ever felt. It’s a vertical tab that gives you virtually no surface to really push down on. Now, the 34 came with an extended release and that’s where I learned that it is a way better design than what the 17 has. A ton of vendors make and sell their versions. I just bought and installed a Glock 34 slide release on my 17. If you’re keeping count, this means the 34 really on has two upgrades I would recommend as it already has the improved slide release.

The first slide release I tried to do was a pain and took probably 15-30 minutes as I tried to figure things out I’d not seen a Glock’s insides before first hand. The second one took about 10-15 minutes and the third time (when I actually replaced the 17’s slide release lever with the 34 model), it probably took me about 5-10 minutes. In short, there is a learning curve.

Procedure:

  1. Ensure the weapon is clear, meaning unloaded and no cartridge in the chamber.
  2. Remove the slide.
  3. Use the first punch to push the trigger pin almost all the way out from right to left when you are looking down at the pistol with the front facing away from you. This should not take a ton of force. I find some light taps with a small hammer help me but some guys do it entirely by hand.
  4. I said stop short of pushing the pin all the way out because you just need to get it out of the slide release. You thin pull your pin punch back out of the release also but still capturing the trigger.
  5. The slide release lever will lift right out.
  6. Put the new slide release lever in its place.
  7. Push the pin punch back into the release lever to orient it. This worked for me vs. trying to get the pin itself back in. Keeping it all aligned was the trickiest part when I first started.
  8. Push or lightly tap the trigger pin back into place while driving the old pin punch out. Again, the punch is there keeping everything aligned so it’s acting like a slave pin. As you tap the real trigger pin in, the punch backs out.
  9. Re-assemble and test your pistol.

Magazine Release

The other issue I found was that the OEM Glock magazine release was too short for me to easily reach forward with my thumb and drop the mag. Again, found I was in good company because a ton of other people feel the same way. Now, I opted for the Tango Down Vickers extended magazine release because it just sticks out maybe an extra millimeter or so and it makes a huge difference. Some other magazine releases are really only suited for competition because they are easily bumped and the mag released.

This is another quick and easy one. I did it one with a screw driver, once with needle nosed pliers and once with curved hemostats. All three work but I think the curved hemostat is easiest.

This will take about five minutes. Procedure:

  1. Ensure the weapon is clear, meaning unloaded and no cartridge in the chamber.
  2. Remove the slide so you have a clear view down into the magwell
  3. Remove the spring wire from the magazine release by working it out of the groove cut in the side of the mag catch. Look at the replacement unit and you will see the slot I am referring to in the middle of the magazine release that is just big enough for the wire to slide into.
  4. Remove the old unit and slide in the new unit
  5. Move the wire back into the slot and test – it should spring back out when you depress it,

Conclusion

I hope this helps you out. I find my two pistols a lot more manageable with the above upgrades and well worth it.


Please share the link on Facebook, Forums, with colleagues, etc. Your support is much appreciated and if you have any feedback, please email us in**@*********ps.com. If you’d like to request a report or order a reprint, please click here for the corresponding page to open in new tab.


When Strength and Quality Matter Most