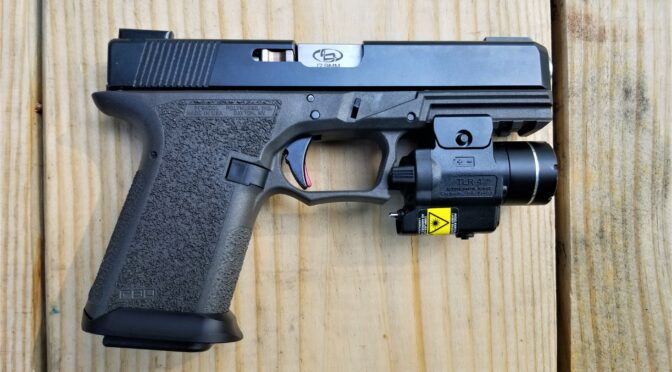
I recently built a Polymer80 PF940CL – their compact long model. This is an interesting variant because it is a their Glock 19 grip but built to use the longer Glock 17 barrel. I had a threaded barrel I could have used but opted to get one of the Storm Lake model 34000 barrels after doing some digging around on their quality. I’m impressed and figured it made since to share a quick review with you.
Storm Lake barrels are made in Tennessee. While not everyone may know their name, they’ve been around since 1983 and sell barrels for 1911s, Glock, Springfield XLs and S&W M&Ps.
Their barrels are made from 416 stainless steel, are hardened to 40-42 HRC and rifling is 1:16LH. The rifling is broach cut to support both jacketed and lead bullets.
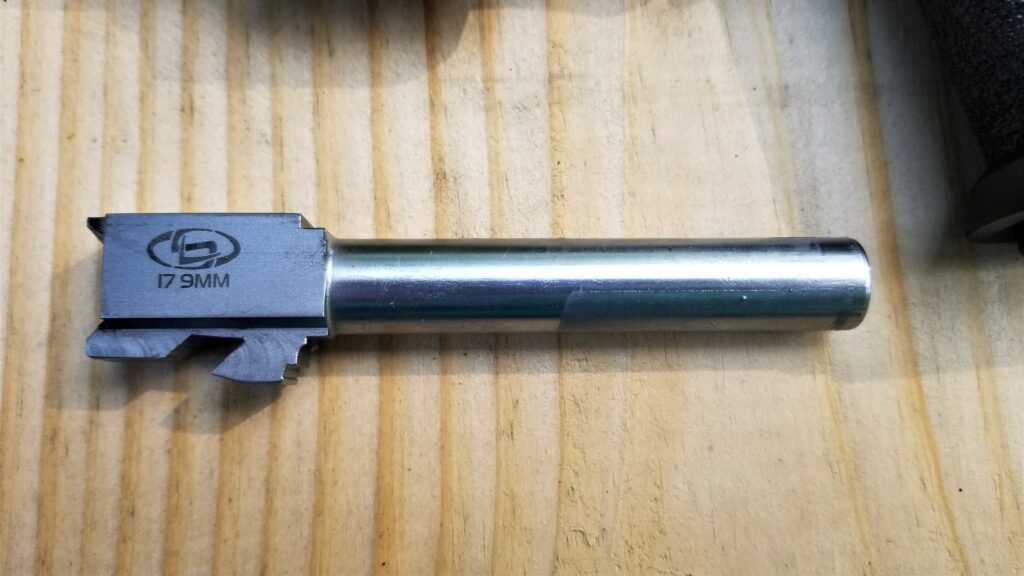
My Glock 17 Barrel
The 34000 is a 9mm 4.49″ long barrel with no ports that weights 0.30 pounds. I don’t plan on running a suppressor or a compensator so there was no real reason to have threading especially if I ever carry it.
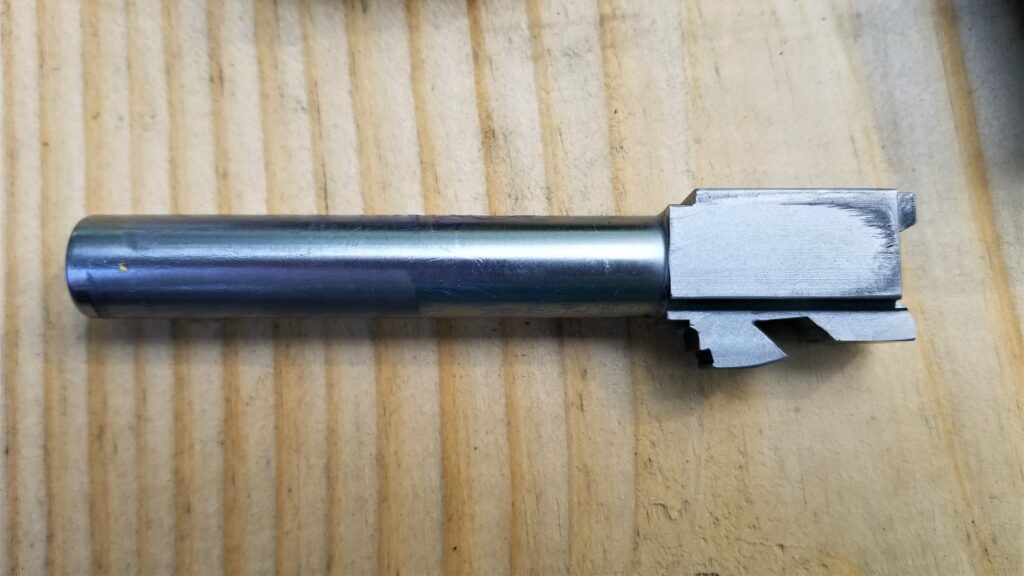
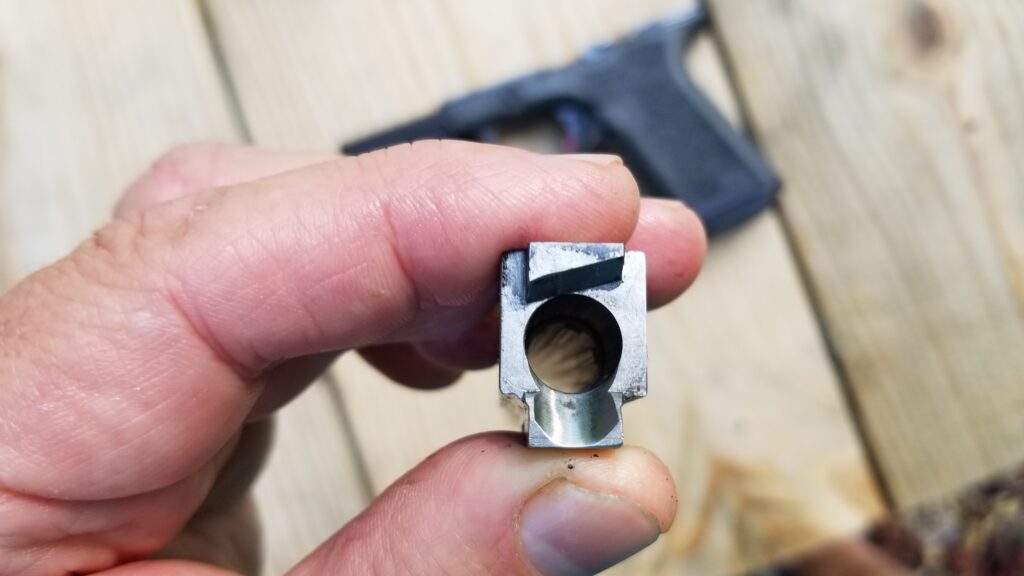
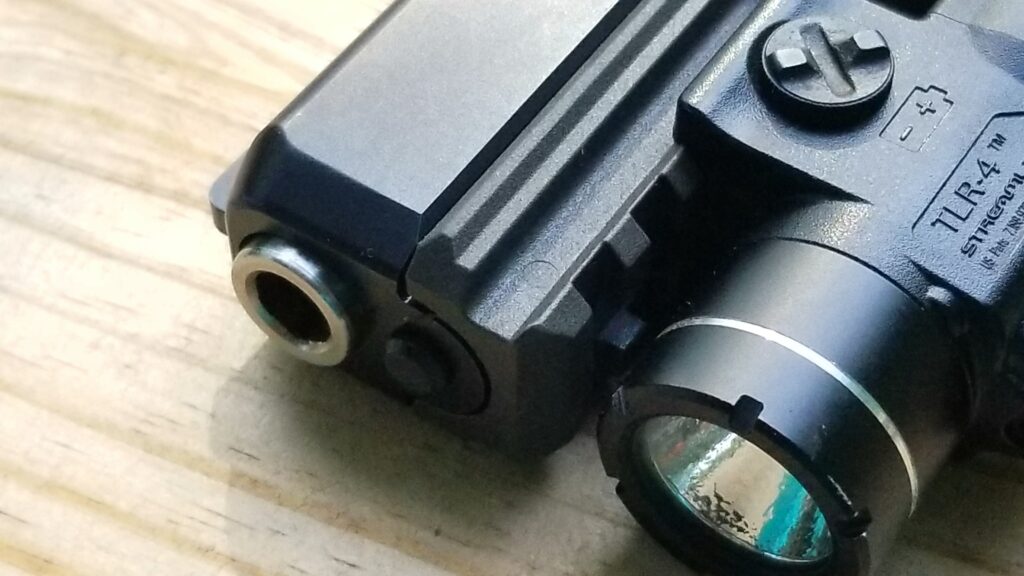
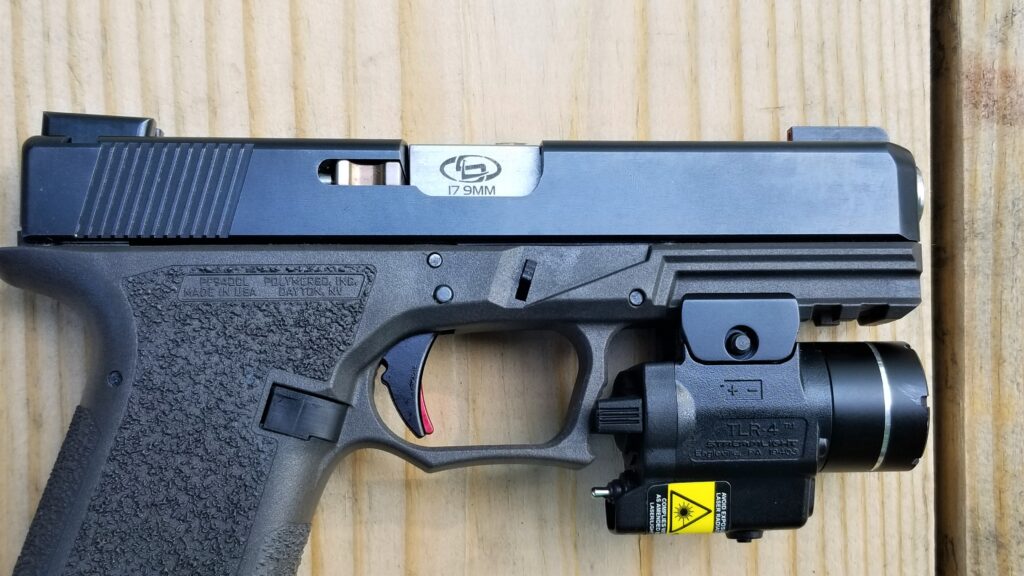
Here’s my 4.49″ 9mm barrel. The black stuff is carbon from shooting. It’s an accurate and reliable barrel.The feed ramp is nicely done. I don’t shoot unjacketed bullets but it worked great with S&B 124gr FMJ , 115 grain FMJ – not sure of the maker – and 124gr Hornady Critical Defense HP rounds.There is a slight crown to protect the muzzle and rifling.Here it is in the PF940CL
All in all, I have nothing negative to say. I am not some super duper target shooter. It’s accurate enough for me under 25 yards and I’ve not had any problems. Now part of that is the build and the magazines too but again, no problems!
I have no hesitation recommending Stormlake barrels. Best of all, I think they are very affordable and show that you don’t always have to spend a fortune to get good quality.
The best selection and prices are actually on eBay. The following are items live on eBay for the G17, 19 and 34 plus other models so just scroll down:
Conclusion
I hope this helps you out!
If you find this post useful, please share the link on Facebook, with your friends, etc. Your support is much appreciated and if you have any feedback, please email me at in**@*********ps.com. Please note that for links to other websites, I may be paid via an affiliate program such as Avantlink, Impact, Amazon and eBay.
One of the firearms that had an impact on me growing up was the iconic Israeli Uzi. In the 1980s you would see them in the news, TV shows and movies all the time. Today, being quite a bit older, what interests me is the history and engineering that led up to this weapon. Suffice it to say that Israel has known conflict even before the country was founded in May 1948 and certainly ever since. Israel first fielded the Uzi in
I’m not going to duplicate the history as there are some excellent resources out there that explain the political climate and how the Uzi came into being.
The Uzi has evolved into a variety of weapons including the micro uzi, semi-auto versions and so forth. What interested me was the full size Uzi that I had grown up hearing so much about and you’d see them with the original wood stock and the metal folding stock.
Over the years, I’ve made many AKs and ARs for personal use. I’ve been really busy but wanted to build something different. For the past several years I have noticed that there are a ton of Uzi kits for sale from the various parts kits vendors and this sparked my interest. For me, part of the challenge of building from a kit is learning how to do so legally and finding all the parts.
I knew I wanted to build a carbine vs. a pistol so that shifted me in the direction of a wood stock for a number of reasons:
To be classified as a rifle, the barrel needed to be at least 16″ with an overall length of 26″.
To get the overall length, that meant I either needed an even longer barrel or a permanently attached stock that would surpass that 26″ minimum.
The resulting carbine would be front end heavy and the wood stock would help balance things out.
I am not a huge fan of my cheek being on sheet metal – I prefer wood with a gently bend.
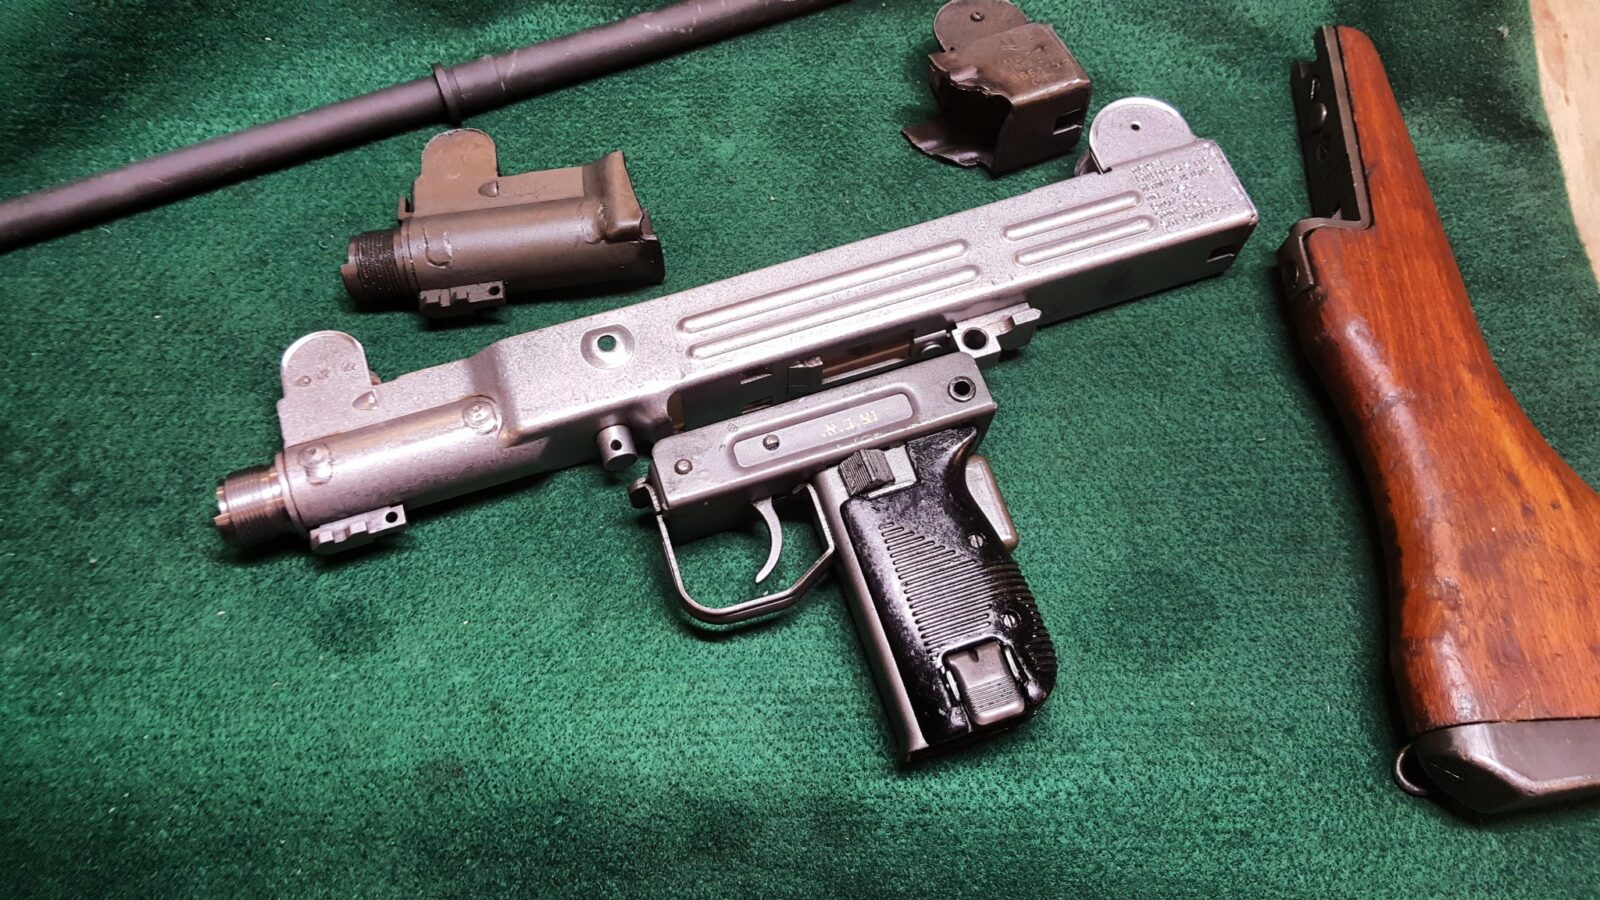
Now you many have a different perspective and that is just fine but due to this I ordered two wood stocked Uzi kits from Robert RTG. I only planned to build one Uzi but purchased a spare kit for donor parts just in case. What arrived were two seriously oiled kits. The wood was a tad beat up as were the pistol grip and handguard panels – probably from being packed with the parts. The bolt and fire control group honestly looked like new.
In terms of the receiver, all my research pointed me to buying one from McKay. They offer just the bent receiver shell and you can do all the welding or a fully welded receiver that is all set for semi-auto use and ready for you to assemble with. I opted for the ready-to-go model and based on McKay’s reputation, I also ordered my 16″ 1:10 twist 9mm NATO chambered barrel from them also. I placed my order direct with McKay, had them ship it to my FFL, Scott Igert, and it arrived a week later.
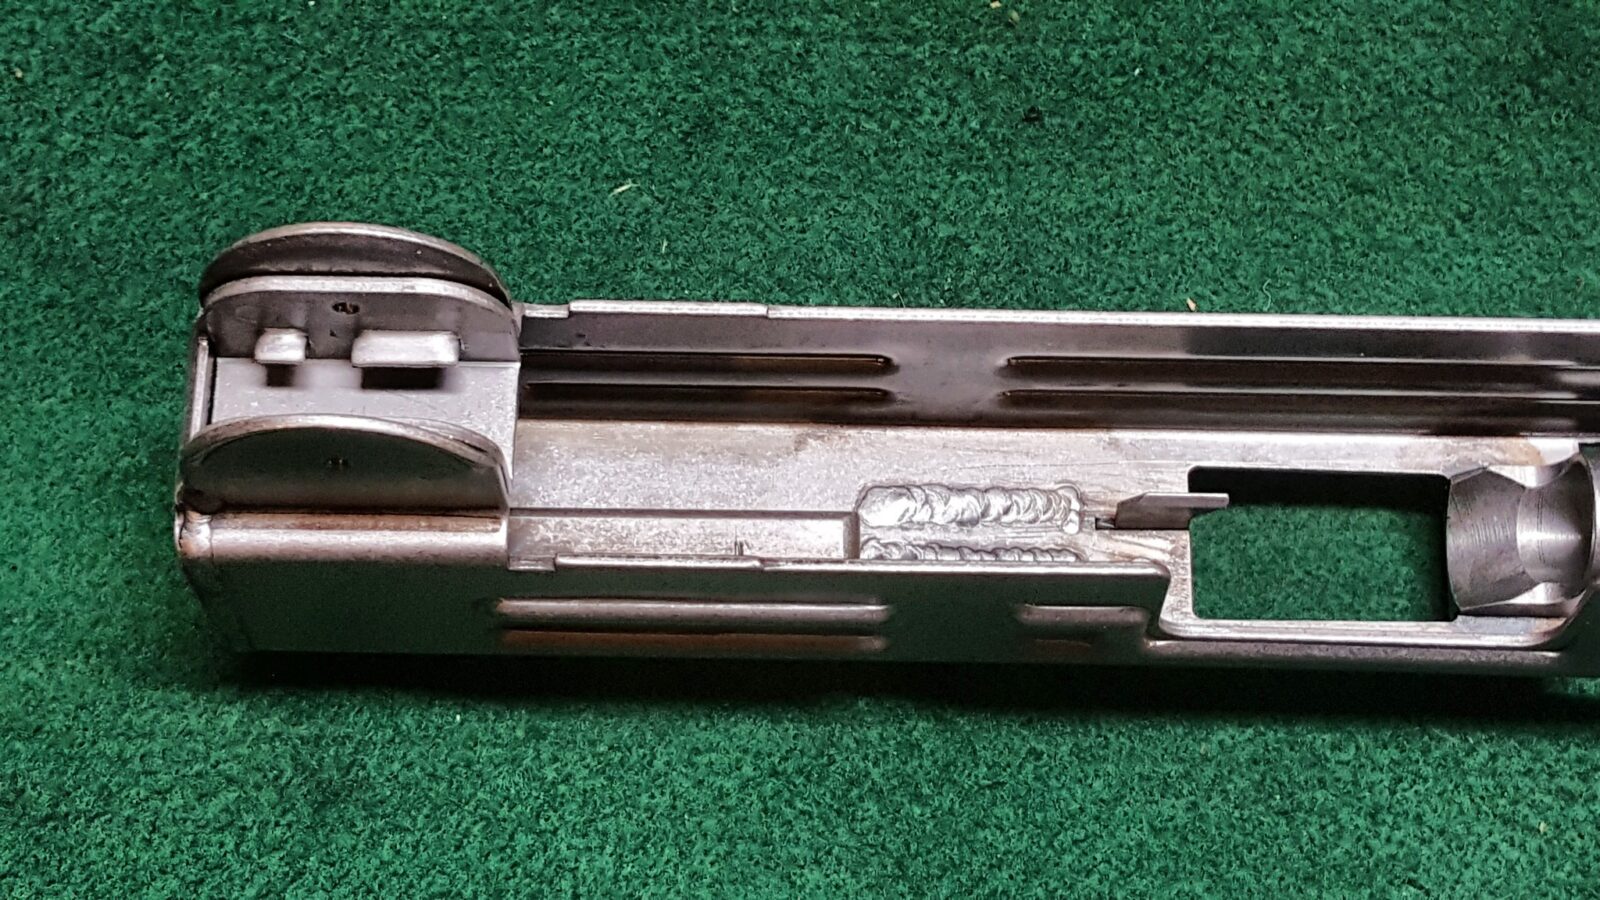
McKay really did a real nice job on the receiver. Here it is with some of the original stubs sitting by it:
Here are the details that McKay took care of when they make their fully welded receiver:
The front trunnion has a reduced inner diameter to prevent installation of a military model
The rear barrel support ring must not allow a military barrel to be installed
The bottom of the semi-auto feed ramp will block a full auto sear – in other words, it is just a tad too long for the full length original sear to fit.
The right side of receiver behind the ejection port has a block bar welded in place that prevents the installation of an original full auto open bolt.
The other plus is that everything above is American made so that means the receiver and the front trunnion count as US-made parts. By the way, in terms of 922r, an Uzi has 13 parts on the 922r parts list so that means three must be replaced with US parts to meet the maximum limit of 10 foreign parts. The McKay receiver, front trunnion and US-made barrel will enable you to meet the parts count requirement.
By the way, there are a lot of other posts about how to do an Uzi:
At any rate, let’s wrap this post up and will discuss the the parts you will want to remove from the old kit.
Note, I have to buy all of my parts – nothing here was paid for by sponsors, etc. I do make a small amount if you click on an ad and buy something but that is it. You’re getting my real opinion on stuff.
If you find this post useful, please share the link on Facebook, with your friends, etc. Your support is much appreciated and if you have any feedback, please email me at in**@*********ps.com. Please note that for links to other websites, I may be paid via an affiliate program such as Avantlink, Impact, Amazon and eBay.
In this ATF letter, the author asked the ATF’s opinion on a number of great AR pistol related questions. I am paraphrasing a few points I found important to help folks doing full text searches for opinions:
1) An AR lower receiver is neither pistol nor rifle until it is built the first time. If you want to make a pistol, a lower receiver must *never* have been built in a rifle configuration.
2) AR pistols do not have a barrel length restriction.
3) AR handguards can be used on an AR pistol
4) An AR rifle and pistol can be in the same household — note, and this is a personal comment, what got a guy in trouble years ago was that he had only an AR rifle and a pistol upper with no lower to mount it on. I don’t remember all of the details but the main thing here is that you never want it to look like the only reason you have a pistol/SBR upper is to put in on your AR that is legally classified as a rifle.
5) Magpul angled fore grips (AFGs) are permissible on the bottom accessory/picatinny rail.
I recommend people print and keep copies of letters just in case they need to show someone that some aspect of a weapon was “approved” by the ATF at some point. Just bear in mind that ATF letters are not absolutes but it helps to have them handy if asked. A state or local government may have their own more restrictive regulations as well so this may not mean AFGs are legal for everyone everywhere.
Legal Disclaimer: I am not an attorney and am not giving legal advice. I am just passing this information along and it is up to you to determine what you can/can’t do.
AK rifles use press-fit barrels wherein the barrel is pressed into either the forged trunnion (if it is a sheet metal receiver) or the receiver and then held in place by the 7mm barrel pin. As part of this, the barrel must be headspaced to the bolt to help ensure the cartridge is properly seated. A challenge that commonly happens is that a builder inserts the barrel using whatever method ranging from a big hammer to a hydraulic press but when they try to use their headspace gauges, they find they have gone too far. Alternatively, folks trying to insert a barrel back in that was already headspaced notice that they overshot the barrel pin groove when looking through the holes across the groove in the barrel. Regardless of how the mistake is identified, the question becomes “what do I do now?”
There is a relatively quick and easy solution – use a long shaft to drive the barrel back out. These tools are generically called “barrel back out tools” and you can make one many ways. They can all be summarized as having a long shaft to reach through the receiver to the chamber end of the barrel and then either a copper or brass fitting to protect the chamber from being damaged by the rod. I have seen everything from guys using socket extensions, to pieces of round steel, to custom purpose built tools.
One time, I pressed in a Yugo M72 barrel too far and had to press it back out so I came up with a quick and easy tool that I kept in my tool box and even sold for a while until I stopped because the profit margin just wasn’t sufficient. With that said though, it’s worth sharing with folks just in case they wind up in a jam.
Here is what you need:
One 1/2″ grade one or two bolt that is about 12″ long (or however long you want to make it)
One 1/2″ grade one or two steel nut
One 1/2″ brass nut
For my first tool, that I still have, I just went to my local Ace Hardware store and bought the parts.
Basically, the long bolt allows you to reach into the receiver to the chamber end of the barrel to apply pressure. I used a really long bolt because a Yugo’s rear trunnion is solid and you have to go down at a long shallow angle to press the barrel back out. With AKMs or other AKs with open rear trunnions, you can simply go straight from the back to the front. Note that you need to clear the ejector without damaging it. I purposefully used a low grade bolt as I did not want it brittle from hardening.
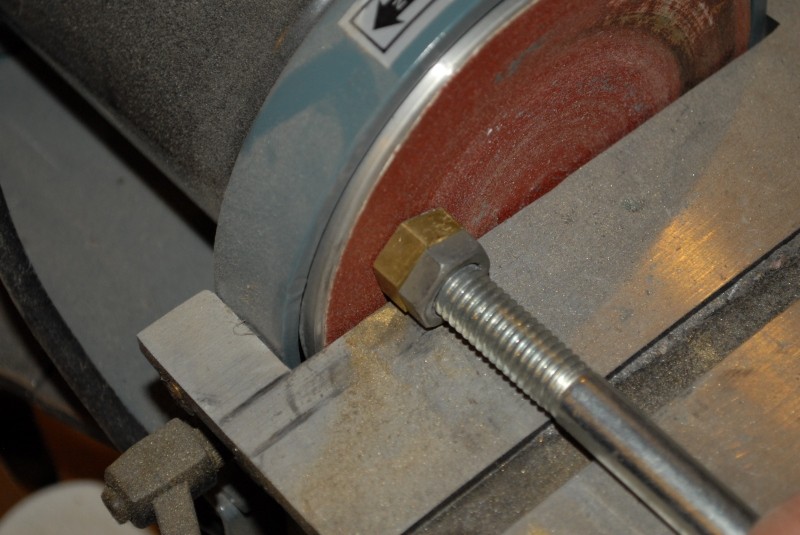
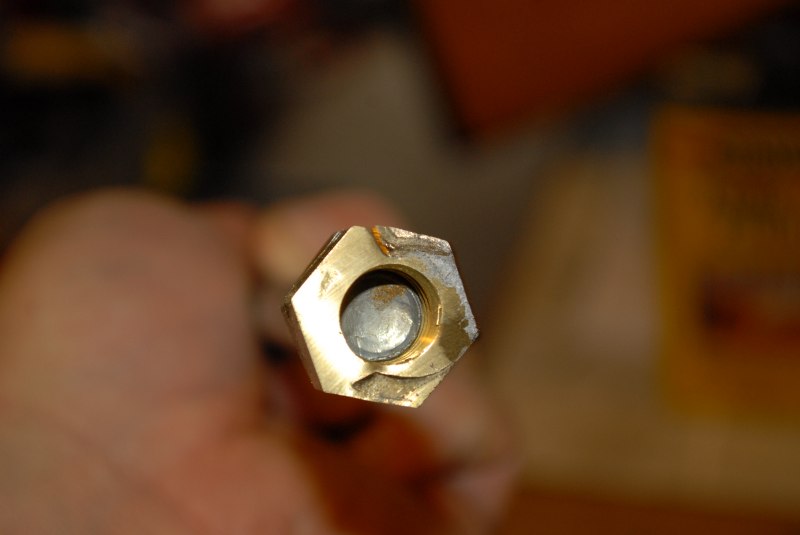
The steel nut needs to be ground down enough so that the combination of it and the brass nut can fit in the area where the bolt normally locks up. You want as much brass as possible to be in front of it and the brass nut should protrude from the bolt. You don’t need a great deal of the brass nut threaded on the bolt as the steel nut is backing it up to provide much needed support. I would grind and test repeatedly until the timing was such that the two nuts matched up just right when I tightened them down.
Use the bolt to hold each nut and sand them down. The steel nut is there to reinforce the brass nut.I don’t have exact dimentions so you can experiment. The steel nut is about half it’s original thickness and the brass is about two thirds. You need enough steel for strength, enough brass to be able to deform yet the assembly must fit in the pocket area inside the trunnion just before the chamber.
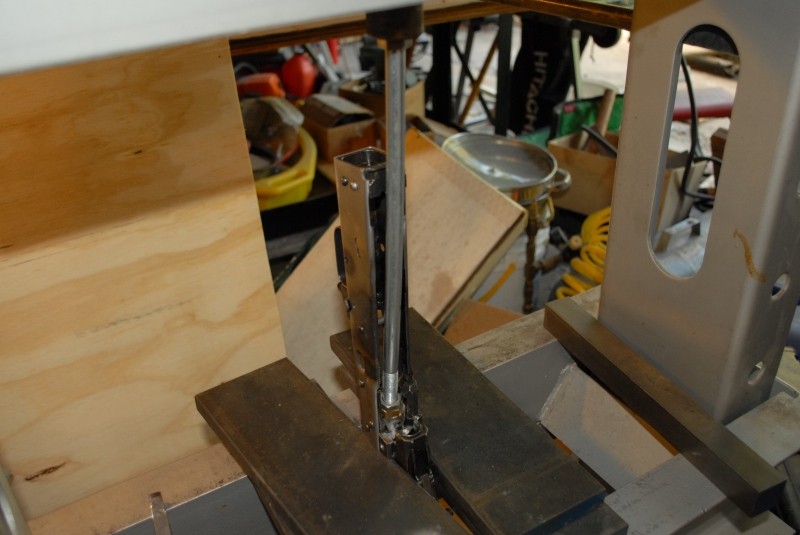
Note, I used to grind the brass nut to match the extractor notch in the barrel but have stopped doing so as the brass simply deformed anyways. The following photo shows how the brass simply bends and conforms to the extractor notch plus you can see that the brass nut extends well forward of the steel bolt.
I just let pressure form the end of the brass nut however it needs to. I just grind the brass nut flat. Very important note – the brass nut must extend past the end of the bolt by about 1/4-3/8″ thick. The longer the better. You do not want the steel bolt to contact the chamber even when compressed – just the brass. I talked to guys who used to put two real copper pennies on the end of the barrel to press it out so I used that as my minimum thickness.
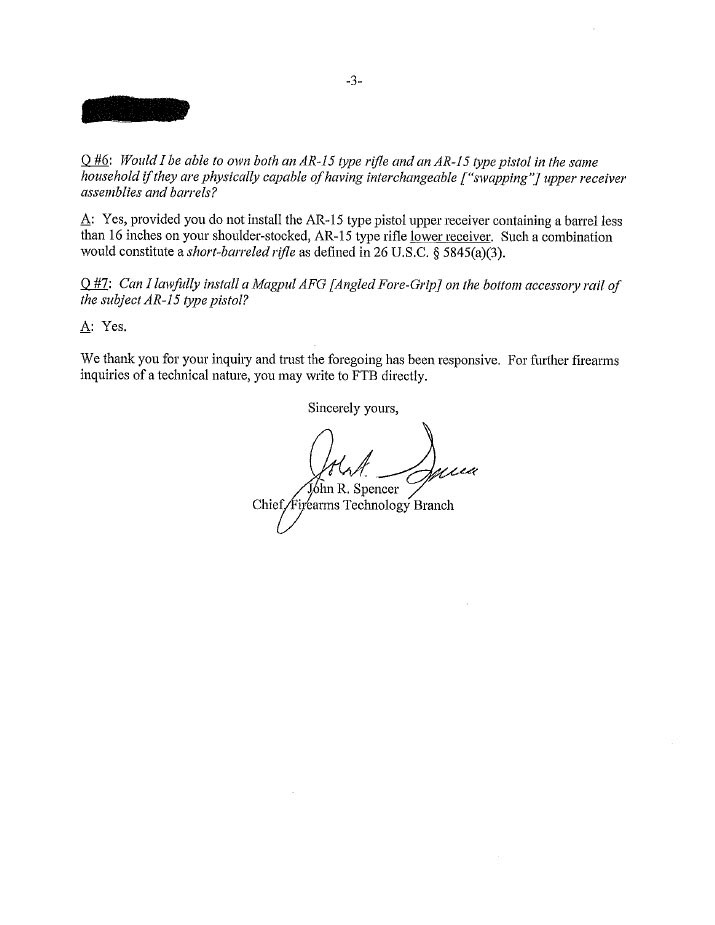
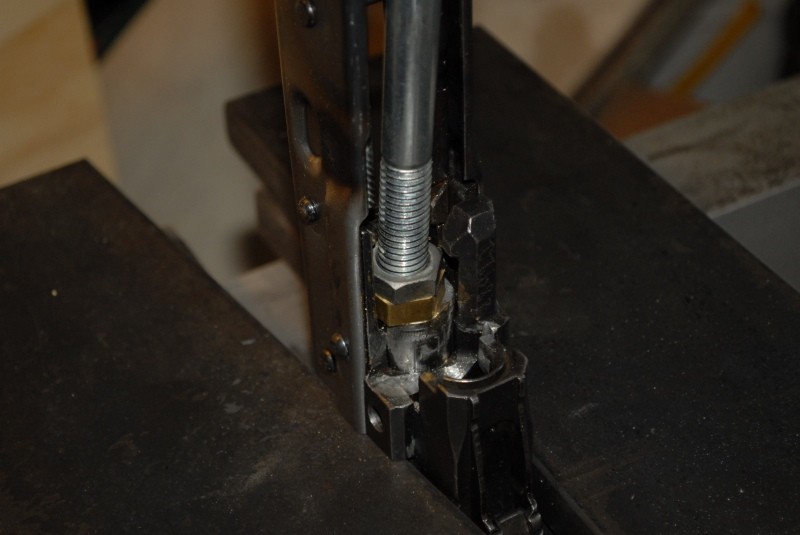
In the next photo, you can see the shallow angle I used to press the Yugo barrel back out. Again, you would not need the same if you could go straight through the receiver:
I actually have a few of these pushers made and ready to use. I have a long 12″ one to be able to reach down at an angle in Yugos (their rear trunnion is solid) plus a much shorter one – maybe about 6″ that I have when I am just working with a barrel in a trunnion.This is actually under load. Only the brass nut is touching the end of the barrel.
Historically I did all my barrel work with my 20 ton press but now I mainly use air tools except for really stubborn parts. When I originally did this post in 2014, I used my press.
With the M72, I was able to very simply move the barrel back out a bit, turn things around and then press the barrel in until the proper headspace was achieved. The tool worked so well that I have it in my tool box still and have used it a few more times plus I did make a dozen or so and sold them to guys who had good luck as well.
As a caution, make sure the trunnion is well supported – you can see I have it resting on the press plates in the photo above. Make sure everything is set up, stable and that you are clearing everything else before you apply pressure with the press.
If you apply pressure and nothing happens, stop and carefully inspect what is going on – the tool may be sitting on something other than the barrel. More force may damage parts and you do not want that.
Lastly, be safe – take your time and play it smart. A press can develop massive pressure. Wear safety glasses and do not dream of having your hands anywhere in, on or around the parts being pressed. All things considered, backing a barrel out should take very little force but you do not want an accident to happen. If you are tired and frustrated, stop and wait until the next day or when you have relaxed and calmed down. Most of my personal accidents have happened when I was in a rush, tired or angry – don’t be me 🙂
In closing, I hope this helps you in your building efforts!
Note, I have to buy all of my parts – nothing here was paid for by sponsors, etc. I do make a small amount if you click on an ad and buy something but that is it. You’re getting my real opinion on stuff.
If you find this post useful, please share the link on Facebook, with your friends, etc. Your support is much appreciated and if you have any feedback, please email me at in**@*********ps.com. Please note that for links to other websites, I may be paid via an affiliate program such as Avantlink, Impact, Amazon and eBay.