Tag Archives: Polymer80

Glock Truglo Tritium and Fiber Optic Sights Are Amazing Improvements!

A fellow emailed me wanting to upgrade his from the generic OEM Glock sights that I don’t think really excite anyone to something that would be more visible in general and also work in the dark. My answer was immediate – go with the TRUGLO TFX Pro Tritium and Fiber Optic Xtreme sights.

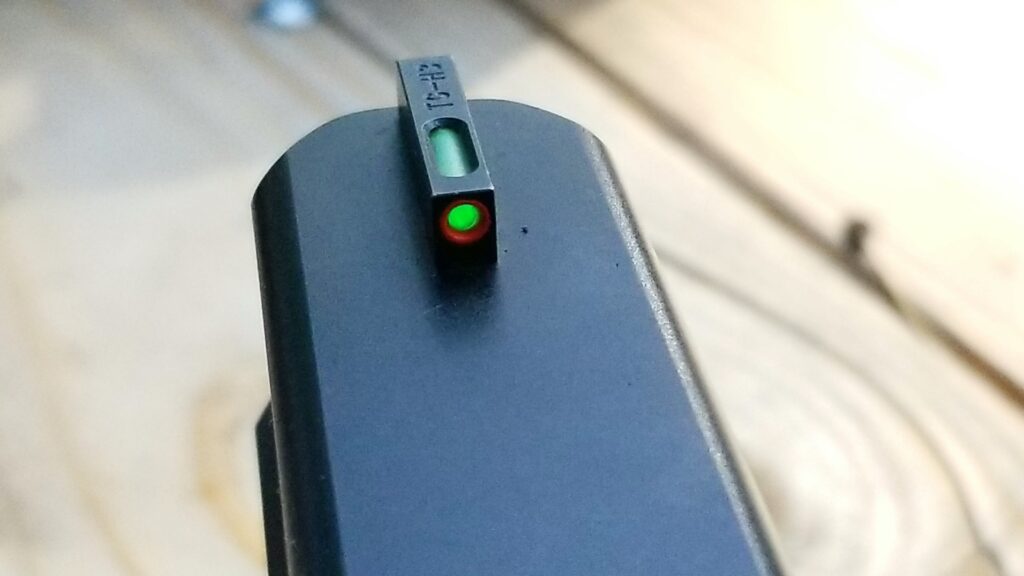
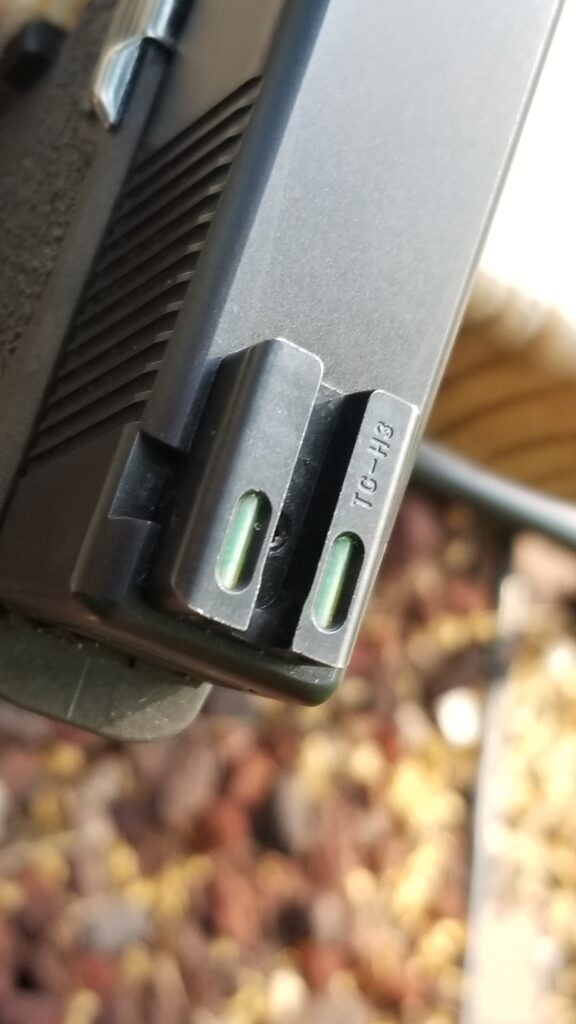
The featured photo above shows how bright they are on my G17 slide on it. I bought these sights by the way – so you are getting my honest opinion.

Folks, these are my hands down favorite sights for a number of reasons:

  • They are CNC machined from steel and have a durable black nitride finish — they are not soft plastic.
  • They do not need batteries – the lit dots are via fiber optics when there is light and sealed tritium when it is dark so you are covered regardless of the light available. The tritium ought to fluoresce (emit light) for about 10-20 years and I’ll worry about replacing them then.
  • I really like the three green dot configuration – two on the rear sight and one on the front. The front also has an orange ring that you can see when there is light but is green when operating off the tritium only.
  • The rear sight goes into the slide’s groove very easily and is then secured with a set screw. Some sights can be a bear to install but not these.
  • The rear sight is big enough that it can help you rack the slide one handed in a one-handed emergency.
  • They have a 12 year warranty.
  • They are assembled in the USA – the tritium capsules are made in Switzerland.

What Glock models are supported?

Because these are so popular TRUGLO is making a variety of models to support the different Glock configurations that are out there. I assembled the following table and you can also check their webpage if you want:

TG13GL1PCGlock® 17 / 17L, 19, 22, 23, 24, 26, 27, 33, 34, 35, 38, 39, 45 (Excluding M.O.S. models)
TG13GL2PCGlock® 20, 21, 25, 28, 29, 30, 31, 32, 37, 40, and 41 (Excluding M.O.S. models)
TG13GLAPC
(TFX front, Adjustable Rear)
Glock® 17 / 17L, 19, 20, 21, 22, 23, 24, 25, 26, 27, 28, 29, 30, 31, 32, 33, 34, 35, 37, 38, 39, 41, 45 (Excluding M.O.S. models)
TG13GL3PCGlock® 42, 43, 43x, 48; Honor Defense® (all models)
Source: https://truglo.com/spare-quiver-mount-spare-quiver-mount

Personally, I use the TG13GL1PC on a G17 and G34. I bought both off sight sets off Amazon – click here to see the large selection there.
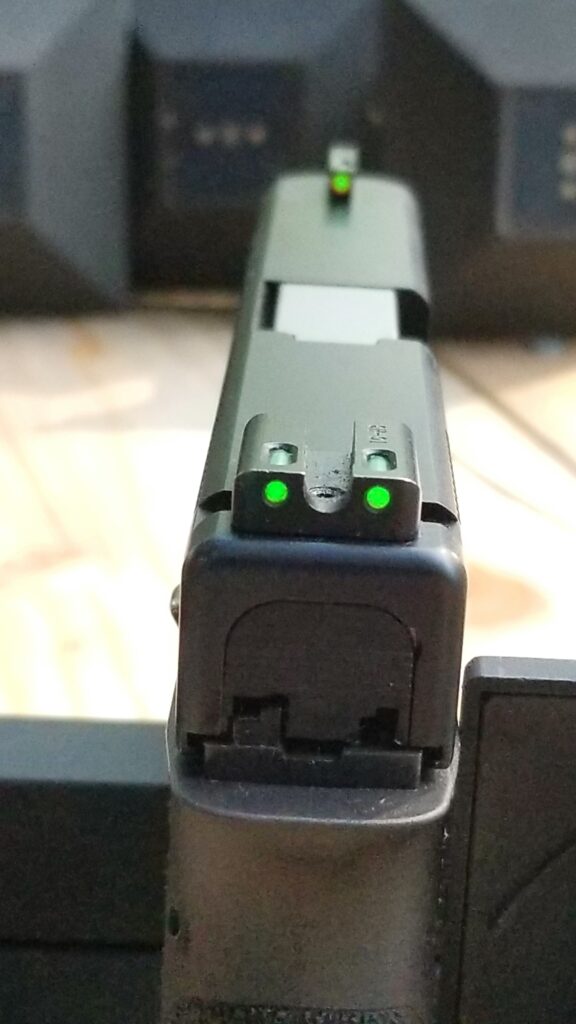
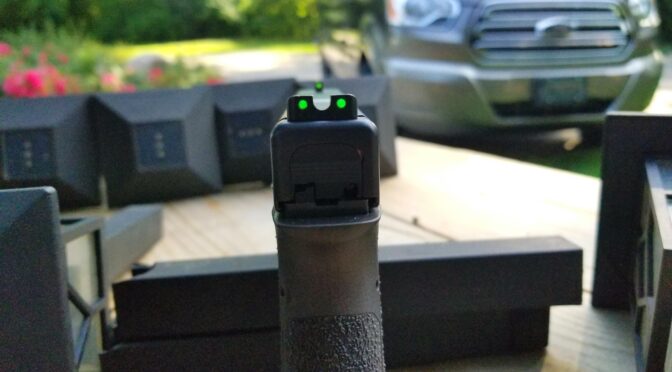
This gives you a better view of the sights overall. This is the TFX Pro TG13GL1PC with the fixed rear sight. I really like the sight picture these give day or night.
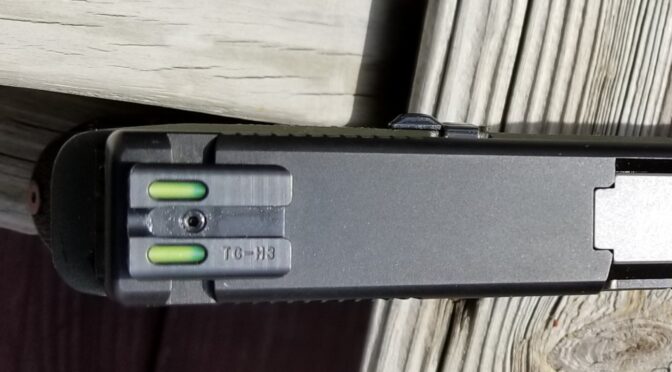
Here’s the rear sight and you can just barely see the set screw that secures the sight between the two “ears”. The slot at the top of each fiber optic is where it collects light to illuminate the dot. If there isn’t any light then that is where the tritium capsules take over.
Here’s the front sight. The orange ring is nice during the day and you only see the green tritium dot in the dark.
Well, trying to take a photo in the dark of three green dots with a cell phone camera was an experience. I went in a basement room and shut the door to cut off light. It’s fuzzy but you get the idea – all three dots are nicely lit in any lighting condition.

Do they have lower cost models also?

Yes, they do. The Tritium series just has the tritium for illumination in the dark and show as bright white dots during the day.

TG231G1Glock® 17 / 17L, 19, 22, 23, 24, 26, 27, 33, 34, 35, 38, and 39 (Excluding M.O.S. models)
TG231G2Glock® 20, 21, 25, 28, 29, 30, 31, 32, 37, 40, and 41(Excluding M.O.S. models)
TG231G1AGlock® 42, 43
Source: https://truglo.com/catalog/product/view/id/2068/s/tritium-tritium/category/19/

They also make a Tritium Pro series that builds on the Tritium base model and adds an orange ring to the front sight plus the back sight is bigger and that makes it easier if you need to rack the slide with one hand.

TG231G1WGlock® 17 / 17L, 19, 22, 23, 24, 26, 27, 33, 34, 35, 38, and 39 (Excluding M.O.S. models)
TG231G2WGlock® 20, 21, 25, 28, 29, 30, 31, 32, 37, 40, and 41(Excluding M.O.S. models)
TG231G1AWGlock® 42, 43
TG231G1MWGlock® MOS 17, 19, 22, 23, 24, 26, 27, 33, 34, 35, 38 and 39
TG231G2MWGlock® MOS 20, 21, 25, 28, 29, 30, 31, 32, 37, 40 and 41
Source: https://truglo.com/catalog/product/view/id/2069/s/tritium-pro-tritium-pro/category/19/

Do they support other brands and models of pistols?

Definitely. These are very popular lights given their great combination of quality at a fair price. I tend to see the best prices on Amazon – click here to see them.

Conclusion

I find these sights to be an incredible improvement over the plain Glock sights – they are easy to see and aid with rapid aiming. I really do like these sights and use them personally. I strongly recommend them.

I hope this helps you out.


Note, I have to buy all of my parts – nothing here was paid for by sponsors, etc. I do make a small amount if you click on an ad and buy something but that is it. You’re getting my real opinion on stuff.

If you find this post useful, please share the link on Facebook, with your friends, etc. Your support is much appreciated and if you have any feedback, please email me at in**@ro*********.com . Please note that for links to other websites, I may be paid via an affiliate program such as Avantlink, Impact, Amazon and eBay.


What sight pusher do I use and Recommend for my Pistols?

A fellow emailed me the other day asking what I use to remove and install sights on my pistols. For those of you wondering what a “sight pusher” is, it is a device that is used to push sights around on a handgun and can be used to install, adjust or remove the sights.

Of course, one size does not fit all so you tend to see pushers that are pistol specific, ones that are designed to with modular shoes, and ones that really shouldn’t have been made in the first place. Yeah, unfortunately I am not joking on that last part. Investigate any pusher before you buy it. Some are sloppy and if the shift or slip, they can put one hell of a scratch in your otherwise nice pistol.

Option #1: For pros who need to support many different pistols, MGW makes the best modular pusher

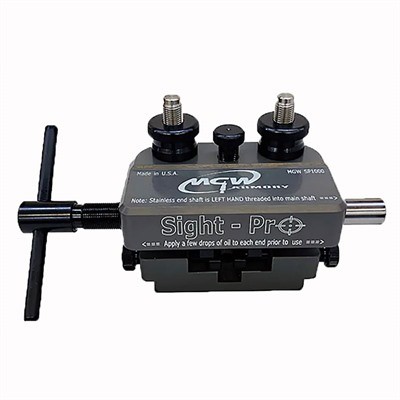
My good friend, Scott Igert, owns Michigan Gun Exchange and has been changing sights for his customers for many years. Because he has to deal with a variety of pistols and the job must be done right, he swears by his MGW (Maryland Gun Works) Sight-Pro pusher. It’s modular and comes with a 30 degree block for Glock and HK sights. In addition, there are a number of different pusher blocks available for use on other pistols.

Here’s a video from MGW in case you’d like to learn more:

Note, MGW also has a number of pistol model specific tools that work on just the one type of weapon. I’ll include them at the end of the post – they are good and just too many to list.

Option #2: Personally, I use the Wheeler Armorer’s Handgun Sight Tool

I work mainly with Glocks and 1911s and the Wheeler unit has worked just fine for my needs. It costs around $138 and so it’s economical. It’s very well made and hasn’t let me down after maybe a dozen uses in two years – again, I’m not using a pusher practically every day like Scott is.

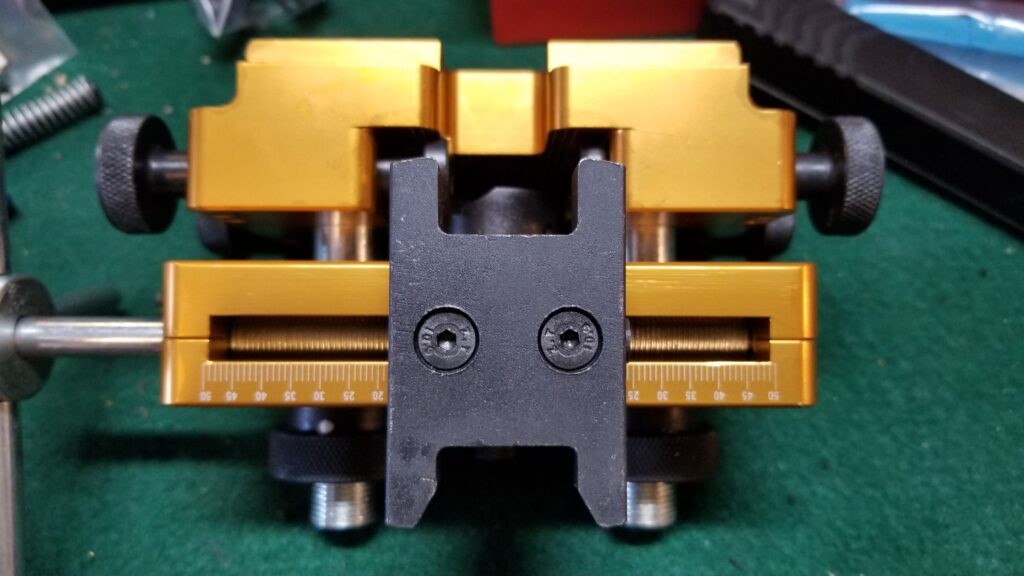
One important thing to consider is that it does not have the flexibility of the MGW – Wheeler advertises it for use with 1911s, Glocks and M&Ps but I have read of a ton of other pistols being involved so do some searching before you buy. Unlike the MGW’s shoes, With the Wheeler, you can flip a plate in the back and the pusher surface that goes against the sight is either straight or angled depending on what you need.

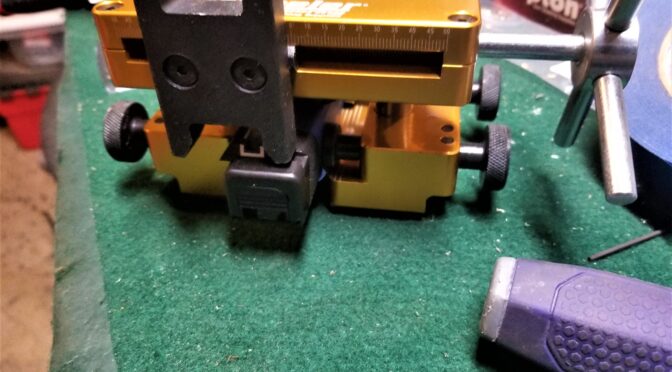
By removing those two allen screws, you can flip the pusher around to either be the side with angled or straight pushing surfaces.
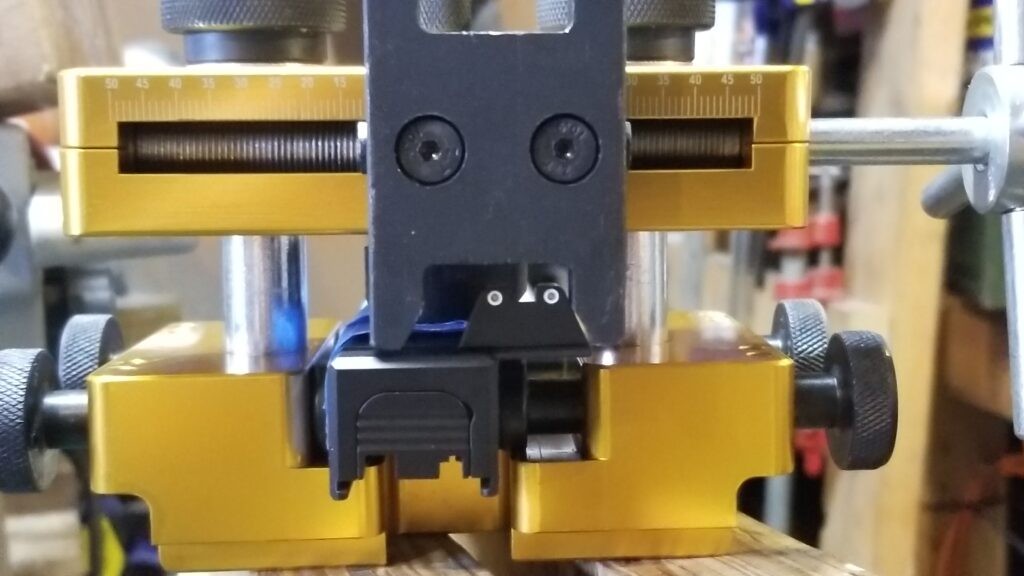
Here I am installing a suppressor height Trijicon sight on a Glock 34 slide.

The following photos let you see the Wheeler pusher from different angles – click on one to see them full size.

Here’s a video from Wheeler that will show you more about their tool:

Amazon sells the Wheeler Engineering Armorer’s Handgun Sight Tool and that’s where I bought mine. They also have a ton of copycat tools that folow the same color scheme. My experience with knockoffs is that they frequently cut corners that can come back to haunt you such as poor hardening, inferior metal, poor fitment, etc. Be sure to get a Wheeler – they have an online store within Amazon and you can click here to go there,

Summary

You’ll notice that I am recommending two pushers for different audiences. For pros wanting to do this for a living, get the MGW Pro-Sight because of the need to support a variety of pistols. For people like me who have an occasional sight to do with a supported pistol, go with the Wheeler.

I hope this helps you out.

3/12/24 Update: The Wheeler is still working just fine. I have no hesitation recommending it.


Note, I have to buy all of my parts – nothing here was paid for by sponsors, etc. I do make a small amount if you click on an ad and buy something but that is it. You’re getting my real opinion on stuff.

If you find this post useful, please share the link on Facebook, with your friends, etc. Your support is much appreciated and if you have any feedback, please email me at in**@ro*********.com . Please note that for links to other websites, I may be paid via an affiliate program such as Avantlink, Impact, Amazon and eBay.


Are ETS Glock Magazines Any Good?

There seems to be two schools of thought when it comes to magazines for Glock Pistols, Polymer80 Pistols and the myriad other arms that can use the reliable Glock magazine design. One will tell you that only Glock magazines are reliable. The other school will tell you that there are other magazine makers out there that work just fine as well. I subscribe to the latter and think that there are other magazine makers that turn out quality products and ETS is one of them.

“ETS” stands for Elite Tactical Systems and they have what they call “The ETS Way” that espouses providing quality products and taking care of customers. To do that they have a 30-day money back guarantee, lifetime warranty, their products are made in the USA and they pride themselves on exceptional customer service.

Just to be clear, I don’t work for them and this isn’t some paid endorsement – folks ask me questions and eventually I write a blog post after a quick reply via email. That’s how this post came about.

I’ve bought and used probably a dozen or more of their Glock magazines over the years and have never had a problem including storing some of them fully loaded for over a year now. They support quite a few other platforms as well and I want to try their new AR magazines.

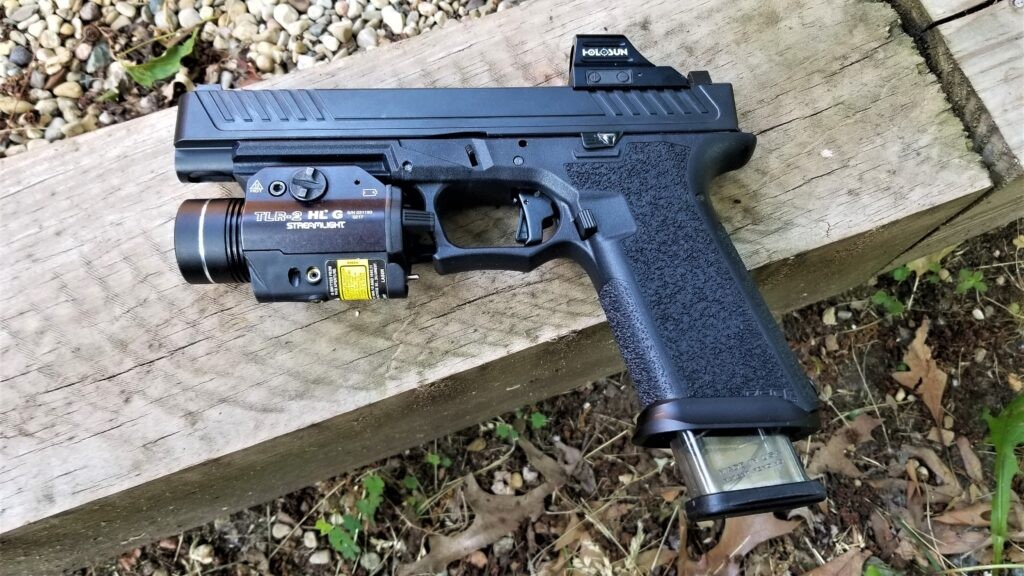
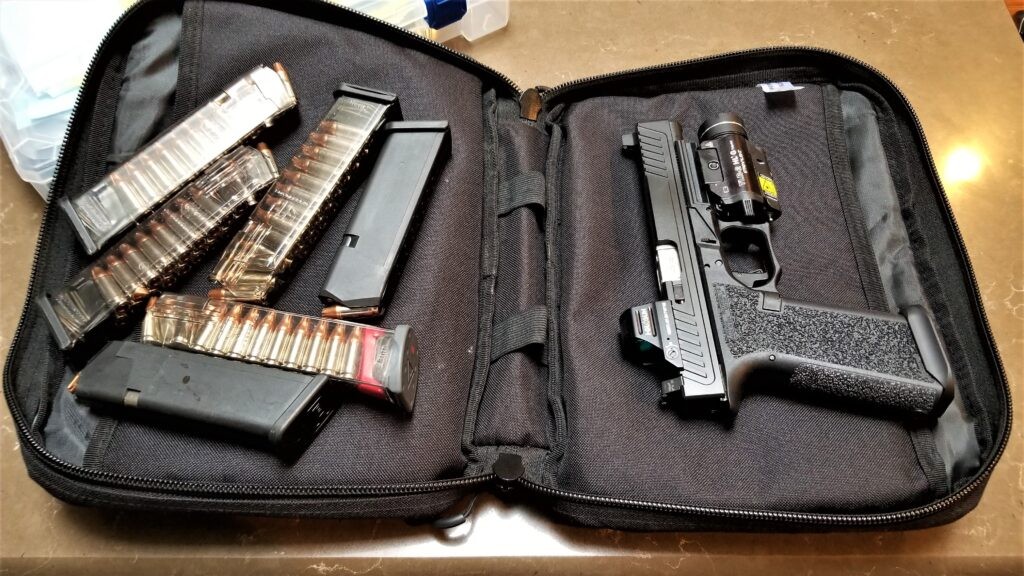
This is my Polymer80 Glock 34-style pistol. It has a 22 round ETS magazine inserted and that is an aluminum Tyrant CNC mag well funnel you see. Note, I recently upgraded from the G34-style slide stop lever shown to a Vickers VTSS-001 and prefer the Vickers. Bottom line is that this combination works really, really well.

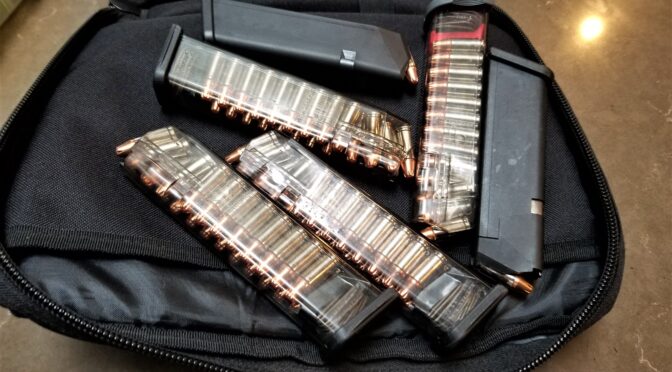
Now you may be wondering “Why bother?” The answer is real simple – they make transparent clear mags as well as smoke/translucent mags so you can see your round count really easily and I like that.

Look at the magazines, with the clear 22-round ETS mags you can instantly see the round count without needing to look at the OEM 17 round Glock magazines’ count indicator on the back. I’ve also been experimenting with different color followers and Vickers Tactical base plates (note the second magazine from the bottom edge of the photo – it has a red follower and an oversized base plate on it). What I am finding is that I really like using the Vickers plates when I want to reach blind into a bag, let’s say it’s dark for example, and instantly know I am grabbing a magazine with +P Critical Duty ammo loaded.

In Conclusion

When people ask me about ETS magazines, I recommend them. If you want to stick with only using Glock magazines, that’s your choice too. Speaking for myself, I’m happy with the ETS magazines.

Where to find them?

The great news is that most major firearms websites carry ETS so you shop around for the color and capacity you want. I buy most of mine from GunMagWarehouse followed by Midway USA.

Here are some listings for their Glock magazines:


Note, I have to buy all of my parts – nothing here was paid for by sponsors, etc. I do make a small amount if you click on an ad and buy something but that is it. You’re getting my real opinion on stuff.

If you find this post useful, please share the link on Facebook, with your friends, etc. Your support is much appreciated and if you have any feedback, please email me at in**@ro*********.com . Please note that for links to other websites, I may be paid via an affiliate program such as Avantlink, Impact, Amazon and eBay.


A review Of my Swenson Glock 17 Slide – It’s Solid

I bought a basic Swenson slide almost two years ago and it’s been solid. Part of what attracted me to it was the beveled nose that allows for easier insertion into a holster. At any rate, I’ve had guys ask me if Swenson slides are any good and my experience has been positive plus from what I have read, most guys find them good. Let me put it this way, if I found a good deal on one to host a RMR optic today, I’d buy it.

The Slide You See

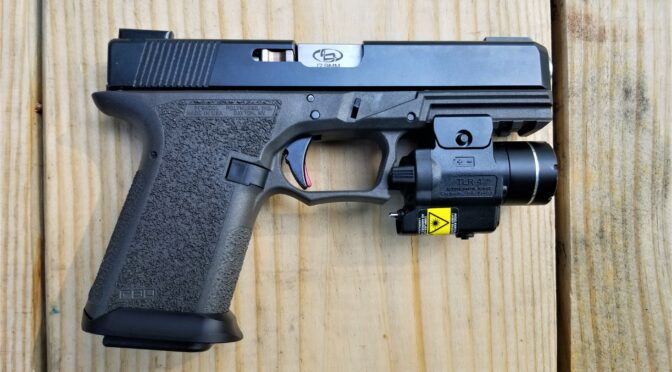
When I first installed it on my first Polymer80 PF940V2 G17, no fitting was needed. However, when I built the PF940CL that it is on now, I did need to use Goodson 400 and then 800 grit lapping compound to get a good fit. Initially there as some binding and now it is just nice and smooth. [Click here if you want to read more tips]

That is the only tuning I’ve need to do. The channel spring liner and all slide parts went in easily and I’ve not had any problems. It’s hosted both it’s current Storm Lake barrel as well as a threaded barrel that I bought from 80P builder with no problem. All in all, it’s worked just fine.

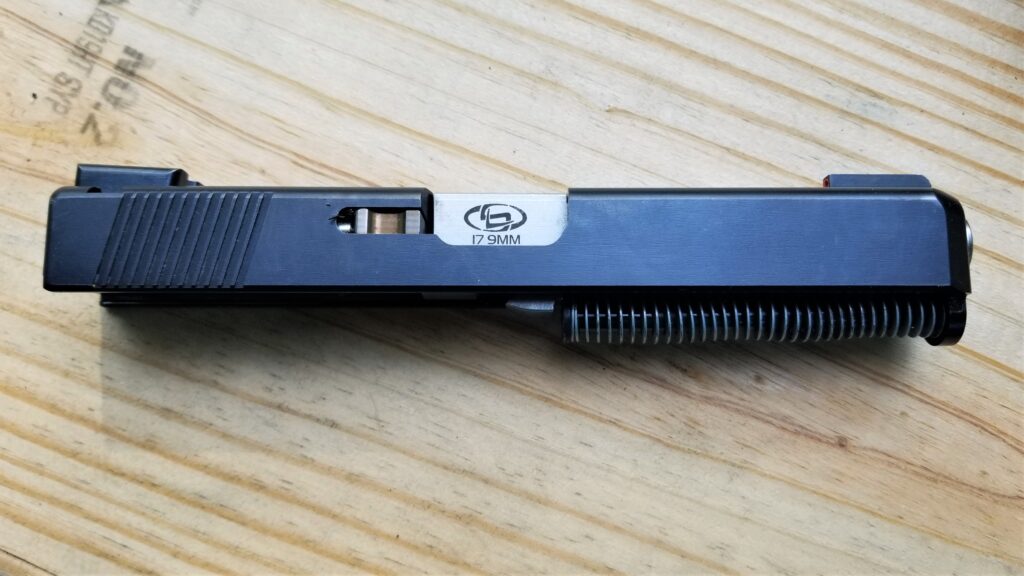
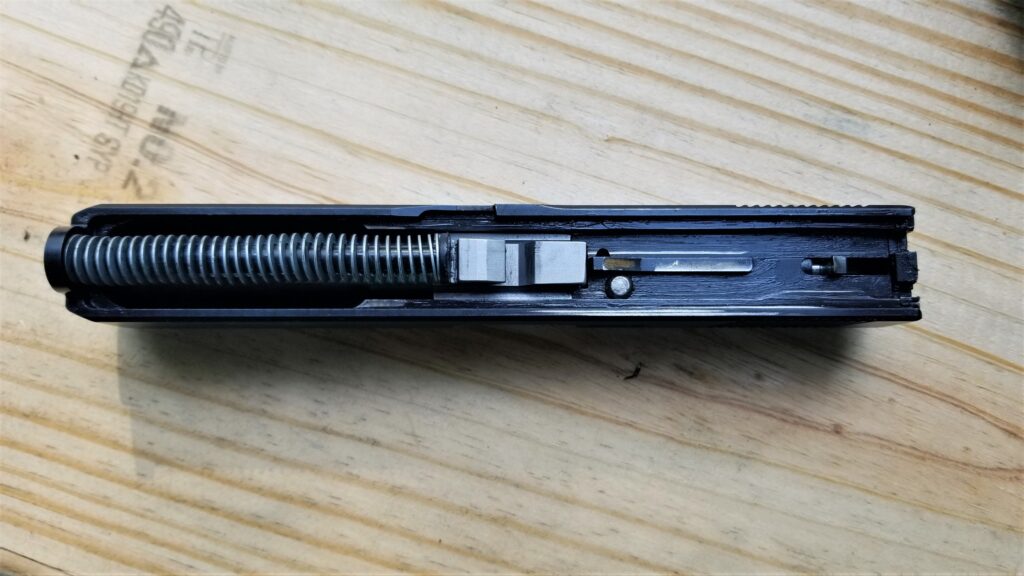
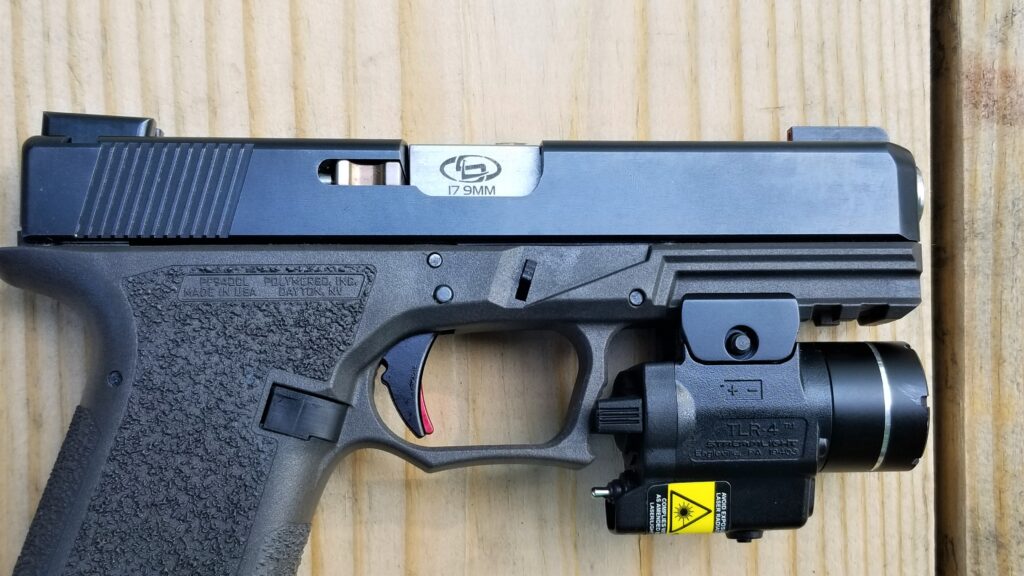
View of the ejection port side. Just a solid basic slide.
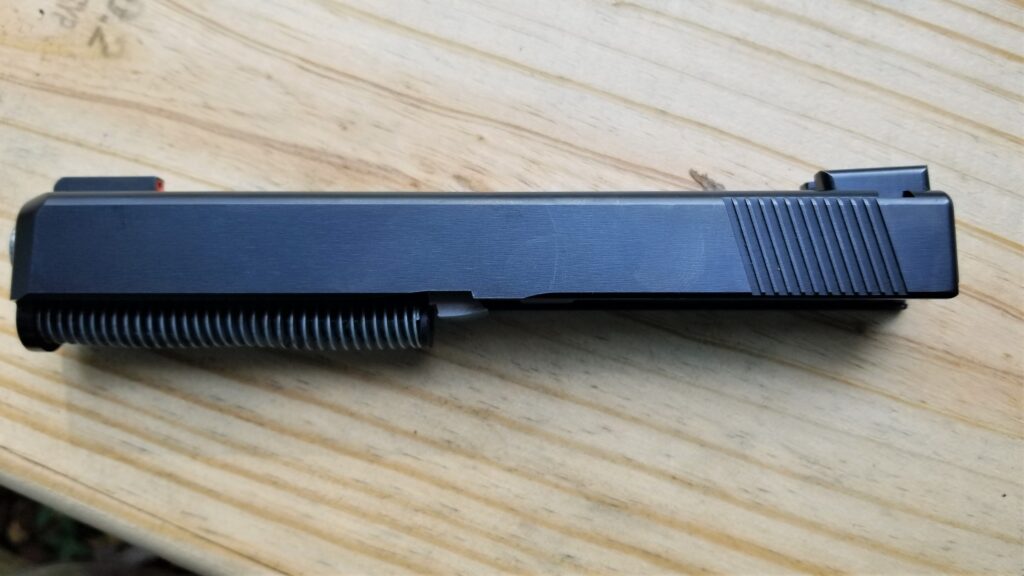
Here’s the other side.
Here’s the bottom. Other than the Storm Lake barrel, I think all of the other parts are OEM Glock.
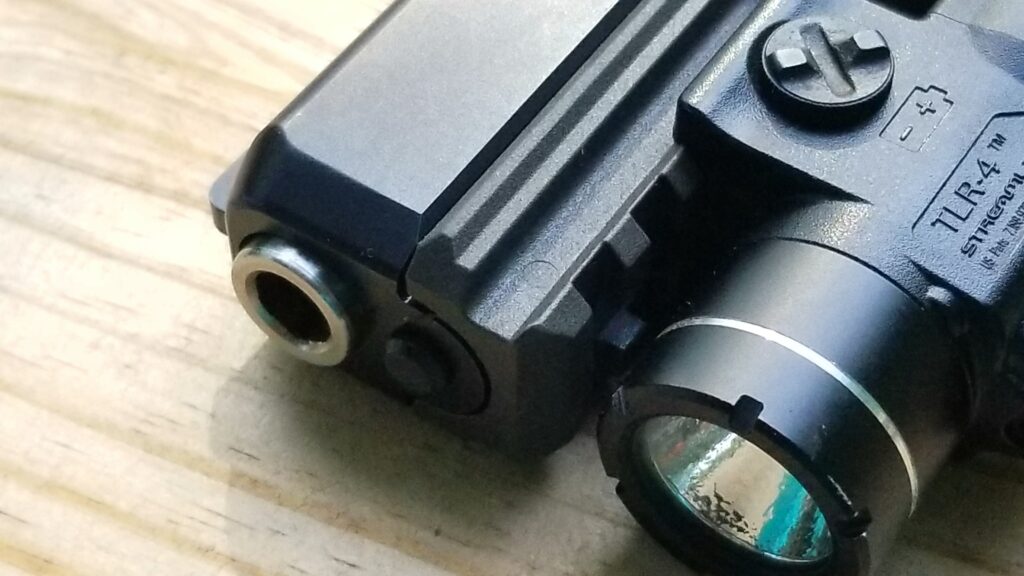
I really like the beveled nose and prefer it for carry pistols. Also, Streamlights are my go to brand for light and laser combos. The TLR-4 works great here and any of the TLR series would since this is a full size pistol. The CL just has the shorter G19 grip to aid with concealment.


So, if you are hunting for a slide for your Glock or Polymer80 build, take a look at Swenson models. They have quite a few designs to select from now including fancy windows and various optics cuts. Just remember, if you are doing a Polymer80 build, look at slides meant for Glock Gen3 models.

The problem these days is finding them. The whole market is in pandemic shock – either hit with supply chain problems or unprecedented demand for guns, ammp and parts. With that said, I did some searching and see Swenson slides either at Midway USA or on eBay and the following is a real time search of eBay for themL


I hope this helps you out!


If you find this post useful, please share the link on Facebook, with your friends, etc. Your support is much appreciated and if you have any feedback, please email me at in**@ro*********.com . Please note that for links to other websites, I may be paid via an affiliate program such as Avantlink, Impact, Amazon and eBay.


Storm lake Glock Barrels Are Good To Go – I sure Like Mine

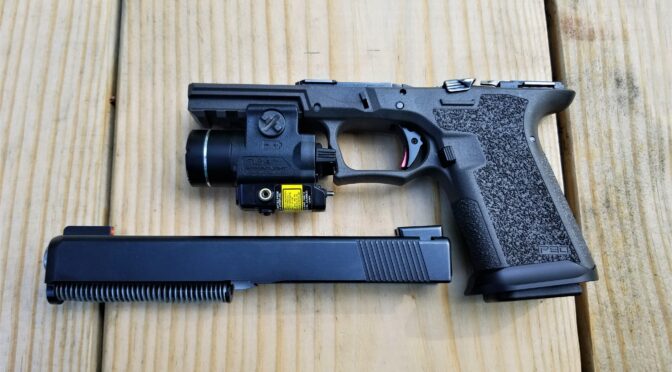
I recently built a Polymer80 PF940CL – their compact long model. This is an interesting variant because it is a their Glock 19 grip but built to use the longer Glock 17 barrel. I had a threaded barrel I could have used but opted to get one of the Storm Lake model 34000 barrels after doing some digging around on their quality. I’m impressed and figured it made since to share a quick review with you.

Storm Lake barrels are made in Tennessee. While not everyone may know their name, they’ve been around since 1983 and sell barrels for 1911s, Glock, Springfield XLs and S&W M&Ps.

Their barrels are made from 416 stainless steel, are hardened to 40-42 HRC and rifling is 1:16LH. The rifling is broach cut to support both jacketed and lead bullets.

My Glock 17 Barrel

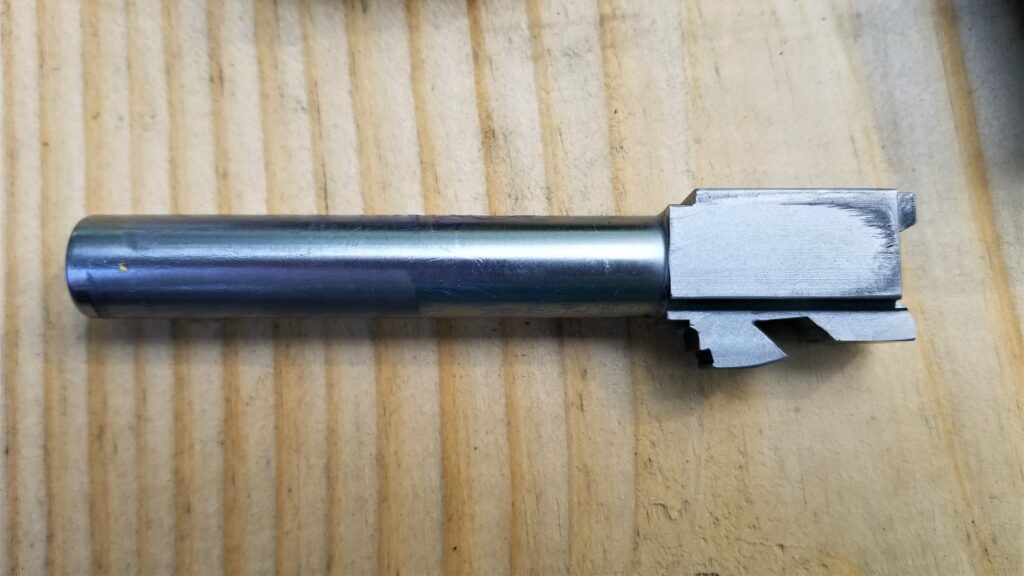
The 34000 is a 9mm 4.49″ long barrel with no ports that weights 0.30 pounds. I don’t plan on running a suppressor or a compensator so there was no real reason to have threading especially if I ever carry it.

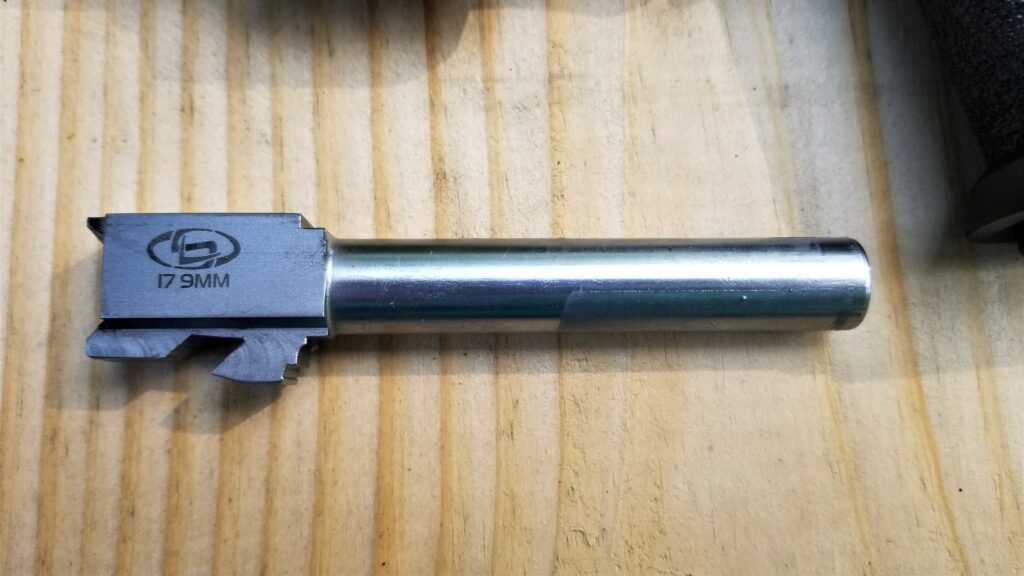
Here’s my 4.49″ 9mm barrel.
The black stuff is carbon from shooting. It’s an accurate and reliable barrel.
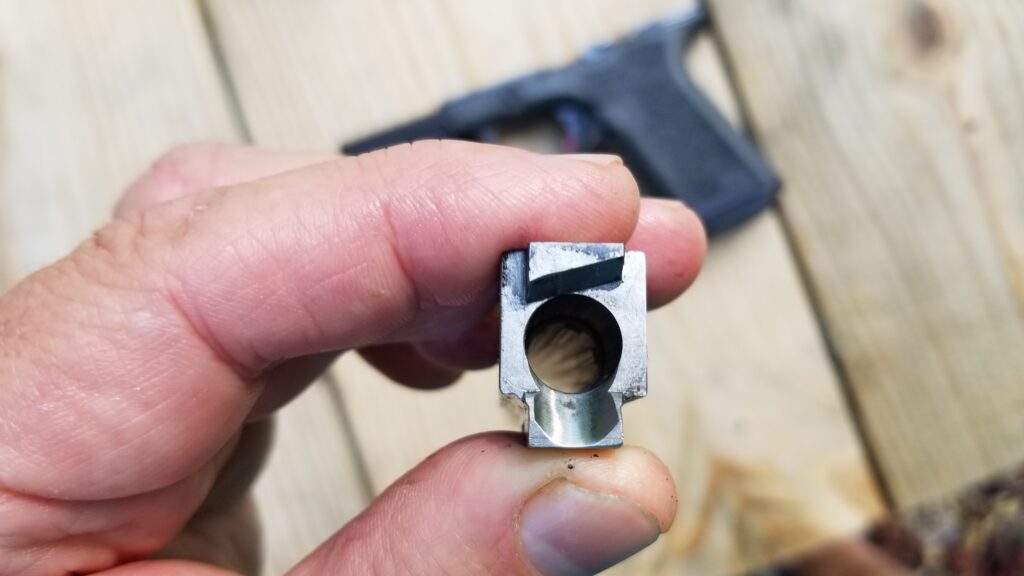
The feed ramp is nicely done. I don’t shoot unjacketed bullets but it worked great with S&B 124gr FMJ , 115 grain FMJ – not sure of the maker – and 124gr Hornady Critical Defense HP rounds.
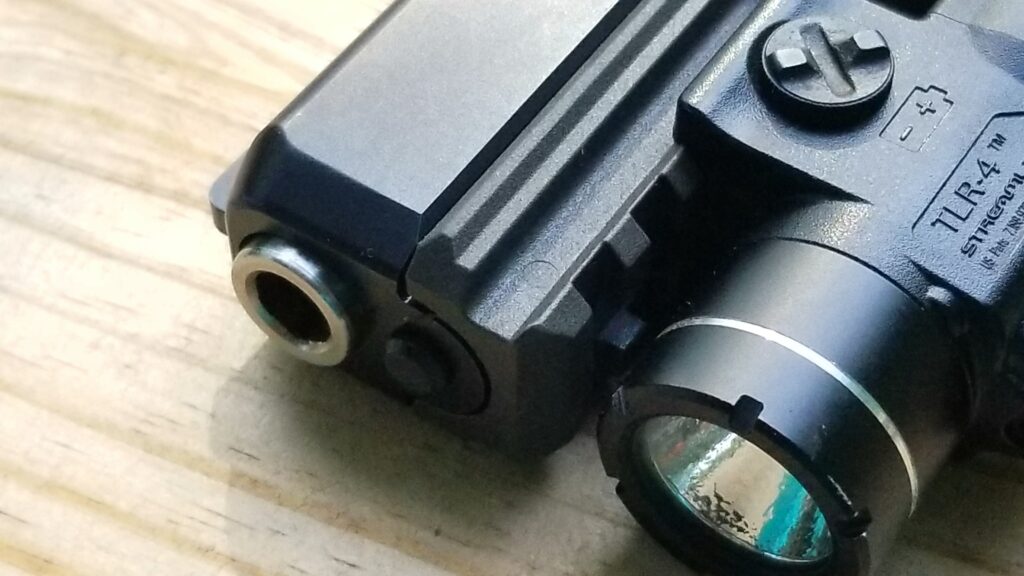
There is a slight crown to protect the muzzle and rifling.
Here it is in the PF940CL

All in all, I have nothing negative to say. I am not some super duper target shooter. It’s accurate enough for me under 25 yards and I’ve not had any problems. Now part of that is the build and the magazines too but again, no problems!

I have no hesitation recommending Stormlake barrels. Best of all, I think they are very affordable and show that you don’t always have to spend a fortune to get good quality.

The best selection and prices are actually on eBay. The following are items live on eBay for the G17, 19 and 34 plus other models so just scroll down:


Conclusion

I hope this helps you out!


If you find this post useful, please share the link on Facebook, with your friends, etc. Your support is much appreciated and if you have any feedback, please email me at in**@ro*********.com . Please note that for links to other websites, I may be paid via an affiliate program such as Avantlink, Impact, Amazon and eBay.


Great Animated Video That Shows How A Glock Pistol Operates: It Really Clarifies Things!

As the saying goes, a pictures is worth a 100 words. Well, this video is worth a few thousand. I am very, very impressed by the fire control group that Gaston Glock created with the three integral safeties. In talking with a lot of Glock pistol owners, they aren’t very clear on how the pistol operates and now I can share this video with folks.

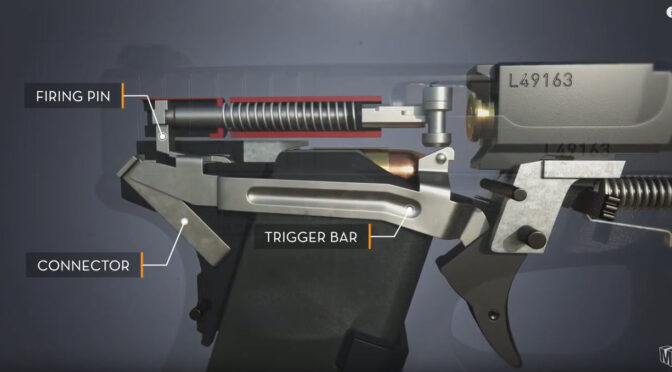
This example screen shot from the video shows how a case is extracted and then ejected. The level of detail is exceptional. Note how the creator of the video shows you a faint ghost image of the pistol around the components he is demonstrating.
In part of the video, the creator shows you how all three safeties work. The above screen shot is from the part of the video where the firing pin safety mechanism is explained.

Matt RIttman created this animated video and really did a service to the firearms community. The computer animation is excellent and the operation of a Glock 19 Gen 4 is very clear. This is a must see for any Glock or Polymer80 owner. I’m not a huge fan of Glock pistols but I am of pistols with the Polymer 80 frames/receivers because of the grip angle. I’ve now built two and legally registered them in Michigan.

Here’s the Video

It’s only 2:54 long and totally worth your time:

I hope you find this as interesting as I did.


If you find this post useful, please share the link on Facebook, with your friends, etc. Your support is much appreciated and if you have any feedback, please email me at in**@ro*********.com . Please note that for links to other websites, I may be paid via an affiliate program such as Avantlink, Impact, Amazon and eBay.


Upgrading To Truglo TFX Pro Sights On Your Glock Compatible Pistols Including Polymer80s

The factory sights on Glocks leave a lot to be desired in my opinion. I like fiber optic sights but also want sights that generate their own light at night. Fortunitely, TruGlo has upgrade sights for Glocks that can do just that. They are the TFX Pro model sights.

The fiber optics use daylight and are very nicely visible. I know there is a trend for red dot optics on pistols but I would rather opt for simplicity. The other really nice thing about these sights is that they use tritium to generate their own light at night – some sights make you charge them with a flashlight but not these. The only issue to bear in mind is that the Tritium isotopes with flouresce for about 10 years and then be dead. My thinking is that is a loooonnnngggg time from now plus it just would affect the night use at that time.

So, let’s get to it, Installation has two discrete steps – replacing the back sight and then the front sight. Both of these can be done by most home gunsmiths because the Glock design is pretty forgiving. Some pistols require a top notch MGW sight pusher to be removed but not the Glocks. The below is based on my experience installing these sights both on my Polymer 80 based Glock 17 and 34 Gen 3 compatible pistols.

Tools & Supplies

I’m kind of like Tim The Toolman Taylor, if you remember the show Home Improvement. I like tools and don”t need much an excuse to buy one in order to try and do the job the right way. When it comes to the rear sight, some guys use a 3/9″ piece of Delrin or wood dowel to tap the old sight out. Because of my hand tremor, that’s risky for me so I looked into sight pushers and decided to go with the Wheeler Engineering Armorer’s Handgun Sight Tool.

For the front sight, a dedicated Glock front sight tool can make the job a ton easier because they are shallow and have a magnet that will hold the tiny screw in position while you get it started. A regular nut driver is too deep and the tiny screw will fall into it vs. being held nicely in position.

You will need some medium Loc-Tite to secure the front sight screw.

Tape to wrap the slide and protect it is a recommended. I use painter’s tape.

Getting Started

  1. Make sure the weapon is unloaded and clear – no magazine and nothing in the chamber.
  2. Remove the slide
  3. Remove the spring and the barrel to get them out of the way – you don’t need to remove anything else.
  4. Wrap slide with painters tape to protect it from scratches leaving the two sights exposed.
  5. I did my back sight first and then my front sight.

Procedure – Back Sight

  1. To remove the back sight. I followed the instructions with the Wheeler unit and flipped the pusher over to use the angled face. Mine was set for straight-edged sights from the factory.
  2. I also oiled all of the threads on the Wheeler.
  3. I secured the slide in the Wheeler unit taking care to make sure the slide was the right height so the pusher would engage the sight and not bind on the slide.
  4. The factory Glock rear sight pushed out incredibly easily. I can see why some guys just drive them out. However, I really liked the control the Wheeler gave me.
  5. I then lined up the replacement sight and pushed it into place – checking over and over and making minor adjustments to ensure it was in the center.
  6. The Truglo has secured by a set screw that I backed out, put a dab of blue/medium Loc-Tite on and then tightened down.
  7. That was it for the back now on to the front.

Procedure – Front Sight

  1. Turn the slide upside down and you will see a small hex head screw that must be removed. I used my Glock Front Sight tool for that.
  2. Push or tap out the original sight.
  3. The replacement TruGlo unit is a tight fit I had to firmly press it into position. It is an interference fit so don’t remove a ton of material so it just falls into the slot cut in the slide. It needs to be pressed in as this helps with alignment and retention.
  4. Put blue/medium Loc-Tite on the screw before reassembly. This is mandatory. If you do not, it will shoot loose over time and you will lose your front sight.
  5. Use the Front Sight tool to reinstall the screw with the Loc-tite and tighten it down.
  6. Done.

Conclusion

I really like the TruGlo TFX Pro sights. They are very visible both during the day due to the fiber optics and at night due to the Tritium. They were well worth the investment. I hope this helps you out.


If you find this post useful, please share the link on Facebook, with your friends, etc. Your support is much appreciated and if you have any feedback, please email me at in**@ro*********.com . Please note that for links to other websites, I may be paid via an affiliate program such as Avantlink, Impact, Amazon and eBay.


Three Simple and Inexpensive Must Have Upgrades on Glock 17 Gen 1-3 Type Pistols To Improve Handling

I am learning a great deal about Glocks via the Polymer80 frame based Gen 3 model 17 and 34 pistols I built. In working with the pistols, I found there are three upgrades that were required immediately for me to more readily operate the pistols. Anybody can do these three – replace the slide stop, slide release lever and the magazine release. Fortunately they are relatively inexpensive so let’s step through each in this post.

Slide Lock Lever

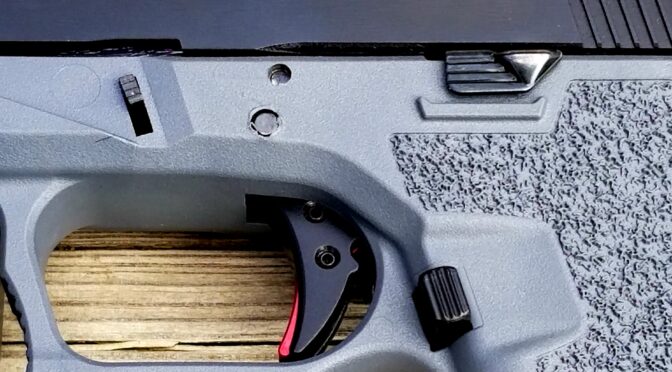
Okay, when I started the Glock 34 compatible pistol using the Polymer80 PF940v2 frame, I had never really stripped a Glock before. As soon as I was working with the slide I absolutely hated the barely protruding OEM Glock slide lock lever. Because of my carpal tunnel and years of abusing my hands, I could barely feel the blasted thing let along get enough grip to easily pull it down. Seriously – I hate that little part. It turns out that I’m not alone. A ton of groups make a replacement unit and they just make the slide stop a hair longer and it makes all the difference in the world.

This will take about five minutes. Procedure:

  1. Ensure the weapon is clear, meaning unloaded and no cartridge in the chamber.
  2. Remove the slide
  3. Before you remove the slide stop, note which way the depression is oriented at the top of the slide stop – the new one will need to face the same way.  The hooked face should face rearward.
  4. Use a Glock takedown tool or a small screw driver to reach in and depress the spring that pushes the slide stop up.
  5. When you push the spring down, the existing slide stop can slide right out
  6. While continuing to press the spring down, slide the new one in.
  7. Confirm the orientation is correct – the hooked surface should face rearward.
  8. Test by pressing down on the release – it should spring back up. If not, look to see if the spring fell out or there is debris in the spring channel preventing it from pushing the release back up.
  9. Re-assemble and test your pistol.

Slide Release Lever

The Glock 17 has one of the worst slide releases I have ever felt. It’s a vertical tab that gives you virtually no surface to really push down on. Now, the 34 came with an extended release and that’s where I learned that it is a way better design than what the 17 has. A ton of vendors make and sell their versions. I just bought and installed a Glock 34 slide release on my 17. If you’re keeping count, this means the 34 really on has two upgrades I would recommend as it already has the improved slide release.

The first slide release I tried to do was a pain and took probably 15-30 minutes as I tried to figure things out I’d not seen a Glock’s insides before first hand. The second one took about 10-15 minutes and the third time (when I actually replaced the 17’s slide release lever with the 34 model), it probably took me about 5-10 minutes. In short, there is a learning curve.

Procedure:

  1. Ensure the weapon is clear, meaning unloaded and no cartridge in the chamber.
  2. Remove the slide.
  3. Use the first punch to push the trigger pin almost all the way out from right to left when you are looking down at the pistol with the front facing away from you. This should not take a ton of force. I find some light taps with a small hammer help me but some guys do it entirely by hand.
  4. I said stop short of pushing the pin all the way out because you just need to get it out of the slide release. You thin pull your pin punch back out of the release also but still capturing the trigger.
  5. The slide release lever will lift right out.
  6. Put the new slide release lever in its place.
  7. Push the pin punch back into the release lever to orient it. This worked for me vs. trying to get the pin itself back in. Keeping it all aligned was the trickiest part when I first started.
  8. Push or lightly tap the trigger pin back into place while driving the old pin punch out. Again, the punch is there keeping everything aligned so it’s acting like a slave pin. As you tap the real trigger pin in, the punch backs out.
  9. Re-assemble and test your pistol.

Magazine Release

The other issue I found was that the OEM Glock magazine release was too short for me to easily reach forward with my thumb and drop the mag. Again, found I was in good company because a ton of other people feel the same way. Now, I opted for the Tango Down Vickers extended magazine release because it just sticks out maybe an extra millimeter or so and it makes a huge difference. Some other magazine releases are really only suited for competition because they are easily bumped and the mag released.

This is another quick and easy one. I did it one with a screw driver, once with needle nosed pliers and once with curved hemostats. All three work but I think the curved hemostat is easiest.

This will take about five minutes. Procedure:

  1. Ensure the weapon is clear, meaning unloaded and no cartridge in the chamber.
  2. Remove the slide so you have a clear view down into the magwell
  3. Remove the spring wire from the magazine release by working it out of the groove cut in the side of the mag catch. Look at the replacement unit and you will see the slot I am referring to in the middle of the magazine release that is just big enough for the wire to slide into.
  4. Remove the old unit and slide in the new unit
  5. Move the wire back into the slot and test – it should spring back out when you depress it,

Conclusion

I hope this helps you out. I find my two pistols a lot more manageable with the above upgrades and well worth it.


If you find this post useful, please share the link on Facebook, with your friends, etc. Your support is much appreciated and if you have any feedback, please email me at in**@ro*********.com . Please note that for links to other websites, I may be paid via an affiliate program such as Avantlink, Impact, Amazon and eBay.