Bolt – Carpenter 158 heat-treated, shot peened and magnetic particle inspected. Manufactured to government drawings. Milspec gas rings. NiB-X coated (40% more wear-resistant than chrome).
Extractor – Manufactured, heat treated, and hardened per government drawings. Black extractor buffer and heavy-duty spring. NiB-X coated.
Firing Pin – Manufactured, heat-treated, hardened, chromed and certified per government drawings.
Carrier – AR-15 or M16 style (heavy weight), 8620 material, heat treated and case hardened. Manufacturing tolerances on inside diameters tightly controlled. NiB-X coated for durability and ease of cleaning.
Gas Key – Hardened to USGI Specifications and attached using knurled grade 8 hardened fasteners. NiB-X coated. Staked per military specifications. The knurled screw heads further enhance the effectiveness of the staking.
Cam pin – Manufactured, heat treated, hardened and certified per Government drawings. NiB-X Coated.
Hammer – Manufactured, heat treated, hardened and certified per government drawings. NiB-X Coated. Can be semi-auto or full-auto.
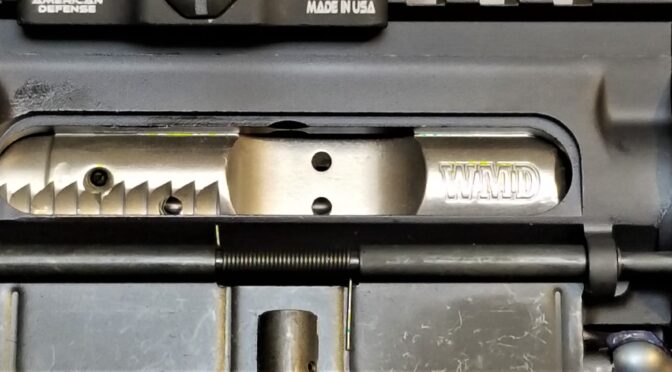
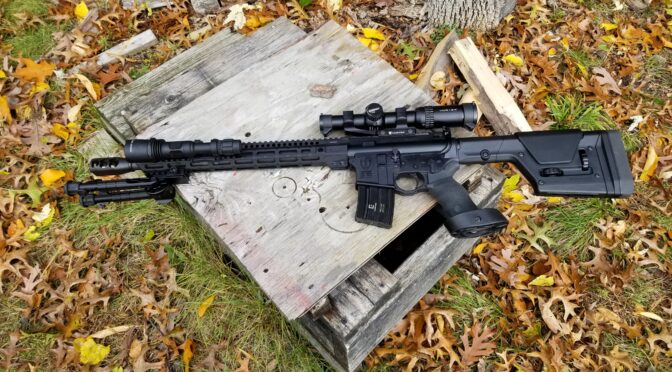
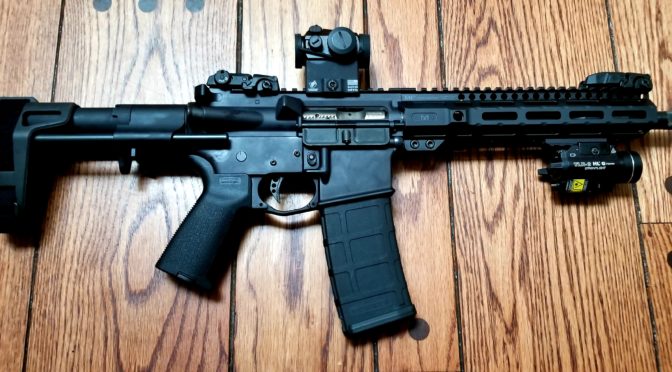
The photo above is of the WMD BCG in my 10.5″ AR pistol. Here are a few more photos for you as well.
The WMD BCG is at the top and a regular PSA BCG is at the bottom.
I can’t stand Biden and think this is absolutely hilarious – The” Angry Joe-14″ AR-14 Stripped Lower. LMAO!! Complete with a dog face pony soldier logo!
I now have built my second Beowulf and guys ask me about the recoil all the time – the short answer is that it’s very manageable. With just a bit of tuning, I’d put it somewhere between a 20 and a 12 gauge shotgun shooting 2-3/4″ magnum loads. Now that there are a ton of options both from Alexander Arms as well as generic 12.7×42 uppers (the metric designation for the Beowulf so they don’t have to pay royalties to Alexander Arms), a lot of guys are getting into the .50 Beowulf cartridge and ask me about what brake to run with.
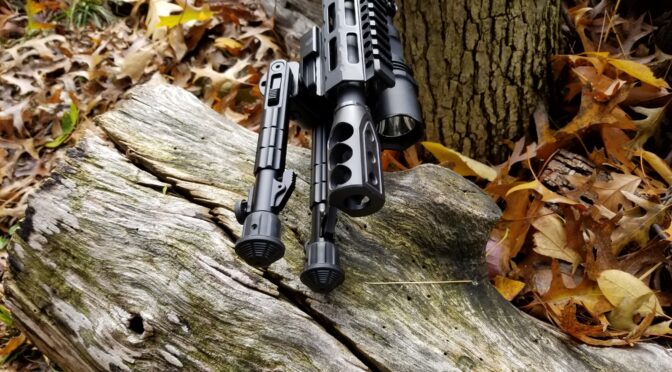
My favorite is the Timber Creek Heartbreaker. It does a remarkable job of venting gasses backwards to compensate for the recoil it would otherwise have. I liked it so much on my first build that it was what I used in my second build. It’s very affordable and I’d be surprised if you can find a brake that does a better job!
Side view of the Heartbreaker and you can see where it gets its name.
View from the top. Note the brake includes a jam nut.
Finding The Brake
You may need to go direct to Timber Creek. Primary Arms is out of stock and they are sometimes on eBay.
My Alpha Wulf
I did a series of blog posts when I built my second rifle. My pet name for it was the “Alpha Wulf” or the leader of the pack. It’s all premium parts and probably my best AR build when it comes to paying careful attention to details during assembly. Here are the posts:
I’m a big fan of the .50 Beowulf cartridge and hope you find this post helpful!
3/6/24 Update: I’m not sure if Timber Creek is still making these or just what. I haven’t built a Beowulf for a few years and don’t have any alternative suggestions.
Note, I have to buy all of my parts – nothing here was paid for by sponsors, etc. I do make a small amount if you click on an ad and buy something but that is it. You’re getting my real opinion on stuff.
With the Alexander Arms (AA) .50 Beowulf DIY Upper comes one actual Beowulf magazine built to AA’s specifications by E-Lander Magazines of Israel. This gave me a chance to see what they did differently to support the ‘Wulf and it comes down to a relief in the front of the otherwise normal AR magazine. This allows the shoulder of the cartridge to pass by without hanging up on its way towards the chamber. Everything else appeared the same in terms of the feed lips and the follower.
E-Lander of Israel makes the Beowulf magazines for Alexander Arms. One is included with the DIY Upper Kit.This is the top front of the E-Lander magazine. Note the notched out area. On a normal AR magazinet his goes straight across,
So, armed with how basic this was, it immediately hit me that a flap sander could make a quick angled surface faster than the drum mag. So, I loaded up a 3/8″ 120 grit flap sander with a 1/8″ shank into my bench rotary tool.
The magazines I convert are D&H 5.56/.223 magazines that Palmetto State Armory sells. They are reliable and well made plus they are very affordable with sales prices starting around $8.99 and normal price around $12.99 for buyers in a rush. They also have regular combo deals such as a case and seven mags for $89.99. You have to love PSA’s deals. Click here to see what they have.
The first step is to remove the floor plate of the magazine. On these D&H magazines from PSA, I just use a screw driver to lift the floor plate for the tabs to clear the magazine body. Pull the floor plate off while trapping the magazine spring. Remove the floor plate, spring and follower so they are out of your way.
I slide a small screw driver between the magazine body and the bottom plate to then lift and remove the plate from the magazine. Note, the magazine spring will come fling out.See the tabs/ridges stamped in the floor plate? That is why you need to use the screw driver to lift the plate so those tabs can clear the magazine body.Any rotary too will use. This is my benchmounted unit that I use on grips and what not, Any Dremel or other rotary tool would work.
So you basically use the flap sander to to cut a ramp on the inside edge of the magazine. You do not need to replicate the notch – just use the flap sander to quickly remove the material.
The left magazine is an original unmodified magazine. The middle has the ramp cut and the right unit has been reassembled. Be sure to blow out the mags before reassembly.
Using the flap sander can get the job done in 30 seconds or so – it’s literally that fast. Be sure to blow out the magazine bodies to remove all of the grit before you reassemble them. Failure to do so may cause you problems later either with the magazine failing or getting into the rifle.
The final step is to test each magazine to make sure it feeds properly. Load two rounds to test chambering in a safe place with the muzzle pointed in a safe direction. Never take a risk.
That’s all there is to it. You can convert a magazine faster than the time it took you to read this post. I hope it helps you out.
I don’t recall exactly when I first found out about the Midwest Industries (MI) Combat series of rails but used one this past Spring when I built a 10.5″ 5.56 AR Pistol. The biggest thing I like is the barrel nut. Now that may sound like a crazy thing to get excited about but there’s a reason. Look at the MI Combat barrel nut – it is a knurled circle with a groove in it. The reason this matters is that the handguard can rotate however it needs around the nut and is secured by a steel key and clamping onto the knurling. If you don’t have this kind of a design, you need to use shims or do some combination of filing and potentially crazy levels of torque to get the handguard’s top Picatinny rail to “time properly” (or align properly) with the rail on top of the upper receiver and also to get the gas tube to pass through into the upper receiver’s bolt carrier channel. PSA has good prices on them so click here to see what they have.
This is the MI barrel nut that the combat rail uses along with a small tin of AeroShell – 33MS/64 Extreme Pressure Grease, MIL-21164D and an acid brush to apply it.The key shown just to the of the screws is part of the cool design. The small nub sitcking out goes into the groove to lock the handguard into position front to back. The two screws go into the handguard to both secure the key and to provide the clamping pressure onto the knurled surface of the barrel nut – it is a very elegant and effective design.Here the key is inserted and the two screws were just inserted. They have blue Loctite on them and will be torqued down to 55 inch pounds.
I do have a few tips for you to bear in mind. Bear in mind the Beowulf has a kick. Bring everything to a torque spec and use Blue LocTite 242 or 243. Both are “medium” formulas that can be readily disassembled with the right tools and 243 adds a bit better oil resistance. I’m moving to 243 as I use up my 242 supply but it’s up to you one which you want to use.
Install the Barrel Nut First
First, just back out the set screws and the low profile gas block will slide right off the barrel. You need it out of the way to install the barrel nut.
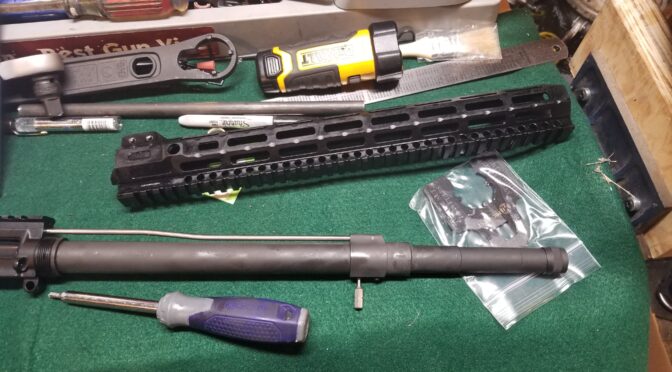
Next, secure the upper assembly in a vise. You will need to use a fixture to hold the upper when you do this. Absolutely do not use your lower to hold the upper. You will bend things. My tool of choice now is the Magpul Barrel Extension Vise (BEV) Block. It very securely holds the upper by engaging the barrel extension. It’s the best tool I’ve found and PSA carries it.
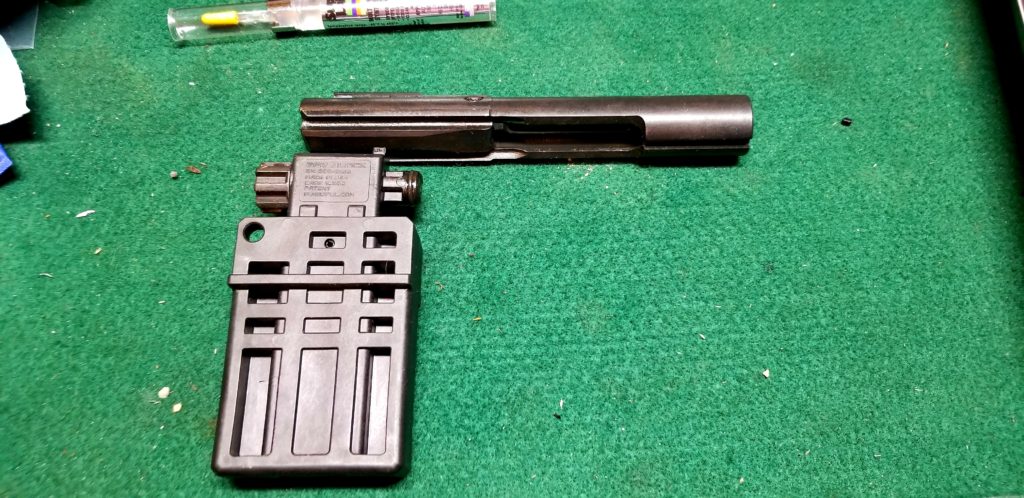
This is my BEV Block along with a spare bolt carrier I use to secure it into the barrel extension akong with a cross pin.
The following is the approximate process for installing a barrel nut:
Degrease the receiver threads and the barrel nut. The Combat rail comes drenched in oil.
Apply the AeroShell – 33MS/64 Extreme Pressure Grease, MIL-21164D to the receiver’s threads – I use an acid brush to get an even light coat.
Torque the barrel nut down to 35 foot pounds (yes, this is foot pounds unlike the gas block) using the spcial MI torque plate they provide and your 1/2″ torque wrench
Loosen the barrel nut – ideally not with the torque wrench to save it from wear and tear.
Torque it again to 35 foot pounds again and loosen it again.
Now, this is the final torque – take the MI nut down to 35-80 foot pounds. I took mine down to 40 foot pounds and called it even. Why the huge range? Well, if you have an old school barrel nut, you may need to torque it quite a bit to get things to align but in our case we just need to apply enough torque to call it even.
Installing the Gas Block
The gas block set screws do have a torque spec if you hunt long enough. Alexander Arms (AA) does not provide it in their general purpose Beowulf manual or instruction sheet that comes with the DIY upper. People cite 25 inch pounds (not foot pounds) with one drop of 242 Loctite per “echnical Repair Standard (TRS) SOFWEP-07-G12P-00032-00 Rev 1 Appx H” that I have yet to locate a copy of that manual. With that said, that is exactly what I did but I used the 243 formulation of Loctite.
Also, AA has done all the machining and used centering set screws to go into the divots in the barrel. You do not need to worry about needing to measure a set back from the barrel’s step lip – just slide the gas block on, put a drop of Loctite on each screw, carefully align the tube and then torque down the screws.
One drop of 242 or 243 Loctite and then torque each set screw to 25 inch pounds – I used my Vortex torque screw driver to tighten mine down.
Timber Creek Heart Breaker Brake
Based on my first Beowulf, it’s very critical to get a good muzzle brake. If you want to reduce felt recoil, the best things you can do in order are: 1) install a good brake. 2) have a good recoil pad 3) make the rifle heavier. Now, I do all three plus I use a hydraulic buffer that helps a tad but a good brake is absolutely critical. For me, it is absolutely my first priority and I knew I wanted to use the Timber Creek Heart Breaker again.
Here’s the Heart Breaker from the side and you can immediately see the heart shapes that give the brake it’s name. Also note the jam nut behind the brake.A view from the top with the ports shown. The bottom does not have ports – just the top to reduce climb.
The AA barrel uses a unique 49/64-20 RH thread. If you are not using an AA barrel, confirm the thread before you order a brake.
To install the brake, I run the lock nut to the bottom of the thread and then thread the brake on as far as it will go, rotate it into final position and then tighten down the lock nut to 20 foot pounds using a crowsfoot head on my torque wrench. I’ve not used Loctite but you can if you want extra protection – I would still go with the medium strength 242 or 243 formula.
Lubrication
To lubricate the whole rifle, I use SuperLube grease and oil. I know it sounds like an infomercial name but it actually works really good. The base is a synthetic lubricant with “micronized PTFE” (think tiny Teflon particles) added in.
If it slides, I apply a light brushed on film of Superlube grease. If something rotates, I use drops of the Superlube oil. Now some folks will disagree with me and go with all CLP or LSA or some secret blend they like – fine. This is just what I do.
Before I pick an optic, I think about how the firearms it is going on will be used. For the Beowulf, it will be hunting and target shooting typically within 100 yards and maybe out to 200 max plus low light situations might well occur.
Armed with that, I decided to use a Vortex Optics Strike Eagle with a 1-6 power magnification, a 24mm objective and a lit reticle. My eyes aren’t so red hot any more so I knew I would need some basic magnification while still having a wide field of view at 1x. Also, I am a huge fan of Vortex due to their quality and no BS warranty. If anything goes wrong with a Vortex optic, they will repair or replace the unit and not run you ragged.
I also opted for a quality offset Vortex mount. You need a solid mount and not something that is going to constantly shoot loose or break under strain.
How Does It Look?
I haven’t had time to take it to the range yet, but am definitely liking how it turned out. The Alexander Arms DIY upper was great to work with as were the Geiselle trigger and MICombat handguard. The PRS stock helps balance out the rifle and adds weight plus the great recoil pad that comes with it. Now, If I can just find some time to go to the range 🙂
My apologies but I have no way to filter out items that the vendors have sold out such as ammo. For example, most places sell out of the ammo fast but you should keep an eye on both Midway USA and going to Underwood Ammo directly – Underwood makes very good ammo by the way. I usually run Alexander Arms ammo but they are sold out most places and while you can place an order directly, you will need to wait quite a while for it to be made and shipped.
Okay, so I built my first .50 Beowulf rifle in 2018, spent a lot of time planning out the recoil mitigation and documented the adventure – click here for the post. At any rate, I sold it to move on to fund other projects but ran into a problem – I missed the ‘Wulf. There are some bragging rights when you say you have a .50 caliber rifle even when you explain it’s not the .50 BMG round. So, I decided to build another one and make it pretty unique. It’s the Alpha, or the dominant Wulf in my mind.
The first thing I want to point out to folks is that the 12.7x42mm is the generic designation of the .50 Beowulf round and is mainly used by firms who don’t want to get into intellectual property issues with Alexander Arms (AA). If you look on Gun Broker and do some searching with Google you will turn up tons of listings for complete 12.7x42mm uppers starting just over $300. … Let me put this delicately – I would recommend that you avoid them. You will get what you pay for either in terms of performance out of the box or over time. If you do some searching you will read that I wasn’t the only buyer who had issues with Radical Arms uppers for example because of the wrong bolt being used.
If you do buy a cheap 12.7×42 upper, I’d recommend you test it right away before the warranty expires. I’m sorry – I just don’t have much faith in them.
Started With an AA .50 Beowulf DIY Upper
This time around, I decided to use an actual Alexander Arms (AA) upper and not screw around with cheap stuff. The only problem was that I wasn’t really sold on the handguards of their complete units. That and the prices were a turn off the last time. As I looked down the AA page, I saw they now sell a “.50 Beowulf Upper Kit DIY” that had everything except for the barrel nut, handguard and brake of your choice. They have both 12″ and 16″ barrel versions of the kit. As much fun as a 12″ howitzer would be, that didn’t interest me as much as building a new rifle using a 16″ barrel.
Here’s the 16″ DIY kit from Alexander Arms. It is very nicely done. Fit and finish were excellent. The manual is for their Beowulf rifles in general and doesn’t help much with the assembly. They do give a bit of guidance with a sheet of paper that comes with the upper. A person new to ARs will need to research how to assemble an upper – I’ll give a quick summary of what I did in this post.Here’s the upper receiver assembly – good finish. No ejection port door as the port is enlarged. I thought about making one but I really don’t need the cover. This is their low profile gas block. All the machining work has been done for you. They already fit and pinned the gas tube plus dimpled the barrel for the two set screws on the gas block to center on. They do include a muzzle nut over the threads. AA threads their barrels 49/64-20 RH for brakes and you definitely want a brake for a ‘Wulf. A brake is essential for reducing felt recoil – weight of the weapon and a good recoil pad help as well.A view of the bottom of the upper – again, want to point out the nice fit and finish. Nothing gritty like you feel with cheap parts – these are very well done. They need lubing certainly but that is to be expected. Cheap parts can be so bad sometimes that it feels like two pieces sandpaper rubbing together. Everything in the AA upper slides/moves smoothly.Here are the two set screws for the gas block. Mine were very lightly tightened and thus easy to remove. I’ll mention this again later but when you install use medium blue Loc-tite (formula 242 or 243 if you want the numbers) and tighten the set screws to 25 in/lbs each.
To sum up the AA upper, they make this build real easy. For me, building an AR is like building with Lego parts from different kits to make something unique, which was exactly my plan with this new ‘Wulf. Next, I am going to skip the upper for a minute and tell you what I in terms of the lower receiver. Why? Well, I’m a creature of habit and always build the lower first and then the upper.
An Overview of The Lower and Parts Used
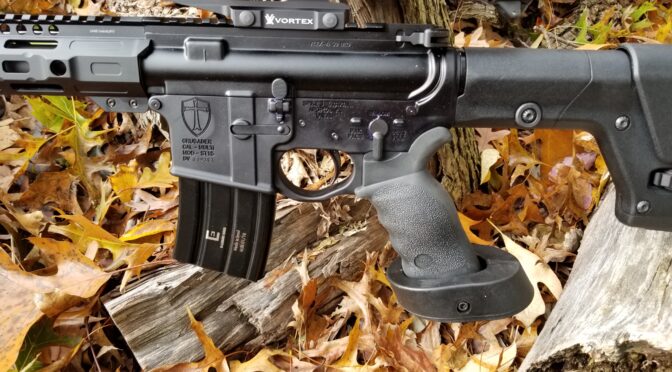
The stripped Spikes Tactical lower I picked is pretty cool! You have the Crusader Cross up front and then look at the selector markings – Pax Pacis (Peace, Truce, treaty)), Bellum (War) and Deus Vult (God Wills).
I thought about using an existing AR lower from another rifle but I decided to build one from scratch. In case you didn’t know it, a Beowulf upper is actually designed to work with any 5.56 AR lower without any modifications being needed to the lower itself – same trigger, buffer, etc. The magazines are slightly modified but we’ll return to that later. So here are the parts details for the lower assembly:
CMC Triggers AR-15 Lower Assembly Kit without Fire Control Group or Grip. Definitely solid mil-spec parts. Beware of cheap stuff that isn’t dimensionally correct or doesn’t last. I used to get the extended bolt release and takedown pins and ambidextrous safeties but I just didn’t find them necessary as I was so used to the originals.
Geissele SSA-E trigger – these triggers and the CMC trigger modules are my favorites. I used the Geissele because it probably just nudges out CMC just a bit to be my #1 favorite AR trigger plus I had one on hand. These triggers can be hard to find as they are popular. Check out the sources listed at the bottom of the post.
Magpul PRS Gen 3 stock – this new version of the PRS stock is stunningly cool. I’ve used every generation now and this is definitely the best. I’ll write up more later but this is the reason I went with the rifle length buffer system – the interesting thing is that the PRS III can work with a carbine buffer system as well! That was news to me. PSA tends to have them in stock.
Ergo Tactical Deluxe Grip With Palm Shelf – While it may have a hokey product name this is my favorite grip for precision rifles. I couldn’t decide whether to install this or a Magpul grip but since I am running with a precision theme, I decided to use this Ergo model.
Building the Lower
A Beowulf uses a standard lower so there really isn’t anything special that you must do. Thus, I’m not going to do a complete part by part instruction just for this rifle. Here’s a write up I did a while ago while building an AR pistol, which is pretty similar other than the use of a brace with a pistol vs. a stock with a rifle:
Buffer Tube and Arm Brace — An AR rifle will have either a carbine buffer tube, carbine buffer and M4-style stock or a rifle buffer tube, buffer and fixed stock. A pistol is similar but can differ depending on the brace you use. The new SBA3 and SBA4 come with Mil-Spec carbine receiver extensions (buffer tubes) so they are just like a carbine right up until either the brace or stock is installed.
I always found having multiple perspectives to draw on can help. Here are two excellent written resources for you if you are new to building lowers:
Okay, so you have an idea of the Alexander Arms DIY .50 Beowulf Upper upper I bought and the lower parts plus assembly. In the next post, I’m going to give you some tips/observations that I had when assembling my lower. I’ll add a link to the new post here as soon as it is complete.
Note, I have to buy all of my parts – nothing here was paid for by sponsors, etc. I do make a small amount if you click on an ad and buy something but that is it. You’re getting my real opinion on stuff.
Folks, I always tell people you need to understand the basic mechanics of how your weapon operates. I’ve posted some slick videos in the past on how the AK-47, Dragunov. Glock pistol, AK-74, and AH-94 rifles operate [by the way, clicking on their names will take you to the blog post for each] and now I just found this one that very clearly illustrates how an AR-15, M16 and M4 operate. The author, Thomas Schwenke, goes through everything and explains both the semi-automatic and fully automatic mechanisms.
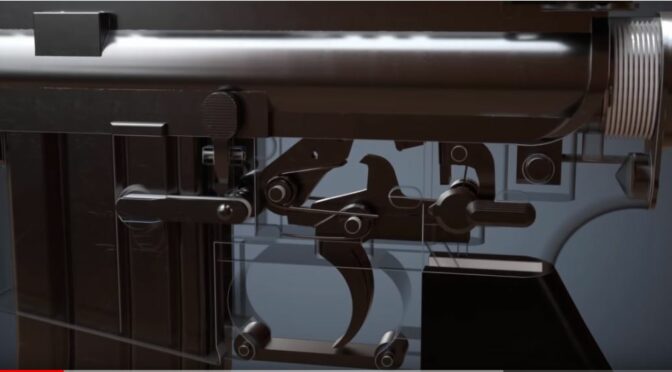
The video has some amazing detail such as this illustration of the M16’s full-auto fire control group.
One thing I like is that there is a narrator explaining what is going on plus they also label key parts – many animations just show the components without either a narrator or labeling.
So if you like AR rifles and pistols, you really need to watch this exceptional video. Kudos to the author for doing a seriously great job!
I recently was looking for a free floating handguard for a 10.5″ AR pistol build and happened upon the new Midwest Industries (MI) Combat rail series. The name made me think mall ninja but the design is interesting and they did a good job manufacturing the assembly.
The 9.25″ M-LOK Combat rail looked good and three things caught my eye – the barrel nut was knurled, they had an innovative means of timing the handguard to the receiver, and it looked good. Yeah, looks do matter to me.
This is the 9.25″ MI Combat rail as it arrived. I have that small tub of barrel nut grease ready.
So,I availed on Holiday sales and ordered one from Optics Planet. The handguard arrives with everything inside. In other words, you need to unscrew the lower two clamping screws to then remove the barrel nut.
The first hint this is different from a lot of handguard that simply clamp is that insert in the middle – that’s the indexing key.Here is the knurled barrel nut, the indexing key and the two screws.
Now you may be wondering why I care about the design of the barrel nut. There are two reasons – first, the knurling creates a more anti-slip surface than a smooth surface would. Second, and perhaps more importantly, the groove that the key rides in allows the rail to align any way you need it to with the receiver without having to deal with shims and it inhibits the rail from sliding forward. Combine thee knurling, key and very generous tabs that position the rail on the receiver and this rail is very well retained. In other words, it isn’t going anywhere unlike many rails that shoot loose and all of a sudden you are holding the rail separate from the weapon because it slid off the barrel nut. That’s not going to happen with the Combat rail.
Installation Video From MI
MI took the time to assemble a short video for you to understand what is required to install the rail. It’s very straight forward.
My Installation Tips
To be honest, I read the paper instructions that came with the rail and realized it would really help to see what was needed so I watched the above video. I really do recommend you take just under 10 minutes to learn from them first hand. That’s tip #1 🙂
Tip #2 – I’d recommend you use a Magpul Barrel ExtensionVise Block – a “BEV Block”. You need to apply quite a bit of torque to remove the existing nut and 40 foot pounds to install the Combat barrel nut. Click here for a post that provides more details.
Note, the Giessele Reaction Rod works too but just costs more.
Tip #3 – When you remove the muzzle device and/or existing barrel nut, I’d recommend you use open end wrenches and NOT an adjustable wrench. Countless millions of nuts and muzzle devices have been marred or destroyed by adjustable wrench jaws giving too much and rounding corners.
I have a big SAW combination set that I use for tasks like this. For example, to remove the PSA barrel nut that was previously installed, I used this big 1-1/8″ wrench and it took quite a bit of torque to break it free. Again, use a BEV Block or Giessele Reaction Rod to safely handle the torque.
Tip #3 – do degrease the parts. You never know what was used during manufacturing or by a previous installer. For example, my PSA barrel nut was lubricated by some white colored grease. I have no idea what is was and used denatured alcohol to remove it from the receiver plus cleaned the new barrel nut.
Tip #4 – Do use Mil-Spec barrel nut grease. It is designed for the appplication and prevents the nut from sticking/corroding onto the upper receiver.
Tip #5 – Do use a torque wrench to install the handguard. I used to do “farmer tight” where you bring something up firm and call it even. The problem with that is either you apply too little torque and the nut loosens up or too much and you strip the threads. MI supplies the appropriate fitting for a 1/2″ torque wrench. The spec calls for 40 foot pounds so do it.
Tip #6 – for the same reason as the torque wrench, use a torque screw driver to install the gas tube (if it uses them and torque will be 25 inch pounds or there abouts) and the handguard’s Allen screws require 55 inch pounds.
I use a Vortex torquing screw driver for optics. It only goes up to 50 inch pounds so I installed the handguard screws to 50 and not 55. There are other screwdrivers that go higher but that is what I had handy.