When Bill Alexander decided to make the .50 Beowulf round, he really got me excited 🙂 The idea of a heavy thumper round in an AR platform really appealed to me so I bought one and one issue that popped up was where to find magazines that were not really expensive.
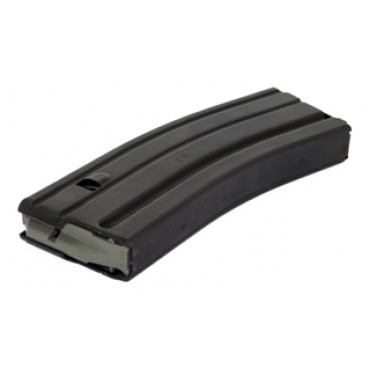
D&H 5.56 30 RD Aluminum Magazines are perfect for this.
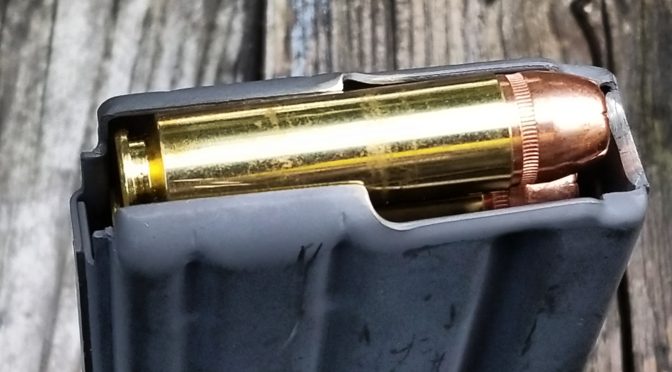
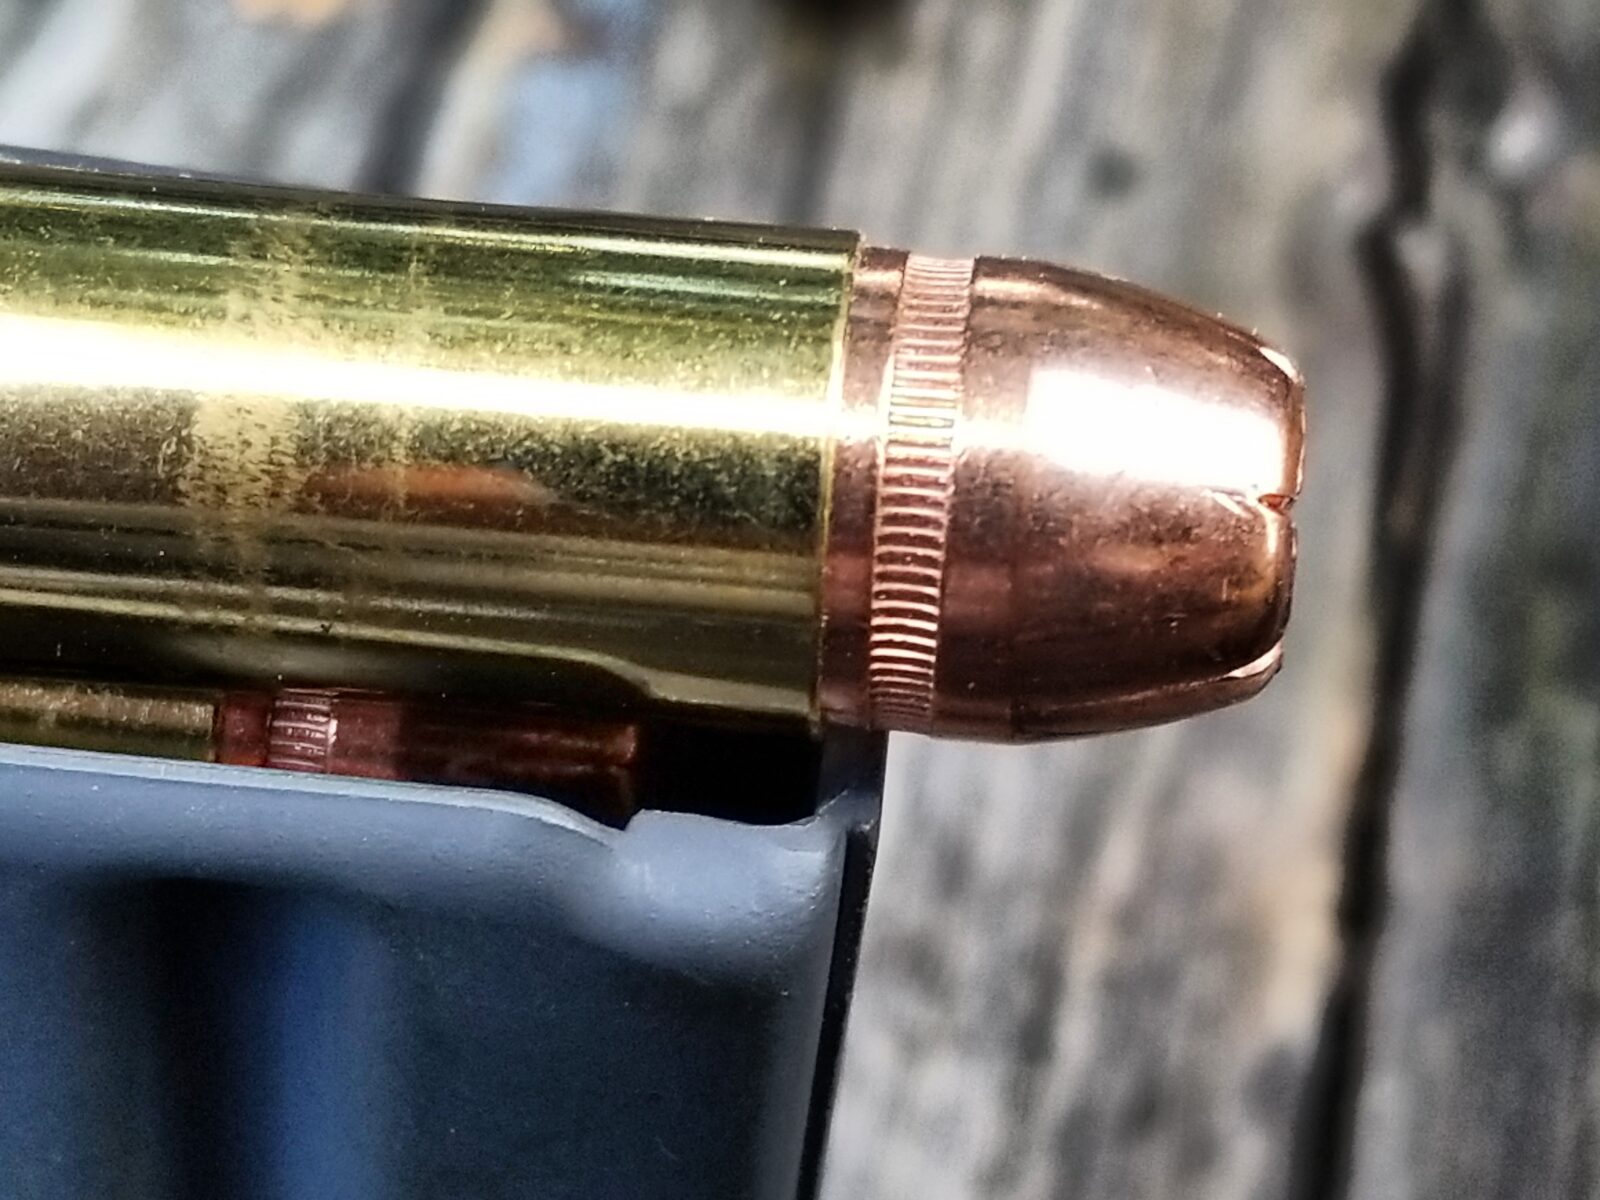
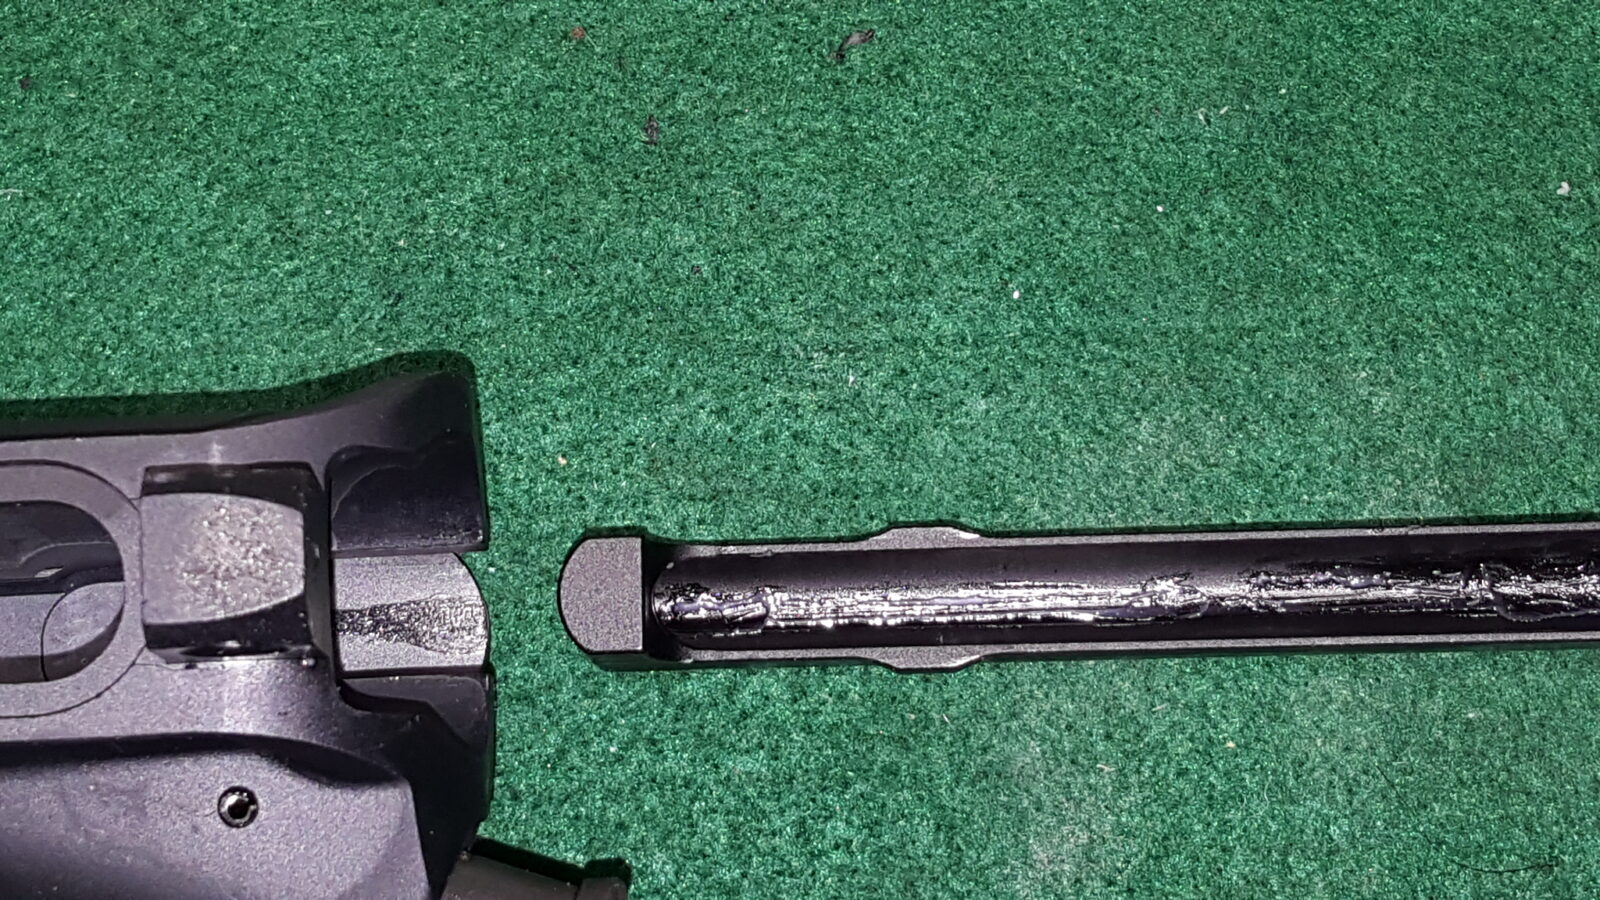
Once in a while the answer is really straight forward and this is one of those times. You do not need to change the feed lips or the follower on a standard 5.56/.223 magazine, you just need to bevel the front lip at about 45 degrees (the exact angle doesn’t seem to be a big deal) so the giant .50 Beowulf bullet goes up and, this is the key part, the leading lip of the brass case hits the little ramp and goes up it vs. hanging. In this next photo – see how the lip of the case will catch? It may catch sometimes or all the time – for me it was practically all the time.
The magazines I convert are D&H 5.56/.223 magazines that Palmetto State Armory sells. They are reliable and well made plus they are very affordable with sales prices starting around $8.99 and normal price around $12.99 for buyers in a rush. They also have regular combo deals such as a case and seven mags for $89.99. You have to love PSA’s deals. Click here to see what they have.
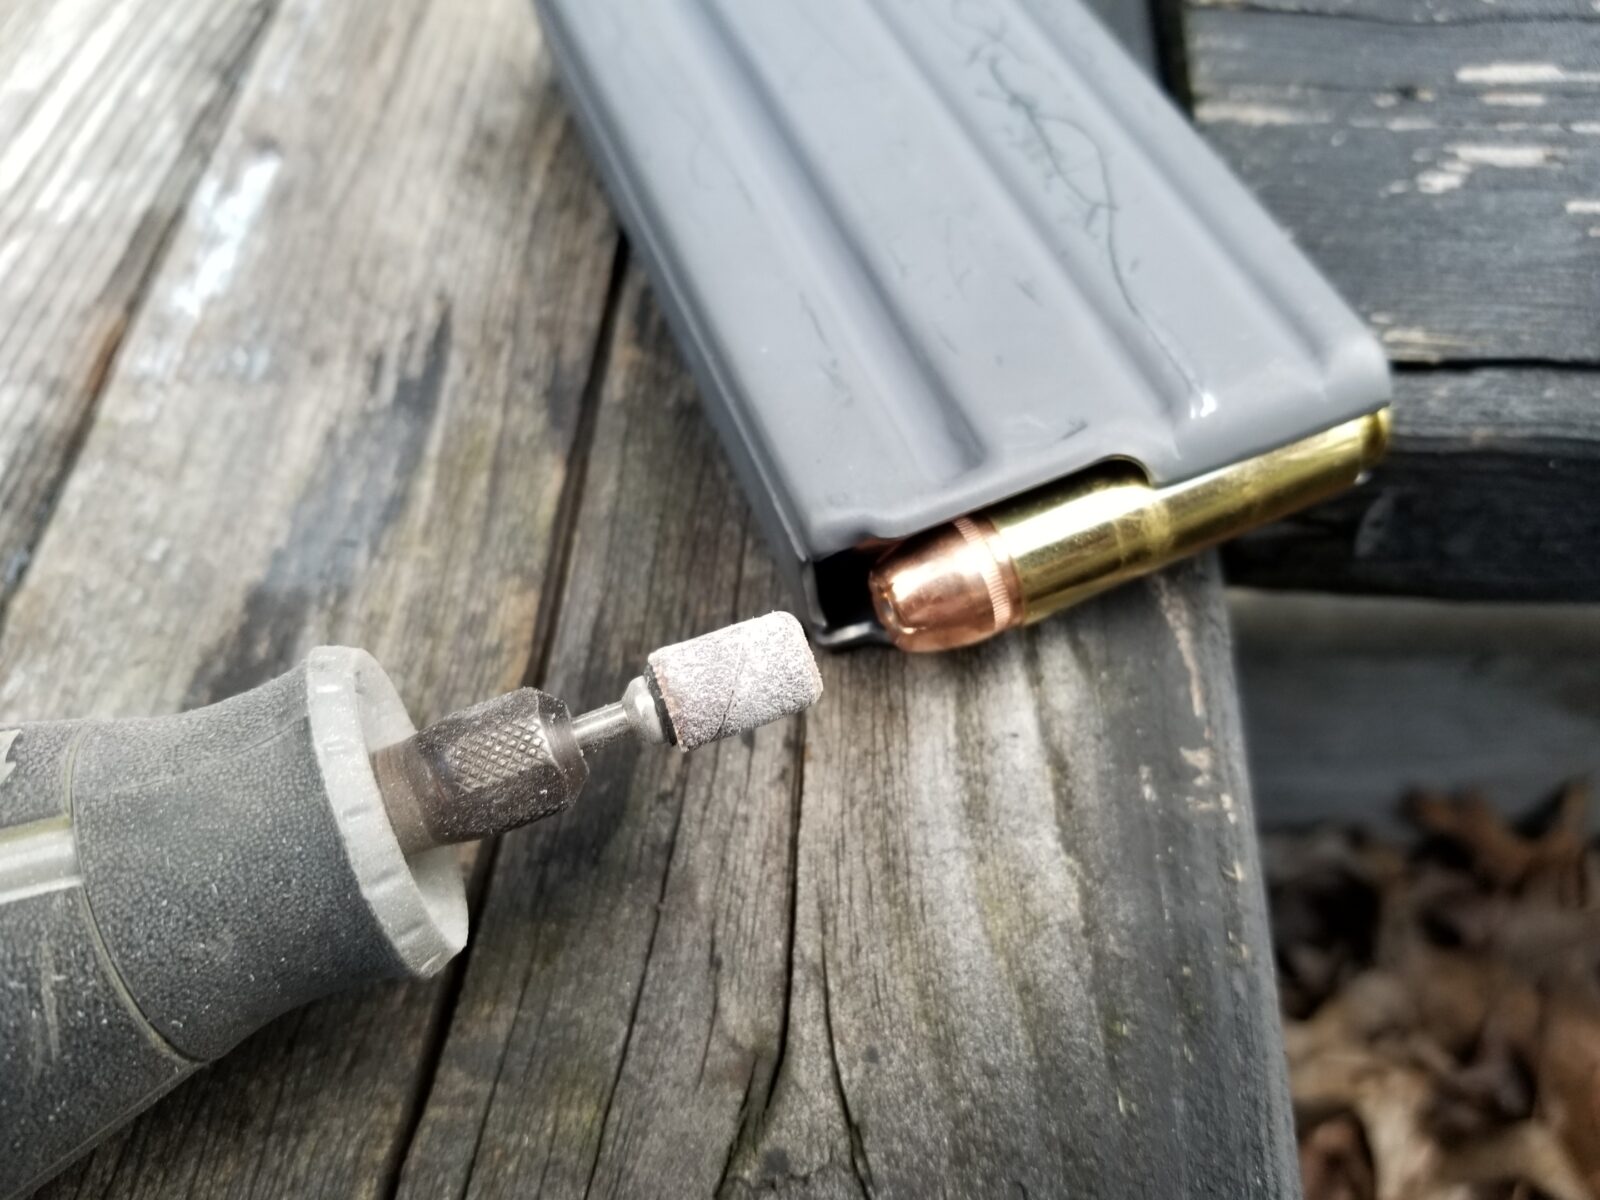
All I did was use a medium grit little sanding drum in my Dremel to bevel the magazine’s front lip – you are basically making an ad hoc feed ramp so the case doesn’t catch. The round you see has the big 350 grain XTP bullet – they hit like a freight train.
Note this is just to show the drum. The magazine is empty when I do the sanding.
This is a really quick operation and you don’t need to take a ton off. I do it with the magazine empty of course, insert a round into the magazine and test then do a bit more. I’d repeat the removal and testing until the round went right up into the chamber. After the first few magazines, I had it down pat.
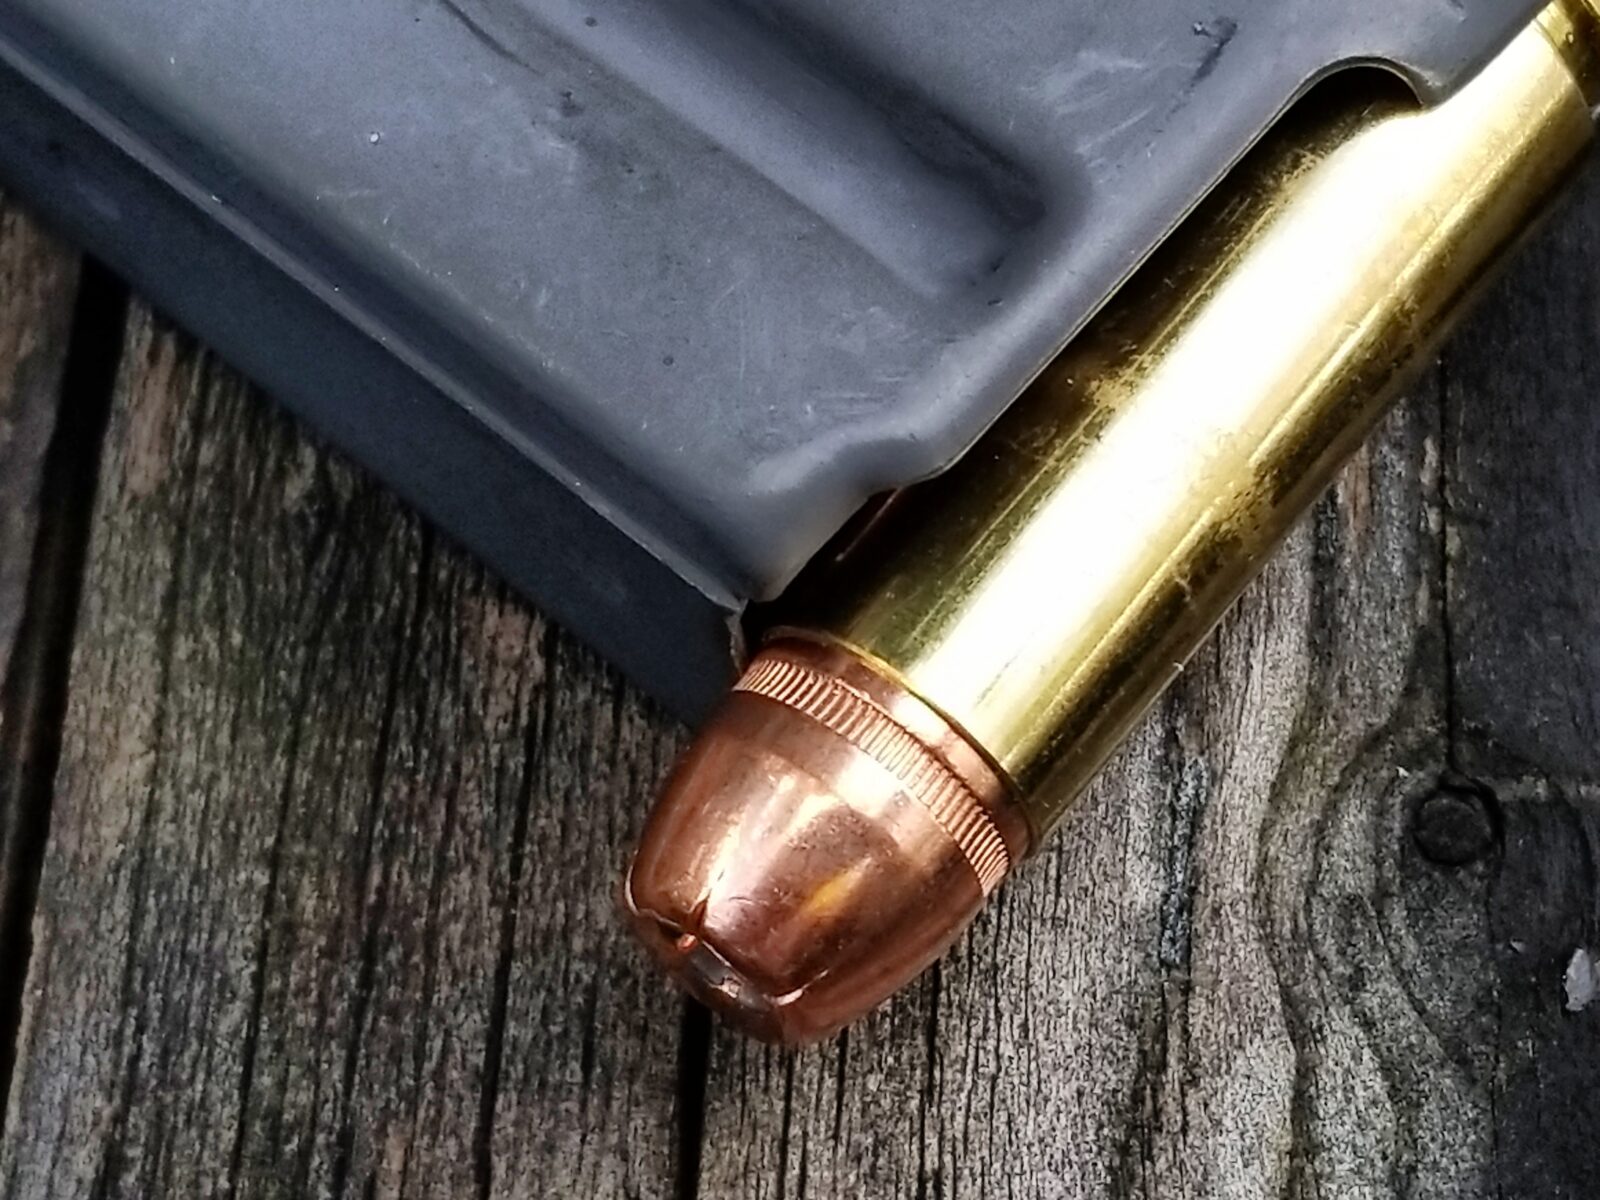
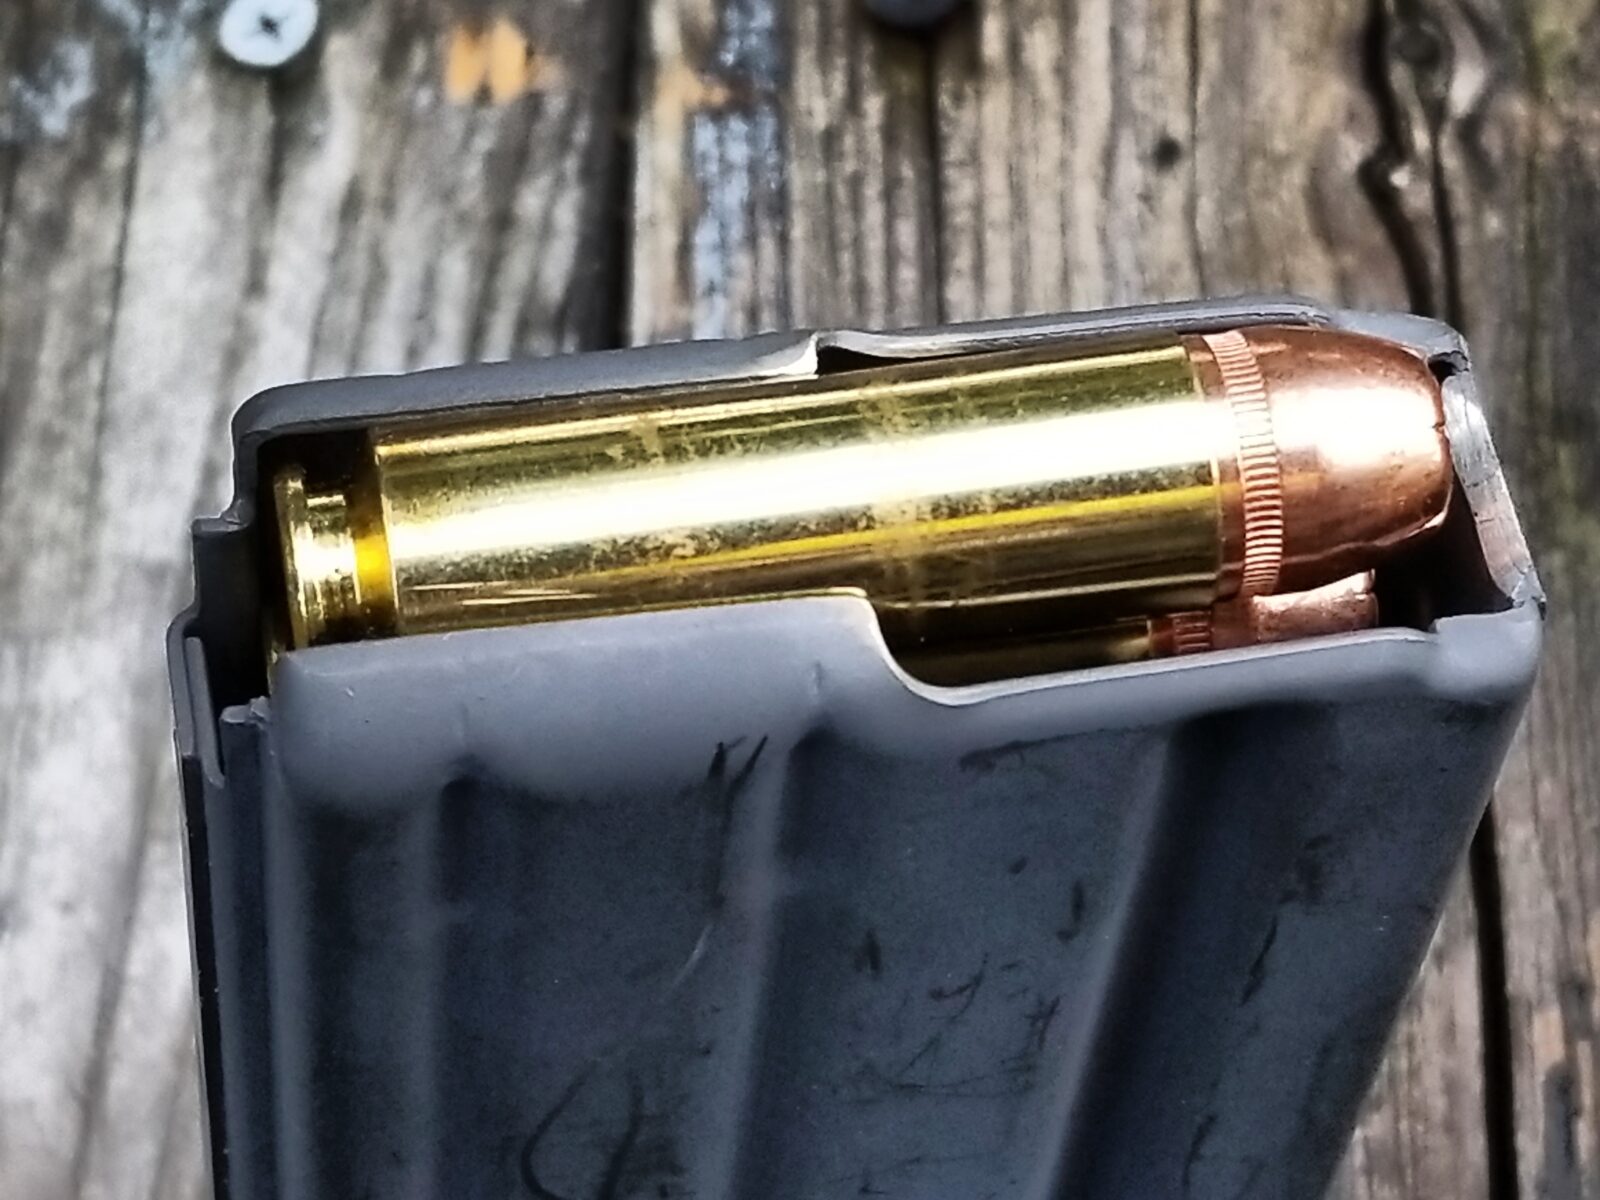
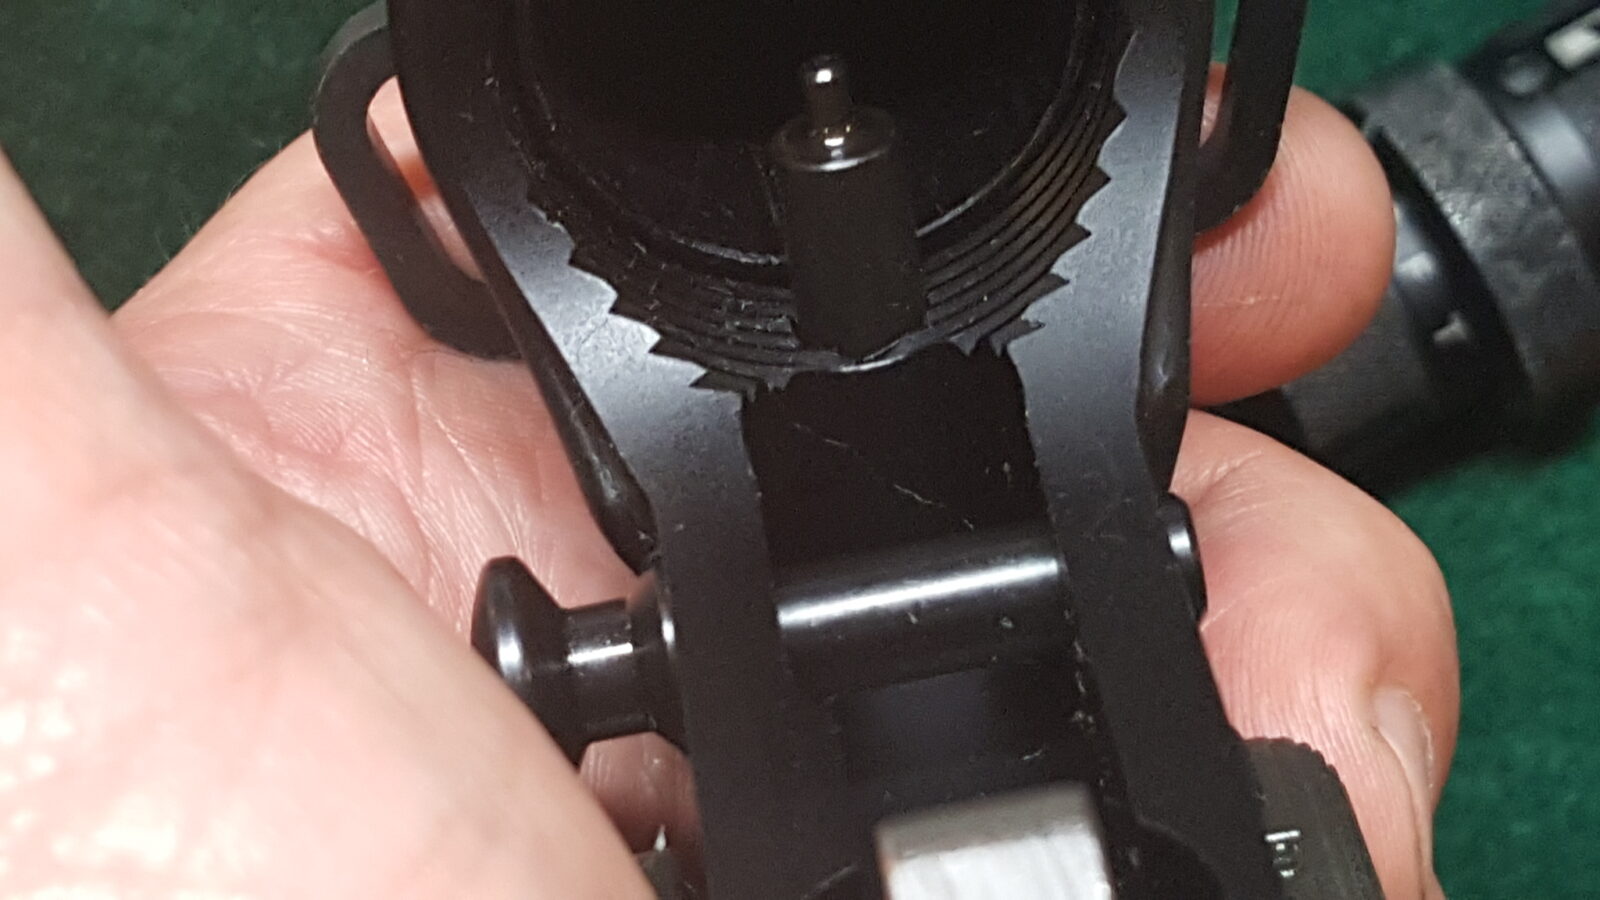
In this next photo, see the shiny little ramp?
That’s all there is to it. I just used quality aluminum magazines and did the tweaking. Polymer mags, such as MagPul take more work and I simply didn’t feel like bothering with them. I did use quality magazines and avoided cheap stuff and I also used the anti-tilt followers – just regular 5.56 followers – nothing special.
In a standard 20 round aluminum 5.56/.223 magazine, you can fit up to seven Beowulf rounds. In a 30 round magazines, you can fit up to 10. I never tried any of the higher capacity magazines so I can’t speak to them at all.
This approach worked great for me and I hope it helps you as well.
I came up with an even faster way to convert the magazines that I wrote about in December of 2019 – click here to read it.
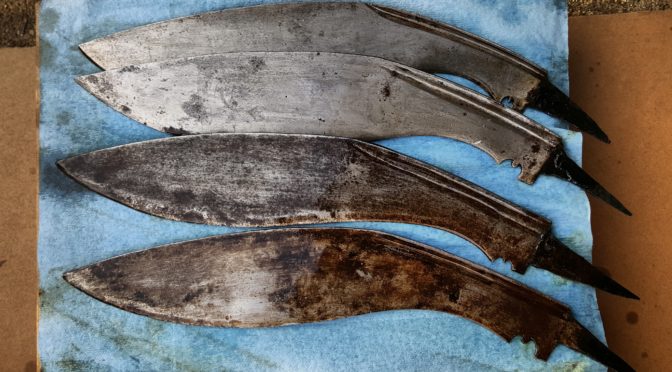
We’ve all had parts come in with really dried out preservative on it such as grease or cosmoline. I bought some 100 year old khukuri blades that were coated in dried out grease and realized this was a great time to take some photos. There’s a way to get all this crud off very easily – most will practically wipe off!
I learned the following trick years ago after a friend was worried I would blow myself up using gas, brake cleaner, etc. In hindsight I must admit it was risky but I rationalized it because I needed to get the parts clean – this is not only effective but also way safer.
Take a 5 gallon pail with a sealable lid on it. In the photos you see a basic Ace Hardware plastic bucket with it’s lid that has a waterproof gasket.
I first learned about this years ago for firearms and it is a cleaner known as Ed’s Red and I’ve used it ever since. The formula was developed and shared by a gentleman named “Ed Harris” and it works great for dissolving grease, cosmoline and even penetrating rusty parts.
The basic formula is:
1 part Dexron III or better
1 part deodorized kerosene
1 part mineral spirits
1 part acetone
I use it over and over, which is why I recommended the lid. I’ve been using this bucket for probably 3-5 years now. If it gets really gross or seems to stop working then I will change it but it’s fine so far.
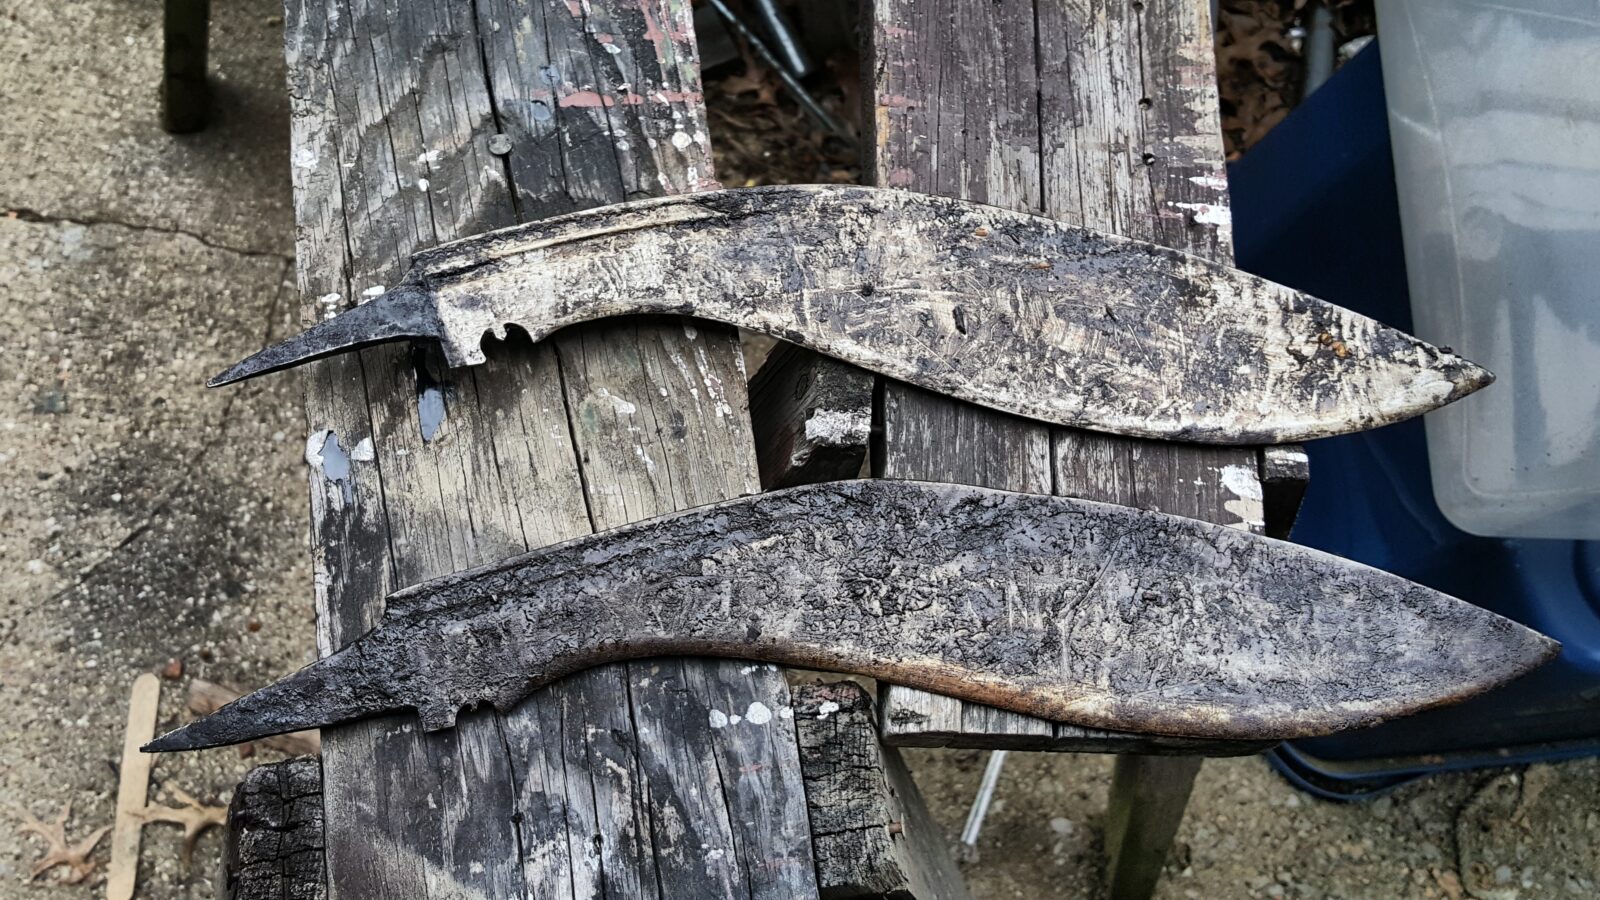
So, I set the blades in the ATF and liberally coated the sides and let it sit. I periodically would reverse the blades so they could be immersed. If they were smaller parts, I’d drop them in there and let them sit for a few days.
What I wold so each time when I turned them was to rub the blades down and try and get the softened/dissolved grease off. A lot of it would wipe right off with no scrubbing.
So here they are a couple of days later simply wiped down. I left a thin film of ATF on them to reduce the odds of rust but all the old dried grease is gone.
When I am done, I put the lid back on and move the pail out of the way. I do keep wet parts out of the cleaner as I don’t want to contaminate it with water but other than that, I’ve soaked all kinds of greasy, oily, rusty, dirty parts in this. The crud settles to the bottom of the pail over time. I’ve learned that if I stir it up there is a lot of debris. If it gets too bad, it will be time for a new batch.
I mentioned it in passing but this is also great for penetrating rusty parts so you can take them apart. I can’t begin to guess what all I have soaked in this bucket over the years but it sure includes gun parts, blades, rusty car parts, etc. It’s a huge time saver and I hope it helps you out as well.
Please note that I am not an attorney and this does not constitute legal advice.
The topic of 922r compliance and parts counts came up the other day as whether it applies to Short Barreled Rifles (SBR). In reading the conflicting ATF documentation, the last guidance given in technical branch letters from 2009 and 2010, the ATF does say it applies. I put it this was as you should look at the trend over time which does seem to point towards 922r being applicable.
I am a very conservative guy and always try to stay on the safe side of legal issues so I would recommend ensuring your SBR is compliant with the 922r parts count requirements. If you do this then you do not need to worry about it and I am sure there are folks who would disagree with me.
Here is the 2009 letter:
Here is the three page 2010 letter:
Again, please let me stress that I am not an attorney. If you have any questions on this, I would recommend doing your own research and/or retaining legal counsel.
The cool thing about ARs is that there are a ton of them out there and people are sharing ideas on how to build, use and maintain them every day. This series of blog posts I just wrote shows my current take on how to assemble lowers. I will continue to improve my techniques over time and I do this both through trial and error as well as researching what others do. In this post, I want to share some links with you that might just give you an “ah-ha” moment because of what these folks are sharing.
Please note that when you click on the below links a new tab or window will open and you may need to manually switch to that tab or window in your browser to see it.
“How to build an AR-15 Lower Receiver: A Step by Step Visual Guide” by The New Rifleman. Great photos and instructions. Shows some different approaches such as using carefully wrapped pliers to squeeze the bolt catch pin into place. Note, I tried pliers once and didn’t like them but this is an example of another approach for you to consider – plenty of guys do use pliers – just be careful wrapping them to protect the receiver from getting nicked/scratched.
“Assembling Lower Receiver – Section 7” by Brownells. This page then links to videos that cover an introduction, the mag catch, bolt catch, pivot pin, trigger group, safety selector, pistol grip and trigger guard.
“Assembling Mil Spec & Free Float Barrels – Section 5” by Brownells. This page links to videos that provide an overview, installing the delta ring, flash hider / muzzle brake, front sight, assembling a free floated barrel, installing free float handguards w/gas block and installing free float handguards with a standard front sight (which makes no sense to me why you would do that but it is there if you want to see that – if I free float a barrel, I want as little stuff on it as possible as in just the gas block and that’s it).
We’re in the home stretch. You can buy completed AR uppers from many sources. I’ve had very good luck with Palmetto State Armory (PSA), Ghost Rifles, White Oak Armory (for precision uppers), Del-Ton, and Rock River Arms. I bought a few Hardened Arms uppers with bolts and simply was not impressed – they seemed gritty and with a 12.7×42 Beowulf build their bolt did not work correctly but I digress.
With that said, the short barreled upper with the Magpul furniture is from PSA and the 10.5″ upper is from Ghost Rifles. If you were to ask me who I use the most, I’d have to say PSA. Subscribe to their Daily Deals email list and you’ll see some pretty wicked deals. With all of the uppers, take note if they are selling the complete upper with the bolt carrier group (BCG) and charging handle or a stripper upper that does not include those two things. I buy depending on what I want to do. For both of these pistols, I bought stripper uppers as I had PSA Nickel Boron (NiB) BCGs that I got a deal on in the past plus I planned to use a PSA charging handle that I had with an extended latch and already had a plain Mil-Spec charging handle that I could use though I do have one of my favorite charging handles – the BCM Mod.3 large latch model – on order.
The next photo shows the two uppers side by side. The PSA upper had the 7″ barrel, CAK Flash Can, Magpul handguards, gas block, tube, and ejection port dust cover installed – all it needed was the BCG and charging handle. The Ghost Rifles upper had the 10.5″ barrel, handguard that I had to trim down for the look I wanted, and ejection port dust cover installed. I added the brake, BCG, charging handles. The side rails on both uppers are M-Lok and were added by me along with the backup sights.
Now when planning an upper, as long as it is Mil-Spec, and they all claim to be, it should mate (a fancy way of saying “fit”) with your Mil-Spec lower. What I have found over the years is that some brands go together nice and snug and some are looser. For example, PSA uppers fit Anderson lowers nice and snug. The Ghost upper was a tad loose on the Anderson lower so I added a spacer to tighten it up.
Okay, so here is how it goes. First, open both pins on the lower like so. Note, you see the buffer already installed. I took an assembled pistol and removed the upper to take the photos. Of course, when I am writing this blog post then I notice I forgot to remove the buffer purely for the photos. Just imagine it is not there 🙂 If it is, no worries – the pins work regardless. The pins and modular design is what makes the AR like Legos for shooters – you can open them and swap uppers at the drop of a hat.
Step two: Inspect the bolt and make sure the gas key screws are staked, that the bolt head can move freely, the extractor works, firing pin present, etc. Normally I do not take the bolt apart – just a quick double check. I have only had challenges with no-name bolts. PSA, Aim, and Fail Zero. have all worked just fine for me. The Fail Zero BCG is very well made if you ever get a chance to use one. If the BCG feels or looks funny then a closer inspection is warranted but outside of the scope of this post. Both of the pistols I assembled in this post is a PSA Nickel Boron (NiB) BCG.
Step three: I like to install the BCG and charging handle before I put the upper on the rifle. You can install the upper and these items if you want. First, I oil the lubrication points of the BCG and apply grease to the underside of the BCG. Do NOT put a ton of grease or oil under the handle. I just put a very light coat of oil on the whole body of the handle. You do not want to get a ton of grease on the gas system.
Step Four: The charging handle has little tabs towards the front. Slide the charging handle in above where it resides, align the tabs on the handle with the keyway in the receiver and press the handle down to where it normally goes. Do not slide the charging handle in yet because the BCG slides in next.
Step Five: Ensure the bolt head is pulled all the way out. You then put the top of the bolt in the handle and slide the assembly forward until the handle locks into position.
Step 6: Put the buffer in the buffer spring and slide it into the buffer tube spring first. When you get to the buffer itself, you may need to push the buffer detent down a bit to get it to slide in. I like the slightly heavier H2 buffers and used a PSA and a Spikes in these two builds.
Step 7: Line the front upper hole with the lower and close the pivot pin all the way.
Step 8: Swing the upper down and close the rear takedown pin.
Step 9: Technically you are done – the two halves are assembled and you can function test your FCG. [For a review on function testing the FCG, click here.] At this point, I do what I call a “rattle test”. If I shake the rifle and the upper is loose in the lower, I add a rubber receiver wedge (these things have a ton of names) to remove the slop. Basically it sits in the lower and you trim the bottom of it until you can close the upper but there is upwards pressure from the wedge locking everything in place thus removing any play.
And with that, you are done with the basic assembly and can go ahead and add whatever accessories you want. When you are planning what to do – ask yourself “Is this a range toy or something I need to rely on and if so, what are key considerations?” and use that to govern what you add. For example, on a defensive weapon, I have backup sights, a quality Vortex optic and a quality Streamlight weapons light. I do not go with cheap stuff as I have had them fail on me. For a range toy, I worry a lot less about what reliability for example.
So here are the two finished pistols. The 7″ is a range toy and the 10.5″ may well serve a defensive purpose so it has a Vortex Spitfire red dot and backup sights.
Okay – safety briefing time: When you test fire, consider using a stand and pulling the trigger with a string from a safe distance. Be sure to inspect the weapon carefully before and after. If you do not feel comfortable with any of this, please see a gunsmith. If you have any doubts at all, please see a gunsmith. I want you to enjoy assembling your AR and shooting it.
By the way, my AR expert is Scott Igert of Modern Antique Firearms. He is a police officer and has years and years of real world AR building, maintenance and tactical use experience. If you need a custom AR built, need to buy parts, or have gunsmithing done, talk to Scott.
Hope this series helped you out! The next post, step 11, will provide additional resource information.
Sources For AR Parts
The following are all vendors of AR parts including barrels, handguards, triggers, magaziness and what have you that I use and recommend:
There are three types of buffer tubes for ARs and the one you pick depends on what you are building. There is the traditional long A2 fixed stock style buffer tube, the 6 position M4-style telescoping stock tube and lastly the pistol buffer tube. Since I am building a pistol, that will be our focus. The pistol buffer tube has no provision for a stock and is just a straight tube. Do not use a rifle tube on a pistol build just to be safe legally. Other than that, the installation is almost identical other than the backplate (shown below the buffer tube in the next photo) which is indexed for rifles but typically not for pistols.
Step one: Install the rear takedown pin assembly. Insert the pin from the right to left. Put a dab of Tetra Gun Grease in the detent hole and then push the pin and spring in. The grease will help retain it.
Step two: Put the backplate on the tube and thread it into the receiver almost to the end. Watch the detent spring and make sure it is compressing properly into the hole and not bending. On pistol builds I will push the plate down with one hand while threading the buffer tube on with the other. Stop in time to insert the buffer spring and detent in their hole. Push them down and thread the buffer tube on the rest of the way. Note, you can stake the tube into position or use a small dab of blue Loc-Tite to hold the buffer tube in position. Note how the front of the tube overlaps the detent pin just enough to hold it in position.
Step three: Install the Arm Brace. The SB Brace I got from Palmetto has a hollow rubber cylindrical hole for the buffer tube to go down. Of course that thing will not want to slide down the tube by itself. I lightly lubricate the buffer tube with silicone spray and then slide/hit the brace into place. Only turn the brace clockwise as you install it lest you unscrew the buffer tube. I did use a rubber mallet to help get it down the tube faster.
So with that the brace is installed. My next post will be about attaching the upper and finishing the assembly.
Sources For AR Parts
The following are all vendors of AR parts including barrels, handguards, triggers, magaziness and what have you that I use and recommend:
In this step we will install the selector spring and detent along with the pistol grip. As you can imagine, I am a grip snob. I do not like the Mil-Spec grip much at all but do like the MagPul MOE and MIAD grip. For me, the lower-cost MOE grip is just fine – it feels good in my hand and is durable. It’s pretty much all I use on ARs other than target rifles where I prefer the Ergo grip with a palm shelf.
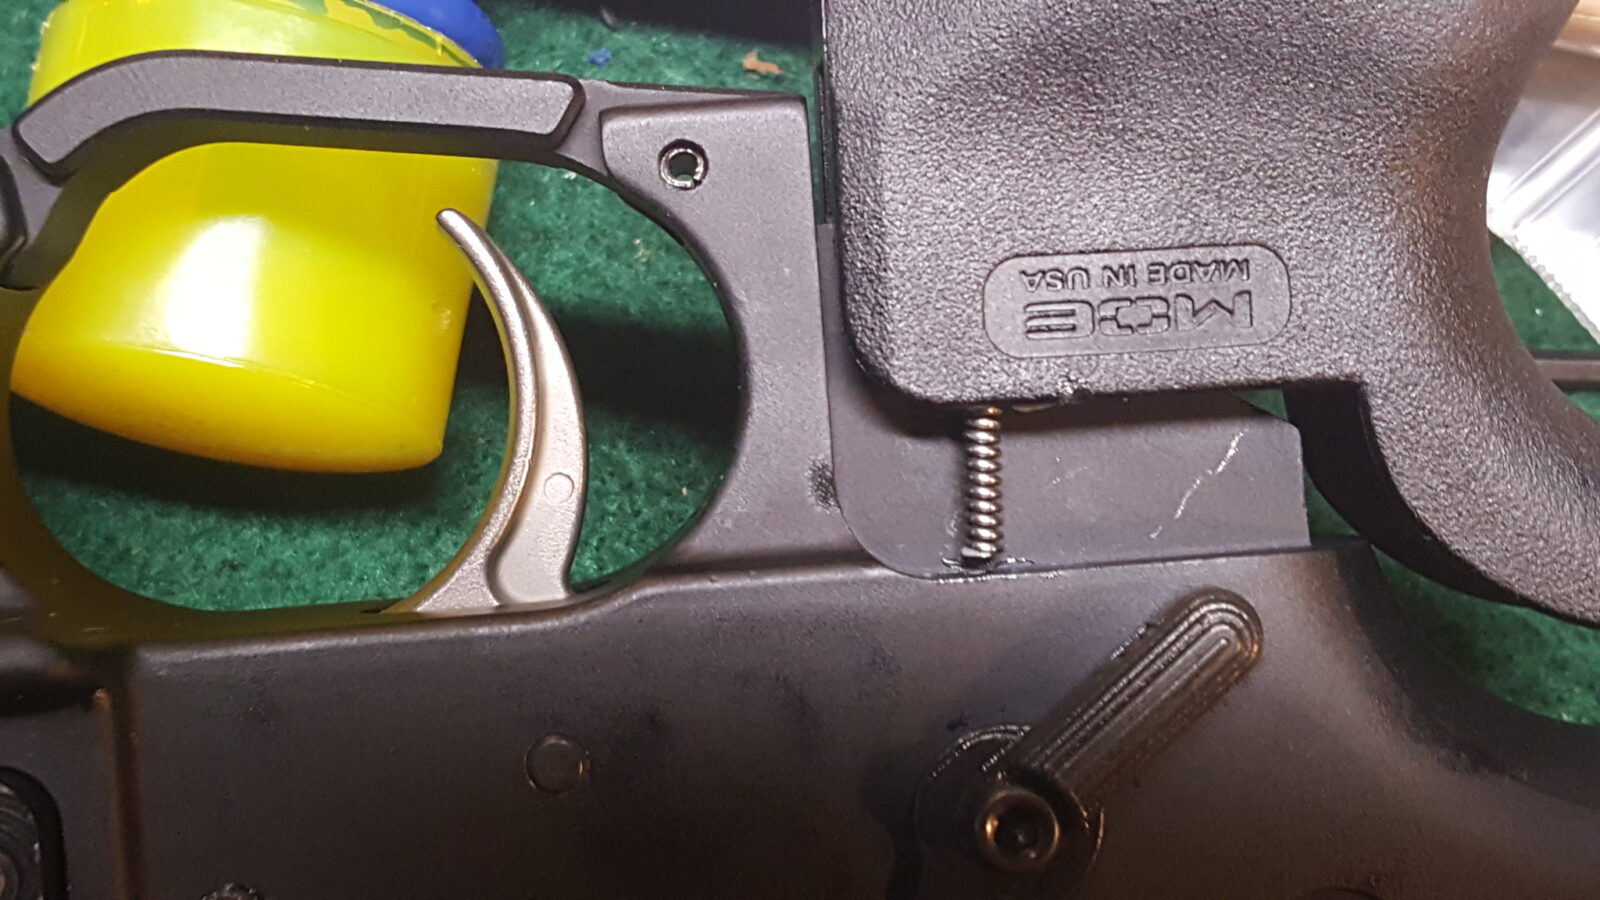
So, first off, I need to point out that in this step we install the spring and detent pin for the selector lever. Both the spring and pin are unique. In the next photo, the selector spring and detent are on the left. On the right is a detent pin and spring for the pivot and takedown pins. Be sure to use the heavier detent and spring on the left for the selector. Also, consider getting spares from Brownells because they are really easy to lose.
Step one: Turn the receiver upside down, put a dab of Tetra Gun grease (or whatever brand grease you like) in the receiver’s detent hole and then insert the detent pin point first. The grease helps hold the pin in as you move things around plus lubricates it:
Step two: I like to put a dab of grease in the spring hole in the pistol grip to keep the spring from falling out. This helps reduce my lost springs. It’s way too easy for your mind to wander and have the spring fall out.
To install the grip, I lay the receiver on its side and push the grip into place. This grip was so tight that I had to tap it into place with a rubber mallet. Go slow and make sure that the detent spring lines up properly with the pin. If you go nuts pushing/hitting it together you can kink the spring and ruin it.
The Magpul grips come with a screw that can be installed via a slotted screwdriver or a hex key, which I prefer. Also note the yellow stuff on the screw – this is a pre-applied threadlocker so you do not need to add more. If you are installing a screw that does not have a lock washer or any threadlocker on it, you may want to apply a bit of medium strength Loc-Tite. Now, to get that screw down there, I angle everything back and slide the screw down the back of the grip just like a ramp and then I use my Allen wrench to tighten things down. Because I can’t get a good grip on the wrench due to my carpal tunnel, I use an adjustable wrench to give me just a bit more torque. Many of you may not need to do that. You are looking for firm – not Big Mongo torqued down tight. There are torque specs for everything but I do farmer ballpark tight on non-critical stuff.
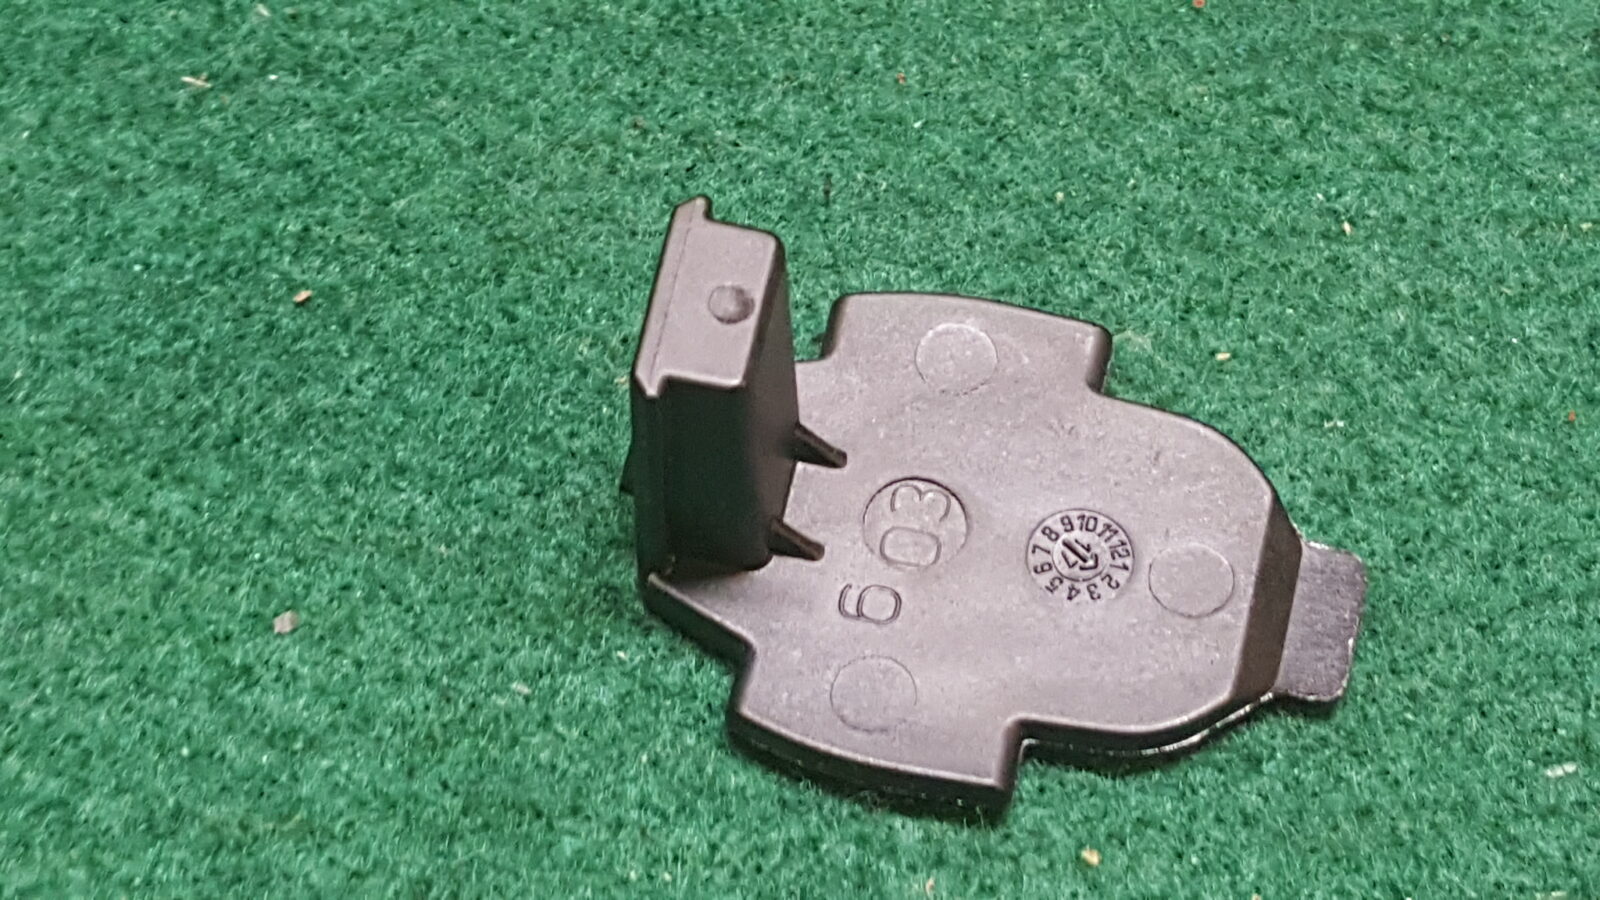
Once the screw is installed, the bottom end cap is snapped on place and you are done. Note, this cover can also be replaced with toolkits that slide up in the grip if you so desire. I’ve not done it yet but am considering it.
The selector assembly is what allows a regular AR to either be on “Safe” by blocking the trigger’s movement or “Fire” my allowing the trigger to pass. It’s actually a very straight forward design and I like those. Now I like ambidextrous selectors and they are just like a normal one but have a small lever that is screwed on to the operating side after the selector is installed. This is a Palmetto State Armory (PSA) model that works just fine for me. Note, some guys like these and some don’t because you will feel it on the other side, which some guys find to be weird and not to their taste. Bottom line, use what you like. If you’ve never felt one before, try and hold an AR with and ambidextrous selector before you buy one.
To install it, first cock the hammer and insert it from left to right with the selector pointing in the “Fire” direction. You may need to wiggle the trigger some to let the selector pass. If you are using a Mil-Spec selector, you are done other than function testing. If you have an ambidextrous selector, most have a groove on the other side and you simply mate up the right side lever. Before install the small screw that holds in it place, put a bit of blue medium-strength Loc-tite on the screw so it is held in place. If you do not apply some form of thread locker, the screw will loosen and fall out.
To function test the fire control group (FCG) overall, you need to do the following but remember to NOT let the steel hammer slam into the aluminum magazine well – control the hammer’s movement with your thumb, fingers or whatever (meaning hold it – don’t put your fingers in front of the hammer and hit them – that hurts!!). Each test below assumes that you can accomplish the step – if not, something is wrong:
Cock the hammer back and the trigger should grab it.
With the selector on FIRE, pull the trigger while holding the hammer with your thumb to control its movement – the trigger should release the hammer.
With the selector on SAFE, pull the trigger and the trigger should not be able to move. If the hammer is released then something is very wrong.
Now, put the selector to FIRE, pull the trigger back and while holding the trigger back, cock the hammer – the disconnector should grab the hammer and when you release the trigger, the hammer should move from the disconnector to the trigger body. Now, pull the trigger and it should fire like normal.
Now, a word of caution – if you do not feel comfortable with any of this, please see a gunsmith. If you have any doubts at all, please see a gunsmith. I want you to enjoy assembling your AR but I want you to be safe even more.
That’s it for this step. Next up is installing the pistol grip, which also includes installing the detent and spring that hold the selector in place because the pistol grip holds them in position.
There are a lot of reputable AR parts vendors online but beware of eBay and bargain basement dealers that sell airsoft parts and tell you they will stand up to firearm use – they will not. At any rate, here are my top sources of AR parts: