Category Archives: AK & Related Rifles

Used to discuss AK-47, AK-74, and related rifles

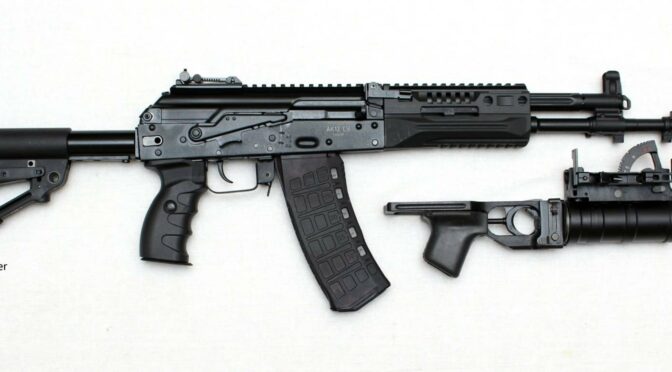
Really Cool Russian Page With A Detailed Breakdown of the 5.45mm AK-12 Rifle

Folks, there is a really cool page in the Russian language that has an excellent breakdown of the Kalashnikov Concern’s AK-12. You can visit it and get a ton of info . A trick I would recommend is to use your browser’s ability to translate a webpage – it will not be perfect but you sure will get a much better idea of what they are talking about.

Click here to go to that page.
We also have a great video in English that gives an overview of the AK-12K, AK-15K AND RPK-16K if you are interested. Click here for that.


If you find this post useful, please share the link on Facebook, with your friends, etc. Your support is much appreciated and if you have any feedback, please email me at in**@ro*********.com. Please note that for links to other websites, I may be paid via an affiliate program such as Avantlink, Impact, Amazon and eBay.


Please note, the image shown above is from the article and remains the property of its respective owner.


July 11th: Zastava Sold Out Of M91 Rifles In One Day – More Due in August

Surprisingly, Zastava has sold all of their first batch of M91 rifles. I say “surprisingly” because I thought the steep price would deter buyers. Atlantic Firearms had it listed at $3,144.99 on 7/10 and pretty much sold out the same day. I guess I should say I was alerted they were there on 7/10 and they were gone by the time I got there. [Note: This is the link to Atlantic’s listing.]
Zastava USA is posting photos of their new M70 PAP rifles and someone asked if more M91s would be coming in. They replied that there would be more in August. Click here for the thread.
I am not sure who else got the M91 besides Atlantic so there might be some others floating around. Two have popped up on Gunbroker but without photos and that always makes me suspicious. [Click here to do a search]

Sorry, but I will not be purchasing one of these rifles at this price point. I simply can’t afford it. I have the M76 (8mm Mauser), the M77 (.308) and will stick with them. I’m hoping the rumors of a FEG Dragunov being imported pan out. [Note, my M77 cost me something like $6-700 from Centerfire hence my disappointment at the price of the M91.]


If you find this post useful, please share the link on Facebook, with your friends, etc. Your support is much appreciated and if you have any feedback, please email me at in**@ro*********.com. Please note that for links to other websites, I may be paid via an affiliate program such as Avantlink, Impact, Amazon and eBay.


Video: Kalashnikov Concern Releases the Civilian Version of the AK-12: The AK TR3 Rifle

I wish I had better news but Youtube cancelled the channel for the Kalashnikov Concern so the video is no longer available. I am leaving the post up so at least you can see the screen shots.

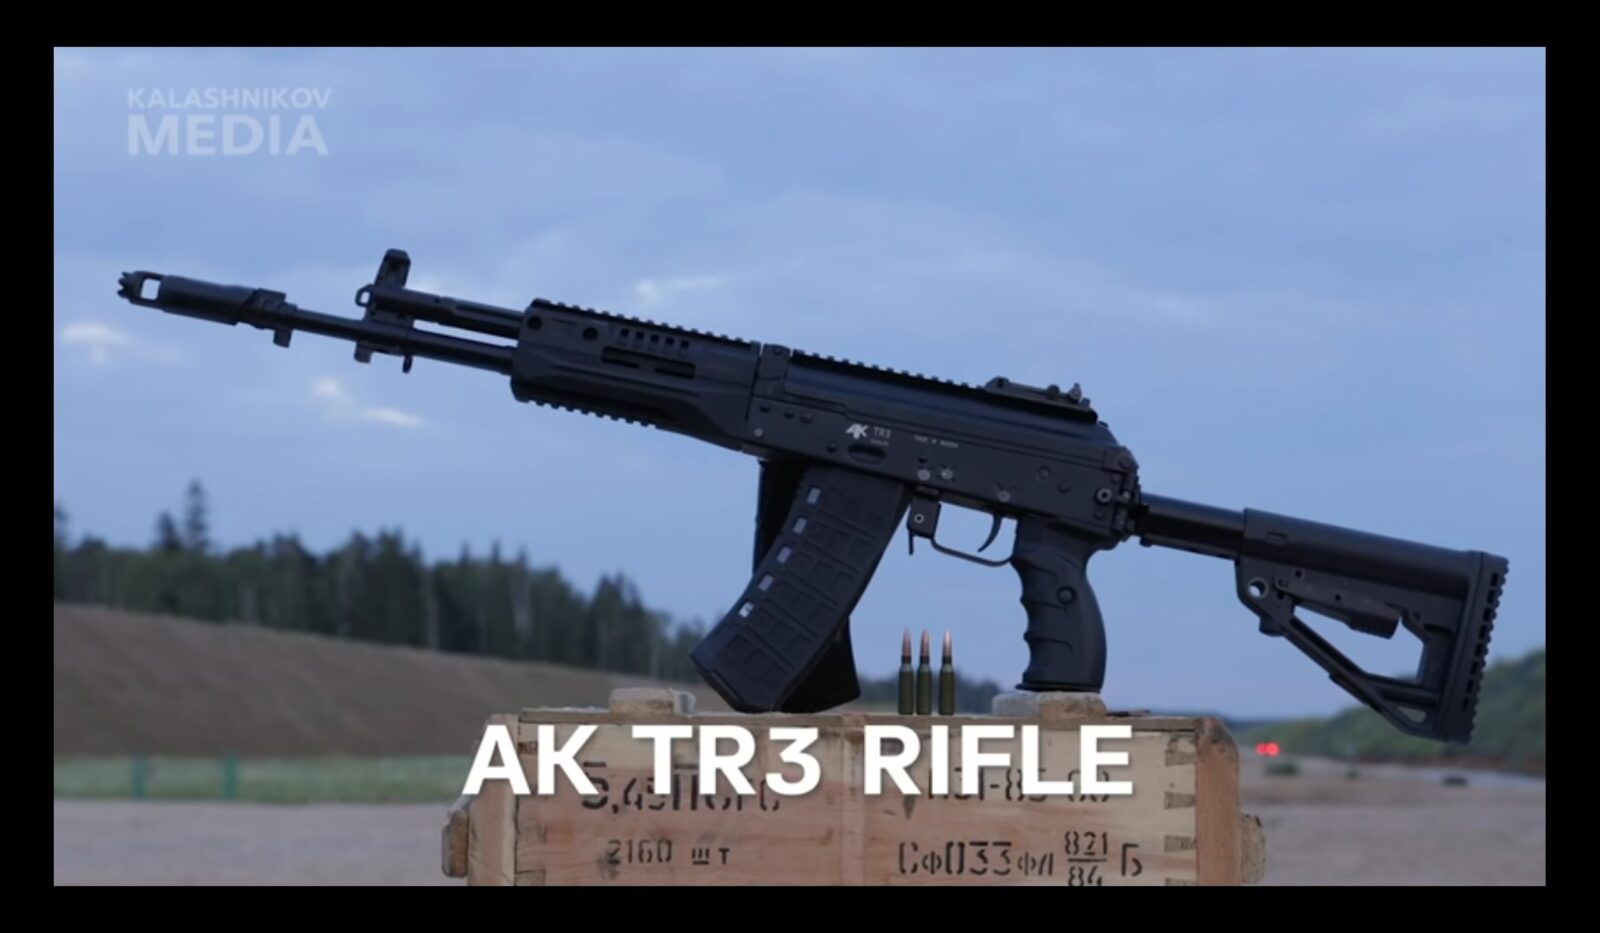
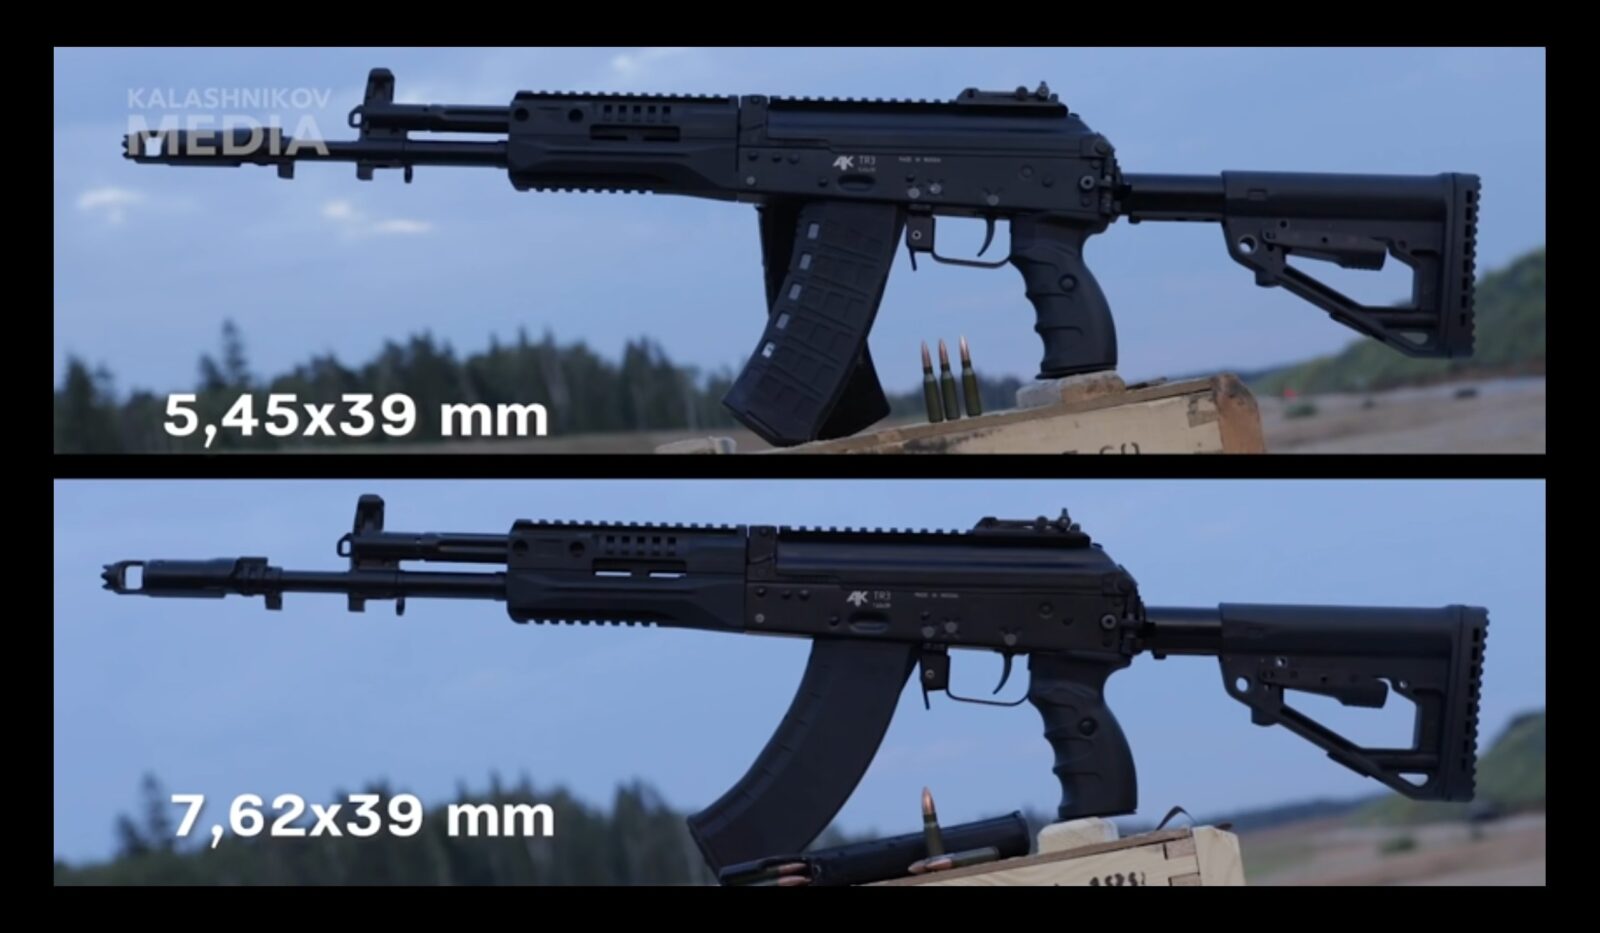
Because of the import restrictions of the Russian firm Kalashnikov Concern, Americans will not get a chance to see a cool new rifle just released by them. Their AK TR3 rifle is a civilian version of the modern AK-12 and will be available in both 5.45×39 and 7.62×39 cartridges. [Click here for a previous post that goes into the AK-12 in more detail.]

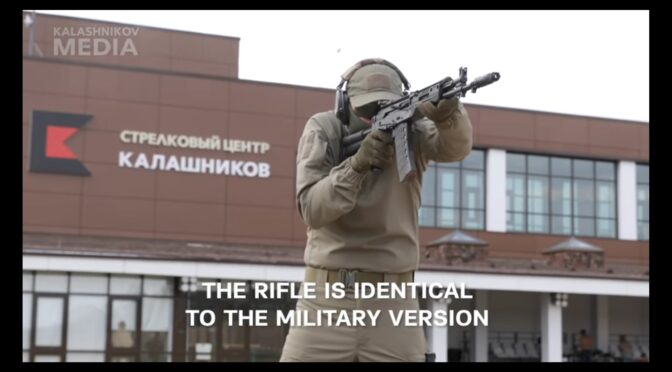
The AK TR3 is identical to the military AK-12. Note that it has three fire control group pins.
The AK TR3 is chambered for both traditional Russian cartridges, the 5.45×39 and 7.62×39

Yeah, I sure wish I could buy an AK TR3 but given the political issues between our countries, that is not going to happen. Regardless, it looks like a very slick rifle and I’ll just have to ogle it from afar.


If you find this post useful, please share the link on Facebook, with your friends, etc. Your support is much appreciated and if you have any feedback, please email me at in**@ro*********.com. Please note that for links to other websites, I may be paid via an affiliate program such as Avantlink, Impact, Amazon and eBay.


All images were extrated from the video and remain the property of their respective owner.


Changed my Yugo M76 Scope Mount To An American Defense AD-RECON-SL and It’s Rock Solid!!

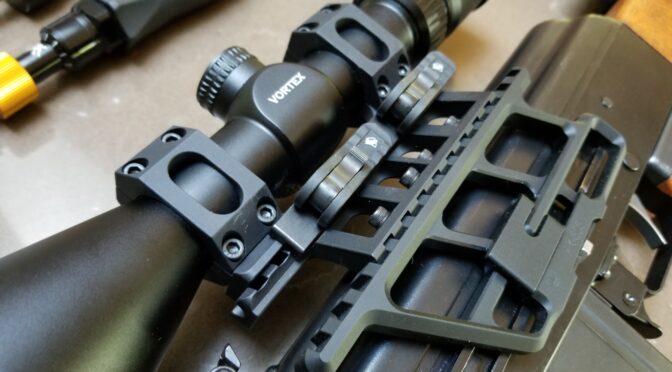
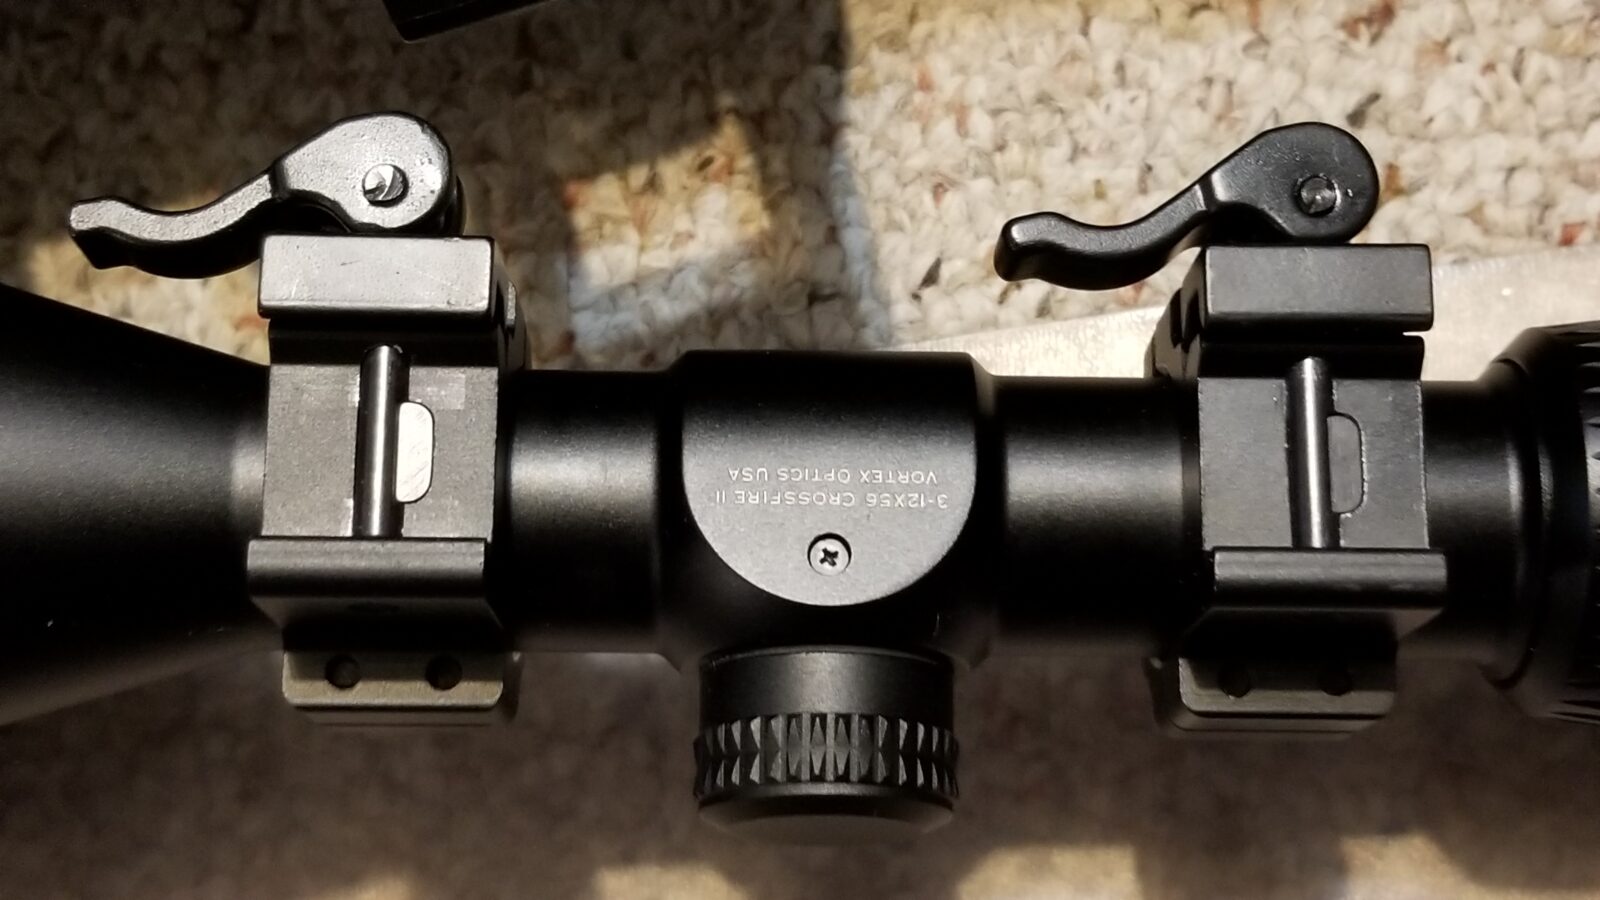
When I was adding the big Vortex Hog Hunter scope to my M76 with RS Regulate side mount optics rail, all I had to prototype with were UTG rings. While the UTG rings aren’t too bad, I have stopped using them with centerfire rifles because they have a rounded screw that passes through the Picatinny rail rail slot. It’s rounded shape and only partially filling the slot risks damaging the rail and the zero shifting because the ring(s) can move.

These are the UTG low profile rings. Note how the screw is round and not rectangular? Also, after 30 rounds of 8mm Mauser firing, the rear flip lever rattled loose.

What is really needed is a quality ring or scope mount that uses a bar that properly fits into the Picatinny Rail slots and locks the optic securely and consistently into position. American Defense mounts are that way and they have an excellent locking lever.

I started using American Defense mounts for my Vortex Crossfire Red Dot optics a little over a year ago and was very satisfied with them and very impressed by their quick release lever design. So, when I needed a new mount for my M76 that was strong enough to hold the big Vortex Hog Hunter scope on my M76 and would clear rear sight block but also be close to the bore, the American Defense AD-RECON-SL immediately came to mind.

American Defense AD-RECON-SL

American Defense started with their QD Auto Lock System – the quick release lever system they developed. – and have branched into a variety of offerings from there including scope, bipod, light, laser and other mounts. In short, they are capitalizing on their really rugged QD levers.

So, the first thing I did was to measure the UTG mount from the top of the rail to the optic center, which I used the top of the lower half ring. That measure came to about 0.975″ and I knew any mount I bought had to be at least that or bigger. The front objective was all but touching the gas tube cover with those UTG low rings.

The AD Recon series has a variety of heights and offsets to select from and they publish specs for you to make an informed decision. In my case, because the RS!Regulate side mount already has front-to-back adjustment, I didn’t feel that I needed any offset but I did want to find as low of a scope mount as I could.

In looking at the specs, the AD-RECON-SL seemed to fit the bill. It had no offset and was their lowest mount with a 1.110″ center for scope with a 30mm tube. it was a tad higher but the slightly higher 0.135″ difference really didn’t worry me so I went ahead an ordered one.

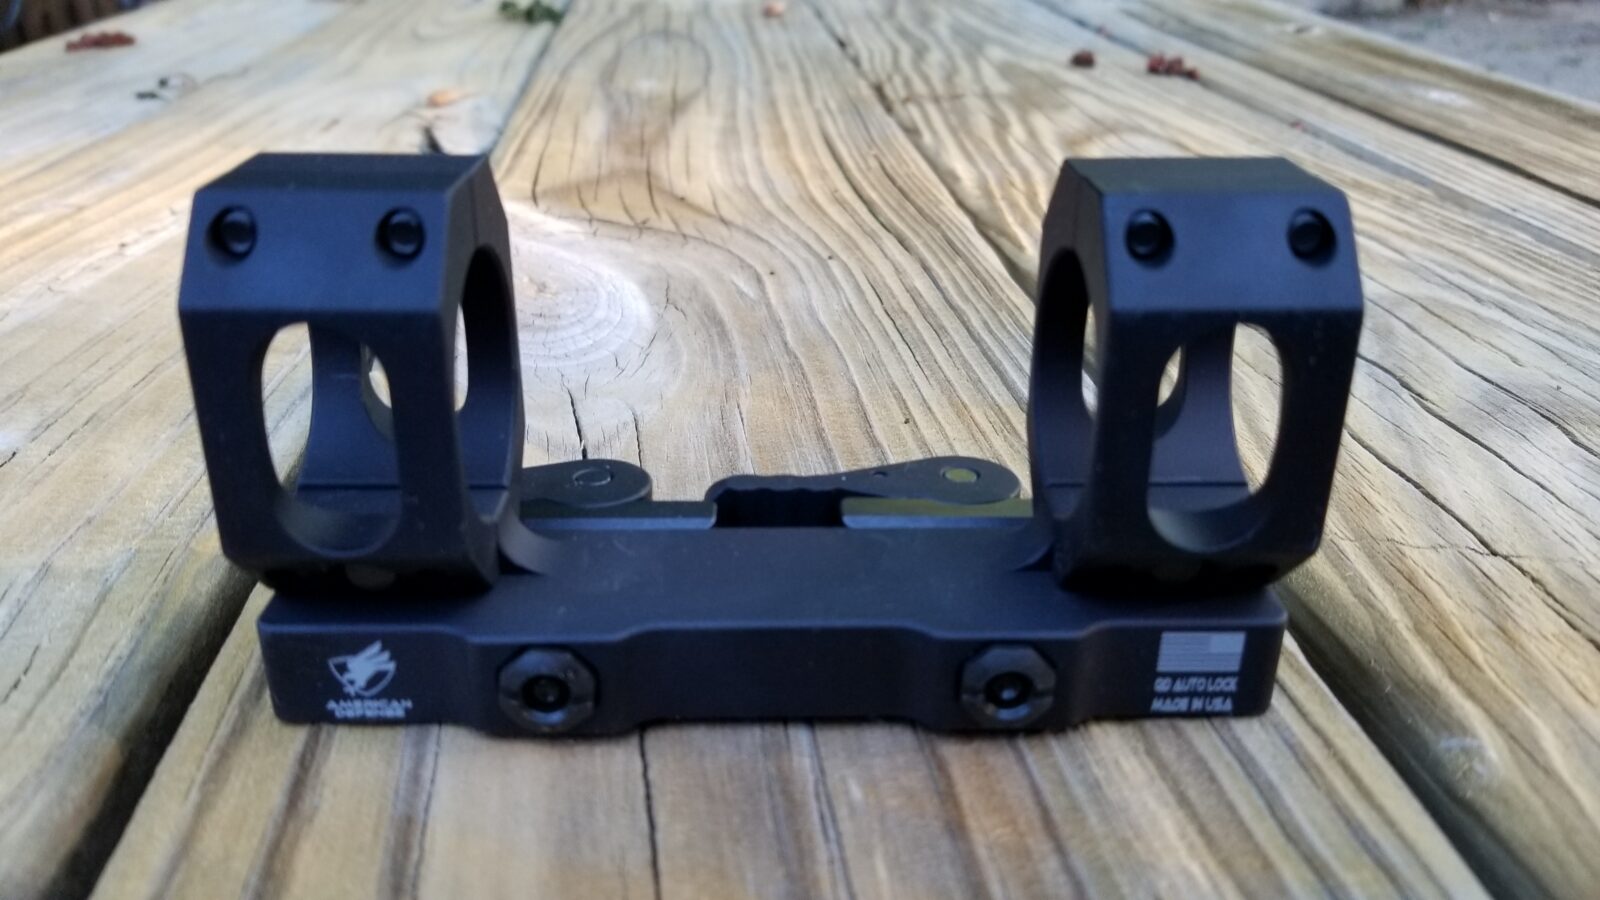
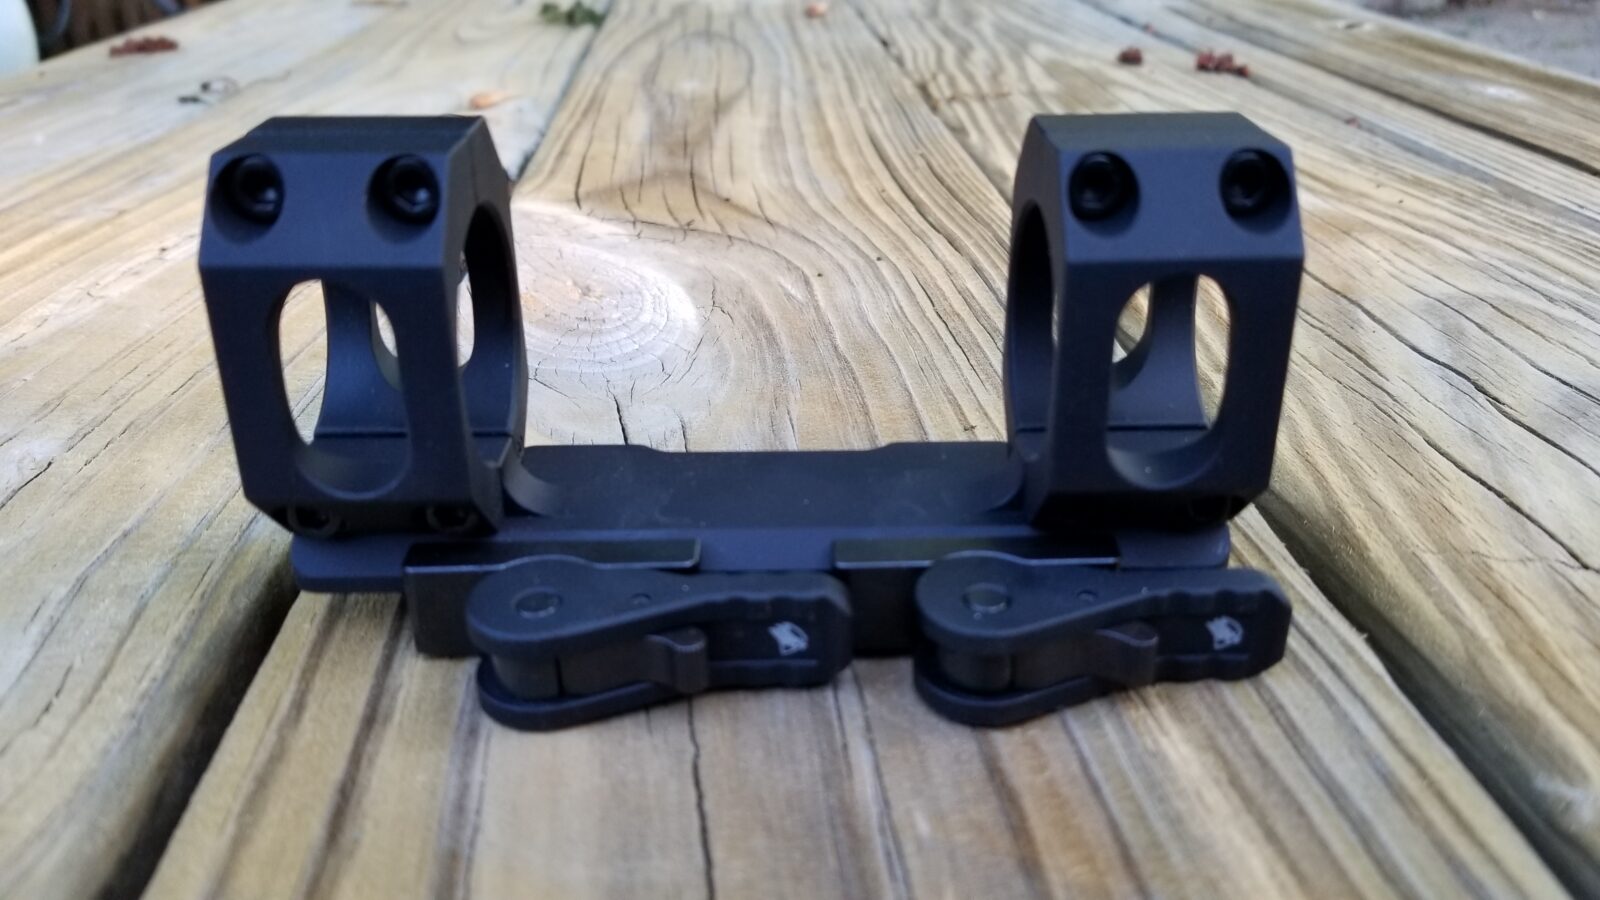
Folks, the AD-RECON-SL did not disappoint. It is really a gorgeous piece of engineering. The fitment is excellent and is finished in a black hard coat. Here are some photos:

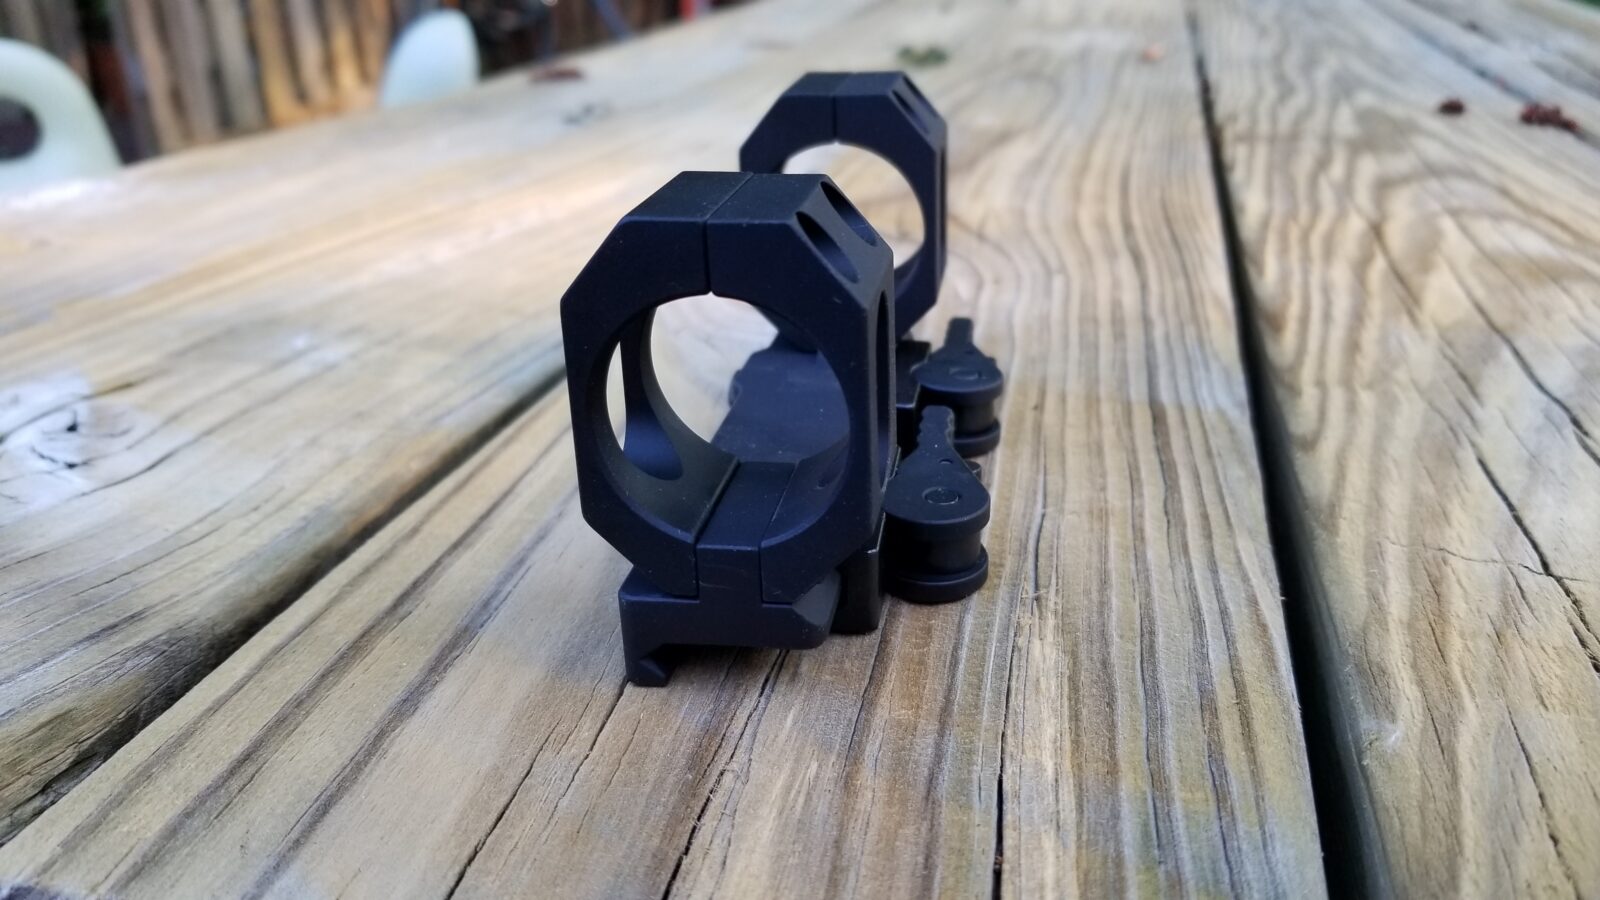
Here’s the side of the unit with the adjustment nuts. I love the flag on the side.
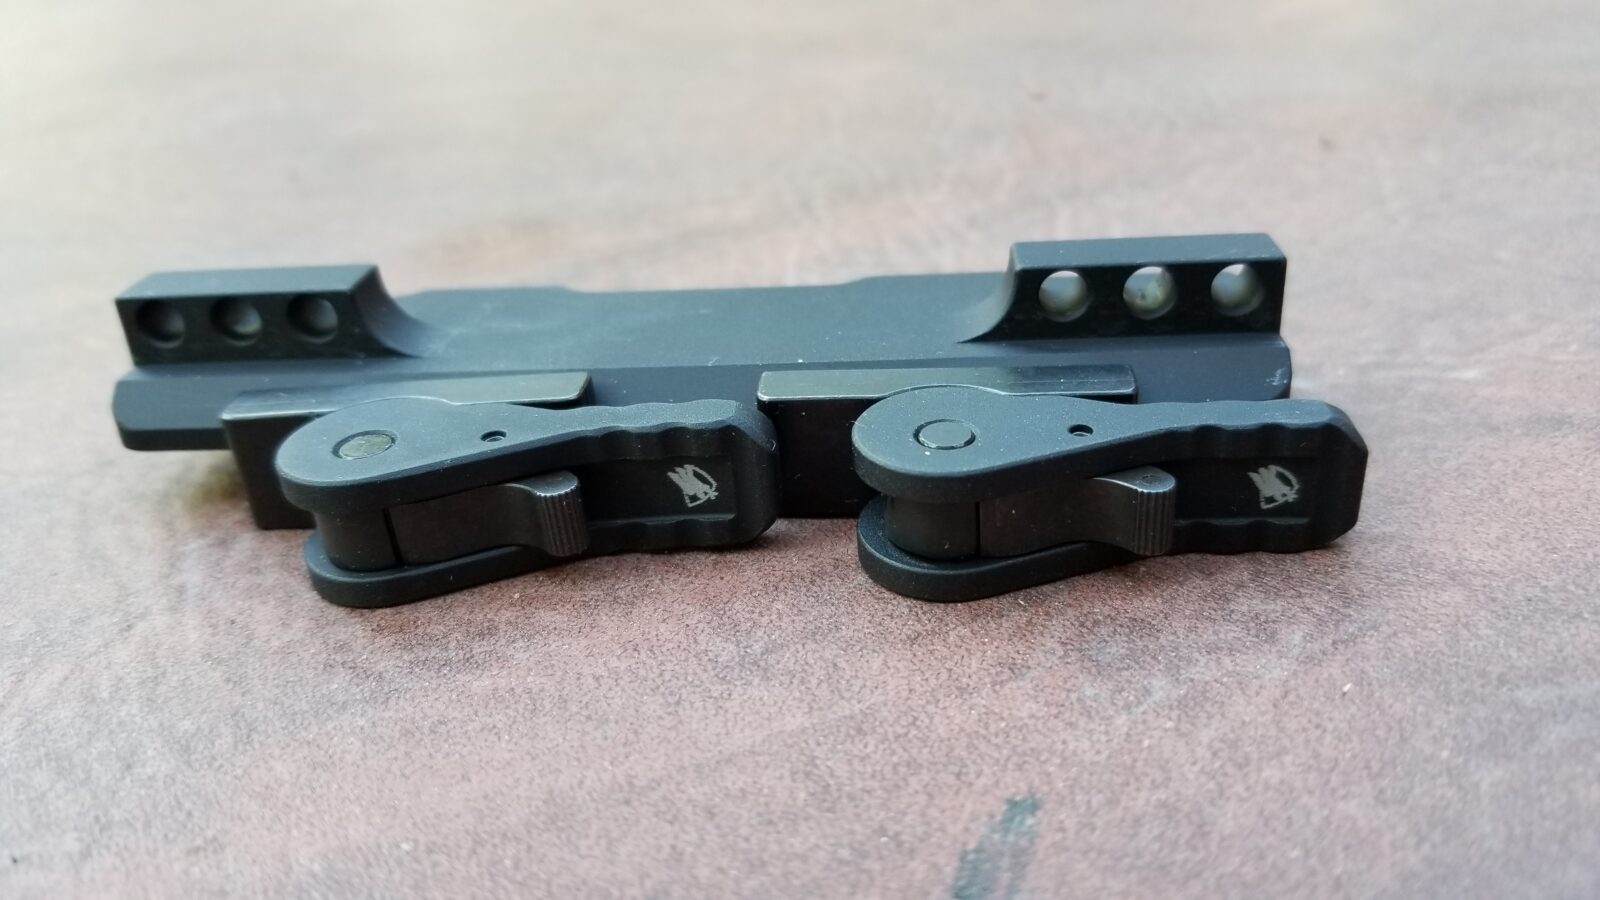
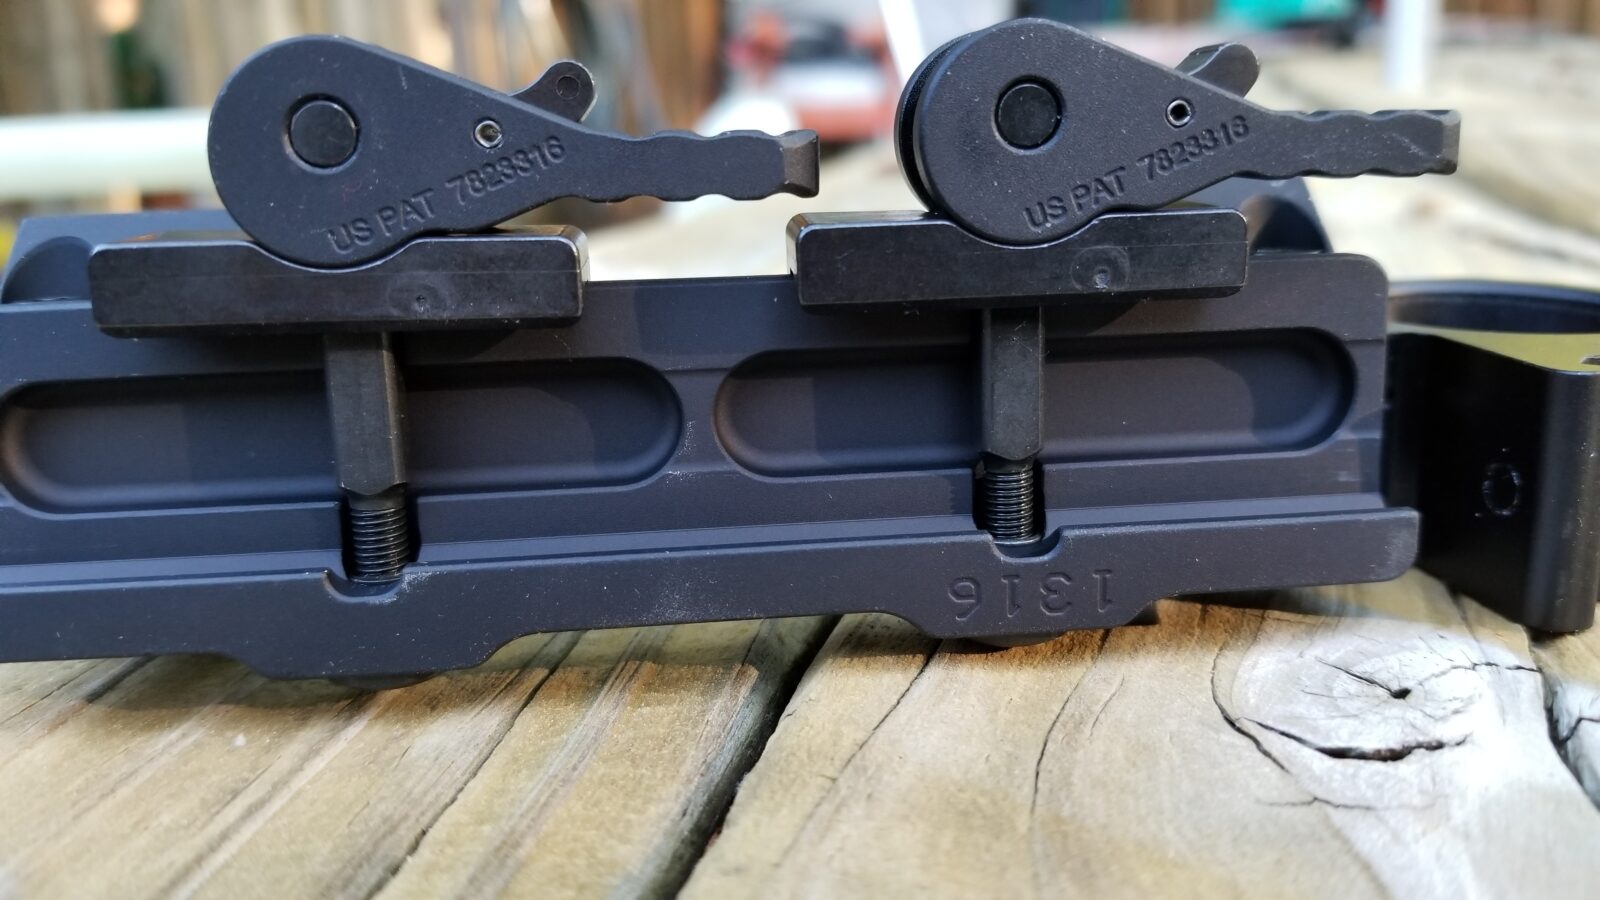
Here it is with their patented QD levers. The small lever you see in the middle of the bigger lever is the locking mechanism that keeps the unit secure. The moment you flip those rings you know your dealing with quality.
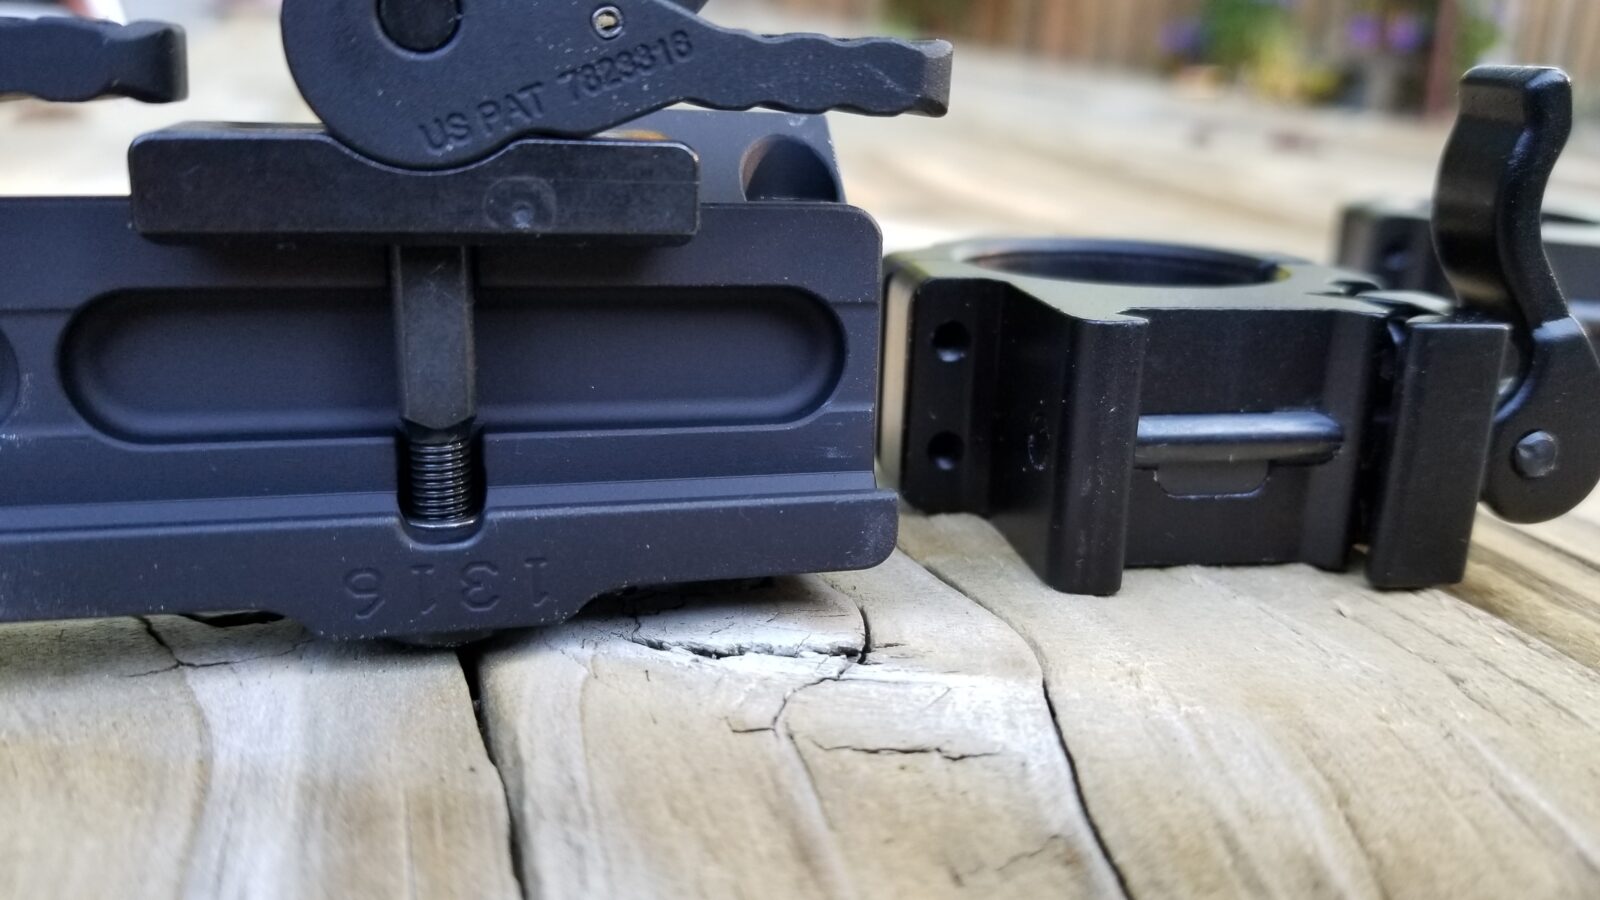
See how American Defense uses bars to lock the mount into the Picatinny rail? This is the way to go. It makes for a very secure and consistent engagement meaning your optic’s zero will not shift and the rail will not get damaged over time under heavy recoil with a simple round screw.
Yeah… that’s the American Defense unit on the left and the little UTG ring on the right. I would have no hesitation recommending the UTG rings for a rimfire or light recoil applications but not for something where there is significant recoil and a heavy optic combined.
Here’s another angle.

But Why Have QD Rings on a RS Regulate Mount?

I do need to explain this. I can bet that I will need to take the dust cover off for some reason and don’t want to rely on tools. If I am hunting, I may not have any tools with me and need to clear a jam or something. That means I need a way to remove the scope and rail to get access to the dust cover.

The RS Regulate’s lower rail does have a quick take down lever that solidly clamps on the M76 rail. That is not the issue and may make you wonder I need another quick release system. The challenge is that the Hog Hunter scope has a giant 56mm front objective for gathering as much light as possible in low-light situations such as dusk. It will hit the M76’s rear sight block if pulled straight back when mounted as low as I want. The solution is to use the AD-RECON-SL optic mount to enable me to lift the scope off the RS Regulate’s top rail and then I can slide the RS Regulate assembly off. The combination definitely works.

Installation

Taking the mount apart was easy – remove the four screws on each ring. I was pleasantly surprised that they used a precision pin to guide the rings into position and not just the screws. Again, this makes it stronger and more consistent.

Here’s a close up of the base. The middle hole is for the guide pin and the outer holes are for the screws.
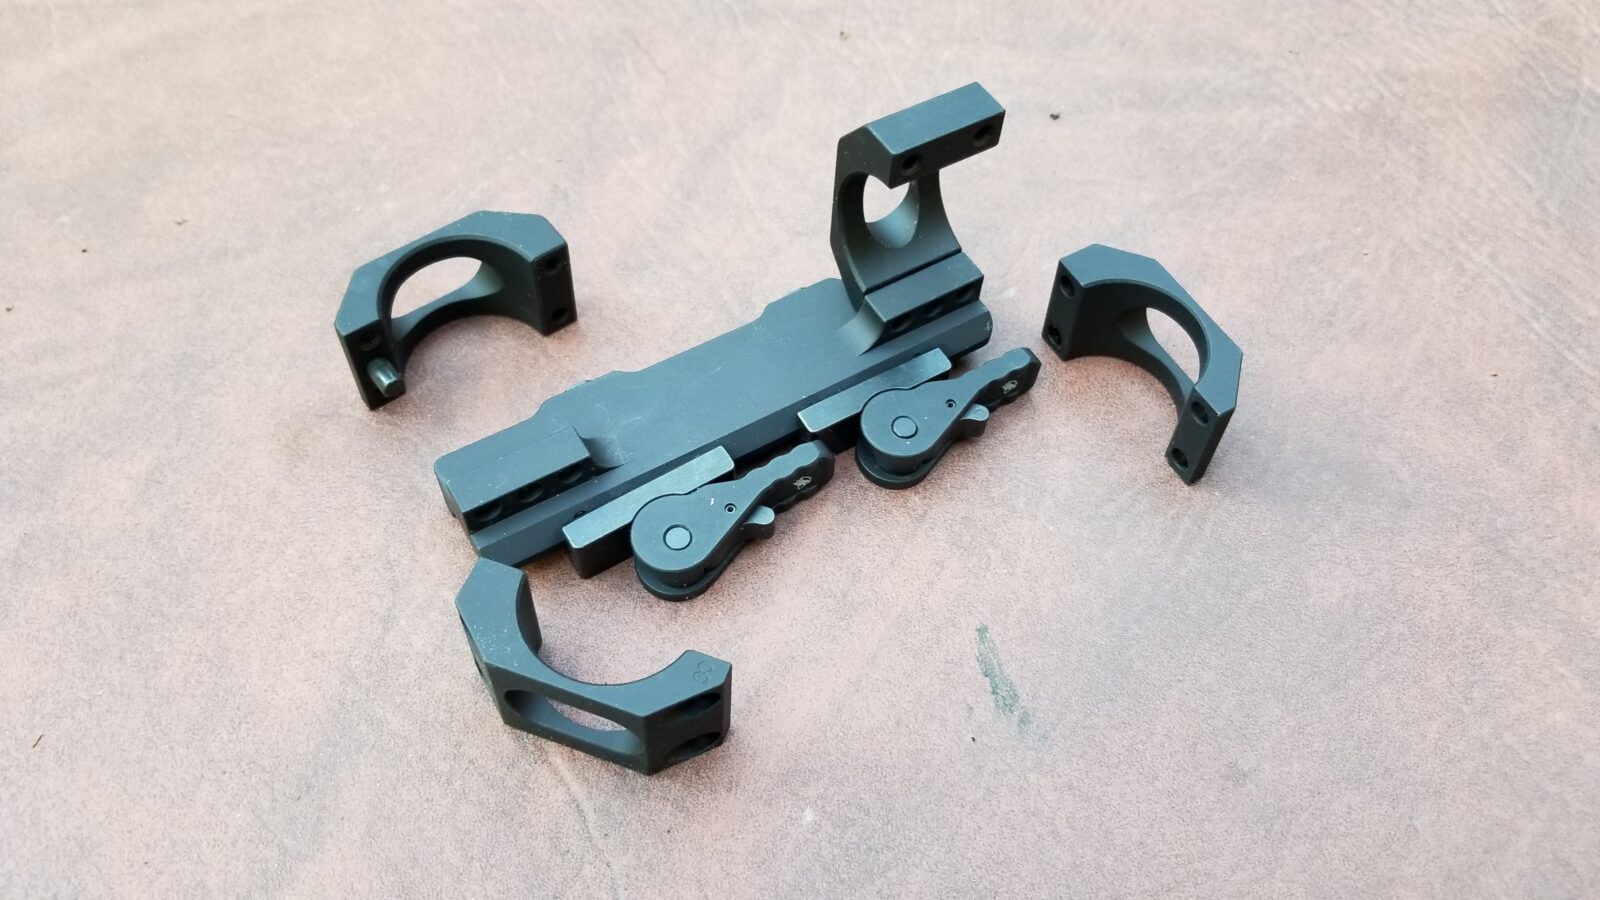
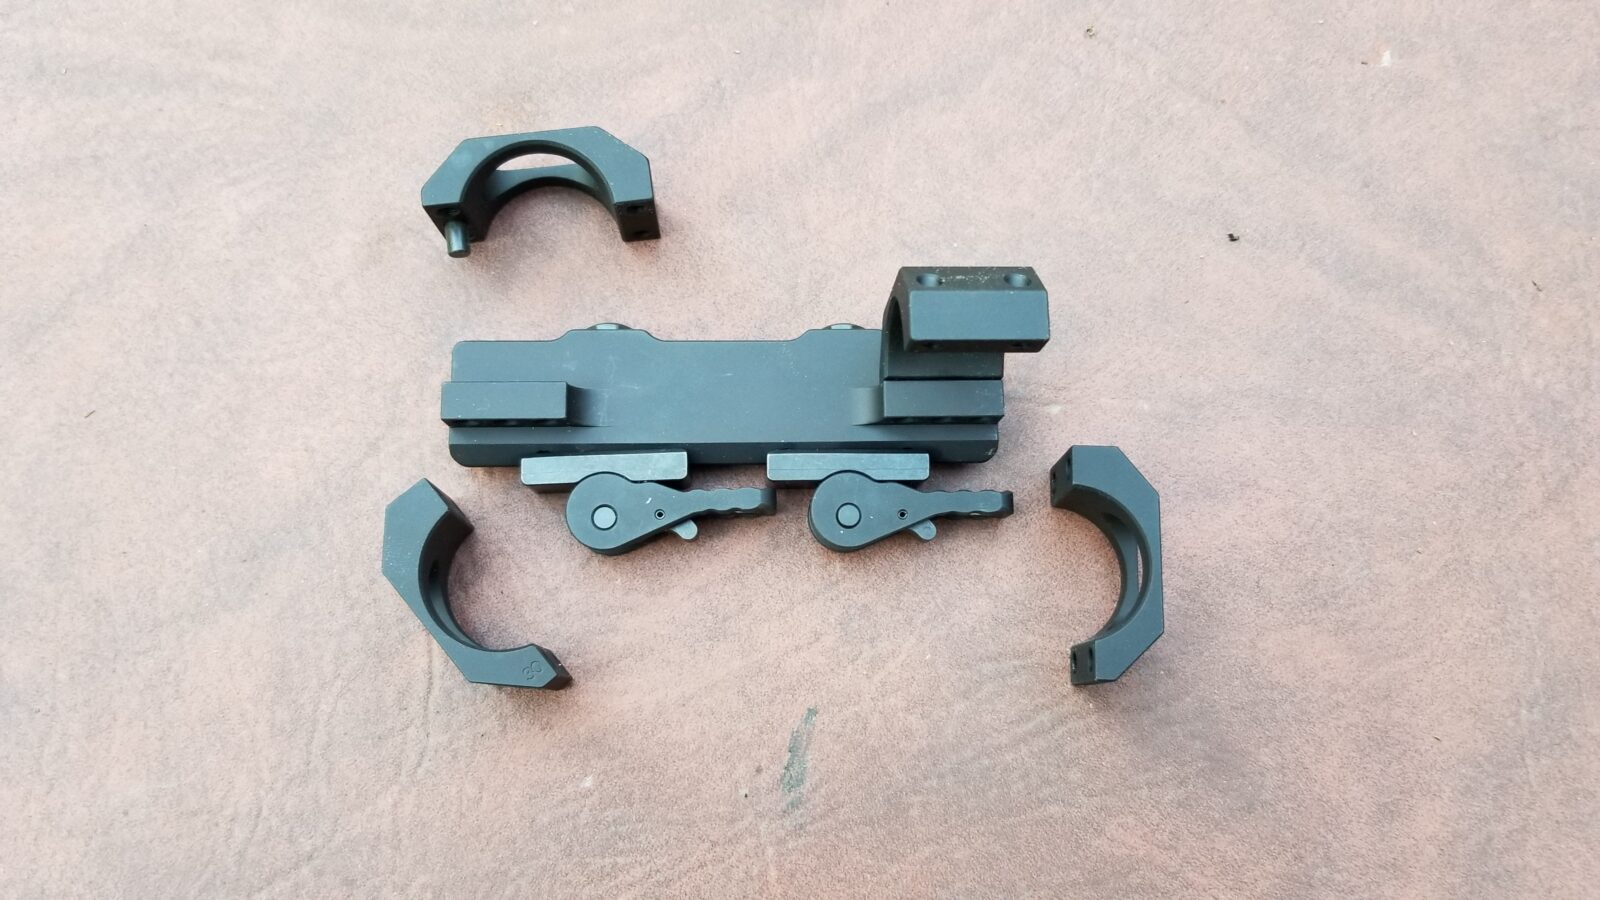
Here you can see the four halves of the rings. The half to the top left with the guide pin. Its counterpart is already installed in the back.
An important design aspect to note is that the halves are not symmerical from top to bottom. The side with the pin is a no-brainer – that goes in the base. The other two halves without pins need to have the thinner section at the bottom for the pieces to mate up correctly. You can see in the top left half that the bottom part with the alignment pin is not as tall as the top. The lower-right is also a good angle for you to see the thinner bottom relative to the top.

There is an installation detail that you may not guess and they detail it in their installation instructions – you install the bottom screws first and tighten them down to the 20-25 in/lbs torque spec first. For folks not used to working with small fasteners, please note that is inch pounds and not foot pounds).

The bottom is torqued down first and then the top. There will be a small gap at the top. This method of bottom then top torquing centers the optic in their design. The only thread locker they will recommend is VC-3 Vibra-tite and the use of anything else will void the warranty. I’ve used a lot of Vibra-tite with Kydex holsters – it’s interesting in that you clean the fastener, apply the VC-3, let it dry and then assemble. It creates a rubbery surface that pretty much negates vibration. It also stays put when you unscrew and reinstall screws. It’s interesting stuff. They include a small packet of it with the mount but I also keep it around for working with Kydex fasteners and other situations where I expect there will be a need to uninstall and reinstall or adjust screws.

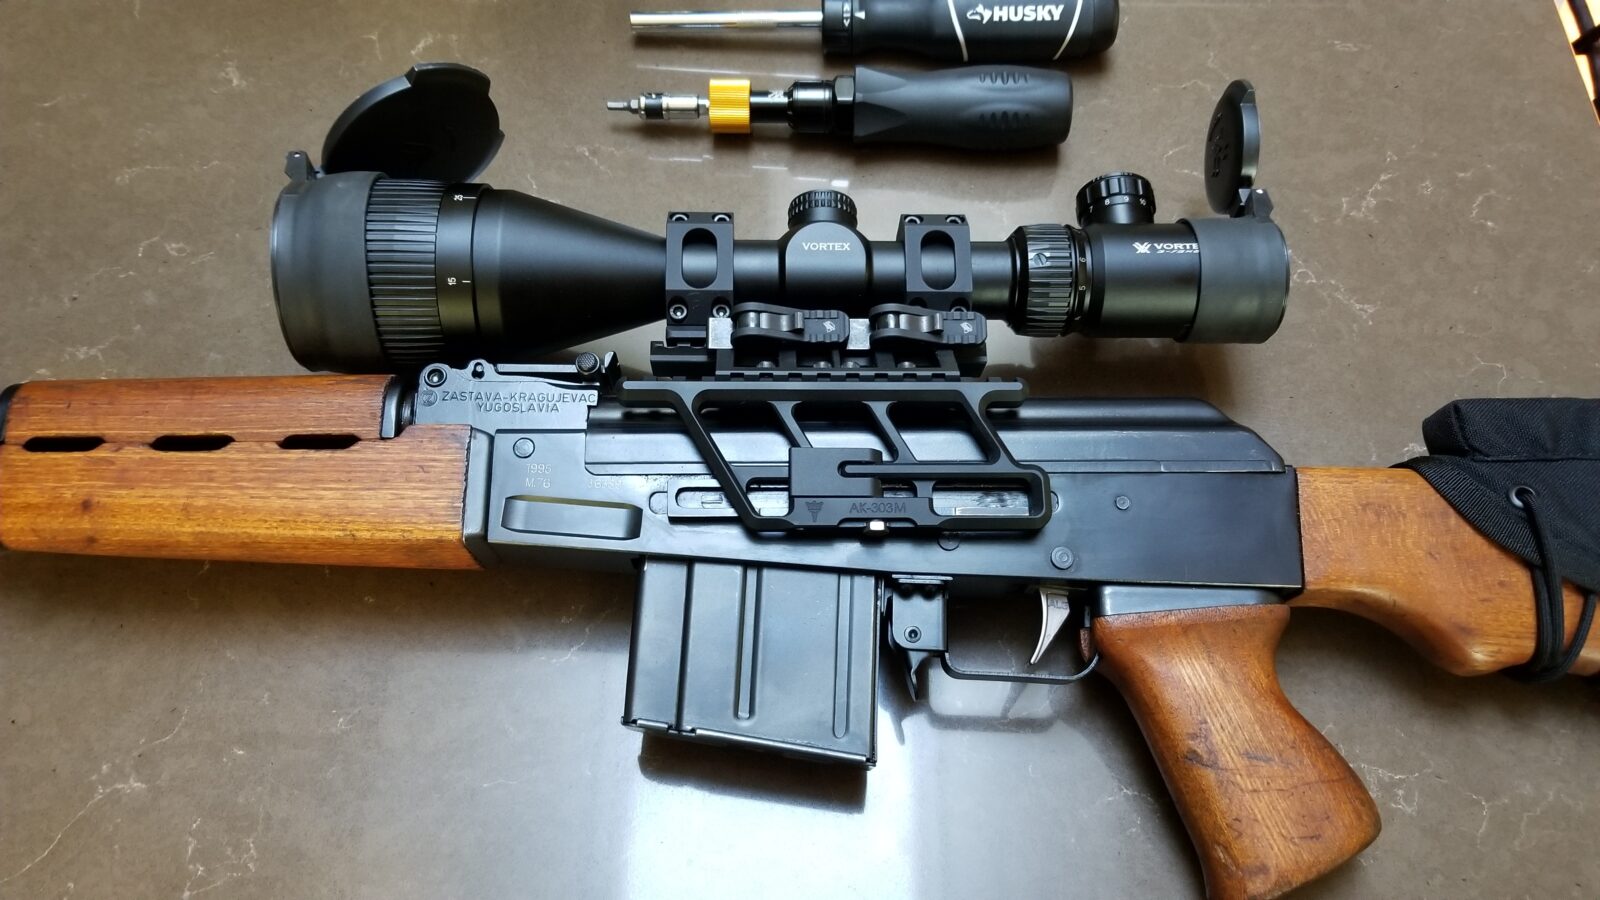
Here’s the M76 rifle with the American Defense mount installed. Note I used my Vortex torquing screwdriver to do the installation. It’s definitely a precision instrument and what I use for all optics work now. I take care to return it to zero after each use.
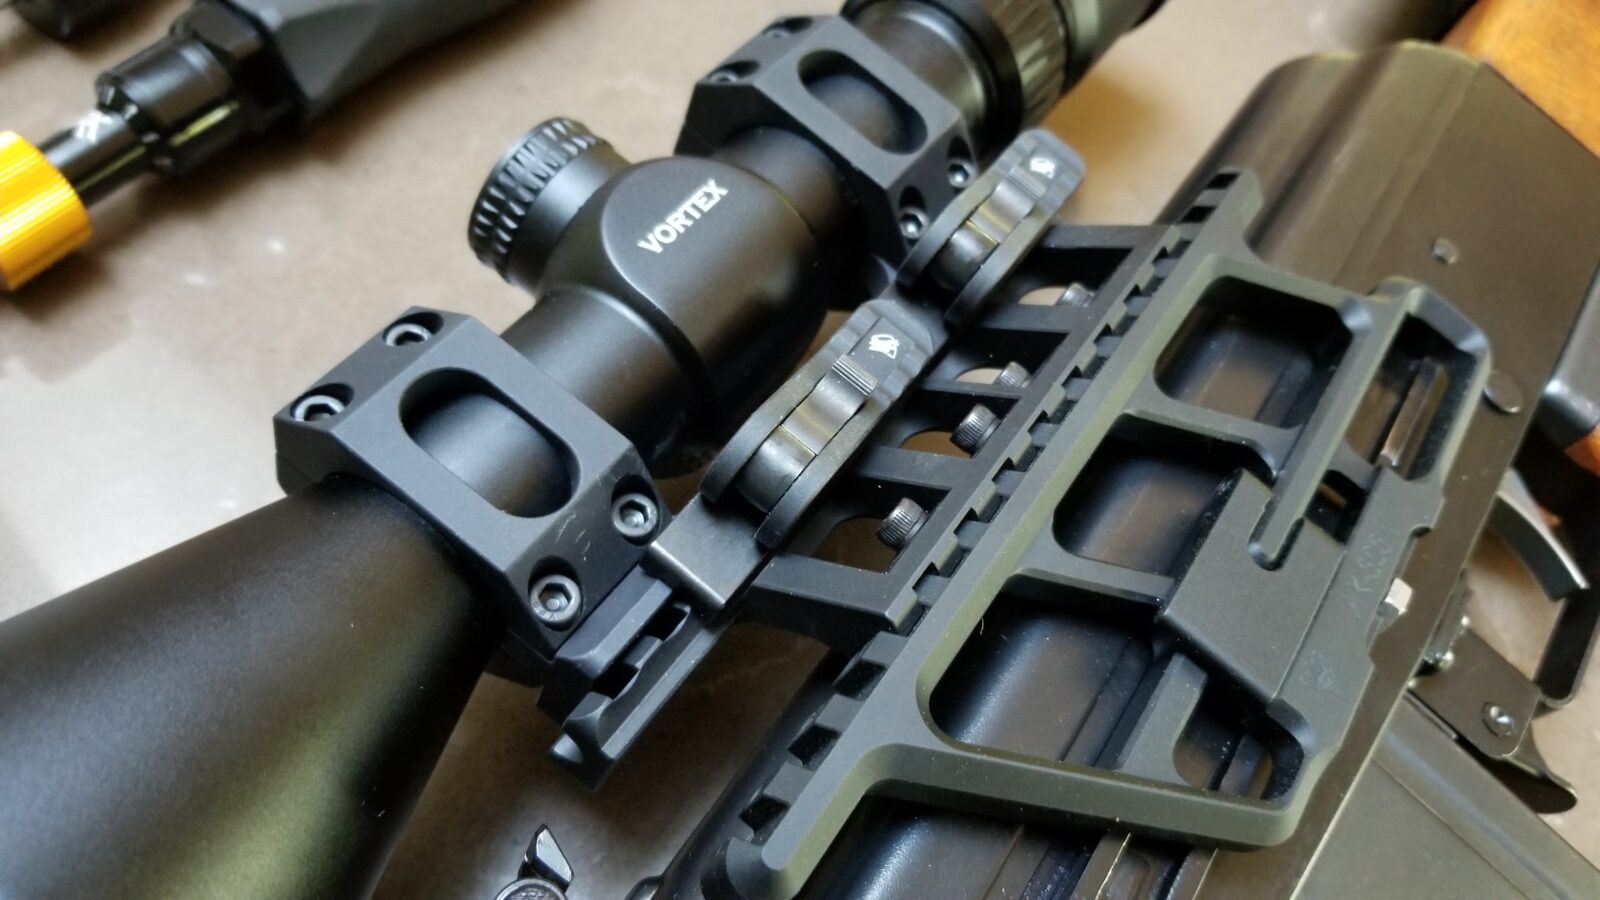
Here it is from another angle.
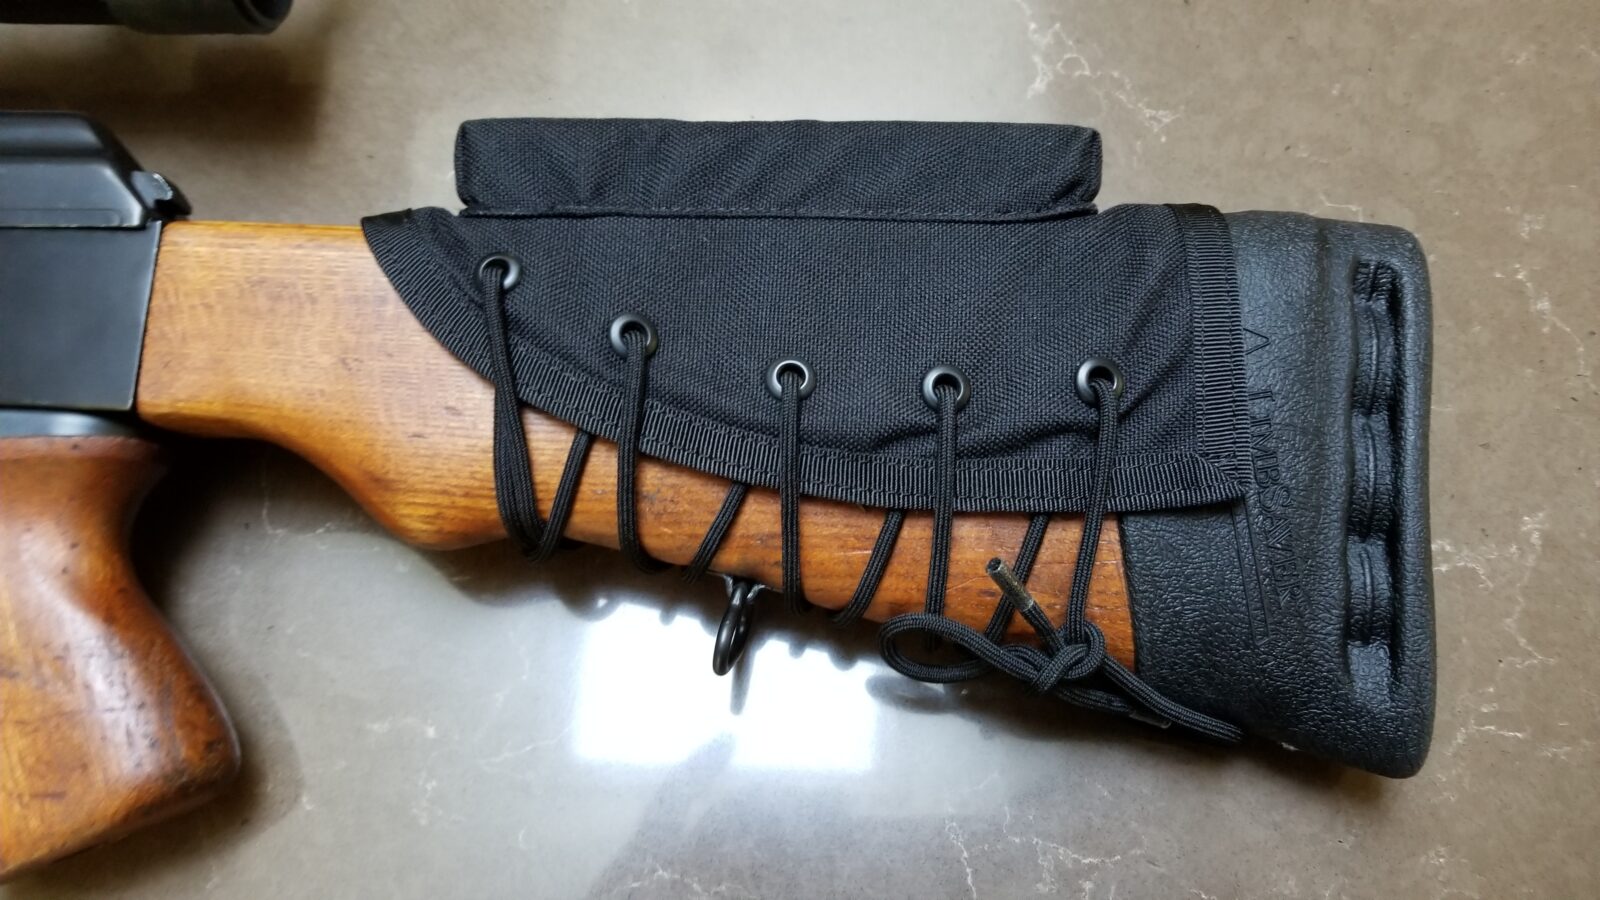
I changed cheek pieces to get a better cheek weld. This unit is nice and stable. I’m so-so about the cheek pad itself and wish it was a bit wider but it is better than the Voodoo cheek pad that was there. I’m still hunting for an even better cheek weld and have some options I want to try that I will report on at a later date after I have a chance to try them. To be clear- it is a solid cheek piece and the right height but personally I do not like the feel of that relatively narrow riser.

In Summary

The combination of the RS Regulate side mount system and the AD-RECON-SL optic mount is absolutely rock solid as in zero flex at all. even with the big and heavy Vortex Hog Hunter scope. I really think I have the ideal optic solution now for the rifle. The length of pull is better thanks to the installation of a SVL slip-on Limbsaver pad. I still need to find a better cheek piece to get my eye just the way I want it comfortably behind the scope and have some options to try. Last thing to report is that I did do some work on the firing pin but haven’t had time to test the rifle again.


If you find this post useful, please share the link on Facebook, with your friends, etc. Your support is much appreciated and if you have any feedback, please email me at in**@ro*********.com. Please note that for links to other websites, I may be paid via an affiliate program such as Avantlink, Impact, Amazon and eBay.


Add Length of Pull to a Yugo M70, M72 or M76 Wood Buttstock WIth A Limbsaver Recoil Pad

Normally, I like the length of the Yugo M70 and M72 buttstocks. They’re shorter than many Western fixed stock designs but I’ve just grown accustomed to the length of pull (LOP). Recently, I had Two Rivers Arms build me a M76 designated marksman’s rifle (DMR) and found the stock to be a tad shorter than what I wanted to get in position behind the big Vortex Hog Hunter scope I had bought for it.

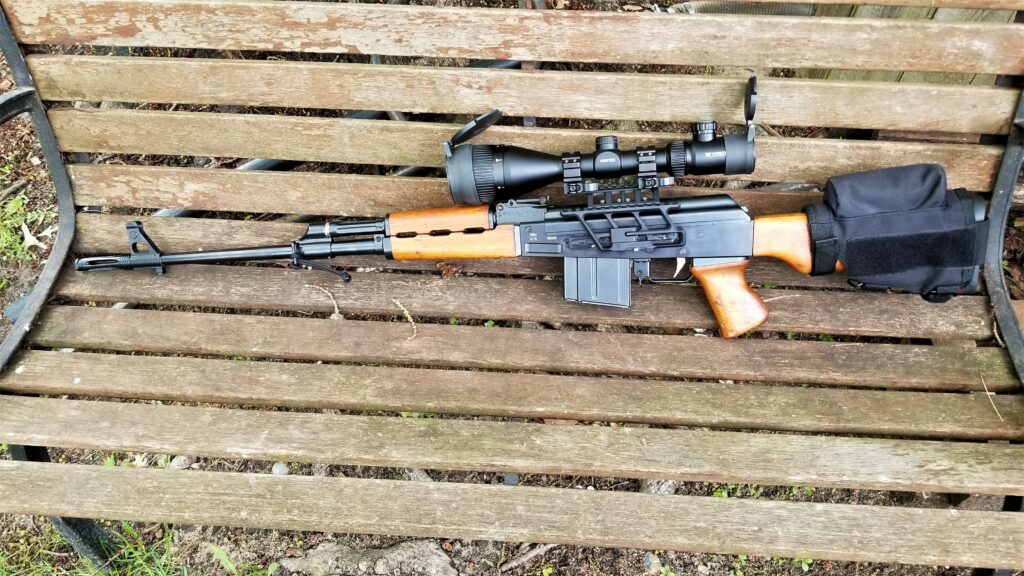
Two Rivers Arms custom built Yugo M76 rifle with a RS!Regulate scope mount and Vortex Hog Hunter scope. The UTG rings have been replaced with an American Defense mount and the cheek piece will be replaced but you can get an idea that this is a big rifle and a big optic.

I realized that to make the LOP longer, I had two options. My normal route with an AK is to install a stock adapter and either go to some form of modular stock. In the case of the M76, I really wanted to stick with the original wood. The brought be to my second option – to add a recoil pad.

There are a ton of recoil pads on the market but as far as I know, nobody makes a direct replacement recoil pad for the Yugo military rifles other than me and my pad is a copy of the original. This gives you two options also – either cut the stock and install a “grind to fit” pad that would ruin the original stock or to go with a slip on pad.

Slip on recoil pads are designed to fit a certain range of buttstock sizes based on the height and width. They may not be the best looking of options but they get the job done and don’t require any modifications to the underlying stock — plus for folks who don’t like messing with tools – they can be slid on and off usually very easily.

End of Buttstock Size for Yugo M70B1, M72B1, and M76 Rifles

Zastava made the Yugo rifles but is now in Serbia and makes both commercial and military rifles. The dimensions I am about to give so you can get the proper pad only apply to he military rifles. If you have a Zastava N-PAP for example, your stock is much smaller and I don’t know the dimensions.

If you do have a military sized Yugo M70B1, M72B1 or M76 then the following should sizes should be approximately right:

  • Top to bottom of the buttstock overall: 4.48″ so just under 4-1/2″
  • Left to right at the widest point: 1.29″ so just under 1-1/3″

So that means a slip on buttpad needs to accomodate those dimensions and will slide right over the original recoil pad as well.

Limbsaver by Sims Vibration Labs

Years ago, I happened across Limbsaver recoil pads and started using them more than Pachmayr, which is another leading brand. I’ve had very good luck with Limbsaver so they were my go-to when it came to the M76.

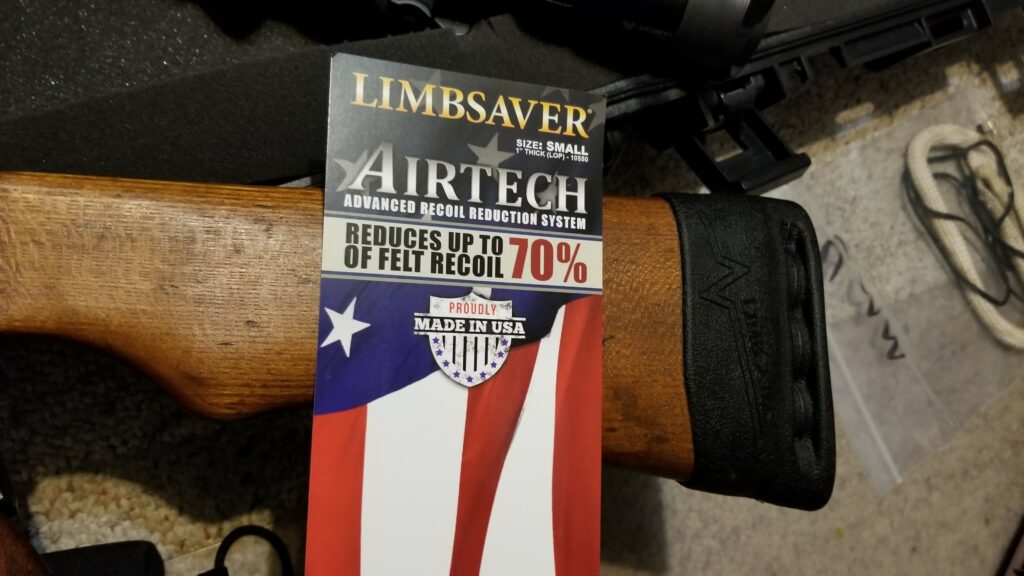
They have a new Air-Tech series that adds 1″ to the LOP and is also remarkably spongy to absorb the recoil. The M76 really doesn’t have a ton of recoil so my decision was more based on the 1″ LOP.

The AirTech slip on pad comes in four sizes:

  • “Small” fits stocks measuring 4-1/2 x 1-1/2 inches to 4-13/16 x 1-5/8 inches
  • “Small/Medium” fits stocks measuring 4-5/8 x 1-9/16 inches to 5-1/8 x 1-3/4 inches
  • “Medium” fits stocks measuring 4-13/16 x 1-5/8 inches to 5-1/8″ x 1-3/4 inches
  • “Large” fits stocks measuring 5-1/8 x 1-3/4 inches to 5-3/8 x 1-7/8 inches

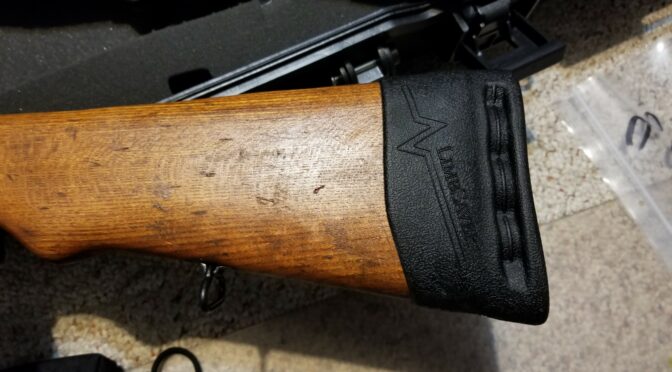
Given those dimensions, I opted to buy the “small” size and it fit beautifully. [Amazon has all four sizes – click here to see them]

The small-sized pad slid right on and fits nice and snug.

I actually wish they had a pad that added about 1/2-3/4″ of pull as that would be perfect. The end result is just a tad longer than what I would dial in with an adjustable Magpul PRS stock but it definitely feels better when I start lining up behind the scope. It’s staying on the rifle!


If you find this post useful, please share the link on Facebook, with your friends, etc. Your support is much appreciated and if you have any feedback, please email me at in**@ro*********.com. Please note that for links to other websites, I may be paid via an affiliate program such as Avantlink, Impact, Amazon and eBay.


Yes, There Is A Published Specification for the AKM Fire Control Group Pins

I had a fellow who was new to AK-47s/AKMs ask me the other day how the two pins work and if there was a published specification for them because his were floating in their holes. I learned a long time ago to try and help guys learn so I took a few photos and sent them to him.

Two Pins for Semi-Auto AKs

In a fully automatic AK, there are three pins and they are referred to collectively as the fire control group (FCG) pins – this includes the hammer pin, trigger pin, and sear pin – once in a while you’ll see the word “axis” thrown in there somewhere. For most civilians, we’ll just see semi-auto AKs so there are just two pins – one for the hammer and one for the trigger assembly which is made up of the trigger and disconnector. They are still called the FCG pins.

For anyone that is interested, a 1968 Soviet era armorer’s manual does have the pin specification:

This is from a Soviet era Armorer’s Guide that specs out the AKM fire control group pin. The shaft is 5mm and is where the trigger and hammer rotate. The same type of pin is used for both the trigger and the hammer – they are not unique.
Here is a pile of pins from a mix of countries. I had them in one of my parts boxes. The diameters of the shafts vary from 4.921 to 4.988mm according to my micrometer. Based on the armorer diagram above, a diameter under 4.97 or over 5.03mm is out of spec. Three of those pins were under 4.97 interestingly enough.

Odds are that the heat treat is messed up on his receiver or someone drilled the holes out of spec. He has enough info now to decide his next steps and since I wrote most of this already, I decided to post it in case it helps someone else.

Accessing the 1968 AKM Armorer’s Manual

I am going to try hosting his huge armorer’s manual PDF file and see how it goes. If people have problems downloading it, I’ll just remove the link – click here for the 64MB PDF file. Note, I am not the owner or creator of that file. Someone did us a huge favor by taking the time to scan in all the pages and share it. It is in Russian and has a ton of diagrams.


If you find this post useful, please share the link on Facebook, with your friends, etc. Your support is much appreciated and if you have any feedback, please email me at in**@ro*********.com. Please note that for links to other websites, I may be paid via an affiliate program such as Avantlink, Impact, Amazon and eBay.


6/4/19 Update From Zastava Regarding M91 Rifles

This will be short post and not a very happy one from my perspective. A few days ago, I emailed Zastava USA for an update on their planned importation of the M91 rifle. They responded to me on June 4th and reported that they will have a “very limited number” some time this summer and the MSRP is $3,400. Wow. I had hoped it would be much more affordable than that – I’ll just have to stick with my M76 and M77 at that price point.

I had really hoped they would be more affordable but after my first post, a number of guys in the know said the price was going to be well over $2K depending on the options selected. Well, now I have the first hand info to pass along.

They did not respond about the M93 by the way. So, no updates on that front but given the pricing on the M91, I’m betting it will be high-priced as well.

Sorry I don’t have better news. For folks who can afford them, please post photos and your experiences so I can live vicariously.

They are here! The following are Zastava listings of weapons you can buy online and have shipped to your FFL:


If you find this post useful, please share the link on Facebook, with your friends, etc. Your support is much appreciated and if you have any feedback, please email me at in**@ro*********.com. Please note that for links to other websites, I may be paid via an affiliate program such as Avantlink, Impact, Amazon and eBay.


Part 6: Two Rivers Arms Yugo M76 Rifle – The First Range Trip

I finally got a chance to take the Yugo M76 to the range and my youngest daughter went with me although now that she’s in college she’s gone a lot. I do have fun when she’s home as she loves shooting also and knows her way around a rifle.

Erika is getting the rifle situated. I forgot my good bench rest so we made do with a Caldwell bag rest I brought along just in case. The weather was great.

We set up at 100 yards and I did the initial test firing and sighting in of the rifle. Function-wise, it was great. We did not have a single failure to feed or eject the whole day.

By the way, my daughter is wearing MPOW 035 ear muff hearing protectors and she said they worked great. She wore them when we were shooting the M76, my .338 Lapua and 9mm Glocks. They are excellent not to mention a good deal. I have three sets of them now for her and others. I am still using my Howard Leight by Honeywell electronic ear muffs.7

Both of us were wearing NoCry safety glasses. I use ones that go over my prescription eye glasses and my daughter wears normal ones because she has contacts.

One thing the slowed me up a bit was that the laser bore sight didn’t really help me out much. I have a new one from Wheeler that works great on the actual muzzle end of rifles but it would appear the M76’s brake was not truly perpendicular to the bore. Normally it is pretty slick but at the range, I had to fire a number of rounds to even get them on the backing board first and then finally to the bullseye.

We were shooting S&B 196 grain SPCE ammo. My groups were about 1.5-2″. I’ll get back down to the range one of these days with my better rest so I can test the accuracy. I have some Hornady Vintage Match ammo too that has cool specs but since I didn’t have my bench rest with me, I largely saved it for next time and will explain why I said that in a moment.

Pierced Primers

The only problem we encountered was the firing pin piercing primers. We went through almost 40 rounds and about a third had pierced primers. This is a known issue with M76s and, yes, the rifle is headspaced properly.

At first I thought it might just be the S&B ammo so I tested it with five rounds of Hornady Vintage match also. I think two of the five Hornady rounds were pierced. At any rate, here are some photos of the S&B ammo.

Example pierced primer. It did this both on S&B and Hornady ammo.
At home, I grabbed some random brass and took this photo to show both pierced and cratered primers.

There are a lot of posts about the piercing and cratering of primers with the M76. I’m pretty busy right now but will read all that I can before I do anything.

First, I plan to confirm the pin protrudes between 1.42mm (.056″) minimum and 1.52mm (.060″) maximum.

Second, I want to compare how close the firing pin hole is to the firing pin on my other M76 bolt plus some of my AKs. I don’t think it looks unusually large but it should be investigated.

Third, I have a hypothesis – I think the firing pin needs more of a rounded radius. The current face of the firing pin is relatively flat. There were literally little punched pieces of primer laying on the firing bench that were flat and the primers that intact showed a very flat impact.

Those primer pieces, maybe they should be called chads, show a pretty flat firing pin face.

I’m not going to rush into anything. I do have a second complete bolt assembly that I can look at and scavenge from if need be. If you have suggestions, contact me – in**@ro*********.com.

Bottom line

We had a lot of fun. The rifle performed very well with no feed or ejection problems, no magazine problems and only the pierced primers were minor issue.

I do need to work on the cheek rest more so it stays in place better.

I definitely look forward to shooting this rifle with a better bench rest and also comparing it side by side with my .308 M77. Also, I’ll report back on what I try to correct the firing pin piercing or cratering primers at some point in the future. Until then, have a great day!


If you find this post useful, please share the link on Facebook, with your friends, etc. Your support is much appreciated and if you have any feedback, please email me at in**@ro*********.com. Please note that for links to other websites, I may be paid via an affiliate program such as Avantlink, Impact, Amazon and eBay.