Have you ever needed to use a nylon soft-sided rifle or pistol case only to find a seam is pulling apart? Yeah, that happened to me again the other day figured it would be a good time to share a trick with you.
I re-use my cases and went to use a flat dark earth colored Midway rifle case only to find that a seam along an edge was pulling apart. Nylon is tricky – on one hand it is pretty strong and rot resistant but on the other, if you don’t pay close attention to what you are sewing and get to close to the edge or lack proper reinforcement, it can pull apart.
I bought two of these cases many, many years ago when Midway had a sale. How many years ago? So many that I have absolutely no idea how many – that’s the best I can tell you. Maybe 8-10+ years ago. The warranty was history long ago so I needed to fix the case. What I have found is that gluing the seam works wonders. The earlier you catch it the less obvious it is.
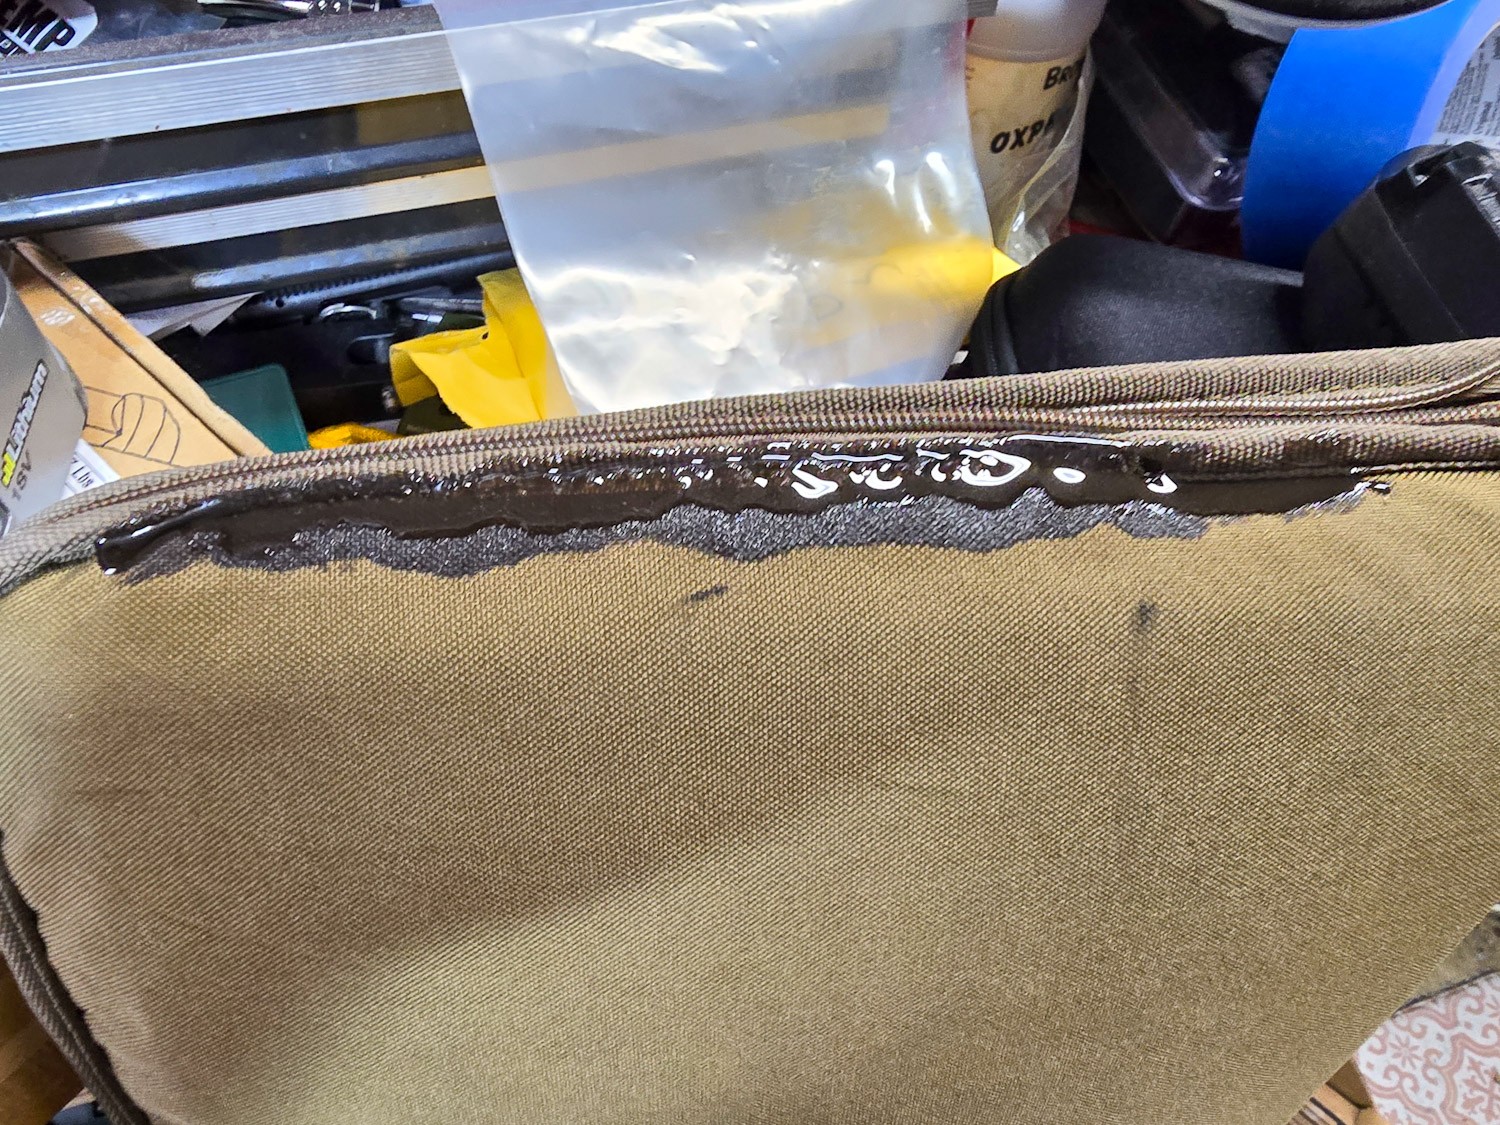
I didn’t think to take photos until part way into the repair. You need a glue that can bend and flex without snapping so any glue that dries, cures and is rigid will not work. I used Gear Aid’s Seam Grip WP have have also had very good luck with ShoeGoo. I am very impressed by Seam Grip and that is what I use the most. I’ll use the ShoeGoo too – don’t get me wrong and it works – it’s just that Seam Grip has become my go-to over the years. The one perk of Shoe Goo is that they have a black colored formulation.
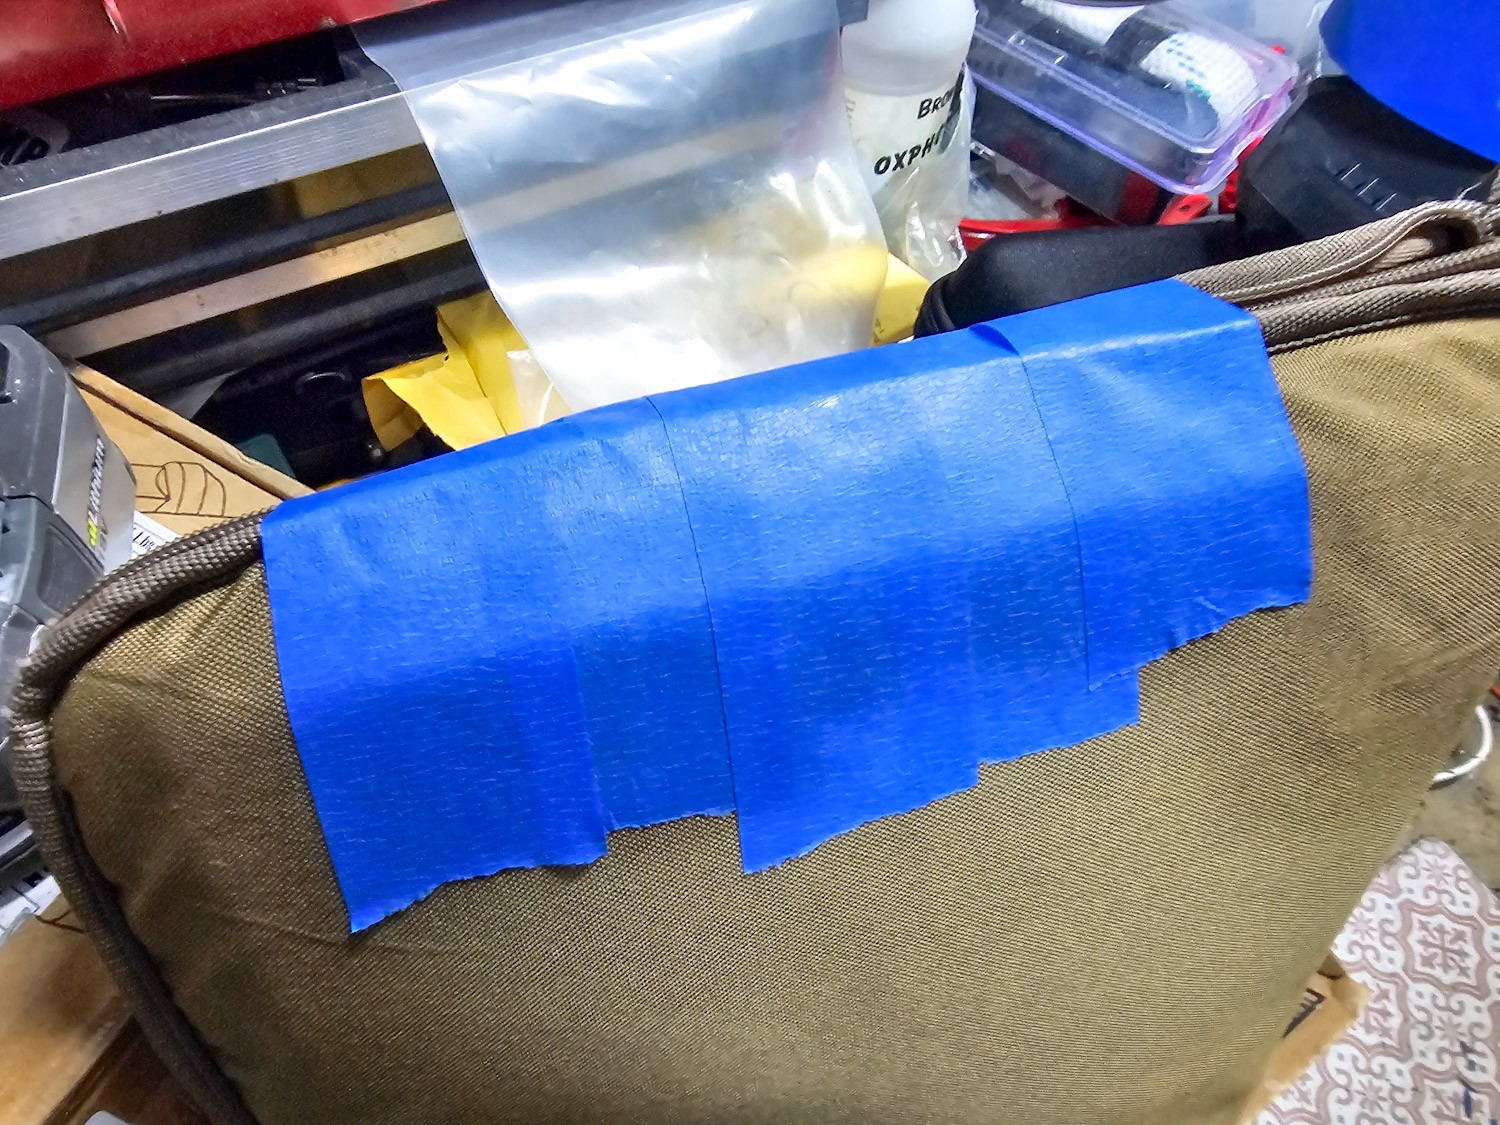
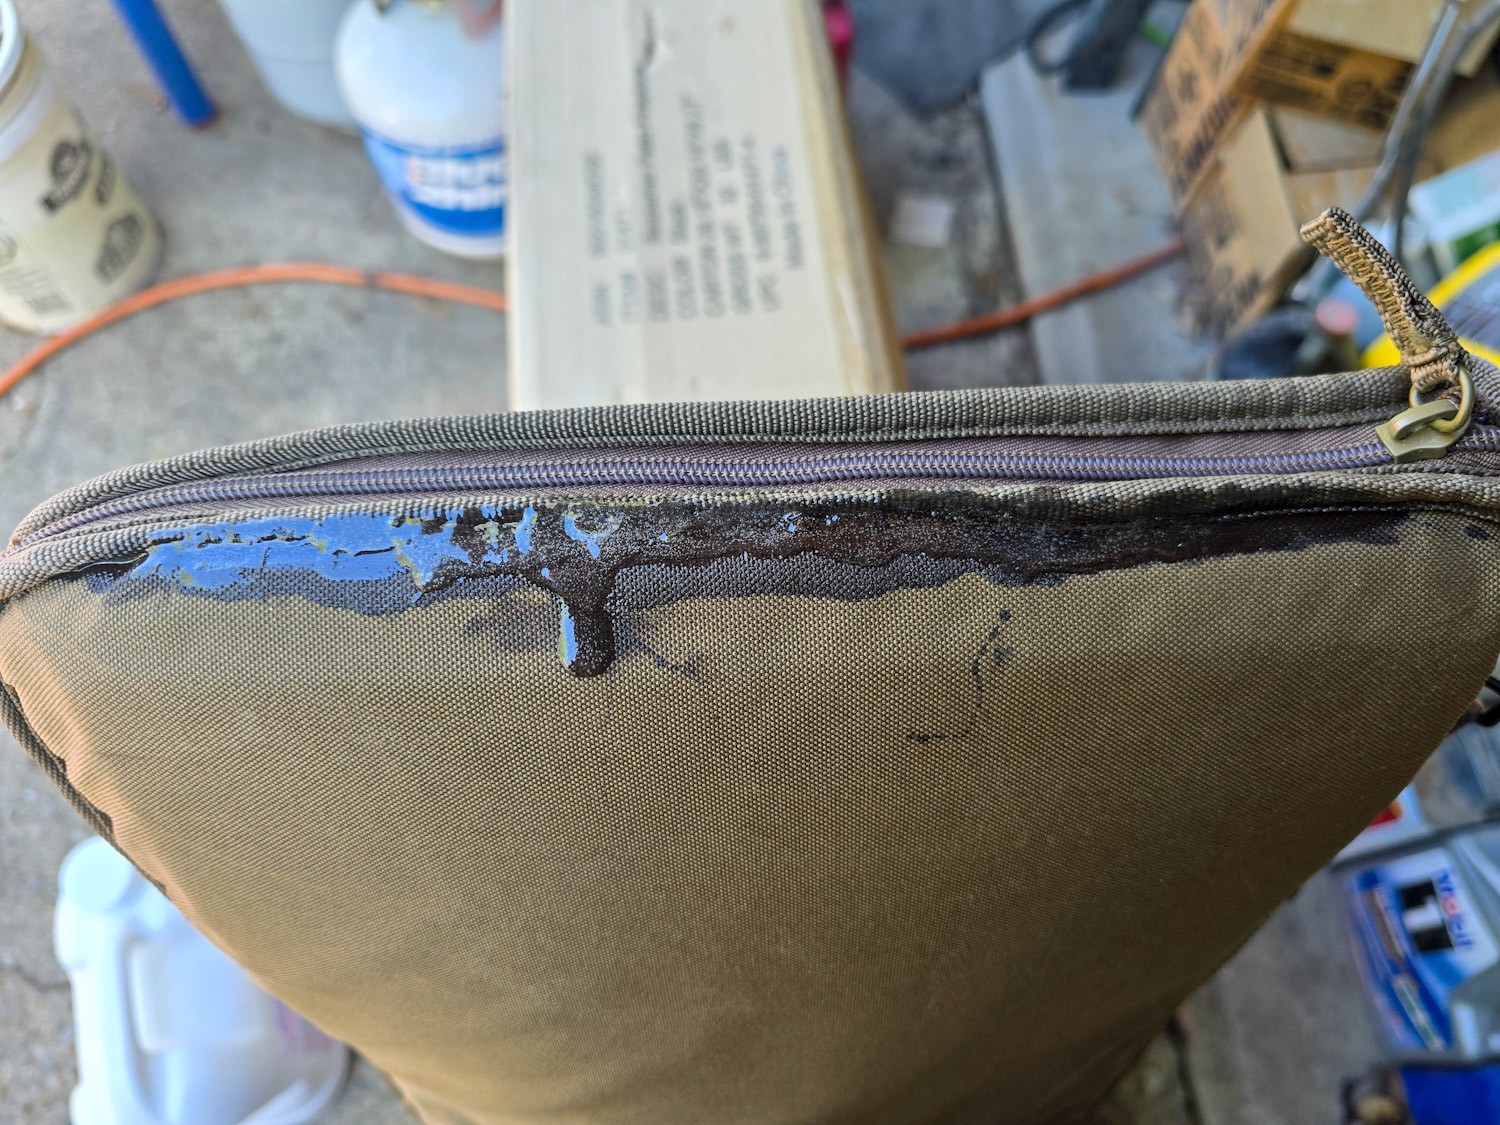
I find that doing 2-3 passes with the glue to work best. I work the first one in try to secure the nylon the way I want or at least get it close. When you do the repair, go a bit further in all directions to make sure the adhesive has a good solid hold.Use something to secure everything while the glue cures. I use blue painter’s tape here. I’ve also used clamps, rubber bands, you name it to hold things in position.Not all repairs go quite the way I planned. This was the third layer of the seam glue and I put it on thick to fill up a bit of a gap and it ran on me overnight. It may not look great but it’s good to go.
Summary
Using glue to repair a seam absolutely works, I’ve done it many times and never had it let go provided I get 2-3 good coats on it and overlap the hole. Follow the directions on whatever glue you do use as this repair will take 2-3 days to do as each coat cures. If you rush it, you risk not having a strong bond.
If you find this post useful, please share the link on Facebook, with your friends, etc. Your support is much appreciated and if you have any feedback, please email me at in**@*********ps.com. Please note that for links to other websites, I may be paid via an affiliate program such as Avantlink, Impact, Amazon and eBay.
The Following is a Basic Do-it-yourself Manganese Parkerizing Formula
A couple of friends online, Elkaholic and Ding, got me interested in parkerizing years ago and gave me a home brew formula and process steps they use. I have been tuning that formula for a few years and thought I would share it as I use it both for blades and firearms. It works great as either the base for a top finish, such as Molyresin or as a finish all by itself. You may be wondering “why not just buy a premade formula such as the great parkerizing solution from Brownell’s” – the short answer is because tinkering can be fun and more rewarding. I like to experiment and try different things. So, with that said, here is the recipe:
Also, be sure to use stainless steel for your tanks. I watch for sales or buy stuff off eBay. The big cooker above is from Walmart and the rectangular pan shown below is from Amazon and is normally the water pan for buffet lines.
For tongs to move stuff around, use solid stainless. I tried the plastic ones and they can leave a plastic residue on blasted surfaces and mess up your finish.
Just like baking, if you want more of the solution, take the recipe and multiply it by two, four or however many multiples you want. Just be sure you have a place to store it when done. I use 5 gallon jugs and label them.
Steps to Follow
Add acid to water in a stainless pan/pot and heat to 190F – don’t boil and waste it. I use a baking thermometer clipped to the side of the pan.
Spray each wool biscuit with brake cleaner to remove oils and allow each time to dry
As the solution warms shred the steel wool into the liquid and add the manganese dioxide
Let the mix simmer and dissolve the steel wool before adding parts
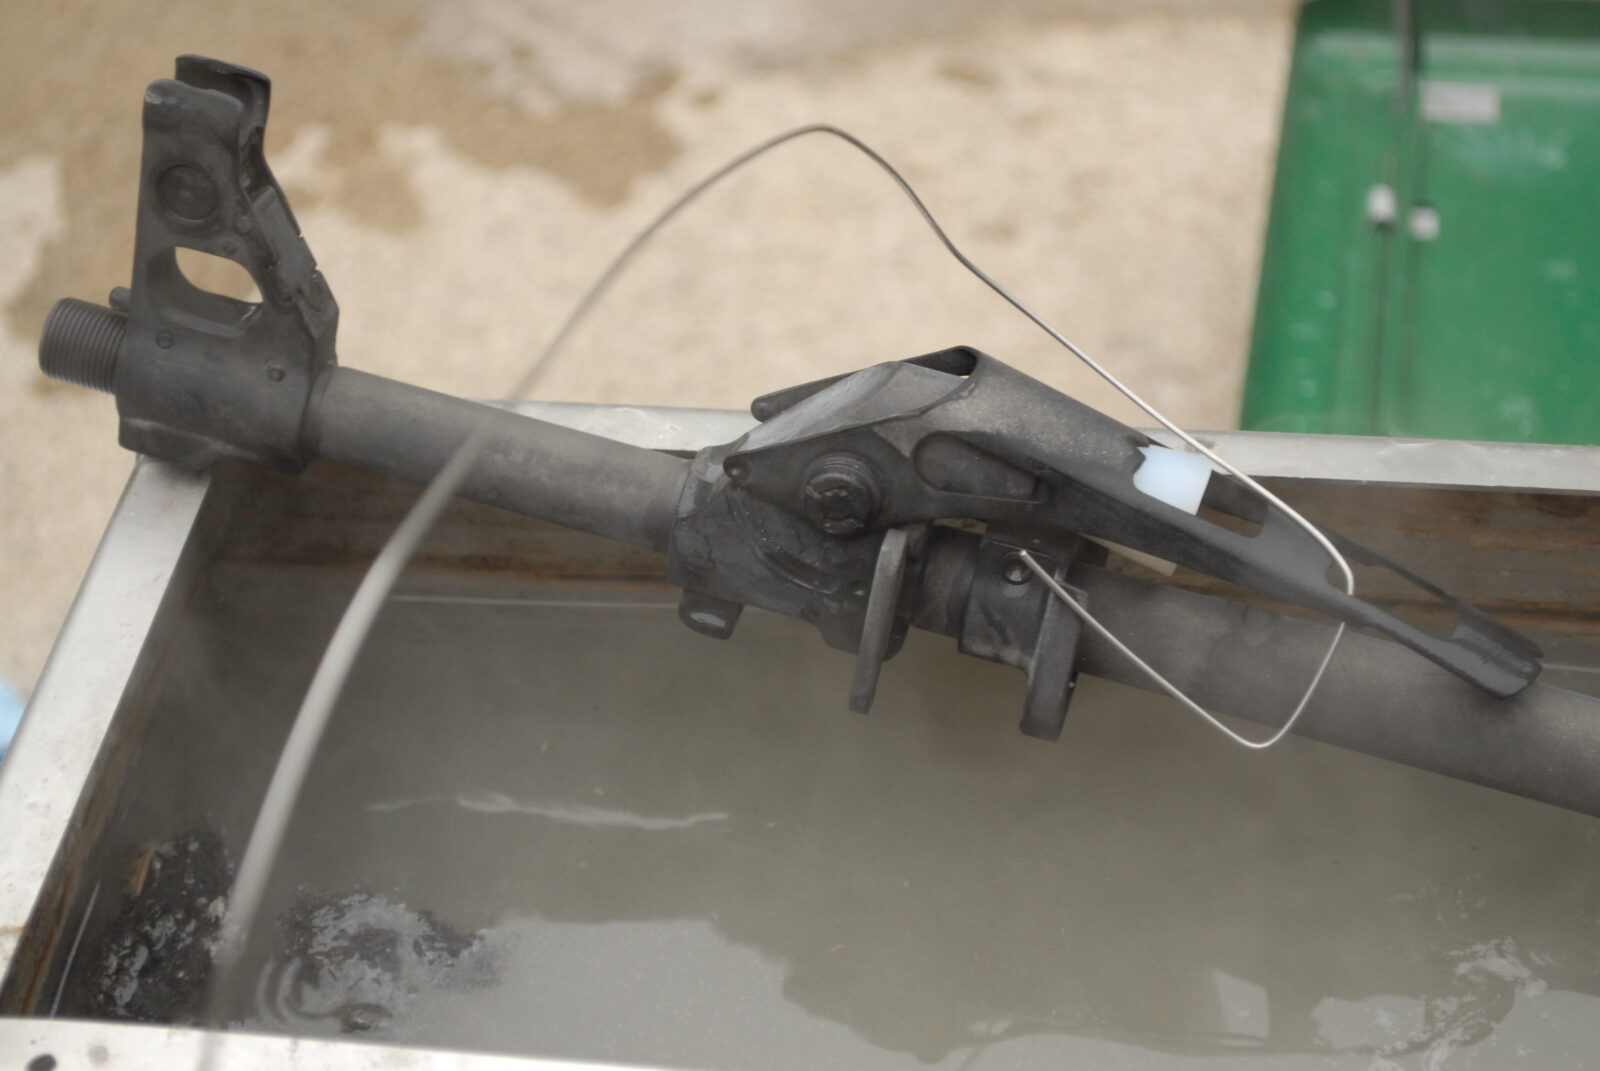
I always blast my parts before I parkerize them – I’ve heard guys tell about using a wire brush on a buffer or drill press as well but I’ve not tried that. Blasting removes the oxides and exposes the bare steel.
Make sure your parts are very, very clean and degreased — only handle with rubber gloves after they are cleaned or oils from your skin can mess things up
You can suspend your parts in the liquid with stainless wire. Leave them until the fizzing stops or about 30-40 minutes. The time varies.
Rinse the parts with boiling water thoroughly to remove the acid.
Spray parts with WD40 to get the water away from the steel
Wipe down with oil or apply whatever secondary finish you want – don’t do both 🙂 If you are going to apply a finish on top of the parkerized surface, use acetone or brake cleaner to remove any oils and then follow their instructions.
At the bottom of the post are links to Amazon products including long parkerizing tanks.
Cleaning Up
When you are done, let your mixture cool and strain the liquid through a coffee filter into a plastic can for future use. I use a blue kerosene 5 gallon container because it is a different color from all my other 5 gallon containers plus I label it. Point being, you do not want to get confused and pour this stuff in when you meant to use a fuel, etc.
The precipitate, the stuff on the bottom, should be scooped onto a shallow pan, allowed to dry and be disposed of as a hazardous waste. For example, where ever your community collects old paints, batteries, etc.
Brownells Has Great Parkerizing Solutions and Kits
Brownells sells very well regarded ready-to-use formulations. I have no hesitation at all to recommend the below items to you – they are top notch.
Click here for their manganese parkerization supplies. Their formula meets Mil Spec STD171
If you have a lot small parts you want to park, they have a bench top kit ready to go that you can buy – click here
Click here for their complete parkerizing tank system. This is a complete system for gunsmiths or others who need to park everything from small parts and pistols up to firearms and swords.
In Summary
I hope this helps you out. I’ve used the above many times and the results are solid.
Updated 2/13/24 with new sources and fixed some grammar issues.
Note, I have to buy all of my parts – nothing here was paid for by sponsors, etc. I do make a small amount if you click on an ad and buy something but that is it. You’re getting my real opinion on stuff.
If you find this post useful, please share the link on Facebook, with your friends, etc. Your support is much appreciated and if you have any feedback, please email me at in**@*********ps.com. Please note that for links to other websites, I may be paid via an affiliate program such as Avantlink, Impact, Amazon and eBay.
In 2014 we visited Greece, and on December 30th, we were in Delphi staying at a small quaint hotel whose elevator put the fear of God in us. The vibrant town was quiet and subdued – the summer tourists weren’t there and the arrivals for New Years Eve handn’t arrived so we had the town more or less to ourselves and some locals.
We walked by a shop and they invited us in. They had tons and tons of bowls, plates, spoons and what have you made from olive wood. There are huge ancient groves of olive trees tended by families for generations surrounding Delphi so there was an ample supply of olive wood to draw from.
Olive wood is simply gorgeous when sanded and finished bears all kinds of browns, tans and wavy grain structure. It’s strong, dense and does great indoors – especially when oiled but doesn’t do as well outdoors or with insects as it lacks natural oils.
At any rate, the products were all made in and around Delphi. We opted for some nice kitchen spoons and a juicer given the striking look of the wood. Before we knew it, the trip was over and we headed home.
December 2023
I was trying to think of something to do as a surprise for my wife and happened across the spoons and juicer from Delphi – they were looking pretty tough. The wood was faded and you could just barely see what they looked like 9 years prior so I decided to clean them up.
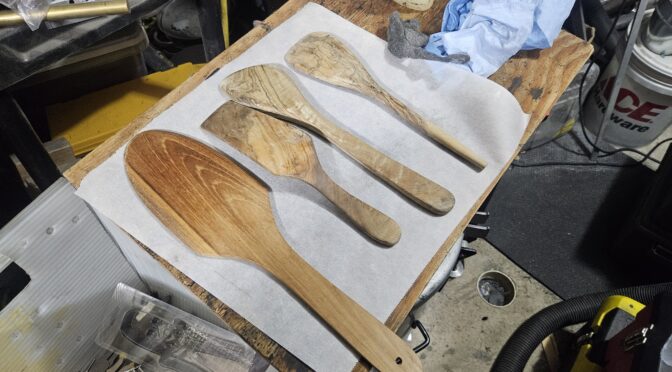
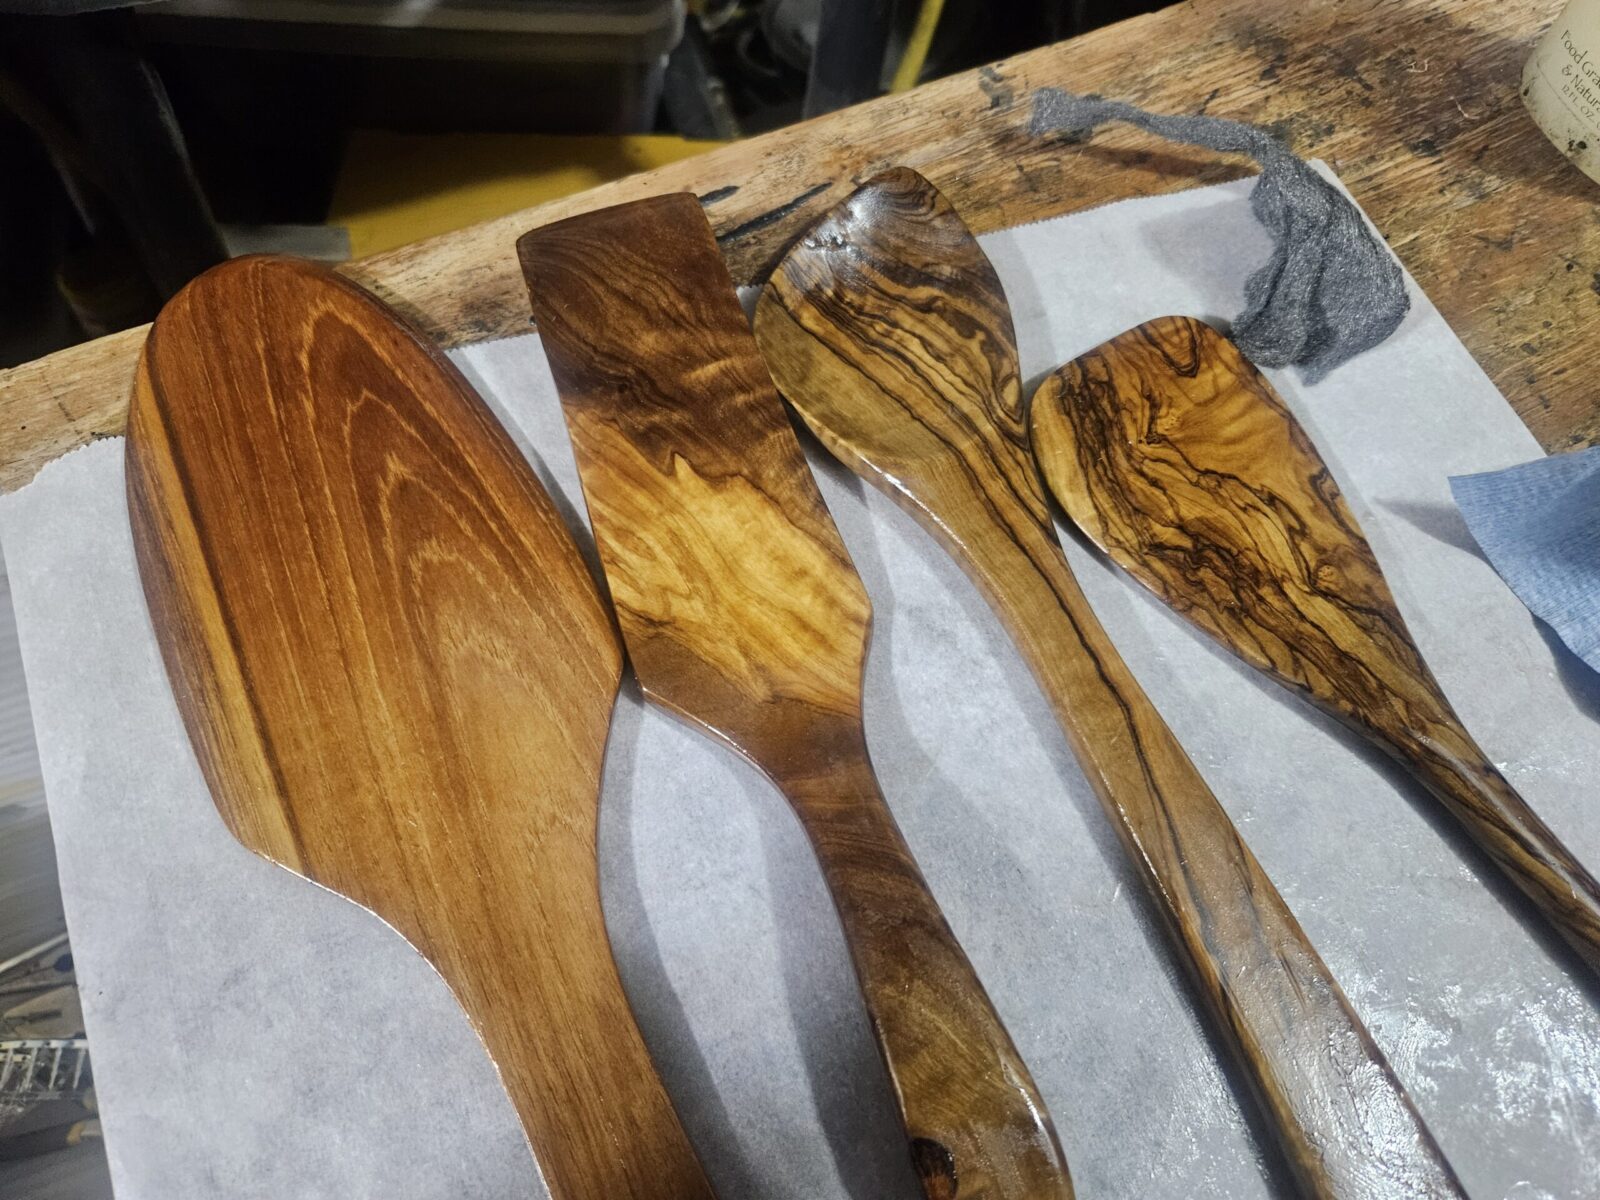
The three utensils from the left are mmade from Olive Wood and were showing their age. The flat tool on the far left was a different wood but I am not sure what is – I just decided to try and touch it up at the same time.
The first thing I did was to run over the spoons with a 220 grit sanding mop in a small drill press that I have dedicated for that purpose. I use sanding mops to finish grips so the station sees a lot of use.
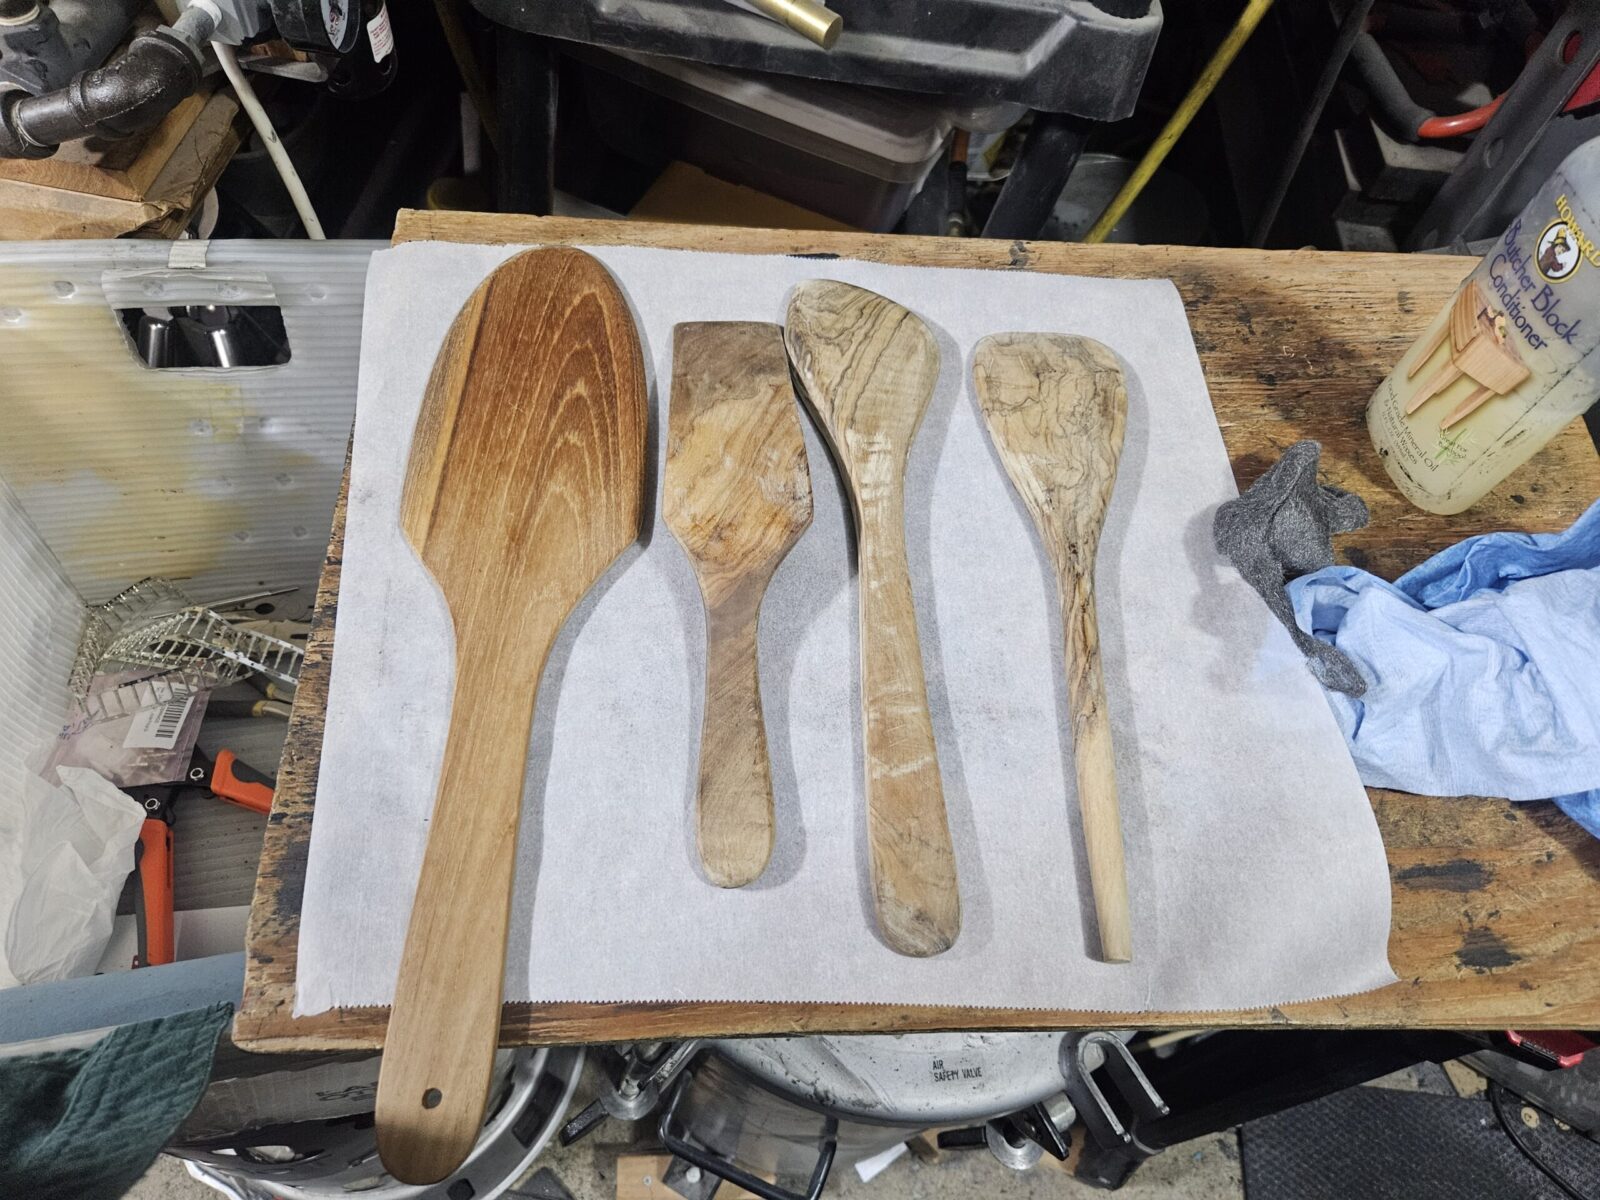
The next thing I did was to use butcher block conditioner to revitalize and protect the olive wood. In general, the conditioners are some combination of food safe mineral oil and waxes that penetrate a wood surface to help protect it. I’ve used a few brands over the years and my favorite is the butcher block conditioner from Howard Products.
There is a bit of a trick I do with restoring a wood finish like this. First off, I rub it in with 0000 steel wool to knock down any stray wood fibers. In case you aren’t familiar with steel wool – “0000” is a very fine grade meant for final finishing. You put the conditioner on thick and let it set for 4-8 hours. You’ll be surprised how much gets absorbed by the wood.
I then wipe it off with a rag and apply it thick again by hand – I don’t use steel wool after the first application. Again, let it sit and absorbe for 4-8 hours, wipe off the residue and repeat.
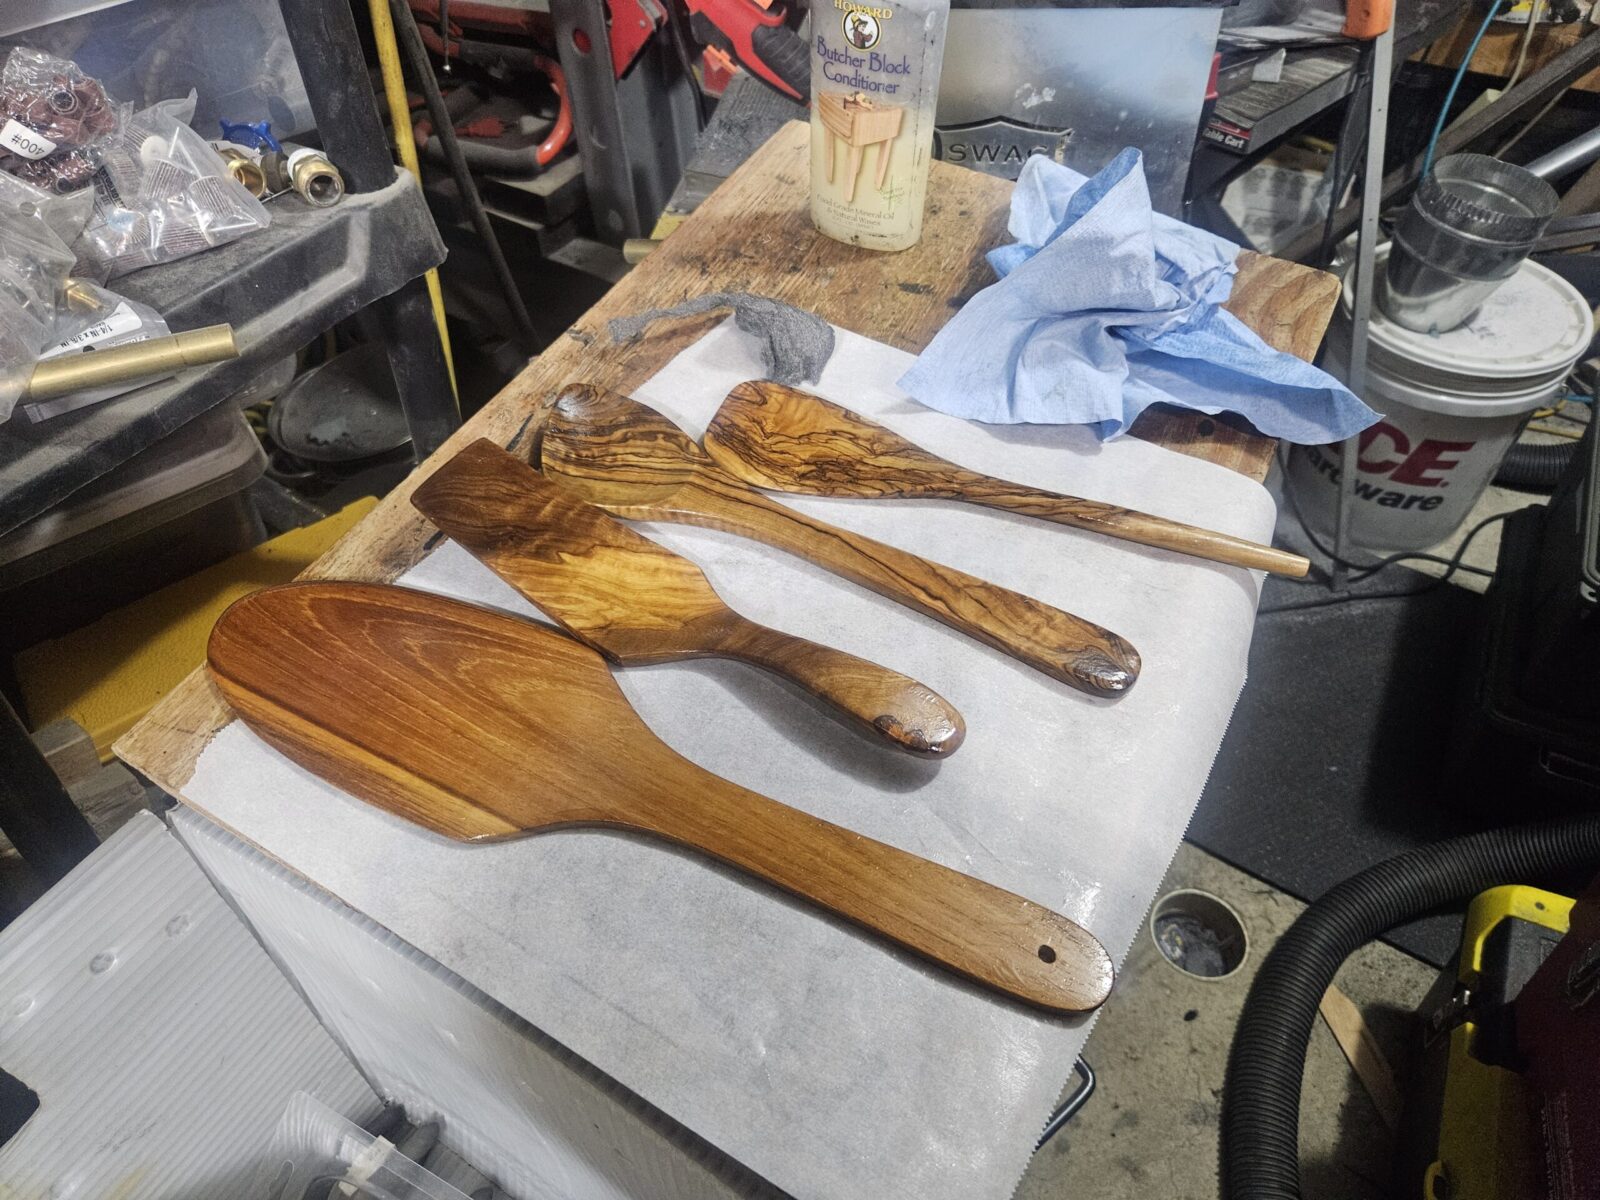
This was after three rounds. You can see the 0000 steel wool and the Howards Butcher Block Conditioner. I’m pretty sure I did another coat after this photo was taken.
You’ll notice with the third or fourth application that less and less is being absorbed so stop where you want and buff the piece with a rag or shop towel.
You may still see or feel a hint of oil but it will disappear in a day or so as it finally gets absorbed. You really can’t go wrong with this finish – just apply, let it sit, rub it off, and repeat until you get the look you want.
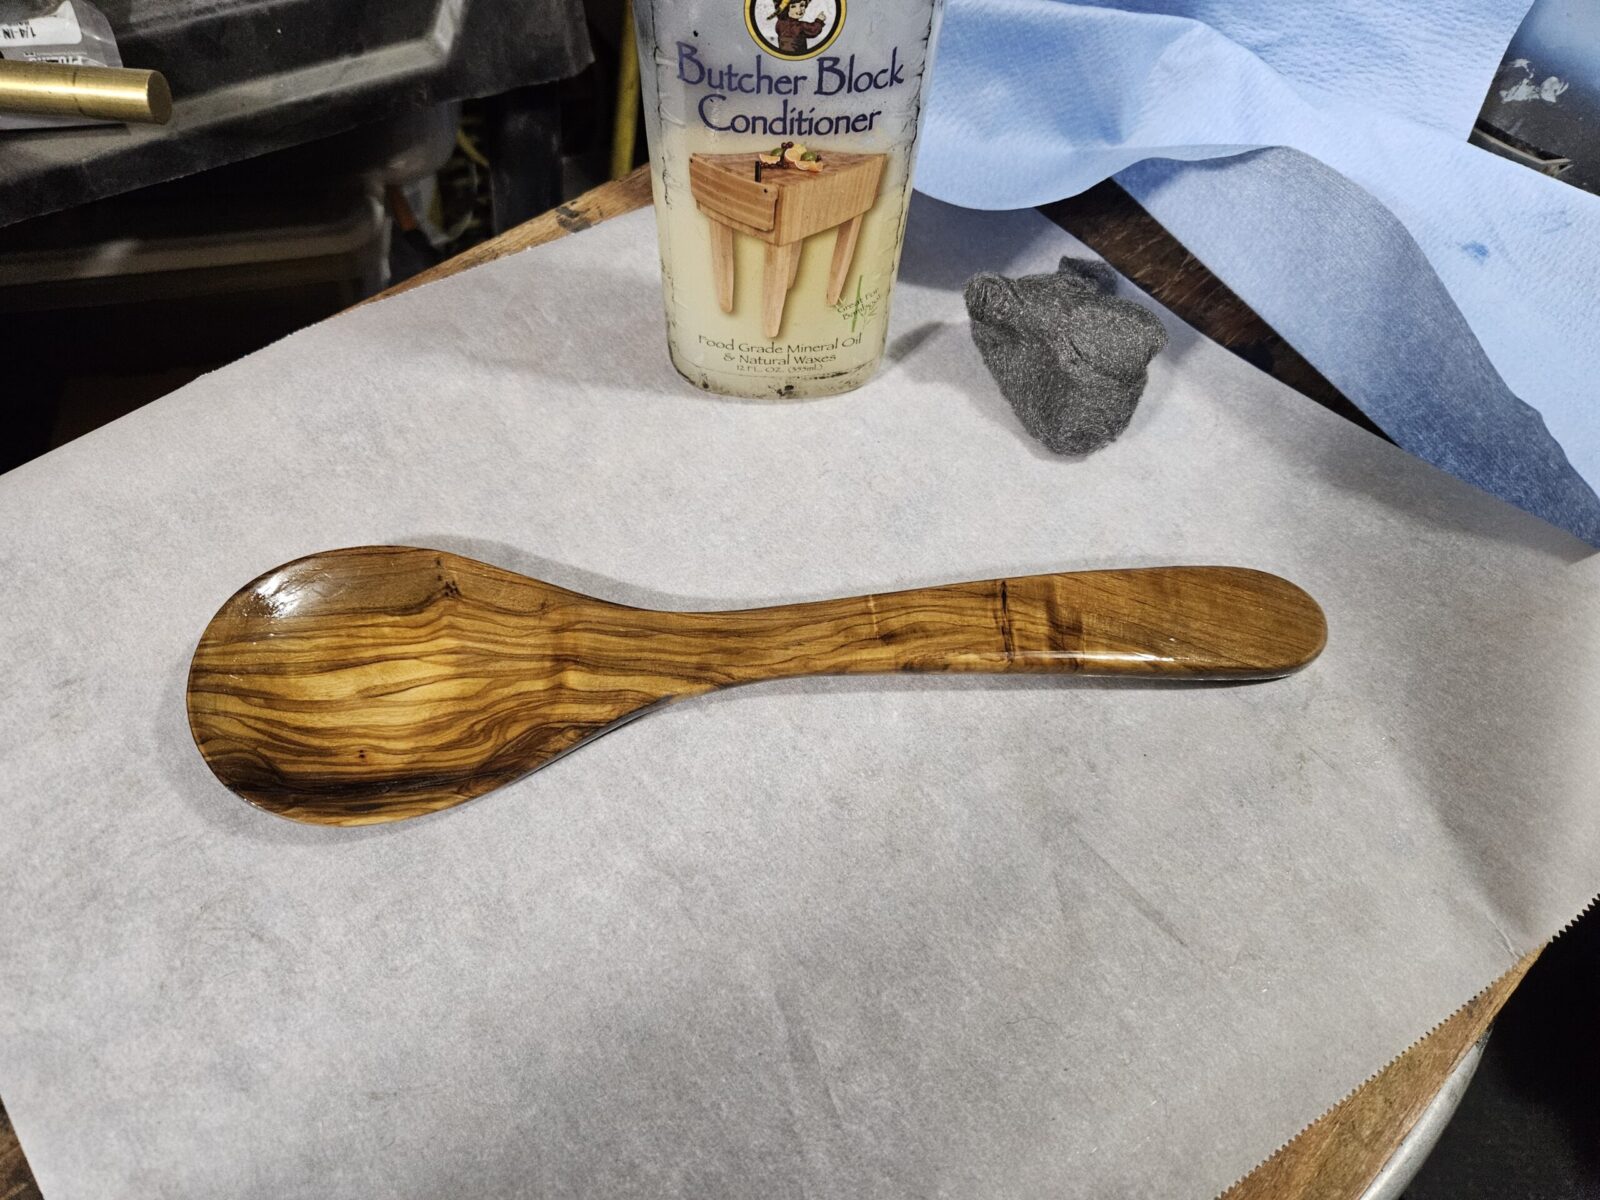
They looked so much better!
I love the patterns and colors of olive wood.
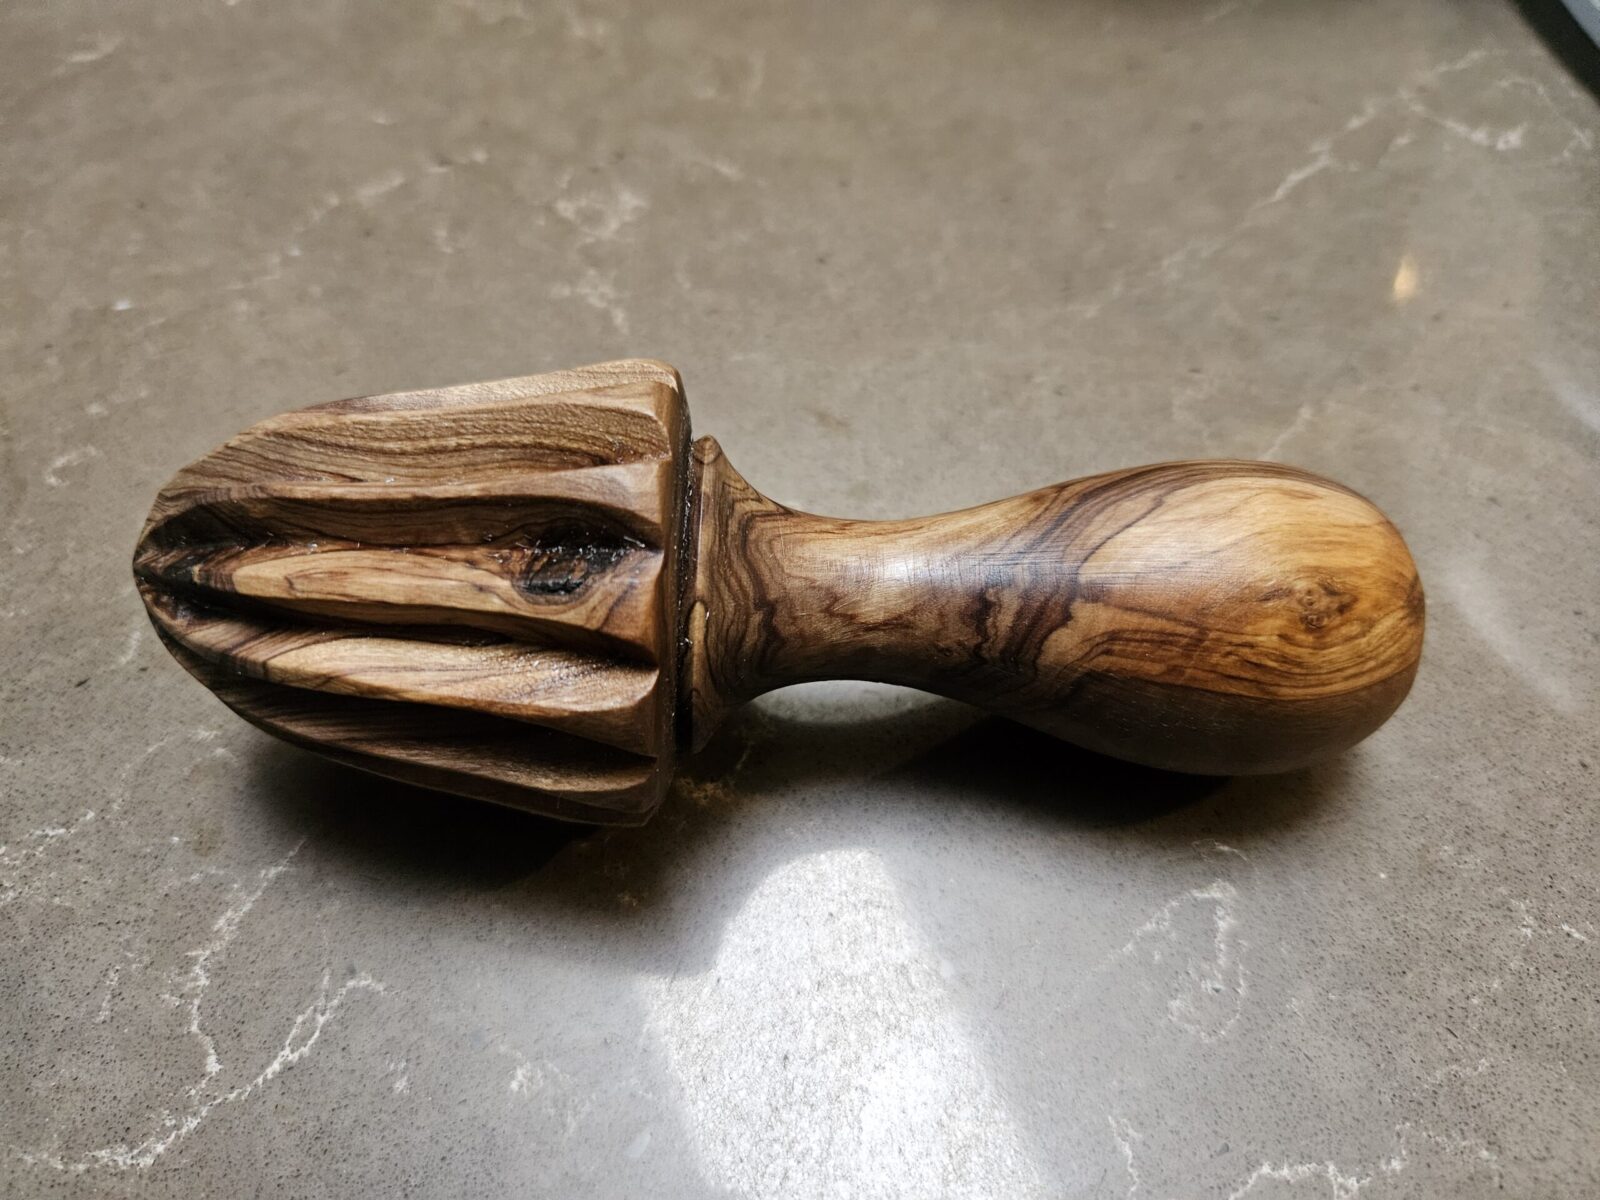
This is the juicer. I ddin’t get a “before” photo but it looked the same as the others. Due to all of the angles, I just used the steel wool to remove stray wood fibers but didn’t sand it. It has 3-4 coats of conditioner on it at the point this photo was taken.
Summary
The utensils from Greece turned out really nice – like new really. My wife is very happy and I shouldn’t wait so long to do it again in the future. It’s amazing how fast time flies by.
Howard Butcher Block Conditioner is my go-to finishing product for breathing life into any wood that comes into contact with food – cutting blocks, wood bowels, utensils, etc. I pretty much follow the above process on all of them.
I hope this helps you out.
If you find this post useful, please share the link on Facebook, with your friends, etc. Your support is much appreciated and if you have any feedback, please email me at in**@*********ps.com. Please note that for links to other websites, I may be paid via an affiliate program such as Avantlink, Impact, Amazon and eBay.
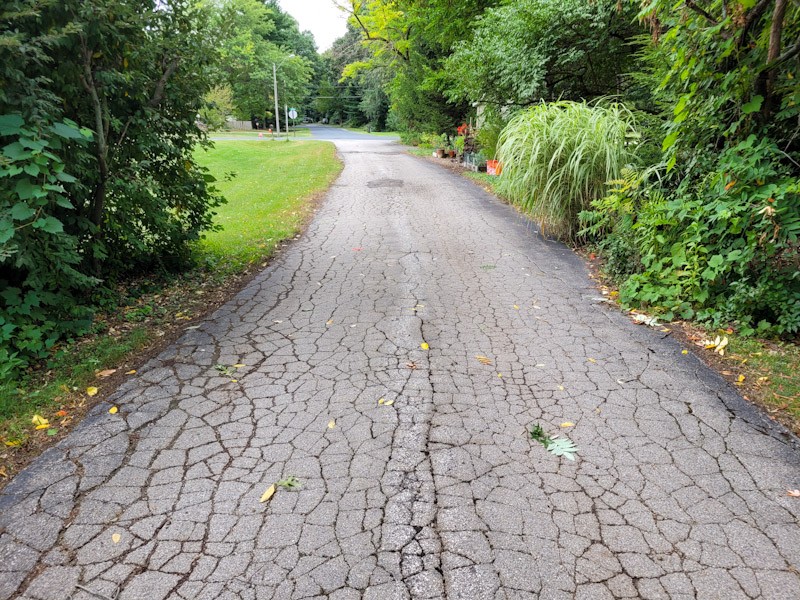
My wife and I wanted to seal our 160 foot long x 12 foot wide driveway in 2022. My first thought was to use a service but they were sold out for the season by the time we asked so we decided to try and do it ourselves.
What I found out is that the old days of buying some liquid tar / oil based product are gone. You have to buy all these different products that are based on latex of some other chemical. You need one thing to seal holes, another for big cracks and the sealant. Okay, we have a big driveway and it is beat to hell, falling apart and really ought to be replace but we couldn’t afford it. So, what did we do? We took a gamble and the results are so-so but I learned a lot and want to share them because I bet they will help you regardless of brand or product you are using.
Getting Started
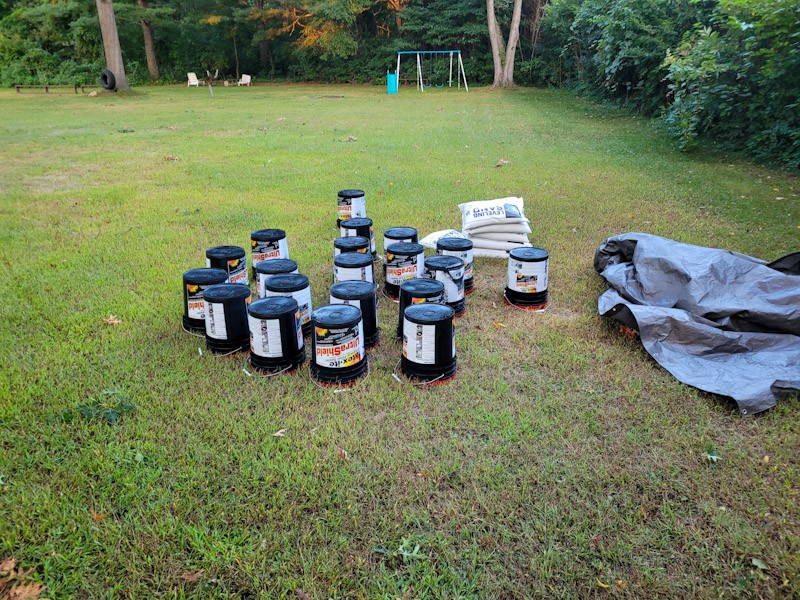
I did the math and bought a bunch of pails of Latex-ite UltraShield. What I did was I took the length of the asphalt portion of my driveway x the average width in feet. I then divided this by their average coverage ratio: 160×12/200=9.6 pails. I think I actually bought 10 pails at my local Home Depot but ecause my driveway was in such tough shape, I wound up actually using 14.25 pails for two coats.
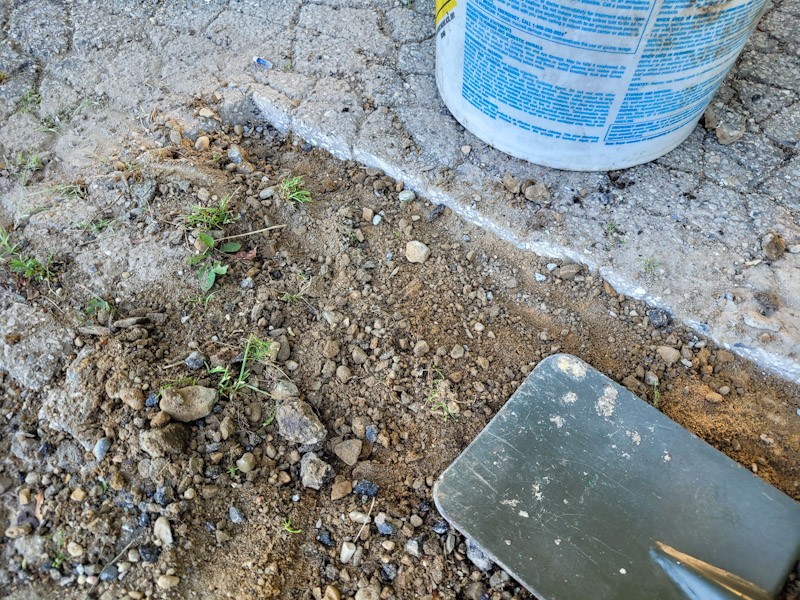
There were areas where the old asphalt had crumbled and disappeared. I bought bags of Quickrete asphalt patch to fill in these places. I first broke out the old material into rough rectangles and dug down another inch.
This is the result – I used a tamper to beat it down as best I could and then sprinkled the top with sand so it wasn’t so sticky.
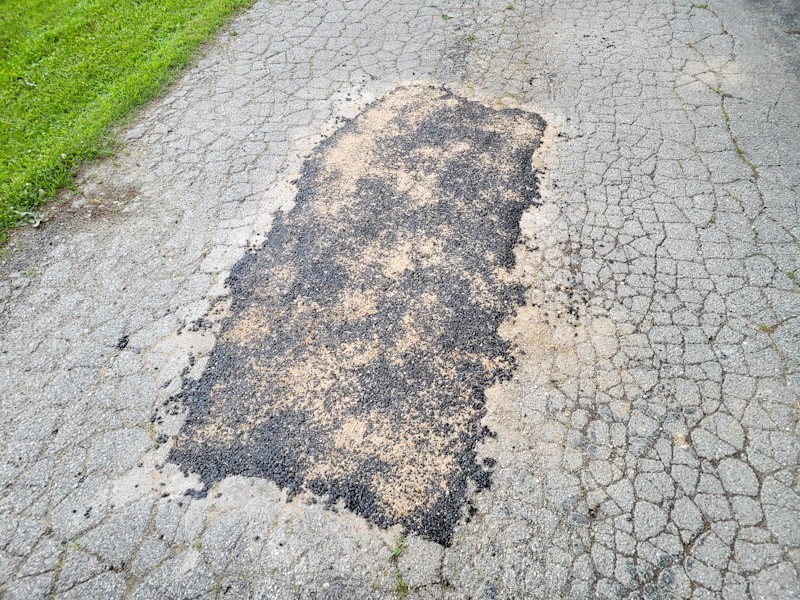
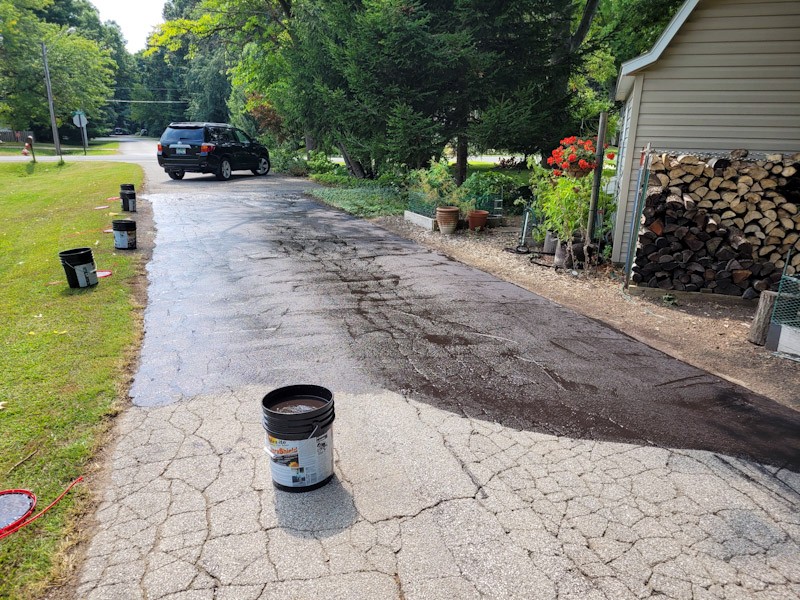
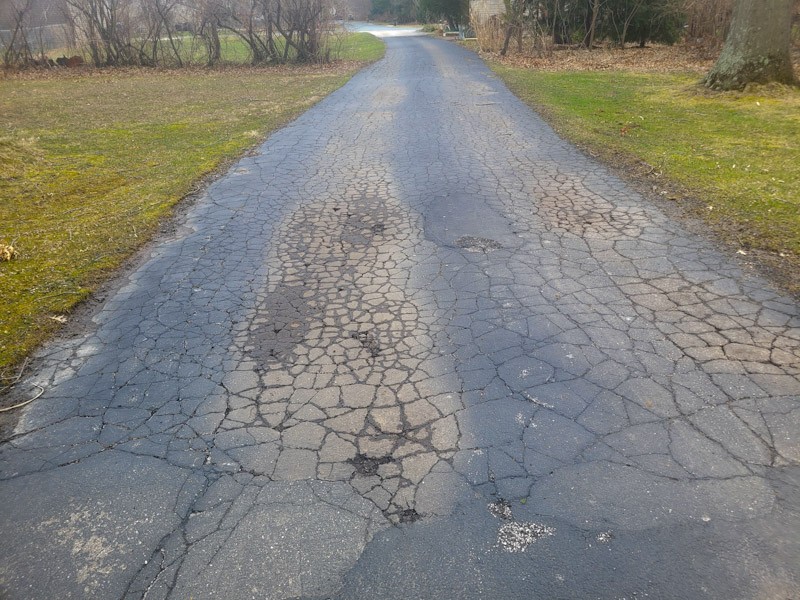
Our driveway was in tough shape – we knew that but were hoping to extend the life a few years. After we filled in the big holes – one of which you can see part way down.
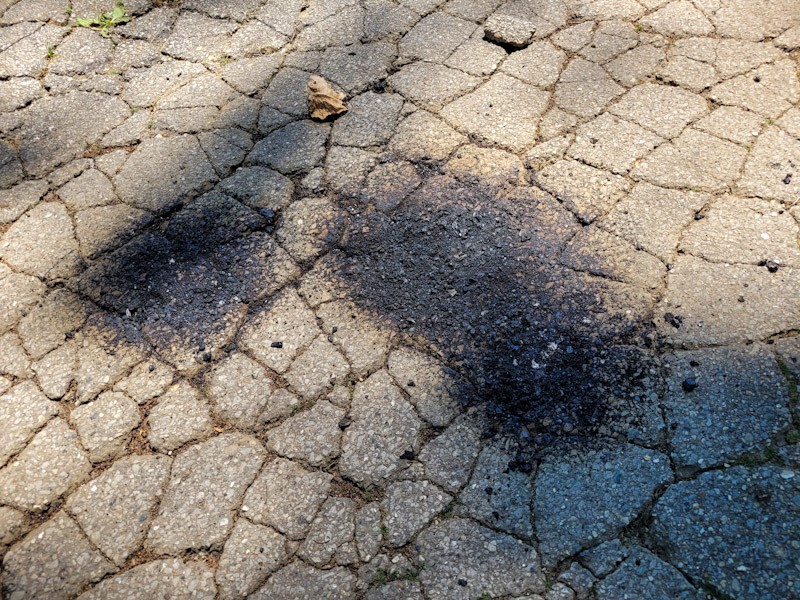
My friend John had a good suggestion – heat up old pieces of asphalt with a ground torch and beat them into holes. So I did that in some places where missing asphalt caused a gap.
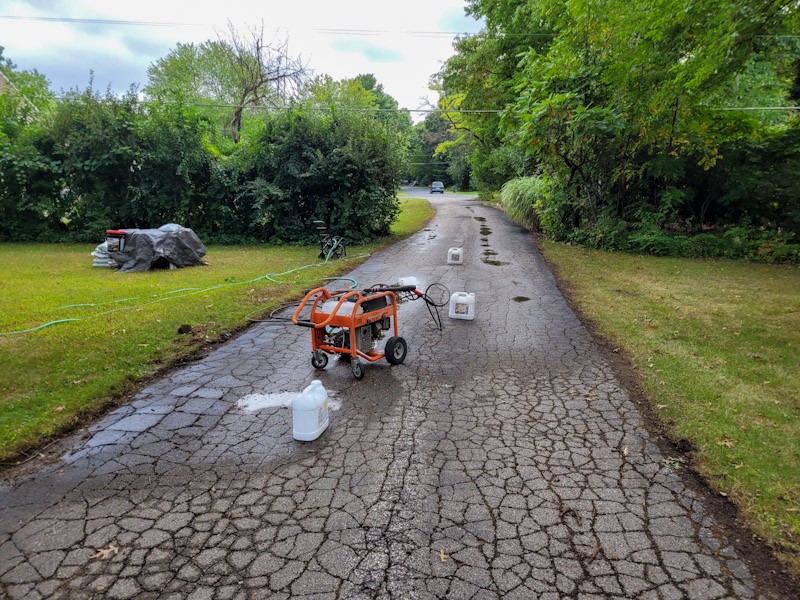
I read the Late-Ite Ultra Shield directions, watched several videos and new surface prep would be key. I burned off grasses and moss with the ground torch, sholved the grass back off the edge, blew it clear with a blower and then washed it – literally. That is my pressure washer – I went down the whole driveway and first applied Purple Power to clean and degrease it and then another pass with just water in the pressure washer to get rid of the cleaner. It was so clean you could eat off it … time would tell me I got it that clean in most places but not all.
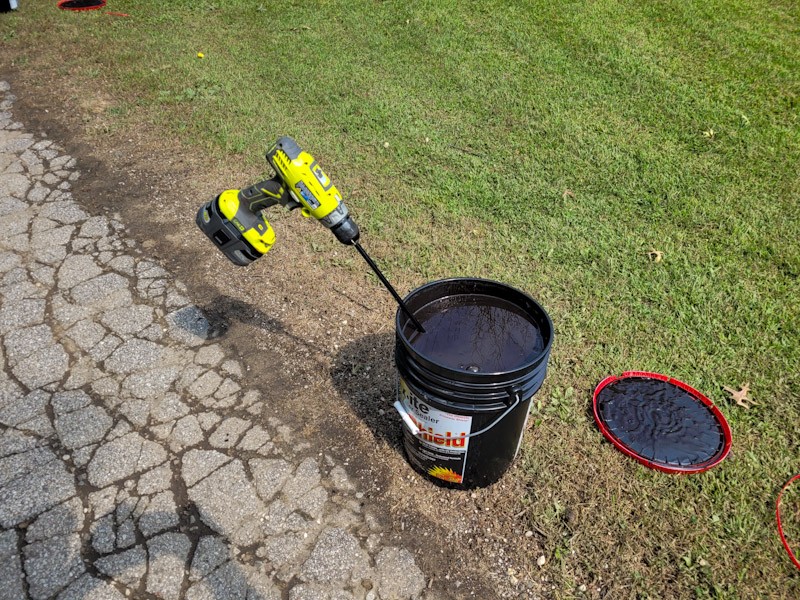
The day before I flipped them so the solids would break free of the bottom and go towards the lid.
The recommend applying the sealer by going left and right with a squeegee – overlapping the last pass and pressing it into the asphalt.
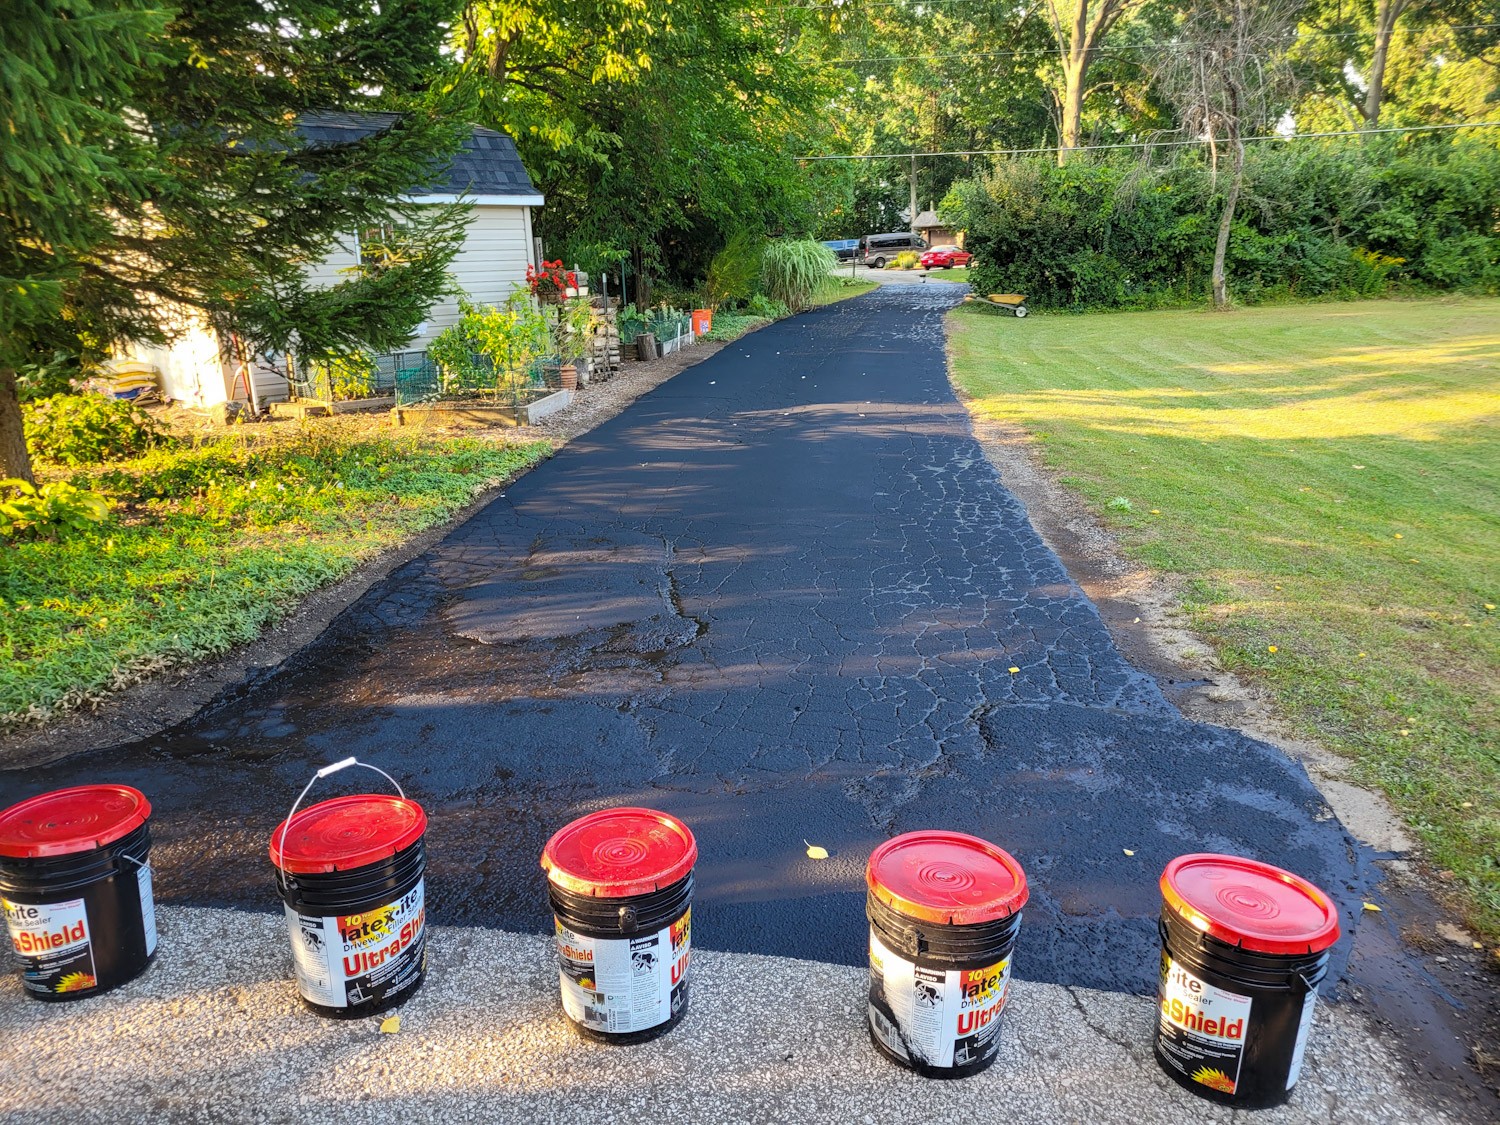
When I got done it looked amazing. You can see all the still wet sealant in the cracks.
I then applied a second coat. The first coat used up each pail real fast due to the cracks. The second coat went much faster and each pail went further. By the time I was done, I had used 14-1/4 pails of sealant and the coverage comes out to about 134 sq ft/gallon if I am doing the math right.
The Results Six Months Later After Winter
I had a really bad experience once with a wood deck repair chemical that claimed to fix anything that looked awesome in the summer but then the wind literally blew it off in sheets during the winter. The deck sealer had glowing reviews that first summer and then got absolutely smalled with one and two star reviews at Lowest after the first Winter. My point is that I have been sitting on a ton of photos and stuff since last fall to see how it would actually hold up before I wrote this post.
The first thing I want to be clear about in fairness to Latex-ite is that they tell you over and over it is a sealant and will not fill big cracks. Well, even though I searched a ton, I ignored that. I shouldn’t have.
Latex-ite is basically a glorified black paint that dries and hardens on clean solid asphalt to seal it. Well, it looks brownish as you are applying it but it turns a nice rich black as it dries and cures.
One thing I learned is that where it can’t get a good grip, it peels up so a oily, dusty or dirty surface will not work. I tried to do my mother-in-law’s little short driveway in a rush and didn’t get it pristinely clean in all places so I can tell you it doesn’t stick plus I had a few on our driveway as well.
You also need to squeegee it in place to force it into cracks, crevices and pores but if applied too thick, such as in the tons of larger cracks on my driveway, it will crack, break down and otherwise slowly disappear.
In short, it is just a sealer and gives you a good looking new black coloring on your asphalt. It really is not a filler, glue or anything else in terms of fixing things.
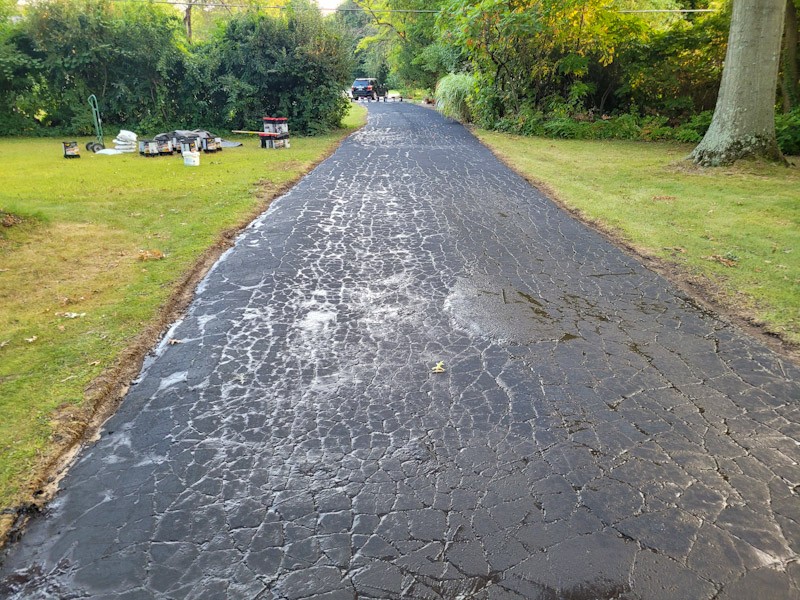
The following photos show the difference between mid-September 2022 and March 2023:
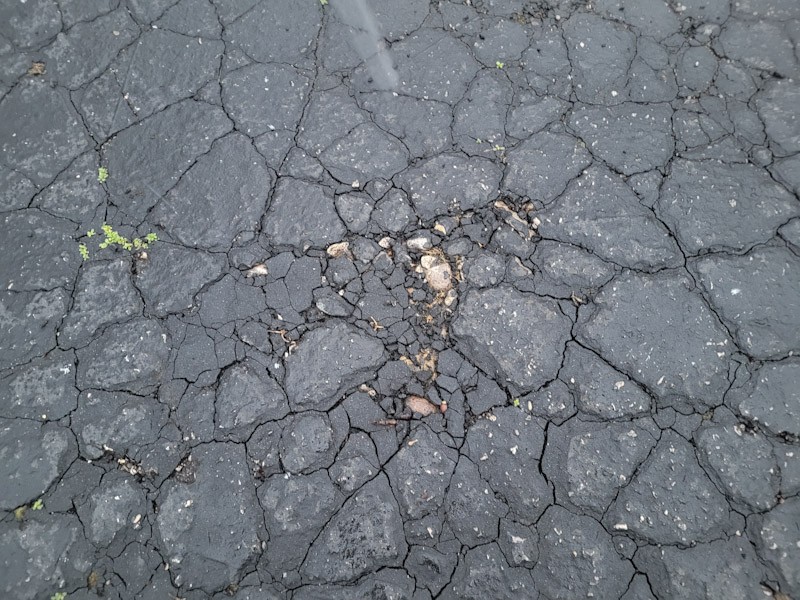
Most cracks over 1/4″ do not have any visible selant in them. The black sealant is on most of the larger pieces – the brown tracks are where we drive and yes, the area is very wet every spring.
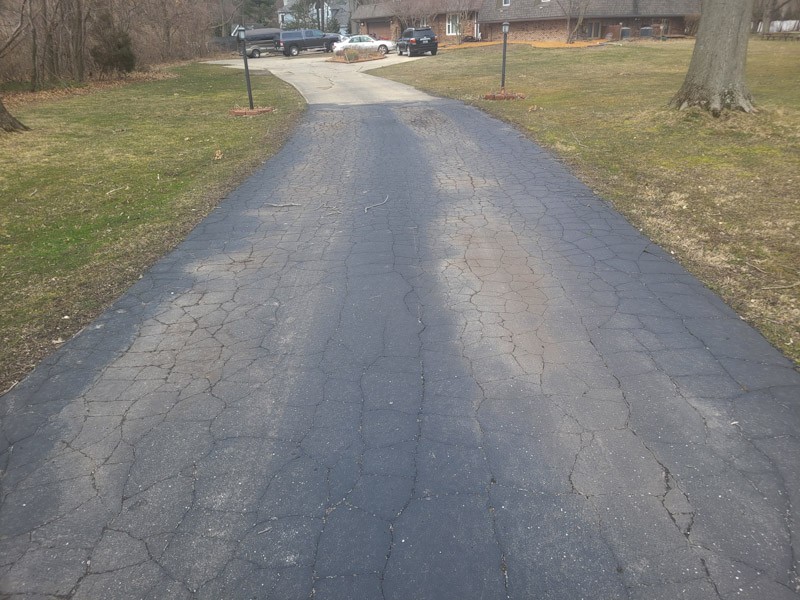
This view is bakc towards our house. The family who had the home built in the 70s had a concrete driveway poured closer to the house and asphalt from a certain point to the road. It was probably a cost savings move and the asphalt is neither very thick nor sitting on a very well prepared bed.
You can see how the sealant is breaking down into flakess and separating.
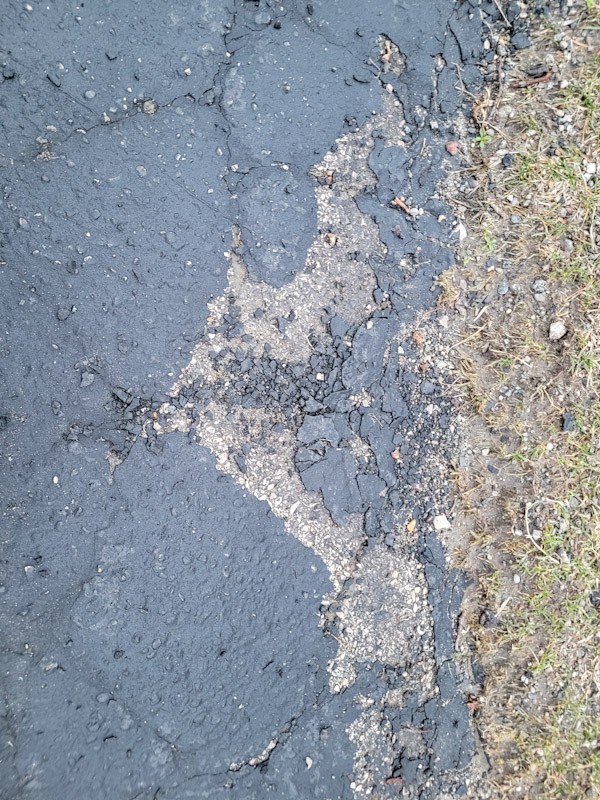
This is by one edge – it tells you that I didn’t get the drive way as clean as I thought in all places. Again, the sealer can’t bond to dirt so it will curl or float there and rapidly break down as you drive over it.
Summary
What I want to take from the blog post are some key lessons learned:
These new drive way finishes – all of them that no longer have oil/petroleum products in them – have limits so carefully read their instructions, application notes and reviews by others. If they say they can’t do something then respect that. My biggest regret in hindsight was trying to use the sealer to fill the cracks – it can’t and the maker said so.
Surface prep is key followed by applying two good coats with a squeegee. The Quickrete patch held up fairly well. The sealer helped keep it from falling apart during freeze-thaw cycles, something I have experienced multiple times in the past.
John’s idea of heating up asphalt pieces and beating them in place worked just fine – no surprises there.
What are my thoughts on Latex-ite UltraShield? Well, to be completely fair to them, the product performed as they said it would. If my driveway wasn’t in such tough shape, I bet it would have held up better. In places where it could get a firm grip on the asphalt it still looks good.
Am I going to use it again if I try to reseal the whole drive again? Maybe not. I would really like to find something that is more flexible given my driveway’s shifting nature but first I need to apply crack filler before doing anything else.
Does it look better than before I started all this? Yes, I think it does. Not as good as I would like but it is better. At best, I am playing a delaying game. We will need to replace that driveway at some point but if I can get another 5-10 years out of it then great.
Let me stress this one more time – regardless of brand or product, unless your driveway sealer or finish says it can fill cracks and gaps the sizes your driveway has, you will need to take care of them first.
I hope this gives you some food for thought.
If you find this post useful, please share the link on Facebook, with your friends, etc. Your support is much appreciated and if you have any feedback, please email me at in**@*********ps.com. Please note that for links to other websites, I may be paid via an affiliate program such as Avantlink, Impact, Amazon and eBay.
I bought my 2021 Ram 2500 in September 2021. It was my first brand new truck and when I saw what the dealer was charging for oil changes, I knew there was no way I was going to have them work on my truck – I’ve always done my own work but because this may well be my one and only new truck, I knew I better do some homework.
First off, I did not want to void my warranty. In talking with the dealership their recommendation was that I only use Dodge/Mopar brand oil filters and Pennzoil Platinum 0w40 engine oil plus I should keep a log of when I changed the oil, filter and with what. Okay I thought – I can do that.
This is a great example of where the Internet and the web can just drive you nuts. If you search about what oil and filter to use, you will get just a ton of search results with guys offering up their weird home brew concoctions, using different weights, brands, etc. That was all fine and dandy but I did not want to void my warranty or give a dealership some excuse to charge me because I didn’t use the approved oil.
Which filter does it use?
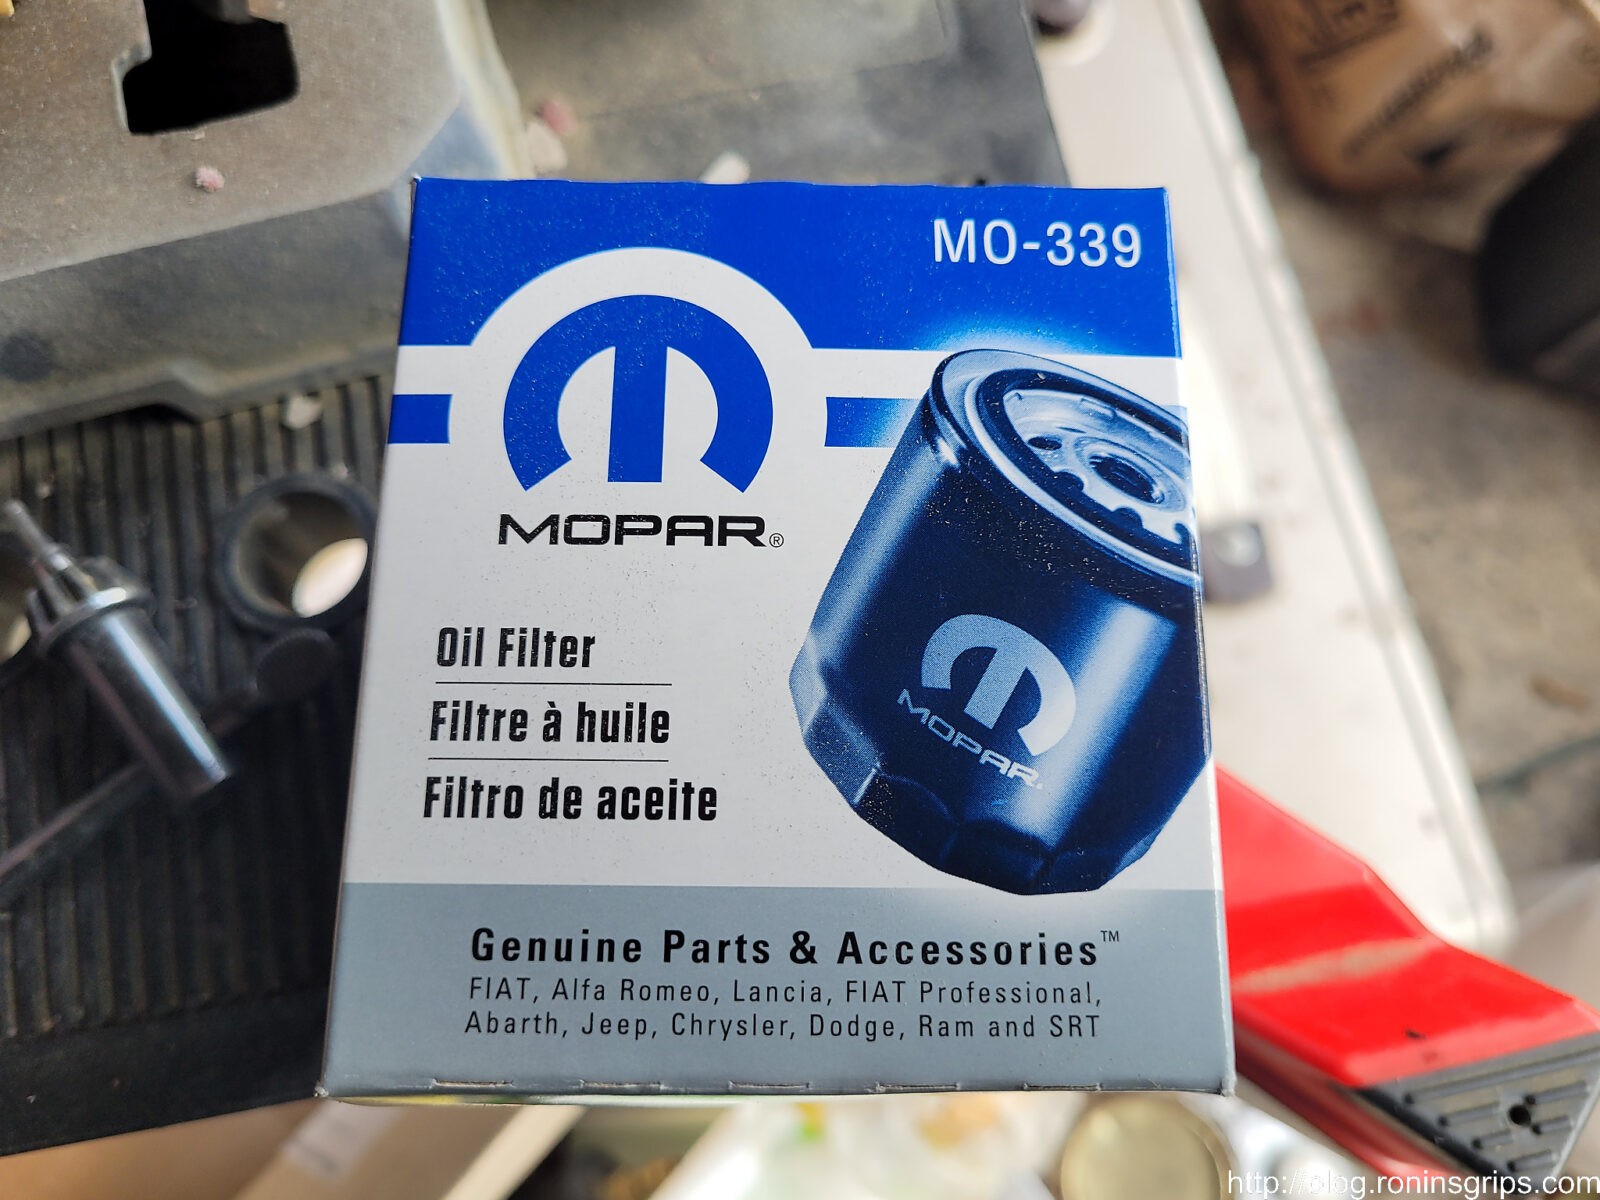
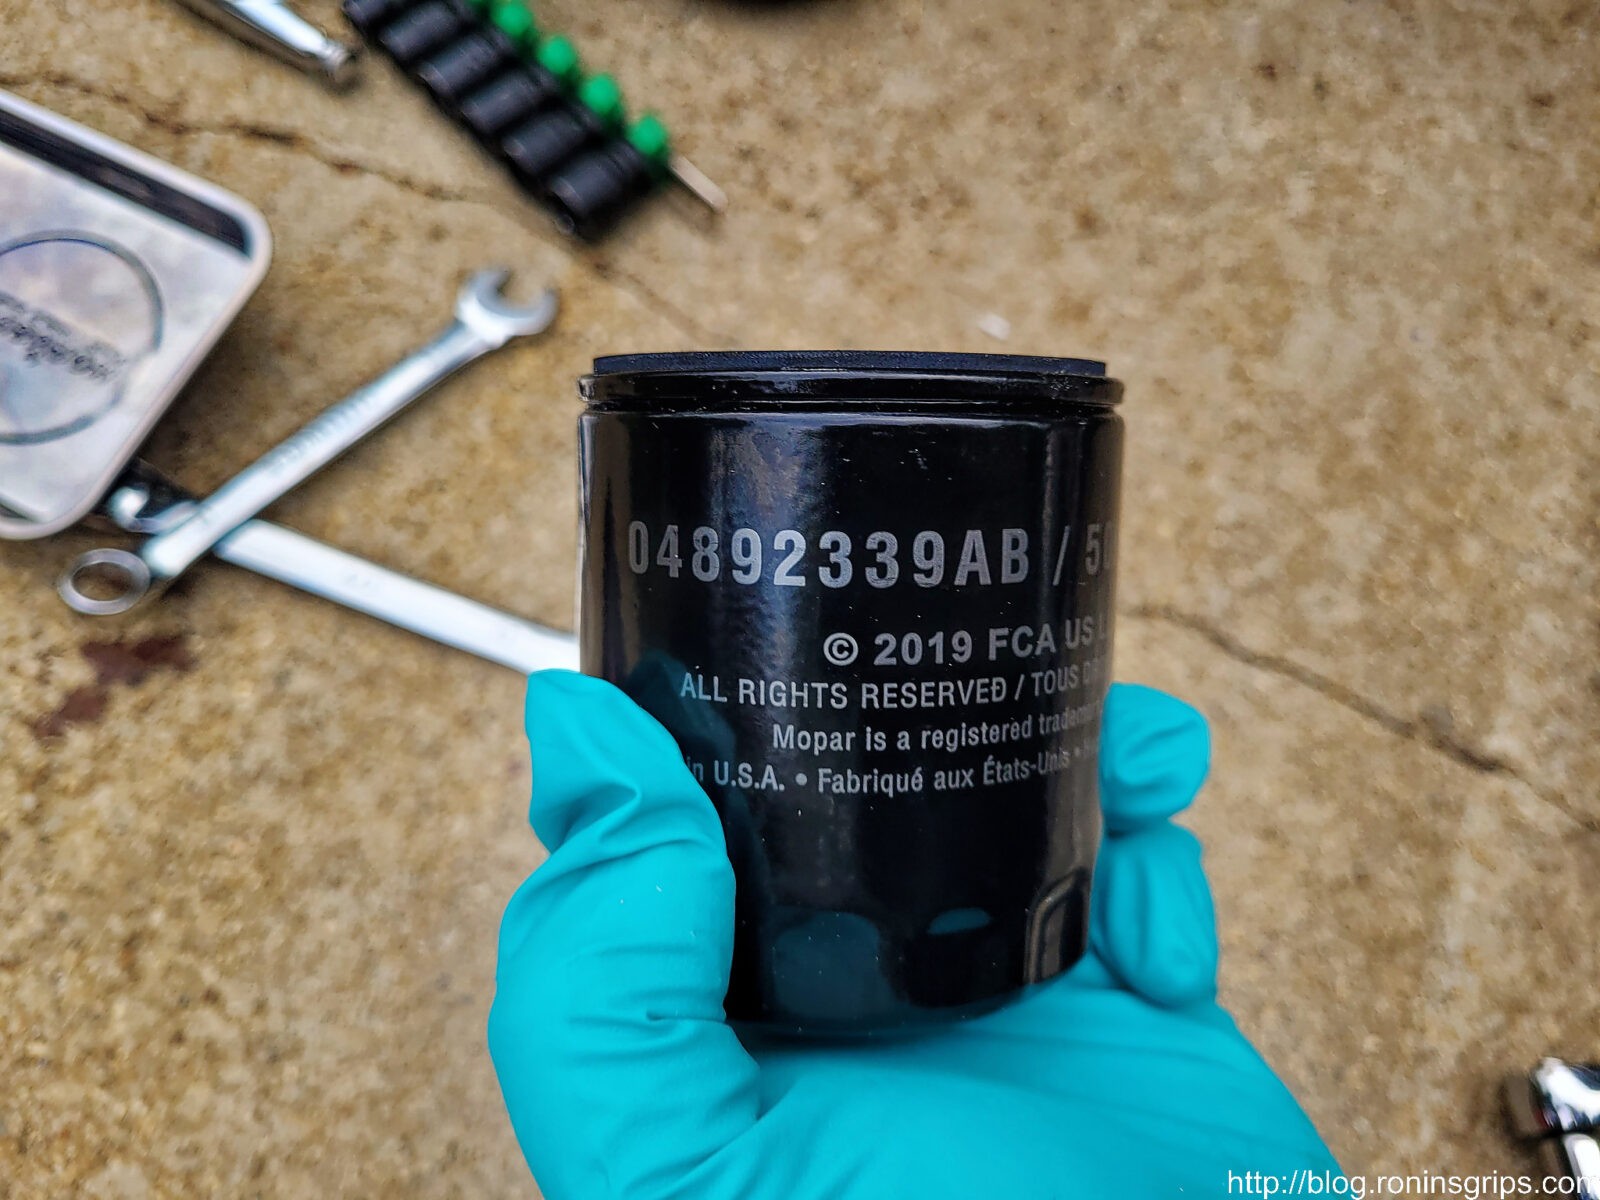
If you want to stick with factory parts to avoid warranty headaches, you need the Mopar MO-339 filter. I am using the 04892339AB but am told there is now an AC part number. Regardless of the letters, I would not be concerned if searching turned up an AA, AB or AC. The main thing is that the correct model is MO-339 and you can buy it from Amazon.
This is the correct model number – Mopar MO-339. Sure, there are other quality brands of filters out there such as Wix but my intent is to use Mopar filters until the warranty expires. Then I will move to Wix or whoever is best at that time.
FCA is Fiat Chrysler Automobiles. They are now owned by Stellantis – just FYI. The part number is 04892339AB. The last two letters reflect minor revisions to the base numeric part. For example, 04892339AA would have been a previous version of the part. Odds are it would work ok if you find it. I always go for the most current part number I can find because usually they are trying to improve/fix design issues. The AB series started in 2019. I saw an AA filter that was marked 2009-2011 and recently read there is an AC series but I have not seen it personally.
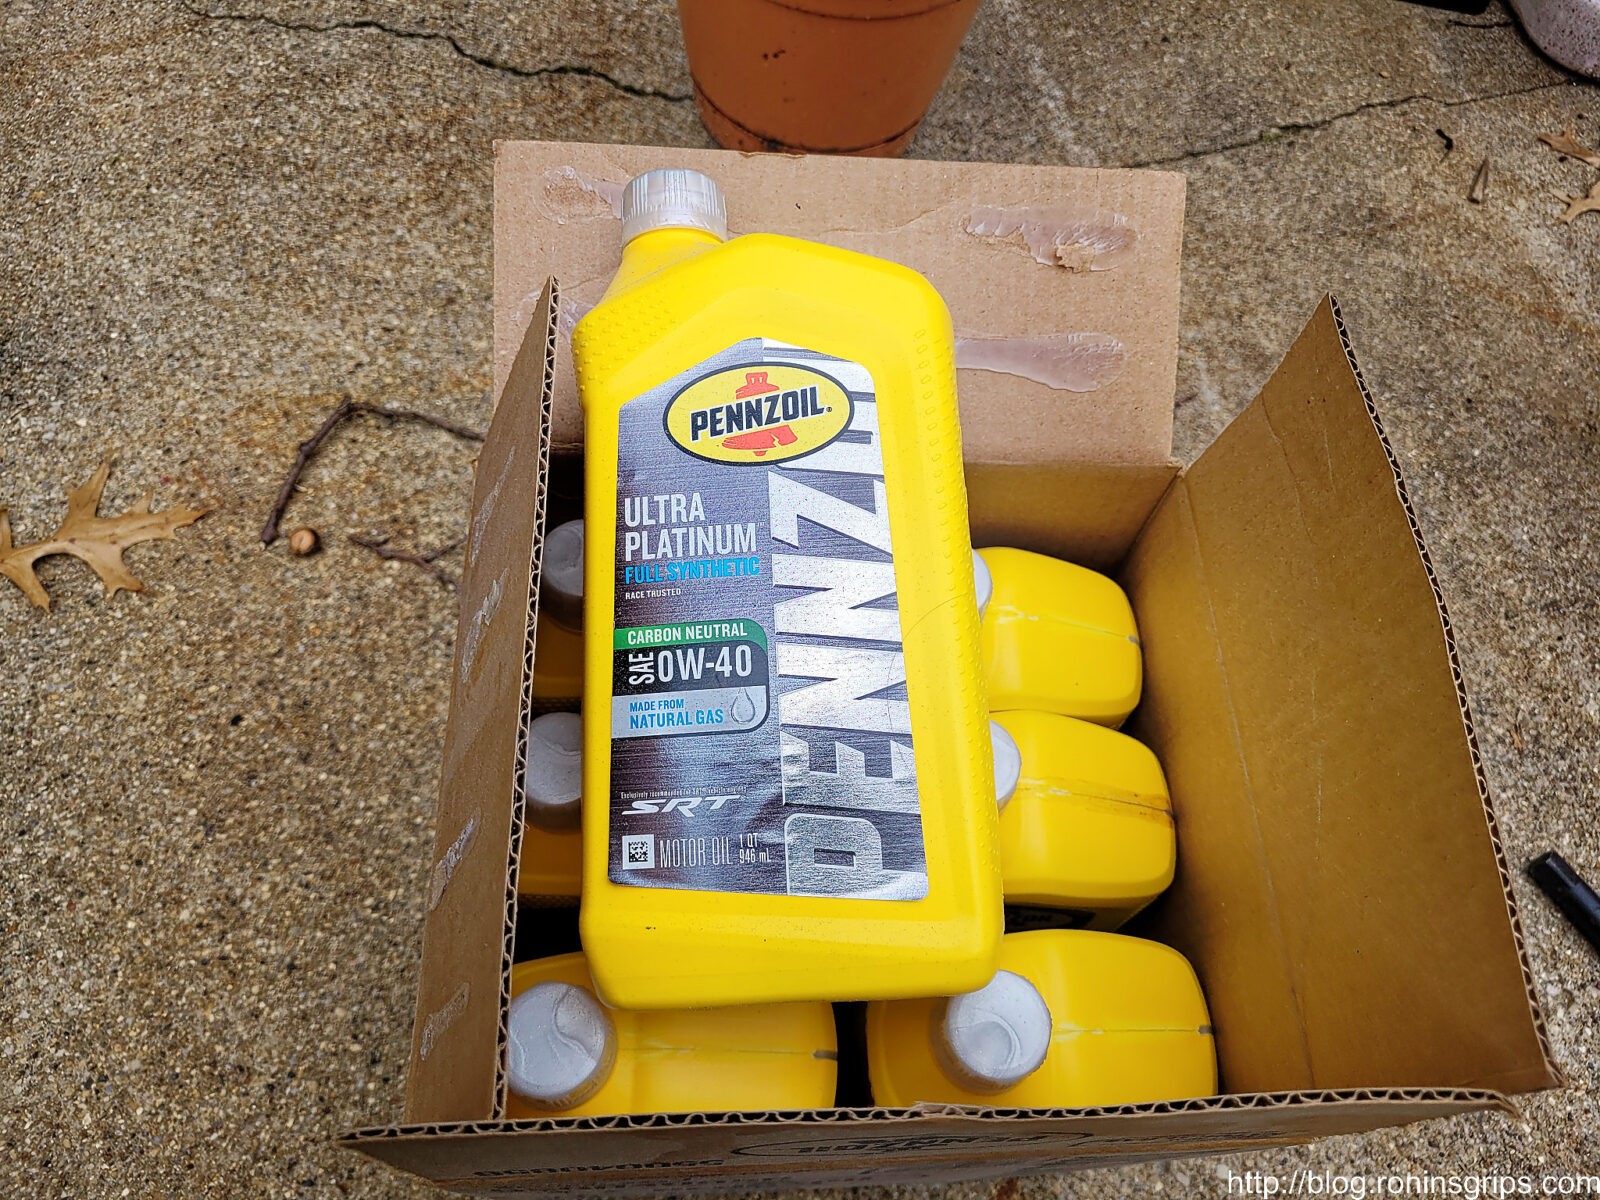
Where can you find the Pennzoil Ultra Platinum Full Synthetic 0W40 Oil?
You are going to need 7 quarts of oil if you change the filter and I always change the oil and the filter. I am used to walking into Autozone, O’Reilly’s or Walmart and buying oil. They do not carry this weird Pennzoil “Ultra Platinum Full Synthetic” 0W40 that Dodge was specifying. Apparently there were some office politics about switching to Pennzoil and to lock people into using Pennzoil plus being more likely to go to the dealership for oil changes they (I’m not entirely sure who “they” are but will blame both Dodge and Pennzoil) – they came up with this odd spec that really wasn’t required. Stuff like that irritates the hell out of me – they could have specified something else and made it easier for all of us.
My first oil change some time late last year was quite an experience. The oil filter had “factory installed” printed on it and boy, it did not want to come off. I wound up using a vise-grip type oil filter wrench to get a good enough hold to finally break the seal and spin it off.
I just did my second oil change getting ready for Winter and rotated the tires also [click here for a post about how to do that the easy way]. I figured I would take a minute and share with you where to buy the filter and oil from and hope this helps you out.
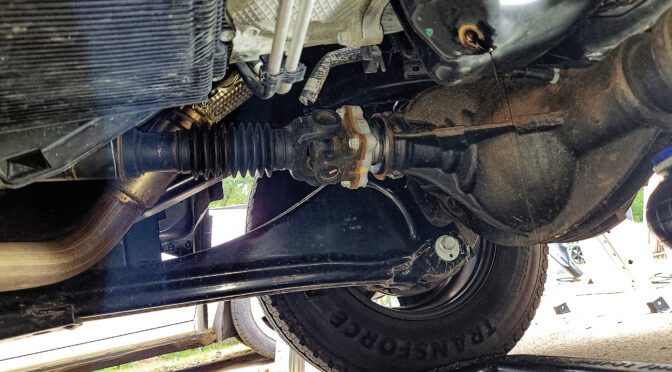
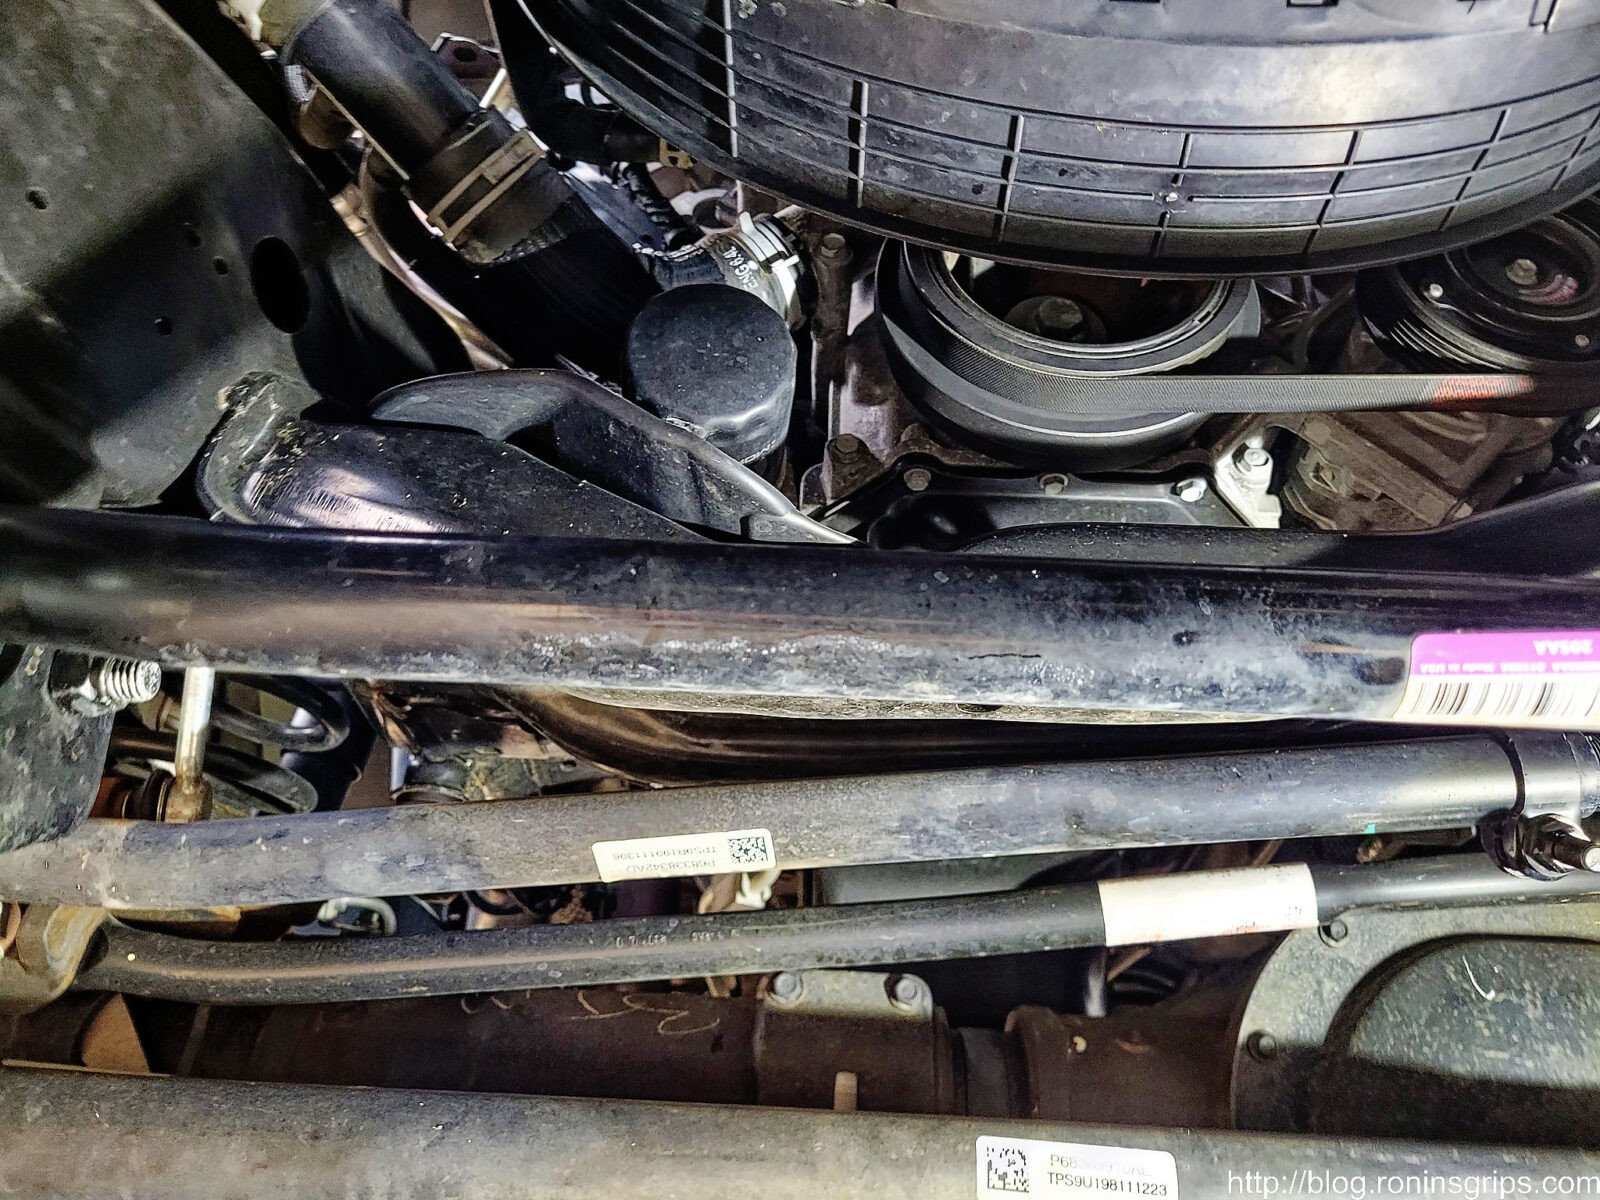
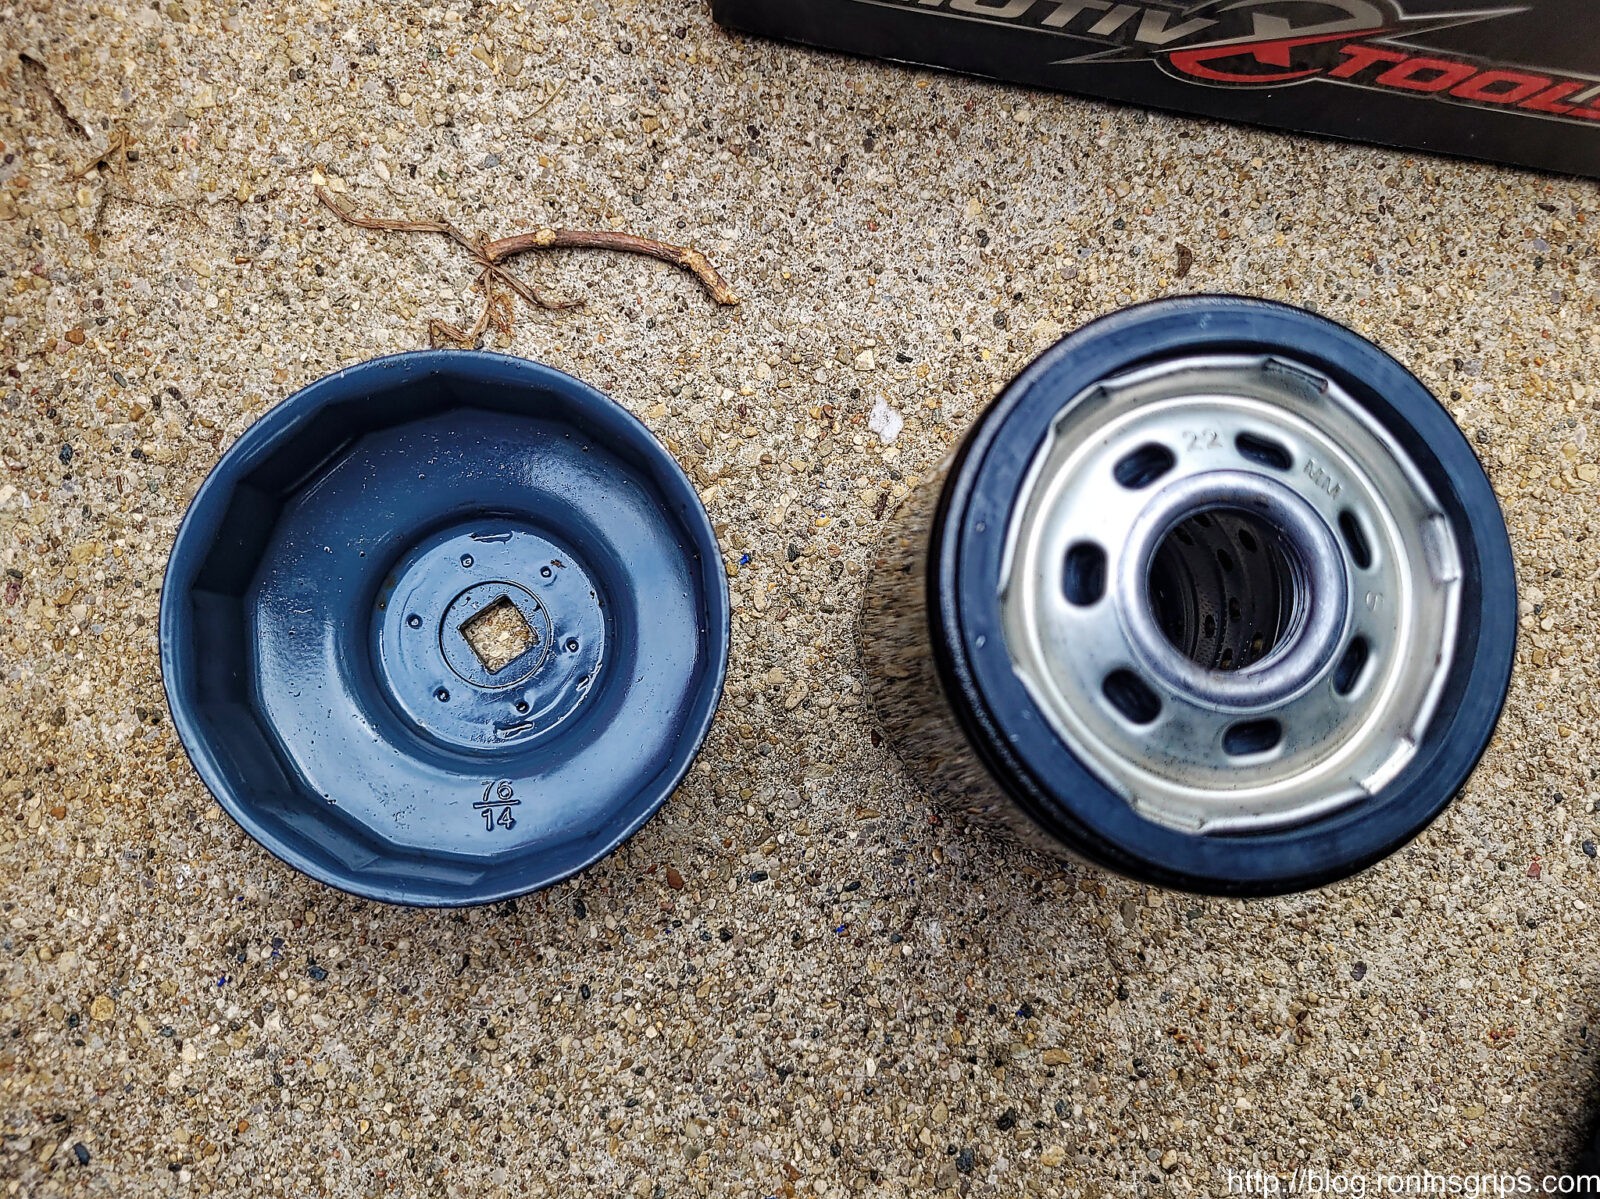
The filter is located just to the left of the bottom of the lower engine’s crank pully. An end cap filter wrench/socket makes changes really easy. For the first one, the factory installer went nuts either torquing it down or the seal stuck to the block – I’m not sure which it was but I had to really crank down with a locking oil filter wrench to get it off.
By the way, the torque spec for the oil drain plug is 20 foot pounds. Now I know some guys just feel how tight to go by hand and I did that for over 30 years but now do to nerve and muscle damage, I can’t tell how tight I am pulling so I torque to spec – totally up to you.
Note, I have to buy all of my parts – nothing here was paid for by sponsors, etc. I do make a small amount if you click on an ad and buy something but that is it. You’re getting my real opinion on stuff.
If you find this post useful, please share the link on Facebook, with your friends, etc. Your support is much appreciated and if you have any feedback, please email me at in**@*********ps.com. Please note that for links to other websites, I may be paid via an affiliate program such as Avantlink, Impact, Amazon and eBay.
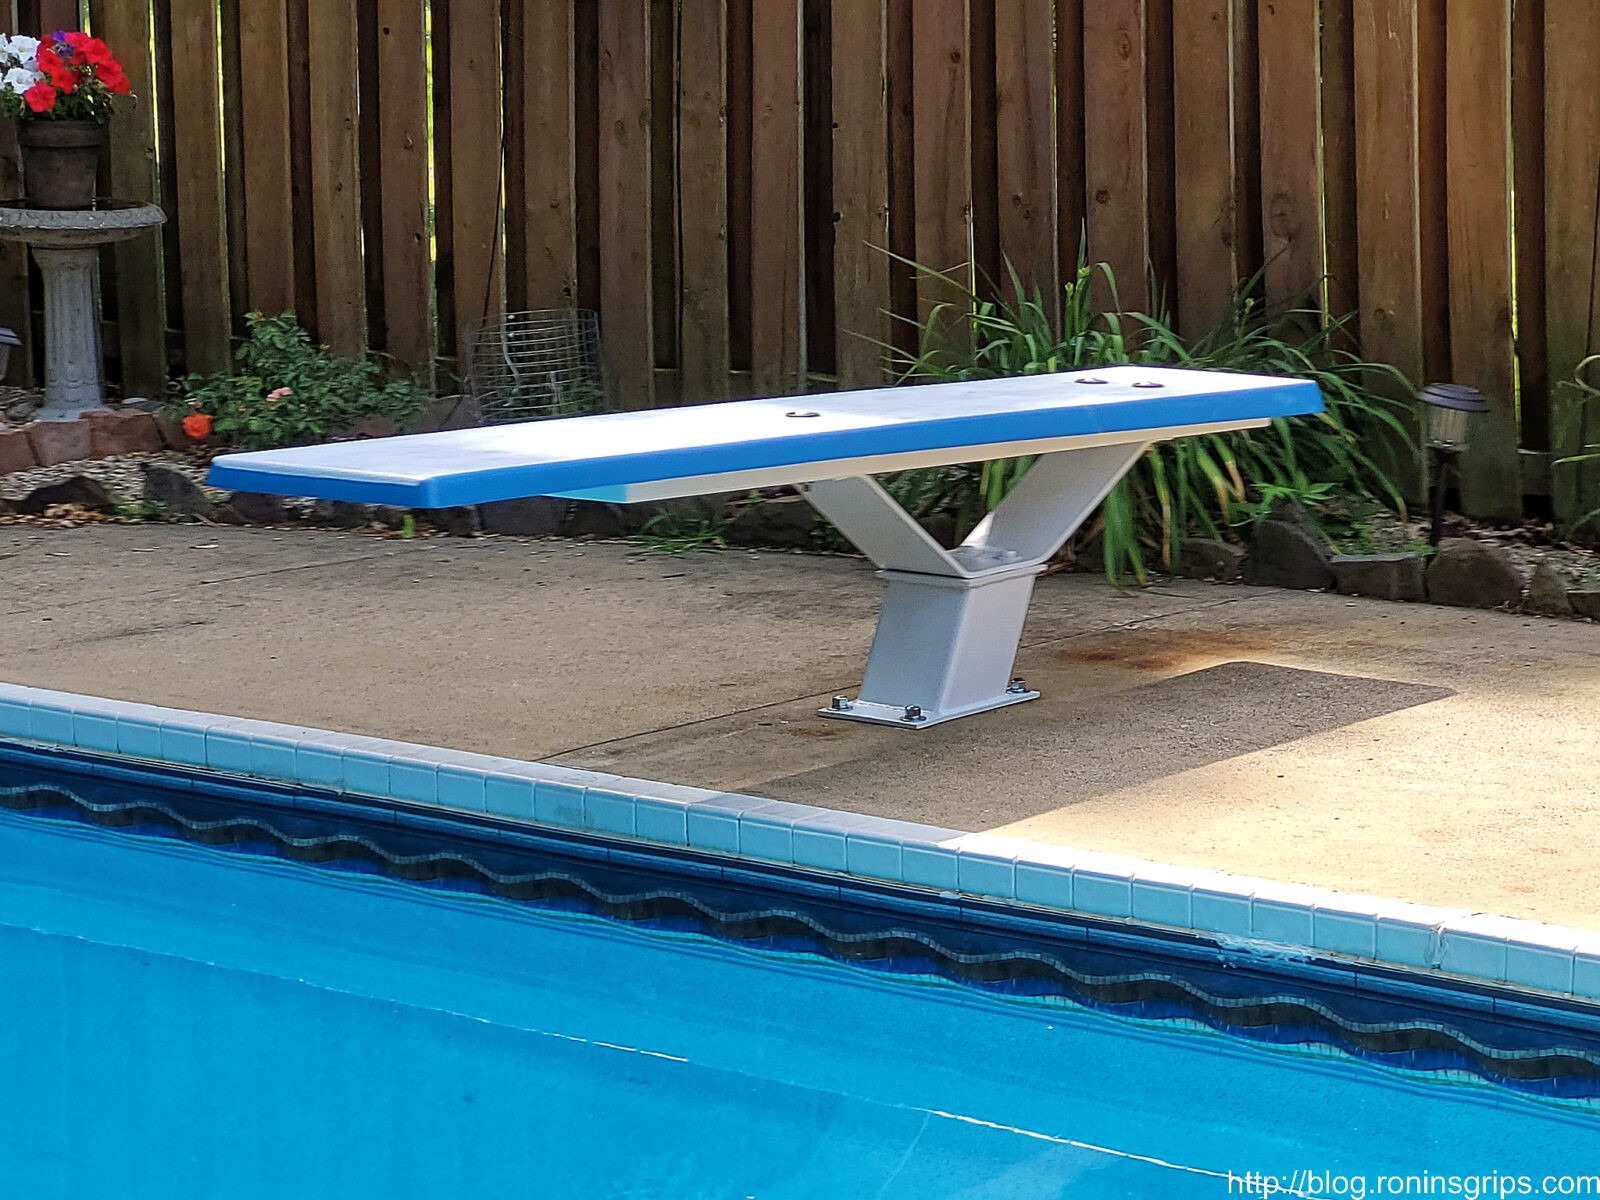
Have you ever been stuck between a rock and a hard place because you need to get something done but a vendor fumbles the ball … badly? That happened to me recently. We have a home made in the 70s and the pool is the same. While we have replaced the liner a number of times over the years, it was the original slowly falling apart diving board. We actually bought our home in 98 and the previous owner had put a 2x8x6 between the board and the spring to keep it alive.
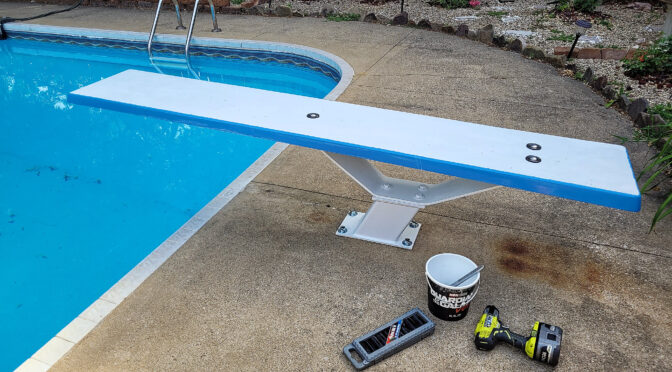
Let’s fast forward to about a month ago. We were getting ready for a family reunion to be held at our place so I got the pool ready for the summer and decided I better check the diving board. Oh man, it was shot. The fiberglass underneath had torn around the board it encased and there was just no way it was safe.
One thing I have learned about pools over the years is that you can usually find parts. So, I new it was an 8′ residential diving board and the hole pattern for mounting it was 4.5″ on centers in the back and the front single hole was 36″. I did some digging and the hole pattern and distances from the back and sides corresponded with the SR Smith 8′ Frontier II board.
A number of vendors carried it online and the problem was that I needed it with only about a two week lead time before people started arriving for the party. InTheSwim said they had it and it would arrive in time. I used my wife’s card on the website and it wouldn’t go through so the website gave me an 800# to call. I did, the lady told me it was a fraud screen, I approved a text message sent to my wife’s phone and the InTheSwim operator told me it was all set and I should get an email shortly. She never said she resubmitted it … About an hour later, still no email so I called and I am pretty sure the same lady answered and said the order was fine …. in fact it was not.
After a week of no updates, I called and after confusion on their part, they found the order in limbo, fixed it and told me it would probably still make it in time. Okay… I kept tabs on it and finally called and said I needed the board. They told me it would not even ship until after the party. I asked that they expedite it, that I would even pay for it and they said they had no way to do that. I then told them in no uncertain terms to cancel the order. If that reads like a rant, it should. I hate it when a vendor fumbles the ball and literally does nothing to make it right.
I was left with two options – disappoint a bunch of relatives or figure out how to fix the board. I decided to do the latter and I suspect this is the part of the post you really care about.
What went wrong with the board?
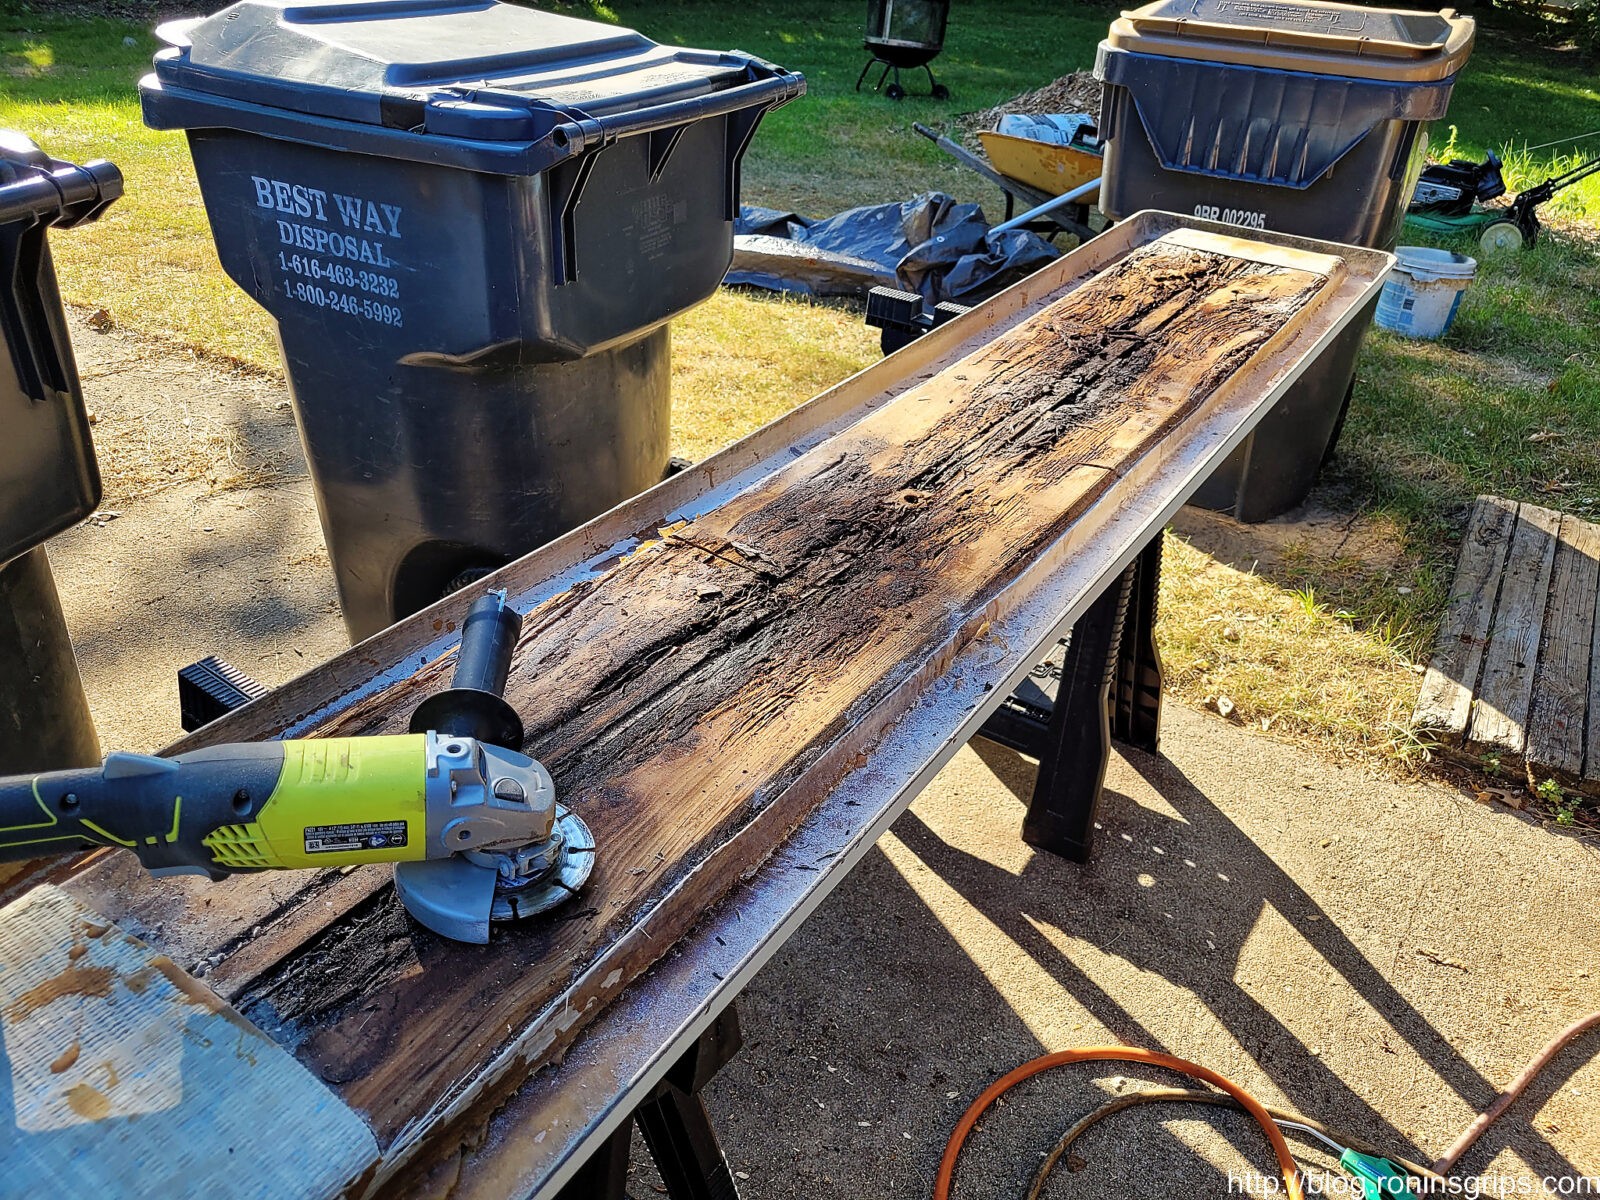
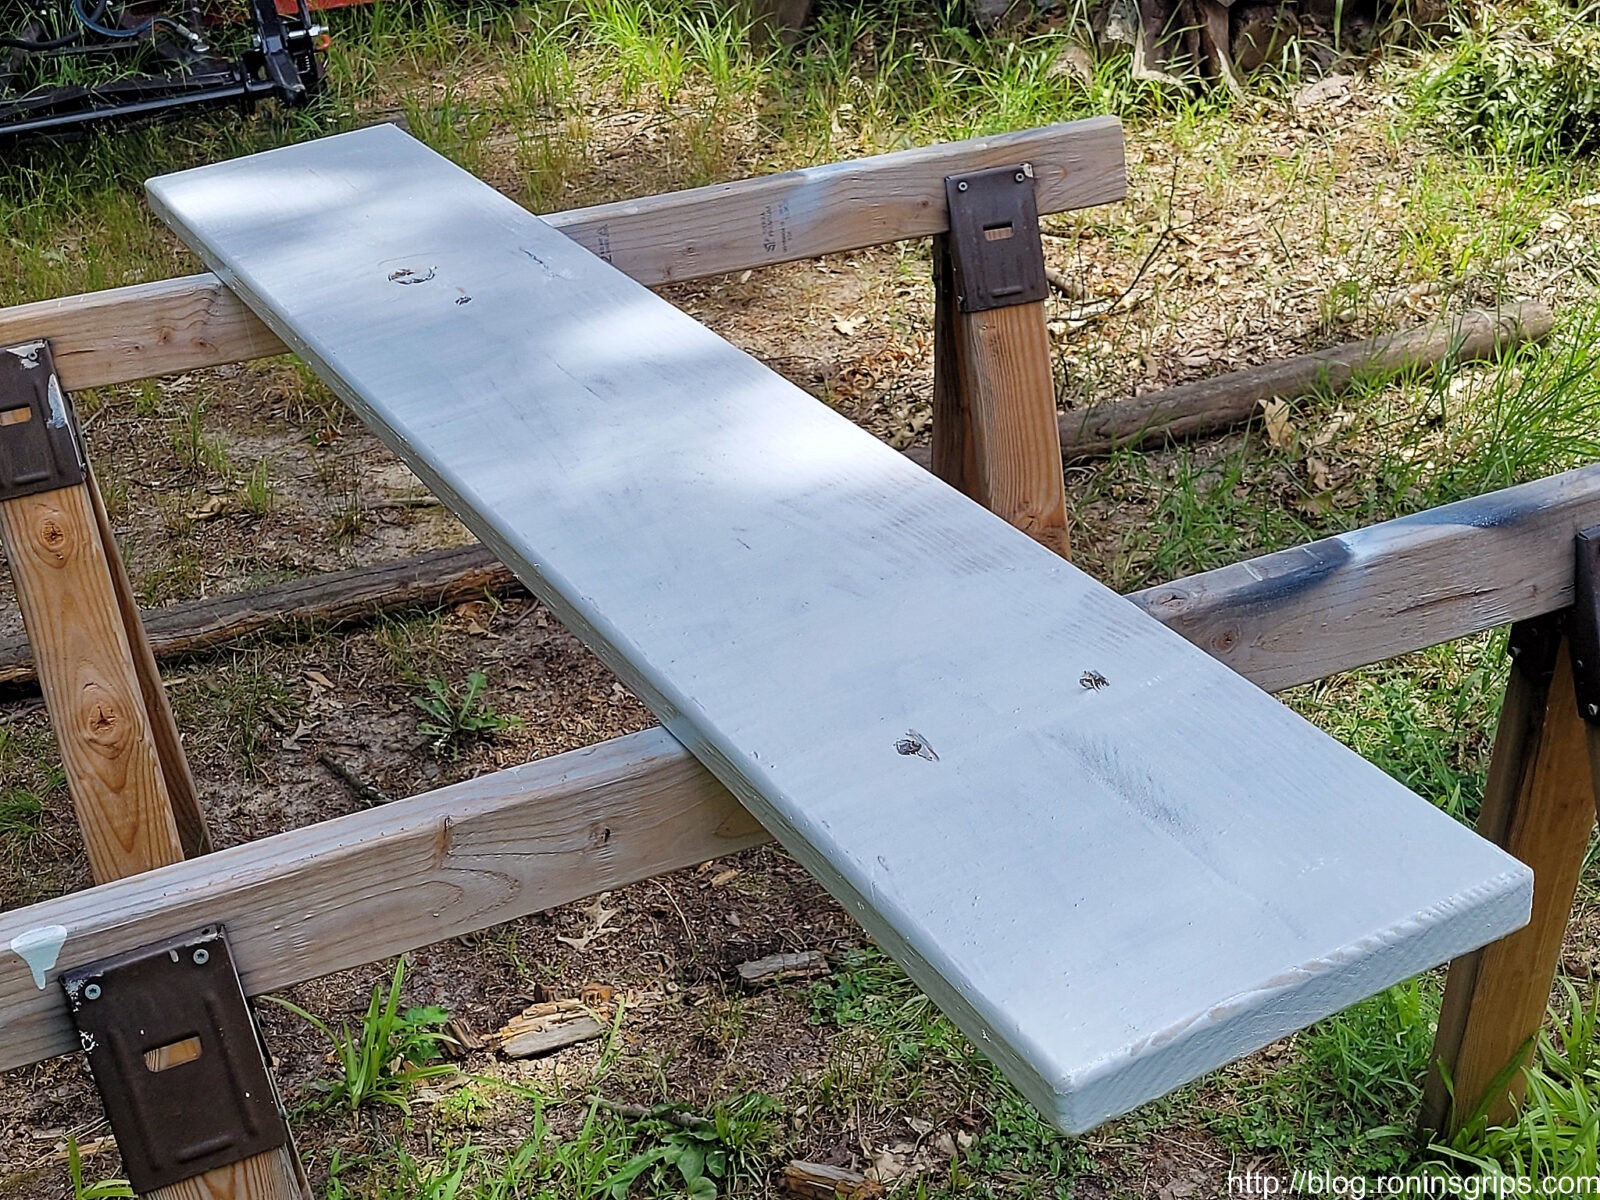
Many, if not most, residential diving boards have a fiberglass top, sides and bottom but the core is wood. Through the in the fiberglass rotting wood was plainly visible. I put the board on sawhorses, put the old supporting board underneath it and flipped the diving board over to access the bottom. Again, the diving board was resting on the old supporting board – I new that if I didn’t support it, the odds were high that it might snap. Once supported, I used a diamond masonry cutting wheel in my 4.5″ Ryobi cordless grinder to slice off the torn fiberglass to see what was going on. I had a hunch that If I could salvage the top of the board, I could fix the bottom and I was right.
Important Safety Comment: Wear eye protection and a quality face mask (N95 or better) when you are cutting or sanding on fiberglass. You don’t want stuff getting in your eyes or lungs. I also wear gloves to protect my hands.
I used a masonry cut off wheel – in this case a diamond coated one – because the glass fibers can dull saw blades, etc. Just about anything can cut open fiberglass – it just depends on whether you care about what is happening to the blade.
Once I cut open the bottom that held the wood, I could see it needed to be replaced. What was there were three pieces of wood and there was a cap on each end with nails that held it together. Over the years as holes and cracks opened up, water got in and slowly rotted the wood. I really wasn’t surprised when I went to lift the board off the spring – it weighed a ton due to the waterlogged wood.
The wood wouldn’t lift right out so I would prop it up and cut it with a small hand held Ryobi circular saw into thirds. I used a small pry bar and lifted the sections out. I didn’t cut all of the fiberglass out yet thinking that I might use some of it to make things stronger. In hindsight, I’d now tell you to remove all of the hold fiberglass wrapping on the bottom -there was no need to save it.
Wood and Fiberglass
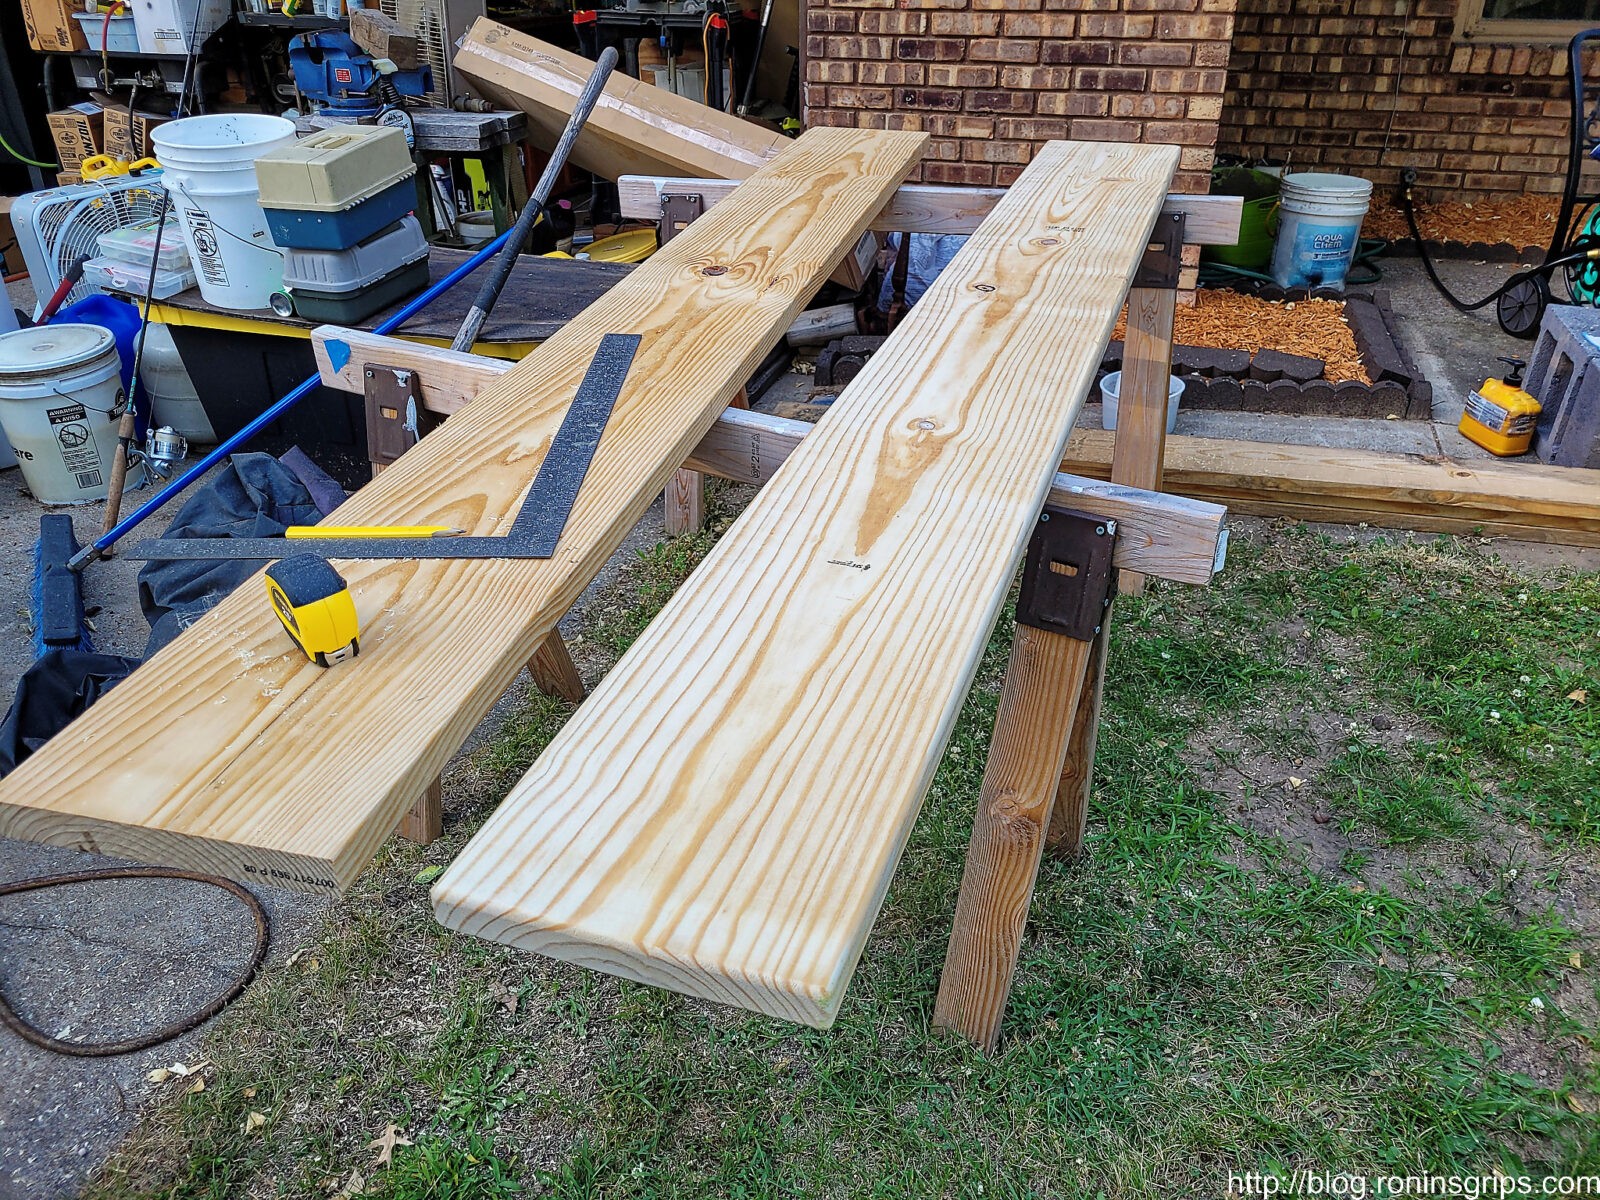
In a perfect world, I would have the exact same size of wood and better yet, treated wood, to replace the rotten wood. I didn’t have time for wet treated wood to dry so I went to Home Depot and bought two 2x12x8 pieces of dry pine lumber. One to go in the board and one to still support it even though it probably wasn’t needed.
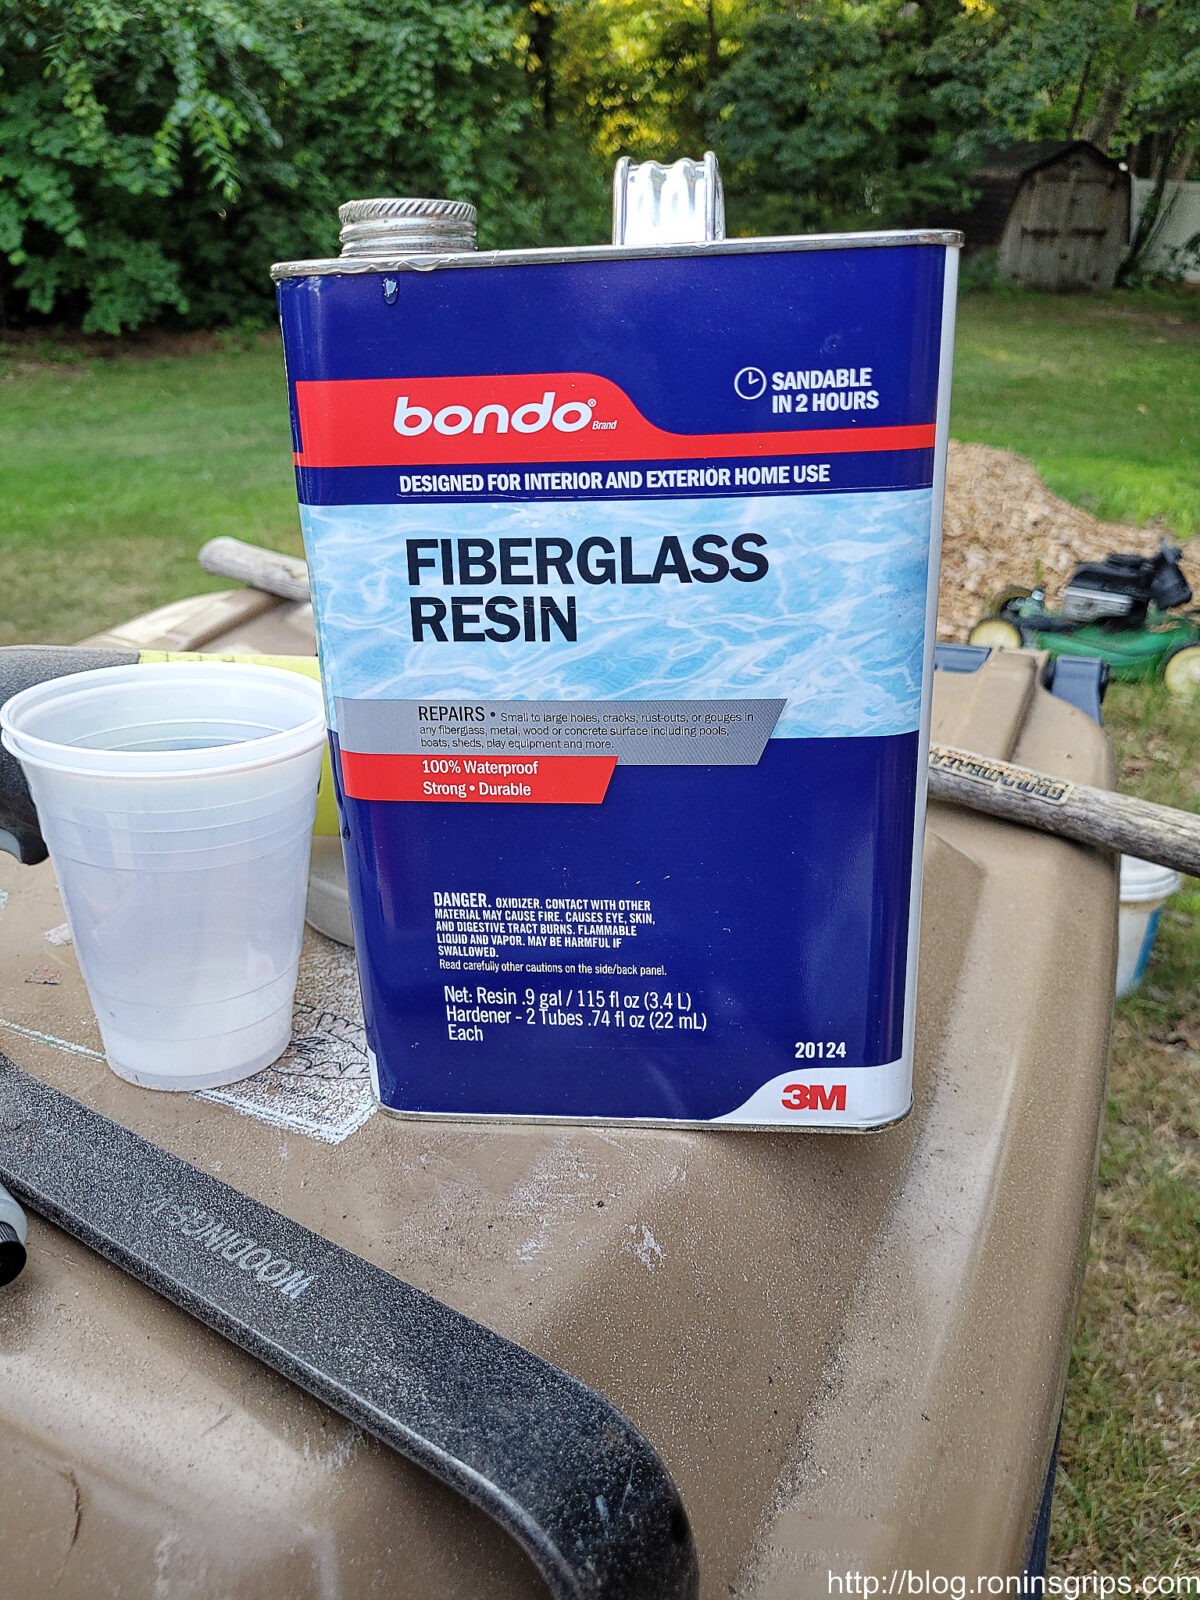
I also stopped by the adhesives section of Home Depot and picked up two 1-gallon jugs of Bondo fiberglass resin and three packages of fiberglass cloth – if I had it to do over, I would have bought a couple more for complete overkill in terms of strength. I knew I had a spare cloth at home so I had four fiberglass cloths total. I also bought a spare package of hardener just in case.
Here’s one of the jugs of resin. Because I work with plastics, I had a large selection of mixing cups and stir sticks. I used 32 oz cups and a half tube of hardener at a time. I would mix them and then pour the contents into a second 32oz cup. This is known as a double pour and reduces the odds of you pouring unmixed contents and making a mess.
Note: The Bondo fiberglass system uses a polyester resin vs. true epoxy. Polyester is cheaper than epoxy but not as strong. I’m pretty sure it will hold up and we’ll see over time. I’m writing this post a week after our reunion and the board looks just fine – no cracks.
Cleaning Up The Board and Preparing It
With the wood out, I then removed all of the debris to get a better look at what was going on. I removed almost all of the old fiberglass that was holding the old board – I now know I could have removed all of it.
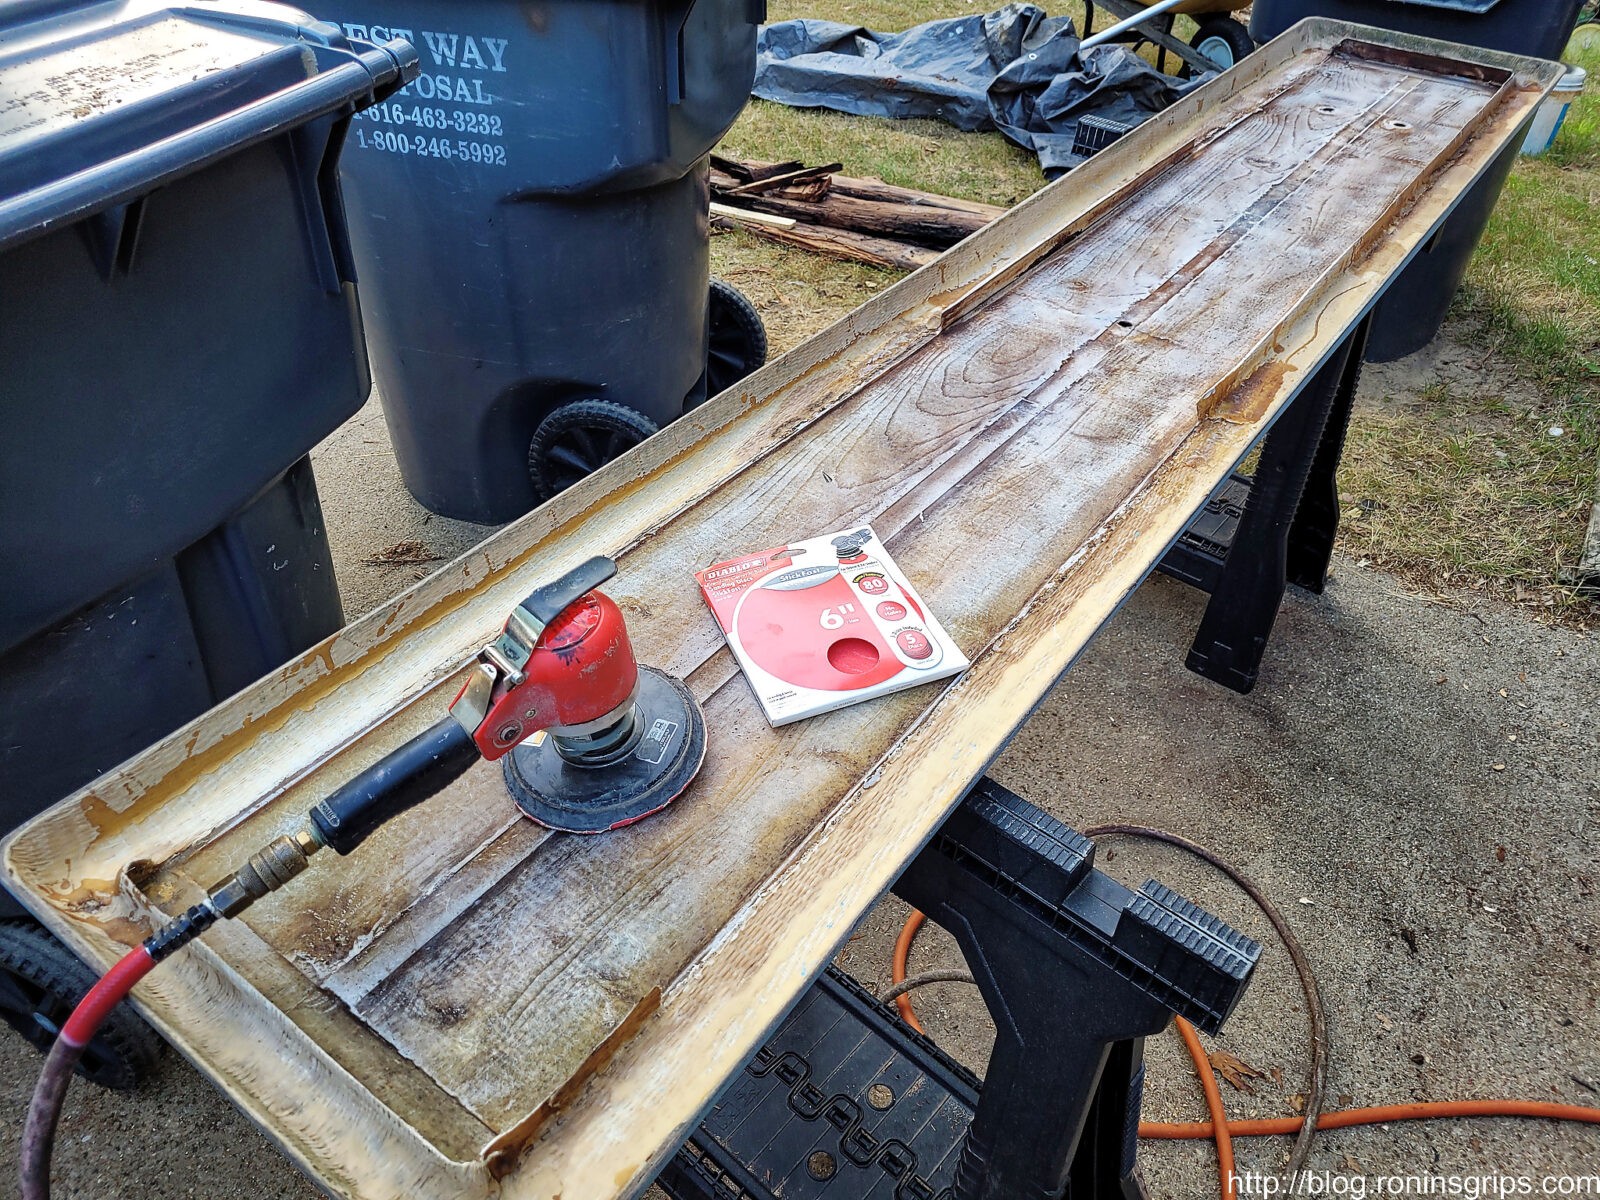
Here I am scuffing up everything really good with 80 grit sand paper in my orbital IR 6″ sander. If you want the fiberglass to bind really well, the surface must be abraded. Just remember, if the surface is smooth and shiny, your adhesion is going to be bad. A very abraded clean surface is ideal.
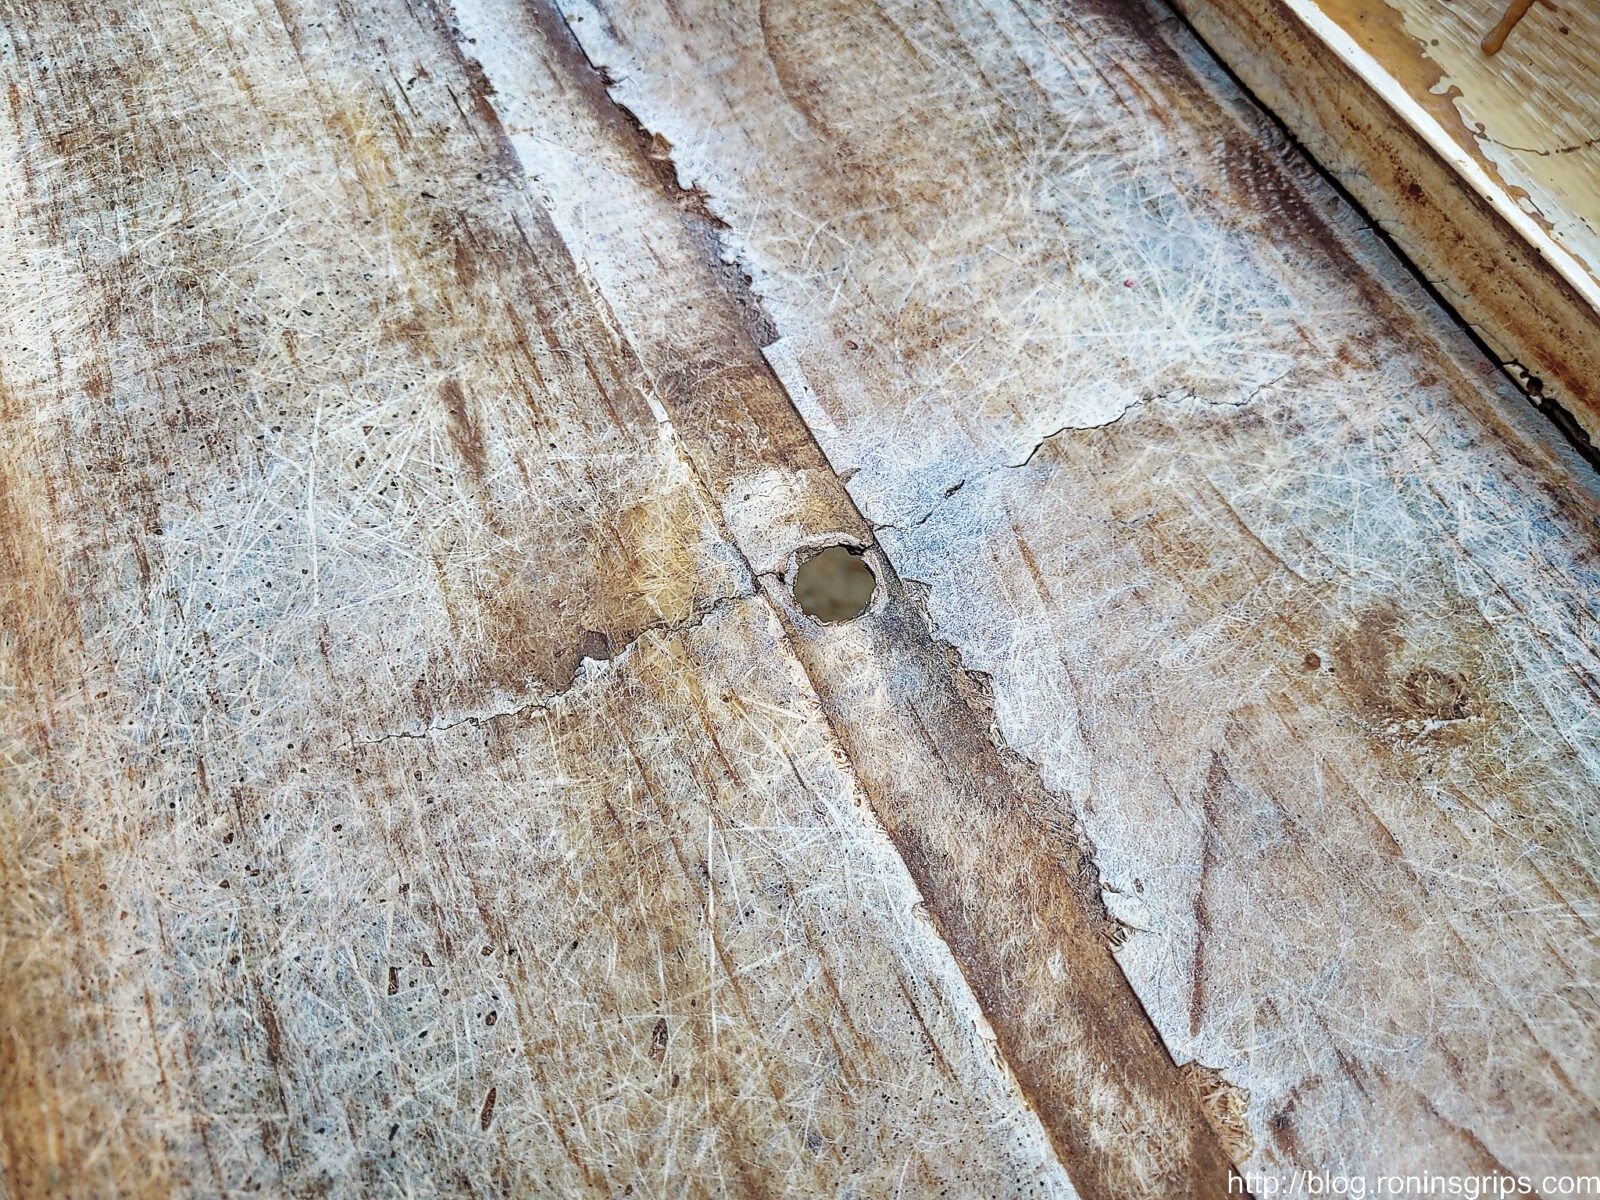
Here’s a better view of the center front hole and the big crack that went completely through the fiberglass top. Note, after sanding, cleaning and degreasing, I closed all holes with black Gorilla tape before I started apply resin. Once again, I would remove all the old fiberglass that surrounded the board. Those vertical pieces you see would be gone.
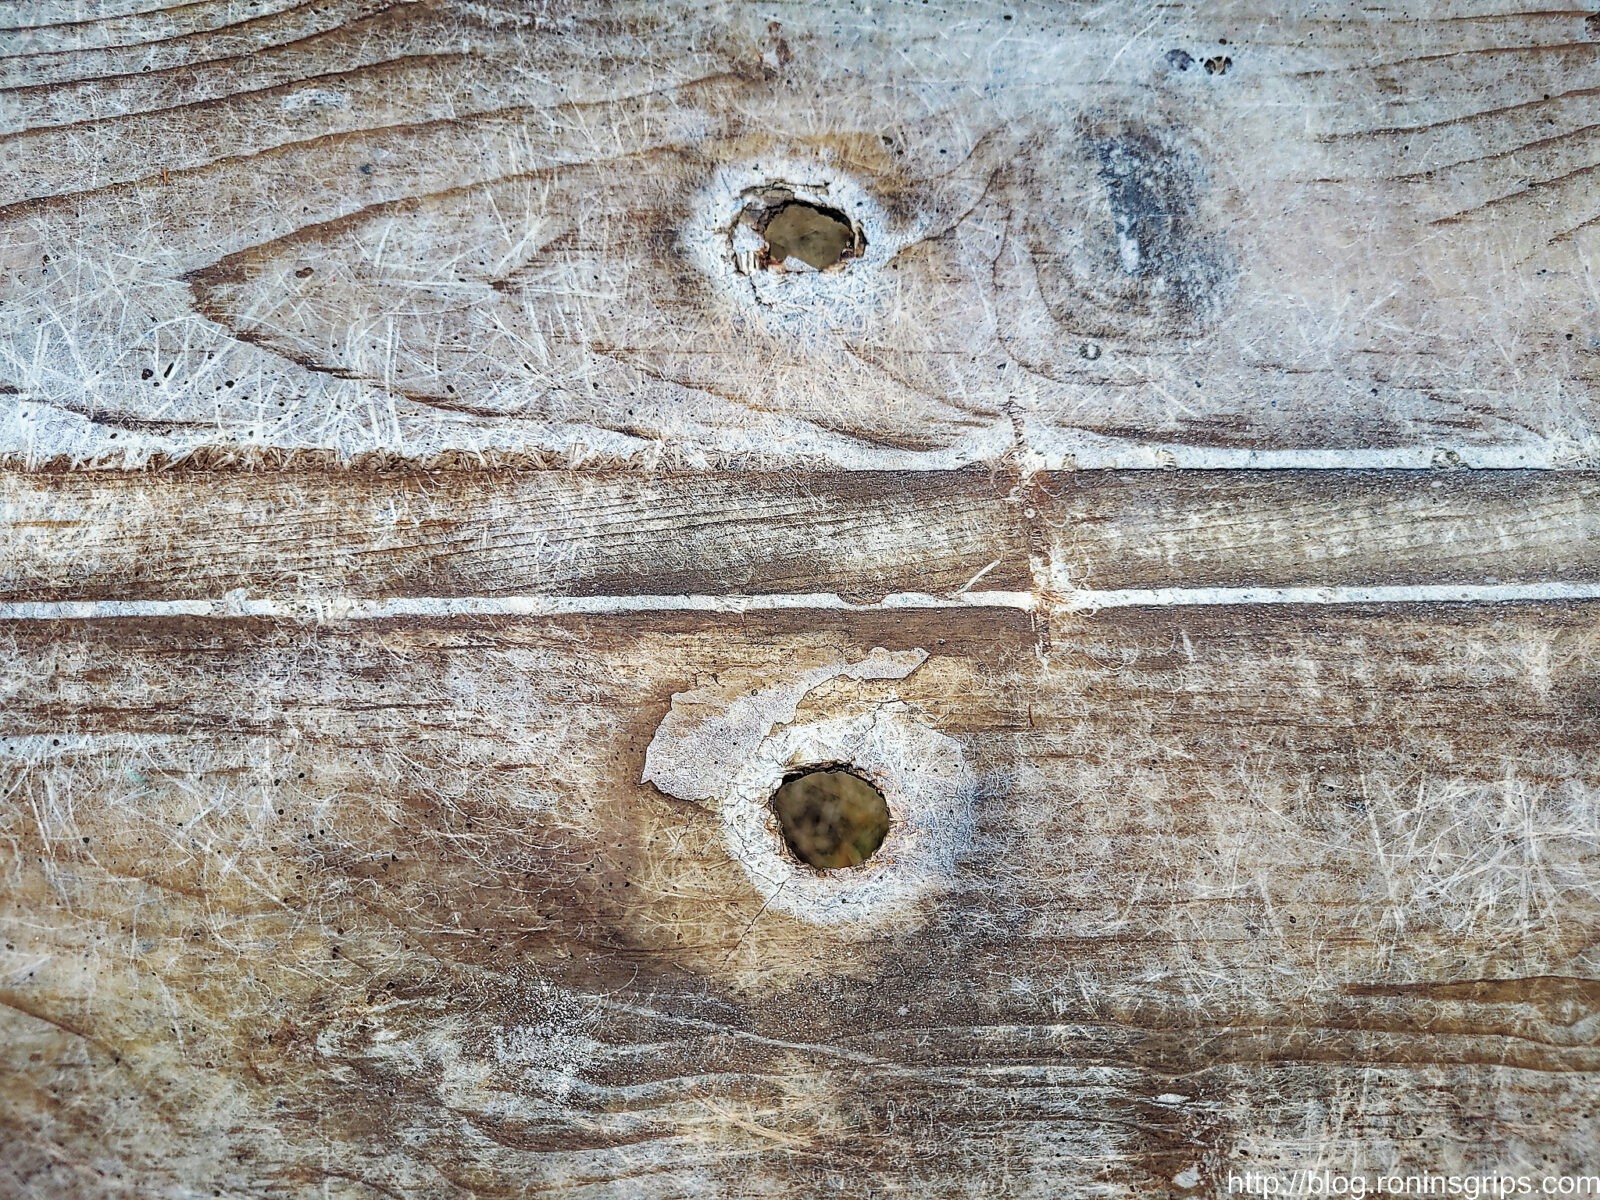
Here’s a close up of the back two holes – they are worn open and stress cracking around them.
One more view of the big crack at the center. I sanded the heck out of everything with 80 grit, sprayed down the inside with brake cleaner thoroughly to degrease it and then stuck big pieces of gorilla tape over each hole. The diving board surface was ready.
Preparing The Wood
The wood was completely dry – let me stress that. If you seal in wet wood, it will rot so make sure your wood is dry.
One thing I noticed with the rotted wood that I pulled out was that they had rounded over all of the corners/edges of the wood to not stress the fiberglass. That made a lot of sense to me. I put a 3/8″ carbide tipped round over bit in my trim router and rounded over the new board too and then sanded it with 80 grit sandpaper to prepare the surface for maximum adhesion.
The 2x12x8 boards were longer than the original so I trimmed them down. I then used a round over bit on both and sanded them. My plan was to embed one in the fiberglass but still have a support/buddy board underneath. Note, I did not drill any holes. My plan was to center the new pine board insert and drill the holes later.
I did test fit everything before I went to the next step. You don’t want to mix up resin and get part way in only to find our boards are the wrong length.
Gluing The Board In Place
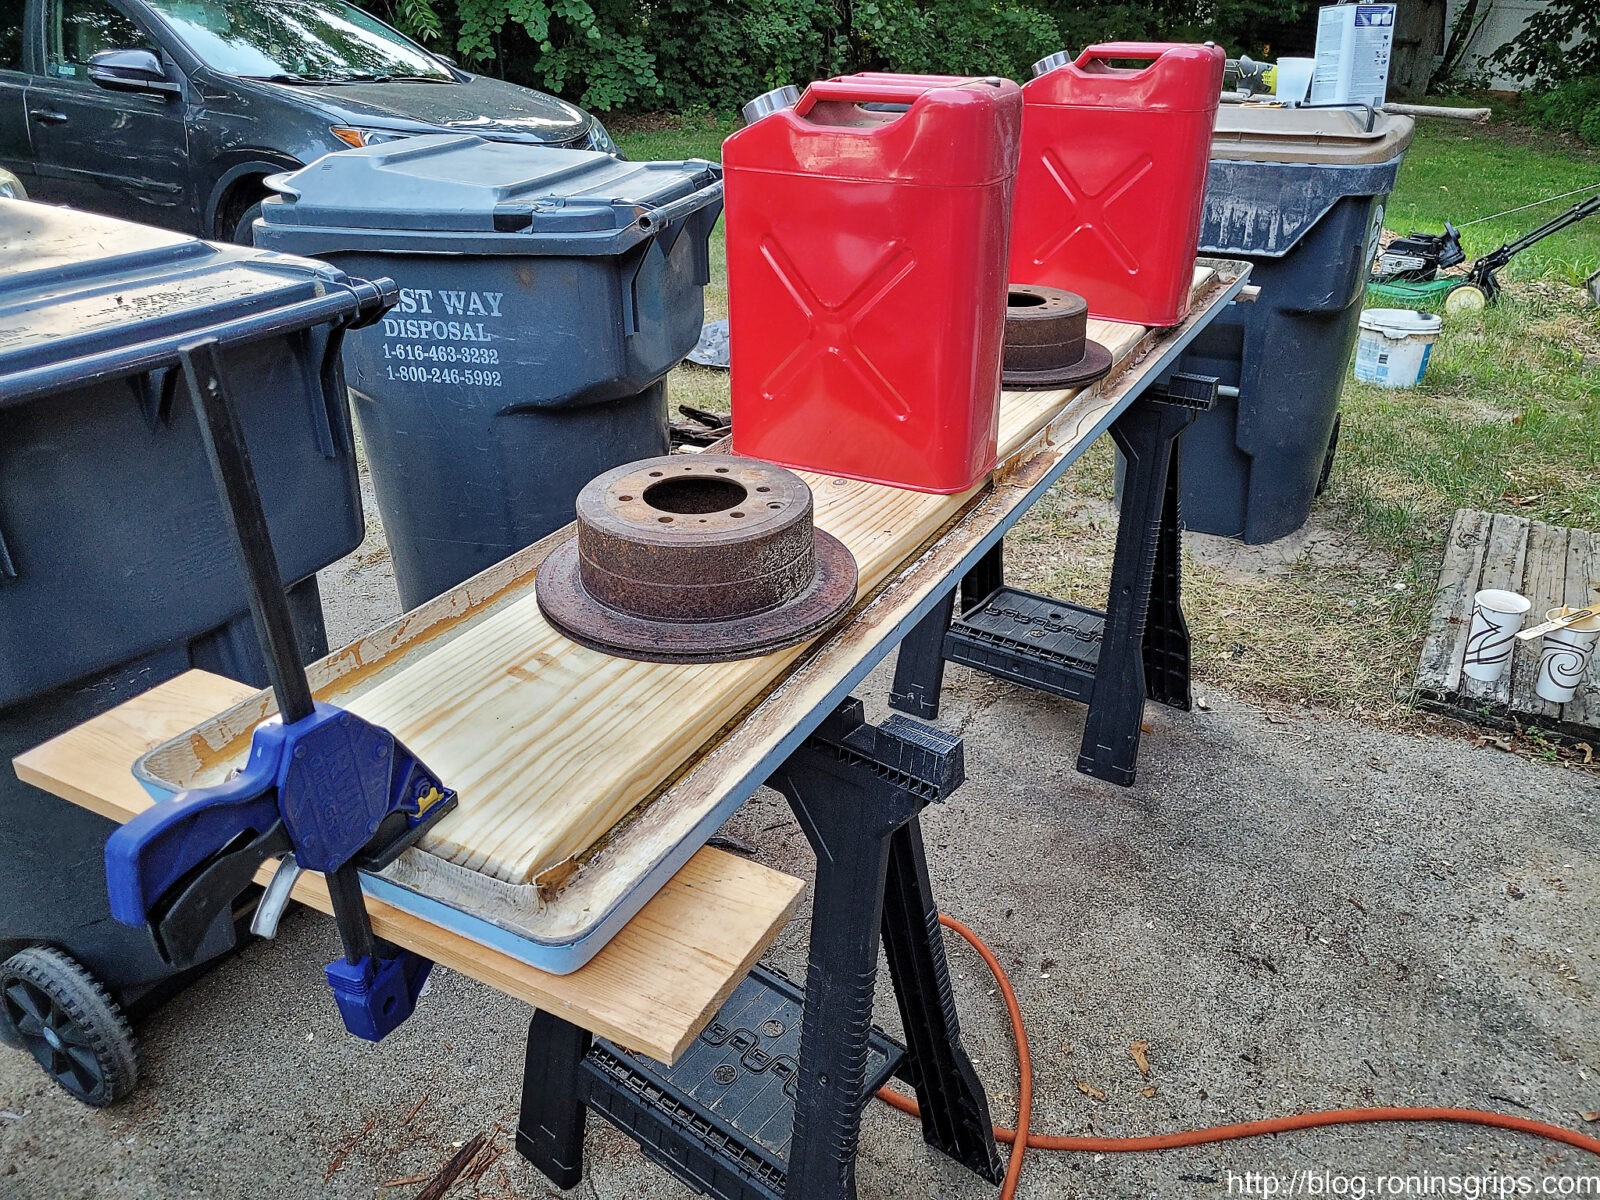
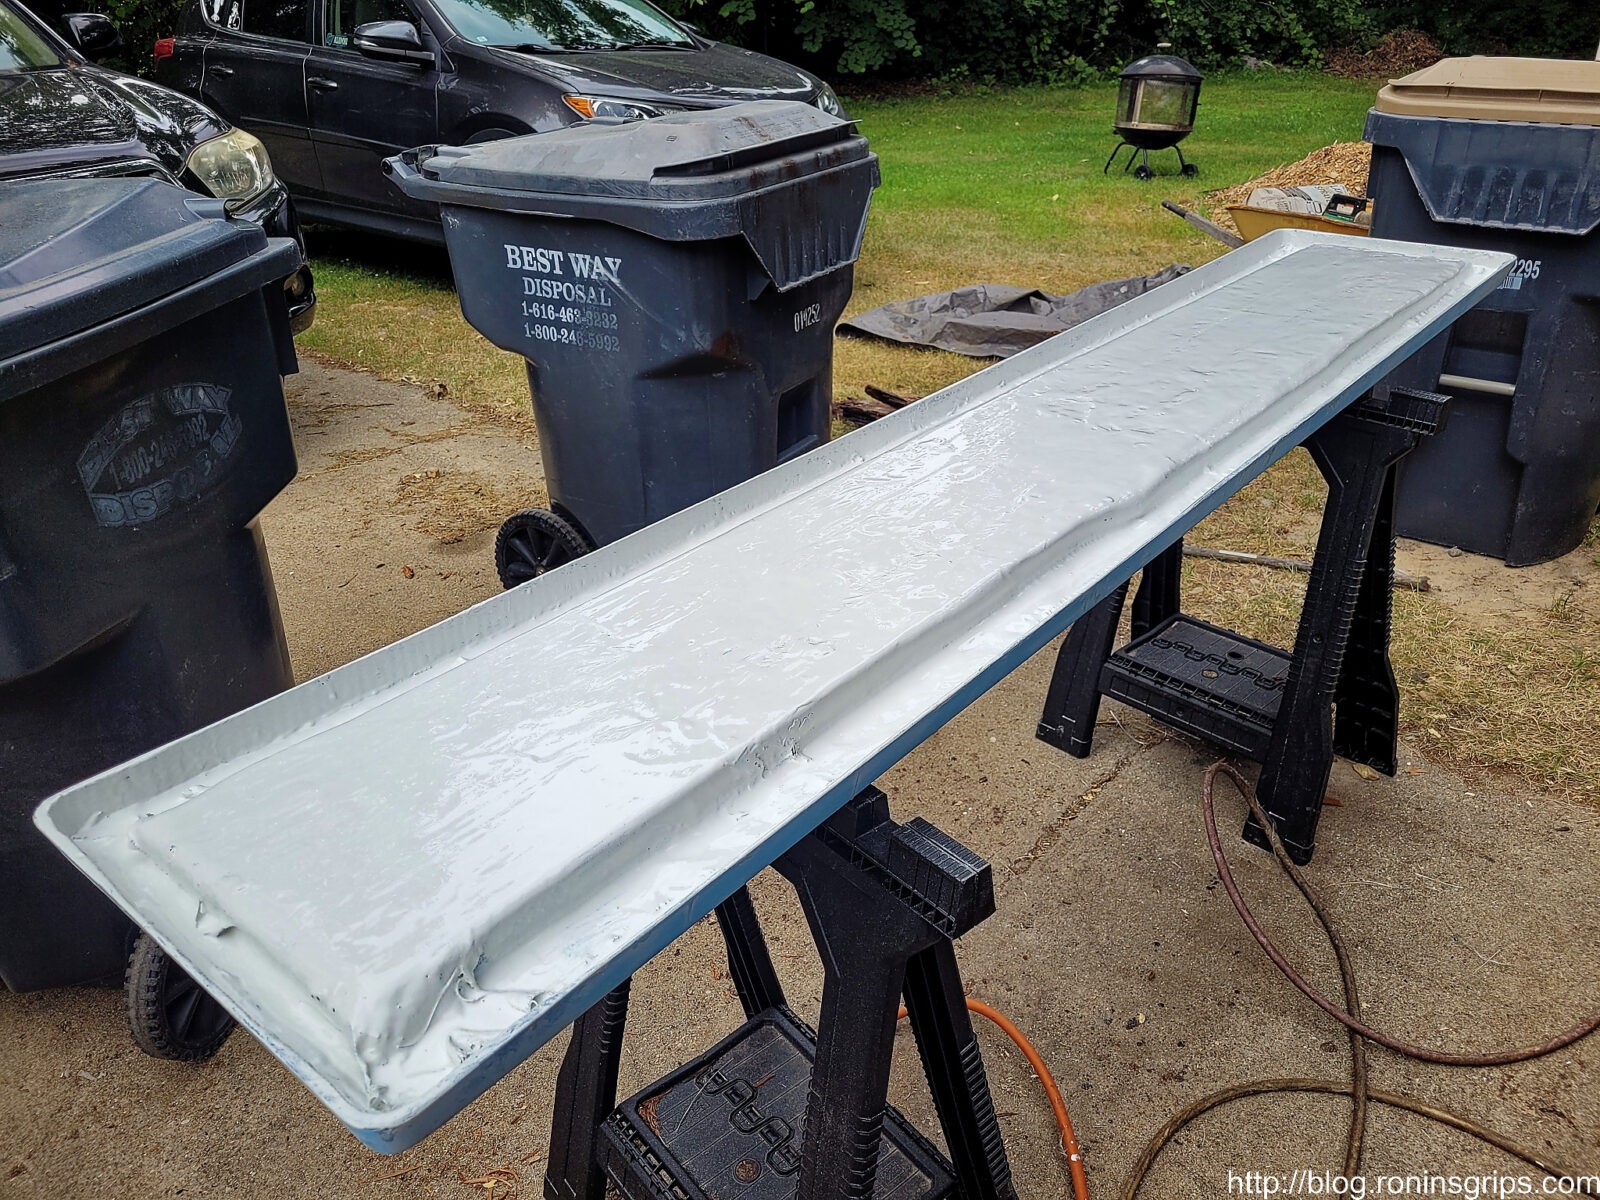
Okay, to close the bottom back up, I did it in steps. For the first one, I mixed up 32oz of resin, liberally brushed it in the bottom of the board really thick. I then clamped the ends and put weights in the middle to keep everything pushed together. You need to have this planned out because once the resin sets, it’s game over. I had the clamps and everything ready to go.
This falls under the “make do with what you have” category. The blue clamps are really strong and are on both ends. In the middle we have two brake calipers from a 96 Landcruiser and two full 5-gallon cans of gas. The more pressure pushing the parts together and the adhesive into as many spaces as possible is what you want.
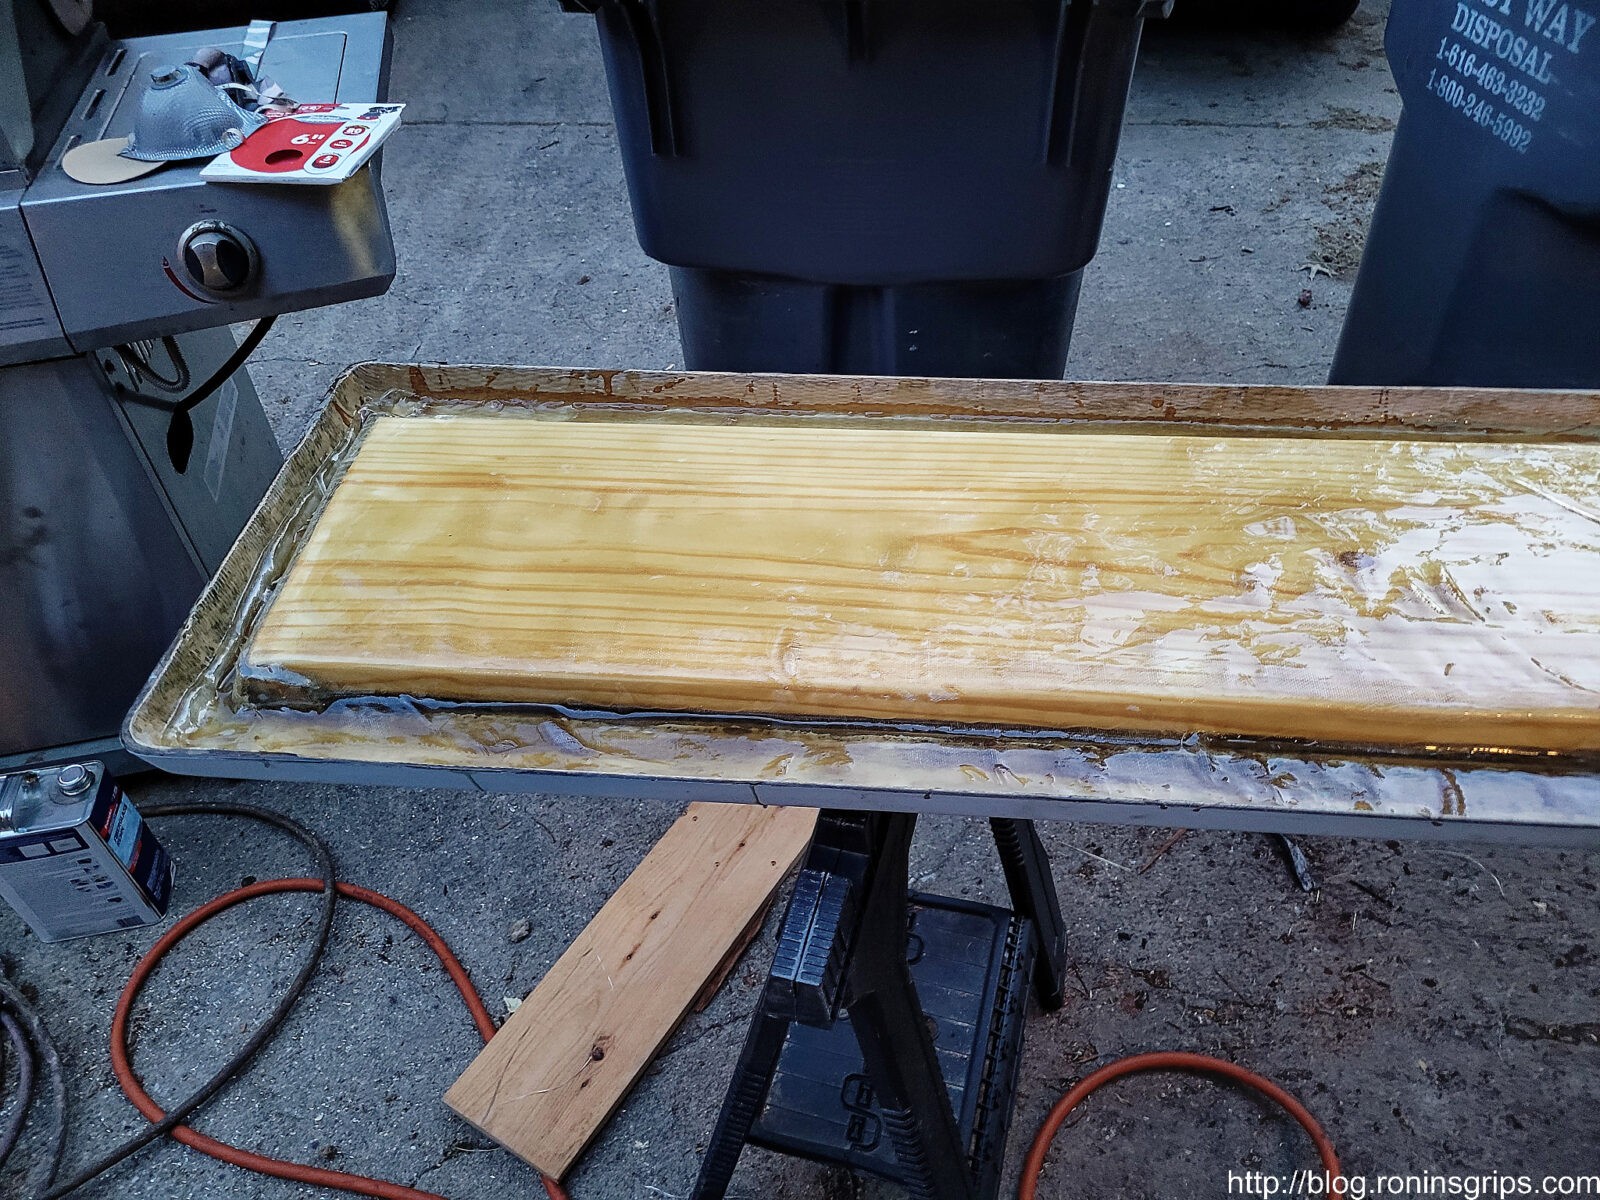
The next step was to put down the first layer of fiberglass cloth. I laid the cloth on top of the board and trimmed it to fit inside and just up the sides. I then mixed up a 32 oz container [don’t forget to do a double pour and use the right amount of hardener] and rapidly brushed it on very thick to the front area I was working on, applied the cloth and then another coat of Bondo on top. If you’ve not done fiberglass before, start with one section and learn. You want to get the cloth in place and wetted down with the liquid before it all sets. Also, have a bunch of nitrile gloves near by or you will get this stuff all over your hands no matter how hard you try. I wear gloves and have at it. I use my hands to rub the liquid into the cloth.
I did the front, the back and then the middle. If you need to stop, just sand the surface, blow it off and continue.
This is about the first half of the board. I let it cure and then sanded it before I applied more.
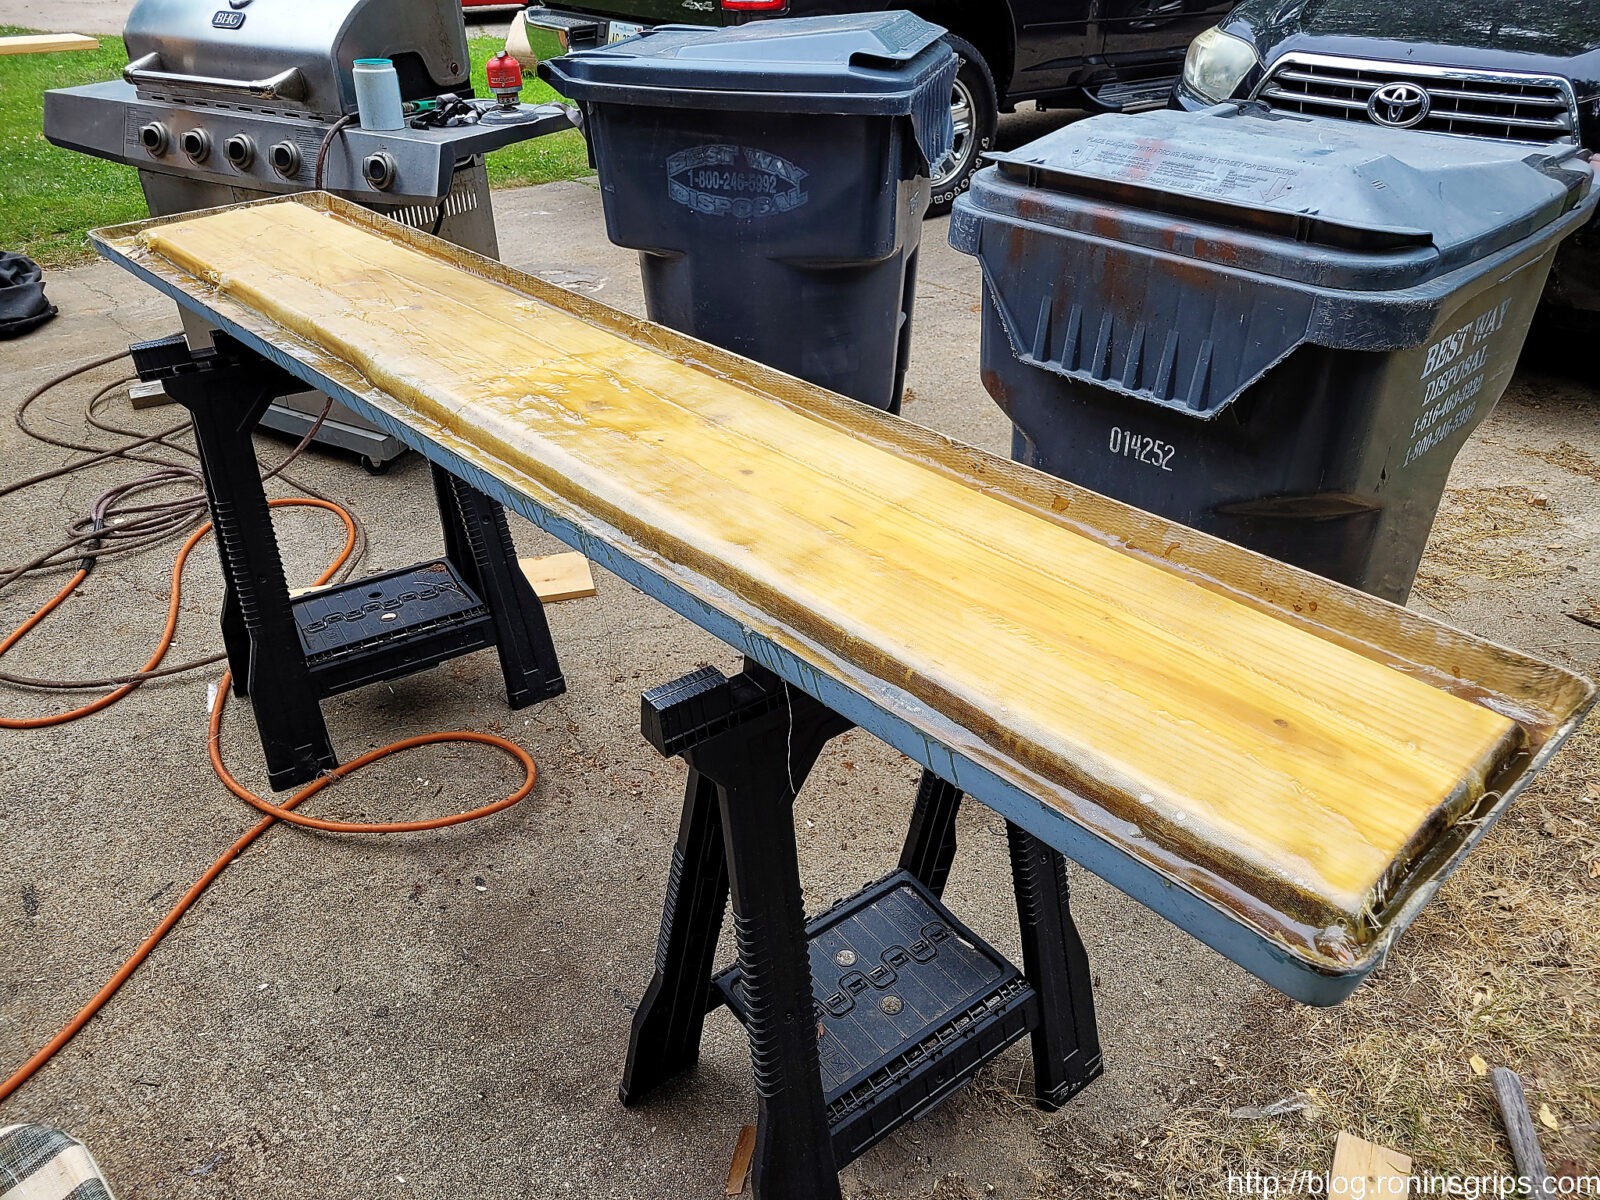
So I did the front, the back, then the middle. I used the full length of the cloths and overlapped at the middle. At this point, it was rock hard and I really wished I had just cut out all of the old fiberglass walls that surrounded the old wood. I thought it might make it stronger but then realized this wasn’t the case. I sanded again and cut my fourth and last cloth down the middle. I applied one length on the left and one on the right to strengthen those areas that still had the remnant walls that I should have removed.
Here it is with all of the layers applied. My next move was to sand and then paint it.
Drilled The Holes
Before painting, I flipped the board over, removed the Gorilla tape. The brownish color of the Bondo clearly showed me the old hole positions and drilled two 1/2″ holes in the rear and one in the front using the clearly visible filled in holes. I carefully pushed the support board under, clamped it in place and drilled it as well.
Painting The Board
To paint the board whatever color you want, use boat paint – what they call the top coat or deck paint. Years and years ago, I painted our board because it looked really tough and found out you had to add non slip grit to the paint or people would slide off. Yeah, there’s a story there about a teenager falling off so make sure you get the non-slip additive for whatever paint you buy.
I used Rust-Oleum’s Topside White for the board and a Ocean Blue paint made by Pettit for the trim. The only reason I went with the Pettit paint was that the local boat store carried it and Lowes didn’t have the blue colored Topside paint.
So, when you are applying this, do it in a well ventilated area, make sure it isn’t going to rain if you are outside (I was in my driveway) and follow the guidance carefully. One thin coat a day. If you try and do a thick coat or too many coats, the paint will not cure to a hard finish and stay in an odd tacky/smudgy state. I had this happen to me years ago because I’m not patient but I sure hard to learn patience with some of the specialty paints.
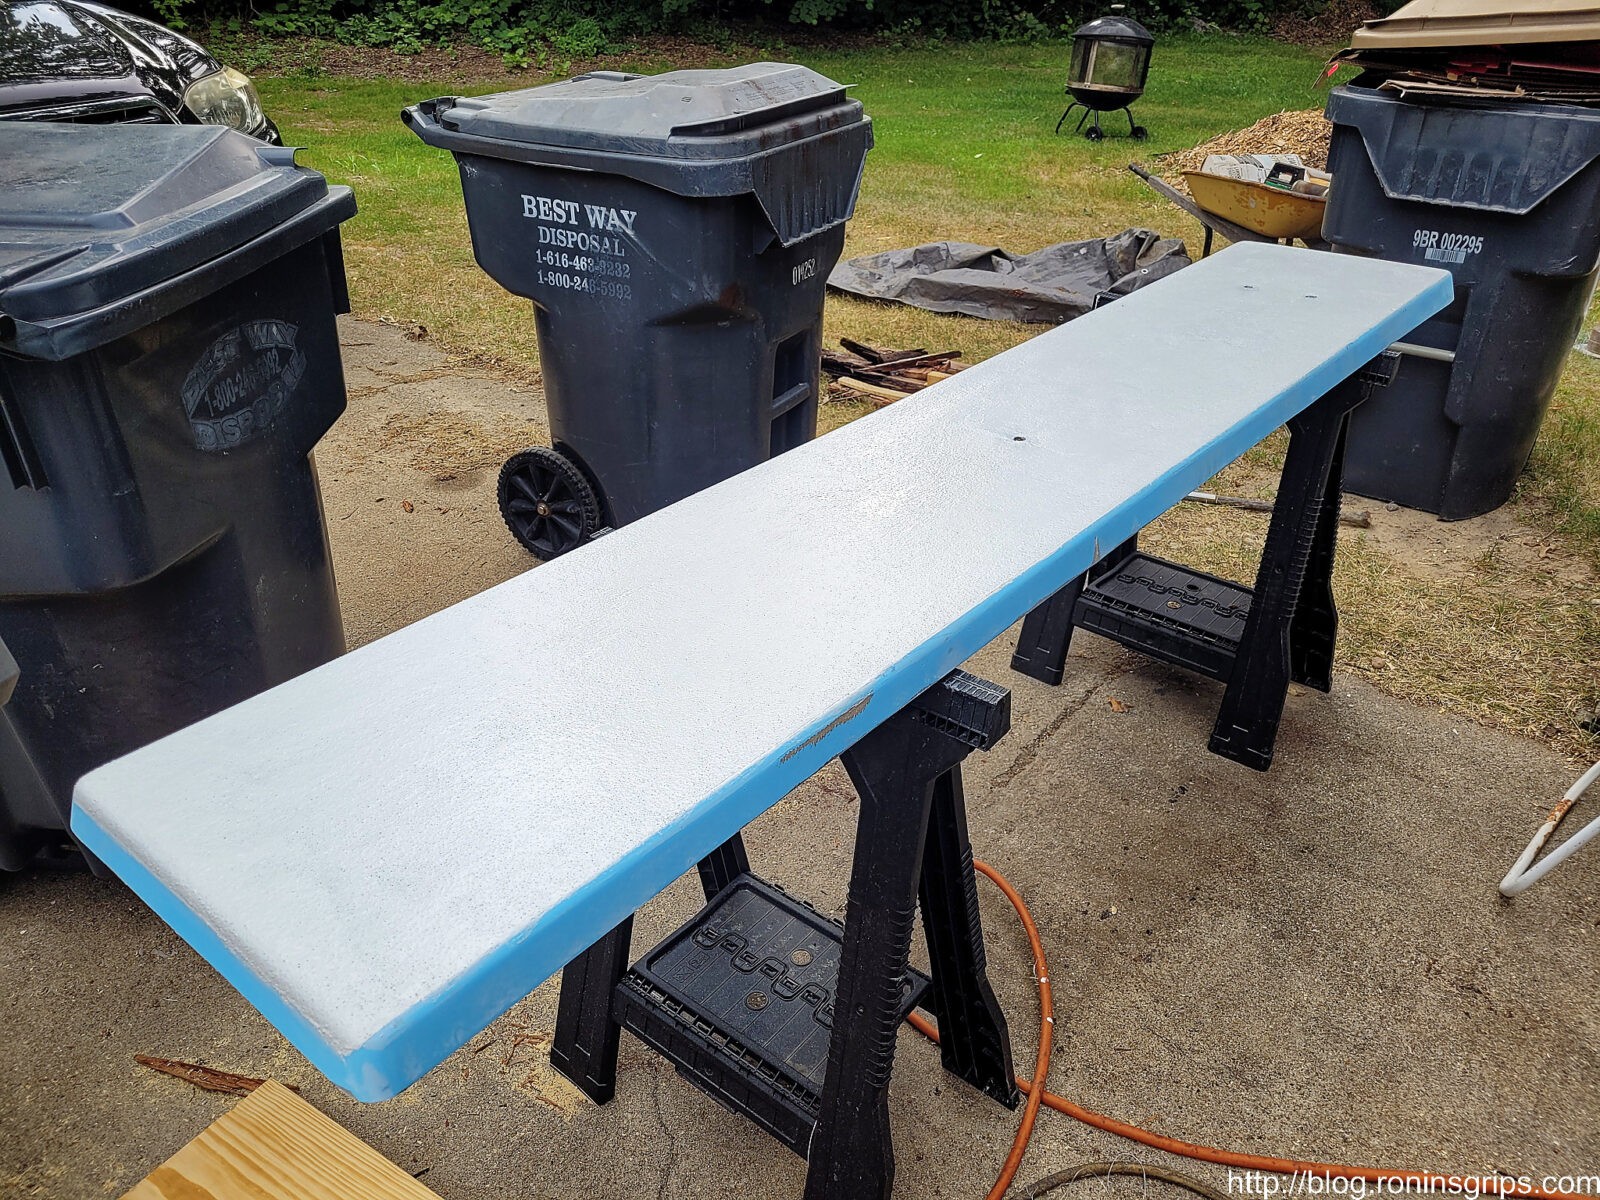
I did two coats of regular white Topside paint on the bottom to protect the fiberglass from UV rays (they really mess up plastics, epoxies and what not unless they are designed for them) and I applied two coats of the white with the grit mixed in on the top.
That’s two coats of white TopSide Paint on the bottom. I did NOT use the non-slip there.
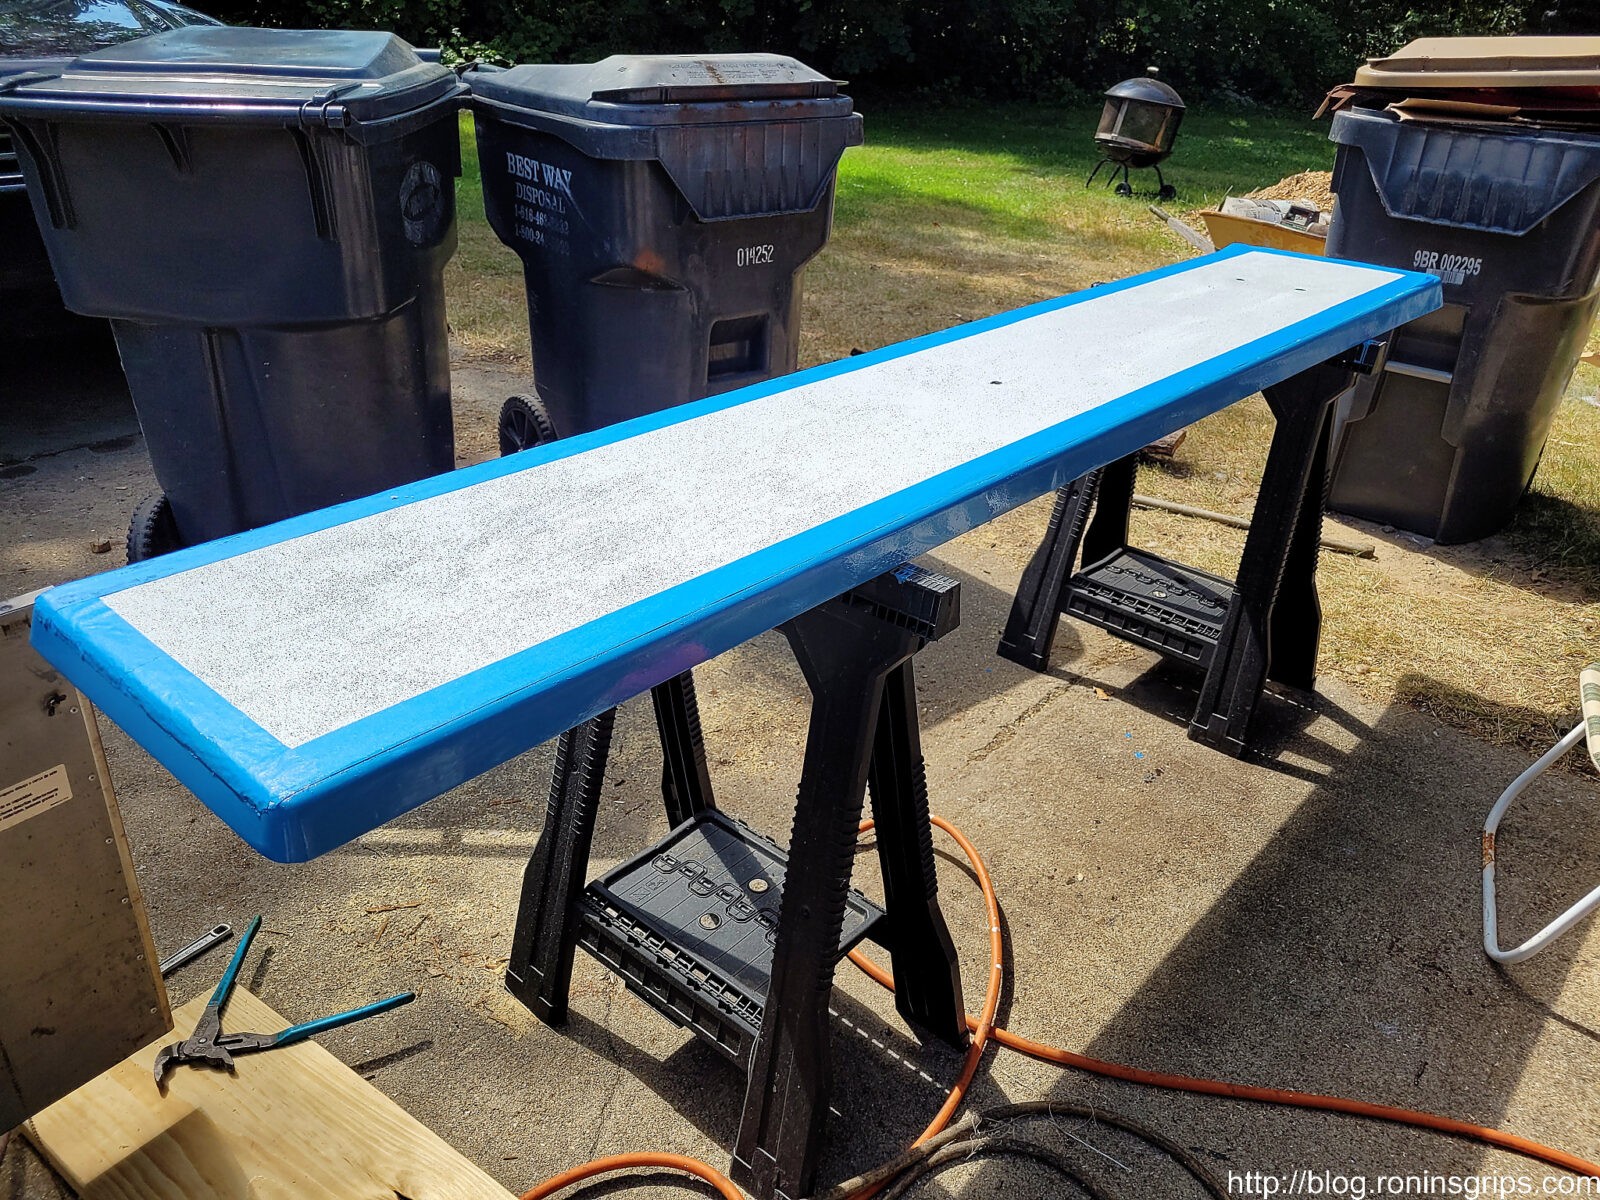
I painted the top with the non-slip additive and didn’t worry about the old blue colored side paint.
It was hot out and even so, I let the top cure for a day before I applied blue painter’s tape to protect the top while I painted the side trim blue.
Painting The Pedestal and Support Board
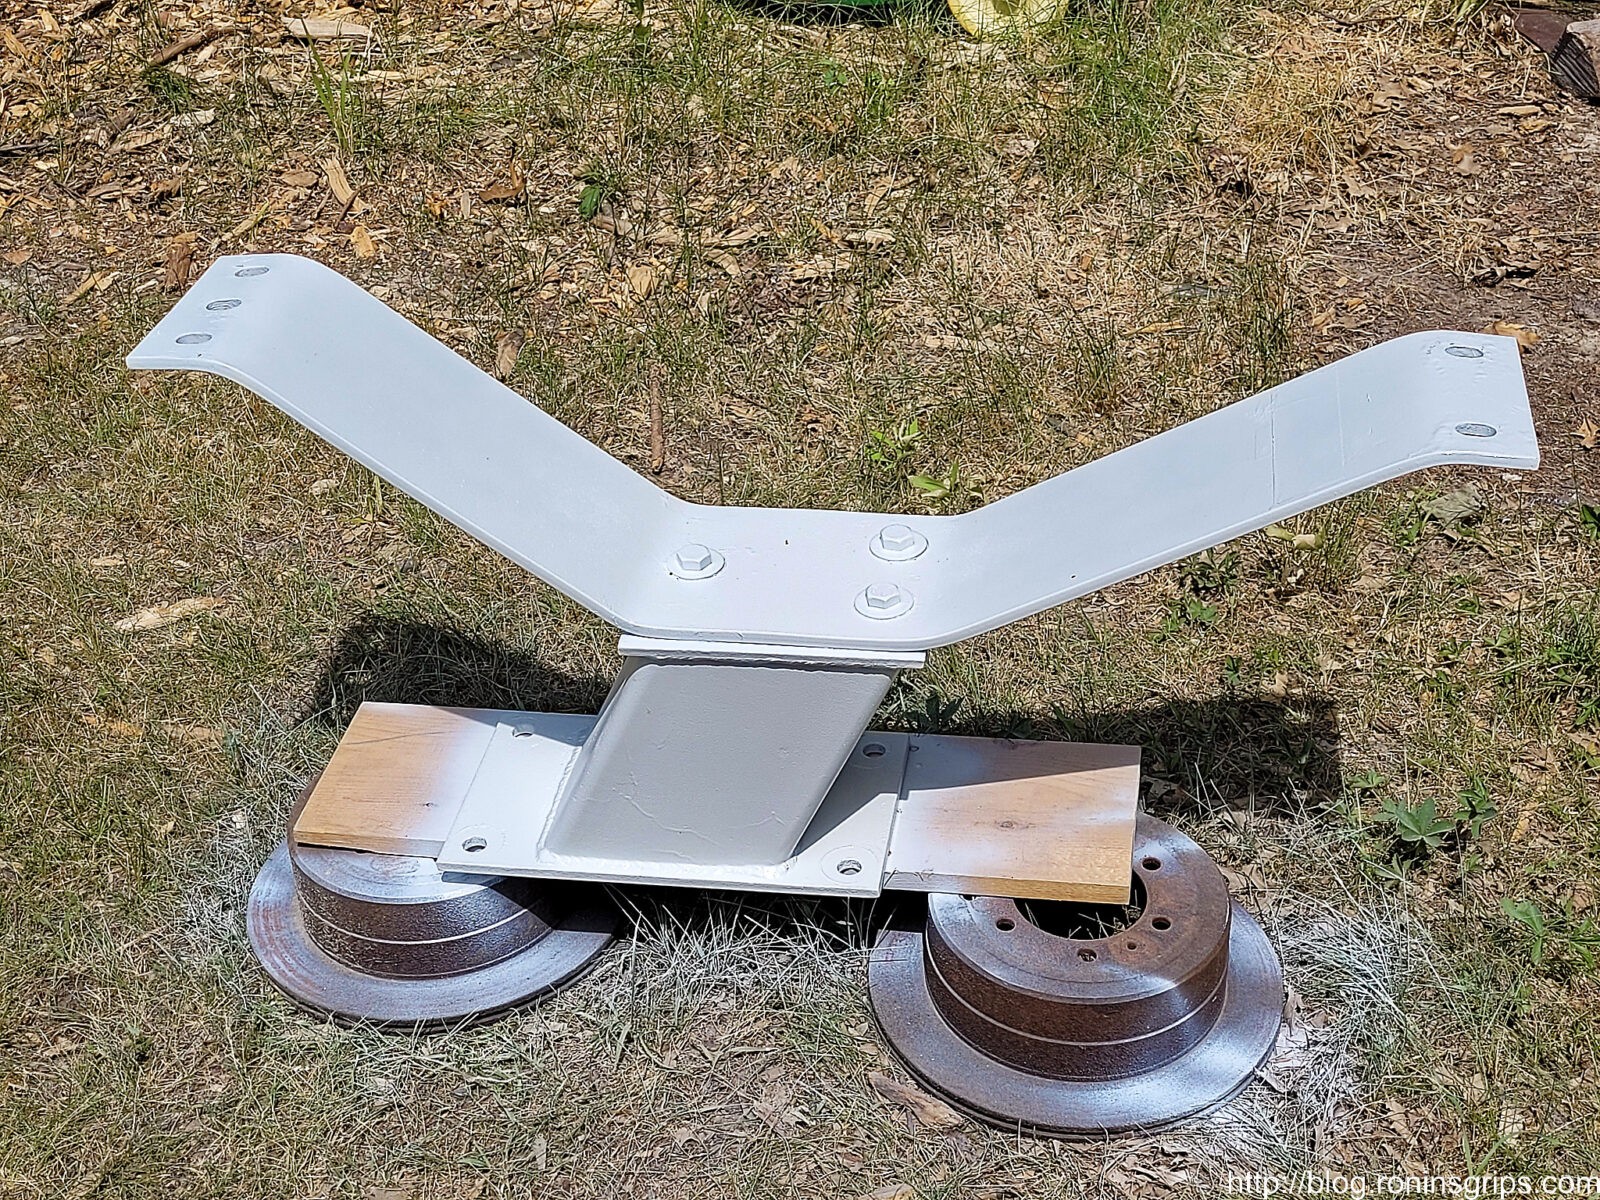
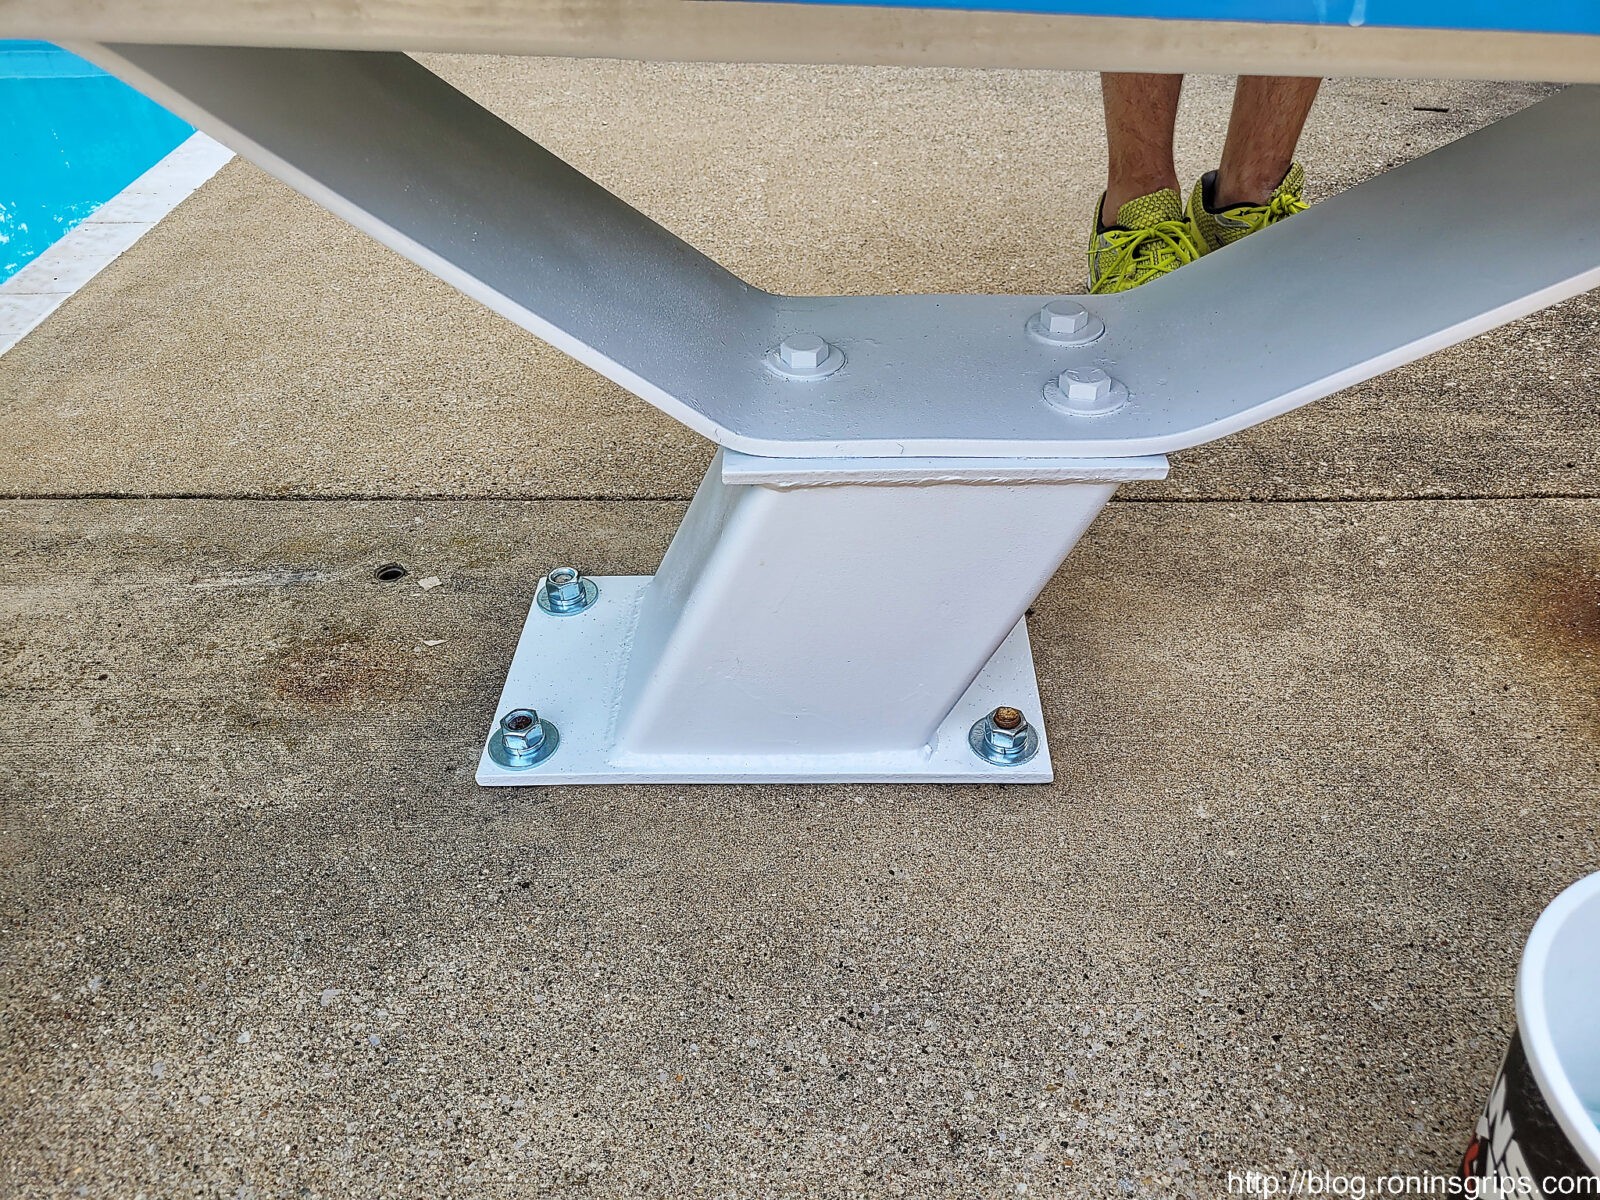
While waiting for coats of paint to cure on the board, we removed the pedestal and spring unit, wire brushed it, sprayed it down with brake cleaner and sprayed on three coats of white Rustoleum spray paint.
We cleaned it and applied three coats of gloss white Rustoleum spray paint.
We painted the support board too. All I had was white spray Rustoleum at that point so that’s what I used.
Wrapping Up
We reinstalled the pedestal and spring unit first. I bought new stainless nuts and washers so it looked better.
We installed the pedestal and spring assembly first before the diving board. Have a solid surface to put the support board and diving board really helped. They are too heavy to move all at once … at least for me. My son helped – those are his feet 🙂
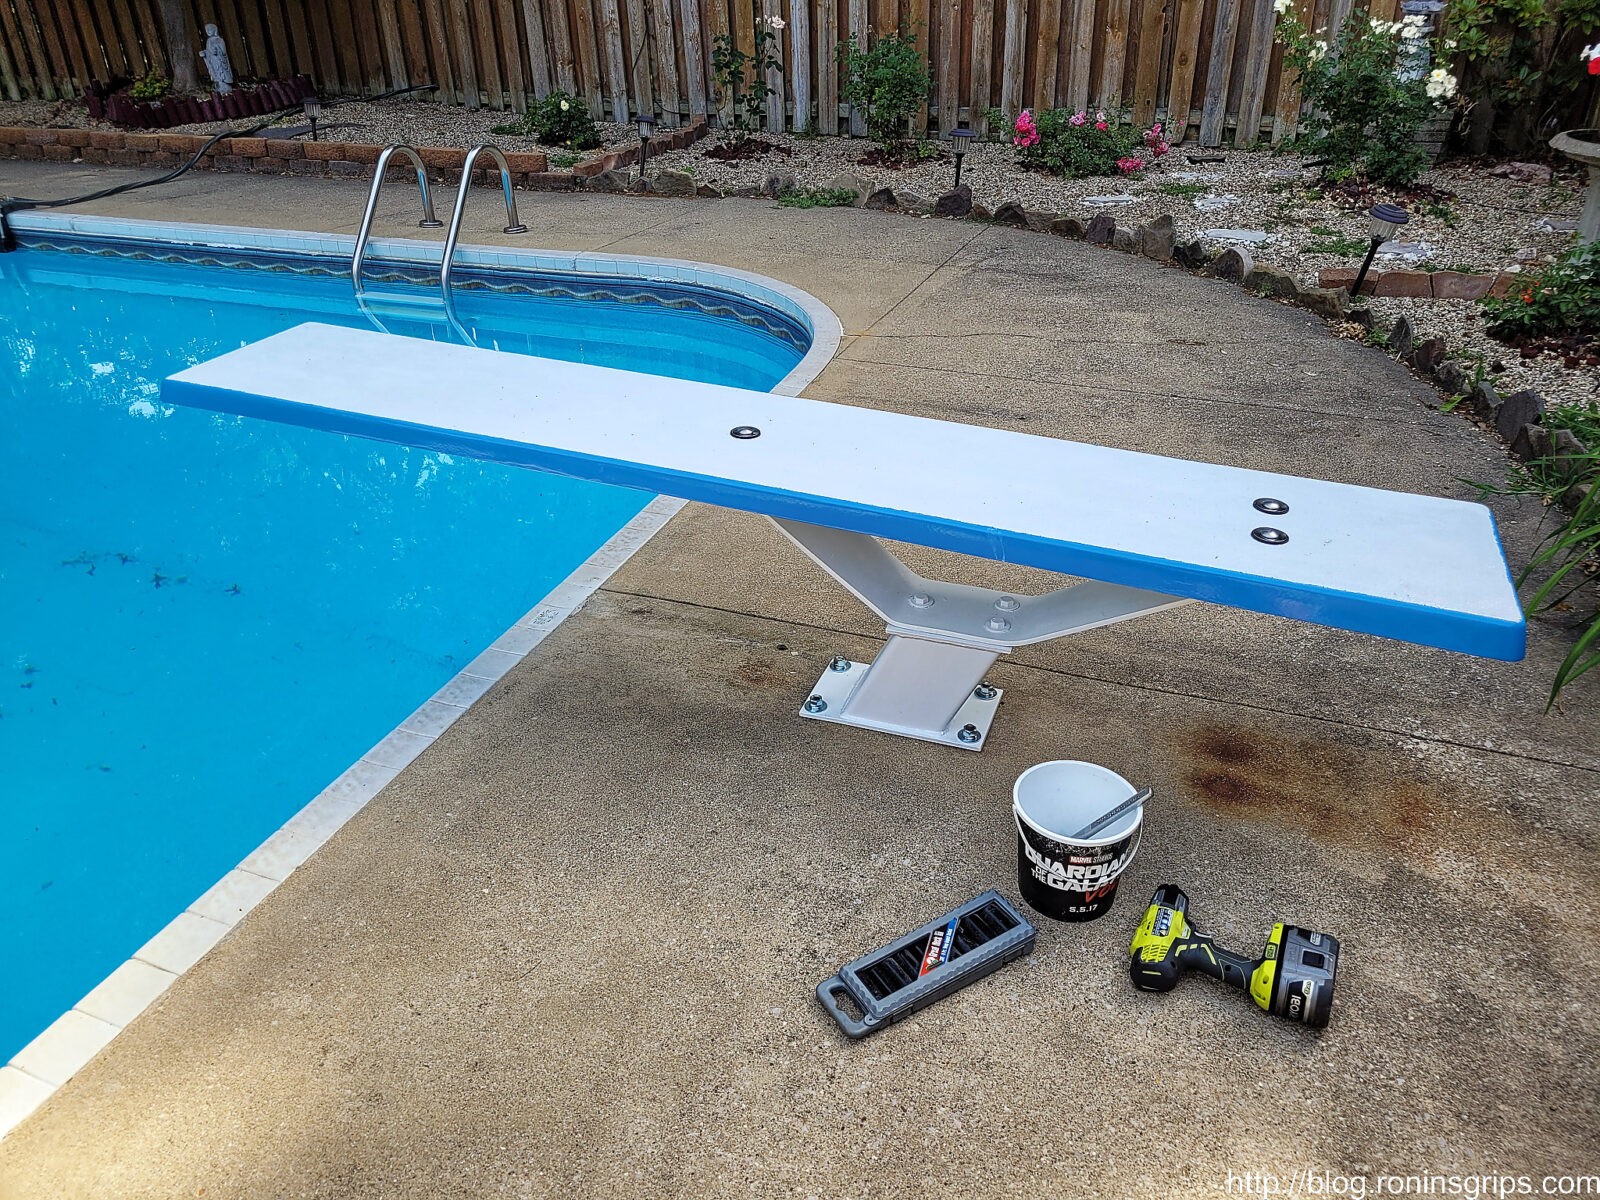
The board is held in place by stainless hardware” 6″ carriage bolts, 2″ fender washers, rubber gasket washers under the fenders on the top. On the bottom are regular washers , lock washers and nuts. Your hardware will depend on your board’s configuration and how thick it is. We salvaged the carriage bolts and I wire brushed the tops so they looked better but I bought everything else at Ace Hardware.
Another view.
In Closing
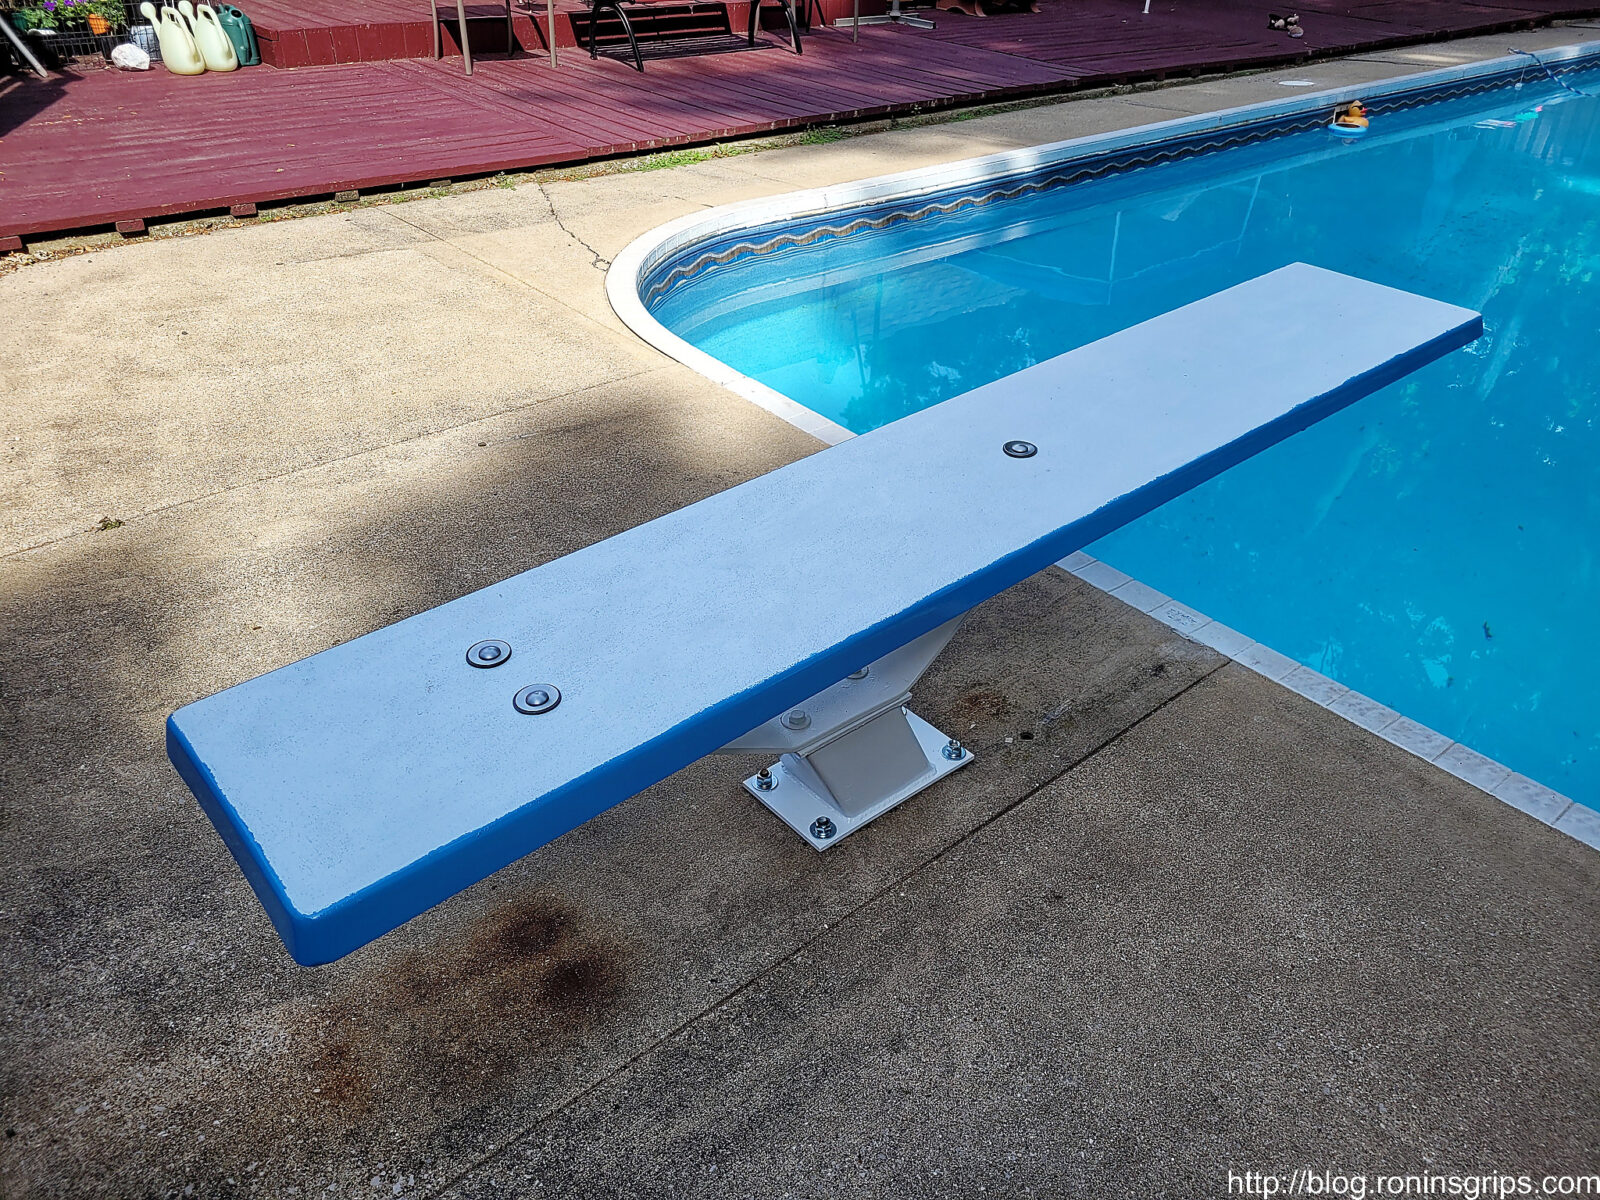
InTheSwim really damaged their reputation with me. On the other hand, this was done in a matter of days, cost us about $300 vs $800 (for the wood boards, hardware & paint) and all the kids at the reunion had a blast. So, problem solved — it worked out to our advantage actually. I’m curious to see how it holds up over time and I have high hopes given how it turned out and performed at the reunion.
One last parting shot.
If you have a diving board, I’d bet you could do the same and save time and money as well. I hope this gives you some food for thought.
7/23/2024 Update: where a number of kids used the diving board and it held up just fine.
6/15/24 Update: Just finishing opening the pool for the summer. The board is holding up just fine.
5/23/23 Update: Board is holding up great and we’re getting ready for another summer. I just inspected it yesterday – no cracks or any signs of issues.
Note, I have to buy all of my parts – nothing here was paid for by sponsors, etc. I do make a small amount if you click on an ad and buy something but that is it. You’re getting my real opinion on stuff.
If you find this post useful, please share the link on Facebook, with your friends, etc. Your support is much appreciated and if you have any feedback, please email me at in**@*********ps.com. Please note that for links to other websites, I may be paid via an affiliate program such as Avantlink, Impact, Amazon and eBay.
In September I bought my first new truck from a dealership – a 2021 RAM 2500 with the 6.4L Hemi engine. It was a Tradesman with a crew cab and the 2GA customer package group – meaning it had the Snow Chief, Chrome Appearance, Tradesman Level 2, Shift on the Fly transfer case, Power Black Trailer Mirrors, LED bed lighting, and Trailer controller. What it didn’t have was front tow hooks — seriously. I was actually surprised by this. I’ve used front hooks so many times over the years that to not have them wasn’t an option but I figured I could add them later and bought the truck.
Wow – Have You Seen The Price To Add Hooks?
Well, this surprised me. I shouldn’t have assumed the cost wouldn’t be bad. Let me itemize this for you real quick:
Tow Hook – Mopar 68349551AD List $132 Online around $93.36 each – you need two
4 hex flange mounting screws / bolts – Mopar 6512808AA. List $5.10/ea and online they are around $3.84/ea. Again, you need four of them – two for each hook
4 hex flange lock nuts – Mopar 6512809AA. List is $5.10 each and online is about $3.84/ea. Thread is M16x1.50mm. Again, you need four of them – two for each tow hook.
That adds up fast. The list total is $304.80 and online is $217.44 – a savings of $87.36 but that does not include shipping or taxes
This does not include the bezels / changes to the bumper if you do it by the book
This does not reflect labor of maybe 2-3 hours or the shop supply charge either.
Also, confirm with the supplier if they have something before you buy it. When I was looking, hooks were hard to find in stock at any kind of discount plus some dealers say they have things but they do not.
So, this definitely wasn’t looking cheap either in terms of parts or labor if I had a dealer do it or even if I went will all new Mopar parts.
How to save money and not sacrifice quality?
What is quality? Quality means meeting my requirements and what did I require? I cared about brute strength. I talked to some guys and they all told me to go with the Ram hooks but to get them off eBay because salvage yards put them up for sale at a huge savings. Wow, they were right. You can get both hooks off eBay that look like new for less than half the price but usually with no fasteners included.
Search on eBay for 68349551ac or 68349551ad tow hooks. The letter designators (aa, ab, ac, and ad) tells us there have been minor changes and the most current version as of my writing this is the “ad” release. I can’t speak to all of the versions but I can tell you I am using the “ac” hooks, no problem. You could search for an earlier release such as “aa” or “ab” if you wanted – I’m just telling you what I did. If you can get a great deal on the newest version, go for it.
When I looked at the Mopar site, it seems to be the hook for all of the trim styles (Tradesman, Big Horn, Laramie, Limited, Limited Longhorn, Lone Star and Power Wagon) of both the 2500 and 3500 series trucks for 2019-2021.
Note: some eBay sellers list two hooks (meaning the pair) in an eBay listing and some just list one so pay attention.
I also always look at how many sales they have done and their rating as well. I’ll pay more for an established seller vs. gambling on a seeming deal from a relatively unknown seller.
I also noticed some sellers put all of the part numbers in their description so searches pull them up so read the listing carefully.
Click on the following to search for:
The 68349551ac hooks (this is what I bought and installed on my 2021 Ram 2500 Tradesman)
By the way, the RAM 1500 hook is not the same so make sure you get a 2500 hook for your model year truck.
Okay, for the bolts and nuts, I did actually go with Mopar and bought them online. I have read posts of fellows going to the hardware store and buying Grade 8 – 5/8″ x 4-1/2″ long bolts, washers, lock washers and nuts. It’s an option but I didn’t want to gamble with the metallurgy so I bought the bolts and washers from https://store.mopar.com/ and there are other online sellers you could go to as well.
As far as the bezels and stuff go, honestly, just cut the fake plastic grill out of the way. Yeah, you could spend the time and money to make it look factory but this is a work truck and the tow hooks are near the bottom of the bumper so nobody is going to be looking for the bezel behind realistically.
As for labor, you can totally do this yourself in less than an hour. I think it took me about 30 minutes.
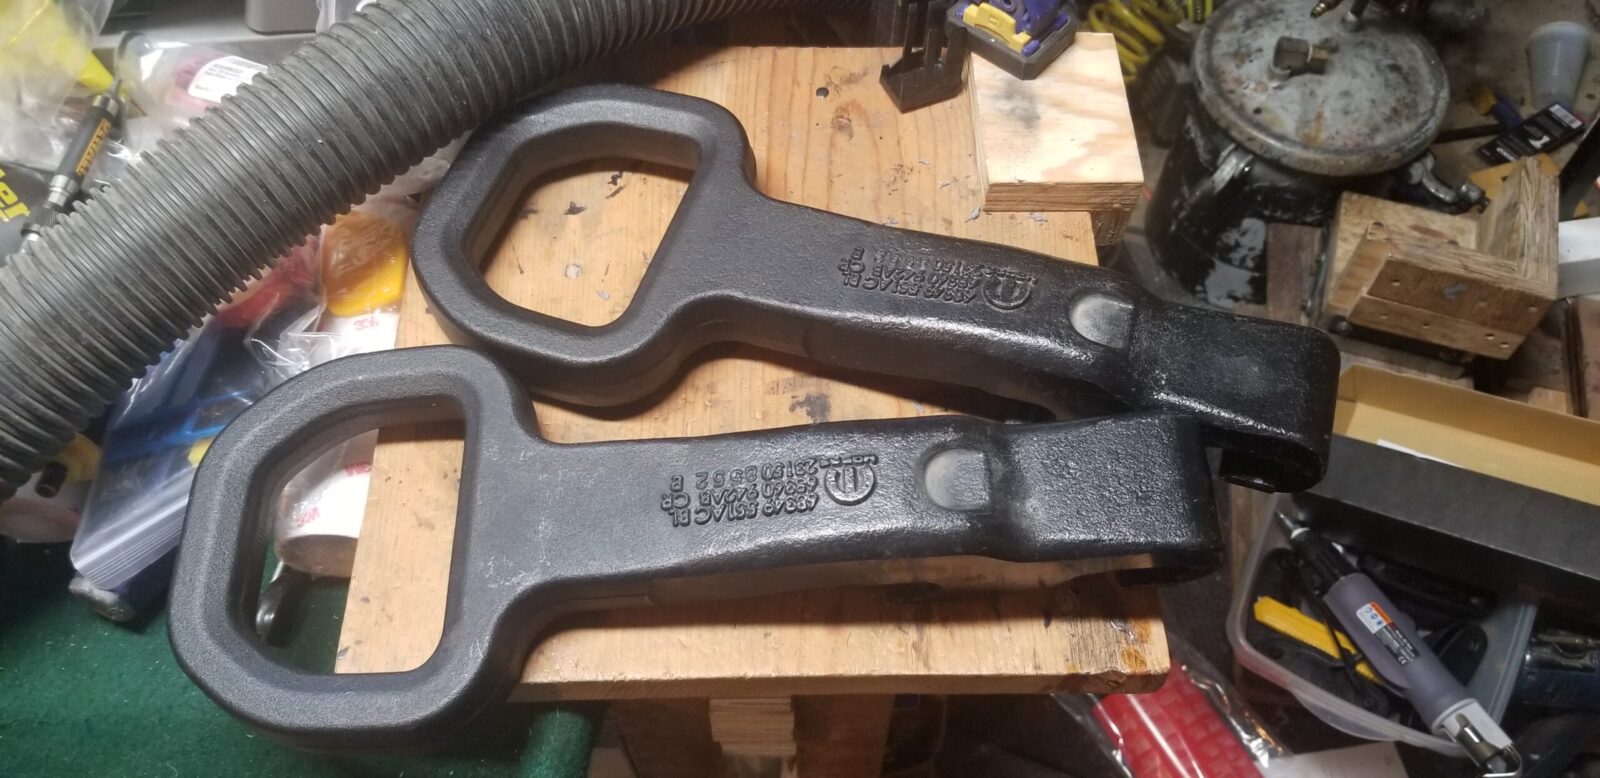
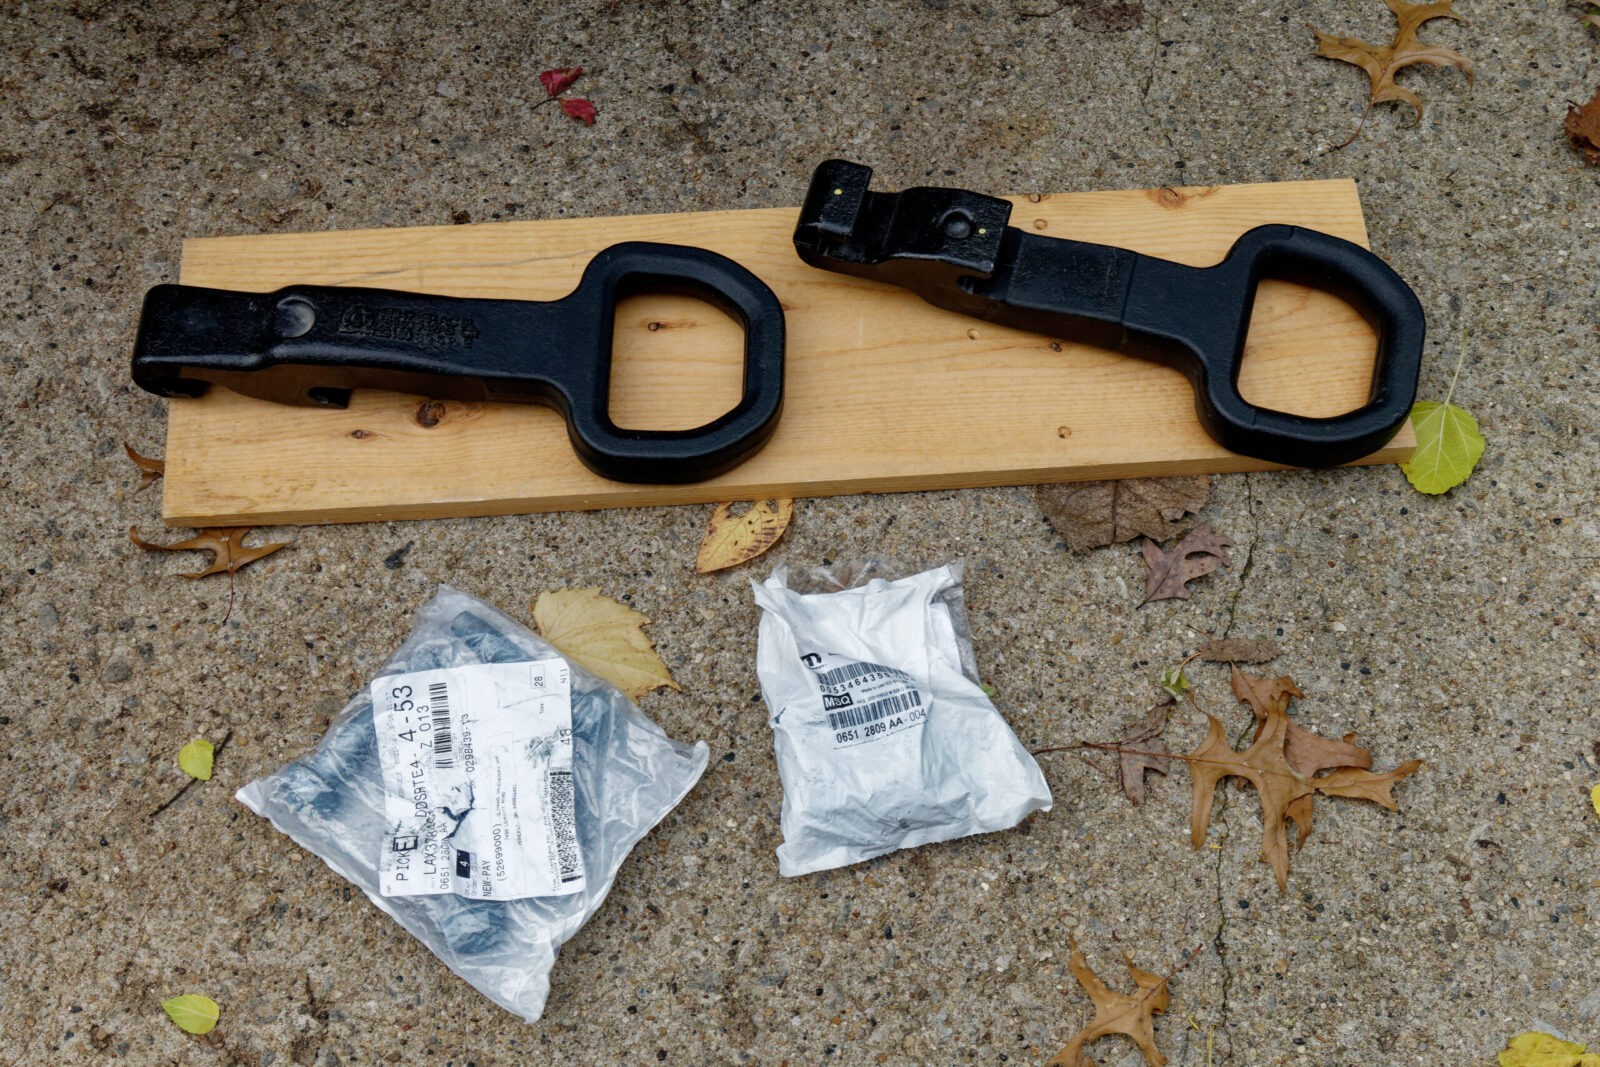
These arrived via USPS Priority Mail maybe 2-3 days after I ordered them. They are like new – I doubt they were ever used. Yes, they do weigh a ton. I guess I could have weighed them but that didn’t occur to me as I really didn’t care. The point is that they sure are beefy. These are the 68349551AC series hooks by the way.
Installing The Hooks
You can totally do this if you are comfortable with cutting on your truck (some guys aren’t and that is okay – find a buddy who is and bribe him/her with beer, BBQ or whatever) and can turn a wrench. I kid you not, you only need a 15/16″ socket, 2-4″ extension and a big ratchet wrench to do this after your cut the little grills out of the way. A torque wrench capable of 80-90 foot pounds is handy but not essential.
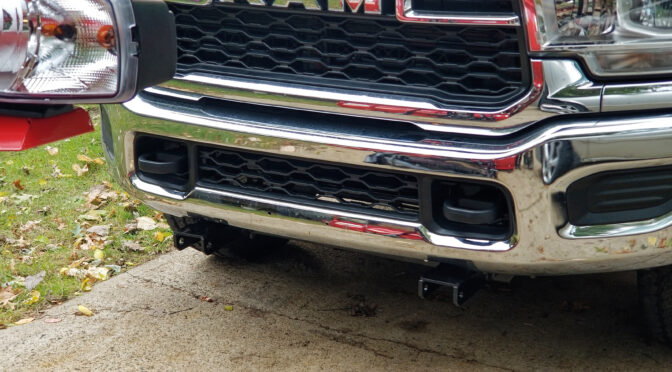
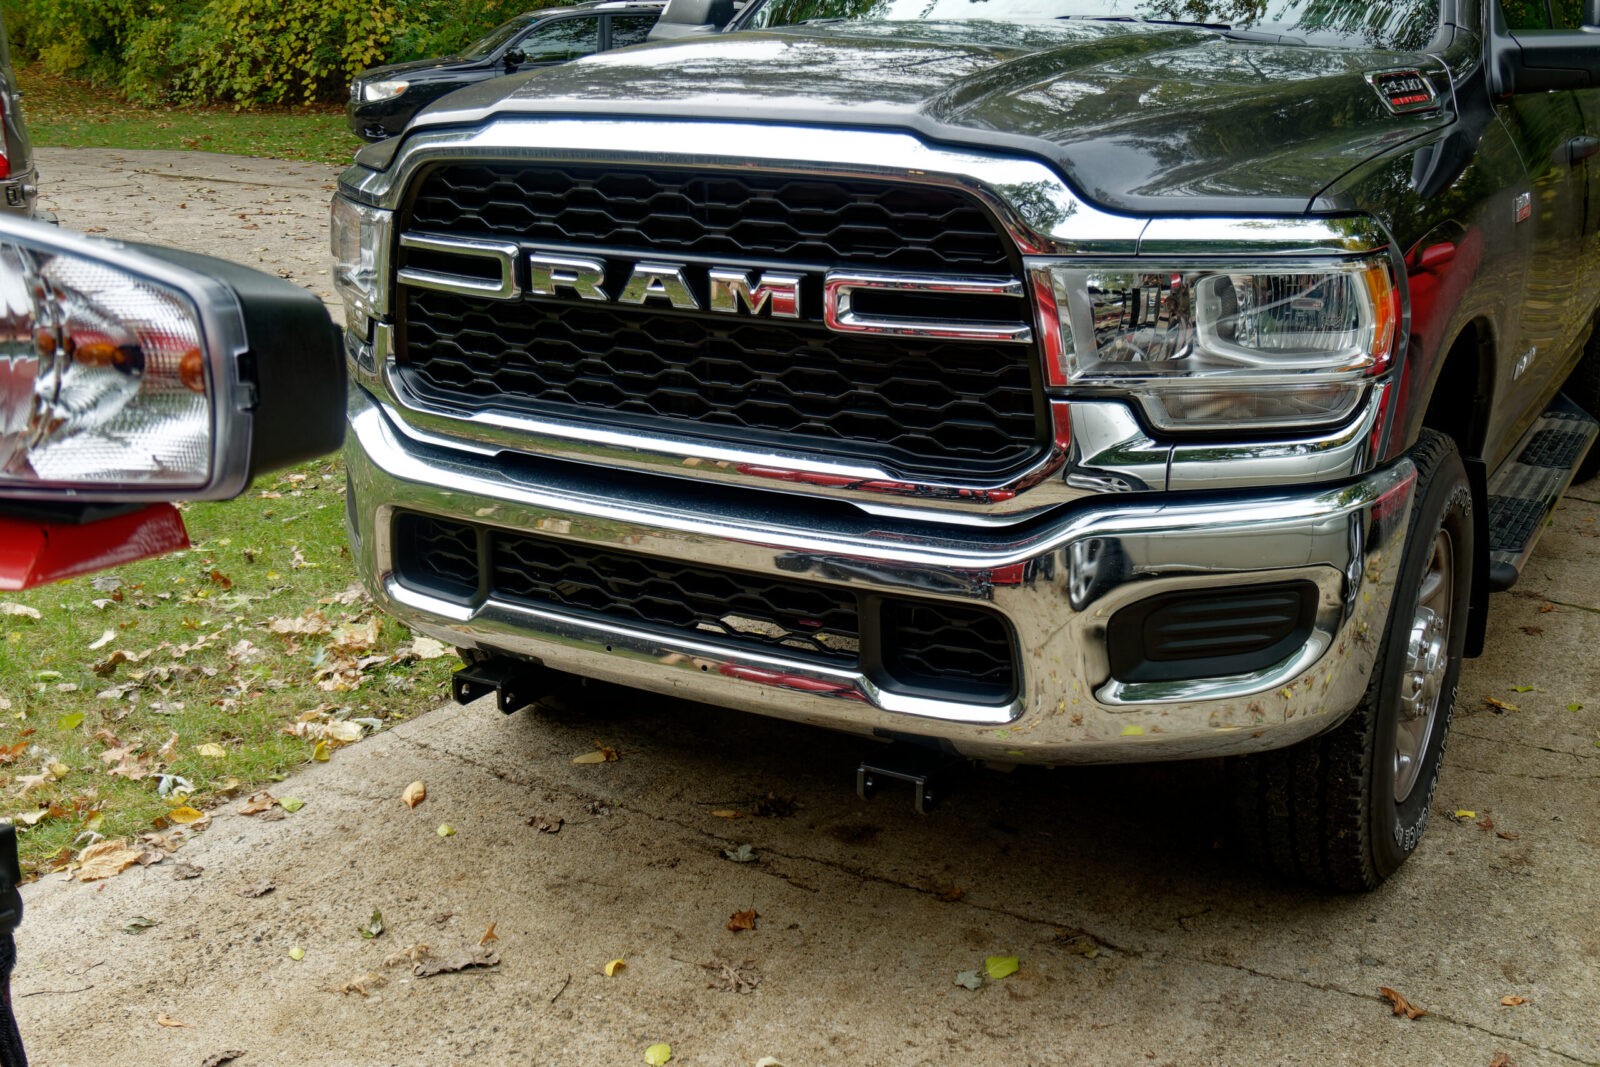
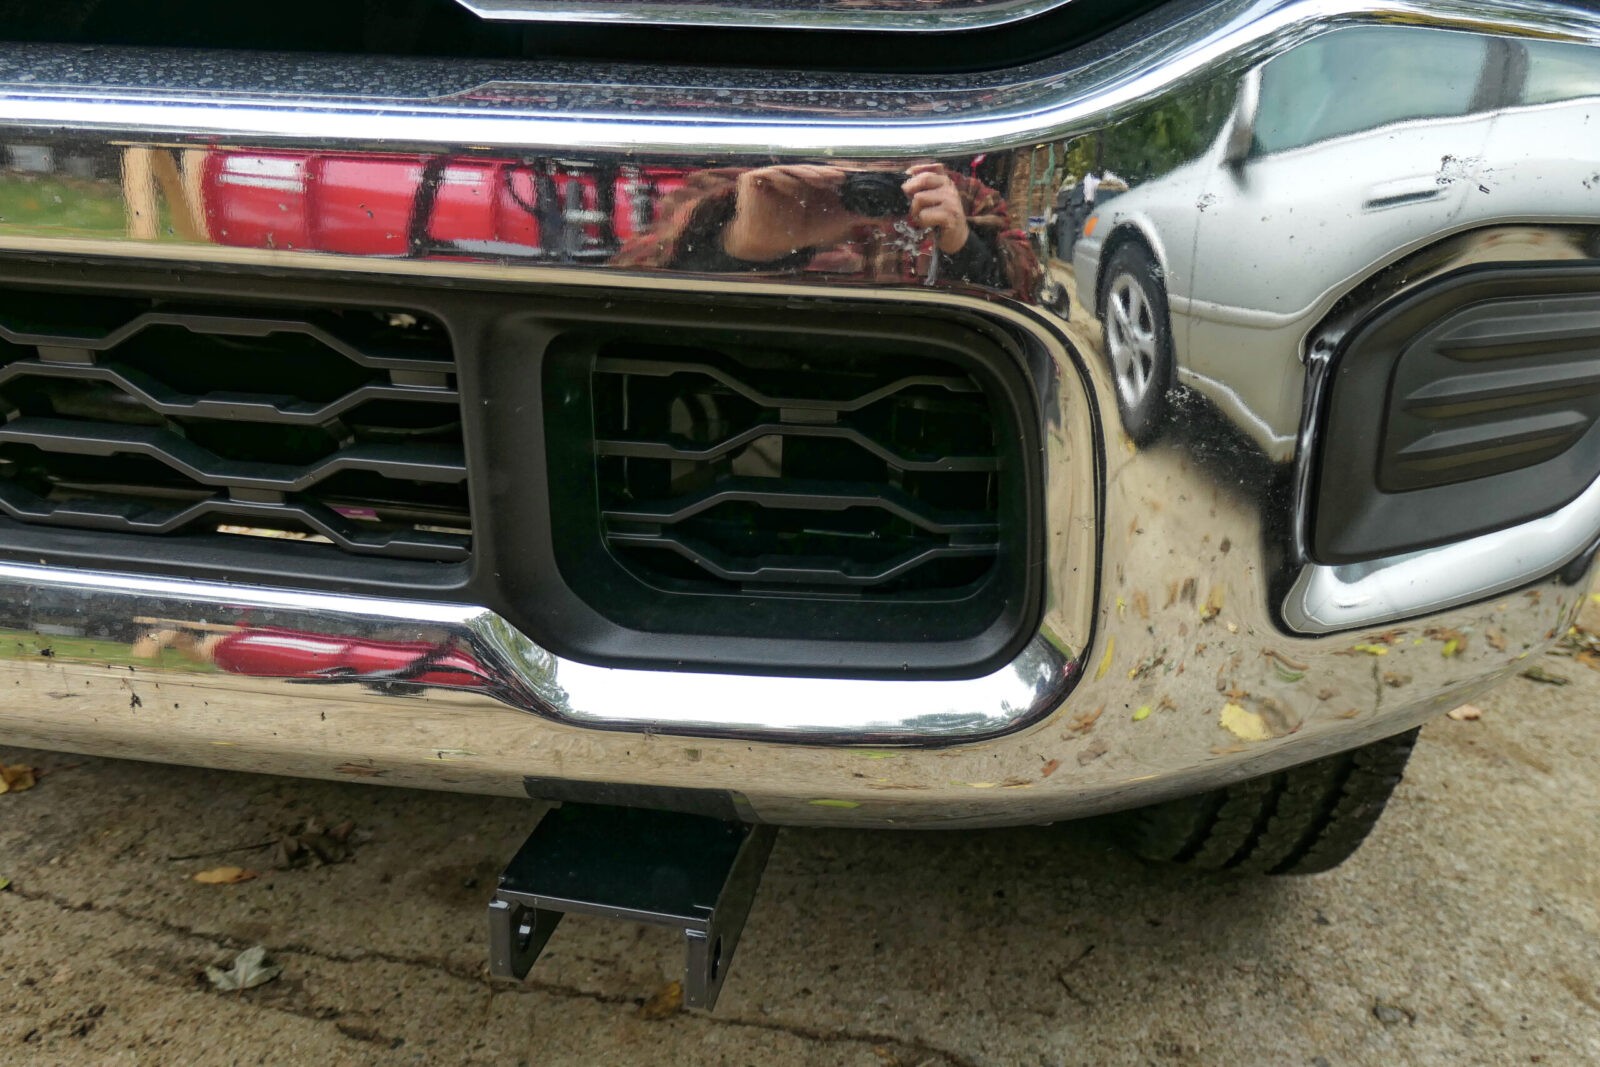
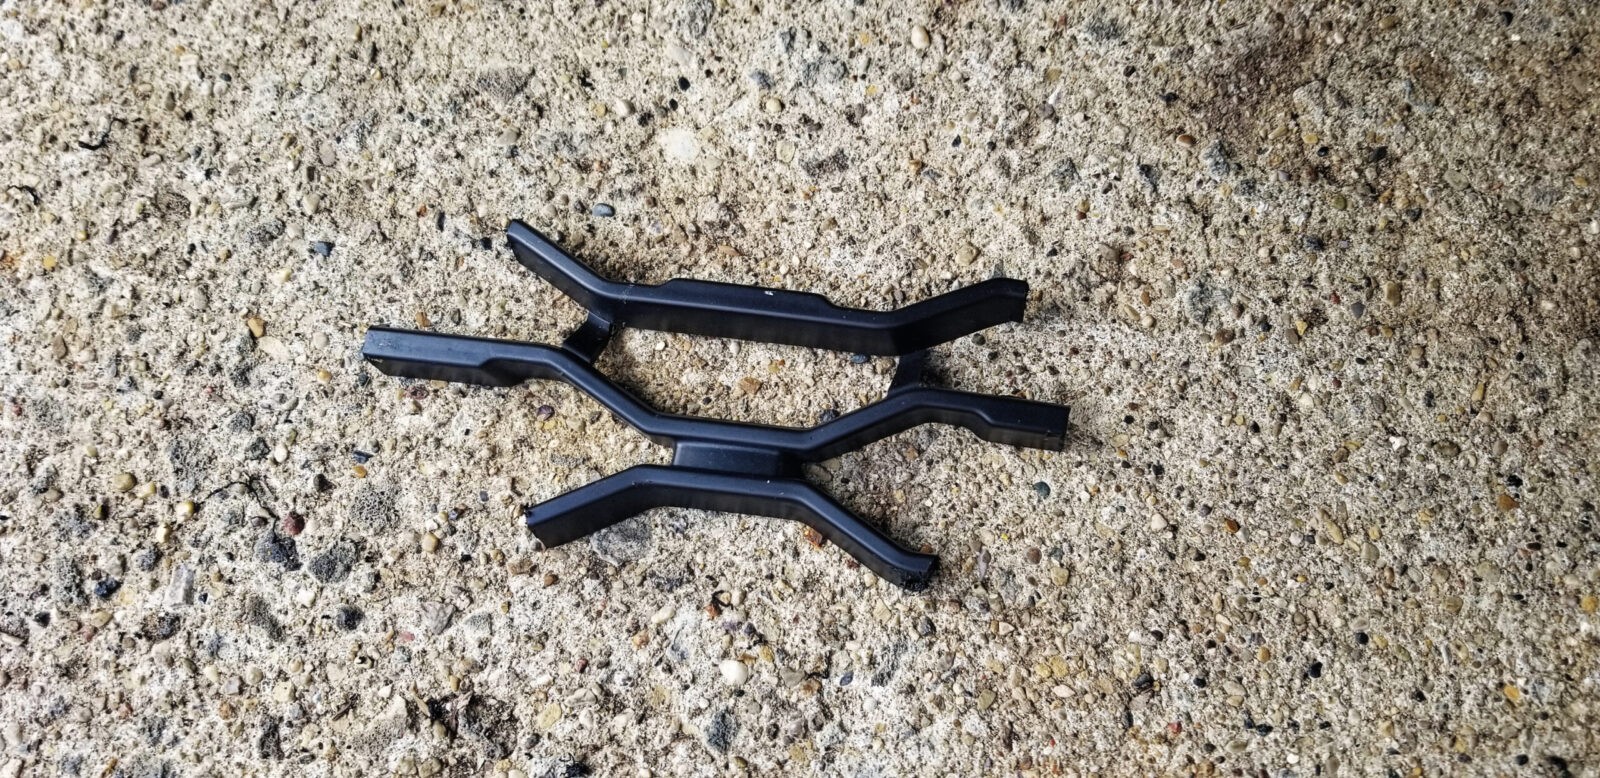
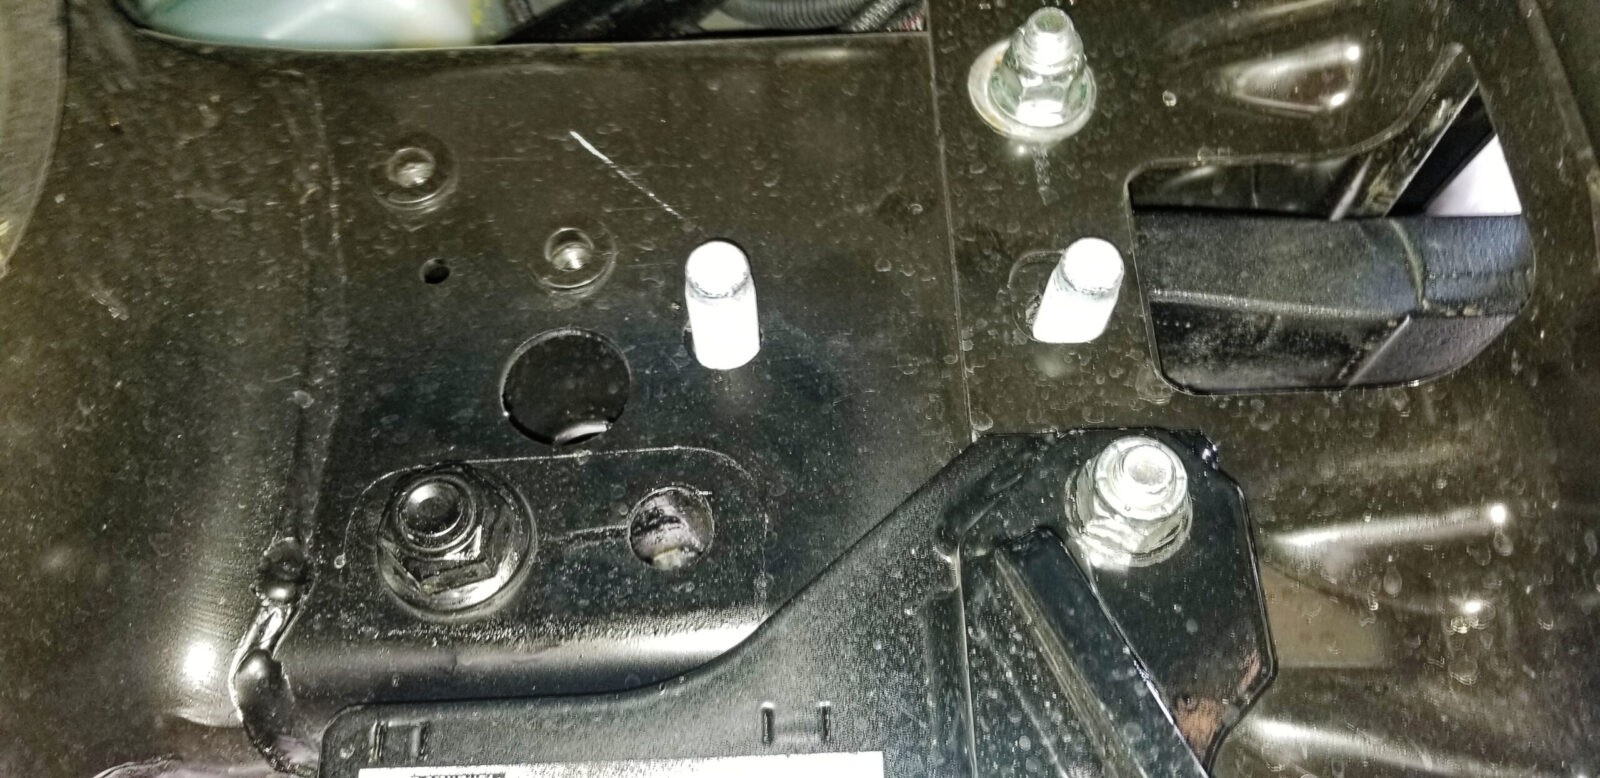
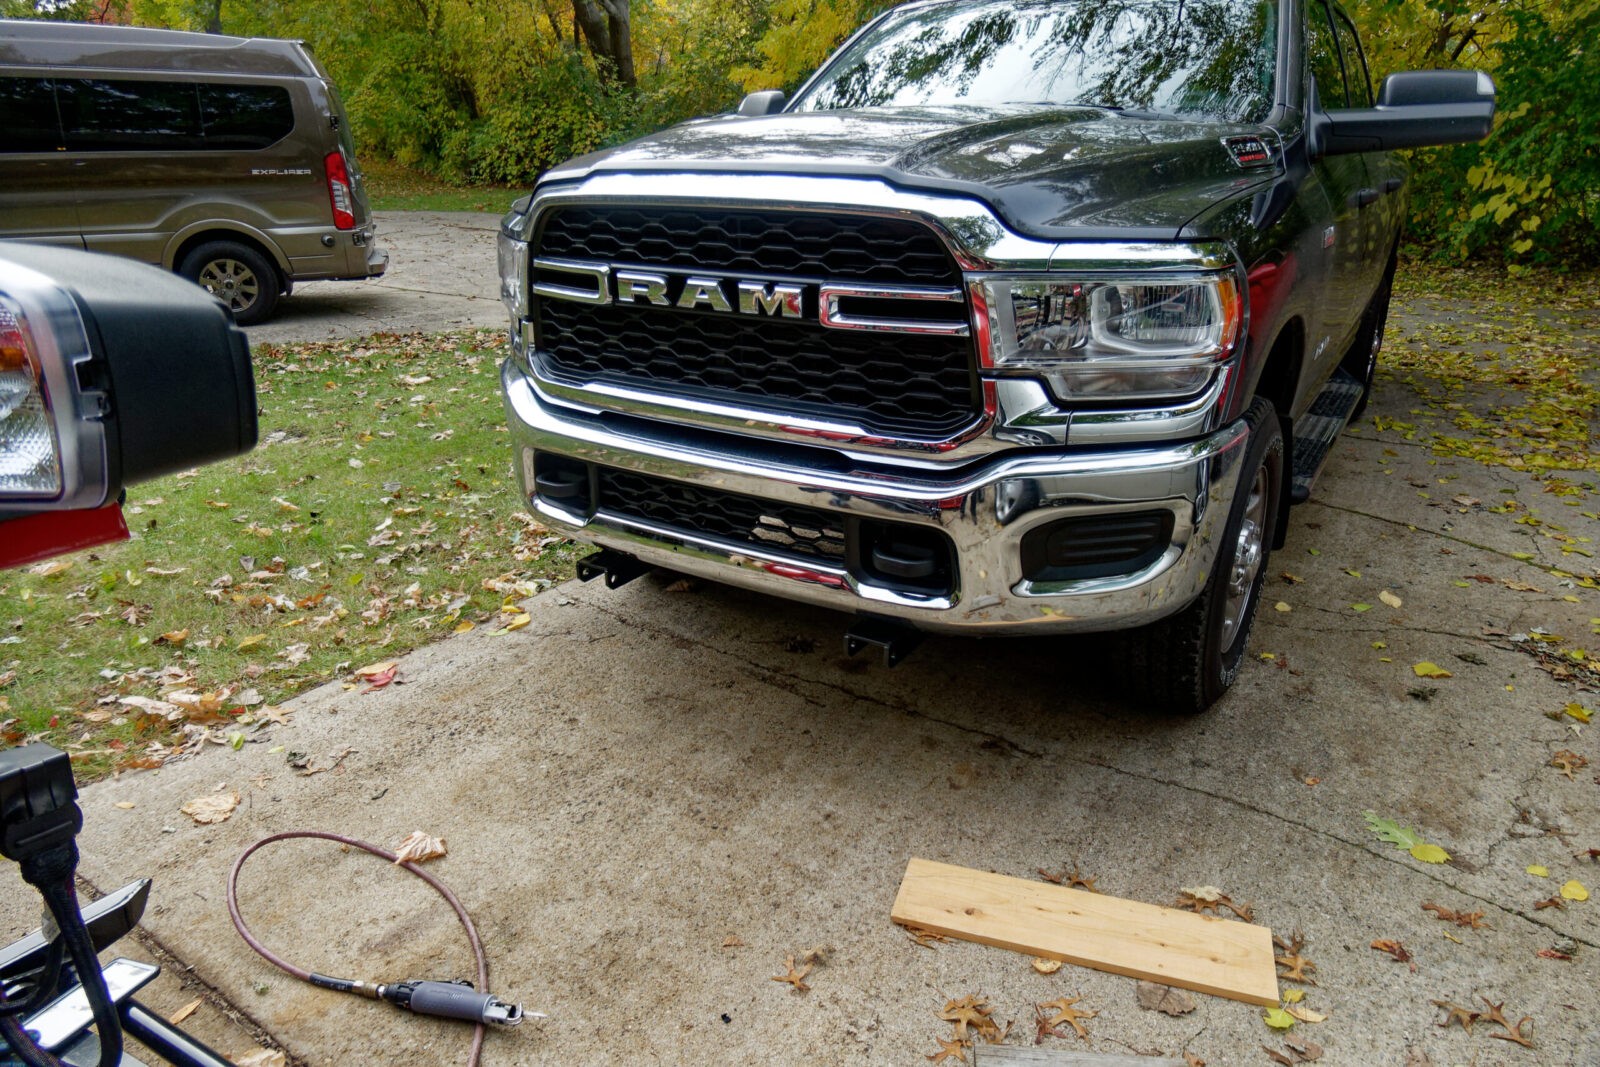
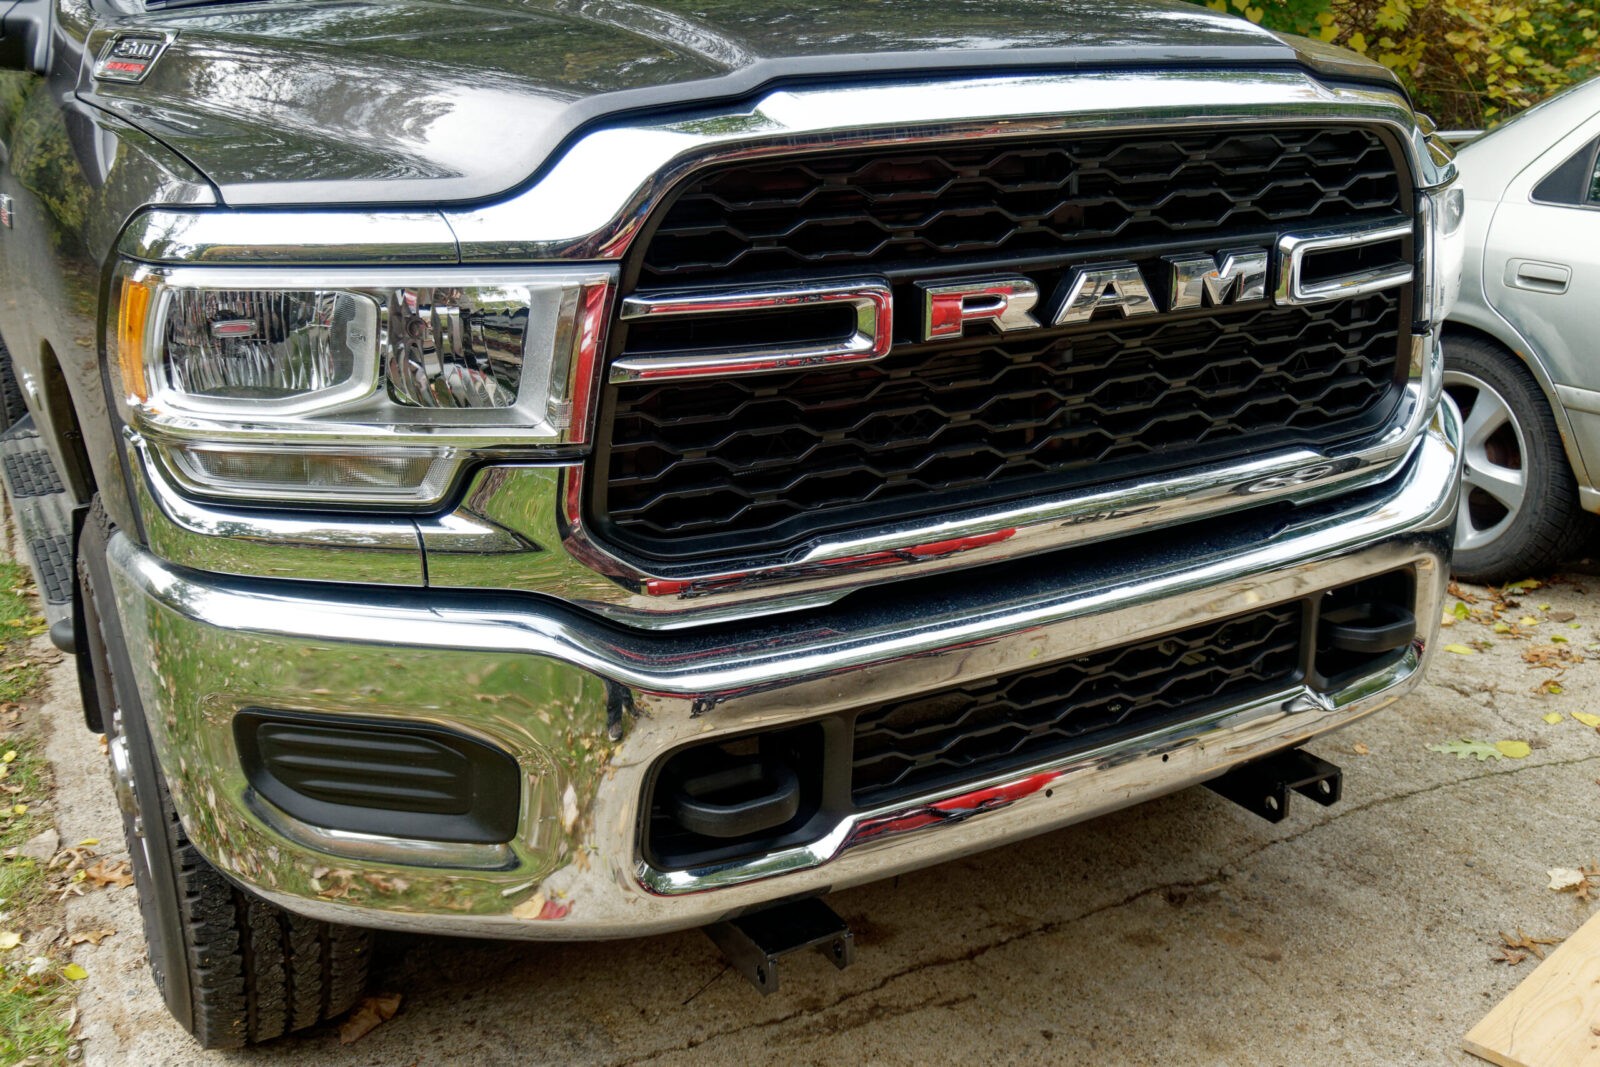
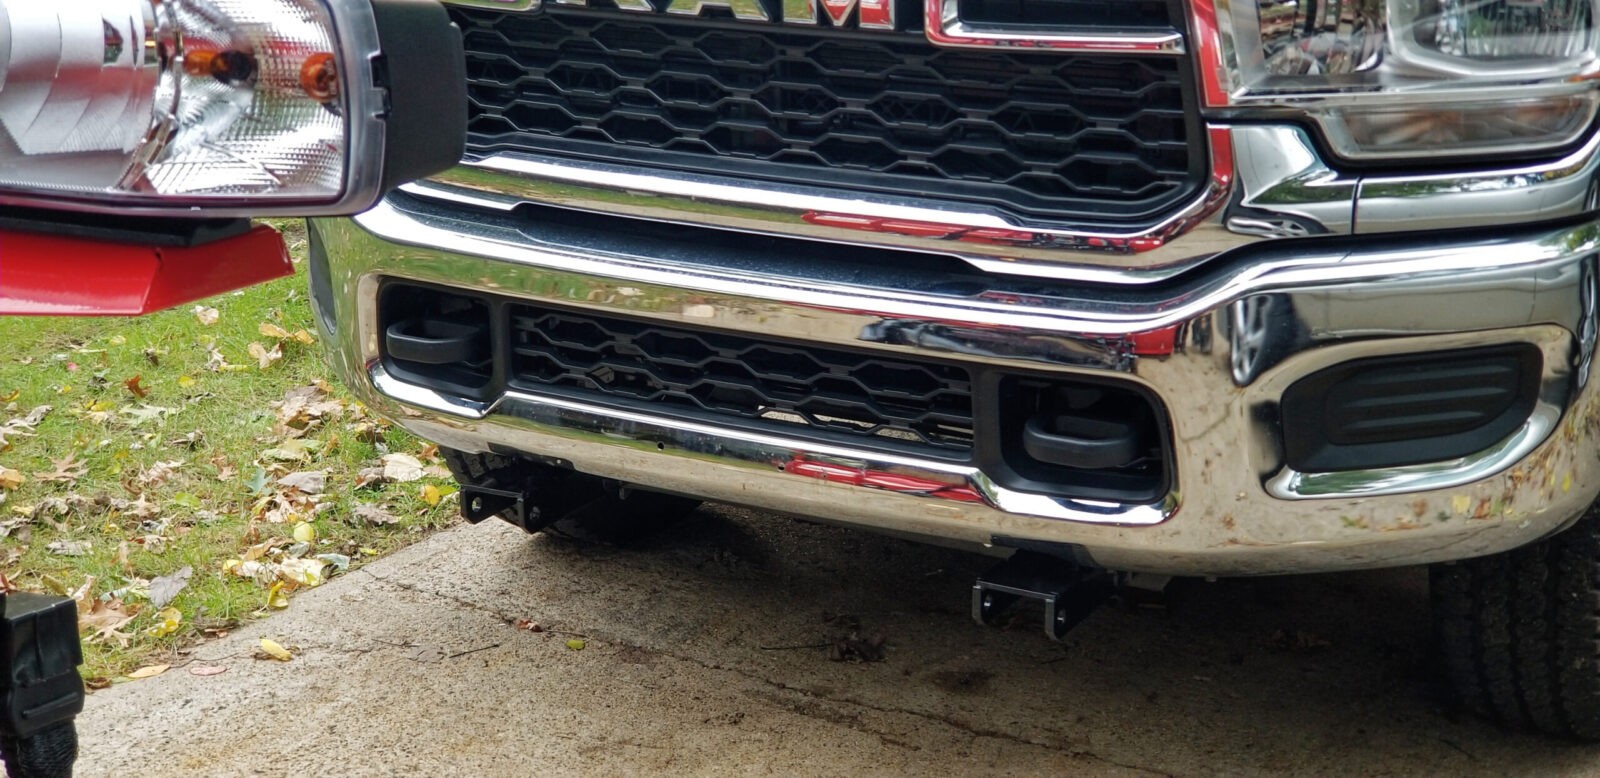
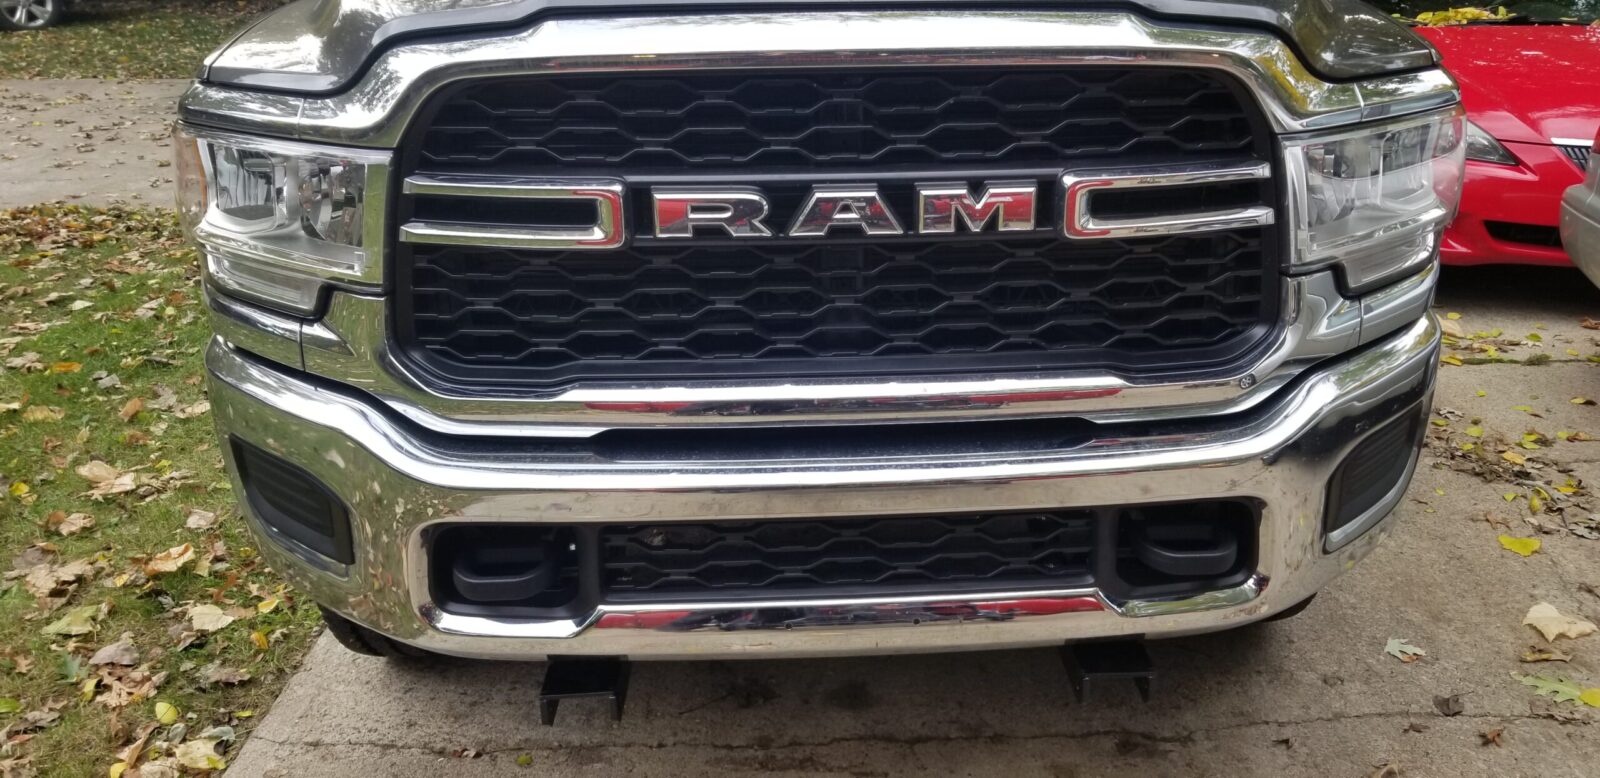
This is my 2021 Ram 2500 Tradesman. The hooks go in the openings located right under the left and right sides of the main grill or the next opening over from where the fog light covers are.
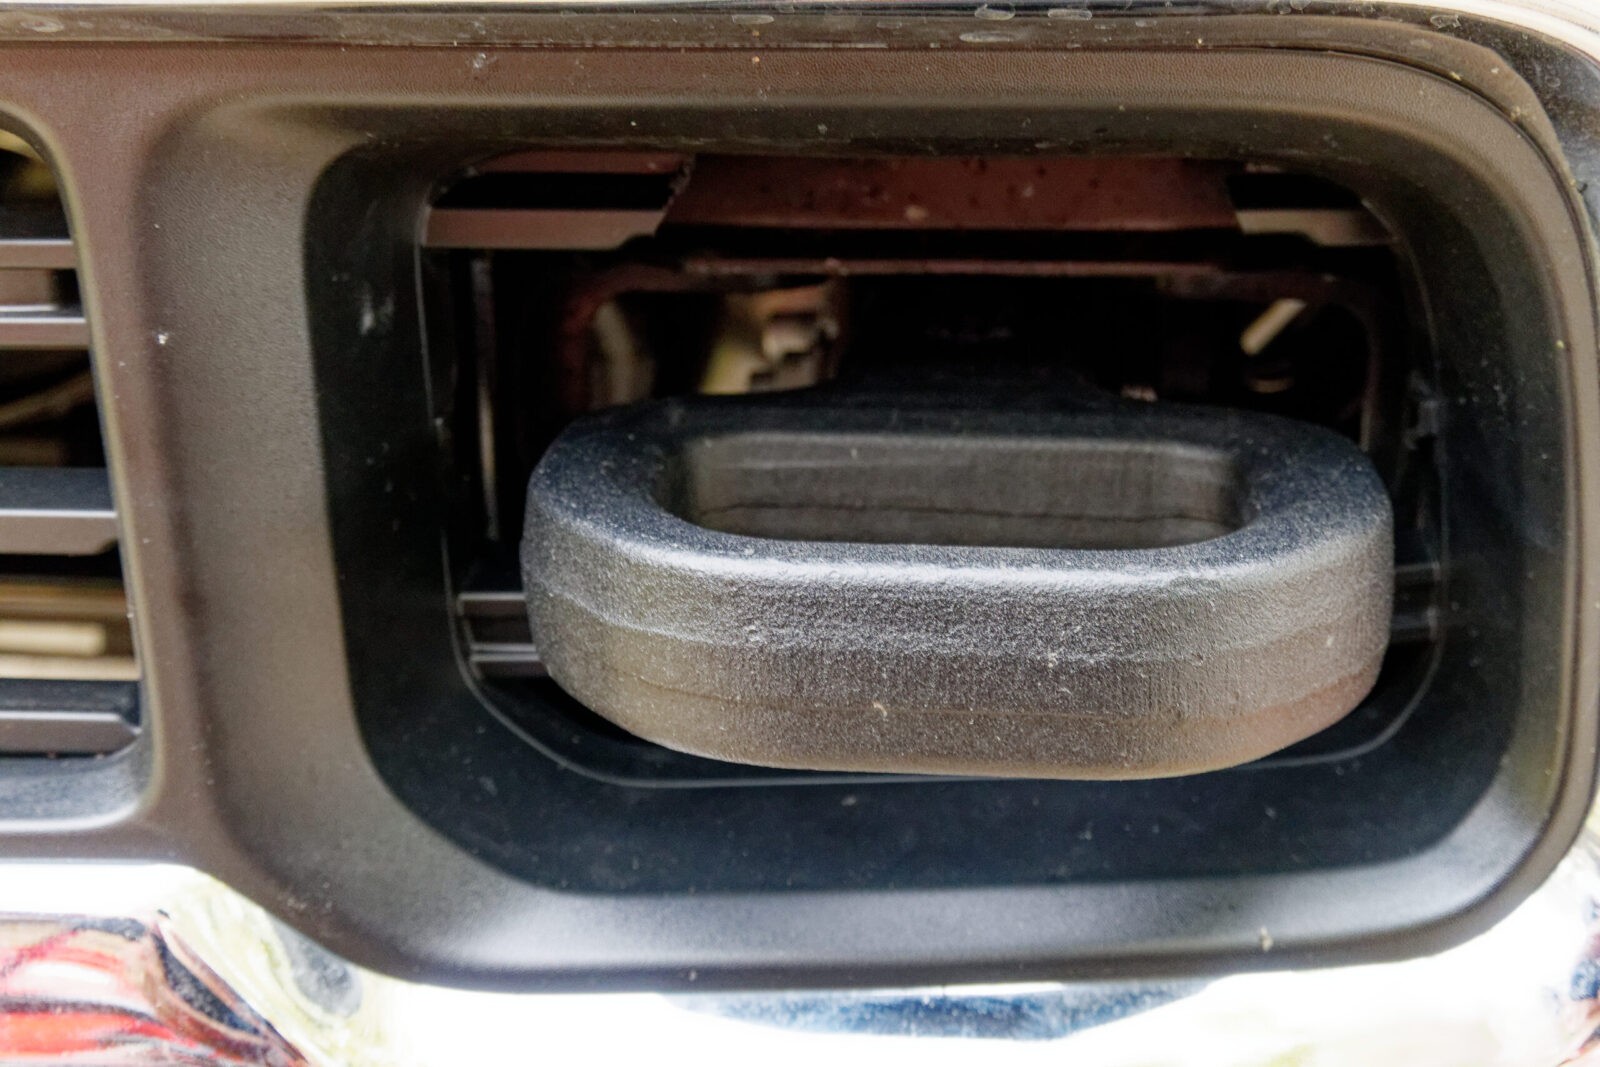
That is the driver’s side tow hook opening with the soon to be cut out plastic grill in the way.
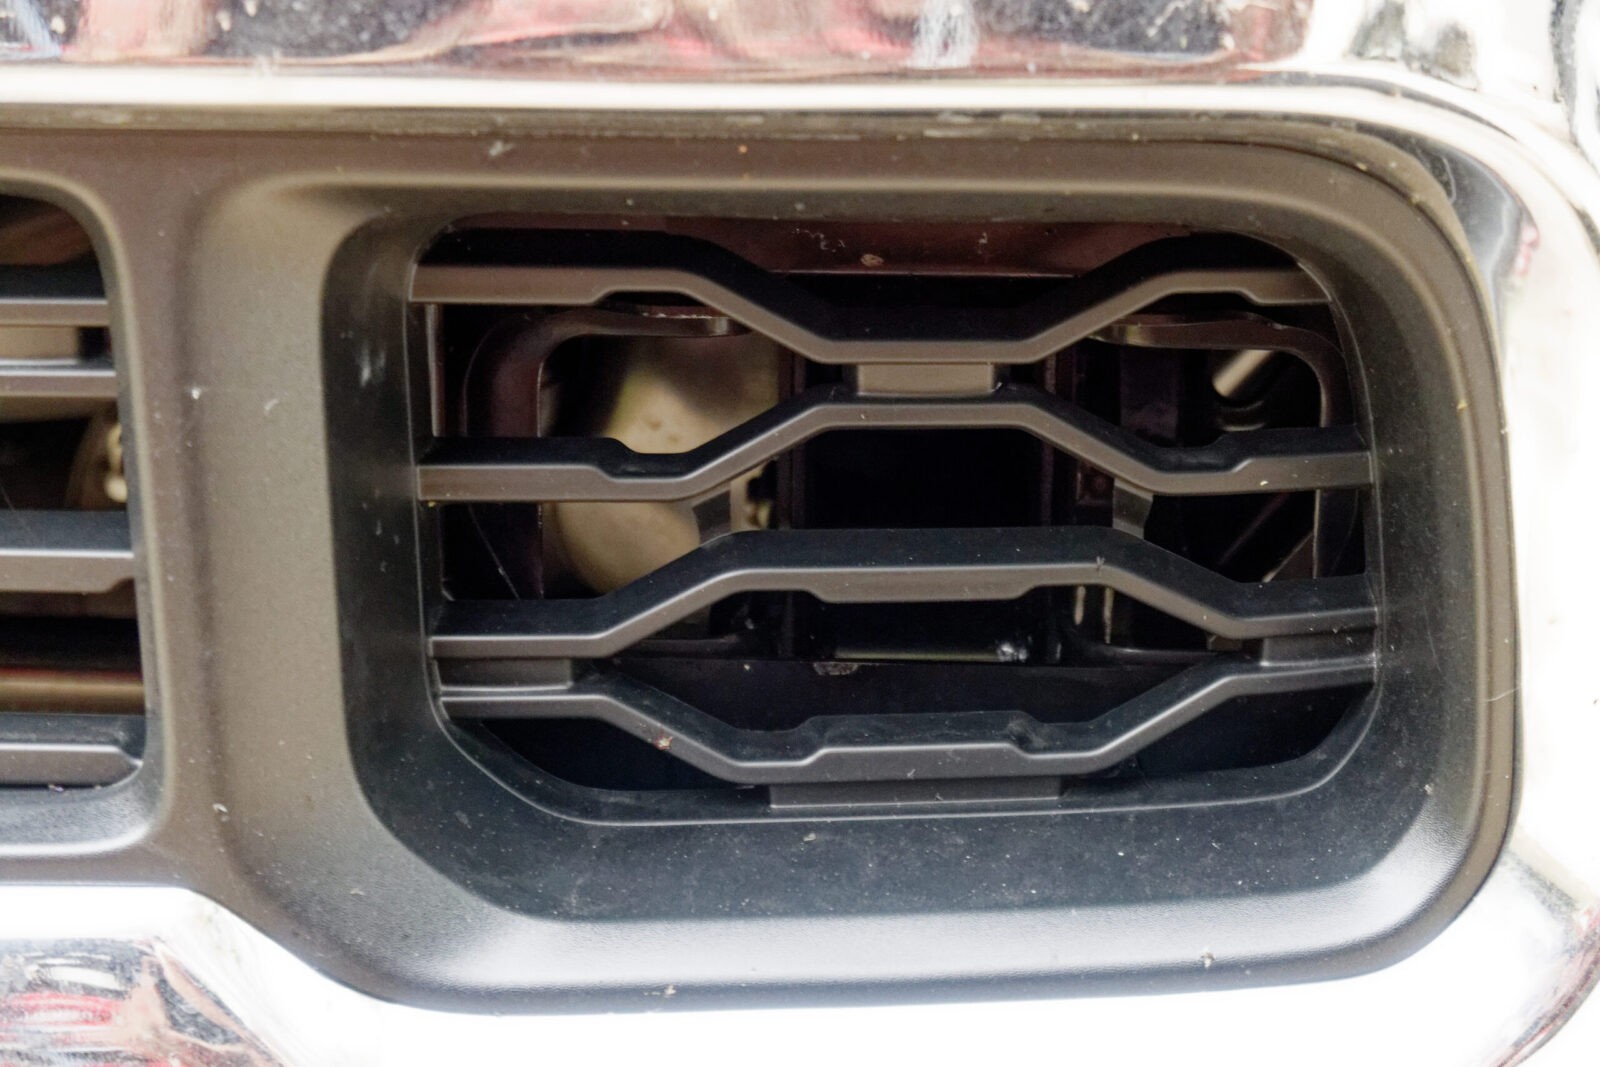
The part of the frame rail where the town gook goes is that square opening straight back from the center so I planned to cut the top three horizontal pieces out of the way.
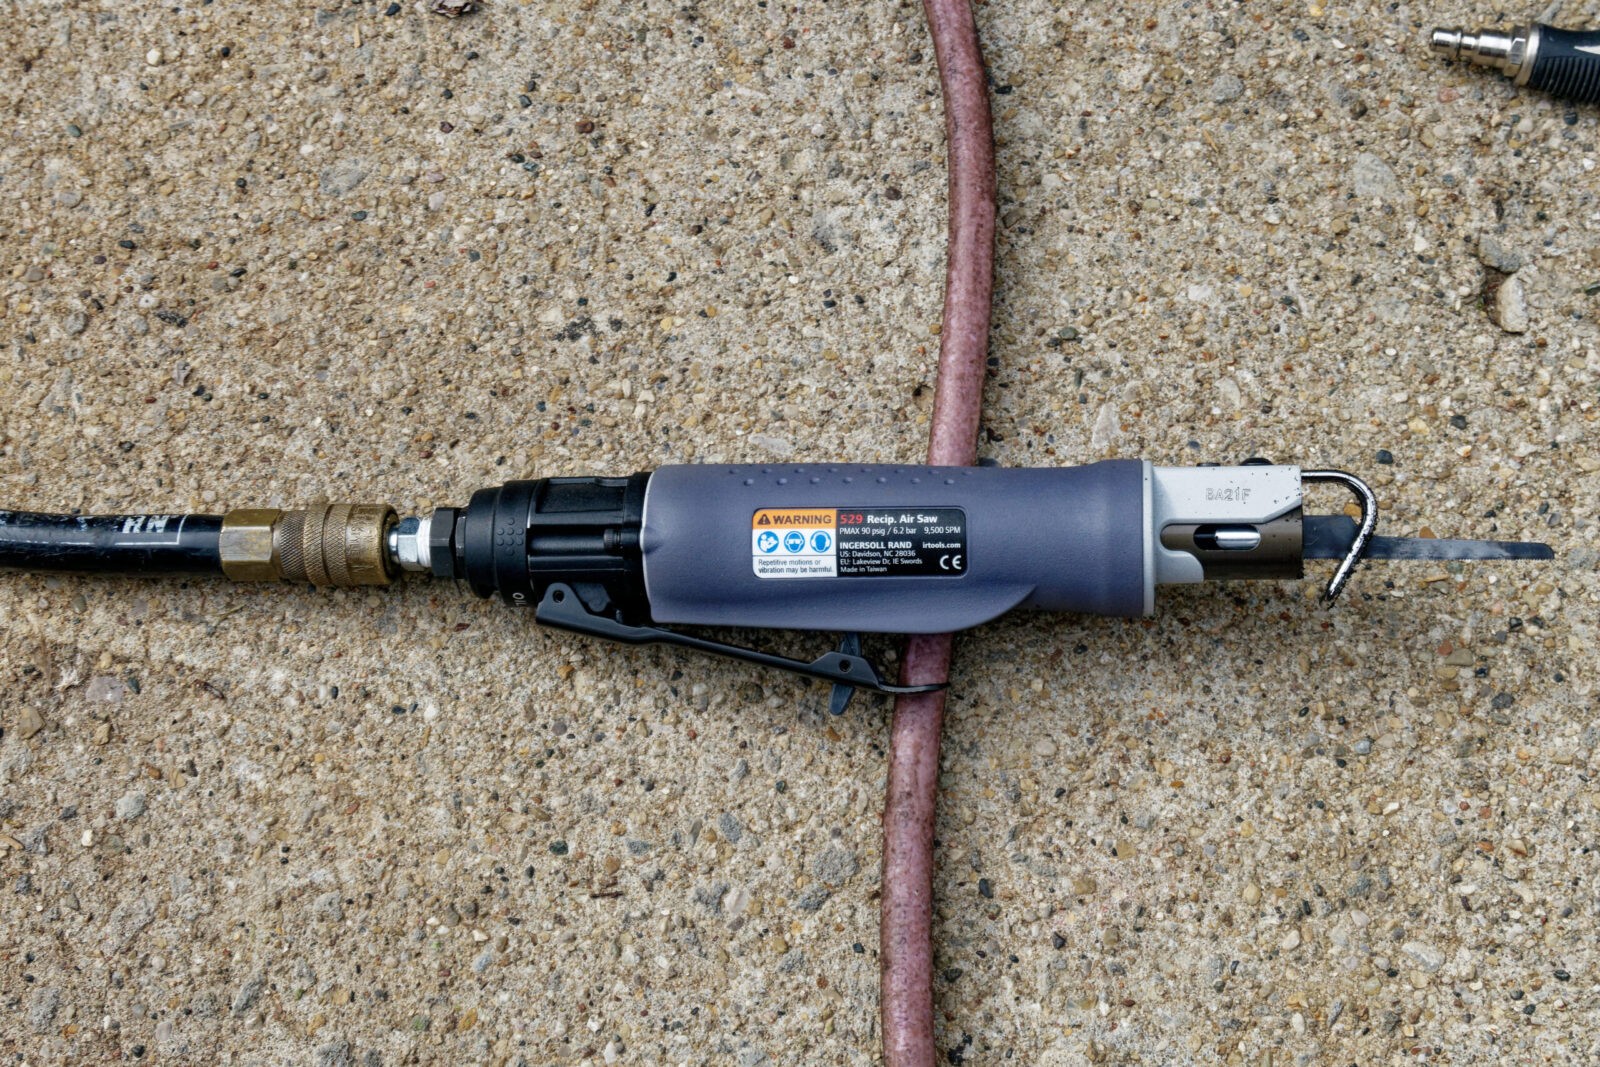
This is an Ingersoll Rand model 529 reciprocating saw used for body work and what not. This thing is amazing. Cheap reciprocating saws have a ton of vibration when they run but not this one. It makes cutting sheet metal as easy as soft grill plastic 🙂 This is a fine 24 tooth blade. Use a fine blade on plastic to avoid any snags and tears. Your other option is to look for one of the small hack saw blade holders or other small saw where you can reach in. The more teeth per inch, the better.
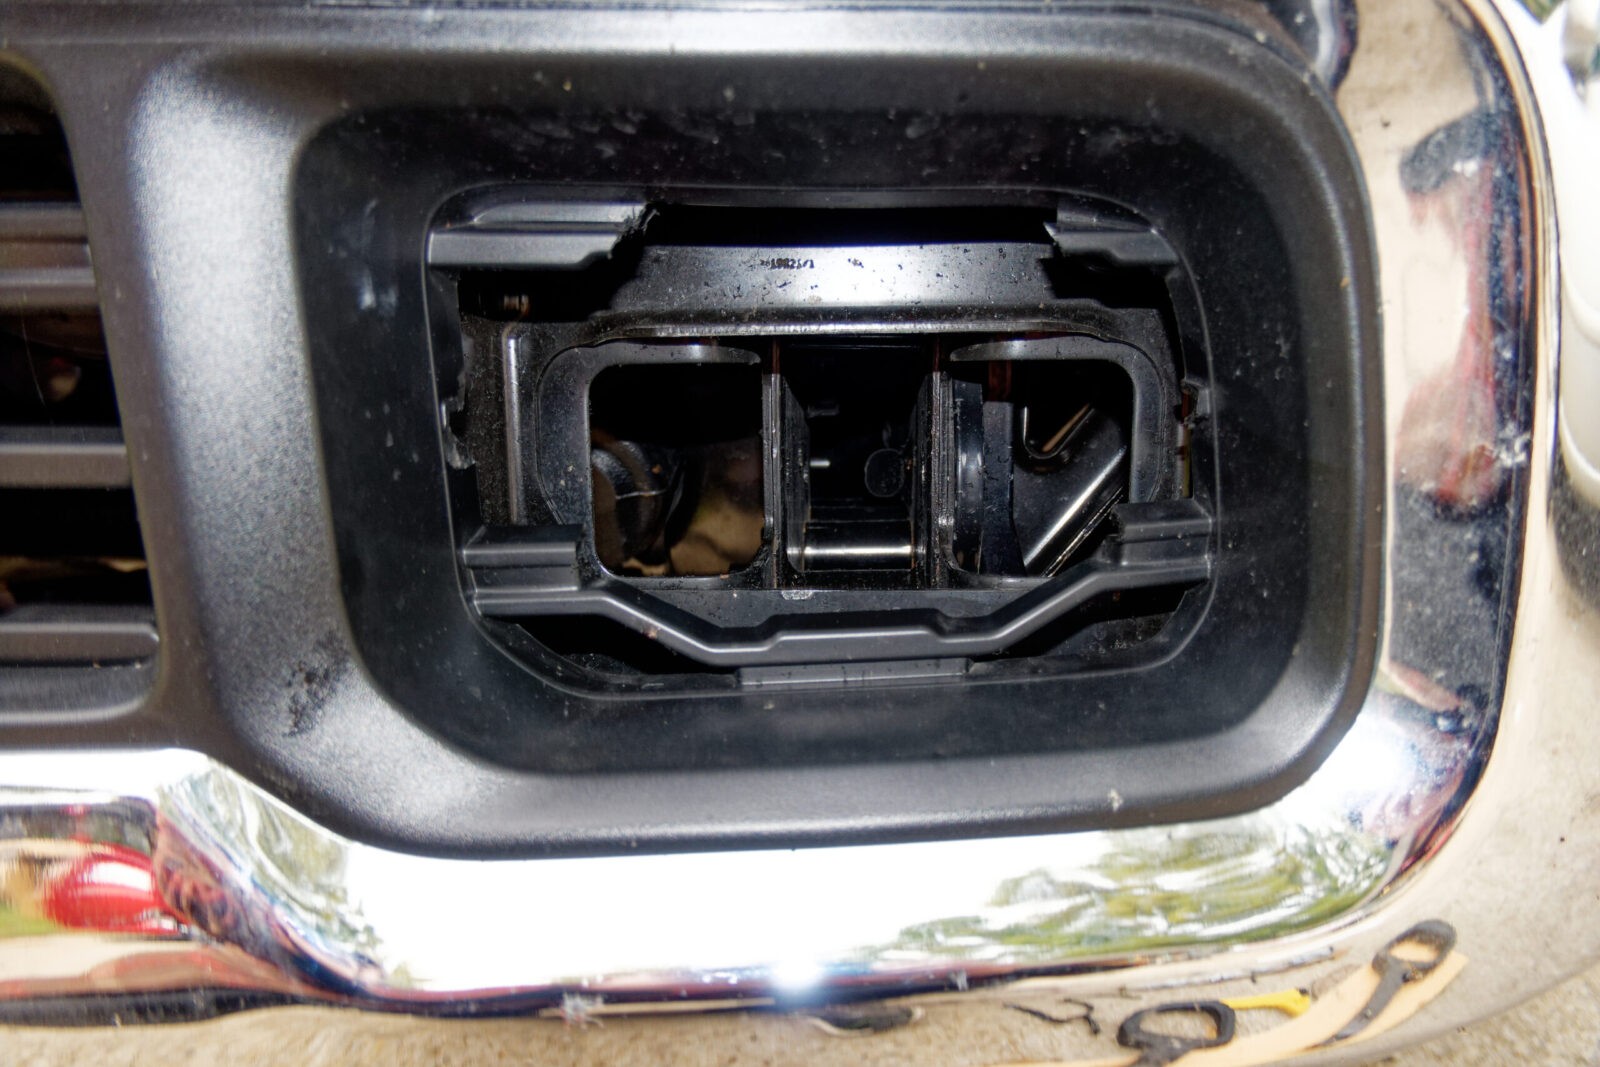
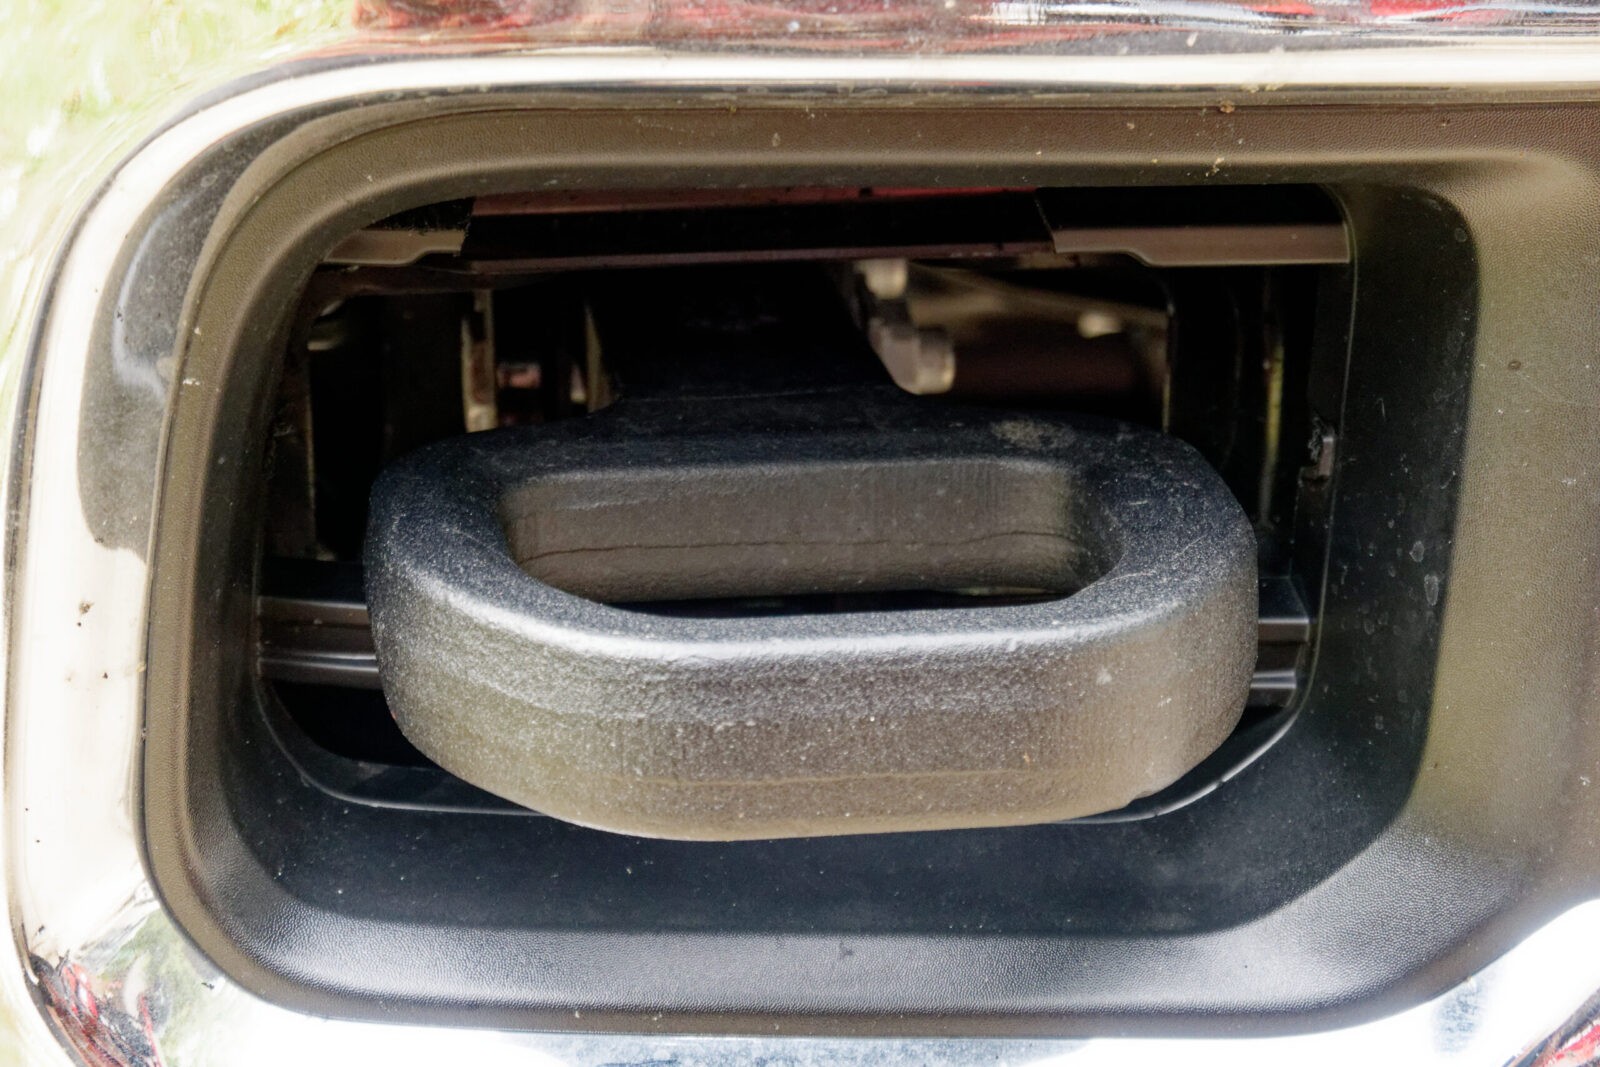
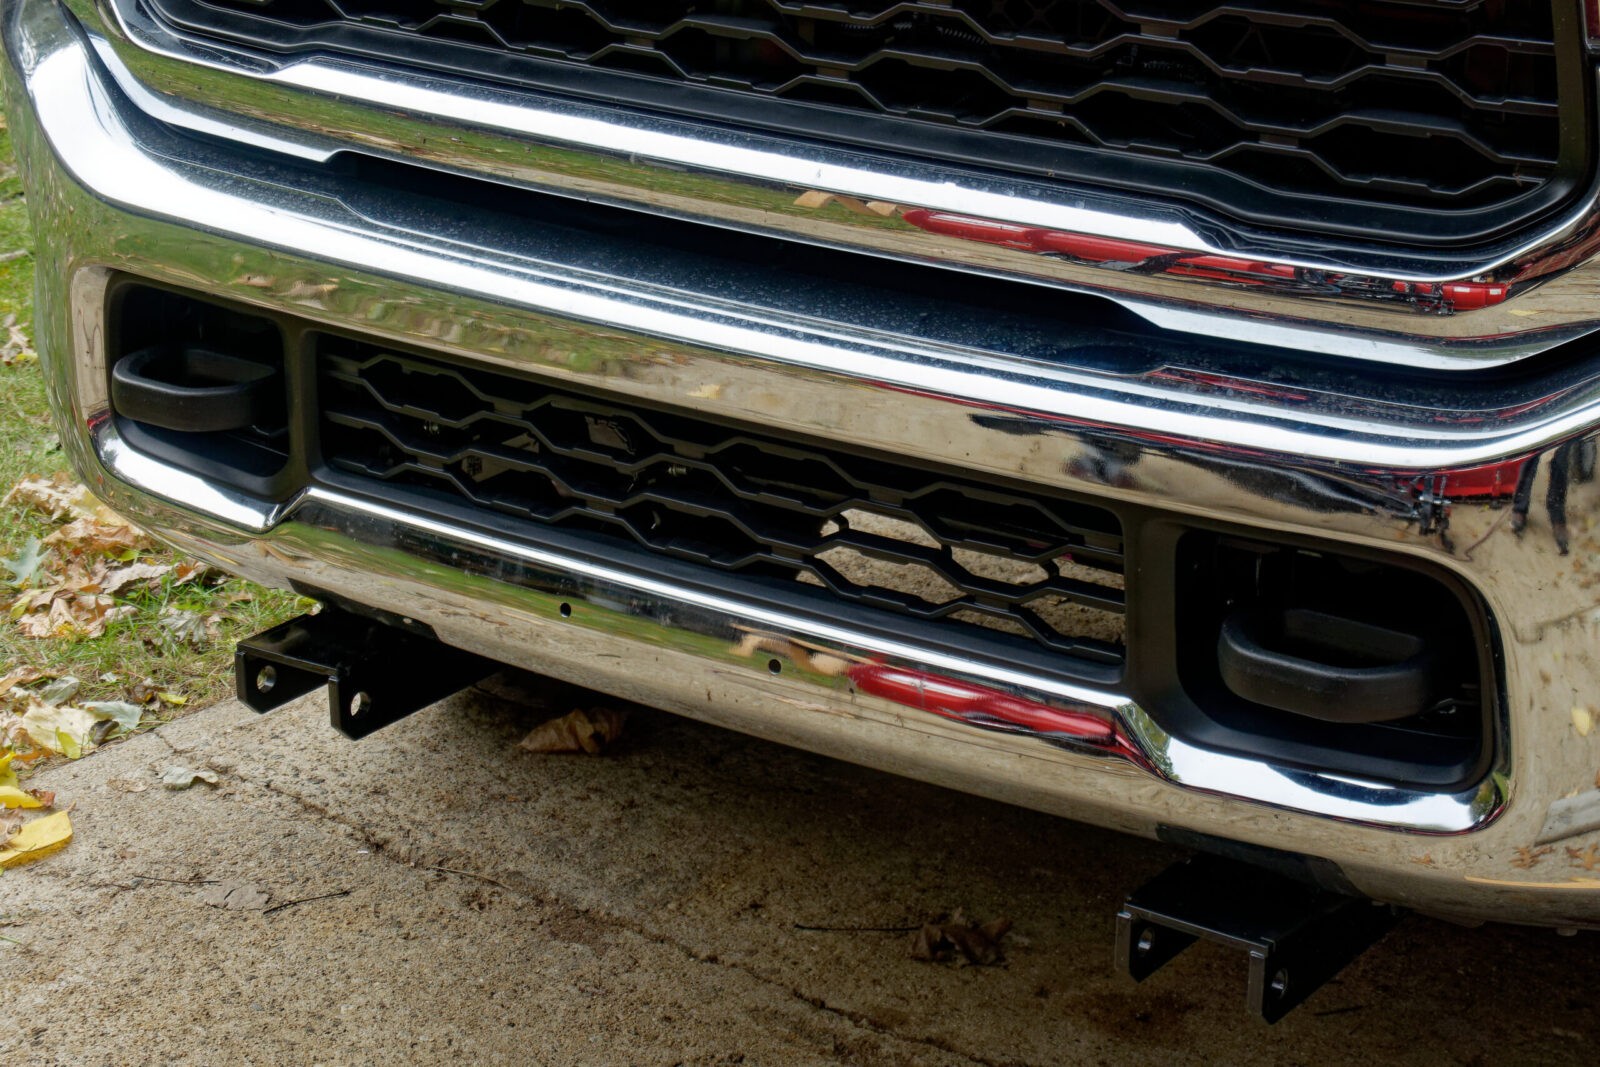
This is right after cutting. I haven’t cleaned up the cuts or blown out the plastic cuttings yet. The tow hook will go straight into that center opening and you will need to jiggle the hook around to get the two bolts through.
This is what I cut out. A fine tooth saw really does a nice job – fast and clean.
Here are the hooks, bolts and buts.
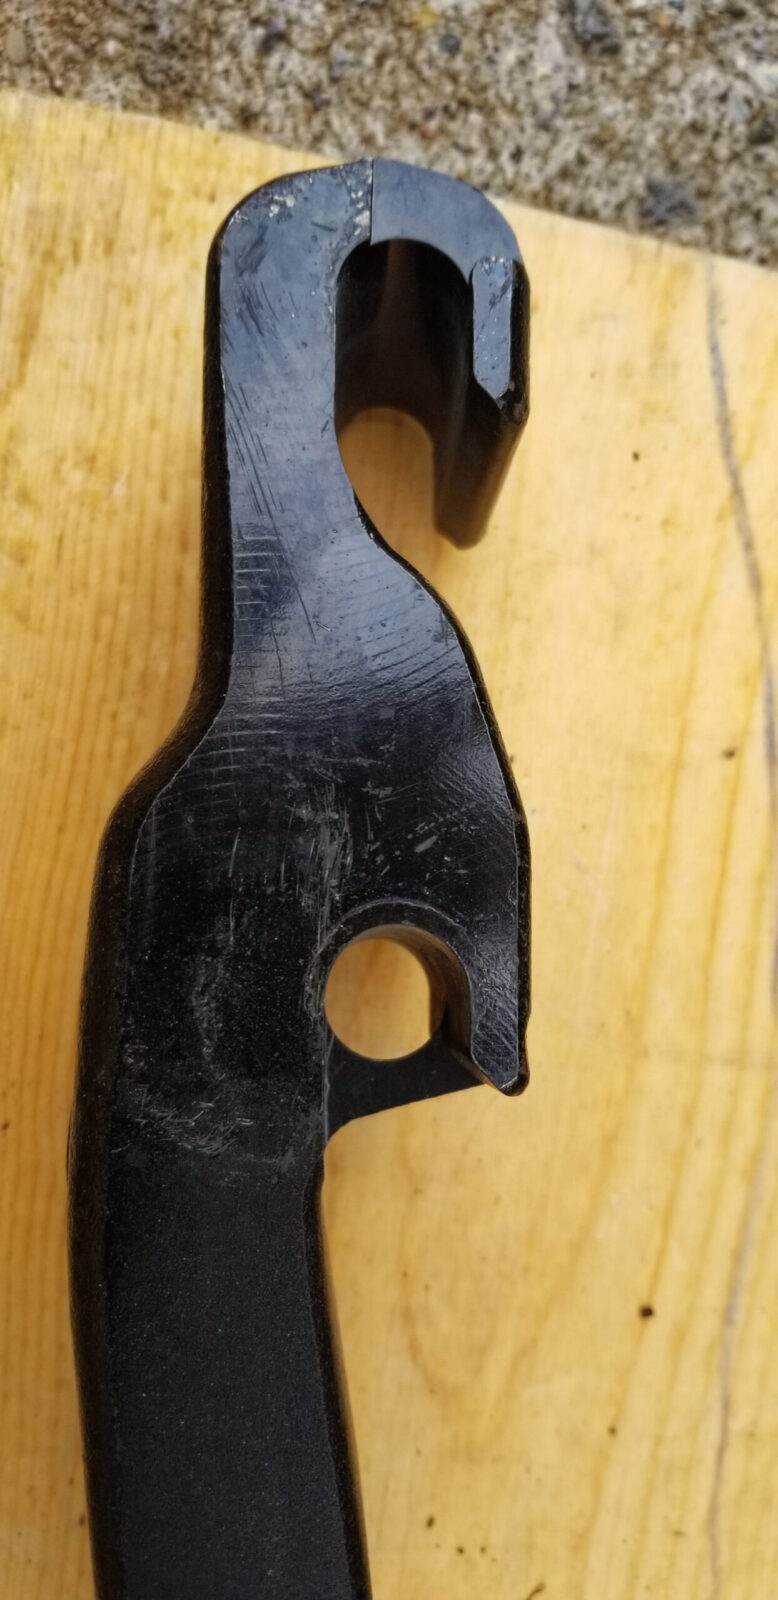
I wanted you to see the side profile of where the bolts engage the hook. The front groove actually has a retaining ring cast into it. I installed the front bolt first – and it will take some wiggling around to get it in and then I did the rear. I did all of this with the truck on the ground by the way, Also, I think the design is pretty interesting. They know the force will be applied by pulling forward so that is where they put their emphasis. The sides of the frame rail clamping against the sides of the hook will further lock it in place not to mention the inevitable rust that will happen sooner or later.
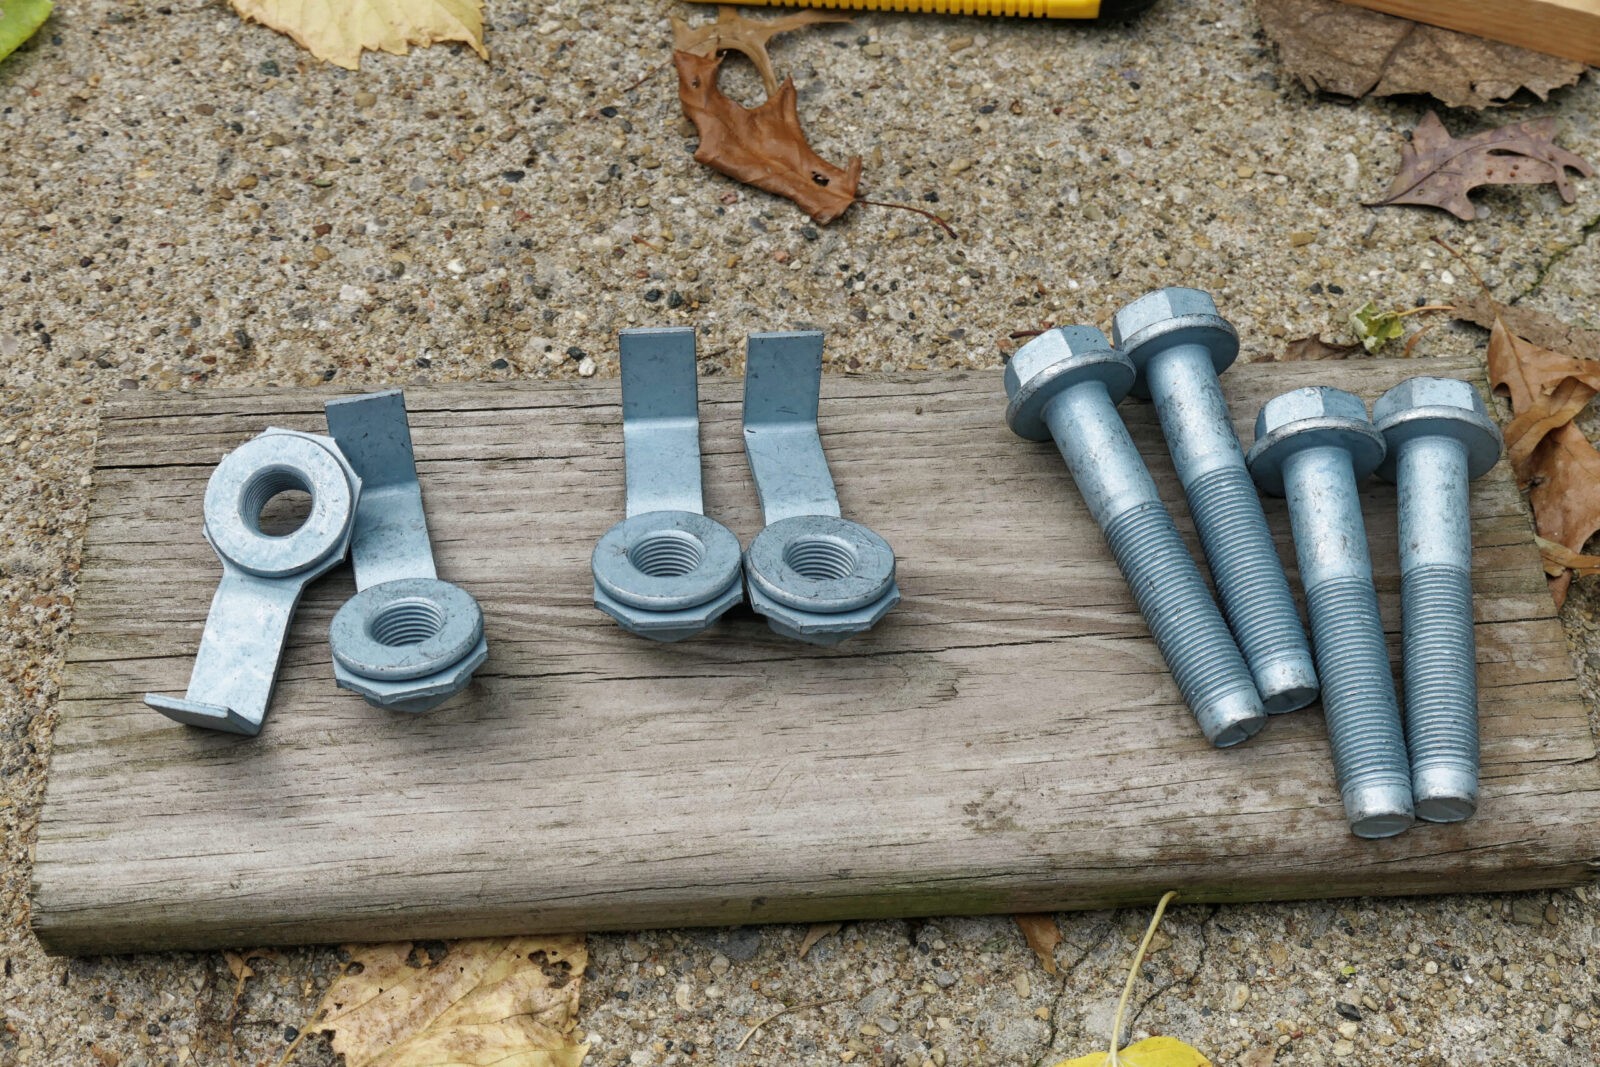
/lbThese are the four Mopar bolts and lock nuts. The wings/tabs on the nuts go into openings in the frames so you can focus on tightening the bolt down to 80-90 ft/lbs. They also limit travel of the nut over time to keep the whole assembly secure.
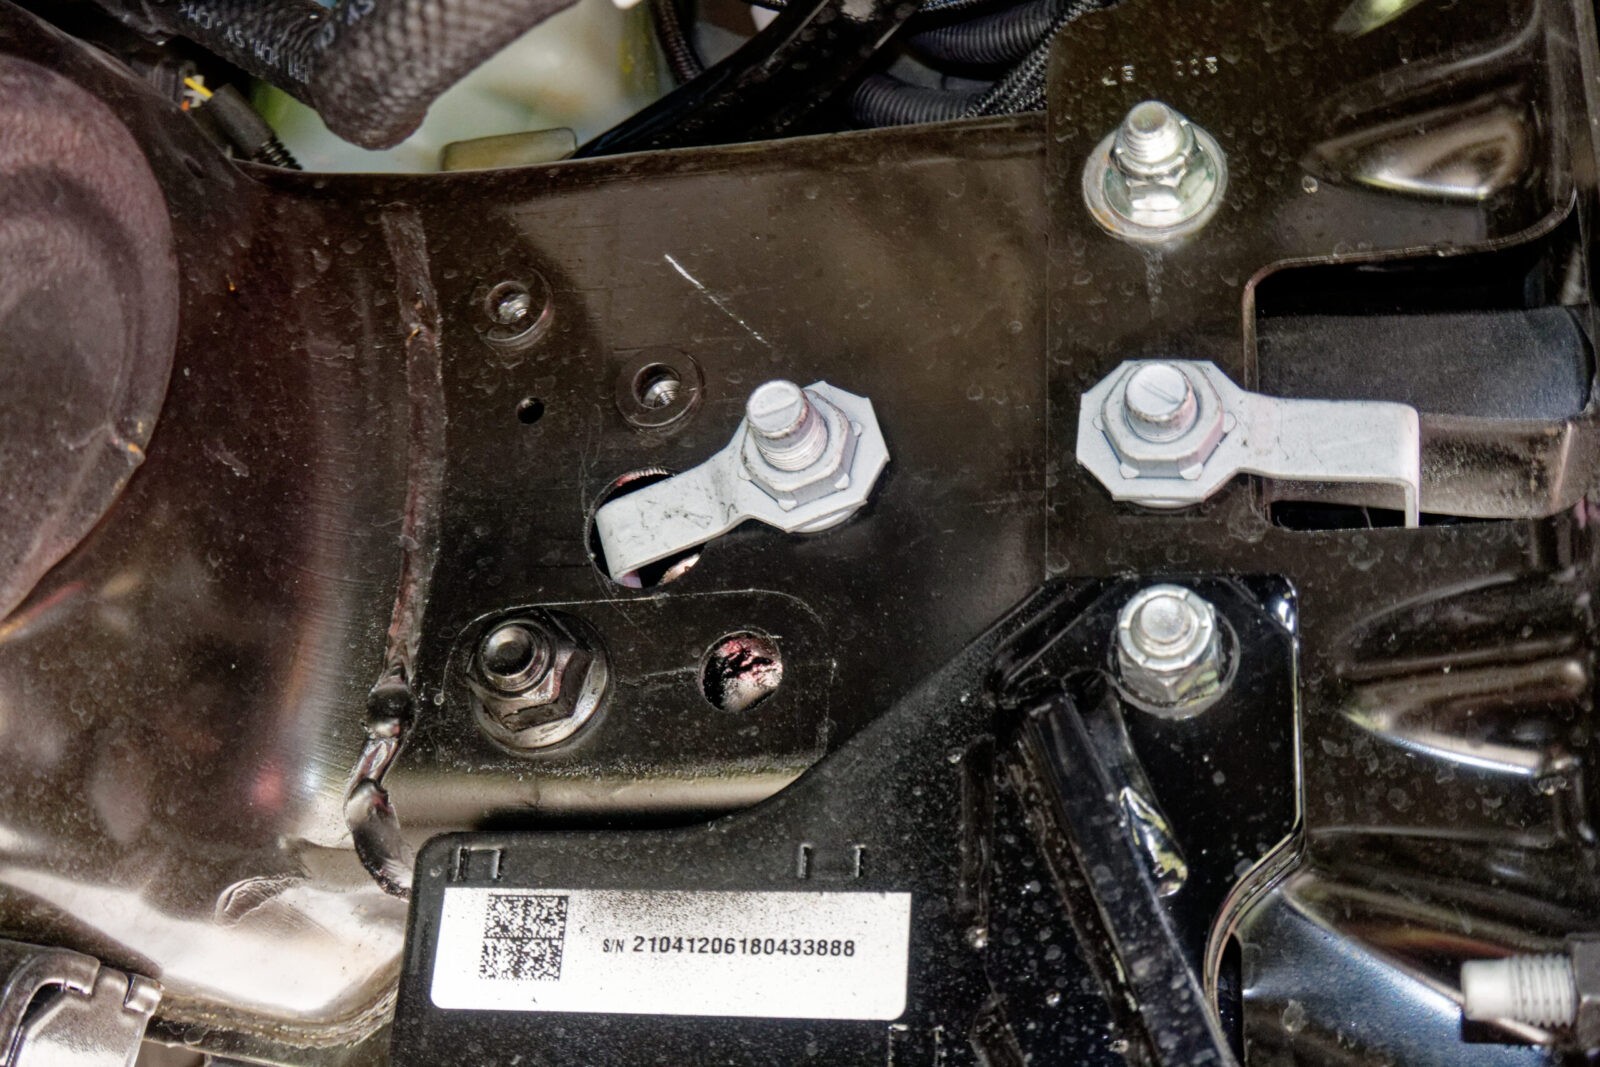
So push the bolts from the outside of rain through to the inside. This is the driver’s side.
So here you can see the bolts with the lock nuts in place.
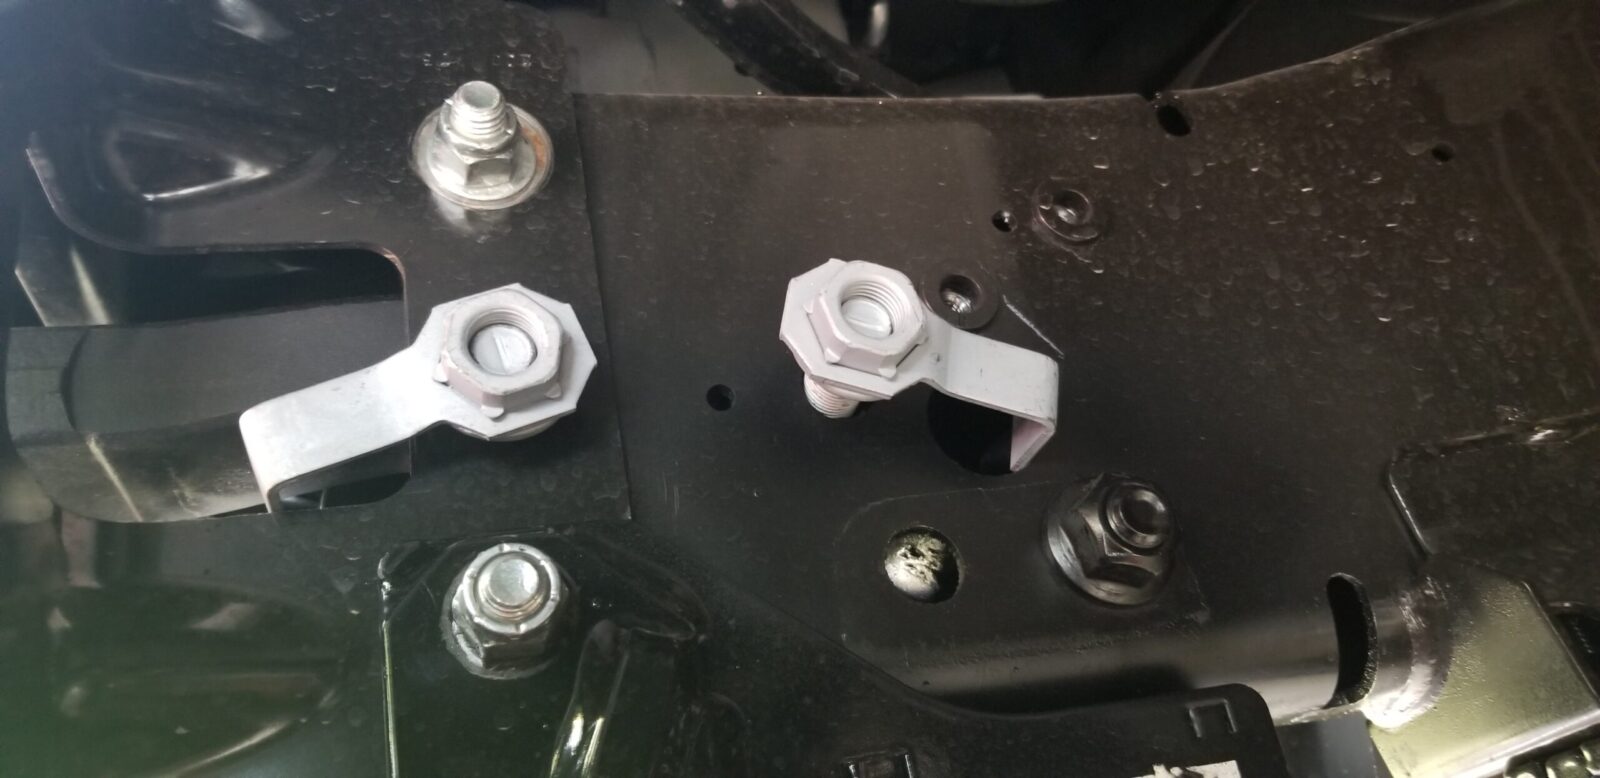
This is the passenger side. I had just started the bolts into the nuts when I took this picture.
Torque Down The Bolts
Some guys reported that their hooks rattled and I think they were not torquing them down enough. Yes, they will rattle when you insert them in the frame but not once you tighten them down. Thanks to the WWW, I could not find an absolute “here’s what RAM said for the 2500 tow hook” torque spec. I saw numbers all over the board.
I took a different tact, Mopar says the nut is a M16x1.5 on their website so when I look that up, a class 8.8 bolt has a 245 Nm spec and a class 10.9 has a 335 Nm spec. Converting 245 Nm to ft lbs gives us 180.7 ft lbs. Wow. I divided that by half and took the nuts to 90 ft lbs and called it even. No rattling and the hooks feel solid as a rock. If they loosen up, which I highly doubt, I’ll search around again for the torque spec and/or apply Loc-Tite. Given the design of the locking nuts, I really do not think this is going to happen.
If you don’t believe in torque wrenches, do whatever works for you. Due to a variety of nerve factors, I can’t feel how much pressure I am applying any longer so I torque stuff down to spec.
If you do know a definitive value, please email me and I’ll adjust accordingly.
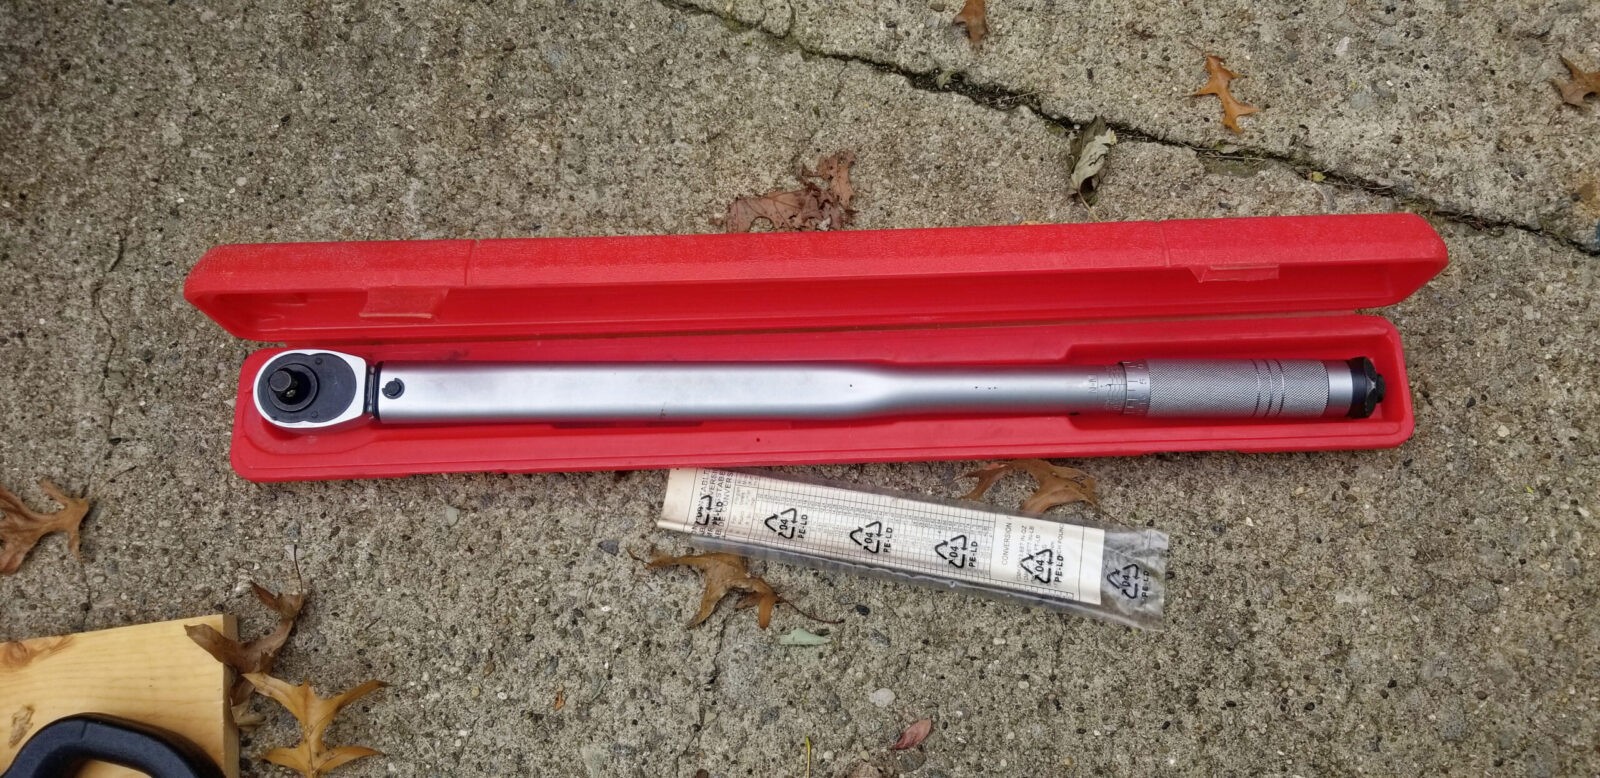
This is big Ed my 50-250 ft lb 1/2″ torque wrench. I have “bigger Ed” that is a giant 3/4″ unit. I also have a number of 1/4, 3/8 and 1/2 torque wrenches for different applications.
The Result
They are rock solid. I haven’t used them yet but am ready for winter.
Driver’s side. I think I could have left the one top section of the grill but I am also not sure if it would have gotten busted off anyways from shackles, hooks, etc. I also can’t get rid of the slight angle of the hook left to right despite trying to make it flat several times so I am not going to worry about that either,
Passenger side
One last comment, I did go in a week or two later and spray painted all of the exposed bolts and nuts with black paint to slow up the rust on the fasteners. In Michigan, fighting rust is an art form and also a losing battle – that salt that gets put on the roads gets everywhere and eventually takes its toll but I sure do try to delay that 🙂
Summary
You can definitely do the hooks yourself. Save some money and get them off eBay, do what you want with the bolts and then trim the front grills so the tow hooks can slide in. It looks pretty good and will do the job.
Note, I have to buy all of my parts – nothing here was paid for by sponsors, etc. I do make a small amount if you click on an ad and buy something but that is it. You’re getting my real opinion on stuff.
If you find this post useful, please share the link on Facebook, with your friends, etc. Your support is much appreciated and if you have any feedback, please email me at in**@*********ps.com. Please note that for links to other websites, I may be paid via an affiliate program such as Avantlink, Impact, Amazon and eBay.
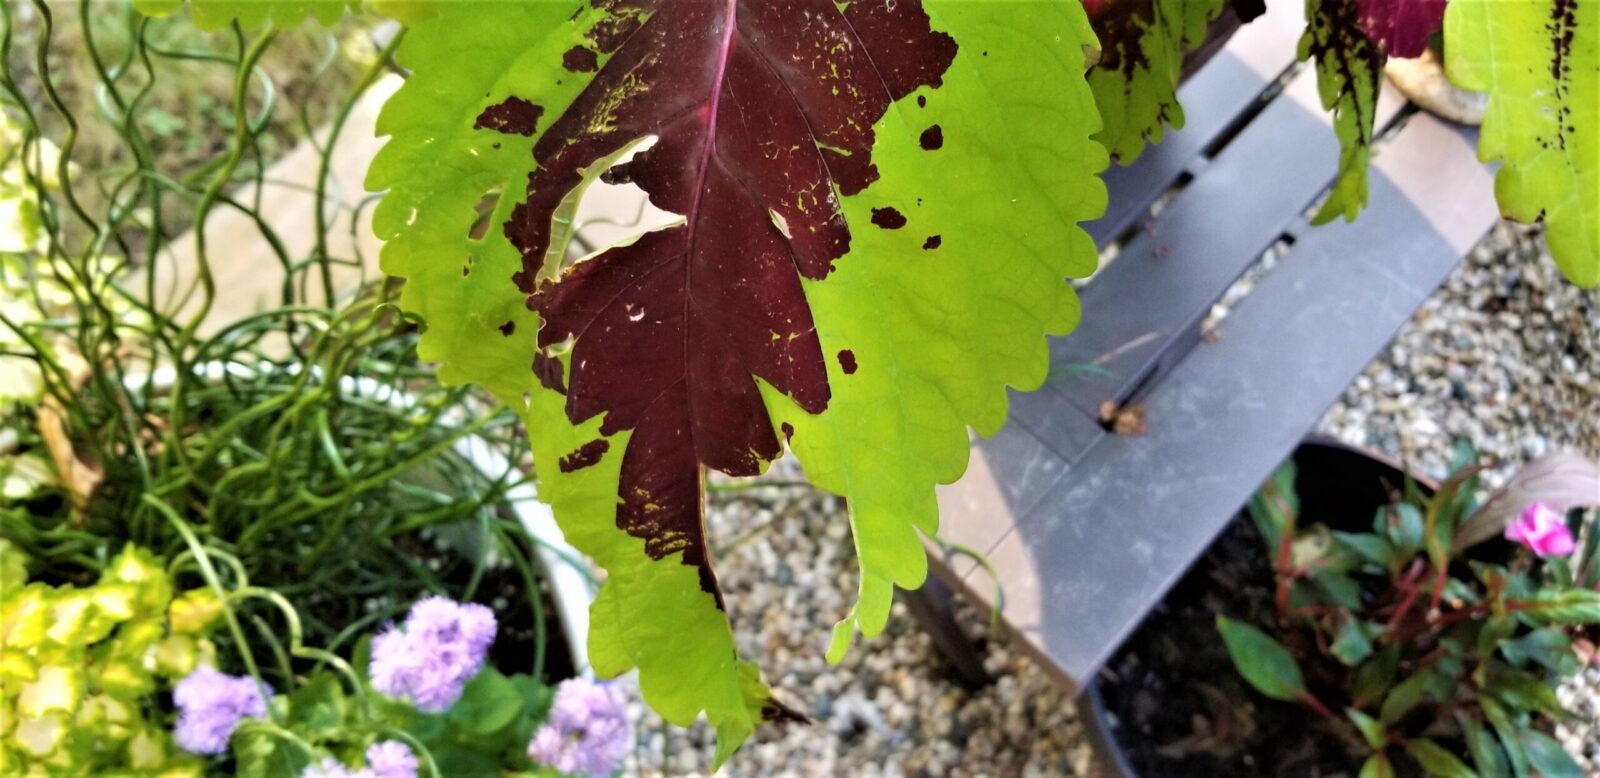
There seems to be a ton of Japanese Beetles this year – these fat little buggers can really do a number on plant leaves – eating them leaving holes or just ragged parts of leaves. Spray is one option and I know folks who use Sevin and others but another option that does not involve spraying is to put up traps that are made just for them.
Here’s one example of the damage the Japanese beetles can do.
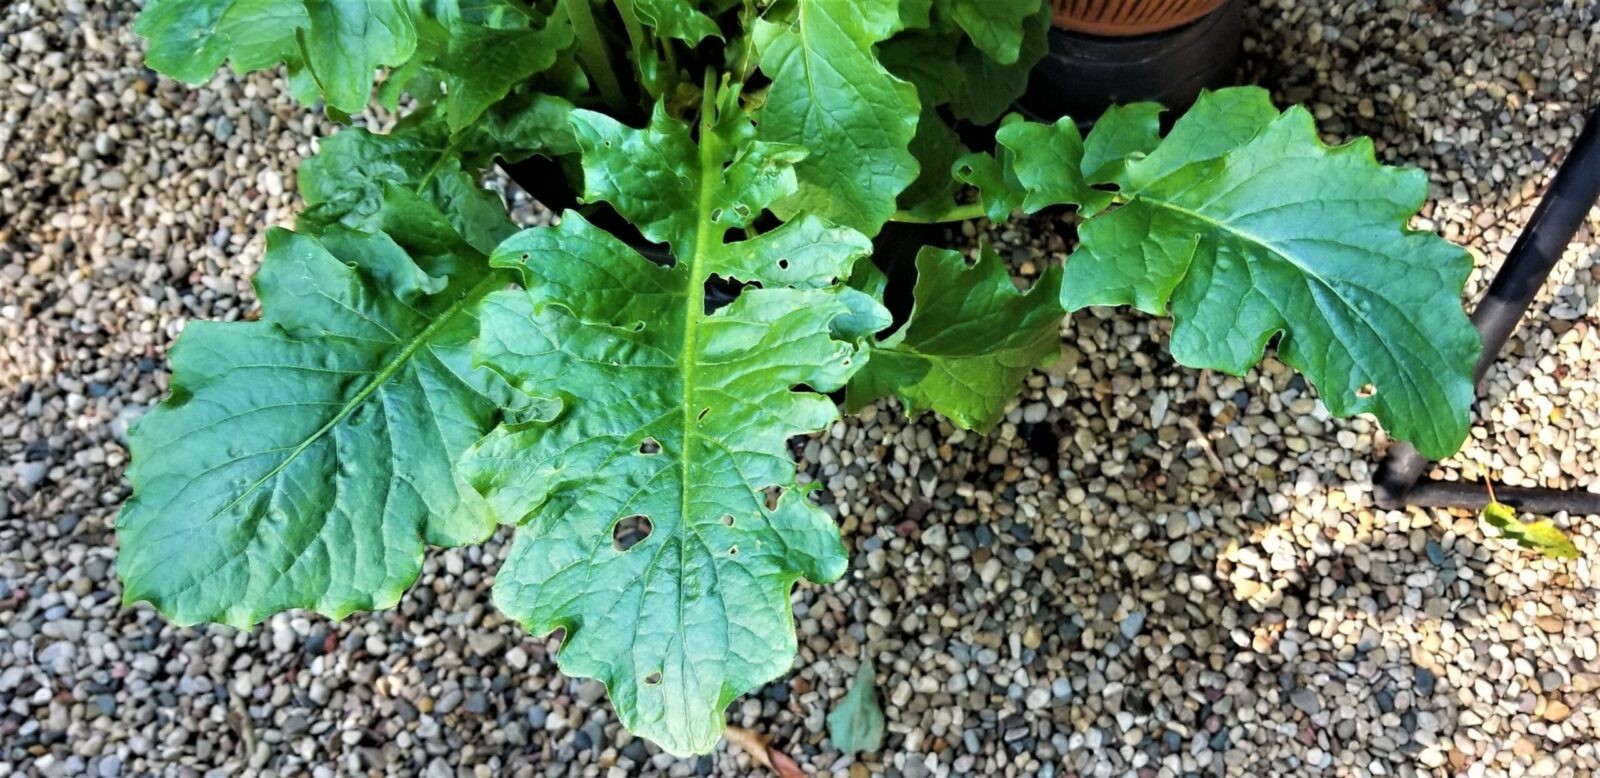
Here’s another.
This close up photo of the culprit. It’s from Wikipedia (1) shows a Japanese Beetle. You can easily catch them eating leaves during the day to confirm whether they are the actual pest or not. You can also sometimes spot them flying away from plants as well by the way.
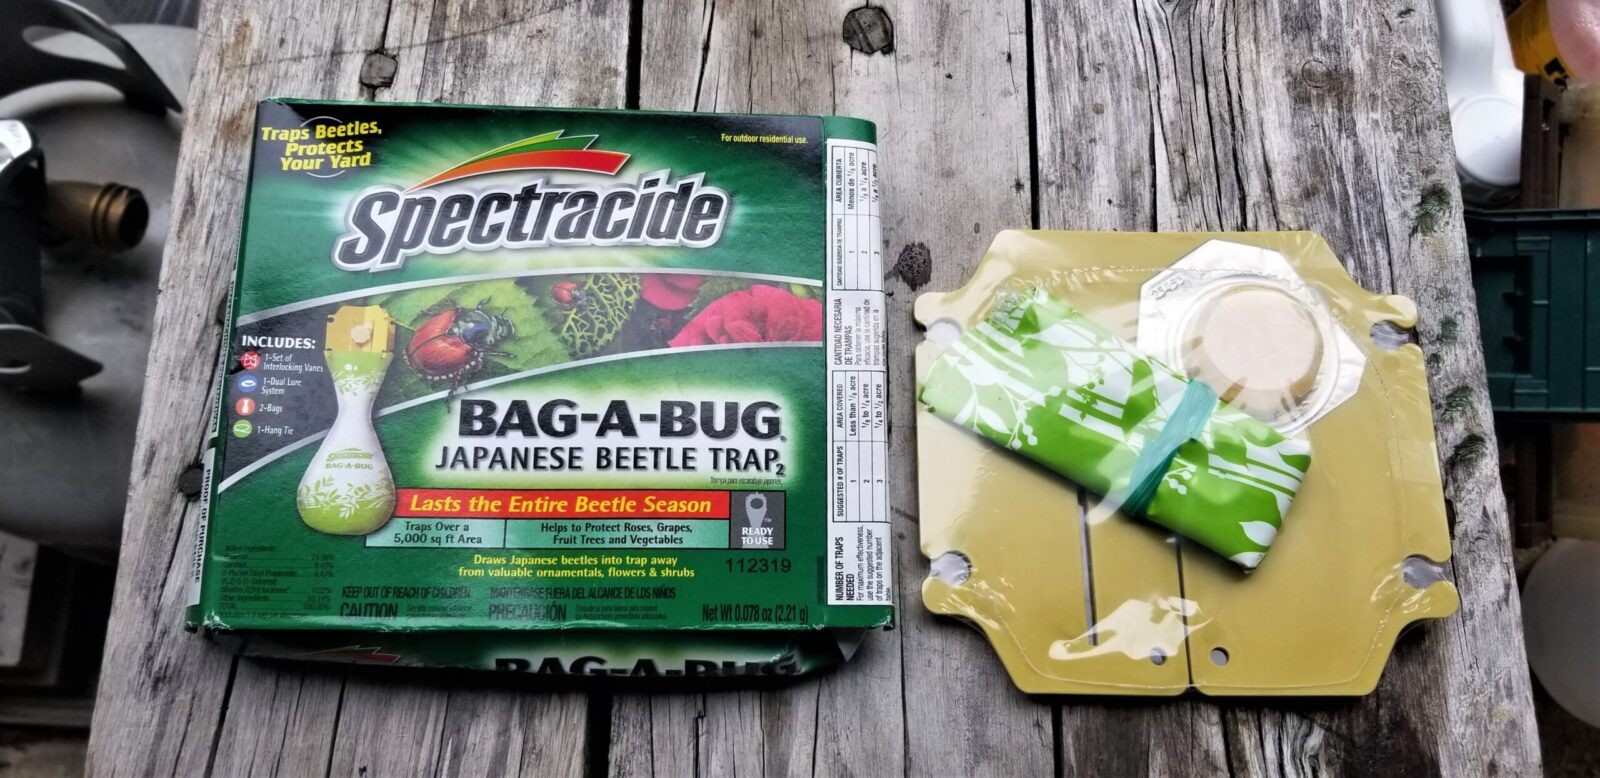
Personally, I use the Spectracide Bag-A-Bug Japanese Beetle Traps. I kind of fell into them years ago – I don’t even recall how. I think someone recommended them to me and I have used them ever since. They are very easy to assemble and definitely do the job.
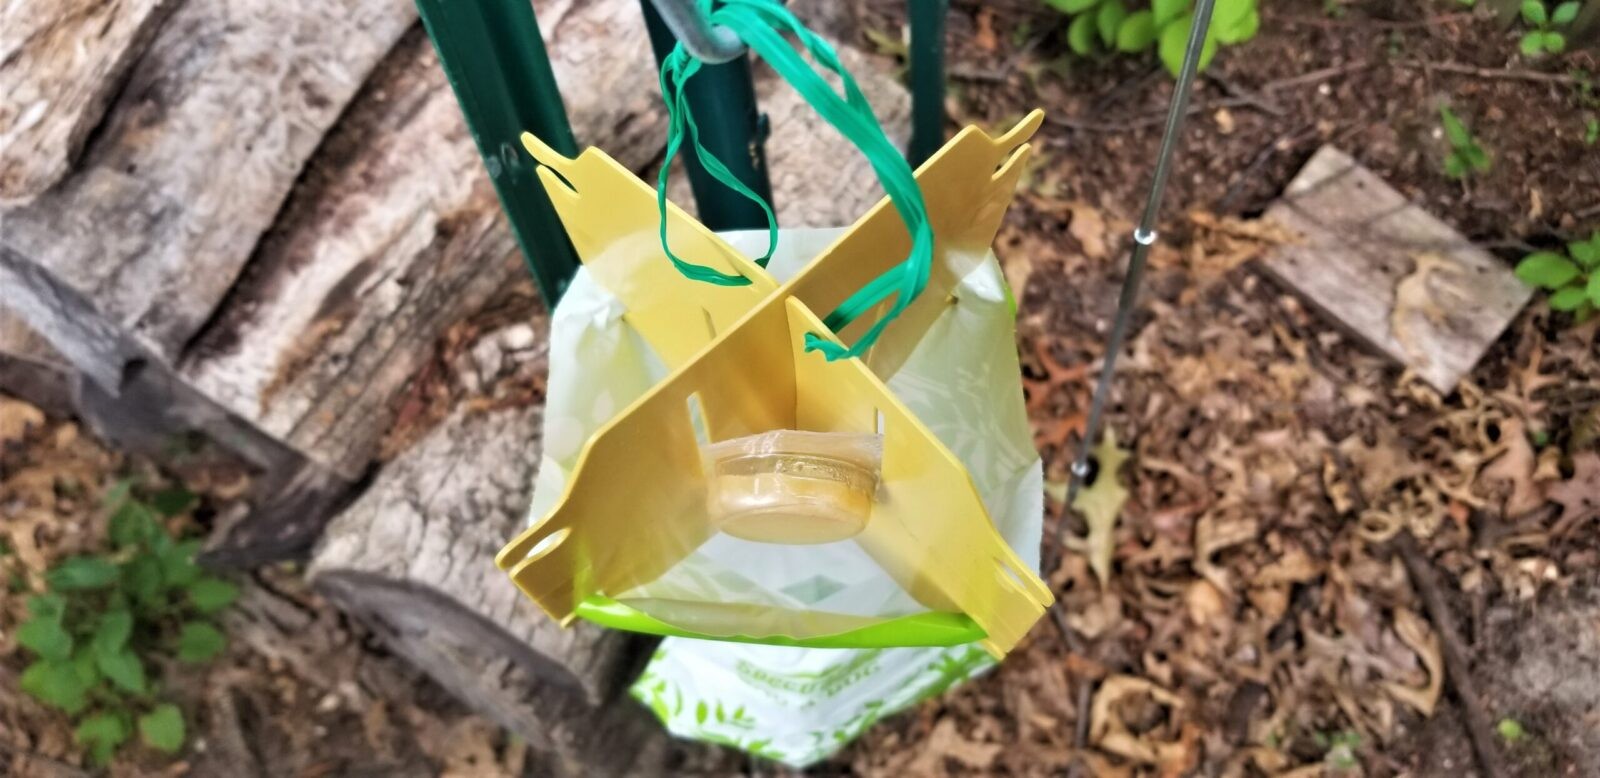
The package has the the plastic frame that holds the bag and the bait (that brown disc in the sealed aluminum package, and a long wire tie to suspend the trap and two bags. It does not come with a stand. You can buy one, make one or hang it off something that you already have – the target height should be with the bottom about a foot off the ground. The bait/lure is supposed to be good for about 12 weeks – enough for the season.
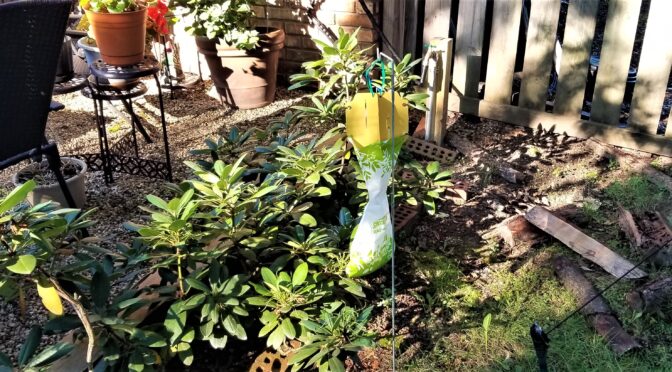
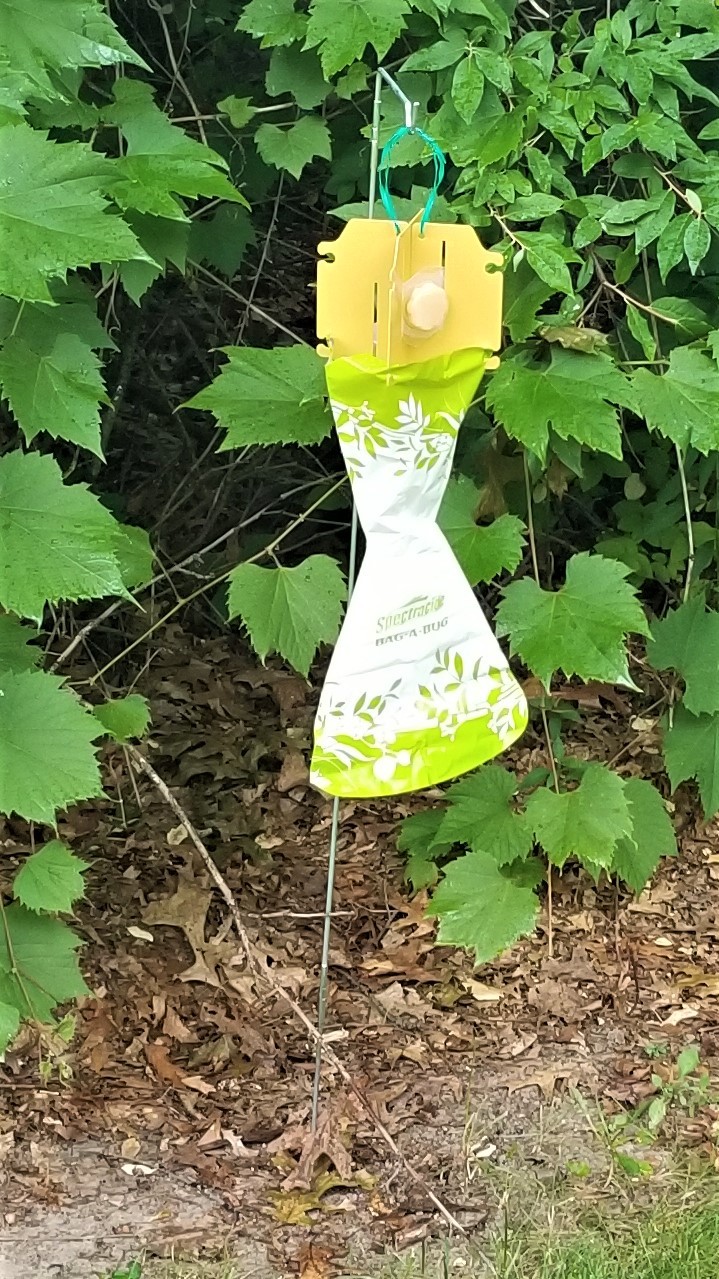
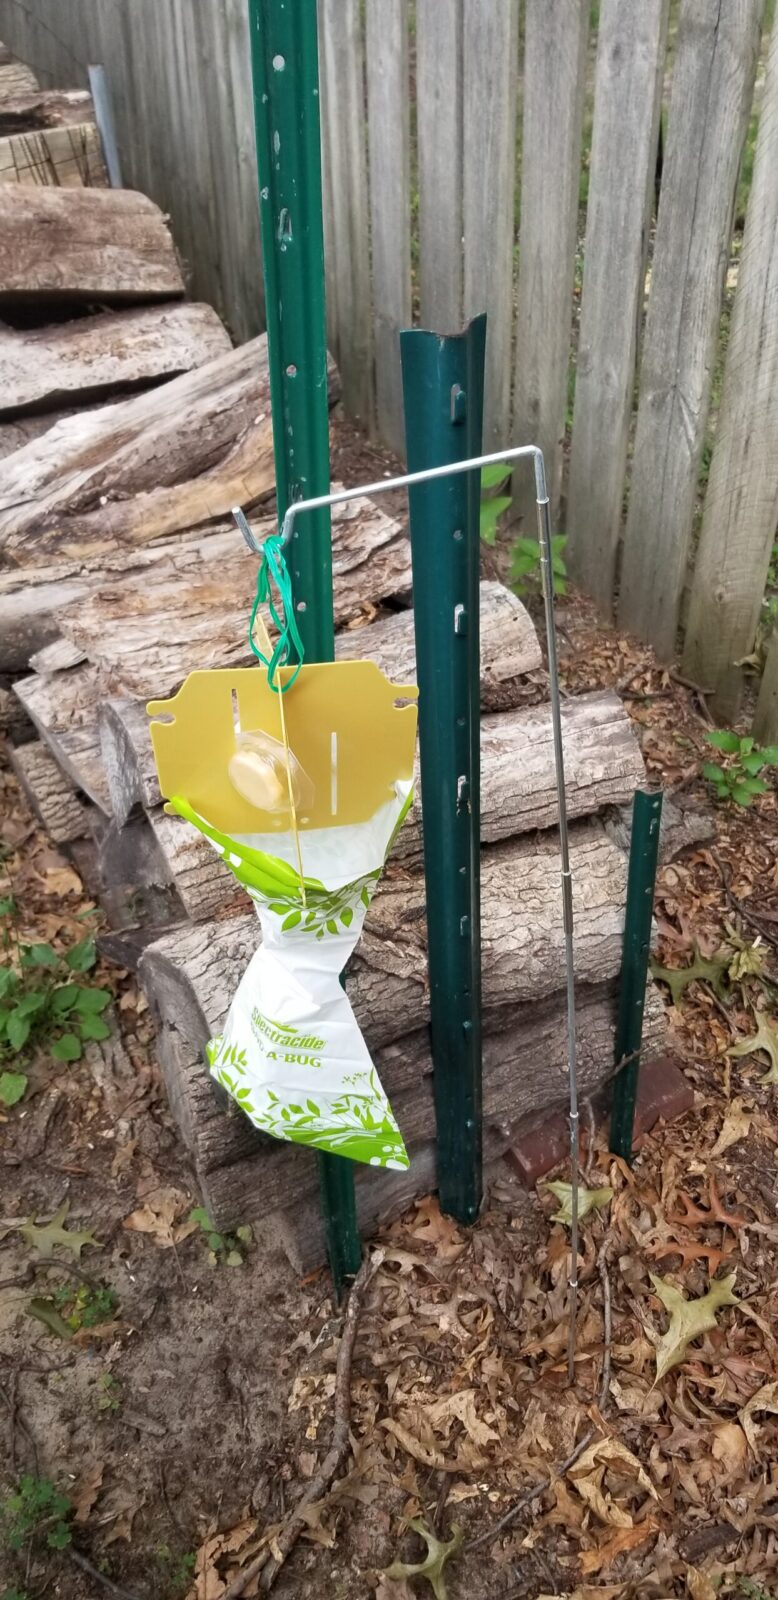
These are bushes near our garden. The recommend putting the trap 30 feet away from plants you care about because you don’t want to attract the beetles and have them decide to stop and eat your plants vs. going to the trap. I have four traps up this year protecting areas where we have plants and vegetables and have caught literally hundreds of beetles in less than a month.
The way it works is kind of interesting. You put the bait block on the trap and the rather clumsy beetles fly for the bait, hit the walls of the trap that are smooth and have nothing for them to grab onto and they fall down in the trap. Once in the trap, the walls are also smooth and they don’t have enough room to fly so they are stuck there and perish.
This is the top of the trap. The beetles are attracted by the bait, hit the walls and fall down. It really works.
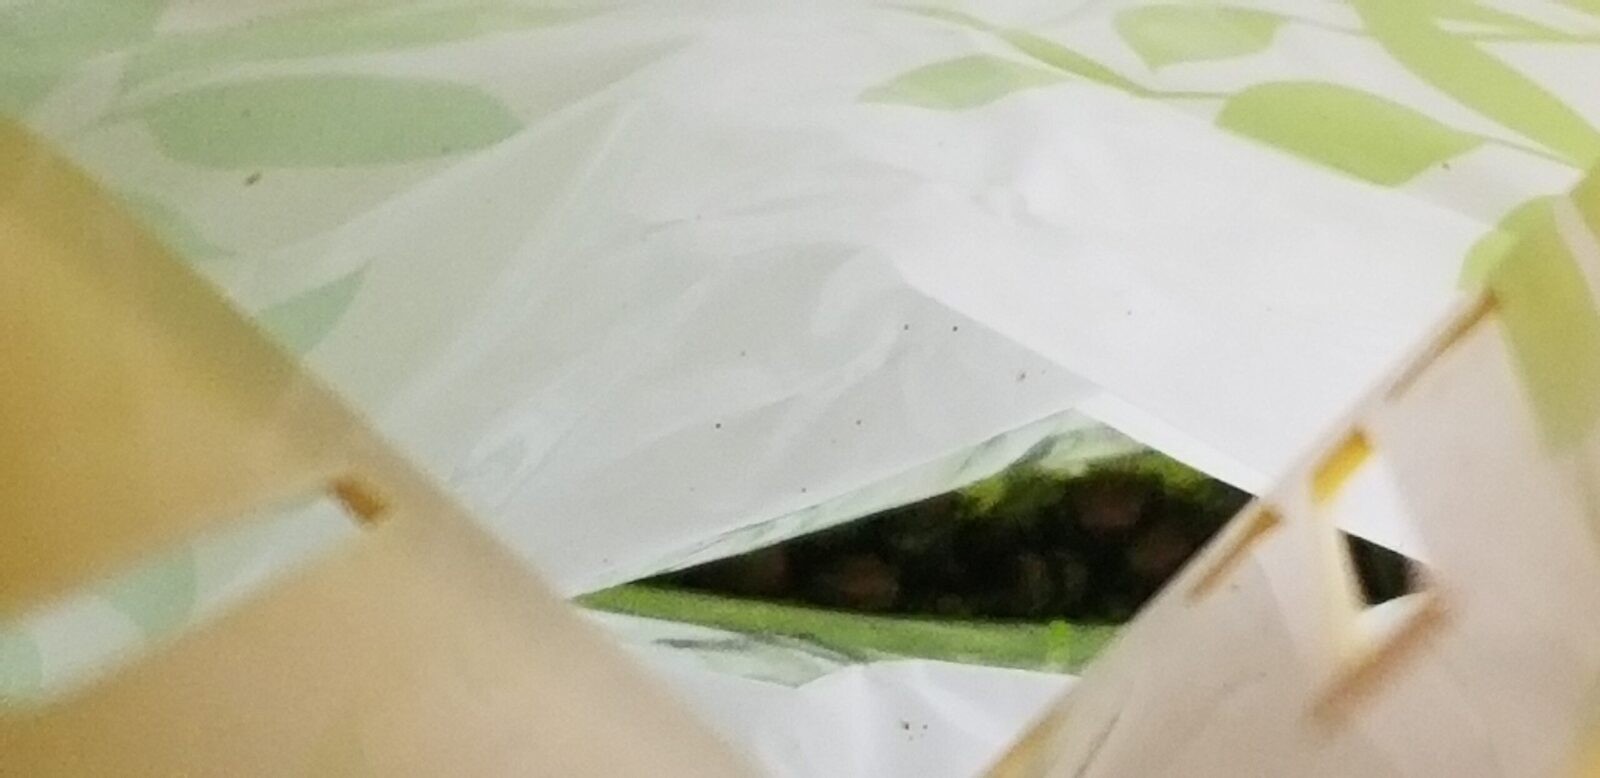
There are probably 2-3 dozen beetles in here after a few days. The most stunning situation I had was putting a trap out not far from rose bushes we have and I had dozens of beetles trapped in less than four hours.
They do make and sell a purpose built stand that comes in sections. I bought a few of them but I just make them now out of 3/16-1/4″ steel rod. The sections are easy for storage but you do need to avoid losing pieces. I lost the top hanger of one and made a replacement.
In Conclusion
The Spectracide Japanese Beetle traps work great and I have no hesitation recommending them. I have read reviews/posts where people complain about the bag ripping but I am not sure why they had a challenge. I only have two recommendations – don’t put them in amongst the plants you care about because they will absolutely lure the beetles right where you don’t want them and the second is to make a couple tiny slits at the very bottom to help water drain out.
These traps definitely work and I hope this helps you save your plants!!
Note, Amazon sellers tend to be very expensive. EBay tends to have far better prices for these traps and accessories like bags and stands:
If you find this post useful, please share the link on Facebook, with your friends, etc. Your support is much appreciated and if you have any feedback, please email me at in**@*********ps.com. Please note that for links to other websites, I may be paid via an affiliate program such as Avantlink, Impact, Amazon and eBay.