Zastava Arms, or Zastava oružje (Застава оружје) as it is known in its native Serbia, stands as a monumental testament to the nation’s industrial and military history. With origins stretching back to the mid-19th century, this Kragujevac-based manufacturer has not only equipped generations of soldiers but has also been a significant contributor to Serbia’s (and formerly Yugoslavia’s) defense industry and a notable exporter on the global stage.1 Its story is one of resilience, adaptation, and an enduring role in the complex tapestry of Balkan and European history.
A Tale of Two Zastavas: Arms and Automobiles
It is crucial at the outset to distinguish Zastava Arms from its erstwhile sibling, Zastava Automobiles (Zastava Automobili / Застава Аутомобили). While both giants of Serbian industry sprang from the same foundational industrial complex in Kragujevac (Крагујевац), their paths diverged. Zastava Arms remained true to its martial origins, focusing on ordnance and firearms, whereas Zastava Automobiles carved its niche in vehicle manufacturing.1 The original cannon-casting plant, established in 1853, is the direct progenitor of the Zastava Arms we know today.1 Although an automobile section was inaugurated within the broader Zastava enterprise in 1904, and the entire complex was later known as Zavodi Crvena Zastava (Заводи Црвена Застава, Red Flag Factories) after World War II, a pivotal decision in 1953 saw a significant portion of the Zastava plant dedicate itself exclusively to automobile production. This bifurcation led to the emergence of Zastava Automobiles and Zastava Arms as distinct, specialized entities.1 This report will navigate the rich history of Zastava Arms.
The parallel development and eventual separation of Zastava’s arms and automotive divisions reflect a broader pattern in state-led industrialization efforts, particularly in nations striving for self-sufficiency. Military requirements often served as the initial catalyst for heavy industry, with civilian applications and diversification emerging as secondary, albeit significant, outcomes. The foundational enterprise was a cannon foundry, driven by the Principality of Serbia’s defense needs.1 Early automotive activities also had military links, such as assembling Ford and Chevrolet trucks for the Yugoslav Army.8 This trajectory suggests that national security imperatives often paved the way for broader industrial capabilities. The eventual split signifies that both sectors achieved a scale and specialization warranting independent operation, but their shared genesis underscores a strategic, state-influenced approach to building national industrial capacity.
The remarkable longevity of Zastava Arms, enduring through multiple state formations, devastating wars, international sanctions, and profound political transformations, highlights not only its intrinsic resilience but also its perceived indispensability to the Serbian state throughout its various iterations. The company’s existence spans the Principality of Serbia, the Kingdom of Serbia, the Kingdom of Yugoslavia, the Socialist Federal Republic of Yugoslavia (SFRY), the Federal Republic of Yugoslavia (FRY), the State Union of Serbia and Montenegro, and the modern Republic of Serbia.4 It has weathered the storms of World War I, World War II (during which it sustained heavy damage), the turbulent dissolution of Yugoslavia, crippling UN sanctions, and direct NATO bombardment.4 Such persistence through extreme adversity implies a consistent level of state support, a deep-rooted institutional adaptability, and a continuous demand for its products, underscoring its strategic importance.
Table 1: Key Milestones in Zastava Arms History
| Year | Milestone |
| 1851 | Decision rendered to relocate the Gun Foundry from Belgrade to Kragujevac (Крагујевац).3 |
| 1853 (Oct 27) | First cannon barrels cast in Kragujevac; official founding of Zastava Arms, initially as the Topolivnica (Тополивница, Cannon Foundry).1 The broader institution was also known as the Vojno-Tehnički Zavod (Војно-технички завод, Military Technical Institute).8 |
| 1880 | Major Kosta Milovanović designs the Mauzer Milovanović M.1880 repeating rifle, popularly known as the Kokinka (Кокинка).10 |
| 1889 | The Gun Foundry wins several medals at the Large World Fair in Paris.3 |
| c. 1924-1928 | Ministry of the Interior signs contracts with FN Herstal (Belgium) for licensed production of M24 series Mauser bolt-action rifles; new factory for rifle and ammunition production established.4 |
| Post-WWII | The factory complex is renamed Zavodi Crvena Zastava (Заводи Црвена Застава, Red Flag Factories).1 |
| 1948 | Production of the M48 bolt-action rifle, based on the Mauser design, commences.3 |
| 1953 | Significant portion of Zastava plant pivots to automobile production, leading to separation of Zastava Arms and Zastava Automobiles. Zastava Arms begins production of the M53 Šarac (Шарац) machine gun.1 |
| 1964-1970 | Development of indigenous Kalashnikov-pattern assault rifle begins, culminating in adoption of Zastava M70 by Yugoslav People’s Army (JNA) in 1970.4 |
| 1990s | United Nations imposes economic sanctions on FR Yugoslavia due to Yugoslav Wars, impacting production and exports.4 |
| 1999 | Zastava factory complex in Kragujevac sustains damage during NATO bombing.5 |
| 2005 | Significant restructuring commences; Memorandum of Understanding signed with Remington Arms (USA) for export.4 |
| 2019 | Zastava Arms USA established as exclusive importer for US market.4 |
Forging an Arsenal: From Topolivnica to the Great War (1851 – 1918)
The Birth of Serbian Arms Industry in Kragujevac
The genesis of Zastava Arms lies in a strategic decision made in 1851 by the Principality of Serbia to relocate its Gun Foundry from Belgrade to the more centrally located city of Kragujevac.3 This move was a clear statement of intent: to establish an indigenous capability for arms production, thereby reducing reliance on foreign powers. On October 27, 1853, this ambition materialized with the casting of the first cannon barrels at the new facility.1 This date is not merely a historical footnote; it is celebrated as the official founding day of Zastava Arms and marks the dawn of Serbia’s domestic arms industry. The initial output consisted of four four-pound cannons and two short howitzers.4
The foundry was initially known as the Topolivnica (Тополивница, Cannon Foundry).1 The critical task of organizing these early operations and training the first generation of Serbian arms craftsmen fell to a French engineer, Charles Loubry (referred to as Lubry in some Serbian sources), who oversaw the casting of a battery of six-pounder cannons. After Loubry’s departure in 1854, Milutin Jovanović assumed leadership, progressing to the production of twelve-pounder cannons.14
The establishment and early development of Zastava Arms were direct consequences of Serbia’s pressing need for military self-reliance in a volatile geopolitical neighborhood. This drive for sovereignty in defense procurement shaped its initial trajectory and institutional character, with the choice of Kragujevac being a deliberate strategic move for a national arsenal. The official narrative emphasizes the goal of achieving Serbia’s “own production of arms and equipment” 3, breaking dependence on foreign suppliers. The era was marked by frequent regional conflicts and the overarching influence of larger European powers, making an independent arms source vital for the Principality, and later Kingdom, of Serbia.
Institutional Framework and Early Technological Prowess
The Topolivnica was intrinsically linked to, and indeed formed the core of, the Vojno-Tehnički Zavod (Војно-технички завод, Military Technical Institute or VTZ) in Kragujevac.8 The VTZ itself was established by a decision of the Serbian government in 1850, with construction spanning from 1851 to 1853.14
The Kragujevac facility rapidly became a beacon of technological advancement in 19th-century Serbia. It housed the nation’s first steam engines, witnessed the first electric light (the first electric bulb in Serbia was illuminated in the Čaurnica / Чаурница, Cartridge Casing Plant, a building within the VTZ complex, in 1884), established the first formal technical school for industrial training, and implemented the first recognized quality control systems.3 This commitment to quality and innovation garnered early international acclaim when the Gun Foundry was awarded several medals at the prestigious Large World Fair in Paris in 1889.3 Between 1856 and 1860, the facilities underwent significant upgrades, enabling the plant to produce weapons with full parts interchangeability, a hallmark of modern manufacturing.4 The Vojno-Tehnički Zavod was more than just an arms factory; it served as a significant catalyst for broader industrial and technological modernization within Serbia. The documented introduction of Serbia’s “first steam engines, first electric light, first technical school, first quality system” at the VTZ 3 highlights its role as an industrial vanguard. The lighting of the first electric bulb in Serbia within the VTZ complex 14 is a symbolic marker of this pioneering status. This indicates that the investment in defense production had spill-over effects, driving technological diffusion and contributing to the overall modernization of the Serbian economy and society.
Pioneering Firearms: From Cannons to the Kokinka Rifle
While cannons were the initial focus, the evolving nature of warfare demanded modern infantry firearms. By 1878, the Serbian military recognized that its existing “Piboduša“ Model 1870 Peabody rifles, with their large 14.9mm caliber, were becoming obsolete, prompting a concerted effort to modernize its armaments.4
Following a research project and competitive tender in 1879, a new rifle design emerged. In 1880, Serbian Major Kosta “Koka” Milovanović, a key figure in Serbian ordnance, developed an updated version of the Mauser Model 1871 bolt-action rifle. This rifle, chambered in a unique 10.15x63mmR Serbian caliber and featuring Milovanović’s innovative “progressive rifling” (where the grooves reduced in diameter from breech to muzzle), became Serbia’s first domestically designed repeating rifle.4
Known officially as the Mauzer Milovanović M.1880, it earned popular monikers such as the “Mauser-Koka” or, more affectionately, the „Kokinka“ (Кокинка).4 While initially manufactured in Germany by Mauser (as the Mauser-Milovanović M1878/80), Zastava Arms is also listed as a manufacturer, suggesting later production or assembly in Kragujevac.15 Approximately 110,000 of these rifles entered the Serbian arsenal and saw their first major combat use in the Serbo-Bulgarian War of 1885.15 The Old Foundry Museum (Muzej Stara Livnica / Музеј Стара Ливница) in Kragujevac prominently features this historic rifle.24 Zastava’s early operational model, characterized by the assimilation of advanced foreign technology (French engineering expertise for cannons, German Mauser rifle designs) coupled with indigenous innovation (Milovanović’s progressive rifling), established a foundational pattern of pragmatic technological development. The engagement of French engineer Charles Loubry for cannon production and training 14 demonstrates an openness to leveraging external expertise. The Mauser-Koka, while based on a German design, incorporated unique Serbian modifications 10, showcasing adaptive innovation. This blend of acquiring proven foreign technologies and adapting them to specific national requirements, while simultaneously nurturing local talent, proved to be a highly effective strategy for a smaller nation seeking to build a credible defense industry.
Arming the Nation: The Balkan Wars and World War I
The Mauser-Koka rifles, including variants converted around 1907 in Kragujevac to fire the 7x57mm Mauser cartridge from a 5-shot magazine (these conversions often referred to as Đurić Mausers / Ђурић-Маузер), were the mainstay of the Serbian infantry during the Balkan Wars (1912-1913) and World War I (1914-1918).15
The Vojno-Tehnički Zavod in Kragujevac served as the primary arsenal, responsible for producing and maintaining weapons for the Serbian army throughout these critical conflicts.3 On the eve of the Great War, Kragujevac, with a population of nearly 17,000, was home to seven industrial enterprises, with the VTZ being by far the most significant.26
During World War I, Serbia faced severe ammunition shortages, a common problem for many belligerents. The crisis was overcome through a combination of factors: crucial aid from Entente allies (primarily France and Russia), ammunition “borrowed” from then-neutral Greece, and, critically, the maximized efforts of domestic production at the Kragujevac works, where ingenuity and intense labor were applied to produce as many shells as possible.28 The Serbian army even had a permanent delegation at the Schneider factory in Creusot, France, to oversee ordnance matters.28 The co-location of a technical school with the foundry 3 points to a far-sighted strategy for developing the human capital necessary to sustain and advance this critical industry.
Interwar Growth and Technological Assimilation (1919 – 1939)
Post-WWI Rejuvenation and Expansion
Following the devastation of World War I and the creation of the Kingdom of Serbs, Croats, and Slovenes (later Yugoslavia), the Vojno-Tehnički Zavod (VTZ) in Kragujevac embarked on a period of significant reconstruction and modernization. The museum guide’s reference to “VTZ između dva rata | Obnova” (VTZ between the two wars | Restoration) underscores this phase of rebuilding and renewed development.3
The factory underwent substantial expansion. By the late 1930s, on the eve of World War II, it had transformed into a veritable “industrial giant,” employing a workforce of nearly twelve thousand individuals and operating approximately ten thousand machines.3 This scale made it one of the largest and most important industrial enterprises in the Balkans. The massive expansion of Zastava’s workforce and machinery during this period cemented its role as a cornerstone of the regional economy in Kragujevac and a significant contributor to national employment and industrial output. Such a large workforce indicates that the factory was a primary economic engine for Kragujevac and the surrounding Šumadija (Шумадија) region. The demand for skilled and semi-skilled labor would have spurred vocational training and created a substantial industrial working class, extending its impact far beyond purely military considerations.
Strategic Alliances: FN Herstal and the Yugoslav Mauser M24
A pivotal development in the interwar period was the establishment of a close partnership with the renowned Belgian arms manufacturer, Fabrique Nationale d’Herstal (FN Herstal). Between 1924 and 1925, the Ministry of the Interior of the Kingdom of Yugoslavia concluded significant contracts with FN Herstal.4
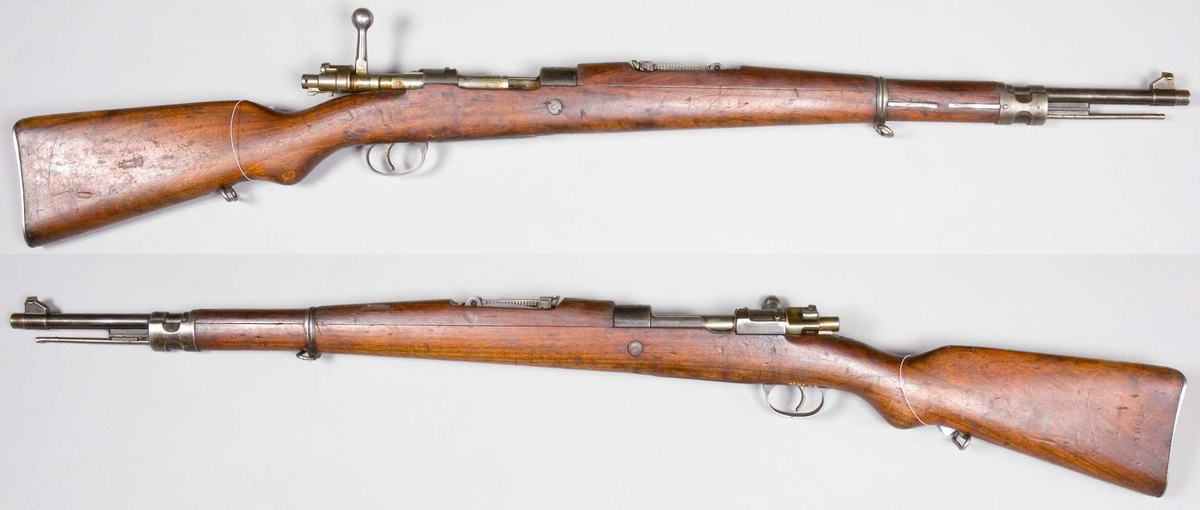
These agreements facilitated the licensed production of the M24 series bolt-action rifles, a Yugoslav variant of the Mauser 98 system, chambered in the standard 7.92x57mm Mauser caliber.4 Yugoslavia became a major adopter and producer of this Mauser pattern, which was a proven and respected military design.11
To accommodate this large-scale production, a new, modern factory dedicated to the manufacture of rifles and infantry ammunition was constructed in Kragujevac. Ammunition production commenced on March 22, 1928, followed by rifle production on October 15, 1928—a date chosen to coincide with the 75th anniversary of the first cannon casting at Kragujevac, symbolizing continuity and progress.4
The M24 rifle became a standard infantry weapon. Notable variants included the Sokolski karabin M.1924 (Соколски карабин М.1924, Sokol carbine M.1924), a slightly shorter version designed for youth paramilitary training and target practice, and the Jurišna puška M.1924 ČK (Јуришна пушка М.1924 ЧК, Assault rifle M.1924 ČK), designed for specialized assault units, featuring a bent bolt handle and additional sling swivels.16 Bayonets produced for these rifles at the Kragujevac arsenal were typically marked “BT3” (VTZ Cyrillic).30
The interwar era was transformative for Zastava, marking its maturation into a large-scale industrial enterprise capable of mass-producing modern weaponry. This was achieved through a deliberate strategy of acquiring proven foreign technologies via licensing agreements. The contracts with FN Herstal for the M24 Mauser rifle were not merely for a design blueprint but involved establishing comprehensive production lines for both rifles and ammunition.4 This implies a significant transfer of manufacturing technology and quality control processes from a leading European arms maker, allowing for rapid modernization of the Yugoslav military’s arsenal.
Diversification through Czechoslovakian Licenses
Beyond the Belgian collaboration, Zastava also looked to other advanced European arms industries for technology. In 1930, the factory secured a license from Czechoslovakia to produce 26 mm M 1929 signal pistols.4
Furthering this relationship, in July 1936, Zastava obtained a license from the prominent Czechoslovakian arms manufacturer Zbrojovka Brno (Збројовка Брно) to manufacture their highly regarded ZB vz. 26 light machine gun. This weapon, chambered in 7.92x57mm Mauser, was designated the M 1937 in Yugoslav service.4 Approximately 5,000 of these light machine guns were produced by Zastava.11 This strategy of “technology assimilation” allowed the Kingdom of Yugoslavia to equip its forces with reliable, contemporary weapons relatively quickly, enhancing its defense posture in an increasingly unstable Europe.
Nascent Automotive Activities
While this report focuses on Zastava Arms, it is pertinent to note that the broader Zastava industrial complex in Kragujevac also began to engage in automotive assembly during this period, primarily for military needs. In 1930, Ford trucks were assembled for the Yugoslav Army, and in 1939, assembly of Chevrolet military trucks commenced.8 These early forays into vehicle production laid the groundwork for what would eventually become the separate entity of Zastava Automobili.
Under Fire: Zastava Arms in World War II (1939 – 1945)
Cessation of Operations under Occupation
The outbreak of World War II and the subsequent Axis invasion of Yugoslavia in April 1941 brought a sudden and brutal halt to the burgeoning operations at the Vojno-Tehnički Zavod in Kragujevac. Production ceased as the country was overrun and occupied.8
The city of Kragujevac, home to this vital arsenal, suffered grievously under occupation. A particularly horrific event was the Kragujevac Massacre of October 20-21, 1941, where German occupation forces, as a reprisal for partisan attacks, executed thousands of civilian men and boys from the city and surrounding areas.31 While the sources do not explicitly state that Zastava workers were singled out, the massacre decimated the local male population from which the factory drew its workforce, casting a dark shadow over the city and the plant.
Wartime Damage and Destruction
Throughout the war, Zastava Arms (then VTZ) sustained heavy damage.3 As a key military-industrial asset, it would have been a strategic target for various warring factions.
Liberation and Swift Resumption of Production
The city of Kragujevac was liberated from Axis occupation on October 21, 1944, by Yugoslav Partisan forces.4 Demonstrating its critical importance to the newly emerging Yugoslav authorities, the Zastava weapons factory was rapidly repaired and brought back into working order within a matter of months following liberation.4
Production recommenced almost immediately. The first firearm to be developed and produced in this new post-liberation phase was the 9mm M 1944 B2 submachine gun, a design initiated in the very same year as the liberation, 1944.4 This quick turnaround underscores the urgency of re-establishing arms production.
The alacrity with which the Zastava factory was repaired and production restarted post-liberation, even amidst the widespread chaos and devastation of war’s end, underscores its paramount strategic value to the nascent communist-led Yugoslav state. This urgency was likely driven by the immediate need to arm the victorious Partisan forces, consolidate control, and lay the foundations for national defense in a volatile post-war European landscape. The phrases “repaired to working order within months” and “production began shortly after” 4 signify a high-priority effort. The immediate development of the M 1944 B2 submachine gun 4 points to a clear focus on equipping forces for ongoing or anticipated needs. This mirrors the factory’s original founding principle: the imperative of indigenous arms production for national security.
The wartime experience of occupation, the brutal Kragujevac Massacre, and the extensive damage to the factory likely had a profound psychological and strategic impact, further solidifying Yugoslavia’s post-war commitment to military self-reliance. The trauma of events like the Kragujevac Massacre 31 and the vulnerability exposed by “heavy damage” 4 would have served as powerful motivators to ensure future defense capabilities were domestically controlled. This may have influenced design philosophies towards weapons that were robust, reliable, and suitable for mass production, as seen in some later Zastava products like the M70 rifle, known for its ruggedness.21
The Red Star Rises: Zavodi Crvena Zastava in SFR Yugoslavia (1945 – 1991)
A New Name for a New Era: Zavodi Crvena Zastava
Following World War II and the establishment of the Socialist Federal Republic of Yugoslavia (SFRY) under Marshal Tito, the Zastava industrial complex in Kragujevac was nationalized and renamed Zavodi Crvena Zastava (Заводи Црвена Застава), meaning “Red Flag Factories”.1 This symbolic renaming, utilizing a potent communist emblem, reflected the new socialist political order and the factory’s integration into the state-controlled economy, emphasizing its role in serving the collective and the Jugoslovenska Narodna Armija (JHA / Југословенска народна армија, ЈНА, Yugoslav People’s Army).4
Iconic Firearms Production
The post-war era saw Zastava produce some of its most iconic and widely recognized firearms, becoming a cornerstone of Yugoslav defense and a significant exporter.
- M48 Rifle: Building on its Mauser expertise, Zastava began production of the 7.92x57mm Mauser Model 1948 rifle.3 This rifle, based on the earlier M24 and the German Kar98k, became the standard service rifle of the JNA from the early 1950s until it was gradually replaced by the M59/66 semi-automatic rifle.38 Several variants were produced, including the M48 (all machined parts), M48A (incorporating some stamped parts like the magazine floor plate to speed production and lower cost), M48B (additional stamped parts, intended for export), and M48BO (bez oznake / без ознаке, unmarked, for export).11
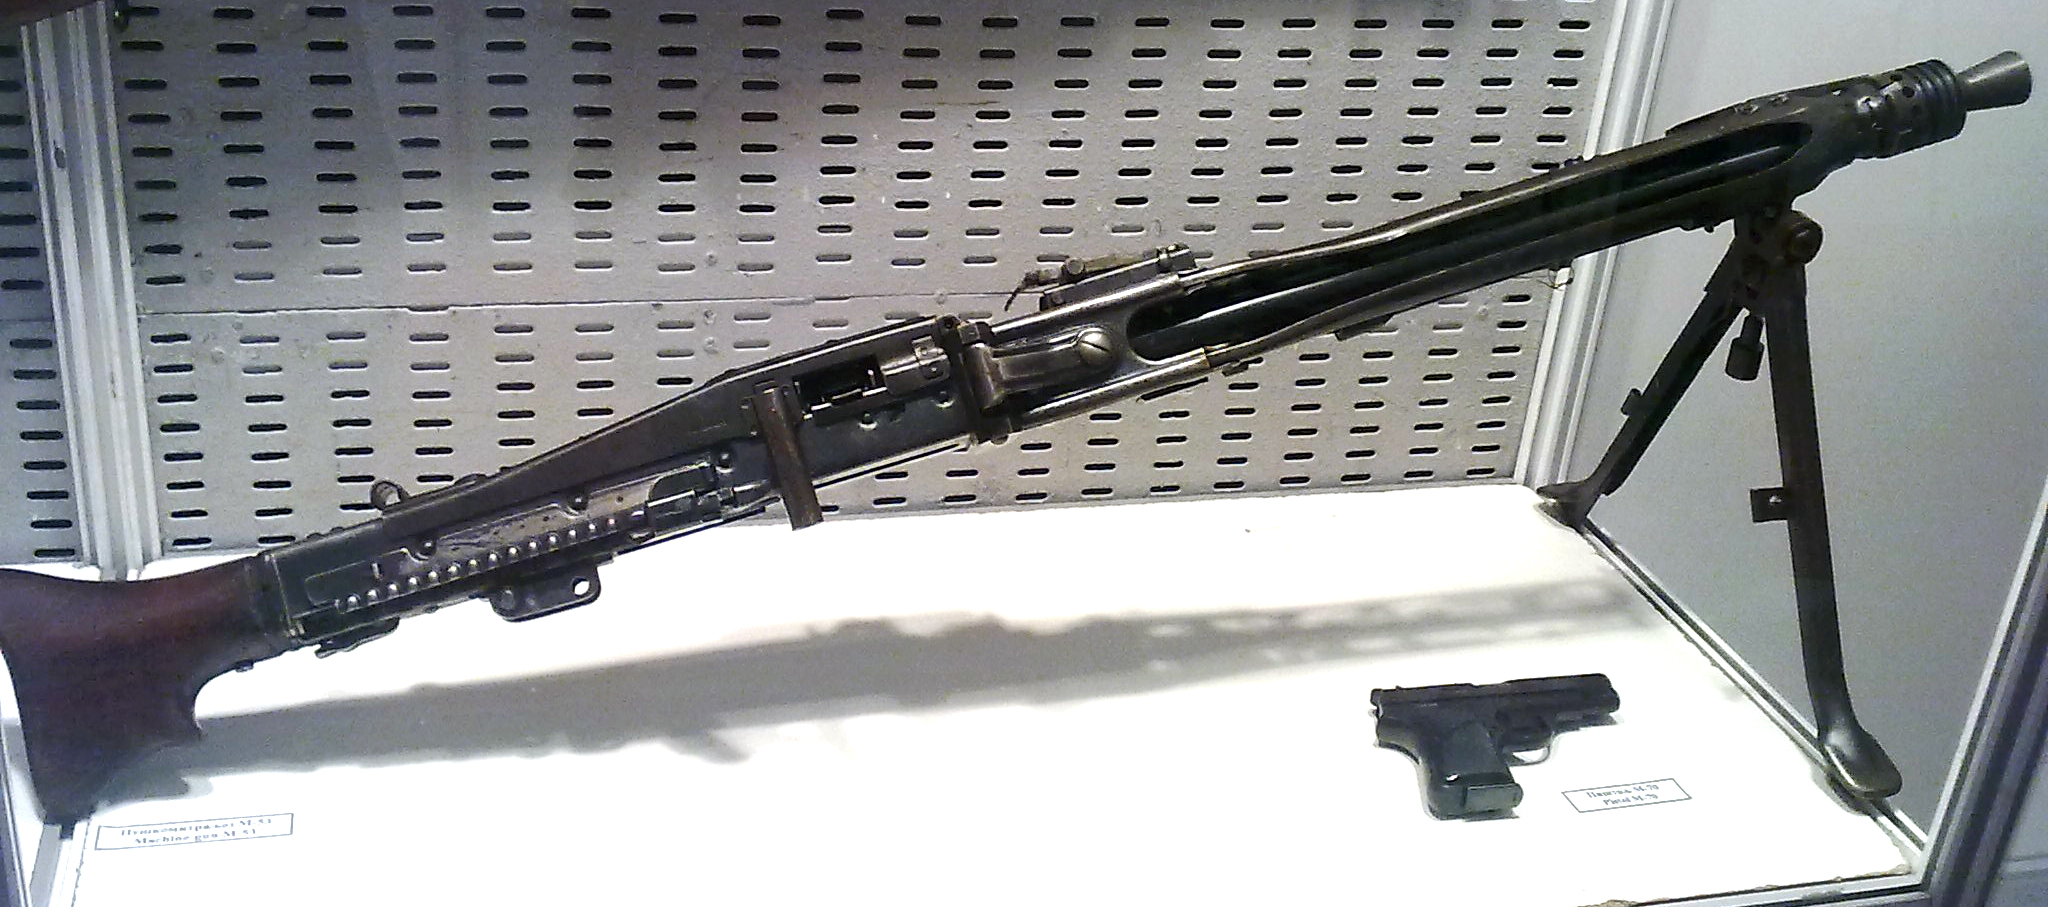
- M53 Šarac (Шарац) Machine Gun: In 1954, Zastava commenced production of the 7.9mm M53 Šarac machine gun.4 This weapon was a near-identical copy of the formidable German MG42 general-purpose machine gun from World War II. Yugoslavia utilized captured German machinery and technical data to produce the M53, retaining the original 7.92x57mm Mauser caliber, which remained in widespread Yugoslav service alongside Soviet calibers.12 A key modification was a reduction in the cyclic rate of fire to around 950 rounds per minute, compared to the MG42’s 1,200 RPM, making the M53 more controllable.12 Captured MG42s refurbished to this standard were designated M53/42.39
- PAP M59 Semi-Automatic Rifle: As infantry doctrine evolved, Zastava began batch production of the 7.62x39mm Poluautomatska puška M59 (Полуаутоматска пушка M59, Semi-automatic rifle M59), commonly known as the PAP M59, in 1964.4 This rifle was a Yugoslav-produced version of the Soviet SKS carbine. A notable variant, the M59/66, incorporated an integral 22mm NATO-standard grenade launcher and a flip-up grenade sight.11
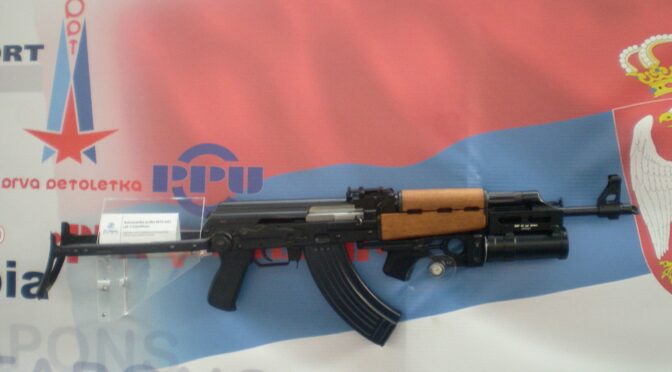
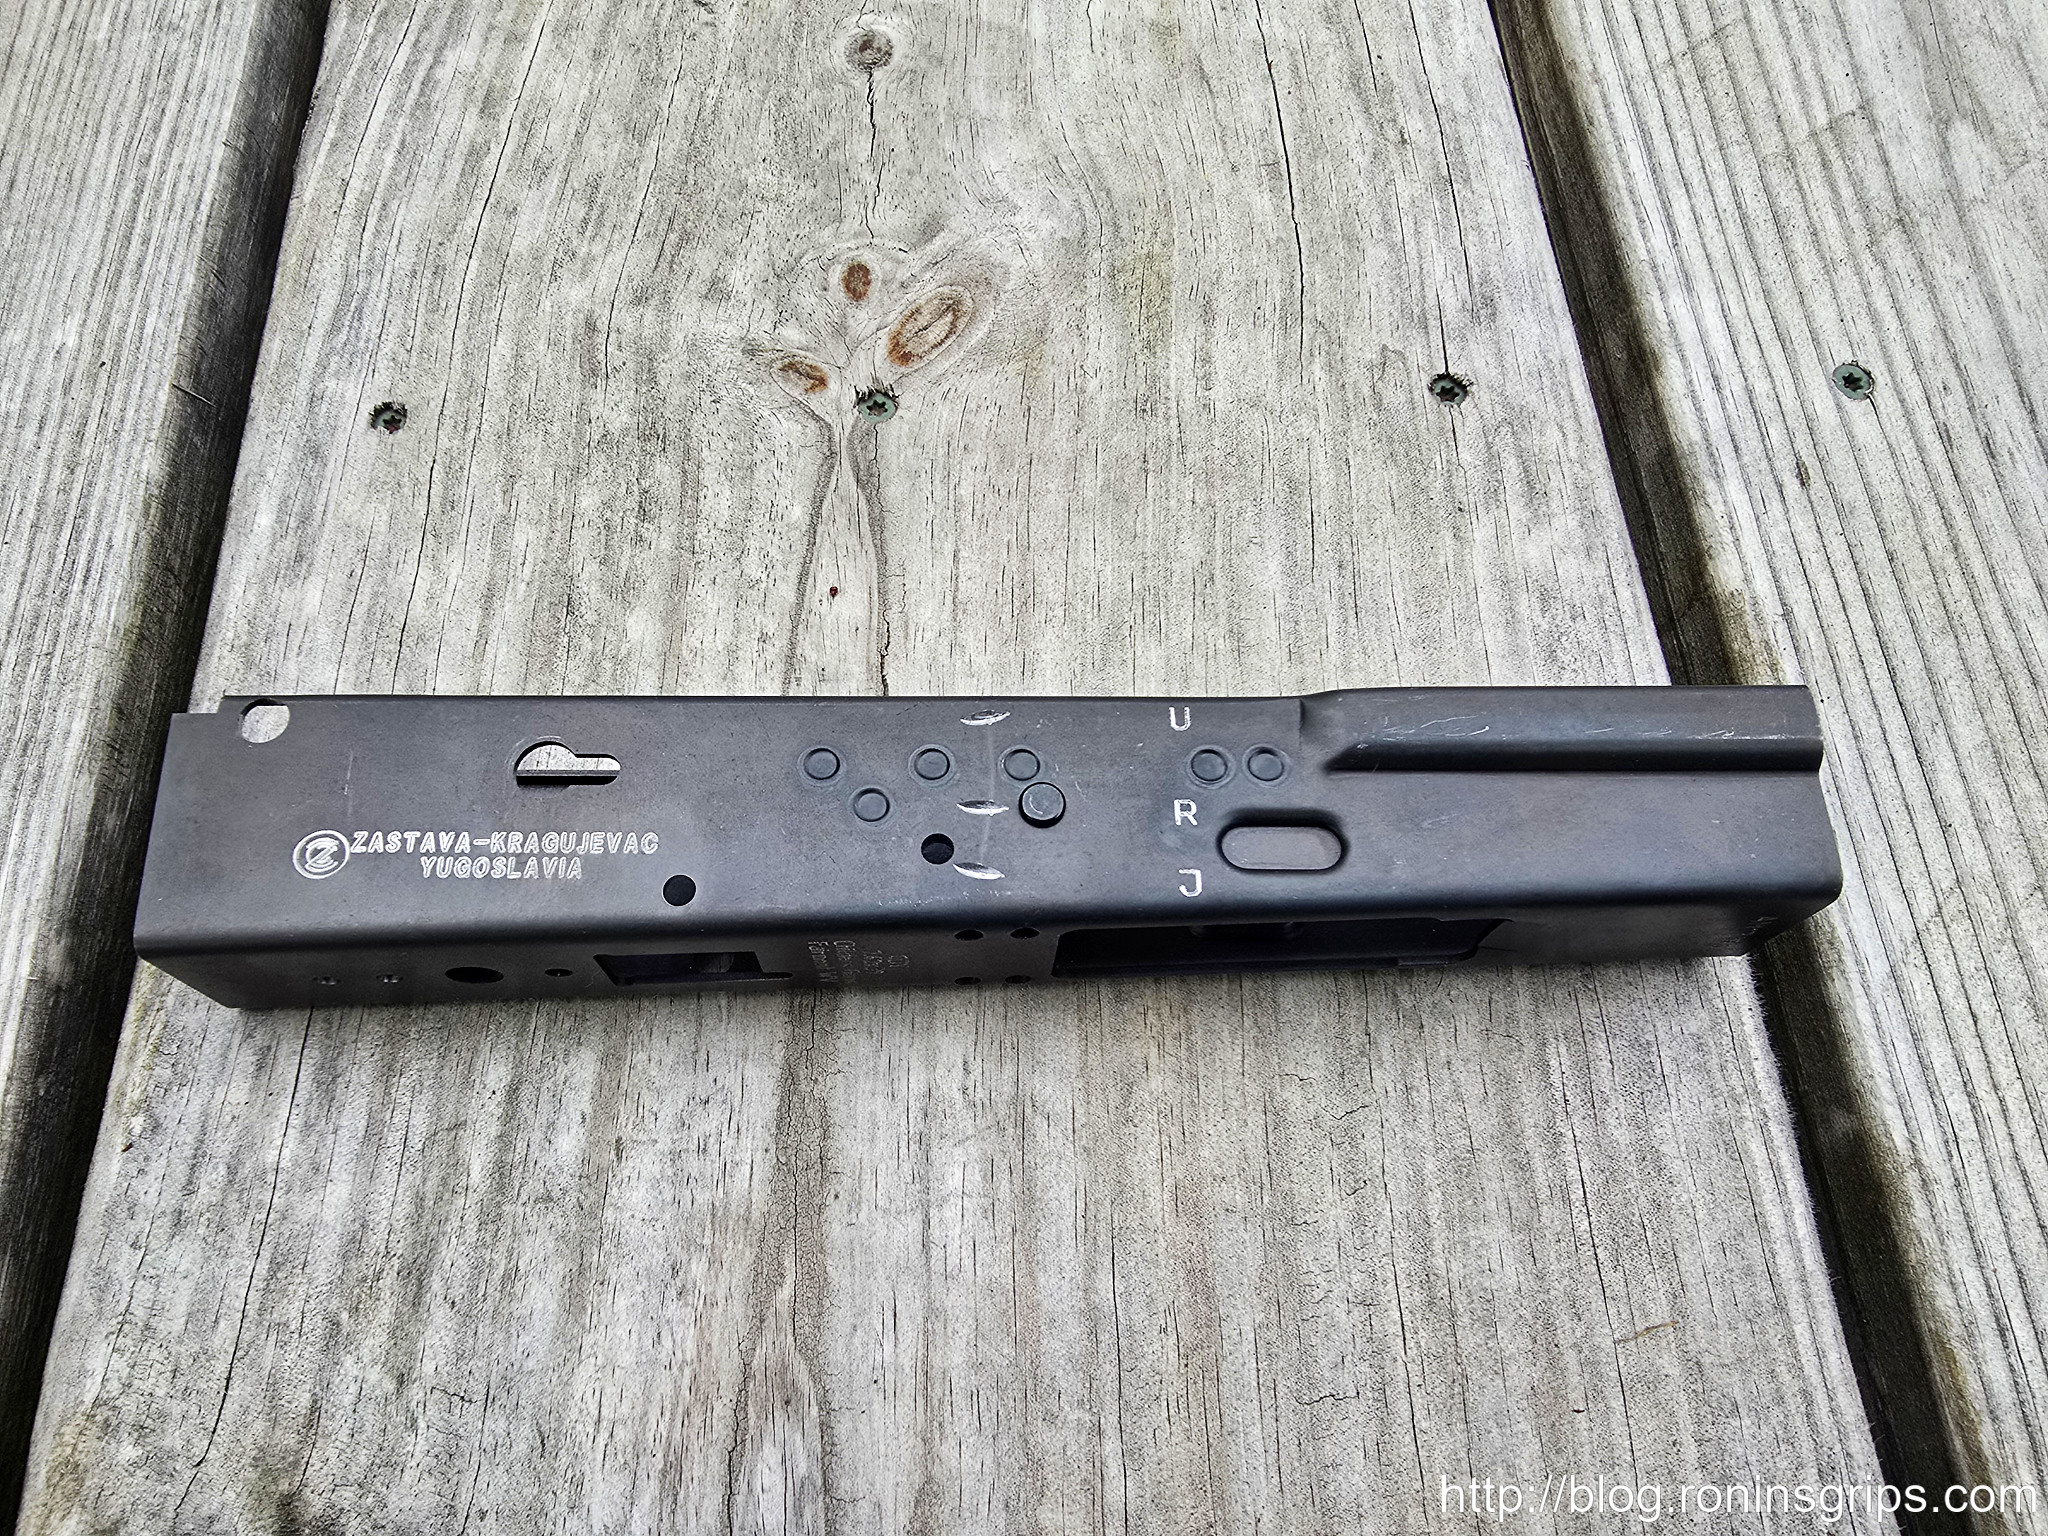
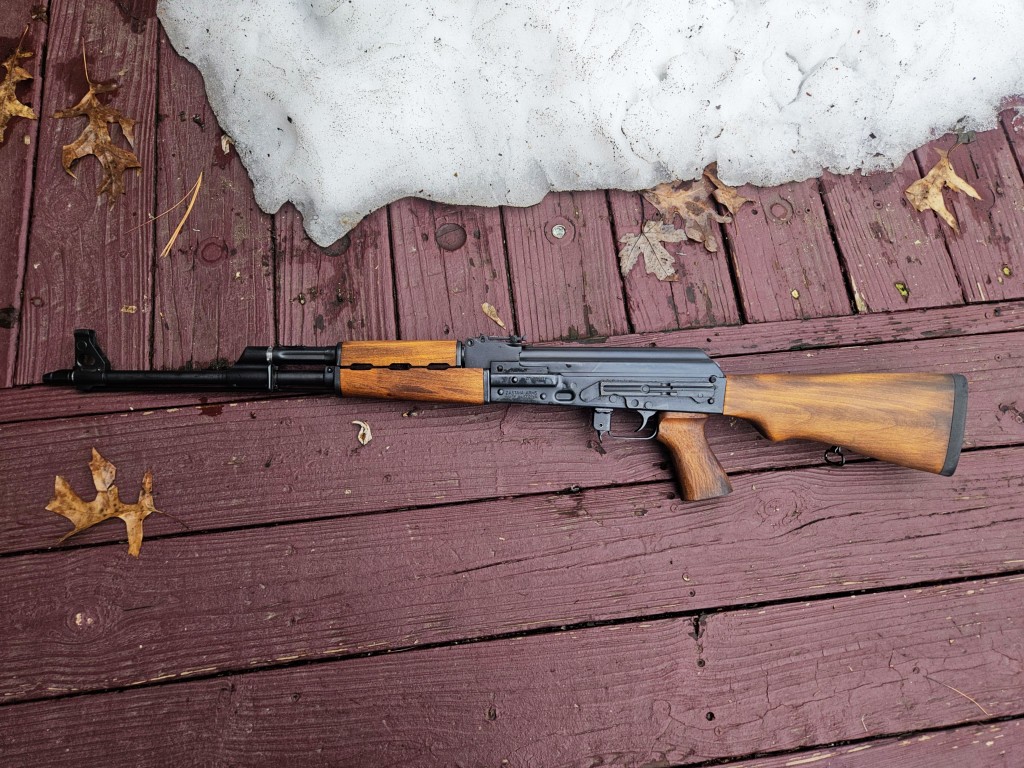
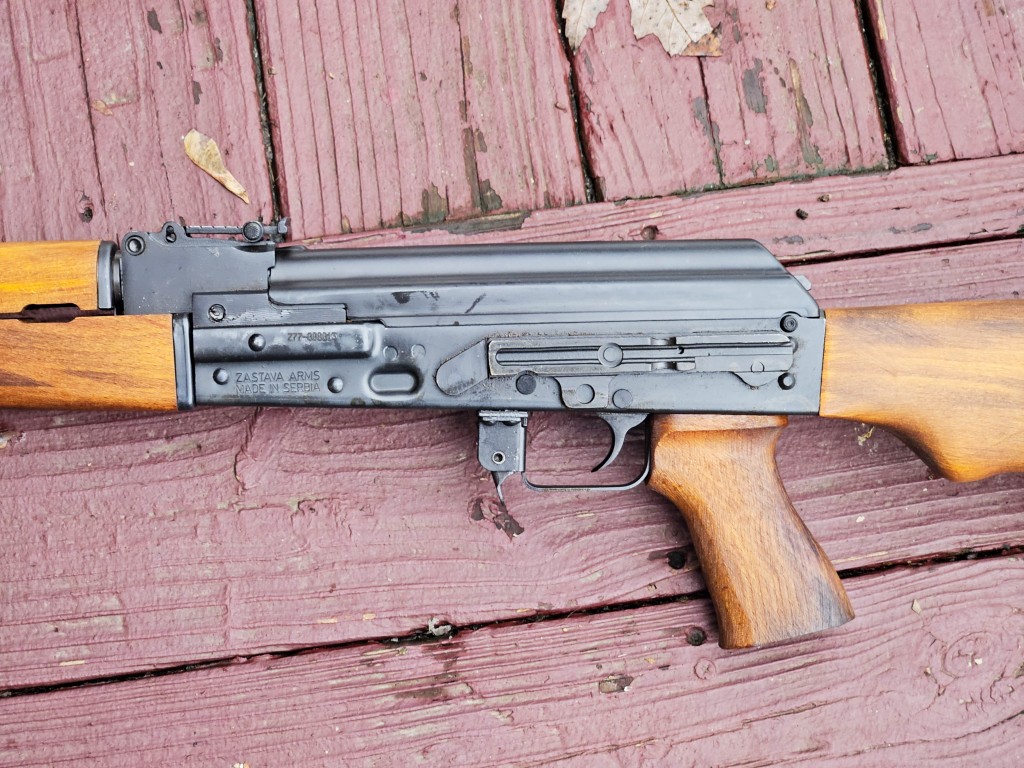
- M70 Assault Rifle Family: Perhaps Zastava’s most famous product line, the M70 assault rifle family, emerged from Yugoslavia’s independent military development path. Development of an automatic rifle based on the Kalashnikov (AK-47) system began in 1964, initially designated the M67 in 1967.4 The Zastava M70, an unlicensed derivative of the Soviet AK-47 (specifically the Type 3 milled receiver variant), was subsequently developed in the 7.62x39mm caliber.4 Due to political differences between Yugoslavia and the Soviet Union, particularly Yugoslavia’s refusal to join the Warsaw Pact, Zastava was unable to obtain official technical specifications and instead reverse-engineered the AK design.17
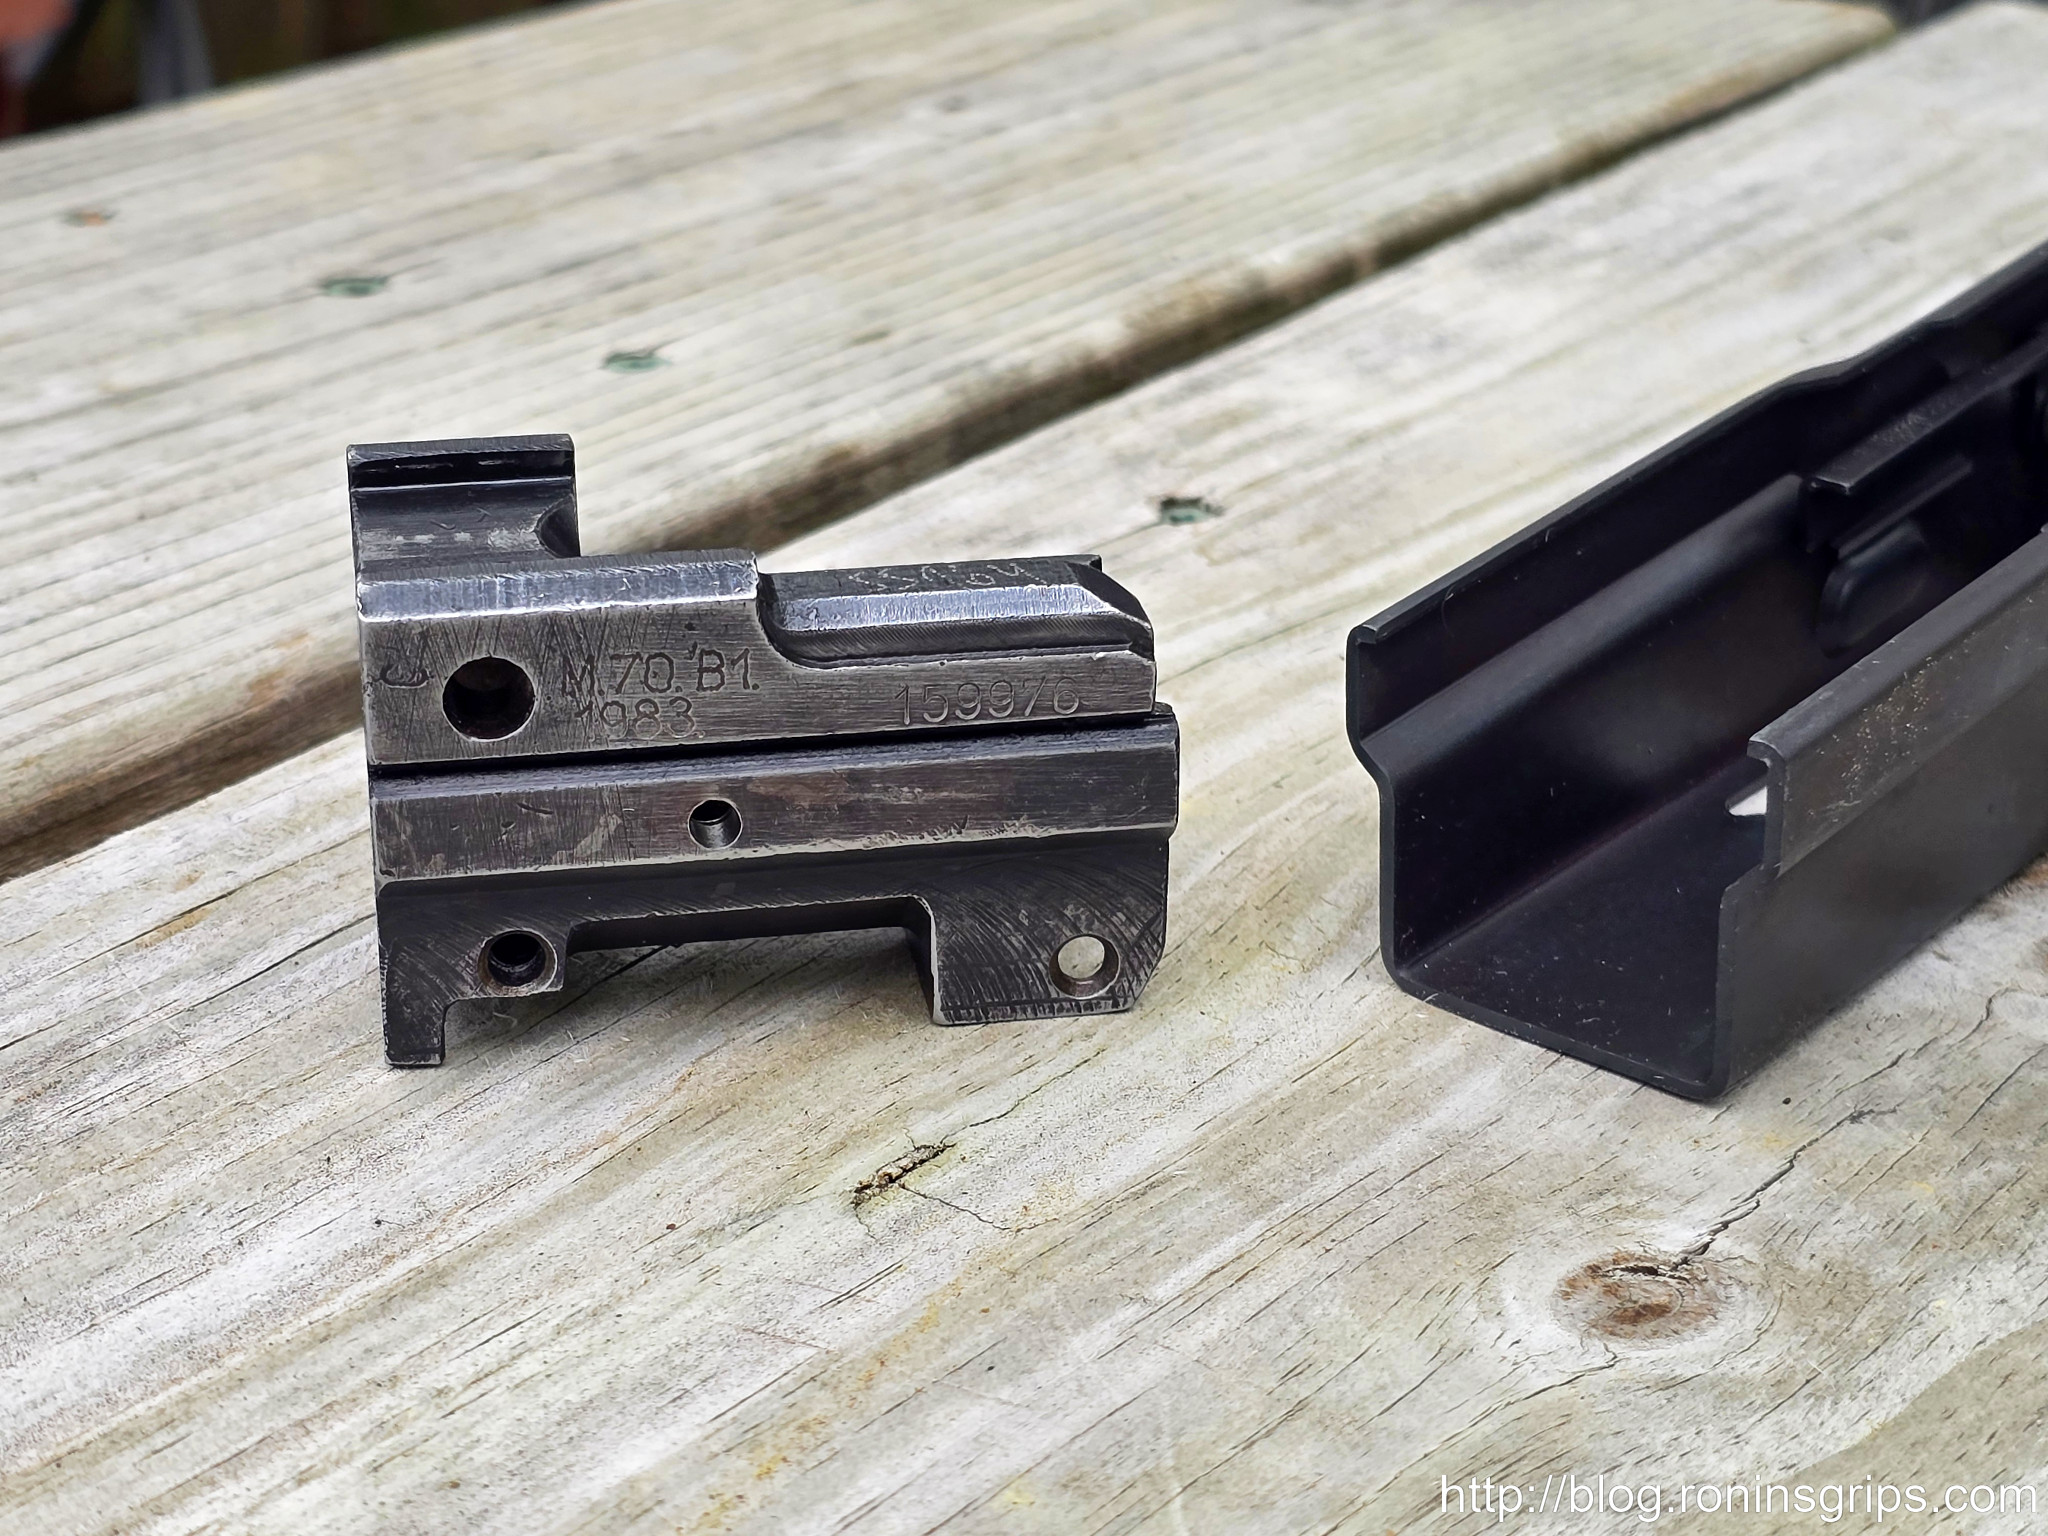
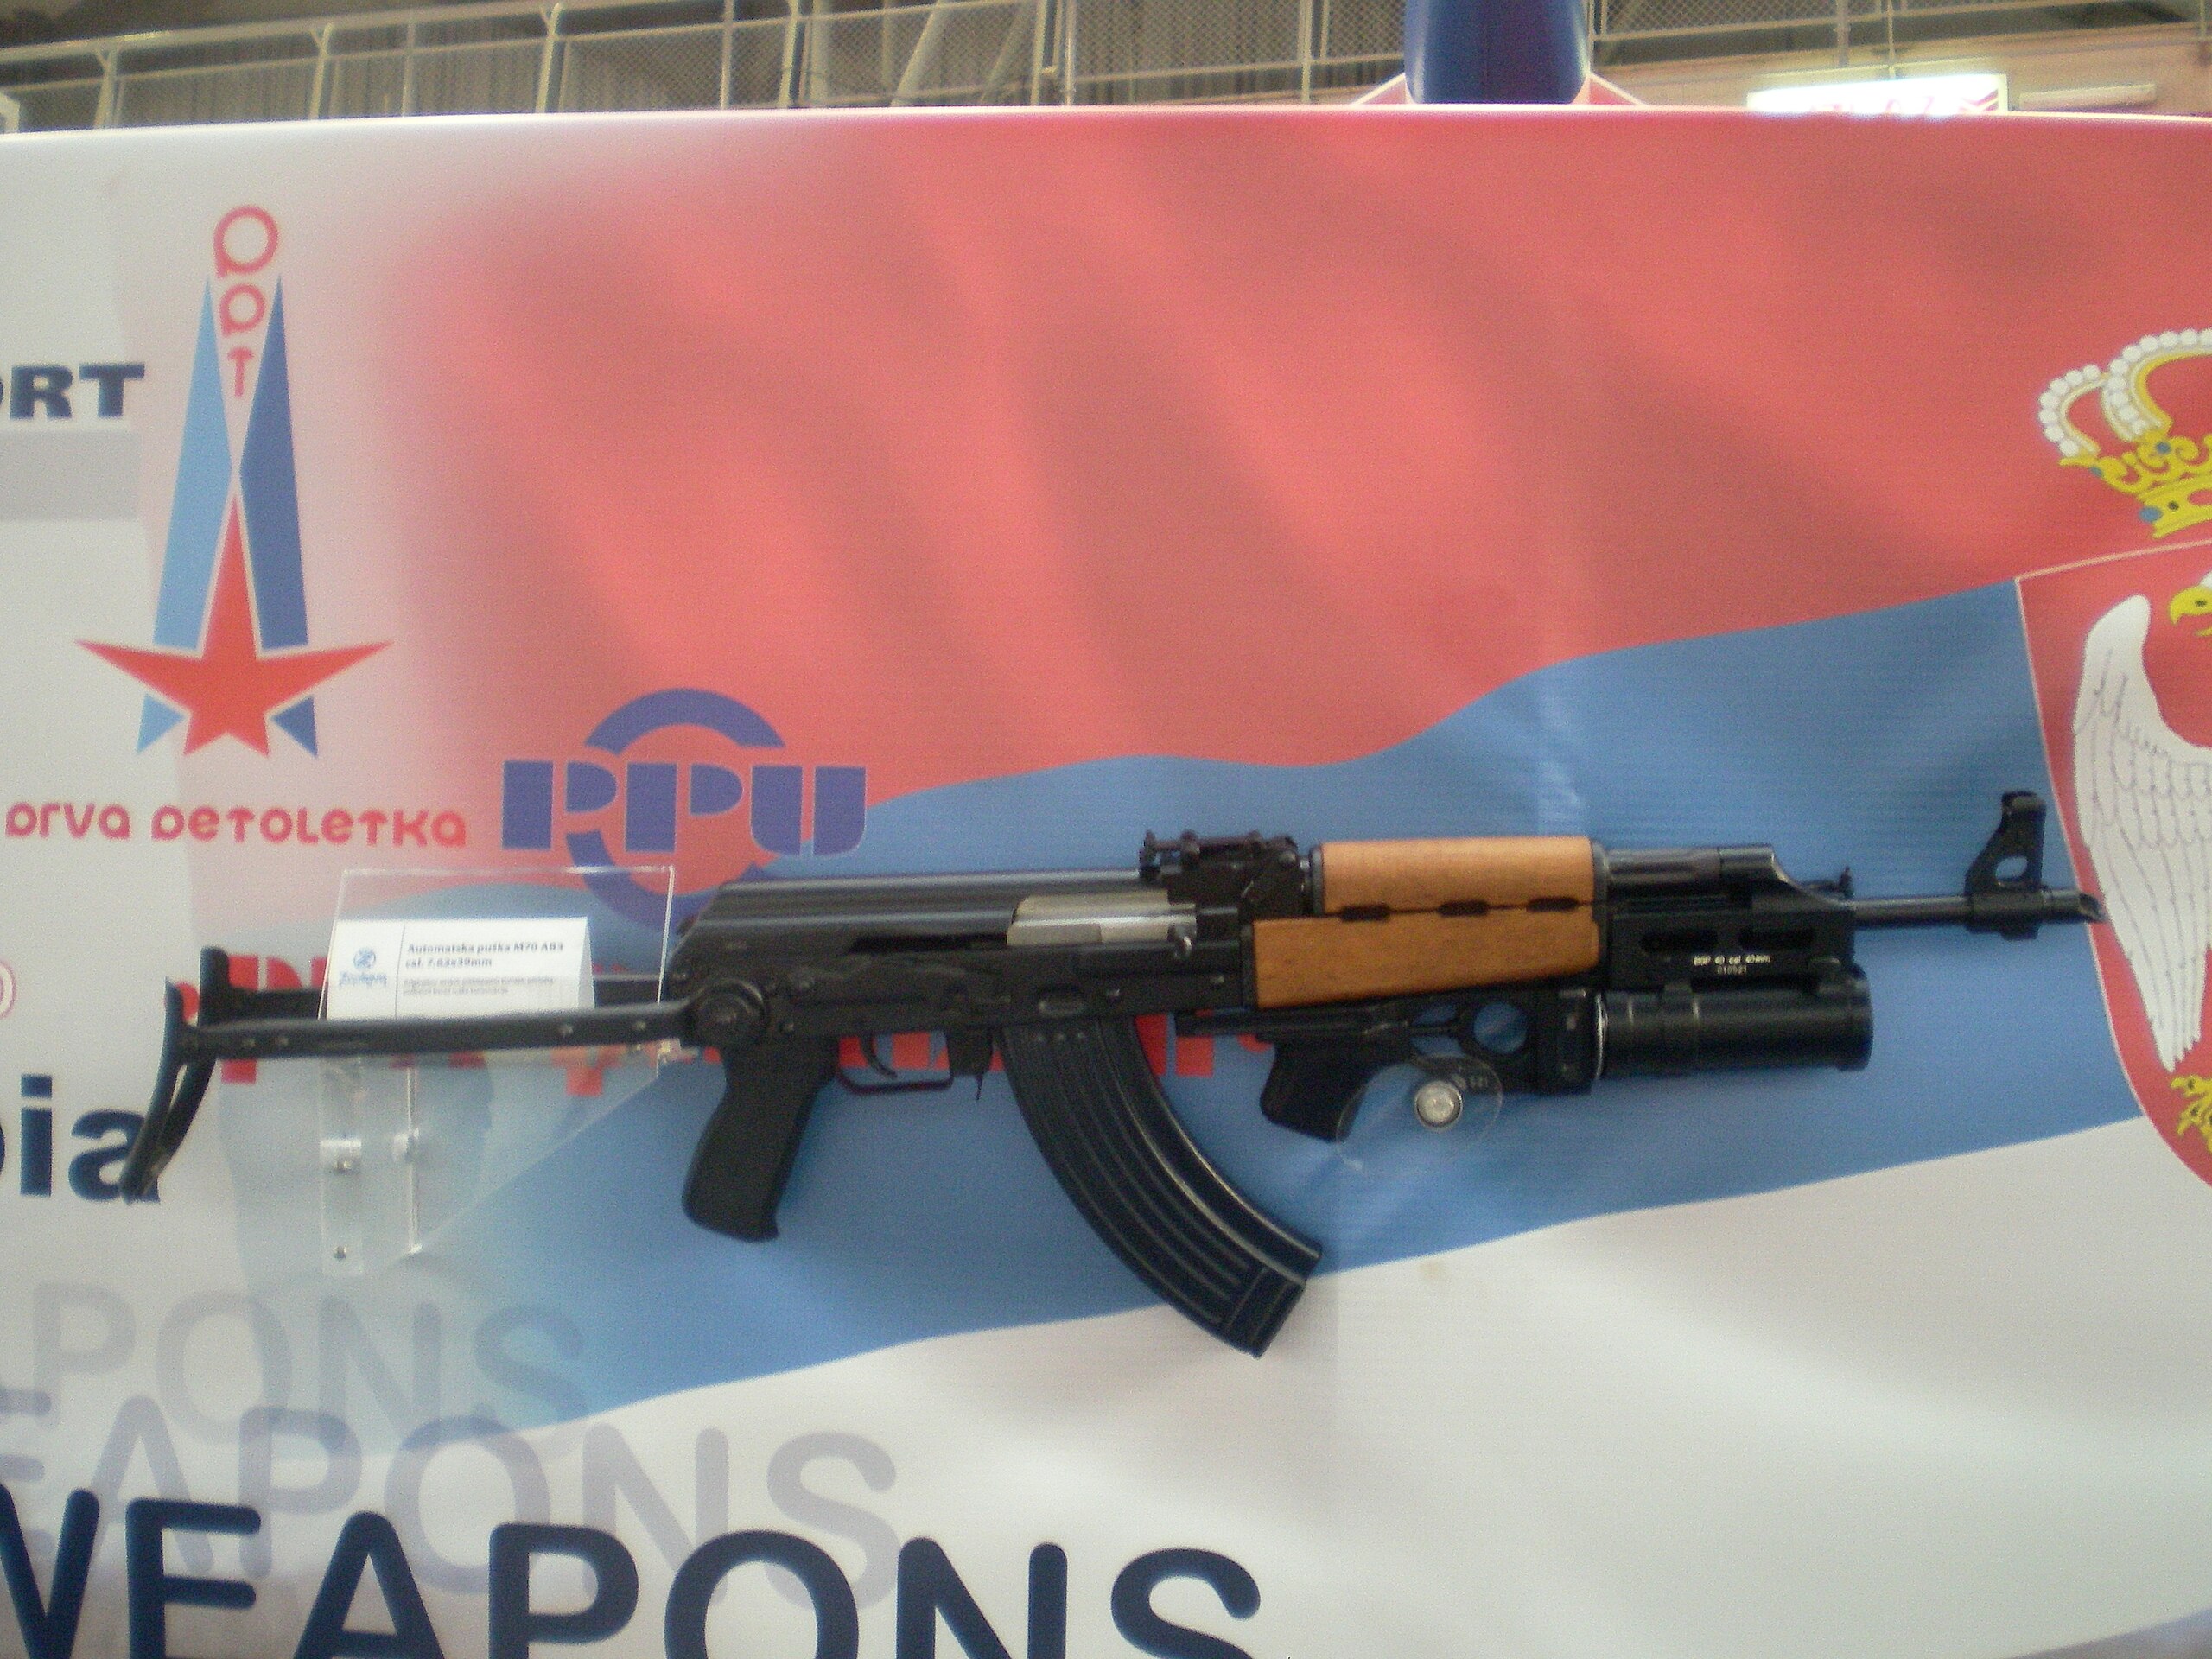
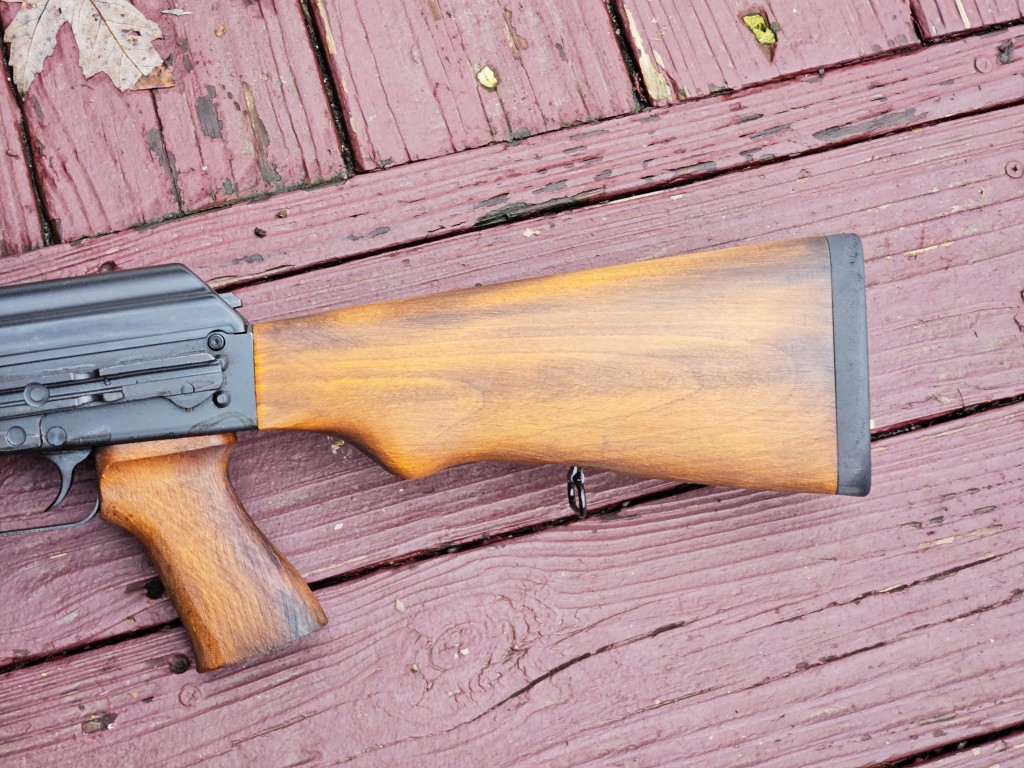
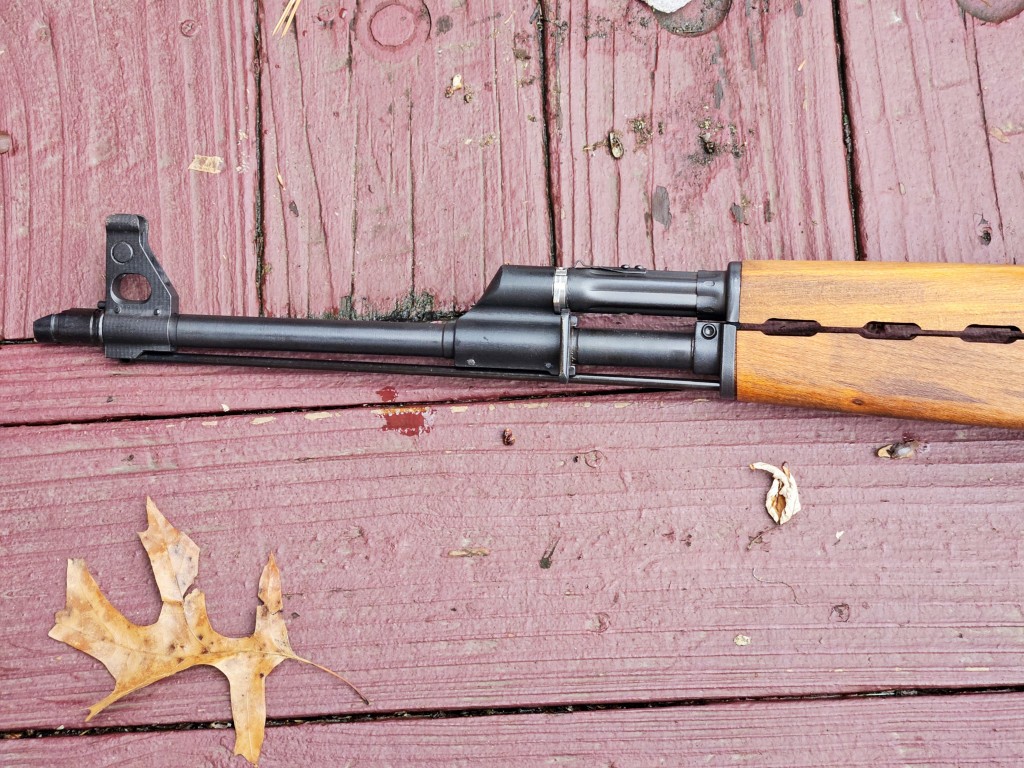
The JNA officially adopted the M70 assault rifle into its arsenal in 1970.4 The Yugoslav M70 incorporated several unique features distinguishing it from Soviet AKs, including a grenade launching sight bracket mounted on the gas block (which also functioned as a gas cut-off when raised for grenade launching), a thicker receiver (initially milled, later stamped), and often, teak wood furniture.17 Later versions, such as the M70B1 and M70AB2 (folding stock), featured stamped receivers, with some incorporating heavier RPK-style bulged trunnions for increased durability, especially for grenade launching.17 Zastava also produced derivatives of the M70 chambered in Western bloc ammunition, such as the M77 in 7.62x51mm NATO and models in 5.56x45mm NATO, for export.4 - Other Military Arms: The factory’s output during this period also included the M56 submachine gun, which bore a close resemblance to the German MP40 and was chambered in 7.62x25mm Tokarev 4; the M49 submachine gun, a design that synthesized elements of the Soviet PPSh-41 and the Italian Beretta Model 38 11; the M57 pistol, a Yugoslav derivative of the Soviet Tokarev TT-33 pistol, also in 7.62x25mm 4; and the M70 pistol (distinct from the rifle), a compact handgun chambered in.32 ACP (7.65mm Browning).4
Zastava’s arms production during the SFR Yugoslavia era clearly reflects the country’s unique non-aligned geopolitical stance. The decision to utilize and adapt both Eastern bloc (AK-47, SKS) and Western-influenced (Mauser, MG42 concepts) arms technologies, and even to develop unique hybrids or derivatives, demonstrates a pragmatic approach to defense procurement and industrial development. This strategy allowed Yugoslavia to avoid sole reliance on one superpower bloc, maintaining a degree of military autonomy. The production of the M70 as an unlicensed derivative, born out of political rifts with the USSR 17, particularly underscores Yugoslavia’s independent path. Furthermore, the development of weapon variants in NATO calibers 4 suggests a forward-thinking approach towards export markets or ensuring compatibility beyond Warsaw Pact standards, aligning with its non-aligned status and economic needs.
Development of Hunting and Sporting Arms
Alongside its military production, Zavodi Crvena Zastava significantly developed its line of hunting and sporting firearms. This diversification was likely a strategic move to utilize existing manufacturing capacity more fully, generate vital foreign currency through exports, and cater to a growing civilian market, thereby reducing the factory’s sole dependence on fluctuating military contracts.
Production of air rifles and sporting rifles, often based on the robust M48 Mauser rifle action, began as early as 1953.3 In 1954, Zastava further expanded its civilian offerings to include shotguns and small-bore rifles.3
The LK M70 hunting rifle (Lovački Karabin M70 / Ловачки Карабин М70), typically built on a Mauser 98-pattern action, became a particularly well-known and respected civilian product, offered in a variety of popular hunting calibers.4 Other sporting rifles, such as the M85 (a mini-Mauser action for smaller cartridges), were also developed and found success in domestic and international markets.22 The efficiency of basing many of these civilian arms on existing, proven military actions, like the Mauser, streamlined production and maintained a reputation for reliability. Exports of these hunting and sporting weapons became an increasingly important part of Zastava’s business.3
Technology Transfer
The official Zastava Arms website notes that “Years of experience in the field of development of products, technology and capacities created conditions for the transfer of technology to other countries”.3 While specific examples of Zastava Arms licensing its own designs for production in other countries during the SFRY period are not extensively detailed in the provided materials, the statement implies that such transfers were considered or occurred. The primary mode of technology interaction during this era appears to be Zastava receiving and adapting foreign technologies (e.g., Mauser, SKS, AK-47). However, the experience gained in mass-producing these adapted designs would have built considerable institutional knowledge and capacity, potentially laying the groundwork for later technology exports or licensed production agreements with other nations, particularly within the Non-Aligned Movement or other friendly states.
Weathering the Storm: Dissolution, Sanctions, and Bombing (1991 – 1999)
The Impact of the Yugoslav Wars (1991-1999)
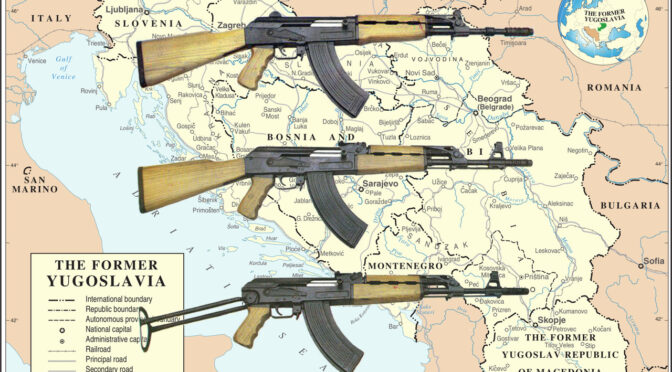
The violent dissolution of the Socialist Federal Republic of Yugoslavia, beginning in 1991 and continuing through a series of brutal conflicts until 1999 (and beyond in some aspects), created immense instability that directly and profoundly impacted Zastava’s operations, its traditional markets, and its supply chains.11 As the primary arms manufacturer for the JNA and a supplier to various republican territorial defense forces, Zastava weapons, particularly the ubiquitous M70 assault rifle and its variants, were widely used by all factions involved in the Yugoslav Wars.17 The M53 machine gun also saw widespread use during these conflicts.39 The breakup effectively shattered Zastava’s large, unified domestic market.
UN Sanctions and Their Effect on Operations
In response to the conflicts, the United Nations imposed comprehensive economic sanctions, including an arms embargo, on the Federal Republic of Yugoslavia (FRY), which then consisted of Serbia and Montenegro.4 These sanctions, which were in effect for significant periods during the Yugoslav Wars (notably Resolution 757 in 1992 and subsequent resolutions), severely hampered Zastava’s ability to legally export its products, import necessary raw materials or specialized components, and maintain its international business relationships.4 Production inevitably slowed as a result of these restrictions. The experience of Zastava Automobili, which saw exports halted and parts supply disrupted 8, would have been mirrored, if not amplified, at Zastava Arms due to the direct applicability of the arms embargo.
This period represented an existential threat to Zastava Arms. The combination of losing its primary domestic market (the unified Yugoslav state), severe disruption to supply chains and export capabilities due to international sanctions, and ultimately direct physical destruction from NATO bombing, would have been insurmountable for most industrial enterprises. The fact that Zastava Arms continued to operate, and even managed to develop new products under such dire circumstances, speaks volumes about its deeply embedded strategic importance to the Serbian state and an almost wartime operational footing.
NATO Intervention and Damage to the Kragujevac Facilities (1999)
The Kosovo War, which escalated in 1998-1999, led to direct military intervention by the North Atlantic Treaty Organization (NATO). From March 24 to June 10, 1999, NATO conducted an extensive aerial bombing campaign against military and strategic targets in the Federal Republic of Yugoslavia.13
The Zastava factory complex in Kragujevac, being a critical component of Yugoslavia’s defense industry, was specifically targeted and sustained significant damage from NATO airstrikes.4 Reports indicate that the Zastava kovačnica (Застава ковачница, Zastava Forge) was bombed on April 9, 1999.18 The company’s Shotgun Shop was also reportedly destroyed during the bombing and was not subsequently restored.11 The NATO bombing, while aimed at degrading military-industrial capacity, inadvertently created a situation where significant rebuilding and, consequently, opportunities for modernization would become a necessity for Zastava in the post-conflict era.
Continued Product Development (Pre-Bombing/During Early Conflicts)
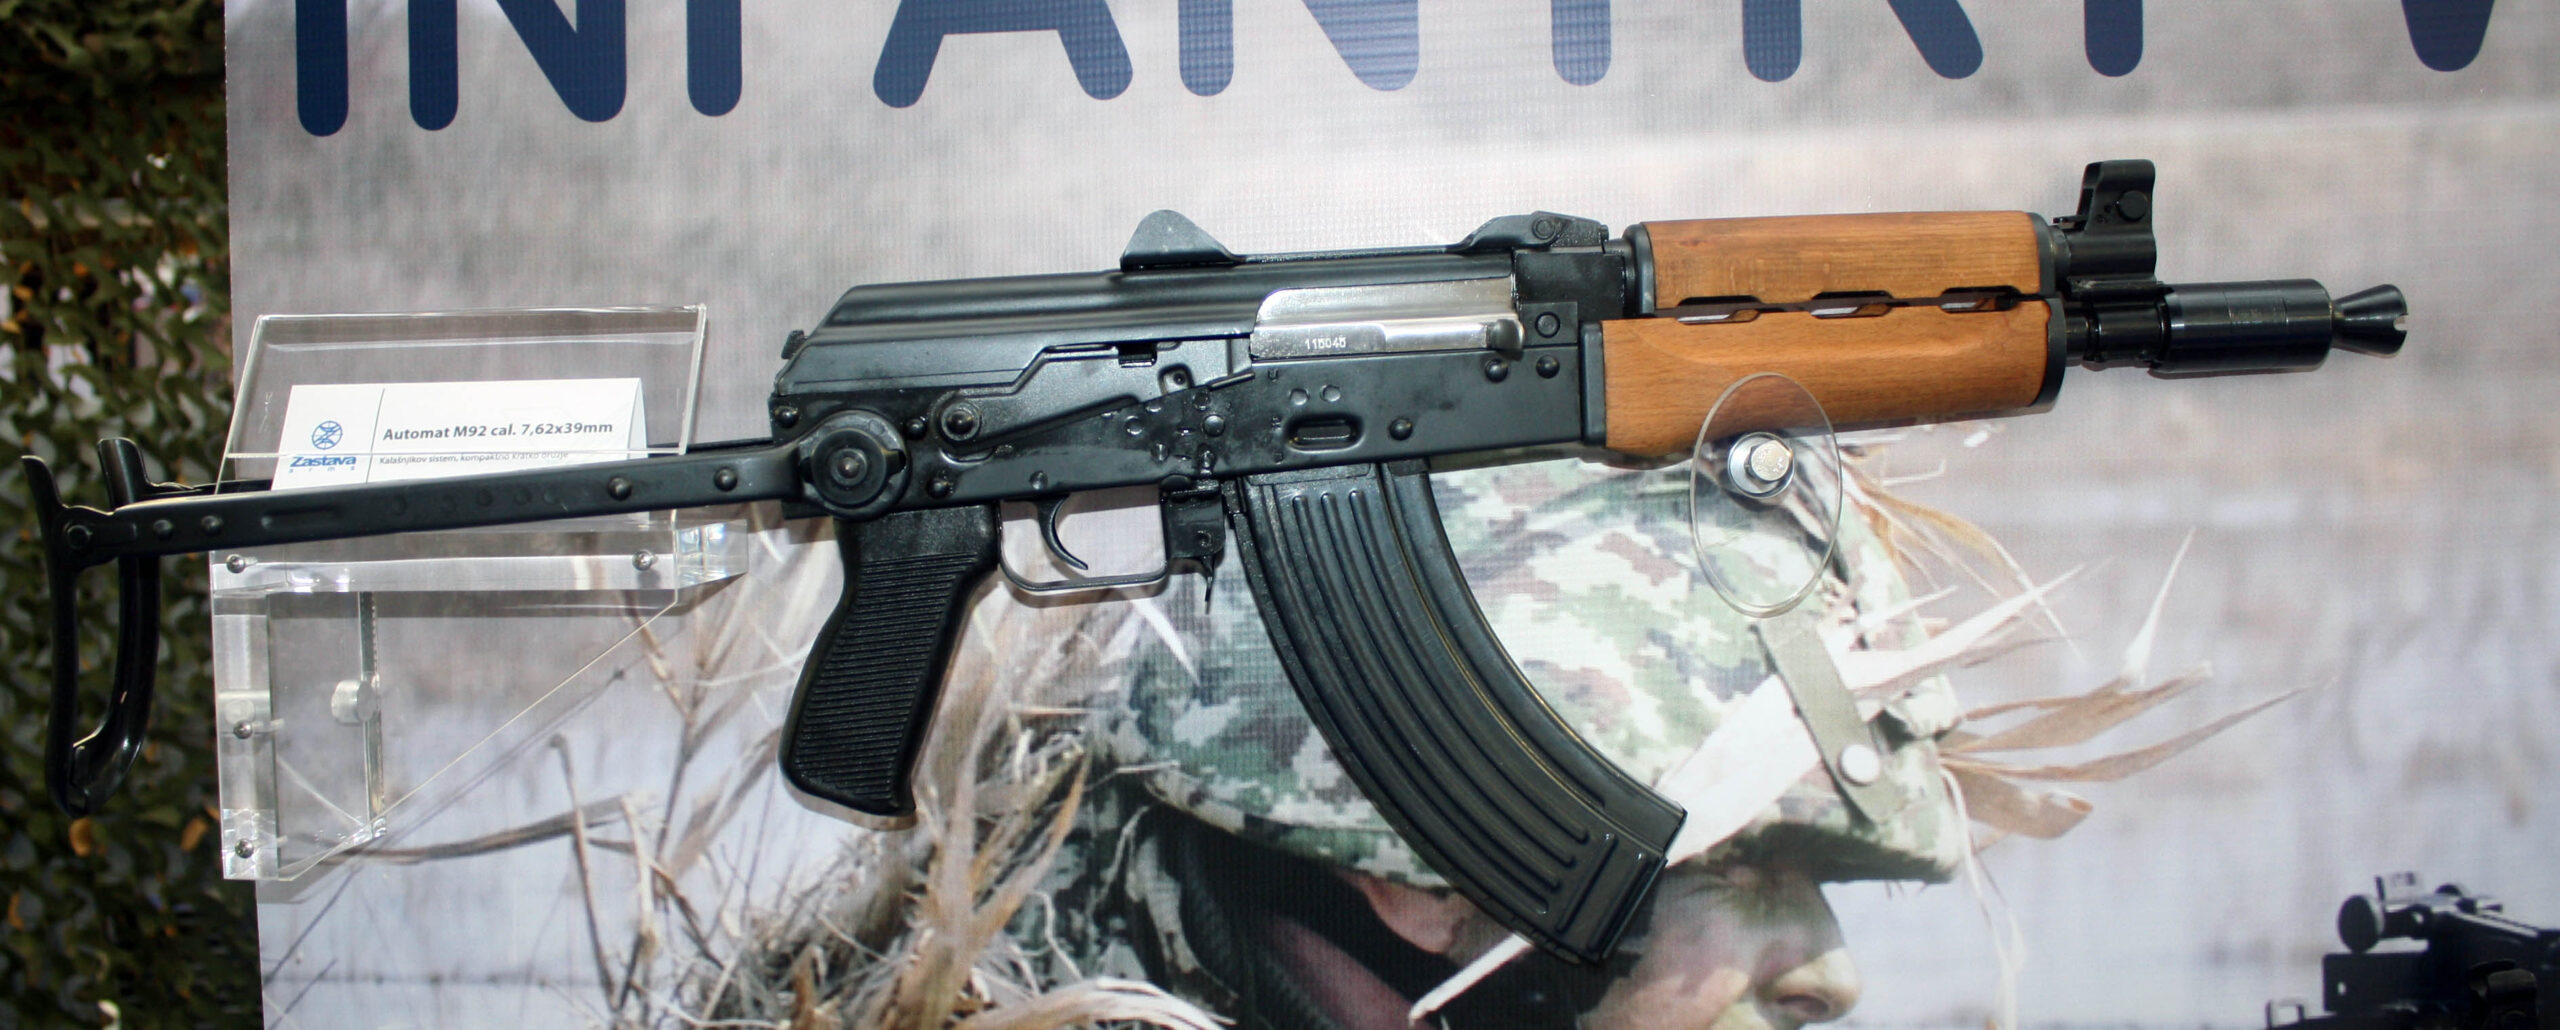
Despite the immense turmoil of the early and mid-1990s, Zastava Arms managed to continue some level of product development. In 1992, as conflicts were already underway, the factory completed the development and initiated batch production of the 7.62x39mm M92 carbine. This compact weapon was based on the earlier M85 carbine (a 5.56mm AK variant) but chambered in the more common 7.62x39mm round.4
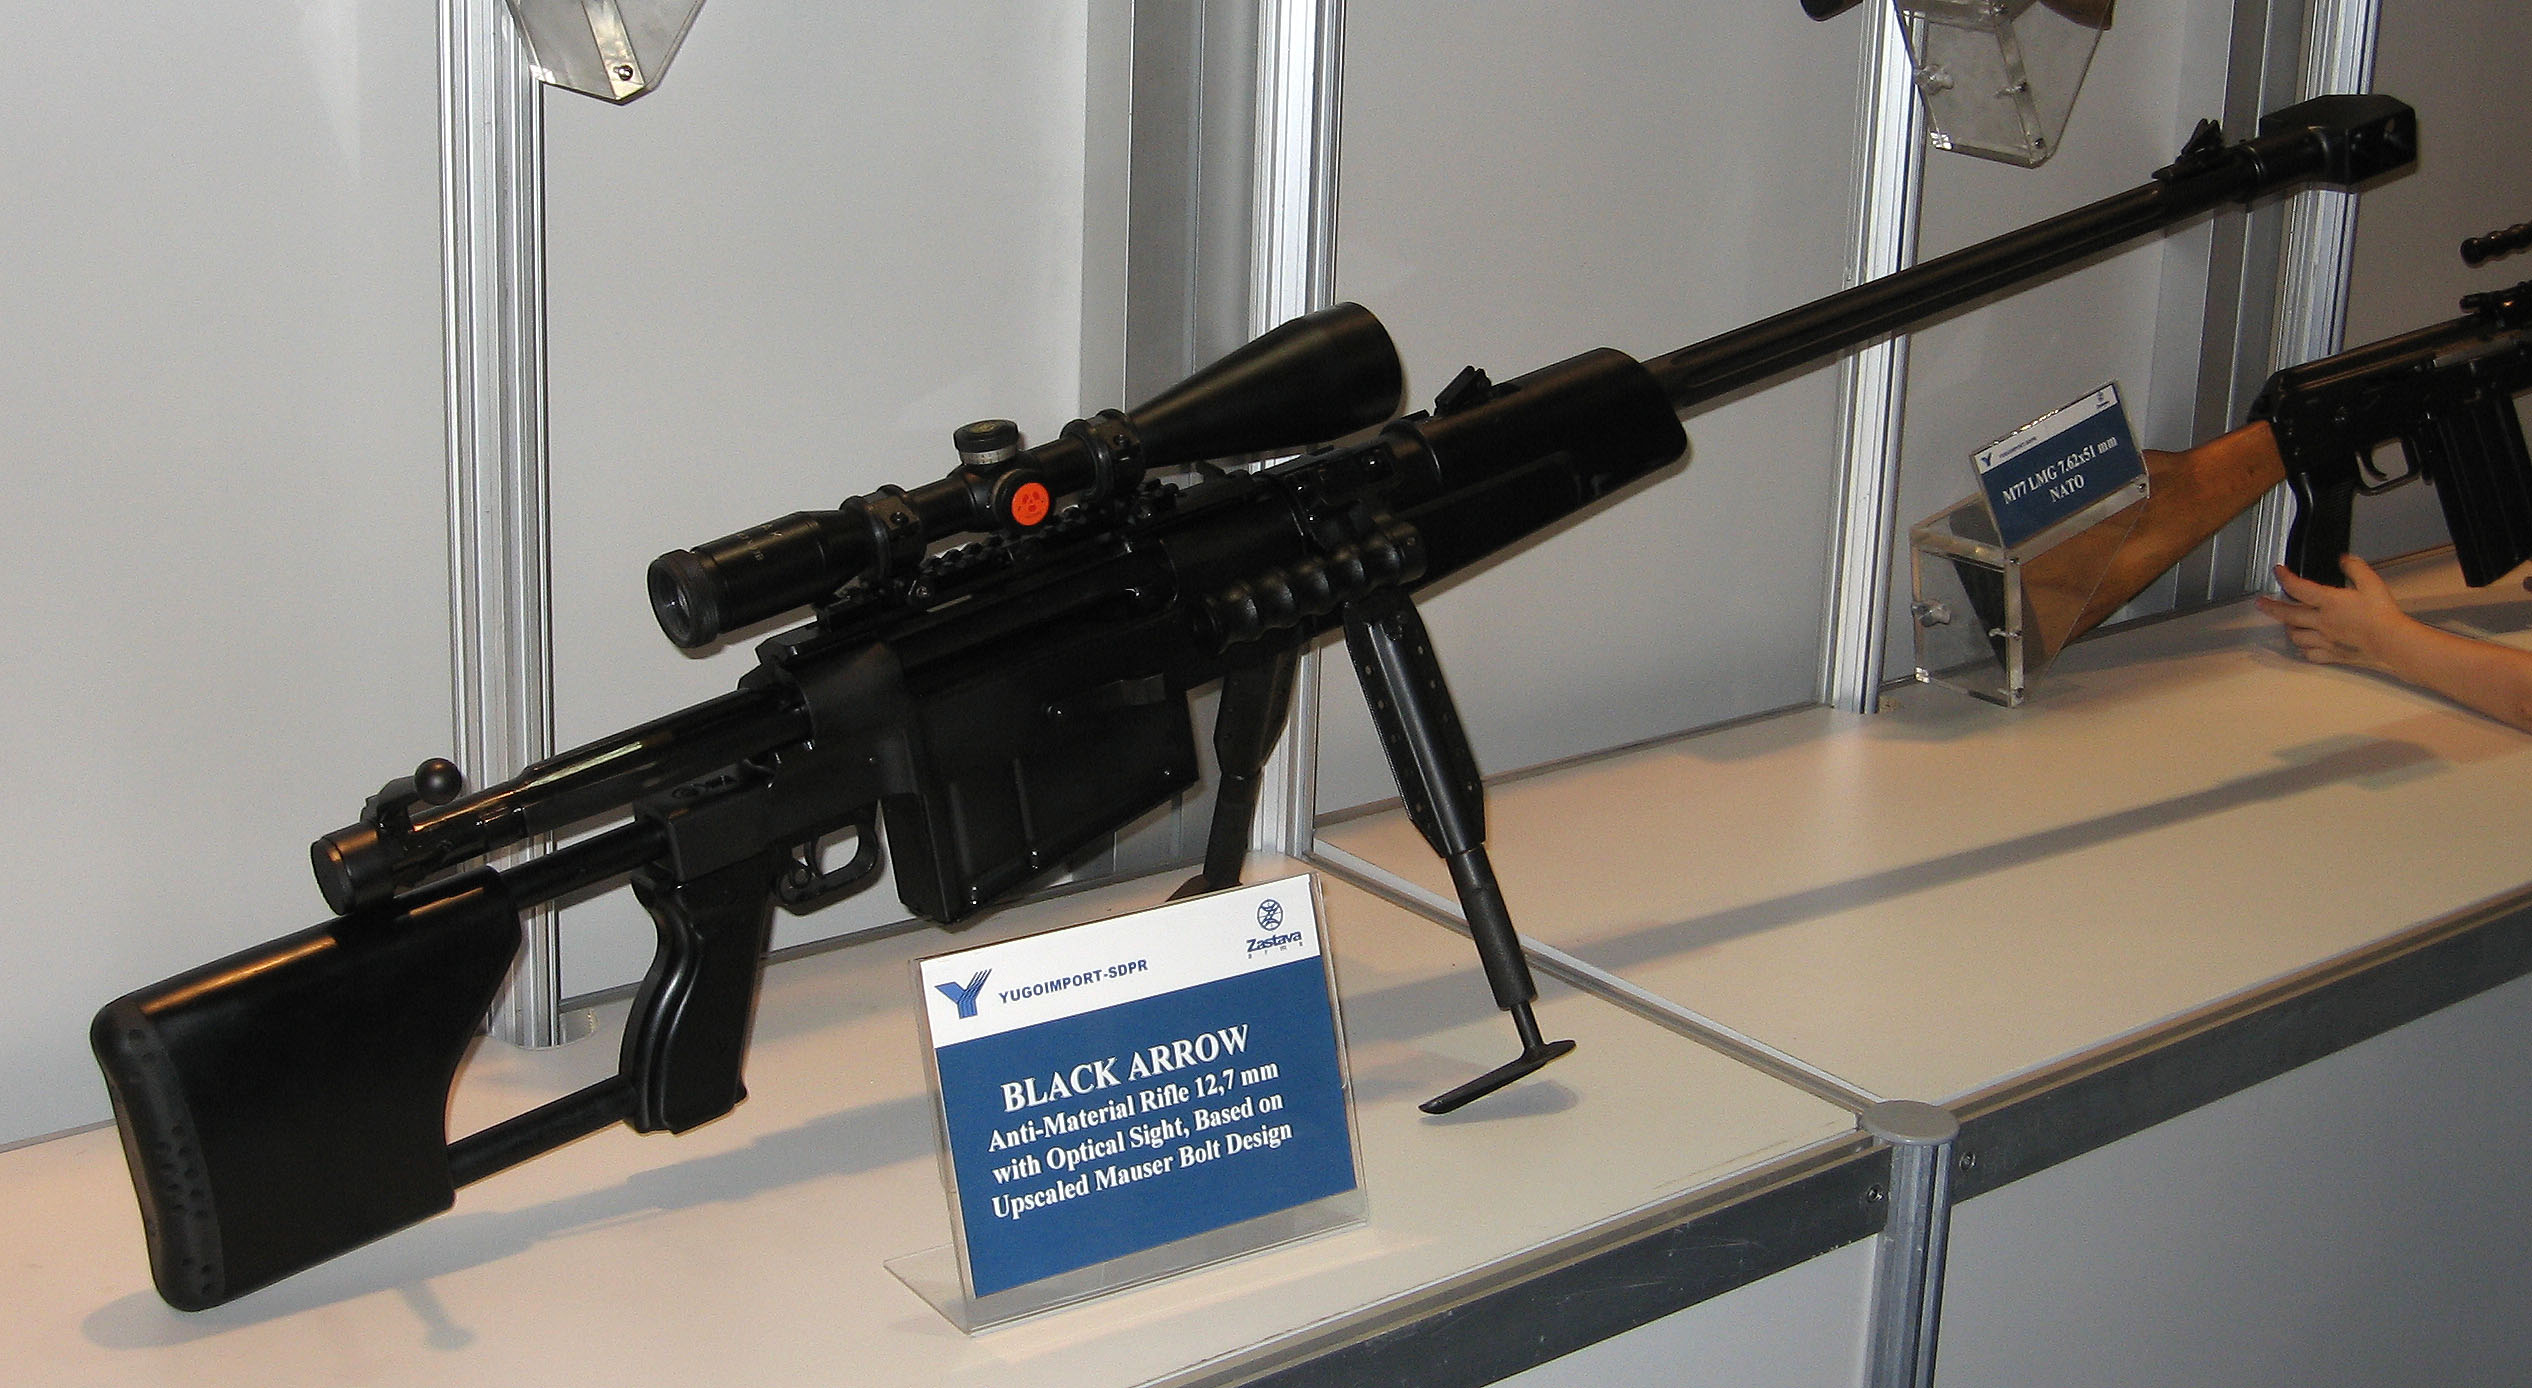
Additionally, leveraging its long experience with Mauser bolt-action mechanisms, Zastava developed the M93 Black Arrow (Crna Strela / Црна Стрела) long-range anti-materiel rifle during this period. This heavy rifle, typically chambered in 12.7x108mm or.50 BMG, was designed for engaging targets at extended distances.4 The development of such specialized weapons even under conditions of conflict and sanctions underscores the factory’s retained engineering capabilities and the ongoing demand from military forces.
Rebuilding and Rebranding: Zastava Arms in the 21st Century (2000 – Present)
Restructuring and Modernization Efforts
The dawn of the 21st century found Zastava Arms grappling with the aftermath of wars, sanctions, and bombing. A period of significant restructuring was initiated, formally lasting from 2005 to 2014, aimed at adapting the company to a new political and economic reality.4 The factory, damaged during both World War II and the 1999 NATO air raids, was largely rebuilt with substantial government assistance.19
In a move to integrate it more formally within the national defense framework, Zastava Arms became part of the Defense Industry of Serbia in 2003, a decision by the Ministry of Defense that facilitated state support.7 On March 10, 2005, the Serbian government passed a decision to actively support the company’s restructuring process.7 A significant milestone in its international standing occurred on August 30, 2005, when Zastava Arms was placed on the United Nations list of proven suppliers of arms and military equipment.7
Technologically, the company has sought to modernize its design and production processes. It employs CATIA (Computer-Aided Three-dimensional Interactive Application) software for product design, enabling a more agile response to evolving market demands.3 Furthermore, Zastava Arms applies a Quality Management System (QMS), holding SRPS ISO 9001:2008 and SNO 9000/05 certificates, to ensure product quality and process improvement.3
Current Military Product Lines
Zastava Arms continues to produce a wide array of military firearms. According to its 2019 military catalog and other company information, its current offerings include 4:
- Assault Rifles: The M21 series chambered in 5.56x45mm NATO (the standard service rifle of the Serbian Armed Forces), the M05E series in 7.62x39mm (upgraded M70 versions), the classic M70 B3/AB3 in 7.62x39mm, and the M90 in 5.56x45mm.
- Submachine Guns/Carbines: Compact versions of the M21 and the M92 carbine in 7.62x39mm.
- Light Machine Guns: The M72 RPK-style LMG in 7.62x39mm.
- Sniper Rifles: The M91 (7.62x54R Dragunov-style), the M07 (bolt-action, various calibers including 7.62x51mm and.308 Winchester), and the M17 (7.62x51mm).
- Long Range/Anti-Materiel Rifles: The M12 Black Spear (Crno Koplje / Црно Копље) and the M93 Black Arrow (Crna Strela / Црна Стрела), both available in.50 BMG and 12.7x108mm.
- Machine Guns: The M84 general-purpose machine gun (PKM derivative in 7.62x54R), the M87 heavy machine gun (NSV derivative in 12.7x108mm), and the M02 Coyote heavy machine gun (12.7x108mm).
- Automatic Grenade Launcher: The M93 (BGA / БГА – Bacač Granata Automatski) in 30mm.
- Underbarrel Grenade Launchers: The BGP 40x46mm and BGP 40mm (for M70 pattern rifles).
- Pistols: The CZ 999, EZ 9, and EZ 9 Compact, available in 9mm Parabellum and.40 S&W.
Civilian Hunting and Sporting Arms
Zastava maintains a strong presence in the civilian firearms market, particularly with its hunting and sporting rifles known for their Mauser-based actions and Kalashnikov-derived semi-automatics 22:
- Hunting Rifles (Bolt-Action): The flagship LK M70 series (Lovački Karabin M70), based on the Mauser 98 action, is offered in a wide range of calibers (e.g.,.243 Win,.270 Win,.30-06,.308 Win,.300 Win Mag, 7×64, 8×57 JS, 9.3×62,.375 H&H Mag,.458 Win Mag). Other models include the LK M85 (mini-Mauser action for calibers like.223 Rem, 7.62x39mm), M808, and precision-oriented M07 Match and M12 models.
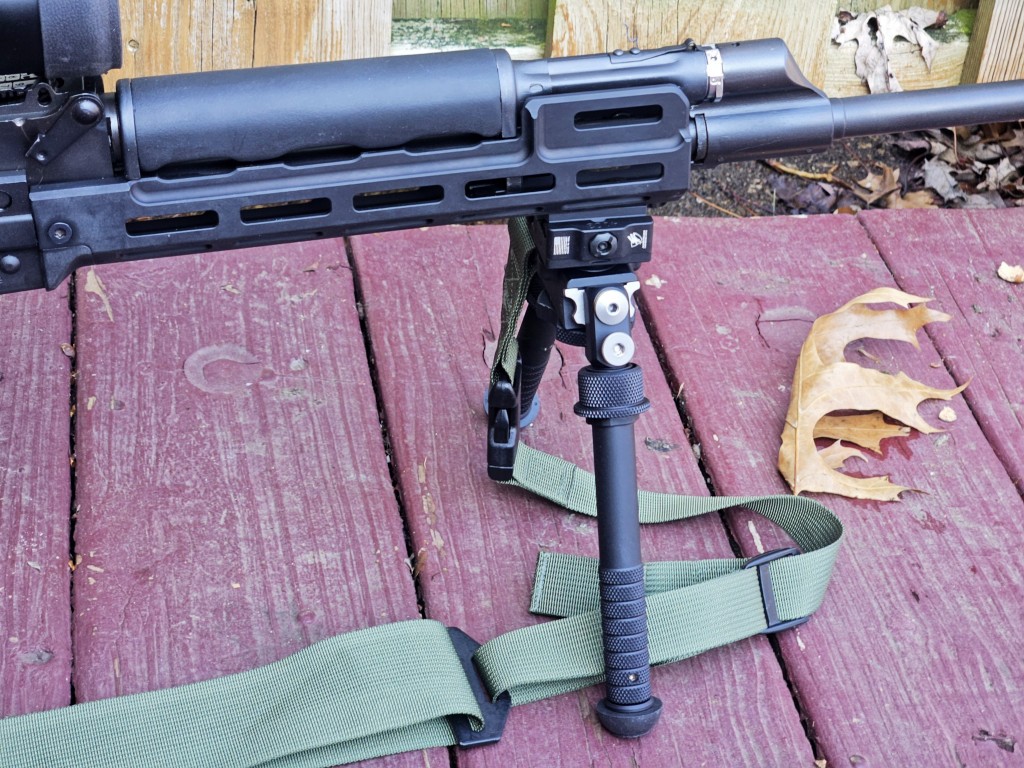
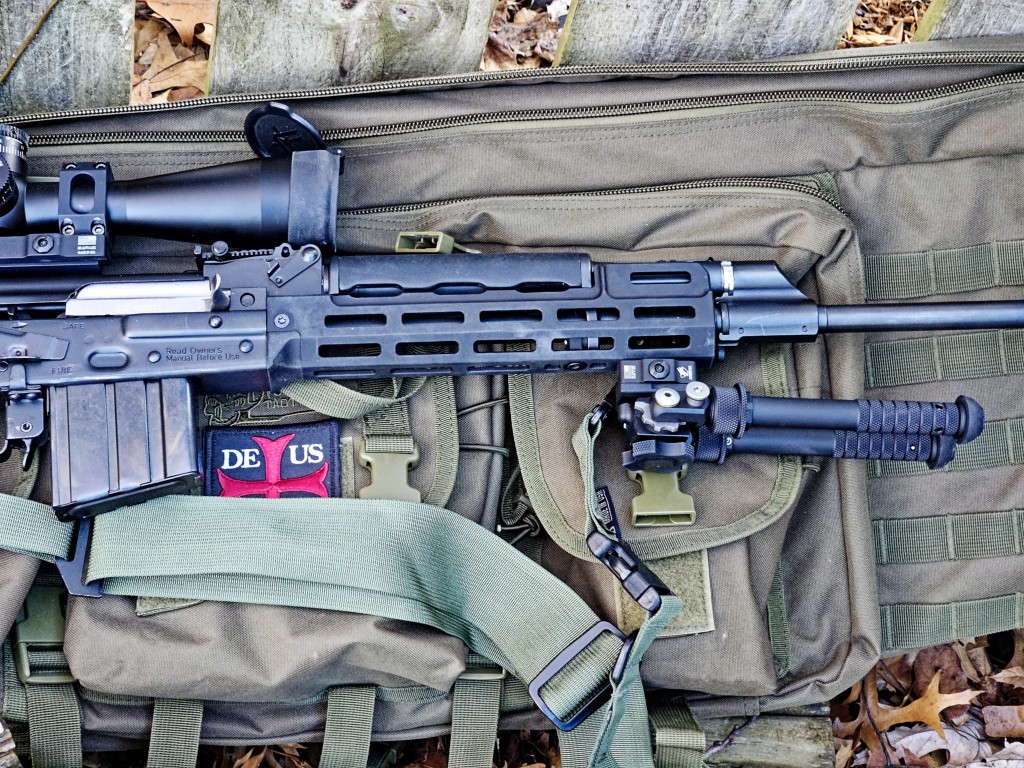
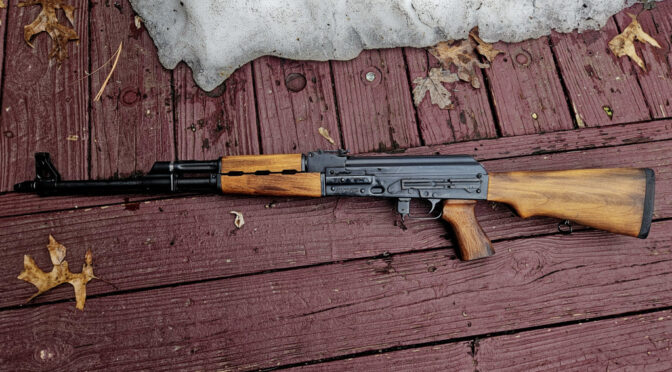
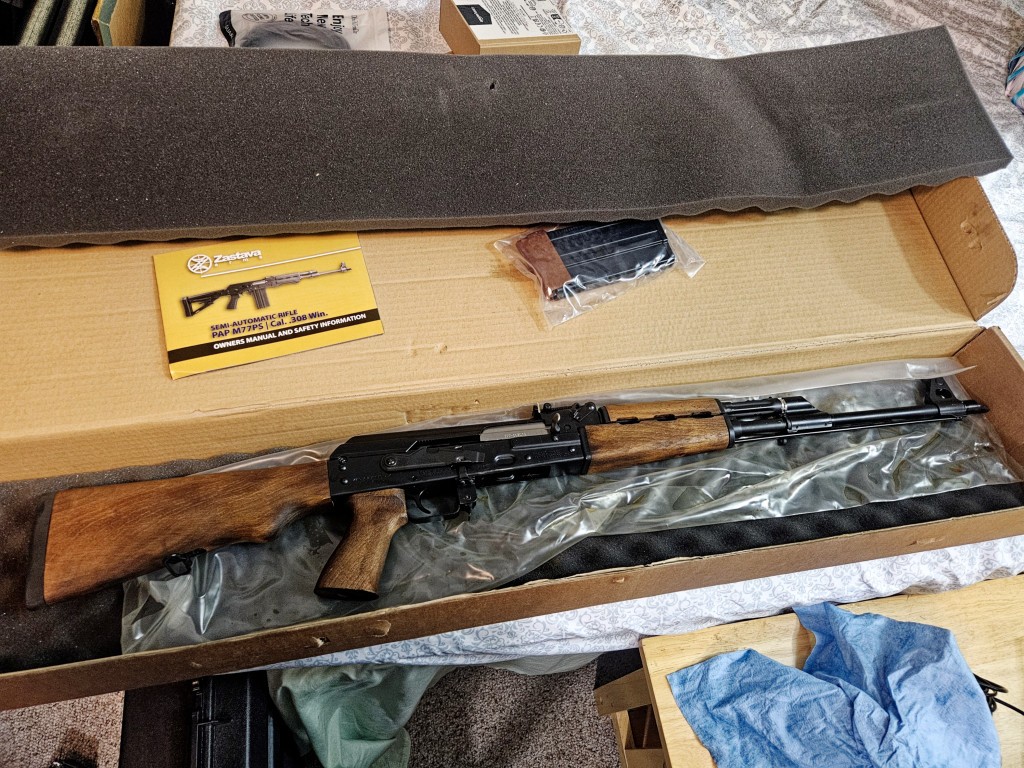
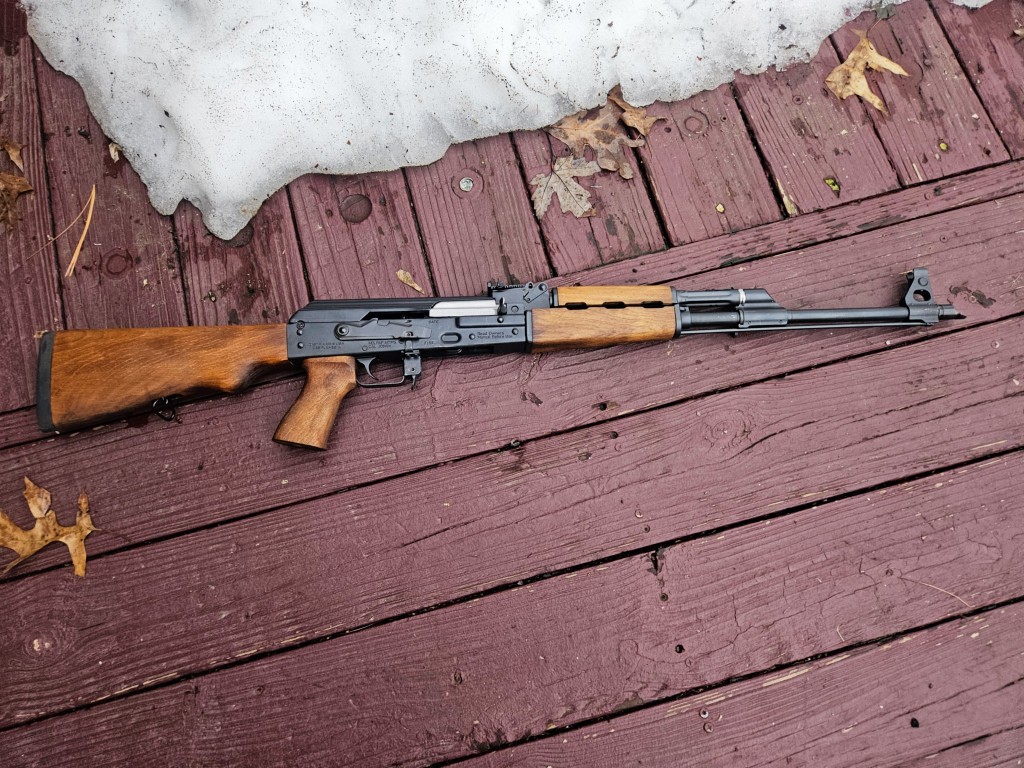
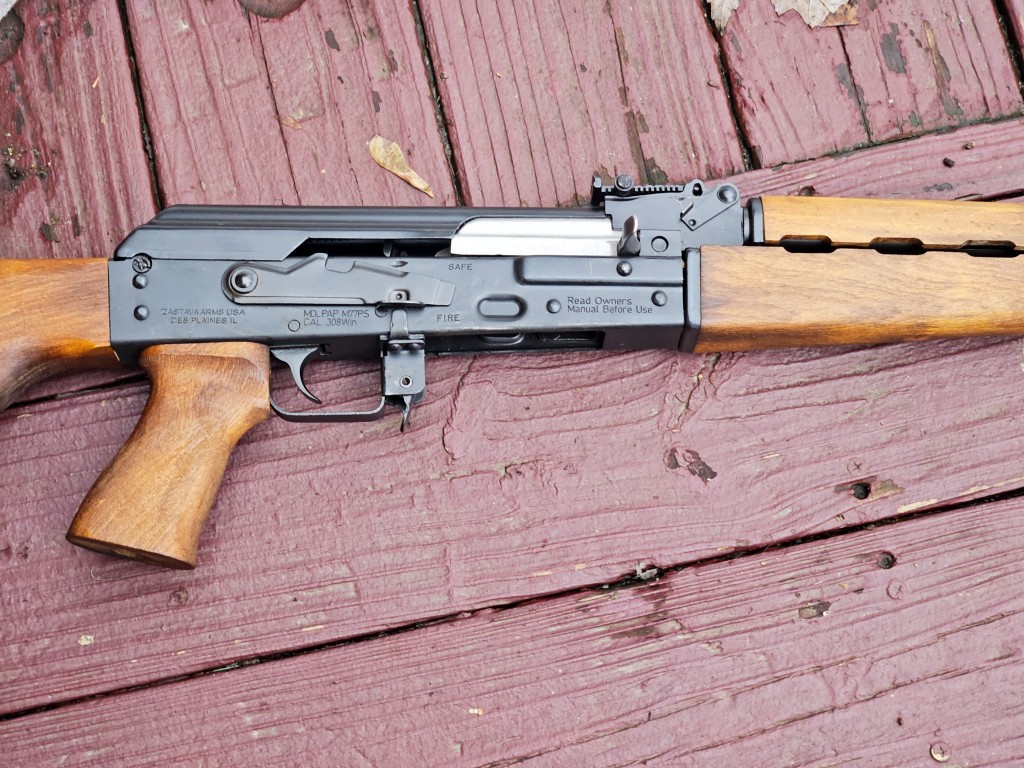
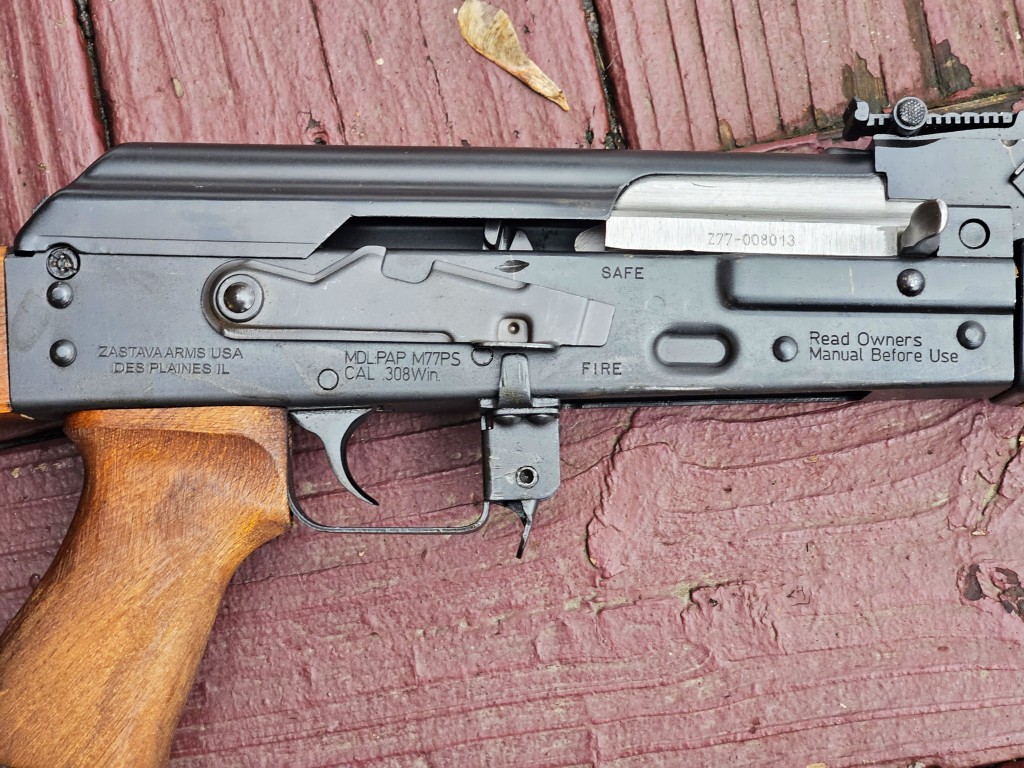
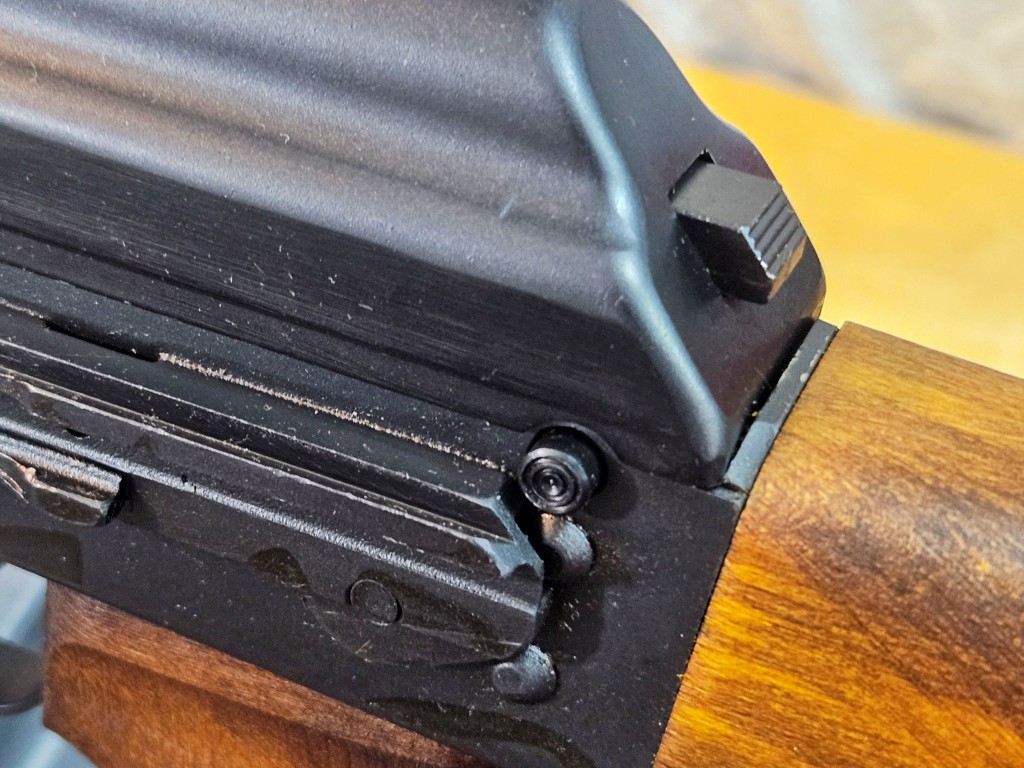
- Sporting Rifles (Semi-Automatic): The PAP series (Poluautomatska Puška / Полуаутоматска Пушка, Semi-automatic Rifle), derived from the Kalashnikov action, is highly popular. Key models include the ZPAP M70 in 7.62x39mm and the PAP M77 in.308 Winchester/7.62x51mm. The M2010 is another semi-automatic offering. The ZPAP M70, particularly as imported by Zastava Arms USA, is noted for its robust construction, often featuring a heavier 1.5mm thick RPK-style receiver and a bulged front trunnion.21
- Small Bore Rifles: Models like the MP22 (.22 LR) and MP17 (.17 HMR).
- Pistols: A range including Tokarev-pattern pistols like the M57A and M70A (chambered in 7.62x25mm and 9mm Para respectively), the compact M88A (9mm Para), and modern double-action designs like the CZ 999 and EZ9/EZ40 series (9mm Para /.40 S&W).
The product line demonstrates a dual strategy: maintaining and updating Kalashnikov-pattern weapons (M70, M05E, ZPAP series) for markets familiar with their robustness and reliability, while also developing more modern, modular systems (like the M19 Modular Rifle mentioned in some catalogs 54, and the M21) and precision long-range rifles (M07, M12, M93) to compete in different segments and meet evolving military and civilian marksmanship requirements. This diversification is crucial for a global exporter.
Table 2: Overview of Current Zastava Arms Product Categories
| Category | Examples |
| Military Firearms | |
| Assault Rifles | M21 series, M05 series, M70B3, M90, M19 |
| Submachine Guns / Carbines | M92, M21 (short barrel variants) |
| Sniper & Long Range Rifles | M91, M07, M93 Black Arrow, M12 Black Spear, M17 |
| Machine Guns | M84 (GPMG), M02 Coyote (HMG), M72 (LMG) |
| Pistols | CZ 999, EZ9 / EZ40 series |
| Grenade Launchers | M93 (Automatic Grenade Launcher), BGP 40mm (Underbarrel) |
| Civilian Firearms | |
| Hunting Rifles (Bolt-Action) | LK M70 series, LK M85 series, M808, M07 Match |
| Sporting Rifles (Semi-Automatic) | ZPAP M70, PAP M77, M2010 |
| Small Bore Rifles | MP22, MP17 |
| Pistols | M57A, M88A, CZ 999, EZ9 / EZ40 series, M70 (small caliber) |
Business Partnerships and Export
Export remains the lifeblood of Zastava Arms, with the company stating that 95% of its product placement is through international sales.7 It exports hunting and sporting weapons to over thirty countries 3 and military products to over forty countries worldwide.4
- Zastava Arms USA: A pivotal development was the establishment in January 2019 of Zastava Arms USA, based in Des Plaines, Illinois. This subsidiary serves as the exclusive importer and distributor of Zastava Arms products for the lucrative US market, also handling warranty, repair services, and parts.4 This move was partly aimed at exercising greater control over product quality and presentation in the US, addressing issues that had arisen with previous third-party importers who sometimes made modifications that caused reliability concerns.56 The establishment of Zastava Arms USA represents a critical strategic pivot, allowing direct management of its brand and quality in its most significant export market.
- Yugoimport SDPR: Domestically, Yugoimport SDPR (Југоимпорт СДПР), the Serbian state-owned defense equipment company, is a key partner for Zastava Arms, often facilitating international defense contracts and joint participation in global defense exhibitions like IDEX in the UAE.7
- International Golden Group (UAE): Zastava Arms lists International Golden Group, based in the United Arab Emirates, as an important international partner, indicative of its reach in the Middle Eastern market.7
- Past Partnership with Remington Arms: In 2005, a memorandum of understanding was signed with the American company Remington Arms to export Zastava-made hunting and sporting firearms (often Mauser-action rifles) to the United States, Canada, and Mexico.4 However, this cooperation was later discontinued, reportedly at Remington’s initiative due to its own financial difficulties. Zastava then sought new US mediators, such as EA Armory, to maintain its presence in the US market prior to forming Zastava Arms USA.58
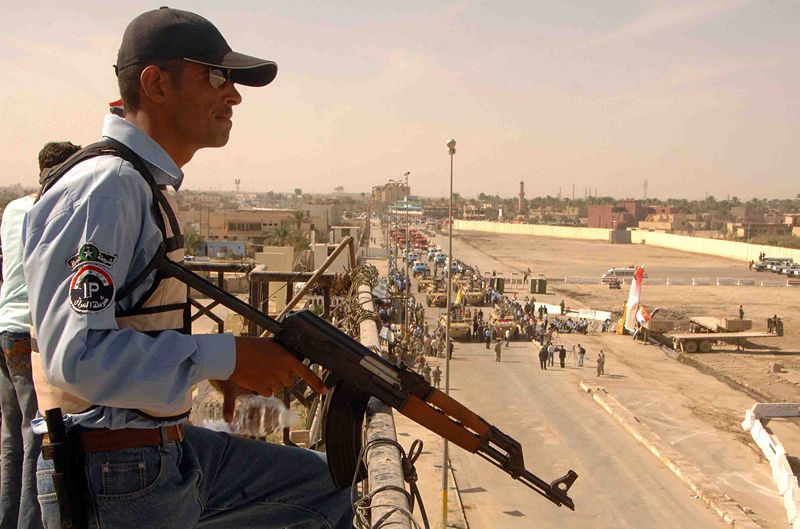
- Key Export Markets and Contracts: Asia, Africa, and the United States are consistently cited as major destinations for Zastava’s products.4 Historically, Zastava rifles like the M48 were exported to countries including Burma, Egypt, Indonesia, Iraq, Syria, Algeria, and Chad.11 More recent specific export deals mentioned in news reports include contracts with Armenia 59 and a large announced contract for hunting and sporting arms to the US valued at $235 million (reported in 2021).60 In a notable instance of military aid, Canada supplied 35,000 Zastava M70 assault rifles to Ukraine in 2022 as part of support efforts during the Russo-Ukrainian War.62
Recent Developments, Financial Status, Achievements, and Challenges
Zastava Arms navigates a complex environment characterized by its strategic importance, historical legacy, financial pressures, and the demands of a competitive global market.
- Financial Situation and Government Support: The company has faced persistent financial challenges. As far back as 2013, it was reported to owe over 80 million euros in unpaid taxes, the largest debt among Serbian defense industry companies.4 By June 2019, its total debt was estimated at around 145 million euros.4 A 2014 article in Privredni pregled (Привредни преглед, Economic Review) noted that Zastava Oružje was operating with significant losses.63 More recently, the Serbian news outlet Nova Ekonomija (Нова Економија, New Economy) reported in November 2023 that the factory had accumulated losses exceeding seven billion dinars (approximately 60 million euros) over the preceding six years under a controversial supervisory board.64
Despite these financial burdens, the Serbian government continues to provide support, recognizing Zastava’s strategic role. An investment of 9.7 million euros was made in 2017 for factory modernization to meet defense industry needs.4 The Serbian state remains a major shareholder (the Wikipedia entry from May 2025 lists the Government of Serbia as 48% owner 4, although a 2025 company document regarding a shareholders’ meeting mentions a more complex structure involving social capital shares 66). - Production and Sales Performance: Notwithstanding its financial difficulties, Zastava Arms has reported periods of strong production and sales. For instance, firearm production reportedly increased by 20% in 2020, with deals concluded that year valued at $95 million, primarily with buyers from Asia, Africa, and the United States.4 The aforementioned $235 million US export contract announced in 2021 also points to significant market activity.60
- Controversies and Allegations of Mismanagement: Zastava Arms has not been immune to controversy. Reports from Serbian media, including Nova Ekonomija 64, and discussions on international forums referencing articles from the Serbian weekly NIN (Недељне информативне новине, Weekly Informational Newspaper) 67, have detailed serious allegations of mismanagement by past leadership. These allegations include claims of unfavorable export contracts, particularly with Zastava Arms USA, where fixed prices for firearms were reportedly maintained despite sharply rising material and energy costs, to the detriment of the Kragujevac factory.67 There were also accusations of questionable deals with domestic private companies, resulting in further financial losses for Zastava Arms.67
The Independent Trade Union at Zastava Arms filed criminal charges against the former president of the supervisory board, Ivica Marjanović, citing abuse of official position and responsibility for the factory’s decline.64 Concerns have also been voiced by users and observers about the condition of some of the factory’s machinery being worn out and an underpaid workforce potentially leading to occasional quality control issues in production, although export samples for the US market are often perceived to be of better finish.68 The entire supervisory board was eventually replaced in late 2023.64 - Achievements and Ongoing Activities: Despite its challenges, Zastava Arms’ enduring legacy of over 170 years in continuous operation is a significant achievement in itself. It maintains a substantial export reach and continues to develop new products, such as the M19 Modular Rifle 54, to meet contemporary demands. The company remains a cornerstone of the Serbian defense industry.4 Zastava Arms actively participates in major international arms fairs, including SHOT Show in Las Vegas, USA, and IWA OutdoorClassics in Nuremberg, Germany, showcasing its products to a global audience.7 Recent company news includes the reopening of its “Old Gun Foundry” museum in Kragujevac in November 2023, emphasizing its rich heritage 69, and its participation in the “Zastava 2024” military capability display of the Serbian Army in June 2024.70
Zastava Arms appears to operate in a precarious yet persistent balance: it is a strategically vital state-supported defense asset with an remarkable historical lineage, yet it is simultaneously burdened by significant accumulated debt and the shadow of past mismanagement allegations. Its future trajectory will likely depend on a confluence of factors: continued and effective state backing, successful and profitable penetration of competitive export markets (especially the US), and sustained improvements in internal governance and operational efficiency.
Conclusion: Zastava Arms – A Legacy Forged in Steel
The history of Zastava Arms is a compelling narrative of industrial ambition, technological adaptation, and national identity, forged over more than 170 years in the heart of Serbia. From its humble beginnings as the Topolivnica in Kragujevac, casting its first cannons for a nascent Principality of Serbia intent on self-reliance, the factory has evolved into a globally recognized arms manufacturer. Its journey mirrors the tumultuous history of the Balkan region and Serbia itself—a saga of nation-building, devastating wars, profound political transformations from monarchy through socialism to a modern republic, economic booms, and periods of acute crisis including sanctions and foreign bombardment.
Throughout these epochs, Zastava Arms has demonstrated remarkable resilience. It armed Serbian and later Yugoslav forces through the Balkan Wars, two World Wars, and the tragic conflicts accompanying the dissolution of Yugoslavia. It assimilated and adapted technologies from both West and East, reflecting Yugoslavia’s unique non-aligned stance during the Cold War, producing iconic firearms like the Mauser-pattern M48, the MG42-derived M53 Šarac, and the Kalashnikov-based M70 family. This ability to absorb, modify, and mass-produce diverse weaponry underscores a deep-seated engineering capability and a pragmatic approach to fulfilling national defense needs.
In the 21st century, Zastava Arms continues to be a pivotal entity in the Serbian defense industry and a significant exporter. The establishment of Zastava Arms USA signifies a strategic commitment to directly engage with its largest and most demanding civilian market, aiming to enhance its brand presence and profitability. However, the company also contends with substantial challenges. A legacy of financial debt and recent allegations of mismanagement have cast shadows, necessitating ongoing restructuring and a reliance on state support. The competitive nature of the global arms market demands continuous innovation, stringent quality control, and agile business practices.
The story of Zastava Arms is, in many ways, a microcosm of Serbia’s own historical trajectory—a narrative defined by a persistent quest for sovereignty and agency on the world stage, often in the face of formidable external pressures and internal complexities. The inherent tension between its role as a strategically vital, state-influenced national asset and the commercial imperatives of the global arms market—including financial sustainability, technological competitiveness, and the ethical considerations of arms exports—will undoubtedly continue to shape Zastava’s path forward. Its enduring legacy, however, is already forged in steel: a symbol of Serbian industrial heritage and a testament to the enduring human endeavor of arms making.
Image Sources
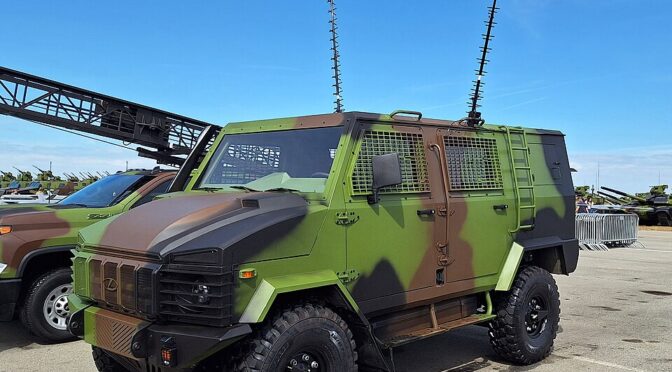
The main photo is from Wikimedia and here’s how the author described it (translated into English from Serbian): “The SM-1 Zastava NTV drone command vehicle of the Serbian Armed Forces exhibited at the “Colonel Pilot Milenko Pavlović” military airport on the occasion of the “Zastava 2024″ display of the capabilities of the Serbian Armed Forces.” Author is Srdjan Popovic.
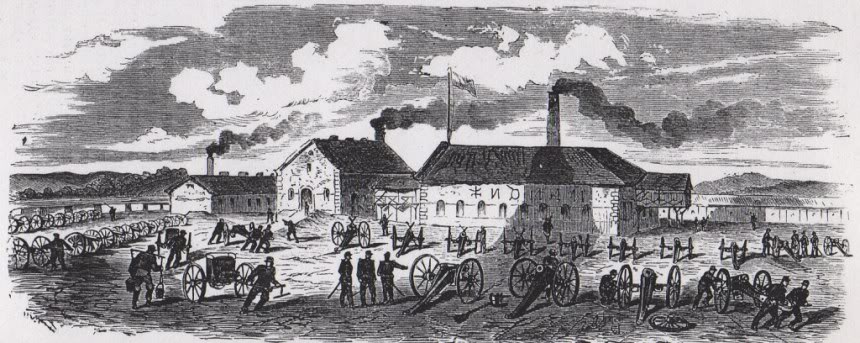
The Kragujevac Cannon Foundry in its working days, originally built in 1856. The drawing is from Wikimedia – the exact date and author are unknown. It was contributed to Wikimedia by SimonKTemplar
Yugoslavian M1924 Mauser. Photo obtained from Wikimedia. Author is The Swedish Army Museum.
The M53 Šarac Machine Gun. Image obtained from Wikimedia. The Author is Aleksej fon Grozni.
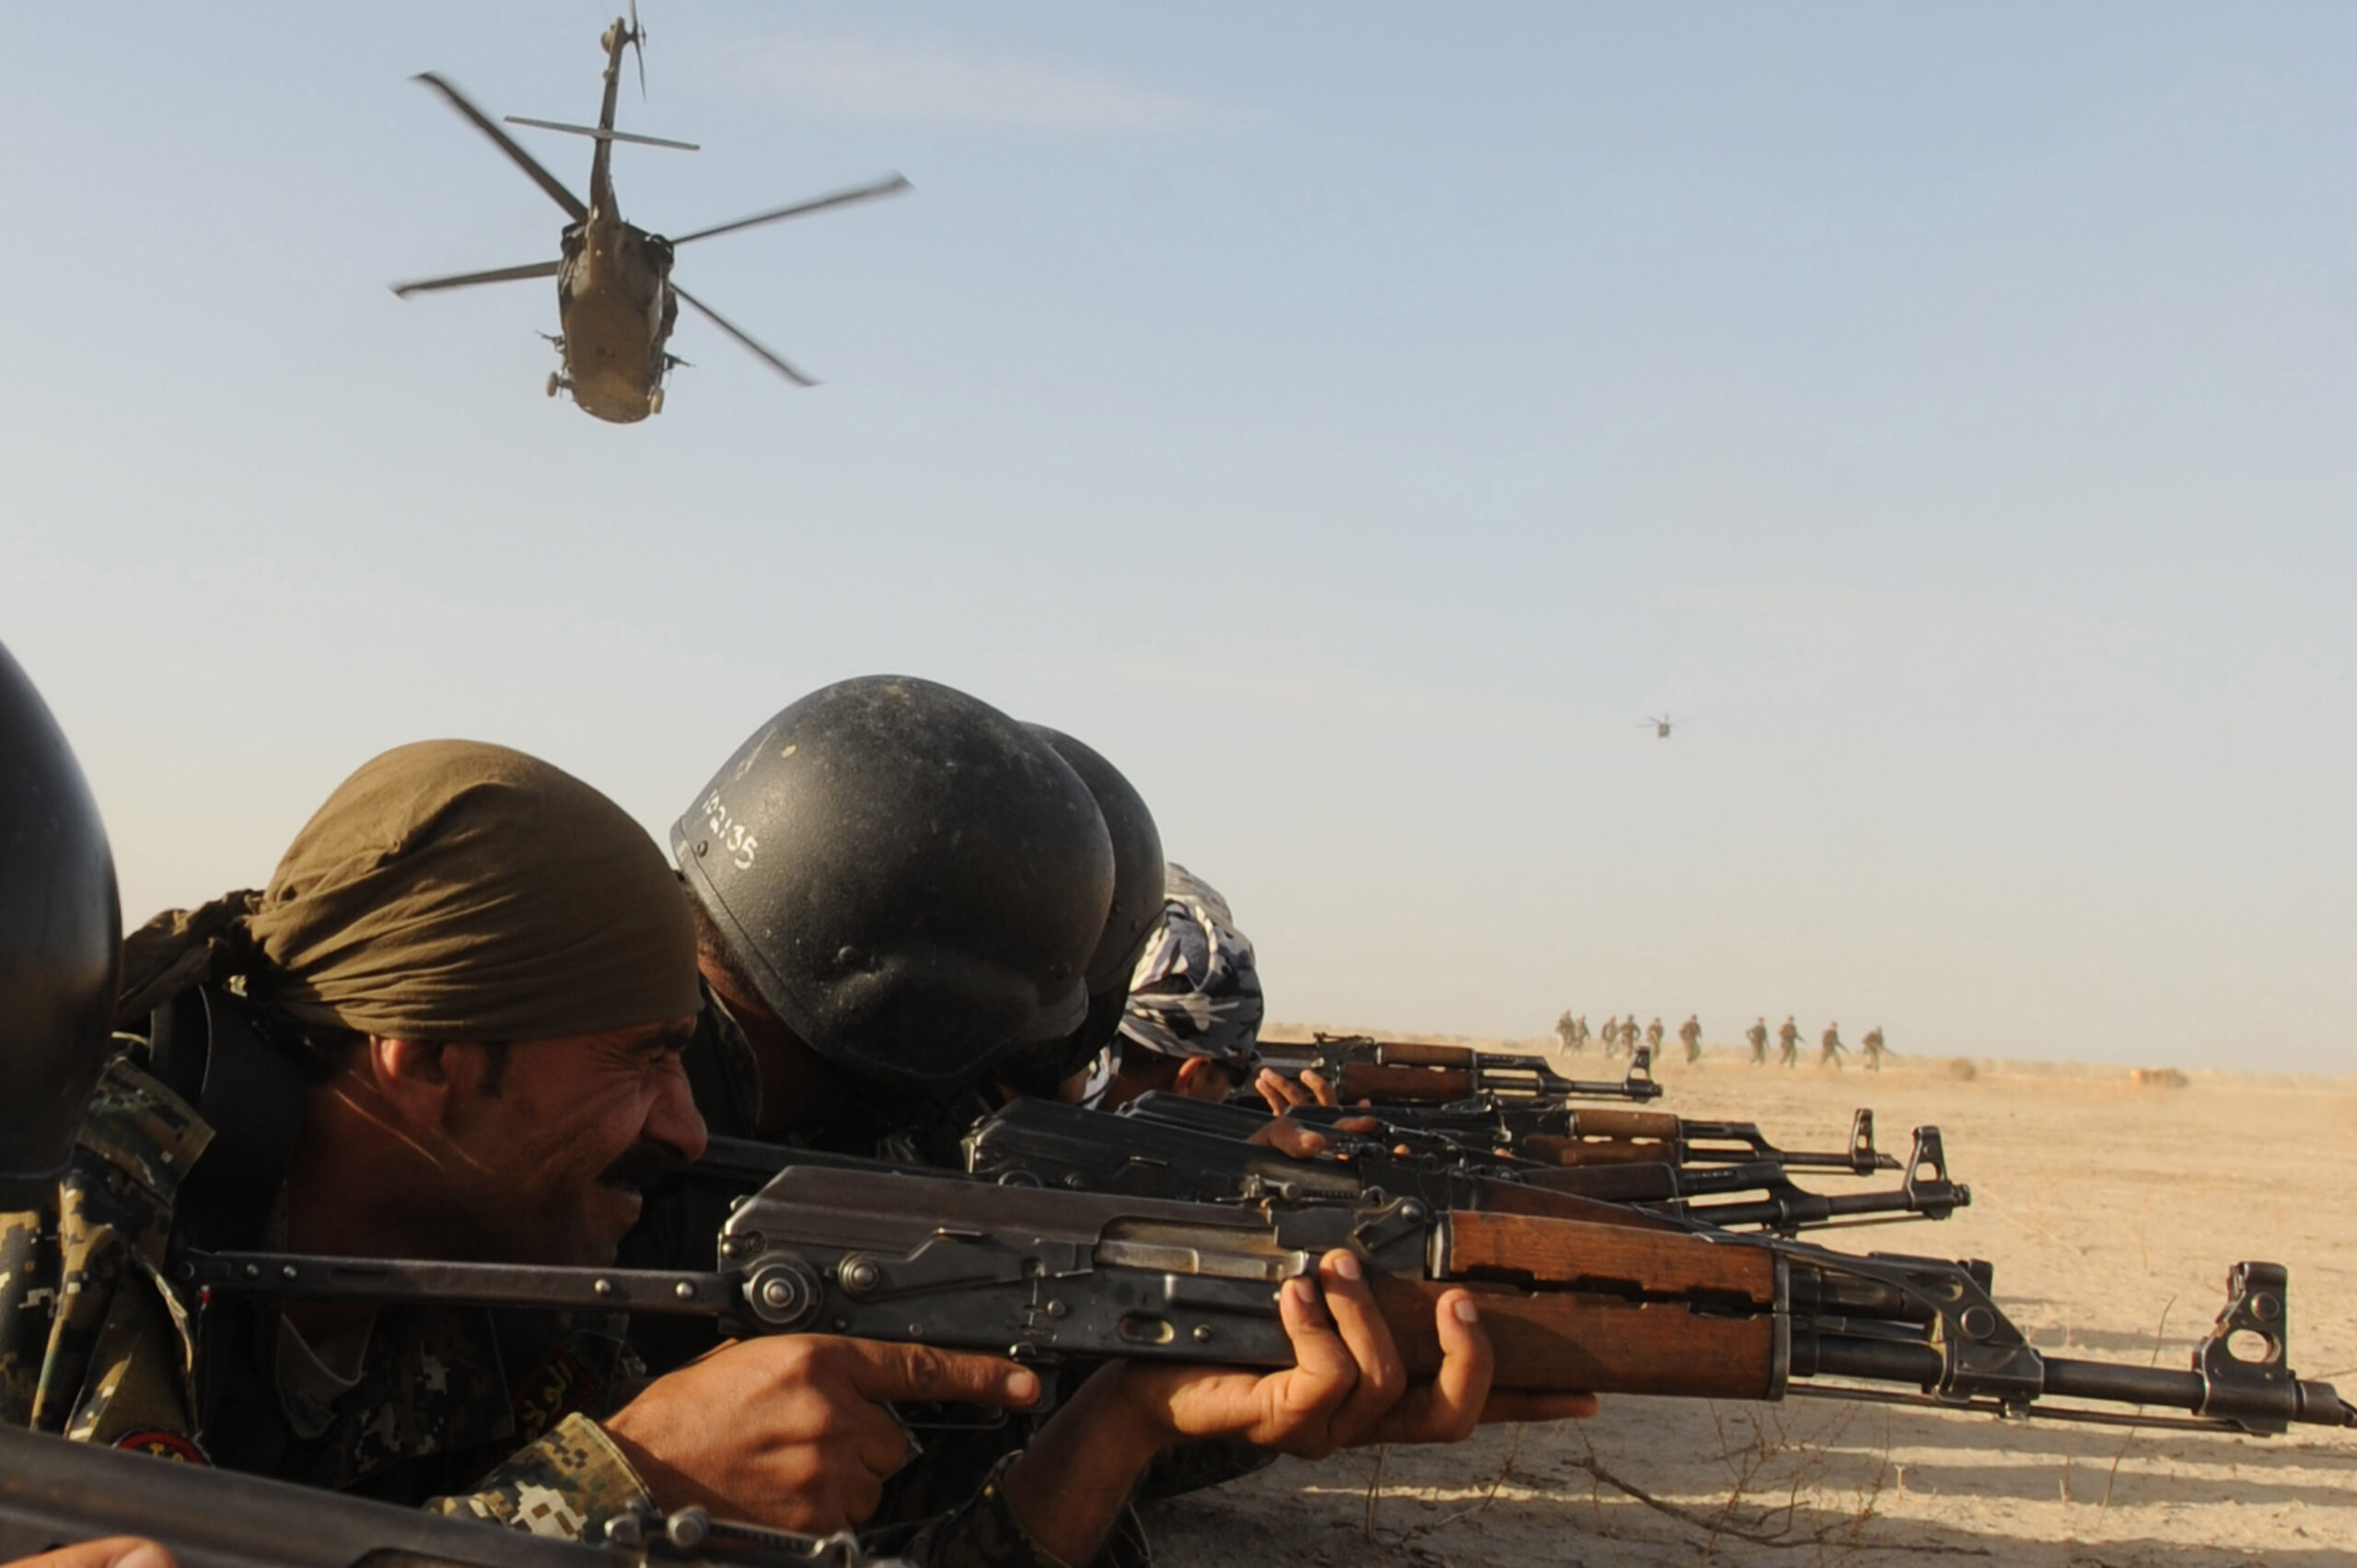
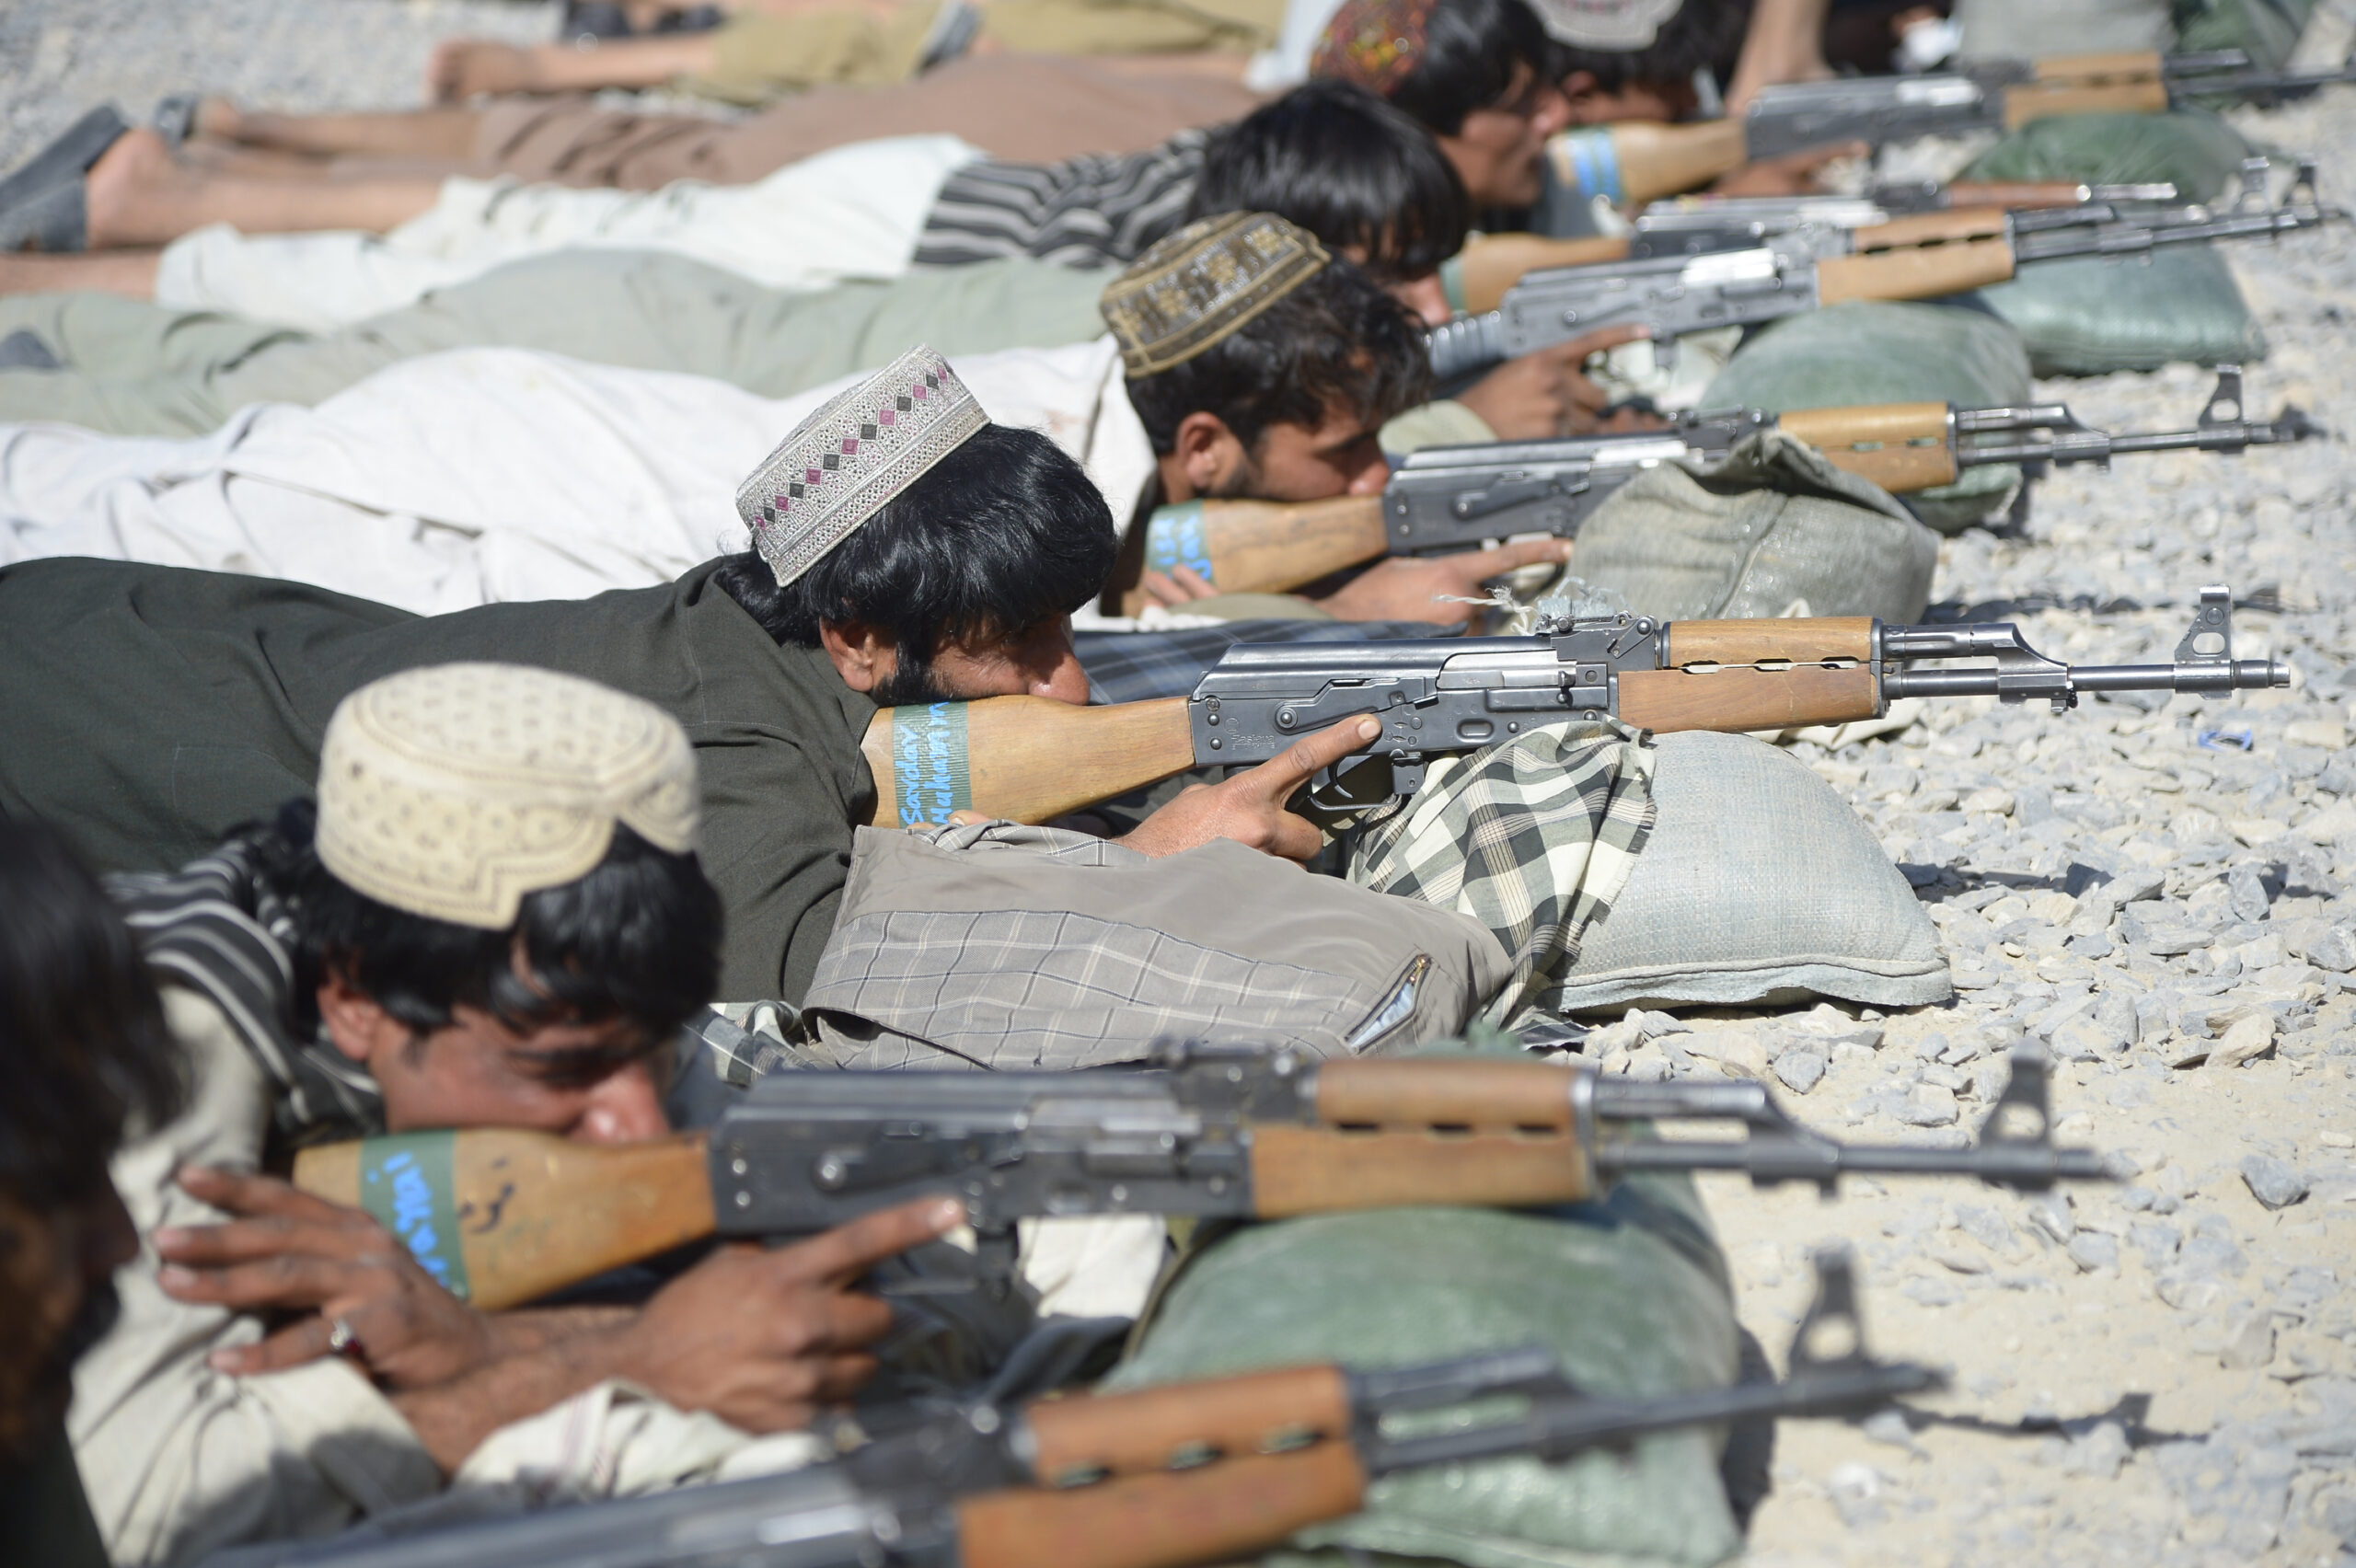
Afghan Local Police (ALP) candidates practice basic rifle marksmanship at a Coalition Forces site in Arghandab district, Kandahar province, Afghanistan, Oct. 16, 2012. The candidates undergo a three-week course which covers basic marksmanship, patrolling, improvised explosive device recognition and security techniques. The ALP program allows Afghans to provide security for their home villages and districts. Note: These are a variant of the M70 rifle as they do not have the grenade launching sight found on the Yugoslav-era M70B1 rifles. Photo obtained from Wikimedia. The author is Petty Officer 2nd Class Ernesto Hernandez Fonte.
Zastava M92 semi automatic rifle on display at “Partner 2011” military fair. Obtained from Wikimedia. Author is Srđan Popović.
Zastava M-93 Black Arrow, 12.7 mm. Obtained from Wikimedia. Author is Marko M.
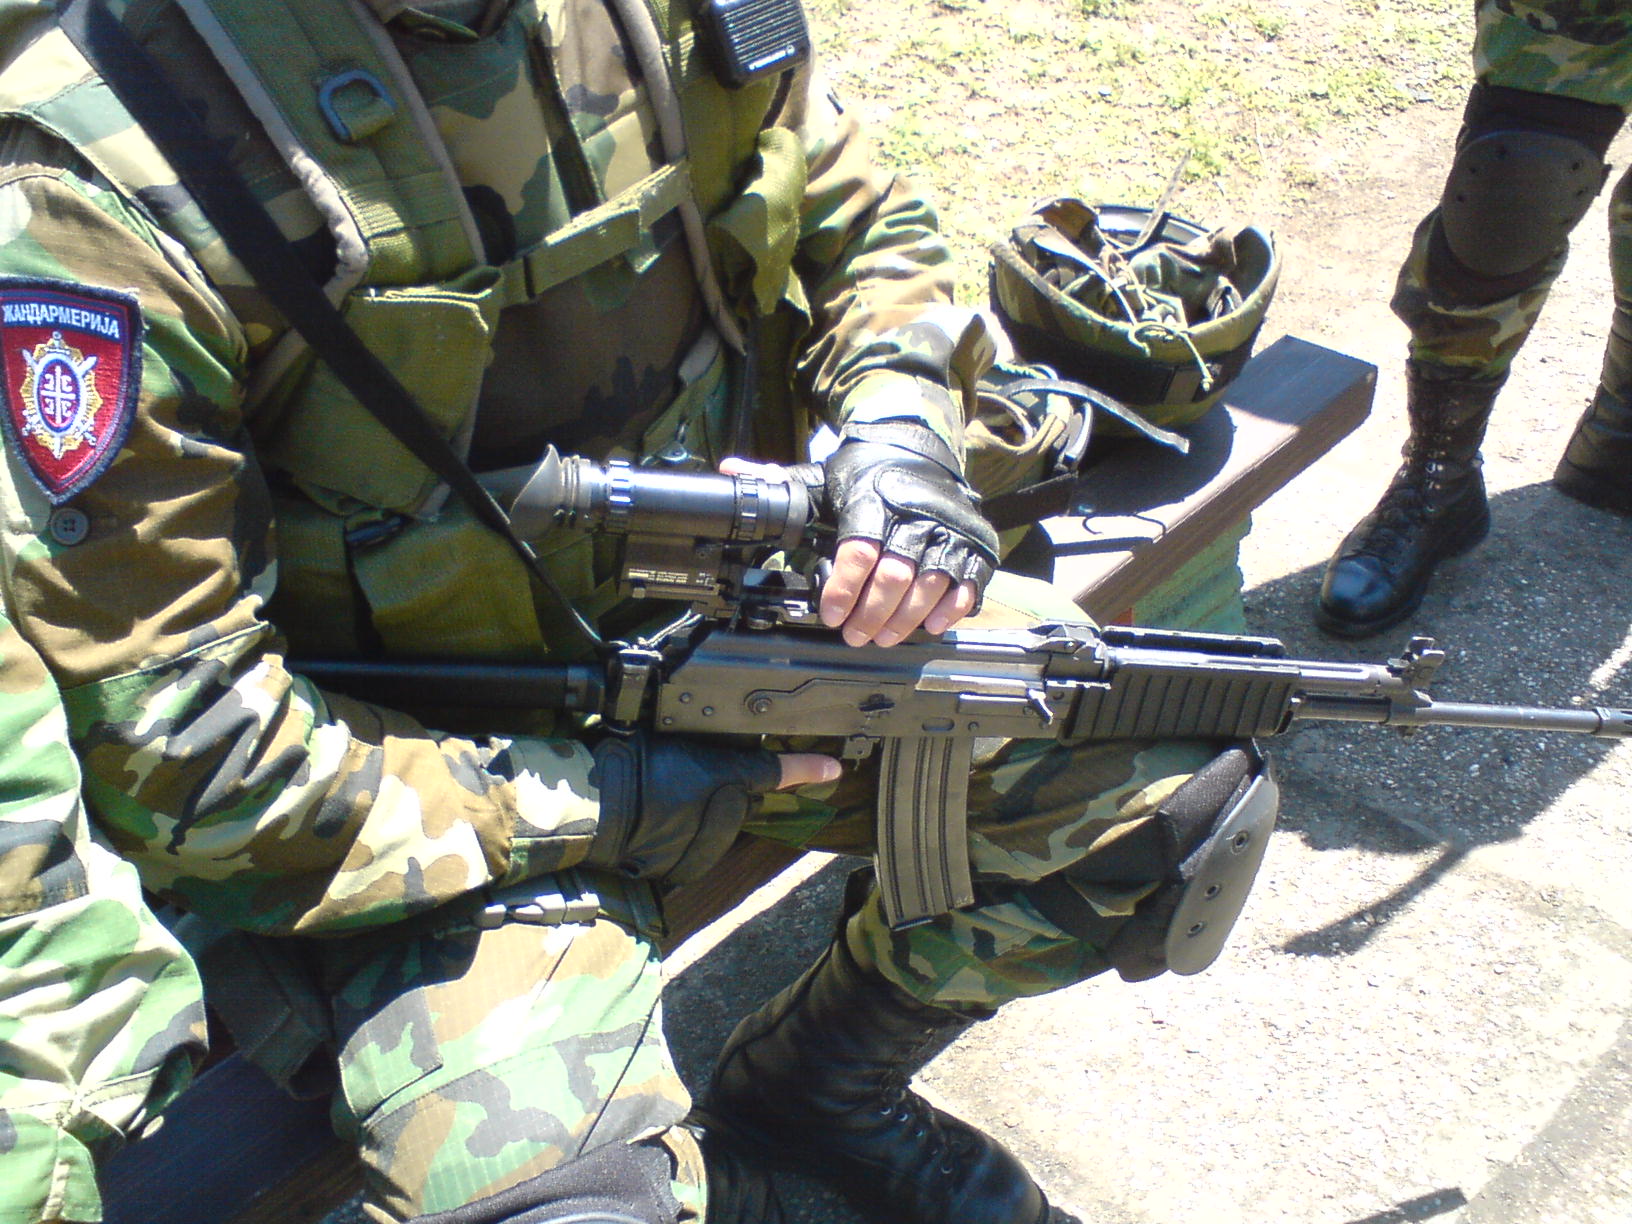
Zastava М21 rifle of Serbian Gendarmerie. Photo obtained from Wikimedia. The author is Boksi.
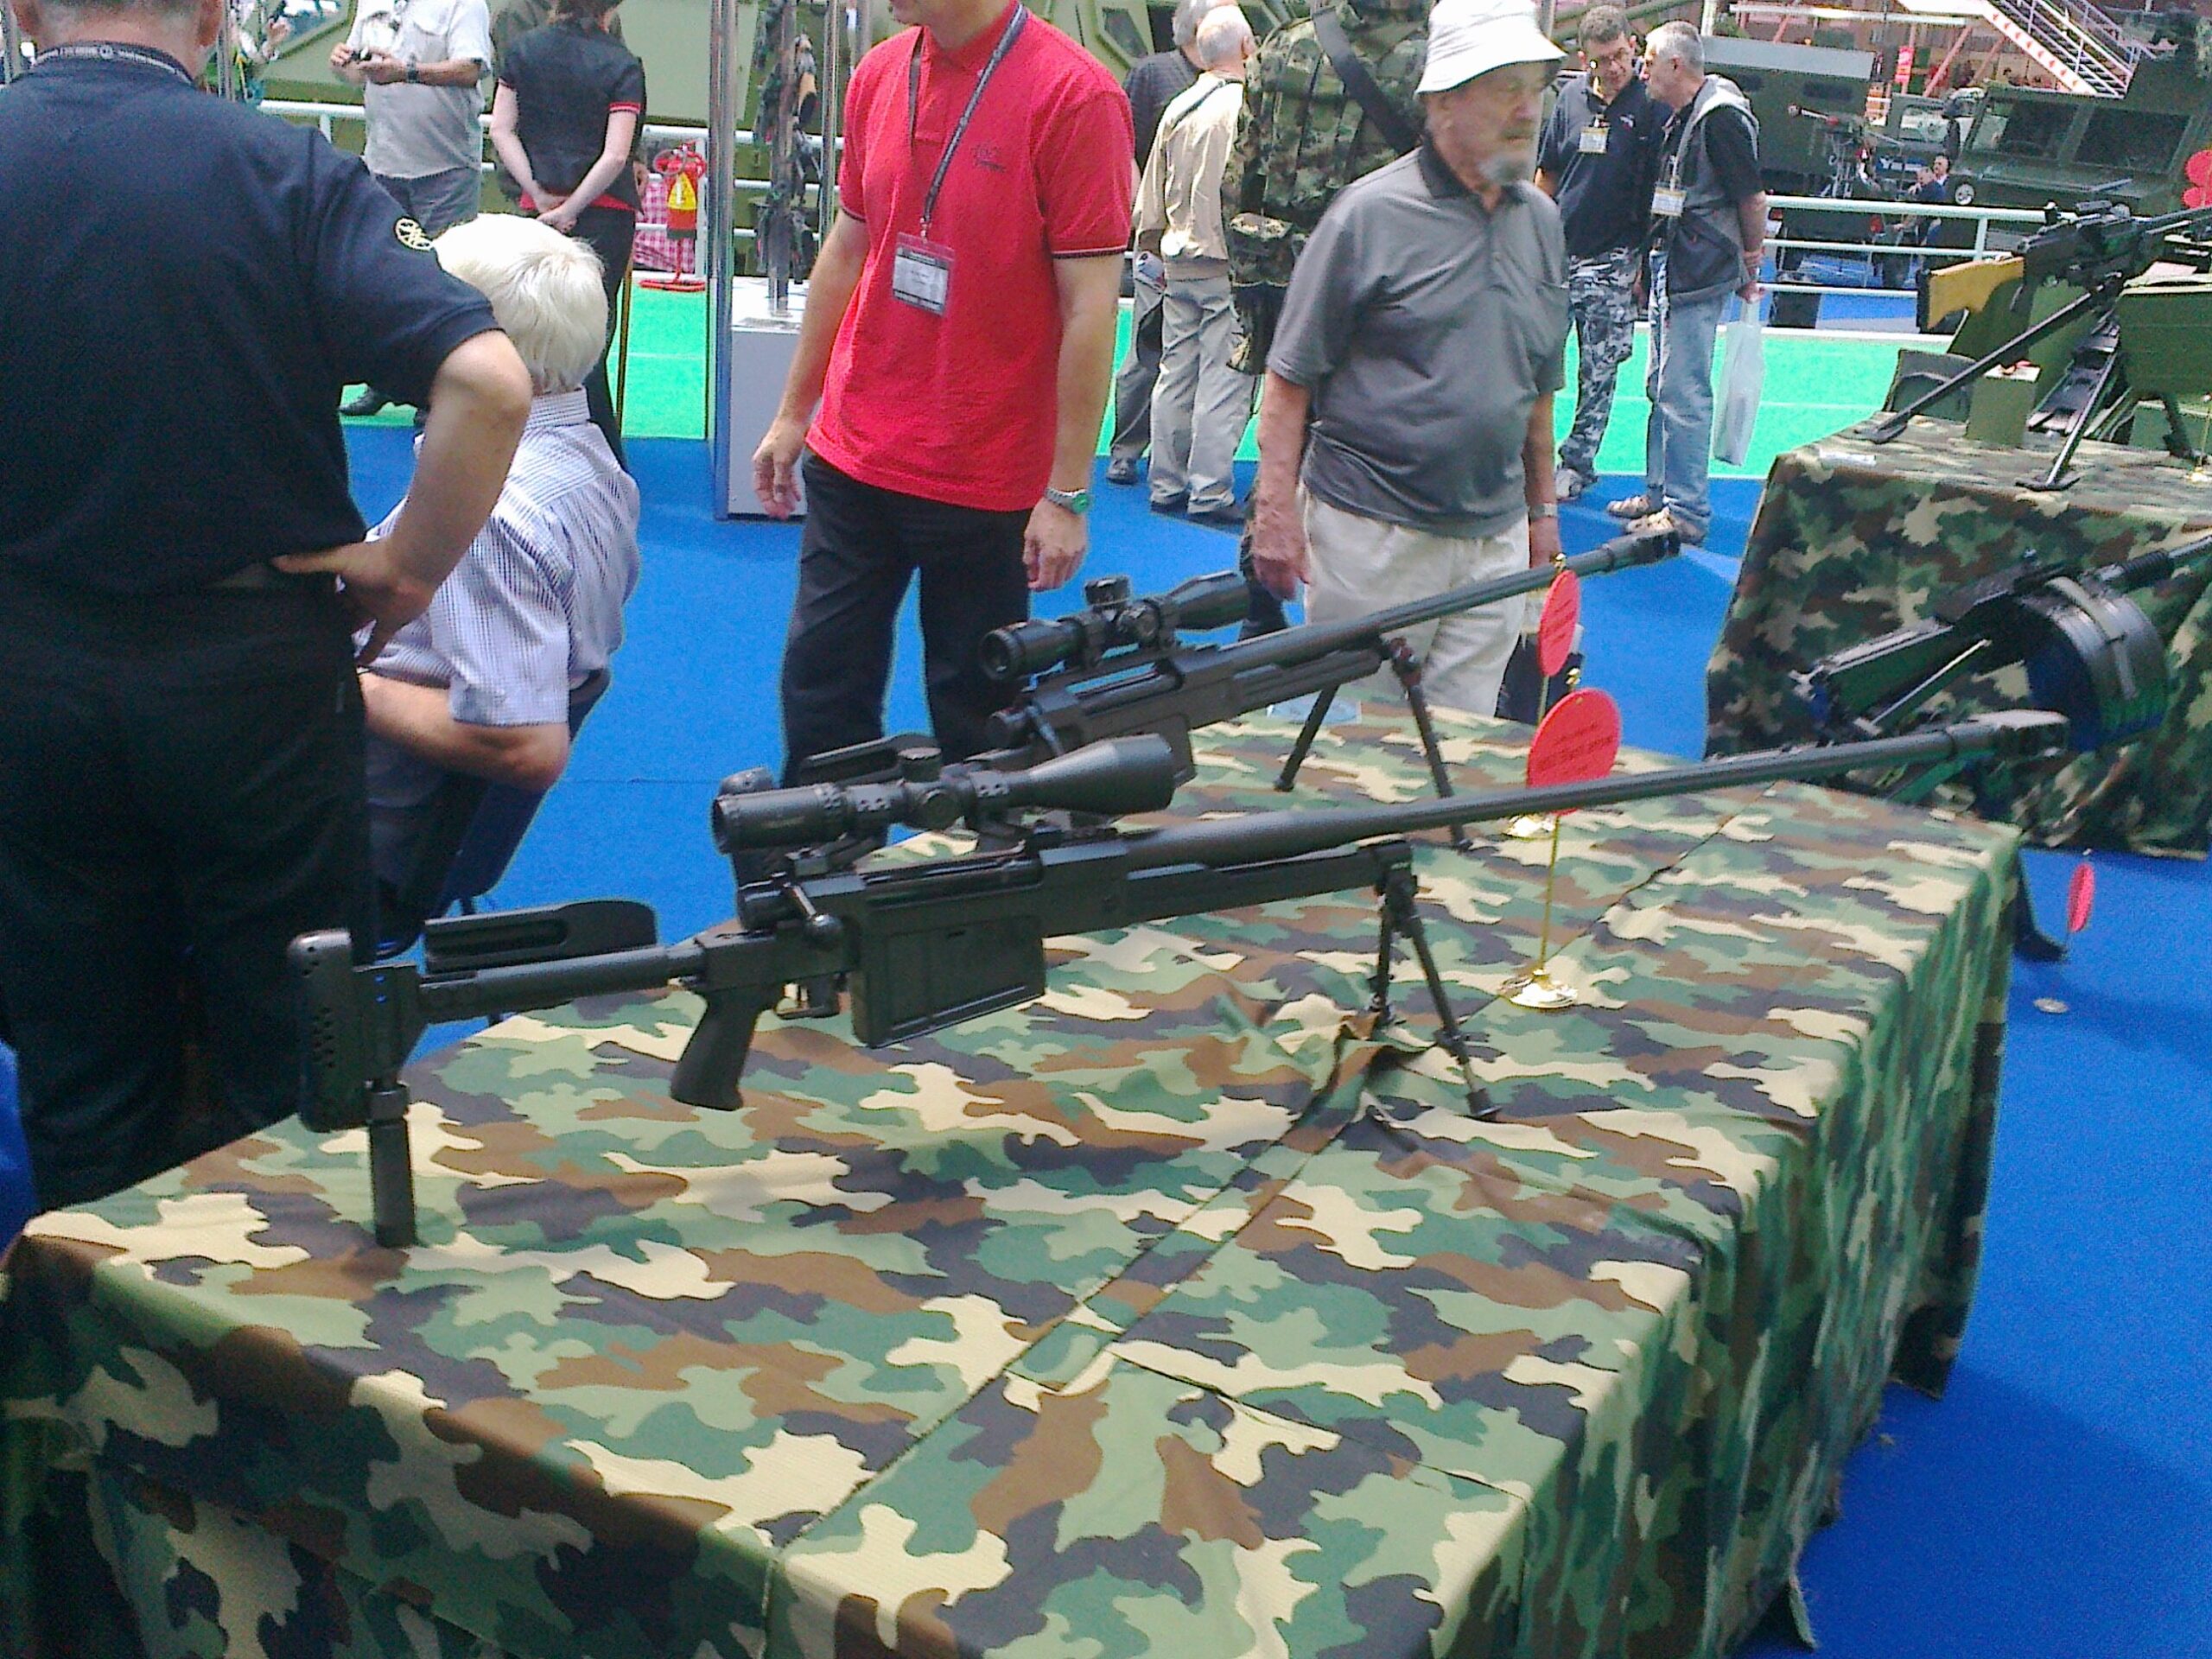
Zastava M12 Black Spear on display during Partner 2013 arms fair, Belgrade. Photo obtained from Wikimedia. The authors is Proka89.
Works cited
- Zastava Arms – Internet Movie Firearms Database – Guns in Movies, TV and Video Games, accessed May 13, 2025, https://www.imfdb.org/wiki/Zastava_Arms
- Zastava Arms – Википедия, accessed May 13, 2025, https://ru.wikipedia.org/wiki/Zastava_Arms
- About us – Zastava oružje ad, accessed May 13, 2025, https://www.zastava-arms.rs/en/about-us/
- Zastava Arms – Wikipedia, accessed May 13, 2025, https://en.wikipedia.org/wiki/Zastava_Arms
- Zastava Weapons Factory Kragujevac – TracesOfWar.com, accessed May 13, 2025, https://www.tracesofwar.com/sights/148989/Zastava-Weapons-Factory-Kragujevac.htm
- History – Zastava Arms USA, accessed May 13, 2025, https://zastavaarmsusa.com/history/
- Profile – Zastava oružje ad – zastava-arms.rs, accessed May 13, 2025, https://www.zastava-arms.rs/en/profile/
- Zastava Automobiles – Wikipedia, accessed May 13, 2025, https://en.wikipedia.org/wiki/Zastava_Automobiles
- History of Yugo, accessed May 13, 2025, http://freeweb.deltha.hu/zastava.in.hu/hist.htm
- Zastava Arms – Company – RouteYou, accessed May 13, 2025, https://www.routeyou.com/en-yu/location/view/51445771
- Zastava Arms, accessed May 13, 2025, https://sadefensejournal.com/zastava-arms/
- The Yugoslavian M53 Machine Gun: Historical Lookback – Firearms News, accessed May 13, 2025, https://www.firearmsnews.com/editorial/yugo-m53-machine-gun/488581
- Kosovo War – Wikipedia, accessed May 13, 2025, https://en.wikipedia.org/wiki/Kosovo_War
- Војно-технички завод у Крагујевцу — Википедија, accessed May 13, 2025, https://sr.wikipedia.org/wiki/%D0%92%D0%BE%D1%98%D0%BD%D0%BE-%D1%82%D0%B5%D1%85%D0%BD%D0%B8%D1%87%D0%BA%D0%B8_%D0%B7%D0%B0%D0%B2%D0%BE%D0%B4_%D1%83_%D0%9A%D1%80%D0%B0%D0%B3%D1%83%D1%98%D0%B5%D0%B2%D1%86%D1%83
- Mauser-Koka – Wikipedia, accessed May 13, 2025, https://en.wikipedia.org/wiki/Mauser-Koka
- FN Model 24 and Model 30 – Wikipedia, accessed May 13, 2025, https://en.wikipedia.org/wiki/FN_Model_24_and_Model_30
- Zastava M70 assault rifle – Wikipedia, accessed May 13, 2025, https://en.wikipedia.org/wiki/Zastava_M70_assault_rifle
- РТК | Застава ковачница – RTK, accessed May 13, 2025, https://rtk.co.rs/tag/%D0%B7%D0%B0%D1%81%D1%82%D0%B0%D0%B2%D0%B0-%D0%BA%D0%BE%D0%B2%D0%B0%D1%87%D0%BD%D0%B8%D1%86%D0%B0/
- Inside Serbia’s Booming Arms Industry – Radio Free Europe, accessed May 13, 2025, https://www.rferl.org/a/24998852.html
- Zastava Arms USA – AT3 Tactical, accessed May 13, 2025, https://www.at3tactical.com/collections/zastava-arms-usa
- Zastava ZPAP M70: An Authentic AK For The U.S. Market | An Official Journal Of The NRA, accessed May 13, 2025, https://www.americanrifleman.org/content/zastava-zpap-m70-an-authentic-ak-for-the-u-s-market/
- Застава оружје — Википедија, accessed May 13, 2025, https://sr.wikipedia.org/wiki/%D0%97%D0%B0%D1%81%D1%82%D0%B0%D0%B2%D0%B0_%D0%BE%D1%80%D1%83%D0%B6%D1%98%D0%B5
- Zastava oružje — Википедија, accessed May 13, 2025, https://sr.wikipedia.org/sr-el/%D0%97%D0%B0%D1%81%D1%82%D0%B0%D0%B2%D0%B0_%D0%BE%D1%80%D1%83%D0%B6%D1%98%D0%B5
- Old Gun Foundry Museum – European route of industrial heritage – ERIH, accessed May 13, 2025, https://www.erih.net/i-want-to-go-there/site/old-gun-foundry-museum
- ВОЈСКА КРАЉЕВИНЕ СРБИЈЕ – ПРВИ СВЕТСКИ РАТ, accessed May 13, 2025, https://mikiprogramer.wordpress.com/%D0%B2%D0%BE%D1%98%D1%81%D0%BA%D0%B0-%D0%BA%D1%80%D0%B0%D1%99%D0%B5%D0%B2%D0%B8%D0%BD%D0%B5-%D1%81%D1%80%D0%B1%D0%B8%D1%98%D0%B5/
- Industrijalizacija Kragujevca: Od topova do automobila – Far, accessed May 13, 2025, https://far.rs/sr/2018/08/30/industrijalizacija-kragujevca-od-topova-automobila/
- Muzej Stara livnica, accessed May 13, 2025, http://www.muzej-topolivnica.rs/
- The Serbian Army and its Struggle with the Ammunition Crisis of 1914 – Časopis „Istorija 20. veka“, accessed May 13, 2025, https://istorija20veka.rs/wp-content/uploads/2024/01/2024_1_2_sar_19-44.pdf
- Yugoslavian Mauser M24/52-C 8mm Mauser (7.92×57) Rifle – Colorado Gun Sales, accessed May 13, 2025, https://cogunsales.com/product/yugoslavian-mauser-m24-52-c-8mm-mauser-7-92×57-rifle/
- WW1 WW2 Kingdom Of Yugoslavia M1924 Serbian Yugoslavian VTZ Bayonet With Scabbard – YuAntiques, accessed May 13, 2025, https://www.yuantiques.com/ww1-ww2-kingdom-of-yugoslavia-m1924-serbian-yugoslavian-vtz-bayonet-with-scabbard
- The Kragujevac Massacre 1941| A Brutal Nazi Suppression at Yugoslavia – The Kootneeti, accessed May 13, 2025, https://thekootneeti.in/2017/10/20/the-kragujevac-massacre-1941-a-brutal-nazi-suppression-at-yugoslavia/
- Kragujevac massacre – Wikipedia, accessed May 13, 2025, https://en.wikipedia.org/wiki/Kragujevac_massacre
- How good is Zavasta : r/ak47 – Reddit, accessed May 13, 2025, https://www.reddit.com/r/ak47/comments/1ajvmg1/how_good_is_zavasta/
- TFA][AT] Zastava M70 (Cold War Series) – Steam Community, accessed May 13, 2025, https://steamcommunity.com/sharedfiles/filedetails/?id=3239065979
- Zastava Guns for Sale | Black Basin Outdoors, accessed May 13, 2025, https://blackbasin.com/zastava/
- Zastava M 98/48 – Wikipedia, accessed May 13, 2025, https://en.wikipedia.org/wiki/Zastava_M_98/48
- ZASTAVA M48 rifle – American Liberator, accessed May 13, 2025, https://www.americanliberator.cz/en/gun/opakovaci-puska-crvena-zastava-m48
- Zastava M48 – Wikipedia, accessed May 13, 2025, https://en.wikipedia.org/wiki/Zastava_M48
- Zastava M53 | Weaponsystems.net, accessed May 13, 2025, https://weaponsystems.net/system/1673-Zastava%20M53
- M53 Machine Gun – The Recordist, accessed May 13, 2025, https://therecordist.com/product/m53-machine-gun/
- Застава М53 — Википедија, accessed May 13, 2025, https://sr.wikipedia.org/wiki/%D0%97%D0%B0%D1%81%D1%82%D0%B0%D0%B2%D0%B0_%D0%9C53
- Yugoslavian M70 Assault Rifle. 7.62 cal – Live Firing – History in the Making, accessed May 13, 2025, https://history-making.com/product/yugoslavian-m72-assault-rifle-7-62-cal-heavy-barrel-live-firing-2/
- Застава М70 – Википедија, accessed May 13, 2025, https://sr.wikipedia.org/wiki/%D0%97%D0%B0%D1%81%D1%82%D0%B0%D0%B2%D0%B0_%D0%9C70
- Zastava M70 (автомат) – Википедия, accessed May 13, 2025, https://ru.wikipedia.org/wiki/Zastava_M70_(%D0%B0%D0%B2%D1%82%D0%BE%D0%BC%D0%B0%D1%82)
- Штык-нож к пистолету-пулемёту М56 «Застава». – militaris, accessed May 13, 2025, http://militaris.ru/index.php/katalog/%D1%8E%D0%B3%D0%BE%D1%81%D0%BB%D0%B0%D0%B2%D0%B8%D1%8F/%D1%88%D1%82%D1%8B%D0%BA-%D0%BD%D0%BE%D0%B6-%D0%BA-%D0%BF%D0%B8%D1%81%D1%82%D0%BE%D0%BB%D0%B5%D1%82%D1%83-%D0%BF%D1%83%D0%BB%D0%B5%D0%BC%D1%91%D1%82%D1%83-%D0%BC56-%D0%B7%D0%B0%D1%81%D1%82%D0%B0%D0%B2%D0%B0-detail
- Застава М70А — Википедија, accessed May 13, 2025, https://sr.wikipedia.org/wiki/%D0%97%D0%B0%D1%81%D1%82%D0%B0%D0%B2%D0%B0_%D0%9C70%D0%90
- Zastava oružje, accessed May 13, 2025, https://oruzje.net/zastava-oruzje
- Hunting and sporting firearms, accessed May 13, 2025, https://www.armoran.ch/wp-content/uploads/2019/07/Zastava_Arms_Zivil.pdf
- Sporting Rifle LK M70 – Zastava Arms USA, accessed May 13, 2025, https://zastavaarmsusa.com/product/sporting-rifle-lk-m70/
- Хронологија распада СФР Југославије – Српска енциклопедија, accessed May 13, 2025, http://www.srpskaenciklopedija.org/doku.php?id=%D1%85%D1%80%D0%BE%D0%BD%D0%BE%D0%BB%D0%BE%D0%B3%D0%B8%D1%98%D0%B0_%D1%80%D0%B0%D1%81%D0%BF%D0%B0%D0%B4%D0%B0_%D1%81%D1%84%D1%80_%D1%98%D1%83%D0%B3%D0%BE%D1%81%D0%BB%D0%B0%D0%B2%D0%B8%D1%98%D0%B5
- НАТО бомбардовање Југославије – Википедија, accessed May 13, 2025, https://sr.wikipedia.org/wiki/%D0%9D%D0%90%D0%A2%D0%9E_%D0%B1%D0%BE%D0%BC%D0%B1%D0%B0%D1%80%D0%B4%D0%BE%D0%B2%D0%B0%D1%9A%D0%B5_%D0%88%D1%83%D0%B3%D0%BE%D1%81%D0%BB%D0%B0%D0%B2%D0%B8%D1%98%D0%B5
- Югославская автоматическая винтовка «Застава» – боевой и гражданский варианты, accessed May 13, 2025, https://www.militaryplatform.ru/10307-jugoslavskaja-avtomaticheskaja-vintovka-zastava-boevoj-i-grazhdanskij-varianty.html
- military guns catalogue® – zastava-arms.rs, accessed May 13, 2025, https://zastava-arms.rs/wp-content/uploads/2019/09/military_catalogue_2019_w.pdf
- Katalozi – Zastava oružje ad, accessed May 13, 2025, https://www.zastava-arms.rs/katalozi/
- Успешан наступ фабрике „Застава оружје“ на изложби SHOT Show 2025. у Лас Вегасу, accessed May 13, 2025, https://rtk.co.rs/uspesan-nastup-fabrike-zastava-oruzje-na-izlozbi-shot-show-2025-u-las-vegasu/
- Review: Zastava ZPAP M70 Rifle | An Official Journal Of The NRA – Shooting Illustrated, accessed May 13, 2025, https://www.shootingillustrated.com/content/review-zastava-zpap-m70-rifle/
- Отворен међународни сајам НВО “IDEX 2025”, Абу Даби – УАЕ – Yugoimport, accessed May 13, 2025, https://www.yugoimport.com/aktuelnosti/dogadjaji/otvoren-17-medjunarodni-sajam-nvo-idex-2025-abu-dabi-uae
- “Zastava Arms” and “Remington” discontinued cooperation due to financial crisis – export to US market through new mediator – eKapija, accessed May 13, 2025, https://www.ekapija.com/en/news/204951/where-to-invest/infrastructure%2525252525252525252Findex
- Government of Serbia approved export of “Zastava” arms to Armenia, arrangement worth 1.75m USD – eKapija, accessed May 13, 2025, https://www.ekapija.com/en/news/86107/infrastructure/real-estate%252Finvestments
- „Заставино” оружје иде у Америку за 235 милиона долара – Politika, accessed May 13, 2025, https://www.politika.rs/scc/clanak/479359/zastavino-oruzje-ide-u-ameriku-za-235-miliona-dolara
- „Застава оружје” уговорила извоз у САД вредан 235 милиона долара – Politika, accessed May 13, 2025, https://www.politika.rs/scc/clanak/479728/zastava-oruzje-ugovorila-izvoz-u-sad-vredan-235-miliona-dolara
- List of military aid to Ukraine during the Russo-Ukrainian War – Wikipedia, accessed May 13, 2025, https://en.wikipedia.org/wiki/List_of_military_aid_to_Ukraine_during_the_Russo-Ukrainian_War
- Stanje i perspektive ekonomsko-finansijskih odnosa Srbije sa inostranstvom, accessed May 13, 2025, https://ndes.ekof.bg.ac.rs/downloadsakta/zbornik2014deo2.pdf
- Smenjeni dosadašnji članovi Nadzornog odbora “Zastava oružje” – Nova Ekonomija, accessed May 13, 2025, https://novaekonomija.rs/vesti-iz-zemlje/smenjeni-dosadasnji-clanovi-nadzornog-odbora-zastava-oruzje
- Defense industry of Serbia – Wikipedia, accessed May 13, 2025, https://en.wikipedia.org/wiki/Defense_industry_of_Serbia
- застава оружје ад надзорни одбор број: 28 – дана: 16.04.2025. године крагујевац – zastava-arms.rs, accessed May 13, 2025, https://www.zastava-arms.rs/wp-content/uploads/2025/04/Odluka-o-sazivanju-vanredne-sednice-Skupstine-12.05.2025.pdf
- Zastava USA: Its not about rifle, it is about factory | AfricaHunting.com, accessed May 13, 2025, https://www.africahunting.com/threads/zastava-usa-its-not-about-rifle-it-is-about-factory.79578/
- Zastava LK M70 worth the money? | AfricaHunting.com, accessed May 13, 2025, https://www.africahunting.com/threads/zastava-lk-m70-worth-the-money.81209/
- News – Zastava oružje ad – zastava-arms.rs, accessed May 13, 2025, https://www.zastava-arms.rs/en/news/
- Вести – Zastava oružje ad, accessed May 13, 2025, https://www.zastava-arms.rs/sr/%D0%B2%D0%B5%D1%81%D1%82%D0%B8/
- Музеј “Стара ливница” – ГТО Крагујевац, accessed May 13, 2025, https://gtokg.org.rs/muzej-stara-livnica/