Category Archives: Fixing Stuff

Sick and Tired of Mosquitoes? How I Got Rid of Them With Talstar P Pro

Our home is in a former swampy area that was drained in the 1980s and a subdivision built.  In short, you dig down and can hit water fairly soon – usually within 10 feet.  At any rate, we’ve had a very wet spring and summer and had standing water in our lawn until late-June and the mosquitoes have been the worst I ever recall in the 20 years we’ve been here.  We could not stay out at night or we’d get attacked unless we hosed ourselves down with Deep Woods Off.  In short, something needed to be done.

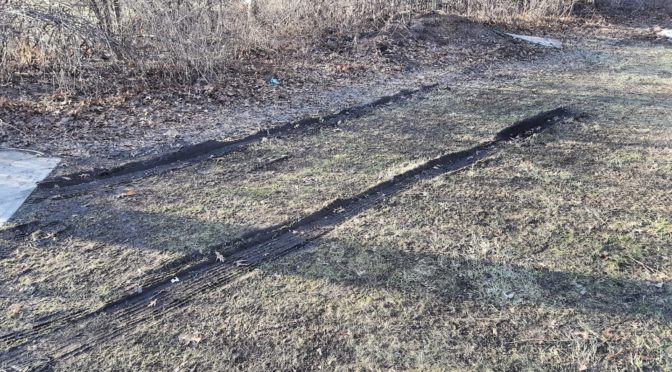
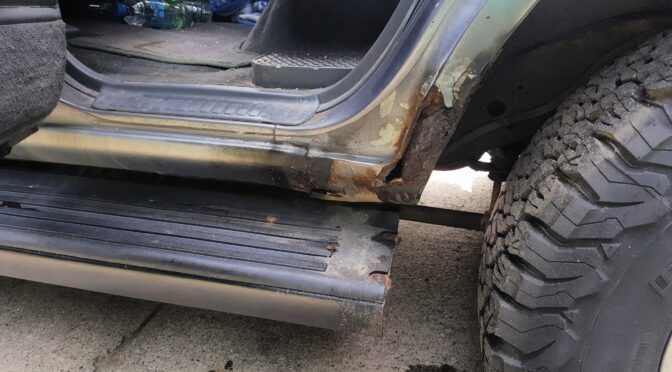
This hedgerow is right by my garage and ensured the mosquitoes had a perfect base to attack me from and rings our property:

When I was at Ace Hardware, I saw Off! brand’s Backyard Pretreat that was supposed to kill mosquitoes and leave a residue to repel them.  I thought they would know what to do given their experience – as it turns out, this product is a rip off.

I’m sad to report that after three jugs of this stuff and my getting bit over and over while applying it, I can’t say it did anything at all even several days later.  I really had high hopes – I dragged a long hose all over the place spraying stuff down over and over with no noticeable improvement.

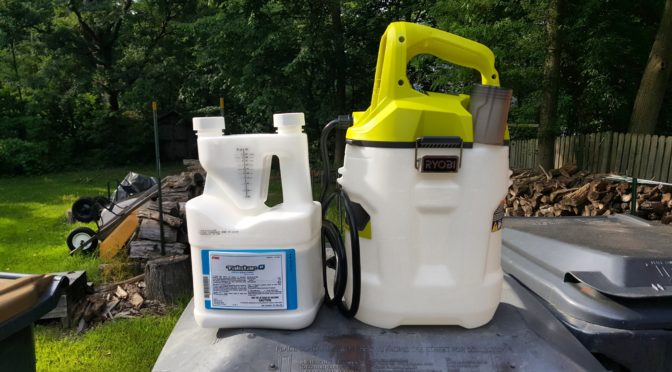
On Facebook, I posted my woes with Mosquito control and a friend, Allan, suggested Talstar P Pro and a Ryobi cordless electric sprayer to help with evenly spraying a ton of solution.  I had never heard of Talstar so I did a search and it is very well regarded.  Allan told me they live on a wooded ravine and he’s been using it for 10 years to control mosquitoes and it worked exceptionally well for him.

Talstar P Professional

Every once in a while on Amazon, you see a review score that is mind blowing.  FMC’s Talstar P Professional 96 oz has 2,263 customer reviews and a combined score of 4.6 out of 5 stars.  That is one heck of a score and is only possible if something works really, really well.

5/21/2023 You will no longer find it on Amazon – you need the liquid Talstar and I tend to find eBay the best source to buy it. Click here for a current list on eBay.

So, based on what I read and Allan’s recommendation, I ordered the 96oz bottle.   I then read up on the Ryobi sprayer.  It gets good reviews, uses the 18volt Ryobi batteries (it comes with one battery and a charger) and it has a three year warranty.  I ordered it off the Home Depot website [Click here]  as they had free next day home delivery and since I had to wait for the Talstar, I figured it would save me a trip.

Note:  You can use any pressurized sprayer you want – I have 1.5 acres and knew I would be applying gallons and gallons of it.  My shoulders and elbows hurt enough as it is and I didn’t want to incur the repetitive stress.

The sprayer arrived the next day and the Talstar the day after.  While I was waiting, I went to the FMC website to read up on Talstar to make sure I understood how to apply it plus I peppered Allan with his experience.

I would recommend you go to the website [click here] as they have recommendations on best practices for mosquito management and Talstar P Pro is actually interesting from a chemical perspective.

The active ingredient is Bifenthrin, which is similar to the chemical extracted from Chrysanthemums to kill insects.  Here are two links so you can read more at the National Pesticide Information Center.the user guide for the Talstar P.

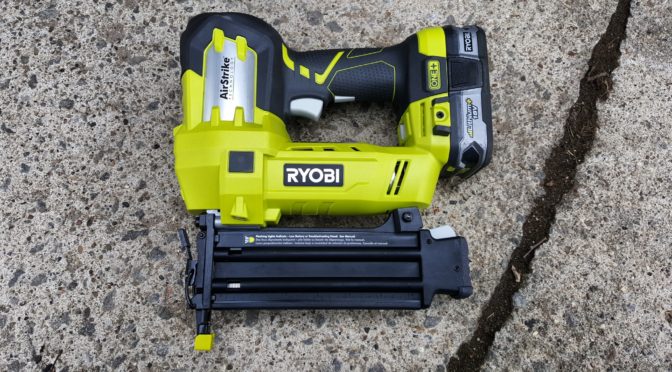
Ryobi Model P2830A One+ 18-Volt Lithiu-Ion Cordless 2 Gallon Chemical Sprayer

Here are photos of the sprayer.   I charged the battery and screwed in all the fittings.  They are all lose so be sure to do that.  I didn’t have any loose plastic in the tank but I did rinse it out just to be safe.

Application

After reading the user guide, I planned to use one ounce of Talstar to one gallon of water to ensure I had residue to continue killing mosquitoes.  Since it was a two gallon tank, I increased it just a bit to 2.5 ounces per two gallon tank.  Note, a real nice perk is that the tank lid is a measuring cup!  I would use it, rinse it out and pour the mix into the tank before filling it with water.

While doing the work, I wore Nitrile gloves just to avoid contact plus I was constantly adjusting the sprayer tip from coarse mist to a stream to try and reach back over brush, through leaves, etc.

FMC recommends spraying at night or in the evening when mosquitoes are active.  I was busy the first night so I did it the following morning at 7am.   I mixed up two gallons and started spraying around the house, pool, garden and so forth.  I hosed down the bushes, the walls of the house and under the eaves.  I also sprayed the hedge – first using a coarse spray on all the brush, leaves and ground.  I found adjusting the tip to a stream was handy to penetrate the brush and also reach further back.  I’d just come back to the hose and what not and mix another two gallons of spray (2 gallons water and 2.5oz of Talstar) and kept spraying.

It took me aboput 30-45 minutes and 8 gallons, or four complete tanks, to do most of our yard.  I skipped probably a half acre of grass starting about 100-150 feet from our house but I did all of the hedge row, bushes, etc.  I was pleasantly surprised that the 2.0Ah battery was able to do the whole yard.  When I finished the first batch, I did plug the battery in and let it charge.

That night I still saw mosquitoes, but fewer of them, and applied a second dose around 7:30-8pm.  Same procedure – 8 gallons focusing around the house, all the bushes, etc.

Results

The next morning – no mosquitoes.  Whoa!!!  I did not see one single mosquito all day.  That night I worked on cars without being attacked!  I did so again yesterday and just had breakfast with my wife in her garden — something that would have been next to impossible.

I’d say the spray got a good number of them but when they landed in the residue, that got rid of a ton as well.  In other words, you might see a bit of a delay from dose to noticeable reduction.

In four weeks, I am going to do it again.  Even my wife, who always groans at me and my tinkering, was impressed and told me to make sure I apply another dose before the first one wears off!

It’s really not that expensive in the long run.  The bottle holds 96oz.  I use 10oz per 8 gallons (4 batches x 2.5oz/batch).  If I apply it twice per application, that means I’ll use 20oz per time, which means I’ll get just over 4 complete applications (so about four months of protection).  At $35/bottle, that’s about $9/time plus however you want to account for the sprayer.  For me, it’s worth it.  My wife really reacts to mosquito bites plus we can enjoy being outside again and I can go back to working outside without getting attacked.

I’d highly, highly recommend you skip the ripoff gimmicks and temporary fixes.  Spend the money and get Talstar Pro and a spray bottle (if you don’t have one).  It made a world of difference for us and wanted to spread the word that this stuff really works.

May 21, 2023 Talstar is no longer on Amazon but there are tons of sellers on eBay – click here to open eBay and see the latest Talstar P Pro liquid listings..


If you find this post useful, please share the link on Facebook, with your friends, etc. Your support is much appreciated and if you have any feedback, please email me at in**@ro*********.com. Please note that for links to other websites, I may be paid via an affiliate program such as Avantlink, Impact, Amazon and eBay.


Resurrecting a Gummed Up Air Tool Without Disassembly

Recently I got out my Ingersoll Rand model 117 air hammer to use and found out its action had gotten all gummed up.  It’s been probably a year since I last used it even then probably didn’t use it a ton.  I always drip air tool oil into a tool before use because my air lines run driers and particulate filters for my plastics work.  Thus, I have to manually apply the oil before I use a tool.

When I went to use 117 the piston would not actuate and when I shook the tool, it didn’t sound like it normally did.  My first thought was to check the air pressure and it was at 90 PSI and the regulator was wide open so my next guess was lubrication.  Adding more air tool oil didn’t make any difference.  I then remembered a tip a guy told me years ago with gummy air tools – spray a ton of PB Blaster down the quick connect fitting and let it sit with the quick connect fitting up in the air trapping the penetrating oil in the tool for 5 minutes and try again.

So, I did that, reconnected the air line and it worked!  The tool worked like a champ and it blew PB Blaster everywhere!  I did it one more time just to make sure stuff was clear and ran the tool for a maybe 30 seconds to blow the PB Blaster out, wiped it down with a rag and then put in four drops of air tool oil.  Problem solved.

This was a huge win because I was in the middle of working on AK and wanted to use this tool plus I didn’t have time to take it all apart,  I’m writing this post a few weeks later after completing the AK build and the IR 117 is still working like a champ.

By the way, PB Blaster can be found at tons of automotive stores.  The packing looks gimmicky but it is actually one of the best penetraing oils that is out there along with Kroil.  If I didn’t have access to either of those, I would have made up some Ed’s Red or at least used some form of transmission fluid.  Tranny fluid works great but take a while to penetrate gunk.


If you find this post useful, please share the link on Facebook, with your friends, etc. Your support is much appreciated and if you have any feedback, please email me at in**@ro*********.com. Please note that for links to other websites, I may be paid via an affiliate program such as Avantlink, Impact, Amazon and eBay.


Getting the Simplicity Broadmor 16 Hydro Lawn Tractor Ready for the Season – Air and Oil Filters via Amazon

Given we live in a rural area, it can be a challenge trying to find the right air and oil filter for our Simplicity Broadmor 16 Hydro tractor.  It has a Kohler engine and the air and oil filters are readily available on Amazon.   It makes life way easier to just order them.  Sometimes I’ll get a deal on several and have one for the following year.

So, just to make things easy for you, here are links if you need to order them:

I only change the oil filter once a year.  If there’s a real good deal, I might buy a two pack.   You can search and double check prices.

For the air filter, I definitely use the model with the pre-cleaner.  The foam pre-cleaner catches a ton of dust.  Each year I have to clean and re-oil the pre-cleaner several times due to all the dust.

I change these each season plus I grease the oil fittings.   When we got the tractor I asked the mechanic who delivered it what would be the one thing he’d recommend to get long life from the tractor.  Of course he pointed out the oil and air filters but then he added to make sure to keep the tractor greased using the Zerk fittings and I have ever since.

I hope this helps you out some as well.


If you find this post useful, please share the link on Facebook, with your friends, etc. Your support is much appreciated and if you have any feedback, please email me at in**@ro*********.com. Please note that for links to other websites, I may be paid via an affiliate program such as Avantlink, Impact, Amazon and eBay.


Fixed a Starting Problem on my Simplicity Broadmor 16 Hydro Tractor

We bought this Simplicity Broadmor 16HP lawn tractor back around 1999-ish and it has served us well.  In the years since, I’ve had to replace a few parts and figure things out as the dealer went out of business.  Luckily, finding parts is pretty straight forward given the WWW and Amazon.

At some point last summer, the tractor began to develop intermittent problems with starting when it was hot.  It didn’t happen all the time and was a bear to try and find – sometimes you’d turn the starter switch and nothing would happen.  Well, I just assumed it was the solenoid given similar problems with cars over the years.  I did some digging and bought both a solenoid and starter off of Amazon.  In the Simplicity, and many tractors for that matter, they are two separate parts mounted away from each other.  The solenoid is up under the dash held in place by two screws and the starter is held in place by two screws and a collar.

I ordered a Caltric Starter for the Kohler CV16 engine and it mounted up just fine.

I ordered a Stens 435-099 starter solenoid and it went in just fine as well.

Well, I thought I was set but the problem got worse.  In a ways, that was a good thing.  Because when the problem happens readily, you can sort out what is wrong.

This spring, when we got the tractor out, every time it would get hot it would not re-start.  I put my multimeter on the starter power cable and it was dead.  I did not hear any clicking from the solenoid either.  If I wiggled the switch then it might start but not always so the switch made me suspicious.  If I used jumper cables and went right to the starter, it would start and run no problem with the key one.  Okay, time to replace the switch.

I did some digging and the replacement switch was a Briggs and Stratton 1686734SM unit.  I got that on order from Amazon and waited for it to show up.

Now there is just a bit of a twist here that I want to share with folks to save you some time.  It turns out the tractor was built using an all plastic switch (groan) part number 1718305 that requires you to change the wiring in the connector.

Note the letters next to the male spades – this is how you confirm it is the 1718305 switch – the layout of the pins:

It just so happens that to use the replacement 1686734SM unit, you need to diagonally swap the four lower wires – upper left to lower right and upper right to lower left.  They recommend you label the wires before you do the swap – I just jotted down the color codes.

The following photo is from the instruction sheet that came with the switch — it’s actually well done and helped me figure this out:

Figure 2 shows the identifying marks for the plastic 1718305 switch and exactly matched what I had.

Figure 3 shows the pin out of the original connector

Figure 4 shows the new lay out.

In case you lose track of the wires for whatever reason, here are the color codes that are in my Broadmor by labeled connector pin:

  • A.  Red / White (meaning primarily red with a white stripe)
  • B.  Red — this is from the battery so make sure your battery is disconnected
  • G.  Black
  • L. Red/Black
  • M.  Purple/White
  • S. Blue/White

First, disconnect the negative cable from the battery or you risk some fireworks when you change the red/hot wire.

To change the wires around, I moved them a pair at a time – just the lower four are changing — I ran a small blade screw driver in and loosened the female spade fitting inside the connector and pulled it back out gently with a pair of needle nose pliers.  I then swapped the location and pushed each connector into the new location.

To seal the connections, I applied a layer of silicone grease on the female connector openings so that when the male spades pushed in, they would be coated with the grease.  I have a jar of Mission Automotive brand Silicone grease that I use all the time.

I then confirmed the layout one last time, sat on the tractor, made sure the engine was clear and started it.  Everything worked on the first try – a good sign.

The switch fit nicely inside the OEM hole.  It comes with extra parts for mounting and I just did what Simplicity did – I installed the switch, used the supplied hex nut to secure it on the front and pressed on the switch cover.  I then tested again just to be safe.

By the way, here are photos of the back of the installed switch:

I then mowed part of the lawn for 10-15 minutes and when the tractor was good and hot, I turned it off and back on several times.  I then let the tractor idle for about 10-15 minutes and again could turn it off and on with no problem.

I think the problem is solved as the tractor is still working just fine.  I wanted to post this in case you needed to know what to get from Amazon or see the wire colors and hope it helps you out.

7/20/19 Update:  I did the above in June 2018 and the tractor is still running just fine.  All of the above have held up without any problems.

5/23/20 Update:  Still holding up just fine.  I’ve mowed the yard two times this year.  No problems.


If you find this post useful, please share the link on Facebook, with your friends, etc. Your support is much appreciated and if you have any feedback, please email me at in**@ro*********.com. Please note that for links to other websites, I may be paid via an affiliate program such as Avantlink, Impact, Amazon and eBay.


Ryobi 18-Volt ONE+ AirStrike 18-Gauge Cordless Brad Nailer

Well folks, I recently needed to install some molding at my mother in law’s and realized I no longer have a small compressor to run my air nailers at a remote site.  So, I recalled an article I had read that spoke well of the Ryobi Airstrike 18ga brad nailer.

The interesting twist on this nailer is that it uses an 18 volt One+ battery to operate and you don’t need a compressor or air lines.  I have a ton of Ryobi tools and decided to pick up just the tool for $129.99.

I read the manual and the tool has both an air pressure adjustment and a depth adjustment.  In the next photo, the silver dial on the top adjusts the air pressure and depth is down towards the nose.   You’ll notice I have one of the slim low-profile lithium batteries on it.

It came with 200 1-1/4″ brads and they look just like the ones I use in my air brad nailer so I have plenty for the future.  They load in the magazine just like other nailers.

Now, I definitely would recommend practicing some with this.  The balance is fairly good but what is really different is the way it cycles when you pull the trigger.  There is a split second delay as it builds up pressure and then it fires the hammer driving the brad forward.  For me, the delay took some getting used to.  We’re not talking very long at all but I’m used to bang-bang-bang-bang with an air nailer as fast as you can pull the trigger.  Here there is just enough pause to throw you off.  I found myself pulling the trigger and lifting to fast so I needed to make my self slow down, pull the trigger, let it cycle and then pull.

What I was installing was some of that cheap paper/fiber molding so it was very easy for the nailer to drive the brads in.  I really should have dialed the pressure back a bit and/or reduced the depth.  That will take further experimenting for me to learn the right combo.

All in all after driving about 30 brads, I am happy and would recommend the unit to someone who is interested in going cordless.

Note, I would consider a bigger nailer if I needed it down the road but most of the time I am close enough to my shop that I can run an airline to my big compressor.  The reviews are mixed on the big nailer as it uses a relatively oddball sized nail and I’m hoping they change that.

If you are thinking of buying one of the brad nailers, they are on Amazon but you will pay a premium.  Either get them at your local Home Depot store or buy them online:

Just the tool – click here.

The tool, battery and charger – click here.

Update 10/4/2018:  I used this while remodeling my mother-in-law’s house and did not have one problem.  I was driving between 1″ to 1-1/4″ 18ga nails through paneling, baseboards and door moldings.  Not one jam, misfire, light strike, etc.  I’m very pleased with the tool.  Like many things, I just had to get used to it.

2/27/20 Update:  Used this to tack up some wood.  This thing is so handy when you don’t have a compressor handy.


If you find this post useful, please share the link on Facebook, with your friends, etc. Your support is much appreciated and if you have any feedback, please email me at in**@ro*********.com. Please note that for links to other websites, I may be paid via an affiliate program such as Avantlink, Impact, Amazon and eBay.


Getting Unstuck With Traction Mats

Well, I parked our full size Ford Transit van at the end of the driveway on the grass to get it out of the way.  Of course, given the recent snow melt the ground turned out to be too muddy and soft to support the van’s weight – but I didn’t notice that because it took a while to slowly sink.  Yeah, I didn’t notice anything – my wife did we she went to use it!  Oh crud.  So she called my cell phone and was none too happy.  I didn’t really worry about it because my truck could pull it out – or so I thought.

I drove to the house, cockily pulled my trusty old 96 Landcruiser up in front of the van and got out one of my big tow straps and walked up to the van.   Should have been easy, right?  Wrong.  Nothing, nada to hook on to.  Ford, in their infinite wisdom does not put a tow hook, eye or anything up near the bumper!  Crap, crap, crap.  [Note, near the bottom of this blog post I added in what I found after researching how to recover a full size Transit.  I’m still irked at Ford.]

Did I mention my wife was standing their fuming?  Yeah, she was.  I should have known better than to park the heavy full size van on soft ground.  Point taken – I didn’t realize it was that soft.

At any rate, I went back and looked at the 5″ deep rut the driver’s side rear tire had dug for itself.  By the way, these photos are after removal.

I needed something long to fill the ruts and give traction.  Luckily, back in 2010 and then in 2014 I bought these things called “traction mats” from a company called OTW Enterprises who touted them as portable tow trucks.  In 2010 I bought the black ones after getting my truck stuck on ice with the plow blade buried in a snow mound.  In 2014. I bought an orange set to put in my wife’s car in case she got stuck.  Here they are after I hosed all the mud off.

Well, they bounced around in the trunks for a while and did bail me out a couple of times over the years but were actually leaning on the outside wall of my shop.  They don’t fold and while they fit in the trunk you have the little plastic spikes catching stuff so I tool them out at some point and leaned them against the wall of the shop.  At any rate,  I walked over and they were exactly what I needed.  Each mat measures 36″ long and 8″ wide.  Since I had four, I butted on up against the front of each tire and placed a second one in front of it to help the tire get up and out of the rut.  The sides are labeled by the way – the relative few long spikes go down and the side with many spikes goes up.

I got in and rolled the the van back a bit and then forward to get up on the mats.  I then slowly gave it more gas (not much) and the van up and forward onto the mat and got out of ditch and I kept moving forward onto the pavement.  I don’t have any action photos – things were stressful at the time and I really wasn’t thinking about a blog post 🙂

Well, I was pretty pleased with the outcome.  Wreckers charge at least $65 to come out to our house so avoiding that charge is always a good thing.  My wife was relatively happy but gave me a hard time for causing the problem in the first place.

Are these mats perfect?  No.  They will fly out from under your car if you don’t go slow and make sure you have the correct side down.  Even then they sometimes do so I would never have someone stand behind the car.  My recommendation is to go slow – avoid your spinning tires and rock the vehicle onto the mat if need be – don’t spin your tires onto them.

My wife is so impressed she wants them back in the cars.  I just wish they had a carry case but I do recommend them as another tool to keep in your bag of tricks.

I hope this helps you out.


Comment about Ford and Their Oversight on Towing

By the way, I looked up the tow/winch location up for future reference  so if you are surfing the web trying to figure out how to tow a full size 2016 Ford Transit, here is the reference link at Ford – click here.

Look just behind the tires at the frame and you’ll see the eye rings that are part of the frame.  You can’t make this stuff up — Thanks Ford.  It drives me nuts when you look at decisions made in ivory engineering towers vs. real world needs.  Sure, let’s bury it under the van, make it hard to get to and pretty much ensure damage will occur if you actually use this to pull the van for whatever reason.

Now look how their factory winch attachment point lines right up with hitting the front radiator.  If you pull this at just about any angle where the recovery vehicle is higher than the van then the cable/strap is going to cut right into the aluminum radiator at the front.   In the next photo, you can see the silver aluminum radiator just above the lip of the bumper molding.

If you wanted to protect that radiator, you’d actually need a harness with something to push the attached cable lower to the ground – or fabricate another attachment method.   Maybe my 4″ drop hitch in my rear class IV receiver would be low enough to tie onto vs. my truck’s winch or front recovery hooks.  … Something for another day.  I didn’t buy a new van to have to worry about something people in rural areas need regularly in the winter.   They should have been in the front.


2/11/2018 Update:  The traction mats bailed me out again when I got the van stuck on ice in our yard while turning around.  I’ve come to realize the van does a fair job on the road but the tires are damn near useless on uneven icy surface,  With this van, it’s really handy to have four.  With only two handy, I could move the van forward and then get stuck, move the mats, move forward again, get stuck, etc.  I had to do the cycle about three times.  I think if I had all four handy it would have done the trick in one shot because I could have built up some forward momentum.  I now have all four stored together,  We’re nearing the end of Winter finally and I think I will keep all four in the van next year and need to find some kind of carrier bag to store them in.

20 tips for getting better results with epoxy

I use a ton of epoxy as part of my work plus fixing all kinds of stuff at home, on cars, guns, knives and more.  I’d like to take a few minutes share some lessons learned with you to bear in mind on your next project that involves epoxy:

  1. Buy quality epoxy – not cheap junk.  Epoxy is a generic term and a lot of the no-name blister pack retail stuff is crap.  Go for brand names.  If they list real specs about the formulation then it is probably legit.
  2. I recommend industrial epoxies and not the consumer stuff.  My hands down favorite epoxy is Brownell’s Acra Glas liquid.  It is strong and resists breaking down from repeated impacts very well.  It’s one down side is that it takes a long time to set up so it may not be your best bet if you need something to be fixed and back in service quickly.
  3. Know your application and match the formula to your need – there is no magical formula that does everything.  You may need a putty, a fast cure, a short pot life, higher heat resistance, improved impact resistance, shear strength, etc.  Figure out what you need and then look for the epoxy that will work best for you.  At any given time I probably have 3-4 different formulations on hand.
  4. The longer it takes an epoxy to cure the stronger it is.  All things being equal, an epoxy that cures in 24 hours will be stronger than one that claims to do so in 5, 10 or 30 minutes.
  5. Read the package – setting up vs. curing and reaching full strength are two very different things.
  6. If you want to get epoxy to flow into wood or difficult areas, heat it up.  The liquid thins as it warms up but note this will also speed up how fast it sets up and cures.
  7. As epoxy gets colder, it takes longer and longer to cure.  If you are working outside, use a space heater, flood light or other heat source to keep the epoxy and the work piece area being repaired at least 70F.  I shoot for 80-90F.
  8. Epoxy can get really thick as it gets cold and not want to come out of the containers.  Either keep it inside where it is warm or at least warm it up before you use it,
  9. Epoxy resin can sugar with age just like honey.  What I mean is that will develop a solid mass in the resin bottle – it’s not really sugar!  If you heat up a container of water, take the resin container’s lid off and then set it the container in the water, the resin will warm up and the solid will dissolve back into liquid.  I buy 28oz or larger bottles of Acra-Glas that I don’t always use right away so when it sugars, I do this.
  10. As mentioned above, I buy my epoxy in bulk.  Acra-Glas can be measured by volume and it has a ratio of 1 hardener to 4 resin.  The way I deal with this is very simple – I use 10cc syringes without needles.  I have on syringe in a cup that I use for hardener and one syringe stored in a cup that I use for hardener.  The reason I do this is that the two parts do not react to the air very fast.  I may be able to use one syringe for a several weeks/months before it stops working so I set the syringe in its dedicated cup when done to be used again.  I do not use fresh syringes every time.  A 100 count syringe pack will last me at least a year.
  11. You can definitely color epoxy.  You can buy purpose-made dyes such as So-Strong or add in powdered tempra paint.
  12. You can add fillers for strength or looks.  When filling gaps, I mix 1/32″ milled glass fibers with the epoxy.  The ratio depends on the epoxy you are using, how thick/pasty you want the result to be or how much you want it to still flow into place.
  13. To get rid of bubbles you either need to draw a vacuum, apply pressure or at least use a heat gun to thin the epoxy once it is applied and this allows the trapped air to escape.
  14. When I am gluing big objects together, such as wood panels, forms, or other construction I will use a cartridge based epoxy.  My favorite is Hysol E-20HP.  To use a cartridge, you need the dispensing gun and also the correct mixing tip.  This allows you to squeeze the trigger and properly mixed epoxy comes out of the tip.  When you are done, you just let the tip harden in place sealing the epoxy.  When you are ready to use the gun again, you simply remove the plugged tip with a new one.  This allows for you to deploy a bead of epoxy very quickly but the con is that you throw away a tip every time you stop.  You also can’t color the epoxy first but it is fast and convenient on larger projects.
  15. The surface must be clean for epoxy to work best.  Remove dust, dirt, oil, etc.
  16. A rough surface is always better than a smooth surface.  I always recommend sanding, brushing or blasting a surface to improve adhesion.  Not only do you increase the surface area but you also are creating a texture where the epoxy can get under the base material in thousands of tiny places to really grab hold.
  17. Wear disposable gloves to avoid making a mess.  I buy boxes of the Harbor Freight 5 mil nitrile gloves when they go on sale for $5.99/box of 100.  They really are a good value for a medium-light duty disposable glove.
  18. If you need to clamp parts together, wrap the assemble with wax paper to avoid gluing your clamps to the work piece – yeah, I’ve done that.
  19. Whenever possible, I prefer to clamp work together to get this best bond.
  20. Check, double-check and come back in again later and check your work again to make sure nothing has shifted.

I hope these tips help you with your next project.


If you find this post useful, please share the link on Facebook, with your friends, etc. Your support is much appreciated and if you have any feedback, please email me at in**@ro*********.com. Please note that for links to other websites, I may be paid via an affiliate program such as Avantlink, Impact, Amazon and eBay.


Did you know most consumer vehicle undercoatings are rip offs?

We recently bought a new van and I wanted to undercoat it so it would last — being old school that was the first thing I thought of anyways.  The next was to do some searching around with Google about undercoatings so I could get the best product to use.  You know what I found out?  When most cars and trucks are made, the manufacturers do a ton of stuff now to prevent corrosion straight from the factory – so much so that you may find it hard pressed to find a shop that even does undercoating/rust proofing any more.  The car companies have improved their alloys, finishes and even learned not to leave exposed lips for mud to settle in to and sit – think about how the old wheel wells had the reinforcing lip all the way around that dirt/mud could sit in and hold salty water or even just water against the metal – of course it would rust.  So now you look in to wheel wells and through one method or another that flange is either not there or protected.

So I want to share some things I learned.  First, rubberized spray on undercoatings often caused more problems than they solved.  Now, you may be wondering why – I know I did.  You see, it is a spay on finish the adheres to whatever surface it can stick to – paint, rubber, metal, dirt, etc.  Over time, that undercoating develops small holes from stuff hitting it and then a pocket starts to form, salty water enters in and is held against the very steel it is trying to protect!  So to make a long story short, after reading tons of posts about the various spray on rubber undercoatings one must conclude they are not worth investing in any longer.

Second, rust proofing sounds great but there really is no such thing.  You are delaying the inevitable if we are talking about steel and salt water – eventually something is going to rust.

Okay, enough doom and gloonm, let’s say you live in a state, like Michigan, where they salt the heck out of the roads in the winter.  What do you do to protect new cars even more than what the factory did *or* you want to try and save older vehicles even if they have started to rust?  The answer, interestingly enough, was developed long ago – Fluid Film.  Eureka Chemical Company, yes that really is their name – started in the 1940s when they developed a product with an unlikely source to help the Navy prevent corrosion – the not-so-secret ingredient is lanolin from sheep. If you want to read the whole story, click here.

Let me cut to the chase – the reason this stuff works is that it oozes and seals itself if nicked.  DoD, NASA, Coast Guard, Delta and others are still using this stuff!  After doing a lot of reading, I bought a five gallon pail off Amazon, an applicator gun and a pail pump dispenser.  They sell an aerosol can version but I really don’t have much experience with it but am a bit leery of it because the liquid is so thin that comes out compared to what I can spray with the applicator gun.

This is my second year using it on our vehicles and it almost makes it a few months before you can tell it has dried out / faded.  In other words, it doesn’t quite make it the whole winter. I get rid of looser dirt by spraying it down, let it try and go to town spraying this stuff on everything – even the exhaust as it will just bake off after the first time it gets good and hot.

Honestly, I think the FuildFilm helps – our newest car after our van is a 2002 Camry and I spray the heck out of it and our other older cars (the oldest is a 1992 Corolla) and my old 1996 Land Cruiser.  I go through about a quart per car/truck liberally applying it real thick all over the under carriage.  I also spray door hinges, locks and hood latch.  The stuff smells funny for the first day or so but seems to really do the trick.  I just finished putting it on our vehicles for the second year.  I’m about half way through the five gallon pail so if you want to test it out some, you could start with a gallon pail – that would do 4-6 cars or trucks depending on how thick you apply it.

So, thought I would pass along what I learned – don’t bother with rubberized undercoatings and definitely check out FluidFilm.

Note, my local Autozone also sells the below aerosol cans.  I really do not know how long it will protect what you spray it on.  It is way, way thinner than the stuff that comes in the pails.


If you find this post useful, please share the link on Facebook, with your friends, etc. Your support is much appreciated and if you have any feedback, please email me at in**@ro*********.com. Please note that for links to other websites, I may be paid via an affiliate program such as Avantlink, Impact, Amazon and eBay.