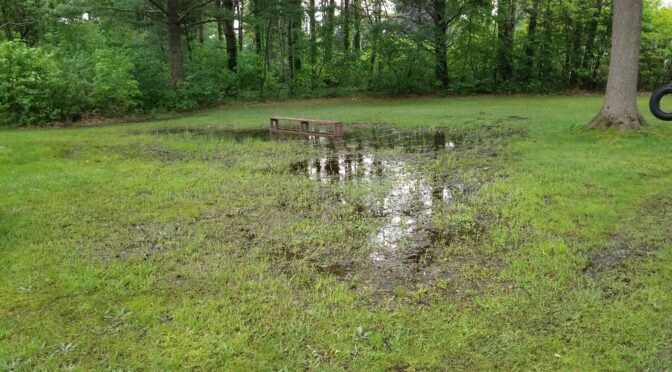
We’ve had a crazy amount of rain this year in Southwest Michigan. It seems we can’t go more than a day or two without rain. The photo at the top of our yard shows how everything is a lush green plus it shows the standing water that won’t go down because everything is so water logged due to all of the rain. We have friends and family complaining about the huge amount mosquitoes that are attacking them as a result – we don’t have that problem. I declared war on mosquitoes last year and upped my attack plan even further this year.

Last year, we started using Talstar Pro insecticide sprayed from an 18 volt two gallon Ryobi sprayer and I wrote a blog post about it because I was so happy with the results. It took me four batches (8 gallons in other words) of spray with 1 oz of Talstar per gallon to get control. It also took over an hour to apply. It definitely did the job but it took a long time and my arm ached from holding all the Ryobi sprayer unit as I walked around.
To be honest, the Ryobi far exceeded my expectations it was just too small, didn’t spray as far as I would like and holding it was killing my elbow, shoulder and back. I decided in April to buy a better sprayer and started researching on the Internet and reading reviews on Amazon. I happened across a vendor on Amazon called “My 4 Sons”, their features looked great and they got very good reviews so I decided to order one.
My 4 Sons Sprayers
First off, they really are a family owned business started by Lance and Lisa Ensign in 1998. Yes, they do have four sons. At any rate, they started with carpet cleaning and eventually branched into battery powered sprayers. I’m no expert but I think they fill a middle niche between little light use sprayers and the big dedicated units that you pull by a tractor or ATV.
It Arrived
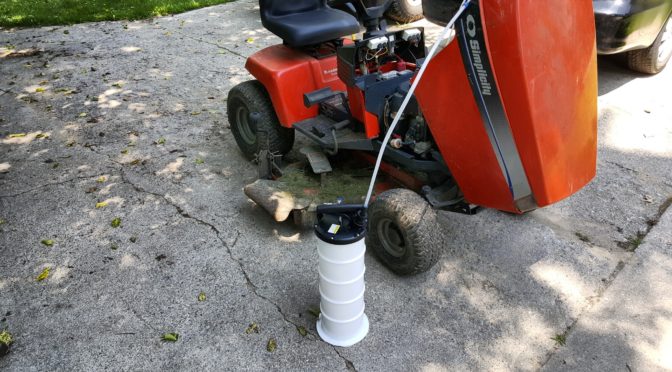
In typical Amazon fashion, the unit showed up a few days later in a big box. What surprised me were parts everywhere and very limited instructions. The guide said to call Lance and listed his number. I left a message and he called me back a short while later and I got everything squared away. He and I then exchanged a few text messages also and they replaced a couple of accessory parts no hassle at all.


Mosquito Control Results
When the mosquitoes first started this Spring, it was brutal. We were getting crazy amounts of rain and even at 1.5oz of Talstar per gallon of water and weekly applications, we couldn’t stay on top of them. I’m pretty sure the Talstar was getting washed off. Normally, Talstar is really good about leaving a residue that kills the mosquitoes but not when it is getting poured on almost every day. I tried to time my re-applications with at least one following dry day and the more the better. I like to apply at dusk when the mosquitoes are active by the way.
The sprayer and adjustable tipped wand worked wonders. With the My 4 Sons system I could really reach out with the spray -maybe 20-30 feet depending on how I adjusted the jet. Plus I could open up the spray and broadly apply it to the underbrush, leaves, grass by the house, bushes, eaves and so forth.
Instead of just 8 gallons, I’m applying about 12 and it takes me about 30-45 minutes to do so. This is because of the bigger tank and that I can spray a higher volume with the new system.
I’d say it took about three weeks to get on top of things and now I am spraying the normal 1 oz per gallon of water about every 4 weeks. We’ve just made it through one of these normal cycles and will spray again near the end of June – so we have another week to go as of my writing this and the mosquitoes are under control.
The Bottom Line
We can go outside safely now but we do hear of folks fighting tons of mosquitoes. I recommend Talstar Pro to anyone who will listen. If you have small urban property, you can start with a pump sprayer and move up from there.
Note, we have dogs and treat them for fleas and ticks. I hate ticks but they don’t bother me much unless I am in the woods. Talstar Pro is great if you need to get rid of ticks and a variety of other insects as well – read the label below.
I’d guess I’ve applied about four batches with the My 4 Sons unit now and am very happy with it. If you need a bigger sprayer for whatever it is that you are doing, I definitely recommend them.
Here are some links on Talstar P Pro if you want to learn more:
- Here is the residential user guide: http://www.fmcprosolutions.com/LinkClick.aspx?fileticket=1nO4Runnvnw%3d&tabid=1936&mid=3489
- They pack a ton of application information in the label about dosages for different type of insects – my recommendation with mosquitoes is to do the 1oz per gallon to leave residue:
http://www.fmcprosolutions.com/Portals/pest/Content/Docs/Labels/Talstar%20P%20Professional%2003-22-2017%20Clean%20Comm.pdf - http://www.fmcprosolutions.com/PestControl/Products/InsecticidesTermiticides/TalstarProfessionalInsecticide.aspx
- https://www.domyown.com/msds/Talstar-P-BMP-Mosquitoes.pdf
PS – The 18 volt Ryobi Sprayer is still going strong even after a ton of use last year and is now being used to hose down plants with fungicide. Since stuff isn’t drying out, we are seeing a lot of fungus development on our roses and vegetables. I’m experimenting between Immunox (which is not impressing me) and Daconil for fungus control. Point being for people with smaller areas, the little Ryobi is still a solid choice.
5/21/23 Update: My older sprayer is still working great. They have a new model that should be just as good or even better. Also, you are better off buying Talstar P Pro from eBay. Amazon has stopped carrying it or allowing sellers to list it.
2/25/20 Update: The My4Sons sprayer worked fine all last year. One of the wheels fell of the cart and they promptly sent me a replacement. I poured out all of the remaining liquid and ensured the pump was empty going into the winter. I’ll definitely be using the unit again this year.
May 2, 2020 Update: If you are having trouble finding the sprayer or Talstar P Pro – read this blog post.
Please share the link on Facebook, Forums, with colleagues, etc. Your support is much appreciated and if you have any feedback, please email us in**@*********ps.com. If you’d like to request a report or order a reprint, please click here for the corresponding page to open in new tab.