The Romanian PSL Rifle – Feeling Nostalgic for the 7.62x54R DMR

I have to admit that I am a huge fan of Ian McCollum’s Forgotten Weapons videos.  On May 28th, 2018, he released “Romania Doesn’t Make the Dragunov:  The PSL”.  Being a fan of the PSL, I had to watch it:

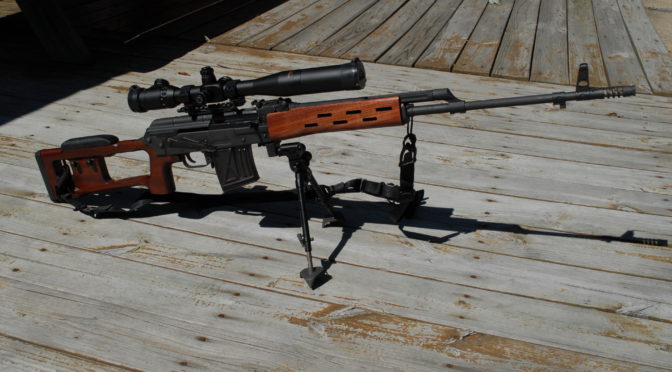
As usual, Ian did a great job.  The PSL, or in Romanian, the Puşcă Semiautomată cu Lunetă model 1974 was Romania’s designated marksman rifle (DMR) in 7.62x54R and came about after they had a disagreement with the USSR and would not longer get access to the Dragunov design.

In a classic example of pragmatism, the designers at Regia Autonoma pentru Productia de Tehnica Militara, also know as  the RATMIL Cugir arsenal, upscaled the Kalashnikov rifle design to handle the larger round.  The receiver design is based on the RPK light machine gun with reinforcing plates at the rear and a bulged front trunnion.   To make use of the relatively old 7.62x54R cartridge, it used a 24.4″ long barrel whereas a typical AKM has a barrel that is about 16.3″ long.

Ronin's Grips polymer samples showing heat resistance at different temperatures.

In short, while some people refer to it as a Dragunov, it really isn’t the same design at all.  The Dragunov’s design is unique and more complex.  The PSL is essentially an AK-47 on steroids and it does a pretty good job for what it was intended for – being a DMR and providing supporting fire at longer distance targets vs. a sniper rifle.  A DMR has good enough accuracy to – say about 2-3″ MOA or better whereas a sniper, or precision rifle, will tend to be sub-MOA.

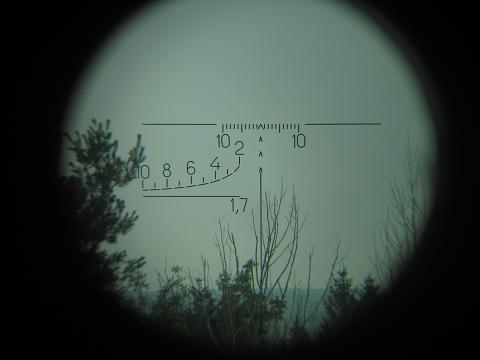
Paired with the rifle is a LPS 4×6 TIP2 ((Lunetă Puṣcă Semiautomată Tip 2, or “Scope, Semi-Automatic Rifle, Type 2”) scope that attaches via the receiver side plate.

Ronin's Grips polymer samples showing heat resistance at different temperatures.

Really, the PSL design was a success for the Romanians.  It was relatively inexpensive, rugged and did the job.  They actually wound up exporting it to a number of countries for military use including:  Afghanistang, Azerbaijan, Bangladesh, Congo-Kinshasa, Ethiopia, Iraq (after Hussein), Moldova, Nicaragua, North Korea, Pakistan, Somalia.

Here it is seen in the hands of an Afghan Army soldier:

Ronin's Grips polymer samples showing heat resistance at different temperatures.

In the following photo an Ethiopian solider is firing a PSL:

Ronin's Grips polymer samples showing heat resistance at different temperatures.

Of course, another market existed for these semi-auto rifles also – the United States.  It was imported under a variety of names including:  PSL-54C, Romak III, FPK and SSG-97.  They were all the same rifle more or less and might show modifications for importation such as removal of the bayonet lug or no third FCG pin provision in the receiver.  The PSLs in the US could have been assembled either at RATMIL or later after Romania joined NATO, the ARMS arsenal.  Note, there are also PSLs floating around built from kits on US receivers also with quality running the whole gamut from poor to excellent.

My PSL

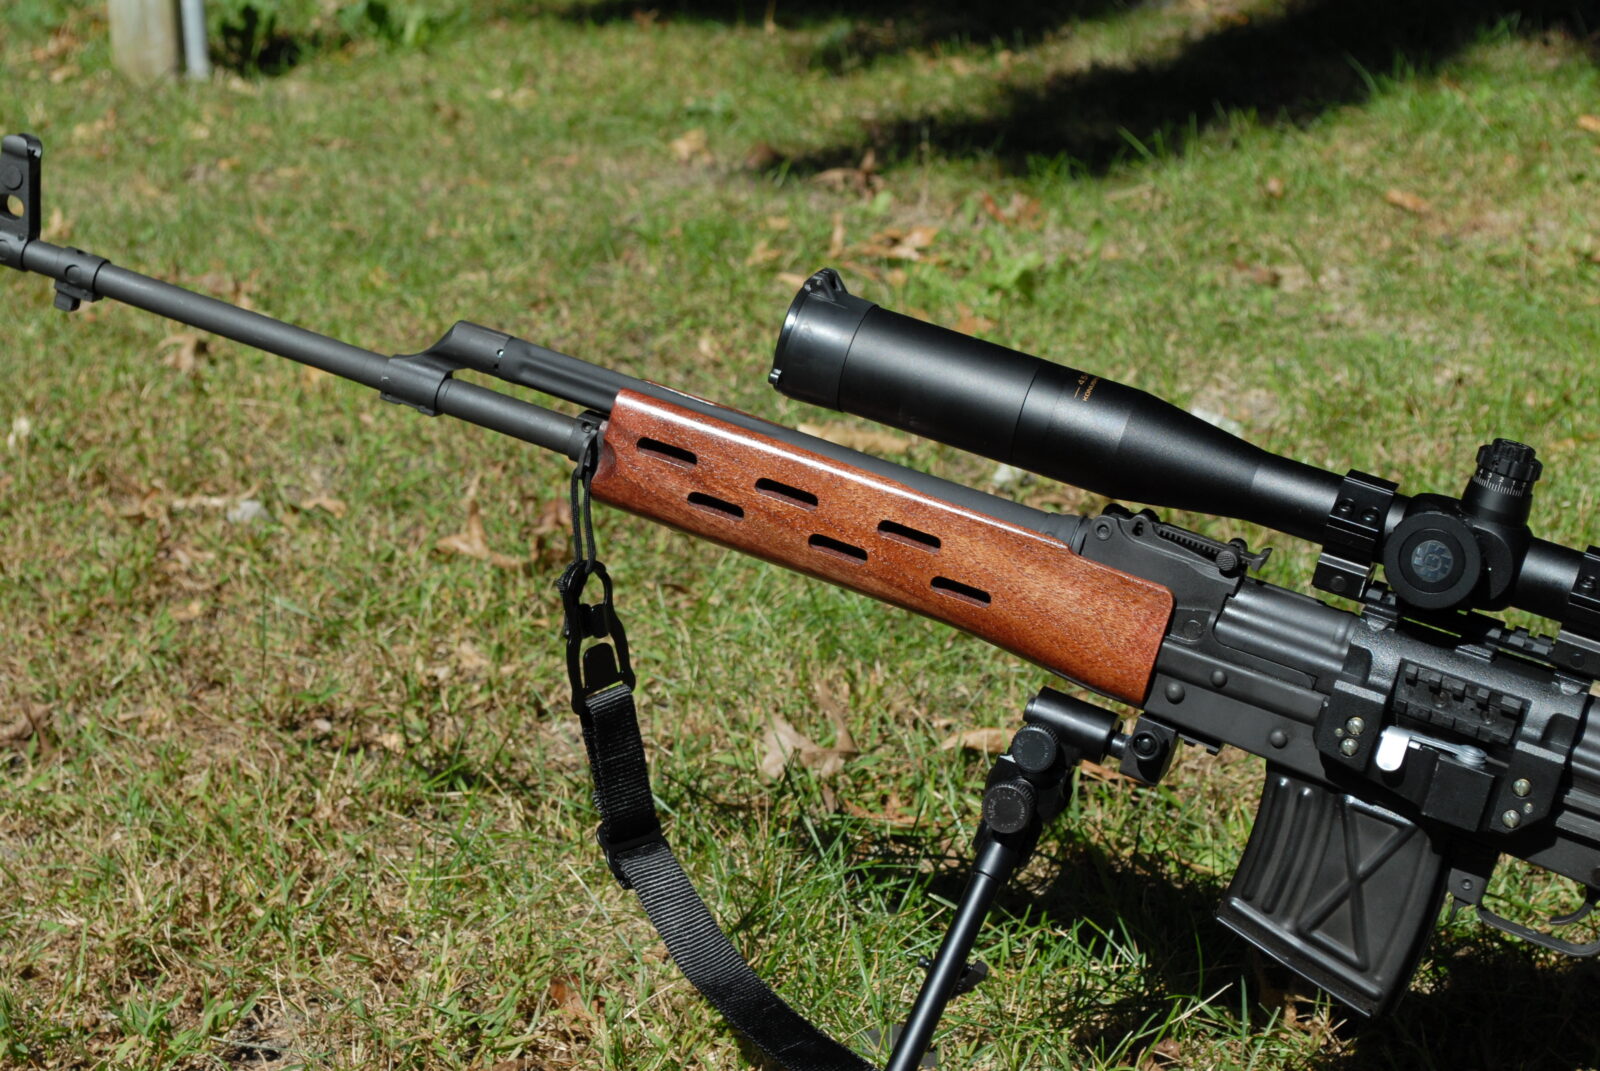
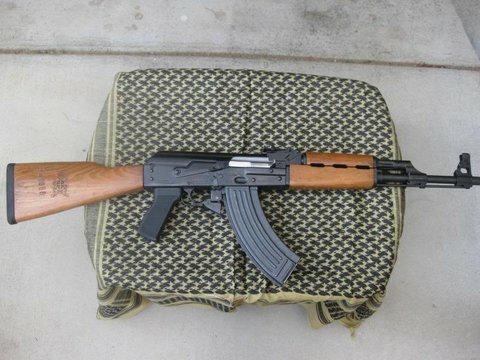
At any rate, part of the reason I wrote this is that I felt nostalgic.  I bought a Century Arms assembled PSL Sporter from Centerfire Systems in 2010.  Here it is next to a Yugo M70B1 for comparison and it has a Konus optic on a BP-02 SVD/PSL low center mount that is in line with the bore that I purchased from Kalinka Optics:

Ronin's Grips polymer samples showing heat resistance at different temperatures.

Contrary to rumor, the skeleton stock as the original design and not something they did for the US market.  The skeleton thumbhole profile was developed to reduce weight, withstand recoil and be relatively comfortable – hiding under the steel butt plate was a spring to dampen recoil.

Ronin's Grips polymer samples showing heat resistance at different temperatures.

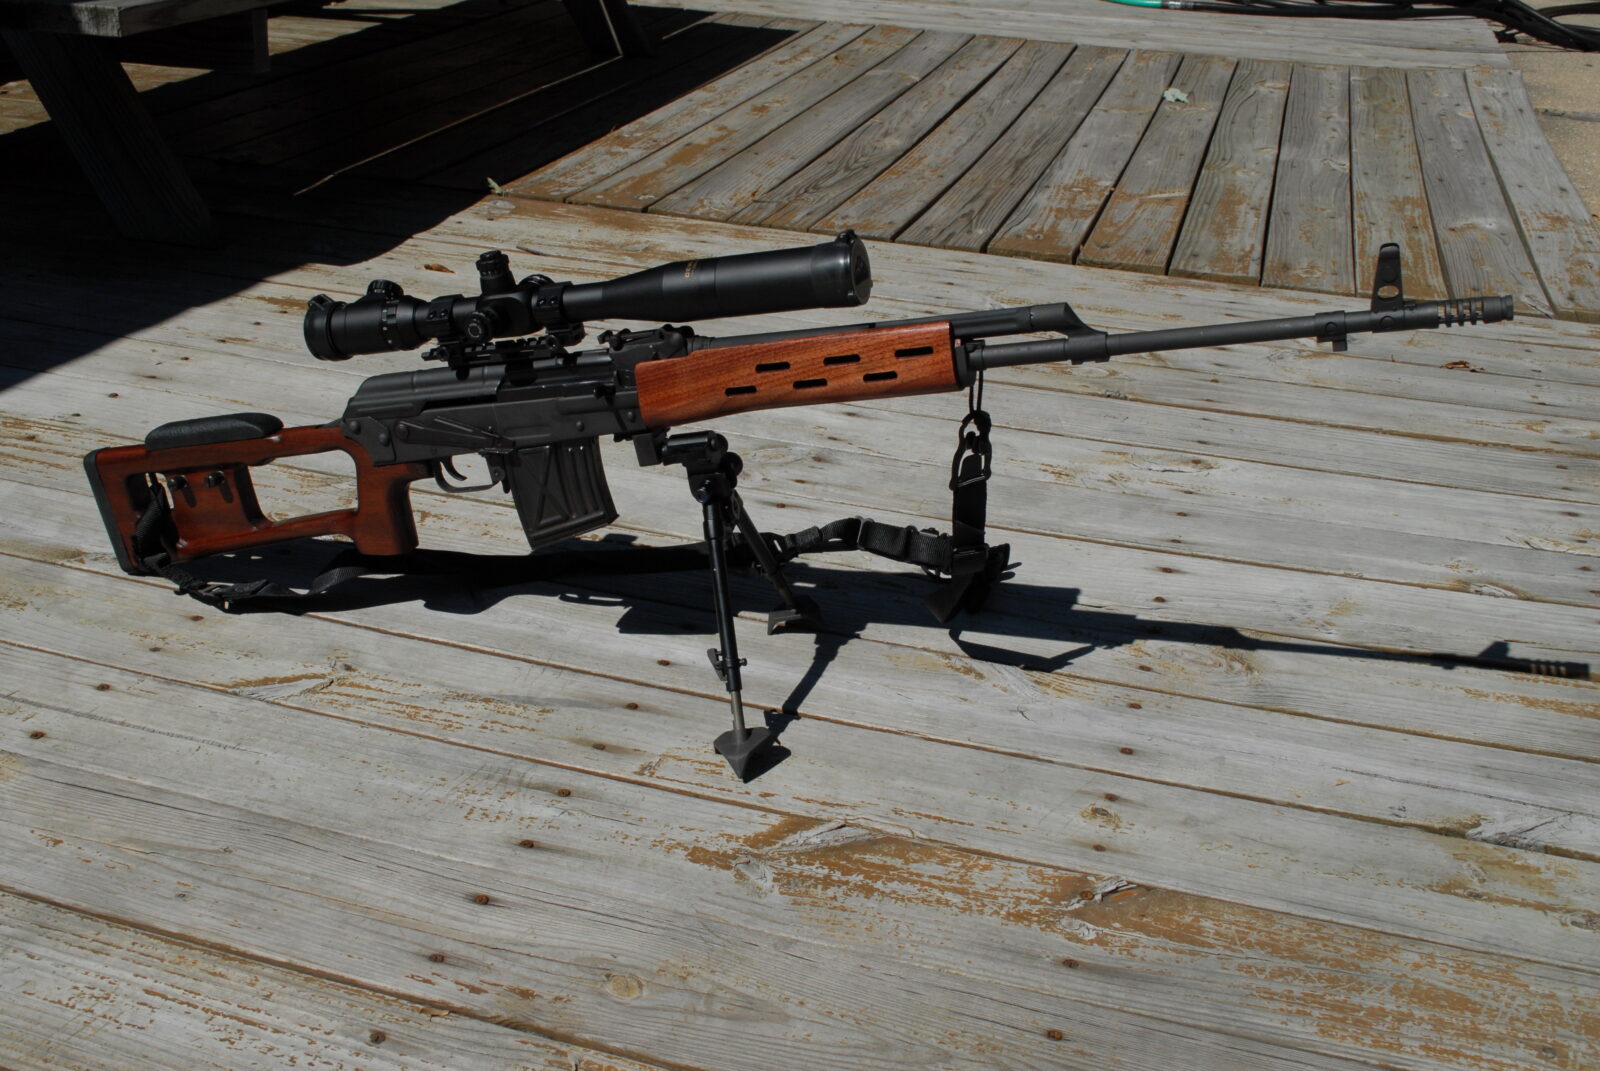
I couldn’t leave the rifle along because I really wanted an SVD so I had to pick up a Rhineland Arms  unfinished walnut SVD conversion stock set – all it needed was the finish.  I used one of the Minwax cherry stains (I don’t recall which now I’m afraid) and the multiple coats of boiled linseed oil (BLO) on top.

One thing I did need to do was to carefully remove the gas tube cover retainers on both ends.  I carefull ground them off with my Dremel and then refinished the gas tube as you can see in the next photo.

Ronin's Grips polymer samples showing heat resistance at different temperatures.

I then drilled and tapped the receiver to hold a small piece of picatinny rail and took care not to harm the serial number and what not.   I figured the rail could be readily removed for inspection if ever needed.

Ronin's Grips polymer samples showing heat resistance at different temperatures.

So here was the end result including a Versapod bipod with claw feet:
Ronin's Grips polymer samples showing heat resistance at different temperatures.

I definitely am nostalgic about the rifle.  In one of those twists of fate, I had to sell it before I ever got to shoot it.  If I ever fell into a good deal on one, I would get it.


** Note, images that have a grey wood background, are of the Rhineland stock, the finished custom rifle or are in the shop are mine.  The other images are in the public domain and are from Wikipedia’s entry on the PSL.


Please share the link on Facebook, Forums, with colleagues, etc. Your support is much appreciated and if you have any feedback, please email us in**@*********ps.com. If you’d like to request a report or order a reprint, please click here for the corresponding page to open in new tab.


Customizing and Shooting the Pakistani Ordnance Factory POF-5 Pistol

Having watched one too many TV shows and movies with H&K’s MP5 submachine gun over the years, the sub gun has been on my “I want to have one list” for years but way out of my price range.  While surfing, I read about how Pakistani Ordnance Factory (POF) licensed the design and tooling necessary from H&K Germany to make roller locked weapons including MP5 clones.  In reading about the various Mp5 clones,  it became apparent that the POF-5 units are actually well regarded.  What really tipped the scales was a great post by T. Mark Graham at Arizona Response Systems who really knows his way around MP5s saying they were good to go with details of his analysis provided.

This led me to calling up Chuck at Kelly Enterprises and talking about whether to buy a Zenith (my first choice) or a POF.  Chuck is a very straight forward guy and tells it the way it is.  The Zenith would be hard to get and he had POF-5 pistols in stock plus he gave me a great deal so I ordered one and had it sent to my friend and FFL, Scott Igert, at Modern Antique Firearms.  Chuck sent me all the tracking info and just a few days later, the POF-5 was with Scott waiting for me to pick it up.

On inspection you could tell the receiver paint was a bit glossier than the more satin finish of an HK but other than the action feeling dry and new (that gritty not worn in feeling), it looked good to go.

Ronin's Grips polymer samples showing heat resistance at different temperatures.

Now, I have two personality quirks.  First, I can’t hit the broad side of a barn with a pistol let alone one this big and heavy.  Second, I can’t help but customize any gun I buy and this wasn’t any different.

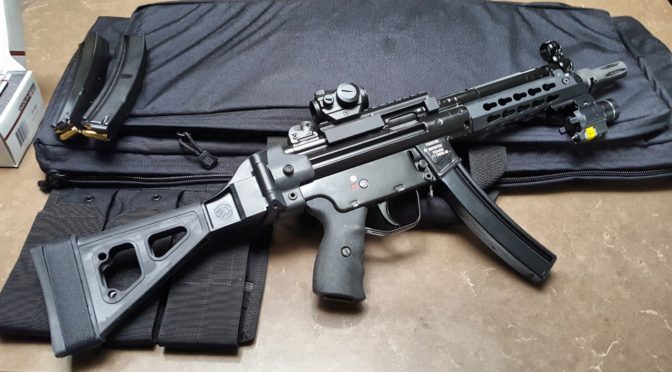
I did a ton of reading and decided to go with a cool S&B brace, a B&T scope mount, Dakota Tactical handguard, a B&T muzzle brake and ordered a bunch of POF MP5 magazines.  You can buy the brace at PSA and Brownells. By the way, Brownells has a ton of replacement parts and aftermarket parts for the MP5 reflecting it’s long-time use by law enforcement no doubt – click here to see them.

Installing the brace was easy – like any HK, you push out the rear pin, pull off the cap and put on the brace.  I bought one all ready to go.

The handguard is a keymod unit from Dakota Tactical and they use a screw instead of a front pin to hold the unit in place.  It really locks up nice and I like the feel of it.  The rail section holding the Streamlight in the below photo is made by Monoki.

Ronin's Grips polymer samples showing heat resistance at different temperatures.

Now the scope mount is the standard B&T universal rail, the BT-21262-1.  I would caution against you buying a cheap optics mount for an HK-type weapon.  There are tons of stories of cheap ones falling off, not seating properly, etc.  The B&T unit is a mil-grade unit.  You slide it on and then work the little claws or feet into position and then secure them with the supplied screws.

Ronin's Grips polymer samples showing heat resistance at different temperatures.

Next up  was to install the Vortex Crossfire Red Dot optic.  These are the latest red dots from Vortex and come with both low and high mounting options.

Ronin's Grips polymer samples showing heat resistance at different temperatures.

Out of the box it has the high mount installed for the AR enthusiasts but includes the low plate as well.

Ronin's Grips polymer samples showing heat resistance at different temperatures.

As you can see, with the default high riser on it, the optic is way too high.  I prefer optics as low as possible where I can get a good cheek weld.

Ronin's Grips polymer samples showing heat resistance at different temperatures.

It’s real easy to change – there are just four screws that need to be removed on the bottom.  I used a bit from my Weaver driver set vs. the supplied key which would work but is slow compared to a driver.

Ronin's Grips polymer samples showing heat resistance at different temperatures.

I have the Weaver Deluxe Tool Kit and use the drivers all the time.  I use the block and hammer some but not a great deal.

Ronin's Grips polymer samples showing heat resistance at different temperatures.

Notice that Loc-Tite Blue (the medium strength formula) is used to secure the screws.

Here’s the end result.  Note, I will install a quick release mount at a later date.

Ronin's Grips polymer samples showing heat resistance at different temperatures.

One side comment – you may find it funny that the thing that puzzled me most was the B&T brake.  It installs on the tri-lobe fitting on the muzzle. There is a quick release lever that baffled me until I carefully inspected it and saw that one end is open and a cross pin is retaining it.  I then pushed the other way and lever lifted right up.  Duh!  I’d never seen one before!  It is solid and I like it.

Ronin's Grips polymer samples showing heat resistance at different temperatures.

The case you see is a 32″ Blackhawk Homeland Security Weapons Carry Case.  It comes with one internal mag carrier and I added a second pouch.  They are sized for 30 round AR mags and you can get two 30-round MP5 magazines in each pouch pocket.

Ronin's Grips polymer samples showing heat resistance at different temperatures.

Next up, I cleaned the bore and lubricated the weapon – especially the bolt head and trigger pack.  Past experience taught me to go through and make sure it was ready.

Two of my brother-in-laws and I took it to the range.  We used 124 grain S&B FMJ ammo and it functioned great and was accurate.  We had a blast at 15-25 yards shooting it despite it being a brisk day.  I really like how this combination worked out.  We didn’t use the light but the green laser was nice and bright when we tried it out.

Ronin's Grips polymer samples showing heat resistance at different temperatures.

We put probably about 200 rounds through it.  You can now feel the action has really smoothed out and I wouldn’t hesitate using this for home defense if I needed – which is why I put the light on it.

All in all, I’m very pleased and would recommend the POF-5 to anyone looking for a semi-auto MP5-type pistol.

Update 10/6/2018:  We put almost 500 rounds through this pistol this summer without one single failure to feed or eject.  We mainly shot the 124 grain FMJ S&B ammo except for one time, as a test, I shot about 20 rounds of Hornady 135gr Critical Duty ammo with no problem.  All of the magazines used (and I have 10 of them) are POF magazines.  Honestly, this thing is awesome.  I’ve only cleaned and re-lubed it once so far but it is on the to-do list.


12/12/18 Update:  I recently bought an HK SP5K and am documenting my journey with it.  Click here for the first post.


Please share the link on Facebook, Forums, with colleagues, etc. Your support is much appreciated and if you have any feedback, please email us in**@*********ps.com. If you’d like to request a report or order a reprint, please click here for the corresponding page to open in new tab.


Getting the Simplicity Broadmor 16 Hydro Lawn Tractor Ready for the Season – Air and Oil Filters via Amazon

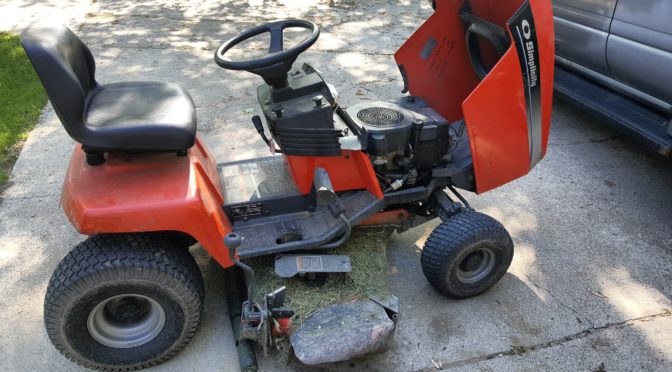
Given we live in a rural area, it can be a challenge trying to find the right air and oil filter for our Simplicity Broadmor 16 Hydro tractor.  It has a Kohler engine and the air and oil filters are readily available on Amazon.   It makes life way easier to just order them.  Sometimes I’ll get a deal on several and have one for the following year.

So, just to make things easy for you, here are links if you need to order them:

I only change the oil filter once a year.  If there’s a real good deal, I might buy a two pack.   You can search and double check prices.

For the air filter, I definitely use the model with the pre-cleaner.  The foam pre-cleaner catches a ton of dust.  Each year I have to clean and re-oil the pre-cleaner several times due to all the dust.

I change these each season plus I grease the oil fittings.   When we got the tractor I asked the mechanic who delivered it what would be the one thing he’d recommend to get long life from the tractor.  Of course he pointed out the oil and air filters but then he added to make sure to keep the tractor greased using the Zerk fittings and I have ever since.

I hope this helps you out some as well.


Please share the link on Facebook, Forums, with colleagues, etc. Your support is much appreciated and if you have any feedback, please email us in**@*********ps.com. If you’d like to request a report or order a reprint, please click here for the corresponding page to open in new tab.


Fixed a Starting Problem on my Simplicity Broadmor 16 Hydro Tractor

We bought this Simplicity Broadmor 16HP lawn tractor back around 1999-ish and it has served us well.  In the years since, I’ve had to replace a few parts and figure things out as the dealer went out of business.  Luckily, finding parts is pretty straight forward given the WWW and Amazon.

At some point last summer, the tractor began to develop intermittent problems with starting when it was hot.  It didn’t happen all the time and was a bear to try and find – sometimes you’d turn the starter switch and nothing would happen.  Well, I just assumed it was the solenoid given similar problems with cars over the years.  I did some digging and bought both a solenoid and starter off of Amazon.  In the Simplicity, and many tractors for that matter, they are two separate parts mounted away from each other.  The solenoid is up under the dash held in place by two screws and the starter is held in place by two screws and a collar.

I ordered a Caltric Starter for the Kohler CV16 engine and it mounted up just fine.

I ordered a Stens 435-099 starter solenoid and it went in just fine as well.

Well, I thought I was set but the problem got worse.  In a ways, that was a good thing.  Because when the problem happens readily, you can sort out what is wrong.

This spring, when we got the tractor out, every time it would get hot it would not re-start.  I put my multimeter on the starter power cable and it was dead.  I did not hear any clicking from the solenoid either.  If I wiggled the switch then it might start but not always so the switch made me suspicious.  If I used jumper cables and went right to the starter, it would start and run no problem with the key one.  Okay, time to replace the switch.

I did some digging and the replacement switch was a Briggs and Stratton 1686734SM unit.  I got that on order from Amazon and waited for it to show up.

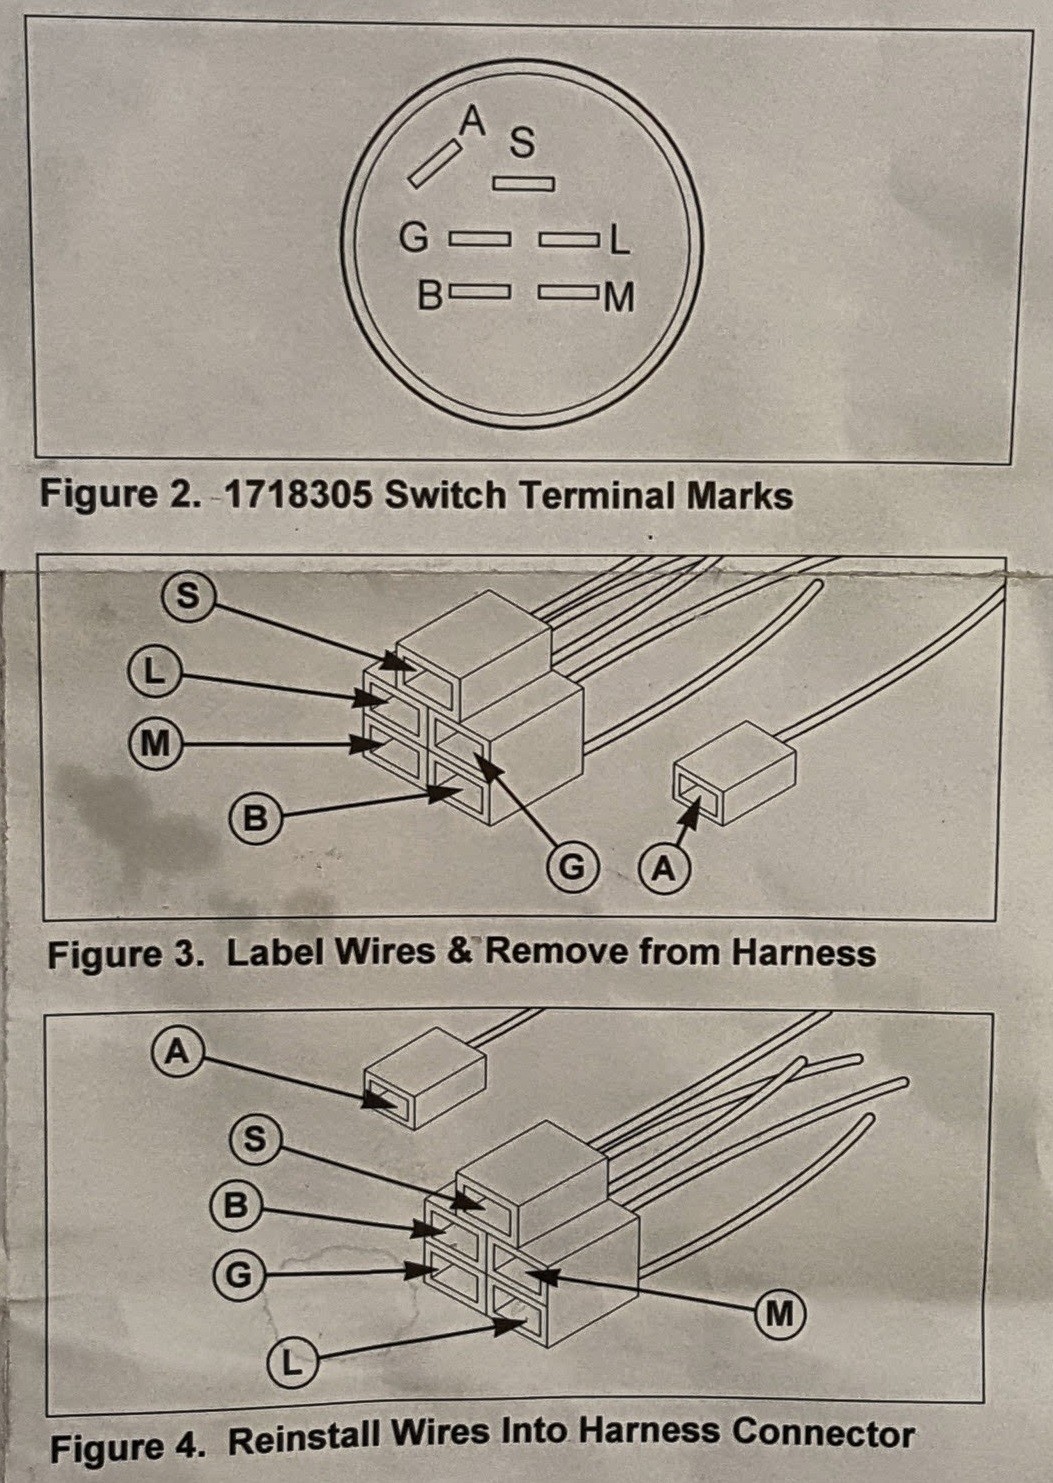
Now there is just a bit of a twist here that I want to share with folks to save you some time.  It turns out the tractor was built using an all plastic switch (groan) part number 1718305 that requires you to change the wiring in the connector.

Ronin's polymer handle being cut with a plastic knife on foil

Note the letters next to the male spades – this is how you confirm it is the 1718305 switch – the layout of the pins:

Ronin's polymer handle being cut with a plastic knife on foil

It just so happens that to use the replacement 1686734SM unit, you need to diagonally swap the four lower wires – upper left to lower right and upper right to lower left.  They recommend you label the wires before you do the swap – I just jotted down the color codes.

The following photo is from the instruction sheet that came with the switch — it’s actually well done and helped me figure this out:

Ronin's polymer handle being cut with a plastic knife on foil

Figure 2 shows the identifying marks for the plastic 1718305 switch and exactly matched what I had.

Figure 3 shows the pin out of the original connector

Figure 4 shows the new lay out.

In case you lose track of the wires for whatever reason, here are the color codes that are in my Broadmor by labeled connector pin:

  • A.  Red / White (meaning primarily red with a white stripe)
  • B.  Red — this is from the battery so make sure your battery is disconnected
  • G.  Black
  • L. Red/Black
  • M.  Purple/White
  • S. Blue/White

First, disconnect the negative cable from the battery or you risk some fireworks when you change the red/hot wire.

To change the wires around, I moved them a pair at a time – just the lower four are changing — I ran a small blade screw driver in and loosened the female spade fitting inside the connector and pulled it back out gently with a pair of needle nose pliers.  I then swapped the location and pushed each connector into the new location.

To seal the connections, I applied a layer of silicone grease on the female connector openings so that when the male spades pushed in, they would be coated with the grease.  I have a jar of Mission Automotive brand Silicone grease that I use all the time.

I then confirmed the layout one last time, sat on the tractor, made sure the engine was clear and started it.  Everything worked on the first try – a good sign.

The switch fit nicely inside the OEM hole.  It comes with extra parts for mounting and I just did what Simplicity did – I installed the switch, used the supplied hex nut to secure it on the front and pressed on the switch cover.  I then tested again just to be safe.

By the way, here are photos of the back of the installed switch:

Ronin's polymer handle being cut with a plastic knife on foil

I then mowed part of the lawn for 10-15 minutes and when the tractor was good and hot, I turned it off and back on several times.  I then let the tractor idle for about 10-15 minutes and again could turn it off and on with no problem.

I think the problem is solved as the tractor is still working just fine.  I wanted to post this in case you needed to know what to get from Amazon or see the wire colors and hope it helps you out.

7/20/19 Update:  I did the above in June 2018 and the tractor is still running just fine.  All of the above have held up without any problems.

5/23/20 Update:  Still holding up just fine.  I’ve mowed the yard two times this year.  No problems.


Please share the link on Facebook, Forums, with colleagues, etc. Your support is much appreciated and if you have any feedback, please email us in**@*********ps.com. If you’d like to request a report or order a reprint, please click here for the corresponding page to open in new tab.


Our New Polish Beryl Gen 2 Grip Model

The karabinek szturmowy wzór 1996 Beryl rifle is manufactured by the Łucznik Arms Factory in Radom, Poland and is the successor to the Tantal.  The first versions of the rifle had a rather typical AKM style grip.

Ronin's polymer handle being cut with a plastic knife on foil

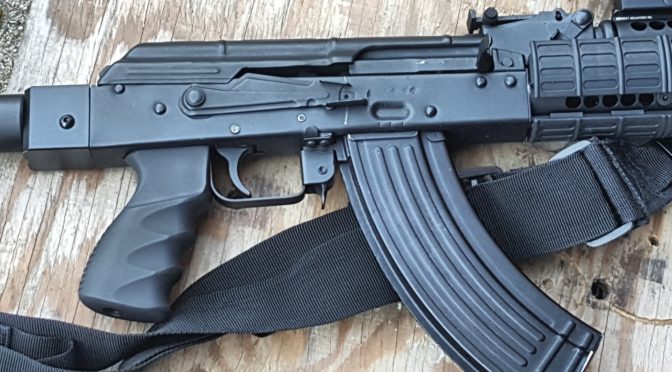
With the kbs wz. 1996C Beryl variant, an ergonomic grip appeared that looked very similar to what the Israelis developed for their Galil Ultra.

Ronin's polymer handle being cut with a plastic knife on foil

So, after doing some digging, I tracked down a brand new copy of that ergonomic grip and made our version.  Note, I am simply calling it the second generation or gen 2.  That’s my naming and not the Pole’s.

Ronin's polymer handle being cut with a plastic knife on foil Ronin's polymer handle being cut with a plastic knife on foil

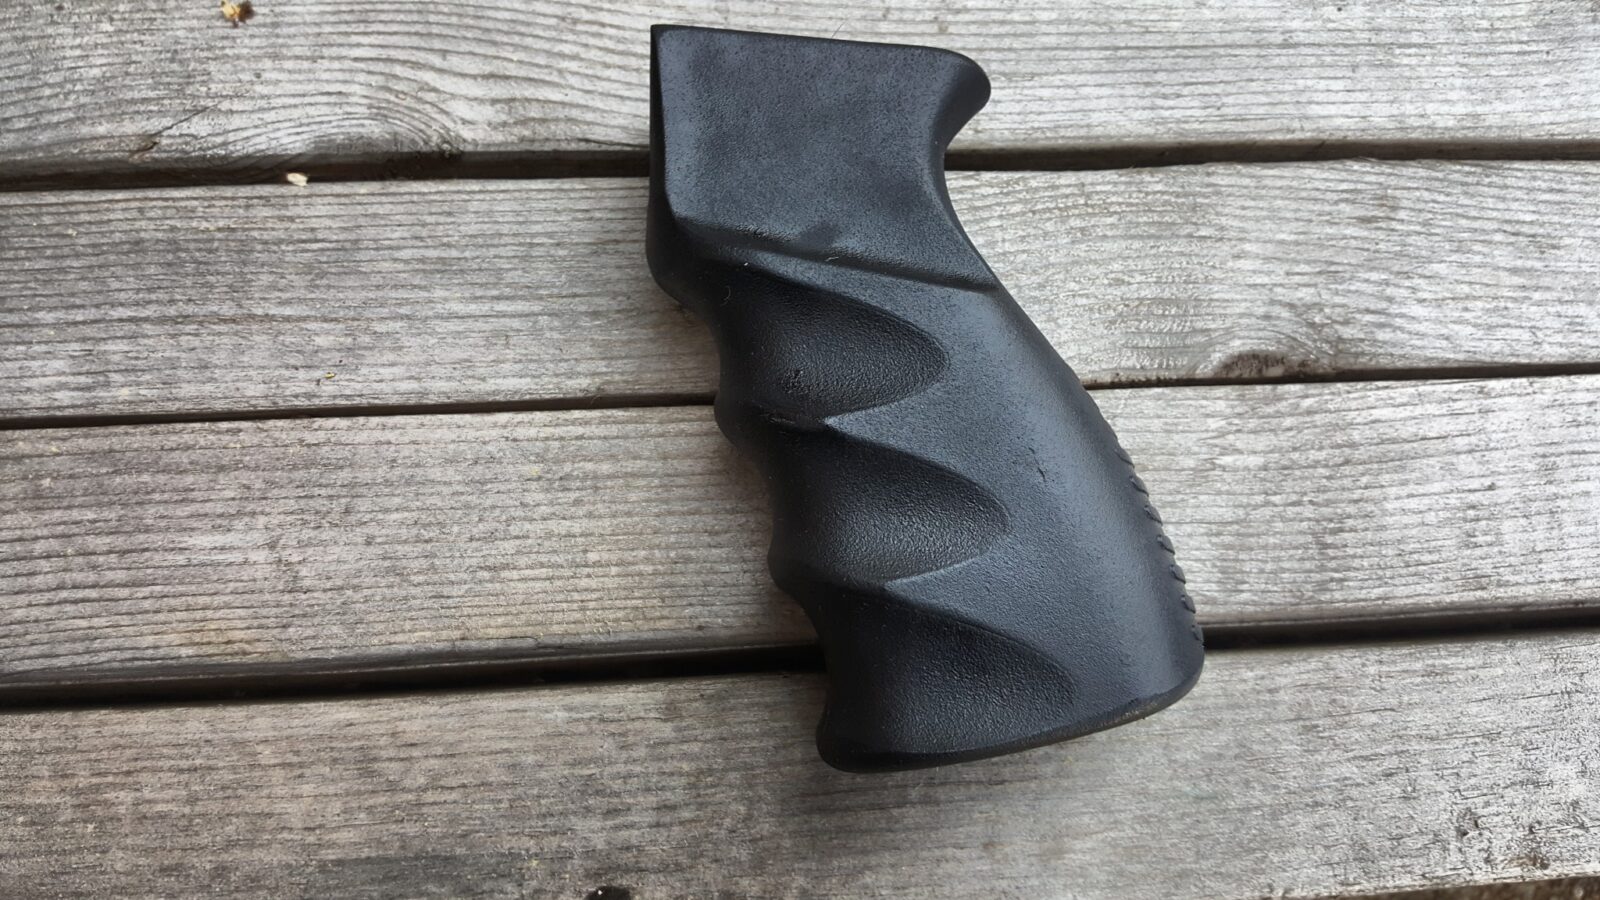
You can see this is like our other grips – it is cast as a solid block and then a hole is drilled for a grip screw.  It is sized to fit a normal 100mm long screw like you find with most AKM grips.  “US” is cast into the back.  If you look at the throat, this ought to fit most rifles but some final fitting/fine tuning may be needed.  I have not tried putting this on a Yugo with their unique grip nut strap.

Ronin's polymer handle being cut with a plastic knife on foil

Ronin's polymer handle being cut with a plastic knife on foil

The original has grooves on the back but we will need to sand there so these ridges/lines on the backstrap will not be there.  We will sand and blast the grip so it evens out with the surrounding surfaces.

Ronin's polymer handle being cut with a plastic knife on foil

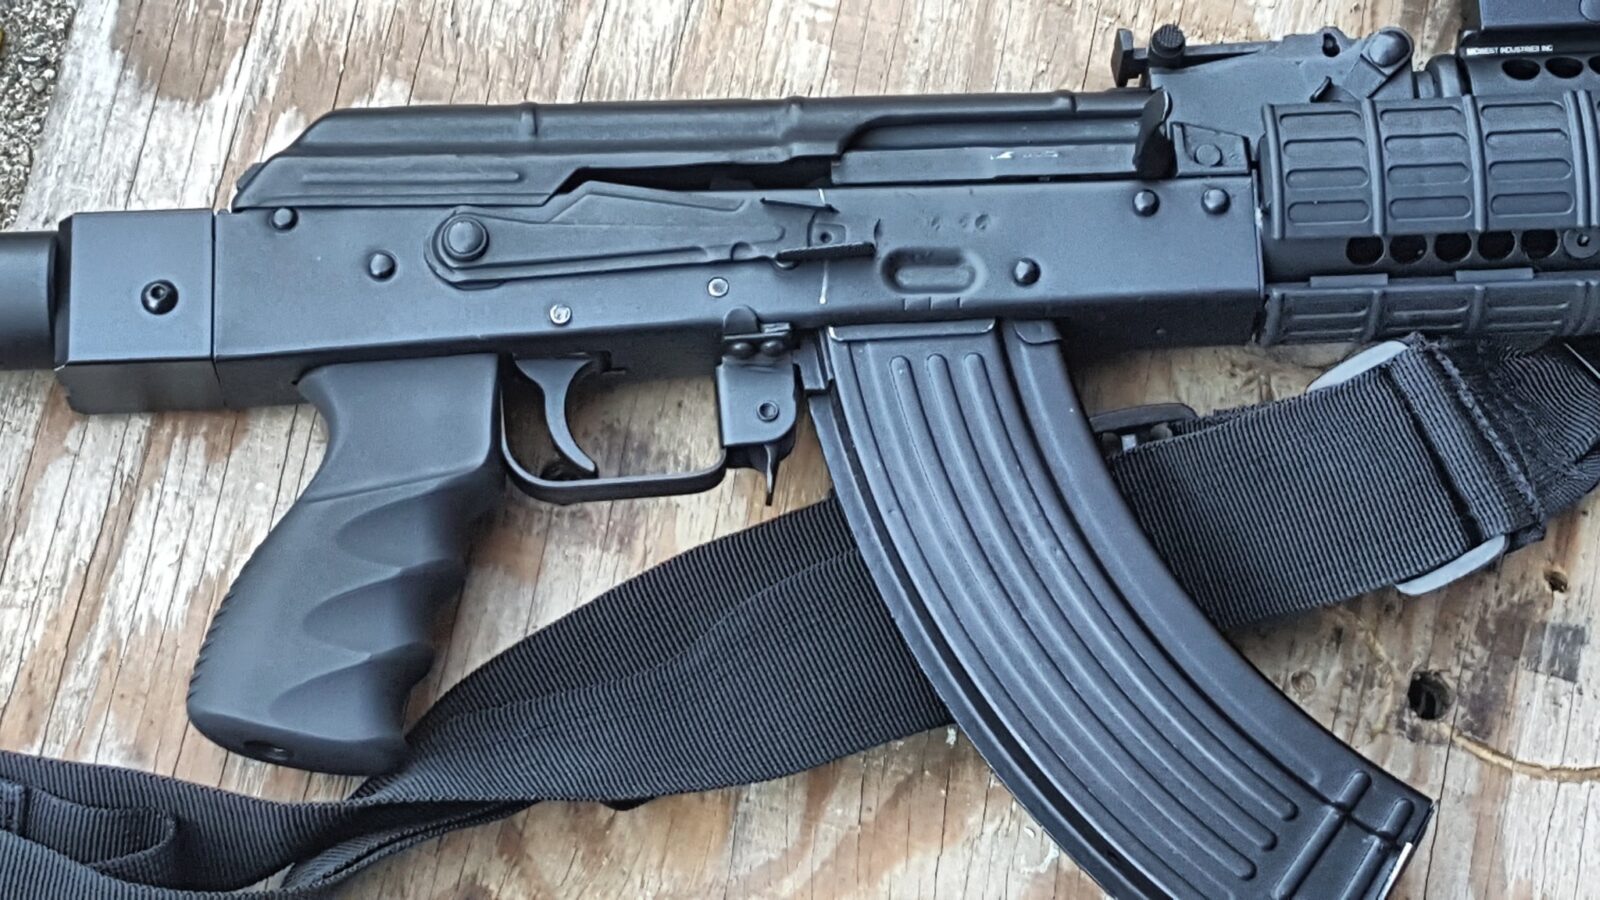
Here is the grip mounted on a Romy G AKM.  No fitting was needed – it went right on.

Ronin's polymer handle being cut with a plastic knife on foil

I wear size XL gloves and the top where the web of my hand from the index to the thumb would sit is just a tad small for me.  The grooves and thumb shelf are very comfortable and could be used with either hand.  For me, I prefer the Russian AK-12 grip or the Bulgarian ARM-9 grip.  I’d recommend this for folks who wear Medium to Large to sized gloves.  If you wear XL or bigger, you may find this a tad small at the top but it is very doable.  I hope to build a Beryl later this year and still plan to use this grip for myself.  I also left it on the Romy for further testing.  I think folks will like this grip regardless of whether they are building a Polish rifle or one from another country.

Ronin's polymer handle being cut with a plastic knife on foil

Click here to go to our online store if you are interested in learning more and/or buying one.

Please note the opening photos of the Beryl rifle are from Wikipedia.  They have a nice basic introduction to the Beryl if you’d like to learn more. 


Please share the link on Facebook, Forums, with colleagues, etc. Your support is much appreciated and if you have any feedback, please email us in**@*********ps.com. If you’d like to request a report or order a reprint, please click here for the corresponding page to open in new tab.


Check Out Joe’s Cool AMD-65 With Our Dark Russian Plum AMD Grips

Th e Hungarians made an interesting variant of the AK known as the AMD-65.  It had a folding stock, short barrel, unique muzzle brake, a front sheet metal handguard that is lower only, a gas tube that doesn’t have retainers for a gas tube cover (because it doesn’t useone) and, finally, the AMD-65 used two unique shaped grips in the front and the rear for better control while firing.

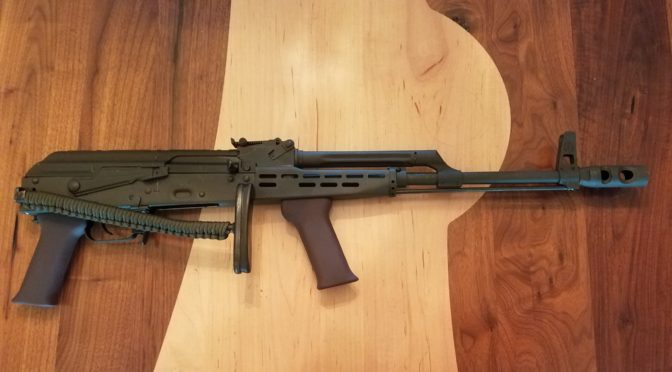
This is Joe’s AMD-65 and you can see he has a rifle-length barrel, wrapped the folder and added two of our AMD-65 grips in Dark Russian Plum.  The  grips have our blasted matte finish that makes them non-slip even when wet.

Ronin's polymer handle being cut with a plastic knife on foil


Please share the link on Facebook, Forums, with colleagues, etc. Your support is much appreciated and if you have any feedback, please email us in**@*********ps.com. If you’d like to request a report or order a reprint, please click here for the corresponding page to open in new tab.


Zastava O-PAP Rifle With One of Our Yugo M70 Grips

This is John’s Zastava O-PAP.  You can tell because it notably does not have the flip up grenade sign on the gas block.  It definitely has clean lines and you can see the bulged trunnion that is another clear indicator that this is the heavier duty O-PAP and not the N-PAP.

Ronin's polymer handle being cut with a plastic knife on foil

John’s rifle has one of our Yugo M70 grips on it.  The Yugoslavians and Zastava saved money by using this unique ergonomic grip on a number of their models including the various favors of the M70, M72, M85, and M92.

John’s grip is colored black and has our matte/blasted finish for a sure “hold” even when wet.

Click here for our order page.


Please share the link on Facebook, Forums, with colleagues, etc. Your support is much appreciated and if you have any feedback, please email us in**@*********ps.com. If you’d like to request a report or order a reprint, please click here for the corresponding page to open in new tab.


Great Step-by-Step AR Assembly Book For Novices – Very Well Done

Hey folks, if you are looking for an affordable book on how to assemble an AR rifle that is step-by-step with a ton of photos – check out Rob Reaser’s book “AR-15 Rifle Builder’s Manual: An Illustrated, Step-by-Step Guide to Assembling the AR-15 Rifle”.   I bought this because I have the Amazon Kindle app on my Samsung tablet and the book was real cheap so I figured why not – I might pick up something new.

This book is aimed at the novice and, to be clear, is an assembly guide.  It is not aimed at engineers or guys who want to really get into the guts from an armorer’s perspective.   The author literally walks a beginner through everything.  I’m not at that stage any more but I could really appreciate his attention to detail.

I know a lot of guys are intimidated by the thought of assembling an AR rifle but Mr. Reaser really does a nice job of stepping you through everything.  So, if you want to build your first AR – get either the Kindle ($7.99) or print edition of this book ($13.49).

When Strength and Quality Matter Most