I’ve owned and built a number of AK-47 pattern rifles over the years and slowly one of my favorite series are the ones from Zastava when they were part of Yugoslavia partly because they are unique. Now, that opens the door – why were they unique? There is some very interesting history behind that and so let’s dive into this further. This first piece will set the stage by explaining why the Soviets didn’t share their AK-47 rifles or designs with Yugoslavia so let’s dive in.
I. Introduction: A Strained Fraternity and a Strategic Weapon
In the shadow of World War II, a brotherhood forged in shared ideology between the Soviet Union (СССР – Soyuz Sovetskikh Sotsialisticheskikh Respublik) and the newly minted Federal People’s Republic of Yugoslavia (ФНРЈ – Federativna Narodna Republika Jugoslavija) was destined for a dramatic unraveling. What began as a seemingly tight-knit alliance, cemented by the fight against fascism, quickly soured, descending into a bitter schism by 1948. A cautious, often fraught, attempt at reconciliation in the post-Stalin years would follow, but the scars of division ran deep.1 This turbulent political saga inevitably cast a long shadow over every aspect of their relationship, particularly in the sensitive arena of military cooperation.
At the heart of the Soviet Union’s rapidly expanding military and geopolitical might lay a revolutionary piece of hardware: the Avtomat Kalashnikova obraztsa 1947 goda (Автомат Калашникова образца 1947 года), the AK-47. Officially entering service in 1949, this assault rifle didn’t just arm Soviet soldiers; it became a potent symbol of Moscow’s technological prowess and a key instrument of its foreign policy.3 The Kremlin wielded the AK-47, and especially the rights to produce it, with calculated precision, using its distribution to reward allies and exert influence.4 Whether a nation received this coveted weapon, or its blueprints, became a telling barometer of its standing in Moscow’s eyes.
Yugoslavia, by the close of 1959, found itself on the outside looking in, denied both the AK-47 and its designs. This wasn’t a simple oversight. It was the culmination of a complex web of factors, chief among them the deep-seated animosity stemming from the 1948 Tito-Stalin split. That seismic event saw Yugoslavia unceremoniously booted from the Cominform (Информбиро / Informbiro – Информационное бюро коммунистических и рабочих партий / Informatsionnoye byuro kommunisticheskikh i rabochikh partiy), the Soviet-led bloc of communist parties, and subjected to a barrage of political and economic pressure.1 This rupture forced Belgrade to chart a new course.
The plot thickened as Yugoslavia embraced an independent, non-aligned stance on the world stage, a move that saw it increasingly reliant on military aid from the West, particularly the United States. Moscow, meanwhile, maintained a tight grip on its arms exports, prioritizing nations that toed the ideological line. Adding another layer to this complex dynamic was Yugoslavia’s own burgeoning ambition to build its own weapons, a drive that would eventually see the Zastava (Застава Оружје / Zastava Oružje) arms factory successfully reverse-engineer the very AK-47s it couldn’t officially obtain. The story of the unshared rifle is thus a tale of clashing ideologies, geopolitical chess, and one nation’s determined, and ultimately successful, quest for self-reliance in a world divided.
II. From Alliance to Animosity and Uneasy Reconciliation: Soviet-Yugoslav Political Dynamics (1945-1959)
A. Post-War Comradeship and Emerging Fissures (1945-1948)
The early days after World War II painted a picture of camaraderie between Moscow and Belgrade. United by communist ideology and their recent joint struggle against the Axis, the Soviet Union and the Federal People’s Republic of Yugoslavia seemed natural partners. A formal Treaty of Friendship and Cooperation, inked in Moscow (Москва / Moskva) on April 11, 1945, by delegations headed by Josip Broz Tito (Јосип Броз Тито) himself, appeared to seal this bond.1 The USSR officially recognized the new Yugoslav state on December 19, 1945, and Belgrade even became the headquarters for the Cominform in 1946, further underscoring the initial closeness.1
Soviet aid flowed into war-torn Yugoslavia: vital food supplies, assistance in repatriating prisoners of war, and the deployment of Soviet technical and military advisors.8 Soviet experts even helped organize Tito’s personal security detail.8 On the economic front, joint ventures like the “Juspad” (пароходство «Юспад») shipping company and the “Justa” (ЮСТА – Югославско-советское акционерное общество гражданской авиации / YUSTA) civil aviation firm were launched, aimed at fostering economic growth and integration.8 For the Yugoslav leadership, who had largely liberated their nation through their own partisan efforts, the Soviet Union was initially seen as an indispensable ally and a blueprint for building a socialist society.9
But beneath this veneer of cooperation, cracks were beginning to show. Tito, a leader with his own strong vision, harbored ambitions for Yugoslavia that didn’t always align with Moscow’s grand strategy. He envisioned Yugoslavia as a dominant force in the Balkans, pursuing plans for a Balkan Federation (Balkanska federacija) that might draw in Bulgaria (Бугарска / Bugarska) and Albania (Албанија / Albanija; Albania – Russian), and he actively backed communist insurgents in the Greek Civil War.2 These moves, often made without Moscow’s full blessing, were viewed by Joseph Stalin (Иосиф Сталин) as potentially reckless and disruptive, especially concerning delicate relations with Western powers.1 Moscow also eyed Yugoslavia’s assertive territorial claims – against Italy over Trieste (Трст / Trst) and Austria (Аустрија / Austrija) regarding Carinthia (Корушка / Koruška; Каринтия / Karantiniya – Russian) – with a degree of apprehension.1
Stalin expected unwavering loyalty from the Eastern European communist states, seeing them as a vital buffer zone and an extension of Soviet might.2 Tito, however, having led a successful indigenous liberation, saw Yugoslavia as an equal partner, not a subordinate.2 This fundamental clash of perspectives was starkly illustrated in November 1945 when Tito, speaking to The Times, declared that while Yugoslav friendship with the Soviet peoples was deep, there was “nothing exclusive about it,” firmly asserting his nation’s independence.1 Even the early Soviet aid, including the presence of advisors, likely served as an intelligence channel for Moscow. As Yugoslavia began to assert its own path, these points of contact may have become sources of friction, with Soviet officials in Belgrade reportedly sending dispatches to Moscow accusing the Yugoslav leadership of ideological straying and “leaderism” (вождизм / vozhdizm).8 The initial “comradeship,” it seemed, was built on shaky ground, with Moscow perhaps viewing its assistance as an investment that demanded Yugoslav compliance, making Belgrade’s subsequent divergence all the more galling to the Kremlin.
B. The 1948 Tito-Stalin Split (Raskol Tito—Staljin / Раскол Тито—Стаљин): A Bitter Divorce and the Informbiro Storm
The simmering pot of Soviet-Yugoslav tensions finally boiled over in 1948, erupting into the infamous Tito-Stalin split (Раскол Тито—Стаљин / Raskol Tito—Staljin; Советско-югославский конфликт / Sovetsko-yugoslavskiy konflikt – Russian) – a dramatic and acrimonious divorce that sent shockwaves through the communist world.7 The Kremlin’s patience with Yugoslavia’s independent streak had worn thin. Tito’s ambitious plans for a Balkan Federation, his assertive stance on Trieste, and his continued support for Greek communists – all actions Stalin feared might provoke a Western backlash – became intolerable to Moscow.2 Stalin’s attempts to tighten his grip on Yugoslav internal affairs, from its economic blueprints to its security forces, met with staunch resistance from Tito, who commanded a loyal and powerful base within the Communist Party of Yugoslavia (КПЈ – Komunistička partija Jugoslavije) and the state apparatus.2
The crisis escalated with alarming speed in early 1948. In a clear signal of displeasure, the Soviet Union abruptly withdrew its military and civilian advisors from Yugoslavia in March.8 What followed was a volley of increasingly venomous letters exchanged between the Central Committees of the Yugoslav and Soviet Communist Parties. The Soviet missives were laden with accusations, painting the Yugoslav leadership as anti-Soviet, nationalistic, Trotskyite, and guilty of straying from the sacred tenets of Marxism-Leninism.8 The Yugoslavs, unbowed, fiercely defended their policies and their sovereign right to forge their own path to socialism.10
The conflict reached its zenith on June 28, 1948. Meeting in Bucharest (Букурешт / București), Romania (Румунија / Rumunija; Румыния / Rumyniya – Russian) – a gathering from which Yugoslav delegates were notably absent – the Cominform adopted a resolution that formally cast Yugoslavia out. The KPJ leadership was condemned for pursuing policies hostile to the USSR, for abandoning Marxism-Leninism in favor of bourgeois nationalism, and for cultivating a “terroristic regime” within its own party.1 This act marked the dawn of the “Informbiro period” (Информбиро период), an era of intense political, economic, and psychological warfare waged by the Soviet Union and its Eastern Bloc allies against a defiant Yugoslavia.7
The Soviet bloc slapped a comprehensive economic embargo on Yugoslavia, hoping to bring its economy, heavily reliant on trade with these nations, to its knees.7 Ominous military maneuvers were conducted along Yugoslavia’s borders with Hungary (Мађарска / Mađarska; Венгрия / Vengriya – Russian), Romania, Bulgaria, and Albania, creating a very real threat of invasion.7 A ferocious propaganda war was unleashed, with outlets like Radio “Free Yugoslavia” (Радио Слободна Југославија / Radio Slobodna Jugoslavija), broadcasting from Bucharest, and newspapers such as “For Socialist Yugoslavia” (За социјалистичку Југославију / Za socijalističku Jugoslaviju) and “New Struggle” (Нова борба / Nova borba), relentlessly denouncing Tito and his government.8 Moscow also threw its weight behind anti-Tito Yugoslav émigrés and allegedly backed plots to topple the Yugoslav leadership from within, including a failed coup attempt linked to high-ranking military officer Arso Jovanović (Арсо Јовановић).11
Yugoslavia’s response was one of unwavering defiance. Tito rallied the nation, framing the struggle as a defense of Yugoslav sovereignty and independence.1 Internally, the regime unleashed a brutal crackdown on anyone suspected of Soviet sympathies. These individuals, derisively labeled “Cominformists” (информбировци / informbirovci or ибеовци / ibeovci), faced arrest, imprisonment, and horrific conditions in notorious camps like Goli Otok (Голи оток, literally “Bare Island”).7 Isolated from the East and staring down the barrel of potential Soviet military action, Yugoslavia had little choice but to turn to the West, primarily the United States, for economic and, critically, military lifelines.1
The repercussions of the Tito-Stalin split were immense. It cemented Tito’s authority at home and dramatically boosted his international standing as a leader who had dared to defy Stalin.1 It set Yugoslavia on the unique path of “Titoism” (титоизам / titoizam), a brand of socialism characterized by worker self-management and a non-aligned foreign policy.7 The split also triggered purges of suspected “Titoists” in other Eastern Bloc countries as Stalin moved to consolidate his control.7 For Yugoslavia, the immediate economic and military fallout was severe, forcing a wholesale reorientation of its foreign and defense strategies.7 The failure of the Informbiro campaign to unseat Tito, despite its ferocity, not only hardened Yugoslav resolve but also, ironically, spurred the development of a more self-reliant defense posture and a domestic arms industry. The very real threat of invasion, coupled with the initial uncertainty of finding alternative arms suppliers, drove home the strategic necessity for Yugoslavia to bolster its own defenses – a lesson that would profoundly shape its approach to national security, including its eventual quest to produce its own version of the AK-47, and later leading to its “Total National Defence” (Општенародна одбрана / Opštenarodna odbrana) doctrine.15
C. Navigating the Thaw: Khrushchev’s Olive Branch and Lingering Shadows (1953-1959)
The death of Joseph Stalin in March 1953 signaled a potential sea change in the icy relations between Moscow and Belgrade, ushering in a period of gradual, though decidedly cautious, normalization.1 The new Soviet leadership, with Nikita Khrushchev (Никита Хрущёв) eventually emerging at the helm, embarked on a broader policy of de-Stalinization and sought to dial down international tensions. Mending fences with Yugoslavia was part of this new playbook.17 The Kremlin hoped to repair the rift within the socialist world and perhaps coax Yugoslavia back into a closer orbit.
A pivotal moment arrived with Khrushchev’s landmark visit to Belgrade in May-June 1955. The visit culminated in the signing of the Belgrade Declaration (Београдска декларација / Beogradska deklaracija; Белградская декларация / Belgradskaya deklaratsiya – Russian) on June 2, 1955.1 This document was a diplomatic breakthrough, formally acknowledging the legitimacy of “different paths to socialism” and enshrining principles of mutual respect for sovereignty, independence, and non-interference in internal affairs.8 Diplomatic ties were fully restored, and trade agreements were struck, easing the economic vise that had squeezed Yugoslavia since 1948.17
But this thaw, while welcome, had its limits, and a deep-seated distrust lingered beneath the surface. Tito’s Yugoslavia remained fiercely committed to its non-aligned foreign policy, carefully navigating a path between the Eastern and Western blocs.1 Tito famously quipped that Yugoslavia would receive Soviet overtures “with a grain of salt,” a clear indication of Belgrade’s enduring skepticism about Moscow’s true intentions.17 While Khrushchev harbored hopes of bringing Yugoslavia back into the Soviet-led “socialist camp” (often dubbed the “Lager“), Tito was resolute in safeguarding Yugoslavia’s hard-won independence.22 Suspicions cut both ways: Yugoslav leaders feared Moscow’s ultimate aim was to reassert dominance, while the Kremlin remained wary of Tito’s independent spirit.17
The fragility of this rapprochement became starkly clear by late 1956. The Soviet military crackdown on the Hungarian Uprising (Мађарска револуција 1956. / Mađarska revolucija 1956.) and the events of the Polish October (Пољски октобар / Polski oktobar) drew criticism from Yugoslavia, reigniting ideological clashes and chilling the recently warmed relations.13 Soviet accusations of Yugoslav “revisionism” resurfaced, and in a throwback to earlier pressure tactics, the USSR in 1958 postponed previously agreed-upon loans to Yugoslavia.8
Military relations during this period of normalization mirrored this complex dance. High-level military delegations were exchanged. Yugoslav State Secretary for National Defence, General Ivan Gošnjak (Иван Гошњак), journeyed to Moscow in June 1957, and Soviet Defence Minister Marshal Georgy Zhukov (Георгиј Жуков / Georgiy Zhukov; Георгий Жуков / Georgiy Zhukov – Russian) paid a return visit to Belgrade in October 1957.23 These visits saw discussions on potential military cooperation and Soviet offers to showcase their latest military hardware.23 However, a significant catch remained: the Soviets consistently tied any substantial military-technical assistance, especially the provision of modern weaponry, to Yugoslavia severing its military aid relationship with the West – a price Belgrade was unwilling to pay.23 Since 1948, Yugoslavia had become a major recipient of US military aid, a lifeline crucial for modernizing the Yugoslav People’s Army (ЈНА – Југословенска народна армија / Jugoslovenska narodna armija).13 While Yugoslavia did announce the end of the US grant aid program in 1957, it continued to purchase spare parts and sought to diversify its arms suppliers, signaling no intent to become wholly reliant on Moscow.14 Adding another twist, Marshal Zhukov’s sudden ouster from his posts in late October 1957, immediately after his Yugoslav trip, further complicated and ultimately derailed the tentative military rapprochement.23
The post-Stalin normalization, therefore, while politically important in ending the overt hostility of the Informbiro era, failed to forge deep military-technical trust, particularly when it came to advanced offensive weapons like the AK-47. Yugoslavia adeptly used the thaw to cement its non-aligned status and maintain its vital Western military connections. This independent posture, heavily reliant on Western arms, was fundamentally at odds with the Soviet Union’s strategic desire for bloc unity and tight control over its key military technologies. The “thaw,” in essence, remained more of a political maneuver than a genuine strategic military partnership that would have justified Moscow sharing its sensitive arms designs with Belgrade.
III. The Kalashnikov Doctrine: Soviet Arms Export Policy and the AK-47
A. The AK-47: Birth of an Icon (1949) and Early Years (up to 1959)
The Avtomat Kalashnikova obraztsa 1947 goda (АК-47) was born from the harsh lessons of World War II and the Soviet Union’s urgent post-war drive to modernize its infantry. Drawing inspiration from weapons like the German Sturmgewehr 44 (StG 44) and built around the new intermediate 7.62x39mm M43 cartridge, the AK-47 was the brainchild of a design team spearheaded by Mikhail Timofeyevich Kalashnikov (Михаил Калашников).3 Early prototypes, dubbed the AK-46, underwent a significant overhaul with input from Aleksandr Zaitsev (Александр Зайцев), leading to the version that would become legendary.4 Following successful trials, the rifle was officially adopted by the Soviet Army in 1949, earning the GRAU index 56-А-212.3 The green light for its technical documentation and initial experimental production at the Izhevsk Motozavod (Ижевский мотозавод / Izhevsk Motozavod) came from Minister of Armaments D.F. Ustinov (Д.Ф. Устинов) on January 21, 1948.29
Getting the AK-47 into mass production wasn’t without its headaches. The initial design called for a receiver made from stamped sheet metal – a method ideal for churning out large numbers. However, difficulties in welding crucial components like the guide and ejector rails led to a high number of rejected units.4 To overcome these hurdles and speed up production, a heavier, more expensive machined (milled) receiver was temporarily adopted. These milled receiver versions, known as Type 2 (from 1951) and the later, lightened Type 3 (from 1954/55), became the standard for several years.4 As a result, the AK-47 didn’t reach Soviet troops in large numbers until around 1956, with the older SKS carbine continuing in production as a stopgap.4
The quest for a more efficient and cost-effective design didn’t stop there. By 1959, the Soviet military rolled out the AKM (Автомат Калашникова Модернизированный / Avtomat Kalashnikova Modernizirovanniy), or Modernized Kalashnikov Automatic Rifle.3 The AKM boasted a redesigned stamped sheet metal receiver that was lighter and cheaper to make, a distinctive slanted muzzle brake to counter muzzle climb, and a hammer retarder to boost reliability during automatic fire.4 This evolution underscores that the AK-47 platform was a top-priority, constantly developing system for the Soviet military throughout the 1950s. The rifle’s own lengthy development, early production snags, and its significant upgrade to the AKM by decade’s end suggest an intense internal focus. This, coupled with its immense strategic value, naturally meant Moscow would be extremely cautious about exporting it, especially when it came to sharing the latest designs with nations not firmly under its military and political thumb.
B. Moscow’s Armory: The Politics of Soviet Arms Transfers
During the Cold War, the Soviet Union’s arms export strategy was less about profit and almost entirely about politics and power.5 The Kremlin’s main goals were to bolster the socialist bloc, support nations taking an “anti-imperialist” line, cultivate allies in international arenas like the United Nations, and, crucially, to foster dependencies that would tie recipient countries closer to Moscow.5 This was clear in the preferential treatment given to Warsaw Pact members, who got first dibs on Soviet weaponry and were pushed to standardize their arsenals along Soviet lines to improve coalition fighting capabilities.5
But this didn’t mean an open tap for all military technology. The Soviets were careful, keeping a tight rein on what went where. They generally avoided sending arms to countries that might use them aggressively, destabilize a region, or whose political loyalty was shaky.5 Secrecy often shrouded the technical details of exported weapons, especially newer systems, to protect Soviet security and prevent sensitive information from falling into enemy hands.5 Notably, the export of nuclear weapons, strategic missiles, and the most cutting-edge military technologies was severely limited or outright banned for most countries, even many socialist allies.5 Often, arms packages included a mix of modern gear and updated, but essentially older, systems.5
Licensing weapon designs, like that of the AK-47, was a meticulously controlled affair, typically reserved for the most trusted allies within the Warsaw Pact or key strategic partners who showed unwavering political devotion. China, for example, received a license to produce its AK-47 variant, the Type 56, in 1956 3, and other Warsaw Pact nations also set up their own production lines.6
The Khrushchev era (1953-1964) saw Moscow extend its reach to newly independent and non-aligned nations in the developing world, courting countries like India, Egypt, and Indonesia.34 This was a pragmatic move to chip away at Western influence, gain Cold War allies, and project Soviet power globally. Aid, including military assistance and arms, was a key tool in this game.34 However, this didn’t translate into freely sharing the most advanced Soviet military tech or production licenses with every non-aligned state. Even under Khrushchev’s more flexible foreign policy, Soviet arms exports operated on a tiered system of trust. Full licensing and transfer of top-tier infantry weapons like the AK-47 were likely kept for nations deeply embedded in the Soviet security sphere (i.e., Warsaw Pact members) or those, unlike Yugoslavia, that weren’t simultaneously cozying up to Western powers for military hardware, training, and political backing. Yugoslavia’s unique tightrope walk – a socialist state outside the Soviet bloc, actively cultivating ties with the West, and a major recipient of Western military aid – put it in a distinctly less trusted category when it came to accessing Moscow’s sensitive military technology.
C. The AK-47: A Crown Jewel in the Soviet Arsenal
The AK-47 wasn’t just another rifle for the Soviets; it was a game-changer in infantry firepower. Renowned for its straightforward design, ruggedness, reliability in the toughest conditions, and suitability for mass production, it was a weapon perfectly adapted for both conventional armies and revolutionary fighters.3 These qualities made it an incredibly valuable military asset, and Moscow was understandably careful about who got their hands on it.
The early spread of the AK-47 illustrates this cautious approach. Even a close ally like the People’s Republic of China was initially supplied with the older SKS semi-automatic carbine before eventually receiving the license to manufacture its own AK-47 version, the Type 56, in 1956.3 This points to a deliberate, phased rollout of this critical technology, even with ideologically aligned partners. The introduction of the modernized and more cost-effective AKM in 1959 only increased the strategic value of the Kalashnikov system, and the Soviets would have been keen to control the dissemination of this improved design.3
Ideologically, the AK-47 was often portrayed as the weapon for the “liberation of the proletariat” and the arming of “socialist workers and peasants.”6 This framing implied that any nation receiving such a weapon, particularly the know-how to make it, needed to be deemed ideologically pure and politically reliable by Moscow. Yugoslavia, after the 1948 split, was seen by the Kremlin as an ideological traitor, guilty of “revisionism” and nationalism.8 Despite the later political thaw under Khrushchev, this deep-seated ideological mistrust never fully evaporated.17 To provide the AK-47 or its designs to a nation that had so publicly defied Soviet authority, was charting its own “path to socialism,” and was actively building ties with the West would have flown in the face of core Soviet principles of ideological conformity and strategic control. The AK-47’s status as both a revolutionary icon and a vital military tool meant its export, especially licensing, was a decision freighted with significance. For Yugoslavia – a nation that had not only broken from the Soviet orbit but had also become a major recipient of Western military aid – the chances of getting this premier Soviet rifle or its blueprints were slim to none.
IV. Yugoslavia’s Armament Dilemma: Between Western Aid and Indigenous Ambition
A. Rearming the JNA Post-1948: A Lifeline from the West
The 1948 Tito-Stalin split threw the Yugoslav People’s Army (JNA – Југословенска народна армија / Jugoslovenska narodna armija) into a perilous situation. Suddenly facing open hostility and the looming threat of invasion from the Soviet Union and its Eastern Bloc allies, Yugoslavia was in desperate need of modernizing its armed forces.15 The JNA’s arsenal at the time was a patchwork of captured World War II weapons (German and Italian), some pre-war domestic models, and the limited Soviet aid received before the bitter divorce – hardly enough to deter a potential Soviet-led onslaught.1
Out of necessity, Yugoslavia turned its gaze westward, primarily to the United States, for military assistance. Beginning in late 1951, under the Mutual Defense Assistance Program (MDAP), Washington began to supply substantial quantities of military hardware and provide crucial training to the JNA.13 This aid was a game-changer, transforming the JNA’s inventory. By 1957, when Yugoslavia requested an end to US grant aid (which officially ceased in 1959, though some purchases continued), it had received a massive infusion of military support.14
Table: Major US Military Equipment Deliveries to Yugoslavia (approx. 1951-1959)
| Equipment Type | Model(s) | Approximate Quantity | Delivery Period (approx.) | Sources |
| Jet Fighters | F-86D Sabre, F-86E Sabre, F-84G Thunderjet | 405 (total US jets) | 1950s | 14 |
| Tanks | M4A3 Sherman, M-47 Patton | 860 (US models) | 1950s | 14 |
| Self-Propelled Guns | M7 Priest, M18 Hellcat, M36 Jackson | 715 | 1950s | 25 |
| Armored/Scout Cars | M3A1 Scout Car, M8 Greyhound | 565 | 1950s | 25 |
| Artillery Pieces | 105mm, 155mm, 203mm howitzers | 760 | 1950s | 25 |
| Trainers | T-33 Shooting Star (TV-2) | 70 | 1950s | 46 |
| Transport Aircraft | C-47 Skytrain, DC-6 | 27 (C-47), 2 (DC-6) | 1950s | 46 |
| Helicopters | H-5, S-55 Whirlwind, H-23 | Small numbers | 1950s | 46 |
| Naval Vessels | Minesweepers, Patrol Boats | Some | 1950s | 14 |
| Small Arms & Other GFE | Various (e.g., M20 recoilless rifles) | Large quantities | 1950s | 46 |
Note: Quantities are approximate and reflect data available for the period. “GFE” refers to Ground Forces Equipment.
Yugoslavia also procured limited military equipment from other Western nations, such as the United Kingdom, which supplied items like Anson aircraft, destroyers, and jet engines for Yugoslav-made aircraft.14 This massive influx of US military aid, while indispensable for Yugoslavia’s defense in the early 1950s, simultaneously widened the gulf with Moscow regarding sensitive military technology. The aid cemented a Western orientation in much of the JNA’s equipment, training, and operational thinking.13 Such strong Western military ties made the idea of integrating a key Soviet system like the AK-47 not only politically thorny for the USSR but also practically challenging for the JNA. Handing over AK-47s to an army largely equipped and trained by the West would have been counterproductive to Soviet goals of bloc unity and risked their top small arms technology being compromised. Yugoslavia’s termination of US grant aid in 1957 was a nod to Moscow during the normalization period, but it didn’t signal a complete break from Western military ties or a wholesale embrace of Soviet arms.14
B. Zastava Arms (Zastava Oružje / Застава Оружје): Forging an Independent Path to the AK
The Yugoslav People’s Army’s approach to small arms in the post-war era was deeply influenced by its partisan roots and the changing face of infantry warfare. Initially, the JNA fielded a diverse collection of weapons, including captured German Mauser Kar98k rifles. The Zastava factory in Kragujevac (Крагујевац / Kragujevac) began reworking these and producing its own version, the M48 bolt-action rifle.44 Soviet-designed small arms, like the SKS carbine (later made domestically as the Zastava M59) and various submachine guns, also filled the JNA’s racks.43 However, the world was moving on. The limitations of bolt-action rifles in terms of sheer firepower and the shorter reach of submachine guns were becoming increasingly obvious with the rise of intermediate-cartridge assault rifles.55 Having witnessed the effectiveness of weapons like the German StG 44 during the war, the JNA knew it needed a modern automatic rifle.56
As early as 1952, Zastava Arms began experimenting with automatic rifle designs, often drawing inspiration from the StG 44.56 This early interest signaled Yugoslavia’s intent to keep pace with global military advancements.
The year 1959 became a pivotal moment in Yugoslavia’s quest for the AK-47. Shut out from official Soviet designs or licensed production due to the chilly political climate, Belgrade turned to unconventional methods. In a stroke of luck, or perhaps shrewd opportunism, two Albanian soldiers defected to Yugoslavia in 1959, carrying their Soviet-made AK-47s. These rifles were swiftly delivered to Zastava’s engineers for meticulous inspection.56 While these initial samples provided a crucial first look and even allowed for metal castings, they weren’t enough to unlock all the secrets of the rifle’s precise technical data and manufacturing tolerances needed for full-scale reproduction.56
Later that year, or soon after, Yugoslavia managed a more significant acquisition, secretly purchasing a batch of reportedly around 2,000 early-pattern AK-47s. Legend has it this deal was struck during one of President Tito’s visits to an unnamed African nation that was a recipient of Soviet military aid.57 With a larger pool of rifles to dissect and study, Zastava’s engineers finally had what they needed to effectively reverse-engineer the prized weapon.
This clandestine effort culminated in the Zastava M64, Yugoslavia’s first domestically produced, unlicensed version of the AK-47.30 Based on the milled receiver design of the Soviet AK Type 3, the M64 incorporated several distinctly Yugoslav features. These included modifications for launching rifle grenades – a key element of JNA doctrine – different handguard designs (often with three cooling slots instead of the Soviet two), and, on some early prototypes, a mechanism to hold the bolt open after the last round was fired.56 The Zastava design team, featuring engineers like Božidar Blagojević (Божидар Благојевић) and Major Miloš Ostojić (Милош Остојић), worked under the “FAZ” (Фамилија Аутоматика Застава / Familija Automatika Zastava – Family of Automatic Weapons Zastava) concept, aiming to create a whole family of weapons based on the Kalashnikov system.57
Yugoslavia’s success in acquiring AK-47s through these back channels in 1959 and then launching its own reverse-engineering program was a testament not only to its ingenuity but also to its unwavering commitment to an independent defense. This proactive stance was a direct result of the post-1948 reality, where relying on former allies had proven a dangerous game. It sent a clear message: if denied critical military technology by one bloc, Yugoslavia was ready and able to get it elsewhere, reinforcing its non-aligned position and diminishing any leverage Moscow might have hoped to exert through arms denial. This bold move set a precedent for Yugoslav technological autonomy and significantly boosted the capabilities of its burgeoning domestic arms industry.
V. The Withheld Design: Why Moscow Said No
The Soviet Union’s refusal to hand over AK-47s or their blueprints to Yugoslavia by 1959 wasn’t a simple “no.” It was a decision born from a complex cocktail of deep-seated political mistrust, cold geopolitical calculations, established arms export policies, Yugoslavia’s own determined push for military self-reliance, and the AK-47’s own development and rollout schedule.
A. The Ghost of ’48: A Chasm of Mistrust
The 1948 Tito-Stalin split wasn’t just a diplomatic disagreement; it was a seismic ideological and political earthquake that shattered the foundations of trust between Moscow and Belgrade.1 In the Kremlin’s eyes, Tito’s defiance was nothing short of a betrayal of the socialist cause. Stalin himself reportedly harbored such intense animosity towards the Yugoslav leader that he even sanctioned assassination attempts.1 This profound bitterness didn’t simply vanish with time. Even after Stalin’s death and Khrushchev’s attempts at reconciliation, a thick fog of suspicion hung heavy in the air between the two nations.16 Yugoslav leaders remained deeply skeptical of Soviet intentions, fearing a renewed push for dominance, while the Soviets doubted Tito’s commitment to any form of socialist solidarity that didn’t place Moscow at the top.17 The Soviet Union had, after all, publicly and vehemently denounced the Yugoslav leadership for “anti-Soviet” policies and dangerous “revisionism.”8 In such a poisoned atmosphere, the idea of transferring a premier military technology like the AK-47 design – a weapon that embodied Soviet military might – to a nation seen as ideologically wayward and politically untrustworthy was almost unthinkable. The essential ingredient for such a sensitive deal – mutual confidence – was conspicuously absent. Moscow simply couldn’t be sure that Yugoslavia wouldn’t share the technology with its newfound Western friends or use it in ways that undermined Soviet interests.
B. Geopolitical Chess: Yugoslavia’s Western Embrace as a Deal-Breaker
Yugoslavia’s strategic pivot to the West for military support after the 1948 schism was a game-changer in Soviet calculations. The substantial military aid flowing from the United States and other Western countries from 1951 onwards forged undeniable links – both in terms of hardware and doctrine – between the JNA and Western militaries.13 This wasn’t just a trickle; it was a flood of modern tanks, jet aircraft, artillery, and extensive training programs.14 Adding to Moscow’s alarm was the formation of the Balkan Pact (Balkanski pakt) in 1953-1954, a mutual defense treaty that brought Yugoslavia together with Greece and Turkey – both NATO members.10 Although Tito tried to downplay its military significance to Khrushchev, the Soviets saw it as a move that, at least indirectly, pulled Yugoslavia into a Western-aligned military orbit.22
A fundamental rule in the Soviet arms export playbook was to prevent its advanced military technology from falling into Western hands or bolstering countries with strong Western military ties.5 During military discussions in 1956-1957, any Soviet offer of significant military aid, including modern weaponry, came with strings attached: Yugoslavia had to cut its military ties with the West and send the US military mission in Belgrade packing.23 Tito, however, wasn’t willing to pay that price, as Western support remained crucial for Yugoslavia’s security and economic stability. Consequently, from Moscow’s perspective, providing AK-47s to a Yugoslav military heavily equipped, trained, and influenced by the United States would have been akin to indirectly arming a Western-leaning force. Worse, it risked the rifle’s technology being dissected, exploited, and potentially countered by NATO. The potential for technological leakage or strategic misuse far outweighed any slim chance of wooing Tito with this particular weapon, especially while Yugoslavia kept its Western military lifelines open.
C. Moscow’s Prudence: Guarding Key Tech from an Independent Outsider
The AK-47 was more than just an effective rifle; it was a cutting-edge piece of Soviet military innovation, a prized technological asset.3 Soviet policy on licensing and exporting such critical military designs was notoriously tight-fisted, generally reserved for its most loyal Warsaw Pact brethren or exceptionally close, ideologically pure states, like China in the early days of their alliance.3 Yugoslavia, an independent, non-aligned nation that had openly thumbed its nose at Moscow’s authority and carved out its own distinct foreign policy, simply didn’t fit the bill as a trusted recipient for such a crucial weapon system.1
A general principle of Soviet arms export strategy was caution, especially with its most advanced systems. Moscow aimed to prevent uncontrolled proliferation, avoid unnecessarily inflaming regional conflicts, and maintain a degree of control over the capabilities of recipient nations.5 The Cold War was, in many ways, a technological arms race, and both superpowers were intensely wary of their key military innovations falling into the hands of, or being exploited by, states they couldn’t fully control. Yugoslavia, with its unique geopolitical balancing act and proven independence, was a textbook example of such a nation. Handing over AK-47 designs or large quantities of the rifle would have meant relinquishing control over a vital military technology to a state operating outside its direct sphere of influence, risking its adaptation or spread in ways that didn’t serve Soviet strategic interests.
D. Yugoslav Autonomy: Belgrade’s Go-It-Alone Spirit
The shock of the 1948 split and the subsequent Soviet-led blockade left an indelible mark on Yugoslavia’s approach to national security. It drove home the harsh lesson about the dangers of relying too heavily on a single foreign power for essential military gear.15 As a result, building a strong domestic arms industry became a top strategic priority for Belgrade. Zastava Arms in Kragujevac already had a history of arms manufacturing, churning out Mauser-pattern M48 rifles and other small arms in the post-war years.51 This existing industrial foundation provided a springboard for more ambitious endeavors.
The clandestine acquisition of AK-47 samples in 1959, followed by Zastava’s dedicated efforts to reverse-engineer the weapon and develop the M64 prototype, stands as a powerful testament to Yugoslavia’s proactive and determined pursuit of modern military technology, even without Moscow’s blessing or a license.56 This independent streak demonstrated a clear commitment to achieving a degree of self-sufficiency in critical defense areas. It’s plausible that even if the Soviets under Khrushchev had offered the AK-47 designs or a license, the political strings or economic terms attached might have been unacceptable to a Yugoslavia fiercely protective of its sovereignty. Having already embarked on a path of diversifying its arms sources (thanks to Western aid) and nurturing its own capabilities, Belgrade might have preferred the longer, more challenging road of independent development over a Soviet deal that could have entailed unwelcome dependencies. The Soviet refusal to provide the AK-47, therefore, met a Yugoslav determination to acquire the capability one way or another. This, in turn, ultimately strengthened its military-industrial complex and reinforced its non-aligned defense posture, making Yugoslavia less vulnerable to future political pressure through arms supplies from any bloc.
E. The AK-47/AKM Timeline: A Premier System, Sparingly Shared
The AK-47’s own development and deployment timeline also played a role. Though officially adopted in 1949, getting the rifle into the hands of Soviet troops in large numbers took several years due to initial production hiccups, especially with the stamped receiver.4 The significantly improved and modernized AKM version, featuring a more easily mass-produced stamped receiver, only made its debut in 1959.3 This means that throughout the entire period of Yugoslav-Soviet normalization (1955-1959), the AK-47 was the USSR’s primary, relatively new assault rifle, and its definitive mass-production iteration, the AKM, was just appearing on the scene as the decade closed.
The transfer of such cutting-edge military technology, particularly its production license, typically followed a strict pecking order: first, equip your own forces, then provide it to your most trusted and strategically vital allies. Even a major communist power like China only began licensed production of its AK-47 variant, the Type 56, in 1956 – several years after the AK-47’s formal adoption by the Soviet Army.3 This points to a deliberate and controlled process for sharing AK-47 technology. Given this internal Soviet timeline for the AK-47’s own development, production refinement, and initial dissemination, Yugoslavia – with its complicated and often strained political relationship with Moscow – was simply not high enough on the priority list to receive such a sensitive and relatively new technology transfer by 1959. Even if political relations had been significantly warmer and free of the deep-seated mistrust, it’s likely that widespread licensing or export of the AK-47, let alone the just-emerging AKM, to a non-Warsaw Pact country like Yugoslavia would have been deemed premature from the Soviet strategic viewpoint, which naturally prioritized its own forces and its closest, most reliable allies. The profound political issues merely sealed a fate already influenced by the weapon’s own lifecycle and Soviet dissemination practices.
VI. Conclusion: Forging Arms and Independence
The Soviet Union’s decision to keep its AK-47 rifles and their designs out of Yugoslav hands by the end of 1959 was not a simple “no.” It was a complex verdict shaped by a potent mix of factors. The deep, lingering mistrust from the 1948 Tito-Stalin split, which painted Yugoslavia as an ideological maverick in Moscow’s eyes, set the stage.1 This fundamental distrust was amplified by Yugoslavia’s determinedly non-aligned stance and its significant reliance on Western military aid, particularly from the United States, making any transfer of sensitive Soviet military technology to Belgrade a geopolitical non-starter for the Kremlin.13
Moreover, Soviet arms export policies during the early Cold War were notoriously restrictive when it came to advanced weaponry. Moscow prioritized its Warsaw Pact allies and ideologically compliant states, exercising extreme caution with nations like Yugoslavia that charted an independent foreign policy course and maintained strong Western ties.5 The AK-47, and its successor the AKM (which arrived in 1959), were crown jewels of Soviet military technology, and their dissemination was tightly controlled.3 The AK-47’s own development and deployment timeline meant it was still a relatively new and evolving system within the Soviet military itself, making widespread export or licensing to a country outside its immediate security bloc highly unlikely by 1959.4
Meanwhile, Yugoslavia, steeled by the hard lessons of the Informbiro period and driven by a powerful imperative for self-reliance, was actively building its own domestic arms industry.51 The clandestine acquisition of AK-47 samples in 1959, followed by the impressive reverse-engineering efforts at Zastava Arms that led to the M64 prototype, showcased Belgrade’s resolve to obtain modern assault rifle technology, with or without Soviet approval.56 This bold initiative not only highlighted Yugoslav ingenuity but also underscored a deep commitment to an autonomous defense posture.
In the end, the Soviet refusal to share the AK-47 did not stop Yugoslavia from arming itself with Kalashnikov-pattern rifles. Instead, it spurred the nation’s engineers and defense industry to develop their own versions, most notably the Zastava M70 series. These rifles became a mainstay of the Yugoslav People’s Army and a significant export success in their own right. This outcome fostered a crucial degree of self-sufficiency in small arms production for Yugoslavia, a cornerstone of its independent defense doctrine and its distinctive non-aligned identity on the turbulent stage of the Cold War.
The story of the Soviet-Yugoslav AK-47 dynamic is a vivid illustration of how the intricate dance of Cold War power politics, ideological clashes, national interests, and technological ambitions shaped military relationships. It underscores that the transfer – or denial – of arms and military technology was a powerful tool of statecraft, with far-reaching consequences for industrial development, strategic autonomy, and the geopolitical paths nations chose to tread in a bipolar world. For Yugoslavia, the rifle Moscow withheld ultimately became a catalyst, driving it to forge not only its own weapons but also a more independent destiny.
The next post will explore more about the early phases of the Zastava AK program because then it gets really interesting. Click here to open a new browser tab and read about how Zastava developed the first “Yugo” AK – the M64 – that preceded the M70 series.
Image Sources
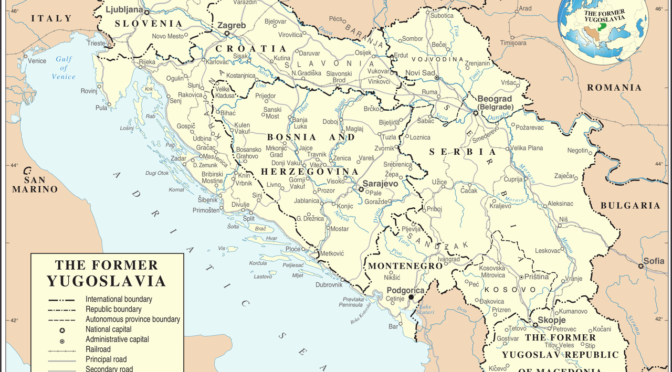
The Map of Yugoslavia was obtained from Wikimedia. Image source was “The Cartographic Section of the United Nations (CSUN) Date=2007-03-10” https://commons.wikimedia.org/wiki/File:Former_Yugoslavia_Map.png
Works cited
- Soviet Union–Yugoslavia relations – Wikipedia, accessed May 11, 2025, https://en.wikipedia.org/wiki/Soviet_Union%E2%80%93Yugoslavia_relations
- The Soviet Union’s Foreign Policy in the Balkans during the First Years of the Cold War (1945-1960) – Digital Commons @ Wayne State, accessed May 11, 2025, https://digitalcommons.wayne.edu/cgi/viewcontent.cgi?article=1081&context=honorstheses
- Gun History: The Origin Story of the AK-47 – Outdoor Life, accessed May 11, 2025, https://www.outdoorlife.com/blogs/gun-shots/gun-history-origin-story-ak-47/
- AK-47 – Wikipedia, accessed May 11, 2025, https://en.wikipedia.org/wiki/AK-47
- 3. Conventional arms transfers during the Soviet period – SIPRI, accessed May 11, 2025, https://www.sipri.org/sites/default/files/files/books/SIPRI98An/SIPRI98An03.pdf
- The Breakout: The Mass Production, Distribution, and Early Use of the AK-47 – The Gun, accessed May 11, 2025, https://erenow.org/ww/the-gun/7.php
- Tito–Stalin split – Wikipedia, accessed May 11, 2025, https://en.wikipedia.org/wiki/Tito%E2%80%93Stalin_split
- Советско-югославские отношения – Википедия, accessed May 11, 2025, https://ru.wikipedia.org/wiki/%D0%A1%D0%BE%D0%B2%D0%B5%D1%82%D1%81%D0%BA%D0%BE-%D1%8E%D0%B3%D0%BE%D1%81%D0%BB%D0%B0%D0%B2%D1%81%D0%BA%D0%B8%D0%B5_%D0%BE%D1%82%D0%BD%D0%BE%D1%88%D0%B5%D0%BD%D0%B8%D1%8F
- Yugoslavia and the USSR 1945 – 1980: The History of a Cold War Relationship, accessed May 11, 2025, https://www.yuhistorija.com/int_relations_txt01c1.html
- Раскол Тито—Стаљин — Википедија, accessed May 11, 2025, https://sr.wikipedia.org/wiki/%D0%A0%D0%B0%D1%81%D0%BA%D0%BE%D0%BB_%D0%A2%D0%B8%D1%82%D0%BE%E2%80%94%D0%A1%D1%82%D0%B0%D1%99%D0%B8%D0%BD
- Informbiro period – Wikipedia, accessed May 11, 2025, https://en.wikipedia.org/wiki/Informbiro_period
- Советско-югославский конфликт – Википедия, accessed May 11, 2025, https://ru.wikipedia.org/wiki/%D0%A1%D0%BE%D0%B2%D0%B5%D1%82%D1%81%D0%BA%D0%BE-%D1%8E%D0%B3%D0%BE%D1%81%D0%BB%D0%B0%D0%B2%D1%81%D0%BA%D0%B8%D0%B9_%D0%BA%D0%BE%D0%BD%D1%84%D0%BB%D0%B8%D0%BA%D1%82
- Foreign Relations of the United States, 1958–1960, Eastern Europe; Finland; Greece; Turkey, Volume X, Part 2 – Historical Documents – Office of the Historian, accessed May 11, 2025, https://history.state.gov/historicaldocuments/frus1958-60v10p2/d158
- THE CHANGING PATTERN OF YUGOSLAVIA’S ARMS PROCUREMENT – CIA, accessed May 11, 2025, https://www.cia.gov/readingroom/docs/CIA-RDP85T00875R001600040005-2.pdf
- Total National Defense in Yugoslavia – DTIC, accessed May 11, 2025, https://apps.dtic.mil/sti/tr/pdf/AD0742397.pdf
- Yugoslav-Soviet relations, 1953-1957: normalization, comradeship, confrontation, accessed May 11, 2025, http://etheses.lse.ac.uk/2525/
- YUGOSLAV- SOVIET RELATIONS – CIA, accessed May 11, 2025, https://www.cia.gov/readingroom/docs/CIA-RDP91T01172R000300020025-1.pdf
- СОВЕТСКО-ЮГОСЛАВСКИЙ КОНФЛИКТ 1948 – Большая российская энциклопедия, accessed May 11, 2025, https://old.bigenc.ru/domestic_history/text/3589560
- Югославия – Советский Союз. 1955-1956. Первые встречи после развода – LiveJournal, accessed May 11, 2025, https://humus.livejournal.com/2526263.html
- Односи Југославије и Совјетског Савеза — Википедија, accessed May 11, 2025, https://sr.wikipedia.org/wiki/%D0%9E%D0%B4%D0%BD%D0%BE%D1%81%D0%B8_%D0%88%D1%83%D0%B3%D0%BE%D1%81%D0%BB%D0%B0%D0%B2%D0%B8%D1%98%D0%B5_%D0%B8_%D0%A1%D0%BE%D0%B2%D1%98%D0%B5%D1%82%D1%81%D0%BA%D0%BE%D0%B3_%D0%A1%D0%B0%D0%B2%D0%B5%D0%B7%D0%B0
- SOVIET-YUGOSLAV RELATIONS – CIA, accessed May 11, 2025, https://www.cia.gov/readingroom/docs/CIA-RDP79R00890A000700100003-6.pdf
- YUGOSLAV-SOVIET RELATIONS, 1953- 1957: Normalization, Comradeship, Confrontation – LSE Theses Online, accessed May 11, 2025, http://etheses.lse.ac.uk/2525/1/U615474.pdf
- Др Александар ЖИВОТИЋ УСПОН И ПАД ЈУГОСЛОВЕНСКО-СОВЈЕТСКИХ ВОЈНИХ ОДНОСА 1957. – Токови Историје, accessed May 11, 2025, https://tokovi.istorije.rs/cir/uploaded/1%202014/CLANAK%20-%20ZIVOTIC%20ALEKSANDAR.pdf
- Нови хоризонти спољне политике Југославије: Балкан, Европа, свет – SANU, accessed May 11, 2025, https://dais.sanu.ac.rs/bitstream/id/64017/bitstream_64017.pdf
- Yugoslav People’s Army – Wikipedia, accessed May 11, 2025, https://en.wikipedia.org/wiki/Yugoslav_People%27s_Army
- 60. Interdepartment Policy Paper Prepared by the Departments of State and Defense, Washington, undated. (7/5/73), accessed May 11, 2025, https://2001-2009.state.gov/r/pa/ho/frus/nixon/e15/107794.htm
- AK-47 Automatic Rifle | Smithsonian Institution, accessed May 11, 2025, https://www.si.edu/object/ak-47-automatic-rifle%3Anmah_439260
- Автомат Калашникова – Википедия, accessed May 11, 2025, https://ru.wikipedia.org/wiki/%D0%90%D0%B2%D1%82%D0%BE%D0%BC%D0%B0%D1%82_%D0%9A%D0%B0%D0%BB%D0%B0%D1%88%D0%BD%D0%B8%D0%BA%D0%BE%D0%B2%D0%B0
- История автомата Калашникова (АК-47) – Ижевский мотозавод «Аксион-холдинг, accessed May 11, 2025, https://www.axion.ru/kalashnikov-100/
- AK-47 – Survival, accessed May 11, 2025, http://landsurvival.com/schools-wikipedia/wp/a/AK-47.htm
- AK-47 | Definition, History, Operation, & Facts – Britannica, accessed May 11, 2025, https://www.britannica.com/technology/AK-47
- Russian Military-Technical Cooperation: Structures and Processes – Columbia International Affairs Online, accessed May 11, 2025, https://ciaotest.cc.columbia.edu/olj/sa/sa_june01bab01.html
- Soviet Union Study_9 – Marines.mil, accessed May 11, 2025, https://www.marines.mil/portals/1/publications/soviet%20union%20study_9.pdf
- The Main Drivers of Soviet Foreign Policy Towards India, 1955–1991, accessed May 11, 2025, https://tnsr.org/wp-content/uploads/2024/11/TNSR-Journal-Vol-8-Issue-1-SAHNI.pdf
- The Main Drivers of Soviet Foreign Policy Towards India, 1955–1991, accessed May 11, 2025, https://tnsr.org/2024/11/the-main-drivers-of-soviet-foreign-policy-towards-india-1955-1991/
- Comparison of the AK-47 and M16 – Wikipedia, accessed May 11, 2025, https://en.wikipedia.org/wiki/Comparison_of_the_AK-47_and_M16
- Kalashnikov rifle – Wikipedia, accessed May 11, 2025, https://en.wikipedia.org/wiki/Kalashnikov_rifle
- Khrushchev’s Peaceful Coexistence: The Soviet Perspective | Guided History – BU Blogs, accessed May 11, 2025, https://blogs.bu.edu/guidedhistory/russia-and-its-empires/michelle-van-sleet/
- Yugoslavia and the Soviet Policy of Force in the Mediterranean Since 1961. – DTIC, accessed May 11, 2025, https://apps.dtic.mil/sti/tr/pdf/ADA106190.pdf
- SKS – Wikipedia, accessed May 11, 2025, https://en.wikipedia.org/wiki/SKS
- The Avtomat Kalashnikov Model of Year 1947 – Sites at Penn State, accessed May 11, 2025, https://sites.psu.edu/jlia/the-avtomat-kalashnikov-model-of-year-1947/
- Chapter 4 The Tito Doctrine in – Brill, accessed May 11, 2025, https://brill.com/display/book/9789004358997/BP000016.xml
- Did the USSR give Yugoslavia weapons before 1948? – Quora, accessed May 11, 2025, https://www.quora.com/Did-the-USSR-give-Yugoslavia-weapons-before-1948
- Why did the Yugoslavs during the war employ the MG42 and its derivatives like the Zastava M53, although most of their firearms are of Soviet origin? – Quora, accessed May 11, 2025, https://www.quora.com/Why-did-the-Yugoslavs-during-the-war-employ-the-MG42-and-its-derivatives-like-the-Zastava-M53-although-most-of-their-firearms-are-of-Soviet-origin
- What weapons were used in the Yugoslav War? – Quora, accessed May 11, 2025, https://www.quora.com/What-weapons-were-used-in-the-Yugoslav-War
- YUGOSLAV MILITARY EQUIPMENT AND ITS SOURCES – CIA, accessed May 11, 2025, https://www.cia.gov/readingroom/docs/CIA-RDP79T00429A001100010022-0.pdf
- YUGOSLAV MILITARY EQUIPMENT AND ITS SOURCES | CIA FOIA (foia.cia.gov), accessed May 11, 2025, https://www.cia.gov/readingroom/document/cia-rdp79t00429a001100010022-0
- Foreign Relations of the United States, 1950, Central and Eastern Europe; The Soviet Union, Volume IV – Historical Documents – Office of the Historian, accessed May 11, 2025, https://history.state.gov/historicaldocuments/frus1950v04/d768
- Yugoslav Nuclear Diplomacy between the Soviet Union and the United States in the Early and Mid‑Cold War – OpenEdition Journals, accessed May 11, 2025, https://journals.openedition.org/monderusse/11239
- Советско-Югославский конфликт. 1948-1953гг – Холодная война, accessed May 11, 2025, http://www.coldwar.ru/conflicts/yugoslaviya/conflict-1948-1953.php
- Zastava Arms, accessed May 11, 2025, https://sadefensejournal.com/zastava-arms/
- Zastava Arms – Wikipedia, accessed May 11, 2025, https://en.wikipedia.org/wiki/Zastava_Arms
- Zastava M59/66 – Wikipedia, accessed May 11, 2025, https://en.wikipedia.org/wiki/Zastava_M59/66
- Why did the Yugoslav People’s Army use the Zastava M48 (a locally produced variant of the German K98k) as their primary service rifle until the mid-1960s, even though bolt action rifles were already obsolete during WW2? – Quora, accessed May 11, 2025, https://www.quora.com/Why-did-the-Yugoslav-Peoples-Army-use-the-Zastava-M48-a-locally-produced-variant-of-the-German-K98k-as-their-primary-service-rifle-until-the-mid-1960s-even-though-bolt-action-rifles-were-already-obsolete-during-WW2
- Intermediate cartridge – Wikipedia, accessed May 11, 2025, https://en.wikipedia.org/wiki/Intermediate_cartridge
- Zastava M70 assault rifle – Wikipedia, accessed May 11, 2025, https://en.wikipedia.org/wiki/Zastava_M70_assault_rifle
- Zastava M64. Part 1. The Unusual History of Yugoslavian AKs – The Firearm Blog, accessed May 11, 2025, https://www.thefirearmblog.com/blog/2024/05/07/zastava-m64-part-1-unusual-history-yugoslavian-aks/
- Chinese and Yugo AK similarities : r/ak47 – Reddit, accessed May 11, 2025, https://www.reddit.com/r/ak47/comments/vhvwa4/chinese_and_yugo_ak_similarities/
- Yugoslavian Serbia AK-47 History – Zastava – Faktory 47, accessed May 11, 2025, https://www.faktory47.com/blogs/kalashnikov/yugoslavian-serbia-ak-history
- Последняя «Zastava», сербский взгляд на автомат Калашникова – Военное обозрение, accessed May 11, 2025, https://topwar.ru/8858-poslednyaya-zastava.html
- Автомат (штурмовая винтовка) Zastava M64 / M70 / M77 / M92 – ВКонтакте, accessed May 11, 2025, https://vk.com/@weapons-avtomat-shturmovaya-vintovka-zastava-m64-m70-m77-m92
- We’ve Got a List of Every AK-47 Ever Made – The National Interest, accessed May 11, 2025, https://nationalinterest.org/blog/buzz/weve-got-list-every-ak-47-ever-made-78141
- Zastava M64 – The Unusual History of Yugoslavian AKs | The Armory Life Forum, accessed May 11, 2025, https://www.thearmorylife.com/forum/threads/zastava-m64-the-unusual-history-of-yugoslavian-aks.19074/
- Српски “калашњиков” осваја Америку – Lovački savez Republike Srpske, accessed May 11, 2025, https://lovcirs.com/aktivnosti/srpski-kalasnjikov-osvaja-ameriku/1402/
- Автомат Калашникова по рецепту Иосипа Броза Тито – Военное обозрение, accessed May 11, 2025, https://topwar.ru/29027-avtomat-kalashnikova-po-receptu-iosipa-broza-tito.html
- Zastava M70 (автомат) – Википедия, accessed May 11, 2025, https://ru.wikipedia.org/wiki/Zastava_M70_(%D0%B0%D0%B2%D1%82%D0%BE%D0%BC%D0%B0%D1%82)
- Топ-5 малоизвестных разновидностей “Калашникова” – новости Подоляка, accessed May 11, 2025, https://podolyaka.ru/top-5-maloizvestnyh-raznovidnostey-kalashnikova/
- Югославская автоматическая винтовка «Застава» – боевой и гражданский варианты, accessed May 11, 2025, https://www.militaryplatform.ru/10307-jugoslavskaja-avtomaticheskaja-vintovka-zastava-boevoj-i-grazhdanskij-varianty.html
- Guns in Movies, TV and Video Games – Zastava M70 – Internet Movie Firearms Database, accessed May 11, 2025, https://www.imfdb.org/wiki/Zastava_M70
- AK-47 Assault Rifle | PDF | Firearms | Projectile Weapons – Scribd, accessed May 11, 2025, https://www.scribd.com/document/137558177/AK-47-Assault-Rifle
- Yugoslavian M64 AK Overview – YouTube, accessed May 11, 2025, https://www.youtube.com/watch?v=B1MB4jX_0QM
- Yugo M64 reweld – SKSBOARDS.COM, accessed May 11, 2025, http://www.sksboards.com/smf/index.php?topic=96259.0
- Ak 47 | PDF | Magazine (Firearms) | Personal Weapons – Scribd, accessed May 11, 2025, https://fr.scribd.com/document/175746045/AK-47
- What’s your opinion on the M70 Zastava rifle? – Quora, accessed May 11, 2025, https://www.quora.com/Whats-your-opinion-on-the-M70-Zastava-rifle
- Nonaligned Movement: Liberation Movements – Yugoblok, accessed May 11, 2025, https://yugoblok.com/nonaligned-movement2/
- Zastava M57 – Википедия, accessed May 11, 2025, https://ru.wikipedia.org/wiki/Zastava_M57
- Югославская снайперская. Винтовка Zastava M 48B | Оружейный журнал «КАЛАШНИКОВ» – KALASHNIKOV.ru, accessed May 11, 2025, https://www.kalashnikov.ru/yugoslavskaya-snajperskaya/
- A country’s weapons can be a good indication of whether they wanted to be a Soviet puppet state : r/NonCredibleDefense – Reddit, accessed May 11, 2025, https://www.reddit.com/r/NonCredibleDefense/comments/17jukc7/a_countrys_weapons_can_be_a_good_indication_of/
- Is the Yugoslav, Zastava M-70, the best licensed built Ak-47 and maybe the best Ak-47 variant to this day? : r/ak47 – Reddit, accessed May 11, 2025, https://www.reddit.com/r/ak47/comments/10r4iq9/is_the_yugoslav_zastava_m70_the_best_licensed/
- Selling the Russians the Rope? Soviet Technology Policy and U.S. Export Controls – RAND, accessed May 11, 2025, https://www.rand.org/content/dam/rand/pubs/reports/2008/R2649.pdf
- Watching the Bear: Essays on CIA’s Analysis of the Soviet Union, accessed May 11, 2025, https://www.cia.gov/resources/csi/static/Watching-the-Bear-Essays-on-CIAs-Analysis-of-the-Soviet-Union-1.pdf


