Category Archives: Trucks

How to rotate heavy truck, SUV or van tires the easy way and not hurt your back!

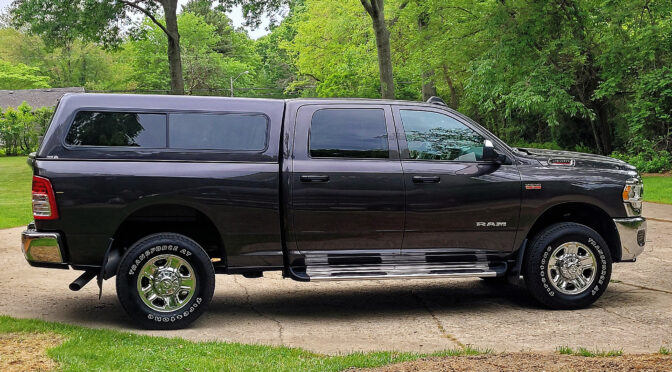
I bought a new 2021 Ram 2500 in September of 2021. It was my first heavy gasser with a 6.4L Hemi and a piece of advice a lot of guys gave me was to make sure I rotated the tires with every oil change. It sounded reasonable – it’s heavy truck and the tires need to be rotated so they will wear evenly. If you don’t do this your handling may suffer such as picking up a wobble or you may wear the tires such that they must be replaced prematurely. Ok, I was totally on board with concept but then started thinking about how heavy they probably were – I sure knew they weren’t going to be light.

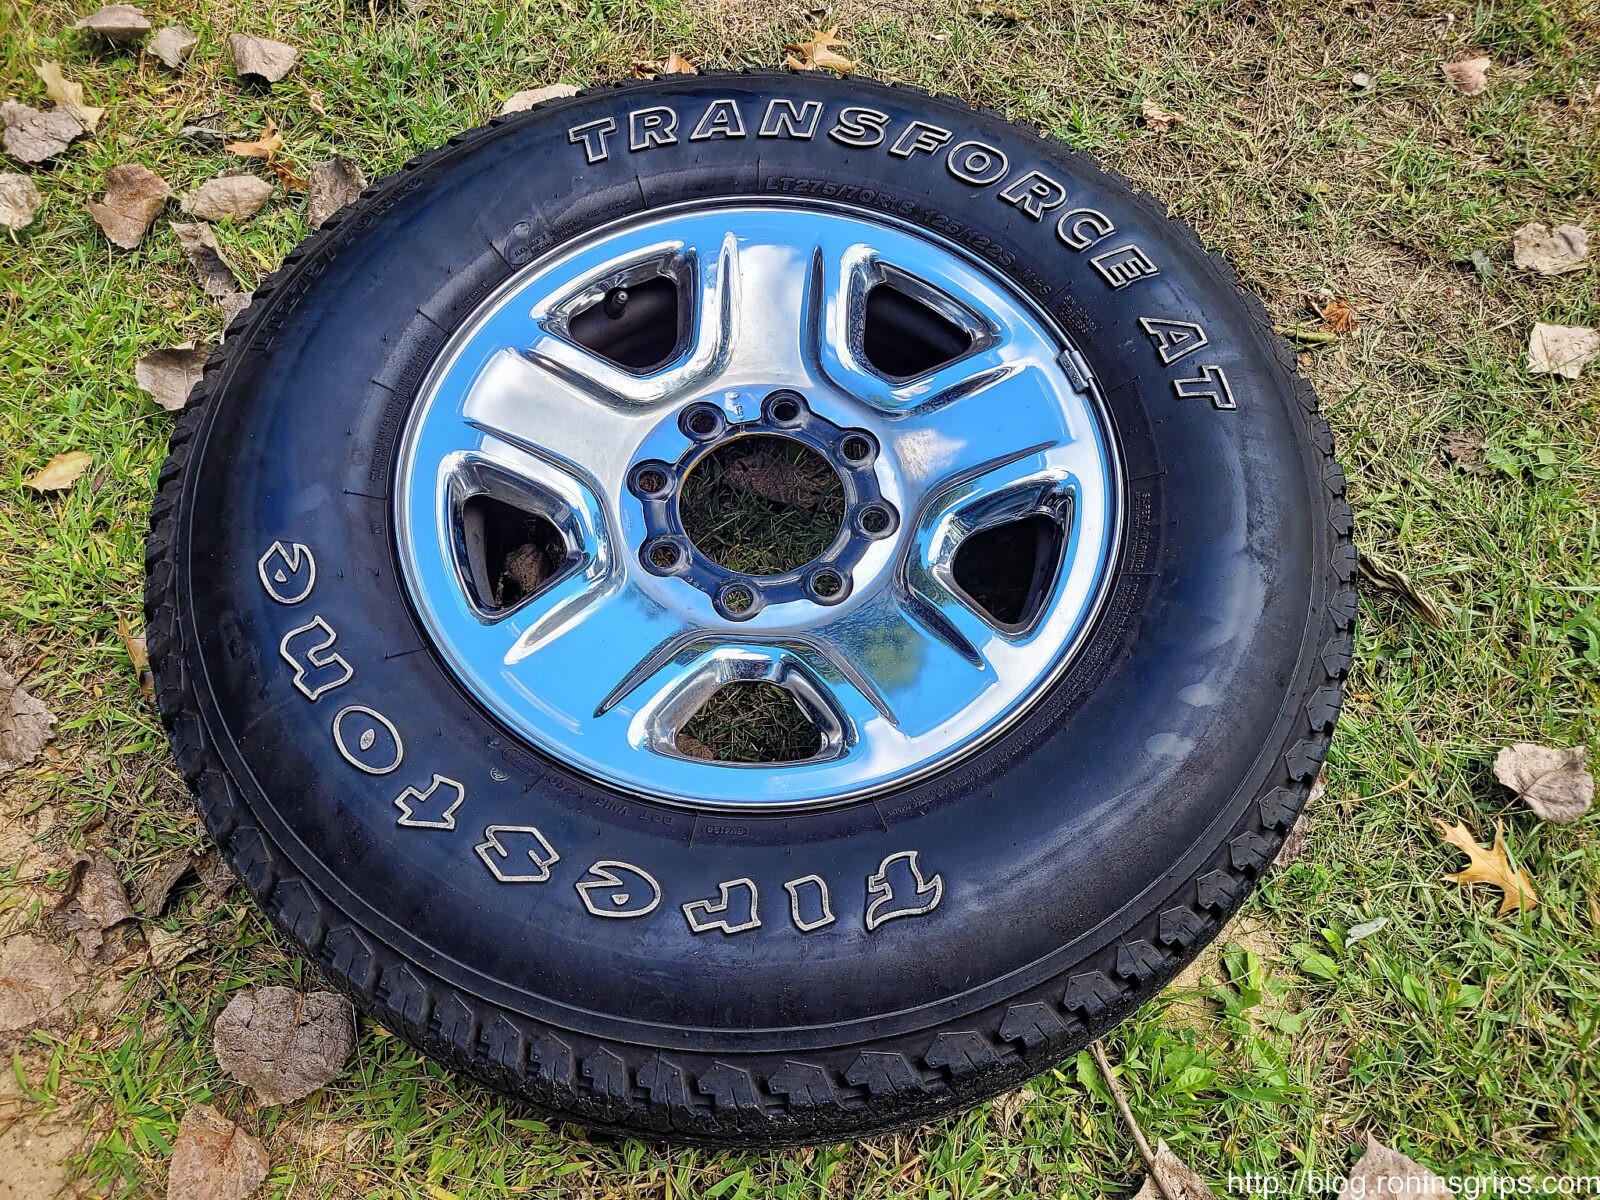
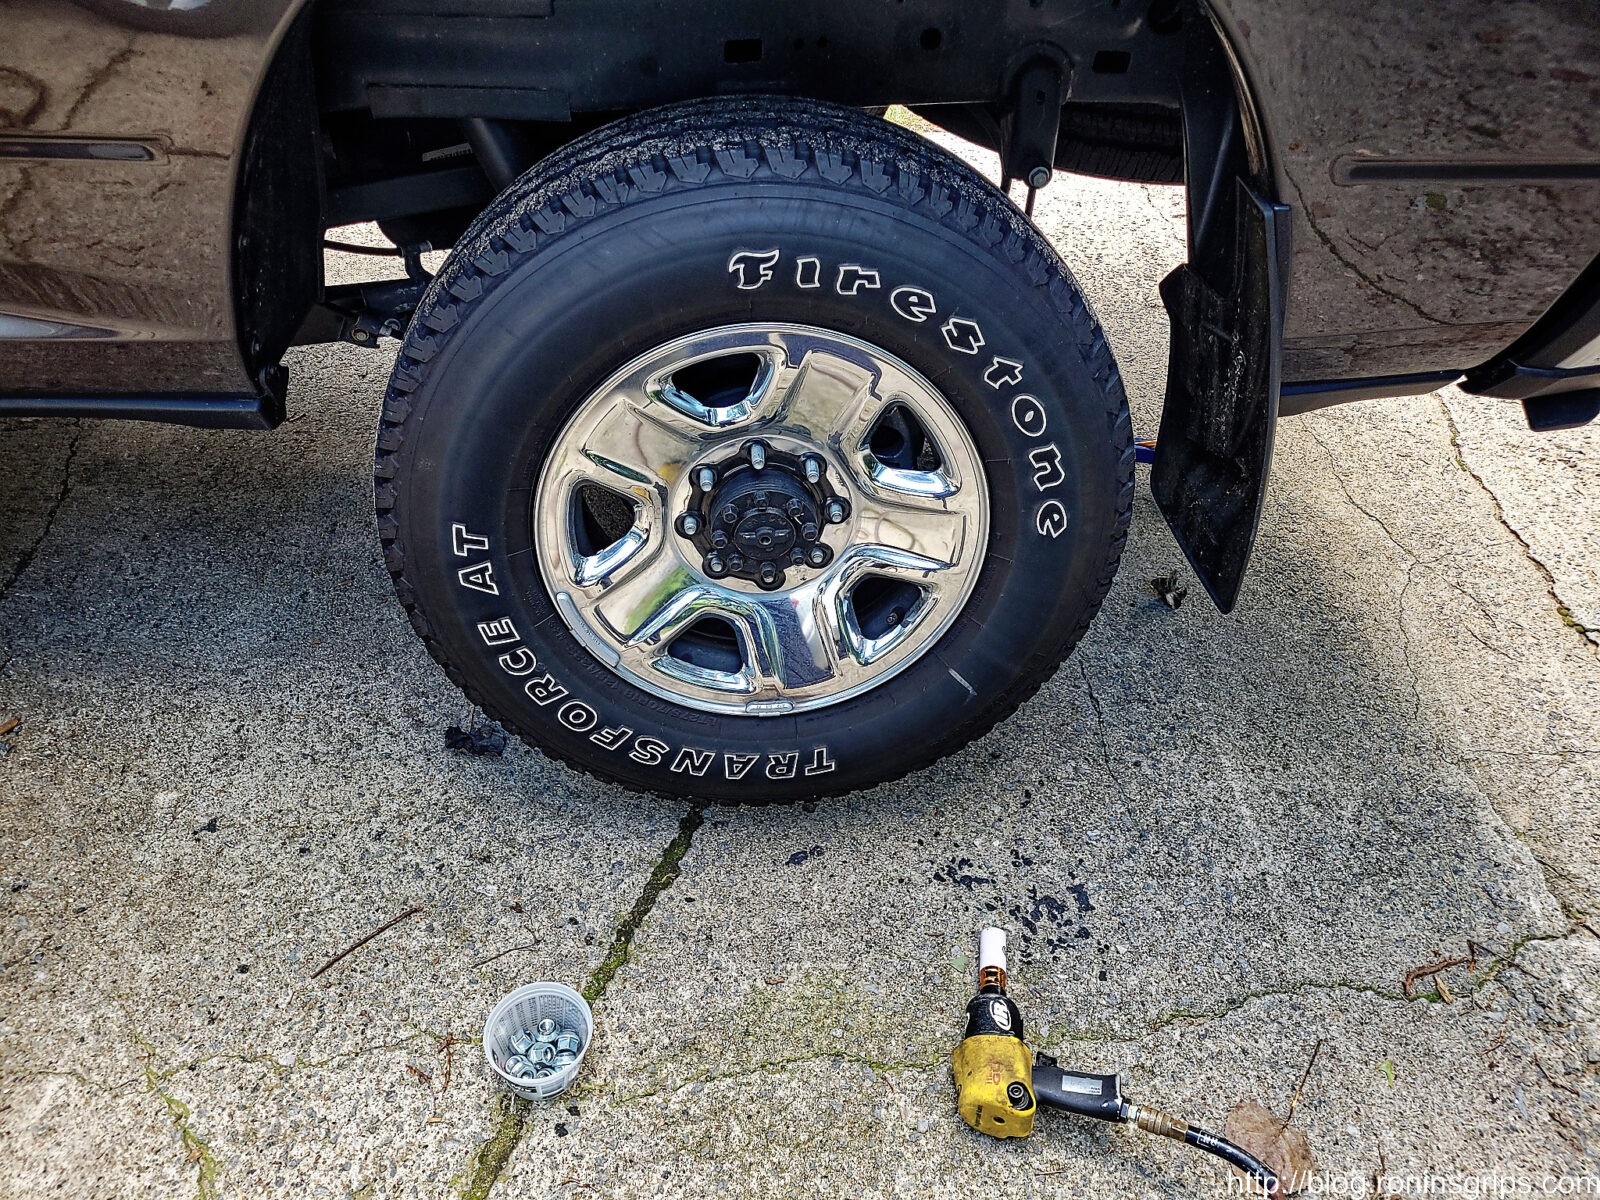
Factoid: FCA (Fiat Chrysler Automotive – who owns Dodge now – and FCA is now part of Stellantis – for those keeping track of who owns who) reports the LT275/70R18E Firestone Transforce AT tires as weighing 50.7 pounds. The 16×8 steel chrome clad wheel comes in at 45.2 pounds. Add them together and you get 95.9 pounds not including any wheel weights, TPMS, etc. So you might as well say that each weighs 96 pounds. Yeah, that’s quite a bit for me.
Weighing in close to 96 pounds, these tires are too heavy for me easily lift and hold in place when it comes time to mount them on the lugs. For you younger guys who muscle them around all day, good for you. I can’t any longer.

From years of doing stupid stuff, my back and hands are nowhere near as strong at 55 as they were in my 20s and 30s. I’ve always done my own oil changes, tire rotations repairs in general and didn’t plan to stop and pay the ridiculous prices the dealer was quoting. I knew it would be a heck of a struggle for me to lift the tires up and hold them in place while getting the first couple of lug nuts on to hold it. I needed to figure out a way I could lift the 33″ 96 pound tires up into place using mechanical advantage.

So I started by searching on the web for tire/wheel lifts and most of what turned up had to do with moving truck tires across a shop on a dolly. I wasn’t finding anything that said “use this to lift your tires up and down at the vehicle.” My next stop was the local Harbor Freight store to look at various automotive tools and jacks to get ideas. It was there that I got an idea.

There are ratcheting vehicle dollies for garages where there is one dolly for each wheel. You pump a foot pedal and a pawl engages a notch and pushes two cylinders together under the tire. As it does this, the tire and vehicle are lifted up. You do this on all four corners. The dollies have caster wheels under them and if you have a clean concrete floor, you can then slide the vehicle all over the place to either store or work on it. One early trade name was “Gojak” and since then tons and tons of companies have made them.

Hmmm…. I could take one of those and use it to lift the tire into position and hold it as long as I could lift the tire high enough. These jacks are rated at over a 1,000 pounds and my truck’s tires were going to be far, far less than that. No, it was the height that concerned me because I needee to lift the truck high enough to remove the tires in the first place.

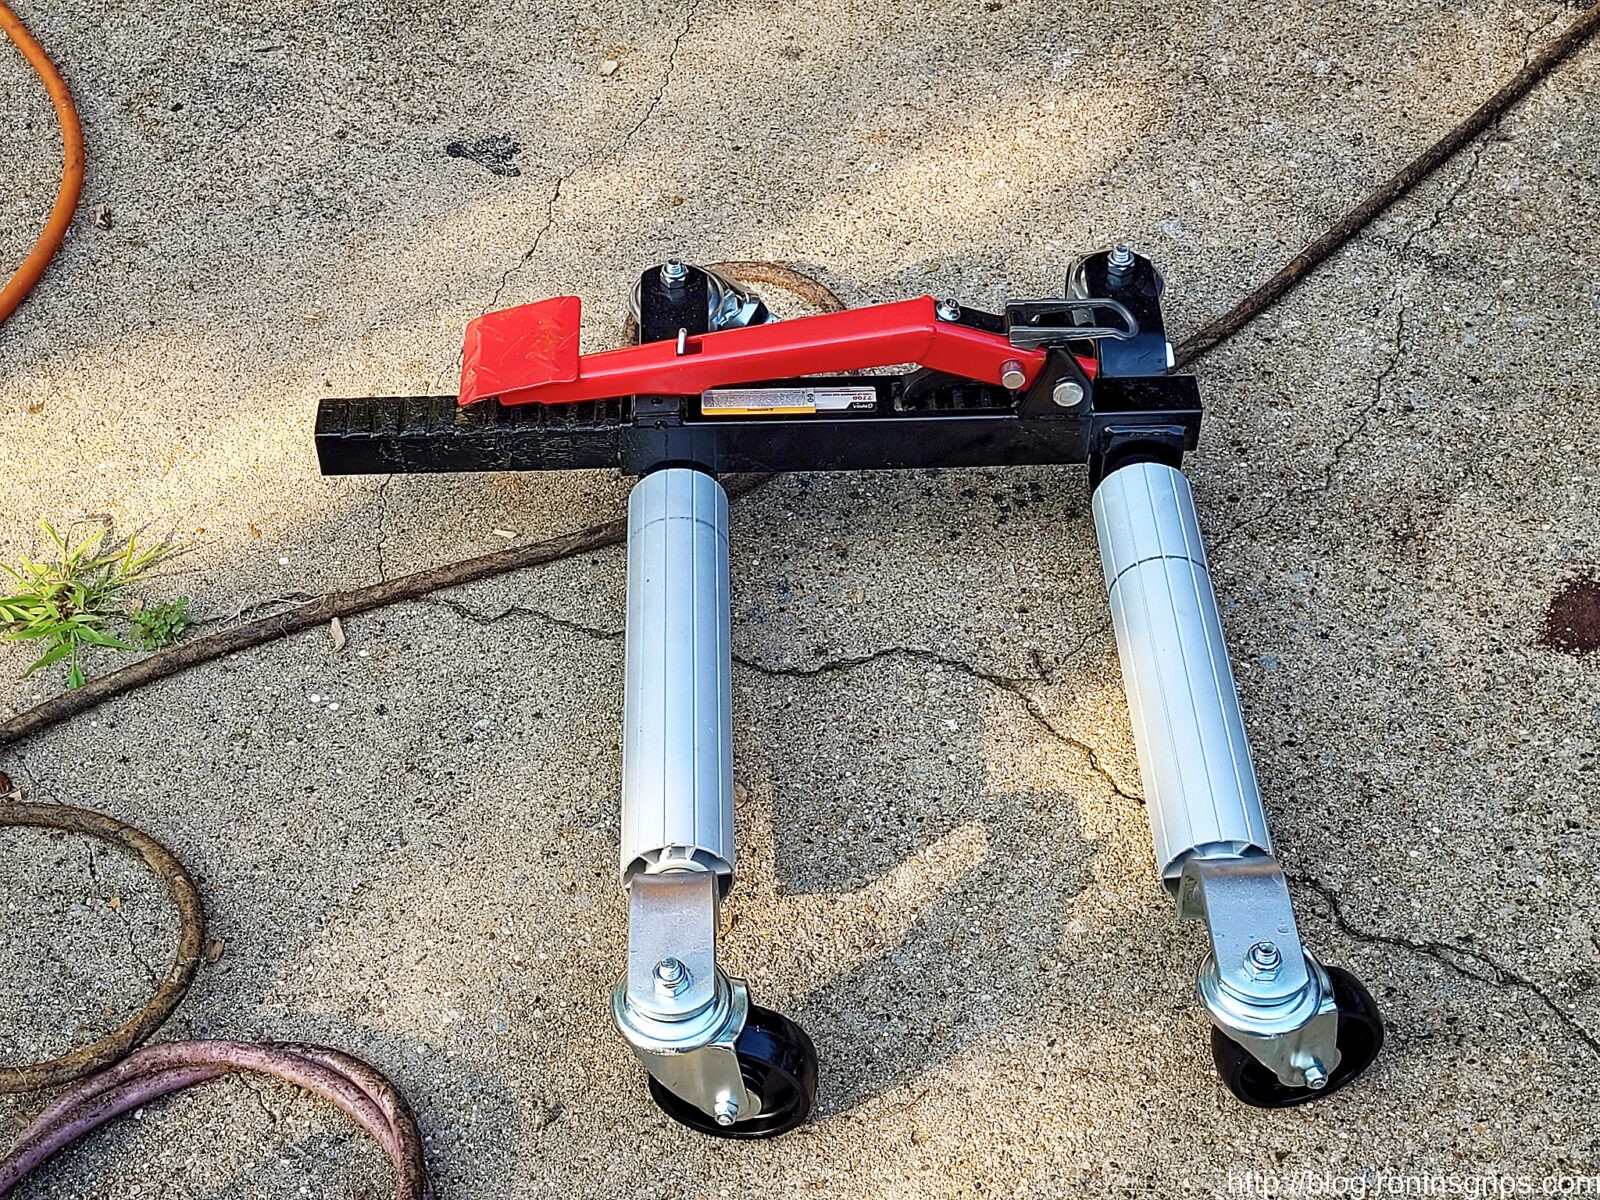
I didn’t particularly care for the looks of the Harbor Freight model so I did some digging and found a Sunex unit on Amazon that works in a purely mechanical manner – some hydraulic models from other brands are reported to leak.

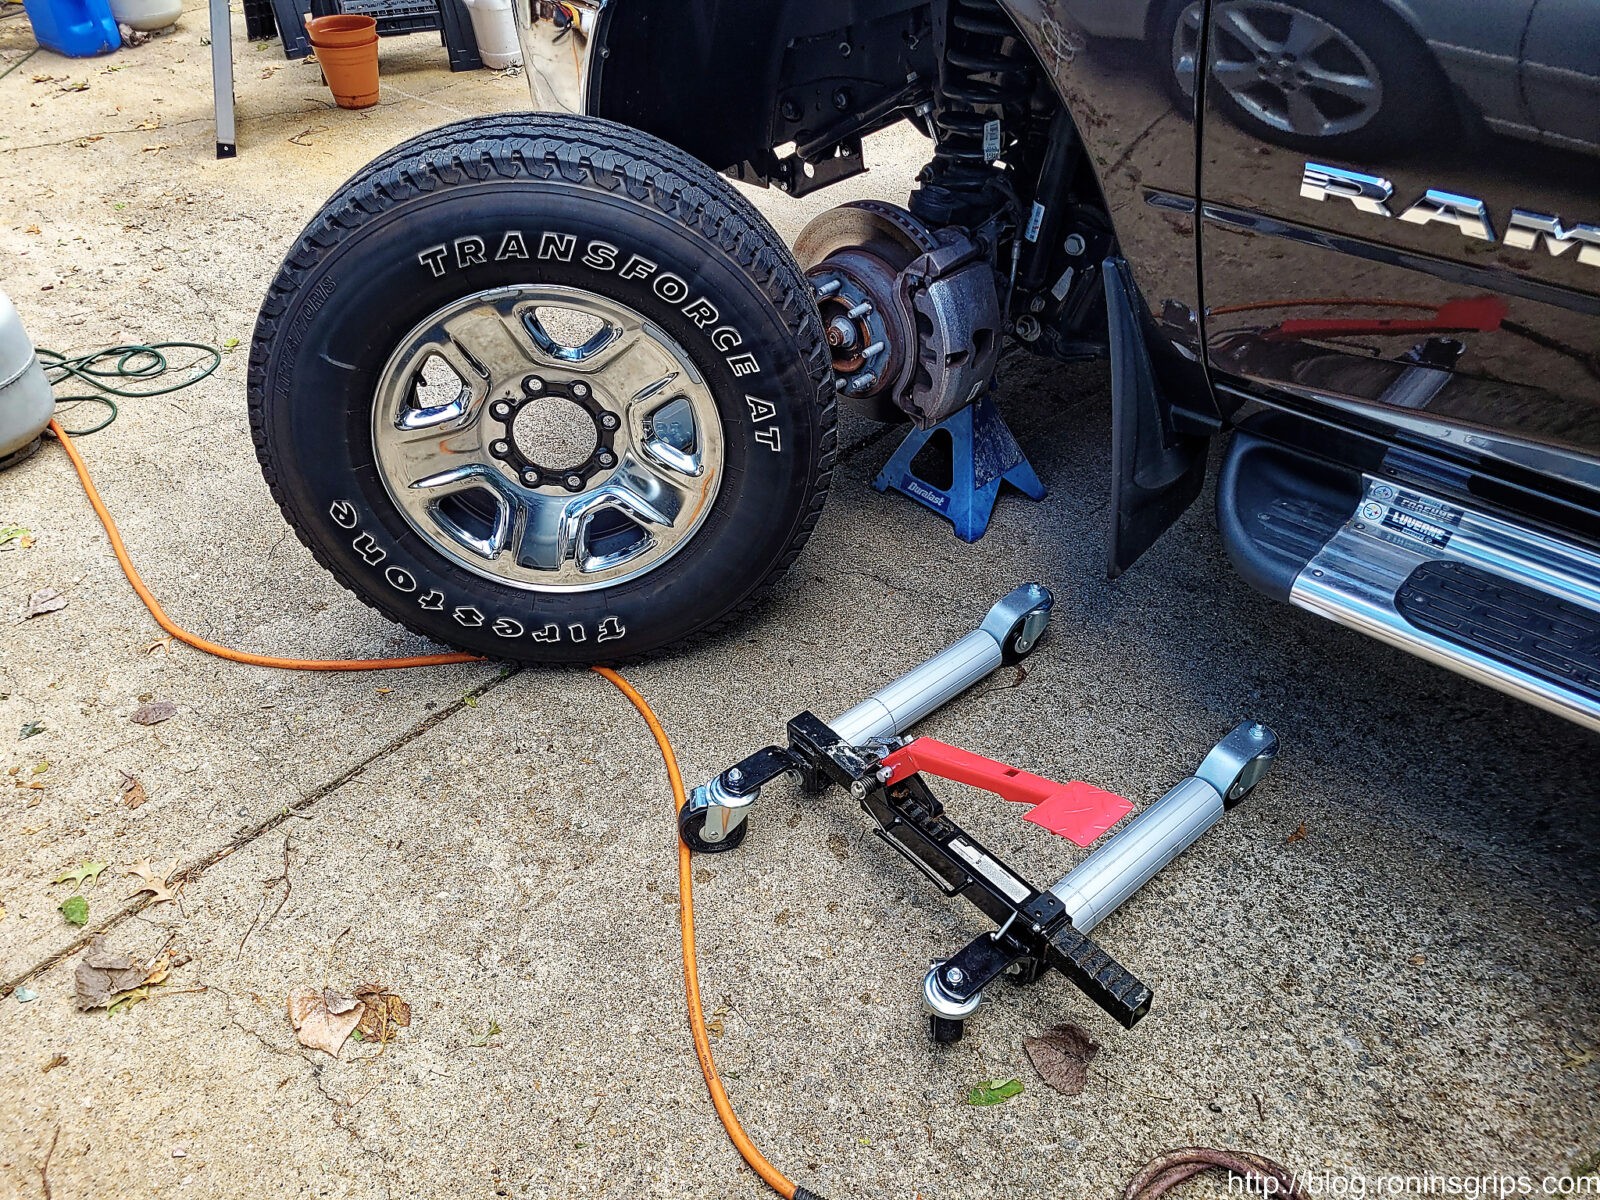
It arrived and took just a few minutes to install the caster wheels. I did make one mistake, I was curious if it could lift one corner of the truck – the answer is a resounding “NO” and I did bend the outriggers that hold the casters slightly. I really didn’t expect it to bend but it also didn’t really hurt the unit from an intended use perspective.

This is a Sunex model 7708 1,500 pound car dolly. I’m not really sure it can handle 1,500 pounds but it works great for lifting tires into place.

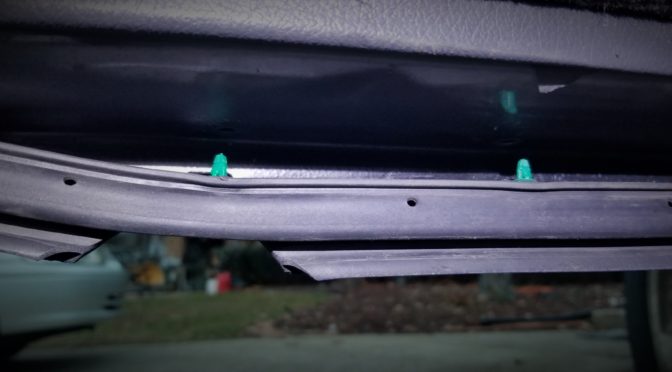
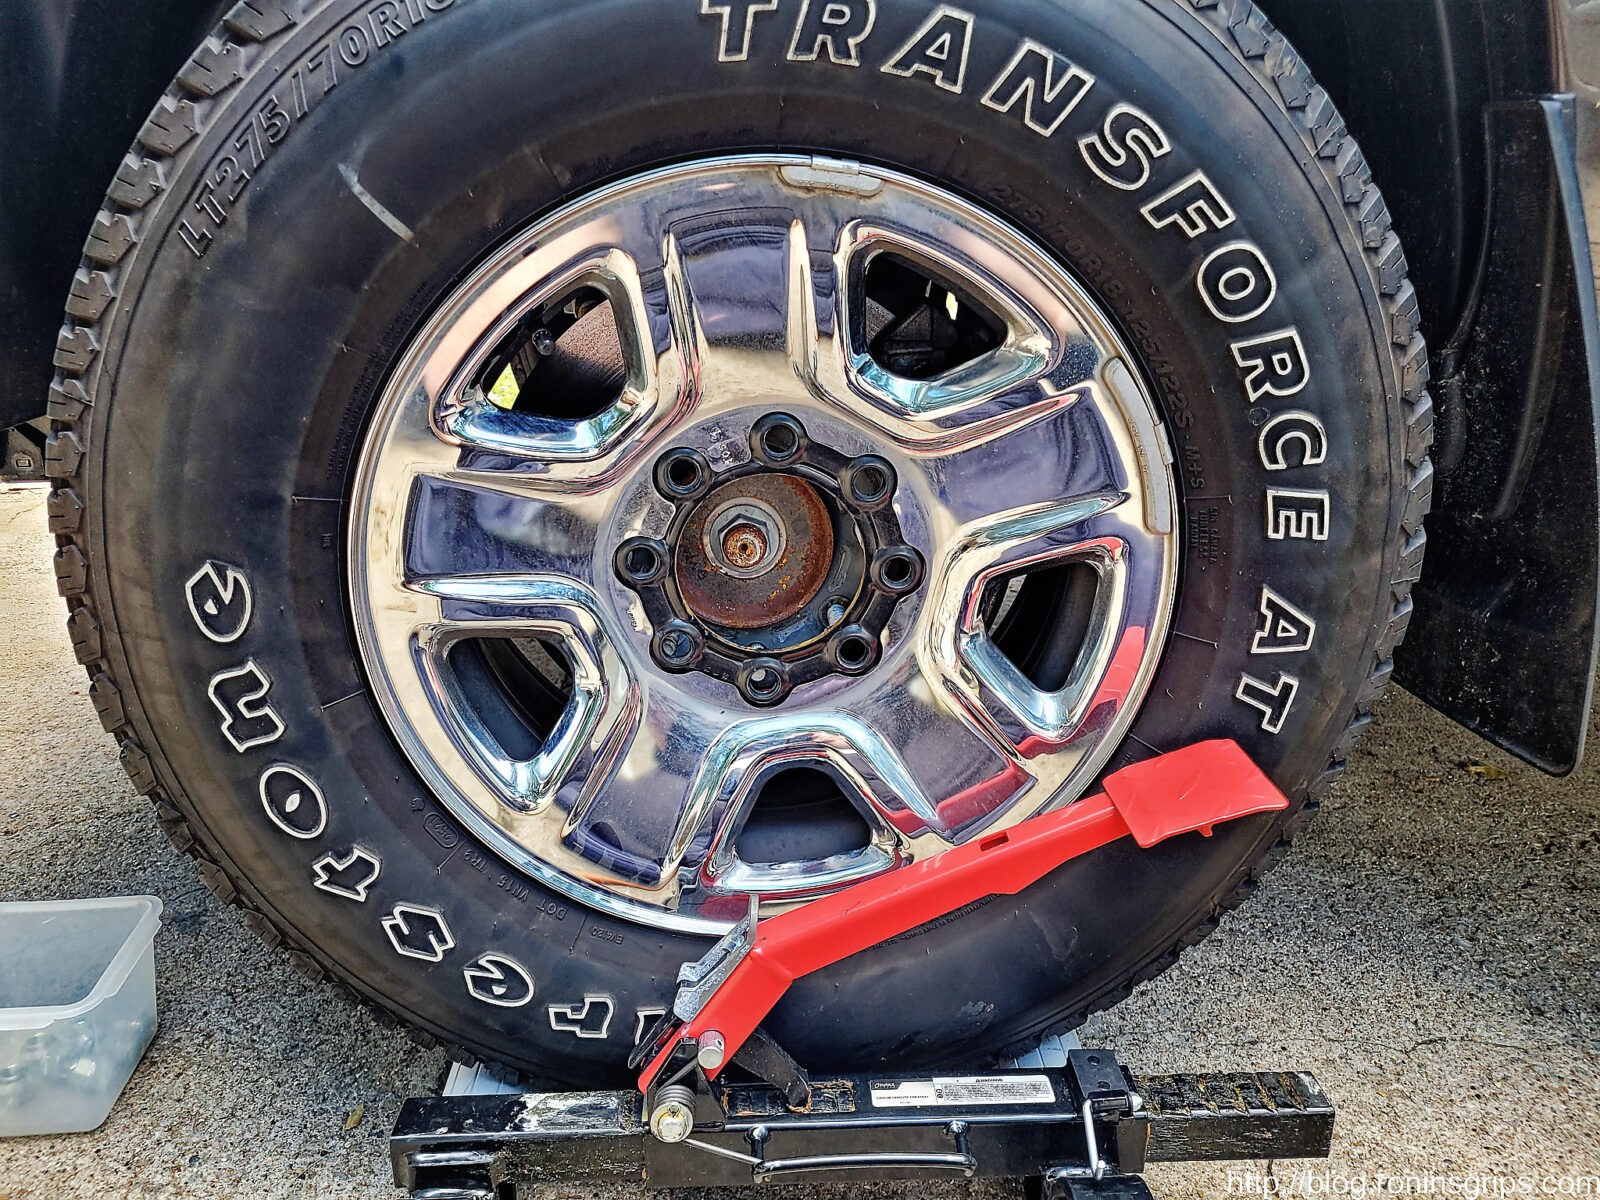
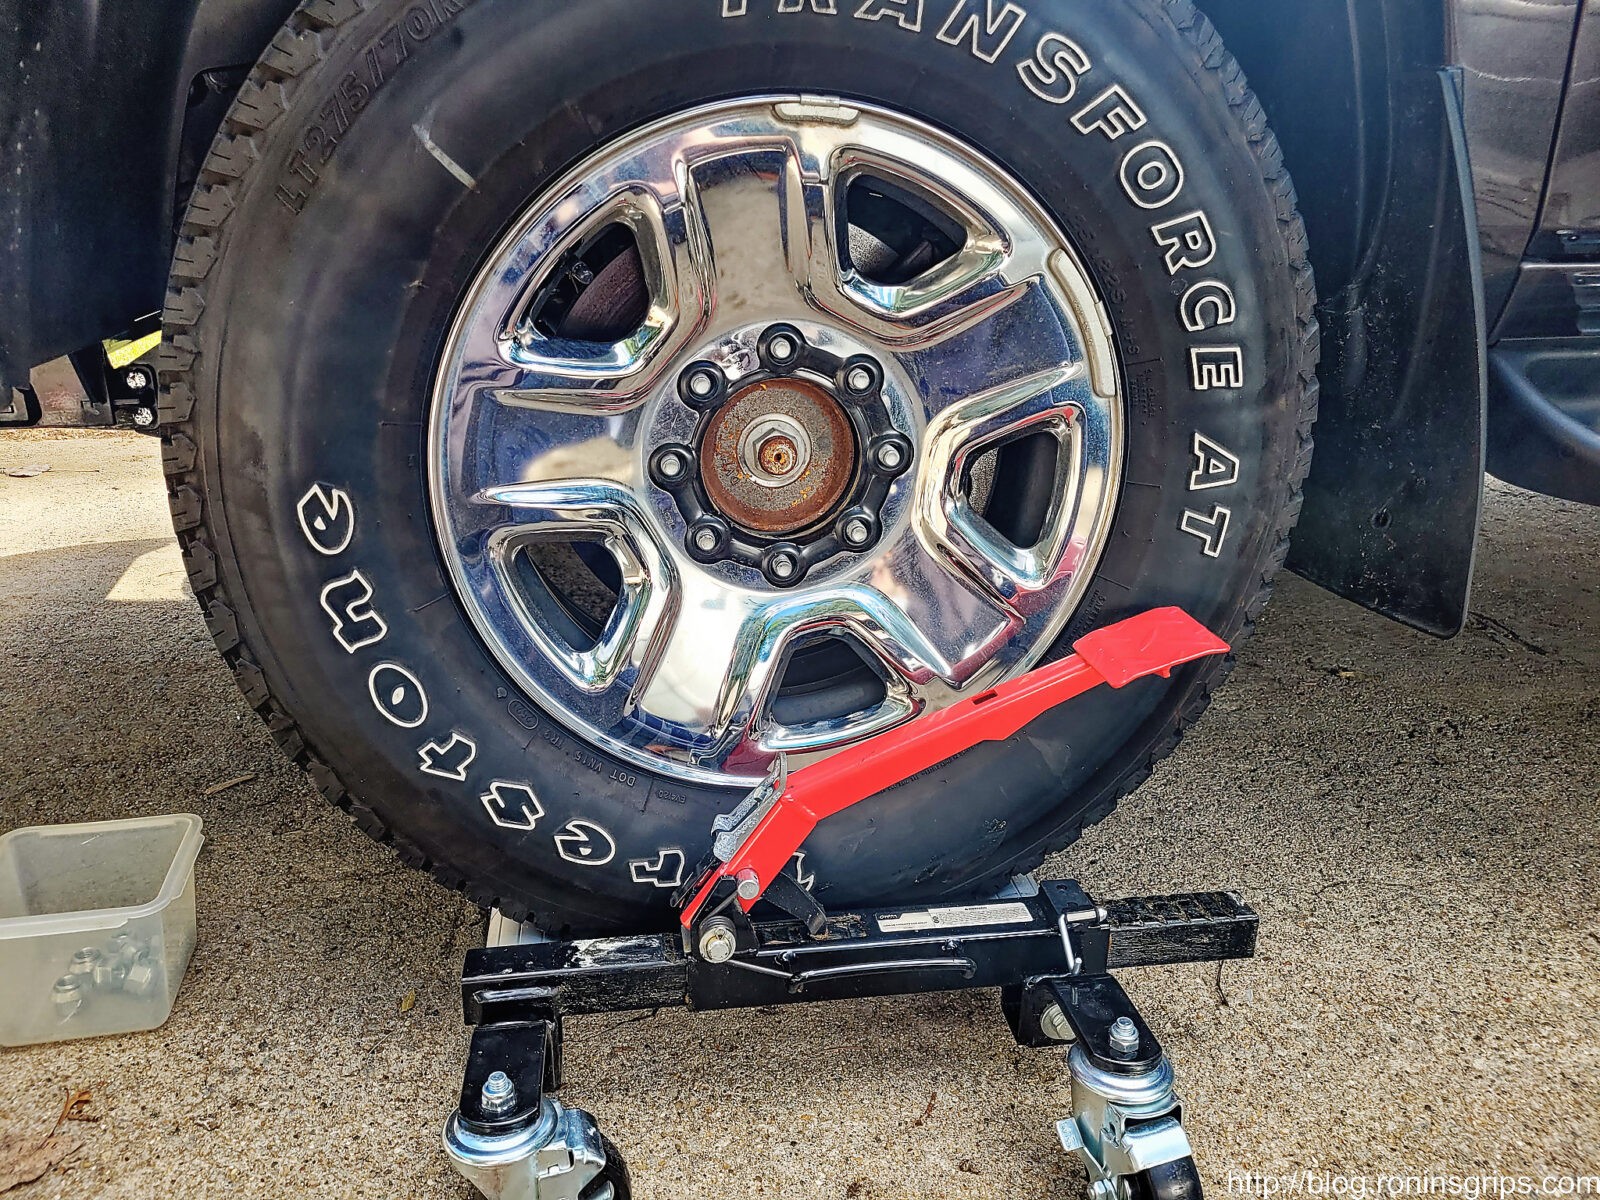
Most importantly, it worked perfect. I would roll the tire over to my truck, slide the jack in by the edges of the tire and then pump the foot lever until it was the right height. I could then install the lug nuts in an amazingly easy manner. It worked so well I did it both on my Ram 2500 and on our Highlander.

I used my Vevor 11,000 pound pneumatic jack to lift up the truck a side at a time and put 6 ton jack stands under each side of the axle. Never trust any jack to hold up a vehicle while you are working on it – especially not a heavy truck. By the way, I really like the Vevor air jack.
Pulling the tires off is easy – gravity is working with you. I use an IR 232TGSL Thunder Gun impact wrench that has held up remarkably well over the years- I bought it after wearing out a couple of cheap ones. I also use a Chicago Pneumatic (CP) SS4211 lug nut socket set to avoid damaging the rims. The sockets have a plastic protective sheath around them and are thin walled for tight areas.
The 2500’s lugs are 14mm and the lug nuts need a 22mm socket. What I like about the CP set is that they are color coded. This copper colored socket is 22mm and I can find it fast due to the coloring. Note, CP stands behind their products. I bought the set in 2018 and shortly after, one plastic jacket started cracking. I called customer service and they mailed me a free replacement. I’ve not had any problems since. Again, let me plug the Thunder Gun. I want to say I wore out two or three cheap impact wrenches before this one. They claim 625 ft lbs max torque in reverse and 550 ft lbs in forward. I can tell you I have busted loose some really rusted nuts with this.
To mount the tires in their new location, I’d get the tire over in front of the hub and then slide the dolly into place to do the actual lifting. You put the silver cylinders on each side of the tire and pump the red lever (you can very easily do it by hand) to lift the tire up.
So the silver toggle on the left side of the red foot lever allows you to change whether the pawl under the lever is pushing the bar and drawing the silver cylinders together or if it moves the pawl out of the way so you can lower it.
So you use the foot pump to get the height right and then you can rotate the tire – the silver cylinders in the dolly turn so you can perfectly line up the wheel on the lugs and put on the lug nuts. Folks, it makes installing the 96 pound tires stunningly easy.

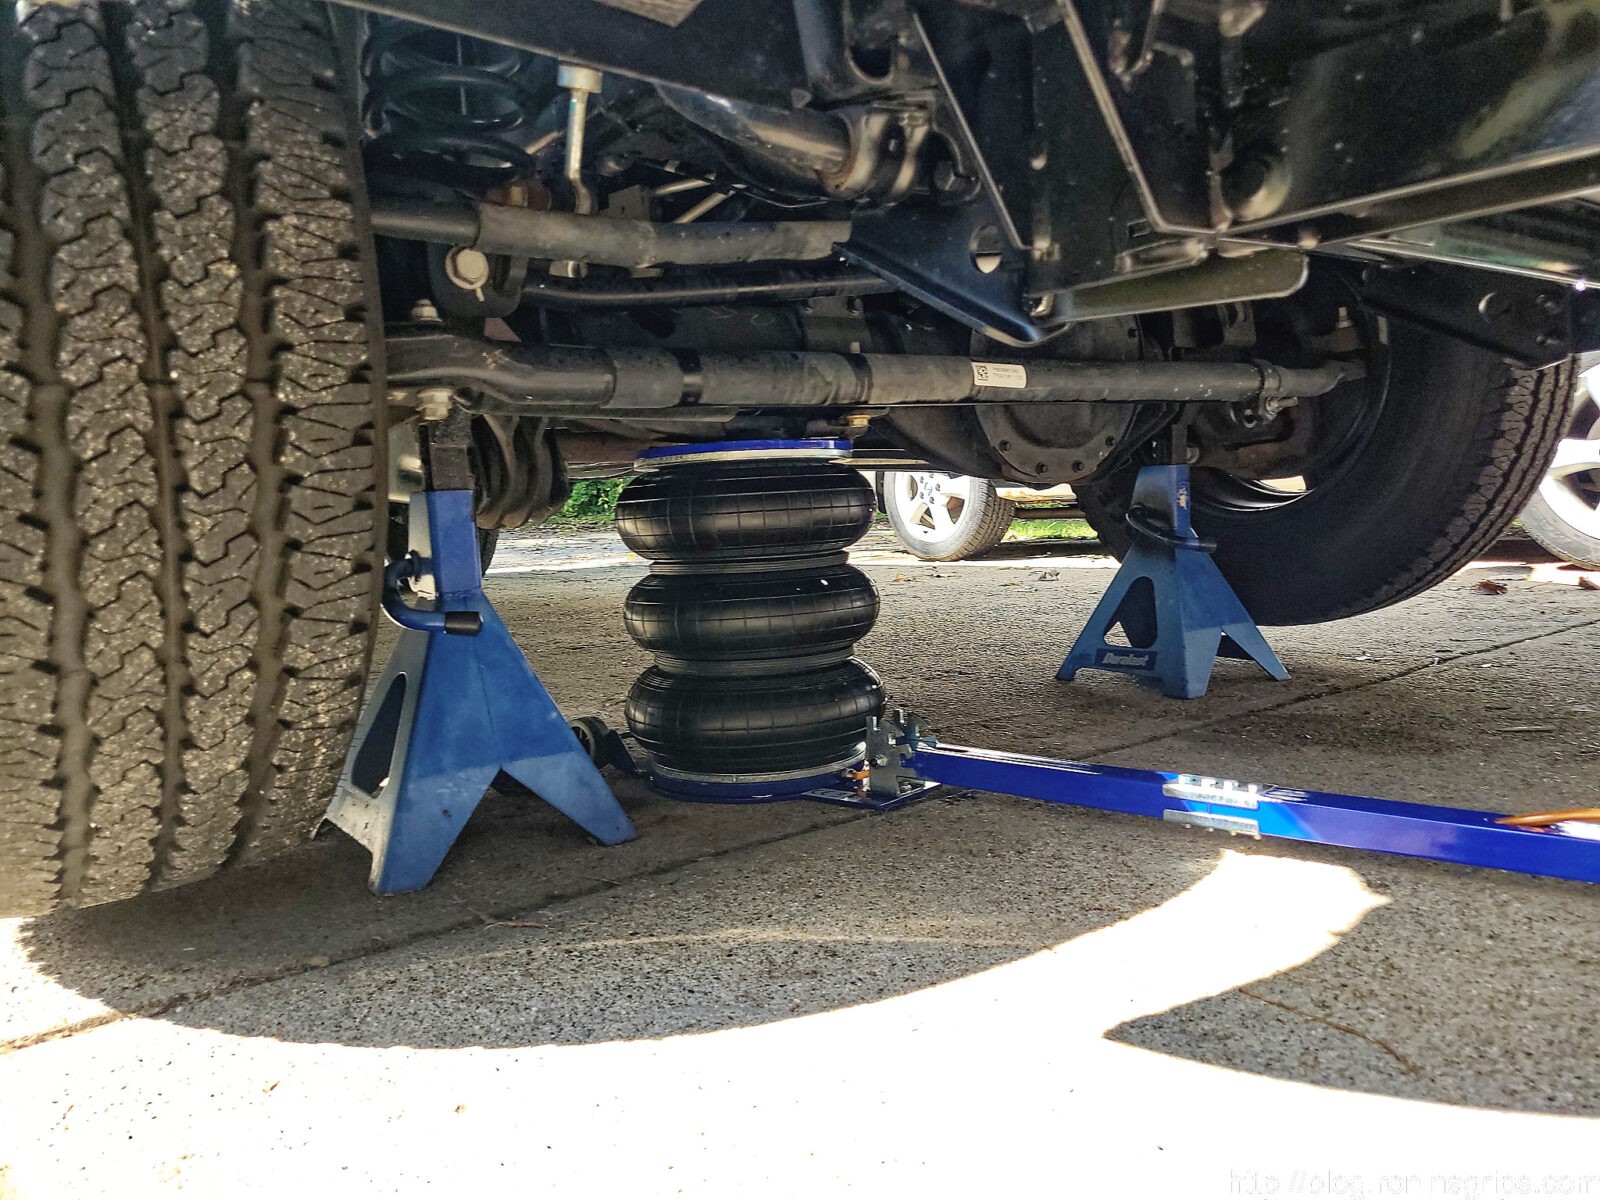
So, in hindsight after actually using the dolly, it really doesn’t take much actual lifting distance to get the tire into place. When I jack up any vehicle, I typically only lift until the tire is 2-4″ off the ground after I put the jack stands in place – so the gap between the floor and the bottom of the tire is not huge. I also realized you can go with just about any of these jacks – you don’t need super heavy duty because the weight of the tire is relatively small. Just read the review for whatever before you buy it.

Additional Details For Fifth Gen Ram 2500 Owners

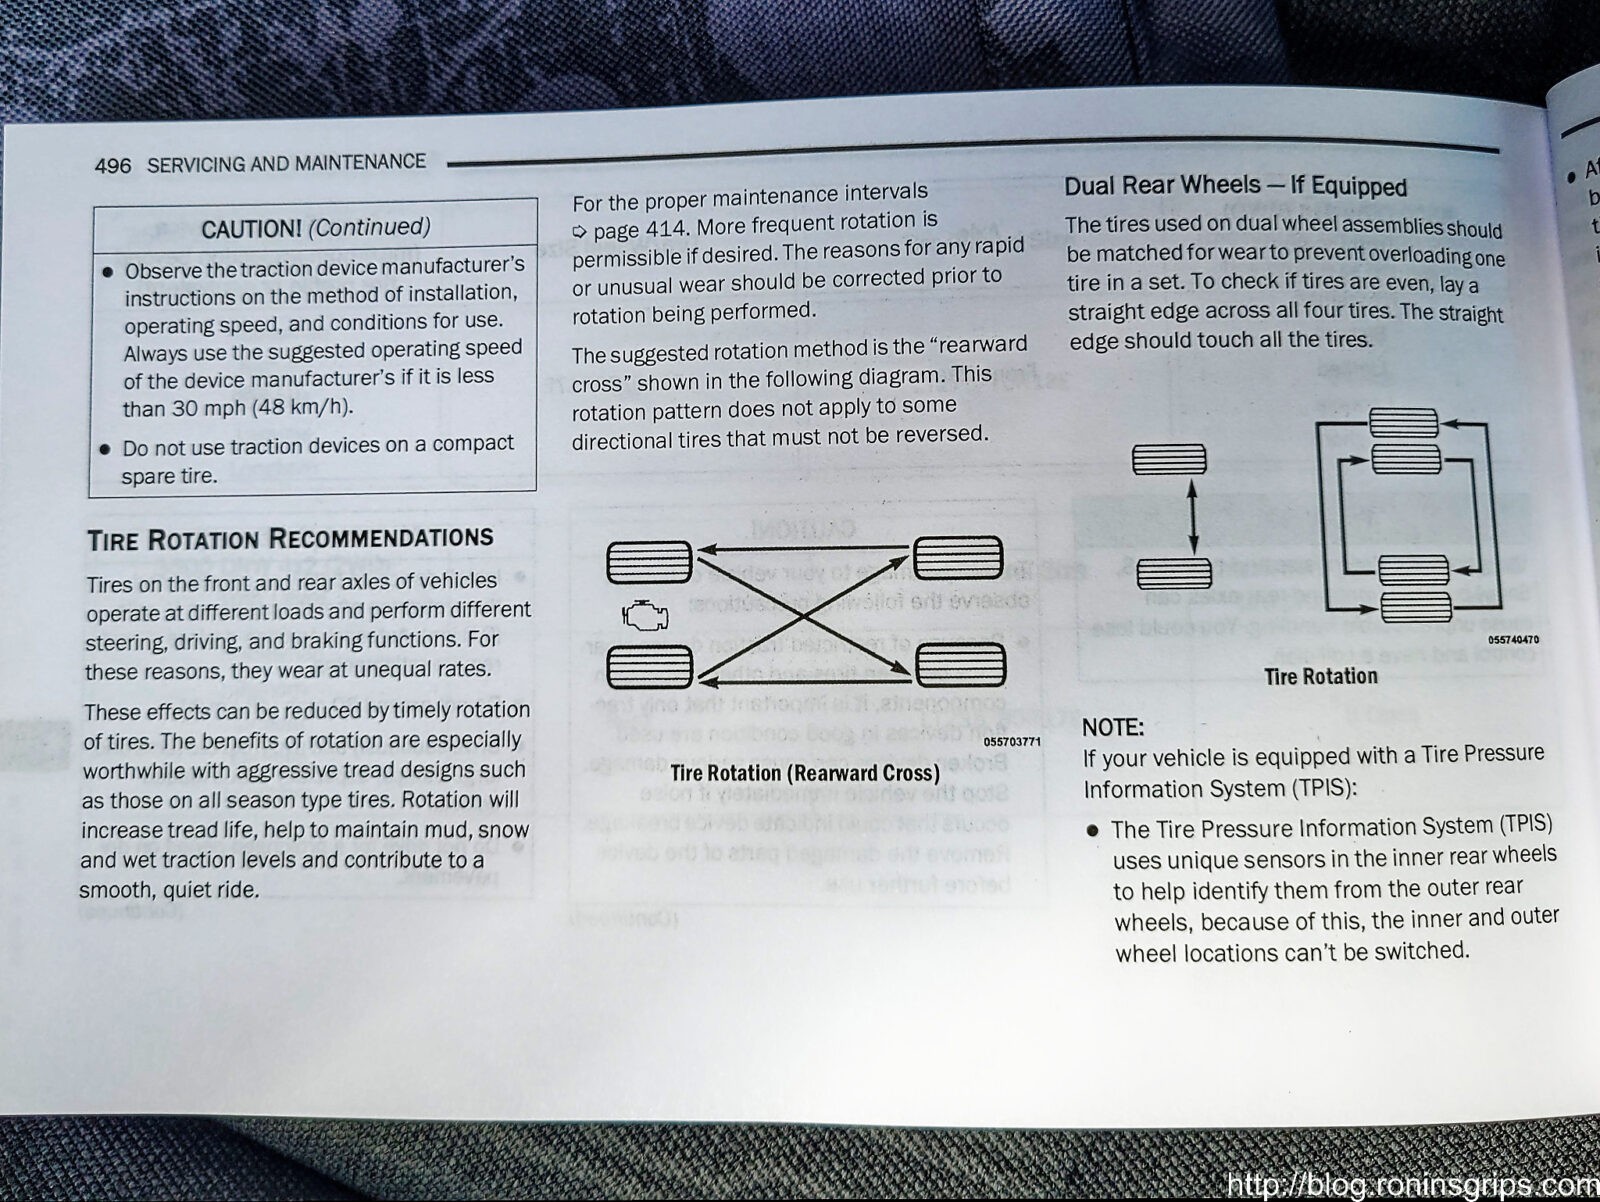
By the way, in case you are trying to find the rotation pattern, it is a reverse cross meaning the front driver’s side goes to the back passenger side. The front passenger side goes to the back driver. The two former rear tires move straight up – rear driver to front driver and rear passenger to front passenger.

Tires on the 2021 Ram 2500 move in a reverse cross pattern. Rotating them with each oil change is recommended. (Source: Photo of page 496 of the 2021 Dodge Ram 2500 Owner’s Manual)

If you are looking for the lug not torque spec, it is 130 foot pounds for cone lug nuts – mine had cone lug nuts. If you have flanged lug nots, it is 140 foot pounds.

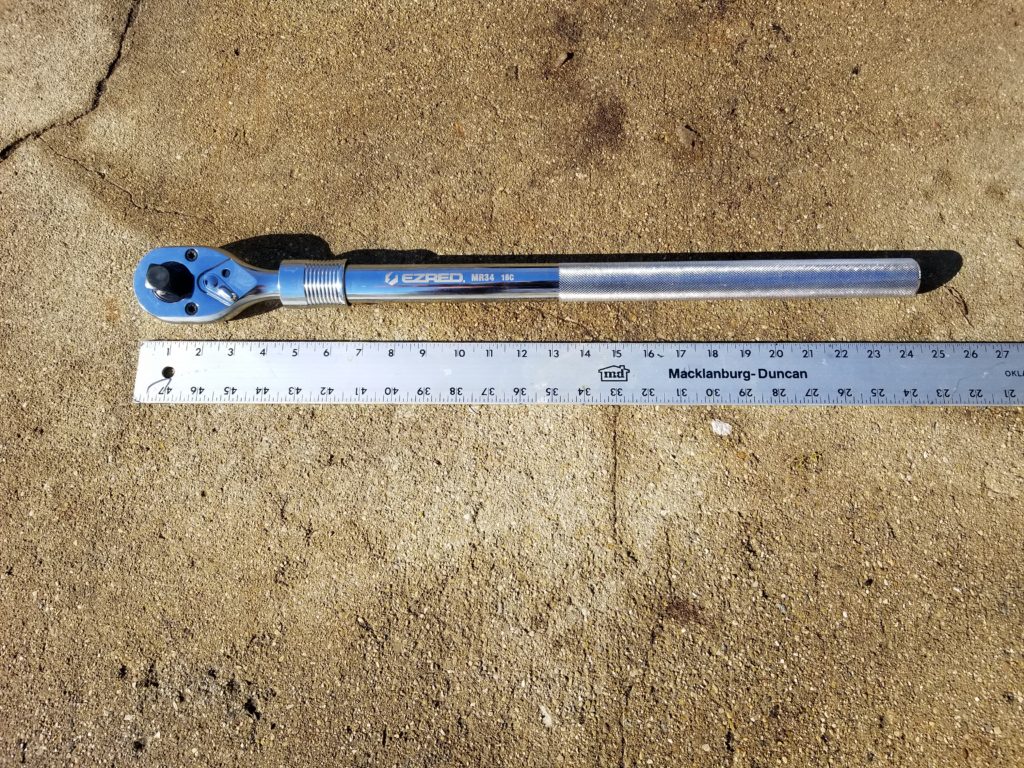
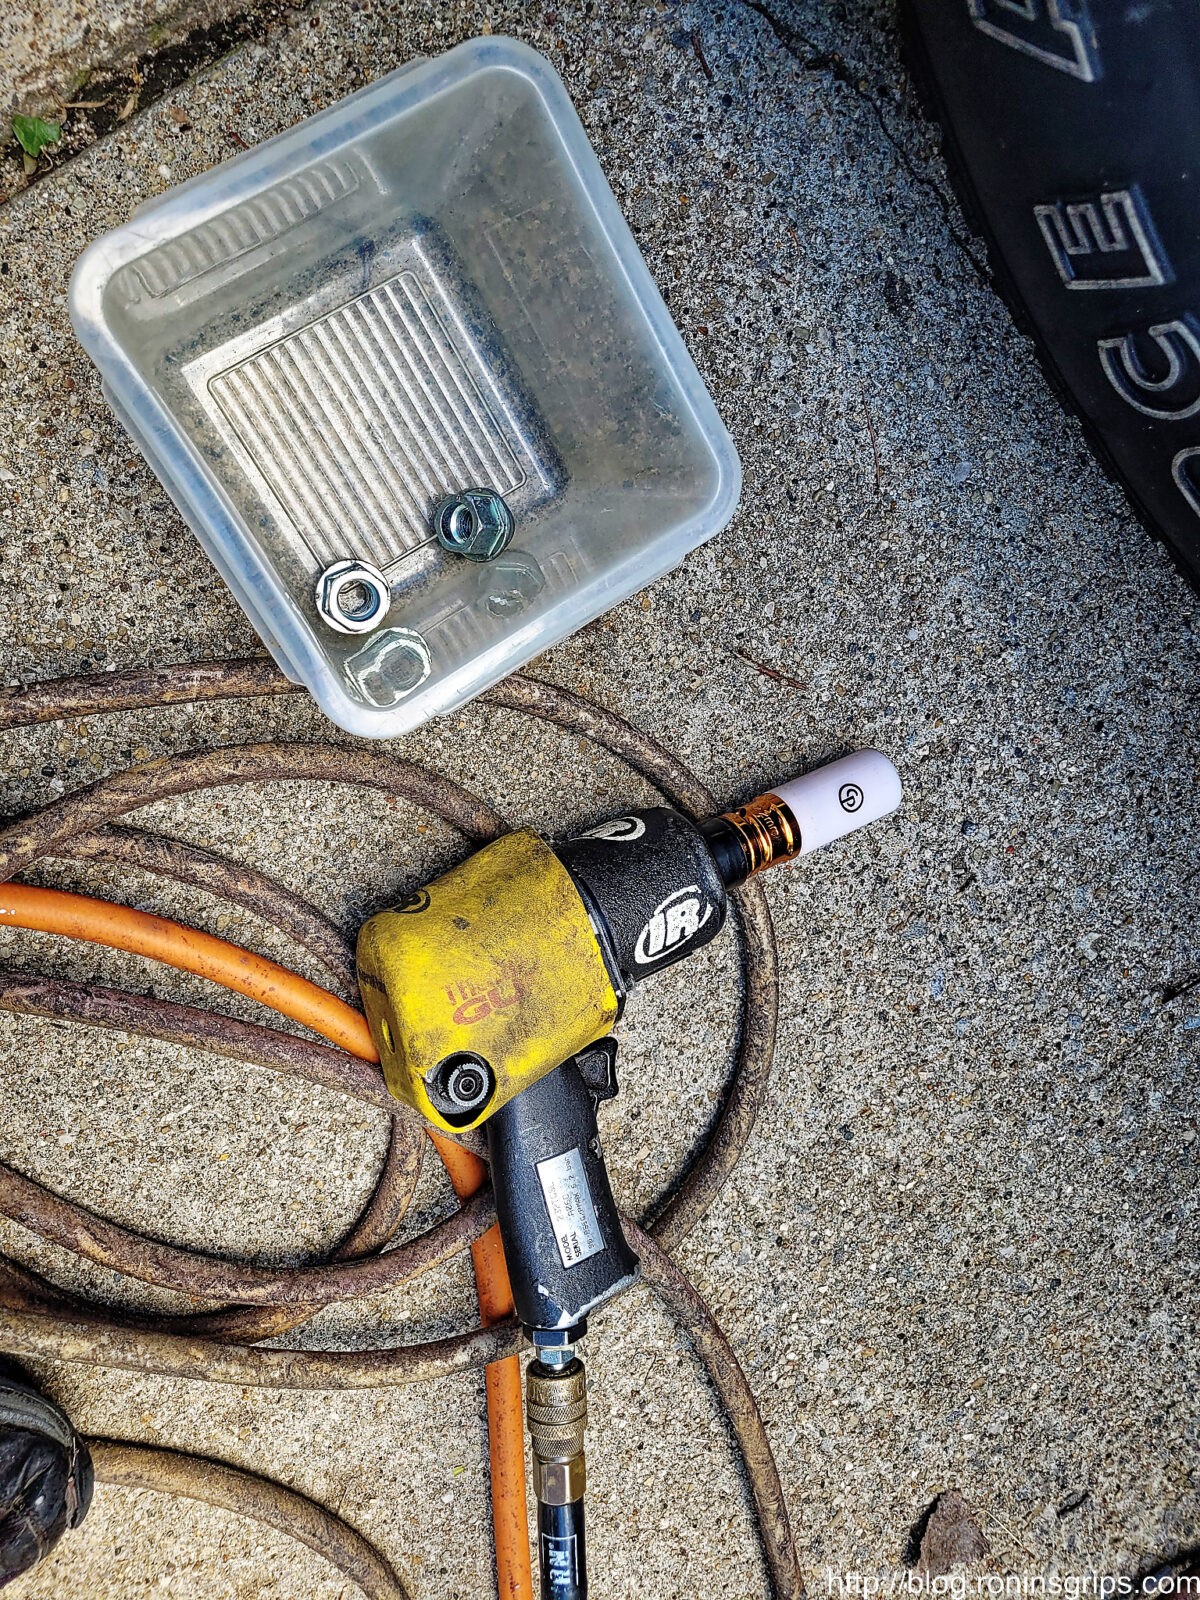
On the topic of torquing the nuts down, I start mine by hand to avoid cross-threading the nuts and then I run them in quickly with my impact wrench using a torque limiting “torque extensions” – these extensions work with impact wrenches and twist at a predetermined torque but get weaker with time so they are great for bringing the nut down to the rim but not for setting the torque. I do the final torquing down with a 1/2″ torque wrench. Do NOT keep tightening with the impact wrench or bad things may happen such as cracking your rim.

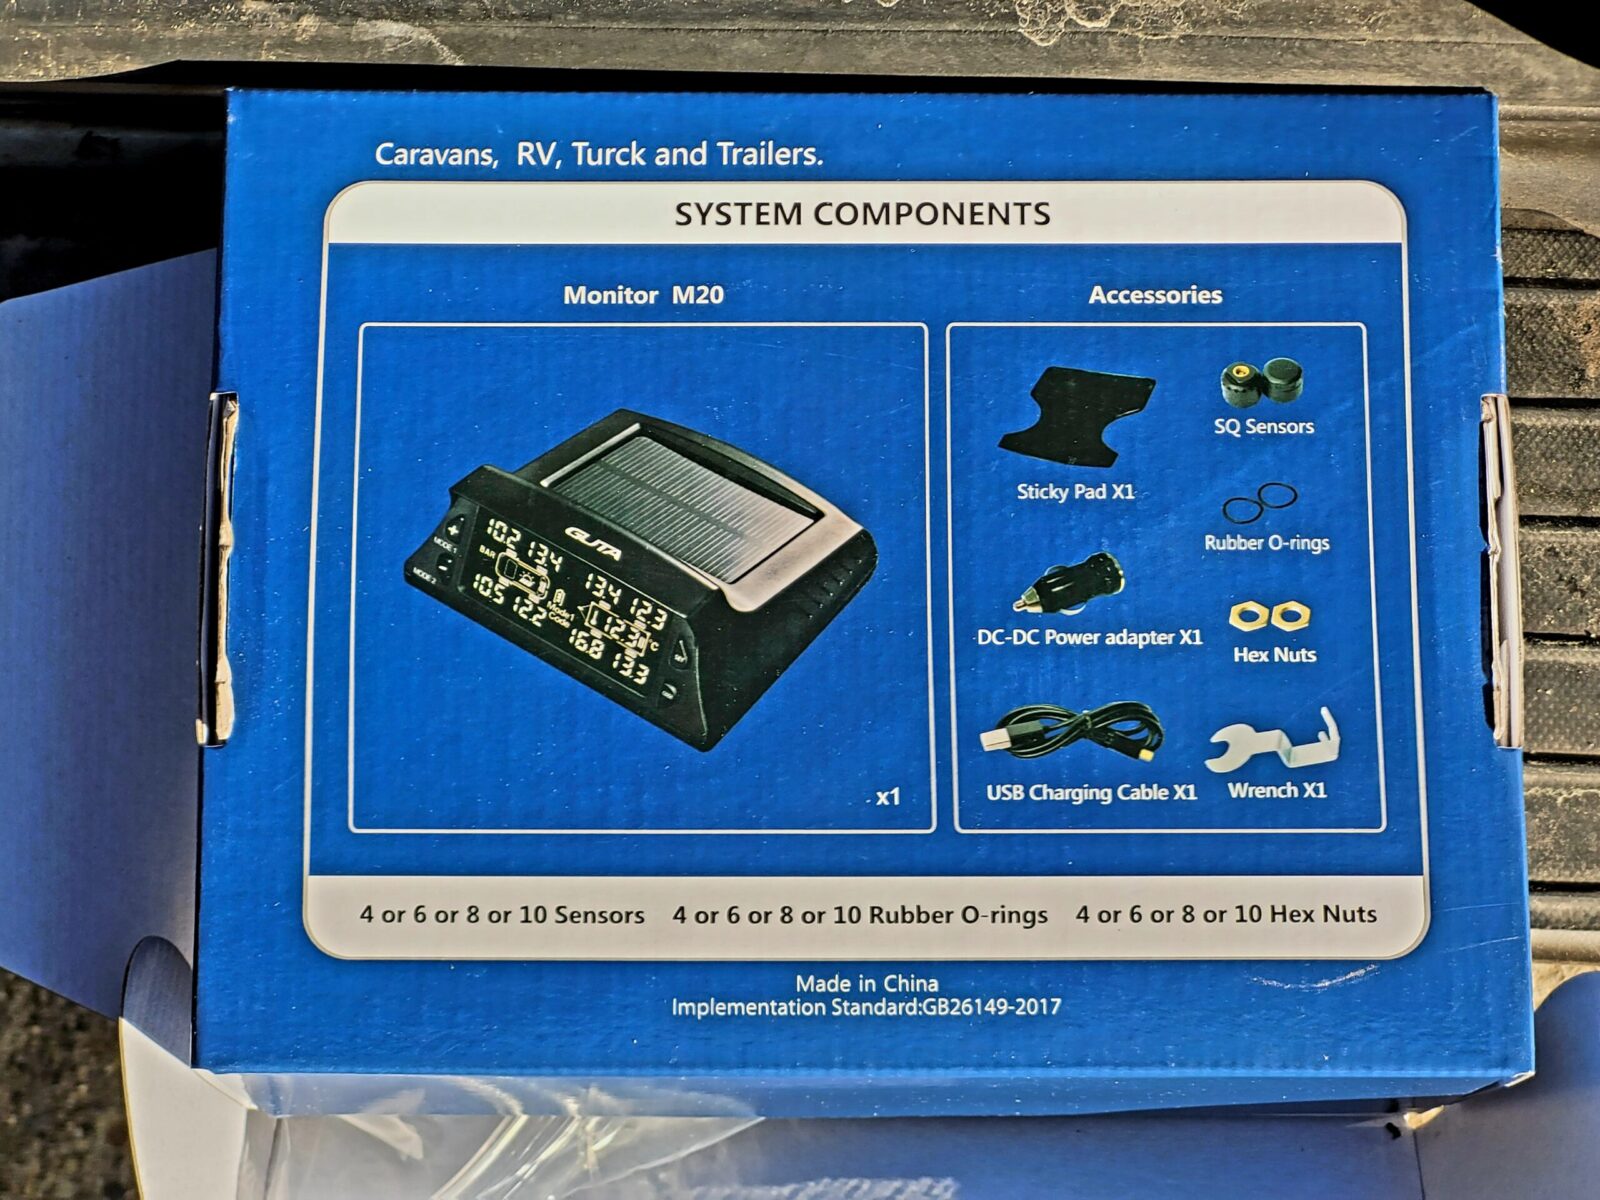
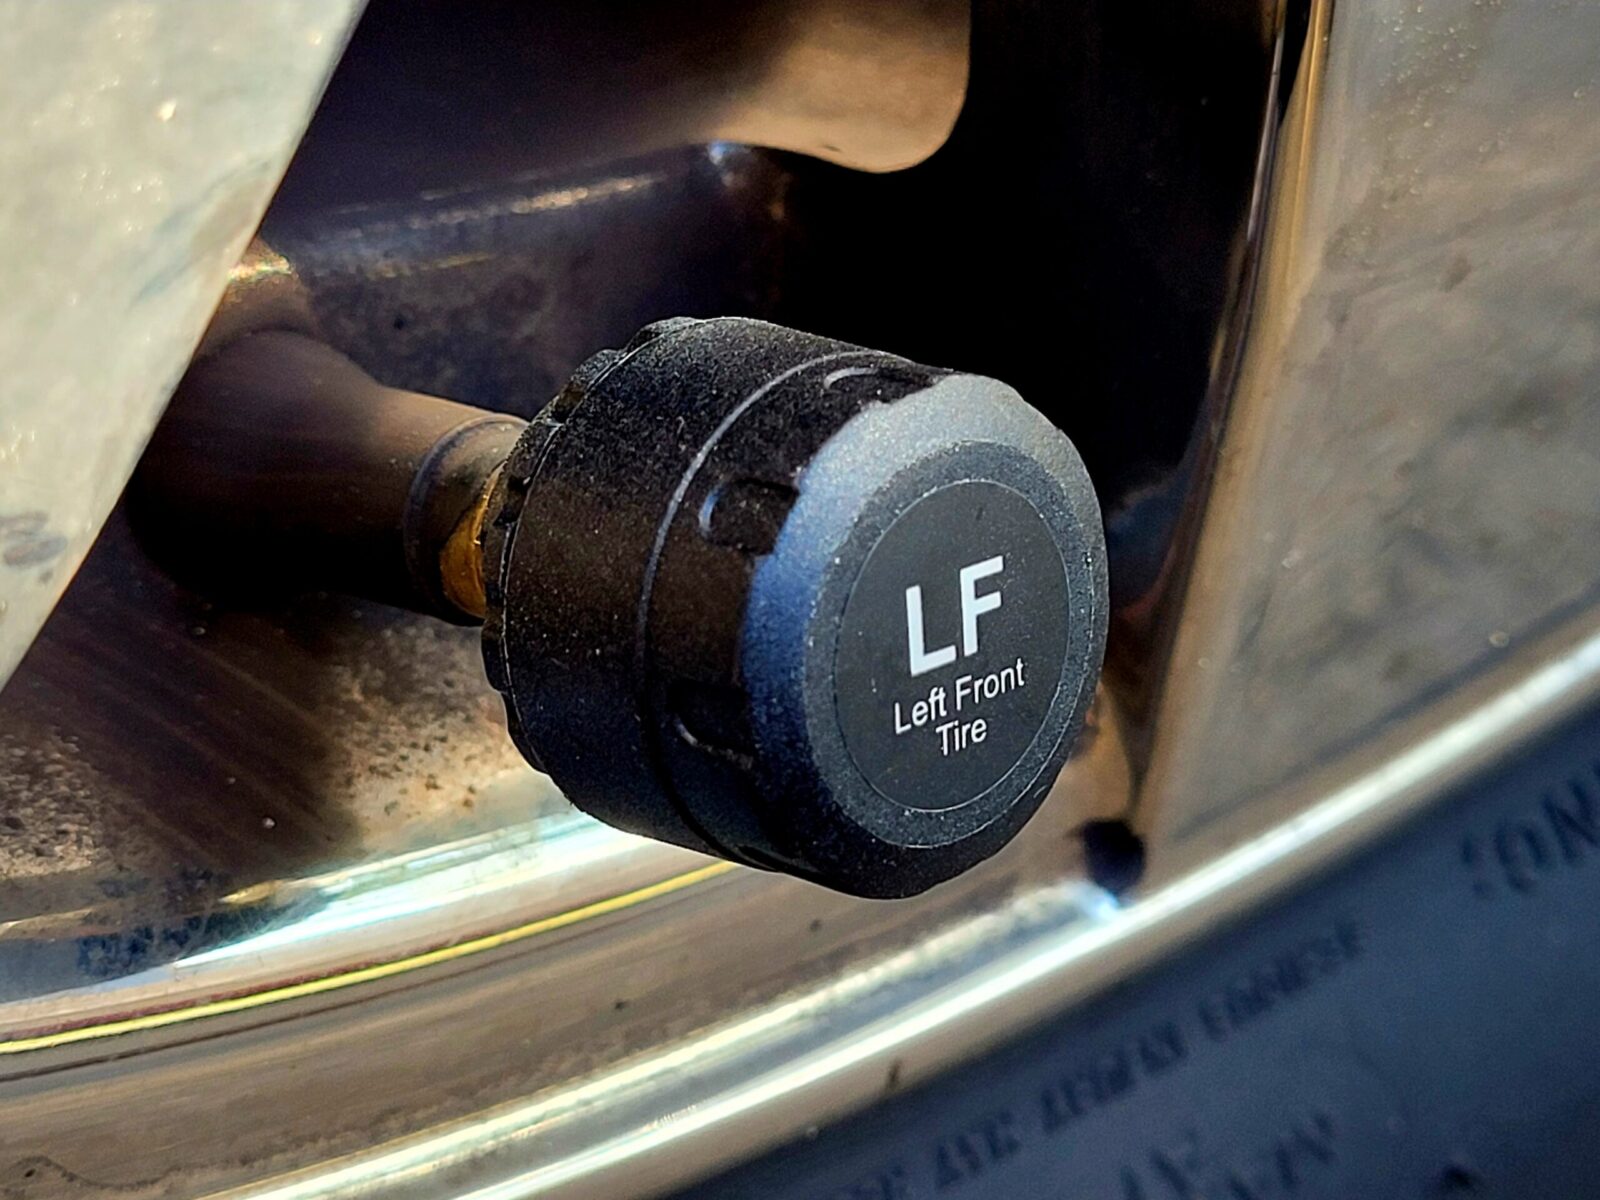
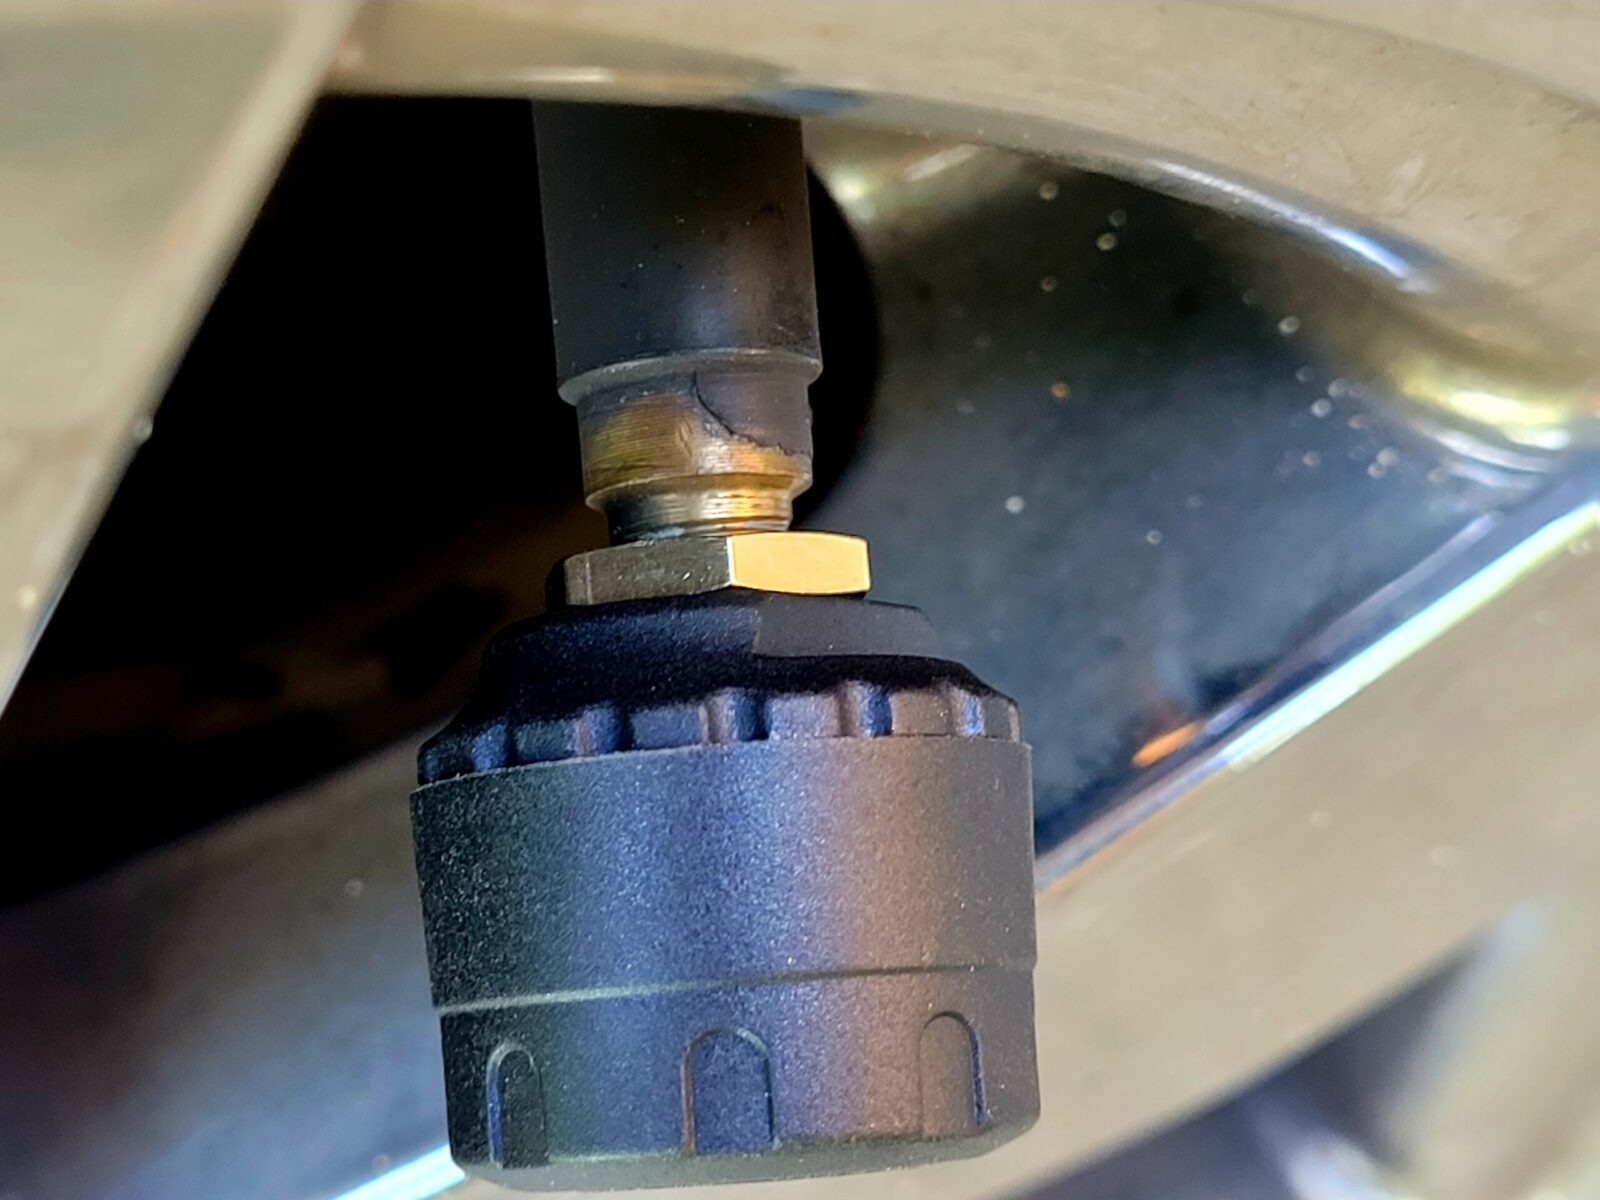
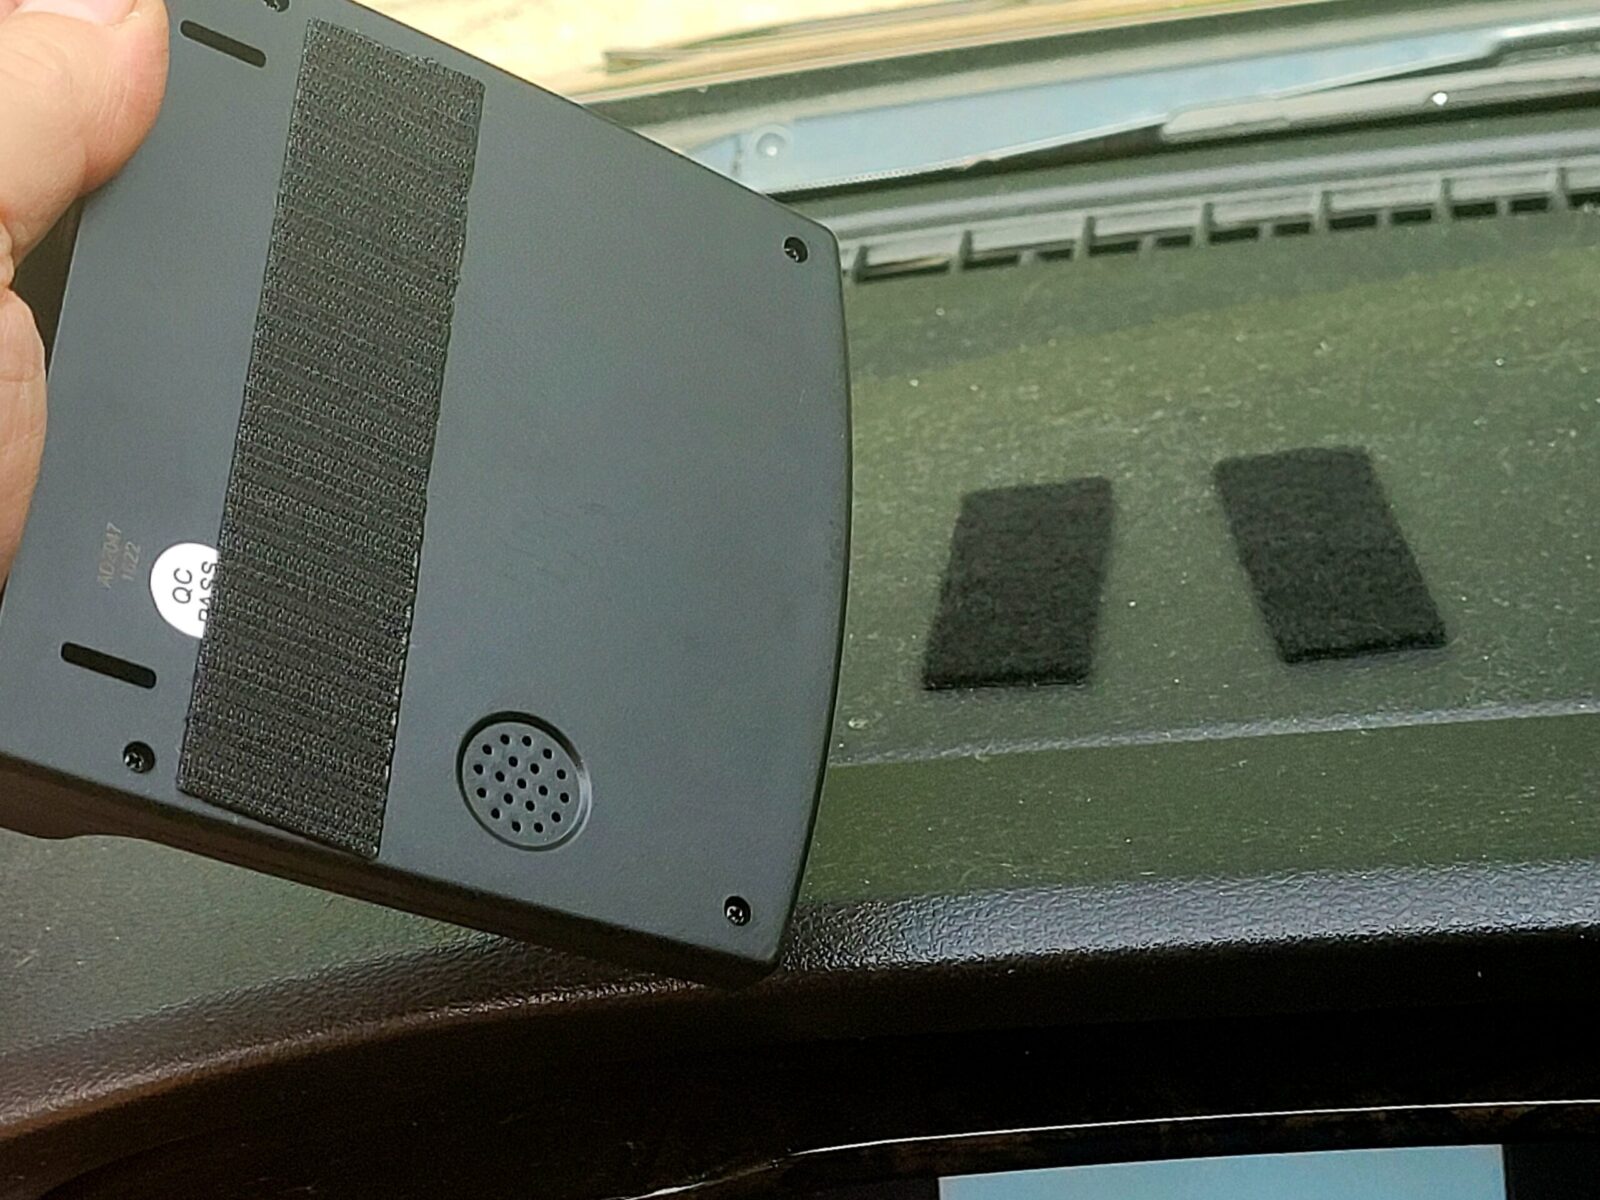
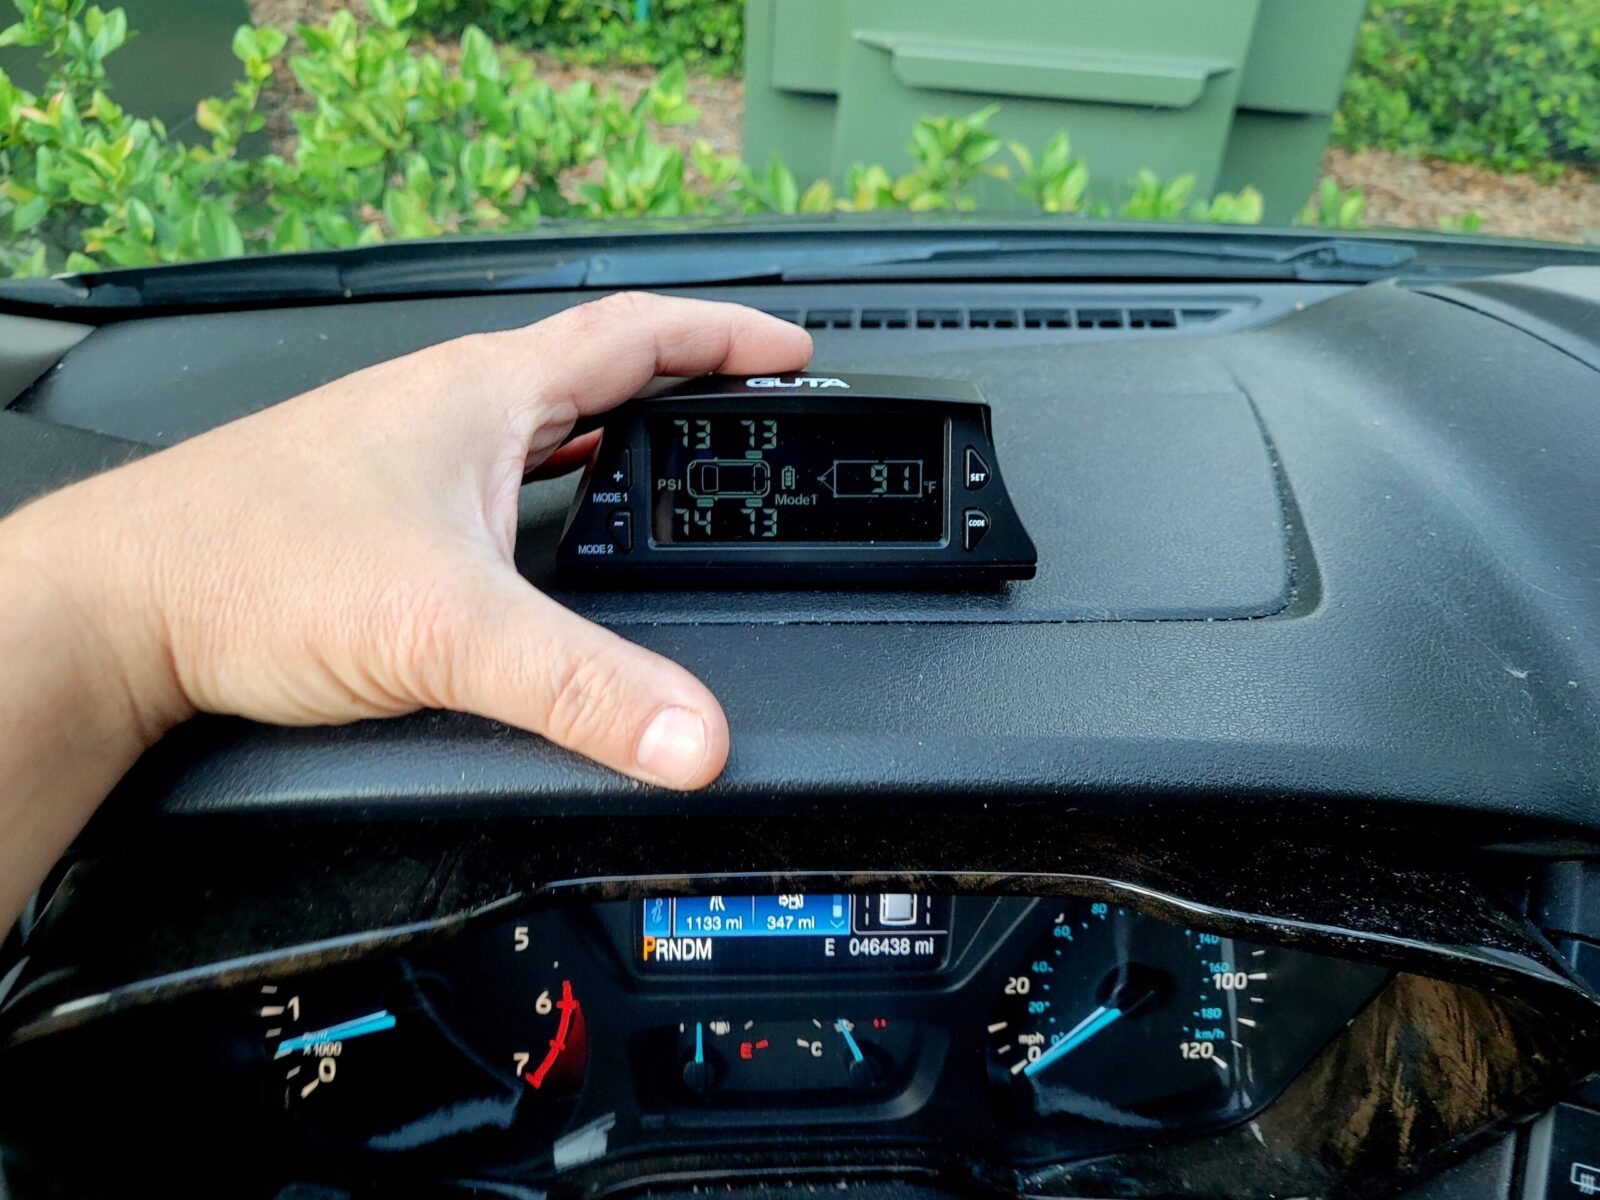
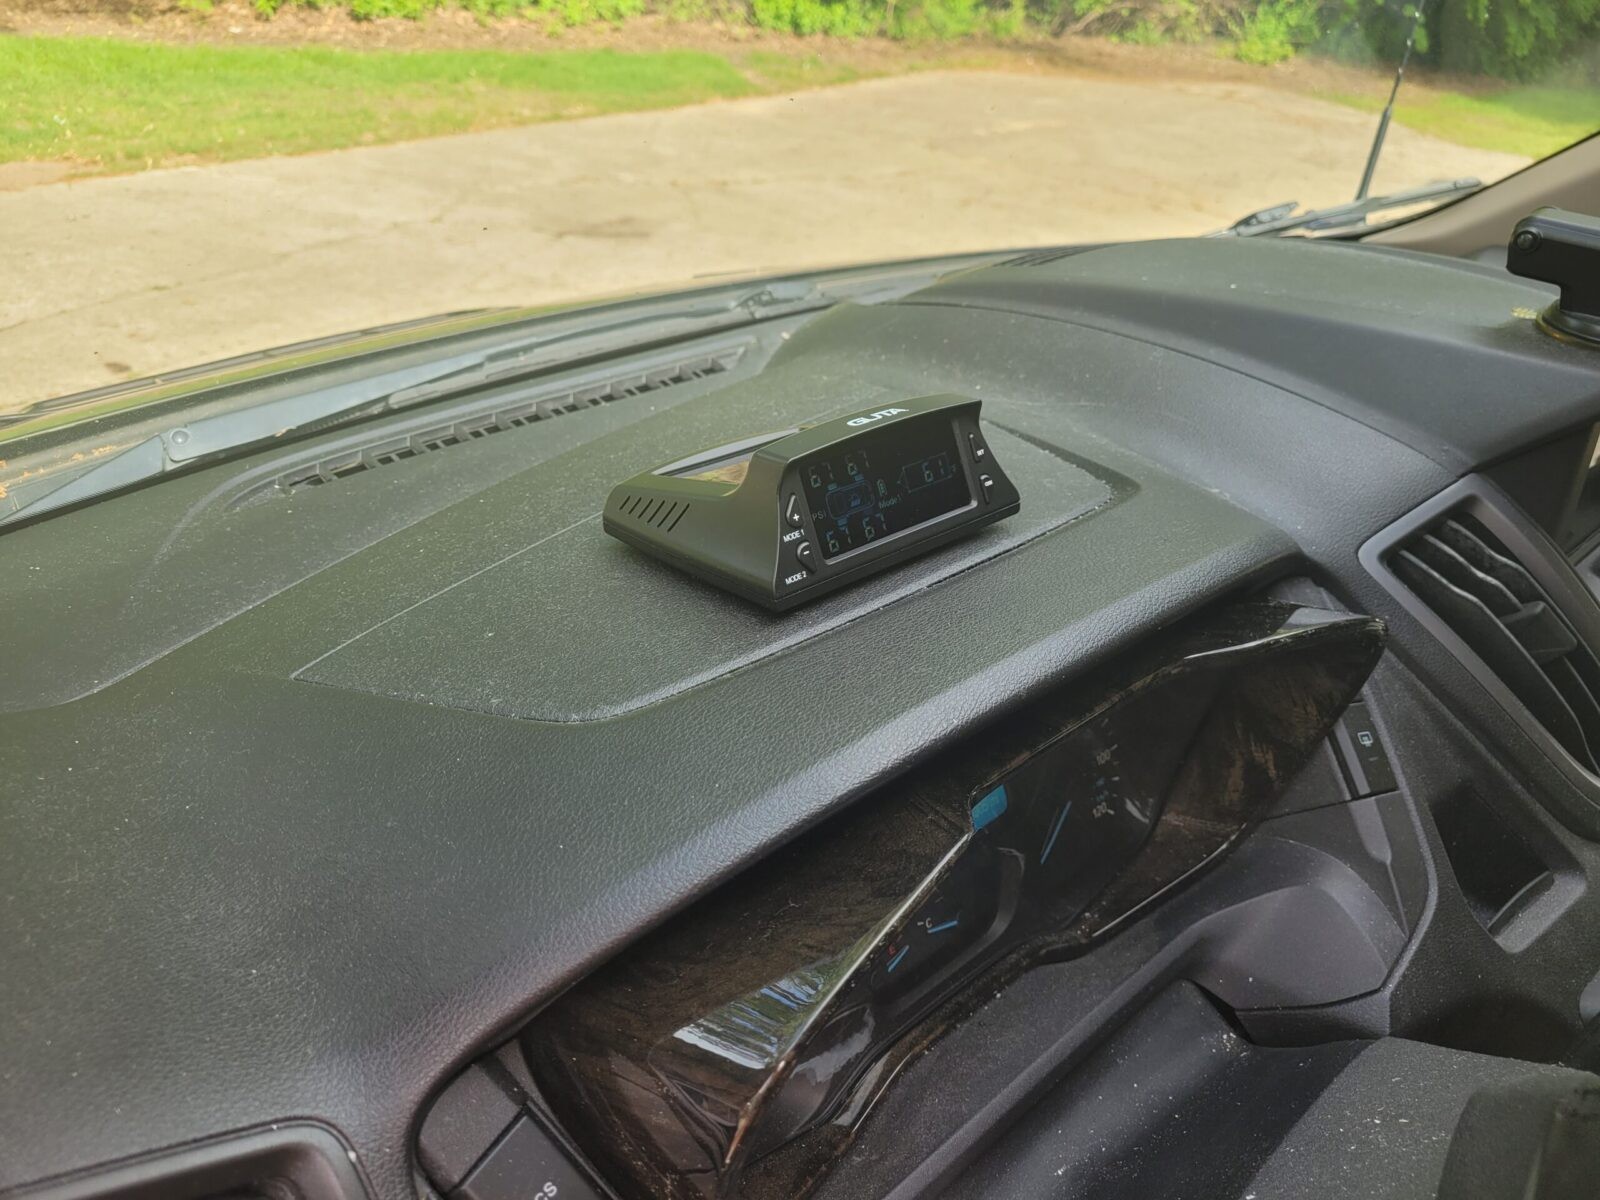
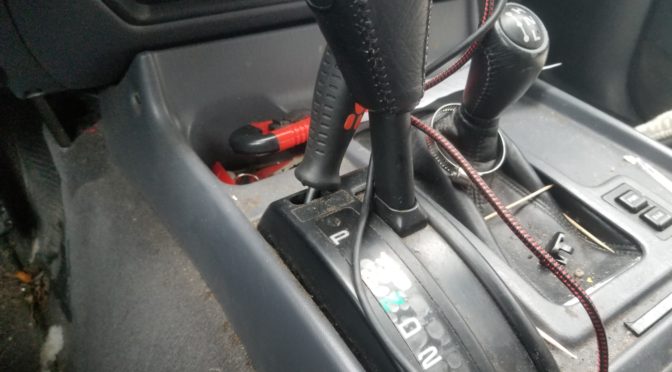
Lastly, the Tire Pressure Monitoring System (TPMS) will learn where the tires are automatically. Note, you can’t change the minimum tire pressures for the front and rear without going to the dealer or knowing how to re-program the appropriate computer settings. At least, I can’t in my Tradesman. If you can in another model, that is something I don’t know about but count yourself lucky – I wish I could.

In Summary

The car dolly idea to do the lifting and positioning really paid off and now I can do the tire rotations safely and easily. I hope this helps you out.

2/19/23 Update: It’s still working great. This is one purchase I am very happy with.


Note, I have to buy all of my parts – nothing here was paid for by sponsors, etc. I do make a small amount if you click on an ad and buy something but that is it. You’re getting my real opinion on stuff.

If you find this post useful, please share the link on Facebook, with your friends, etc. Your support is much appreciated and if you have any feedback, please email me at in**@ro*********.com. Please note that for links to other websites, I may be paid via an affiliate program such as Avantlink, Impact, Amazon and eBay.


The GUTA RV Tire Pressure Monitoring System Is Great For Vehicles That Lack Real Time Monitoring

We had a 2,200 mile trip planned expensive things are with a 2016 Ford Transit 150 that had six year-old tires on it – yeah, they need to be replaced but money is tight with inflation thanks to the politicians. The tread was definitely above the wear bars but the outer layer of rubber was starting to crack. So, I really wanted something to let me know how the tires were doing during the trip.

One thing I really like with my 2021 Ram 2500 is that I can see the tire pressure in real time. Our 2016 Transit has a basic tire pressure monitoring system (TPMS) but doesn’t report to you what the pressure is – it has has an indicator light if something goes wrong. I really wanted something real time for the van and had seen aftermarket TPMS units that had a receiver and sensors that went on the tire valve stems in place of the caps before.

I started doing some research and while there were a lot of different cheaper models out there, I went with the M20-4 (meaning 4 sensors included) model from GUTA on Amazon based on reviews. I’m actually writing this 1,100 miles into our trip and am quite happy with the unit so let me tell you more about it.

Out of the Box

Literally, the unit comes ready to go other than needing a quick topping off of the main receiver’s battery using a Micro USB cord. The sensors have their batteries loaded and are already programmed to the unit.

What you see on the box was included along with 4 sensors and 4 spare O-rings. I didn’t use their adhesive pad and just opted for a couple small pieces of velcro.

The unit recharges its batteries via the solar panel or you can plug it in – the provide both a car/truck cigarette lighter to USB adapter as well as a short cord, I planned to just run via solar so I didn’t bother.

I bought the four sensor model and in the box there are four ready to go sensors with their batteries installed already programmed to the receiver. The are labeled LF (Left Front), LR (Left Rear), RF (Right Front) and RR (Right Rear). Left and right are from the driver’s perspective looking forward.

All of the sensors were labelled, had the 2032 battery already installed and were programmed to the M20 receiver.

One of the reasons I bought the GUTA M20-4 was that nobody reported needing any extra antennas to pick up the data from the TPMS sensors. Our Transit is a full size 150 model so the wheelbase is about 148″ so I wanted to make sure I wouldn’t have a problem.

In terms of the sensors, they just go on the valve stem in place of the valve cap. Be sure to put the right sensor, such as the LF- Left Front – sensor on the right tire of course.

To install them you put the jam nut on first and thread it to the bottom. Then screw on the sensor until it stops – you will hear air leak for a second until the sensor seals as you continue threading it on. You then use their special wrench to snug down the jam nuts to lock the sensor in place. Done.

Here you can see the brass jam nut. By snugging this up against the back of the sensor you are pretty much locking the sensor in place due to the tension it creates. Note the elevated black plastic on the sensor under the jam nut – this is where you use the other end of the wrench to open the sensor to replace the battery when it dies.
This odd looking wrench serves two purposes – the left end us for unscrewing the battery cap on a sensor unit. The right end is offset to make reaching behind the sensor to tighten or loosen the jam nut easier. The offset allows the wrench to clear the sensor body and appropriate engage the jam nut. I put this wrench and the spare O-rings to seal the battery compartment in a clear plastic storage bag and put them in the van for future use.
Rather than use their supplied mounting material, I used some industrial Velcro. You stick it on to a clean surface and let it cure for 24 hours. It does a great job after that. The reason I did this was I wanted to be able to move the unit around some without the Velcro showing.
To give you a sense of scale, you can see the van’t instrument console and my hand – I wear an XL-sized glove. The receiver is small but I find the numbers of the display very easy to read from a normal driving position.
The top back of the unit has the solar cells and I have found they do the job. I let them charge during the day and just let the unit run. I don’t turn it off. By the way, there’s a little sun icon that means it is charging and there is also a battery charge indicator in the display as well.

The Device’s Configuration Screens

Well, the mechanical installation was very easy. The set up screen took a few minutes to figure out but wasn’t too bad. The set up screen lets you select pounds per square inch (PSI) or Bar, whether you want Farenheit or Celsius and then the Low and High pressure literally for each tire. An alarm will sound if either the low or high pressue is exceeded – I’ve experienced that. There’s also a high temperature tire warning that applies to all tires.

For the van, I set the low pressures all to 65 PSI and I set the max to 100. The tire temperature was set to 158F by default and I left it at that figuring I would see what happens and adjust accordingly – I had no idea what to expect actually. I did do some reading and somewhere between 190-225F is the maximum safe temperature for a tire to reach – it depends on your tire’s temperature rating.

The unit supports two modes – Mode 1 is for normal street driving and Mode 2 is for offroad or something. I had no need to explore this as our van isn’t going to go offroad.

By the way, you can add sensors or reprogram/pair sensors if need be and the instruction manual tell you how. They sell versions of this system with more and more tires supported and different displays let you see the status. Again, I just bought the model for four tires. I could add sensors to support a trailer though even with the model I have.

The Results

Honestly, I am very happy. It’s been intriguing to see how temperature affects tire pressure – that one I expected. In general, as temperature increases, the volume of a gas increases so this means that the pressure would increase in the tire.

What I didn’t really expect was to see that with driving, the back tires were a tad warmer than the front and also had about 2 PSI more pressure than the front. Tire temperatures where about 10-15 degrees warmer than the outside tire temperature when driving. It’s 95F here and when we were parked on asphalt the heat of the day would take the tires up to about 101-104F and then they would cool down as we drove.

The pressure is real time but the temperature cycles from tire to tire every 5 seconds, Note the pressure when the temperature was 61F. So you can’t tell which tire was sending the temperature in the photo but in real like, the little tire part of the graphic would be flashing so you’d know what it’s temperature is.
Here are the pressures at 77F – again, one tire was at 77F and I bet the others would have been very close to that.
This one is close to 91F. Note, all of these photos are with the same tire pressures. I filled the tires, installed the sensors and have just watched the numbers change. We had ten hour days with me driving so it gave me something to do in addition to staring outside, self-mediation and pondering existience 🙂

I think the manual said the 2032 batteries in the sensors would last about 6 months. I guess we’ll just have to see about that. Cold Michigan Winter weather takes its toll on batteries because as the temperature drops so does the chemical reaction in the batteries and thus less voltage is produced. I’m really not worried because I did open a sensor and it is real easy to replace the batteries.

To sum it up – The installation was very easy and I like being able to see the pressures at a glance. Knowing that there would be an alarm if a threshold is passed or the pressure starts dropping rapidly too are all reassuring.

So, I like the system and would buy it again.


10/28/2022 Update: Finally had a sensor go out or so I thought. We were driving down a rural highway and all of a sudden the alarm went off with the front driver’s side tire showing 0 PSI. The van was driving fine and when I pulled over the tire looked ok. To make a long story short, the battery in the sensor died. I knew it would sooner or later but there is no low battery warning. It uses CR2032 lithium batteries – one in each sensor. I went to a nearby Walgreens and bought four Energizer batteries and changed them in all four units – if one fails, odds are they are all close to it if you changed them at the same time. To replace the battery, remove the sensor, unscrew the top, slide out the old battery, slide in the new battery and then pair the unit. Pairing is pretty easy – hold down CODE on the main unit to go into setup. Push + or – to move around to the sensor, put the sensor right next to the main unit and push code. It will beep when it pairs. Hold down CODE until the system exits and goes back to standby. Between the battery being probably at least a year old and the system comes with the sensors running plus the temperature was 45F, I wasn’t surprised. Weak batteries tend to fail in cold weather. So, everything is set and I still really like the unit.

Note, I have to buy all of my parts – nothing here was paid for by sponsors, etc. I do make a small amount if you click on an ad and buy something but that is it. You’re getting my real opinion on stuff.

If you find this post useful, please share the link on Facebook, with your friends, etc. Your support is much appreciated and if you have any feedback, please email me at in**@ro*********.com. Please note that for links to other websites, I may be paid via an affiliate program such as Avantlink, Impact, Amazon and eBay.


How To Fix A Broken Vacuum Line Fitting on the Air Box or Air Filter Housing Of A 2008 Toyota Highlander And Other Models – It’s Easy and Cheap!

I’m going to leverage my inner Forrest Gump – used cars are like a box of chocolates. You never know what you are going to get. In this case, it was our 2008 Toyota Highlander. I decided to check the air filter just in case and noticed both that the vacuum lines had cracked and that someone had done a “creative” fix on a 4mm vacuum port that had snapped off.

So this vaccum line was just resting in the hole. There’s some white glue – maybe silicone and som odd metal insert.

If there’s one thing I have learned with modern computerized cars – don’t mess with their sensors or vacuum lines. You can get odd random codes thrown, lose performance, fuel efficiency, etc. So, I knew this needed to be fixed. The big problem – the vacuum fitting was cast into the airbox!! By the way, the air box is the car part that holds the air filter in this case – the air filter housing is another way of thinking of the part.

Let me start by telling you the expensive and time consuming way – buy a replacement air box. Yeah, this is going to cost you a bundle. A OEM Toyota air box will run you $275-400, used is about $100-185 and aftermarket tends to be under $60-90 and maybe iffy quality. Then there is the labor to do the actual swap – it’s going to either take your time or you are going to pay a mechanic to do it and the cost is going to go up fast. There is an easier and faster way.

My Recommended Approach

The magic fraction for today is 5/32″. Why? Because 5/32″ is almost exactly 4mm. If we get a small brass, aluminum or stainless barbed 5/32″ hose fitting with a threaded rear, we can easily fix this. I live in a rural area and this isn’t something I can easily walk into a hardware store and find so I did some searching for NPT to 5/32″ hose barb and found both 1/16″ NPT and metric fittings plus some were brass, aluminum and mystery metal. I discounted anything plastic/nylon because I wanted a stronger fitting.

Another reason I went with 1/16″ NPT is that it can fill a pretty big hole all by itself up to about 0.31″ given the taper plus I could then use a 1/16″ to 1/8″ bushing adapter if I needed to go larger.

After much digging around using Google and Amazon, I opted for an Aeromotive #15630 hose fitting made from 6061-T6 aluminum that I did order off Amazon [click here for the Amazon listing]. There was a no-name generic brass one but no spec so I didn’t go with it. By the way, searching for fittings like this really shows the limitations of general search engines to find parts. I spent a ton of time filtering through tons and tons of search results that turned up the wrong products. What a headache.

Aeromotive 15630 fitting that has 1/16″ NPT thread on ne end and a 5/32″ hose barb on the other.

Installation

The first thing to point out is that the molded vacuum fitting is above the air cleaner so you can safely work on the box without removing it from the vehicle! Any debris from drilling or sanding will land on the filter and you can vacuum it out later. If you have a used car, peak inside and make sure the air cleaner is there and intact.

If you have just the old busted remains of the hose fitting to contend with then Dremel or sand the area flat. You want the installed barb to be able to sit flat against the wall of the box.

Next, pick a drill bit that is just the same size as the tapered bottom of the thread. NPT thread is tapered so the bottom has a smaller diameter than the top. If the air box was steel, we would use a letter “C” drill bit to make a 0.242″ hole. Notice how this is slightly smaller than 1/4″ but I am betting most people do not have lettered drill bit sets so you pick a close size and run with it. We do want the hole slightly smaller in order to thread it. Because this is plastic, we are going to push forward with the metal adapter fitting while turning and let the thread on the adapter cut the thread into the plastic. We aren’t going to bother tapping it first. That’s right – don’t buy a tap to do this uness you are a tool junky and perfectionist, which is fine if you are – I get accused of that a lot.

I’d recommend you start with a bit smaller than 1/4″ where the bit is slightly smaller than the bottom of the adapter, drill the hole and see if you can press it in. If not, go to a bigger bit. If you mess up and have a slightly too big hole, all is not lost – read the “Well crap” section below 🙂

Let’s say that everything goes great and you can screw the fitting into the plastic – Once threaded in, it’s done. Just screw it in and quit. Don’t put too much torque or you can strip it. That works just fine unless the previous guy bubba’d it, which takes us to the next part of the story.

Well crap….

In my case, I had a box of chocolates moment. The previous owner or a mechanic had drilled the hole out and installed some small metal bushing that was hidden due to the white silicone on it. I have no idea what it was from. Once I discovered and removed it, the hole in the air box turned out to be just a tad bigger than the entire 1/16″ tapered thread. Argh… not what I wanted to deal with.

Dear bubba, thank you for hiding this under the white silicone. You just made my fix a bit more complex but not impossible.

Okay, I wanted to get this job and had three options, go to the hardware store and try and find a 1/16 to 1/8″ bushing, install a 1/16″ NP threaded nut on the back to hold it in position, which I also did not have, or glue the hell out of it and call it even.

Because I am always working on cars and pressure systems due to Ronin’s Grips, did have a tube of black Permatex Optimum Black Gasket Maker that I could use. Being black, it wouldn’t be so glaringly obvious. By the way, I opted not to use epoxy due to the flexible plastic walls and expected vibrations that might break down the bond with time. [2/12/24 Note: I think Permatex dropped the Optimum series and their Black Ultra should work just fine – I’m linking to the Amazon listing]

This is what I had on hand at the time and worked great. I could have used any quality black silicone RTV glue/gasket maker and gotten the same results. I tend to either have Permatex or LocTite brand products that I use the most.

First, I scuffed the surface around the hole with 100 grit sand paper so the glue could get a better grab on the surface. The second thing I did was to spray brake cleaner on the area to remove any trace oils that might prevent a good bond.

I was wearing nitrile gloves and also sprayed brake cleaner on the fitting to make sure it was clean. Gloves both keep your hands clean and also prevent you from getting oils from your skin on the parts — assuming the gloves are clean of course. Having a clean surface makes a HUGE difference in terms of how well any glue is going to stick.

Next, I applied a bead around the top of the NPT thread of the fitting and pushed it into the hole. Since I was wearing nitrile gloves, I just took a finger and smoothed the glue out a bit and let it cure for about an hour or so. You want it cured enough to hold the adapter in place – you don’t need it fully cured yet. With warmer weather it will cure faster and in cold weather it my take a long time and need a hot light or something to warm it up above 70F to get things done. Depending on what I am working on, I try to get somewhere between 60-110F. The warmer it is, the faster it will cure but don’t burn it or melt the plastic either!

This is the first pass. It’s not pretty but it will dry strong enough to hold the fitting in place while the second thicker coat is applied.

I then put a second layer of black gasket maker on and fanned it out to get a good grip and to securely hold the fitting. I then let this all cure overnight. I’ve learned long ago not to rush faster than what the adhesive’s manufacturer recommends or you are liable to ruin an otherwise good job.

Here is the second heavier coat this was meant to reinforce the part.

So, once it was fully cured I then needed to change the cracked vacuum lines which are what I noticed in the first place.

4mm Vacuum Lines

What got me started on all this in the first place was noticing that two 4mm vacuum lines were very cracked where they slid onto their respective hose barbs. This happens as rubber ages and gets brittle so finding them wasn’t surprising.

This is one of the ends that was badly split.

Fixing this is easy. You just need either real 4mm vacuum hose or 5/32 vacuum hose. You can either go with one formulated from rubber or more expensive silicone. The advantage to the latter is that it ought to last longer.

Because we own a number of aging Toyotas, I bought an assortment bag of metric sized silicone vacuum hose of Amazon some time ago. It comes with 4mm x 82″, and the 52″ lengths of 6mm, 8mm, and 12mm. It was expensive but now I have an assortment for when I need to repair small lines such as this case. [2/12/24 the vendor I bought from years ago is gone. Check out these listings of sets on Amazon – go with a vendor that has at least 30 ratings of 4-5 stars]

You can see the two pieces I replaced because the new silicone hose is shiny black and a thicker diameter.

Conclusion

Going this route saved us a ton hundreds of dollars and has held up just fine. I did this repair last fall and have not had a single problem. Yeah, the glue does make it a big of a bubba fix but it is revsersible and the fitting isn’t going to fall out. The black gasket maker has held the little barb in just fine and the hose is very supple and shows no wear at all. I hope this helps you out as well.

2/12/24 Update: My repair is still just fine. A reader pinged me that none of the Amazon links worked so I went through and updated them.

7/28/2023 Update: Everything is holding up just fine and we’ve put quite a few miles on the car since this was written in March of 2020.

4/9/2021 Update: Still holding just fine. Not one problem to report.


If you find this post useful, please share the link on Facebook, with your friends, etc. Your support is much appreciated and if you have any feedback, please email me at in**@ro*********.com. Please note that for links to other websites, I may be paid via an affiliate program such as Avantlink, Impact, Amazon and eBay.


The EZRed MR34 Extendable 3/4″Socket Wrench is a Beast With Two Quick and Easy Tweaks

I have both SAE and Metric 3/4″ socket sets that come out once or twice a year when I am working on big bolts on cars and trucks. As you may know, the longer the wrench, the more torque you can apply. Back when I was younger would would slide a piece of pipe or heavy wall tube over a ratchet or breaker bar to get even more mechanical advantage. We definitely snapped some socket wrenches while doing this as we exceeeded their design specs.

You see, a ratcheting socket wrench has limits as to how much torque the mechanism can handle before something either bends or breaks. Quite often, the rathchet pawl would bend/crumple and no longer be able to engage the teeth of the gear. When that happens, we’d toss the cheap wrench.

This is why breaker bars were made by the way – they have no ratcheting mechanism and, thus, can handle more torque. There’s one problem though, there are times where you can’t get the breaker bar into position because you can’t turn the handle relative to the socket. So, what is a person to do when they need a ton of torque and a ratchet mechanism?

The short answer is to get a wrench with a long handle that is designed to handle a ton of torque. A ton of companies make socket wrenches with longer handles. I have a couple of these but what I find really handy are wrenches with extending/telescoping handles. When you are working in a relatively tight space, you may not have room for the fully extended handle or you have need to work it into position before you can open the handle.

The EZRed MR34 Wrench

So, when I need a ton of torque and mechanical advantage to help me get there (I’m at the age where I need to work smarter because my body doesn’t support harder any longer 🙂 – I break out the wrench I affectionately call “The Beast”. It is a beautifully made and chromed giant 3/4″ ratchet wrench.

[iframe style=”width:120px;height:240px;” marginwidth=”0″ marginheight=”0″ scrolling=”no” frameborder=”0″ src=”//ws-na.amazon-adsystem.com/widgets/q?ServiceVersion=20070822&OneJS=1&Operation=GetAdHtml&MarketPlace=US&source=ac&ref=tf_til&ad_type=product_link&tracking_id=ronin03-20&marketplace=amazon&region=US&placement=B0021UL1ZK&asins=B0021UL1ZK&linkId=edc2cdba8f610b96c4d5bcb8b6035998&show_border=false&link_opens_in_new_window=false&price_color=333333&title_color=0066c0&bg_color=ffffff”]

The wrench is sold in the US by a firm called “EZRed” with a lifetime warranty and, like many things, is actually made in Taiwan. When you do some digging around, there are a lot of guys using this wrench for heavy equipment, farm equipment, trucks, steam pipes and more. After reading about the real world experiences with the wrench, I ordered one in.

Here is the wrench closed and you can see it is about 24″ overall.
Here is the MR34 fully open and about 40″ long overall.

The first things I noticed was that it’s a big wrench even without the handle extended. Next, it’s a heavy wrench and weighs in at about 8.5 pounds. I have to be honest, I don’t usually pay much attention to looks but the chrome finish is gorgeous.

Pull the collar down and a detent is released that allows the handle to telescope out. The handle then locks into position in the next available hole. The locking feature is definitely nice.

I use this for 3/4″ sockets and also have a SunEx 3/4 to 1/2″ reducer for those times I want to apply a ton of torque to a smaller bolt.

Here’s the wrench with a SunEx 3/4 to 1/2″ adapter.

So far, I am very happy with the wrench. As you can tell, I haven’t used it a ton yet but for the few quick jobs so far, it worked great.

Two Big Tips

A fellow recommended apply Blue Loctite to the head screws and grease the wrench while it was open. He was spot on – the screws were surprisingly lose. Even though they have blue thread locker on them from the factory something seems odd and guys have reported losing the screws. I really think if Ihad not followed the fellow’s advice I would have already lost mine as well – they are that loose.

The screws come out and then the head is very serviceable. You can see the two pawls and their springs plus the selector in the middle. What you don’t see is any lubricant! I must say I am a bit surprised.
You can see the faceplate and the 24 tooth geared head.

So, I used a brush and lightly applied SuperLube grease to everything, reassembled the wrench and put Blue Loctite on the two head screws before tightening them down. The whole thing took maybe 10 minutes start to stop including taking the photos.

If you ever need it, the EZRed sells a rebuild kit – part number RK34.

Summary

I really like the wrench. It’s worked great so far but I really haven’t done anything super stressfulso far – just breaking some very rusty 1/2″ diameter carriagle bolts free off my plow. It’ll definitely get used this upcoming summer a lot more.


If you find this post useful, please share the link on Facebook, with your friends, etc. Your support is much appreciated and if you have any feedback, please email me at in**@ro*********.com. Please note that for links to other websites, I may be paid via an affiliate program such as Avantlink, Impact, Amazon and eBay.


Do It Yourself Cold Weather Mechanic Work Gloves That Are Insulated But Still Allow You To Work

Here’s a quick tip for you when you need to turn a wrench outside except it is really cold but you still need to feel what you are doing or can’t wear bulky insulated work gloves.

What you need to do is real simple – put on nitrile gloves first. This layer next to your skin insulates and protects you from both the wind and your hands getting wet. This is a big deal when there is snow. The second layer is your regular thin mechanics gloves. I have several brands of work gloves but Mechanix is probably the brand I use most followed by Ace.

I meant to write about this last year but forgot. Yesterday I had to work on my plow and it was +9F. The above worked great. Of course there is a limit and I don’t want anybody getting frostbite so use your common sense and play it is safe it is super cold.

At 9 degrees Farenheit, holding steel tools and moving metal parts around is a recipe for frostbite. It was this kind of work last year that led me to experimenting with putting Nitrile gloves under my thin Mechanics gloves.

I buy boxes of 5 mil Nitrile gloves whenever they go on sale at Harbor Freight. I think the sale prices tend to be around $5.99 and there are 100 in each box. I use a ton of them with my plastics work but also when working on cars. Any brand ought to work but I think the Harbor Freight gloves are a great deal when on sale.

I settled on 5 mil thick gloves because thinner ones fall apart very easily and thicker ones start to be bulky and mess with your sense of touch. I tried both 7 and 9 mil gloves before going back to 5.

I like 5 mil. It’s neither too thin nor too thick in my opinion. Note, they are meant to be disposable so you may or may not get more than one use from them.

The outer gloves are just basic Mechanix brand gloves.

I literally snapped this photo on my way out to work on the plow in 9 degree snowy weather.

I hope this little trick helps you out! I set up some Amazon product links for you below this post in case you would like to buy gloves.


If you find this post useful, please share the link on Facebook, with your friends, etc. Your support is much appreciated and if you have any feedback, please email me at in**@ro*********.com. Please note that for links to other websites, I may be paid via an affiliate program such as Avantlink, Impact, Amazon and eBay.


Don’t Buy The DBPower 1200A Portable Jump Starter For Your Car or Truck – They Will Not Last

In August 2016 I bought a DBPower 400A DJS10 Peak jump starter amd found it handy. At the end of August 2018, I bought two of the bigger 1200A portable jump starters. I was busy and the units sat until some time in November when I tried to charge them. One was dead on arrival and would not charge no matter what method I tried (USB or their supplied charger). I contacted the seller and they were cool about immediately shipping a replacement. I charged it no problem and put both in our cars as a “just in case” measure.4

So, fast forward to February 1, 2019. Michigan was in the grips of an arctic freeze with ambient temperatures ranging from -8 to -12F and windchills under -20F. It was this way for two days. On the first, I went to start my wife’s Camry for the first time in several weeks and the starter could barely turn a few times before the solenoid clicked. The battery read 11.17 volts.

I thought myself lucky that I had the foresight to buy the batteries as I would not have to move my truck around to jump start it or run an extension cord out to use one of my Noco Genius chargers. The DBPower unit had been in the car and it was about +9F at the time. The whole point of these things is to store them in the car, right? It was fully charged when I put it in there.

Guess what? The DBPower read “Lo” voltage on the LED display when I turned it on and tried to charge the battery. It didn’t help the cart start at all. I was pissed. These things were $72.99/each. I felt like I had wasted a ton of money on junk. That is not a good feeling.

So, I decided to run an extension cord from my shop and hooked up my big Noco Genius G2600 charger to the battery and set it to the 30 amp quick charge setting that runs for five minutes.

This time around, the story ends a lot better – the car started right up. My wife used her car to run errands and I let it charge all last night with the normal charging cycle on the Noco.

4/16/19 Now, DBPower did make things right and replace both units and told me I have to charge the units every two months to have reliable power. If you open a unit up, you will find out they have Lithium Polymer (LiPo) power cells. These can hold a big charge and discharge quickly but they lose the charge as they sit – typically in about two months.

12/6/19 update- still working just fine as long as I keep them charged.

12/21/19 – pulled one out of our van. It’s been there since probably Labor day and the battery is at zero. I’m charging it now. What I am finding with these things is the you need to top them off every 2-3 months. The Noco charger holds a charge far longer than the DBPower unit. I charged the Noco early on the summer and it’s between 50 and 75% right now according to its status LEDs.

7/14/20 – Have now thrown away two units because they don’t buy a charge. Seriously, do not buy a DB Power unit and buy a Noco jumpstarter instead. My Noco holds a charge and has had zero problems.

11/5/20 – Throwing out my last two DBPower units that no longer hold charges. The Noco is still doing just fine and I plan on buying a second one.


If you find this post useful, please share the link on Facebook, with your friends, etc. Your support is much appreciated and if you have any feedback, please email me at in**@ro*********.com. Please note that for links to other websites, I may be paid via an affiliate program such as Avantlink, Impact, Amazon and eBay.


What to do if your 1996 Landcruiser’s Shifter Will Not Come Out of Park – How to Release the Shift Lock Button

Have you ever noticed that things go bad at the worst time? In my case it was during heavy snow. I was plowing wet snow out of the way and had a few hours to beat when the temperatures would drop and turn the melting snow into a block of ice.

My plow truck is a 1996 Toyota Landcruiser that has a rear mounted plow made by a long gone firm named “Super Plow”. It works pretty good when snow stays under 18″ so I plow a few times during a storm to keep it knocked down.

I was plowing, put the truck in park and got out to see what I needed to touch up. I got back in and it would not shift out of Park. I could tell that the shift lock button was not going in as far as it should. First, I tried turning the steering wheel left and right – no luck. The lock would not release. I then put the truck’s transfer case in Neutral and rocked it some – nothing. I dropped the blade to make sure there weren’t any stresses – nothing. Well, that meant the selector solenoid wasn’t moving out of the way. Argh!! Of course I was stuck right in the middle of the driveway.

I called my buddy John Freehling up who is a real mechanic and will forget more about cars than I will ever learn. He told me that there ought to be an emergency release somewhere near the lever and to do a quick search on the Internet to find out just where, which I did.

You get access to the emergency release by using a blade screw driver, knife or something, to pry the little rectangular lid that is located to the upper left of the shift console. You then can insert a screw driver to gently push down and release the shift lever.
Bingo! Problem solved. I then got the truck back to my garage and went in and read on the computer instead of my little phone screen.

The access plate is at the upper edge of the console. You can see the small plate sitting in the boot of the transfer case lever. You need to reach in and press the release each time you want to take the lever out of park.

The Work Around

Now, it is literally subzero weather right now and I’ll work on permanently solving the weather this weekend when it warms up. Until then, I found a great solution on the web – cut a carpenter’s pencil off so it sticks up slightly – just the body – you don’t need it to be pointed. I put my pencil in and gave myself about an inch protruding and cut it off in my bandsaw.

Getting out of park takes two hands – I push down on the stubby pencil with my left hand, push in the lock button like normal and pull the lever down with my right. Again, you just need it to move the shift lever out of park – not all the time. It works just fine. I was able to finish plowing my hose and my mother-in-law’s no problem.

What might the problem be?

Troubleshooting and fixing this one ought to be pretty straight forward when it is warmer. Here’s what I am going to try in order:

  1. Push down on the brake pedal. If the lights turn on, then the brake pedal switch is good. If they don’t then the problem is most likely the brake pedal switch. I read an interesting post where the guy said unscrewing and removing the brake pedal assembly makes it very straight forward.
  2. If the brake lights come on, make sure they all come on. If not, one blown bulb could potentially cause the problem.
  3. Related to #2 – Check brake light fuse and replace if blown.
  4. If the light all come on, check for power at the solenoid because odds are the solenoid failed.

So, we’ll see what the final fix is but I hope this helps anyone stuck and unable to get the shift lever lock switch to depress and let them shift out of park.

2/3/19 Update: It blew the fuse — As you see, the truck’s plow is on the rear. I smashed the trailer light hookup assembly pretty good and it must have shorted somewhere. This summer I’ll use a hole saw and cut the rear bumper to install a trailer electrical assembly that is better protected vs. under the bumper. So, the truck’s brake lights and shifter are working again.


If you find this post useful, please share the link on Facebook, with your friends, etc. Your support is much appreciated and if you have any feedback, please email me at in**@ro*********.com. Please note that for links to other websites, I may be paid via an affiliate program such as Avantlink, Impact, Amazon and eBay.


These are the Correct Weatherstripping Clips for 1996 Toyota Landcruisers (80-series)

I did some bodywork on my 1996 Landcruiser (an 80-series Landcruiser) this past summer and had to replace the weatherstripping clips on the bottom of the driver side door. I did some digging and found that these clips are the correct size (5mm with a 15mm head) and they worked great for me. The one guy complains that these are green so he only scored it three stars. My originals were a pinkish color so green didn’t matter to me at all plus once installed, you can’t see them.

I popped the remaining originals out with a removal tool. If you don’t have one, they make a world of difference in the removal of clips. In a truck this old, I try to replace old plastic clips when I can as often find them to be brittle and either break during removal or re-insertion.

Here is a clip removal tool. The green clips under it are the brand new replacement units.

The tool you see in the above photo came with the following replacement Toyota Trim Clips package that has helped me out a number of times such as securing drooping engine bay plastic shields on a 2002 Toyota Camry.

Here were the remaining original clips. Note the lovely pink-ish color thus I really didn’t mind what colors the originals were as long as they worked.

Here is the end result – I worked the clips into each hole in the weather stripping and then simply pushed them into the body holes. I think I installed a total of five to six clips. The drooping problem was solved.

The heads securely fit in the holes in the weather stripping and into the body.
No more drooping weatherstripping!

In Summary

These clips worked great. I just did this post to try and save anyone trying to find clips specifically for an 80 series Landcruiser.

[iframe src=”//rcm-na.amazon-adsystem.com/e/cm?o=1&p=12&l=ur1&category=automotive&banner=1AC8X5476PPPSFTDGY02&f=ifr&linkID=bd65cc9db2b5db7e95b9e7581b8f257c&t=ronin03-20&tracking_id=ronin03-20″ width=”300″ height=”250″ scrolling=”no” border=”0″ marginwidth=”0″ style=”border:none;” frameborder=”0″]


If you find this post useful, please share the link on Facebook, with your friends, etc. Your support is much appreciated and if you have any feedback, please email me at in**@ro*********.com. Please note that for links to other websites, I may be paid via an affiliate program such as Avantlink, Impact, Amazon and eBay.