Tag Archives: Pistol

Adding a Brace and Changing the Forearm on the PTR PDWR

In the last blog post, I talked about the specifications and ordering the PTR PDWR.   Even before it arrived, I knew I wanted to add a brace.  My plan was to use PTR railed handguard and I had a “wait and see” attitude towards the brake.

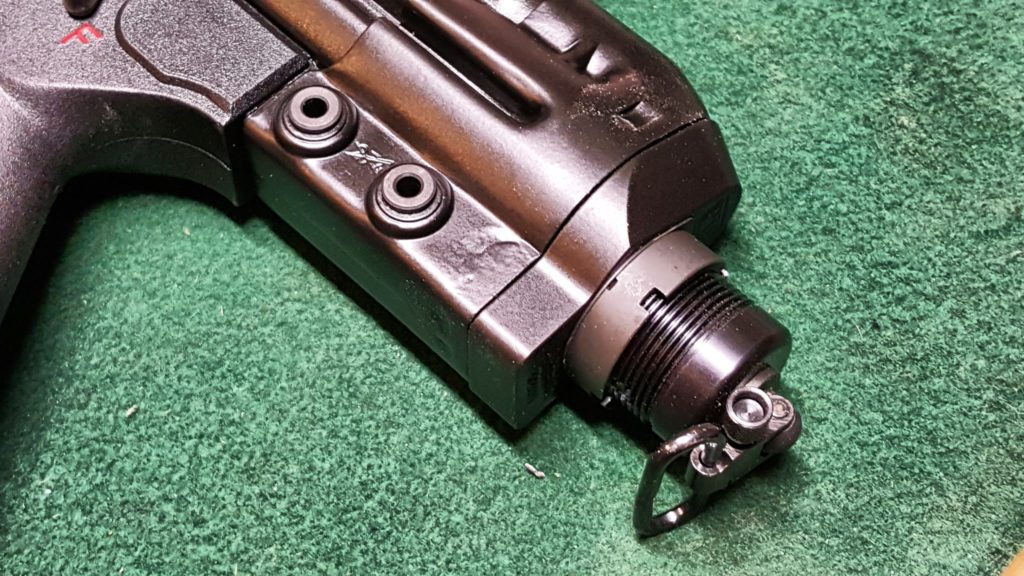
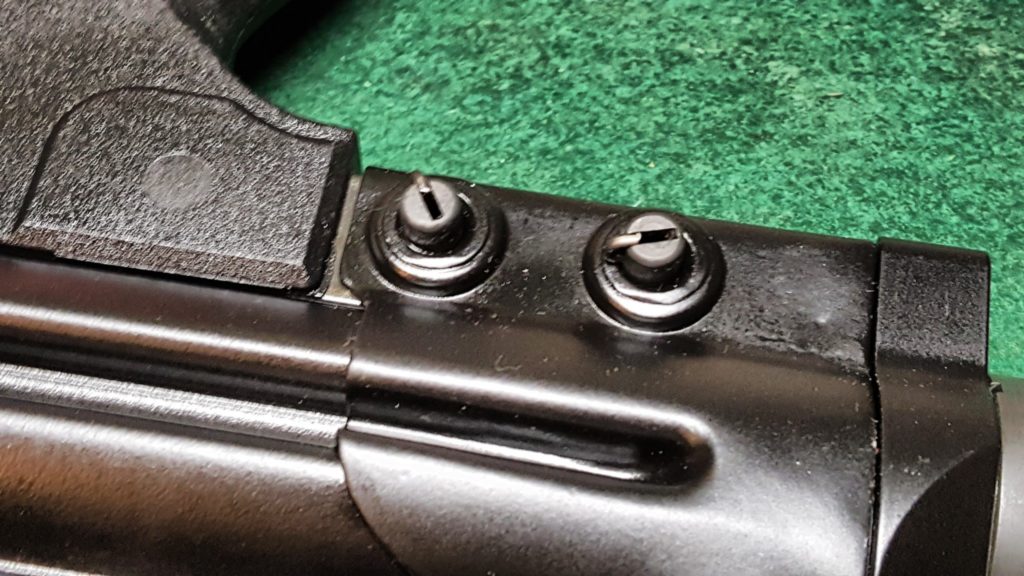
So, the first step was to remove the existing end cap.   In HK-type weapons is is held in place by two push pins that are simply pushed back out.  You’ll notice that one side is relatively flat:

The other side will be protruding and this is the side that you push on and will remove the pins from the other side:

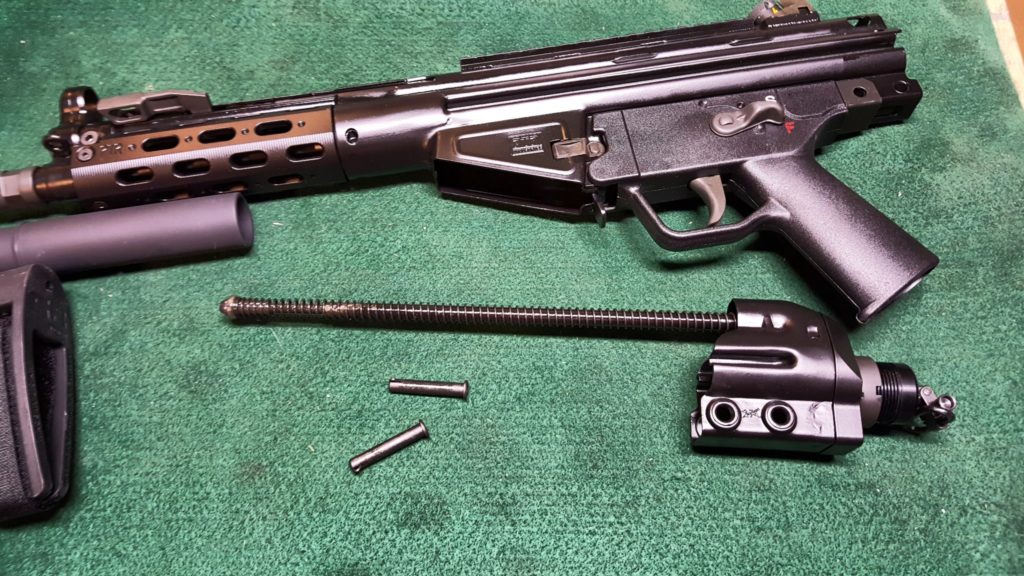
You then wiggle the end cap and push it off the end of the stamped receiver.  It will look like this:

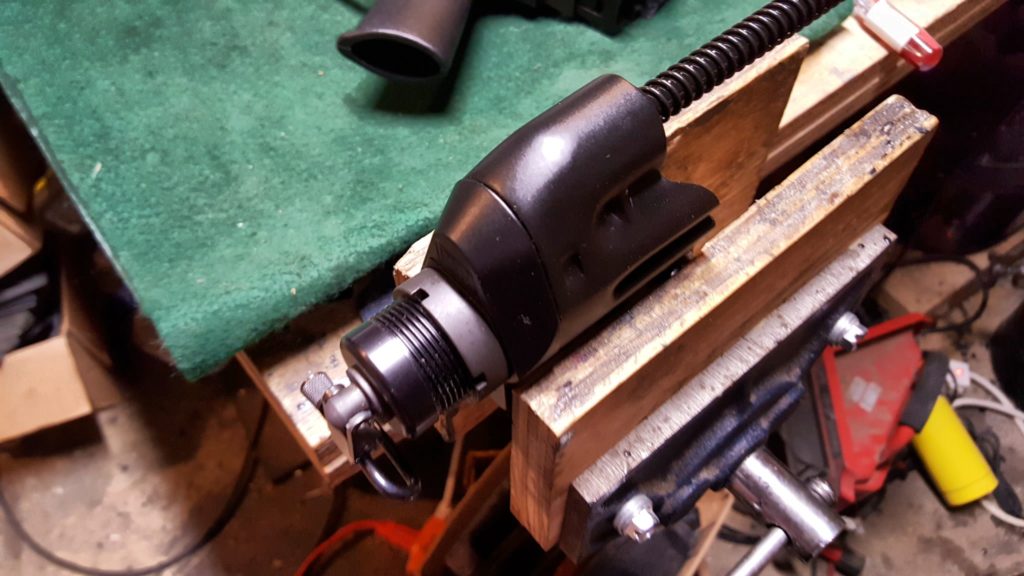
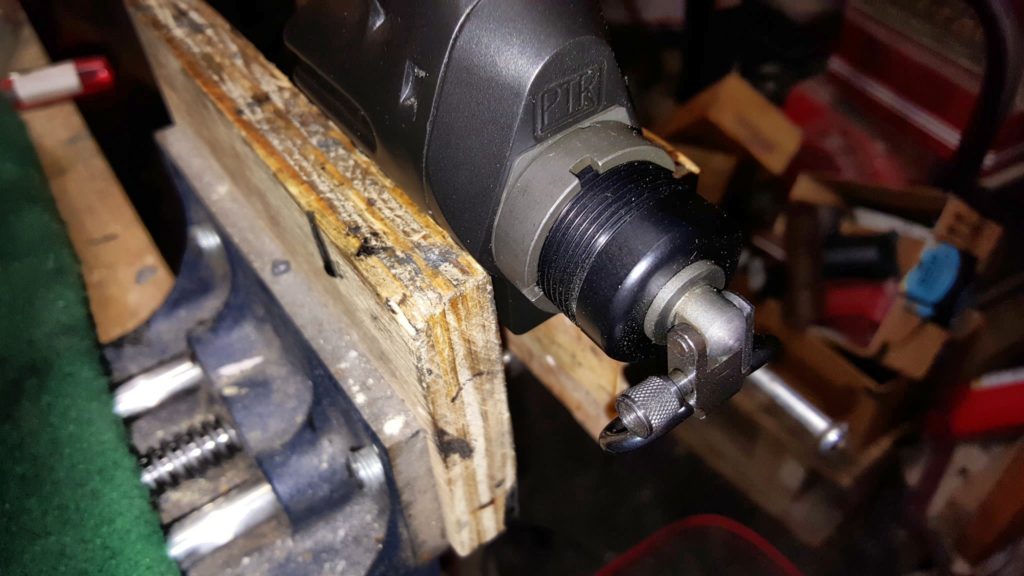
I then secure the end cap assembly in a vise to make working on it easier.

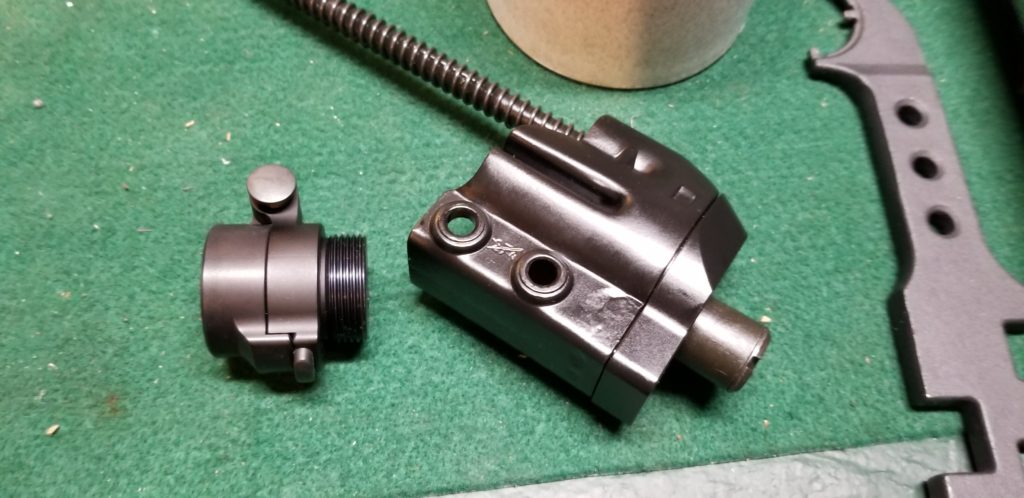
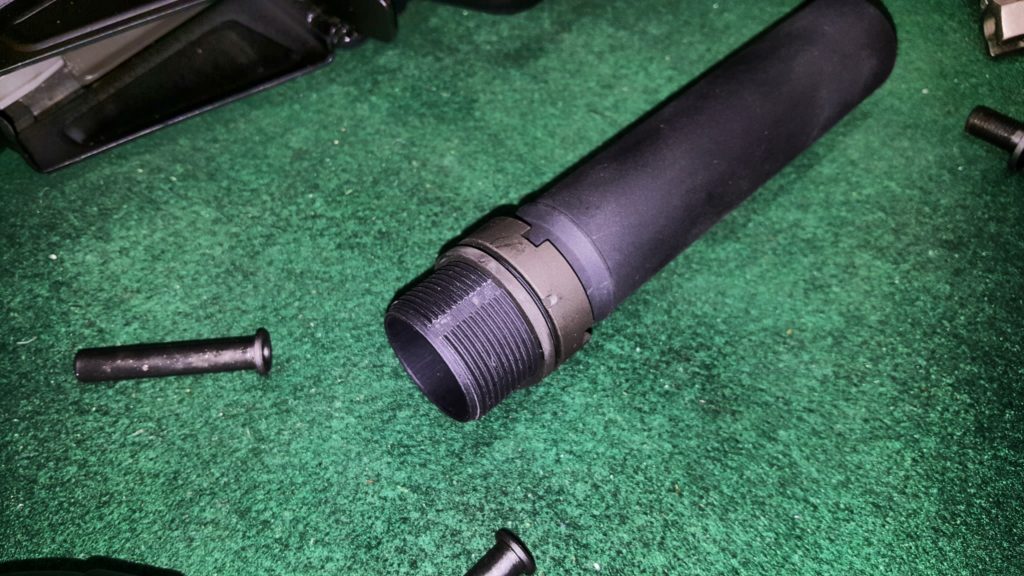
In the next photo you can see how the tube and sling really are like a small stub of an AR/M4 buffer tube complete with an indexed end plate to keep it from rotating and a castle nut.  The swivel is separate from the tube and is threaded into place so unscrew and remove it first.

In the next photo, you can see the lighter grey castle nut on the black tube.  The light grey surface you can see in the otherwise black cap is the plate you will need to fish out after you back off the castle nut.

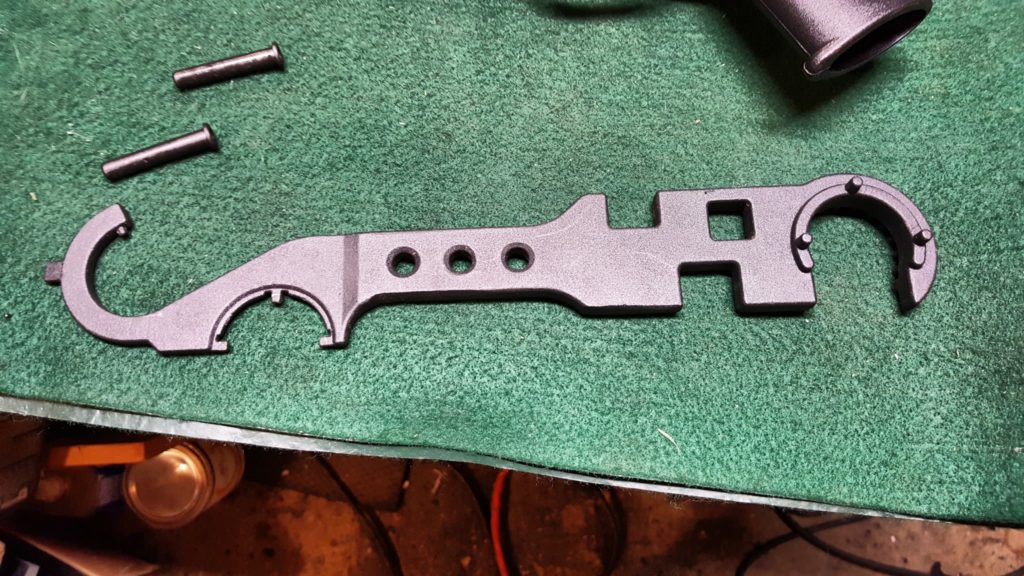
To remove the tube itself, you do the exact something you would on an AR.  Use a castle nut wrench to loosen the castle nut and then thread it back out of the way.  Then pull the end plate out of the receiver so it can rotate and then turn the tube to remove the assembly.

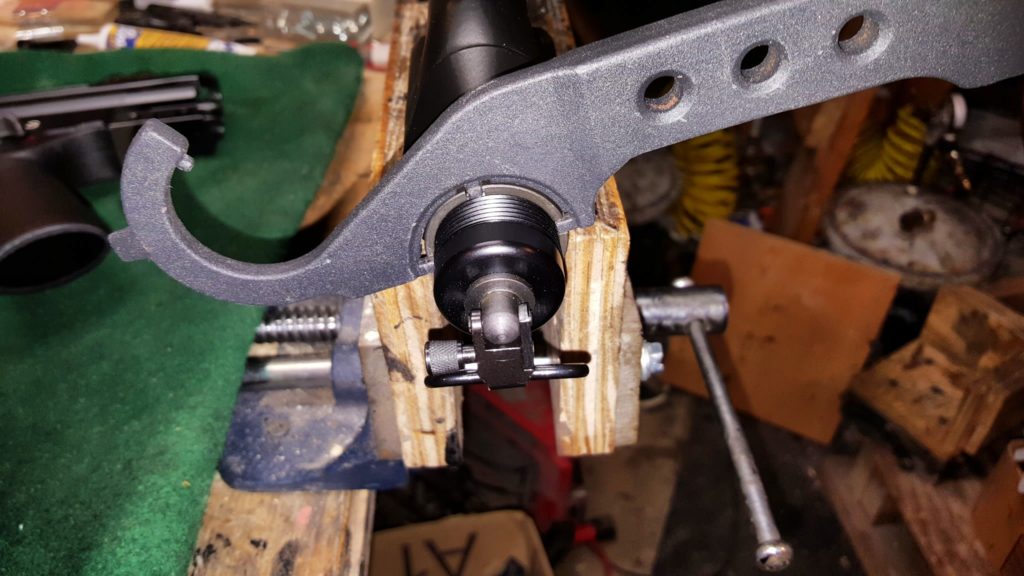
In the next photo you see the castle nut wrench on the tube with the sling.  I realized shortly after this was taken that I probably needed to get the sling off before I could back out the tube – that is why I said remove the sling first.

As written above, you will need to pull the end plate out of receiver to be able to turn the tube.  With the plate pulled out from the receiver, the tube simple unscrews.  If it does not want to unscrew, make sure your plate is out of the way.  Also in the next photo, you can see the very secure mount that the sling screw threaded into.  That was well thought out.

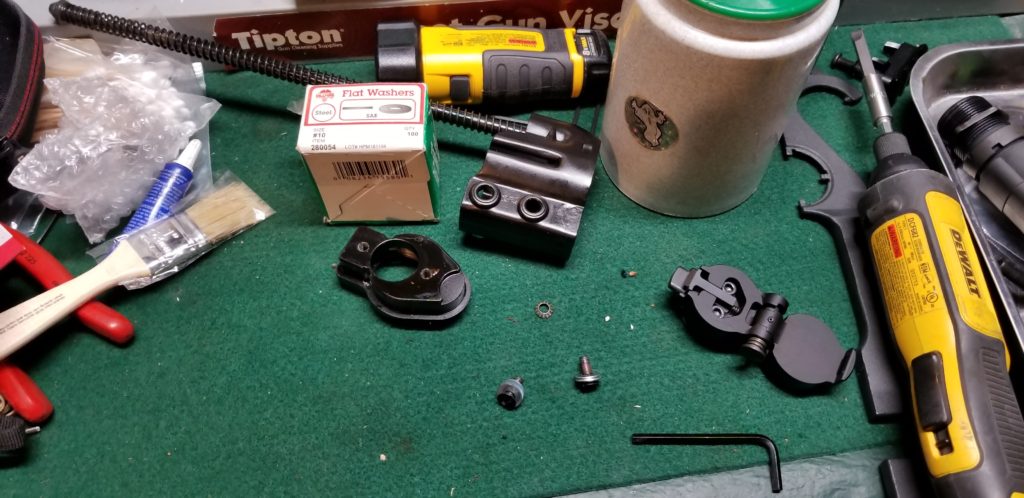
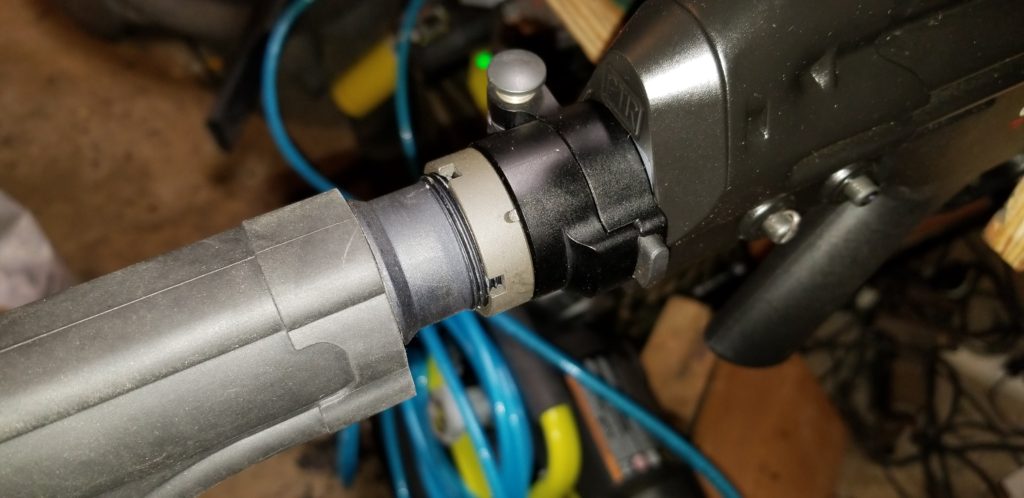
Next, I wanted a folding mechanism to be inline between the receiver cap and the buffer tube.  SBTactical makes a very sturdy 6061 aluminum unit known as the “BTFA”.  To install it meant the tower that the sling swivel screwed into needed to be removed.  It adds about 1.1″ to the length when installed.

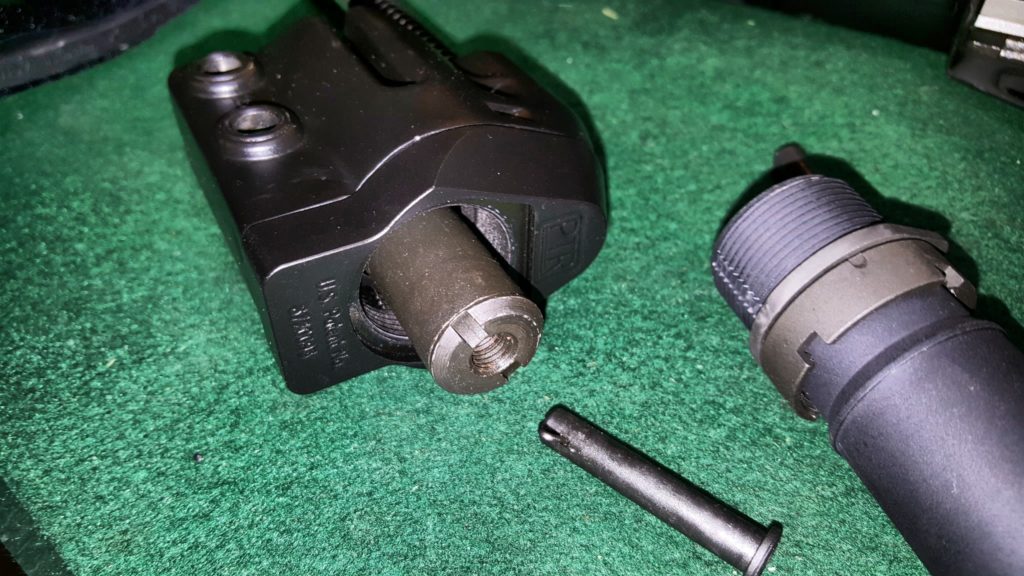
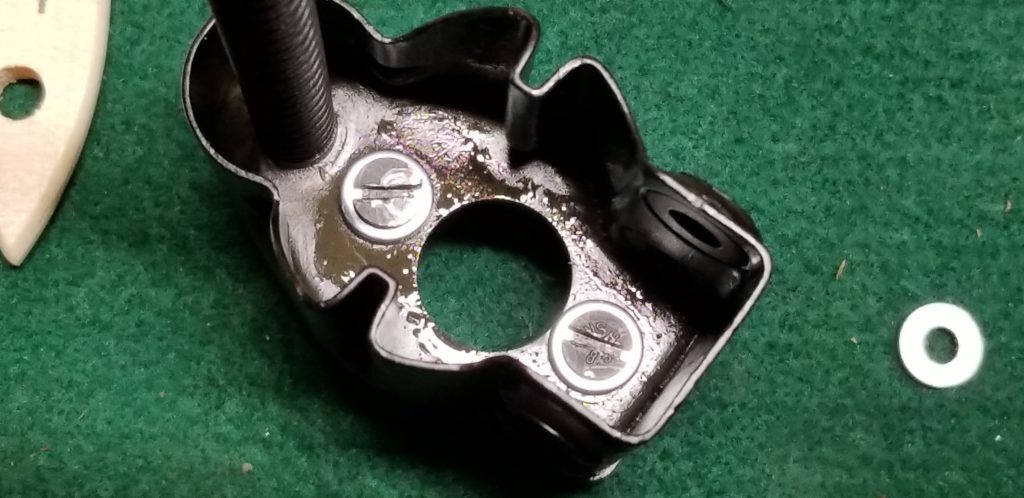
The tower is held in place by two screws inside the cap.  Mine were beat half to death – the assembler at PTR must have figured nobody would ever notice.  He/she was wrong and I was disappointed that they had installed the screws with an undersized blade screw driver and tore up the slots.

Once I removed the tower, I just inserted three #10 washers between each of the screws so the aluminum end cap and the sheet metal assembly would all come back together nice and snug.  If I wanted to take the time, which I didn’t have, I should have found some of the correct size button head socket screws and replaced the beat up countersunk originals.  So, what I had looked like this and the screws were a bear to get in (Yes, I did use the correct size screw driver to put them back in.)

Putting it Together

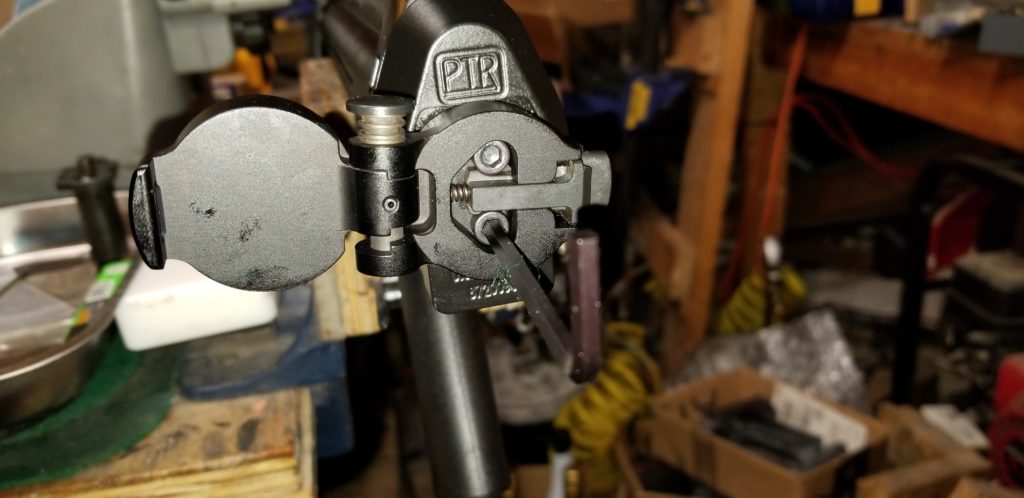
The BTFA install is very simply.  Use the supplied allen wrench to loosen the disc assembly that is the threaded plug that goes into the receiver.  Do not remove them all the way – you just want to loosen it up so you can screw in all the thread and adjust the folder to the direction you want.  I wanted the stock to swing to the left to lock out of the way of the ejection port.  You then tighten down the allen screws back down.

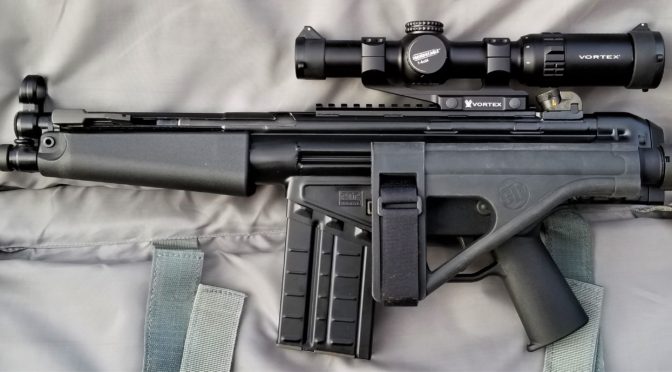
I installed an SB PDW tube and an SB SOB (love that acronym) brace.  Now, to install the tube, I reused the PDWR’s end plate to and a new castle nut that came with the tube.

To install the buffer brace on the tube, I spray silicone on the tube so it can slide on way easier plus it makes it easier to true up the brace if it needs to move a little bit one way or the other.

One comment about the end result, it is a solid folder but the combination of tube and folder is long.  I will investigate other options and post the results in the future.

The Handguard

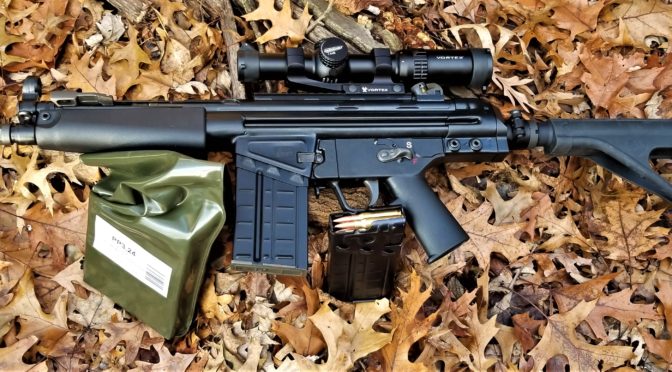
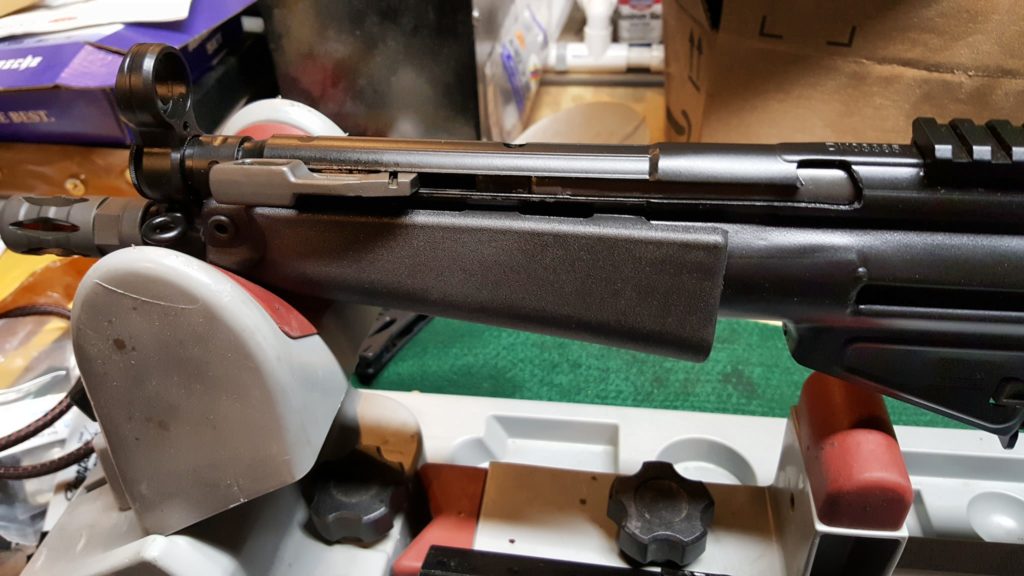
Now, in terms of the handguard, I thought I was going to use the original PTR model you see in the photos above.  It’s a little small left-to right in my hands so I actually wound up changing to a US made wide tropical forearm.  It’s a tad looser than I would care for and will post updates about that later.  I may stick with the existing wide tropical unit or move to a DTAC like I have on my POF-5.

12/17/18 Update:  I’ve now tried three or four models of MP5 handguard and they all wiggle.  I’m either going back to the PTR unit or a DTAC.  The DTAC handguard on my POF-5 has been solid as a rock.

Next up is the optic.


If you find this post useful, please share the link on Facebook, with your friends, etc. Your support is much appreciated and if you have any feedback, please email me at in**@*********ps.com. Please note that for links to other websites, we are only paid if there is an affiliate program such as Avantlink, Impact, Amazon and eBay and only if you purchase something.


ATF letter stating you can build an AR pistol from a receiver transferred as such and never assembled as a rifle

Okay, I posted a couple of ATF letters and a guy sent me a message asking if I had the letter specifying that an AR pistol can be built from an AR receiver that was transferred as a receiver and never assembled as a rifle.  It just so happens I did save that one back when I built a couple of AR pistols a few years back.  I like to have the letters of anything someone may ask about and keep them in my case with the weapon when I take it shooting.  At any rate, here is the ATF letter in case anyone else needs it:

Please note that I am not a lawyer and this should not be construed as legal advice.


If you find this post useful, please share the link on Facebook, with your friends, etc. Your support is much appreciated and if you have any feedback, please email me at in**@*********ps.com. Please note that for links to other websites, we are only paid if there is an affiliate program such as Avantlink, Impact, Amazon and eBay and only if you purchase something.


How to remove the Zastava M92 PAP Pistol’s Factory Thread Cover

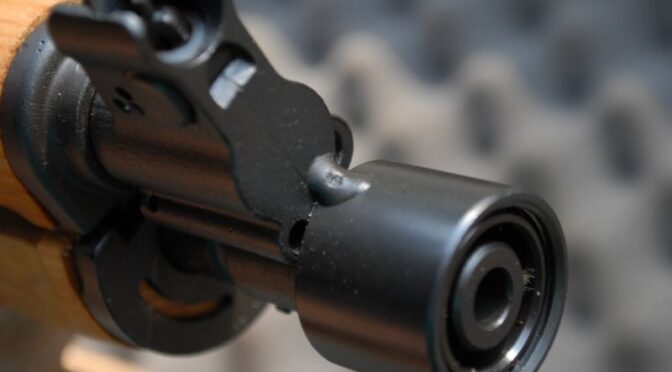
A few folks have asked how to remove the factory installed thread protector from their M92 PAP pistols.  Zastava does actually thread the pistols and it’s a 26mm diameter x 1.5mm pitch left hand thread (M27x1.5LH is the short cut way to write it) under that cover. These things were installed for importation, ruin the look of the pistol and, fortunately, are very easy to remove if you take your time.

Now I used a Dremel with a cut off wheel.  You could just as easily use a hand file.  For me, I used the thread cover to protect the threads and did not worry if it got scratched.  Cut a little and try to turn the thread cover.  It will turn clockwise to be removed once the weld is broken.  Note, if you decide to use a Dremel and are new to them, practice with your cut off wheel on some scrap metal before doing your pistol.  They can hop around unless you know how to hold and maneuver them.

I prefer cordless Dremels with removable batteries so I can swap them at any time but any rotary tool will work. You’ll need at least an abrasive cutting disc to cut through the small spot weld.
I couldn’t take the photo and cut but you go slow with the cutting disc and only remove enough weld for the thread protector to freely turn.
Not a very clear photo but you can see the remaining weld on the thread protector.
Here’s the remaining weld on the front block. Note, don’t toss your thread protector as you can use it to safeguard your threads as you grind down the remaining weld.


Next, I put the thread protector back on and used a stone wheel in the Dremel to clean up the remains of the weld on the gas block.  Again, if you are new, practice first.  The stone wheel may look simple but they can make a mess real fast if you lose control.  I’ve been using Dremels since 1985 – trust me when I say you should practice first.  Also, I like Dremels and have used them for years.  They have tons of corded and cordless models plus there are other rotary tools on the market if you expect to have very limited use and want to save money.

I used a small stone and light pressure to remove the rest of the weld. Putting the thread protector back on will keep you from damaging the threads. Grinding wheels like to hop around if you aren’t very careful.
While the steel is shiny and clean, use your favorite cold blue to stain the steel. I like Brownell’s Oxpho-Blue liquid.
Burnish it with steel wool, repeat and apply oil.
Done. By the way, you can get the M92 muzzle break detent assembly from CNC Warrior – they actually make them.
Here it is again with better lighting,

I hope this helps you out!


If you find this post useful, please share the link on Facebook, with your friends, etc. Your support is much appreciated and if you have any feedback, please email me at in**@*********ps.com. Please note that for links to other websites, we are only paid if there is an affiliate program such as Avantlink, Impact, Amazon and eBay and only if you purchase something.


ATF Opinion Letter on AR Pistols – Some Key Considerations

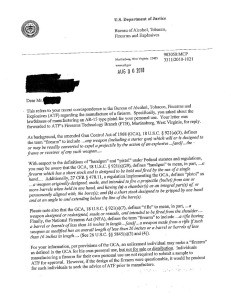
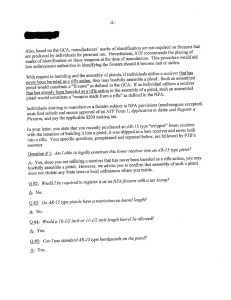
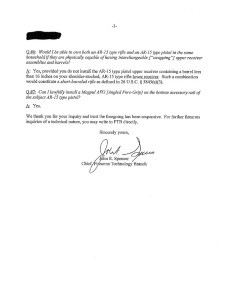
In this ATF letter, the author asked the ATF’s opinion on a number of great AR pistol related questions.  I am paraphrasing a few points I found important to help folks doing full text searches for opinions:

1) An AR lower receiver is neither pistol nor rifle until it is built the first time.  If you want to make a pistol, a lower receiver must *never* have been built in a rifle configuration.

2) AR pistols do not have a barrel length restriction.

3) AR handguards can be used on an AR pistol

4) An AR rifle and pistol can be in the same household — note, and this is a personal comment, what got a guy in trouble years ago was that he had only an AR rifle and a pistol upper with no lower to mount it on.  I don’t remember all of the details but the main thing here is that you never want it to look like the only reason you have a pistol/SBR upper is to put in on your AR that is legally classified as a rifle.

5)  Magpul angled fore grips (AFGs) are permissible on the bottom accessory/picatinny rail.

AR_Pistol_1AR_Pistol_2AR_Pistol_3


I recommend people print and keep copies of letters just in case they need to show someone that some aspect of a weapon was “approved” by the ATF at some point.  Just bear in mind that ATF letters are not absolutes but it helps to have them handy if asked.  A state or local government may have their own more restrictive regulations as well so this may not mean AFGs are legal for everyone everywhere.

Legal Disclaimer:  I am not an attorney and am not giving legal advice.  I am just passing this information along and it is up to you to determine what you can/can’t do.

Izzy’s Wild C39 Micro SBR With Our Orca Handguard

This is Izzy’s wild SBR based on a C39 Micro with our Orca handguard:

247032_323823147790846_5872452074749683117_n

1958268_323823167790844_1665054343734233584_n

10351594_323823184457509_2527195309386070490_n

Here are the details from Izzy:

I put a 7 slot magpul one piece rail section, drilled and tapped on the actual [handguard and the] rail is very strong I may add. The micro was something in my head for awhile so when I saw this 6.5 in with a billet receiver I was sold. Not too much was added to make it what it is.
My own design charging handle.
VZ 58 side folding stock drilled and pinned then use para cord for the extension
NRM Defense did the cerakote in Tungsten with all the controls in black
SLR muzzle brake
Red star adjustable trigger assembly
Magpul grip and mags with a Bravo Company vertical fore grip

The web page for our C39 Micro Orca handguard is:  http://shop.roninsgrips.com/Custom-Century-C39-Handguard-Our-Orca-Model-C39MicroOrcaHandguard.htm


If you find this post useful, please share the link on Facebook, with your friends, etc. Your support is much appreciated and if you have any feedback, please email me at in**@*********ps.com. Please note that for links to other websites, we are only paid if there is an affiliate program such as Avantlink, Impact, Amazon and eBay and only if you purchase something.