Tag Archives: Grip

Why Some Grips Will Not Fit Yugo or Zastava AK Rifles

I am often asked if some model of grip will fit a Yugo surplus or current day commercial Zastava rifle and the answer is a bit of an “it depends”.  Let me tell you why.

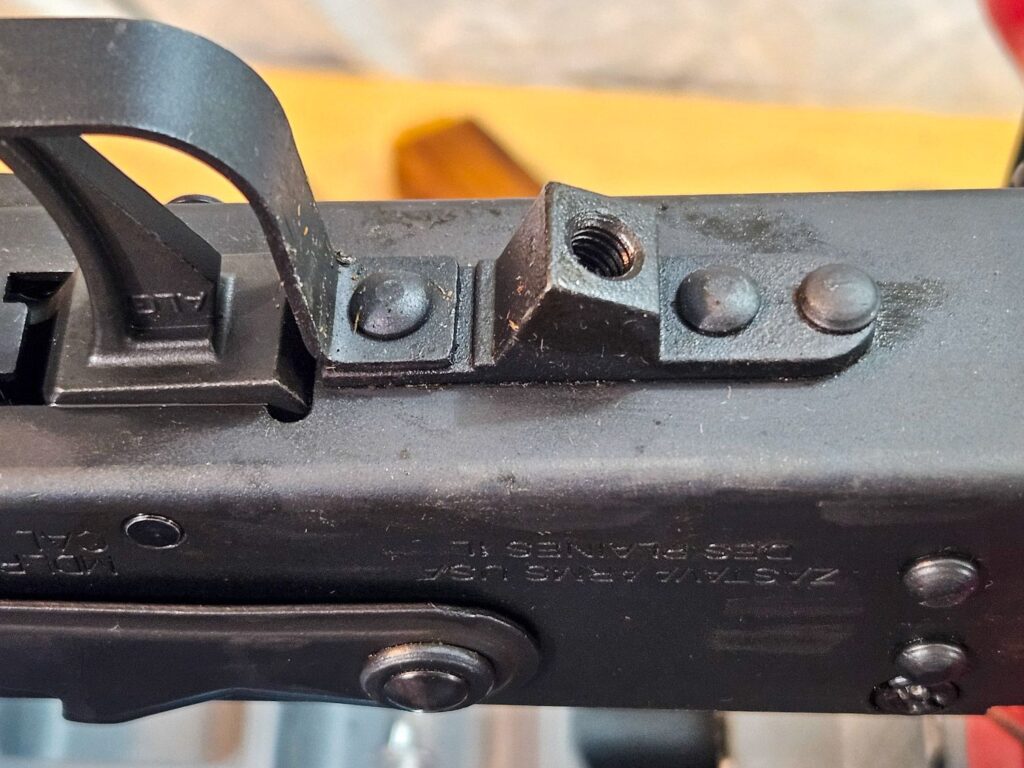
When Zastava was still located in the former country of Yugoslavia, they did a number of modifications to the base Soviet AK-47 design.  Relevant to this post whas their decision to use a retained grip nut that is riveted to the receiver.  This is different from AKMs that have a removable forged grip nut that drops down through a square hole between the trigger guard and the rear end of the receiver.

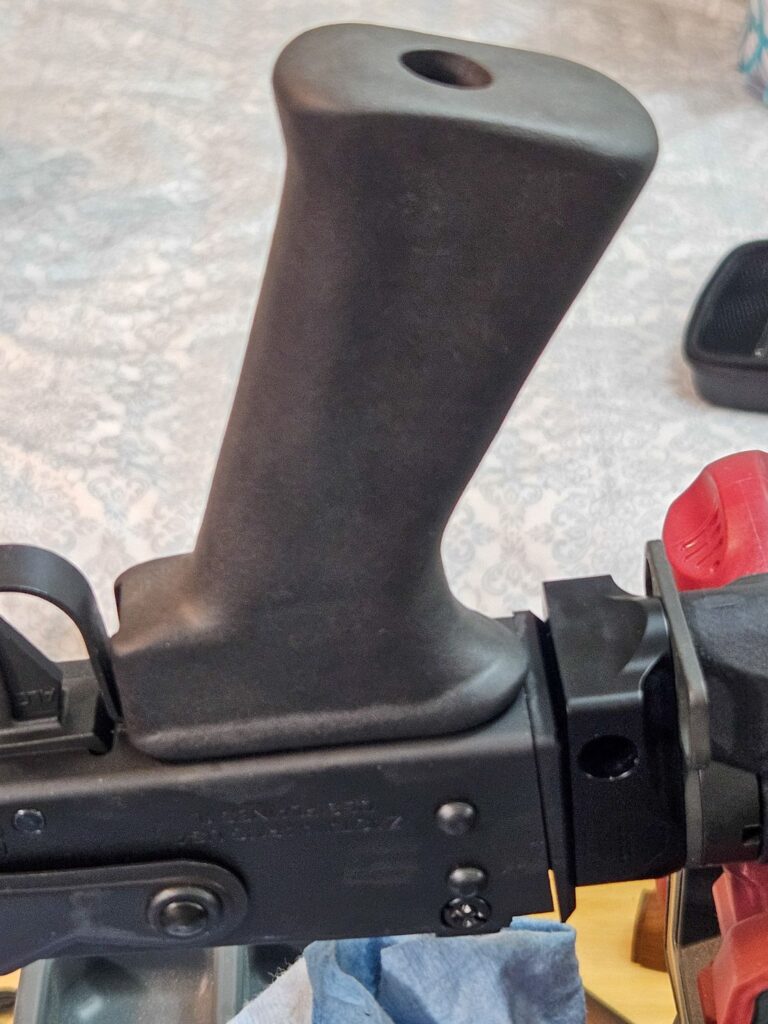
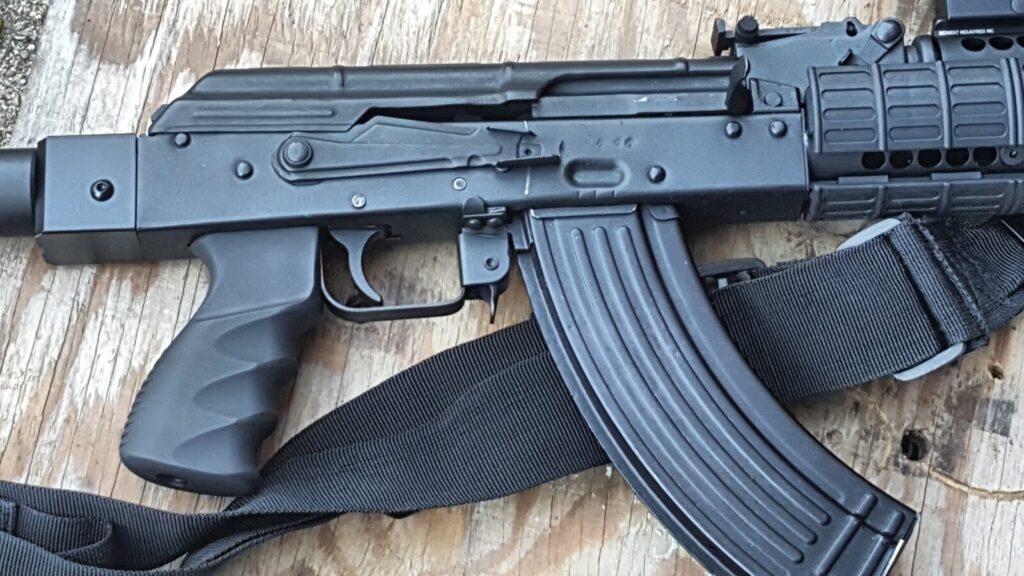
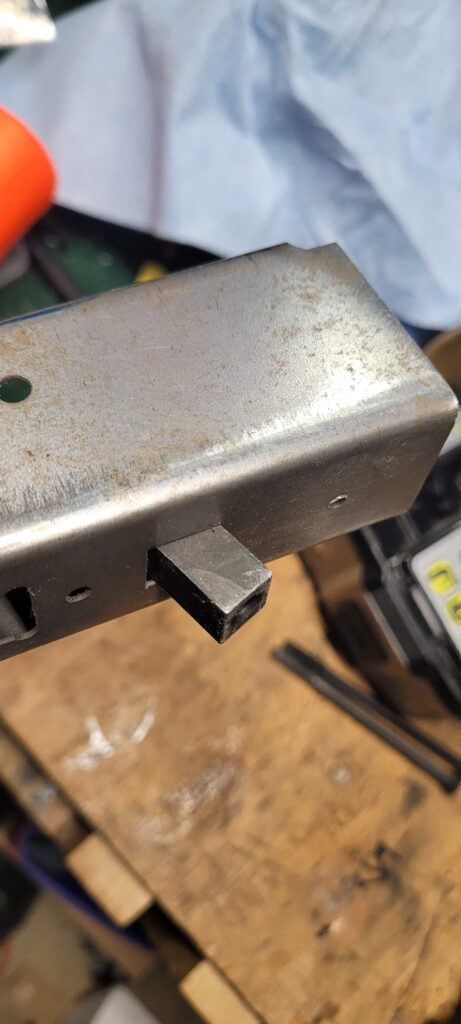
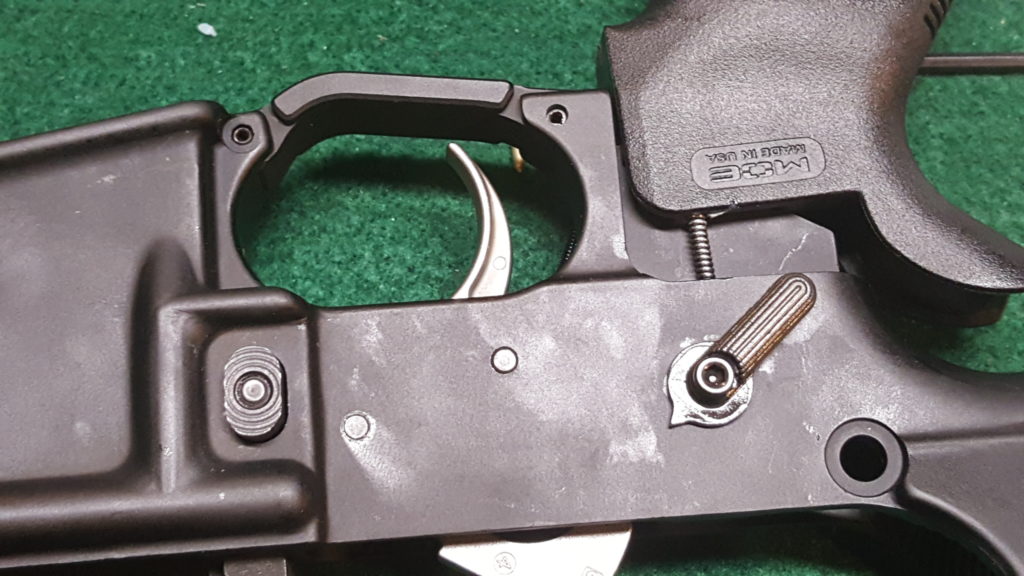
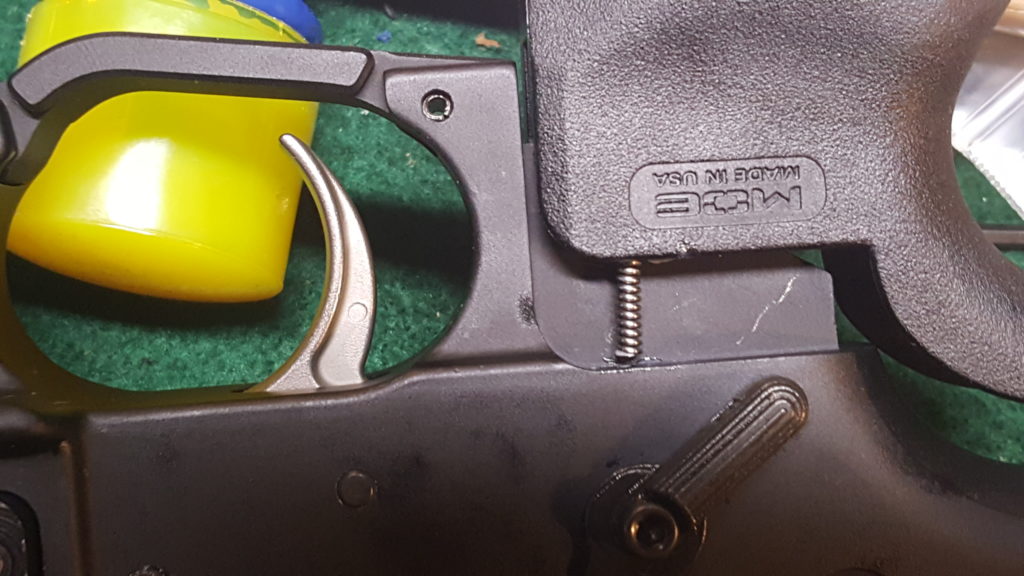
All AK-based rifle designs that I know of have this grip nut “strap” that is riveted in place.  Note how the trigger guard rides higher than a normal AKs and a longer rivet is used to pass through the trigger guard, strap and the receiver itself.

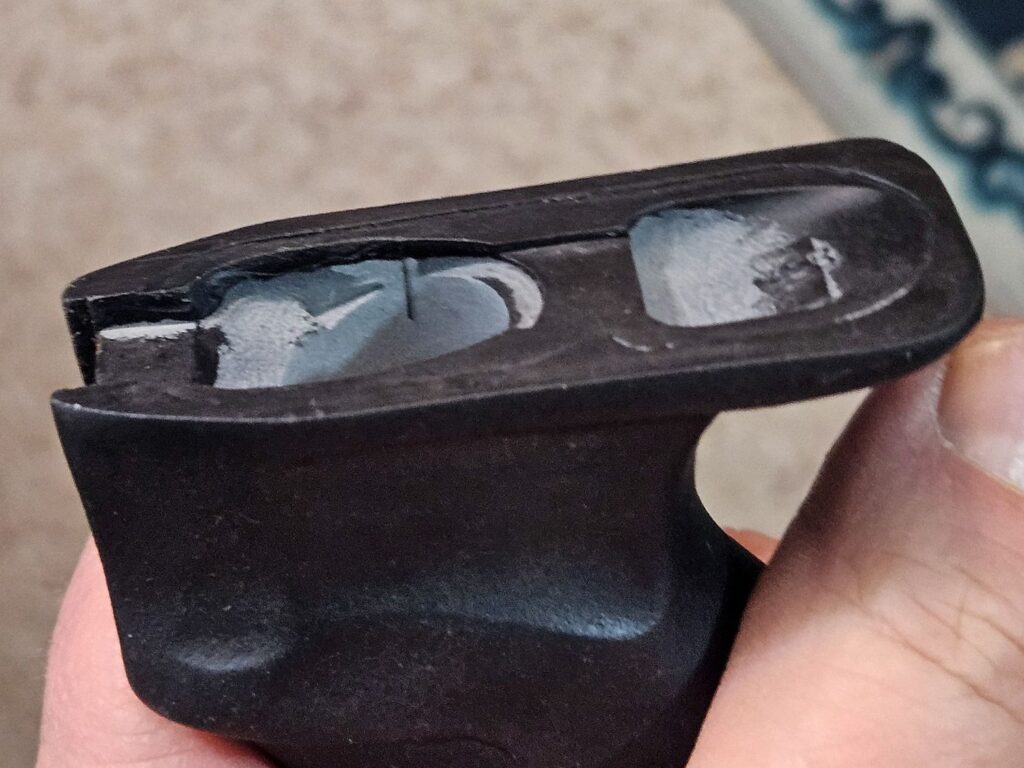
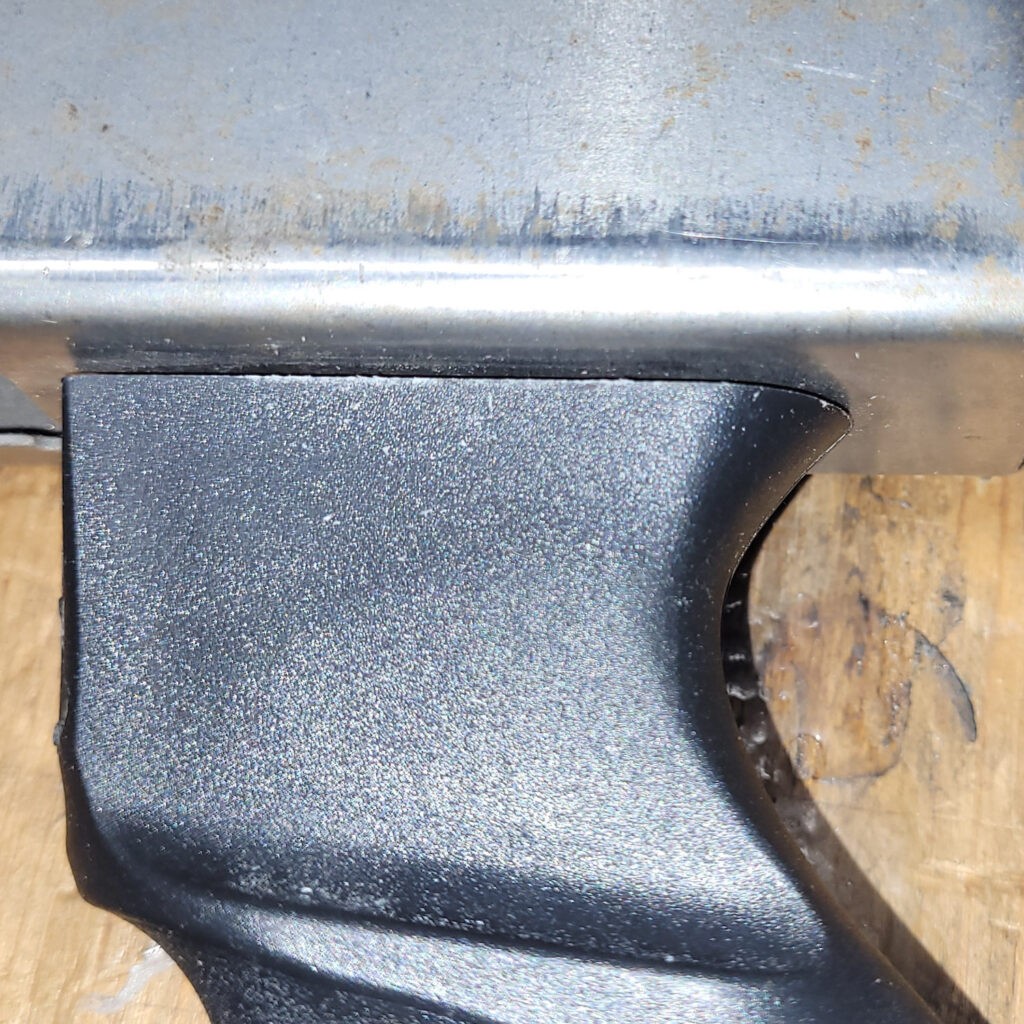
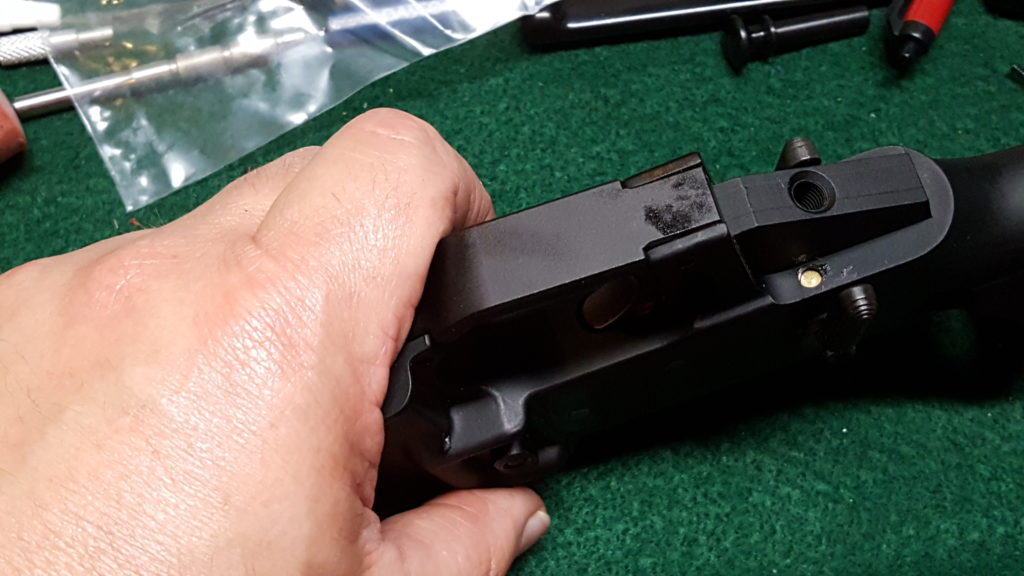
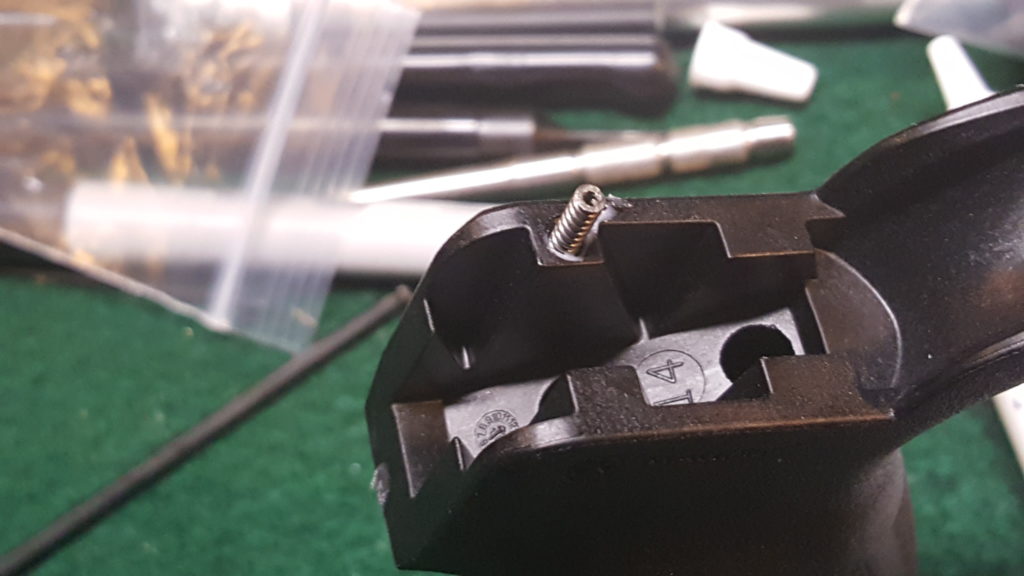
When it comes to grips, that strap and its rivets are the problems.  If you have a grip with very limited space in the top, it will not fit – at least not without modification.  The AK-12 grip has a tight backstrap that goes along the bottom of the receiver and I don’t think it could even be made to fit.

Notice the extra rivets sticking up behind the round grip screw hole.
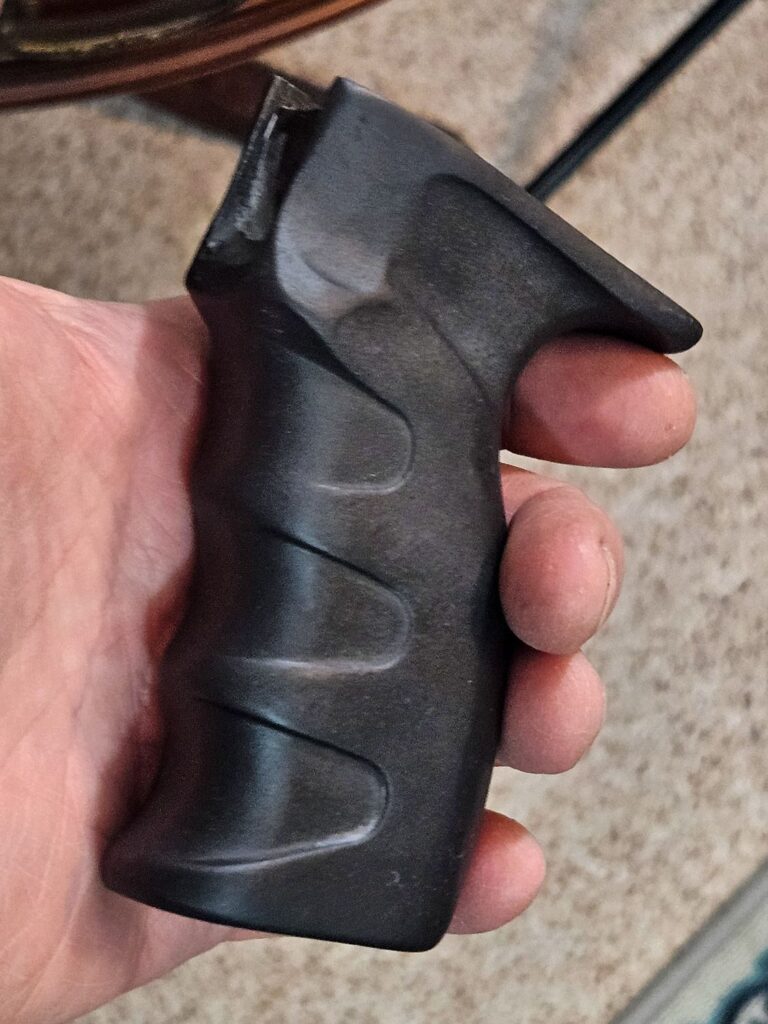
This is our version of a Russian AK-12 grip.  It’s very comfortable and a grip I like a great deal.
The middle of the top and some of the back aren’t going to clear the grip nut strap and rivets.  I could carve/Dremel the middle out but there is very little material to work with in the back.  Might it work?  Maybe but I didn’t have time to give it serious try.

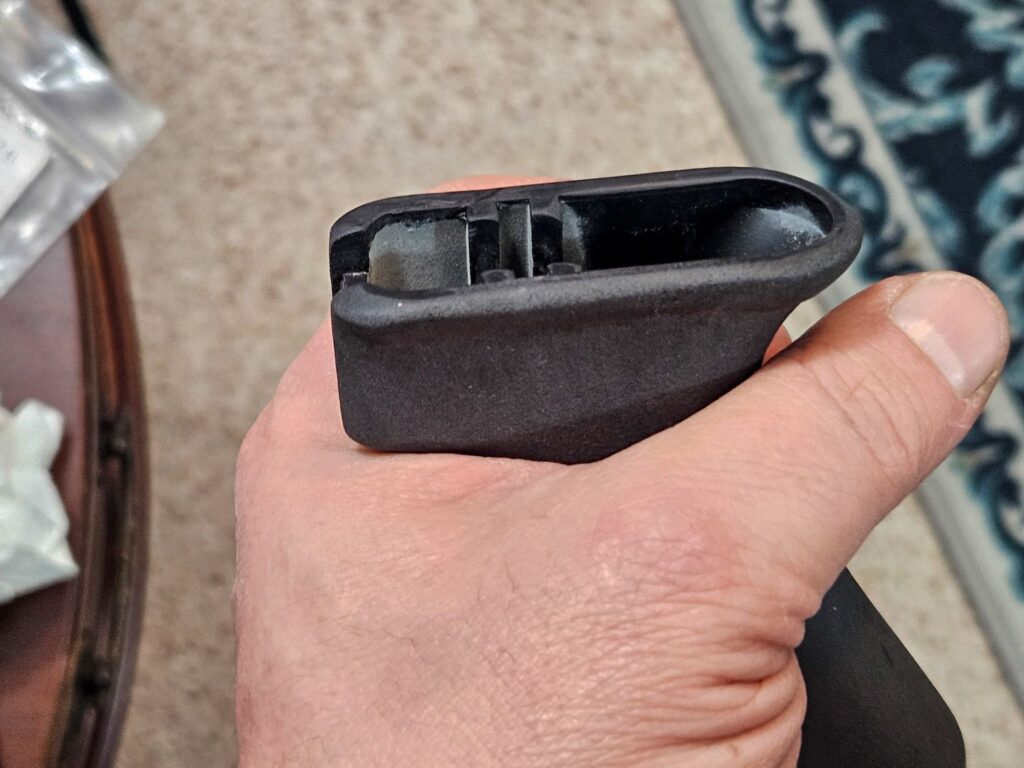
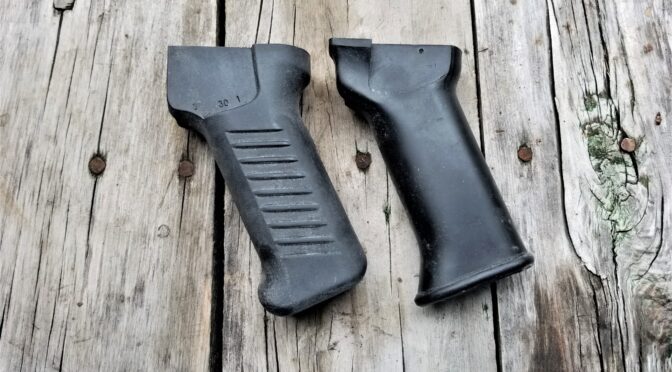
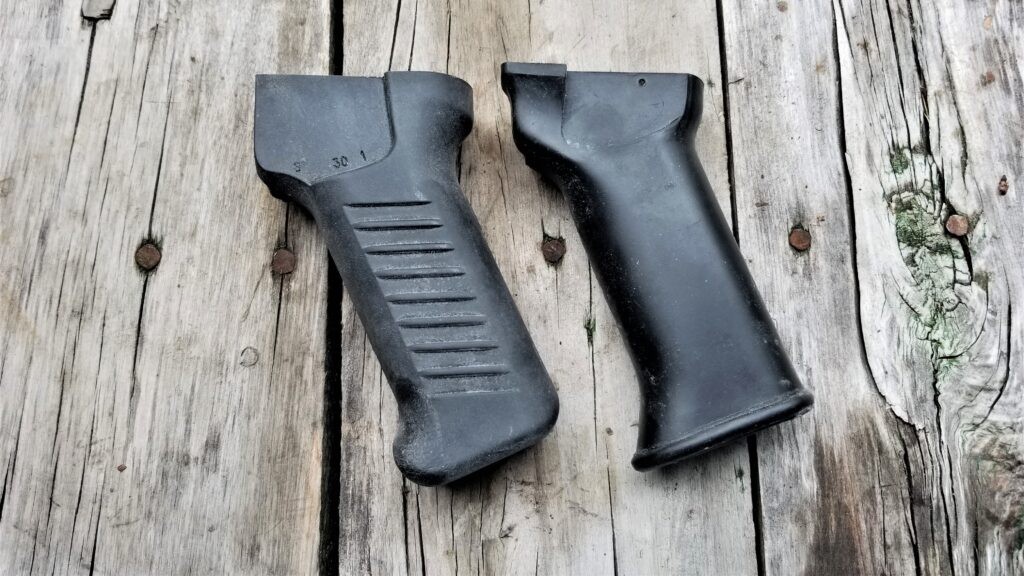
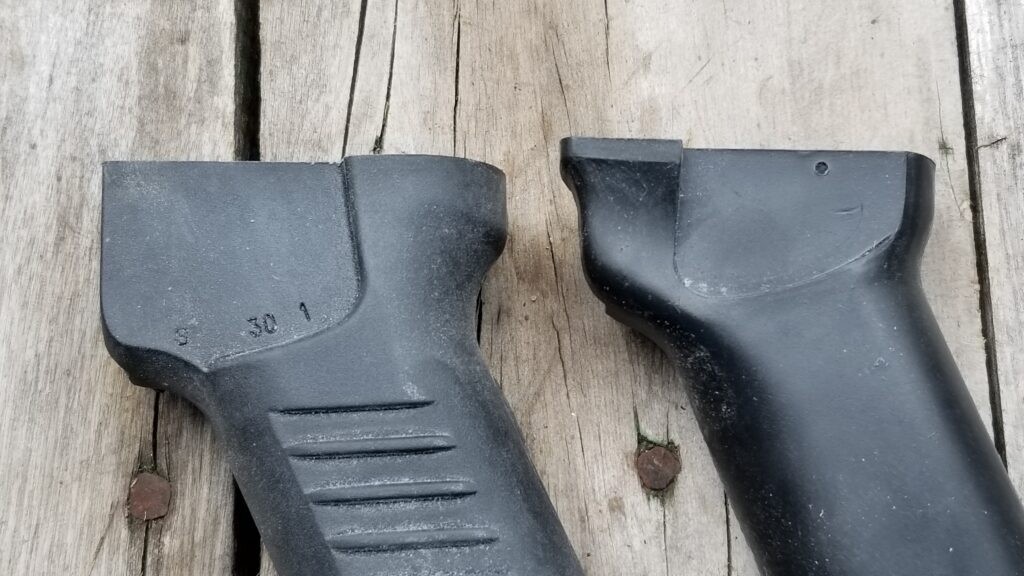
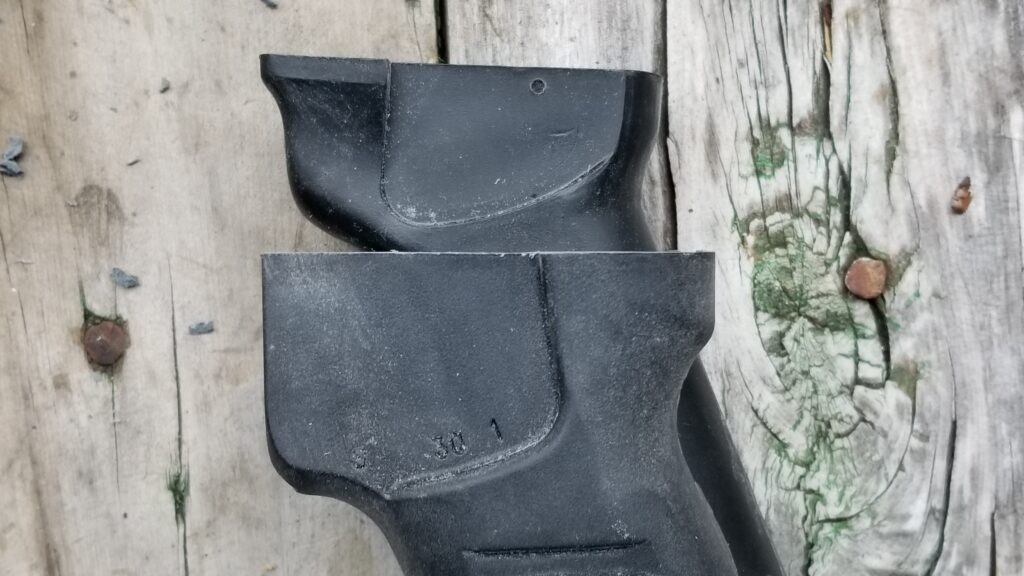
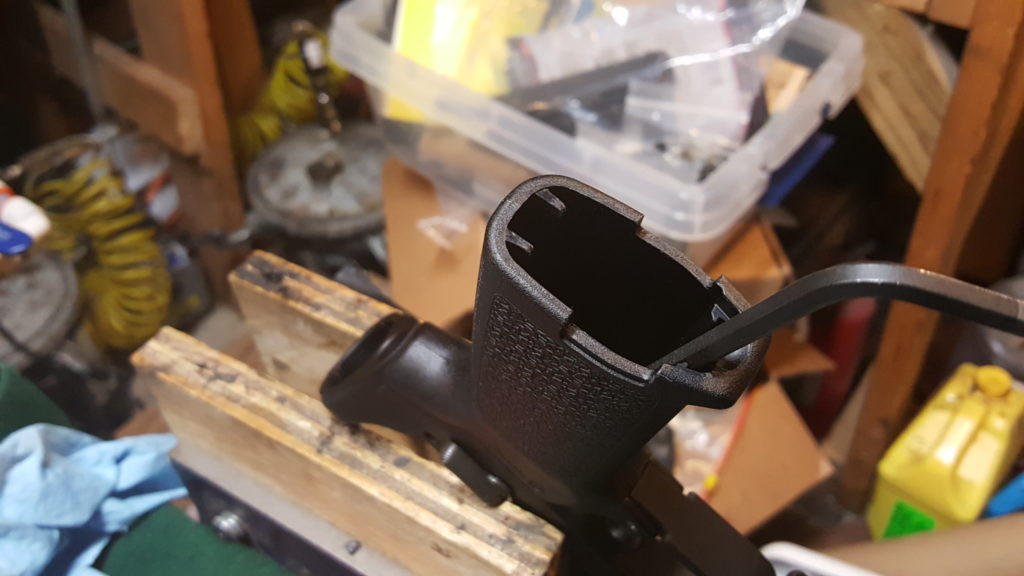
If you look at the top of a traditional Zastava black polymer grip, you’ll notice the top is wide open.  It has plenty of room to accomodate the grip strap.  So, a grip like a Russian Molot will work as well.

The Molot’s top is wide open.
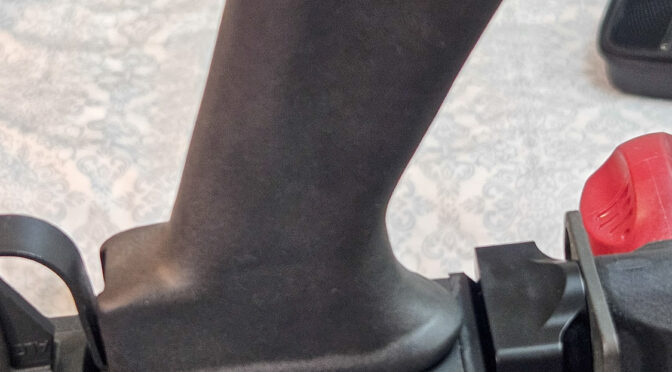
Due to the wide open top, a Molot grip can readily go on a Zastava.

Summary

Grips with shallow tight tops will not fit on a Zastava rifle, unless modificatios are made.  Examples of grips like this are Hungarian AMDs, IMI Galils, Polish Beryl eronomically styled grips, and Russian AK-12s.

What will fit are grips with big top mouths such as many traditional AKMs (Romanian and Egyptian), plus newer grips like the Bulgarian ARMs, and Russian Molots.

I hope this helps.


Note, I have to buy all of my parts – nothing here was paid for by sponsors, etc. I do make a small amount if you click on an ad and buy something but that is it. You’re getting my real opinion on stuff.

If you find this post useful, please share the link on Facebook, with your friends, etc. Your support is much appreciated and if you have any feedback, please email me at in**@ro*********.com. Please note that for links to other websites, I may be paid via an affiliate program such as Avantlink, Impact, Amazon and eBay.


Fitting a Ronin’s Grips Beryl Grip To Your Rifle

Some time back in 2017 or 2018, I bought some original Beryl second generation grips – the larger one with finger grip cut outs. I then made a couple of molds based on the originals. I thought they would be popular right away, but I’d sell one here and there and then Arms of America started importing Beryls with the AKM-looking grip. Guys started buying my grip and reports started coming back to me this year that my grip was loose on their Beryl rifles. This really confused me as my mold was cast from an original. At first I thought it was occasional issues with the customer or the rifle but then more reports came back and I had to dig in.

A customer, Phillip, sent me a ton of photos and links to posts of guys sharing how they fit my grips to their rifles. Whoa! I had no idea! Thanks to Phillip’s help, I was able to figure out what was going on and write this post.

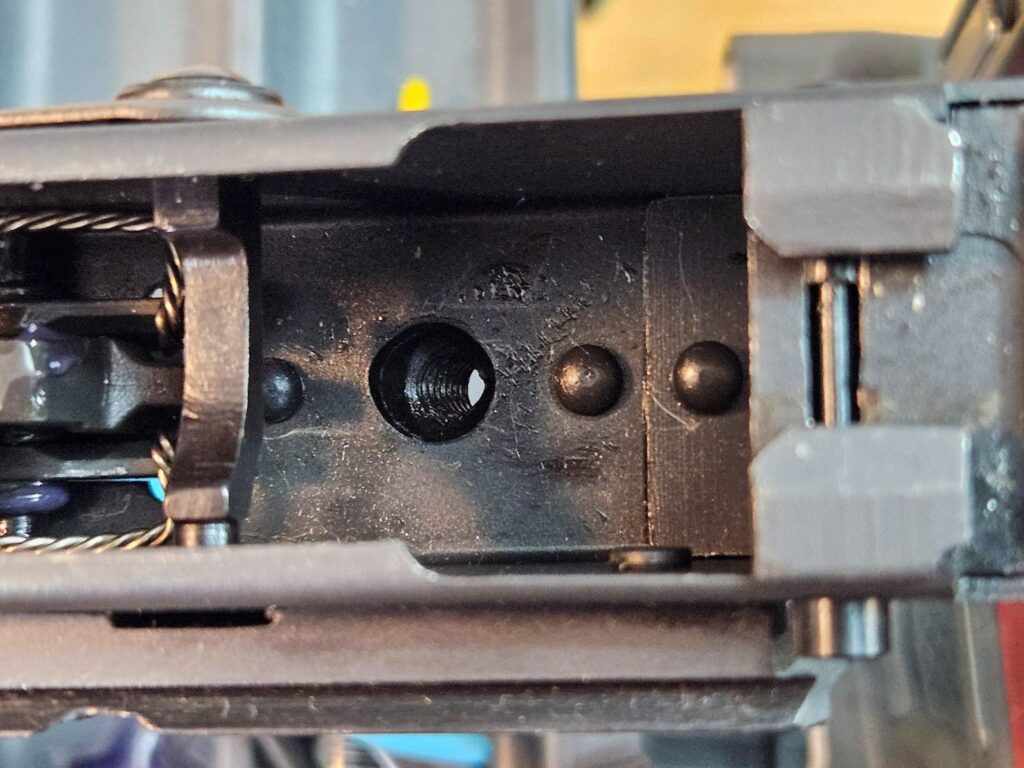
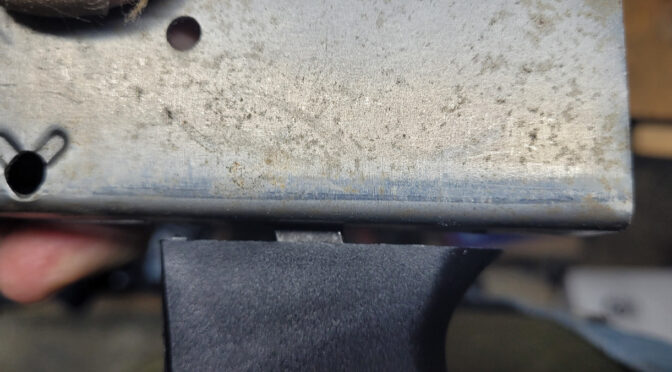
What is keeping the grip from sitting all the way is the grip nut – the small square forging that the pistol grip screw threads into for securing the grip against the receiver and trigger guard. It’s just a tad too long and the inside top of the grip is hitting it.

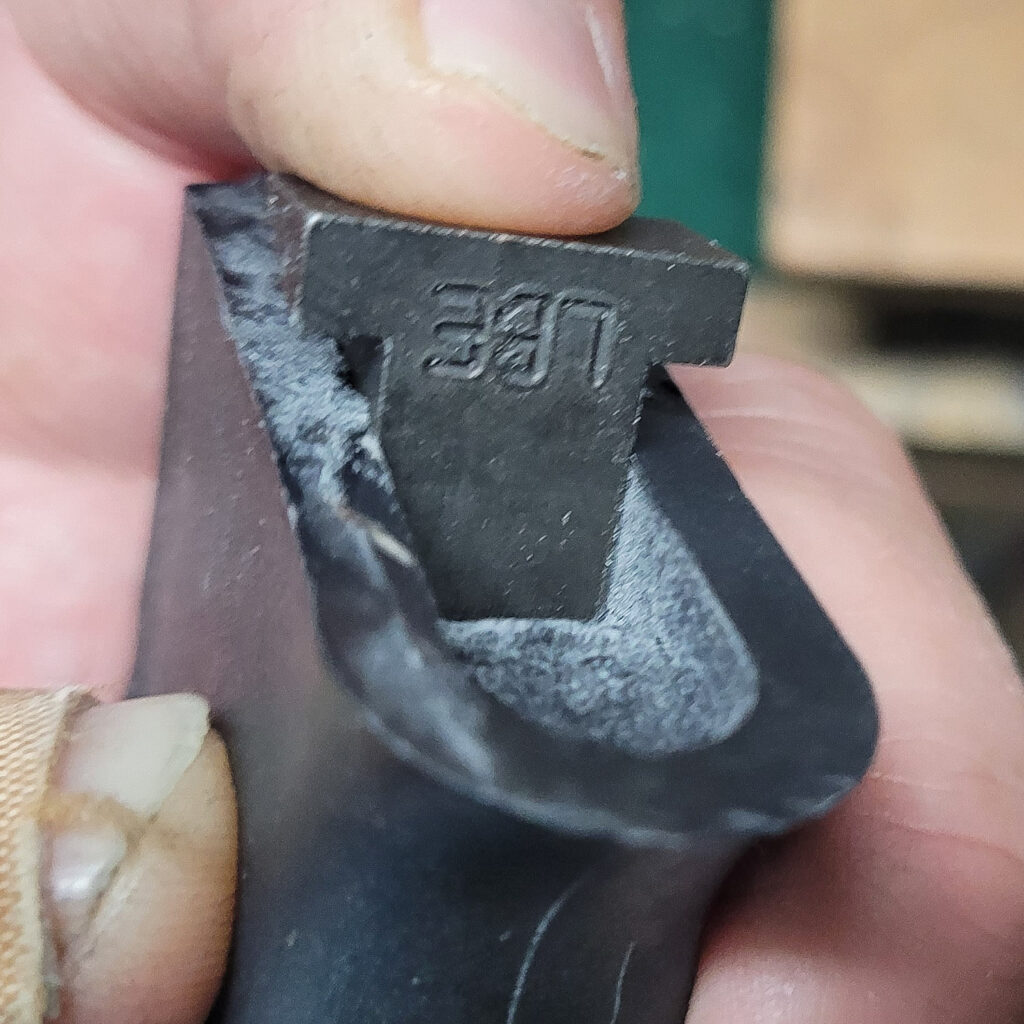
The grip nut is hitting the inside top of the grip. That inside top shelf was in the original grip. Maybe they had a grip reinforcement plate or shorter grip nuts when using this style of grip – I’m not sure.
Not all grip nuts are too long – this is a Romy G kit that I built way, way back sometime between 2004 and 2006. I know I did not need to trim the nut. This is what threw me off when guys said they weren’t fitting. In hindsight, different countries and makers of grip nuts having different lengths isn’t surprising – you often see a lot of differing parts tolerances across AK makers and models.

Trimming the Nut

At this point, I can’t change the mold so you need to make any adjustments on your end. You either need to carve open the inside top of the grip using a bur, sanding tip or even a small 1-2″ saw blade. That seems like a lot of work – the easiest seems to be to file or grind the grip nut’s bottom so it is a tad shorter.

If you want to save your original grip nut, you can buy another and trim it if you want. Any AKM-style grip nut ought to work. For the screw though, use the one we supply with the grip.

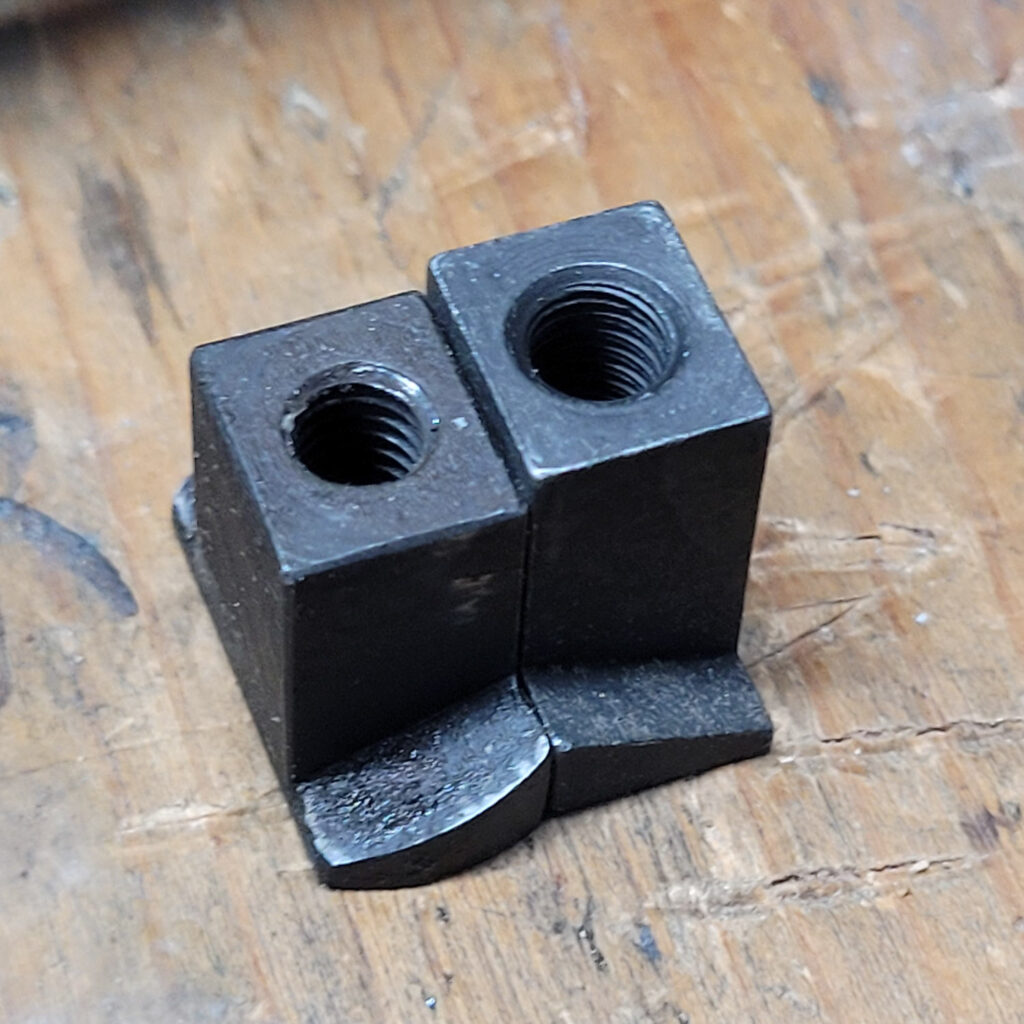
The left is a Romanian MD.63 nut and the right is a new slightly taller LBE Unlimited nut, The LBE is just a tad taller but either one would need to be trimmed to sit flush. Regardless, it is the part of the grip nut that is face up in this photo that you need to shorten via a file, sanding belt, end mill or whatever. Normally, this flat part is facing downwards the the grip screw slides into it.
It’s that bottom edge that needs to be trimmed.

To fit it, trim off a bit and test over and over. You don’t need to do it all at once. If the threads seem off at some point, run the grip screw in from the other direction to clear the threads.

Trim the bottom of the grip nut until the grip sits nice and flush against the receiver.

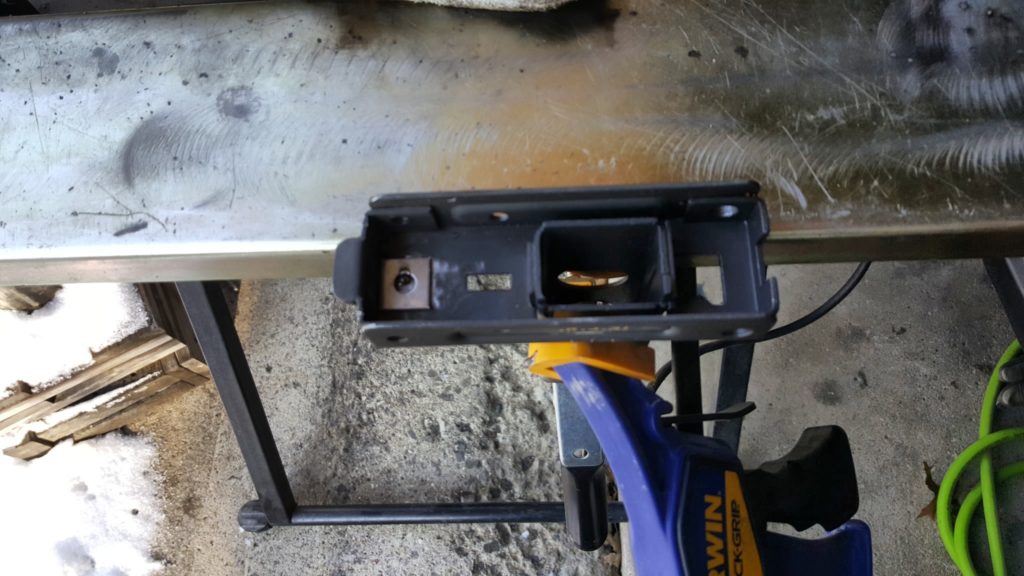
By the way, if you are wondering what the grip is against, it is an old AK-Builder bent flat where I messed up the top rails years ago and now use it for mocking things up.

Summary

I didn’t know the grip nut length was going to be a problem and don’t have a way to change the molds at this point. What I’d recommend is either trimming your nut or buying a replacement and trimming it as needed.

I hope this helps you out.


If you find this post useful, please share the link on Facebook, with your friends, etc. Your support is much appreciated and if you have any feedback, please email me at in**@ro*********.com. Please note that for links to other websites, I may be paid via an affiliate program such as Avantlink, Impact, Amazon and eBay.


Will A Bulgy ARM9 Grip Fit An IMI Galil? The Notch Is Definitely Different

A recurring question I get is if a Bulgarian ARM-9 grip can be used on an IMI Galil rifle. Not easily is my answer and I took a bunch of photos so you can decide for yourself. You would need to add black epoxy to the inside back of the ARM in order to Dremel or mill it open further to duplicate the swing of the Galil’s lever – at least that’s how it looks to me because I don’t own an IMI Galil to experiment with.

So, here are some photos so you can see what I mean:

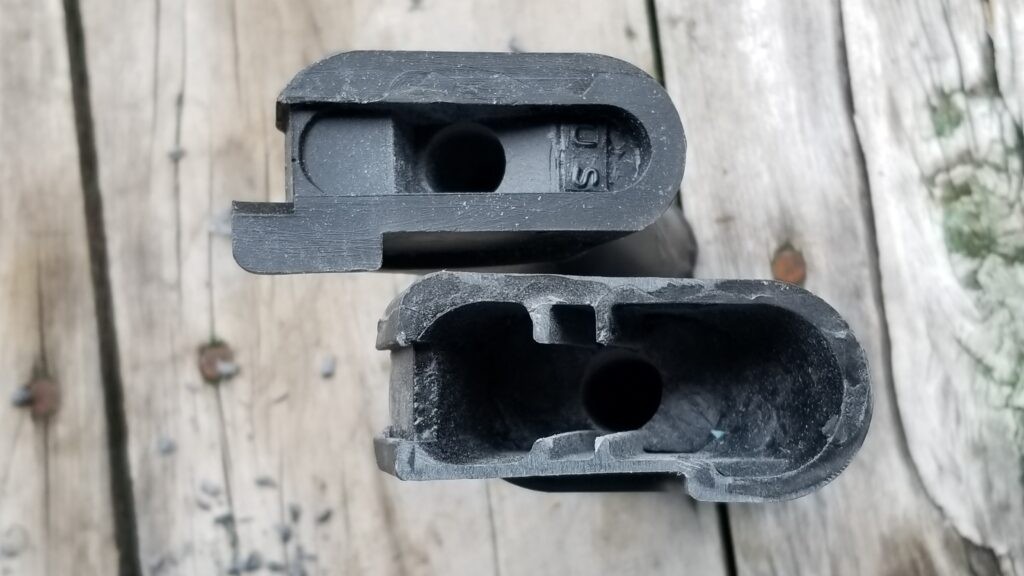
Note the difference in the shape of the ARM-9 grip’s notch on the left vs. the IMI Galil’s notch on the right
Here are the notches even closer.
Here’s the ARM sitting on top of the Galil for another perspective.
Here’s where you can see that the ARM-9’s original wall design is hollow behind the notch. It’s not an impossible change – if you were to abrasive blast the inside of the ARM grip and then use wax stripper, you could then fill that back in with black epoxy. It wouldn’t be an exact color match by any means.

Summary

So there you have it. They are different and definitely not a simple swap with out doing some epoxy work and then maybe a top coat of some finish if you want the colors to match. I hope this helps you out as you think through your options.


If you find this post useful, please share the link on Facebook, with your friends, etc. Your support is much appreciated and if you have any feedback, please email me at in**@ro*********.com. Please note that for links to other websites, I may be paid via an affiliate program such as Avantlink, Impact, Amazon and eBay.


Why Does the Color of Grips and Handguards From Ronin’s Grips Fade And What To Do About It?

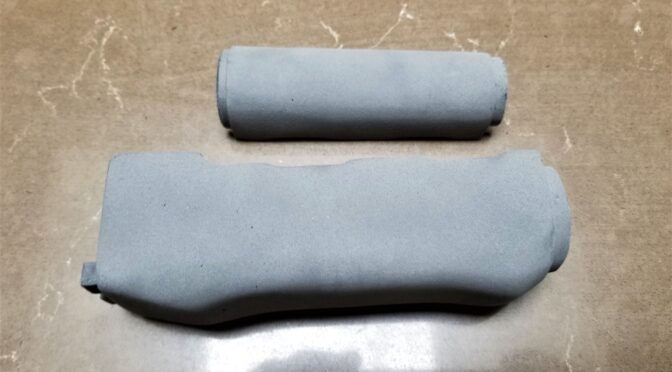
I’ve had guys ask why the color of my grips or handguards seem to fade with time. The short answer is that it has to do with the liquid wax finish oxidizing and not the plastic – the color is actually in the plastic. You see, we sand every grip and handguard to get rid of mold imperfections and then we blast each with abrasive media (currently it’s Black Beauty or Black Magic depending in the store I go to) and that turns the plastic almost white as you can see in the photo above. We blast the surface to create a very sure grip when you grab hold – your hand doesn’t slide easily. The polished finish we used to do resulted in a surface that is slick when wet due to sweat, water, blood, etc.

So, the blasting abrades the surface and messes up the colors being reflected back to your eyes. To solve this problem, I tried a ton of different oils and waxes and the best was Atsko Sno-Seal. It really brought out the color and it did not fade – or at least I never saw it fade. The problem is that Sno-Seal is a paste wax and I have carpal tunnel. Rubbing it into grips and handguards every day over and over was killing by wrists so I had to stop it.

This pushed me back to the drawing board and this time I looked at liquid waxes. Some of them really smelled as the liquids evaporated and the best option I could find find was the various butcher’s block finishes that combine mineral oil and a wax – often a bee’s wax. This stuff goes on like a dream but does fade with time. There’s nothing wrong with the color – it’s just the finish oxidizing and drying out.

What to do about the fading?

As mentioned above, the finish I apply will fade. The good news is that the owner with a number of options and I’ll shorten it down to the four I recommend:

  1. Buy Sno-Seal and apply it. This stuff is awesome for boots and I actually had it for my boots when I tested it. It’s my #1 recommendation and what I do for furniture I make for myself.
  2. Shoe polish holds up really well and you can nudge the colors/hues one direction or another depending on the color of the wax. This goes on pretty easy and seems to last. Just buff it well so you don’t get any color on your hand. I’ve had very good luck with Kiwi products.
  3. Any fine wax for boots, leather, wood or preservation ought to work. Just follow the directions. Absolutely do not use super thick floor wax or it will be a disaster as one customer found out.
  4. Put another coat of butcher’s block conditioner on it. Easy to apply but it will not last.
Atsko Sno-Seal is my #1 choice. Kiwi shoe polish works great. Howard’s Butcher Block Conditioner is what I use in production and is also what fades with time.

How to Apply Sno-Seal

My first recommendation to customers is always Sno-Seal. It takes just a little it to polish a grip or handguard plus you can use it to waterproof your boots.

I did this corner at room temperature and you can tell it takes a bit more effort to rub it in and buff it off.

You can either warm it up on your hand and then rub it in or you can use a heat source to warm up the grip or handguard just a bit – meaning warm to the touch not hot – and it goes on even easier. When I did the M72 hanguard set shown, for example, it was warm after about a minute and 20 seconds in our microwave. You rub the wax in and buff it off – done.

Hello Mr. Microwave! You can optionally warm your piece of furniture up with a microwave, oven turned on at 150F or less, hair dryer, etc. You want it to be warm, not hot. If you can’t pick it up, it’s way too hot. The plastic will not begin to deflect until around 250F and there’s no way you can pick that up hence the rule of thumb. [Click here if you want to read about a heat test we did]
So here’s the finished handguard set after I buffed off the remaining wax.

Again, if you ask me what I do for my own grips and handguards, it’s Sno-Seal and I rarely use extra heat – usually just I just warm it up with my hands and rub it in. Sno-Seal lasts the best of anything I have found.

I hope this helps you out.


If you find this post useful, please share the link on Facebook, with your friends, etc. Your support is much appreciated and if you have any feedback, please email me at in**@ro*********.com. Please note that for links to other websites, I may be paid via an affiliate program such as Avantlink, Impact, Amazon and eBay.


Uzi Part 4 of 7: Preparing the Grip Frame For Semi-Auto Use

At first glance, the Uzi grip frame is intimidating!  There are springs, pins and levers all over the place but it turns out to be surprisingly simple.  Now, I need to tell you something – I read everything I could on the grip frame [Notably the excellent UziTalk post about assembling the frame, Beaker’s great Uzi build write up on NES and Gaboury’s Uzi book] and I kept the spare Uzi’s grip frame fully assembled sitting on the bench for reference.  As you follow the steps, it becomes pretty straight forward actually.


Legal Disclaimer:   I am not a firearms attorney nor do I claim any regulatory expertise and you accept all responsibilities and liabilities for compliance with all federal and local laws that pertain to you.  I sorted out posts on what is required to make the Uzi legal in terms of the grip assembly and it seems to come down to two elements:  1] Mike at NDS received guidance on the McKay receiver that there needed to be a blocking bar for the bolt and the selector lever in the grip frame must be blocked from going to the full auto position [See post #7]  2] The sear needs to either modified for for semi-auto use or replaced with a dedicated semi-auto unit to fully penetrate into the semi-auto receiver.  A full auto sear will not fit in the McKay receiver’s holes and I am using a McKay to be clear.


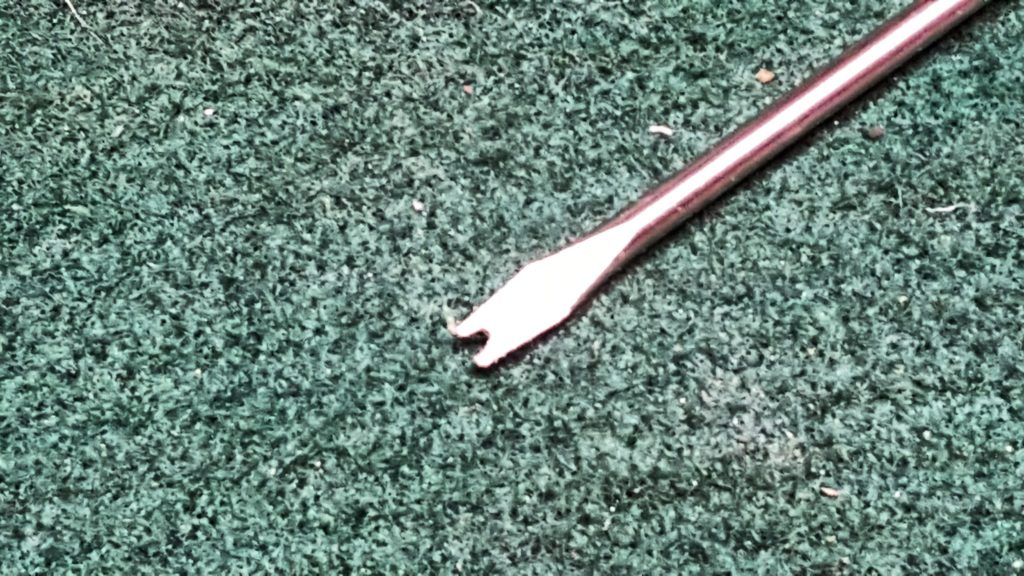
Before you get started, you need to make a quick tool.  Take any small blade screw driver and use a Dremel fiber reinforced cut off wheel to make a notch in it.  Literally, just cut straight in.  You will need this to push down the surprisingly stout legs on the trigger spring that have to pass under some hooks and then under the disconnector.
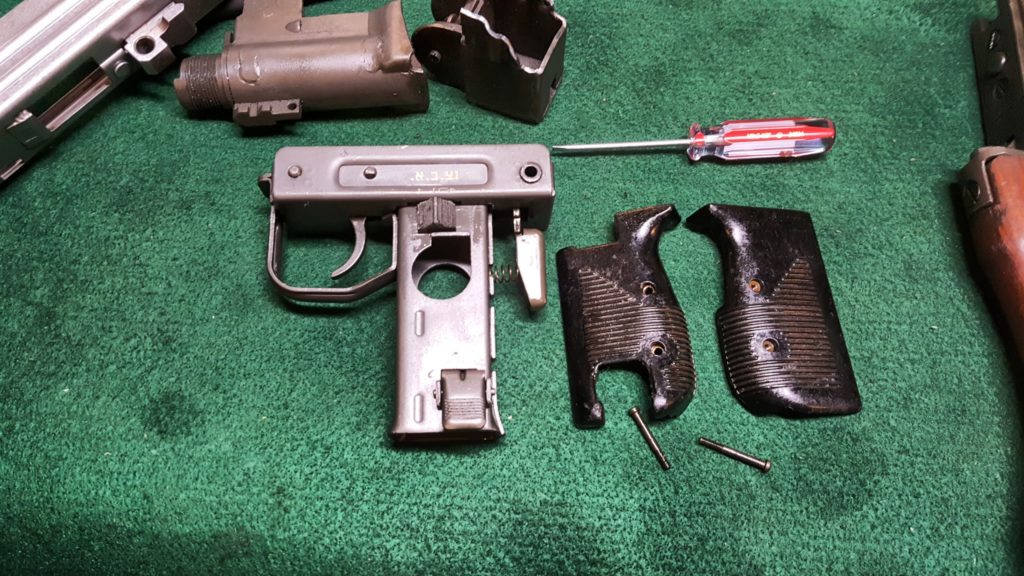
1] Remove the two screws that hold the grip panels in place.  You’ll notice the grip panels are beat up but the parkerized finish and parts are in exceptional shape.  All my internals looked like new.  I am real pleased with the kits Robert RTG sent me.
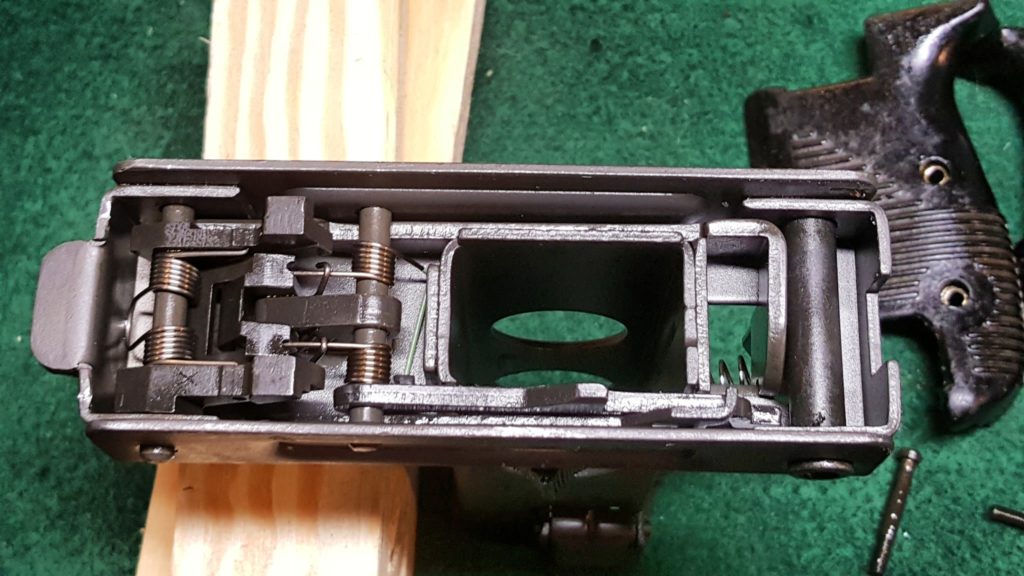
2] Here’s our first peek inside the grip frame.  This crazy looking thing is actually very straight forward.  I was really impressed by how they did the pins – the look like screws but you actually insert the pins and turn them into position to lock everything in place.  It’s really a very well thought out way to do it.
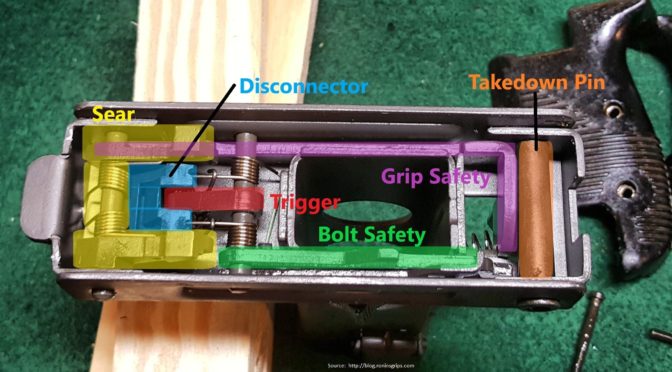
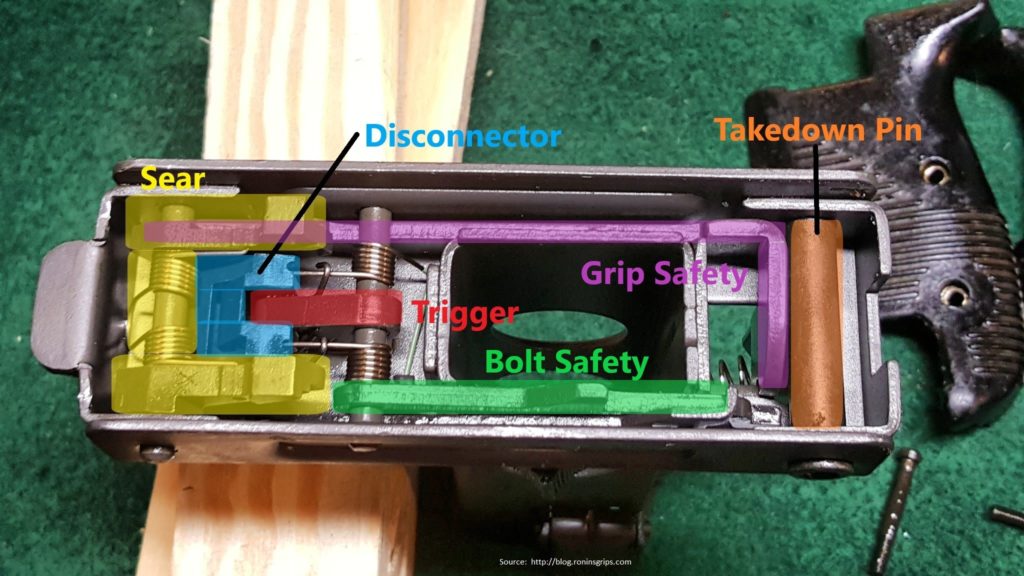
I will never get any awards for illustration but here are the major parts labelled so you can see them.  Note how the trigger pin bends forward, under the hooks and under each side of the disconnector.  To remove and install the trigger requires the notched screw driver I showed above as the notch makes moving each incredibly stiff small spring leg on the trigger way, way easier.
3] Next, I pushed out the takedown pin.  It just presses right out like an HK’s.  I suspect that whomever demilled the kits just stuck it in there for safe keeping.  Have baggies or a parts tray to keep track of all of this.  I always recommend taking photos and/or making notes too.

4] Before you remove the sear, look at how much room you have in front and under the sear.  This will aid you when you weld in the selector stop plate later.  I used a small screw driver to push out the sear pin.  The spring is attached to the sear and when the pin is removed, it comes out as a unit.  This unit will either need to have the lobes cut down to fit in the receiver or use a new dedicated US semi-auto sear but you will use the same spring so be sure to save it.
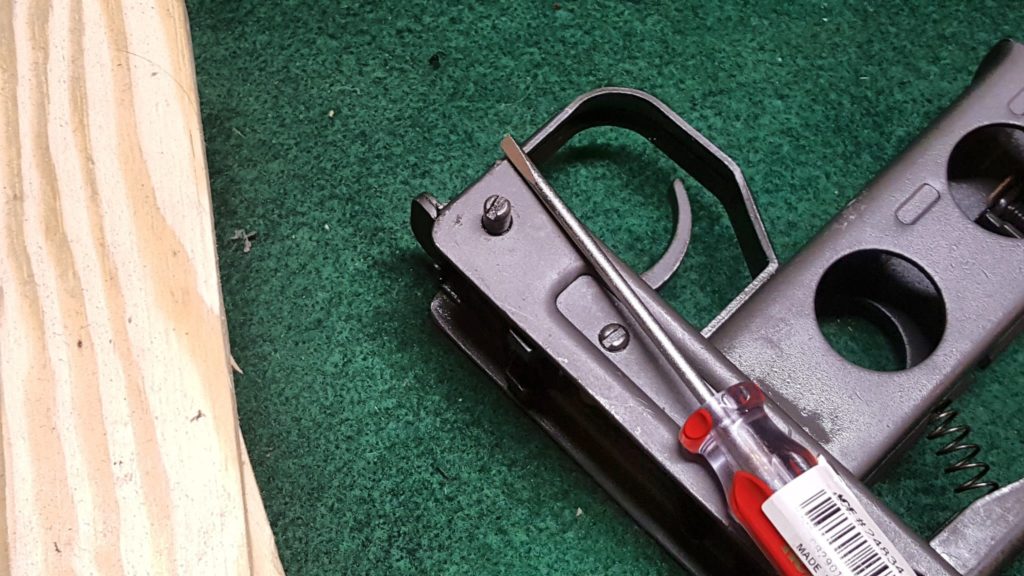
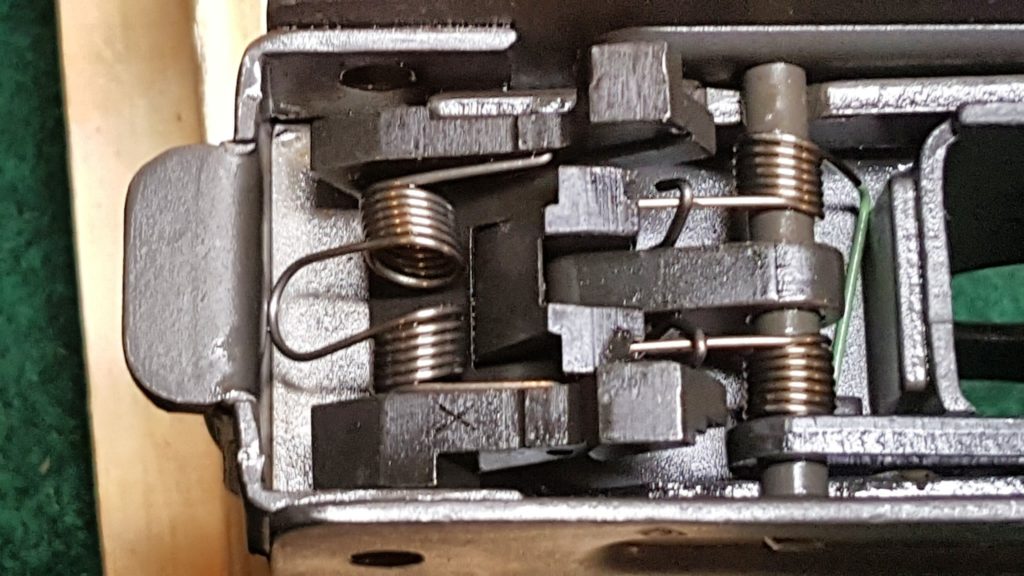
 

5] Next, use your tool to push down on the trigger spring legs such that they are sticking up in the air and not under the disconnector or the wire hooks.
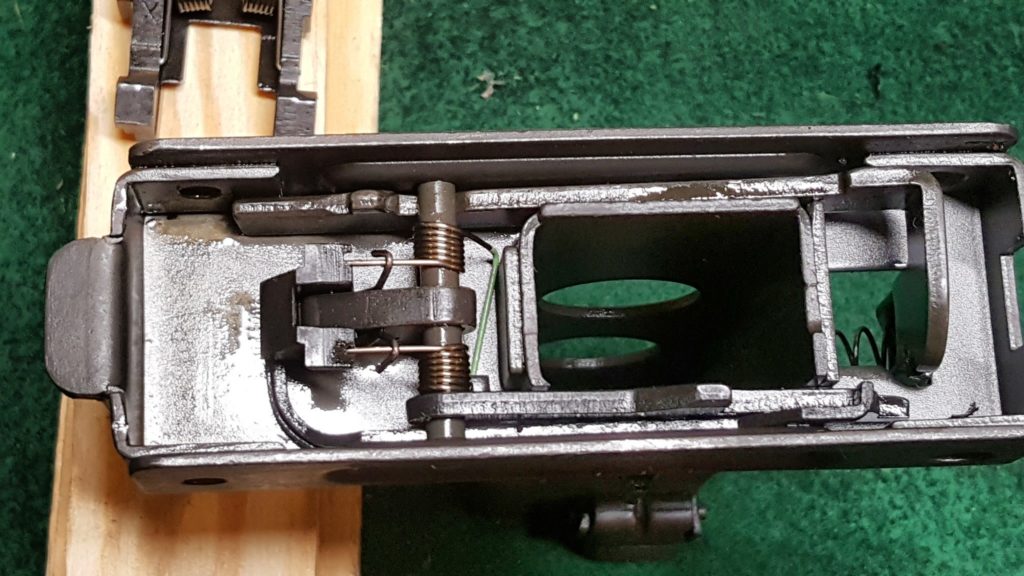
6]  Once the trigger pin is removed you can then remove all the other parts.   Remove the grip safety spring and then lift the grip safety straight out of the frame.

7] Next you need to size the selector stop plate you need.  In digging around, I could not find any sheet metal between .050-.075″ thick in my collection so I simply bought a pre-made selector stop plate from US Barrel Shrouds for $2.95 and made sure the selector stopped appropriately and where to place it for welding before I removed the selector bar spring and the selector bar.  You want to make sure the selector fully stops on semi-auto, the middle setting, and not further to the left. You may need to adjust the plate a bit – in my case it dropped right in and worked.  Also, the selector bar has virtually no vertical travel when the grip frame is fully assembled so don’t worry about that right now.

Note, the selector knob is just pressed onto the selector bar.  When you remove the bar, the knob will fall off so be prepared to catch it.
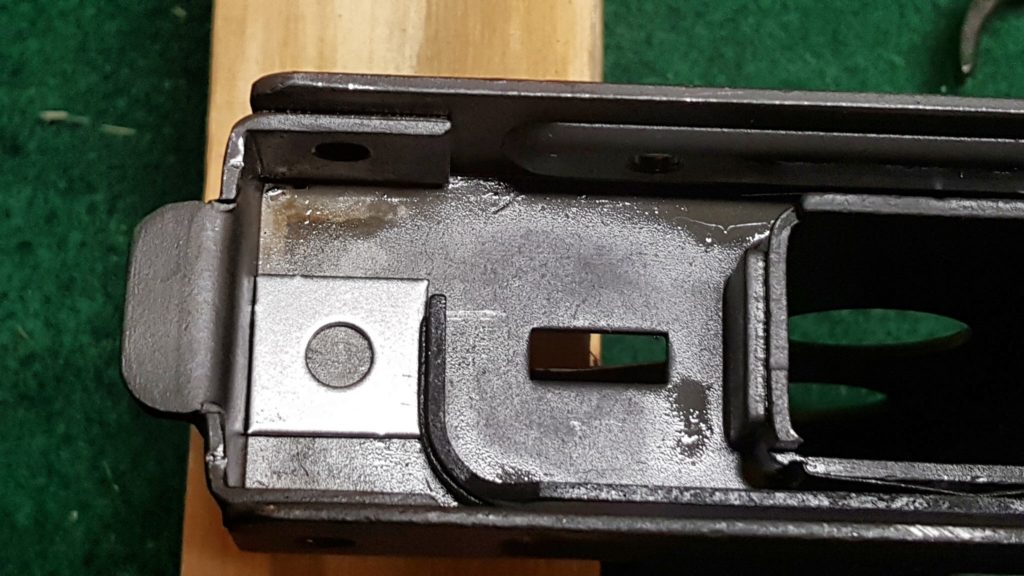
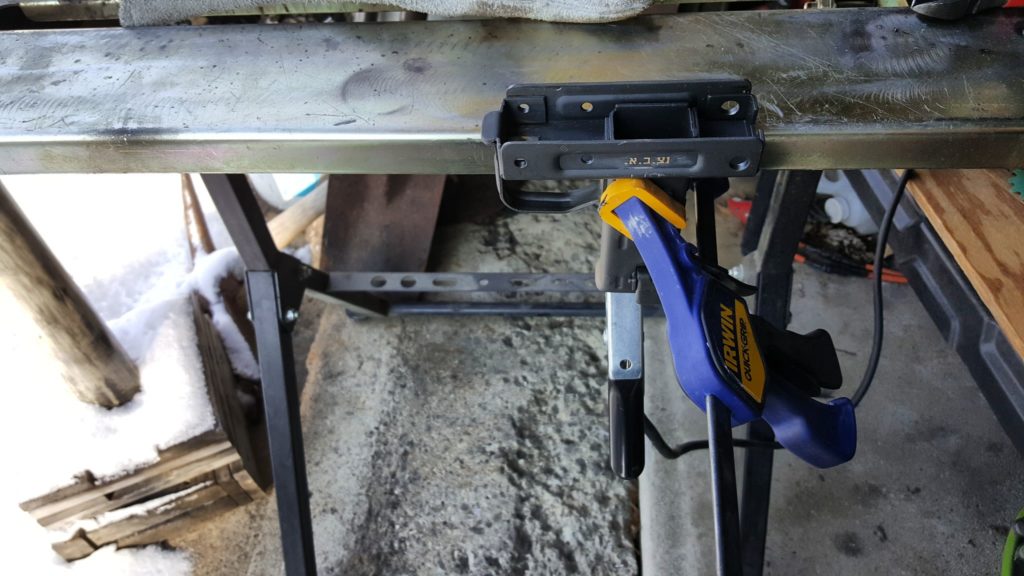
8] I then degreased and sanded the frame to remove the parkerizing in order to get a good weld.  I then clamped the work and spot welded it with my MIG.  You actually have a fair amount of room so the weld does not need to be perfectly flat – I did a bit more sanding than I needed to before I realized the amount of room I had to work with during test fitting.  I also did two small spot welds in each corner by the lop of the frame just to be sure.  My stop plate is rock solid now.
9]  I did not bother removing the magazine catch and at this point, I stopped as I collected all my parts to refinish them with Molyresin.  I them re-assembled following that.

10] To re-assemble the grip frame, what saved my bacon was the excellent guidance from Uzi Talk with one exception.  The McKay receiver does not use a bolt safety so when the Uzi Talk directions mention it, remember that you are not going to install the bolt safety.  If you do mistakenly install the bolt safety, the grip frame will not fit onto the receiver.

During assembly, I put Tetra grease on everything to help everything slide plus I oiled the rotating parts on the pins.  There is an old saying “if it slides, grease it.  If it rotates, oil it.”

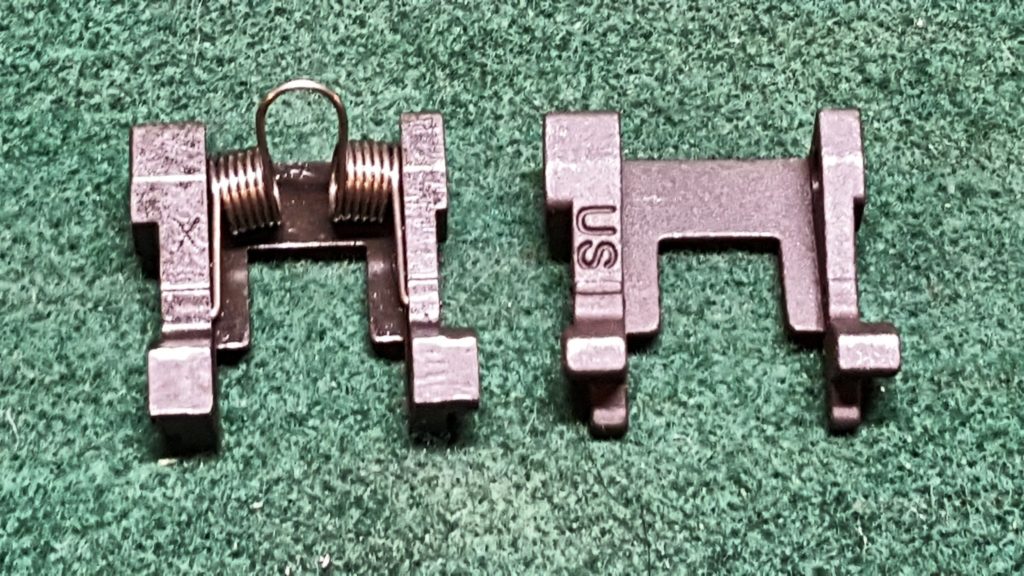
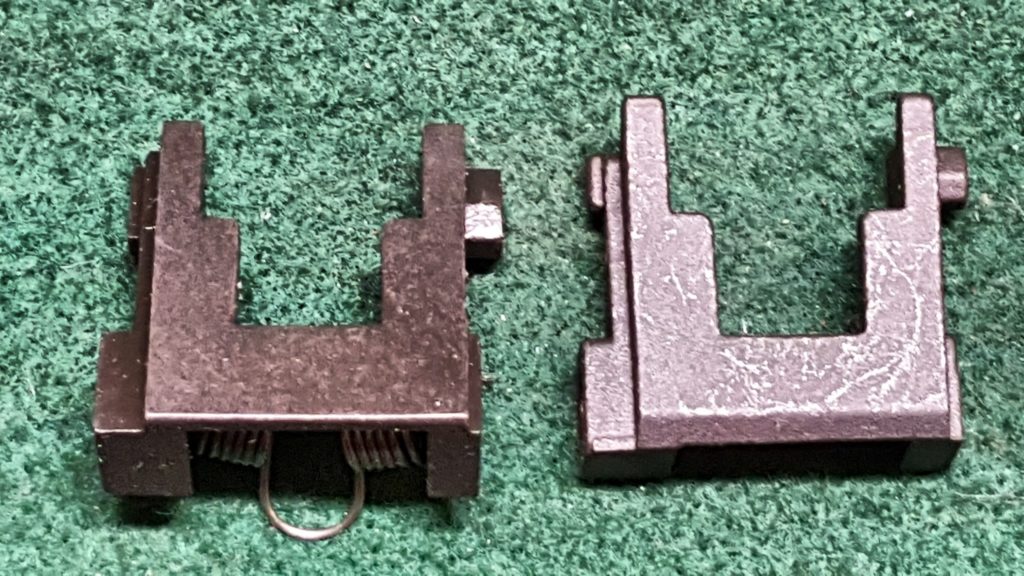
Also, I mentioned I used a US made semi-auto sear.  I bought mine from US Barrel shrouds and it worked great.  The original is on the left with the spring still attached.  The new one is labelled US in the photos below or does not have the spring yet.  I thought you might want to get a good look at it for reference.  Note how the “pads” at the rear of the semi-auto sear are shorter but there is still a shelf at the bottom.
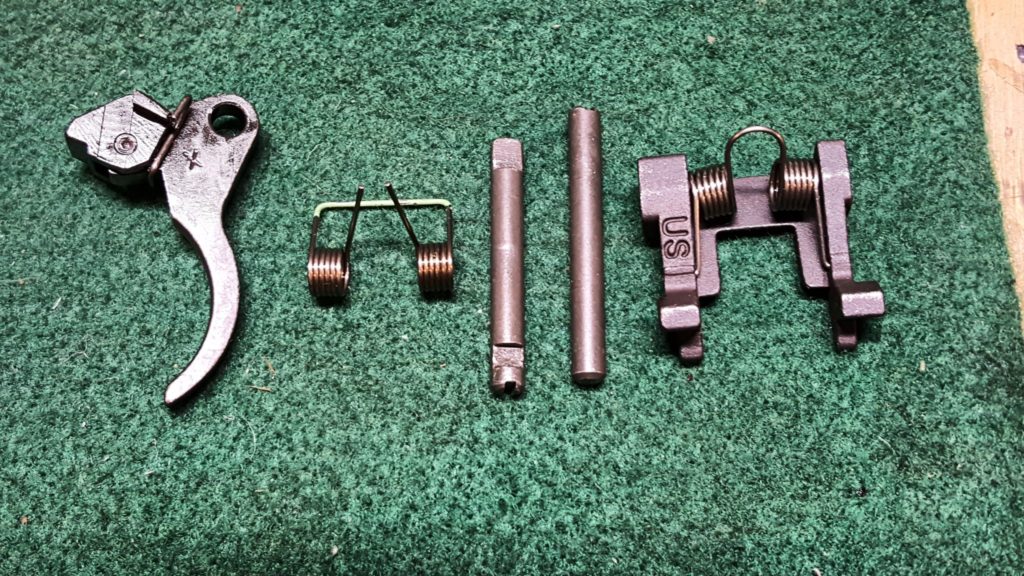
Below is a photo of the FCG group with the sear spring moved over plus it’s interesting to see the two fire control pins – the shorter one with the flat end is the trigger pin and the longer one is for the sear.
I hope this helps!  Next up is the top cover assembly.


If you find this post useful, please share the link on Facebook, with your friends, etc. Your support is much appreciated and if you have any feedback, please email me at in**@ro*********.com. Please note that for links to other websites, I may be paid via an affiliate program such as Avantlink, Impact, Amazon and eBay.


Assembling an AR Lower – Step 8 of 11: Installing the Pistol Grip, Selector Spring and Detent

In this step we will install the selector spring  and detent along with the pistol grip.  As you can imagine, I am a grip snob.  I do not like the Mil-Spec grip much at all but do like the MagPul MOE and MIAD grip.  For me, the lower-cost MOE grip is just fine – it feels good in my hand and is durable.  It’s pretty much all I use on ARs other than target rifles where I prefer the Ergo grip with a palm shelf.

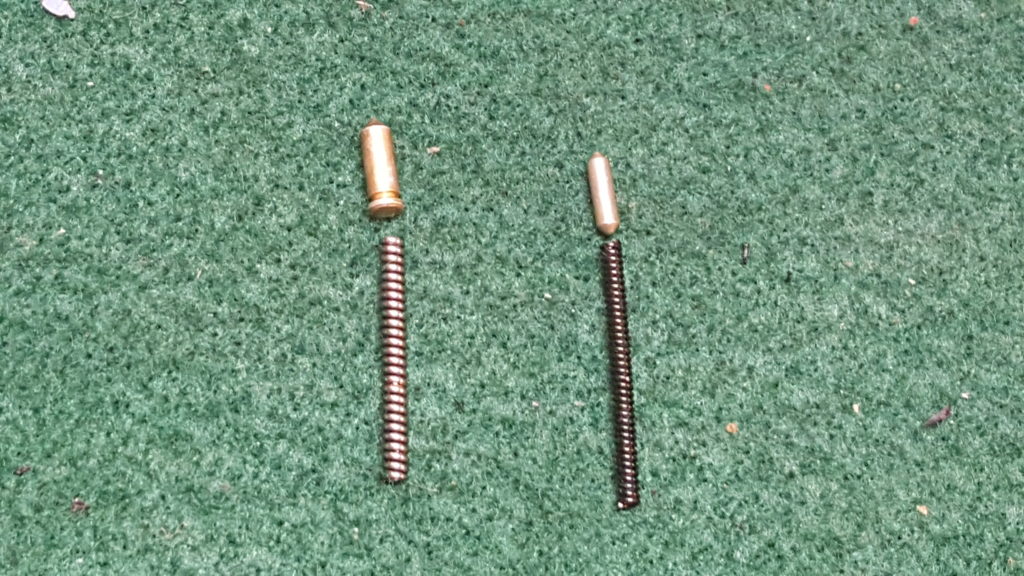
So, first off, I need to point out that in this step we install the spring and detent pin for the selector lever.  Both the spring and pin are unique.  In the next photo, the selector spring and detent are on the left.  On the right is a detent pin and spring for the pivot and takedown pins.  Be sure to use the heavier detent and spring on the left for the selector.  Also, consider getting spares from Brownells because they are really easy to lose.

Step one:  Turn the receiver upside down, put a dab of Tetra Gun grease (or whatever brand grease you like) in the receiver’s detent hole and then insert the detent pin point first.  The grease helps hold the pin in as you move things around plus lubricates it:

Step two:  I like to put a dab of grease in the spring hole in the pistol grip to keep the spring from falling out.  This helps reduce my lost springs.  It’s way too easy for your mind to wander and have the spring fall out.

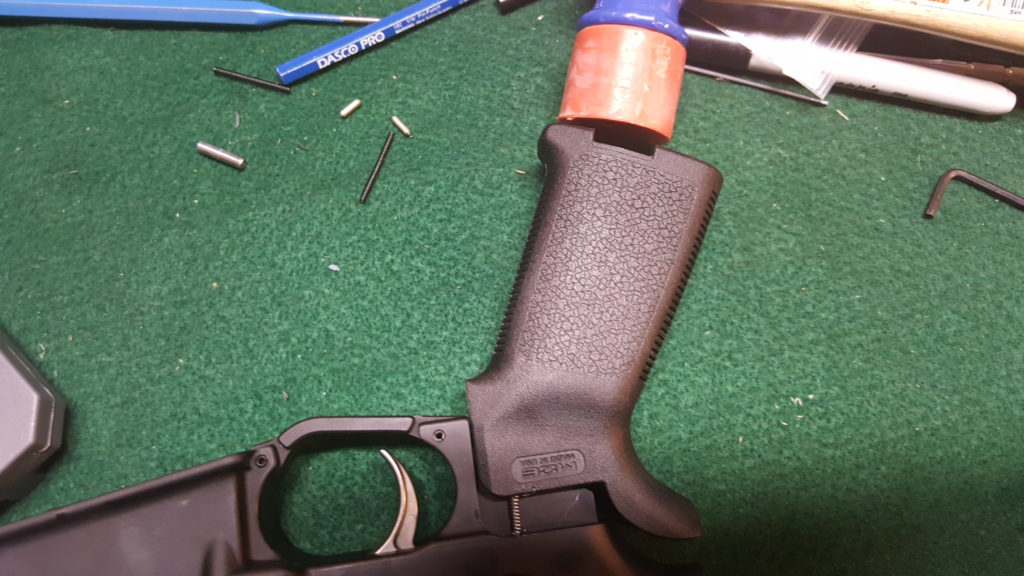
To install the grip, I lay the receiver on its side and push the grip into place.  This grip was so tight that I had to tap it into place with a rubber mallet.  Go slow and make sure that the detent spring lines up properly with the pin.  If you go nuts pushing/hitting it together you can kink the spring and ruin it.

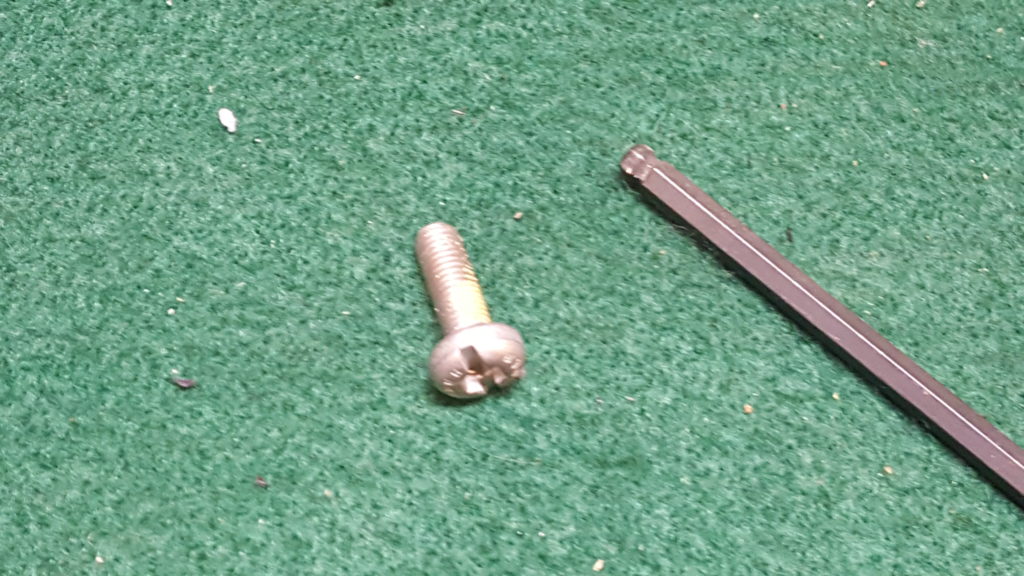
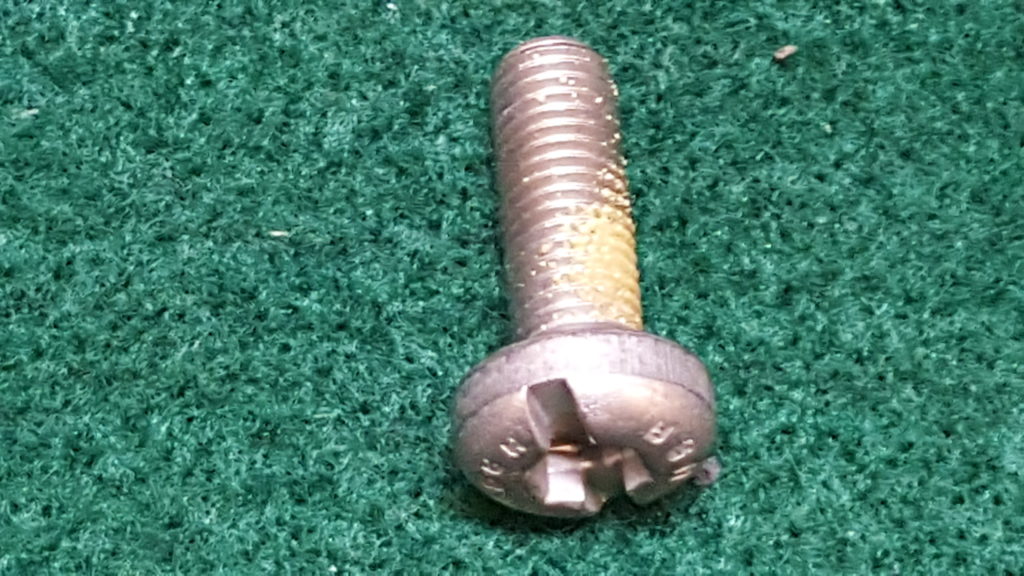
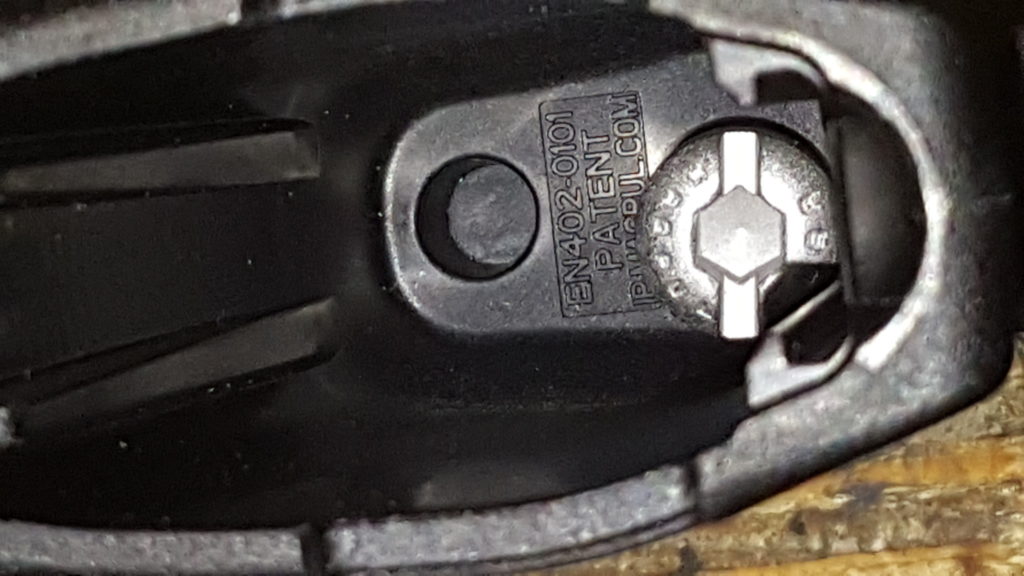
The Magpul grips come with a screw that can be installed via a slotted screwdriver or a hex key, which I prefer.  Also note the yellow stuff on the screw – this is a pre-applied threadlocker so you do not need to add more.  If you are installing a screw that does not have a lock washer or any threadlocker on it, you may want to apply a bit of medium strength Loc-Tite.  Now, to get that screw down there, I angle everything back and slide the screw down the back of the grip just like a ramp and then I use my Allen wrench to tighten things down.   Because I can’t get a good grip on the wrench due to my carpal tunnel, I use an adjustable wrench to give me just a bit more torque.  Many of you may not need to do that.  You are looking for firm – not Big Mongo torqued down tight.  There are torque specs for everything but I do farmer ballpark tight on non-critical stuff.

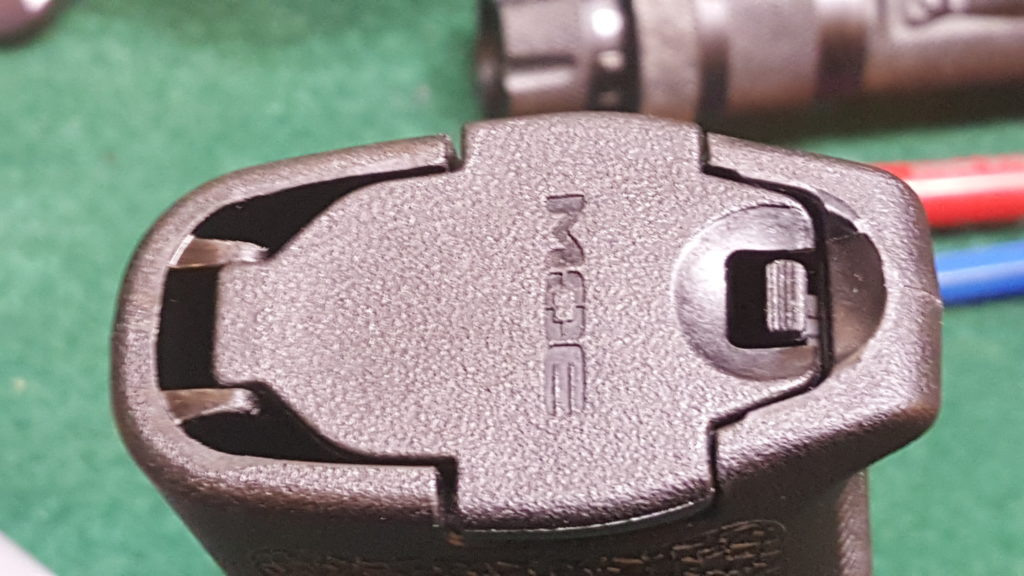
Once the screw is installed,  the bottom end cap is snapped on place and you are done.  Note, this cover can also be replaced with toolkits that slide up in the grip if you so desire.  I’ve not done it yet but am considering it.

The next step will be to install the buffer tube.


If you find this post useful, please share the link on Facebook, with your friends, etc. Your support is much appreciated and if you have any feedback, please email me at in**@ro*********.com. Please note that for links to other websites, I may be paid via an affiliate program such as Avantlink, Impact, Amazon and eBay.


How to cut the folding stock weld on a Vepr IV

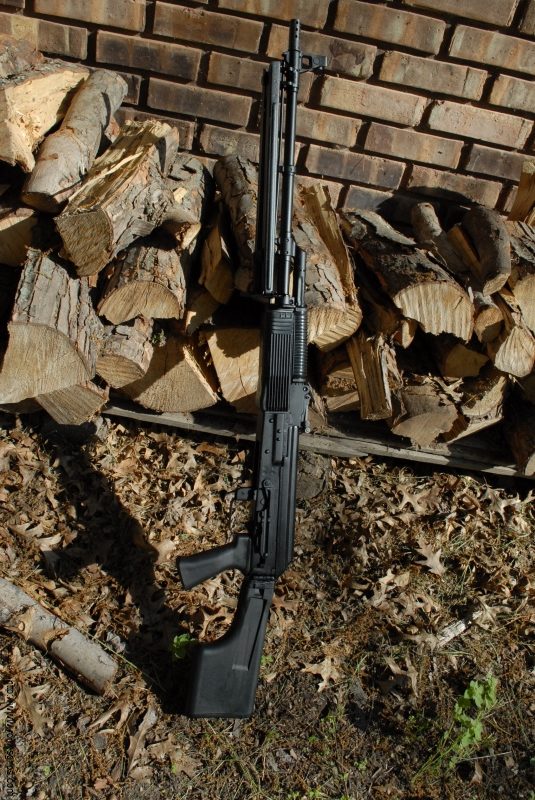
Back in 2014 I bought one of the 5.56 Vepr IV RPKs.  Boy was it nice but it had a folding stock that was spot welded.  I installed a Tapco G2 FCG, the appropriate muzzle device and one of my Molot Gen 2 grips and then US mags.  I’d planned to replace the gas piston but wound up selling the rifle to fund other projects.  I did, however, snap some photos.

The rifles were amazingly allowed into the US and were gorgeous but I could not abide by the tack welded open stock or funky US grip.  First, I removed the butt stock to get it out of the way and protect it.  I then used my cordless Dremel with a cut off wheel to slice the tack weld enough to pull it open and then sanded the edges smooth.


I then applied Brownells’ Oxpho Blue to the fresh bare steel to blacken it.  The end result – you’d never know the tack was there.


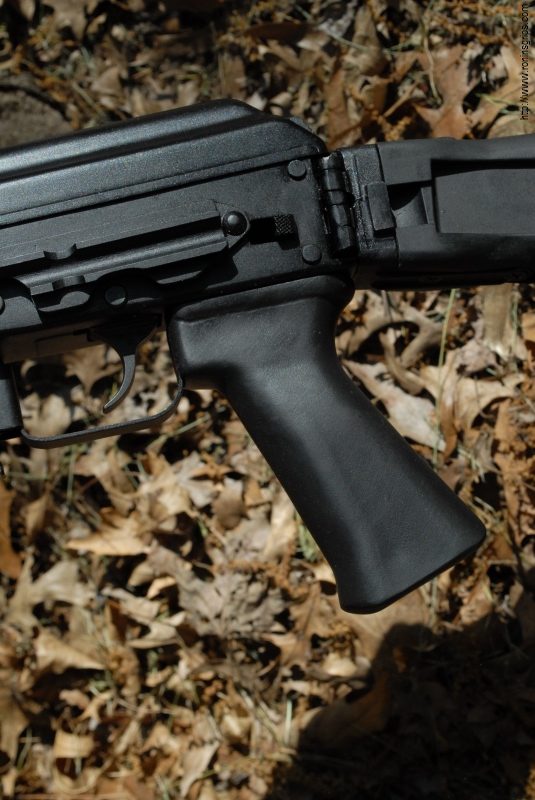
To the left is the grip that IO put on the rifle when they imported it.  To the right is my Molot Gen 2 grip and it is in subsequent photos also.  We make each grip by hand here in Michigan so they count as a 922r compliance part.

Like so many of my firearms, it sat in the safe for a year or two and I never hard time to fire it.  Eventually, I decided to sell it to fund other projects.

7/20/19 Update:  This rifle is #1 on my list of “I wish I never sold it”  They are worth a fortune now.


If you find this post useful, please share the link on Facebook, with your friends, etc. Your support is much appreciated and if you have any feedback, please email me at in**@ro*********.com. Please note that for links to other websites, I may be paid via an affiliate program such as Avantlink, Impact, Amazon and eBay.