Category Archives: DIY – Do It Yourself

Fixing the Water Inlet Valve on a KitchenAid KRMF606ESS01 Refrigerator

Well, when I was little it seemed like fridges (“refrigerators” for people who prefer the full word) lasted an eternity. When we bought this KitchenAid KRMF606ESS01, I thought I was buying a top of the line quality fridge, but that’s no longer the case – appliance manufacturers don’t necessarily want them to laste forever because that means no more sales to a given customer.

A year after the warranty the ice maker stopped working and the service person whom I trust told me it would cost a considerable amount of money to replace the circuit board. So, strike #1 against the KitchenAid. Despite being “stainless”, the shell of the fridge rusts. Strike #2. Strike #3 is the topic of today’s blog post. The water inlet valve failed and leaked water all over our wood floor.

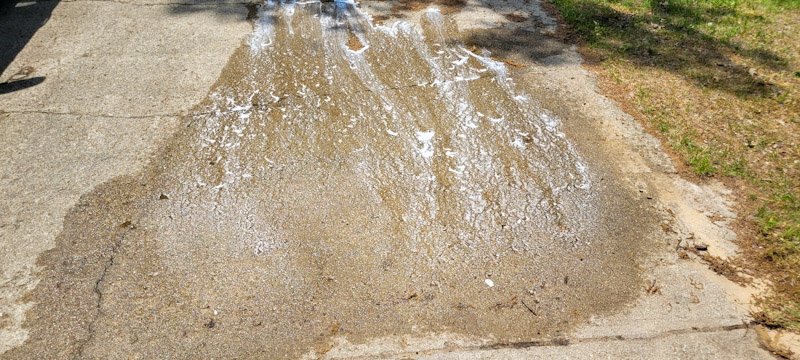
Let me set the stage – I went through the kitchen to my shop and when I came back in I saw wet footprints – my foot prints – from the floormat in front of the fridge to my shop door. ARGH! I was hoping maybe someone spilled water and didn’t clean things up so I removed the mat, mopped up the water with a towel and watched new water slowly emerge from under the fridge. Crap. I immediately wondered about the water lines on and in the fridge. The supply line was copper tube and it had looked great the last time I pulled out the fridge so I doubted it was that but I couldn’t ignore it either or it would ruin our real wood plank floor.

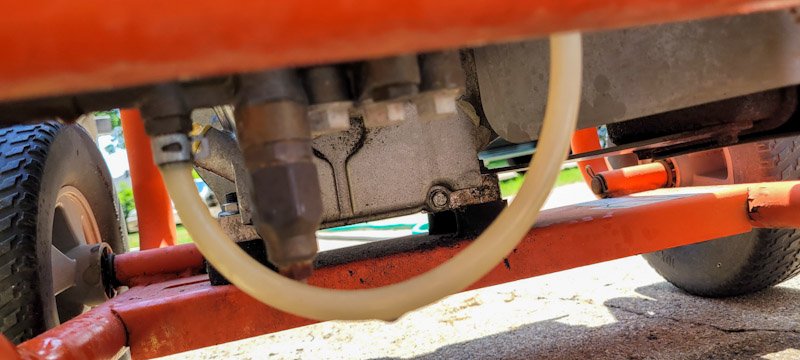
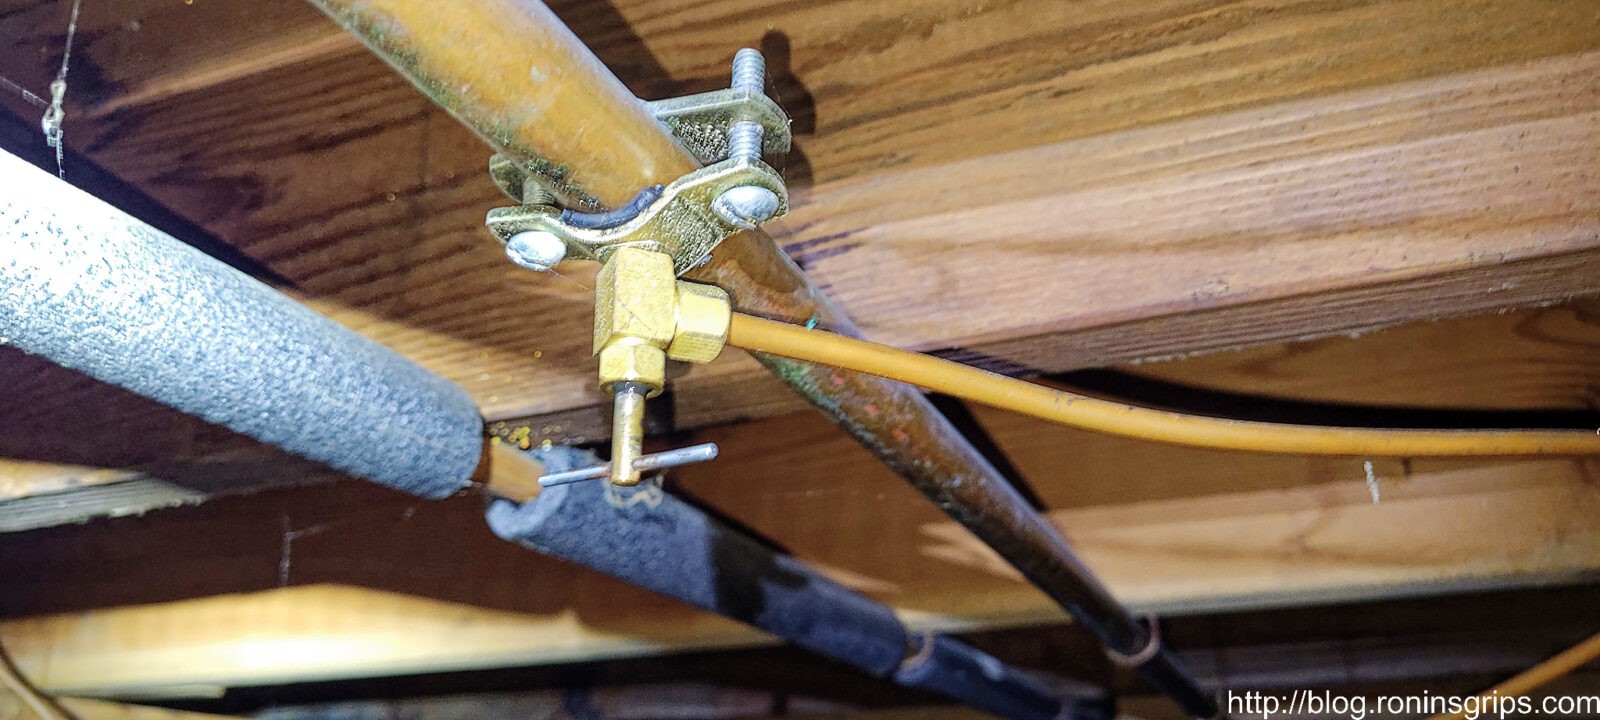
Turning off the water

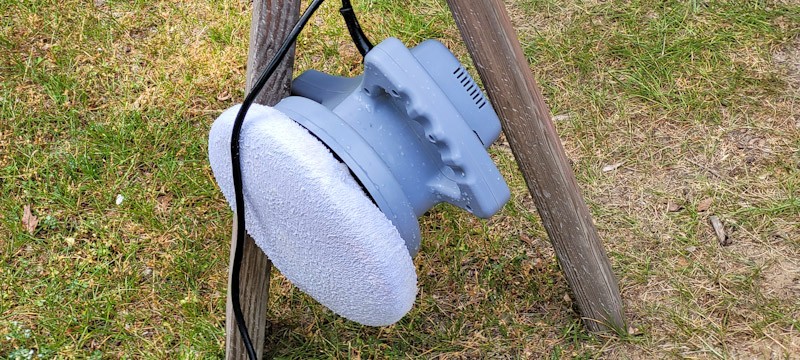
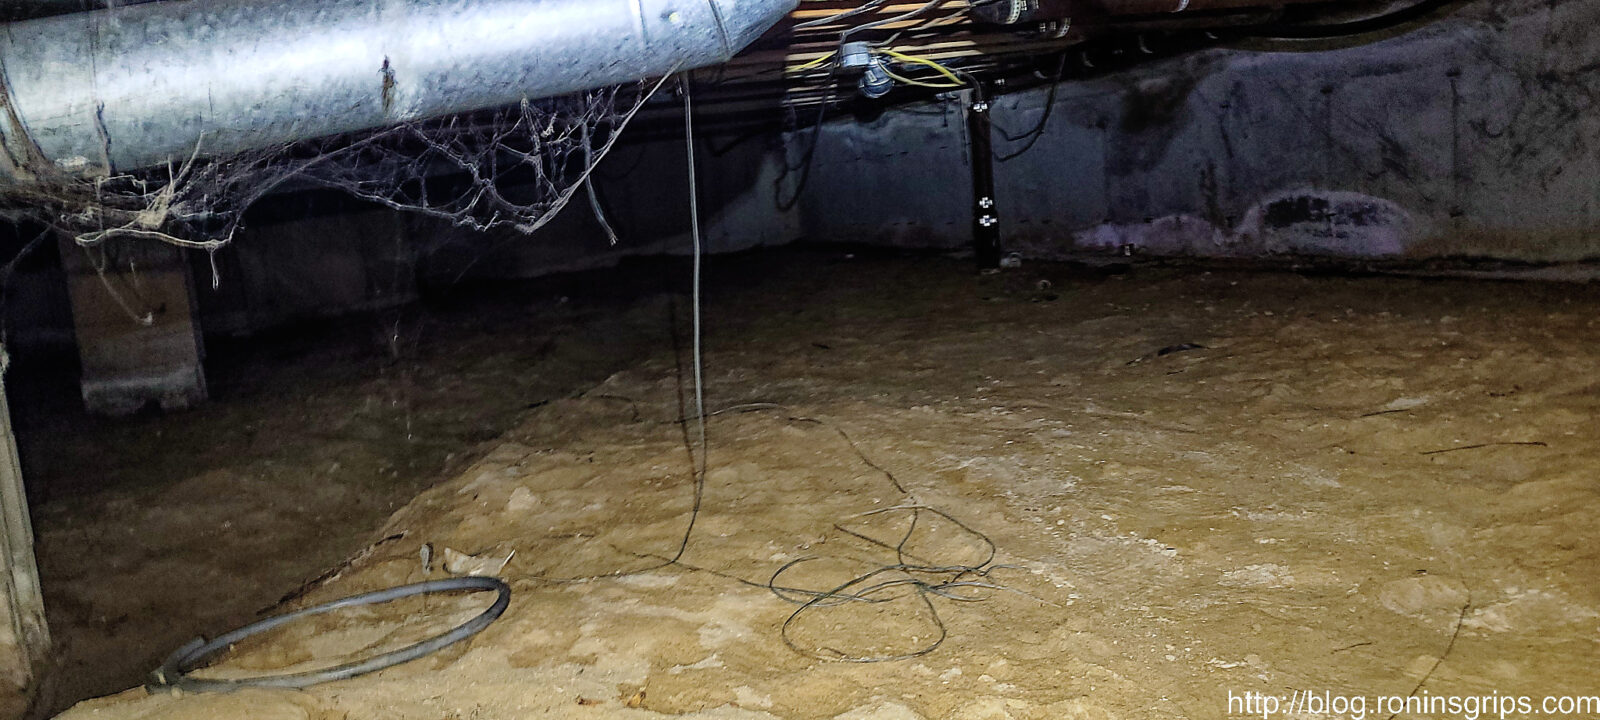
Most fridge installers put a vampire tap on a water line to get the supply needed. In my case, I knew there was a tap under the house. We have a crawl space that isn’t bad compared to some that look like they are a scene from a horror movie but being a pretty big guy with a sore back I have to fold myself in half and do a crab shuffle over to where it is about 50-60 feet from the entrance. Short translation – it’s doable but I swore the whole way over to it.

See that far center column in the dark? Yeah, I was heading just to the right of that and swearing the whole time. It was way easier getting under there 25 years ago.
I don’t know if these things have a formal name – I’ve always heard them called “vampire taps”. They re put on copper supply like with a rubber gasket between the part of the saddle with the valve and the pipe. The two halves of the clamp are screwed together and then the handle is screwed down until the sharp end of the valve pierces the relatively soft copper. You then back the valve off (meaning turn it counter-clockwise) and water begins to flow through the supply line. So, with this in mind, I needed to close the valve which means turning the small handle you see clockwise until it stops thus closing the valve. I’ve needed pliers in the past to deal with hard turning valves and these things are also known to leak when you try to close them. I got lucky – it both turned easy and it shut the water off entirely just the way it should.

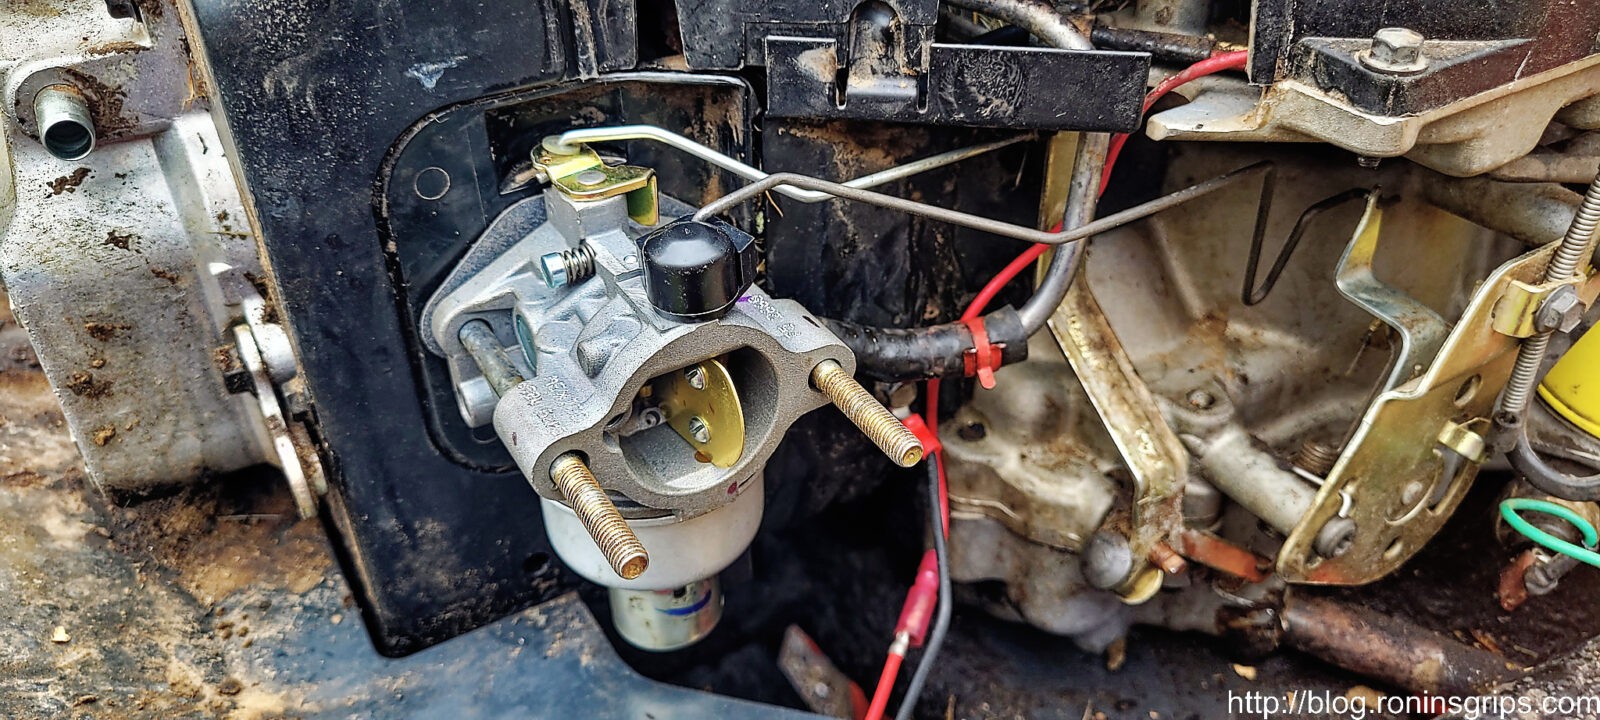
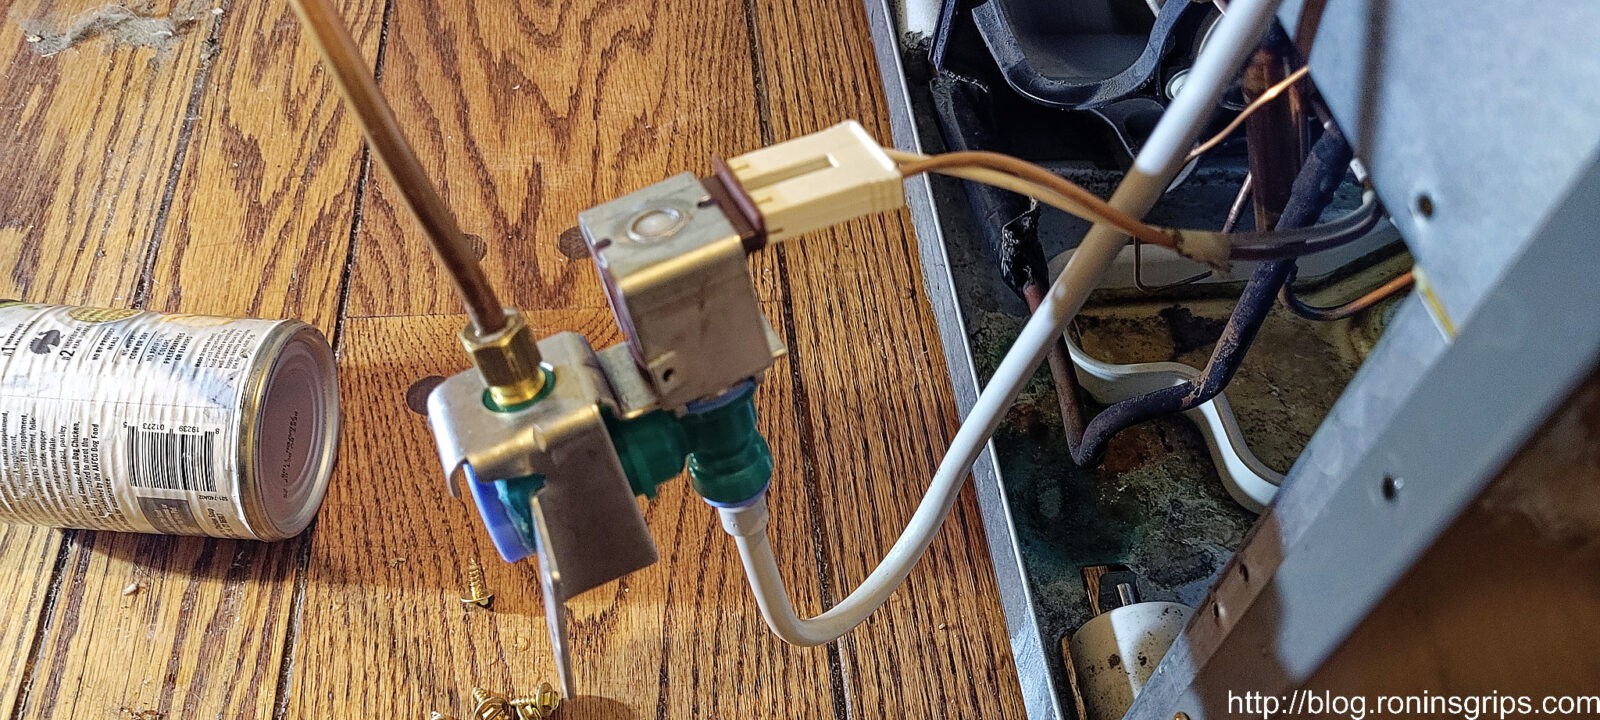
Confirming it was the inlet valve

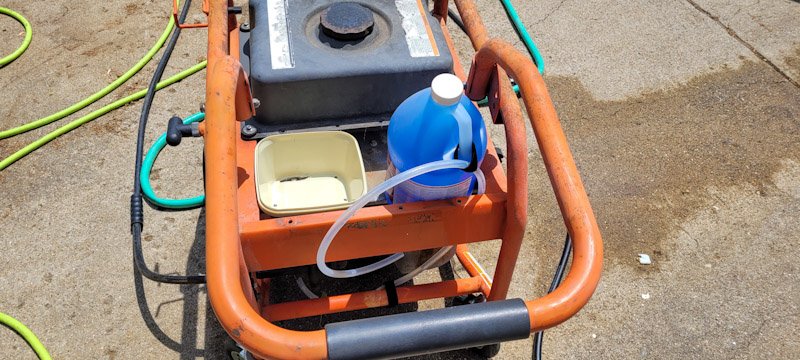
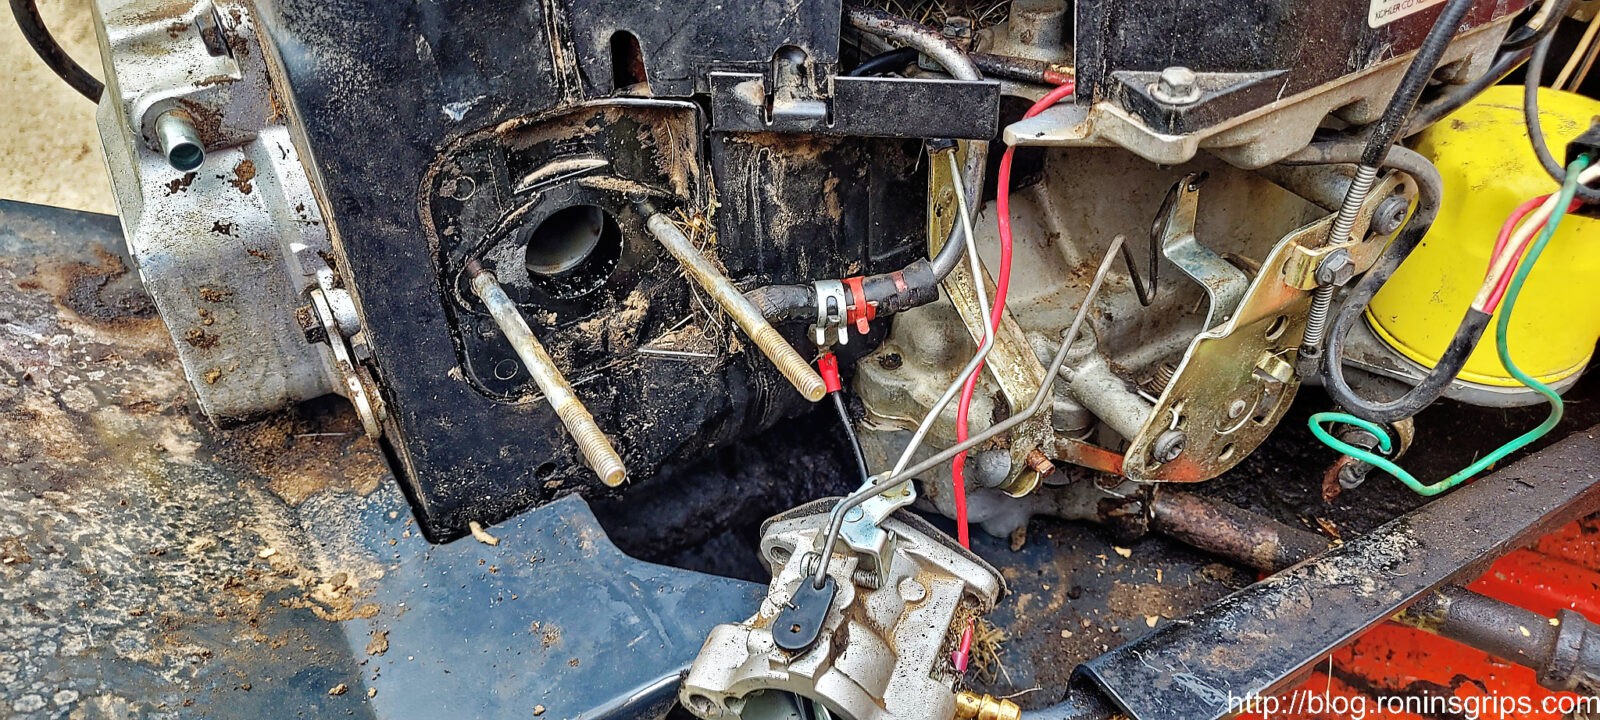
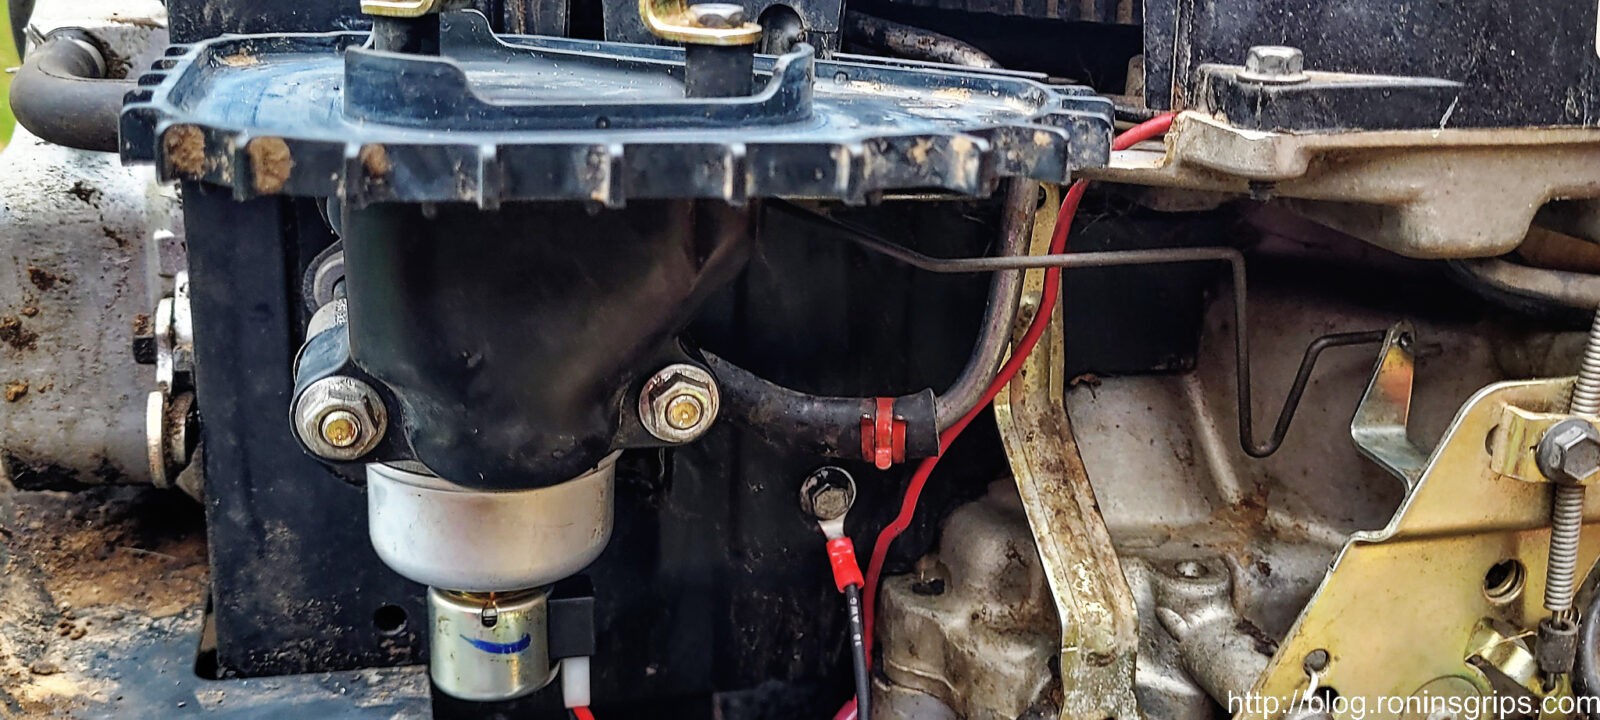
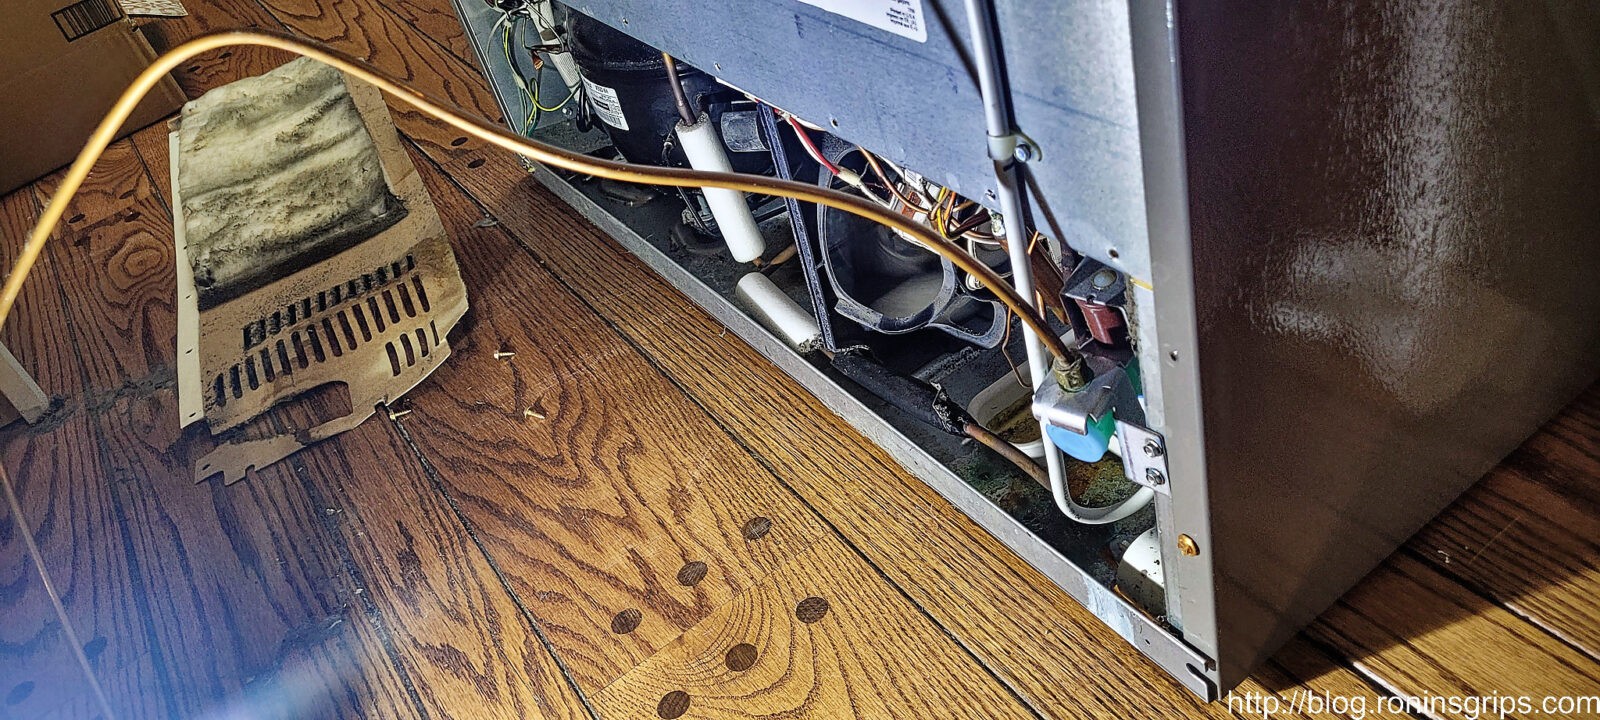
In reading, there are a few ways these inlet valves fail – they can leak water on the floor but still work and dispense water, not leak but dispense water very slowly, or don’t work at all. I was 90% sure it was the valve given past experience with other fridges so the first thing I did was to pull out the unit.

If you have never pulled your fridge out before, let’s start here. See the plastic facia/cover below the door? That is just for looks and pulls off but you need to open the lower freezer door to do so. Note the rust on the “stainless” steel skin above and to the right of the KitchenAid logo. “Stainless” is a generic term and really the resistance to corrosion is dependent on the alloy used. Whirlpool/KitchenAid went with a cheaper alloy to save money so it’s not very “stainless” over time.
By pulling the freezer door open, the entire plastic covering is exposed and it literally just pulls forward – no screws or freaky little clips to deal with. They know folks will need to pull this off periodically (or they should) to clean the condenser coils under the unit. So, pull it off and completely remove it.
The fridge has four wheels to allow you to move it but if these small levelers are in use it will not want to move. Take a small wrench and turn the head of the bolt to retract the leveler on each side. The fridge will now pull forward. Peek in back to make sure you have enough water line to do so. The water supply line and the power cord will limit how far you can pull the unit out until you disconnect them – if you even need to. I never unplugged my fridge while working on it for example.
There was a real small chance that the supply line was loose so I tightened it just a tad and then hand my wife watch the valve for leaks as I went back under the house to turn the tap back on. It’s way easier and cleaner to do it with two people. So, I turned it on and she called down that water was going on the floor and I shut it off. The water started right under the valve and everything else was dry … my money was on the inlet valve was the culprit and it was.

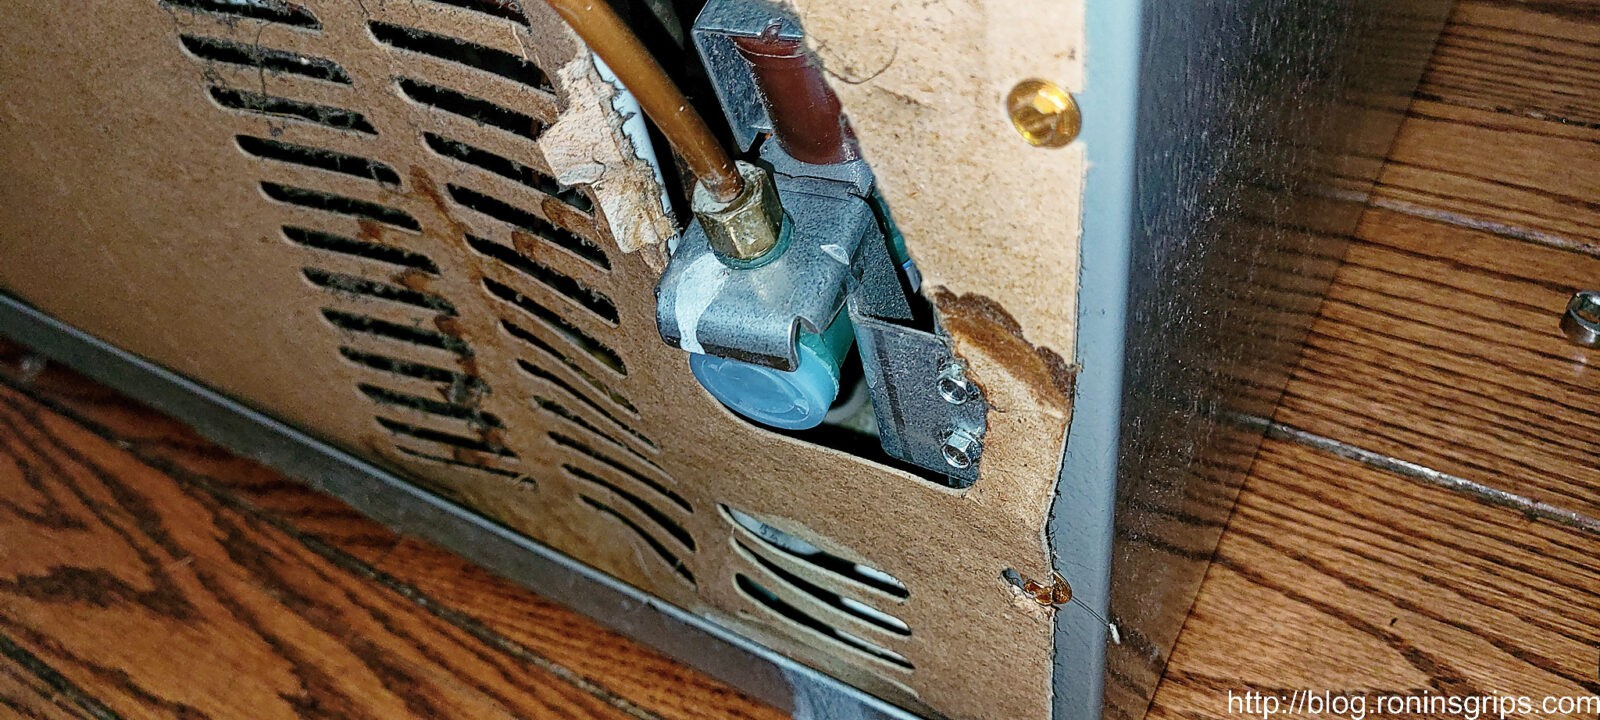
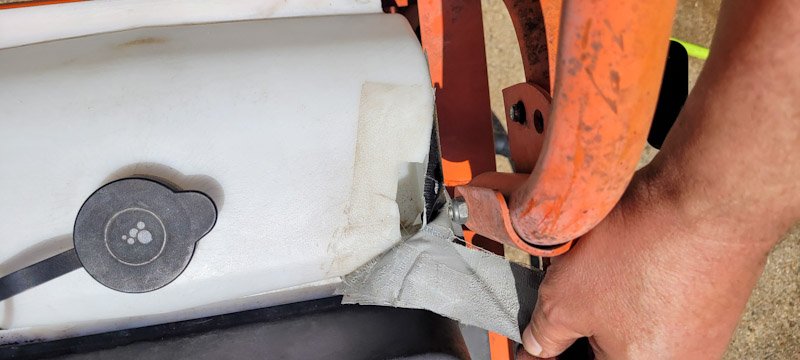
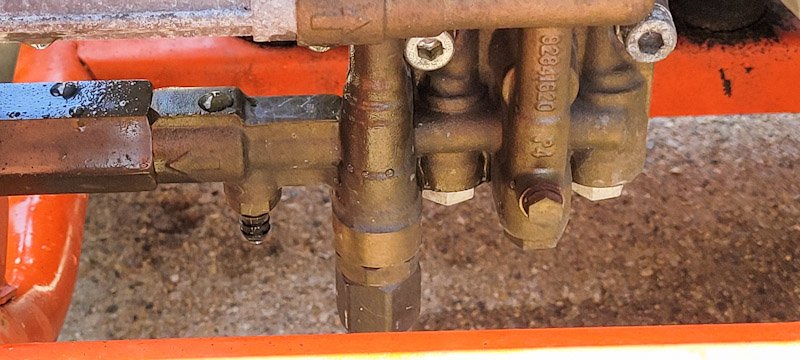
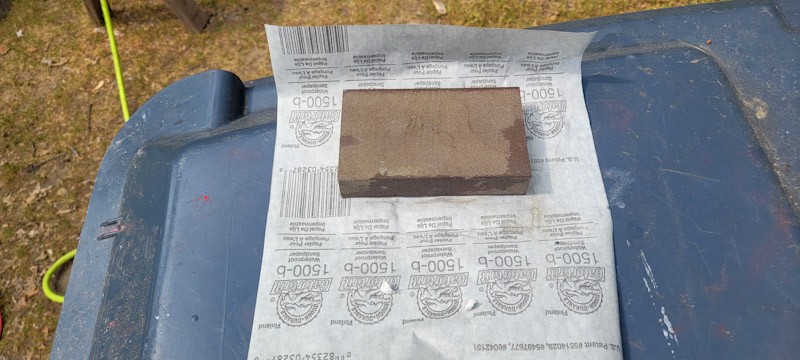
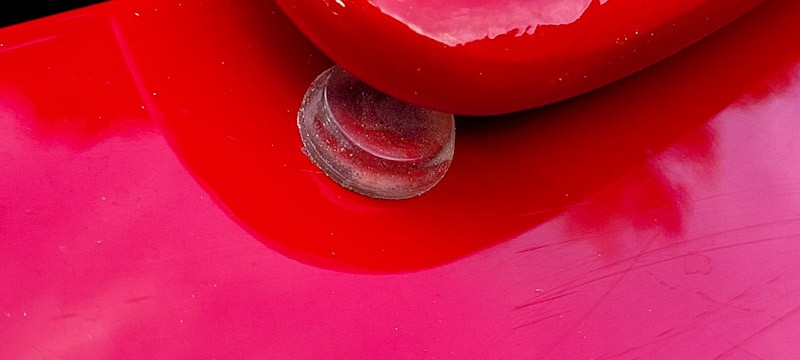
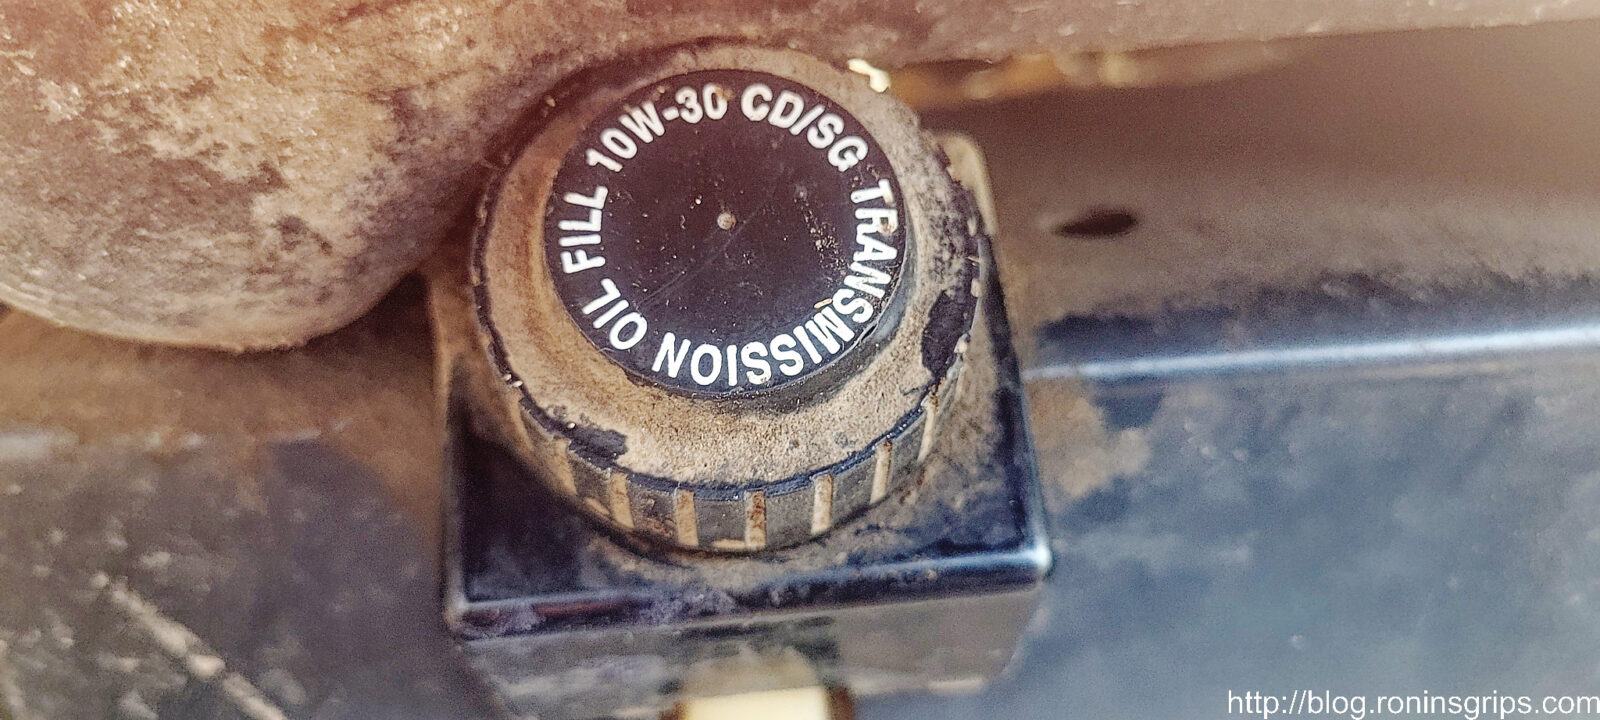
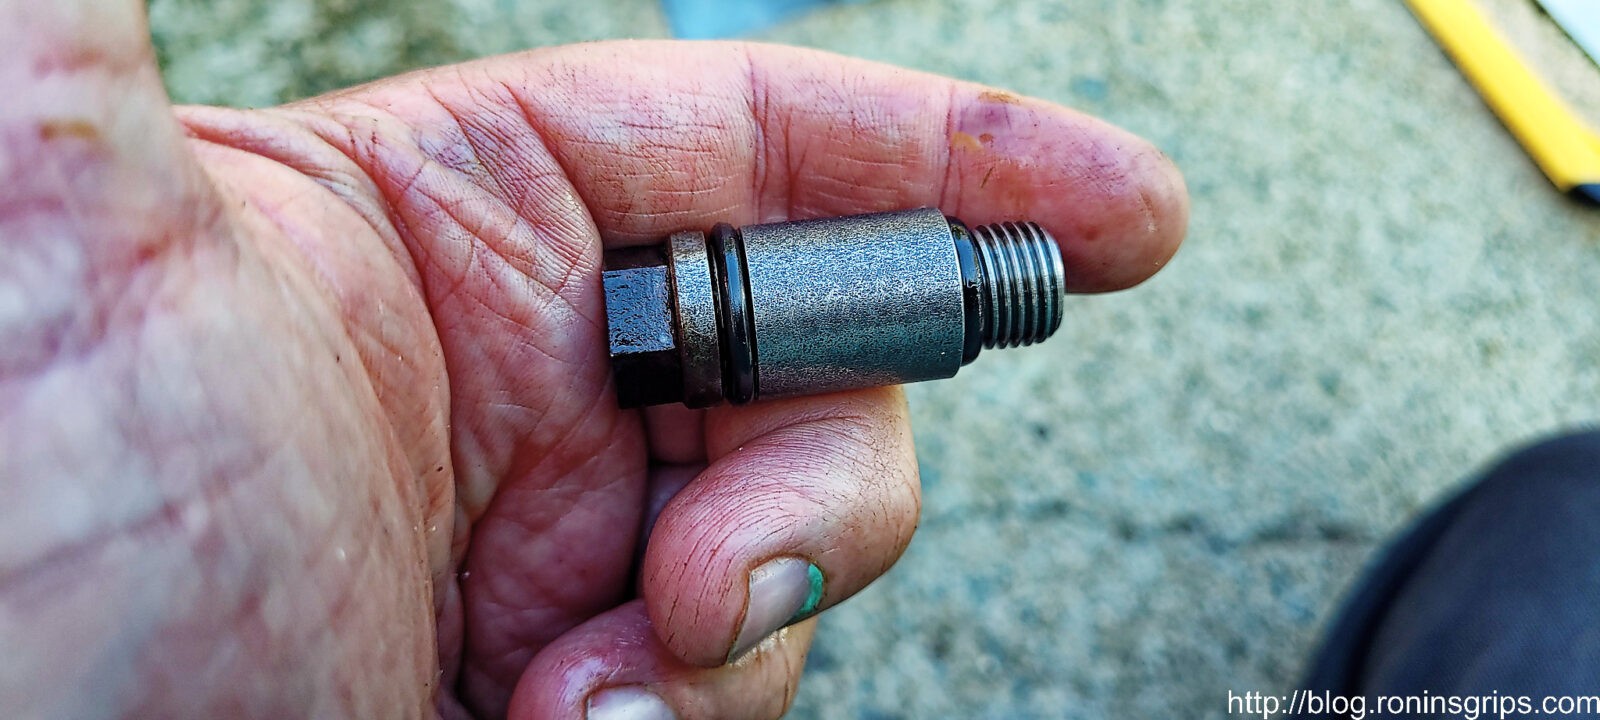
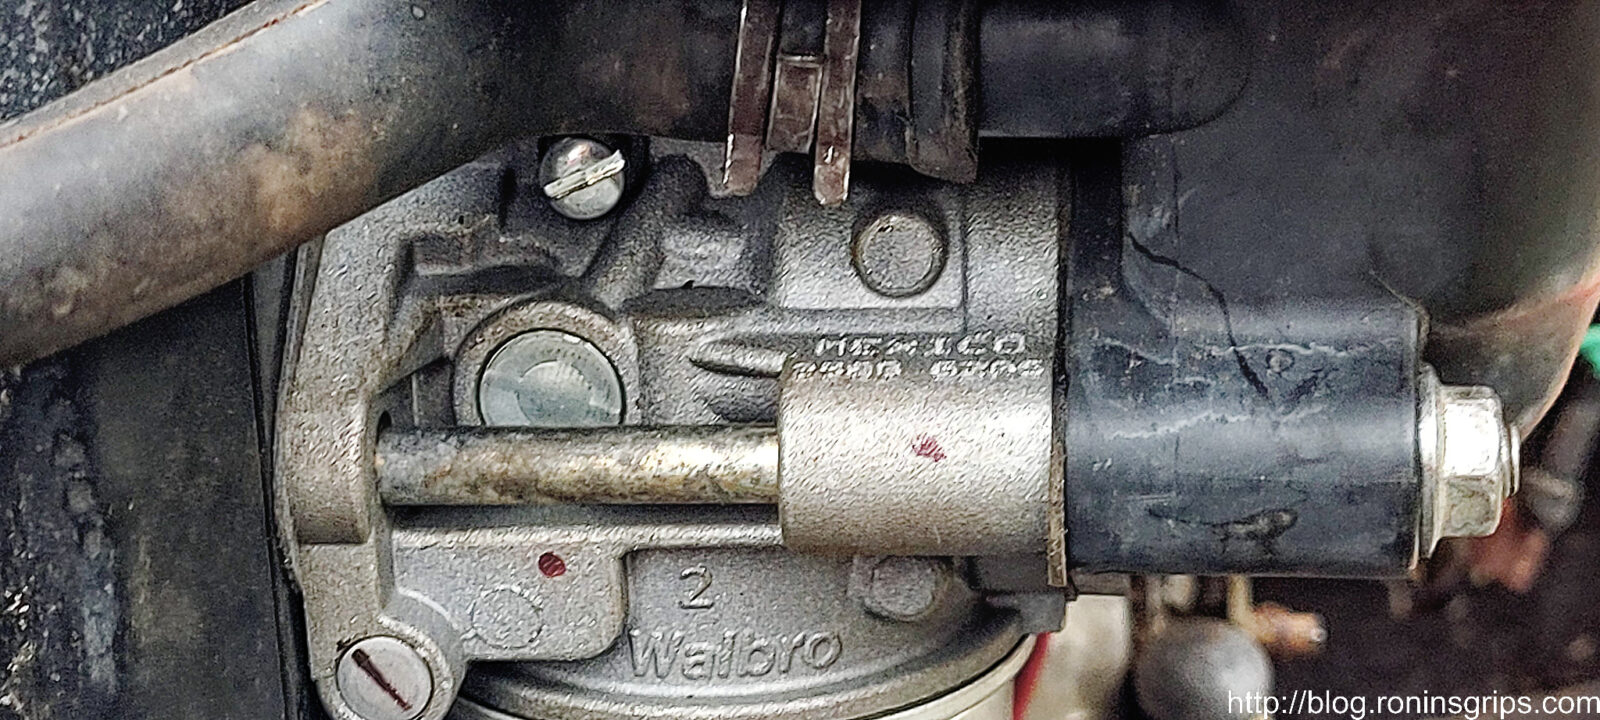
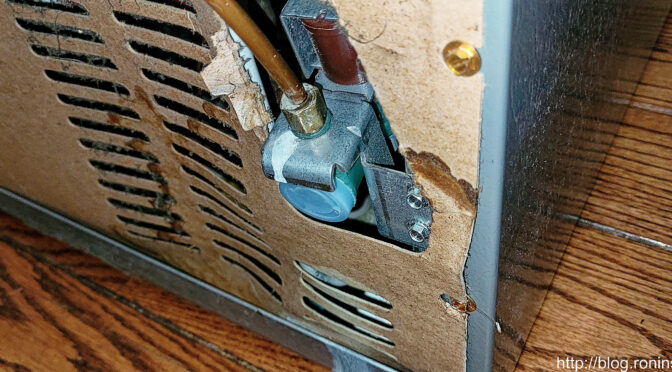
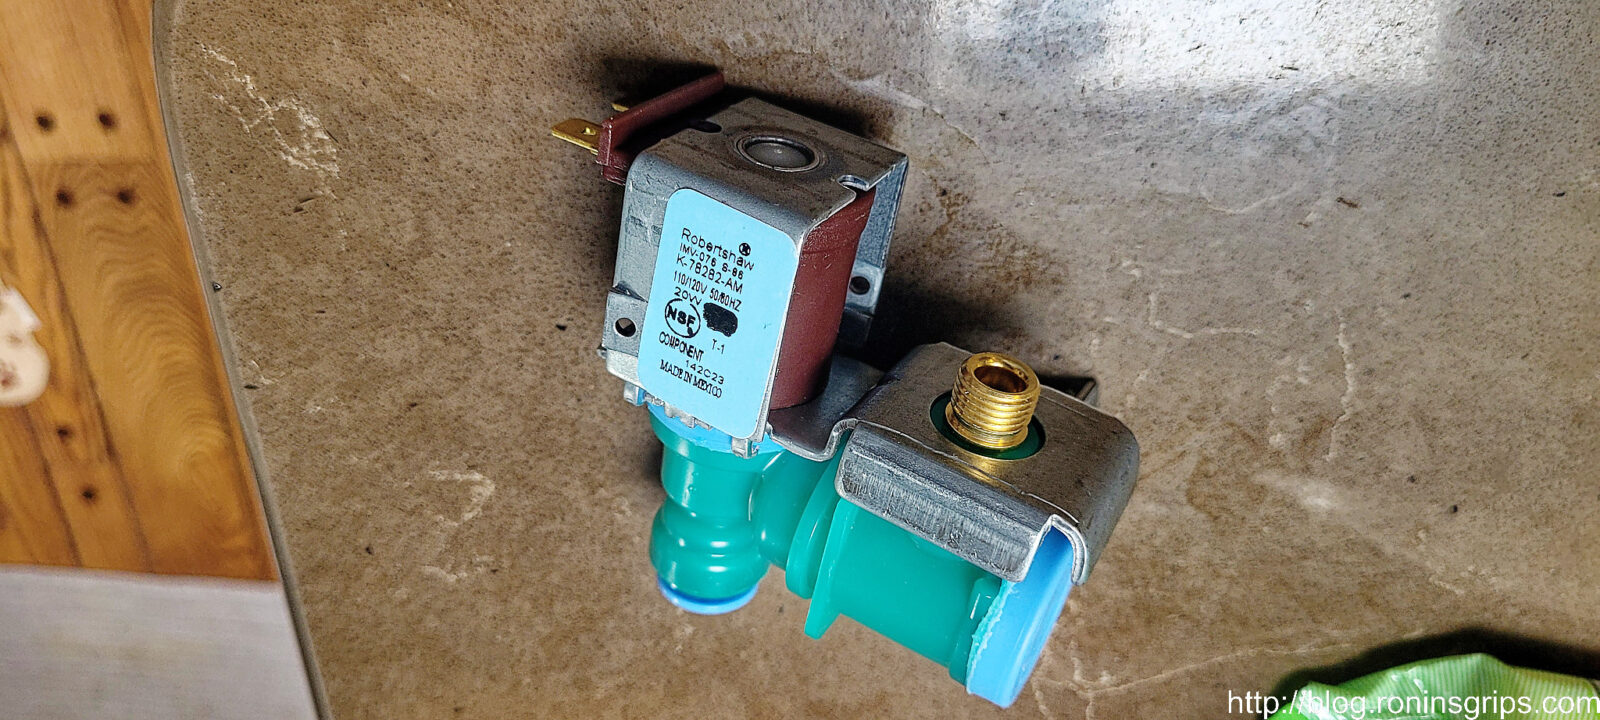
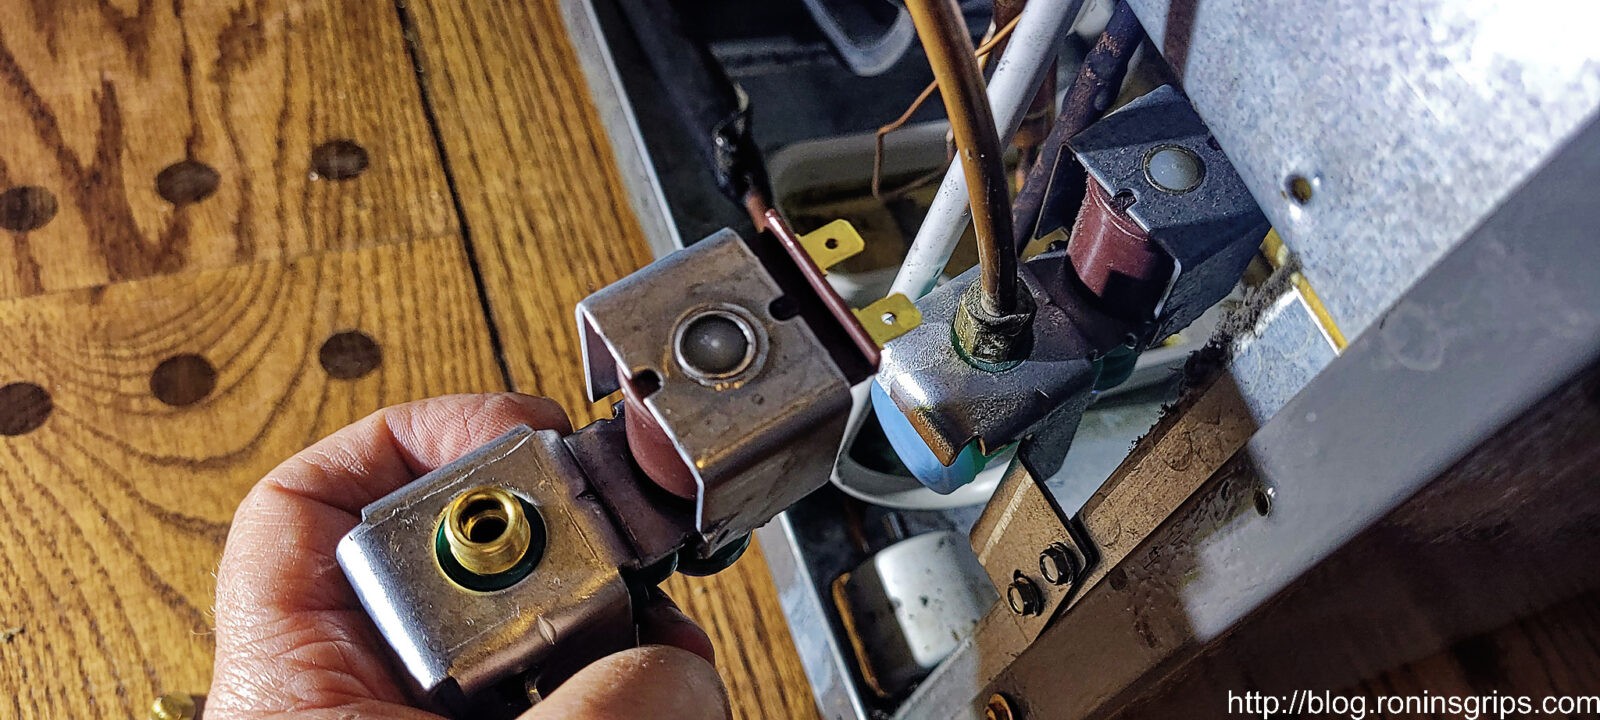
Okay, the water inlet valve is a small electricslly controlled valve that is turned on and off by either the ice maker (that no longer works) or a person wanting cold water from the dispenser pushing their cup against the on-off switch. The valve body is made of plastic and that is what failed. The only saving grace is that the engineers put it at the back of the fridge and it is very easy to access and change – literally a 5-10 minute job. You can easily buy one online without spending a fortune.

To order parts for your fridge, you need to know the exact model number – in my case it was a KRMF606ESS01. You can find this info inside your fridge – in my case this sticker was on the inside top left of the unit facing down hence the camera angle is looking up.

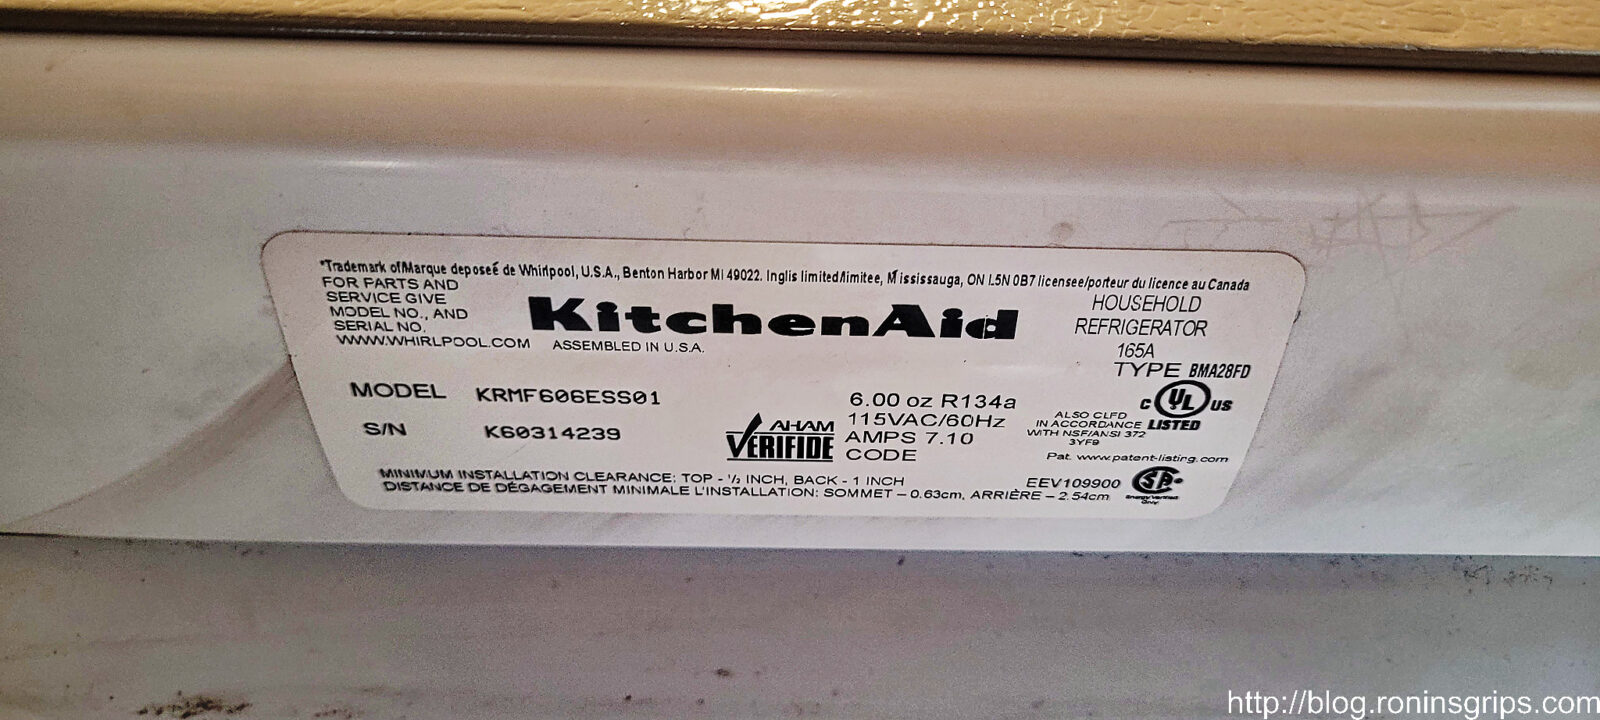
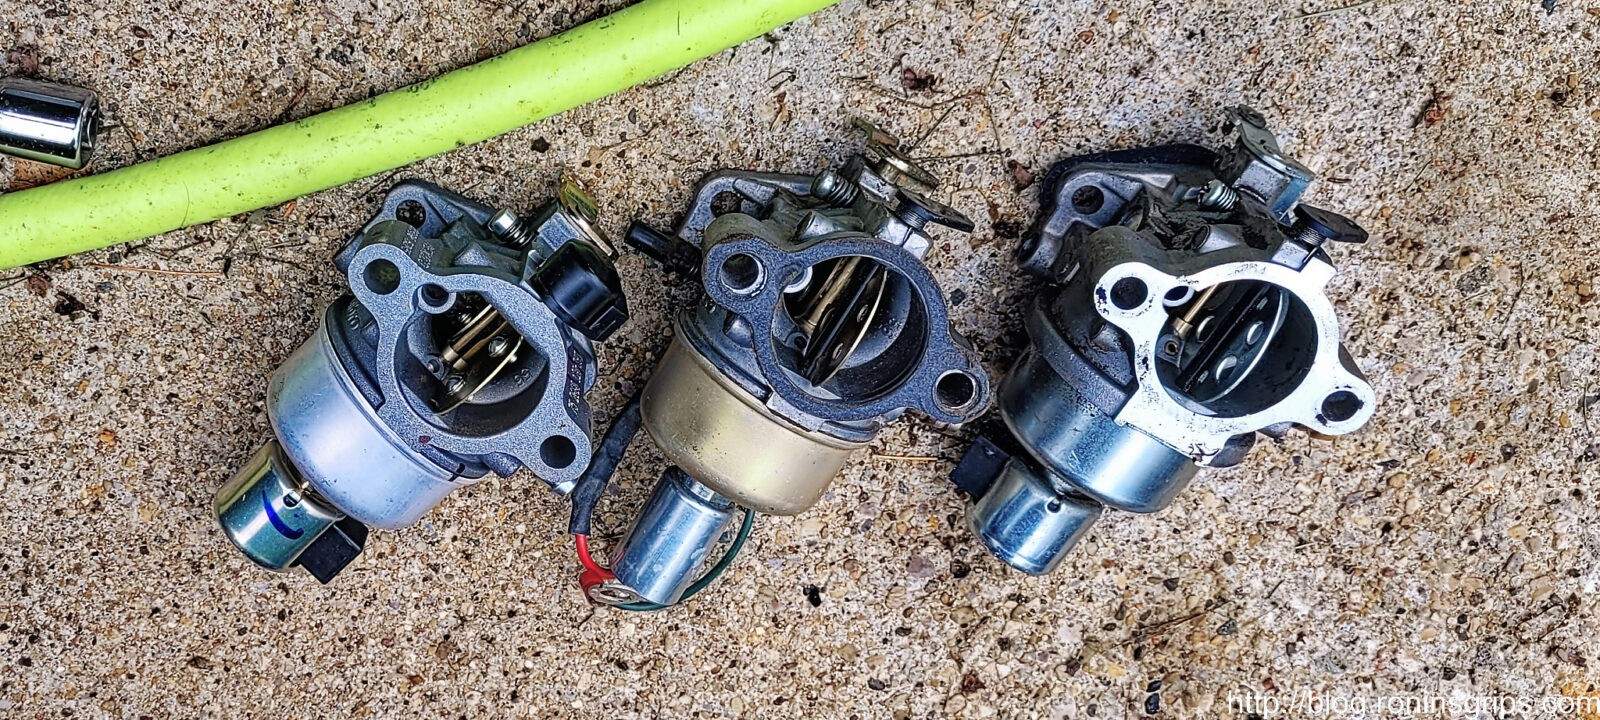
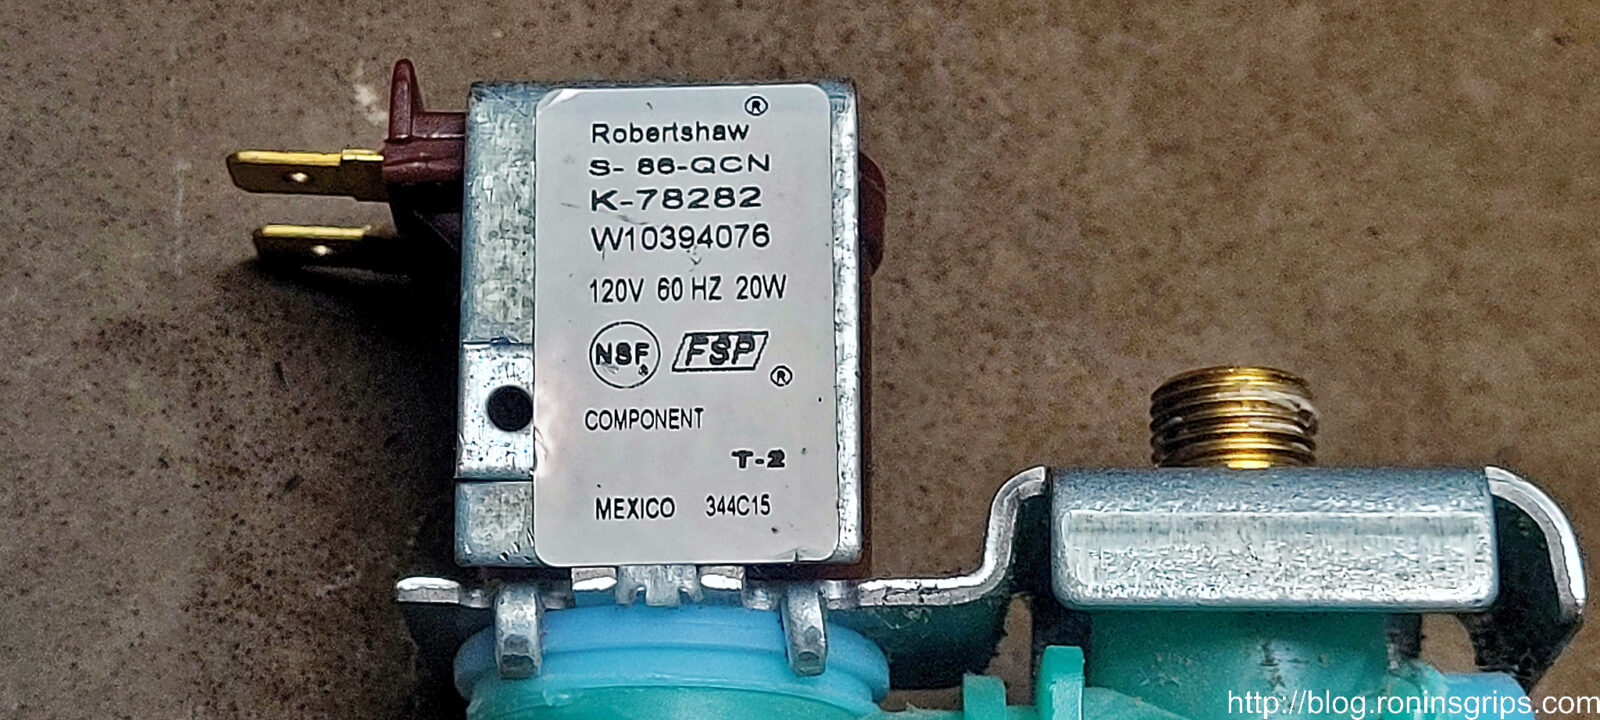
I spent some time searching on Kitchen aid KRMF606ES01 water valve and found out that my fridge has two – one at the inlet (that I needed) and one inside that I did not so make sure you order the right part. The valve part number I needed was W10394076.

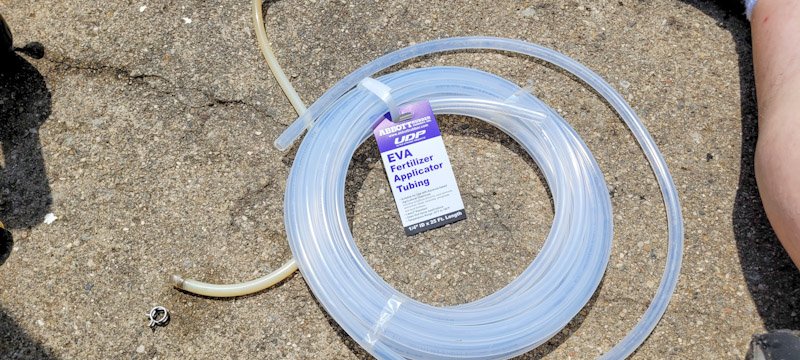
Direct from KitchenAid I could get the part for over $95.49. No, Whirlpool, I didn’t feel like spending a fortune by ordering it direct. I kept on searching and found it in the $70s then the $50s and then hopped over to Amazon and found it for $27.99 with free Prime shipping. It got great reviews and I ordered it on Saturday with delivery on Monday. Guess what – it was the exact same valve. Strike #4 for KitchenAid by the way.
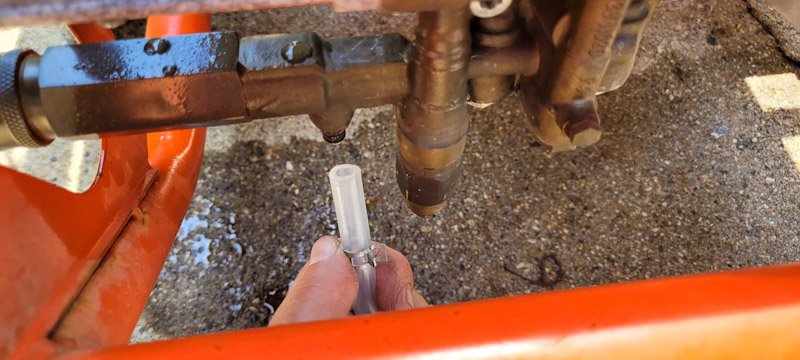
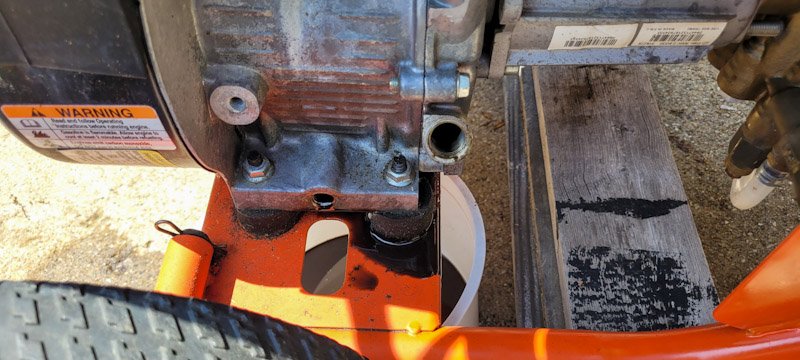
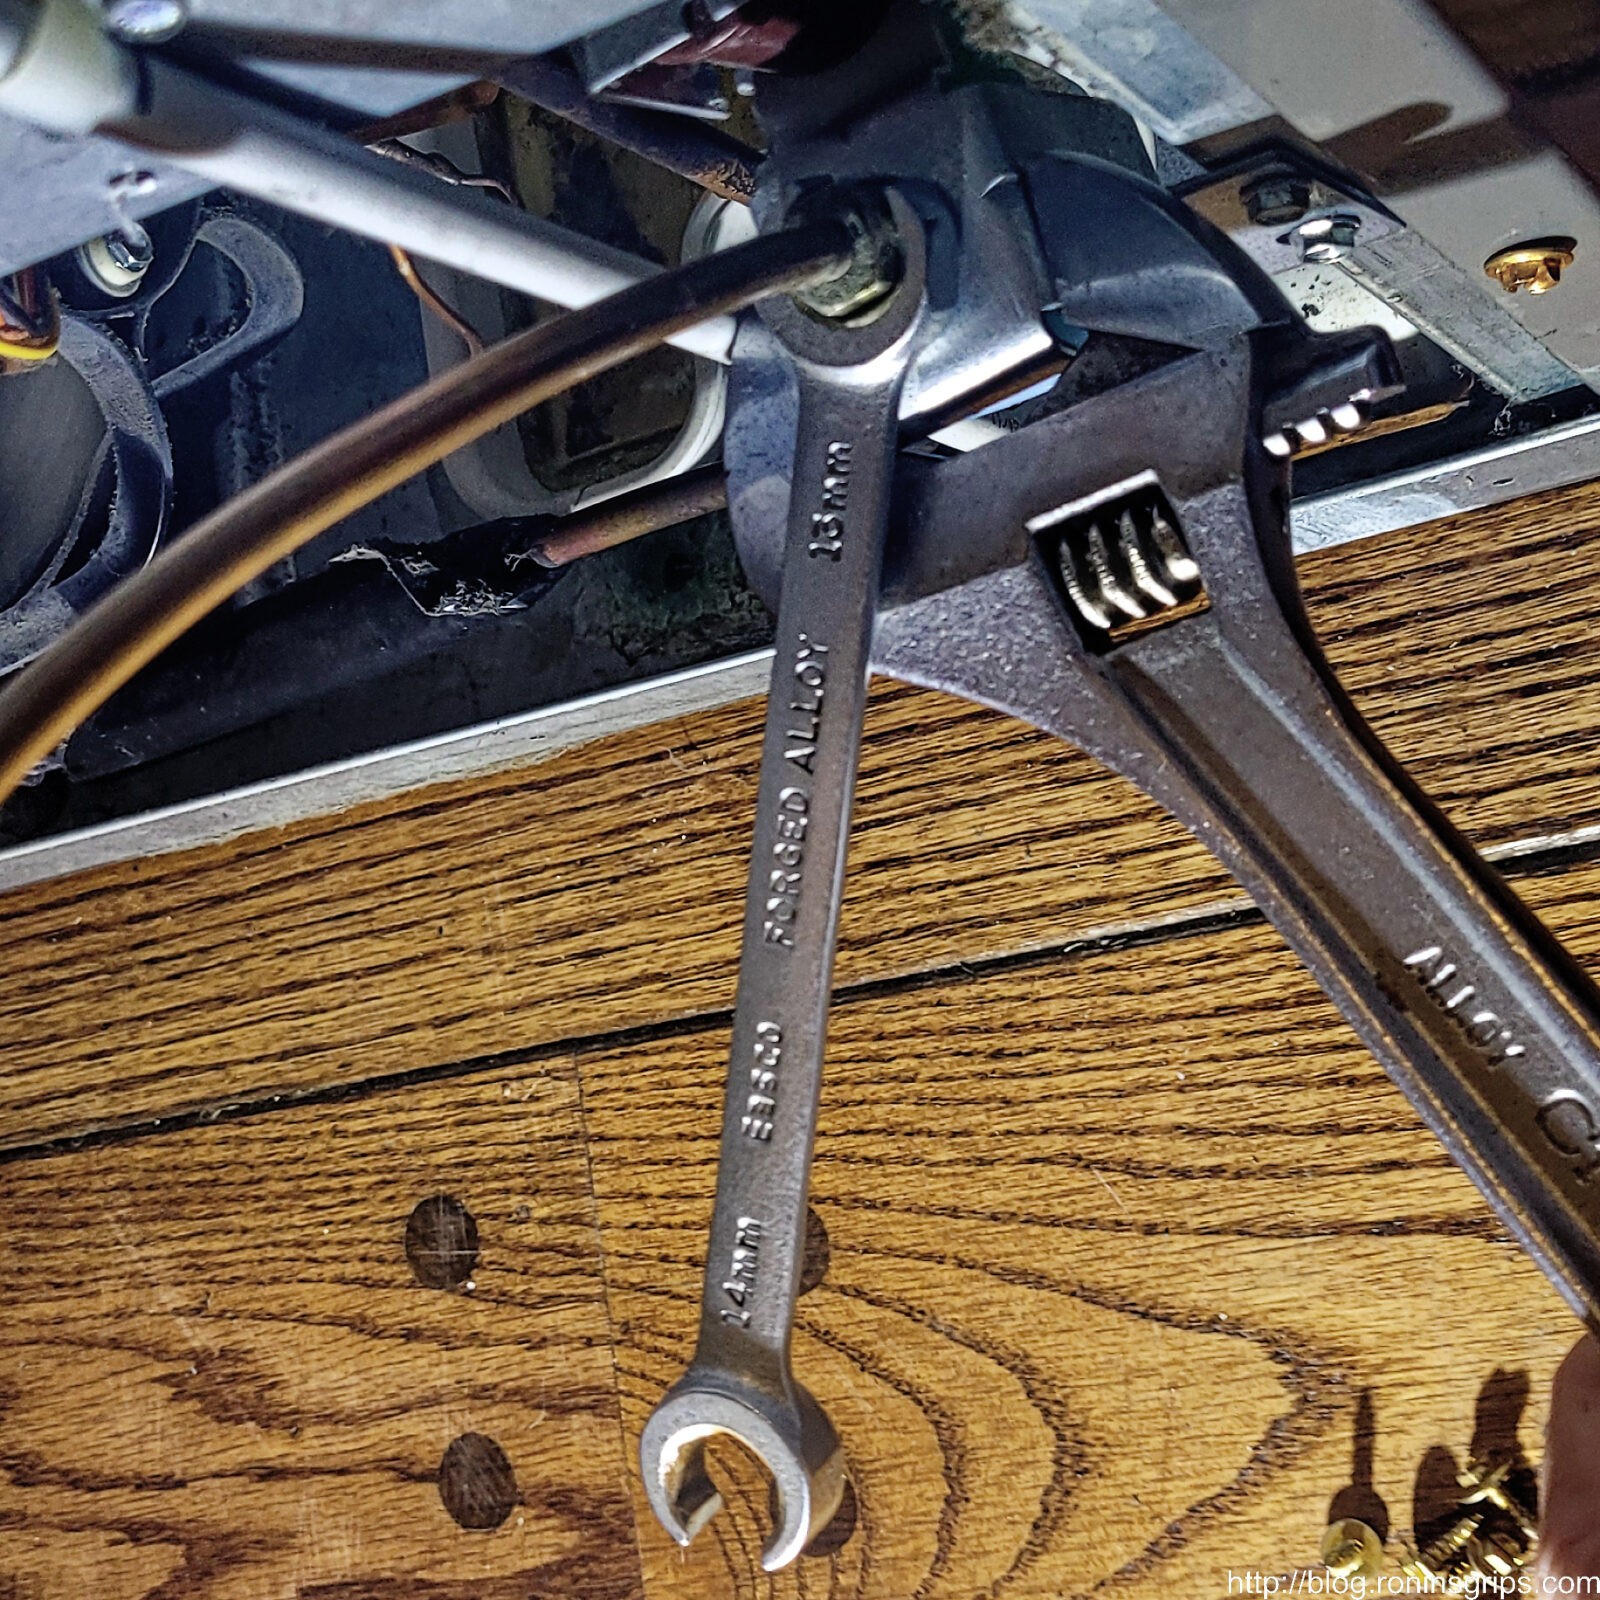
I’m jumping the gun a bit but this is the sticker on the original that I removed from the fridge. Note the maker is Robertshaw and their part number was K-78282 with Whirlpool’s W1039476 part number indicated.
Same maker – Robertshaw – slightly different part number K-78282-AM — the suffix probably denotes some relatively minor changes. No Whirlpool part number on and and no ghastly markup either. It is an exact match otherwise.

Replacing the valve

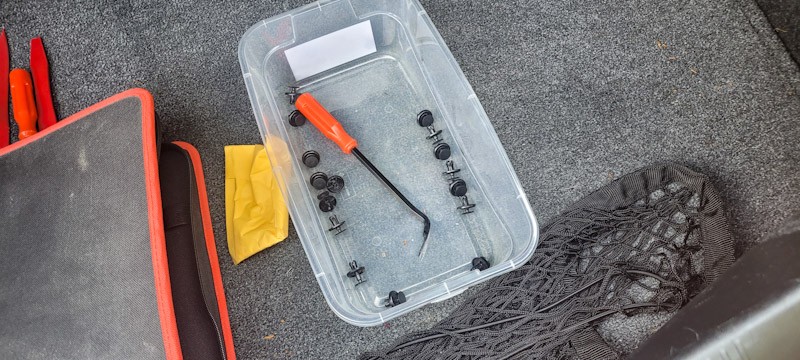
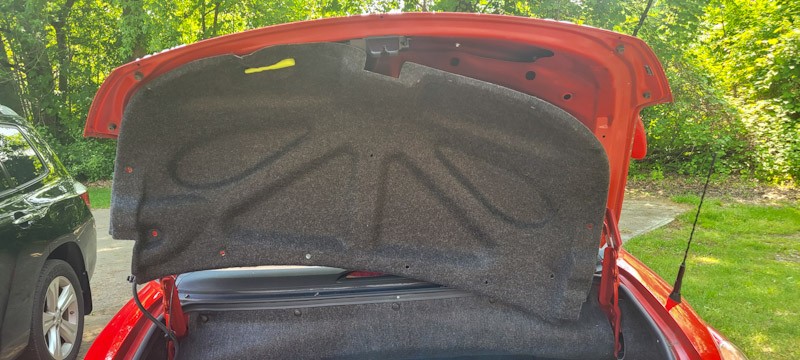
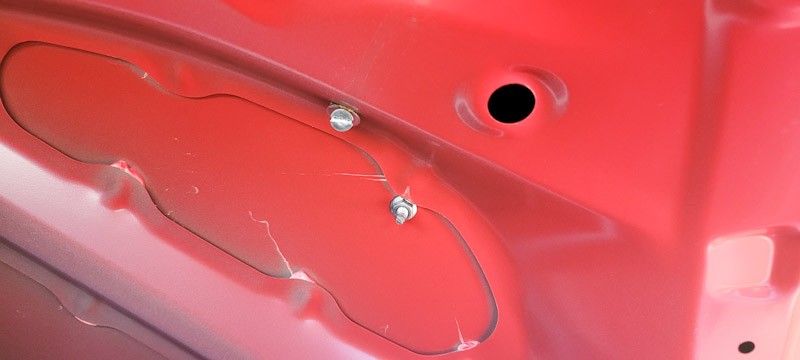
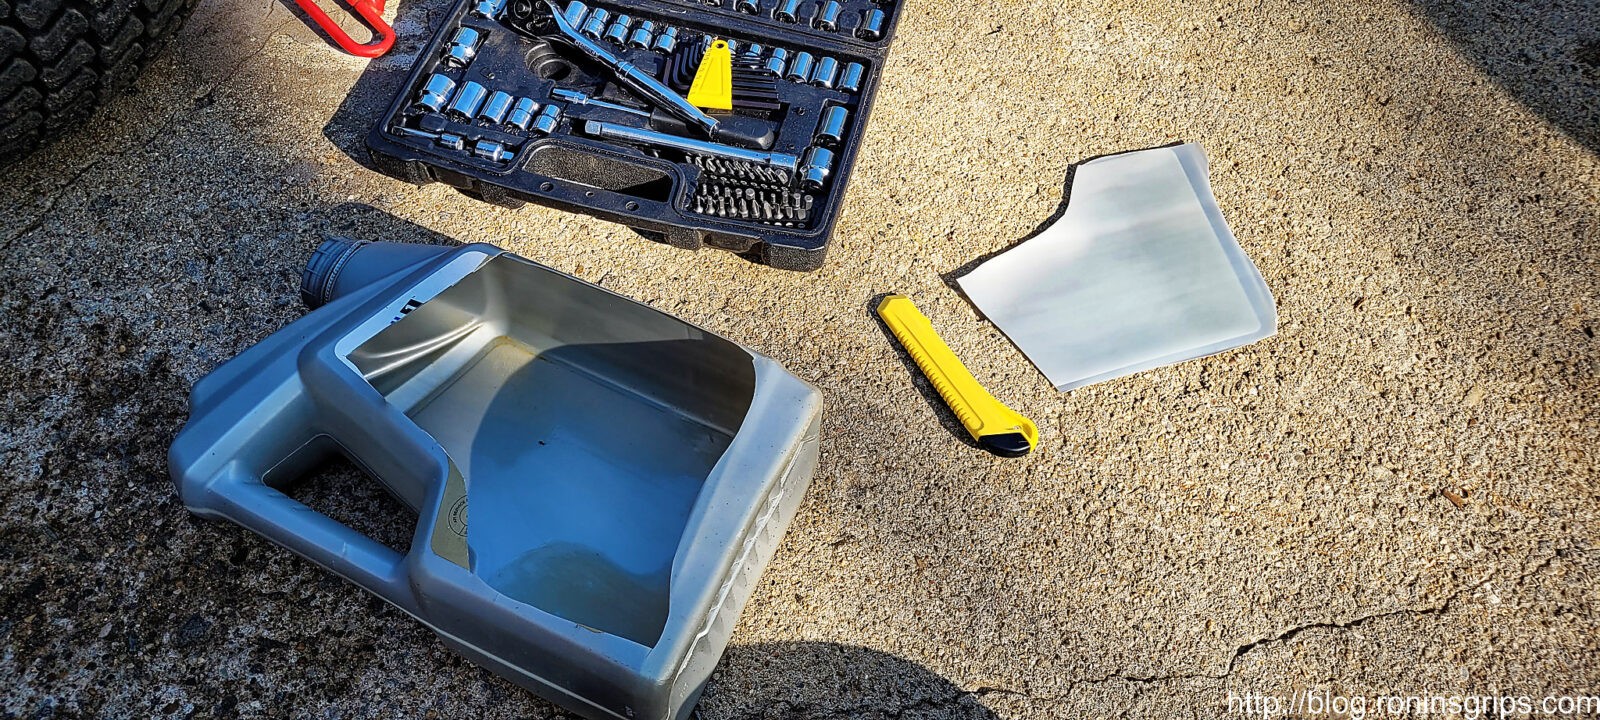
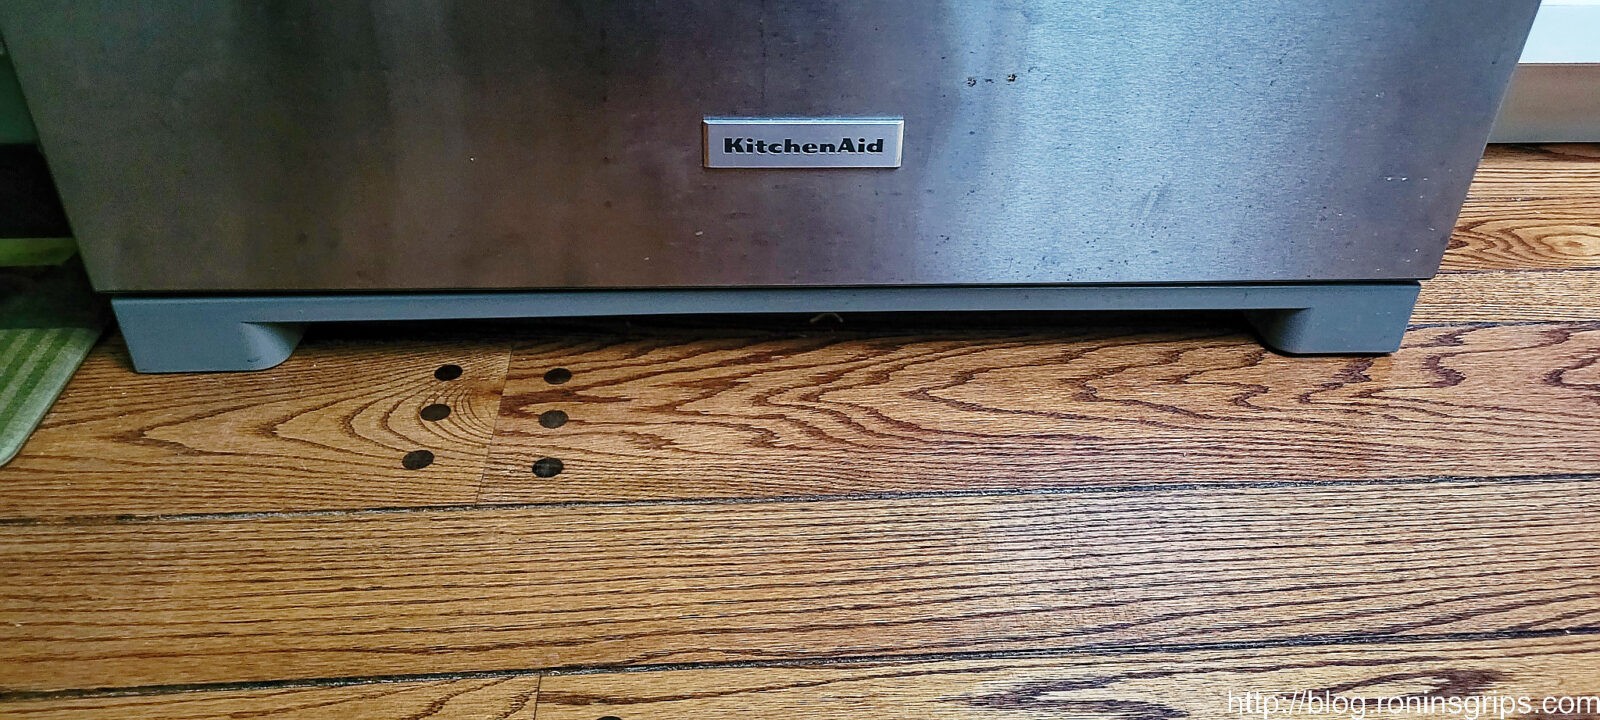
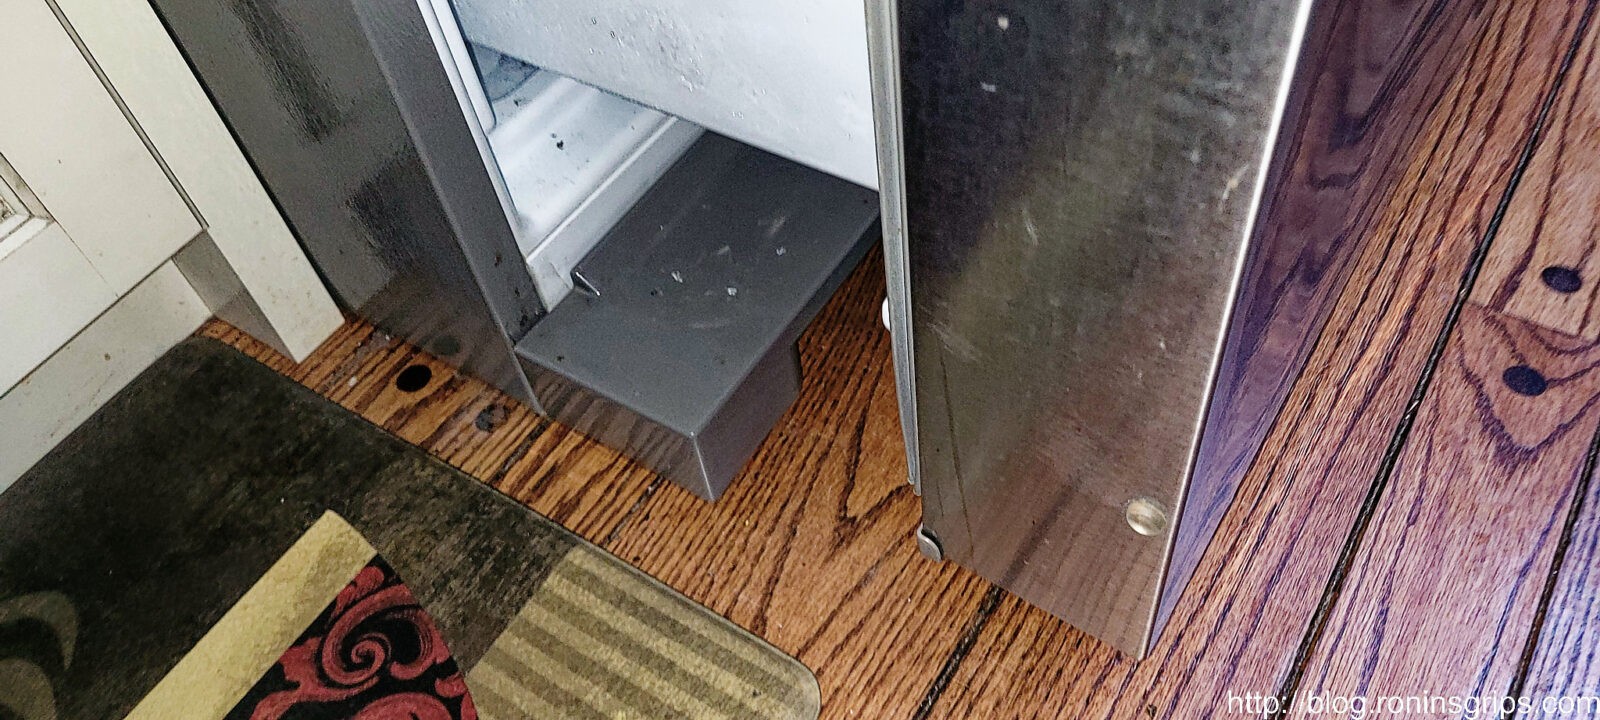
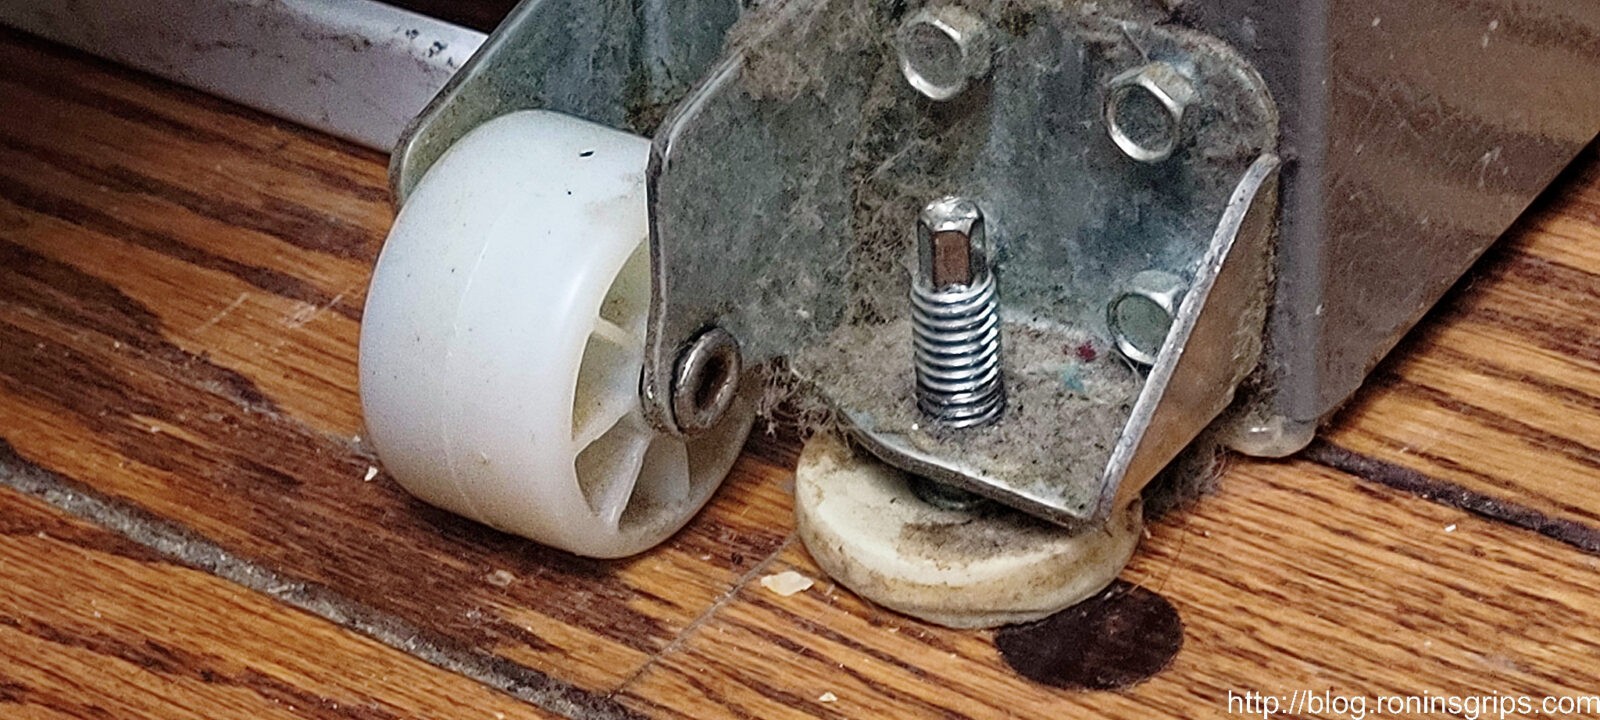
First, make sure the water supply is turned off and have a container you can set the supply line in just in case it drops. I’ll step through this with photos:

get the the fiberboard back cover out of the way by removing the screws around the edges. Doing this gives you easier access and you can make sure there are no drips when you are done.
Always compare new and old parts to make sure they match. I have been burned so many times over the years that this comparison is automatic for me now – don’t assume anything.
I’d recommend moving connections one by one. Take one off the old valve and put them on the new one. Then again, you have three very different connections so mixing them up would be next to impossible. Do note the orientation of the electric connection and keep it the same. In this case, I am using the adjustable wrench to hold the steel bracket and a flare nut wrench to loosen the water supply line. Never use an adjustable wrench on flare nuts – if the jaws give you can round over the nut so at least use a fixed wrench or better yet a flare nut wrench.
The waterline in the bottom is connected via a “push-to-connect” or “push connect” ,fitting. Push the blue collar in towards the valve body while pulling the outlet water line away and it will come right out. Note where the white electrical wire is for reference. Looking at the valve from the back, it is on the left side.
This is everything moved to the new valve. I then put it in place and secured it with the original screws. Again, note where the white wire is at. I didn’t want to find out if it mattered which side was connected so I just followed the same wiring orientation on the new valve, Also, use the adjustable wrench to hold the valve body while tightening the flare nut.

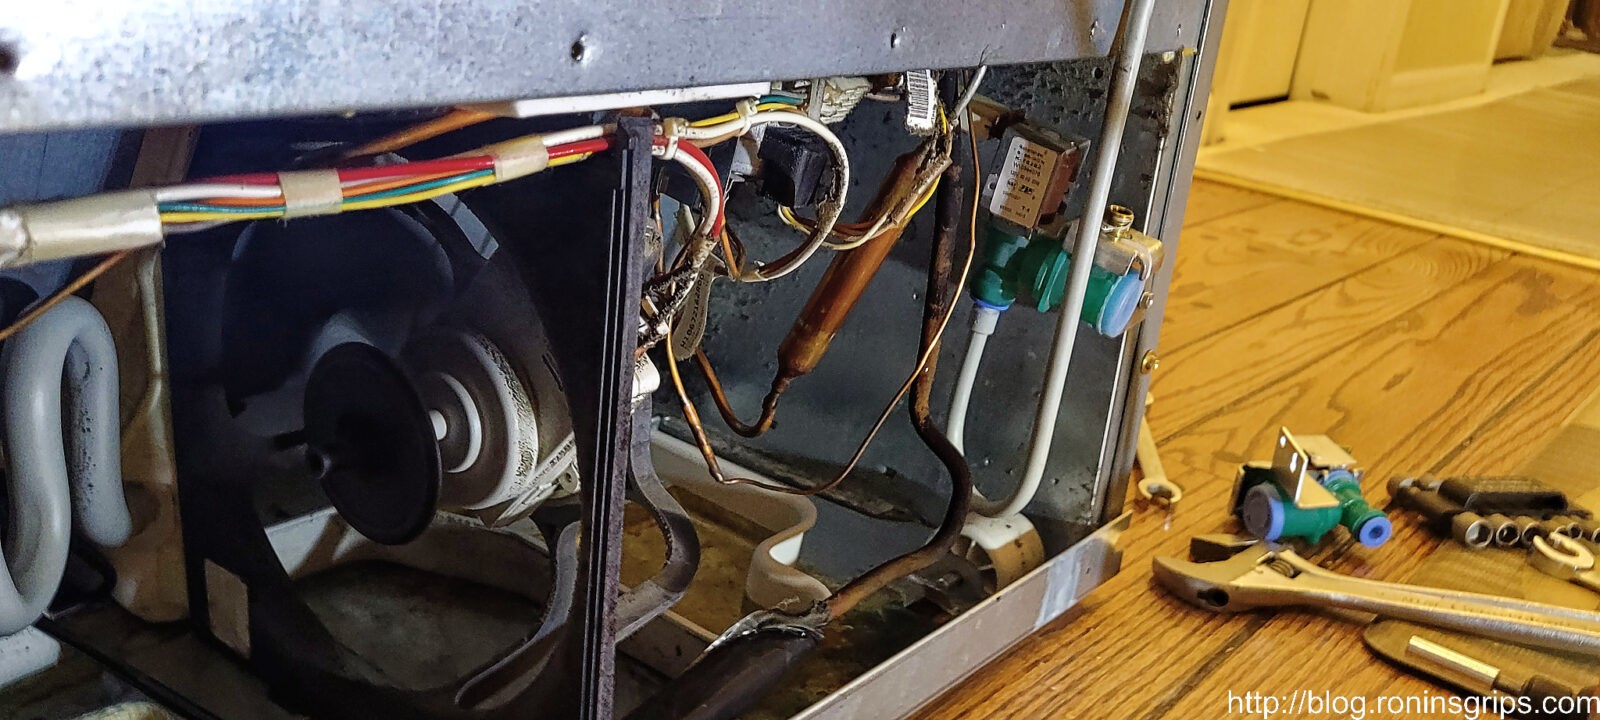
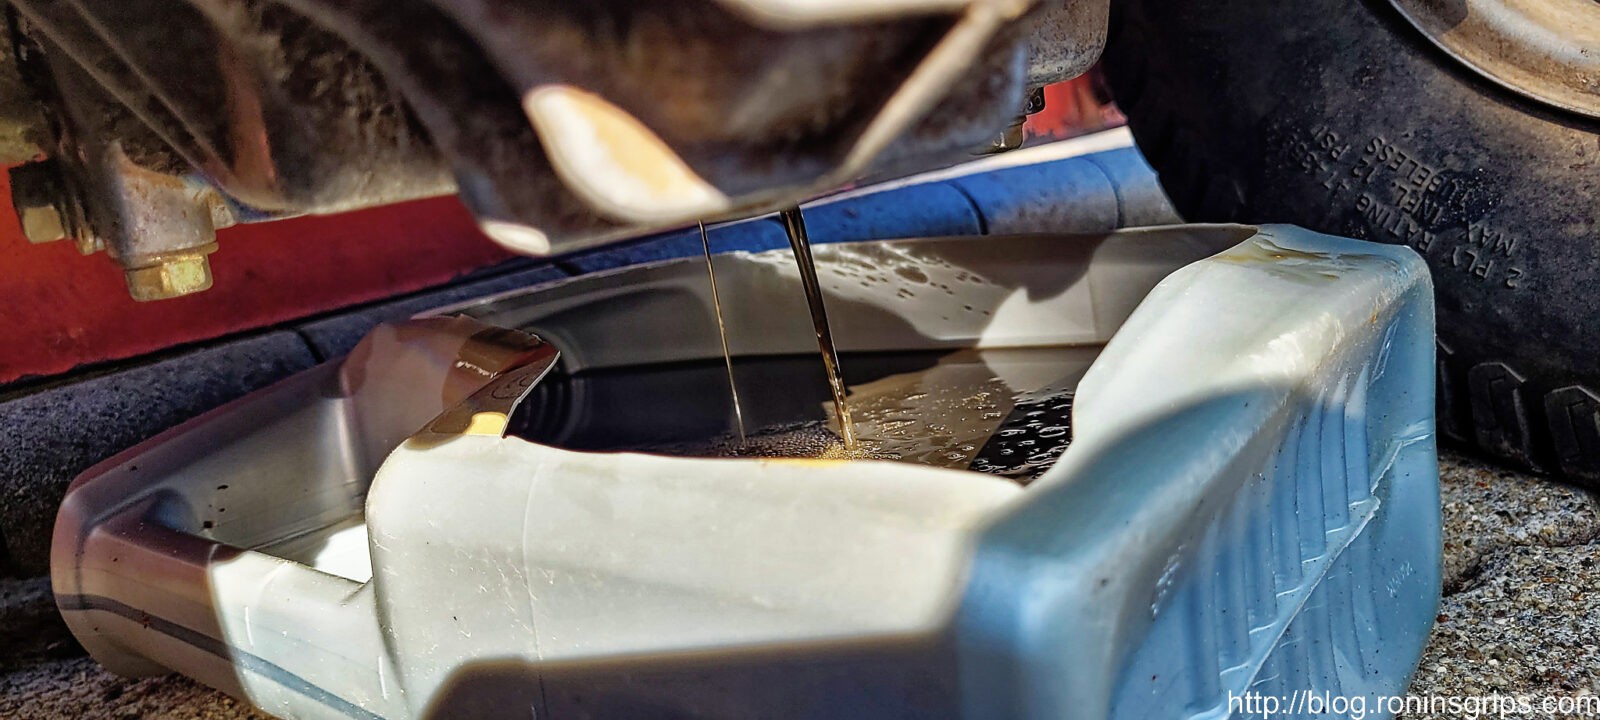
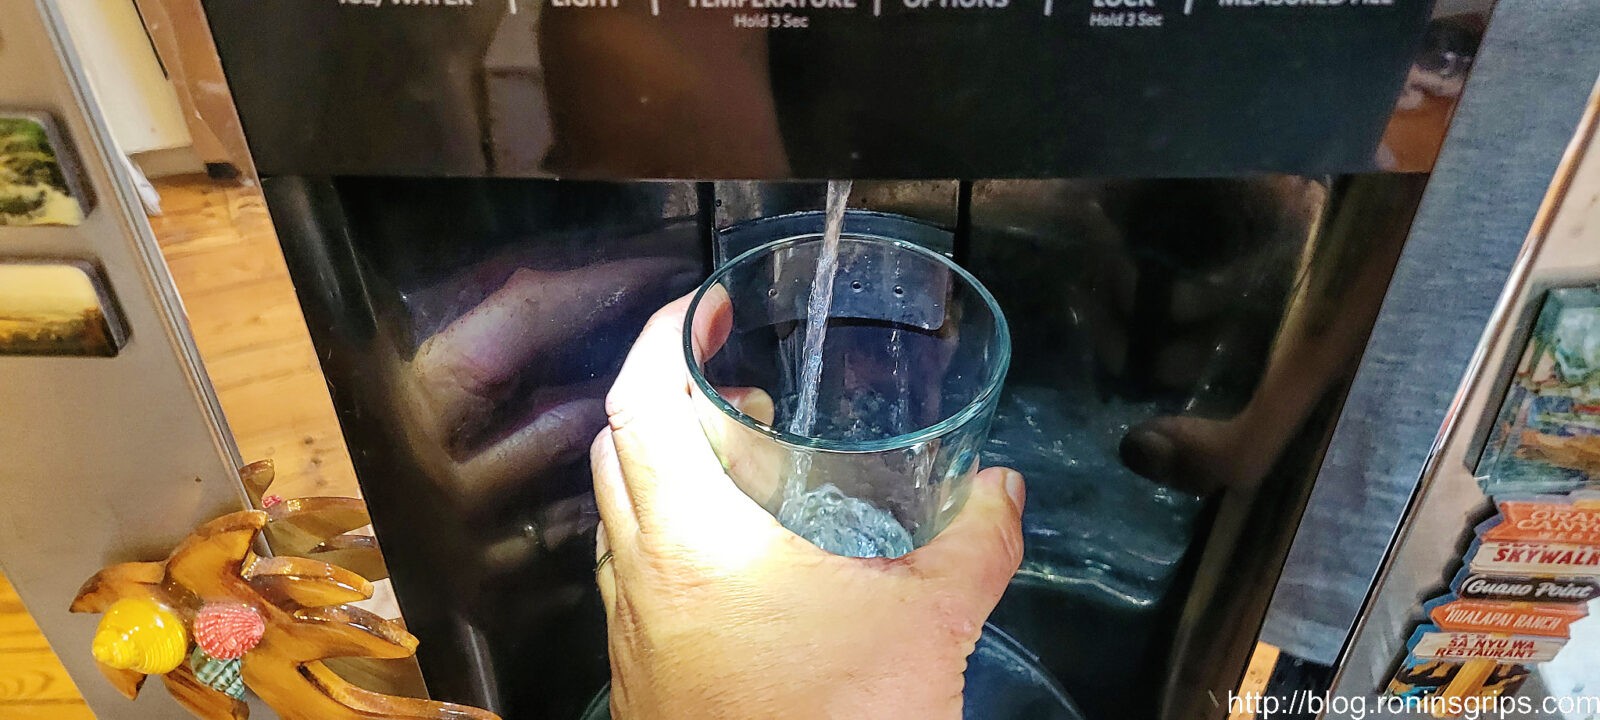
And with the new valve unit installed and my wife watching everything, I headed back down into the crawl space and turned the water on. No leaks. She tried the water dispenser and it was actually putting out a larger volume of water also – our jet had always been on the anemic side.

So, I waited while she filled a few big cups of water and threw them out to purge the lines. She also didn’t see any leaks so I headed back up after a few minutes hoping my crawl space work was done … and it was.

I looked for myself and it was definitely a much stronger jet of water – it had never moved that much water.
After a half hour of careful monitoring for leaks, I sealed it back up. I then waited a few hours and double checked by moving it forward a tad and checking around underneath with a flashlight and no leaks so I slid it back in place. When you slide it back, make sure the power cord and water supply line do not get caught on anything.

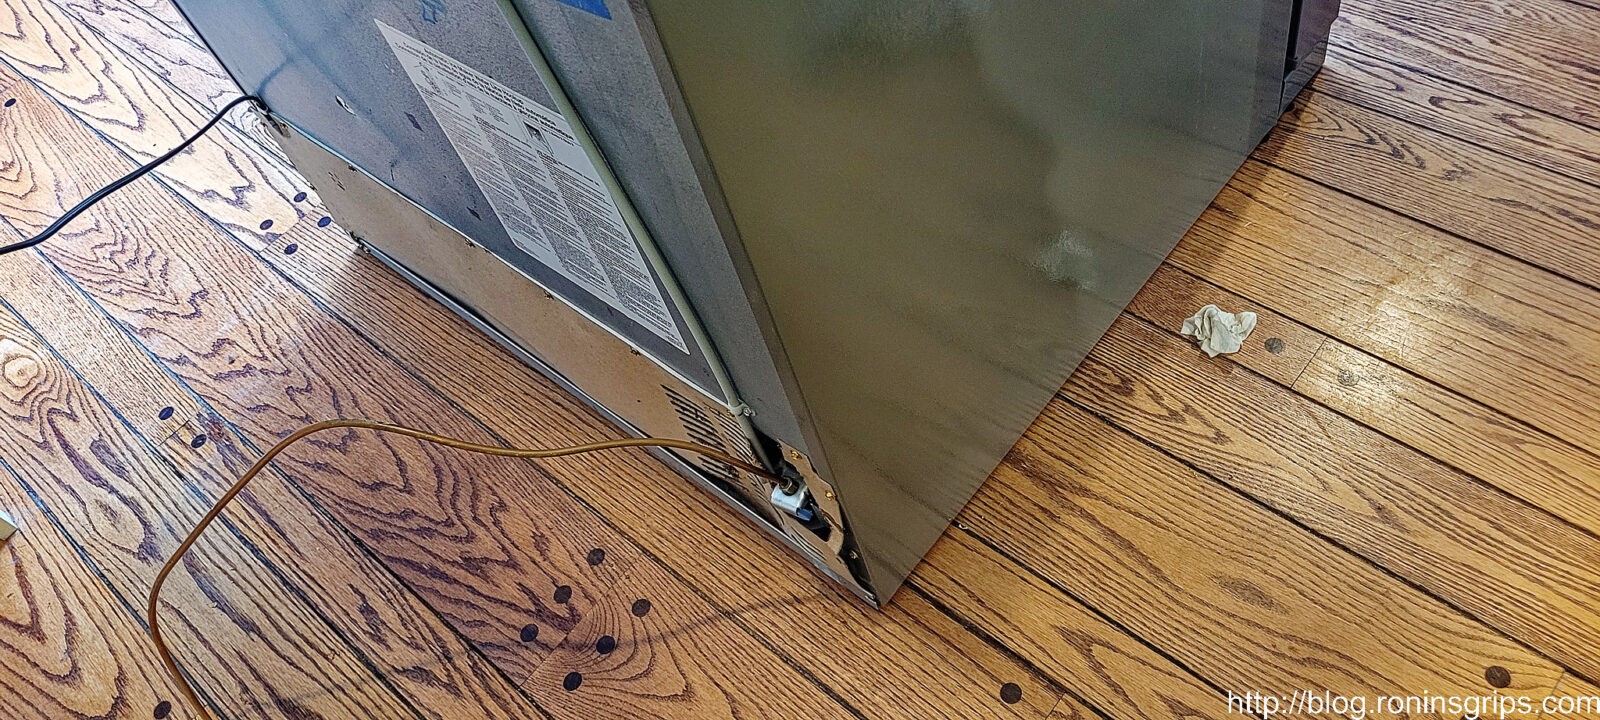
With the fridge back in place, use the levelers if you need to – I don’t actually.

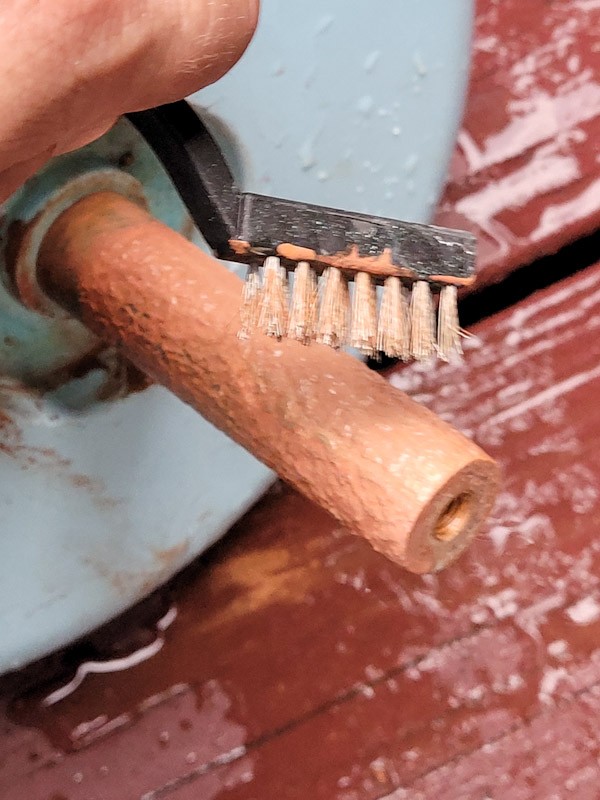
I didn’t get photos but the last thing I did was to use a long brush made for cleaning condenser coils to do just that. As lint and dust build up on the condenser it becomes less efficient, the fridge runs more and your electric bill is higher. The lint and dust there by the way because of an electric fan that is running underneath to help cool things off.

The last step is to open the lower freezer door and push the plastic cover back on the bottom. Done.

Summary

A week later and it is still running great. I hoped that the ice maker might start working again but no luck there. We bought am Aglucky counter top ice maker a few years ago that we’ve been very happy with.

I paid a premium for a supposed top-of-the line KitchenAid fridge and I don’t think the same level of quality is there. We have a Samsung fridge downstairs that has been flawless for us. When we replace this main fridge in the kitchen it may very well be a Samsung but it will not be a KitchenAid.

In the mean time, if you are having problems with your water inlet valve, I hope this helps you solve your problems and save some money.

3/2/24 Update: The new valve is still working great. We noticed we have more flow also – glasses fill faster. So, if you want to save some money, it’s an easy DIY repair that valve is still only $27.99 off Amazon.


If you find this post useful, please share the link on Facebook, with your friends, etc. Your support is much appreciated and if you have any feedback, please email me at in**@ro*********.com. Please note that for links to other websites, I may be paid via an affiliate program such as Avantlink, Impact, Amazon and eBay.


Replacing a Husqvarna 020490 Pressure Washer’s Soap Tank

We’ve had this “Husky” pressure washer for years and years and stored it outside. I’m sure it’s pushing 15-20 years old. We bought it new from Lowes way back when because the first one we bought when we were married had a cracked pump from water freezing in it over the Winter. That was a lesson learned. Don’t store a pressure washer and freezing weather unless you purge the pump.

At any rate, this Husky model 202490 3100 PSI pressure washer has served us really well. Every season it is used for pressure washing our deck, cars, you name it. I think we did replace the gun at one point and use one of the “all in one” sprayer heads so we can adjust to the nozzle we want without swapping heads.

We started running into a problem a few years back. I could tell the washer tank was oxidizing and cracking around the screws that held it in place so I hit them with some Goop to stabilize those parts.

Last year, a small hole opened in one top corner of the the tank because it was so brittle and this year, it just fell apart. Guess what? You can’t find those tanks anywhere and I didn’t have any luck finding a relativeluy close size. At the same time, everything else was just fine and I didn’t want to just throw it away either.

The sun had really taken its toll on the plastic of the soap tank.
I taped the top corners first but this season is just falling apart.

I was complianing to my best friend John and he said “It’s just a siphon feed right? No pump right?” Of course he was right – yeah the tank was over the pump and gravity fed it down to the inlet but it was just a siphon feed at the end of the day.

When a person refers to a siphon draw, what happens is when air or water rushes by an opening it creates a draw and that can be used to pull in either air or water. In this case soap is pulled into into the water stream.

John told me “Dude, just drop a hose in a bottle of cleaner and it’ll suck it right out! You don’t need to spend money on anything fancy.”

You ever have one of those “Duh!” moments where the light bulbs just go on? Yeah, I did right then. I removed the remnants of the old white soap tank and there was actually a shelf there above the engine I could set a bottle of soap on.

Sometimes I get lucky. I could set a bottle of pressure washer soap on there and put a little plastic box to hold stuff.

I then measured the inlet nipple down by the pump and it was nothing more than a 1/4″ fitting. 1/4″ hose would slide right on! Okay, I headed off the Tractor & Supply (TSC) to get some tubing. They tend to have a pretty good selection of bulk tubing.

TSC did not let me down, they had a 1/4″ x 25′ EVA tubing package at a very reasonable price of $20. That would give me plenty for this project and more for future work.

Let me show you some pictures so you have a better idea what I’m talking about.

So the old yellow hose ran from the plastic detergent tank down into that Inlet nipple. I just removed that hose entirely once I pulled off the tank. There was a nice little on/off valve there but I didn’t need it and given its age and that it was made out of plastic you know it was getting ready to fall apart as well.
This is the quarter inch Eva tubing I got from TSC.
I put the tubing on the old siphon nipple and then I used a hose clamp to Snug it down and keep it from falling off.
I then did a bit of experimenting about how long I wanted the line before I cut it to the final length.
You know I also scavenged an old ice cream plastic box that I glued in place next to the soap. That is just a perk but definitely not something I need. I can stick the I was only thinking about you end of the tubing in there when I don’t need it.
I figured while I was at it I might as well change the oil. I hadn’t done that in a long time.
Kind of an anti-climactic photo but the soap part works great. I’m back in business. The only thing I spent money on was the hose. Everything else I had in inventory.

Summary

If you have one of these old Husqvarna pressure washers, just yank out the old soap tank and call it even. Go to your favorite source of quarter inch tubing that will stand up to UV light, water and soap and you’ll be in business.


If you find this post useful, please share the link on Facebook, with your friends, etc. Your support is much appreciated and if you have any feedback, please email me at in**@ro*********.com. Please note that for links to other websites, I may be paid via an affiliate program such as Avantlink, Impact, Amazon and eBay.


Repainting a 2004 Toyota Solara’s Spoiler Using AutomotiveTouchUp.Com Paint

My wife’s convertible Solara is her pride and joy in the summer time. We bought it back in 2017 and it has proven itself to be a reliable and fun car. One issue it had was related to an aftermarket spoiler the previous owner had installed.

In 2021 we waited to take the cover off and there had been a number of hot and humid days. When we removed it, the clear coat on the spoiler was popping off. The factory paint on the car was just fine – the spoiler on the other hand looked tough and by the end of the 2022 Summer driving season it really looked bad so I knew I needed to surprise her by refinishing it.

The clear coat was peeling all over the top of the spoiler but not the bottom.

I do own a full set of automotive paint sprayers but I didn’t feel like getting them out and set up just to do a spoiler. I decided to go with AutomotiveTouchUp.Com who I had bought touch up paint from in the past and had pretty good luck with. The only issue I have ever had with them is that you will wait around four weeks for them to make and ship your paint.

The paint code for a Toyota is one the door sticker and her Solara was “Absolutely Red – 3PO” which describes the bright red on the car very well. I knew I would need primer, that base color and clear coat. I always buy extra just in case so I bought two cans 12-oz cans of each and then I waited for it to show up.

Before you do anything – read their instructions. I went with spray cans so I focused on that section – click here.

Getting Ready to Paint

The first step was to remove the spoiler from the car. This was done by removing the body push pin rivets and moving the interior cover out of the way. Don’t be surprised to find out some of the rivets are missing or broken on an old car. You can easily get them on Amazon along with a tool that makes removal very easy.

Those little push pin rivets do the job and the tool you see makes it really easy to pull them out. If you don’t have a tool use a small blade screw driver or flat edge to get under the pin-part of the rivet and lift it up.
You don’t need to completely remove the cover – just remove as many as you want to get access to the onme screw and one stud on each side that holds the spoiler.
You will see something like this on each side. Remove the machine screws first and start to back off the nut on the stud. If the spoiler stays in place, then remove the nuts completely and the spoiler will lift straight off. In my case, my wife held the spoiler so it wouldn’t fall off when the nuts were removed.
I took one look at the old stuck on seals and left them alone. Trying to remove them would only tear them up. I decided to leave them alone, re-use them and if there was a leak then I would decide whether to replace them or just put a bit of black silicone RTV gasket glue around the two holes to seal it. I didn’t want to jump right to that because if I needed to remove the spoiler again, it would tear up the seals. You can buy black rubber seal material in sheets and you cutt out whatever shape you need but I wanted to avoid that path if I could.
I put the spoiler on two wood sawhorses to do the refinishing work. Note, I added blue painter’s tape to the sawhorses right after this was taken.
I have a 5″ Dewalt orbital sander that I used with 150 then 220 grit sandpaper to remove all of the bubbled/loose clear coat. I wasn’t worried about removing everything down to the bare bare material underneath but did want a solid surface on the top and edges for the primer to grab hold of.

Painting the Car

With the surface prepped, let’s get into the painting process.

This is red primer – not the base paint. I did three coats with wet sanding at 150 grit. No matter how hard and long I shook the rattle cans, the primer would spatter / blow larger drops into the paint vs. the fine mist you want. To be honest, I was regretting not just getting out my spray guns at this point.
I applied five coats of red paint. Light coats are the way to go and what you are looking for is a nice even rich color. I was still fighting the spattering even with the paint. So I did wet sand a few times. There instructions tell you not to do this but they also didn’t have their paint spattering everywhere.
This had six coats of clear coat. I did not wet sand between. The trick is to build up a relatively thick clear coat so you can wet sand it even and then later polish it.
Let it cure for an honest day so that it is hard enough to wet sand and then use rubbing compund to polish it. Water acts as a lubricant in the very fine 1500 grit sandpaper. If you don’t use it, the grit will fill with material and be useless. I keep a bucket of water next to me and keep dunking it in there. In this photo you see a sheet of 1500 grit sand paper that I wrap around the foam block to support it when I sand. I sand the clear coat using 1500, 2000 and 3000 grit sandpaper.
This is a random orbit 6″ bonnet washer. The terry cloth surface holds the rubbing compound and you keep moving around the clear coat removing all of the fine scratches.
The result turned out great. One important thing to remember – it looks and feels cured but it isn’t. There normal one part clear coat needs 30 days to cure the rest of the way. If you wax it, you will probably watch your finish peel right off so be sure to wait.
It wasn’t perfect but way, way better and my wife as thrilled.
The spoiler had rubber bumpers under the front part where it was close to the body. I bought these little 1/4″ tall rubber self-adehsive bumpers at Ace. They looked identical to the originals and will prevent the spoiler from hitting the body for whatever reason.

Summary

Because I had the sprayers, I regretted using the rattle can approach with the spattering that I could not get rid of for whatever reason. The time I thought I would save by not setting up my finishing automotive paint sprayer I lost doing extra sanding to get a relatively smooth finish.

In terms of color, they did a great job matching. I’m writing those blog almost two months after painting and it is nearly an exact match. Only at certain angles and lighting do I think I might see a difference – it’s that close. I’ve used them for other vehicles for bottles of touchup paint and their matching is always really good.

Here’s my advice – if you don’t have a good car air sprayer, these rattle cans (spray cans) from the company will do the job. Just be prepared to do extra wet sanding but not between the clear coats.

What is the ultimate gauge of success? My wife is really happy with the results.

3/2/24 Update: The paint is still holding up just fine. No bubbles, peeling or fading.


If you find this post useful, please share the link on Facebook, with your friends, etc. Your support is much appreciated and if you have any feedback, please email me at in**@ro*********.com. Please note that for links to other websites, I may be paid via an affiliate program such as Avantlink, Impact, Amazon and eBay.


How did we cool off in 96°, but felt like 110° weather? We used cooling towels and misting fans

Folks, as I am writing this I’m in the stands of a jiu-jitsu tournament in Kissimmee, Florida, waiting for it to start. My two nieces and sister-in-law flew in from Manila, Philippines, for the young ladies to compete. Of course, we also had to visit the Disney World parks on some of the hottest days of tghe year.

When we took them to the parks, it was 93 to 95 degrees. With the humidity and what have you, the “feels like temperature” according to weather.com ranged from 103 to 110. It was unreal.

It was scorching hot at the Animal Kingdom at 3:03 p.m on 7/22/2023. Whew!!!

I grew up in Michigan. I’m used to occasional 90° days and what have you but we were at the Disney parks and the heat was something else. Before we went, I talked to some colleagues who worked in Fort Myers, Florida, and they recommended cooling towels and handheld portable misting fans.

This was good news to me because years ago we did something very similar and still had the towels. We donated the misting fans we bought way back when several years ago. They worked but they went through the batteries and water pretty fast.

This time we went with slightly larger rechargeable newer generation misting fans we also had a big new solar battery recharger with us. I had one from 5 years ago that I still use but the battery it’s probably starting to reach end of life and I didn’t want to find that out in a park so I bought a new one.

This is a newer generation charger from the one I had bought years ago. The only difference that I could tell was that if you wanted to recharge it with a cable it had a slot for USBC other than that everything else that I liked about the old charger was the same. We use this 3 days straight in parks and those solar panels are big enough to actually work. The little charger should just have one solar panel on top of the battery pack really don’t make a difference. This design with four exposed panels actually can recharge the charger. Whenever we stopped I would open it up and let it top off even though it has a huge battery pack. I used my old one all over the place on trips, hiking, power outages, you name it.

Folks, these three things were a godsend. I kid you not. We kept the cooling towels wet and would occasionally swing them through the air to cool them off and put them back on our necks. The misting fans were running almost non-stop. We had three of them and I really wish I had bought four or even five so each person could have one versus handing them around but we may do with what we had.

By the way, a misting fan works by letting a little water out that becomes a mist and as the mist evaporates it cools off the surrounding air before it hits you. The model we used has three speeds of fan and you can turn the water on or off.

These fans are the second generation from the vendor that sold me the old ones period they have rechargeable batteries via USB-C slot, a larger water reservoir in the top clear plastic and they worked great.
The fans can fold if you need them to be shorter for some reason and you can see the USB slot. The little hand strap is included and we chose to install them given we were going to be walking around the parks.
Refilling is easily done by removing the little rubber plug and putting it under a faucet, drinking fountain or using the little supplied spare water bottle. The little spare bottle is good for one refill and we did use them multiple times when we were waiting in long lines or whatever and notice we had run out of water in a fan.

The fans came with little extra bottles to refill the fans and we would fill both the bottles and the fans as needed at drinking fountains, bathrooms, Etc. They made very efficient use of their batteries and their water – I was actually surprised. The fans ran a great deal maybe at least 4-6 hours and the batteries didn’t need charging. I can’t say how long they would last bu tthey didn’t let us down.

We’ve used the Frogg Togg brand of cooling towels for a number of years. We bought three more so everyone would have one. Basically they are like a man-made Chamois cloth that you get wet under a faucet or whatever. When you twirl it in the air for a few seconds, some of the water evaporates and it cools off the towel. You then put the towel around your neck and it cools you down. When it gets dry, you get it wet again. Dipping it in ice water is an even faster way to cool off.

Summary

If you are reading this and are going to a hot area where you need to cool off but I can’t recommend them enough. Going to the Orlando,Florida, Disney parks at the end of July in such hot weather would have been absolutely brutal without them.

On the Amazon listing for the fan, be sure to get a model that says “Upgraded” or you may get an older model. To be specific, we had the upgraded royal blue model.


If you find this post useful, please share the link on Facebook, with your friends, etc. Your support is much appreciated and if you have any feedback, please email me at in**@ro*********.com. Please note that for links to other websites, I may be paid via an affiliate program such as Avantlink, Impact, Amazon and eBay.


An Update On My Char-Griller Competition Pro Grill

Back in July of 2020, my kids bought me my first new grill in years – a Char-Griller model 8125 grill that I then converted to use firewood. I wrote a blog post about the conversion work including making the firebox and adding in heavy aftermarket grates [click here to read it]. At any rate, here we are three years later and thought I would write an update – why? Because I love grilling and smoking.

All in all, the grill has been great other than the ultra cheap low temp paint they coated the grill with at the factory. That stuff would regularly bake off in an unchanged area and then I would have to touch it up with Rustoleum High Heat Ultra – that’s the best paint I have found for a grill.

Way back when I bought a cover for the grill and was pretty good about keeping it on for the first year. For the last two years it has largely stayed off because I would forget it at first and then the rodents got to it and it has a bunch of holes now.

At any rate, I was grilling this spring before we were going to have a bunch of relatives over and realized I really needed to wire brush the grill to get off loose paint and rust and then put on some new coats of paint.

The rust was superficial and the trick is to keep it that way – either keep paint on it by touching uop the spots needed or if it is past that, like this one is, wirebrush and paint it when needed.
I use a circular wire brush in my drill to go all around and remove as much surface rust and loose paint as I can.
Go all around and get the front, back and sides – don’t forget the bottom either. If yyou keepo your grill painted it will last for years and years. Kind of an interesting note, the firebox I added worked wonderfully – the botttom is in great shape with hardly any rust or loose paint. If the burning wood were to sit right on the bottom steel of the grill, it would be in far worse shape.
Rustoleum High Heat Ultra – specifically the Ultra blend – is the best paint I have found for the grill. No finish is perfect and this grill gets real hot as I burn down wood to embers so the finish will burn/oxidize over time. I keep a can on hand and do spot touch ups regularly but sooner or later you will need to wire brush and redo certain areas.
Follow the instructions for curing the paint. I’ve found it makes a world of difference if you do. I apply 3-4 coats on the areas that get really hot – for me it is the two ends of the main body and nearly the entire back plus the front below the door.
Here I had just started a fire and was getting ready to grill. Again, this is after curing the finish per instructions.
I’m letting the wood cook down. You can see why the sheet metal gets so hot.
Kind of off topic but this is what I was grilling chicken that night – I do find the use of hot and cold zones (or some folks call them direct and indirect heat zones. Here, the open lid has really allowed the embers to flare up and I then closed the lid and to dampen (reduce) the flames by controlling the amount of air that can get to the chicken.

By the way, the aftermarket grates I put in it have been awesome from the start. They’re nice and thick and cook the food evenly. Totally worth it. There are photos and information about them in the first post.

Summary

I still like my Chargriller. It was a great gift from my kids and by keeping it painted it ought to last a long time. If you need to touch up your grill – definitely try out Rustoleum High Heat Ultra. I’ve found it to hold up the best but you will still need to do touchups.


If you find this post useful, please share the link on Facebook, with your friends, etc. Your support is much appreciated and if you have any feedback, please email me at in**@ro*********.com. Please note that for links to other websites, I may be paid via an affiliate program such as Avantlink, Impact, Amazon and eBay.


How to change the transmission oil in your Simplicity Broadmor 16HP lawn tractor

If you ever notice that you are trying to push the foot pedal to back up your tractor and it is very slow, then you may have one or two things going on – your transmission could be low on oil or it could be really old and due for a change. How do I know this? Well, I just lived it.

We have a 1998 Simplicity Broadmor tractor with a 42″ deck. It’s been backing up slower and slower for quite some time. When I bought the tractor new, I asked the dealer what I needed to do with the transmission – he said just make sure it has fluid but that’s it because it is sealed. He told me this in 1998 … and it’s now 2023. Yeah, I know now.

What is 10W-30 CD/SG?

Well, I was getting my tractor ready for the season and checked the plastic case and saw a dark shadow at the full mark. I took off the lid and couldn’t see any oil at all – anywhere inside. The cap said “TRANSMISSION OIL FILL 10W-30 CD/SG”? I had no idea what that meant so I called my master auto mechanic friend John up and he told me to put in a good real oil, not synthetic 10W-30.

The CD/SG was the API (American Petroleum Institute) service category. The “S” meant it was for automotive gasoline engines and the “G” code is the engine vintage. SG was introduced in 1989 but is not considered suitable for engines introduced after 1993. Regarding “CD”, the “C” is for automotive diesel engines. “D” means it should not be used in diesels made after 1994. In short, a modern car engine 10W-30 oil would work just fine. The simplicity owner’s manual also states this. It takes about 3.5 quarts.

The Reservoir

As to the dark mark on the plastic reservoir – I guess it is stained now due to age. You sure can’t see the fluid in the container unless you remove the cap. It had probably been low on transmission oil for a long time. I topped it off and it worked like new.

I was so happy about the speed in reverse that I called John. He paused and asked if I ever change my transmission oil. I told him that I hadn’t based on what the dealer told me way back when and he just chuckled “boy, you better drain that transmission or you’re going to have a problem”.

So, I listened to John. I looked up in the manual where the drain plug was at, removed it and out came pitch black oil. Have you ever felt guilty about what you did to a machine? I sure did. Wow.

According to the manual, Simplicity recommended that the oil be changed after the first 50 hours of run time and then every 250 hours after that. Folks, I kid you not, I was at 527.6 hours in the meter. Wow. I felt really bad about putting the tranny though that. I was also amazed that it was still working.

I’m going to show you some photos of what I did. One thing I want to point out to you is to make sure the area around the filler cap is clean. You do not want to get any dirt into the transmission oil tank. I cleaned mine with brake cleaner and then blew it off with compressed air just to be sure. I also used my compressed air to blow the work area clean to reduce the odds of dirt getting in the transmission oil tank. Just remember- getting dirt in a tranny can wreck it.

The fill cap was filthy with dust and is a tight fit against the fuel tank. I cleaned it off with brake cleaner, a rag and then blew the area off with compressed air.
That centered hex head is the drain plug. It came free pretty easily. Clean and blow this off too – you don’t want dirt sticking to your drain plug when you go to re-install it.
None of my car/truck drain pans would fit under the tractor’s transmission but I noticed a 5 quart oil container would so I took an empty one, cut out a section of the wall and used it. Note, a full transmission will have somewhere around 3.5 quarts of oil in it.
I removed the drain plug and out came black oil. I felt bad the minute I saw how black it was. I let it drain for 15-30 minutes then I put a clean shop towel in the mouth of the tank and blew shop air in to get out all of the oil I possibly could.
The transmission drain plug is an interesting looking creature. Note the length and two O-rings. I carefully cleaned it, made sure the O-rings looked okay and wrapped it in a clean towel for later installation. Don’t forget to put the drain plug back in before you start refilling the tranny with fresh oil.
The oil was black as night. Well, lesson learned – change the oil.
I went to my local Autozone and it seemed like all of the brand name engine oils they had were semi- or full-synthetics. John recommended I go with a good conventional oil so I went to Tractor Supply (TSC) and their house brand of oil was conventional, API certified and very affordable. Now, the one odd thing is trying to get oil into the filler mouth- it is a weird angle so I had to buy something and what I got I do not have anything good to say about. The funnel you see above is two pieces – unless you keep the white corrugated tube pulled down, oil goes everywhere. I trimmed about 6″ off the original tube so I could hold the funnel while keeping the tube pulled down with one hand and pour oil from the jug with the other. What a headache. I will buy a better gooseneck funnel next time – I had a metal one that I haven’t used in years and couldn’t find.
Thanks to that awful funnel plus the oxidized tank not longer showing the fluid level I couldn’t see what I was doing and overfilled the reservoir so I used my MityVac vacuum bleeder to remove fluid. Next time I will move the tractor some and let the oil go into the tranny before I bring it down to the final level.I started the tractor and the tranny made some noise for a few seconds – maybe 15-30 and then it was fine once oil got everywhere. In hindsight, I probably could have avoided that if I had followed the transmission purging procedure on page 34 of the manual and will do that next time. By the way, it dawned on me that it probably pulled more oil out of the tank as it filled the tranny and it did so I added just a bit more to bring the oil to the cold full mark.
Done – runs great!

Summary

My big lesson learned was that transmission oil does need to be changed. Luckily I found this out before damaged happened. The symptom that set this all in motion was a very slow/weak reverse gear.

]Also, with this vintage of tractor, that transmission fluid reservoir is not longer semi-transparent. What looks like the fluid level is not so you need to manually check and be sure to blow all of the debris away from the cap before you open it. I thought there was fluid but when I opened it, there was no oil in sight.

Last lesson – use good conventional 10W-30 engine oil for the fluid – it works just fine.

So, after I did this I mowed our 1.5 acre yard and it worked great – no scary sounds, reverse was solid and I would swear it went forward faster. It was totally worth the the half-hour to hour that it took. I spent more time trying to figure out what to do than actually doing it and I hope this post helps you skip some of that.


If you find this post useful, please share the link on Facebook, with your friends, etc. Your support is much appreciated and if you have any feedback, please email me at in**@ro*********.com. Please note that for links to other websites, I may be paid via an affiliate program such as Avantlink, Impact, Amazon and eBay.


Avoid Chinese Carbs on Your Kohler Command 16 Engine – Use a Kohler 12-853-93-S carb Instead

Back in 2020 my Simplicity Broadmor tractor with a Kohler Command 16 engine was running really bad and I suspected the carb was having issues so I bought two Chinese carbs off Amazon figuring one would work. They were different brands and about $19/each so I figured “why not?” Well, kind of wish I hadn’t so let me tell you what happened.

I replaced the carb but it really didn’t make a difference. I tried all kinds of stuff with no improvement and decided to use a small engine repair shop that shall go nameless. Turns out the ignition system had a known problems. The flawed Kohler Digital Spark Advanced Ignition (DSAI) was replaced with a Magneto Digital Ignition (MDI) model. Had I known about those issues and that the MDI part number was Kohler 12-707-01-S, I would have done it myself. But I didn’t, they did and they replaced the ignition.

So, let me recap – I had installed a Chinese carb and got it kind of working and the shop installed the MDI upgrade, got it running and called it even. On one hand it was running but it was rough, hard starting and often would backfire when either starting or stopping plus the power felt lower – it bogged down more when I got into tall grass. It got to the point that I had to do something but I wasn’t thrilled with the repair shop either.

Ok, so what did I do? I start reading up on the Command 16 engine in earnest – what I should have done the first time. The most likely culprit was the Chinese carb. The more I read about folks using Chinese carbs was that their quality was hit and miss. Guys who got them to work knew about how to tear down and rebuild a carb to fix what was overlooked by the factory. The guys who didn’t have that level of knowledge – like me – tended to run into problems. Hmmm…. yeah, I was definitely betting on the carb at that point.

I still had the original carb but it had been sitting empty for over three years and I wasn’t sure how the seals would be so I started digging on what OEM Kohler carb I should buy. Turns out that my original 12-053-83 carb was superseded (replaced with a new model) by the 12-853-93-S carb so I did some digging and found it on Amazon for $201.89. Yeah, it was a fair amount of money but buying a new tractor is a fortune these days so I took the gamble.

This was the original 12-053-83 carb the tractor’s Kohler Command 16 came with.

Replacing a carb on a Command 16 is very straight forward – remove the emissions hose, the two nuts that hold the air cleaner assembly in place, remove the fuel hose, the red electrical wire for the fuel solenoid and then you pull the carb off far enough so you can then move it around and remove the throttle and choke stiff wires. It took maybe 30 minutes – I was taking a photos too so that always slows things down.

Those two nuts hold the air cleaner assembly against the carb and the carb to the block. Once you remove them and disconnect the emissions hose, the air cleaner assembly slides right off and you will want to clean it and set it to the side.
Remove the fuel line on the right and disconnect the red fuel solonoid wire. The linkages can’t be removed until the carb is off the studs. You do not want to bend those linkage wires.
With the carb off the studs you now have enough freedom to move the carb and the linkages around until they come out of their respective holes. Take photos or a mental note of which linkage goes where and how they fit. Notice the little nylon bushing in the rear throttle linkage. That did not come with my new carb for some reason so I rescued it from the old carb and put it on the new one.
That little nylon bushing is what I am talking about – it’s upside down in this photo.
It will pushes into the throttle body linkage hole.
From left – New Kohler carb, middle is the Chinese carb and the right is the original Kohler carb.
Clean the area off carefully and put the new gasket that came in the kit on the studs. I am the process or replacing the old fuel solenoid wiring which is why you see two plug assemblies. Red to red and and the black ground wire goes under a screw on the block. I replaced them just to make sure the wiring was good and not wearing out from flexing over and over, oxidized, etc. A new one came with the carb kit so I did it.
So there is a step I couldn’t show because my hands were in use 🙂 Before you slide the new carb on the studs, attach the linkage wires/rods again. Once the carb is back on the studs, you will not be able to move things around enough to insert them. Attach the fuel line and the red fuel solenoid wire. If you turn on the ignition, you should definitely hear a “click” as the fuel solenoid opens. If not, check that the wires are seated, you have a good ground. There should be 12volts coming out of the red wire when you move the key to “on”. I had no problems.
Put the gasket on the carb, slide on the air cleaner, re-attach the emissions hose and tighten down the nuts. I brought them down a tad past snug but didn’t bother using a torque wrench. The studs are relatively small and in aluminum so don’t go crazy with tightening down the nuts.

I sprayed a bit of brake cleaner down the carb to give it some fuel and started it. I think I had to do it twice before there was enough gas in the carb for it to work but it ran great!! Wow – right out of the box. The one adjustment I made after I put on a new air cleaner was to the idle adjustment screw – shown in the top left of the photo. I lowered the throttle lever to where I wanted it to idle and then I screwed in the adjustment clockwise until I heard the RPM pick up. That acceleration told me the screw was engaging the throttle and opening it up more. When I then moved the lever down, the RPM would not go below that point. I then fine tuned it to the RPM that sounded good – yeah, I did it by ear.

Summary

The new Kohler carb ran like a champ. I wish I had just spent the money on it to begin with – yeah, it is expensive but worth it. I mowed our 1.5 acres the next day and what a difference it made! It hardly slowed down going through thick grass and I haven’t heard it run that good in years.

My recommendation to you is that unless you know small engine carbs and want to pull a cheap Chinese model apart and check it before you install it, spend the money on a Kohler as it is built right. By the way, I am not the only person who reports the Kohler carbs literally work right out of the box!

I hope this helps you out!


If you find this post useful, please share the link on Facebook, with your friends, etc. Your support is much appreciated and if you have any feedback, please email me at in**@ro*********.com. Please note that for links to other websites, I may be paid via an affiliate program such as Avantlink, Impact, Amazon and eBay.


Add A Pool Ionizer to Save Money on Chlorine, Clarifier and Your Time!

We live in Southwest Michigan, have an older 40,000 gallon in-ground pool surrounded by trees and all kinds of vegetation. It seemed like trying to keep the pool clean was a never ending job. In July 2022 a friend recommeded that I buy a pool ionizer to clarify our pool and cut down on algae. The results are promising so let me explain.

Background

On Amazon there are a ton of companies selling solar power pool ionizers. They basically look like a mushroom with solar cells on a flat top and then a 10-12″ cylinder that goes down in the water. In that cylinder is a mesh basket filter, a steel spring and a copper-silver anode.

The solar cells generate direct current (DC) voltage with the negative going to the copper cylinder-silver anode. The postive voltage goes to the metal spring that is the cathode and it encircles the anode with a slight gap in between. The slight current causes positively charged copper-silver “cat-ions” to come off the anode and then they float in the water until they bond with negatively charged microorganisms, such as bacteria and algae, and cause them to break down and due. Your filter then removes them.

Is this dangerous? No, the voltage and current are really low. The use of silver and copper to clean/purify surfaces has been known for hundreds of years. So, it’s definitely proven.

What did I buy?

Well, I read reviews on Amazon plus the friend recommended the model I bought. I went sith the EAAZPOOL Solar Ionizer for a 45,000 gallon pool. They make one for smaller pools but I needed this larger one.

The unit arrived nicely packed. I have not needed to use their customer support so far.

Assembly is super easy – turn the solar cell covered main unit upside down, screw in the anode on the bottom, put the spring in place, put the basket on and then use the plastic thumb screw to hold everything in place. It also comes with a big rubber band that you put around the outside of the main body to further seal the seam where the top and bottom halves of the case come together. You then place it in the water and it runs when the sunlights hits it.

Put the rubber band arund the “equator” or outside midde of the unit to further seal it. Note, you need to set the unit in the pool. I tossed it in once and the rubber band popped off. No harm done – I just fished it out and put the band on – no more tossing it in either.

If you disassemble the unit in a few days and check you will notice the surface of the copper-silver rod will be getting discolored and over time it will even become pitted.

About once a week you take the unit part and wire brush the anode and the wire cathode, plus rinse out the basket.

To take the unit apart, turn the plastic butterful screw counter-clockwise until it pulls out.
The basket and the spring cathode lift right off the unit. You can see the green corrosion. That’s after about 1-2 weeks.
The corrosion brushes right off – not hard to do at all. I just clean it right on the unit and the spring also. I then rinse it all off.
This is what the bottom looks like – the copper-silver anode screws onto the screw stud you see. The cathode wire sits on the silver metal contacts you see. The basket sits in the al perimeter.

Results

For us, the most striking difference was the clarity of the water improved. While algae formation decreased some, I had hoped for more. This season I am putting a new anode and cathode in the existing unit and adding a second unit. Our pool only gets direct sun from about 11am until about 3pm because trees block the light so I don’t think enough ionization is happening. I’ll use the test strips they supply to make sure I don’t add too much.

The following are both the unit and the refill kit if you need it – my anode and cathode lasted from July to October just FYI.

Summary

Yes, they do work. Everybody I know with one likes it. My results with the definitely clearer water are promising and I think the second one in my case, with both a big pool and limited direct sun light, will cut back the algae they way I want.

I hope this helps you out. I’ll post an update this summer once I see how using two units works.


If you find this post useful, please share the link on Facebook, with your friends, etc. Your support is much appreciated and if you have any feedback, please email me at in**@ro*********.com. Please note that for links to other websites, I may be paid via an affiliate program such as Avantlink, Impact, Amazon and eBay.