This is his last video in the six part series. He recaps what he did and shares with you some of his tips for sandblasting such as putting foam earplugs in the chamber.
Here are the links to each segment – when you click on them they will open in a new tab:
This is the 5th video in his six part series. If you are building from a flat, then you need to pay careful attention to this. He shows how to file the ejector tip down plus also shows how to do the spot heat treating in this video with a MAPP torch. I spot heat threat the fire control group (FCG) pin holes but I heat treat the entire lower rails outside of the receiver before I spot weld them in. His method works just fine so pay attention. If you are building from a finished receiver then the odds are it has already been heat treated – if you have any doubt, ask the vendor that made it.
By the way, if you need a MAPP torch, go to Home Depot or Lowes (I prefer HD) and buy a Bernzomatic MAPP torch. Personally, I use a MECO Midget Oxy Acetylene (OA) torch that works great for sheet metal. Do some comparison shopping though. It may be real expensive online if they ship the gas too.
Note, the Bernzomatic MAPP torch is definitely more portable so there are times I use it but if I need a lot of heat fast, I get out one of my OA rigs.
Here are the links to each segment – when you click on them they will open in a new tab:
In this fourth installment, you can see usmcdoc14’s welding results and he discusses how to trim the top rails. Note, a lot of flats and receivers now have pre-cut top rails so you only need to trim them if they look like what you see in the video – big, wide and straight.
Here are the links to each segment – when you click on them they will open in a new tab:
Here is the second video in usmcdoc14’s series about building an AK using a flat. He still swears left and right (which I find hilarious – when he said “sandblast the shit out of them” I started laughing) and gives you some good recommendations on checking the past receiver stub from the kit. He talks about his approaches for weld and rivet builds. He does make one comment I don’t agree with. To press out the barrel from the rear trunnion you do not need to remove the rear sight block (RSB) – you just push out the barrel pin out and then press the barrel out. Second, and this is just my opinion, with a weld build I would still drill some holes where the rivets were at and do plug welds otherwise you are going to pour on a ton of heat, may still not get good penetration and risk ruining the heat treat of the trunnion locking lugs.
Other than that, I think it is a good video and worth you watching and learning from. Your best bet is to watch multiple guys and decide what works for you.
Here are the links to each segment – when you click on them they will open in a new tab:
A few guys have contacted me wanting to learn more about how to build AKs from kits. Many of the resources I learned from when I started way back when (ballpark in 2006) are now gone. I do recommend AKFiles and their gunsmithing section so check that out. We really didn’t have Youtube then and when I did some research I found some great videos for you to watch.
A gentleman on Youtube, usmcdoc14, put together a four part series. This is part one and is 29:58 long. He swears left and right and I got a real kick out of watching and listening to him:
Here are the links to each segment – when you click on them they will open in a new tab:
Hiya folks, my hands shake due to what is known as a hereditary tremor. When I try to do fine work it often gets even worse and I hate trying to drive fine nails/brads. A number of years back I bought a Harbor Freight brad nailer that broke in 2016 after a few years of very light use (read that to mean the quality was very disappointing from the get go). So, rather than play Russian Roulette with Harbor Freight, I went to Amazon and started digging on brad nailers and reading the reviews.
I came across the WEN 61720 3/4-Inch to 2-Inch 18-Gauge Brad Nailer. It is both their best seller and with 926 reviews, it has 4.7 stars. Folks, when you have that many reviews and that kind of score, it says something. If a product sucks, reviewers can go back in and change the score so I figured the quality must be pretty decent. I paid $26.33 for it in May 2016 and now it is $19.34!! Yes, the price actually went down. But I tell you what, I have no regrets.
The Wen uses regular 18-gauge brads. It came in a simple plastic case with a small tube of oil and instructions. It even had the 1/4″ air fitting installed. I’ve used Senco, Bostitch, Porter Cable and Harbor Freight brads no problem. I bought a few variety packs of brads but most of my nailing seems to be 1″, 1-1/4″, 1-3/8″ and 1-1/2″ with this unit. I have a bigger 16 gauge nailer that I use for longer heavier nails.
To make moving the nailer around easy, I have a 1/4″ x 50′ Amflo Polyurethane air hose on it with Milton fittings. This hose is light and very flexible. Even in the winter it has been great – I use it to put air in my truck tires when it is so cold that my rubber hoses are stiff. By the way, if you want air couplers that hold up over time and do not leak – go with Milton. They beat the beat the heck out of Harbor Freight and Husky.
I tend to run the tool between 60-90PSI depending on how hard I want it to hit the nail. If you are working with really soft pine, it can really drive it in so I run a lower pressure, usually 60 PSI, in those cases. I will drive a test brad and look at the results to decide if I need to adjust the pressure further or not. Most of my work is with pine but I have also done some poplar as well as a bit of oak trim.
As with just about any air tool, be sure to lubricate it with air tool oil. I don’t run inline oilers due to needing clean air for my plastic work so I simply put in a few drops when I start using the tool for the day. I have used all kinds of oil and just stick with name brands. Right now, I have bottles from ATS and others sitting by various tools. I would recommend sticking with a name brand and one that is relatively light for use in nailers vs. thicker for impact wrenches (Lucas is an example of a heavier pneumatic tool oil). Also, unless you have an inline oiler, a squeeze bottle with a spout really helps vs. a pour top that will make a big mess. For guys getting started, the small bottle that comes with the nailer will last you quite a while – just be sure to use it!! Don’t run the nailer dry.
My project the other day was to resurrect and old planter from my dad. I took the screws off and each shelf that was stapled together had become very loose. I put a few drops of air tool oil int he Wen’s inlet fitting, selected brads that were a hair shorter than the wood I was putting together, and then drove 2-3 of the small 1-1/4″ brads into each individual slat to stabilize it. I then reassembled the plant stand with new screws, stained it with Minwax Provincial Stain and applied 4 spray on coats of satin spar polyurethane on top. The project turned out great. It’s rock solid and it’s a little something from my dad that reminds me of him.
So I have driven probably at least 500 brads with this over the past year without one problem of any kind. The reliability is a huge plus as I hate having to mess with tools to get them to work. I have no problem recommending this Wen brad nailer to you for relatively casual use – I do not use it in production. I’d certainly buy it again – you can’t beat the combination of quality and price.
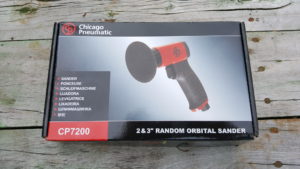
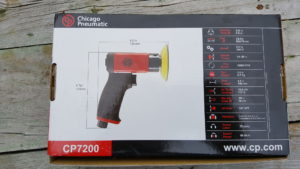
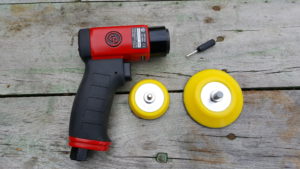
Well folks, I bought three Jet small dual action sanders from a closeout tool shop 4-6 years ago and have to replace the little valve on them several times each. This year when two failed, there were no little valves to be found so I decided to go with a name brand. I did this for two reasons – solid quality and replacement parts. These get a ton of use in my shop. I did some digging around and ran across the CP7200 that has a nice grip, variable throttle, integral regulator to adjust the speed and both a 2″ and 3″ hook and loop pad.
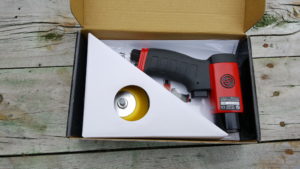
For me, the backer is really important. I need to sand curved shapes, constantly switch grits of sandpaper and those backing pads do wear out. I can’t tell you how many I replaced on my Jet sanders and not all of them are good quality. I made sure this unit used a standard thread (1/4×20) so I could readily find replacement backers. Note the little tool in the next photo, it slides into a key hole so you can lock the head and screw the backer in securely. Many of these little sanders are this way. I have a tool glued into a length of fuel hose to find it easier, I’ve used little philips head screw drivers, etc. Bottom line is that you need to lock the head in place so you can thread on the backer and tighten it down.
Any air sander uses a lot of air – let’s just be up front about that. The manual recommends 16.6 CFM @ 90PSI. That means you’ll want to have a decent compressor and need to figure out how much you want it to run vs. you waiting. In other words, using this with an air compressor intended for an air nailer is going to suck. The little compressor will not be able to keep up and it’s tank is way too small. I have a Ingersoll Rand 2340 with a 60 gallon tank and the pump can deliver 14.3CFM at 90PSI and fills the tank to 175PSI. This that if I am running the tool wide open non-stop, I will use air faster than the compressor can refill the tank. However, it is a big tank at an even higher pressure plus I sand and stop, sand and stop over and over. It really does not tax my compressor at all.
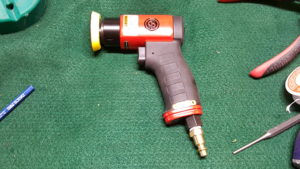
Oh – one last comment about the air supply – use a 3/8″ internal diameter (ID) hose so you can get enough air to the tool. With a 1/4″ hose you may well starve it because the air will be very restricted until it gets to the tool. It’s like having too small of a gauge extension cord going to a power tool – you can just get so much air down that small 1/4″ diameter hose. Quarter inch fittings are fine but do use the 3/8″ hose. With that said, as usual, the unit did not have a 1/4″ quick connect installed so I took one out of my parts bin, installed some PTFE tape and snugged it down. As you can see, the tools weighs in at 1 pound 9.7oz. Not too bad and the grip is nice.
Before you put it into production, squeeze in 2-4 drops of air tool oil. I’ve had good luck with all the oils I have bought and just stick with a name brand such as ATS, Porter-Cable, CH, and even Husky. Your air tool needs this to run. If you have an in-line oiler in your air lines then you may be able to skip this step. I filter the heck out of my air and have to manually oil my tools. My rule of thumb is to oil them before each day of use.
So I bought the unit on May 14th, 2017, and already have probably 20 hours on it with no hitch. Not surprisingly the head was a little stiff but everything wore in nicely. It appears to be working like a champ so I am recommending it to others.
Here it is at Amazon:
Note, CP backers are a fortune. I’ve had very good luck with this brand of Chinese backing pad with my other sanders so I’m providing the eBay link. Be very sure the thread is right (I’ve found three so far – 1/4, 5/16 and M6 so be careful) and look for the particular graphic label. I’ve had other Chinese backers that just disintegrated with very little use. You figure the tool can spin up to 15,000 RPM so your pad needs to be rated for that as well. If you can find them elsewhere, great. I scrounge around on eBay until I find them.
Update 7/7/2017: The sander is still working great – no problems at all. I’d estimate the unit has somewhere between 30-40 hours of use on it at least – it gets used a lot.
Also, I swear by Milton air line fittings. Harbor Freight and Husky female fittings just do not hold up. I do have a ton of HF and Husky male fittings that I am slowly using up but only buy Milton female quick connects now and will switch to all Milton as soon as I run out of the old plugs. I’ve been using Milton Type M female couplers for over a year and they are solid.
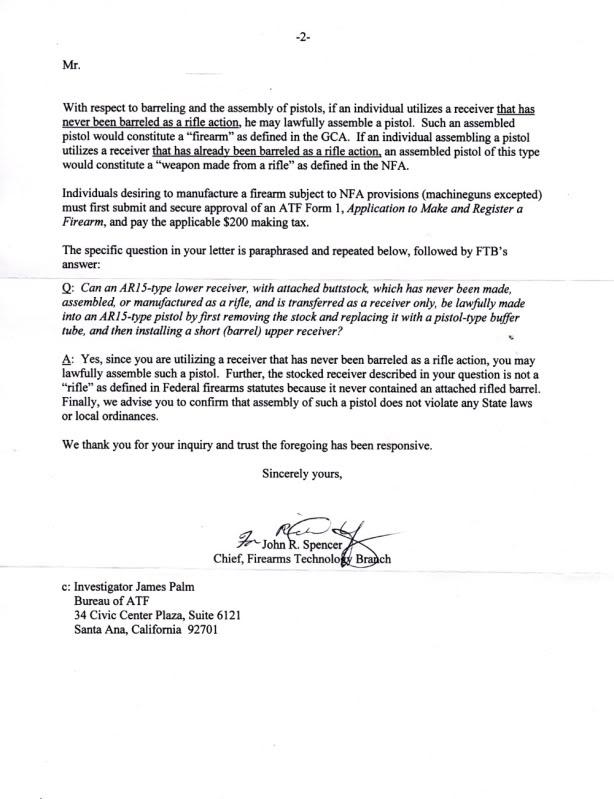
Okay, I posted a couple of ATF letters and a guy sent me a message asking if I had the letter specifying that an AR pistol can be built from an AR receiver that was transferred as a receiver and never assembled as a rifle. It just so happens I did save that one back when I built a couple of AR pistols a few years back. I like to have the letters of anything someone may ask about and keep them in my case with the weapon when I take it shooting. At any rate, here is the ATF letter in case anyone else needs it:
Please note that I am not a lawyer and this should not be construed as legal advice.