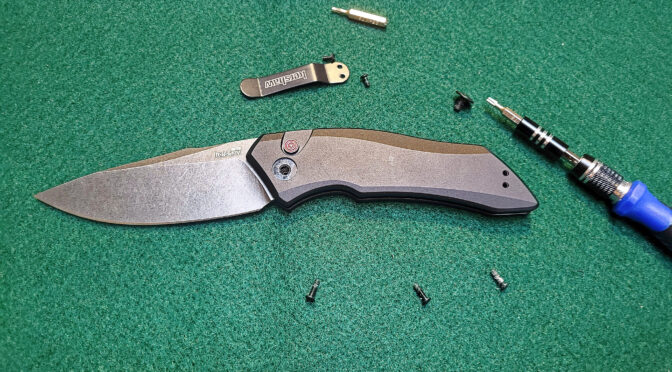
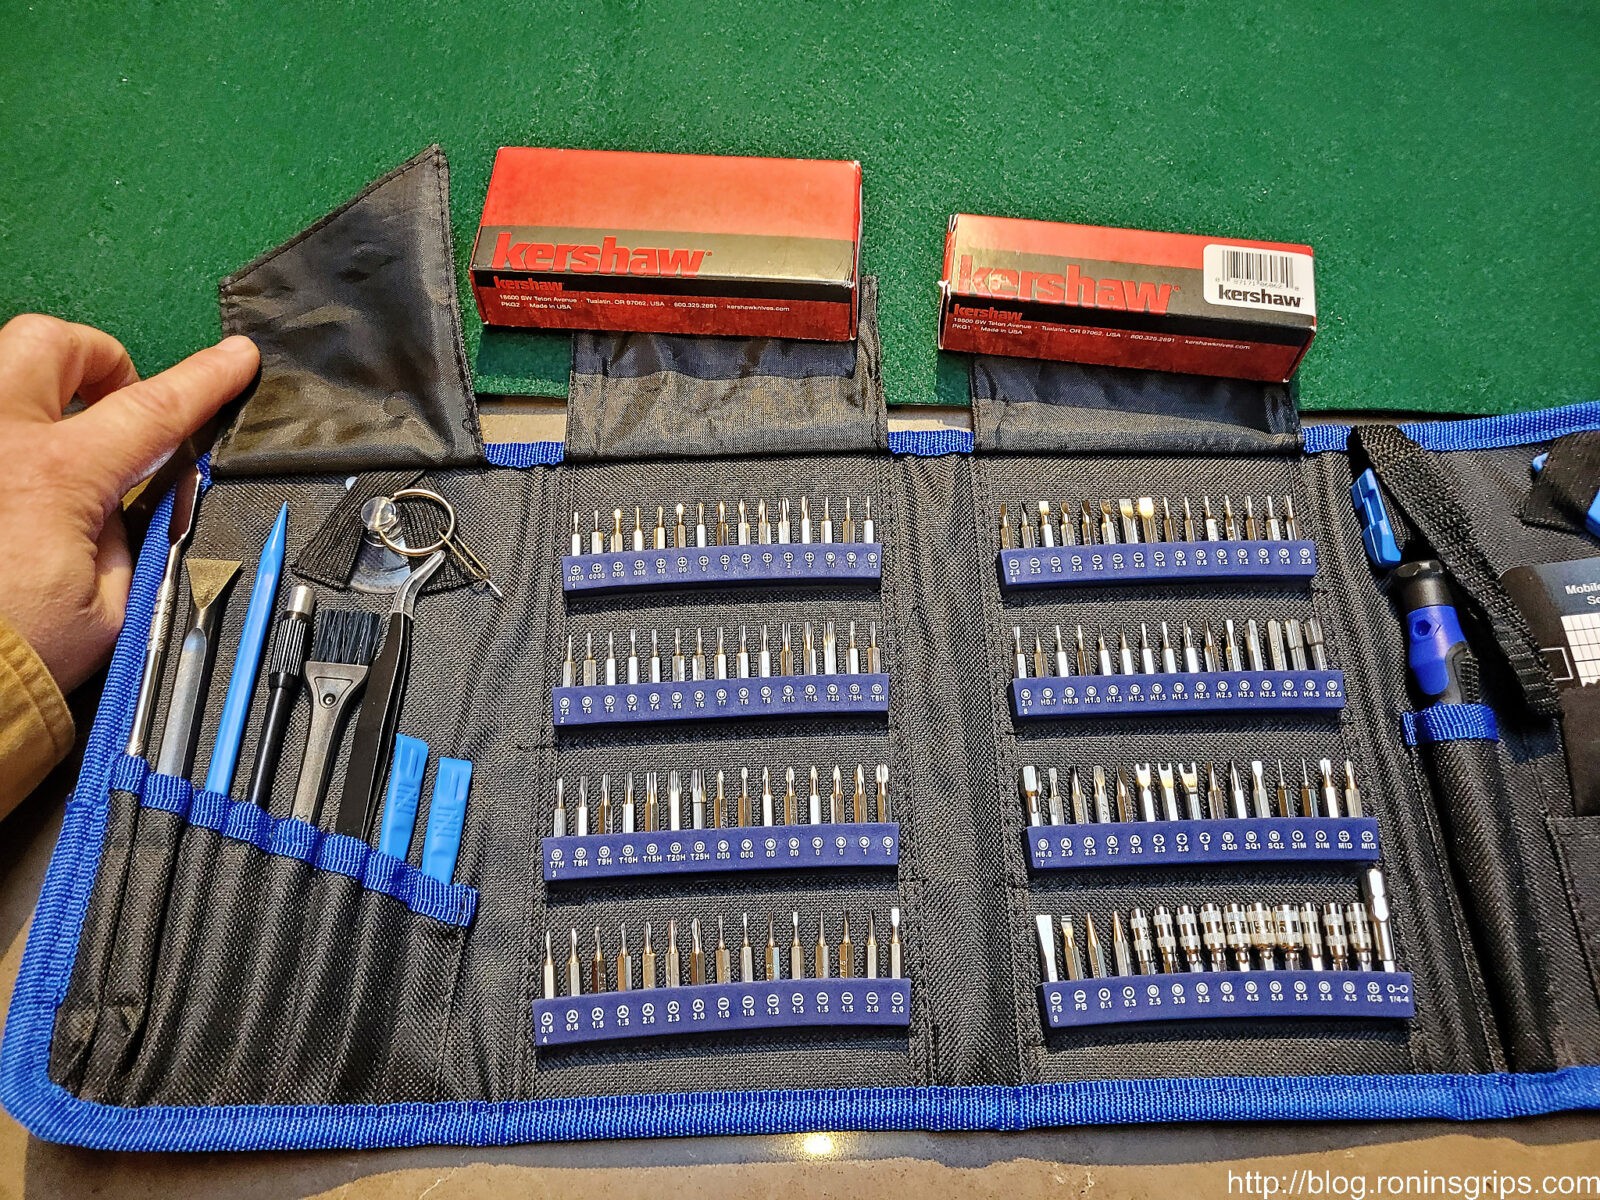
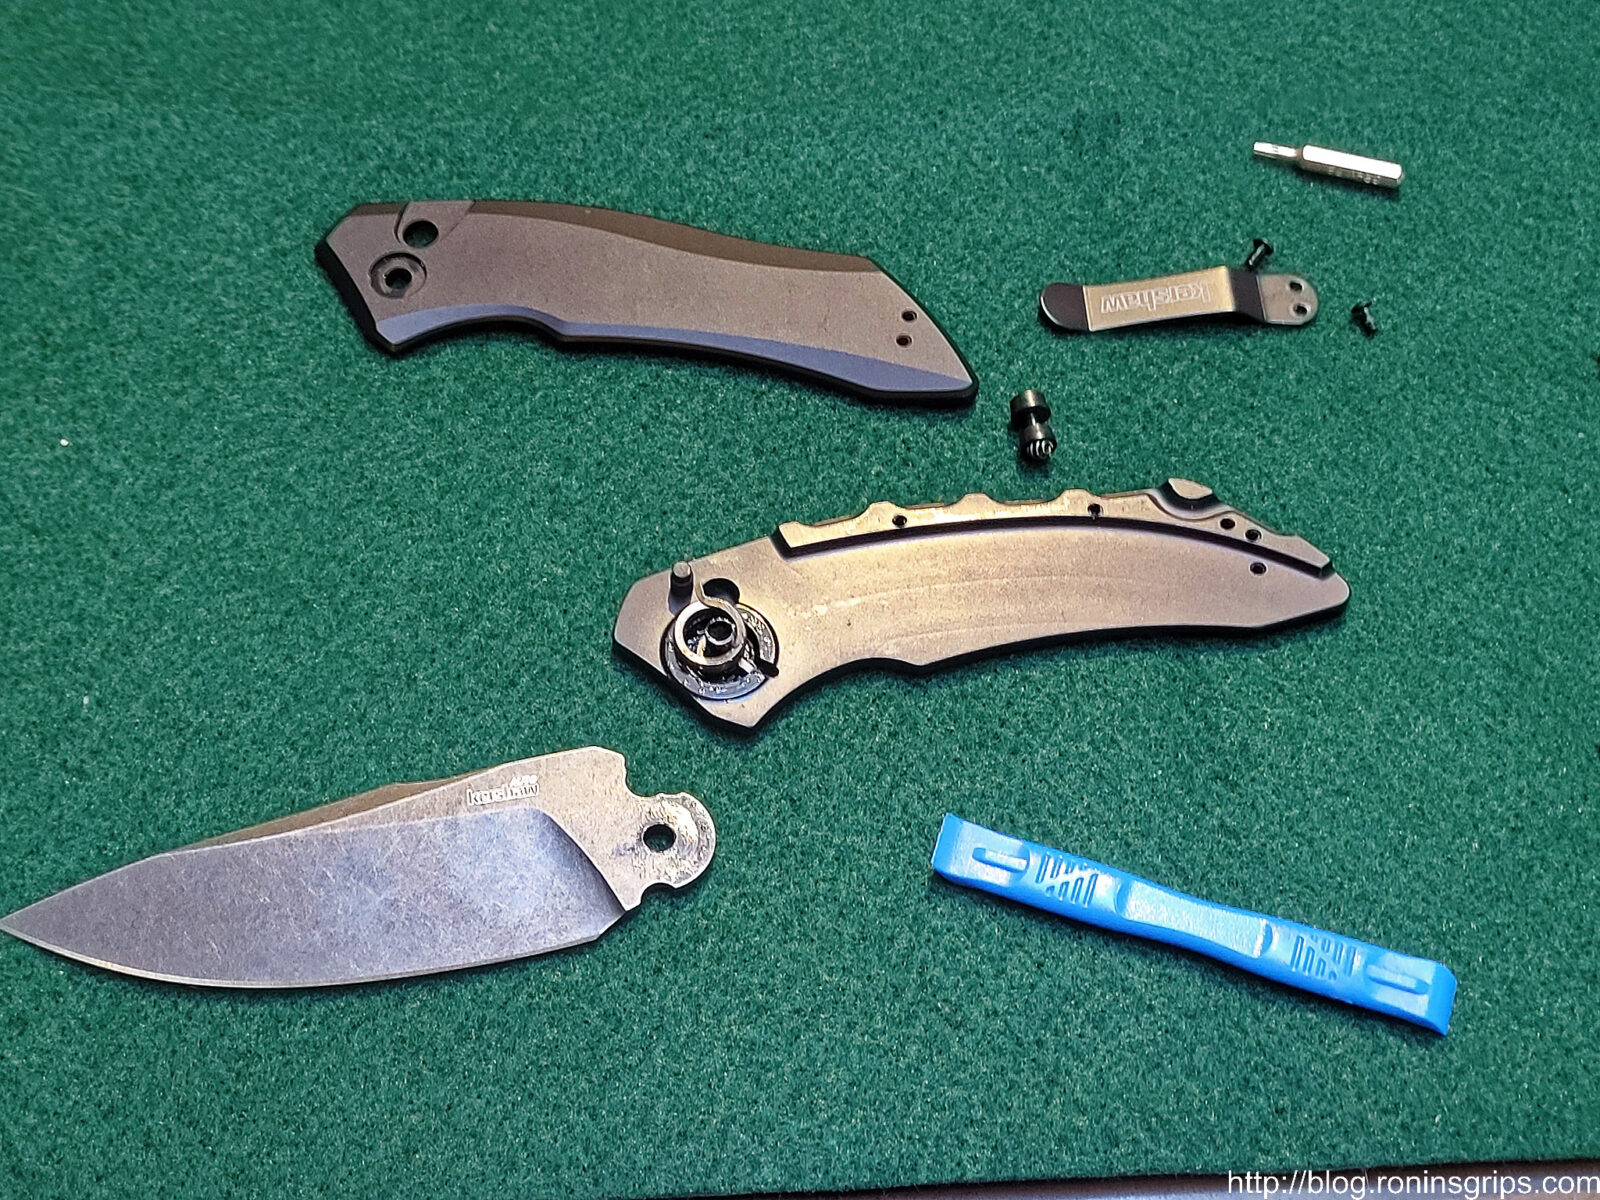
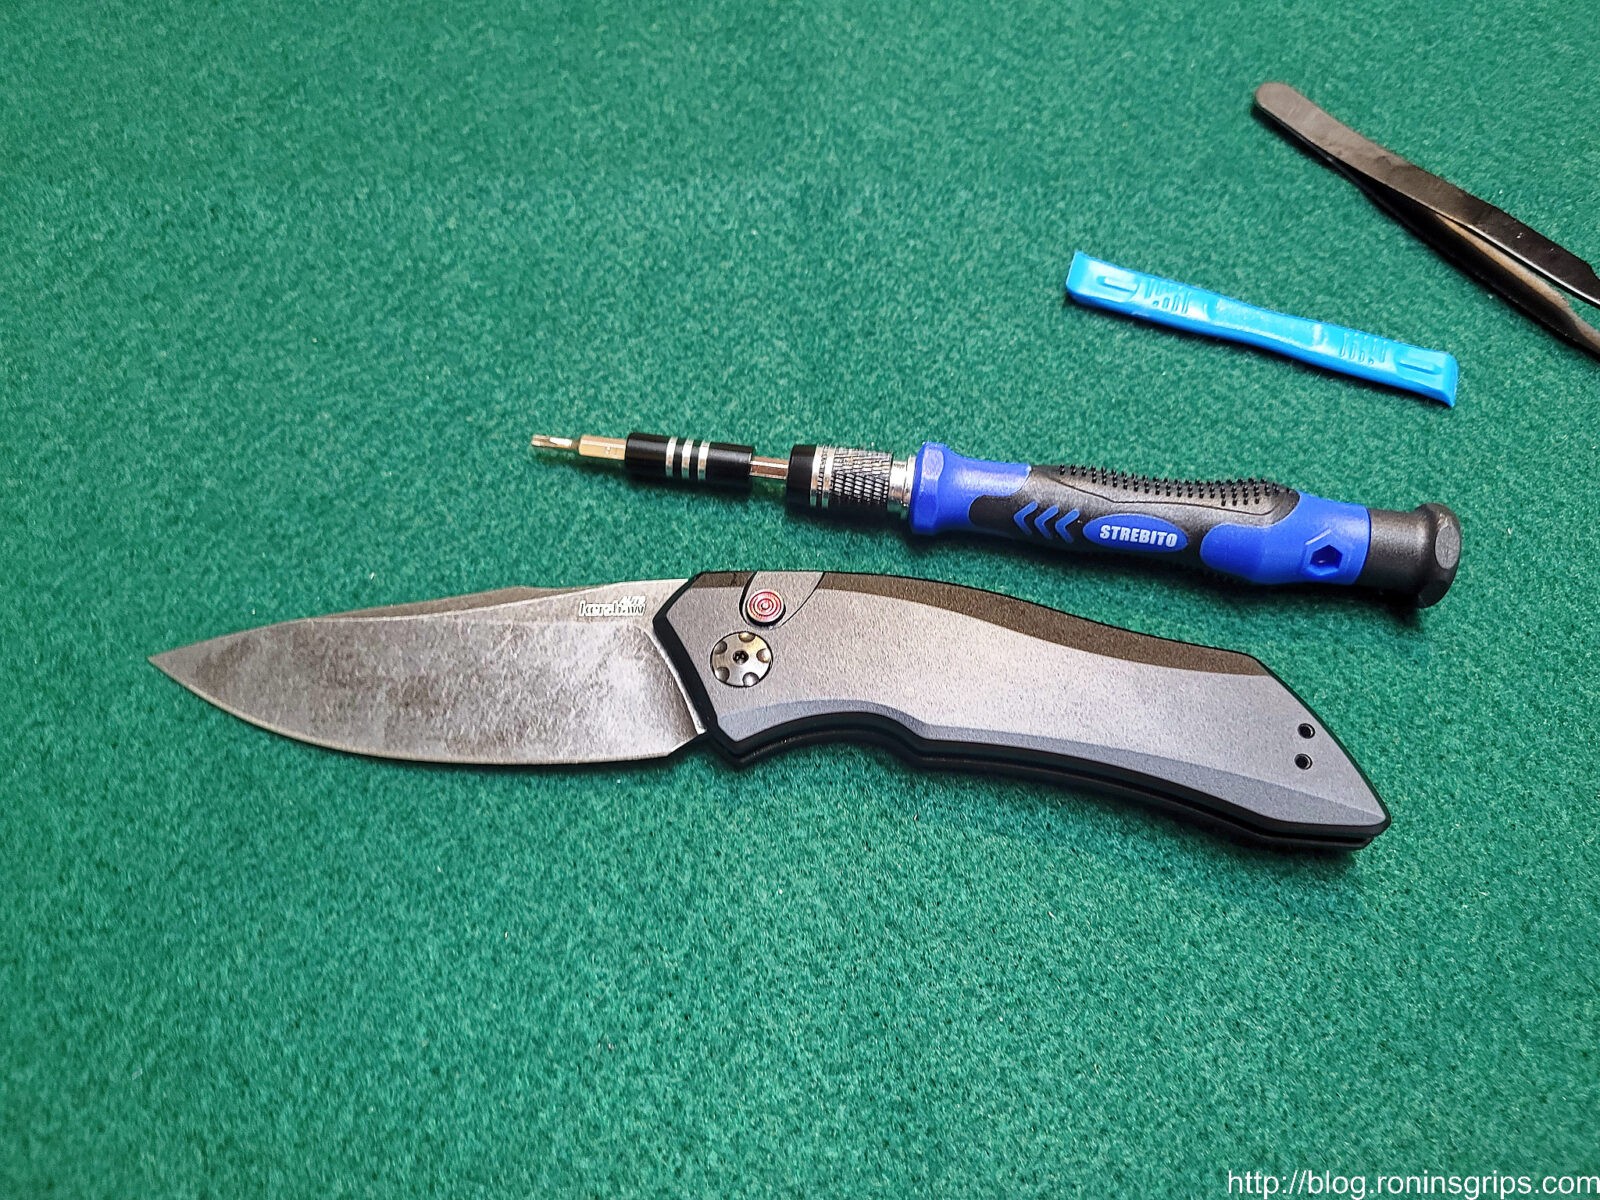
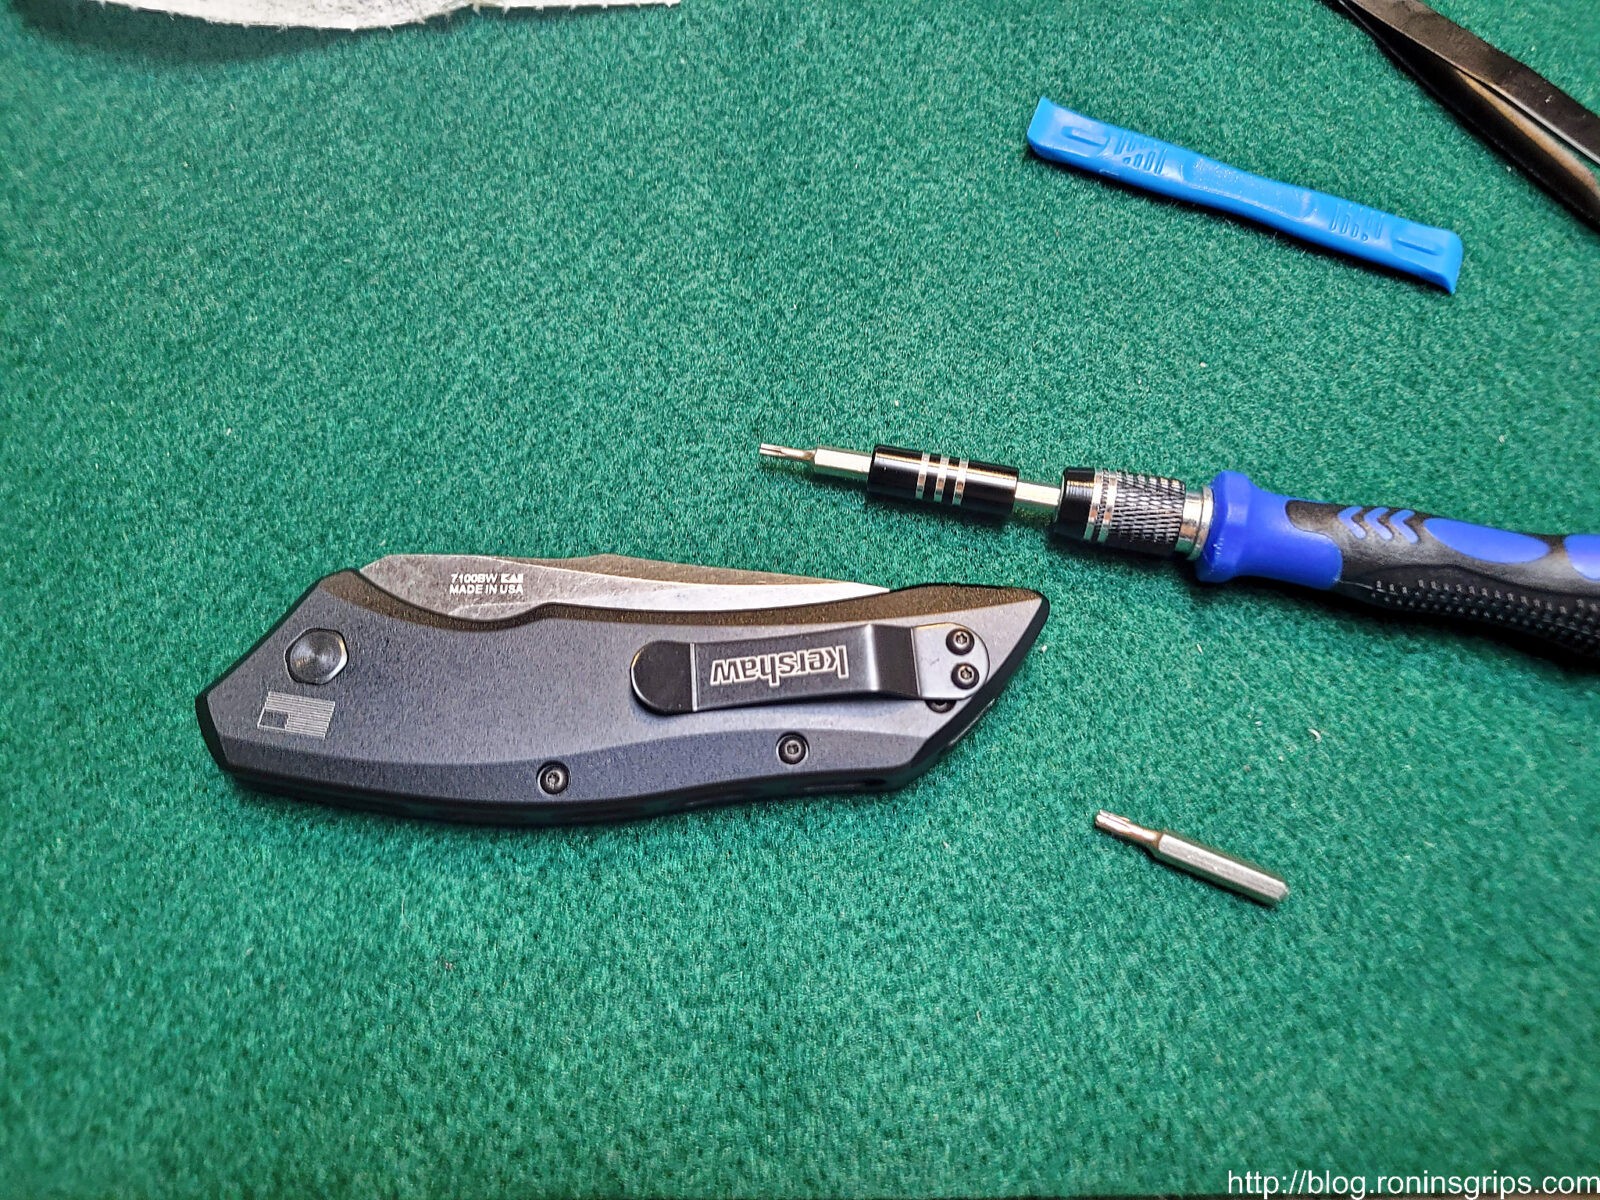
You will need #6 and #8 Torx bits. Something to pry the blade up and tweezers might help. For me, I have a large Strebito tool kit with a ton of precision bits, handles, tweezers and pry bars designed for electronics that has worked amazingly well for me when working on stuff with small fasteners.
Disassembling the Launch 1
Safety brief: Just remember, you are working with a very sharp spring loaded knife blade. It wants to open. Handle it accordingly and play it safe.
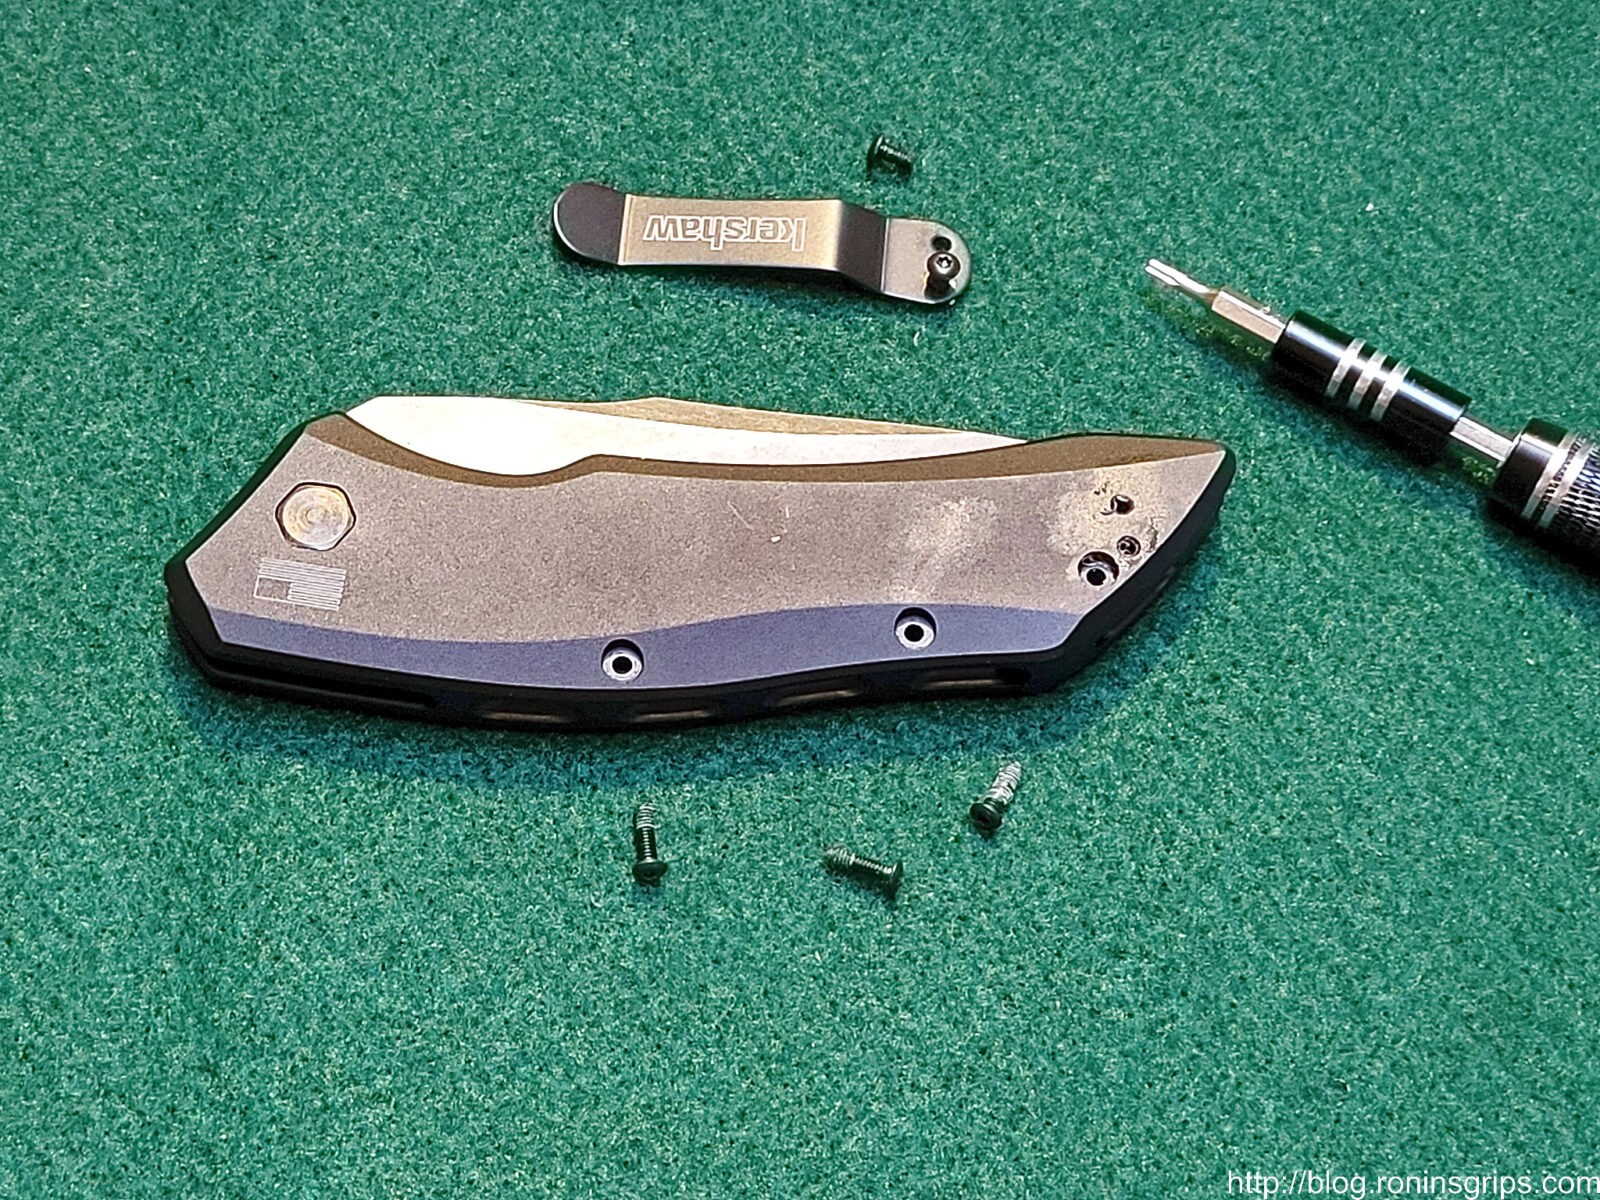
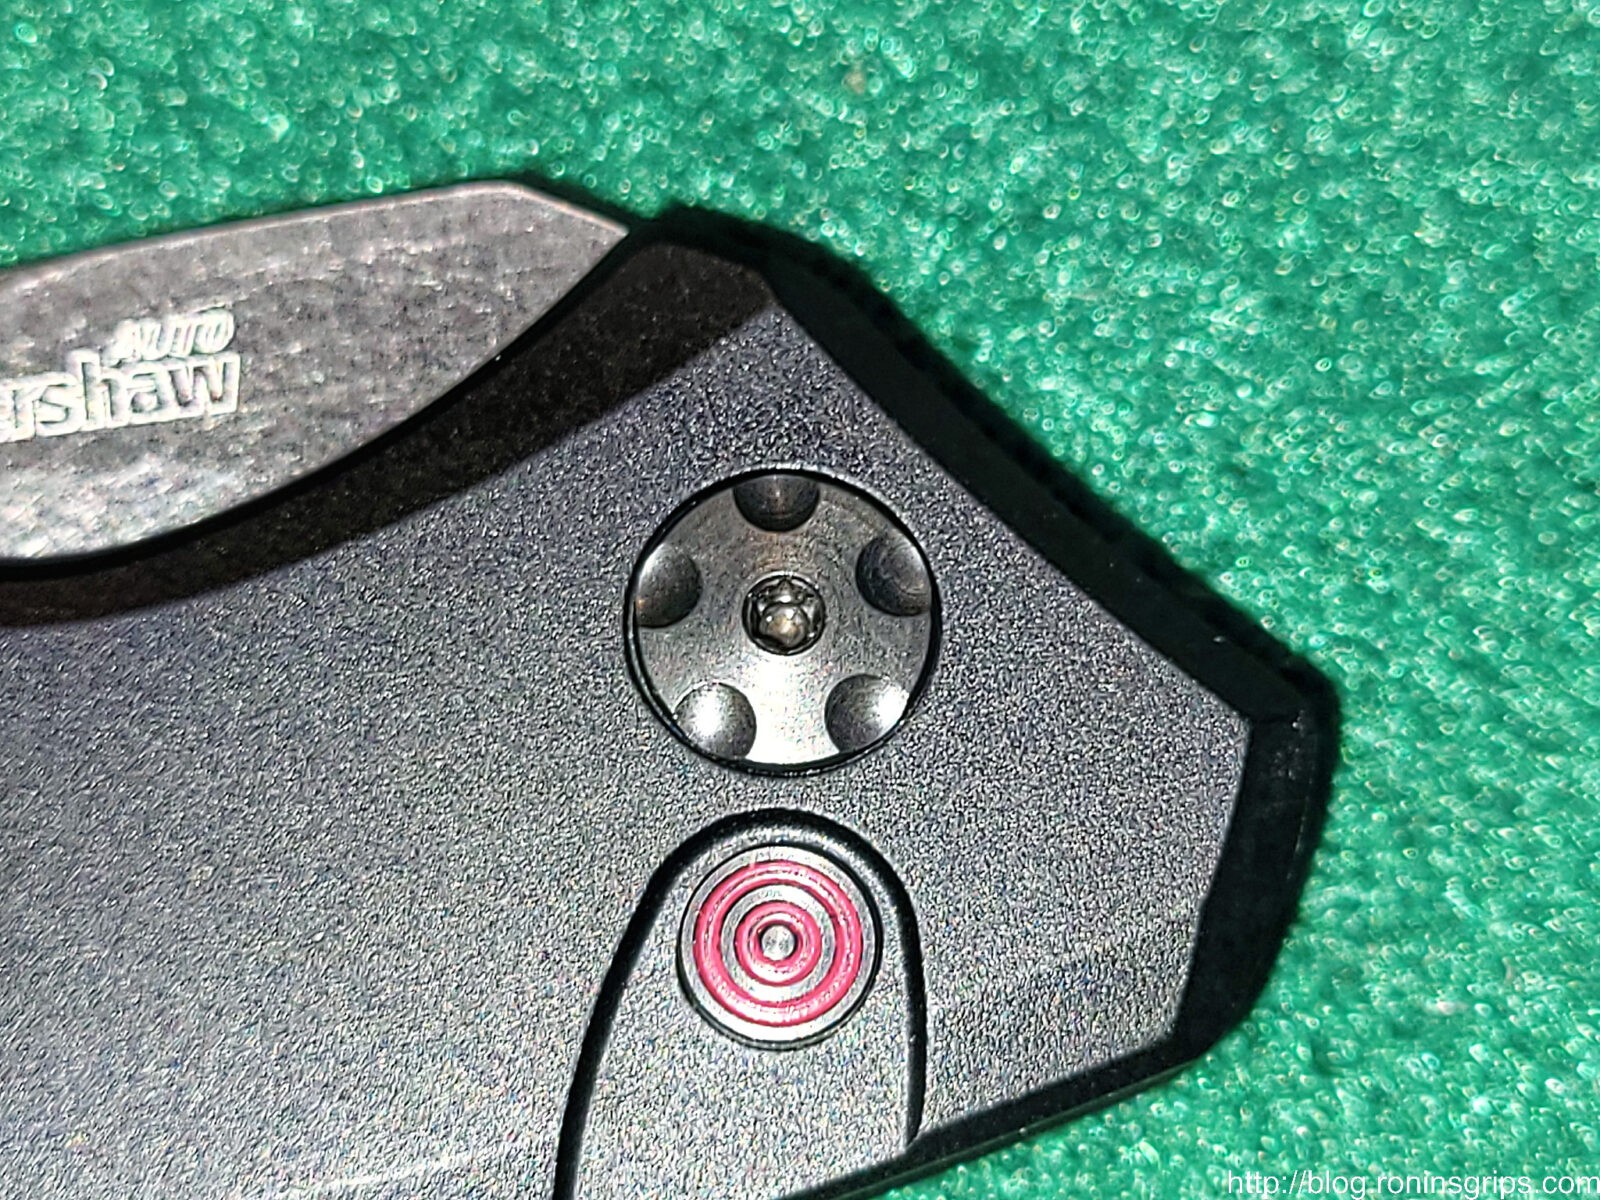
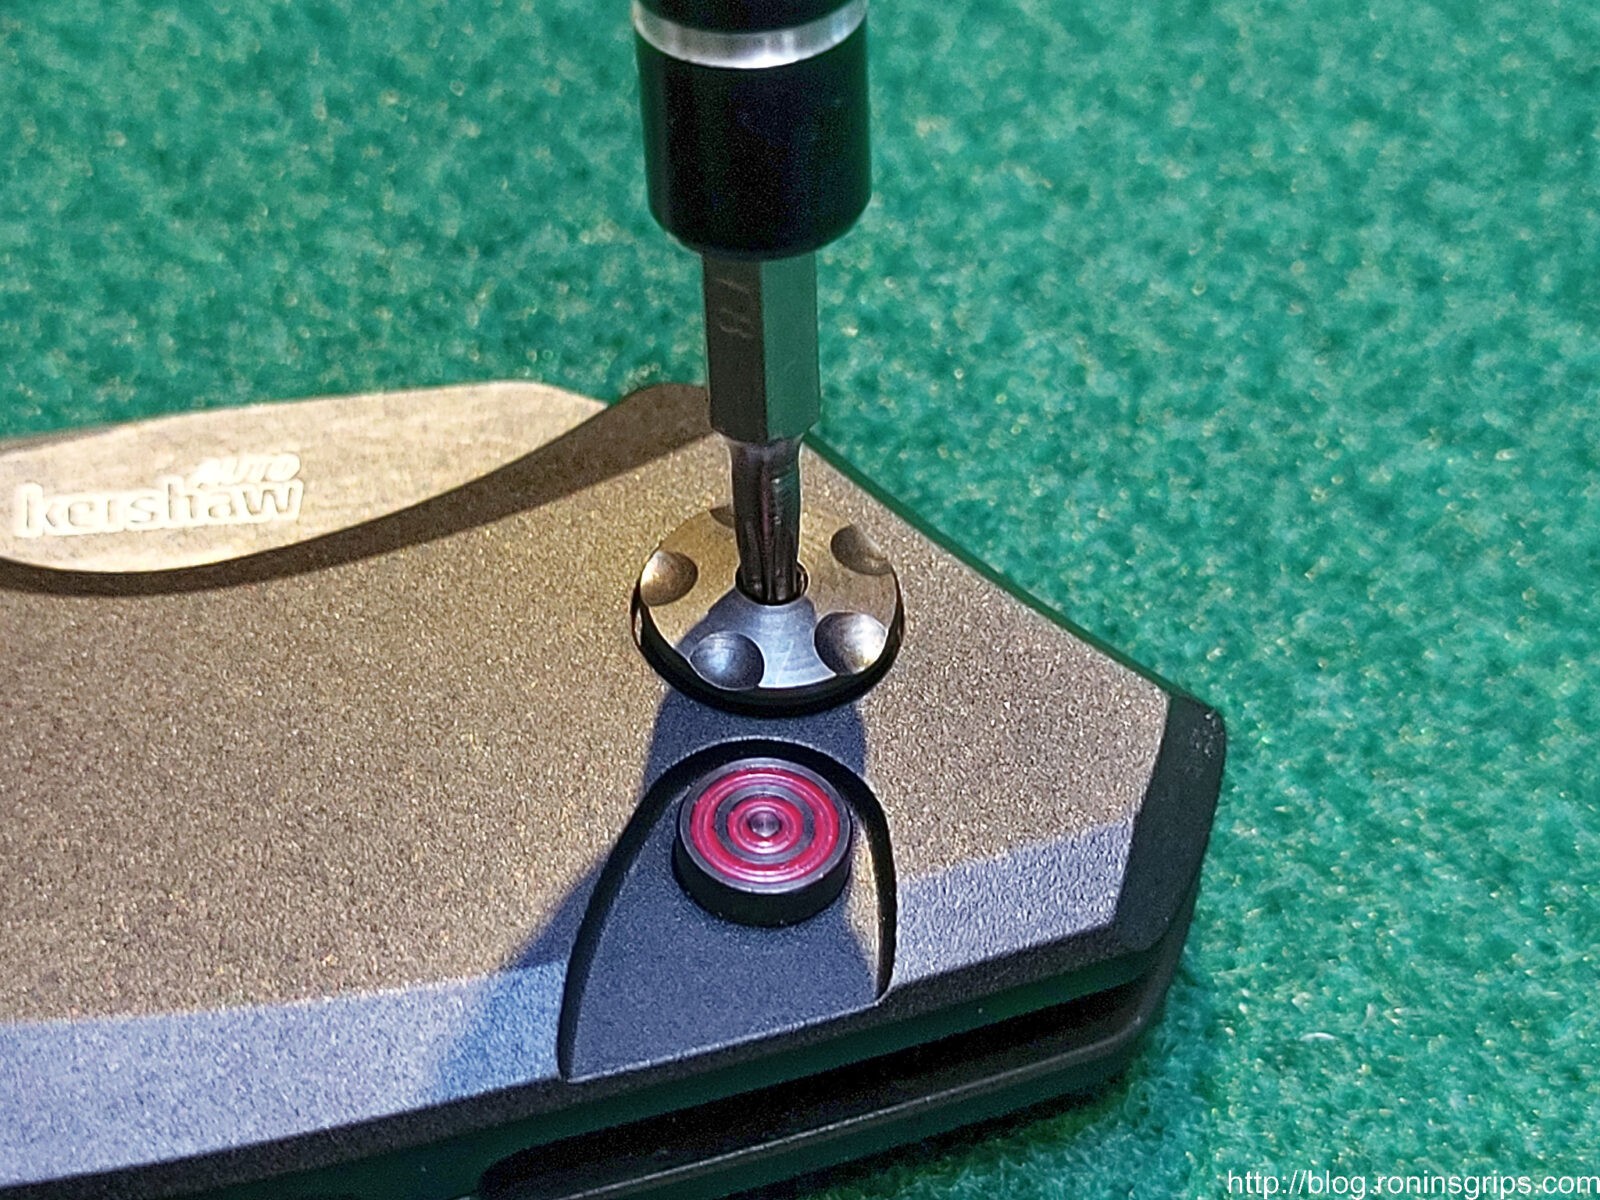
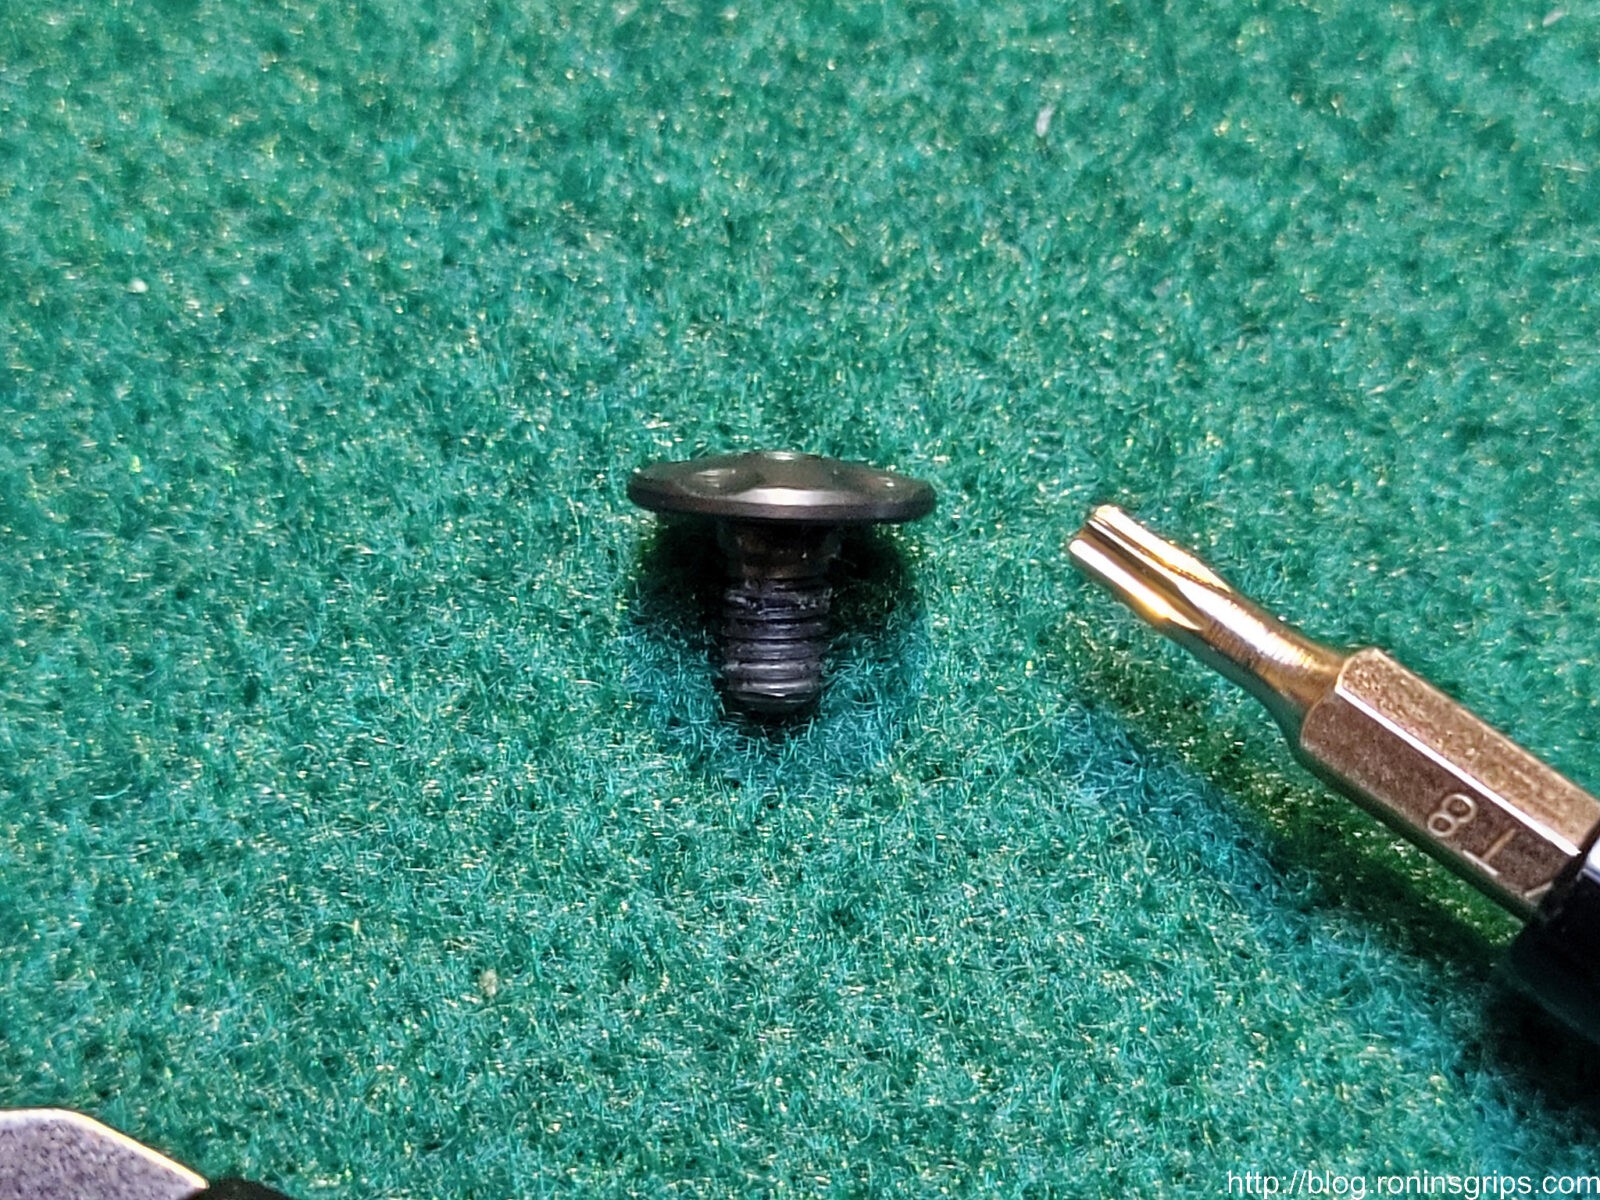
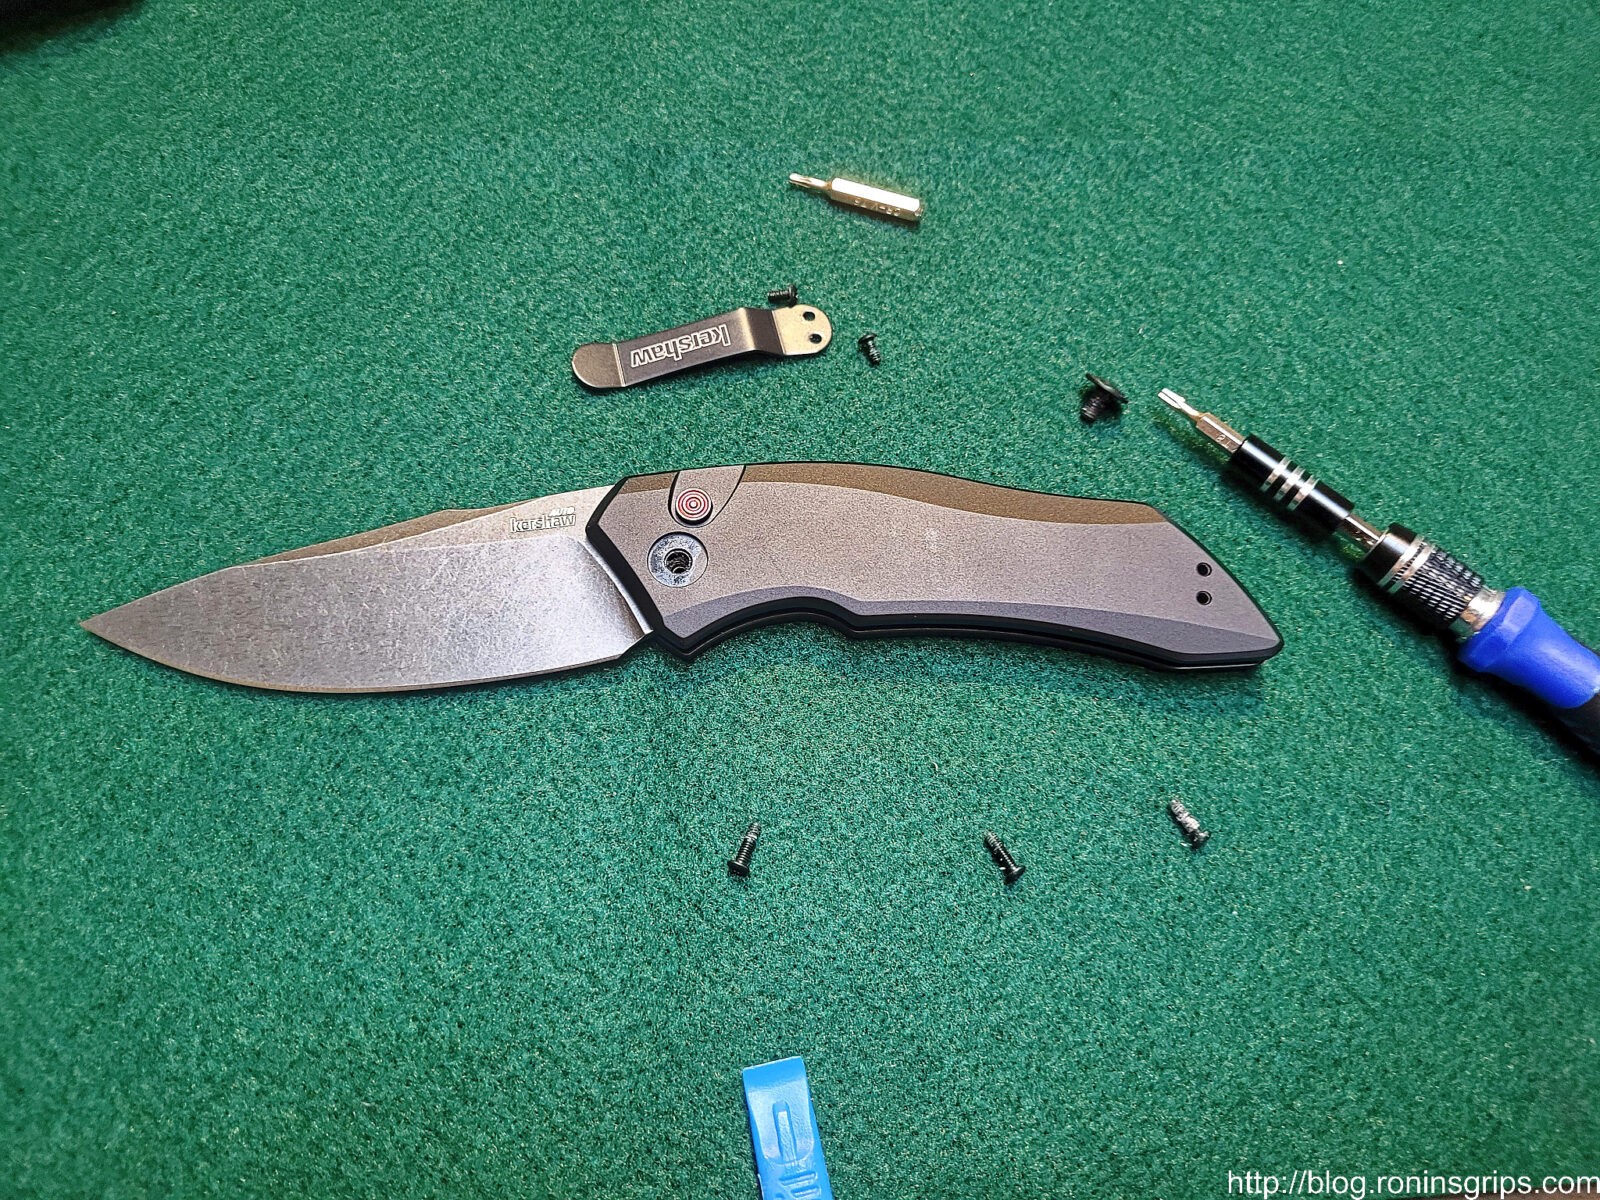
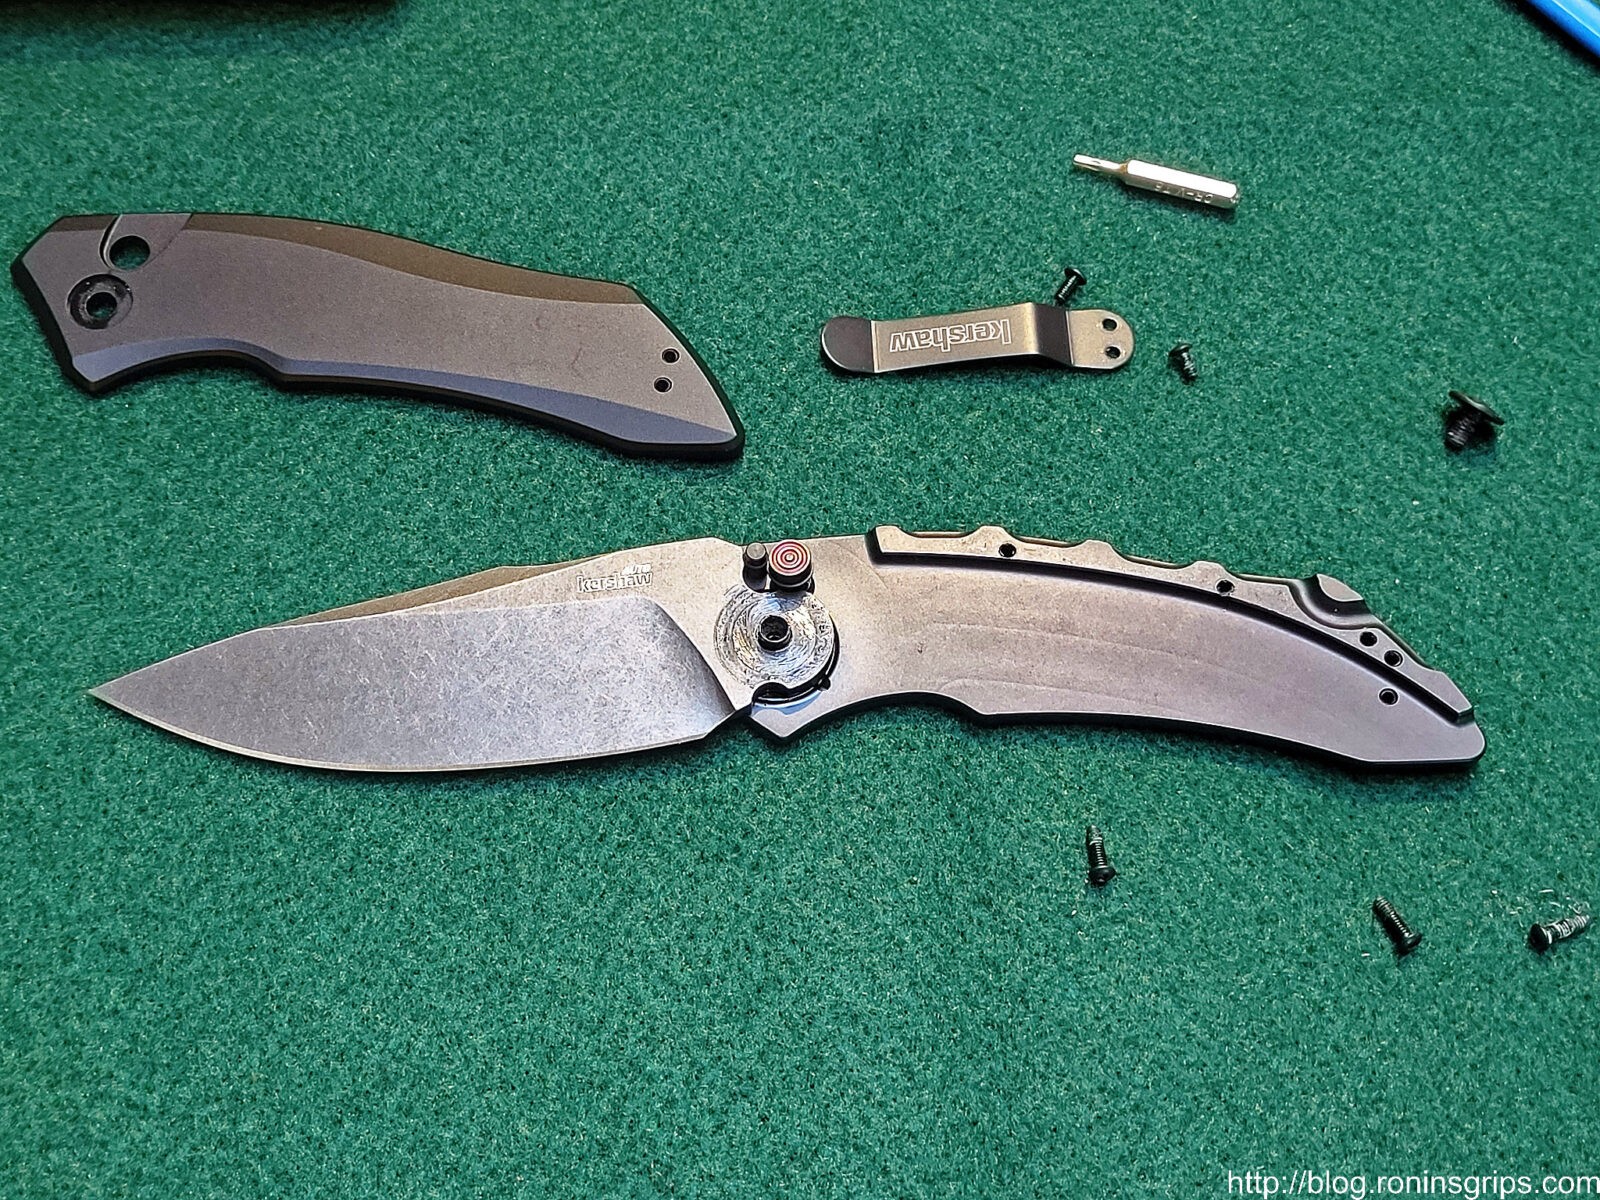
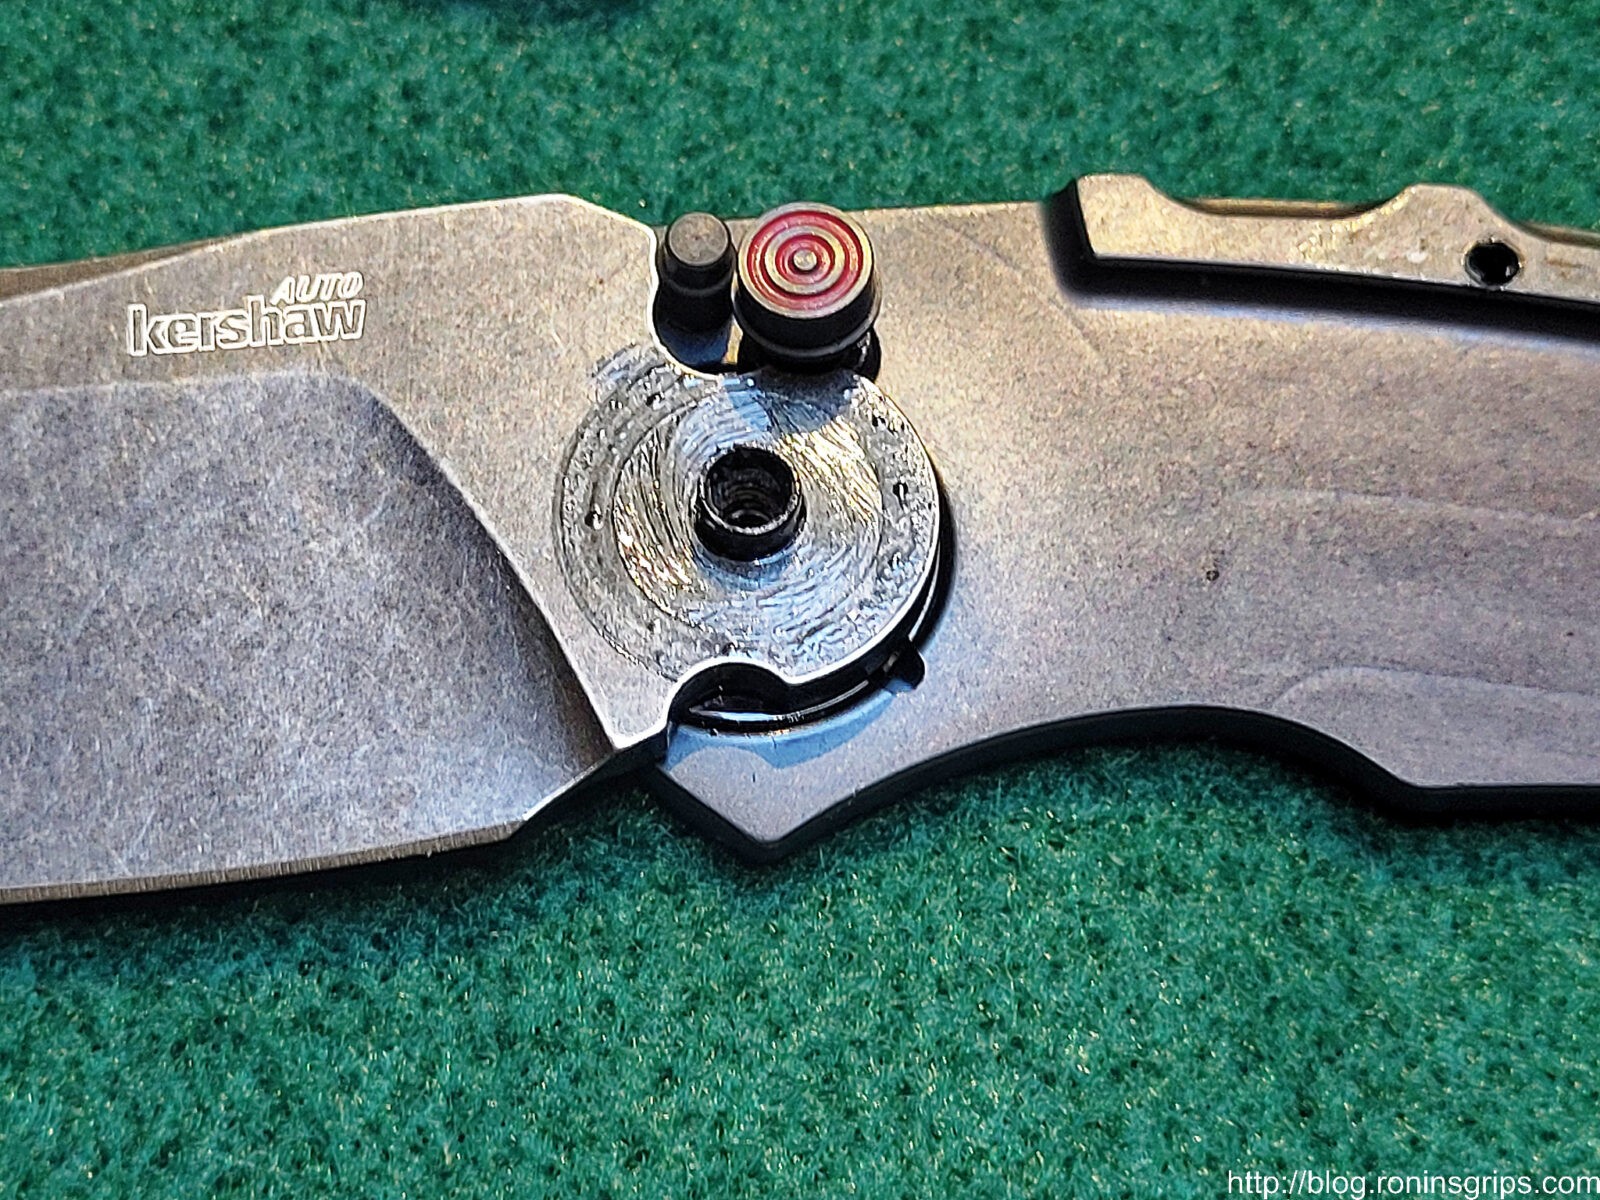
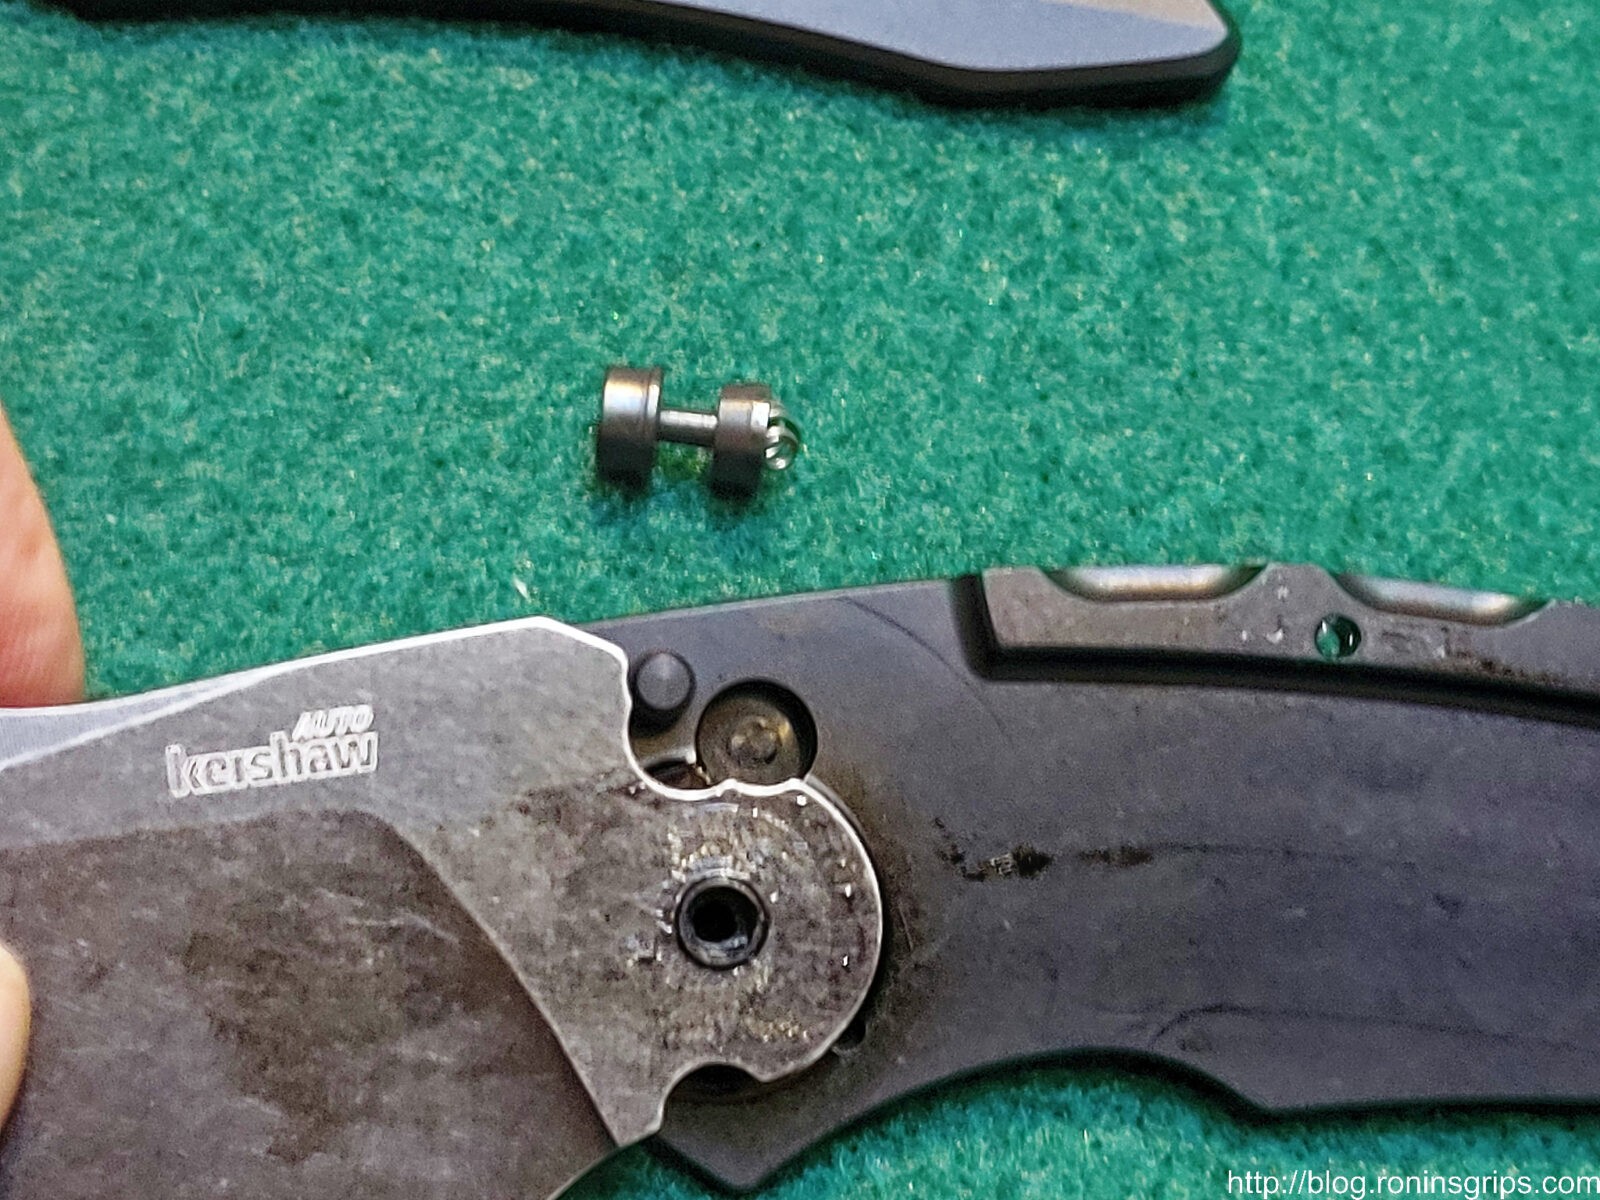
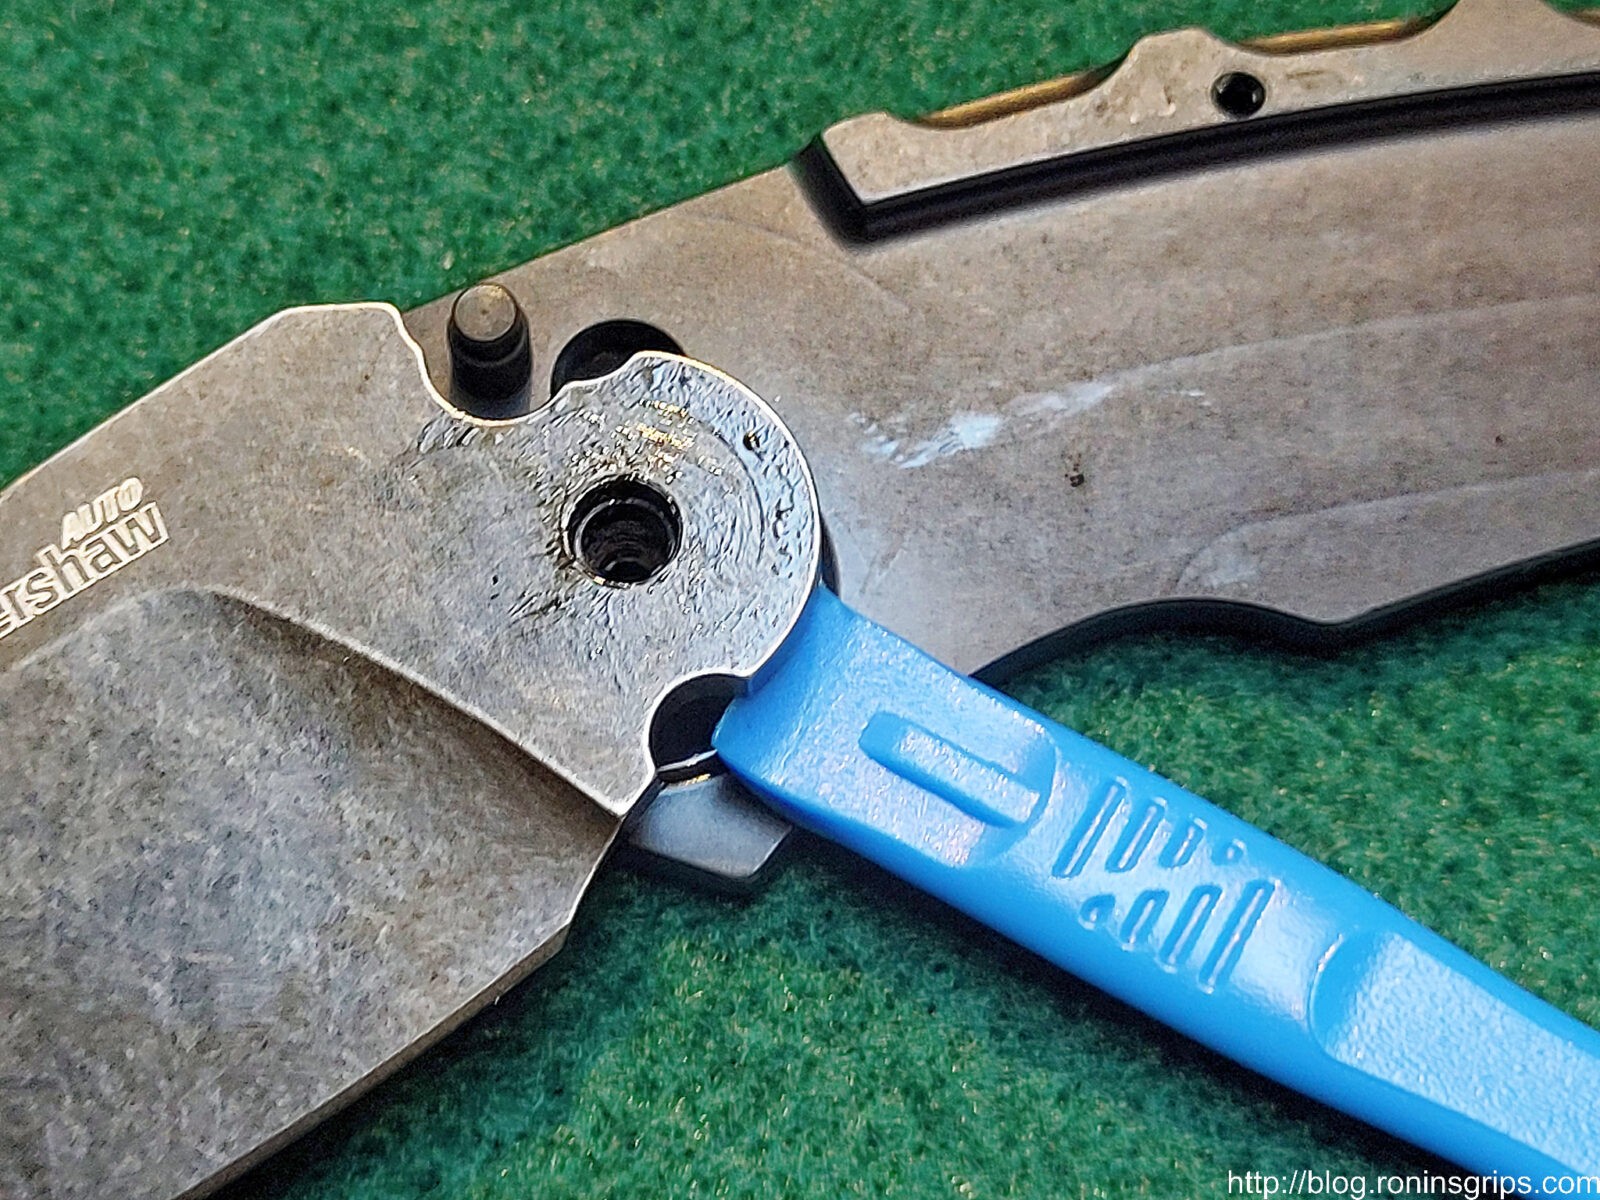
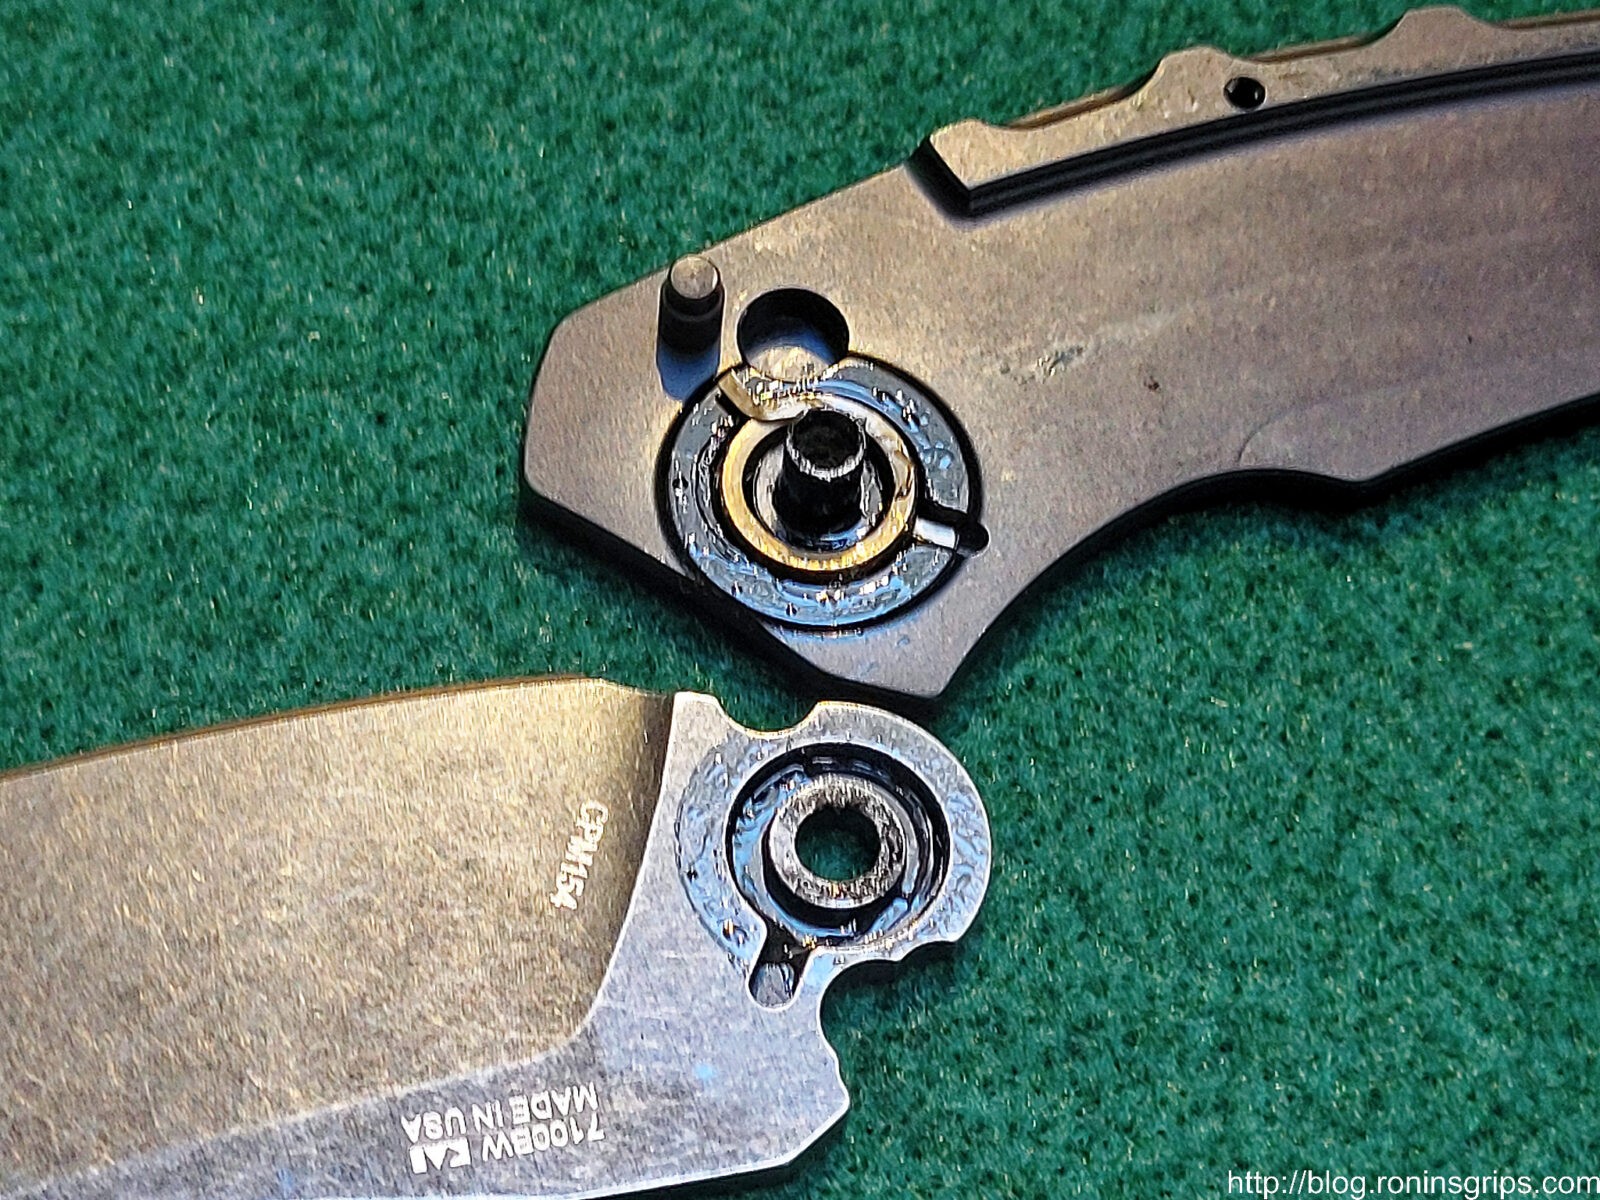
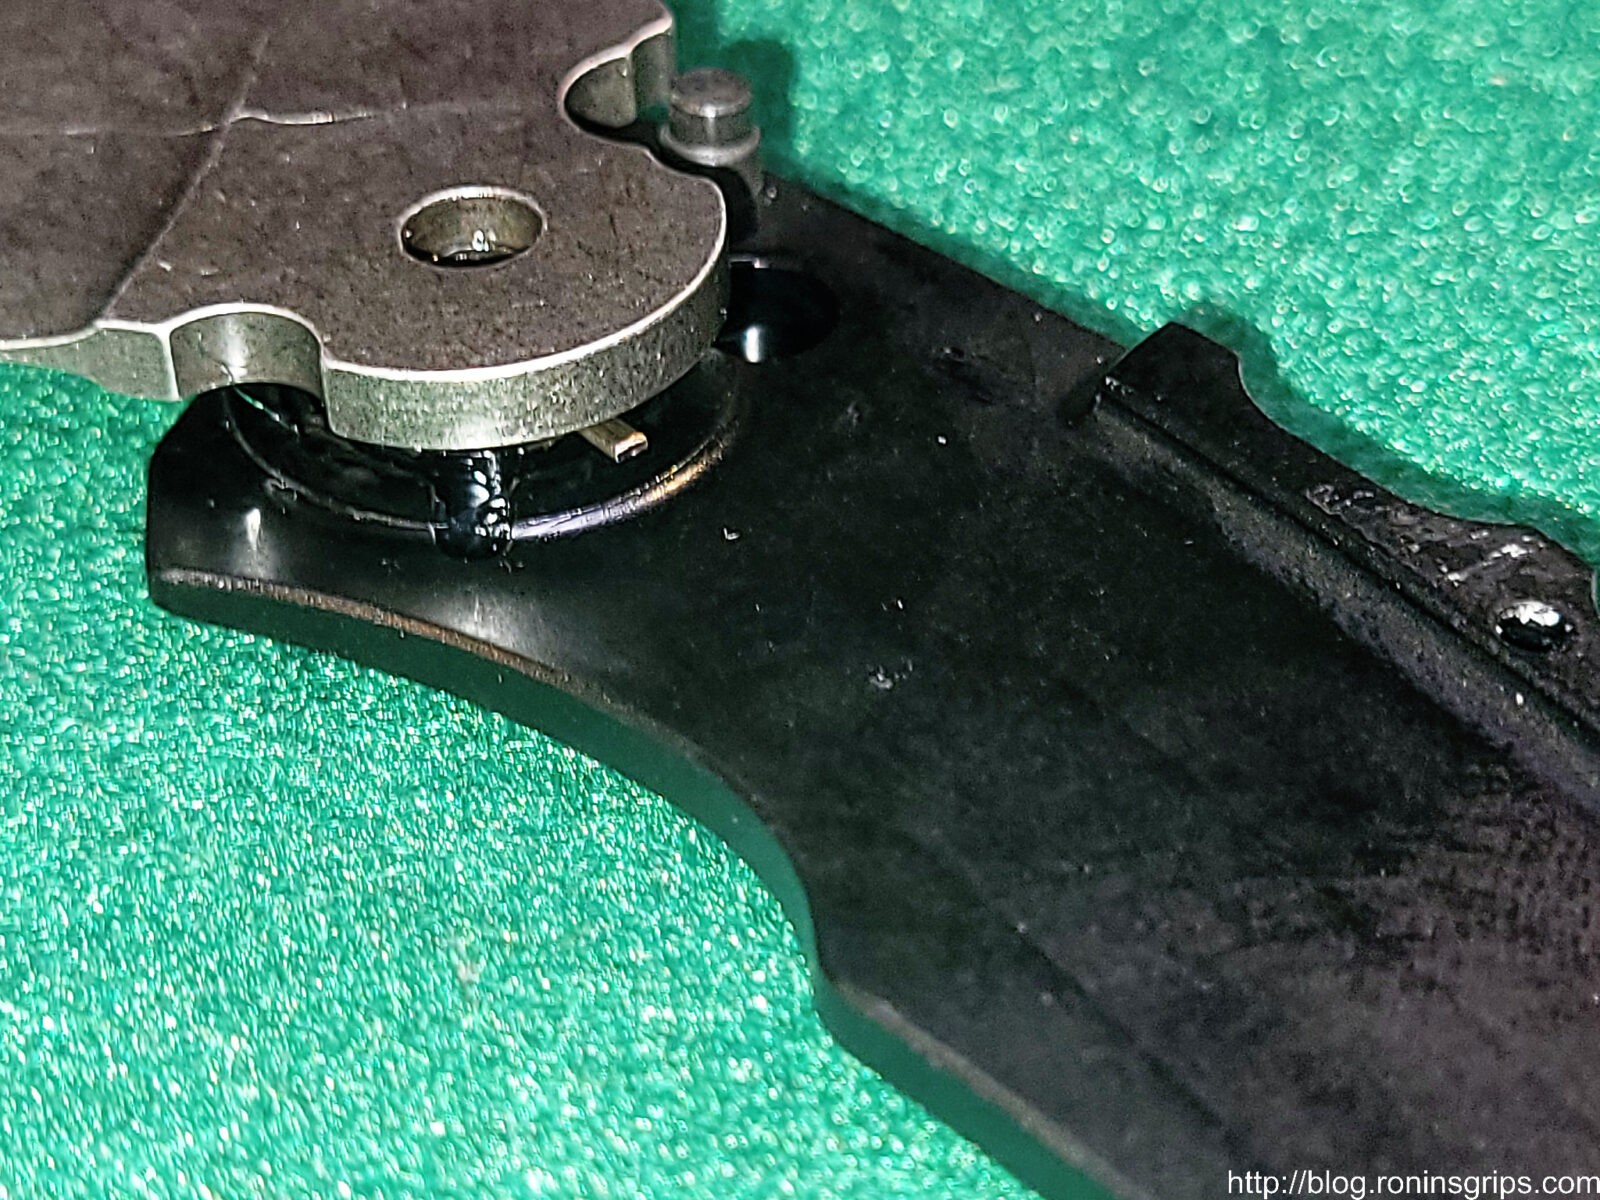
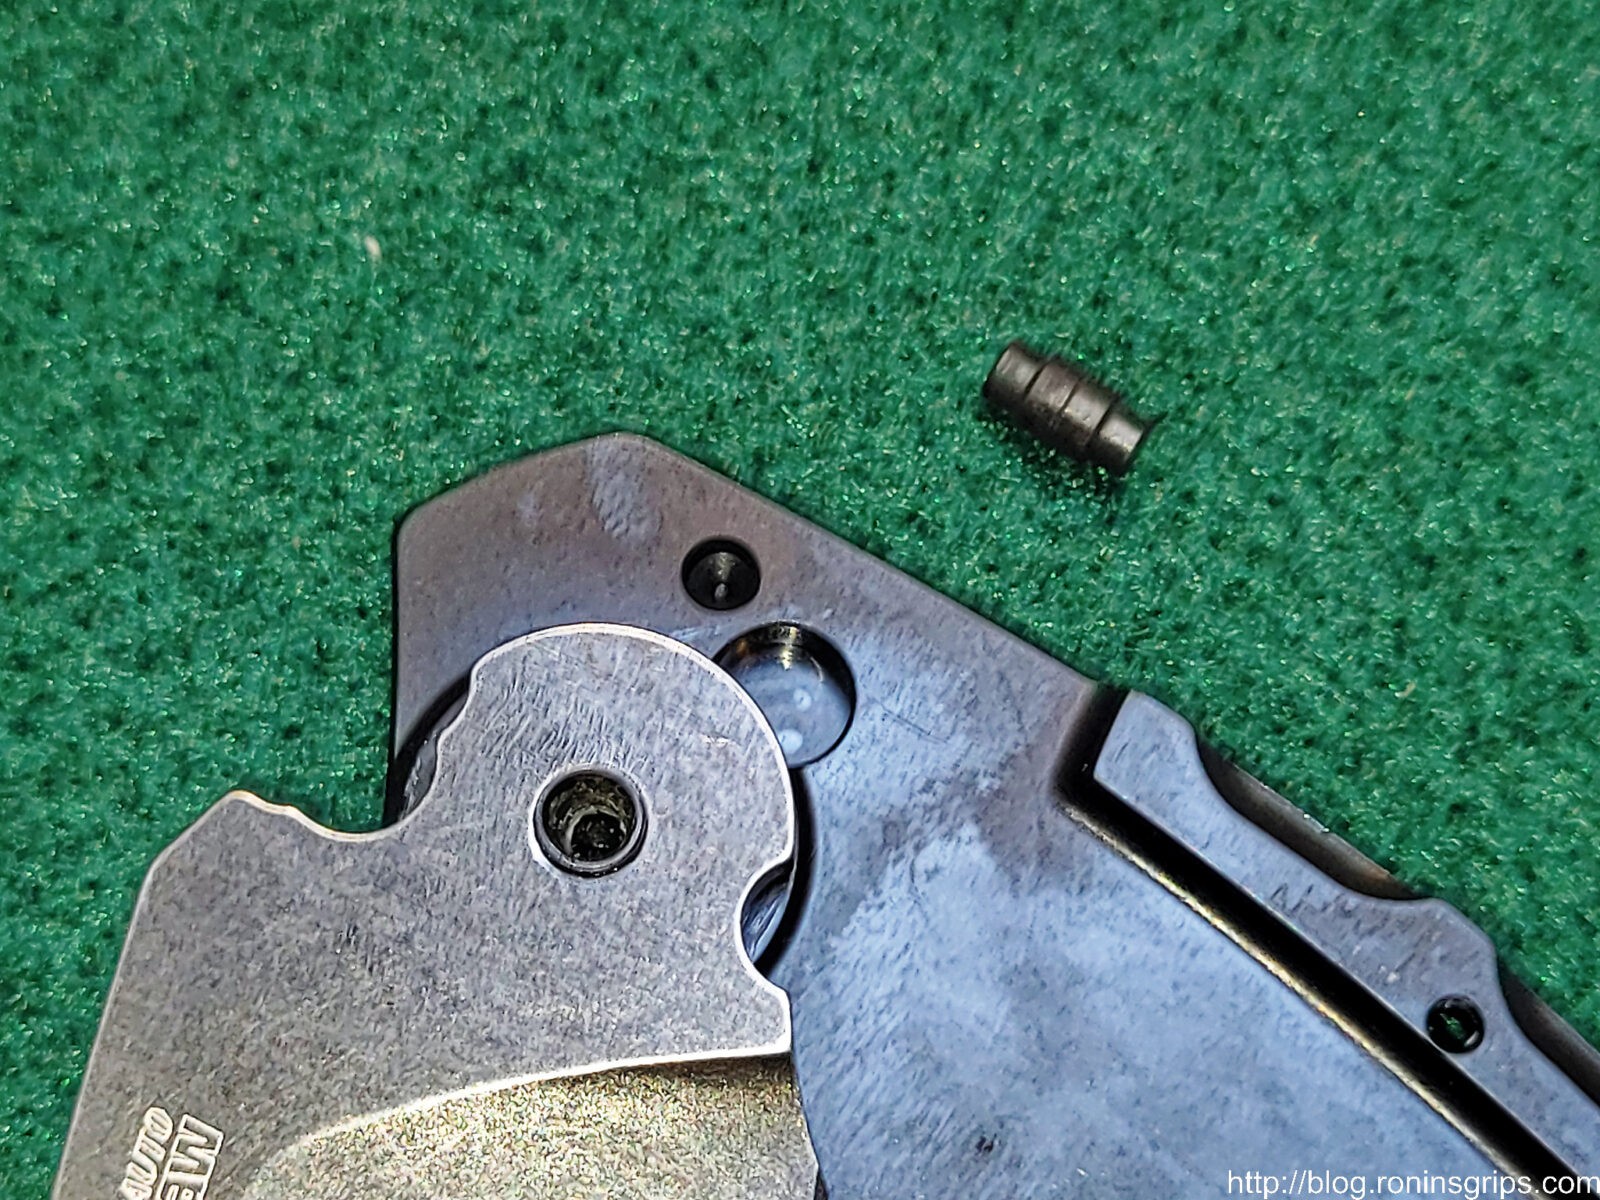
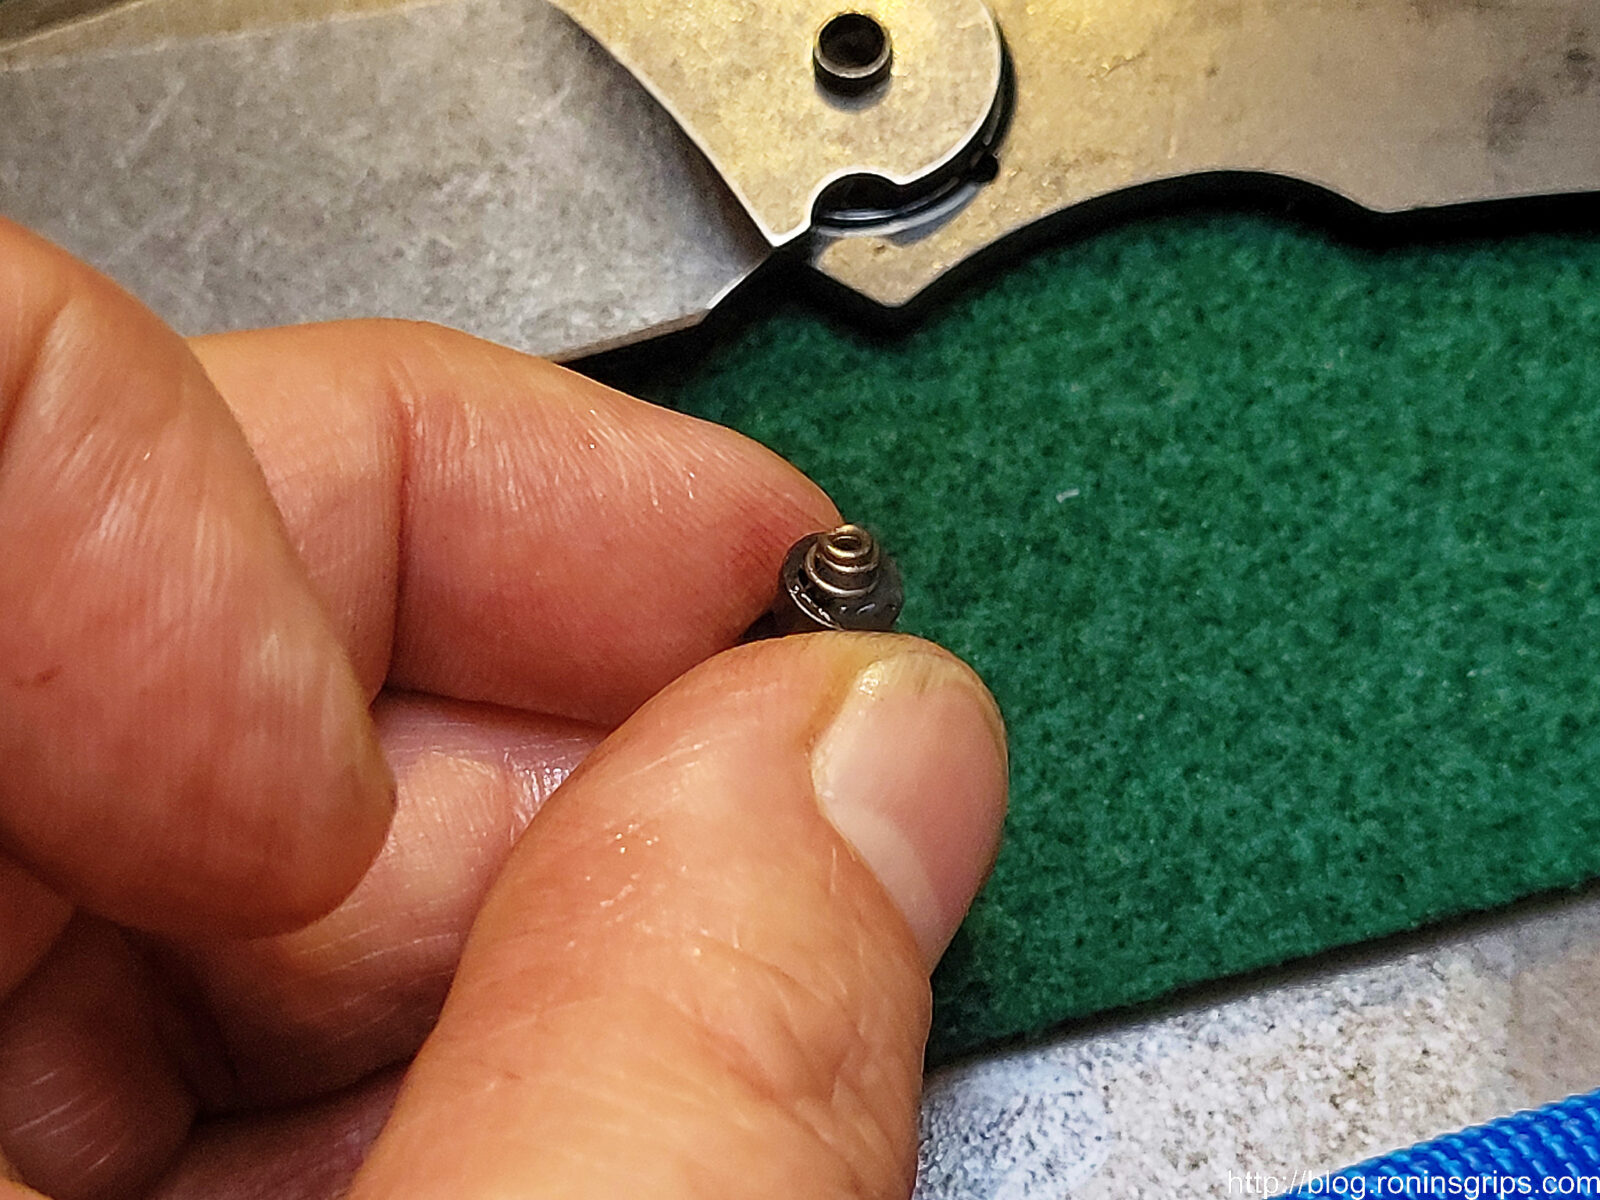
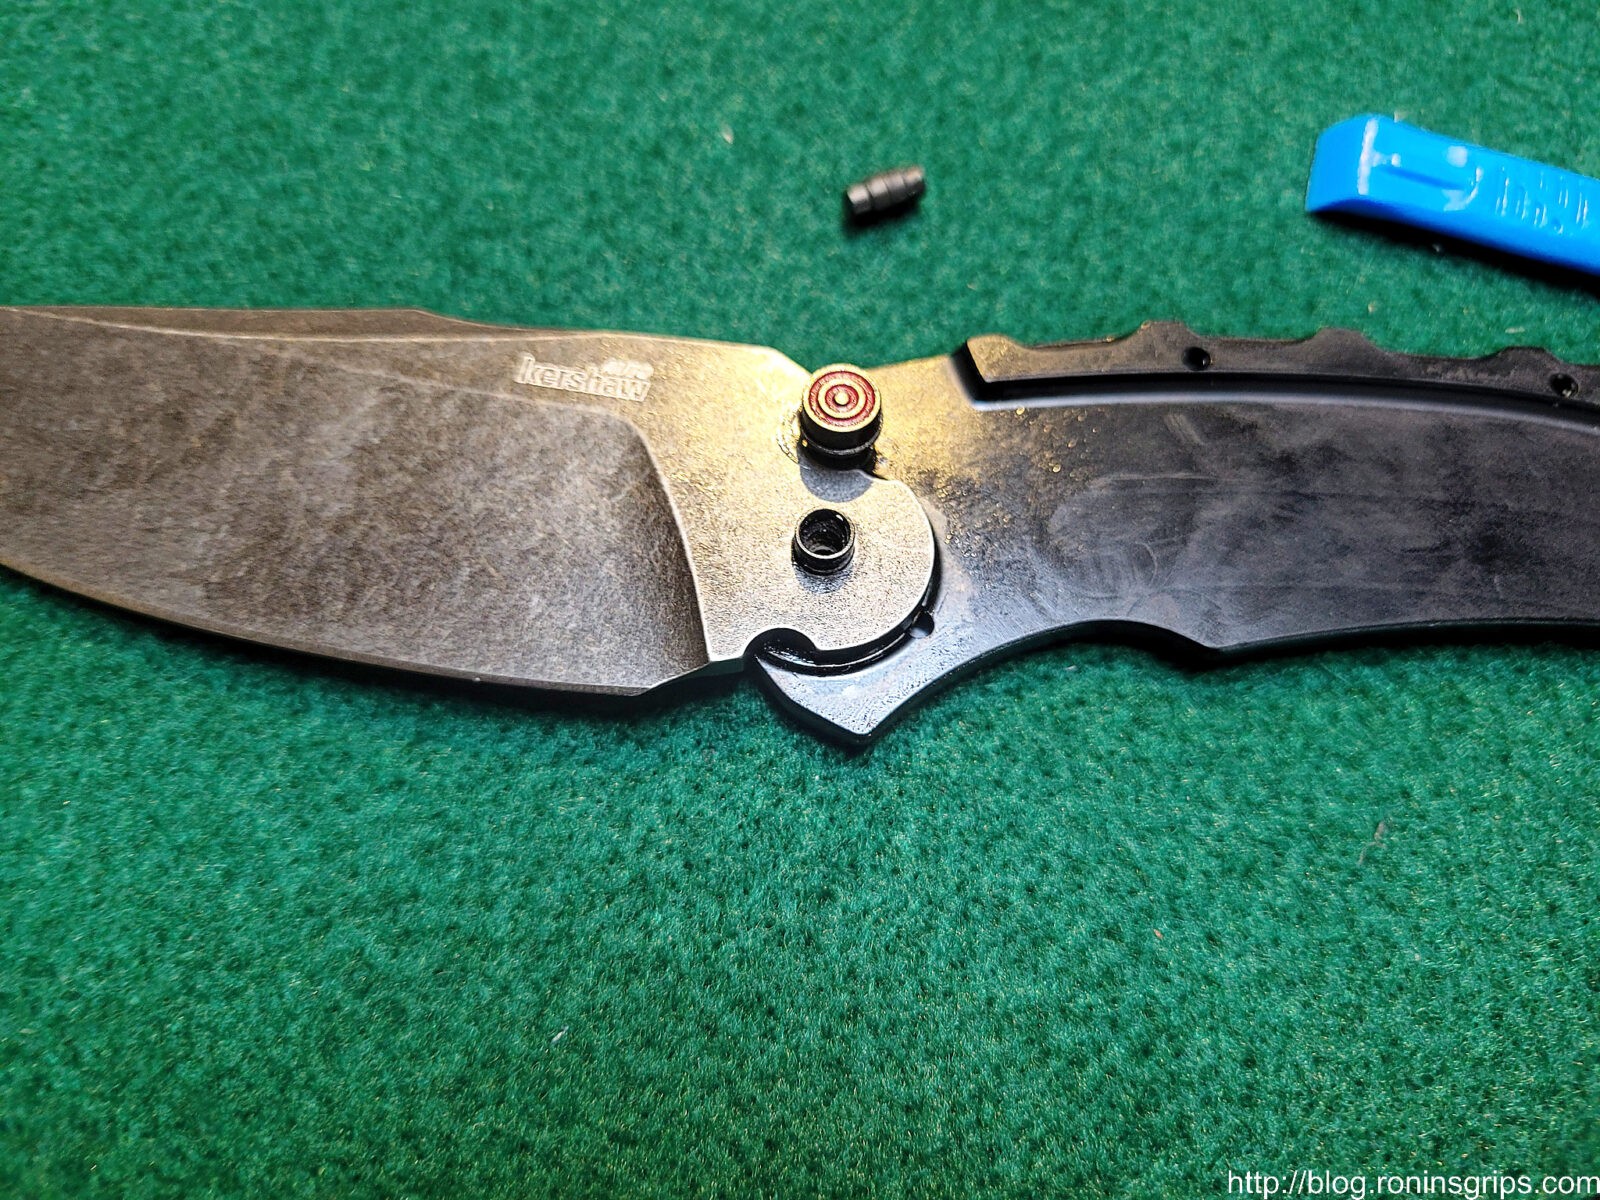
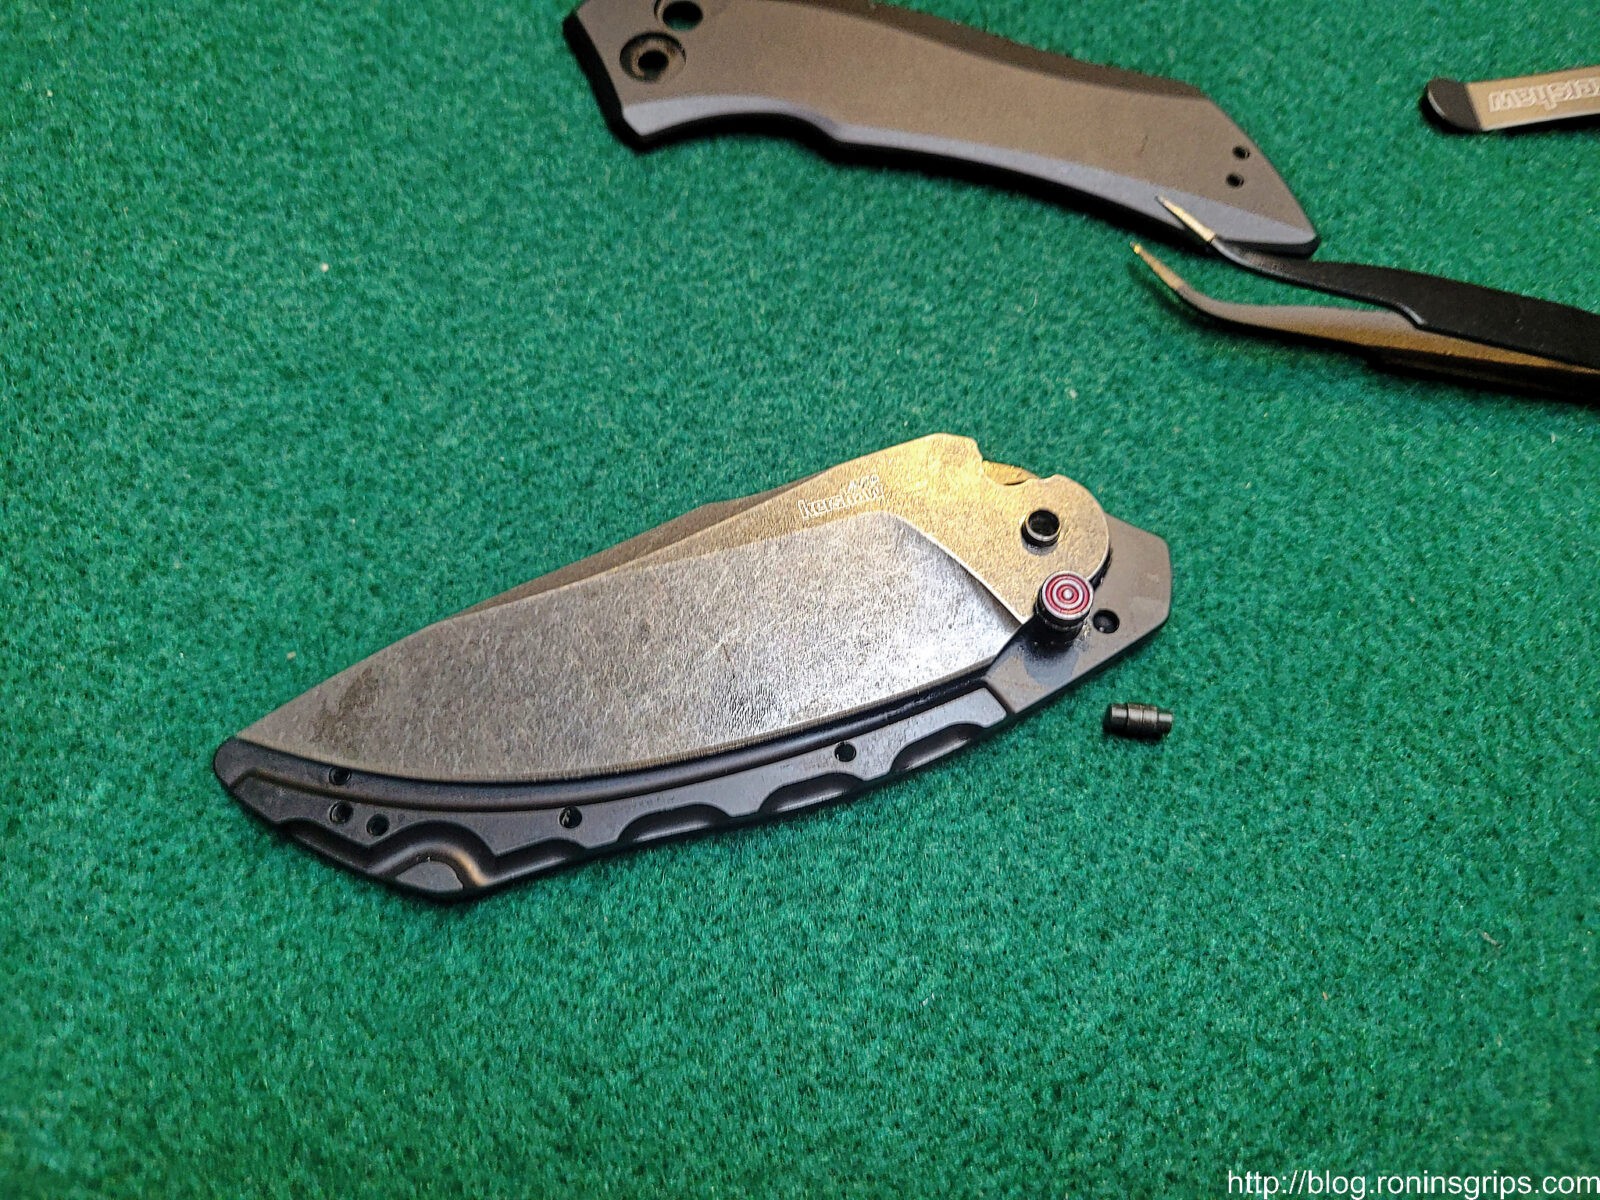
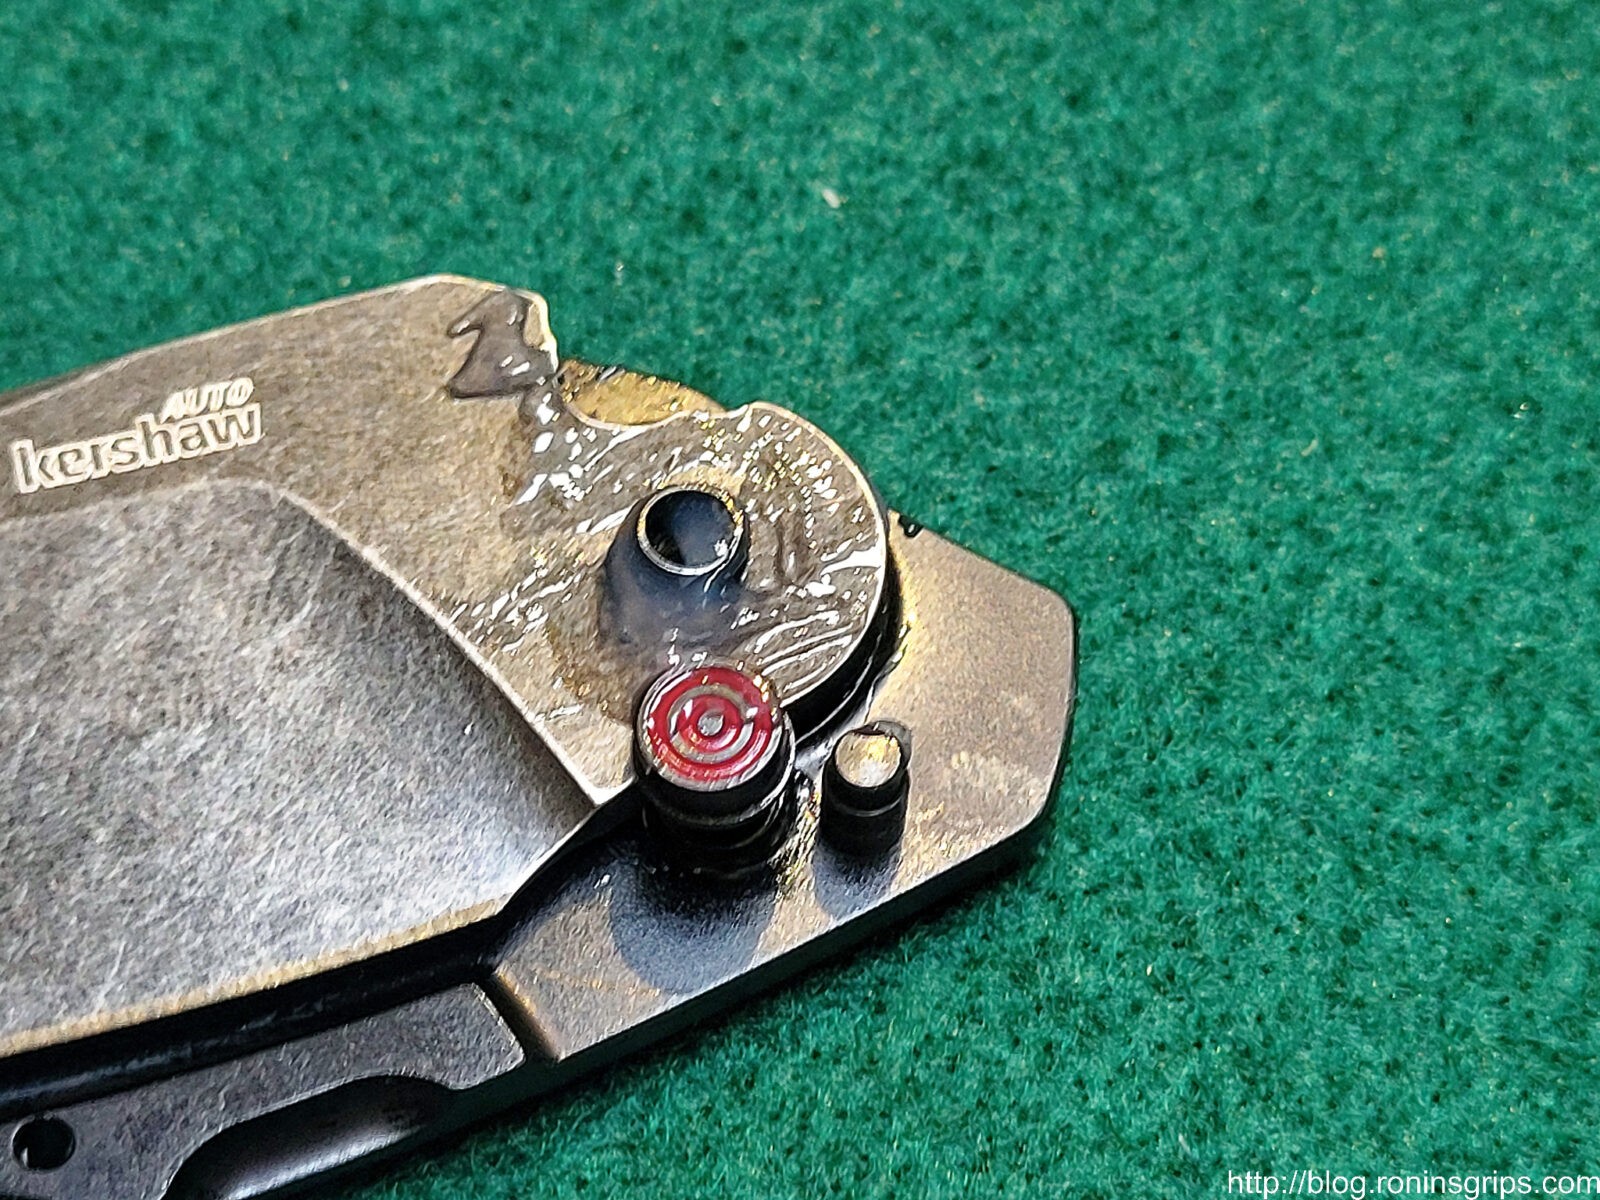
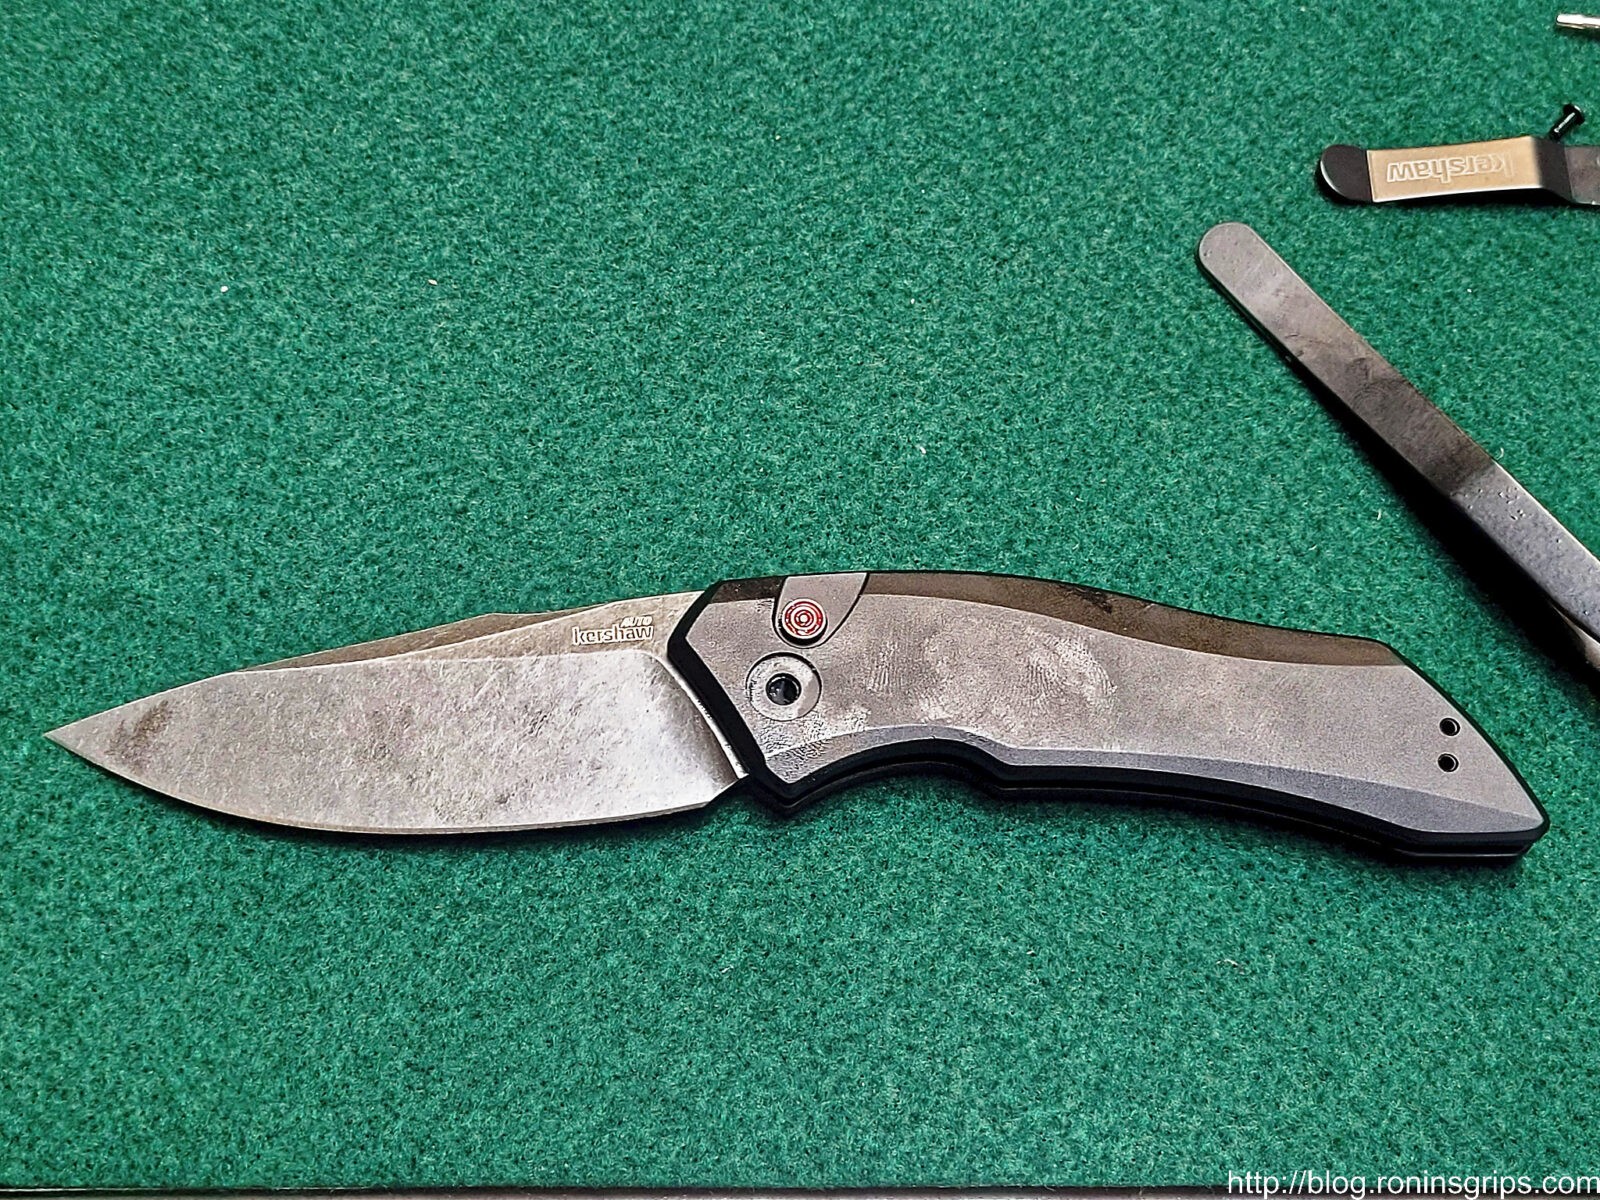
All of these screws use a #6 Torx bit. I removed the clip first and then the three screws holding the handle halves together. Note how the axle bolt is held in place by a hex head on the left. You don’t need to do anything from the side with that bolt – I’m just pointing out it is nice and secure. If you look at the screws at the bottom – especially the one to the right, it looks like some medium strength thread locker was on them.I missed it on first glance – this is the other half of the axle bolt – kind of like a Chicago-screw or post-screw. I saw the decorative half circles and wondered how they removed it and then I noticed the hole in the center and looked more closely with a flashlight – hidden down in there is a #8 Torx screw.There must be some thread locker on this as it took some torque to break it free. I didn’t need to use a wrench or heat – I just had to turn more firmly and it came loose.Looking at the white/grey stuff in the threads – there probably was just a bit of threadlocker to keep it from coming lose but I am not certain. I would tend to think there is because you can’t crank that screw down or the pressure will keep the blade from opening.At this point, all fasteners have been removed. Notice how I have it turned over so the push button is up – you will want to do the same.So the scale lifts straight up and off. It is a snug fit on the axle bolt so it may take some wiggling to get it off. Now I need to point something out – look how clean the machining is and the finish is consistent. So many tools and knives look like crap inside due to an “out of sight out of mind” mindset that it is refreshing to see how well this is done. Kudos to the folks in the Oregon Kershaw plant!The top pin to the left of the push button is hand press fit in place. Pull it out first and the blade will want to rotate clockwise and then the big hole will present itself to the push button and the push button will lift out. Yes, in the photo above I said remove the pin and then the push button. In my case I was taking pictures and wiggling the blade round – the push button came out on its own. At this point the spring tension is being taken up by the pin. It’s not a crazy amount of spring tension the blade open but it is trying to go a bit further so be careful. This photo also lets us see the removed push button assembly. Normally, the fat bottom portion is engaging one of the cut outs in the bade. Either the one at the top that is keep it closed or the one at the bottom that locks it open. When you push the button the fat piece slides out the way and the blade is released to either open or close. Note, the spring is not sitting properly in the base of the push button in this photo.I would not have needed the little blue pry bar if I knew the stop pin simply pulls out. If I had slightly closed the blade to take the pressure off the pin, I could have easily lifted the pin out, then controlled the few more degrees of rotation the spring had left in it and the blade would have lifted right off.The torsion spring is what provides the power to flip the blade into position. The act of the user closing the blade rotates the spring’s coils and store the energy waiting for the button to be pushed spring back into the relaxed position. One leg of the torsion spring sits in the channel of the handle and the other sits in the blade. In this photo I have laid the blade 180 degrees opposite of how it normally sits in the handle so you can see how the torsion spring sits in the two parts. It’s elegant. Notice the ample grease – I think it might be silicone grease. Anything that causes the blade to bind will slow or even stop deployment.Here are the parts and you can see the nicely done flat torsion spring. Again, I should have removed the stop pin, then the push button and the blade would have lifted right off the axle bolt. This is it other than removing the stop pin which plays into re-assembly.
Re-Assembling the Launch 1
Putting it back together is pretty straight forward. In hindsight I would tell you if something seems complicated, you missed something. That was exactly my thoughts as I was trying to the the torsion spring oriented with one leg in the handle and the other in the blade.
I spent about 5-10 minutes trying to get spring in and had my “duh” moment. Given how the spring sits, no tool so going to fit in there. I thought to myself “I wonder if that that stop pin can pull out?” And it did.Wow!! Removing that stop pin made it sooooo simple. Rotate the blade such that the torsion spring legs are seated and you will feel the spring working. Then put in the push button and its spring followed by the stop pin.I wish they designed the spring to snap into the button but they didn’t. An old trick that I used here was to fill the cup of the push button with silicone grease. The grease in turn holds the spring while you install the assembly.Rotate the blade just enough so you can install the push button in that first large semi-circular opening. You can then push the button down and rotate the blade into the next notch which is the normal lock open moment. In this photo the blade is at a funny angle because the stop pin has not been installed yet.Notice the blade is pushed all the way down on the axle bolt. To install the stop pin, push the button, carefully close the bade and release the push button. It should engage and hold the blade in the closed position. This presents the hole for the stop pin wonderfully as you can see in the photo and you aren’t fighting the spring. Literally, the pin goes right in.I put a light coat on silicone grease on this side of the blade as I had wiped most of it off fumbling around. I did clear the silicone out of the bolt if you are wondering. You can also see the stop pin is in its hole.The handle half is reinstalled. I carefully held it in place and tested to make sure the blade still pivoted and the push button worked.When you reinstall the end of the axle bolt, you will need to see how much to snug down the screw. I found that if I made it too tight that the blade would not fully deploy. After experimenting, you may want to put just a bit of medium thread locker on the screw to keep it from working loose. Re-installed these too and with that am done.
Summary
Kershaw did an excellent job on this knife. I thought about doing the same with the Launch 13 and it looks to be the same mechanism so I didn’t bother.
If you are looking for an automatic knife, I am very impressed by the Launch 1 and 13. I suspect the whole line has similar workmanship. I’ll post links further below.
Note, I have to buy all of my parts – nothing here was paid for by sponsors, etc. I do make a small amount if you click on an ad and buy something but that is it. You’re getting my real opinion on stuff.
Growing up as a kid in the 70s and 80s you’d see some guy in a move whipe out a switchblade and you’d know a world of hurt was coming. For years, I wanted one but couldn’t own one. Now that I own two, I’m trying to figure out how they factor into my collection to be quite honest.
I’m not handicapped so I can’t speak to how they would use one but other than the “coolness” factor, I don’t see the point compared to the tons of flippers / assisted opening knives that I already own. To be clear, I am not bashing them but I won’t be buying any more either – my curiosity is satisfied. Please note – I am impressed by the design and the manufacturing but have decided they just aren’t my cup of tea.
With that said you are going to get my honest opinion.
Some Background
I like Kershaw knives in general so an ad for their Launch series of automatic openers caught my eye. I’ve always wanted to try a “switchblade”, or more appropriately termed an “automatic”, so I shelled out $114 for a Kershaw Launch 1 and $125 for a Kershaw Launch 13. I figured that would let me try a couple of different designs and they have a number of Launch models for you to choose from.
One thing that appealed to me with both of them is that they are made in the USA. Kershaw has a production facility in Tualatin, Oregon, that makes these models as well as a number of their higher end Kershaw and Zero Tolerance blades. Part of the premium pricing reflects being built in Oregon vs. China.
Note: You need to know the laws and regulations governing automatic knives in your area before you buy one. The American Knife & Tool Institute (AKTI) maintains a page that can help at a state level but you still need to confirm about your county and city just to play it safe.
The Launch 1
This is a good size knife. The slightly “humped” design enables it to fill your hand and be held very nicely. Let’s talk specifications:
Blade length: 3.4″
Blade profile: Drop-point
Blade steel: CPM 154 – it is a tough stainless alloy that also holds an edge fairly well while being moderately easy to sharpen
Blade finish: Black Wash
Blade thickness 0.121″
Closed length: 4.6″
Handle material: 6061-T6 aluminum
Handle finish: Black anodized
Handle thickness: 0.47″
Overall length when open: 8″
Weight: 4oz
Pros: Weight and size are good, blade flips open with a snap when you push the button, very nicely made.
Cons: I honestly wish there was a safety. This thing opening in a pants pocket is going to really suck fast. Kershaw says it is “low-profile” to make it harder to trigger but even so – you push that button and it will open fast.
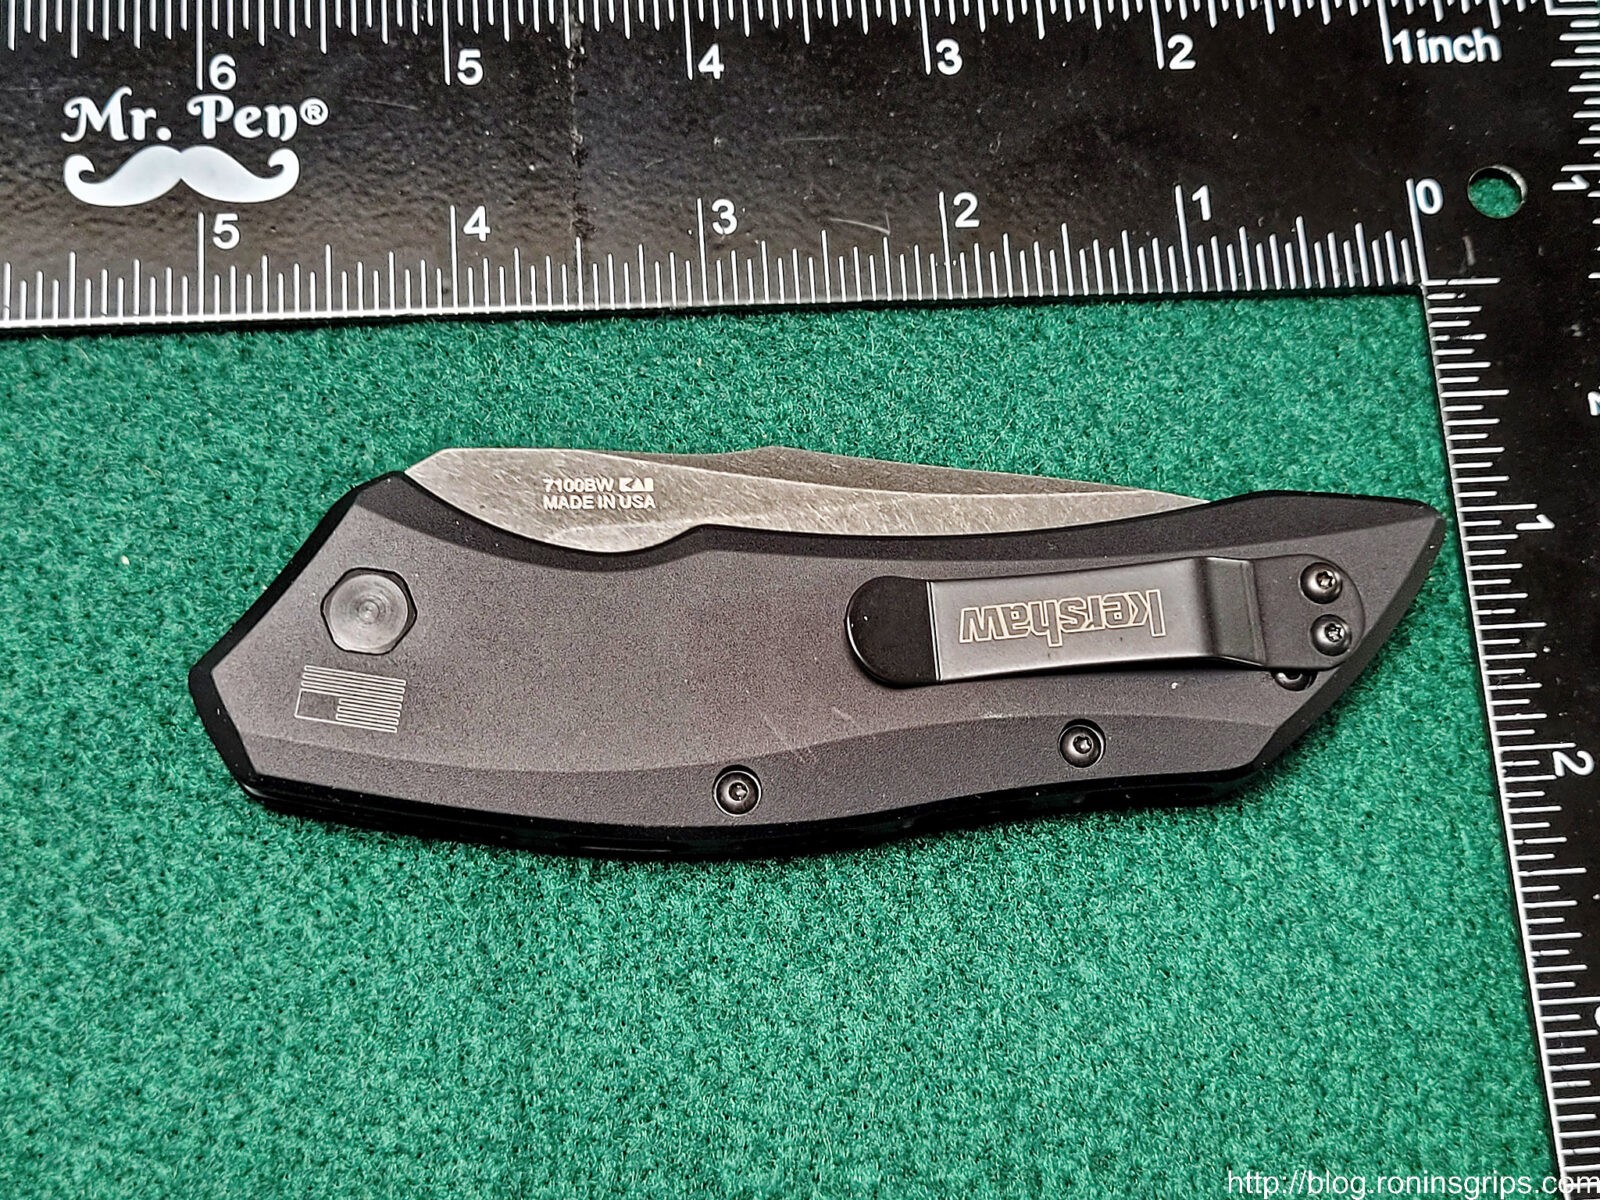
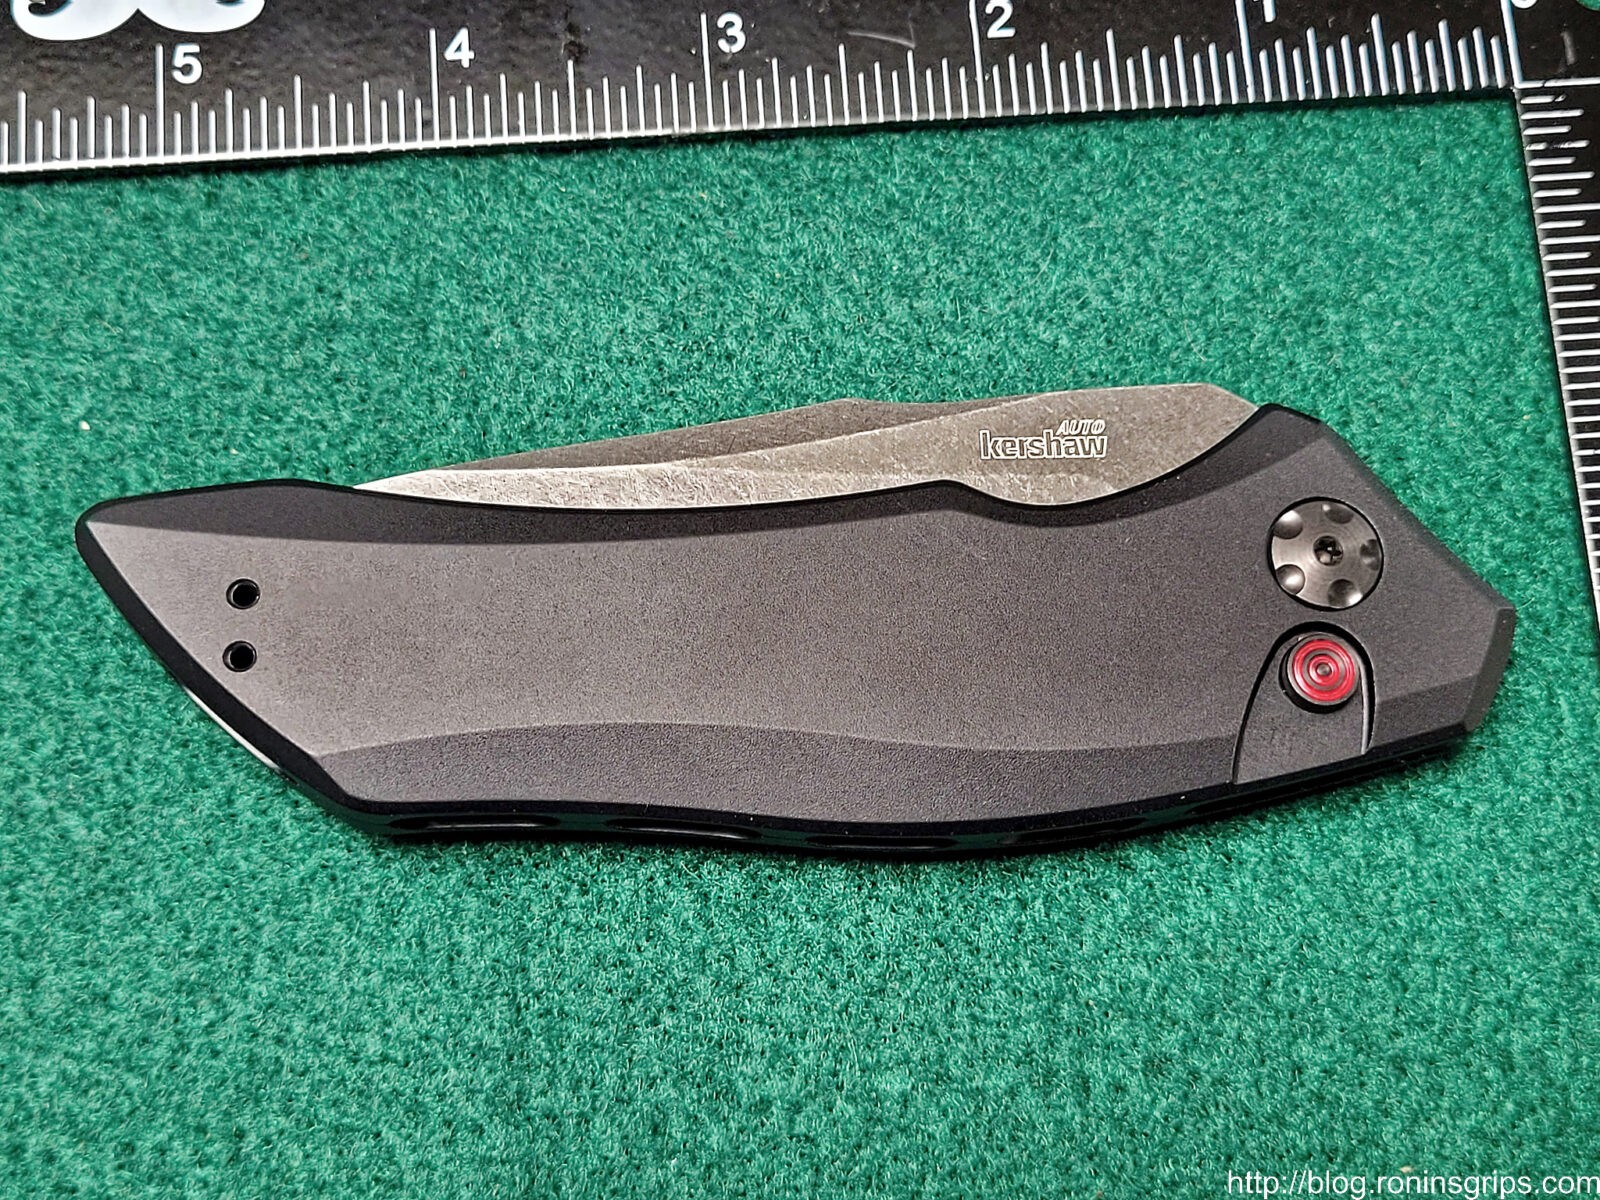
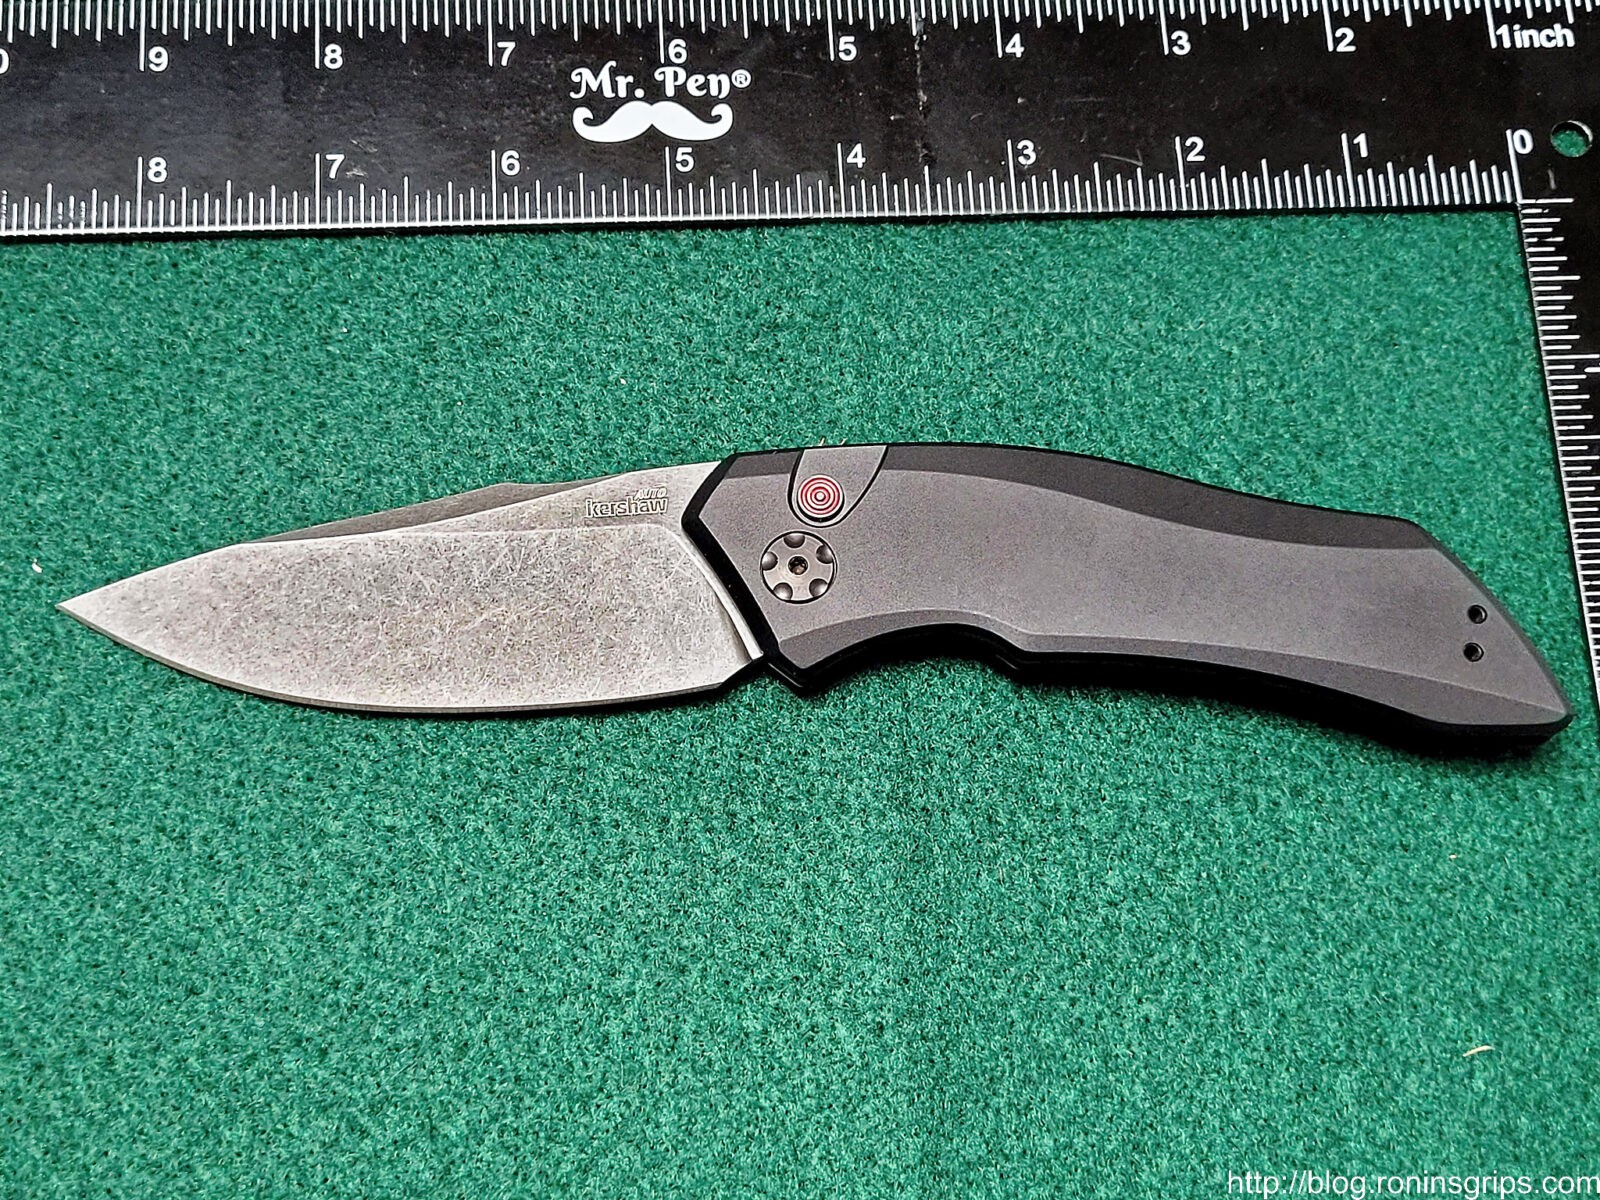
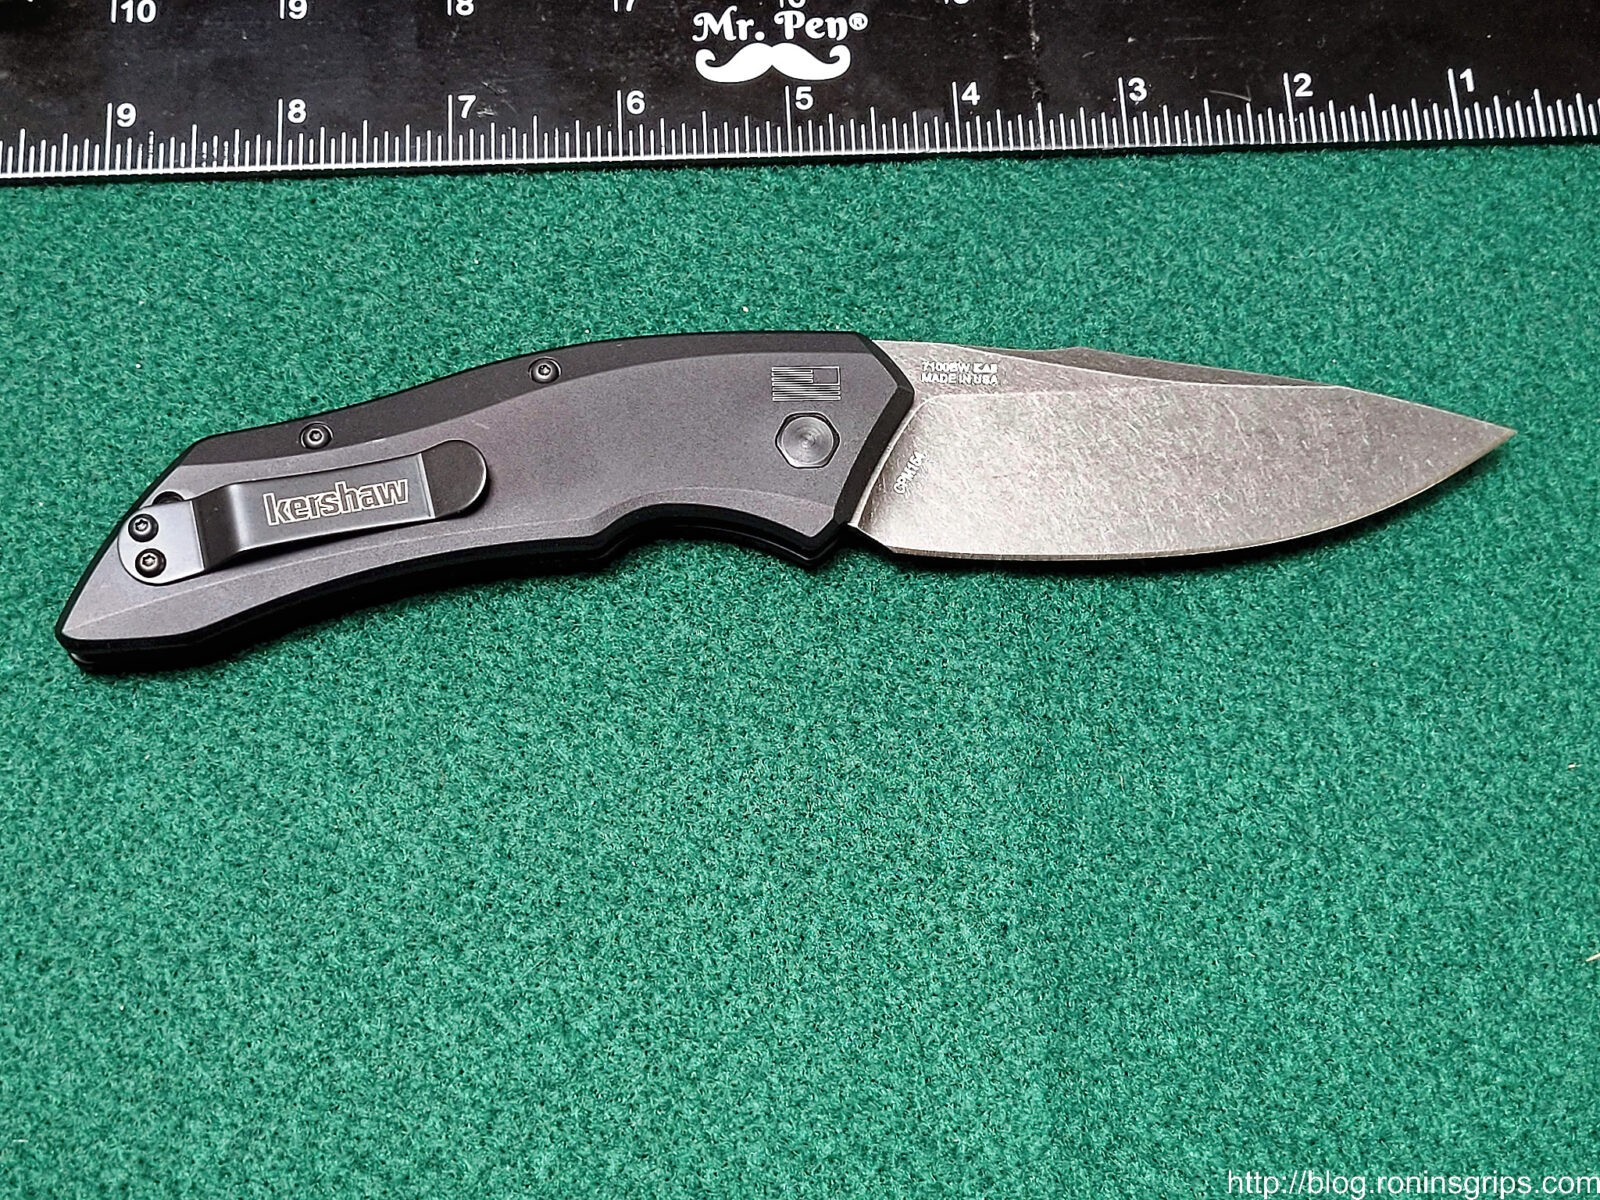
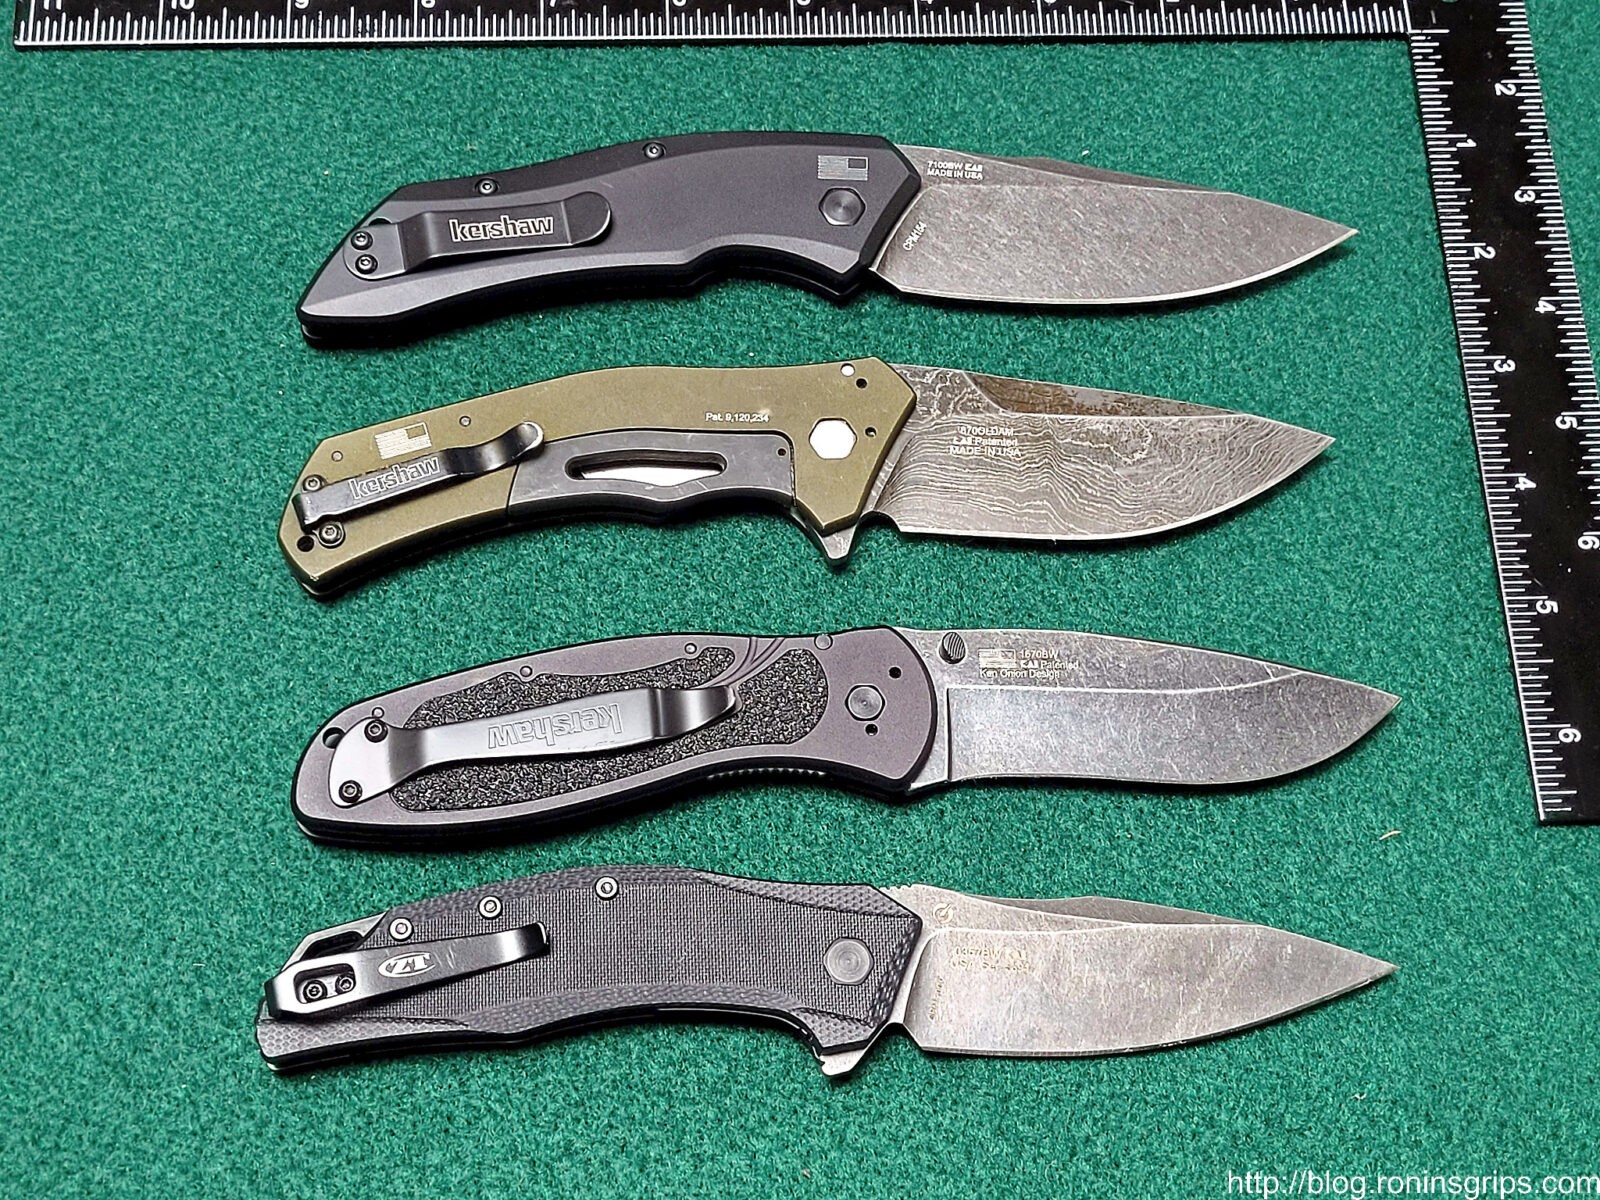
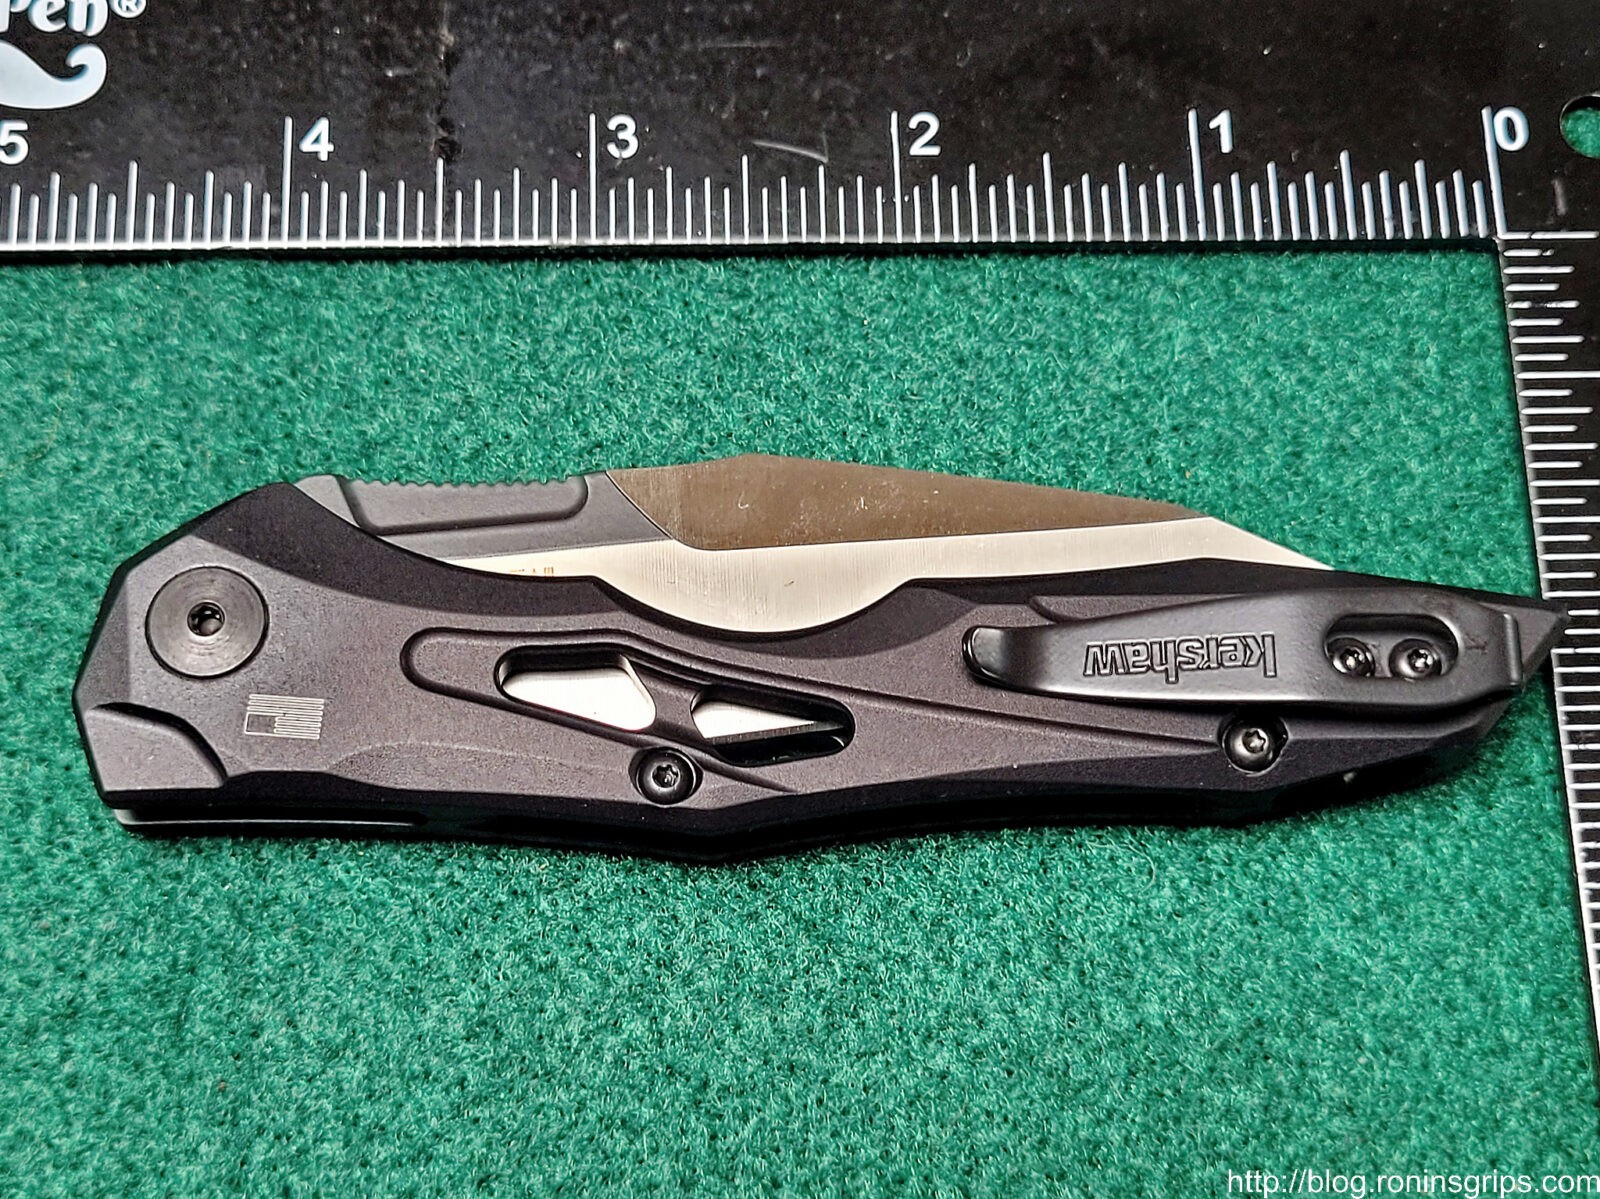
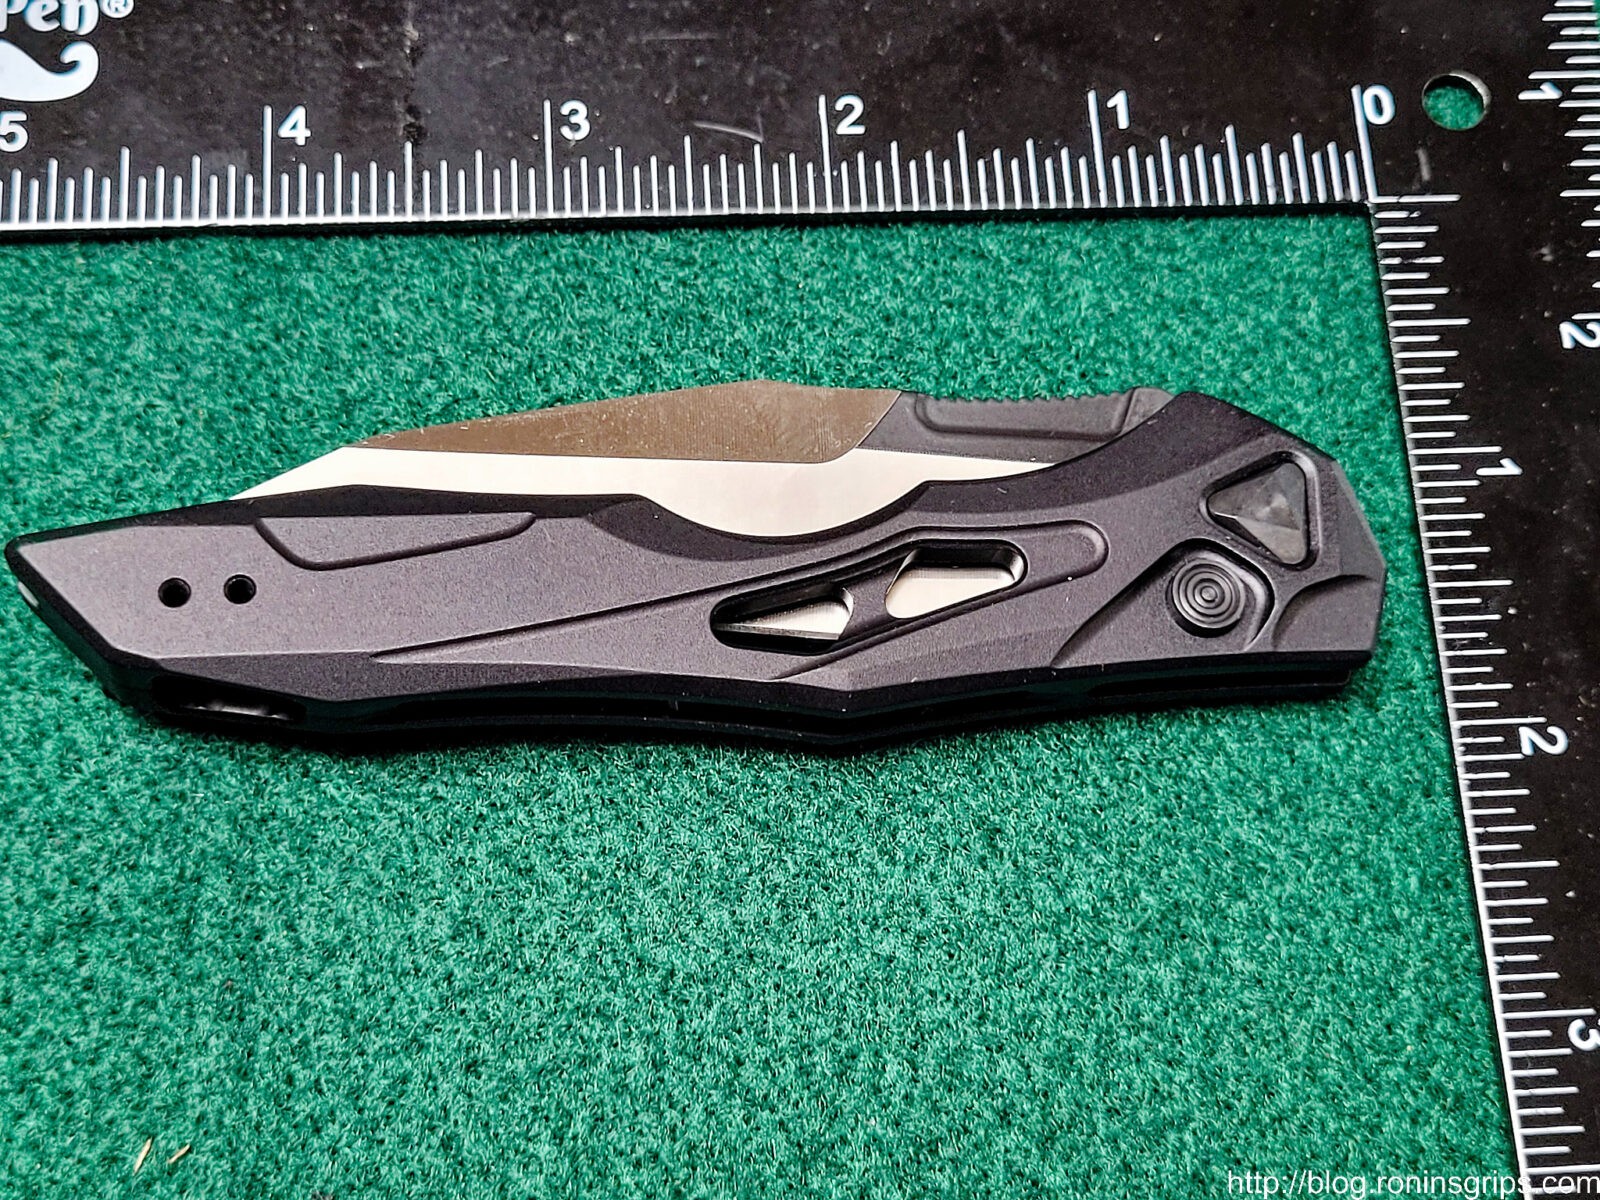
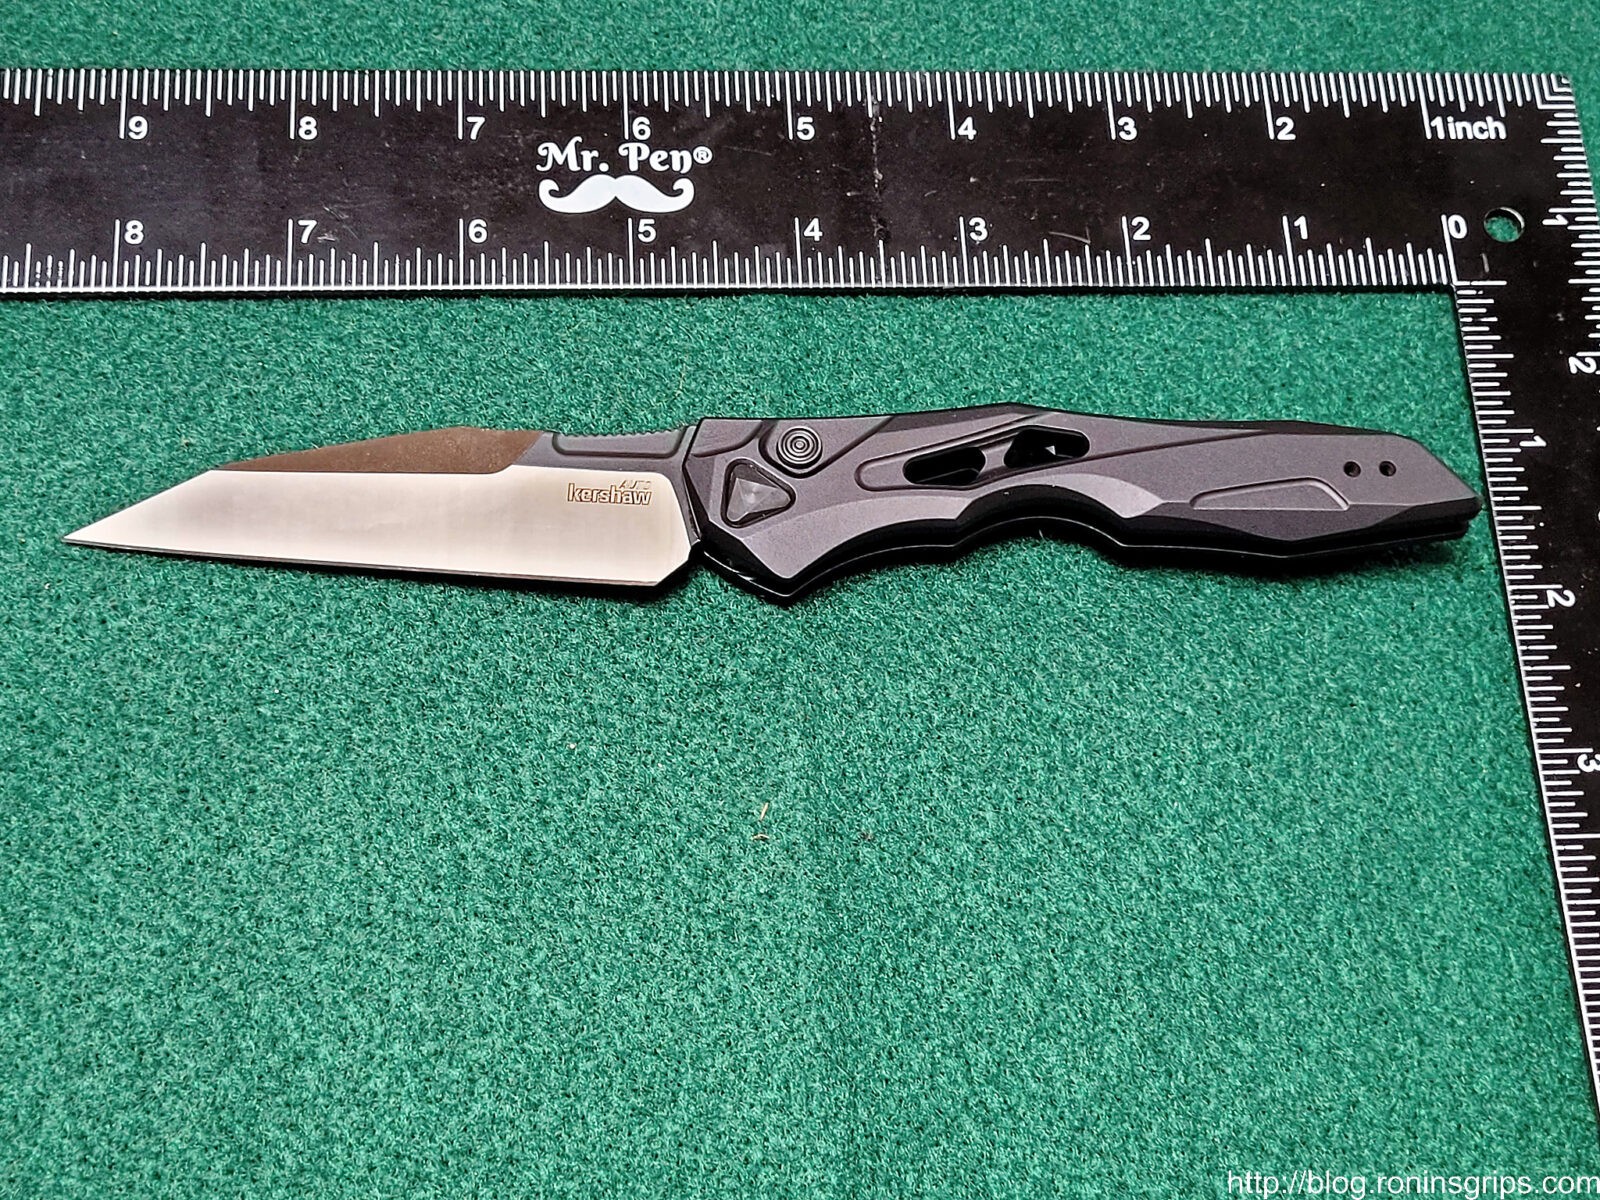
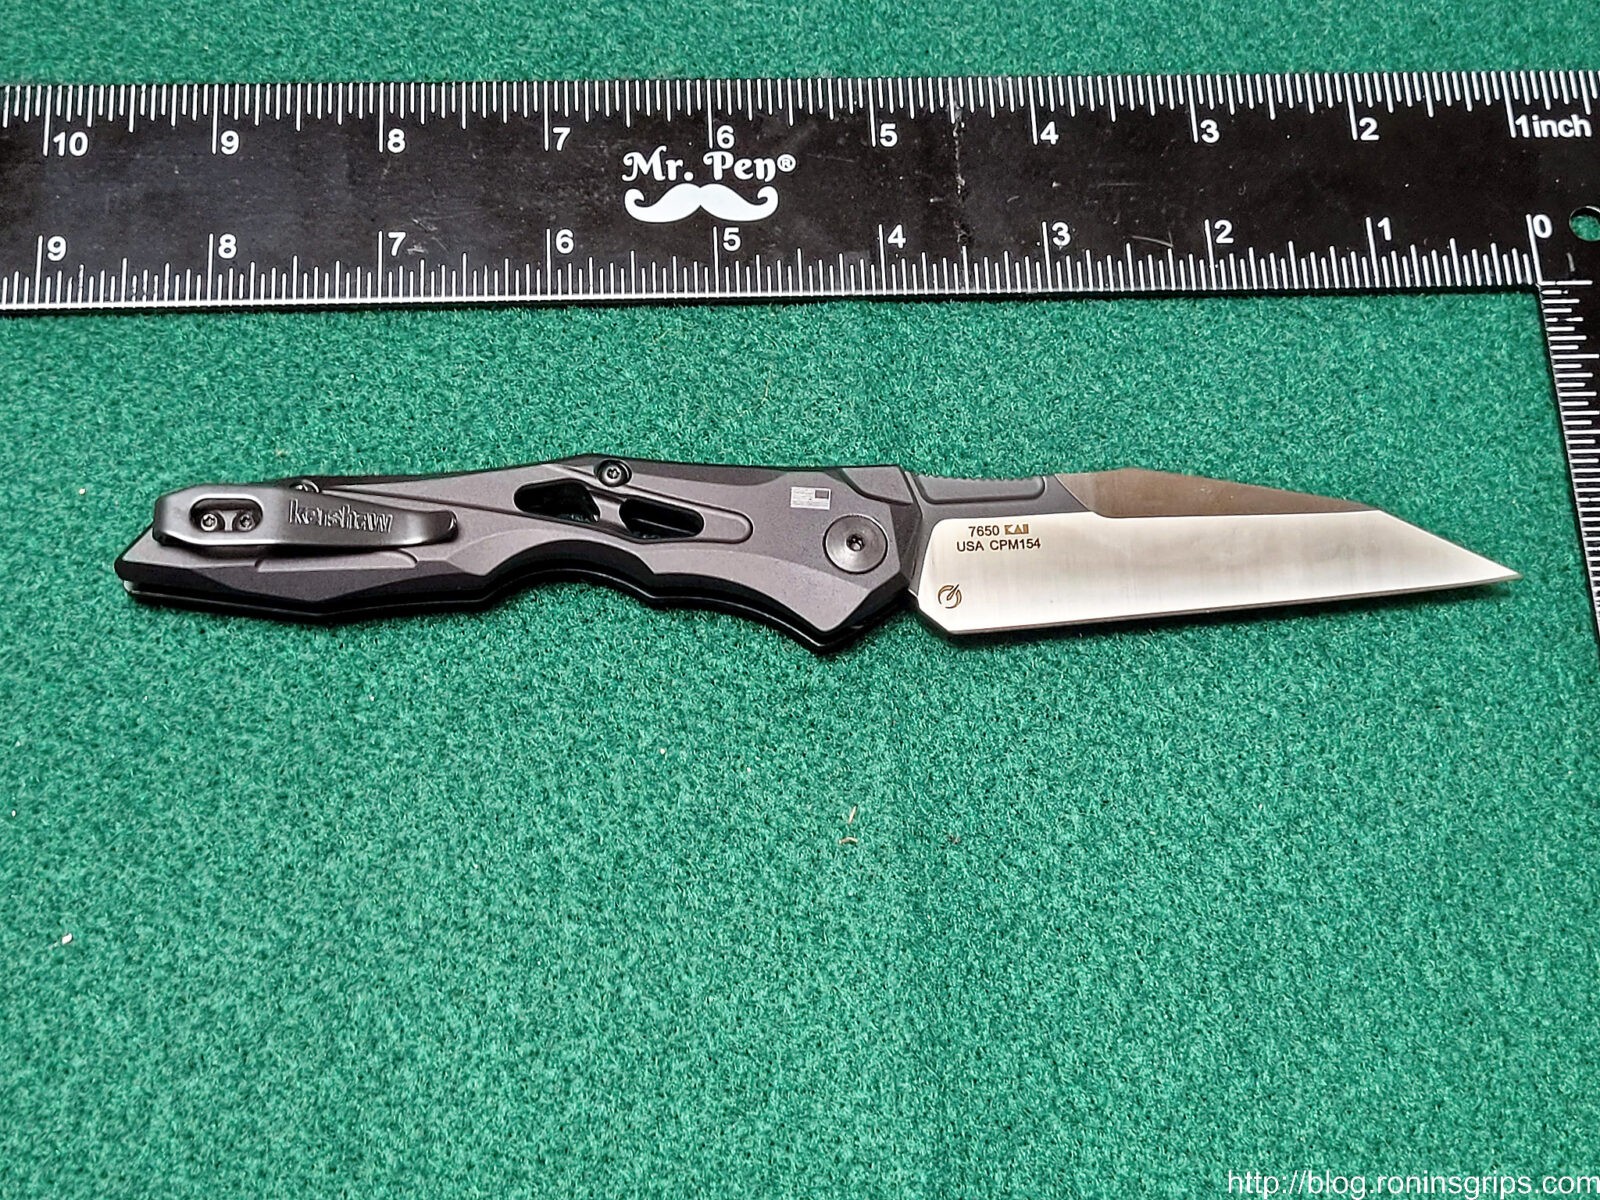
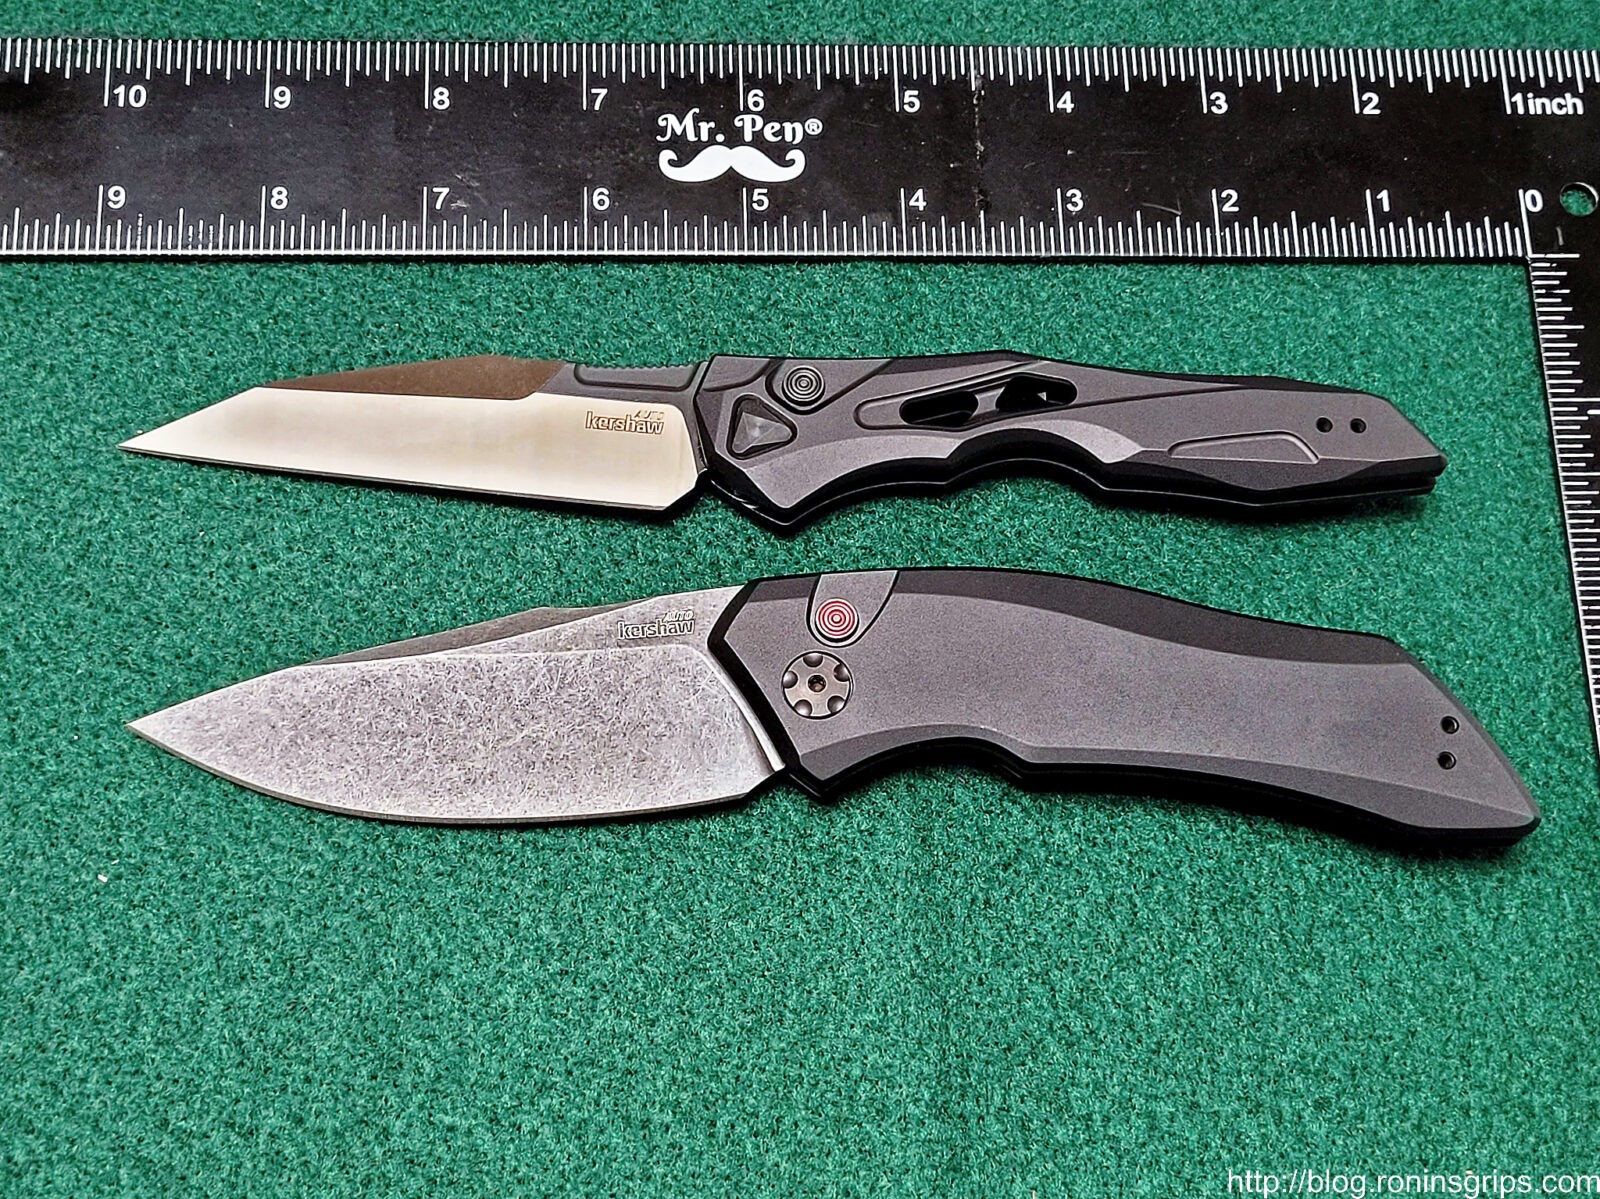
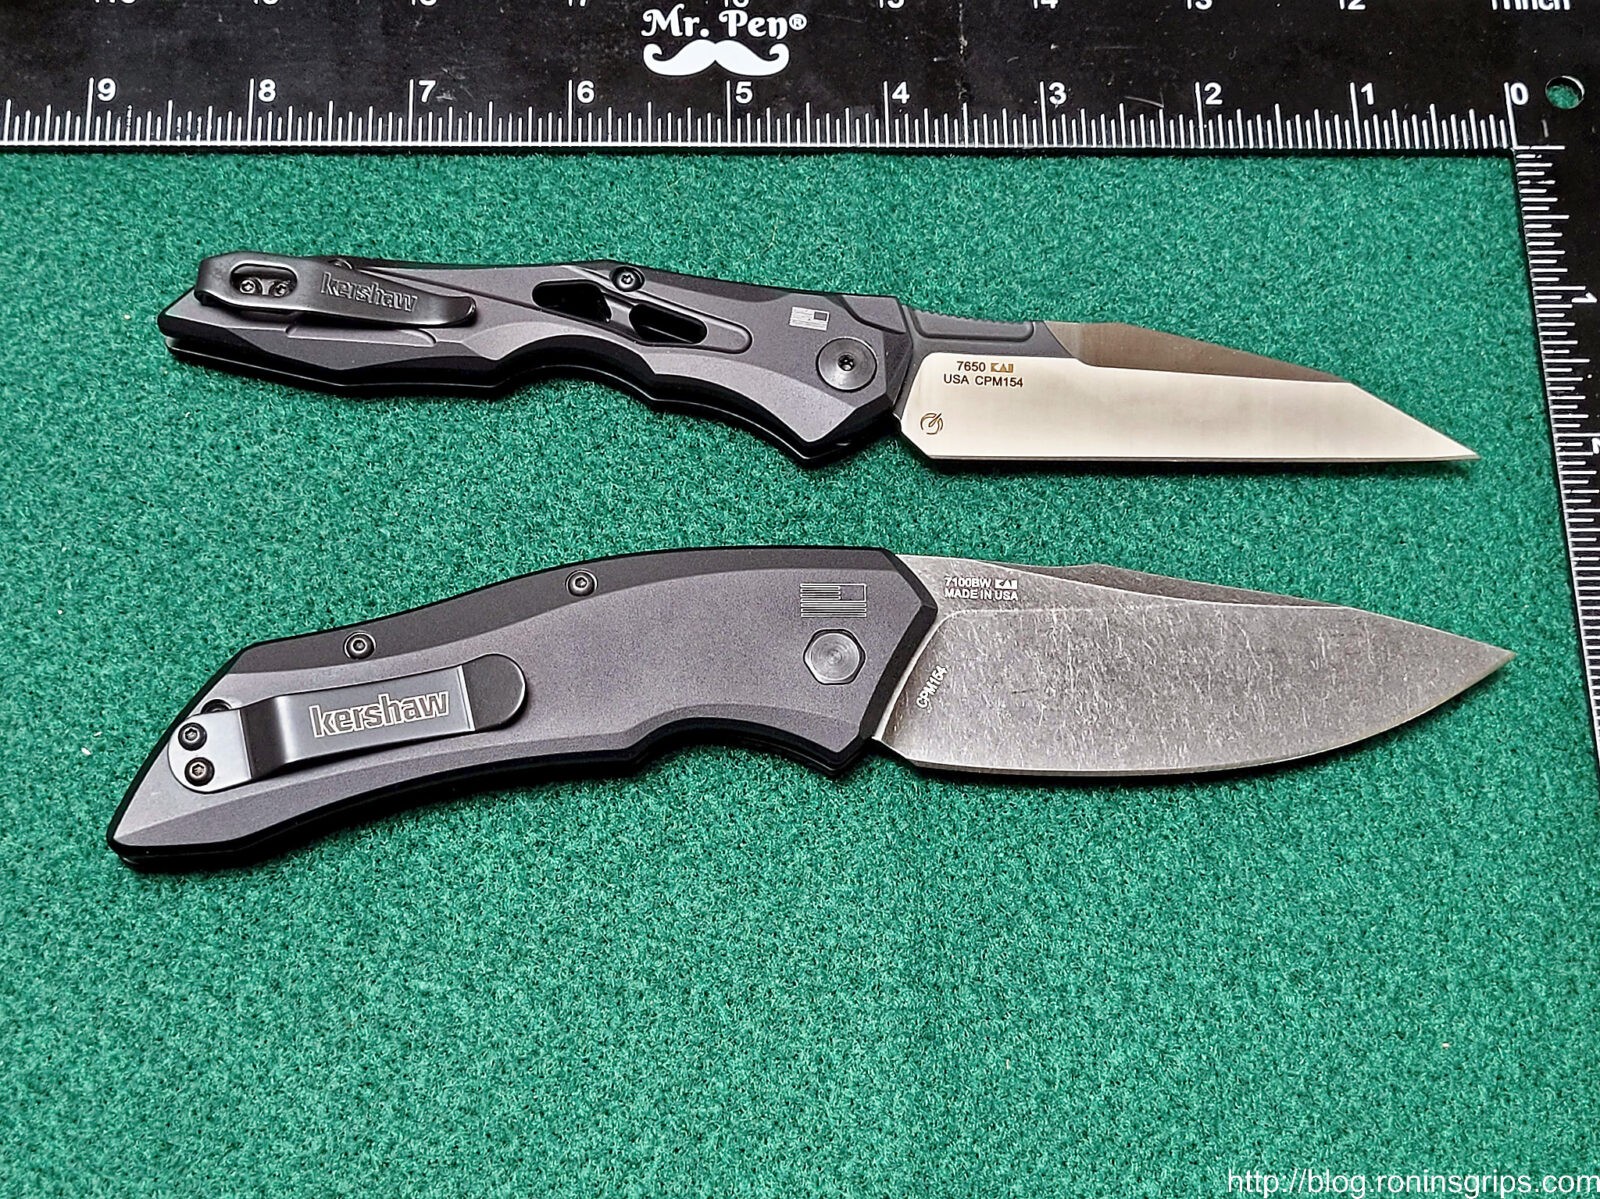
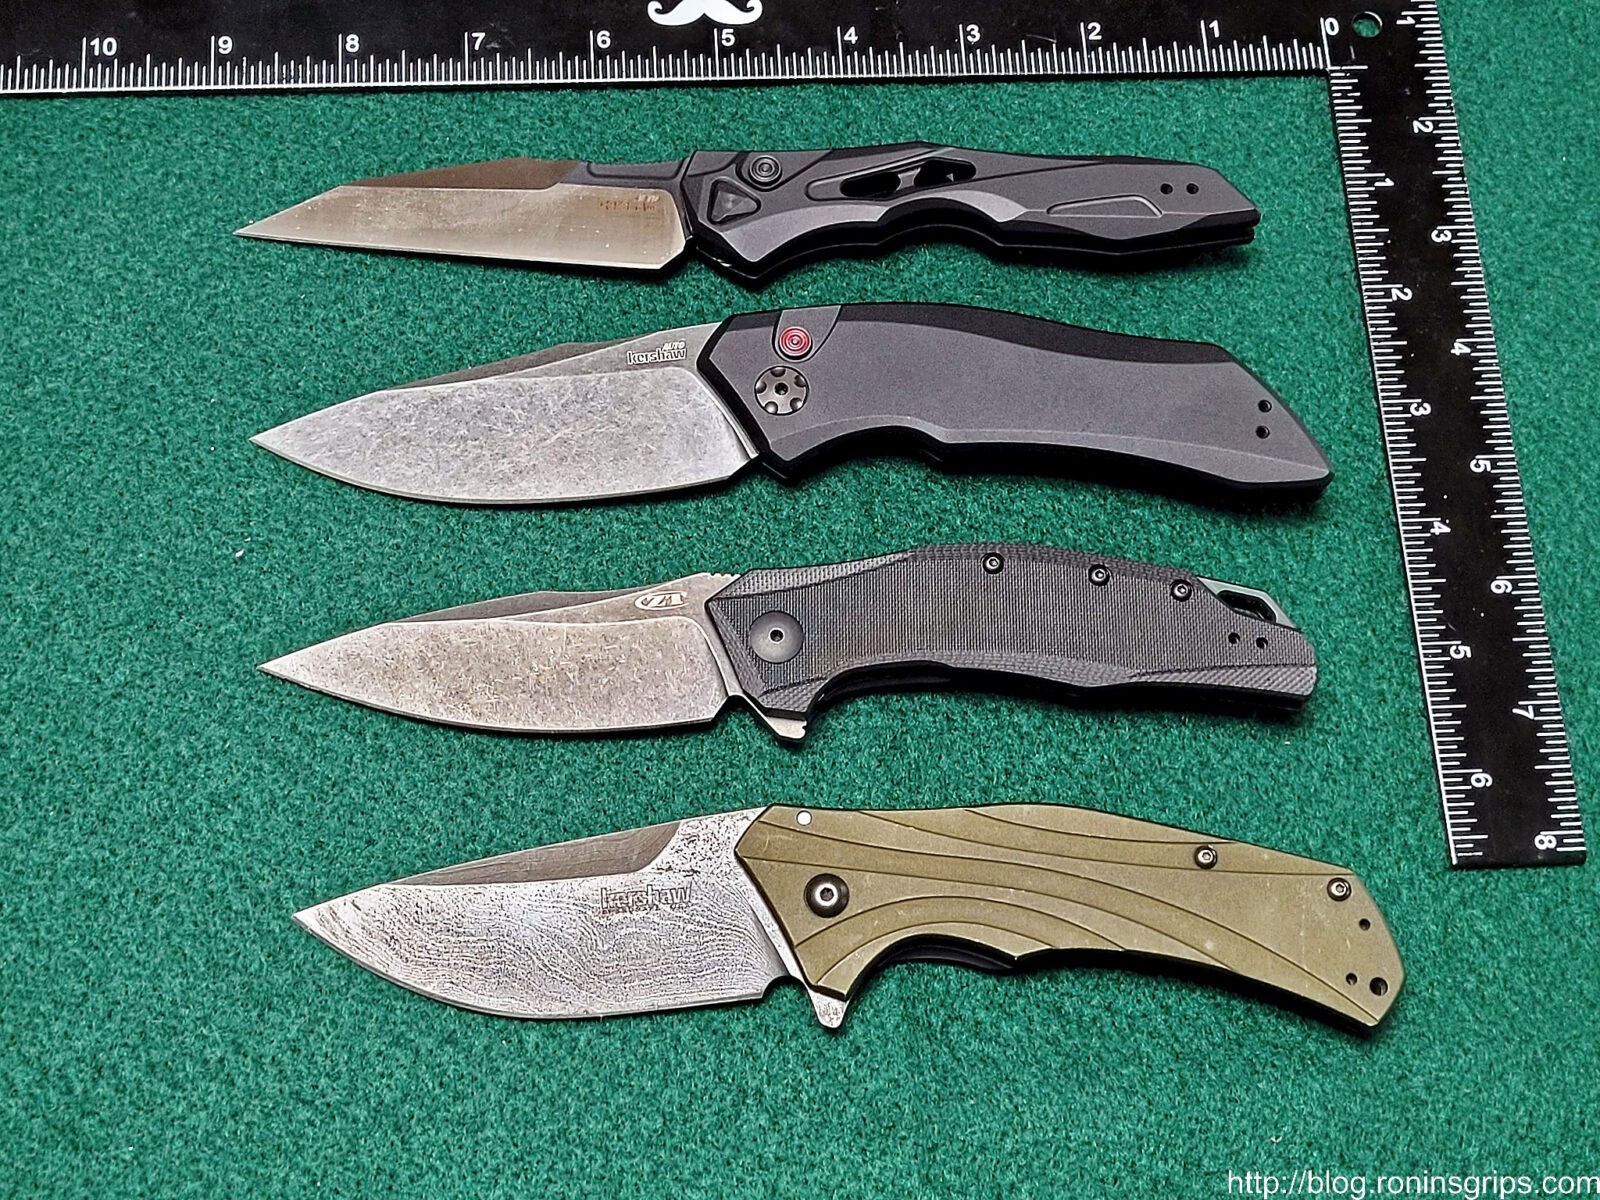
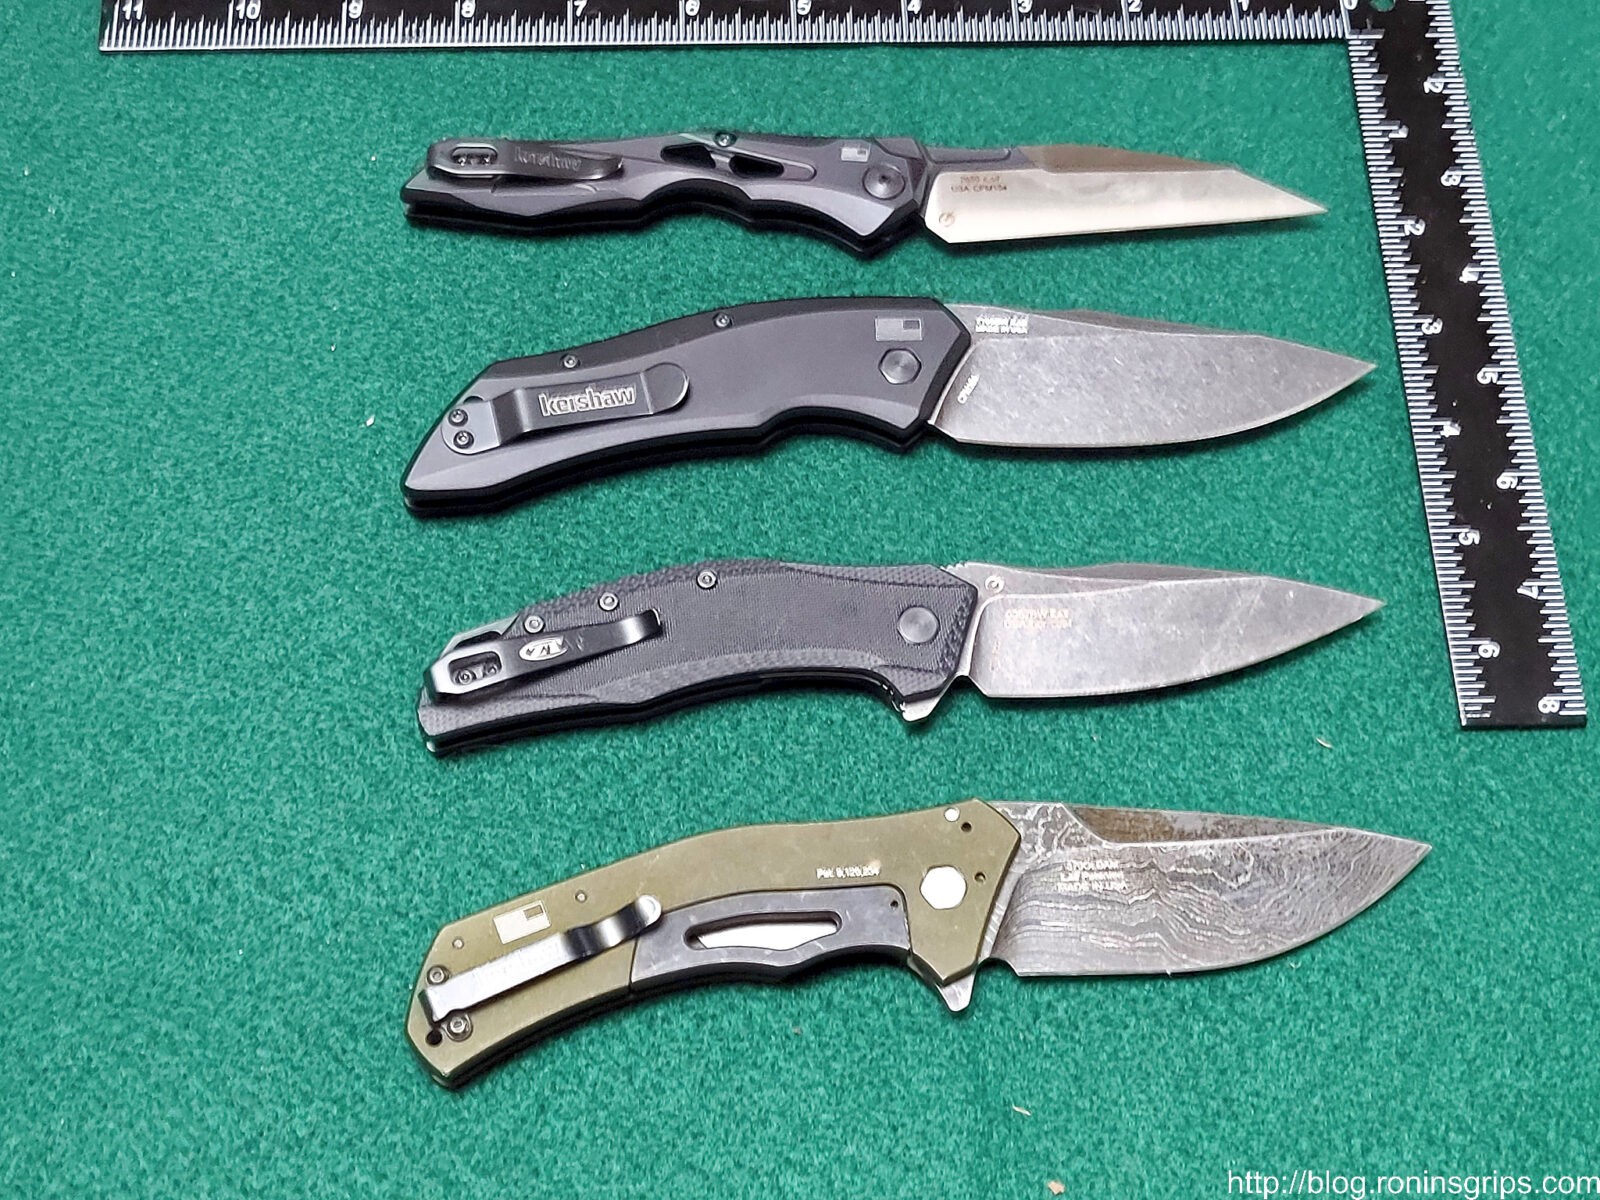
Launch 1 closed. Like the US flag. Lines are nice, clean and flowing. All of the screws on this side are T6 Torx. The handle is 4.6″ long, 0.47″ thick, 6061-T6 black anodized aluminum.At the left are the two screws if you want to move the ciip to this side. The axle pin the blade rotates on is held in place by a T8 Torx. You can see the recessed push button that does dual duty both to allow the blade to flick open and also to unlock the blade once it is locked open.Good view of 3.4″ CP154 blade with a blackwash finish. The blade is 0.121″ thick so just under and 1/8th inch that would be 0.125″.Here’s a view of the other side. Note how the axle bolt uses the handle scale to elegantly hold the hex head in place so you can tighten the axle pin from the other side.From top to bottom: 1. Kershaw Launch 1. 2. Kershaw Knockout with a Damascus steel blade.. 3. Kershaw Blur and 4. ZT 0357. These are all excellent blades. My favorite is the ZT0357 and the Knockout. All are made in Kershaw’s Oregon plant with excellent machining, fitment and finish.
The Launch 13
I like unique looking designs and the Launch 13 immediately caught my eye due to the futuristic look and wicked Wharncliffe style blade. It looks odd but it actually fits my hand very surprisingly – better than I thought it would actually. Let’s look at the specifications:
Blade length: 3.5″
Blade profile: Wharncliffe
Blade steel: CPM 154 – same as the Launch 1
Blade finish: Black Cerkote
Blade thickness 0.121″
Closed length: 4.5″
Handle material: 6061-T6 aluminum
Handle finish: Black anodized
Handle thickness: 0.471″
Overall length when open: 8″
Weight: 2.4oz
So, it is just a tad shorter but quite a bit lighter than the Launch 1. With all of the angles and skeletonized scales, I didn’t think it would be as comfortable as it is.
Pros: Light, A Wharncliffe style blade
Cons: Even though the push button is recessed, I am fearful of it opening in my pocket.
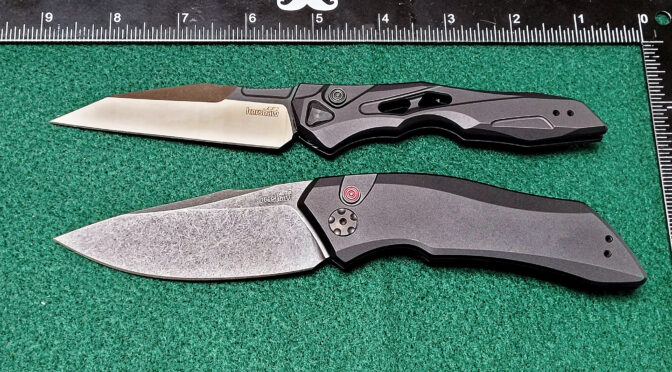
The scales are nicely done and are machined from 6061-T6 aluminum with a black anodized finish. The small screws are all T6 Torx and the nut on the axle bolt is a T8.You can see the push button that both allows the blade to spring open and to unlock the blade once it is open. Interestingly, the axle bolt’s head is triangular instead of a hex head like the Launch 1 uses.The Wharncliffe-profiled blade is very sharp. Yes the grind is simple but it’s a Wharncliffe 🙂Here’s a view of the Launch 13 open from the other side.The Launch 13 at the top and the larger Launch 1 at the bottom.Notice the different handle angles when you get the blades in about the same plane.From the top: Kershaw Launch 13, Launch 1, ZT 0357 and Kershaw Knockout with a Damascus blade (they also make one that is not Damascus wo that’s why I am pointing it out)And the other side from the top: Launch 13, Launch 1, ZT 0357, Knockout with a Damascus blade.
Summary
The Launch blades are very well made. Of the two, I am partial to the Launch 13 because it is lighter and has a Wharncliffe profile blade – again, I like Wharncliffes. I can cross having an automatic knife off the bucket list but plan to stick with assisted opening flippers like the ZT 0357.
Note, I have to buy all of my parts – nothing here was paid for by sponsors, etc. I do make a small amount if you click on an ad and buy something but that is it. You’re getting my real opinion on stuff.
Folks, I have found the Russian Hind Mi-24 helicopter absolutely fascinating for decades. Both I and the Hind are old enough to truly say decades in this case as it was delivered to the Soviet Air Force in 1970 but NATO and the West didn’t find out about them until 1972.
The HIND is a huge helicopter gunship and unique in that it has room for eight passengers. At the same time it is fast, armored and loaded with weapons. Soviet pilots called it the “flying tank: and other nicknames include Galina, Crocodile/Krokodil and Drinking Glass.
At any rate, it is very interesting and has evolved over the years plus the Soviets and later the Russians exported it to many countries including Bulgaria, Macedonia and many others plus it has served in a number of conflicts (click here for the Wikipedia Mi-24 page if you want more details).
The purpose of this blog post is to share with you an amazing video assembled by Erik Johnston where Bruce Stringfellow, a Hind pilot, gives a detailed walkround tour of the helicopter. How detailed? It has an hour and 16 minutes of detail – it is the best video I have ever seen if you want to really know more about the design, capabilities and what a preflight check looks like from a pilot’s view. Here it is:
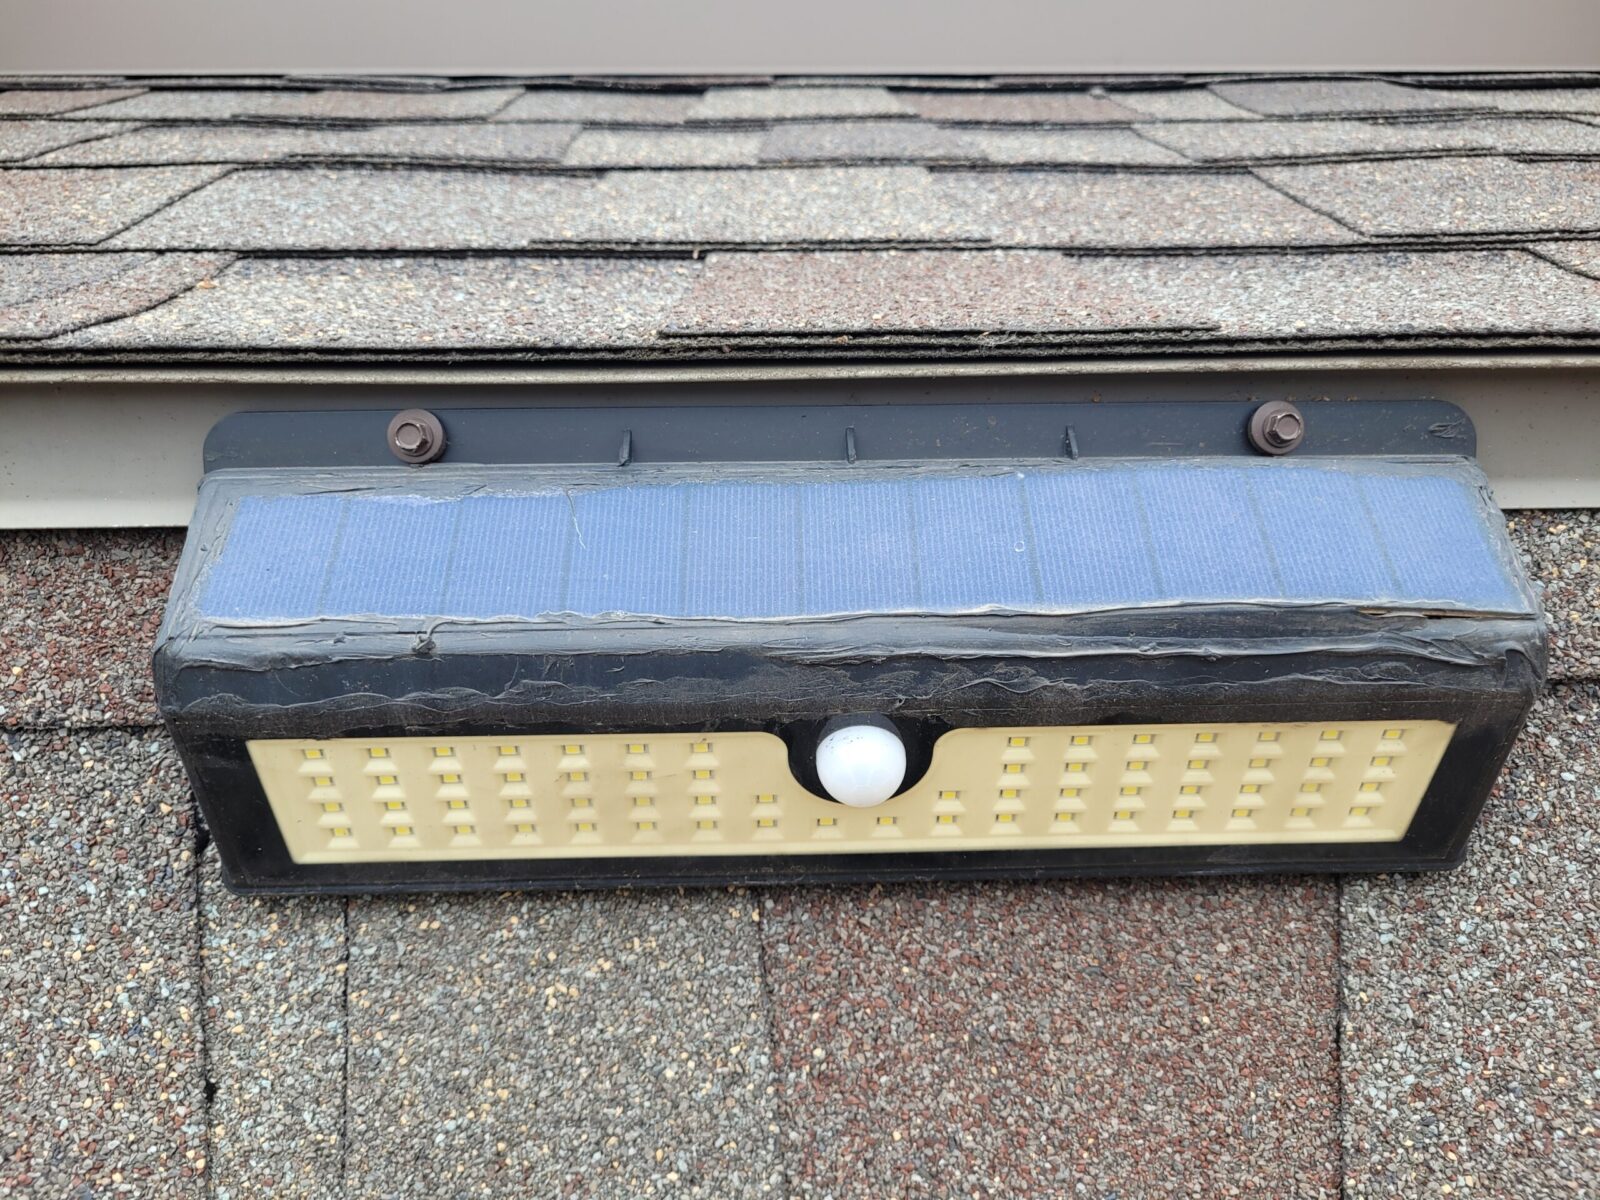
In 2019 I installed some Lemontec solar lights around the perimeter of our house to get rid of dark areas and they have held up fairly well until now. One unit had quit working and other was coming apart so I decided to order some new ones and try a different brand.
A few months back I had to apply silicone glue to seal the bulging solar panel of this Lemontec light. Guess what? It still works great and I moved it to another area. dCompared to the solar light above, this looked better but was dead. Rather than tinker with it, I put it in the trash.
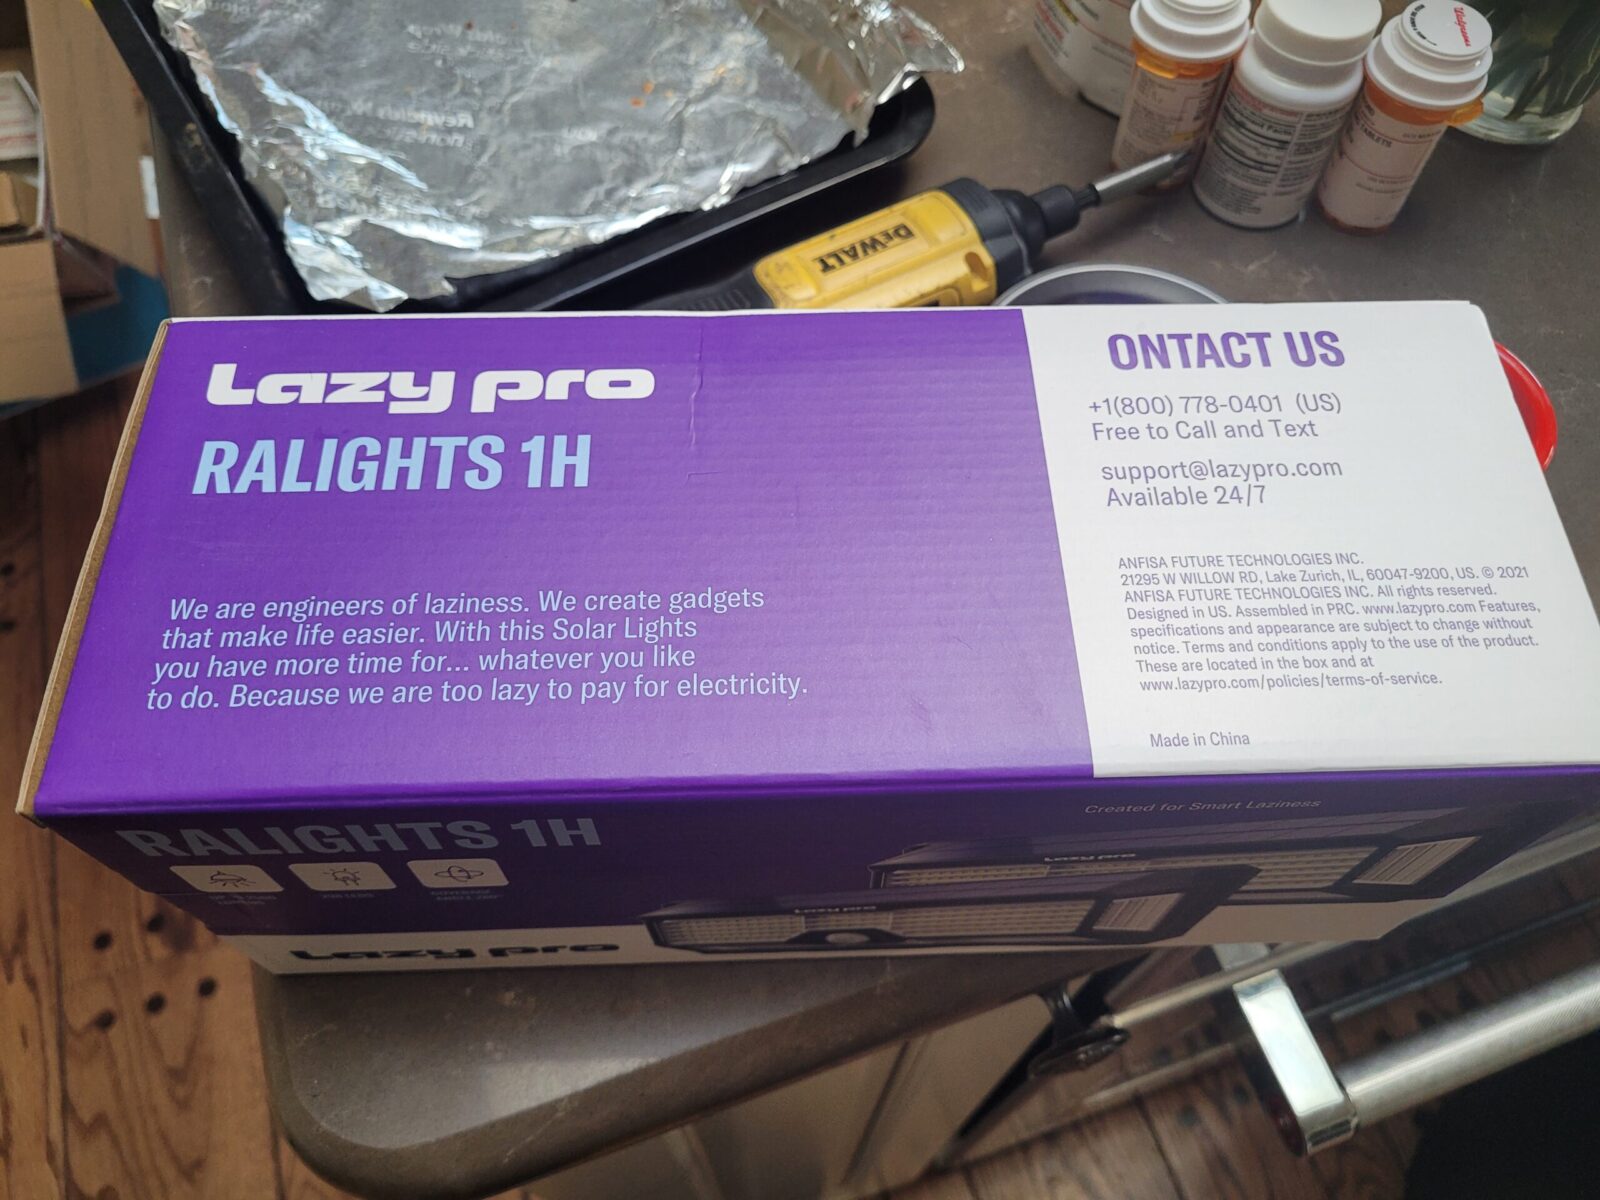
As usual, I did some searching on Amazon and looked for ones with good reviews and found a brand called “LazyPro” – yeah, I almost didn’t try them because of the name but I am glad I did! They are sold in pairs and I replaced the Lemontec that had failed and the one next to it – because they are high traffic areas right by our driveway and also very dark at night.
You ever read something so off the wall that you just have to try it? That was my exact reaction when I read their slogan “We are engineers of laziness. We create gadgets that make life easier. With this Solar Lights you have more time for … whatever you like to do. Because we are too lazy to pay for electricity.” Alrighty … uhm … okay, let’s try them!
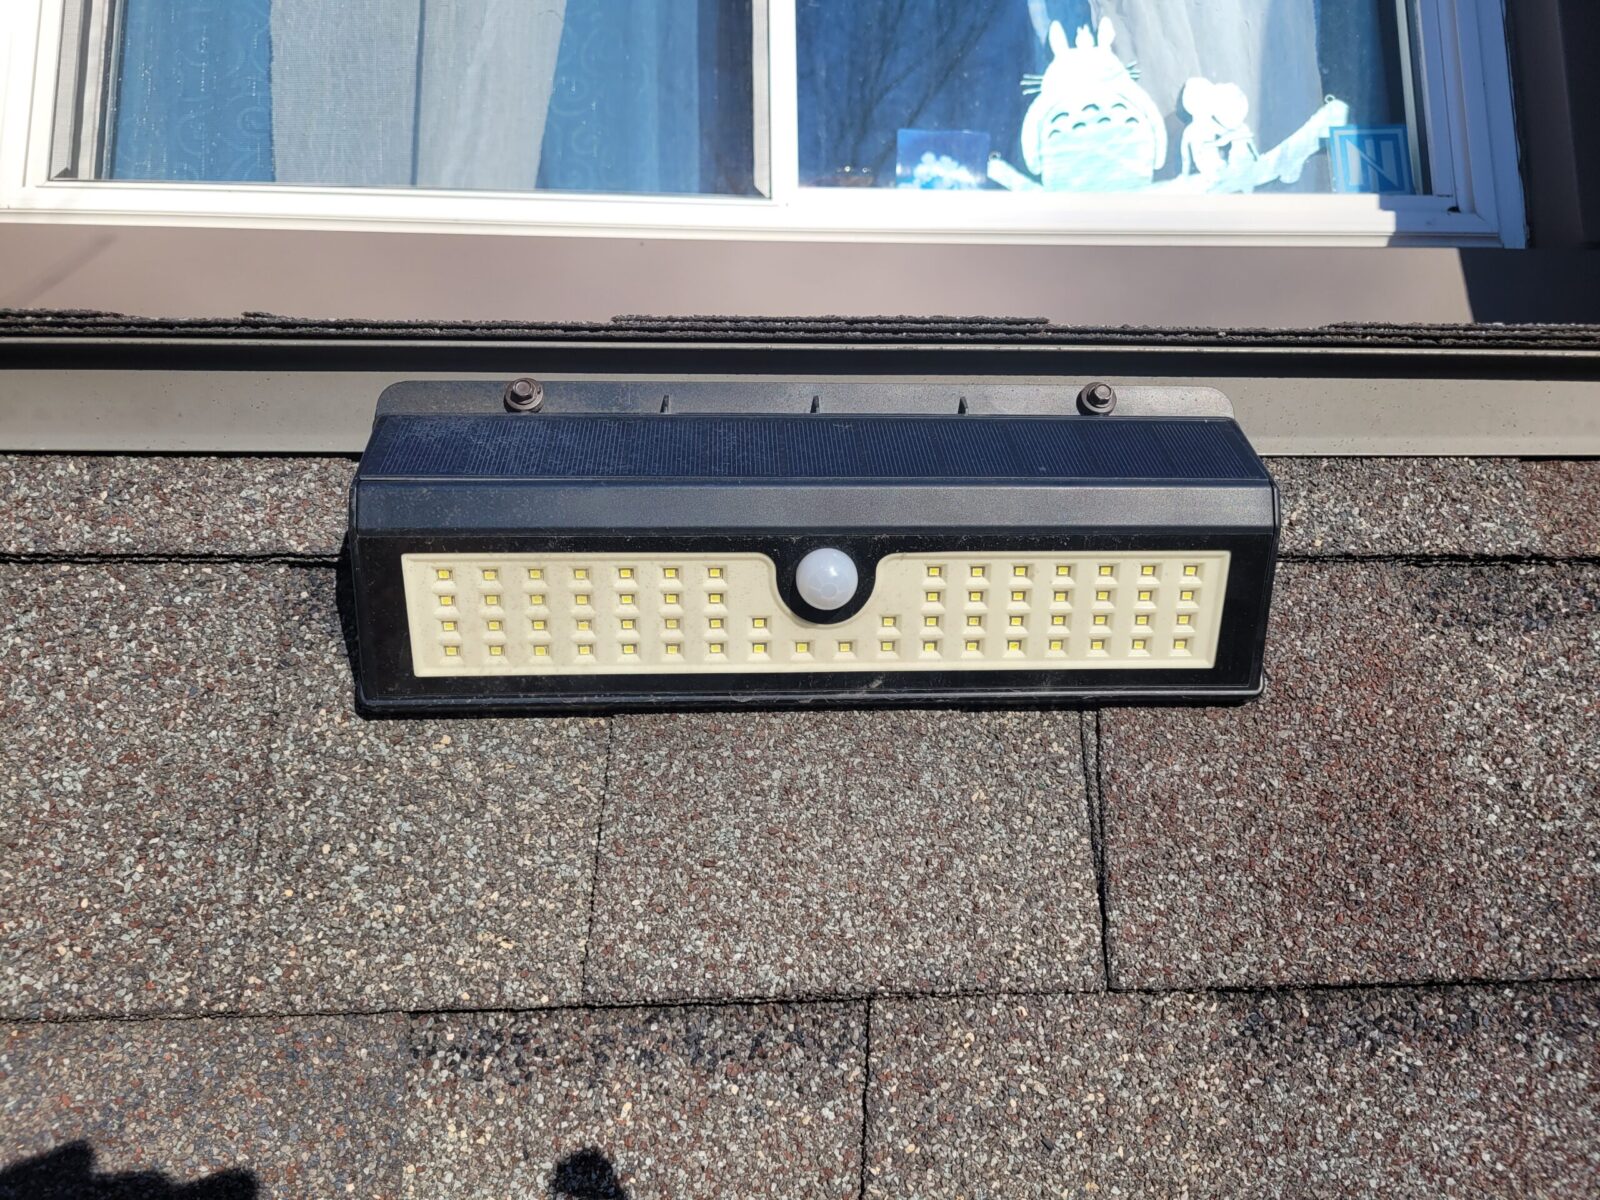
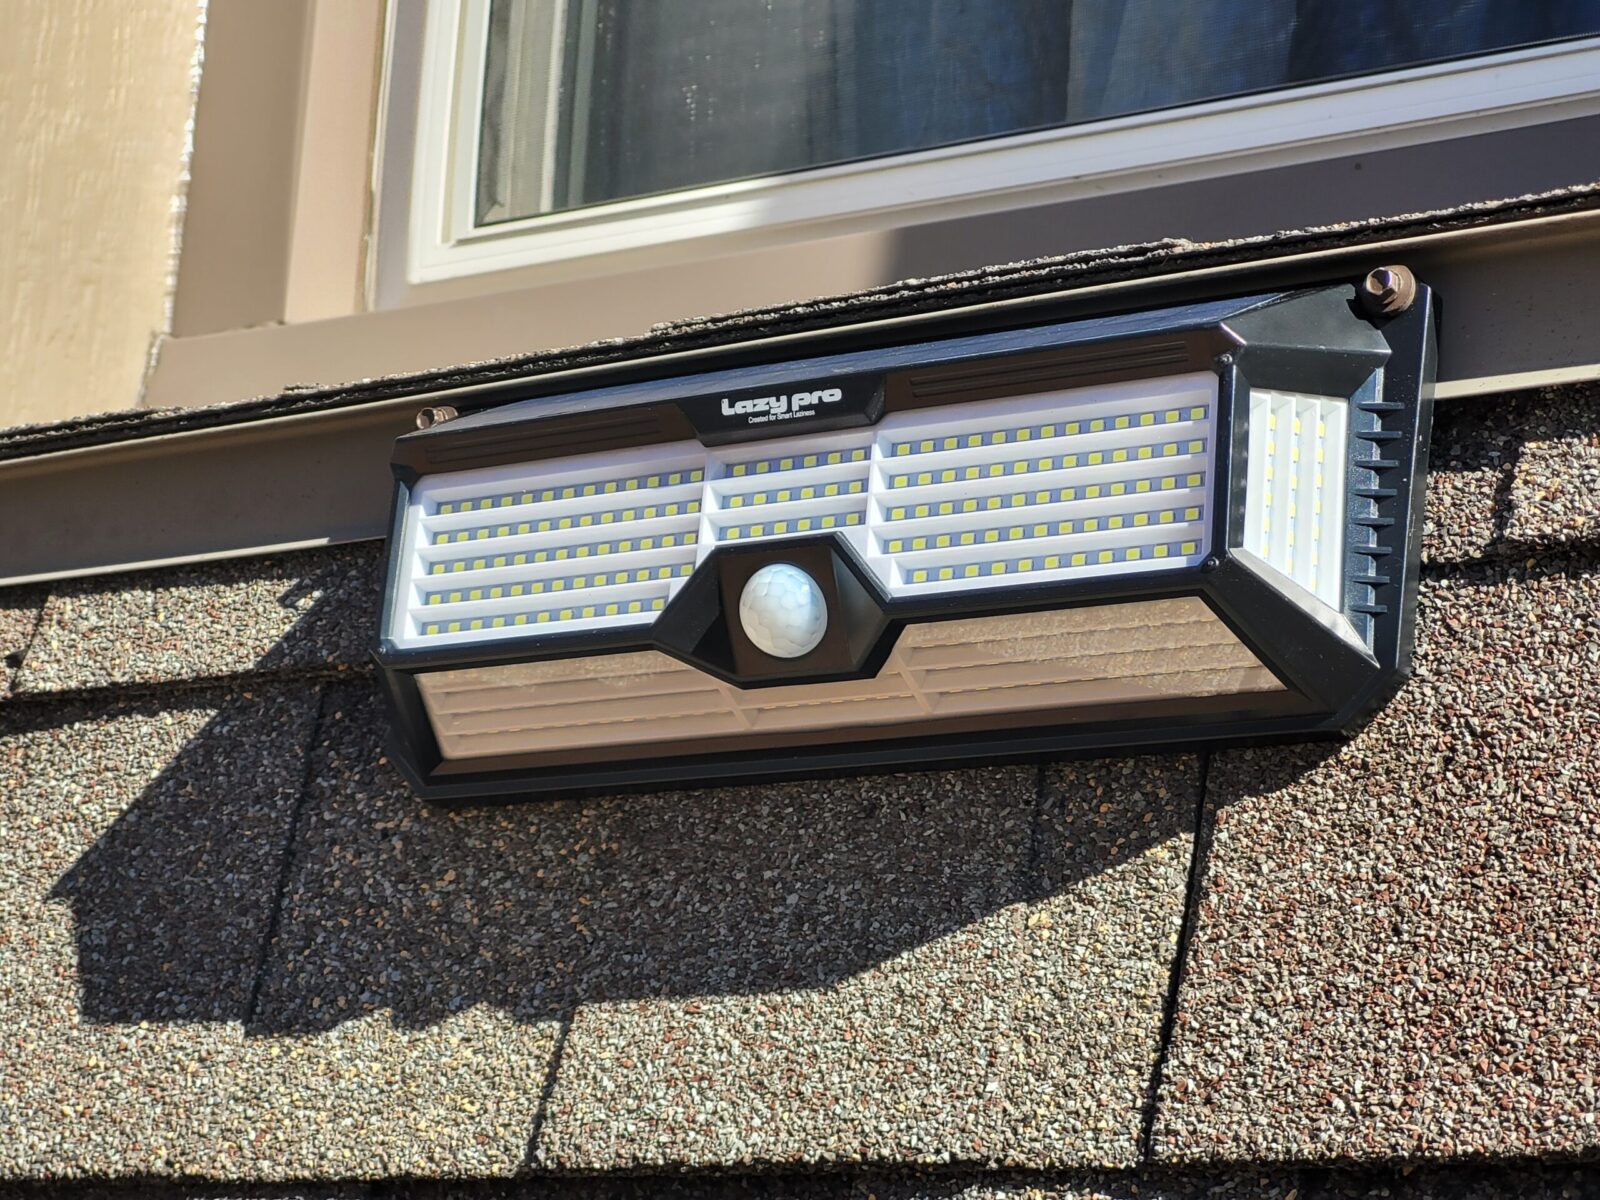
Out of the box they looked well made. This was right before I installed them.I removed the old solar lights and mounted these new ones in their place. I set the switch on the back for dusk-to-dawn and to only turn on if motion was sensed. You do have other options such as turning on at dusk with a low light output and increasing the light output if there is motion.The lights are just over seven feet off the ground and 12 feet apart.
What an improvement! The LazyPro units throw out a very wide volume of light because the LEDs are mounted not just on the front but also on the sides and bottom.
Also, the sensor does a really good job of picking up movement – the Amazon listing claims 40 feet and it easily does that if not even further.
This is the area with just our porch light running. It’s dark.I walked in front to to activate both lights and you can see the huge volume of light the two units are producing.
Summary
Yeah, the LazyPro brand name might make you wonder but these are remarkably good lights. I plan to replace the other four Lemontecs that are still working but don’t produce anywhere near the same amount of light.
I grew up with my dad taking me to see steam engines, steam trains and all kinds of machinery. I’m sure that’s why I find these things so fascinating today. My day job has a fair amount of travel and sometimes I get to see some really cool stuff. I was visiting Tokyo with my wife in April 2019 and we met up with a friend from her childhood, Spike, who showed us around.
One of the places Spike took us was the Ikuta Ryokuchi Park in Kawasaki — I think it was about an hour and a half from downtown Tokyo by train. Ryokuchi is a big park with different sections. We had a great time walking through a exhibits of traditional farms (Minka-en). Outside of the planetarium sat a very nicely preserved D51 Japanese steam locomotive.
There are a ton of pages that can tell you about the D51 “Mikado”-class locomotives – they where built for the Japanese Government Railroad (JGR from 1920-1949) and later the Japanese National Railways (JNR from 1949-1987) by Kawasaki Heavy Industries Rolling Stock, Kisha Seizo, Hitachi, Nippon Sharyo, Mitsubishi and Mitsubishi Heavy Industries. Construction happened in two periods 1936-1945 and also 1950-1951.
In total, 1,115 D51s were built. They had a 2-8-2 wheel layout, were just over 64 feel long, and the locomotive weighed approximately 84.7 US/short tons. Maximum speed was about 55 mph.
There’s an old saying that nobody is sure of where it came from that says if you have one clock you know the time. If you have more than one, you are never quite sure. The reason for this is that if the clocks have different times then which is wrong or right? Well, I guess now we have time servers, atomic clocks and what not to help answer “what time is it?”.
Now why did I open with that? Well, the only sound level meter I had to measure the decibels of anything was my phone and two different apps that kind of agreed. When reading reviews, folks would say that phone sound level apps were not accurate. Well, I decided to buy a sound level meter to be more accurate … that was in 2017 and I thought I knew how many decibels things were using my cool BAFX3608 meter.
Fast forward to February 2023
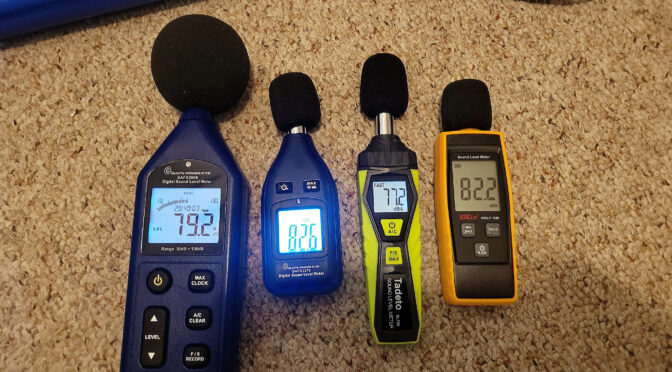
I decided to test my GX CS4 and I also wanted to test some airgun moderators so I thought I would order in a few more inexpensive sound level meters to get readings in different spots – a BAFX3370, a Tadeto SL720 and a XRCLIF-1359.
I was using my GX CS4 compressor to top off my 6.8 liter carbon fiber bottle and thought it would be a great time to get sound readings from relatively the same location. I lined them up and took a video to capture sound readings on each meter at a certain time by freezing the video.
Here’s the video so you can hear the compressor and see the meters:
How did they do?
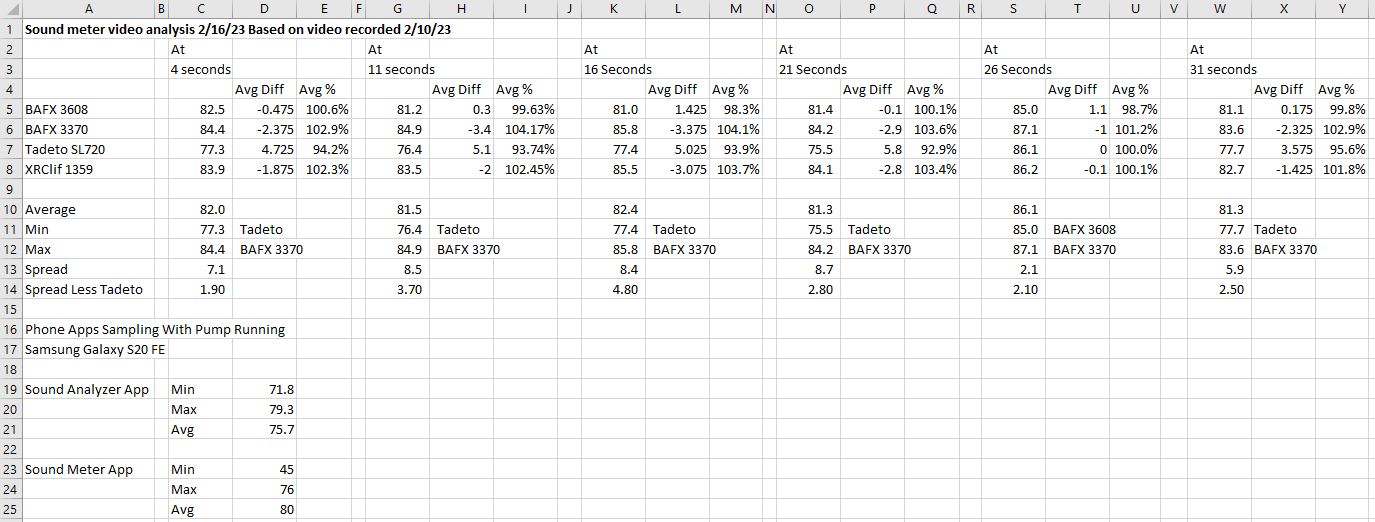
Well, I recorded the readings at 4,11, 16, 21, 26 and 31 seconds. I then calculated the average of the four and compared the meters to the average. The BAFX 3608, BAFX 3370 and XRCLIF were closest. The Tadeo was introducing quite a bit of variation into the samples. With one exception at 26 seconds, it always registered the lowest decibels. Excluding the Tadeto, the average spread was 2.97db across the three meters. With the Tadeto, the average spread increased to 6.8db.
By the way, the manufactures claim +/-1.5db of accuracy for the two BAFX meters, +/-2.0db for the Tadeto and +/-1.5 for the XRCLIF. That means the ranges should have been at most 3.5db apart. The recorded data showed spreads far wider than that.
What this spread tells me is that the two BAFX units and the XRCLIF are in relative agreement given their stated accuracy. My tendency is to think they are closer to whatever the real measurement actually is and discard the Tadeto data. It also tells me that when you buy cheap uncalibrated sound meters you get cheap uncalibrated sound meters.
What about the apps?
I tried the both the “Sound Analyzer” and “Sound Meter” apps for my Samsung Galaxy S20FE. The Sound Analyzer reported an average of 79.3 and the Sound Meter app averaged 80. The sampling was done by holding my phone about the same distance from the CS4 and letting each app collect data for about 30 seconds. Given how fast the CS4 pumps, the apps had quite a few cycles to record.
This is a screen capture of the Excel file I created to look at the data.
Conclusion
I have a vague idea that the average sound level was somewhere between 81.5 to 86.1db as the machine operates if I exclude the Tadeto’s recordings. The samples were drawn at different times and the pump had a repetitive rhythm to it so I am sure the volume did differ but looking at the spread across the meters and the deviation from the average tells me that three meters are closer to one another (the two BAFX models and the XRCLIF) and the Tadeto is an outlier. The apps don’t really agree with anything either.
To wrap it up, thanks to my PC periodically synching its clock to a time server, I know it is about 9:20pm right now. What were the actual sound levels during each of those samples … now that I don’t really know with any precision – I have a ballpark range. I guess some day I will need to buy a quality calibrated sound level meter – what I probably should have done from the start. If you need to buy a meter and can’t afford a higher end unit – buy either the BAFX 3370 or the XRCLIF-1359. The BAFX 3608 is no longer made (as mentioned – I bought it back in 2017).
Here are the GX compressors from the CS4 down to the CS1
FastToBuy 30Mpa Oil Water Filter – Not a GX product but I recommend this filter and you need one between the compressor and your tank or PCP airgun. You will need an extra hose from it to your tank or airgun plus the proper fittings.
Note, I have to buy all of my parts – nothing here was paid for by sponsors, etc. I do make a small amount if you click on an ad and buy something but that is it. You’re getting my real opinion on stuff.
The GX CS4 is a very cool compressor and one of the two ways it gets the long run time is through staying properly greased. (The other is through the use of fluid coolant that I covered in a blog post about setting up and testing the unit). After 4-6 hours of compressing air with your GX CS4, you are supposed to given the top grease pot knob one full turn. How does that work and how does one refill it?
Adding Grease Every 4-6 Hours
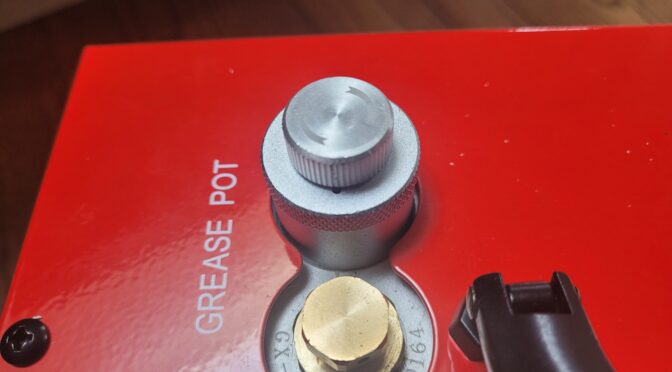
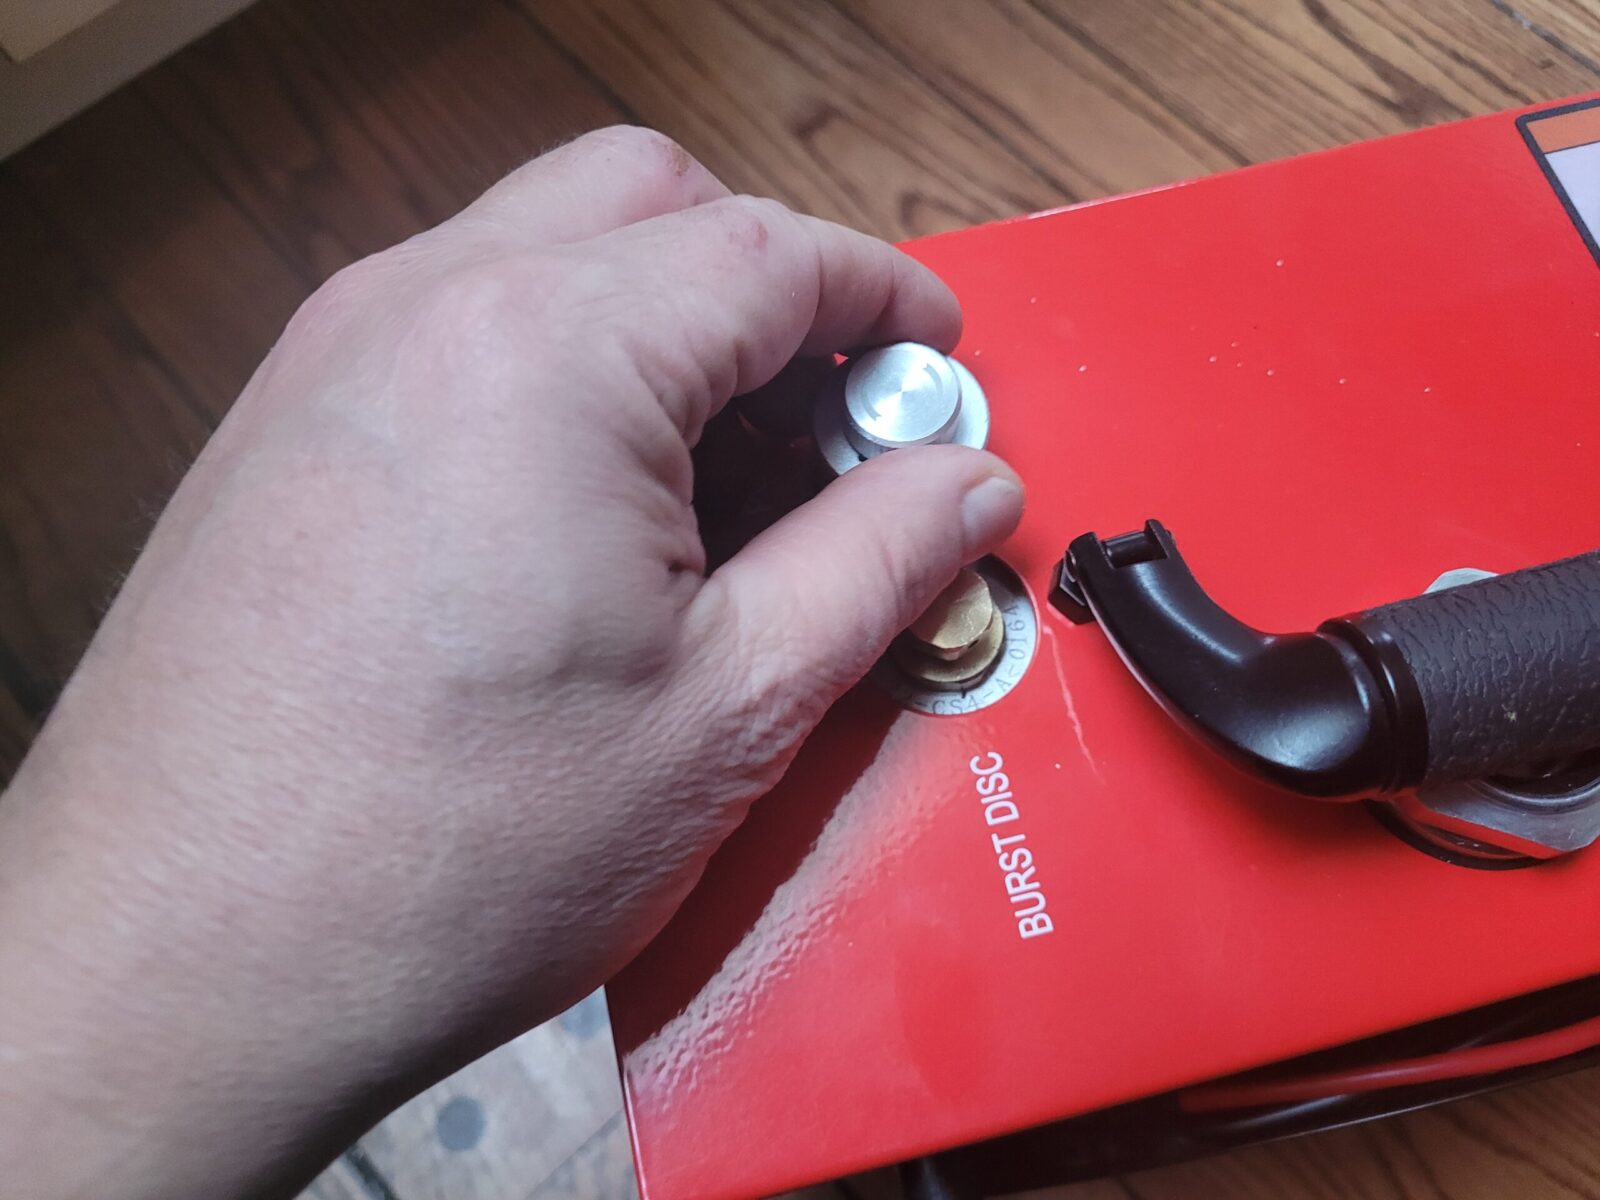
It’s simple, turn the top knob one full turn to introduce grease. You may be wondering why I even bothered adding a blog post. The reason is that when I turned the knob there was so much resistance that I thought the pot was empty – it wasn’t. What I want you to see is why there is resistance:
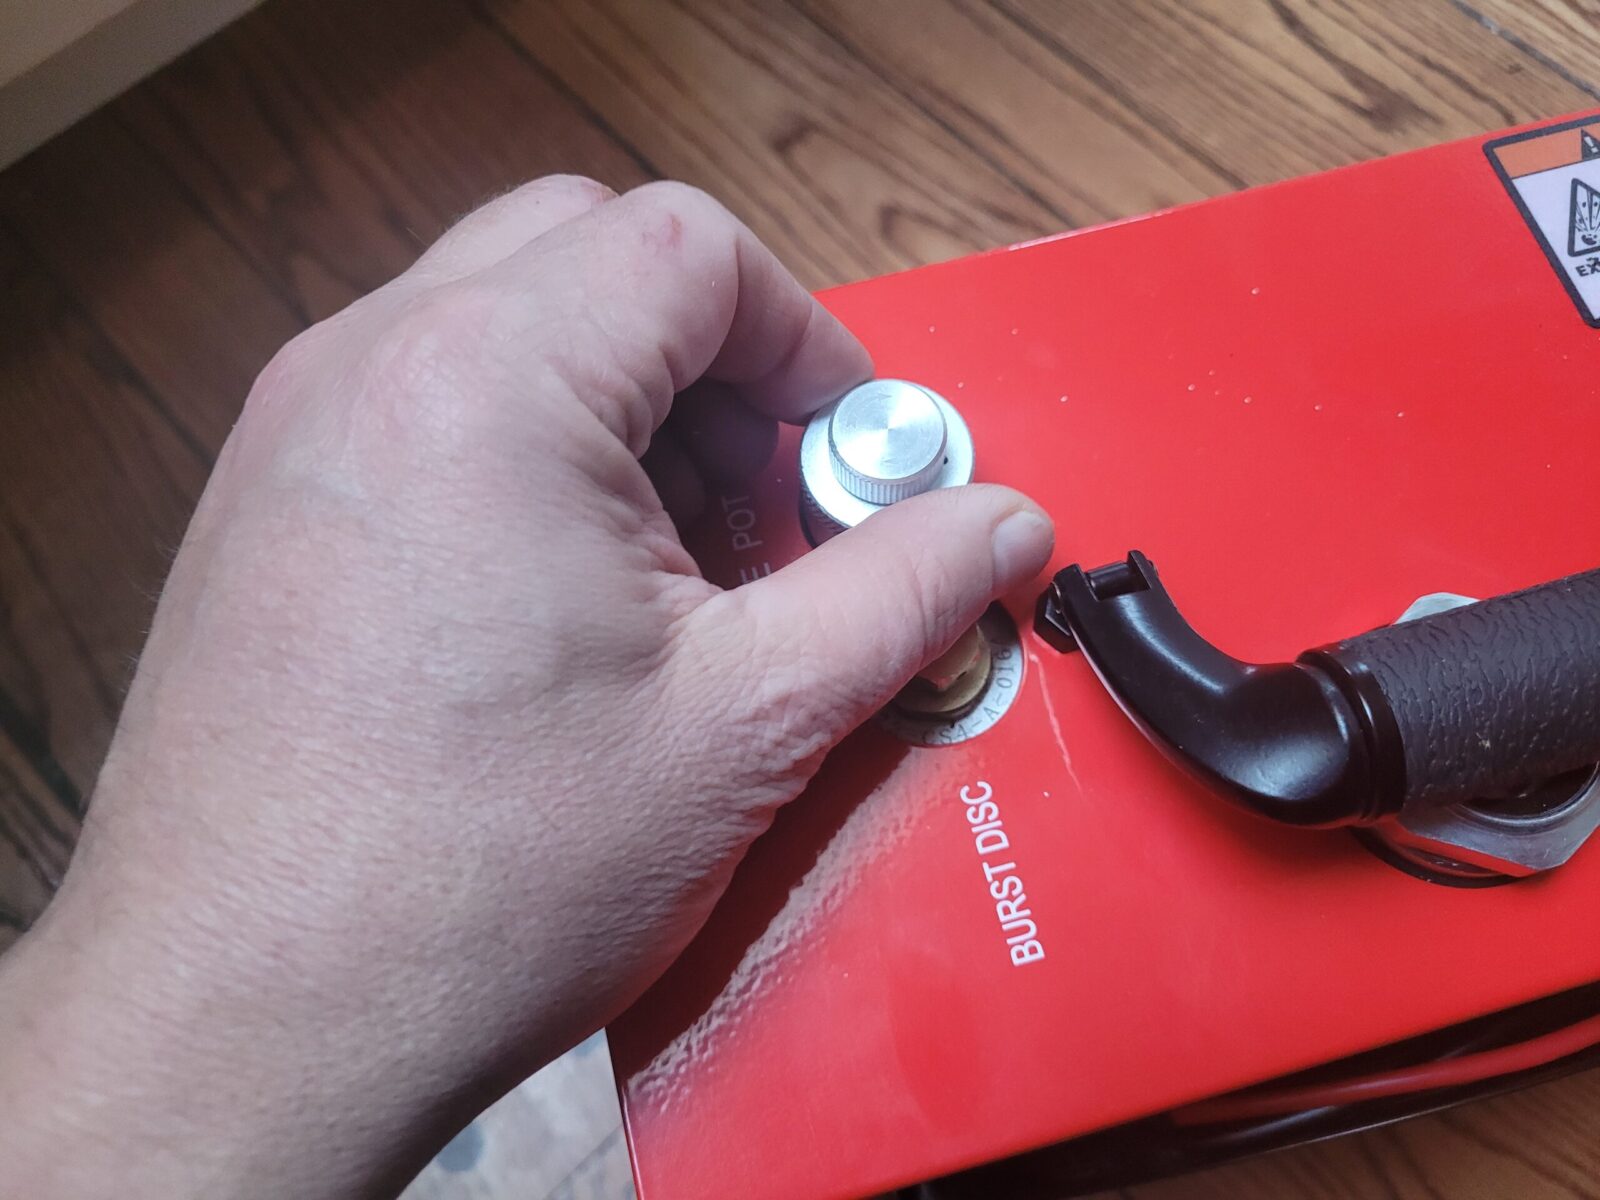
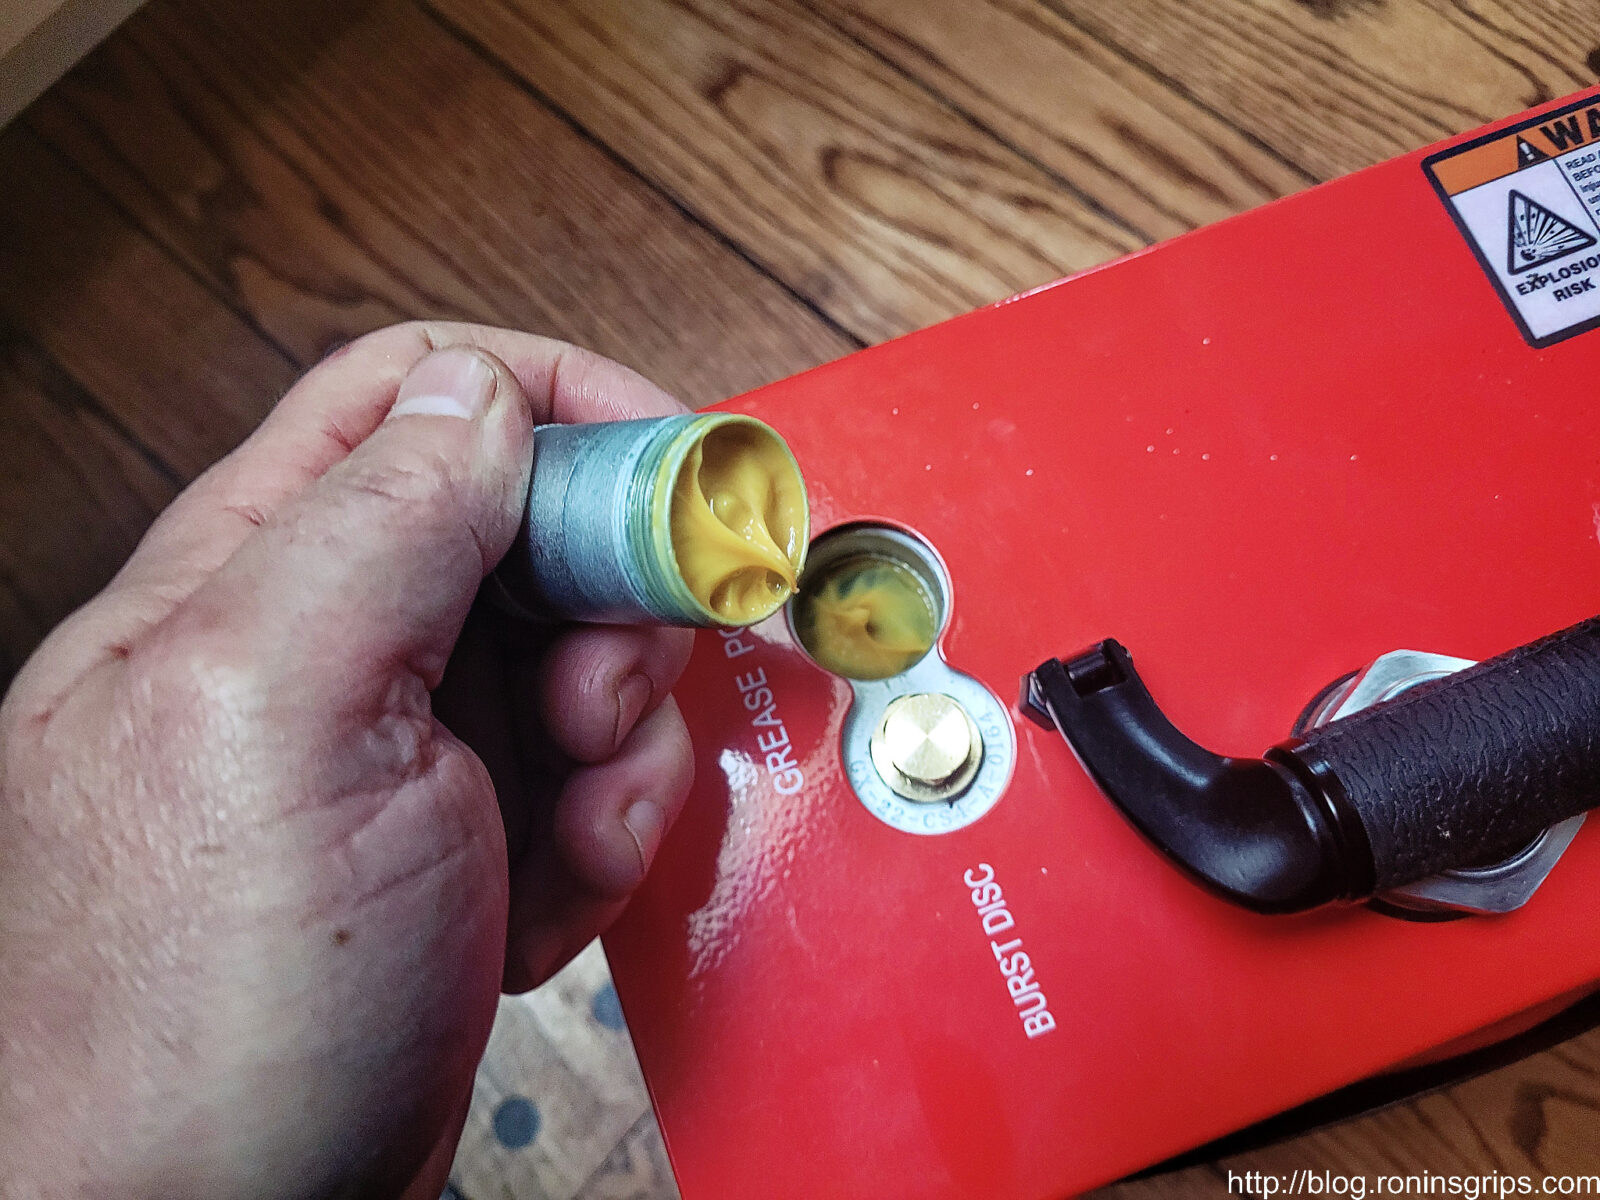
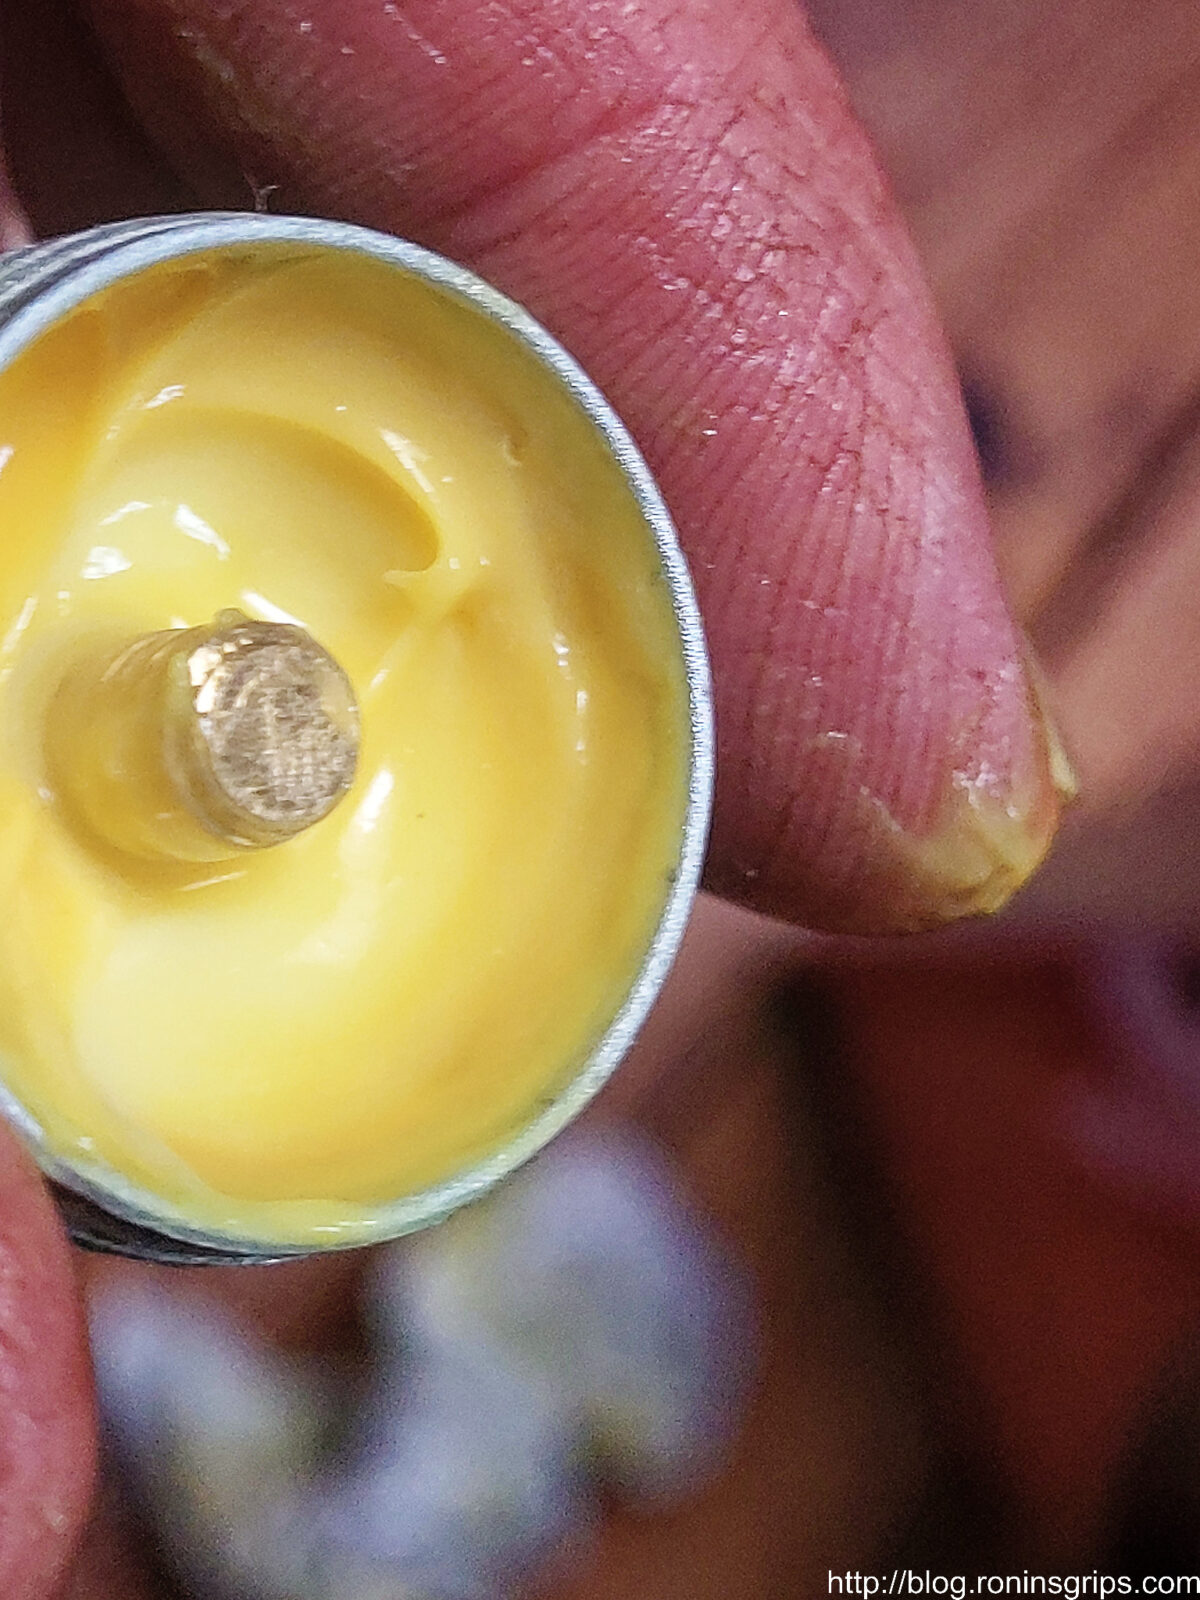
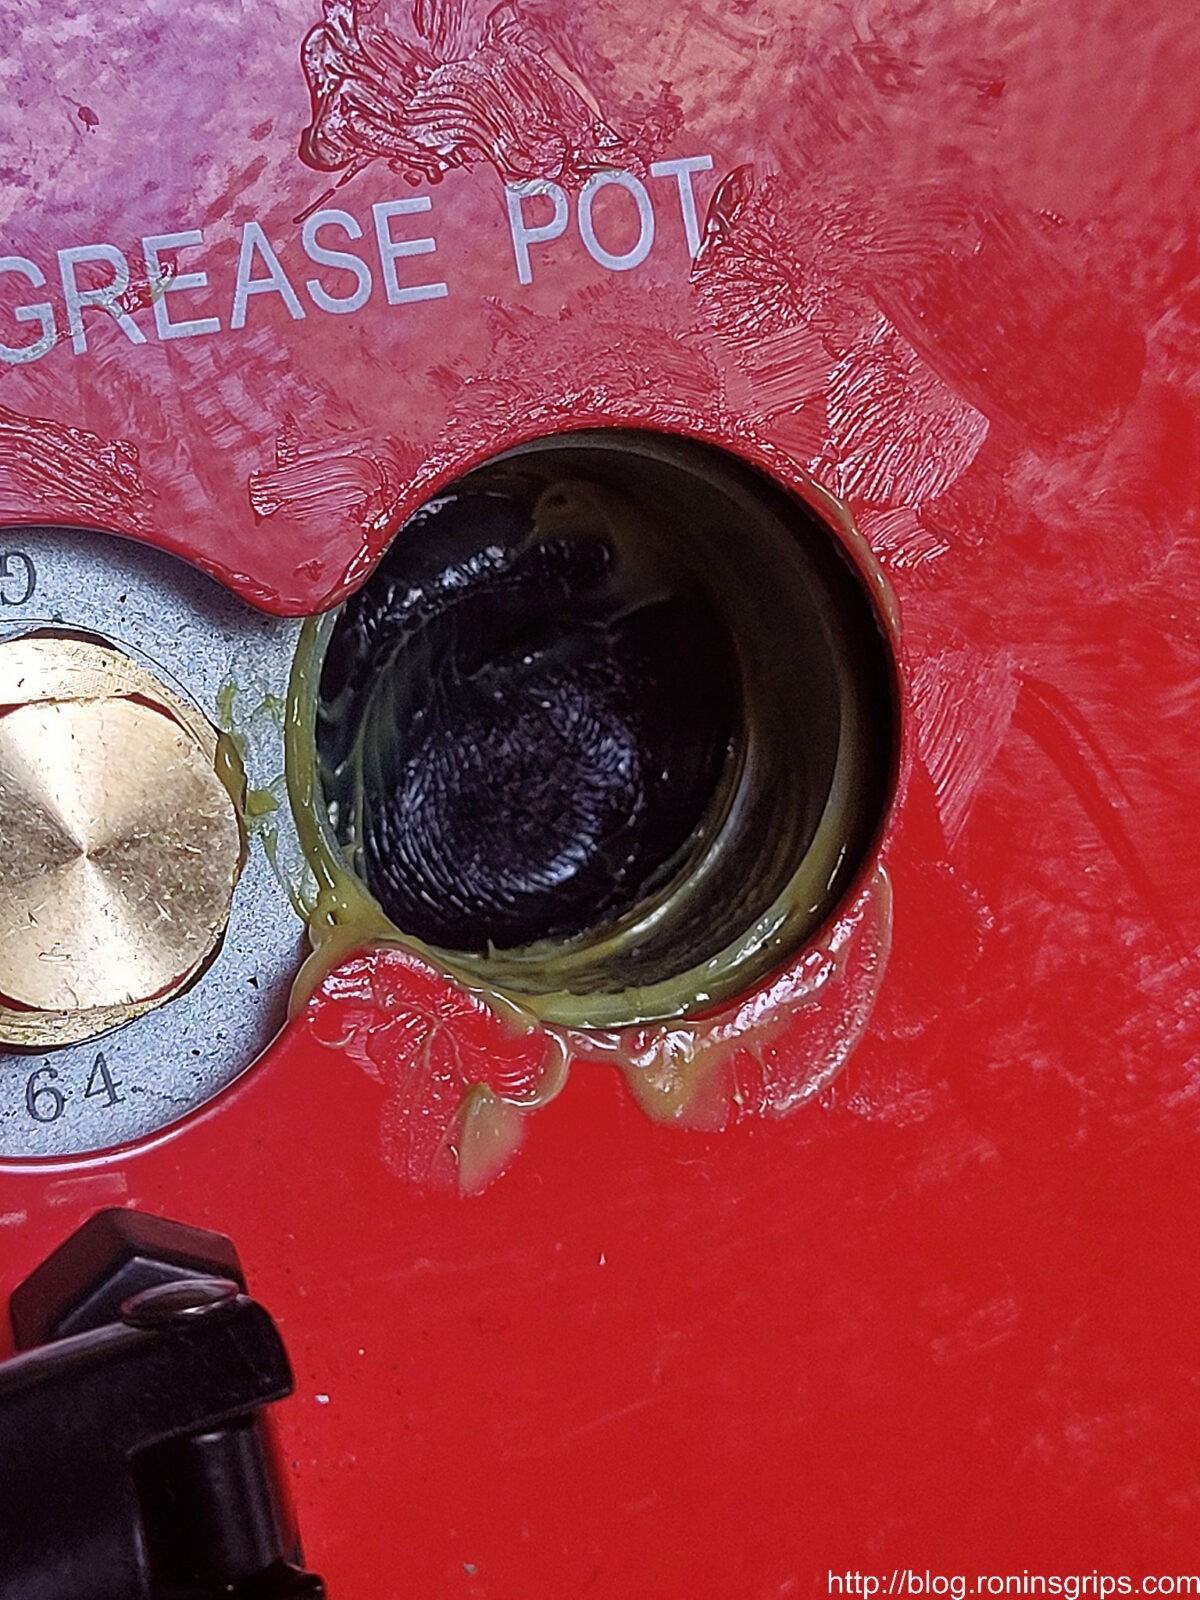
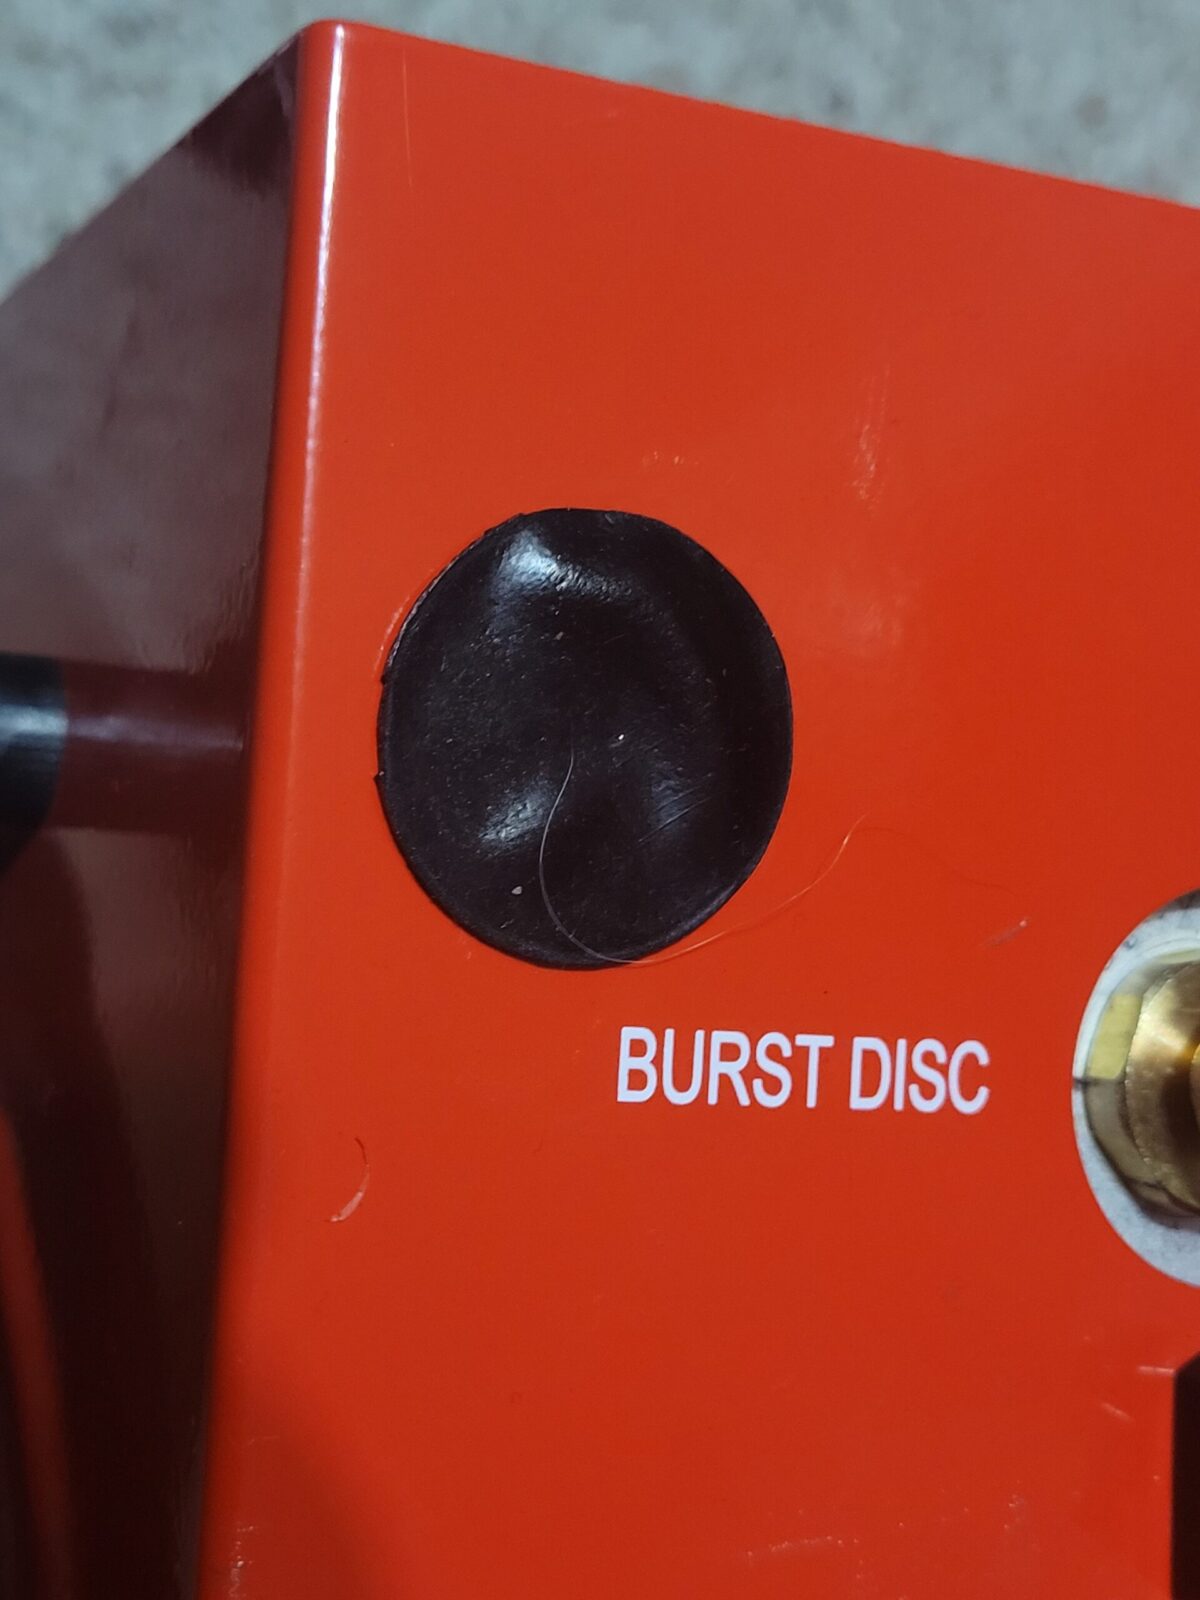
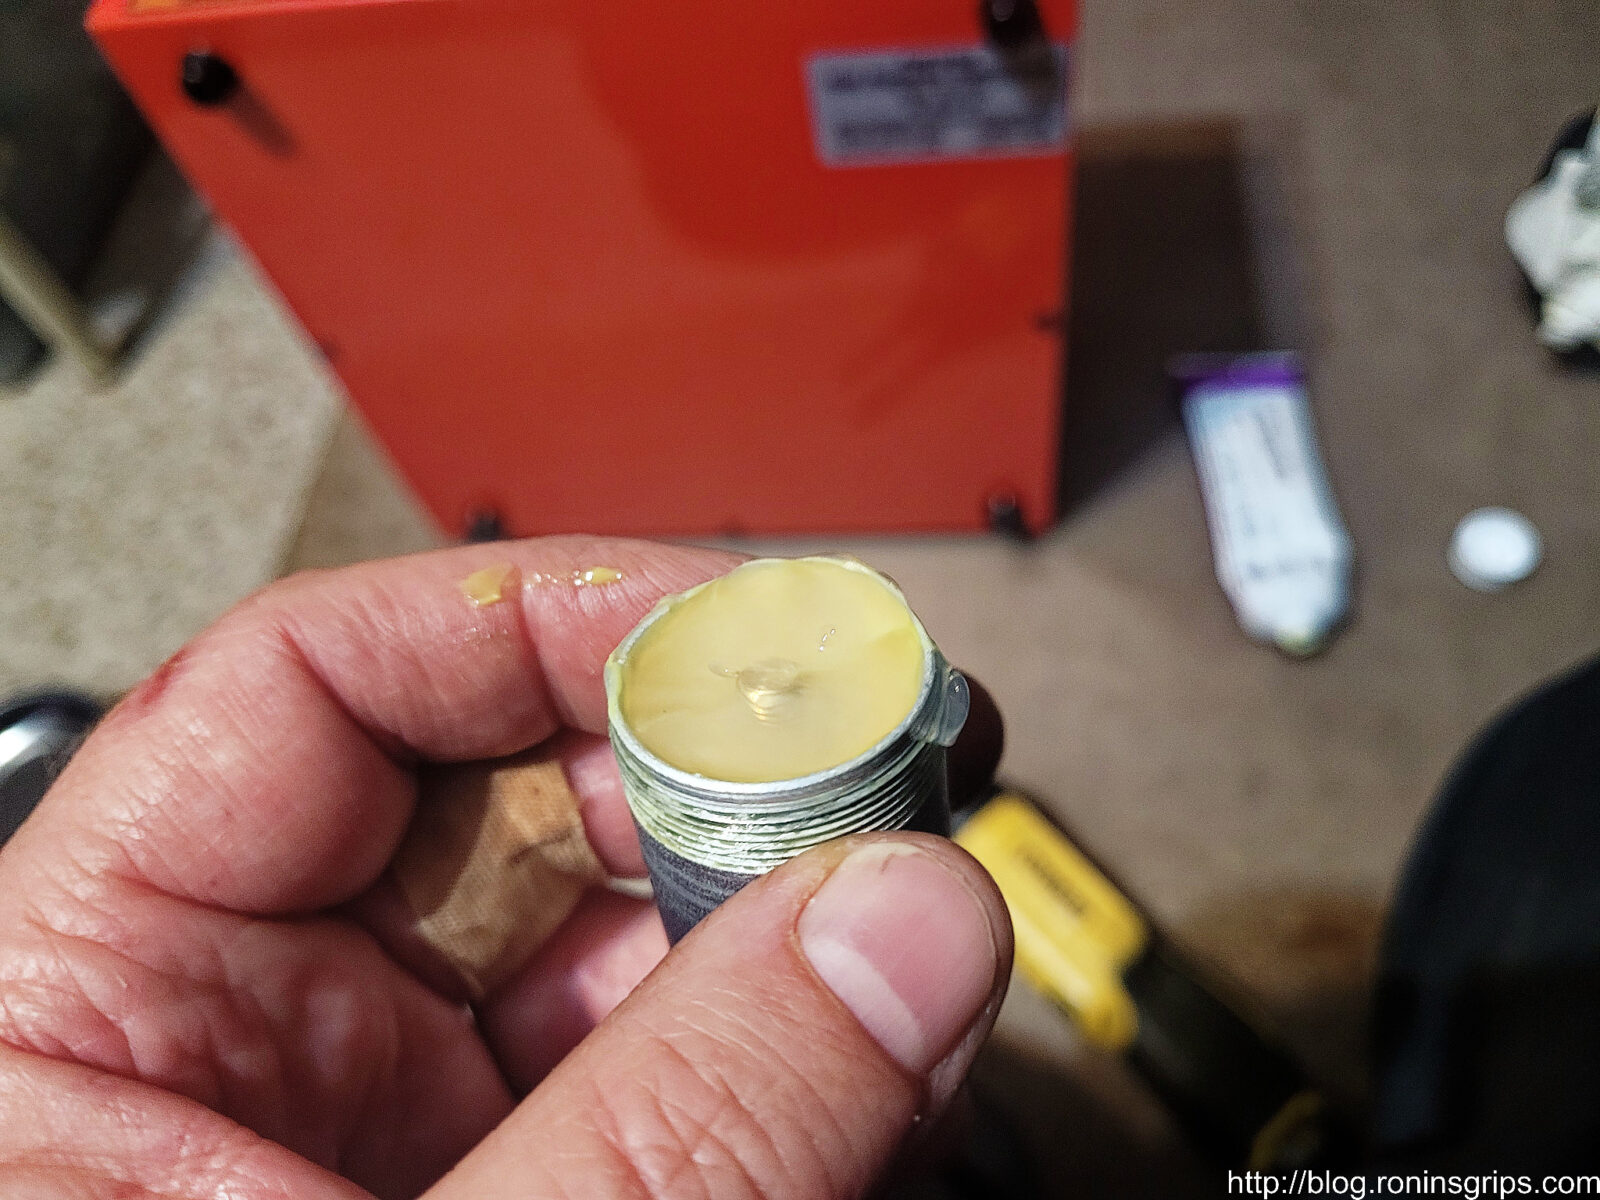
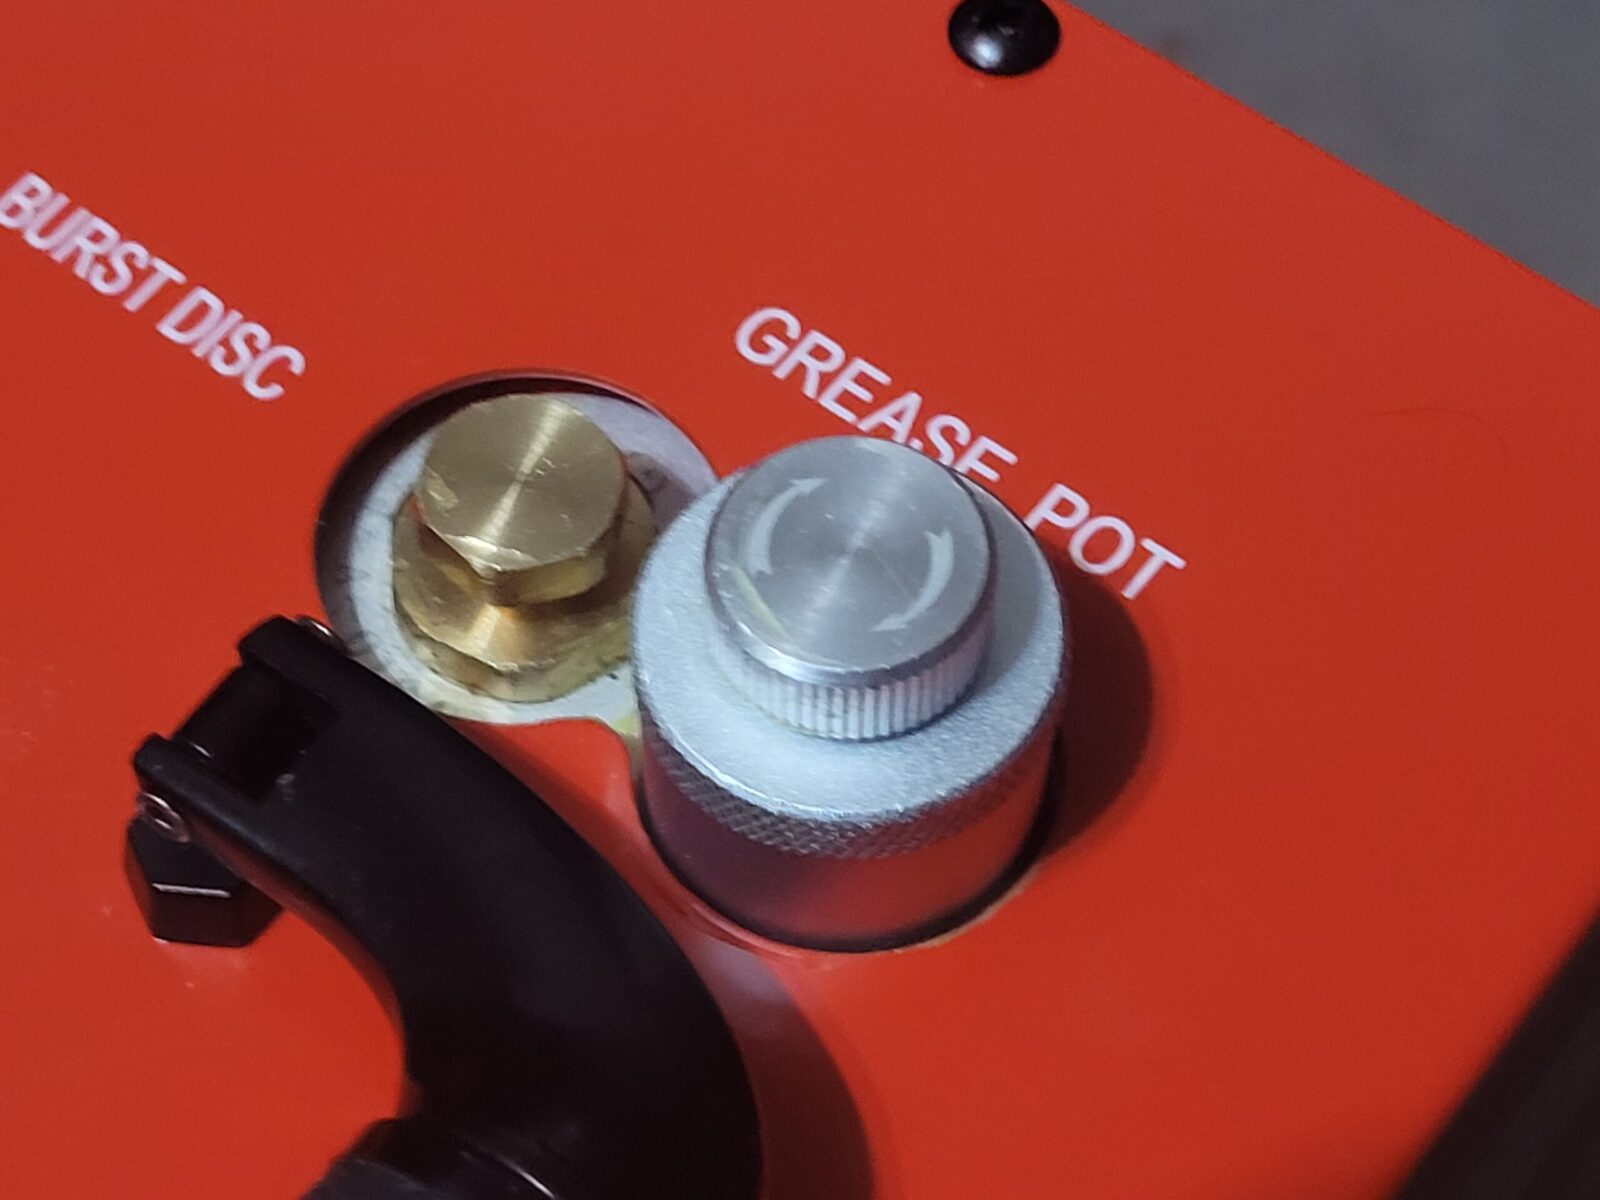
To add grease, you turn the top knob with the arrows one full turn clockwise. The problem was that mine stopped right around 3/4ths of the way around. I thought maybe it had been shipped without the grease pot being filled.To remove the grease pot simply turn the lower portion of the pot counter-clockwise and it will unscrew. It then lifts out.Well, it was definitely full. I can honestly say I have never seen a grease with this color and texture. Note the black thing down in the very bottom of the pot.It’s a simple mechanism. You turn the pot counter-clockwise to cause the plunger to move to the top so you can fill it. Or, you turn it clockwise, the plunger comes down and it pushes grease in … or at least it should.There was a black disc down in the pot / the chamber the pot threads into depending on how you want to describe it.I fished the black disc out using a finger, wiped it off and there was a very small hole in the middle. The black disc is a flow limiter! Now I understand why there was resistance! What this tells us is that you can only turn the screw so much and the limiter will cause resistance. So, turn the top screw until it stops and run the compressor. You can turn the screw on the pot the rest of the way as the grease goes into the mechanism but do not introduce more than one full turn worth of grease.
Refilling the Pot
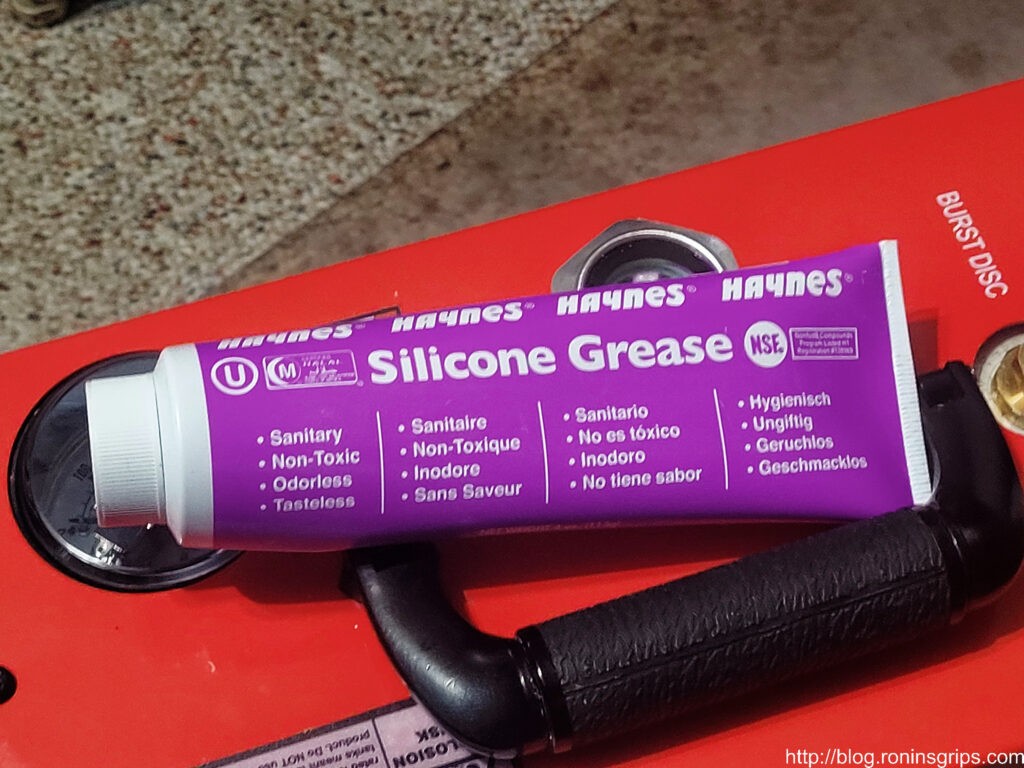
Well, I had really made a mess playing around with the grease pot and lost most of the grease in the process. I asked the Amazon seller, Ankul, what I should use and he told me to go with a general food grade grease. I asked if silicone would work because that seemed to be the composition of most, if not all, food grade greases on Amazon and he said “yes”. Based on that, I ordered a tube of the below Haynes Silicone Grease off Amazon due to it’s good reviews. The important part for you to bear in mind is to go with food grade and I assume this is to protect the seals or something.
This Haynes grease has very good reviews on Amazon so I went with it.I turned the knob counter clockwise and screwed the plunger all the way to the top of the pot and then topped off the pot with the silicone grease and screwed the pot back into the compressor.Once it was installed, I gave the top knob a turn, ran the pump for a minute and then turned it the rest of the way.
Summary
In hindsight, it is very straight forward but I didn’t expect the flow limiter to stop the knob from turning and I didn’t know what grease to use to refill the pot so it seemed like good info to share.
I hope this helps you out.
Note, I have to buy all of my parts – nothing here was paid for by sponsors, etc. I do make a small amount if you click on an ad and buy something but that is it. You’re getting my real opinion on stuff.
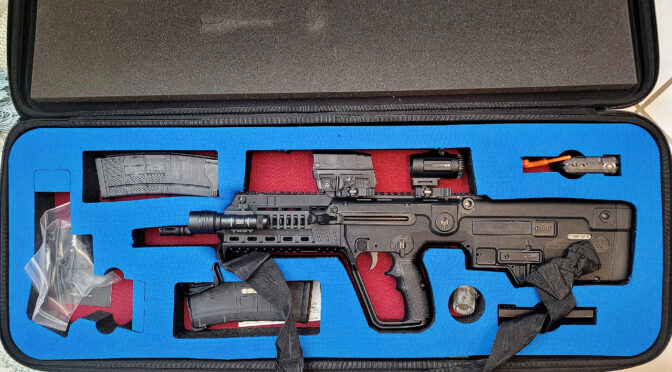
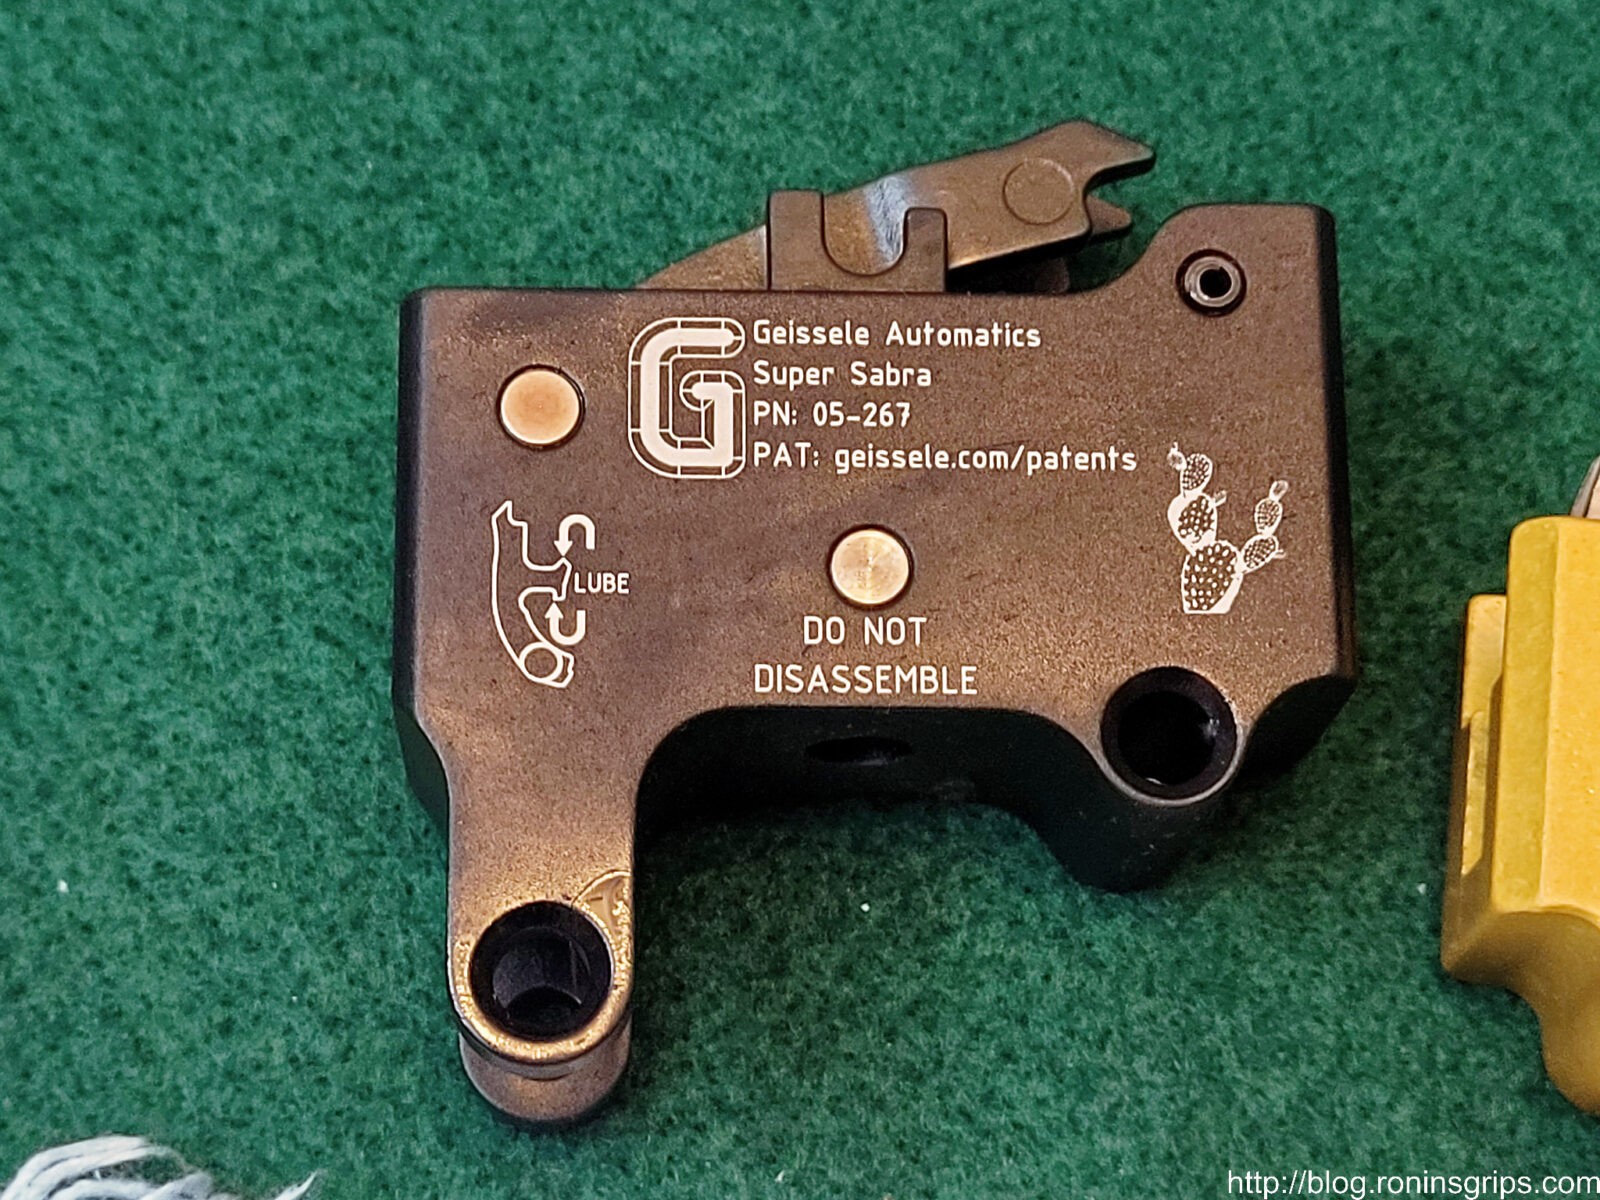
Back in August 2021, I bought a Tavor X95 and everybody told me to switch the stock trigger cartridge. I did some research and at that time people were recommending Timney or Geissele. My first choice was honestly Geissele because I really like their AR triggers but I couldn’t find them. Timney was the same way so I ordered both – I ordered the Timney on 8/17/21 direct from them and they shipped on 10/6/21. I also backordered a Geissele Super Sabra 05-267 with the thought that I could write a blog post at some point and compare them. The Timney arrived first and that’s what I installed and used up until yesterday. Let me explain.
I took my daughter’s fiancé, Kris, visiting from out of town to our local Berrien County Sportsman’s Club range for a few hours of shooting. The Timney trigger pack was in the Tavor and has been since I bought the Tavor. It has maybe 300-400 rounds through it – I’ve not shot it since I posted about taking it to the range last fall and the great time we had. At any rate, we shot a number of pistols and then it was rifle time – I told Kris that the Tavor is my favorite rifle right now and we start shooting.
I shot about 5 rounds to show the controls and make sure everything was good. I then handed it to Kris who then shot a few rounds and then things got weird. He pulled the trigger and nothing happened. I took the Tavor from him, and explained how to safely handle misfires and ejected the round. There was a barely noticeable dent on the primer. “Huh” I thought – must be a flaky hard primer. I loaded it again and tried – same thing. I took the round to the range’s misfire tube and dropped it down the pipe.
This is Kris wondering why it didn’t just fire.
I cycled the Tavor empty, it seemed okay, I then inserted a mag and made sure it was fully seated, handed the X95 to Kris who then charged it, we made sure the bolt was all the way home and he pulled the trigger. Nothing. Okay … something weird was happening. I took the X95 and ejected the round – same thing – a very light dent on the primer. At this point I was beginning to suspect something was wrong with the Tavor – we were shooting Winchester bulk M855 that normally I don’t have any problems with and absolutely never twice in a row.
I had Kris try again and this time I heard something. He would pull the trigger and nothing would happen but when he released trigger there was a delay followed by a click and then if he tried again it would fire. Okay …. something funky was going on inside the Tavor.
I removed all of the ammo and I could replicate it. Something was going on with either the rod that transfers the trigger pull back to the “trigger pack” or “sear mechanism assembly” – what IWI calls the trigger pack – or the trigger pack itself. It was time to pack the rifle up and we moved to an AR I brought that ran just fine.
Taking the X95 Apart
I have a love hate relationship with aftermarket parts. Most of the time when I take and replace a stock part with an aftermarket and something goes wrong, it’s the fault of the aftermarket part. To make a long story short, the problem at the range was caused by the Timney trigger pack.
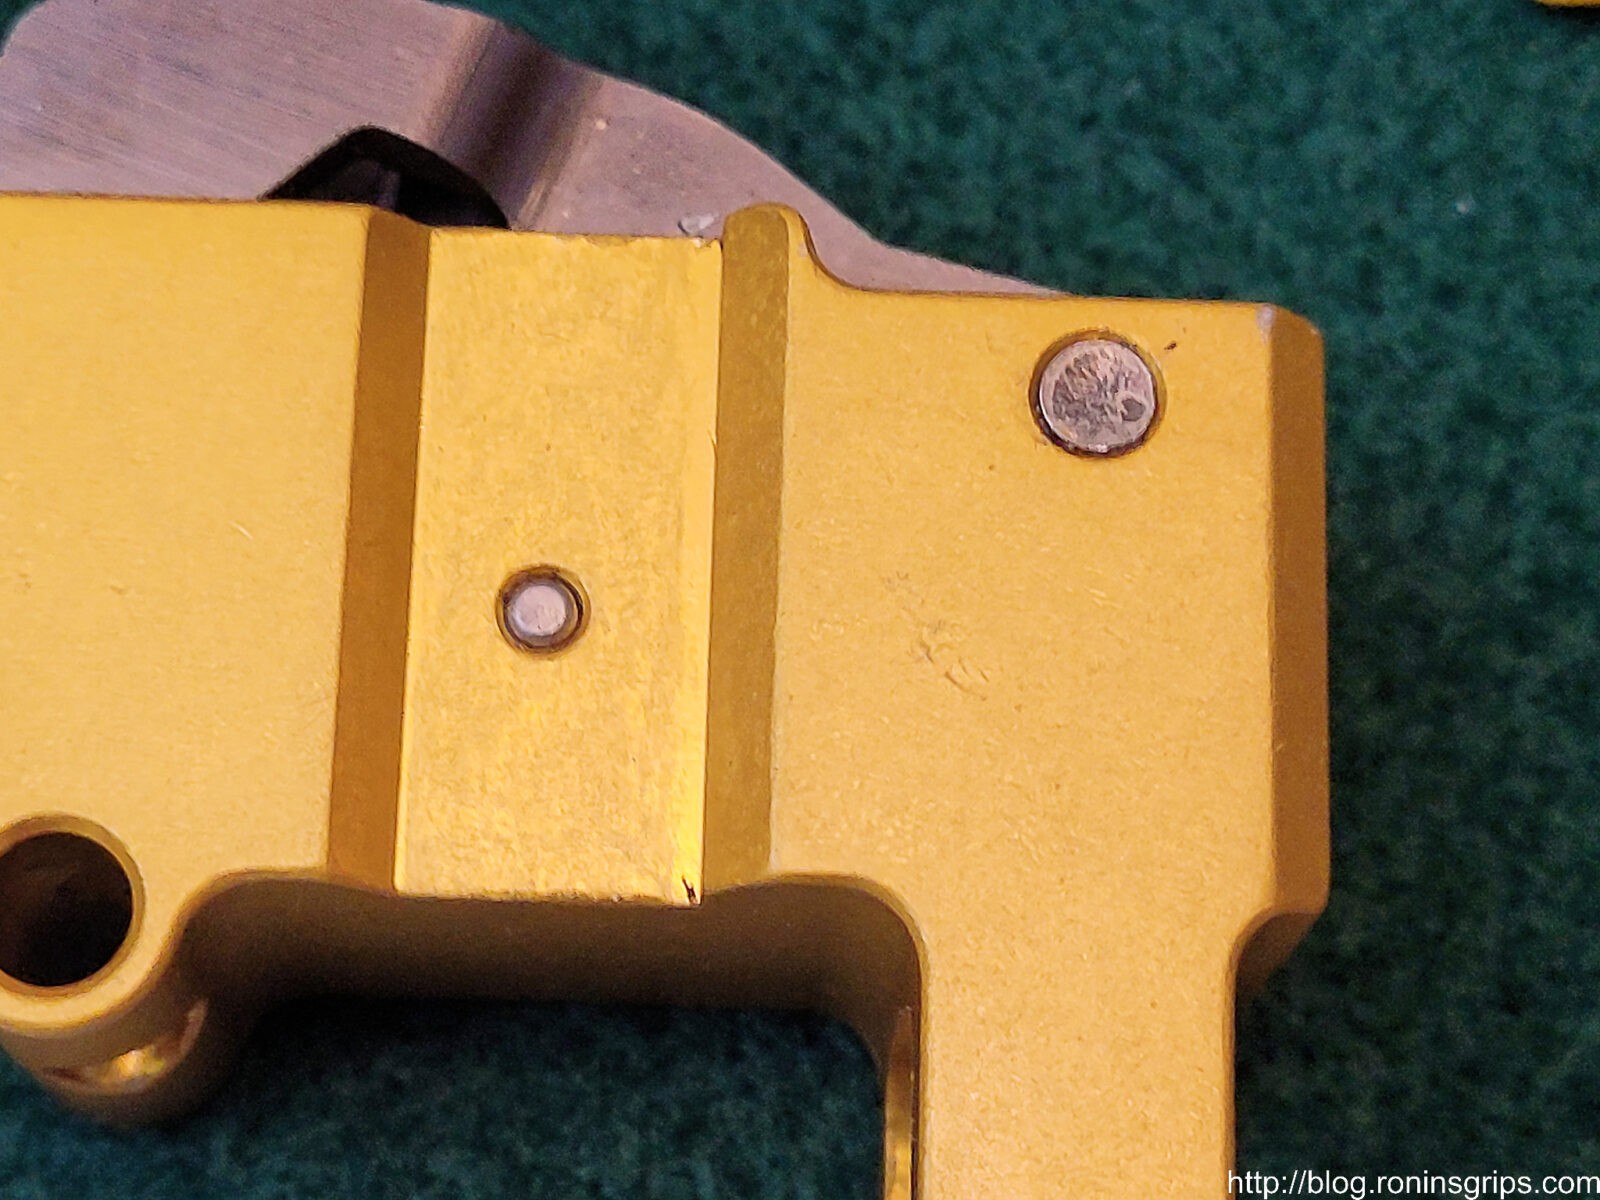
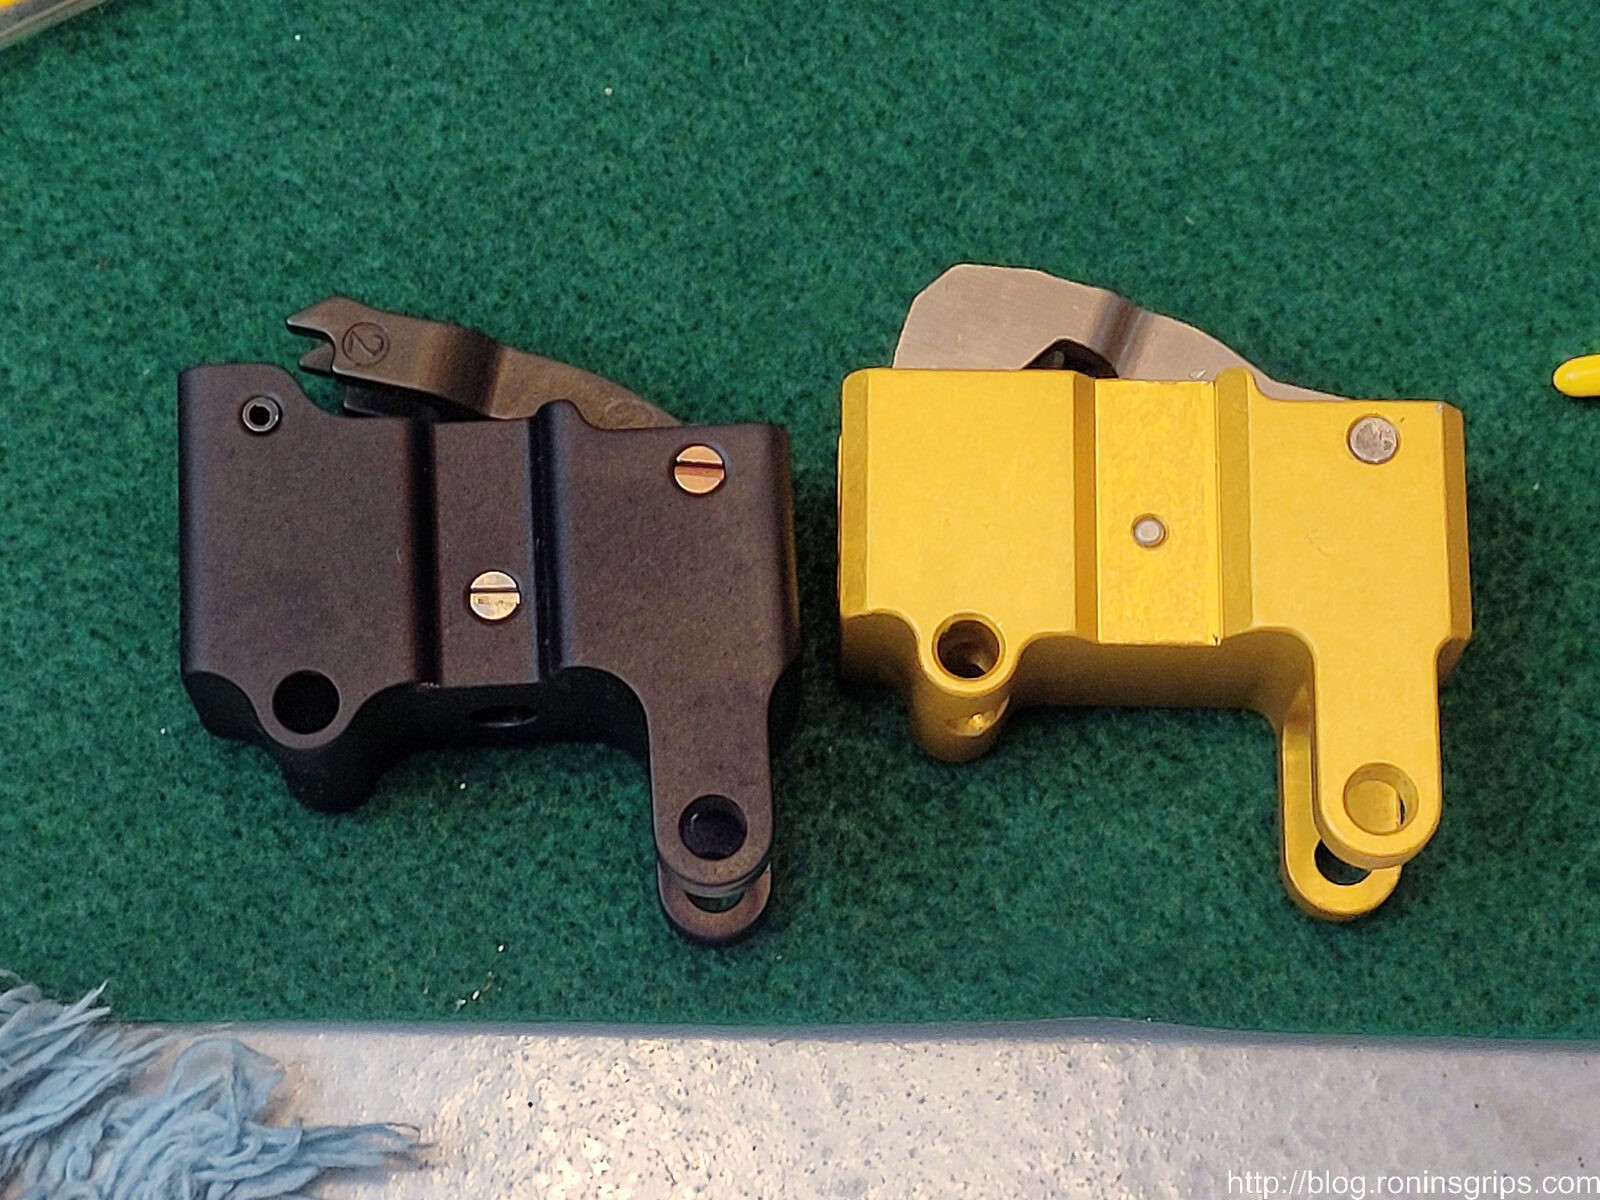
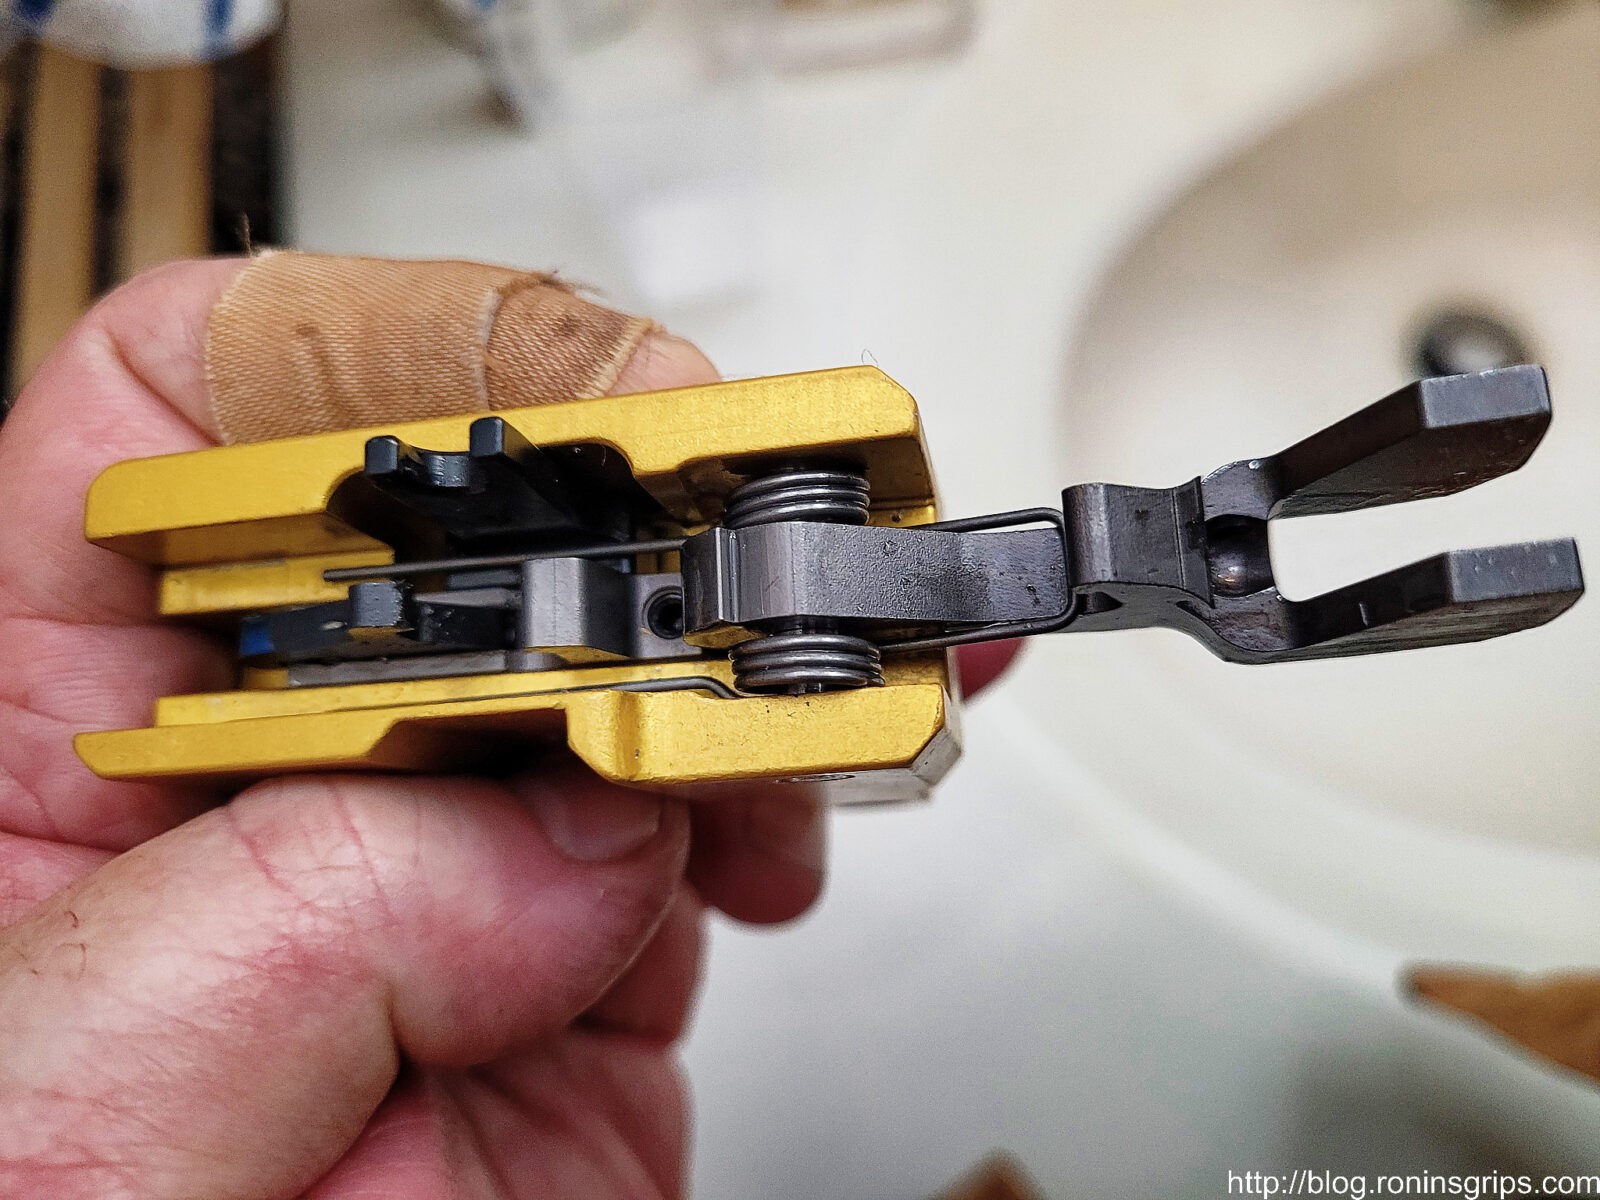
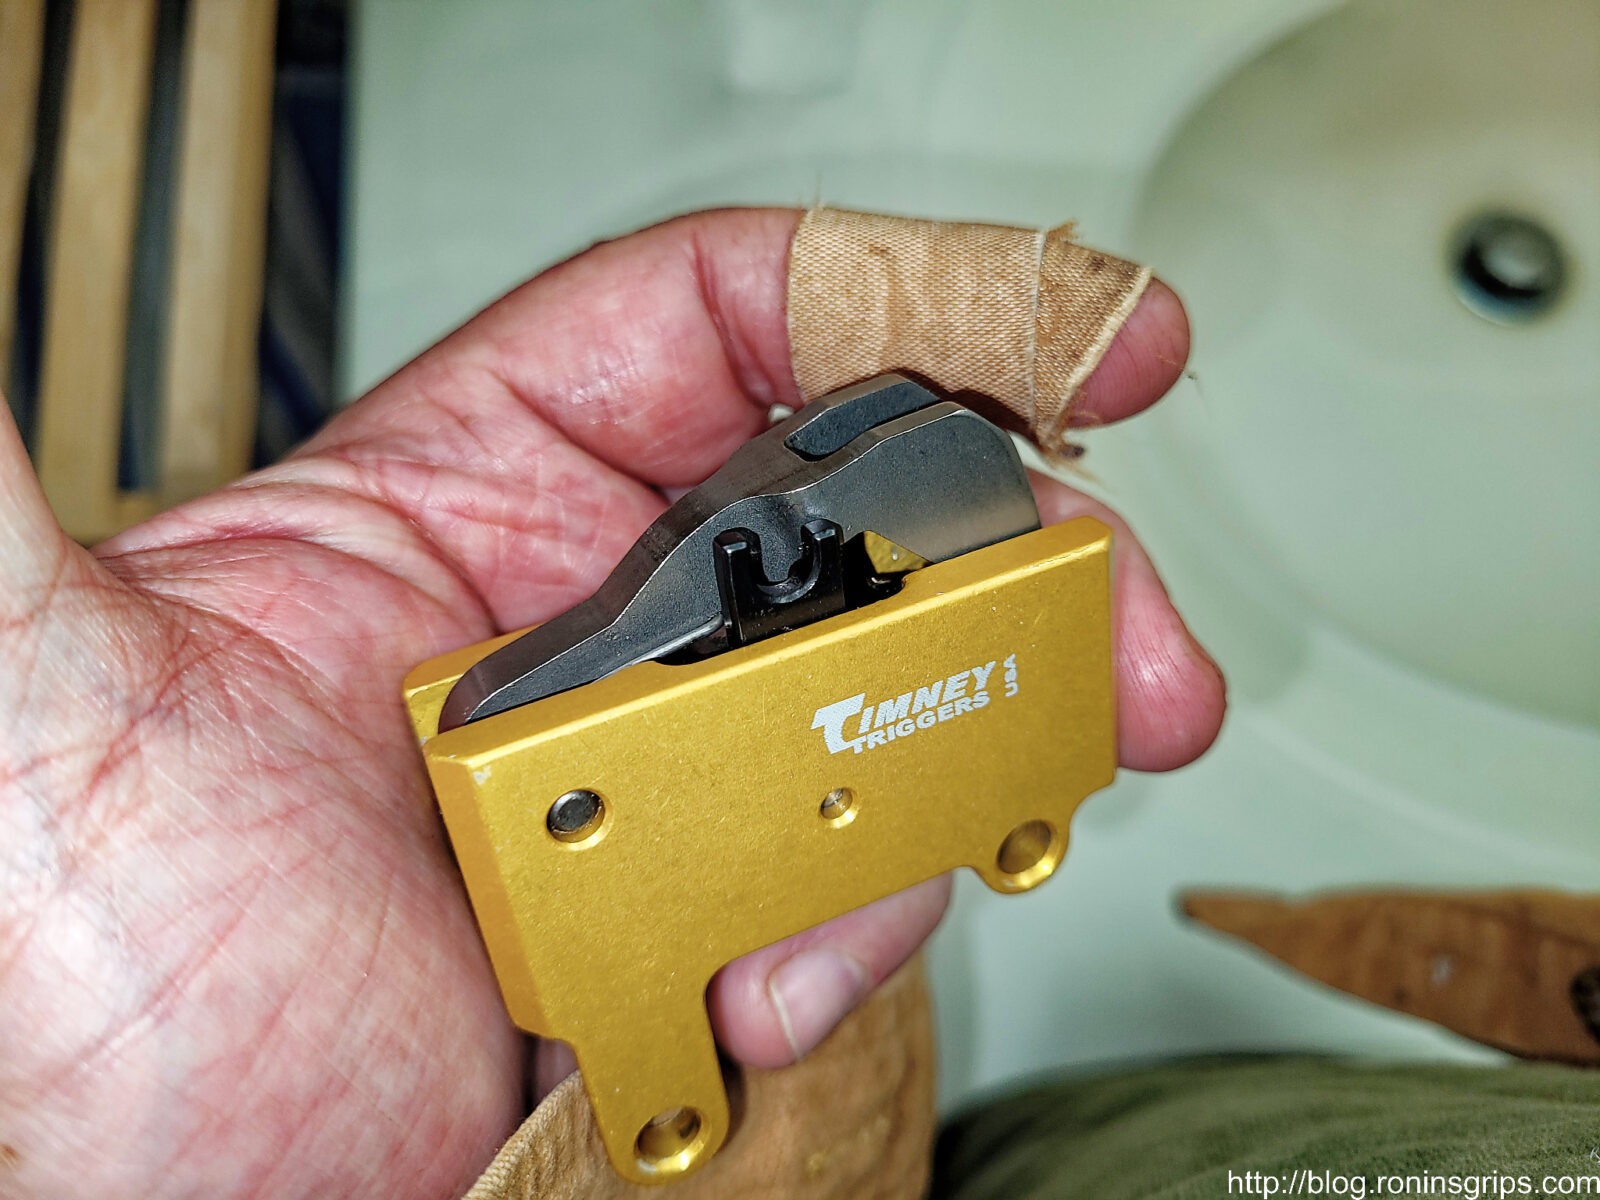
On a Tavor, the trigger pack normally pulls out very easily once you pull out the two retaining pins. Not this time. It did NOT want to come out. I had to pull pretty forcefully to get it out and the culprit was a big silver dowel/axle pin located in the top front of the pack. Both it and a smaller one in the middle were way out towards the right side. Why? No idea. I tapped both the pins back in with a nylon head soft blow hammer in my Weaver gunsmith kit. I tried to get it to “fire” and it wouldn’t so I switched gears and installed the Geissele Super Sabra instead that was still new in the box.
Both of these pins were sticking out on this side. I already tapped them back in before I took this photo.
I lubricated the Super Sabra per their instructions and it dropped right in and worked. So, right now I have an inoperable Timney that I can’t get to do anything on the bench that I think I will try and have Timney do a warranty repair on – I’m kind of curious what they will do or not do. In the mean time, I will happily run the Super Sabra.
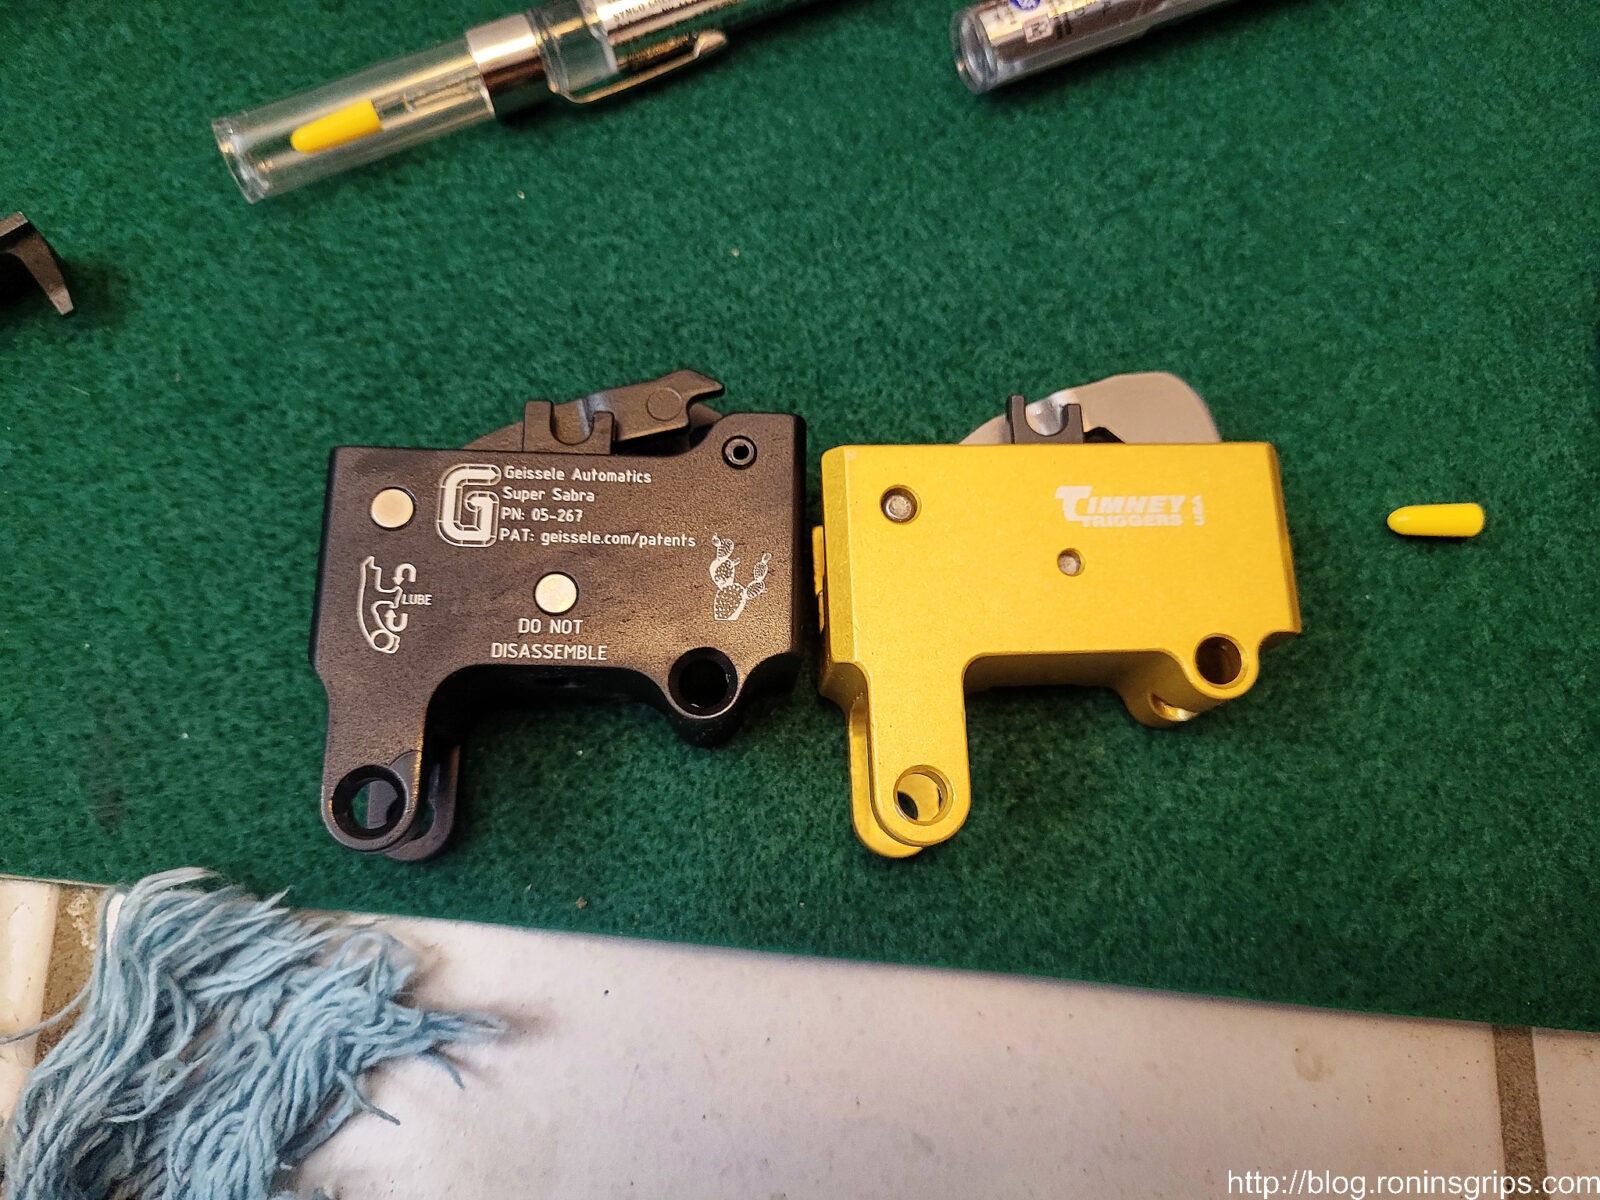
The Geissele Super Sabra on the left and the Timney Tavor trigger pack on the right. Note how the Super Sabra is using screws vs. pins.Here’s the other side of the trigger packs.I have always found Geissele’s engineering to be top notch. This trigger pack dropped right in and felt great. If I were to bet money, and I guess I already did since I bought it, this pack will last. The Super Sabra 05-267.
The Super Sabra feels really good – I am still using the stock Tavor trigger itself – the part you actually pull with your finger. Geissele sells a replacement trigger but I am not using it – just the replacement Super Sabra trigger pack.
For a bullpup trigger the Super Sabra is quite decent. There is a long pull but it breaks pretty nicely at 4 pounds 12 oz on average. To get that number, I did 10 test pulls with my Wheeler digital gauge. The lightest pull was 4 pounds 2oz and the heaviest was 5 pounds 1 oz. Very manageable and will be what I use going forward.
As I was writing this blog post, I had the Timney trigger pack in front of me. I tried repeatedly to actuate the hammer by pulling on the little lever that connects to the transfer rod in the rifle. Boy, it would not move – not one bit. I’d put a ball pin in the “U” and pull – it would not budge. I just tried again right now and heard a loud click just like we did at the range. I pulled on the lever again while controlling the hammer with my free hand and it “fired” – the hammer came up. In looking inside the cartridge i have no idea what has happened but don’t want to take it apart and void a warranty either. When I closed the hammer, it made a funny clunking abnormal sound and now doesn’t want to open/fire again. Weird. Something has gone wrong, that much I know.
I was able to eventually get it to open while I was writing the post. It made the same odd click sound that we heard at the range and after that it opened.When I closed it, an abnormal clunking sound came from the pack and it will not open again.
Summary
Not sure what happened but the Timney trigger pack stopped working. I plan on contacting Timney to see if they will look at it under warranty and will report back how it goes – I emailed them on 2/12/2023. I’m now running the Geissele Super Sabra pack and will see how that holds up.
I’m hoping Timney will do a warranty repair so I can compare both units down the road as I had originally hoped. I’ll update the blog post with how that turns out. By the way, I’ve had a number of Timney triggers over the years and this is the first problem I’ve had with one.
3/28/2023 Update: Got a nice update email from Timney. They are revising the design of the disconnector and will start production in June. That’s pretty cool that they are learning and improving their design. They offered me a refund or to wait for the new model and I opted for a refund at this point and they processed it (I bought it direct from them in this case). So, I am happy with the result.
3/25/23 Update: Really not happy with Timney customer service – I sent them polite emails asking for a status or even if they have the trigger (I can see they do from the tracking #) but they don’t even reply. Last email I told them I don’t mind waiting but please give me an idea of the lead time – no reply. I literally have no idea of the turn around time – they never gave me an estimate.
2/17/23 Update: Timney customer service was really easy to work with. They asked me to send them the trigger pack and they would take care of it. So, I sent it via priority mail with insurance on 2/16. I’m curious if they will tell me what went wrong.
Note, I have to buy all of my parts – nothing here was paid for by sponsors, etc. I do make a small amount if you click on an ad and buy something but that is it. You’re getting my real opinion on stuff.