A fellow asked me that if the GX CS4 high pressure air compressor is an upgrade then why are both the CS3 models (the one with the external 12 volt power supply and the one with an internal integrated supply) still being sold on Amazon. I explained in my email back to him that the CS4 does have a longer run time and a faster fill rate but it’s not a replacement. I figured I better expand on the email because if one person is wondering then others are as well – the models are for people with different needs and budgets.
The CS3 series will work great for anyone filling either a small airtank like my 18 cu ft Omega, or an airgun directly. It’s light and portable so you can do that no problem. The limiting factor is that it is air cooled and has a 20 minute duty cycle after which it needs to cool down. I bought mine in November of 2020 and used it right up until I bought my CS4 in January 2023 and I am certain one reason it held up so well is that I would never run it for more than 20 minutes. If I was filling something that took more than that, I would run it for 20 minutes and then let it cool down. It could top off my Hatsan Gladius or FX Impact Compact Mk.II in far less time than that – it was filling/refilling the Omega bottle that took longer.
The CS4 notably has a water/fluid cooling, the ability to add grease every 4-6 hours of run time, a more powerful motor, a faster fill rate and the ability to compress air up to 400 bar (5,801 psi) and a detachable air line. Yes, it does reflect a lot of lessons learned by GX but it’s not a replacement of the CS3 – the CS3 is still there for folks who want a smaller and lighter unit that is more portable and aren’t filling bigger tanks.
I bought the CS4 because I am getting into some airguns that use a lot of air – a Gauntlet .30 and a Leshiy 2 in .22 so I bought a 6.8L Air Marksman carbon fiber tank. You may be wondering how is a .22 an air hog – well, it gets 28 semi-auto shots and then needs to be topped back off and it’s onboard reservoir is rated at 300 bar. I can fill it one time from the big bottle and then the bottle is close to 250 bar plus I plan on buying the bigger optional air cylinder for the Leshiy.
My point is that all of these were going to require the air pump routinely running longer than the recommended 20 minute duty cycle so I really needed to make the move.
In short, the CS3 is for folks who need a compressor to fill and airgun directly or small bottles plus save a little money. The CS4 does have newer technology and is for users who want to fill airguns directly plus have a long enough duty cycle to fill up to a 6.8 liter tank. I bet it could do bigger as long as you honored the remarkably long 5 hour duty cycle of the CS4 but I’ve not used it enough to say that. The CS4 is more expensive than the CS3.
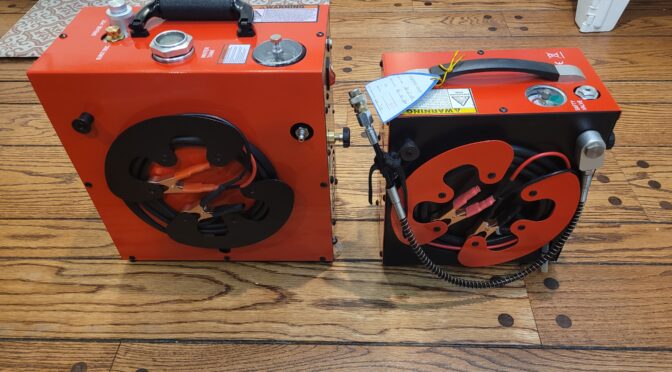
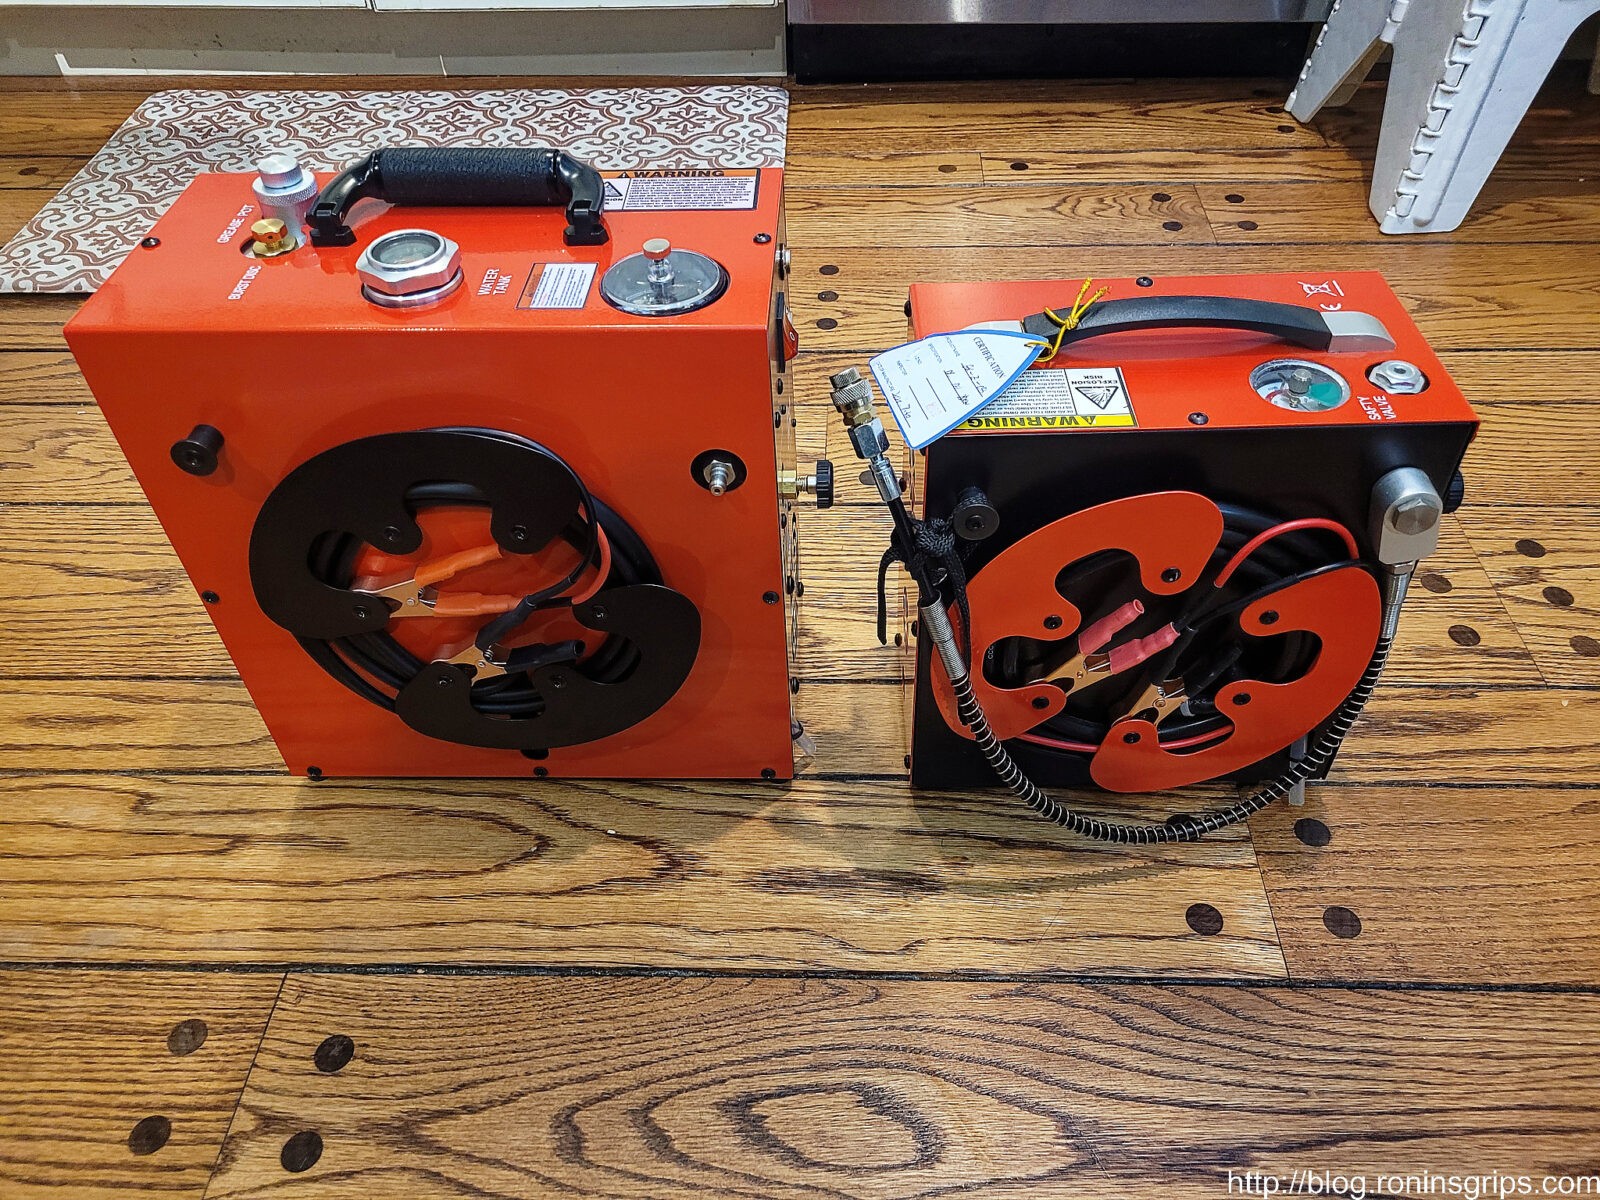
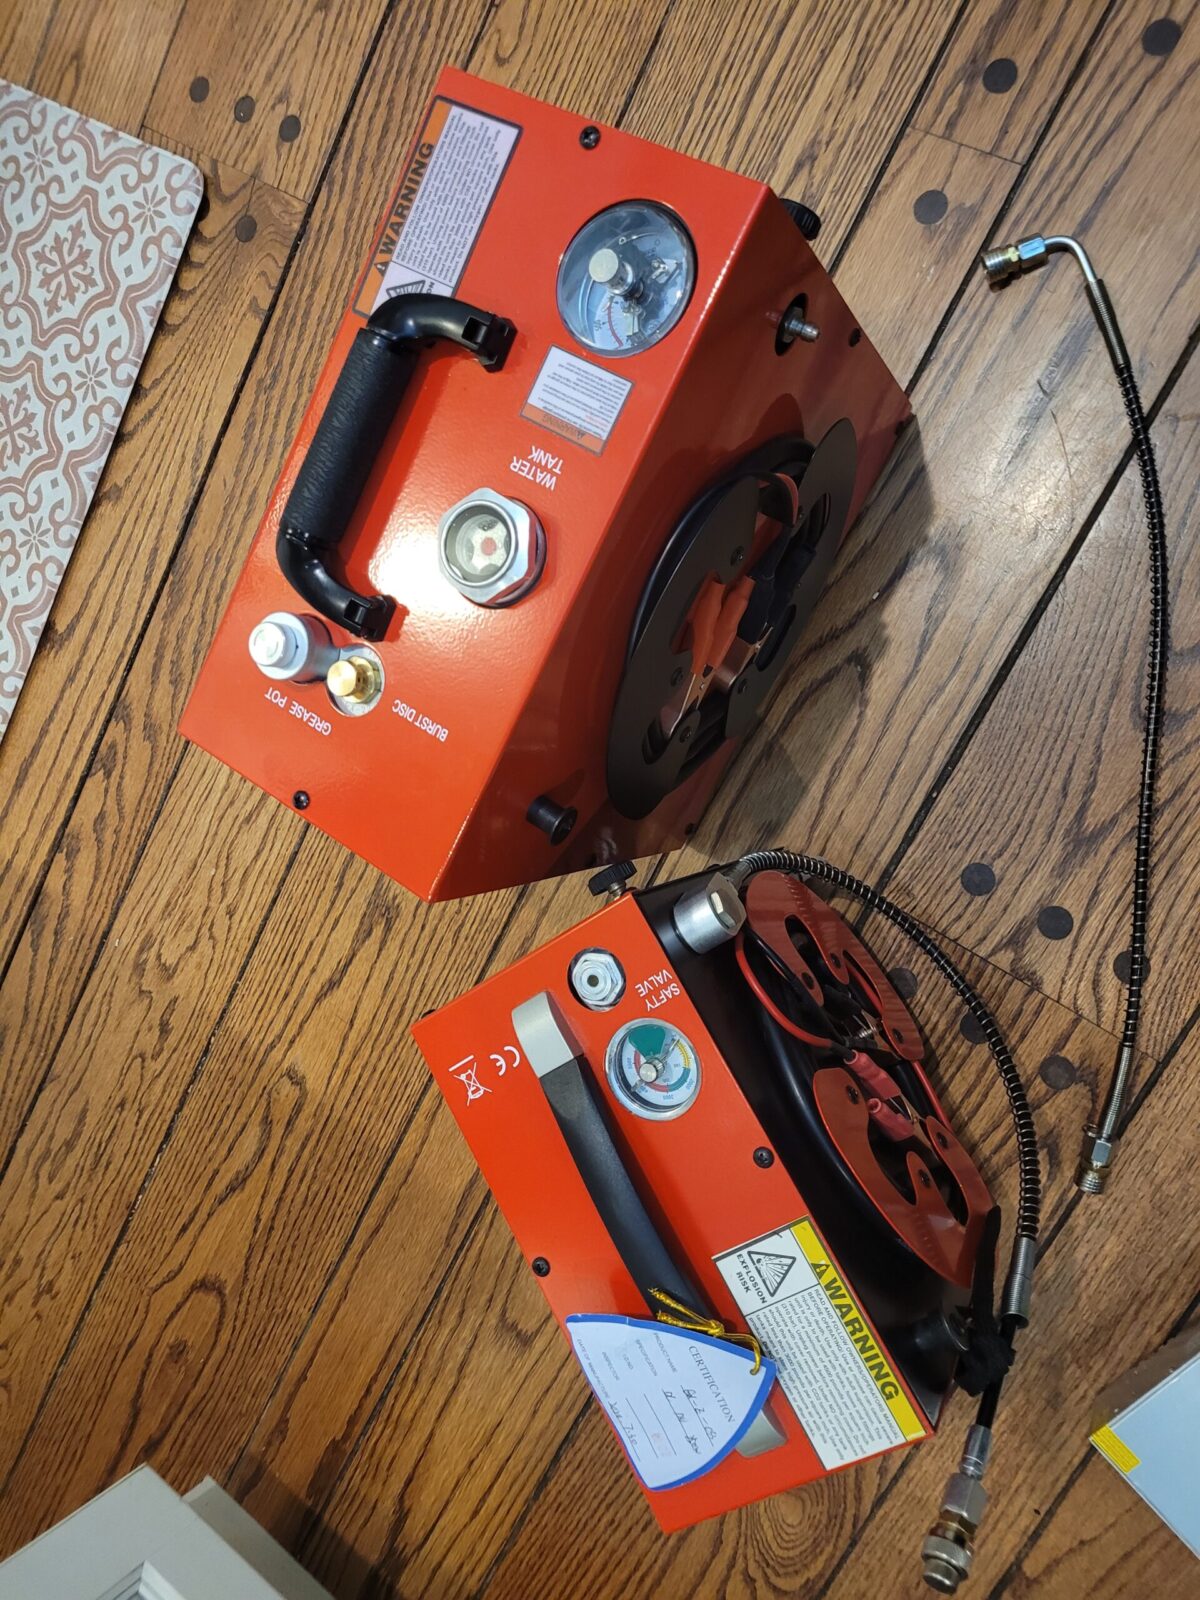
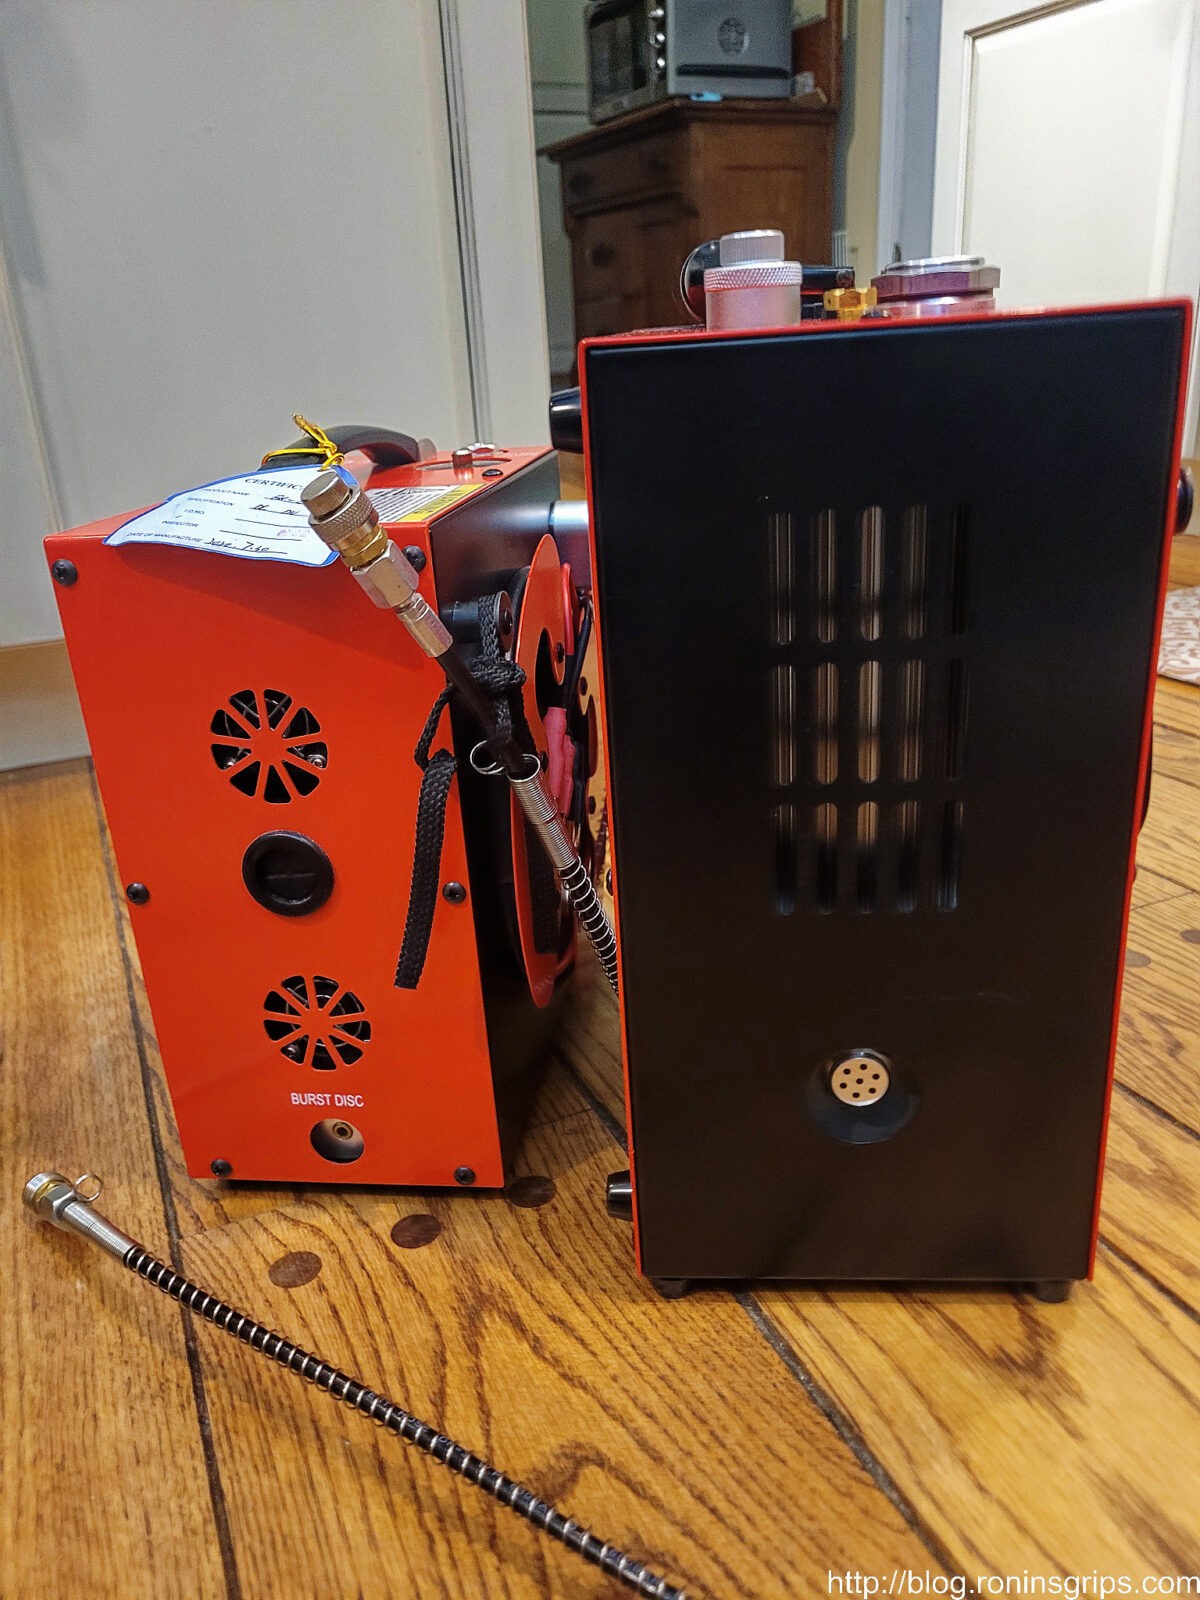
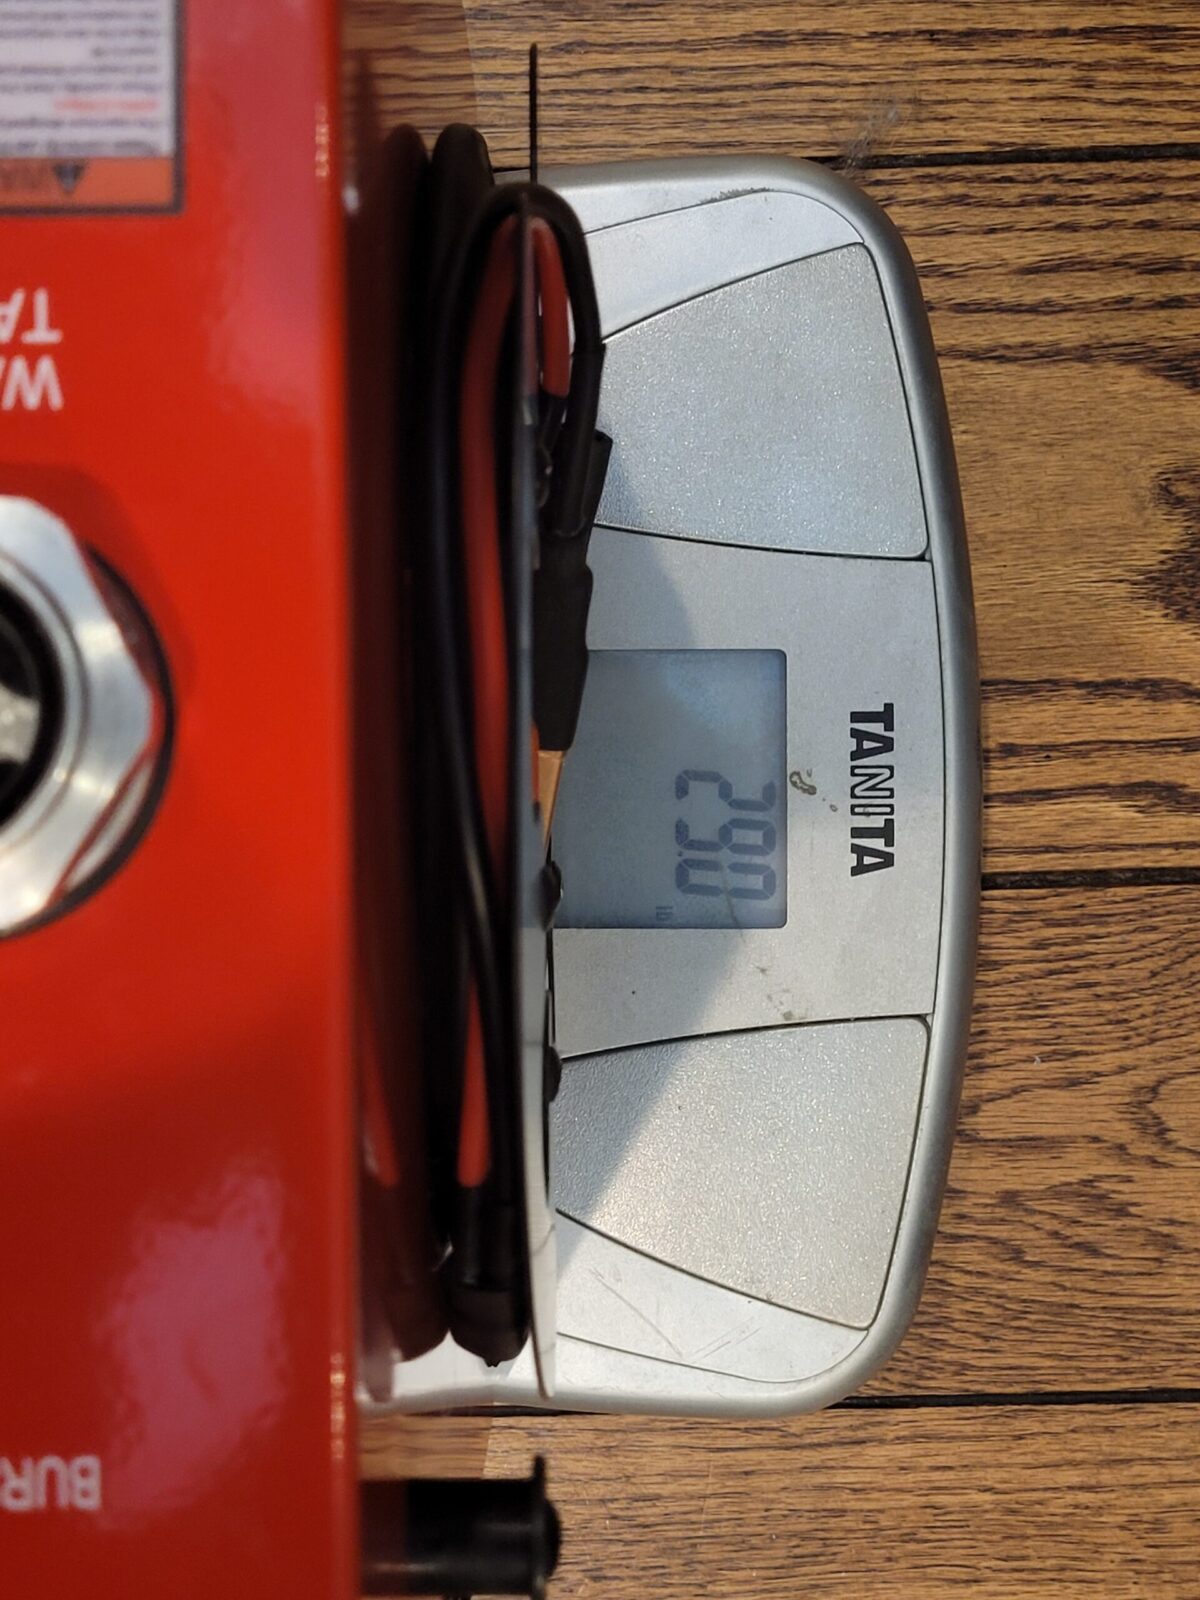
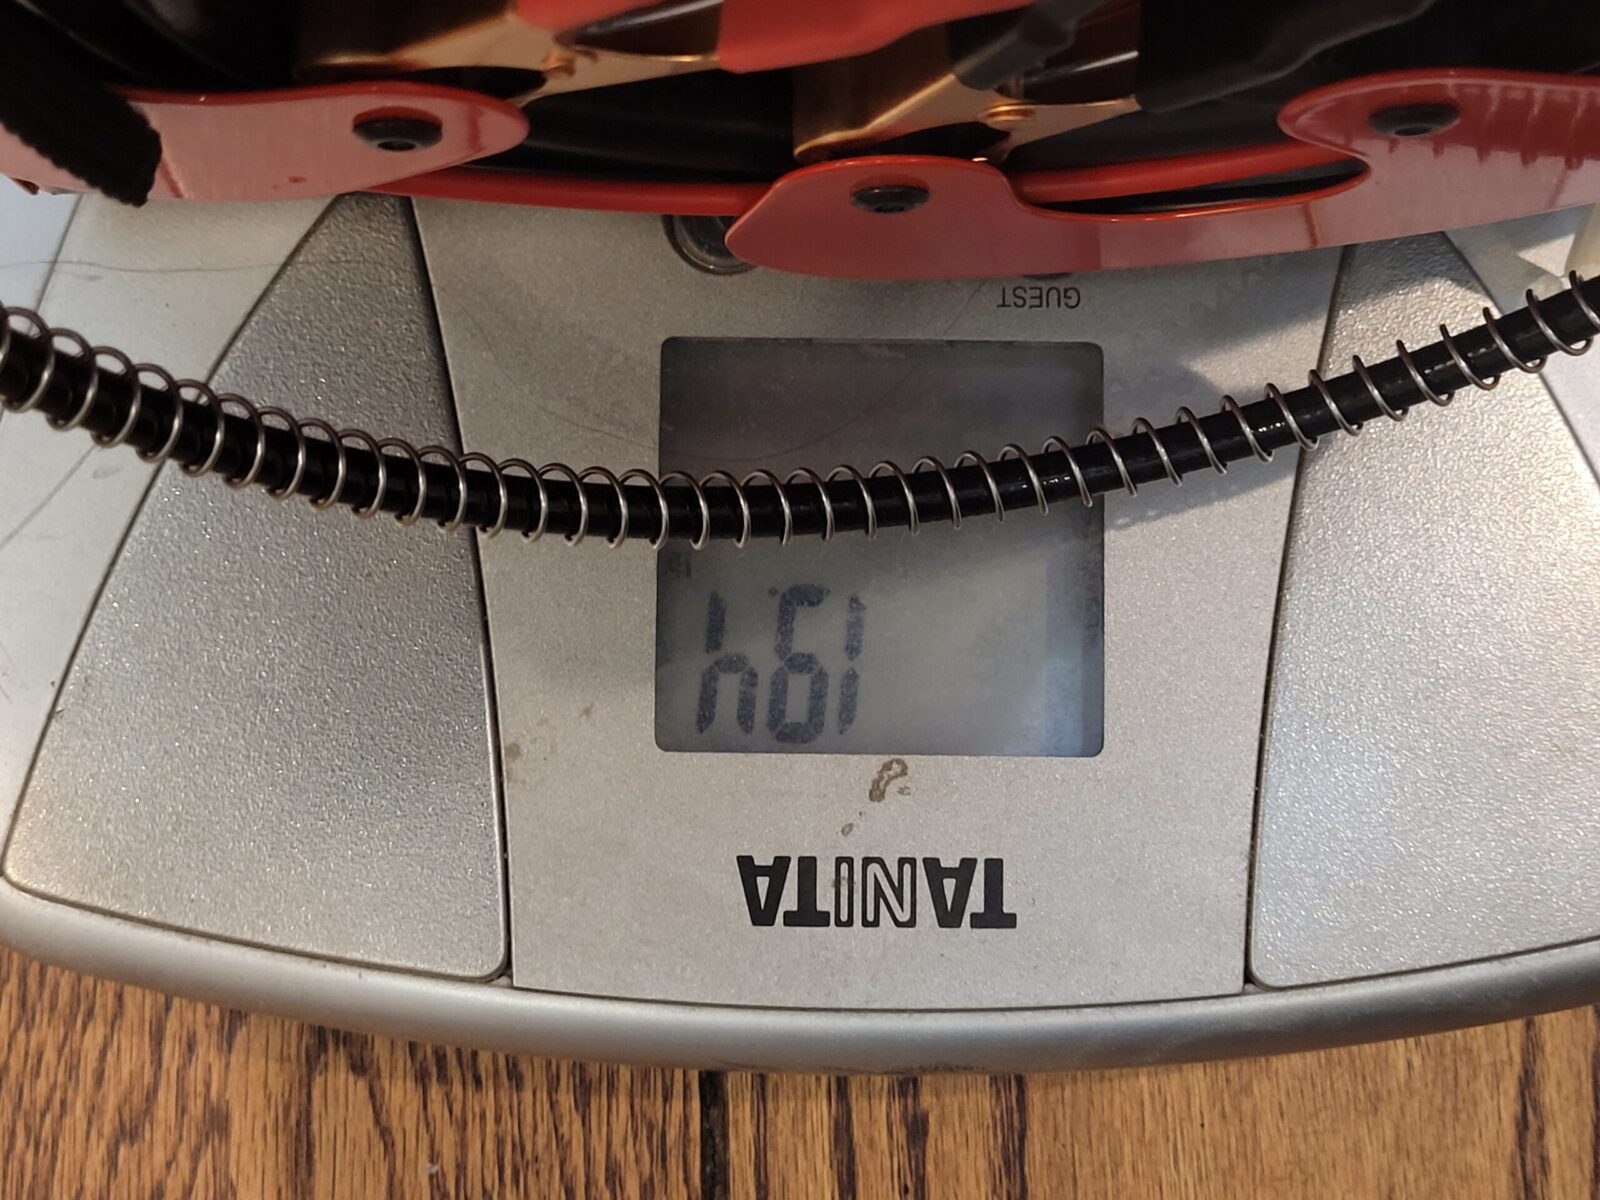
The CS4 is the larger compressorYou can see how the CS3 on the left has an attached air line vs. the CS4 that has a Foster quick connect for r aremovable air line.CS3 is air cooled. You can see the large fluid filled finned cooling jacket on the CS4 through the vent holes.CS4 weighs 29 poundsCS3 weighs 19.4 poundsWhen I bought the CS3 they did not have the integrated power supply model. I would have gone with the external supply regardless as you can hook your compressor up to a vehicle if you need to refill something in the field or at the range. On the other hand, the integrated model is even more portable as you don’t have to move the 12 volt adapter around.
Summary
I had to buy these compressors with my own money and these posts were not paid for – I want to be clear about that. My experiences with both the CS3 and the CS4 have been very positive and I have no reservations recommending either to you.
Oh – also – a guy emailed me the other day asking me about the GX CS2 and I had to tell him that I do not have any experience with that model. Folks, I only have these two. Before the CS3 I had a Hill Mk. IV hand pump – the Hill was excellent but that’s the limit of my high pressure air compressor experience. I am a licensed SCUBA diver but always bought my air at a dive shop so I had a little knowledge from that plus many, many years of industrial and shop pneumatic work but that was only up to 175 PSI.
Here are the GX compressors from the CS4 down to the CS1
FastToBuy 30Mpa Oil Water Filter – Not a GX product but I recommend this filter and you need one between the compressor and your tank or PCP airgun. You will need an extra hose from it to your tank or airgun plus the proper fittings.
Note, I have to buy all of my parts – nothing here was paid for by sponsors, etc. I do make a small amount if you click on an ad and buy something but that is it. You’re getting my real opinion on stuff.
There’s an old saying that nobody is sure of where it came from that says if you have one clock you know the time. If you have more than one, you are never quite sure. The reason for this is that if the clocks have different times then which is wrong or right? Well, I guess now we have time servers, atomic clocks and what not to help answer “what time is it?”.
Now why did I open with that? Well, the only sound level meter I had to measure the decibels of anything was my phone and two different apps that kind of agreed. When reading reviews, folks would say that phone sound level apps were not accurate. Well, I decided to buy a sound level meter to be more accurate … that was in 2017 and I thought I knew how many decibels things were using my cool BAFX3608 meter.
Fast forward to February 2023
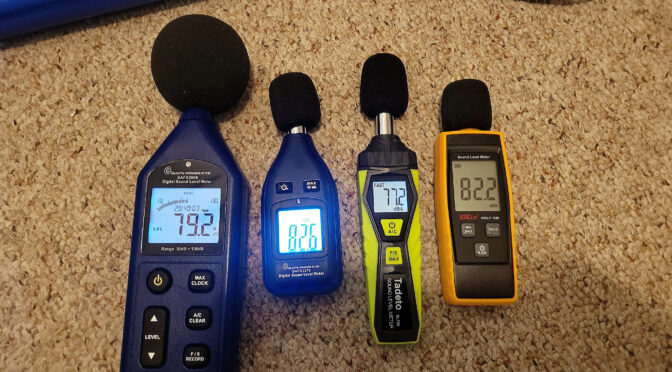
I decided to test my GX CS4 and I also wanted to test some airgun moderators so I thought I would order in a few more inexpensive sound level meters to get readings in different spots – a BAFX3370, a Tadeto SL720 and a XRCLIF-1359.
I was using my GX CS4 compressor to top off my 6.8 liter carbon fiber bottle and thought it would be a great time to get sound readings from relatively the same location. I lined them up and took a video to capture sound readings on each meter at a certain time by freezing the video.
Here’s the video so you can hear the compressor and see the meters:
How did they do?
Well, I recorded the readings at 4,11, 16, 21, 26 and 31 seconds. I then calculated the average of the four and compared the meters to the average. The BAFX 3608, BAFX 3370 and XRCLIF were closest. The Tadeo was introducing quite a bit of variation into the samples. With one exception at 26 seconds, it always registered the lowest decibels. Excluding the Tadeto, the average spread was 2.97db across the three meters. With the Tadeto, the average spread increased to 6.8db.
By the way, the manufactures claim +/-1.5db of accuracy for the two BAFX meters, +/-2.0db for the Tadeto and +/-1.5 for the XRCLIF. That means the ranges should have been at most 3.5db apart. The recorded data showed spreads far wider than that.
What this spread tells me is that the two BAFX units and the XRCLIF are in relative agreement given their stated accuracy. My tendency is to think they are closer to whatever the real measurement actually is and discard the Tadeto data. It also tells me that when you buy cheap uncalibrated sound meters you get cheap uncalibrated sound meters.
What about the apps?
I tried the both the “Sound Analyzer” and “Sound Meter” apps for my Samsung Galaxy S20FE. The Sound Analyzer reported an average of 79.3 and the Sound Meter app averaged 80. The sampling was done by holding my phone about the same distance from the CS4 and letting each app collect data for about 30 seconds. Given how fast the CS4 pumps, the apps had quite a few cycles to record.
This is a screen capture of the Excel file I created to look at the data.
Conclusion
I have a vague idea that the average sound level was somewhere between 81.5 to 86.1db as the machine operates if I exclude the Tadeto’s recordings. The samples were drawn at different times and the pump had a repetitive rhythm to it so I am sure the volume did differ but looking at the spread across the meters and the deviation from the average tells me that three meters are closer to one another (the two BAFX models and the XRCLIF) and the Tadeto is an outlier. The apps don’t really agree with anything either.
To wrap it up, thanks to my PC periodically synching its clock to a time server, I know it is about 9:20pm right now. What were the actual sound levels during each of those samples … now that I don’t really know with any precision – I have a ballpark range. I guess some day I will need to buy a quality calibrated sound level meter – what I probably should have done from the start. If you need to buy a meter and can’t afford a higher end unit – buy either the BAFX 3370 or the XRCLIF-1359. The BAFX 3608 is no longer made (as mentioned – I bought it back in 2017).
Here are the GX compressors from the CS4 down to the CS1
FastToBuy 30Mpa Oil Water Filter – Not a GX product but I recommend this filter and you need one between the compressor and your tank or PCP airgun. You will need an extra hose from it to your tank or airgun plus the proper fittings.
Note, I have to buy all of my parts – nothing here was paid for by sponsors, etc. I do make a small amount if you click on an ad and buy something but that is it. You’re getting my real opinion on stuff.
The GX CS4 is a very cool compressor and one of the two ways it gets the long run time is through staying properly greased. (The other is through the use of fluid coolant that I covered in a blog post about setting up and testing the unit). After 4-6 hours of compressing air with your GX CS4, you are supposed to given the top grease pot knob one full turn. How does that work and how does one refill it?
Adding Grease Every 4-6 Hours
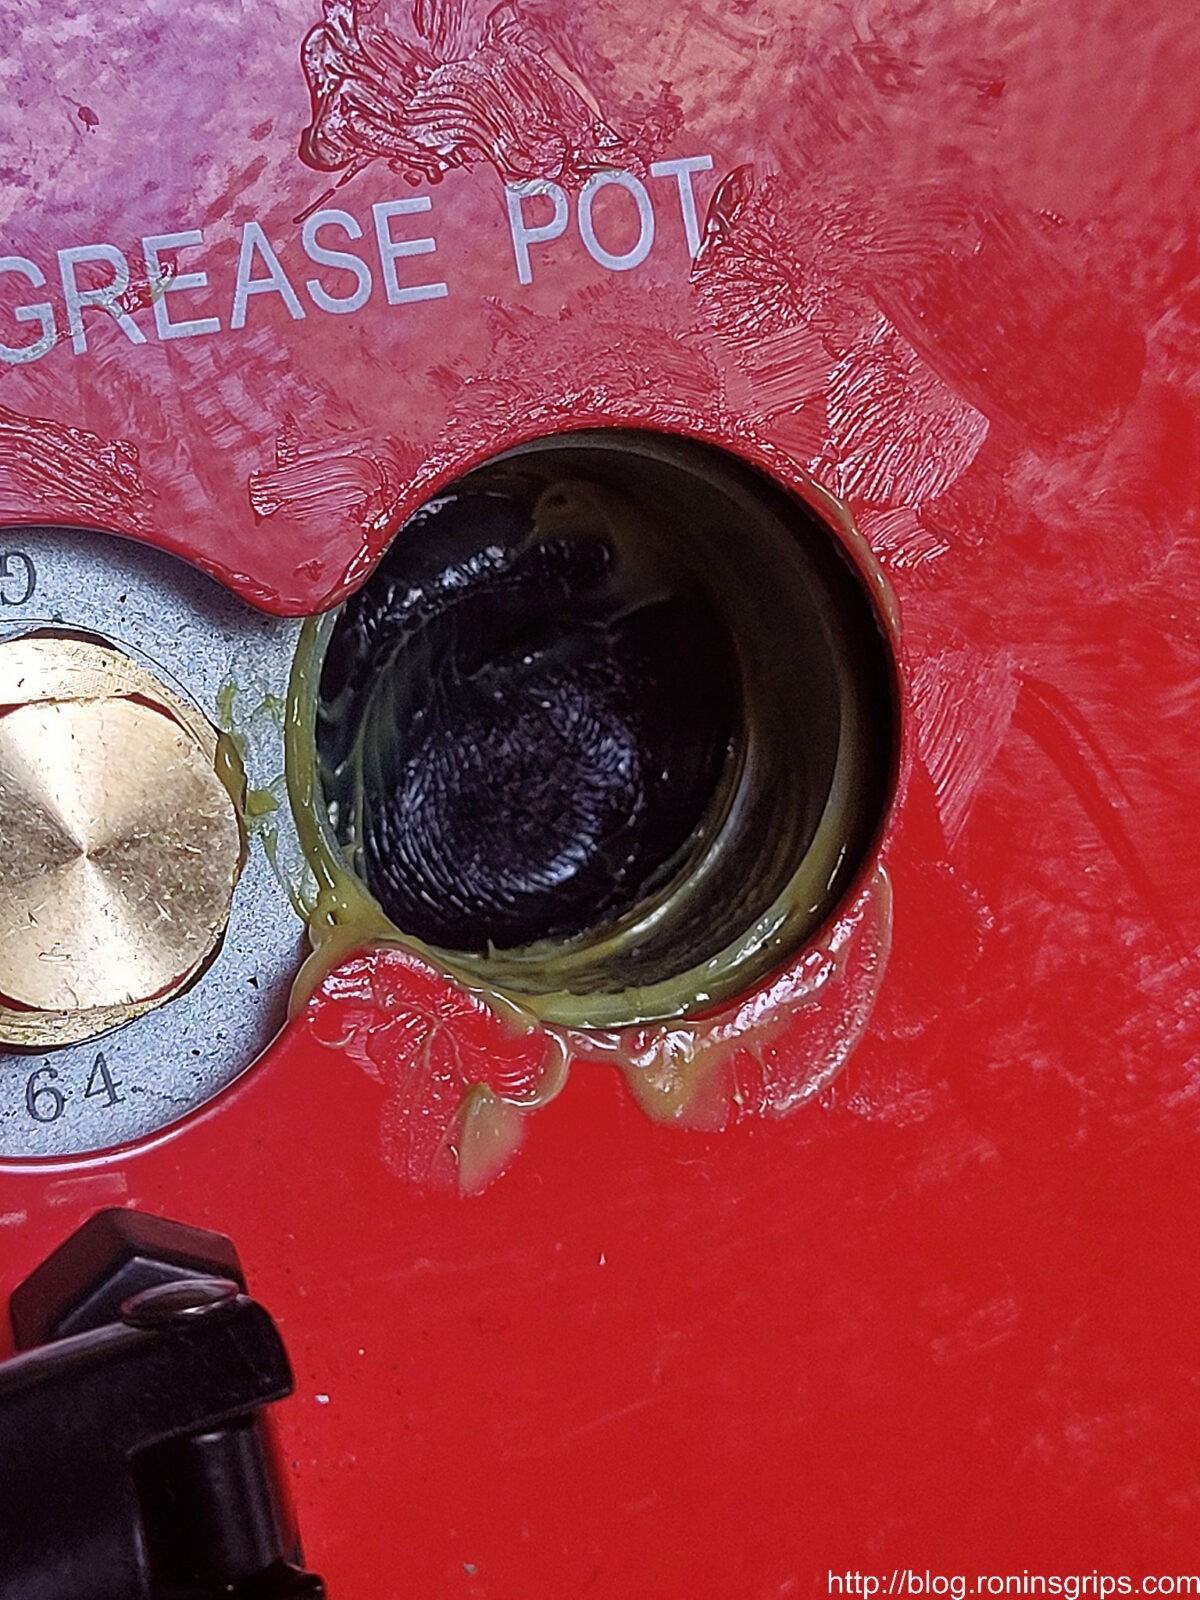
It’s simple, turn the top knob one full turn to introduce grease. You may be wondering why I even bothered adding a blog post. The reason is that when I turned the knob there was so much resistance that I thought the pot was empty – it wasn’t. What I want you to see is why there is resistance:
To add grease, you turn the top knob with the arrows one full turn clockwise. The problem was that mine stopped right around 3/4ths of the way around. I thought maybe it had been shipped without the grease pot being filled.To remove the grease pot simply turn the lower portion of the pot counter-clockwise and it will unscrew. It then lifts out.Well, it was definitely full. I can honestly say I have never seen a grease with this color and texture. Note the black thing down in the very bottom of the pot.It’s a simple mechanism. You turn the pot counter-clockwise to cause the plunger to move to the top so you can fill it. Or, you turn it clockwise, the plunger comes down and it pushes grease in … or at least it should.There was a black disc down in the pot / the chamber the pot threads into depending on how you want to describe it.I fished the black disc out using a finger, wiped it off and there was a very small hole in the middle. The black disc is a flow limiter! Now I understand why there was resistance! What this tells us is that you can only turn the screw so much and the limiter will cause resistance. So, turn the top screw until it stops and run the compressor. You can turn the screw on the pot the rest of the way as the grease goes into the mechanism but do not introduce more than one full turn worth of grease.
Refilling the Pot
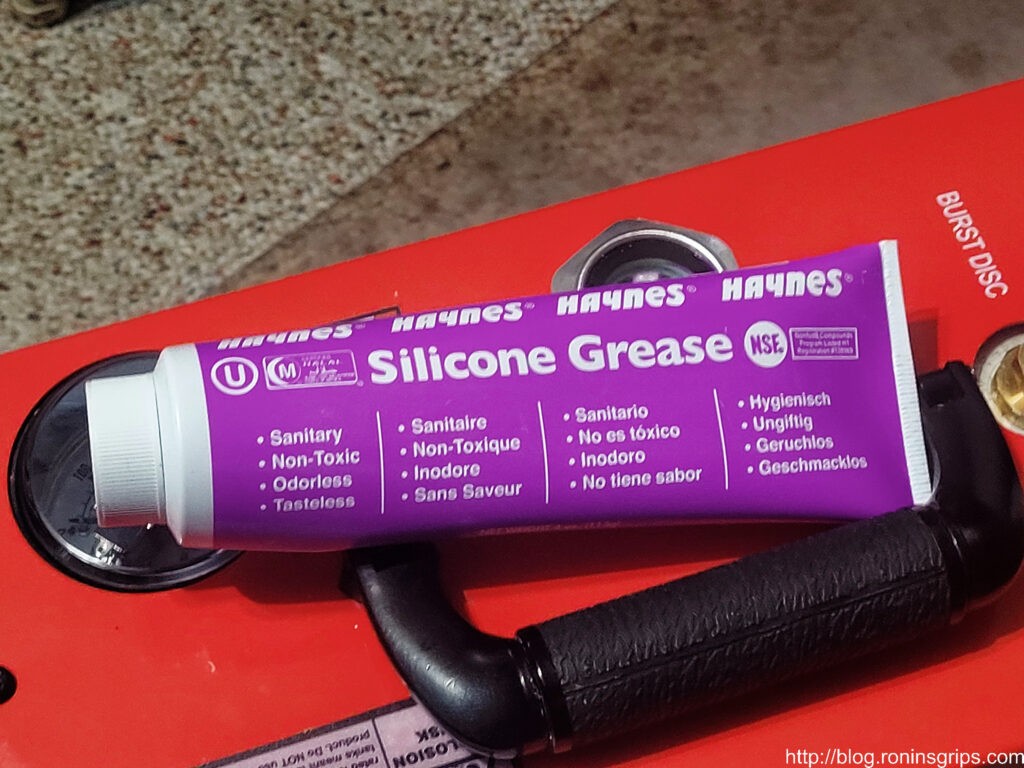
Well, I had really made a mess playing around with the grease pot and lost most of the grease in the process. I asked the Amazon seller, Ankul, what I should use and he told me to go with a general food grade grease. I asked if silicone would work because that seemed to be the composition of most, if not all, food grade greases on Amazon and he said “yes”. Based on that, I ordered a tube of the below Haynes Silicone Grease off Amazon due to it’s good reviews. The important part for you to bear in mind is to go with food grade and I assume this is to protect the seals or something.
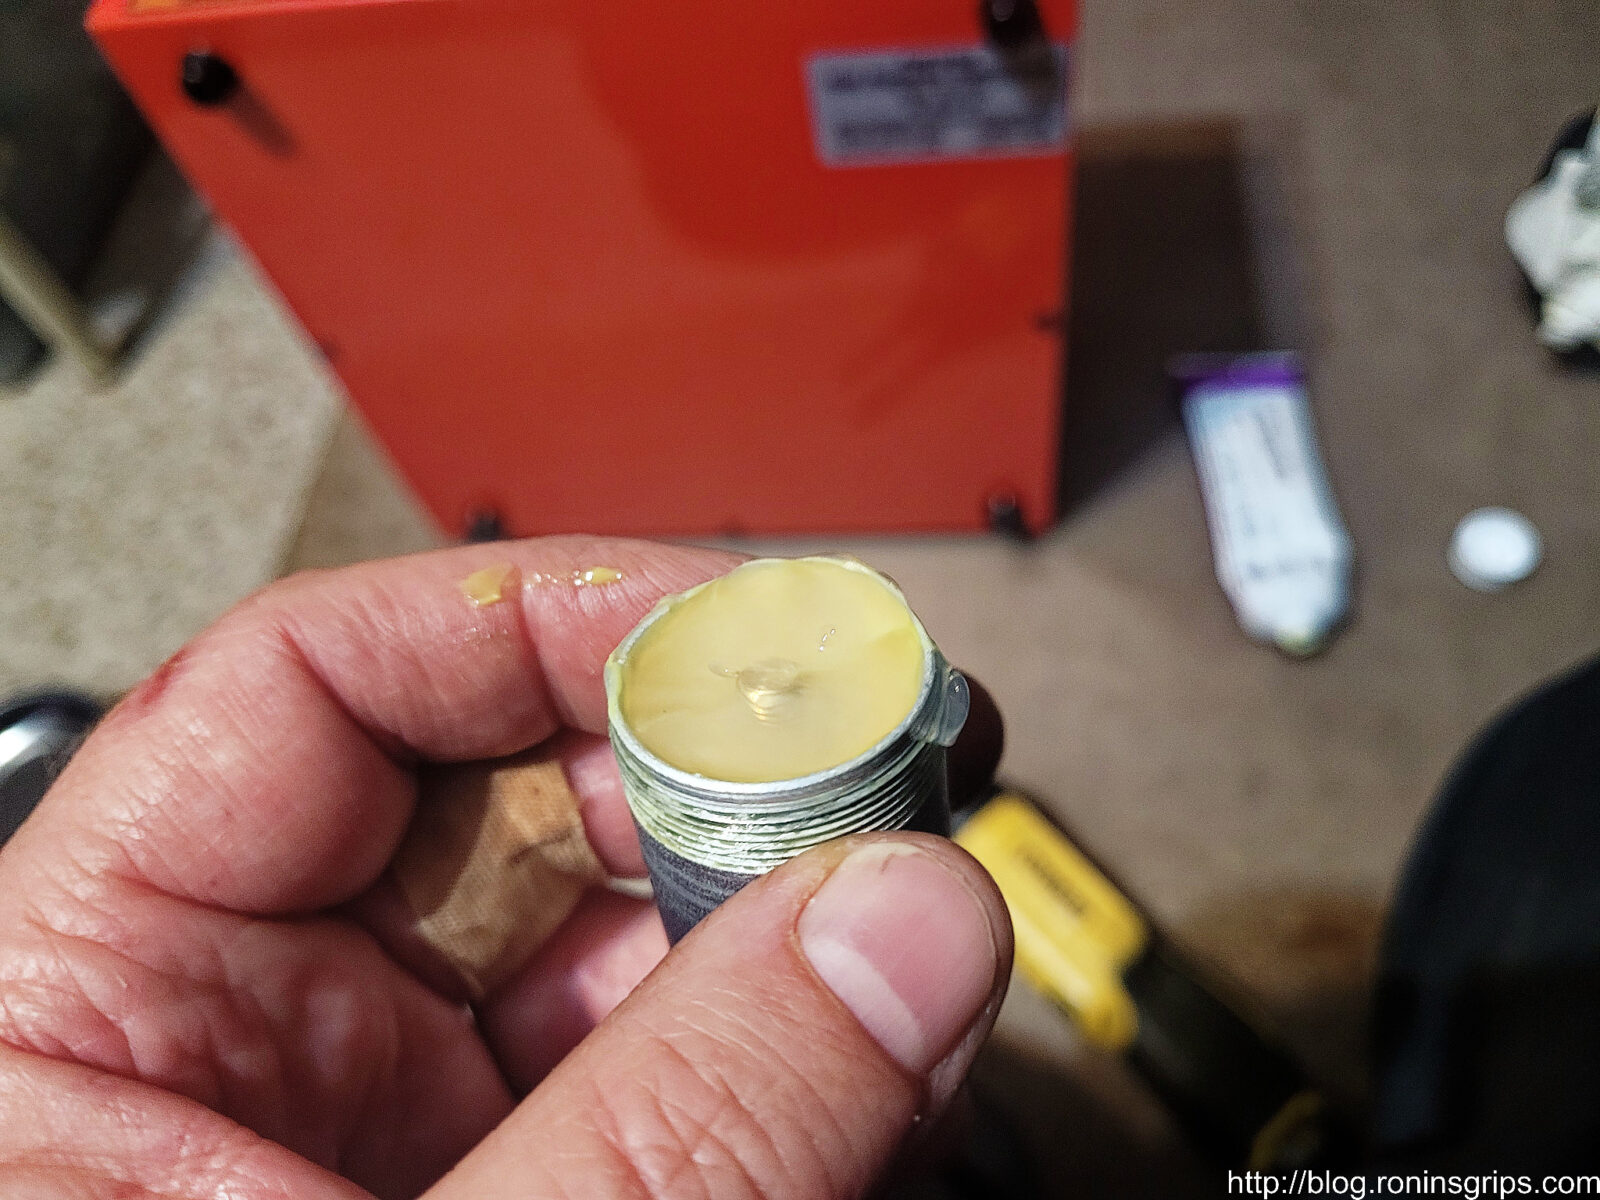
This Haynes grease has very good reviews on Amazon so I went with it.I turned the knob counter clockwise and screwed the plunger all the way to the top of the pot and then topped off the pot with the silicone grease and screwed the pot back into the compressor.Once it was installed, I gave the top knob a turn, ran the pump for a minute and then turned it the rest of the way.
Summary
In hindsight, it is very straight forward but I didn’t expect the flow limiter to stop the knob from turning and I didn’t know what grease to use to refill the pot so it seemed like good info to share.
I hope this helps you out.
Note, I have to buy all of my parts – nothing here was paid for by sponsors, etc. I do make a small amount if you click on an ad and buy something but that is it. You’re getting my real opinion on stuff.
Okay, I used my GX CS4 compressor to top of my 6.8L tank the other day and ran it for about 30 minutes or so to top off the tank at 300 bar. As you may have guessed, I’m a tinkerer and am always curious how things work. So, I looked at the CS4, it looked at me and I removed the case.
It’s really easy to do – I removed the little sheet black metal screws that run around the edges of the red sheet metal cover, removed the coolant tank cover, unfurled the power cord wrapped on the spool and the cover just comes straight off.
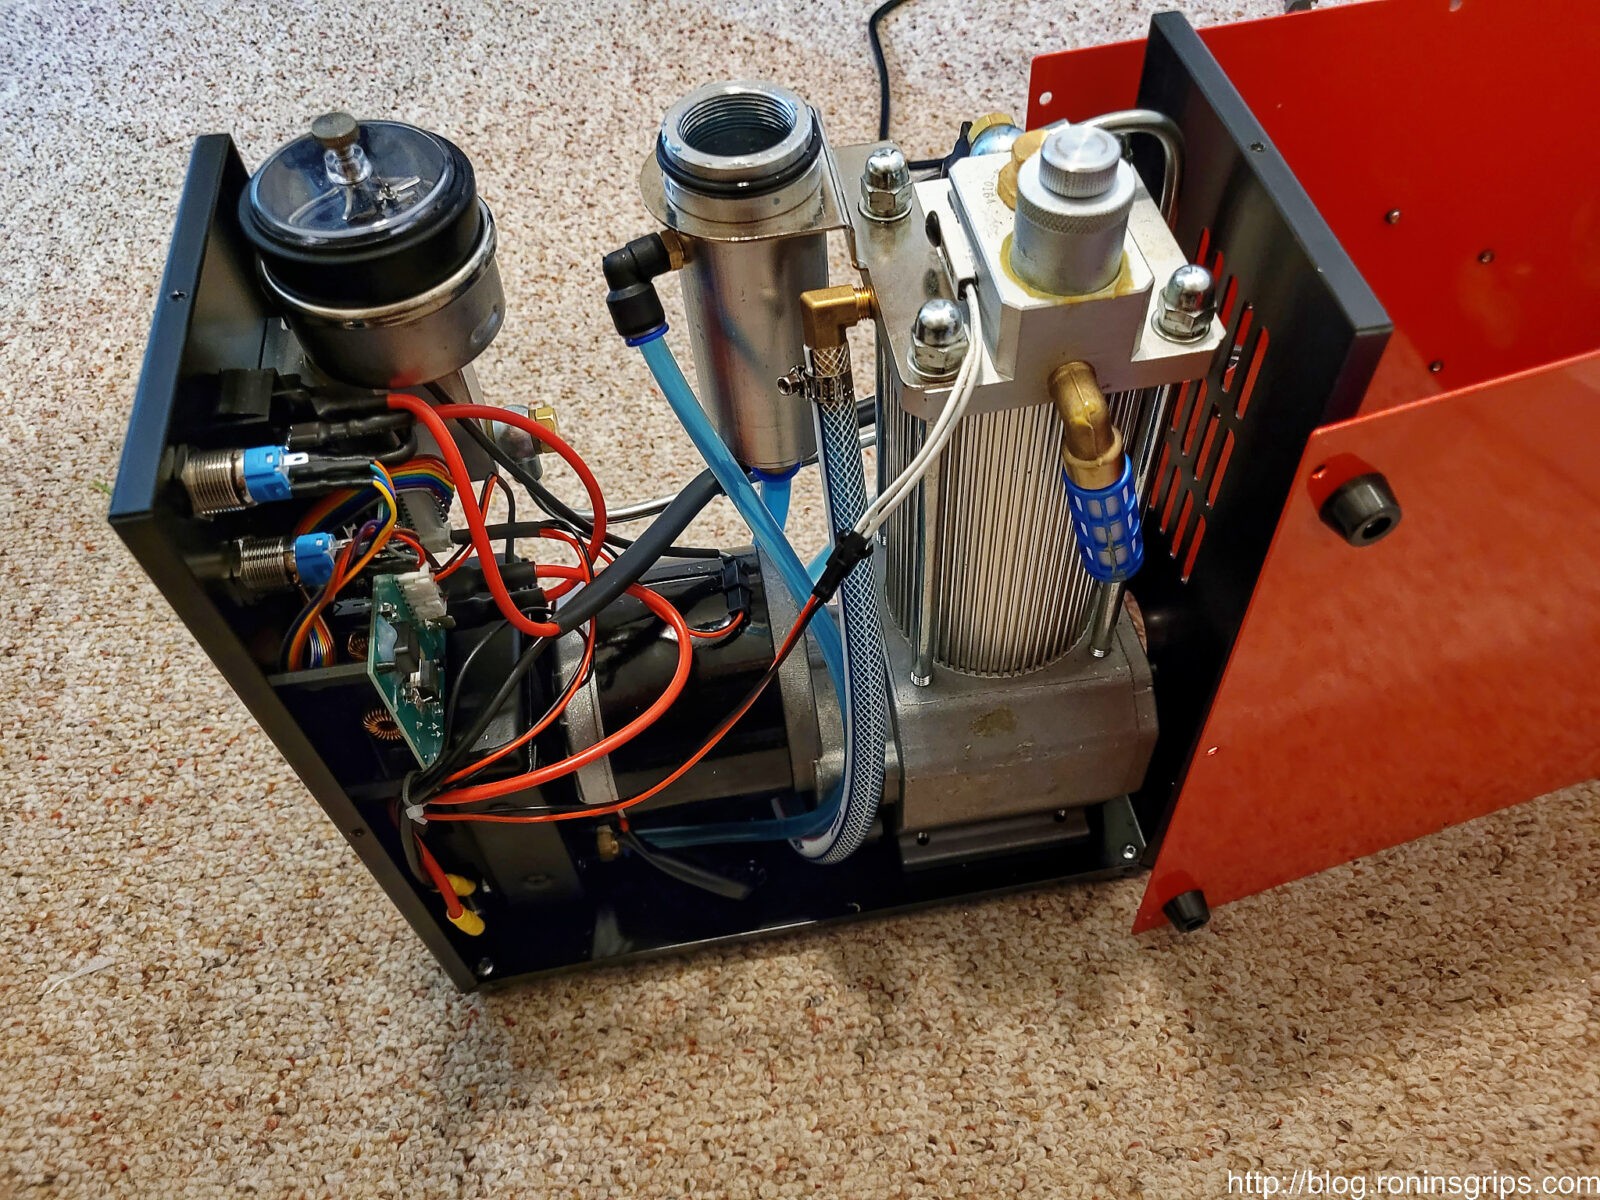
Here are some photos:
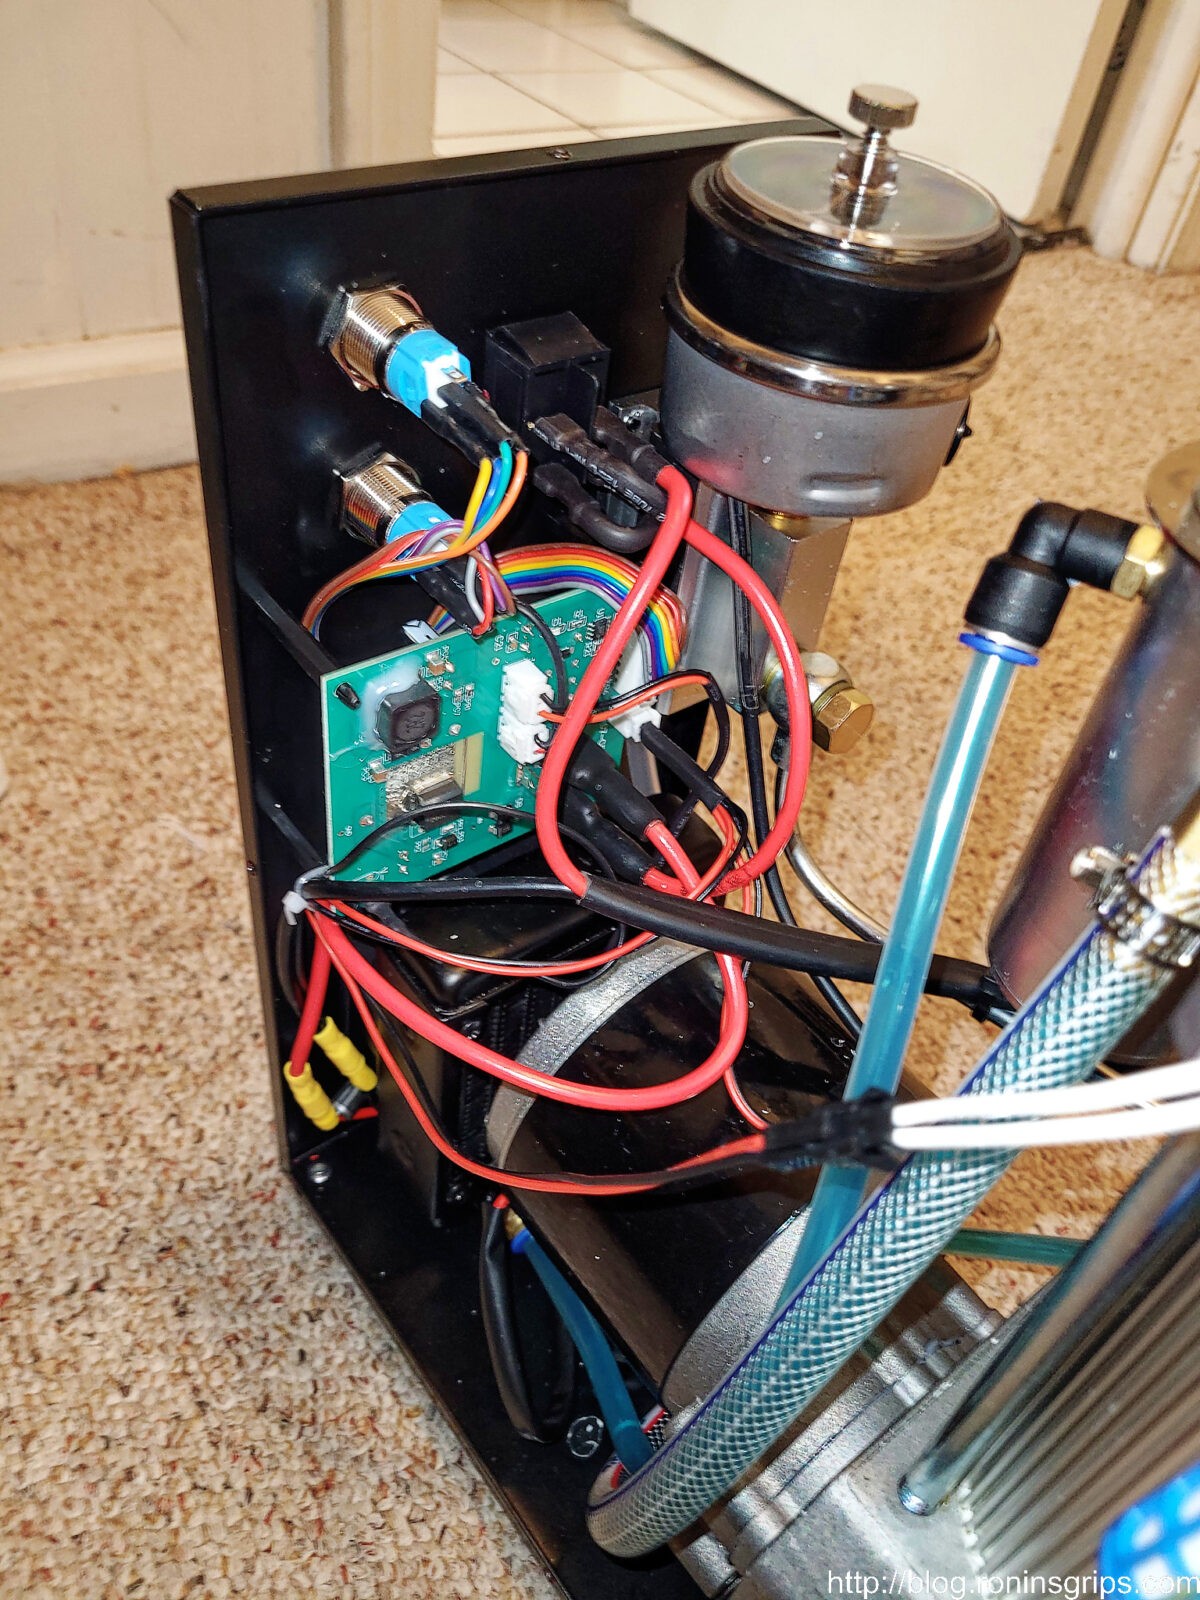
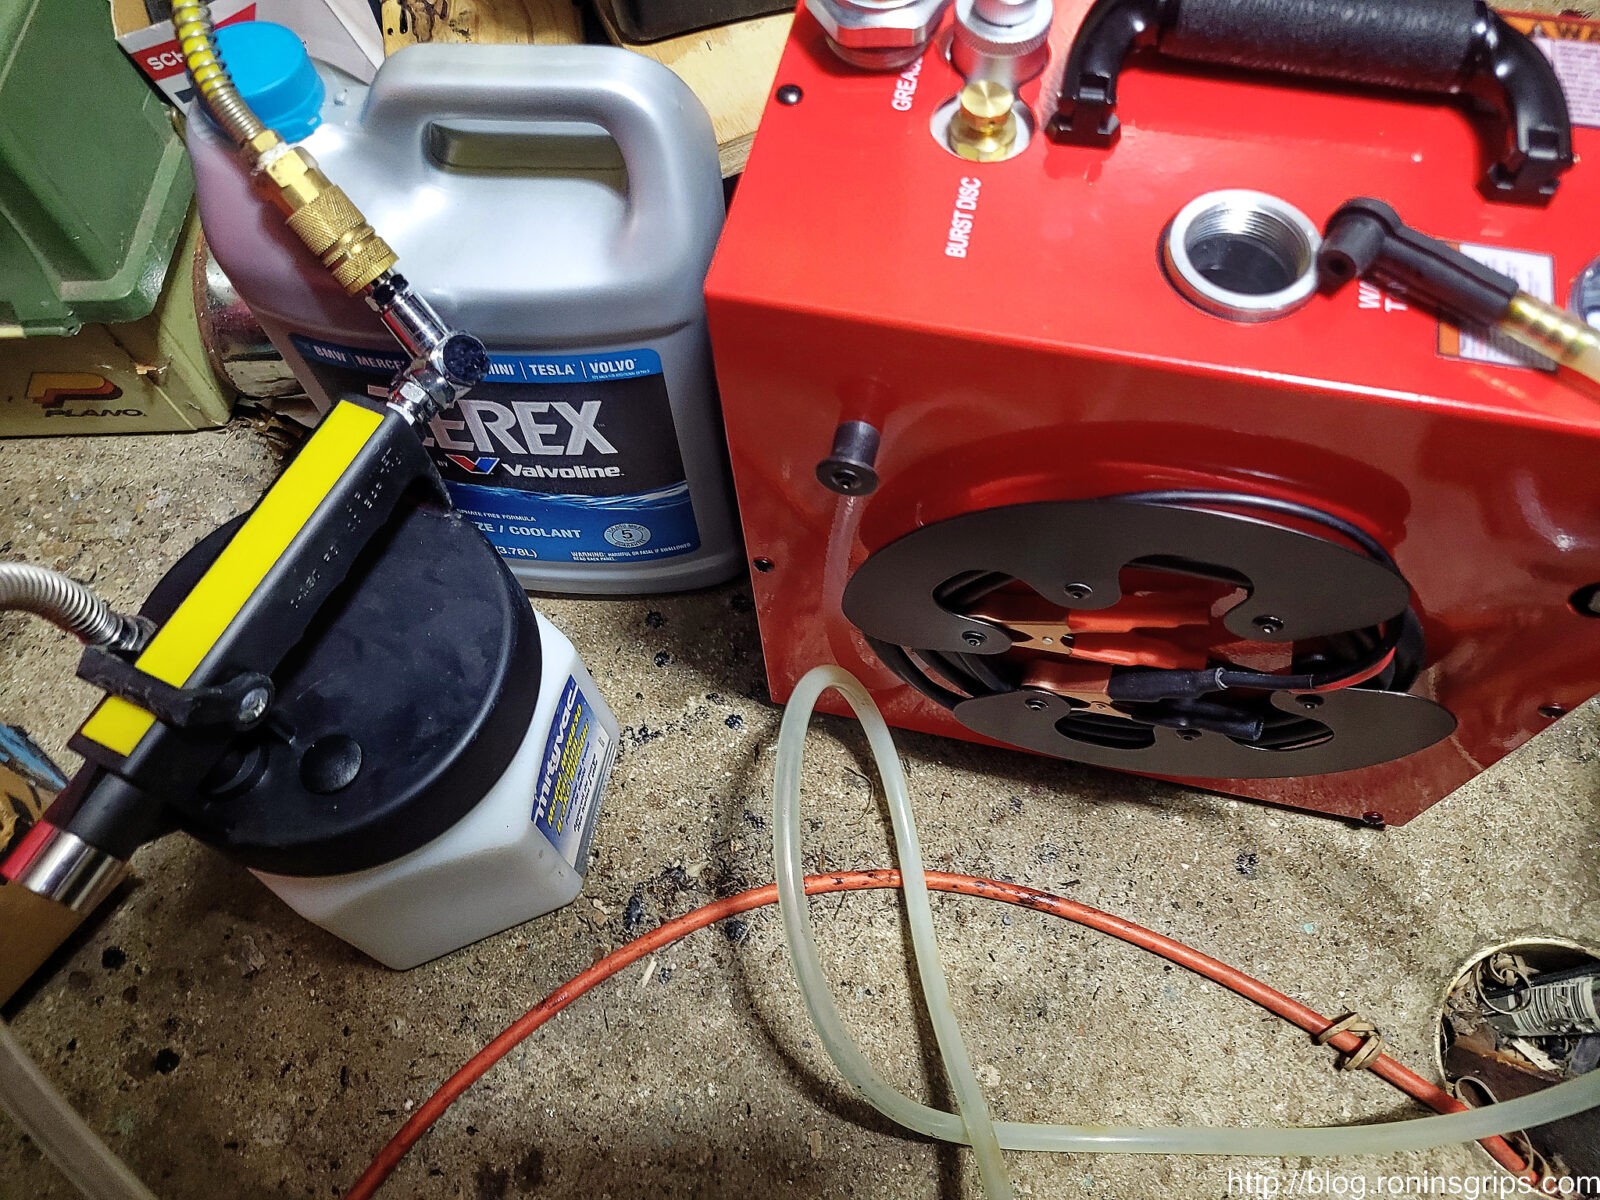
The first thing that struck me was how cleanly it is laid out. The blue lines are the coolant lines – they are that color because the GL48 70/30 mix I am using is blue. It sure makes them stand out – you can see the water intake at the bottom of the fluid reservoir in the middle. The silver hard line is the high pressure air running from the top of the compressor over to the aluminum manifold block that has the pressure gauge assembly and the male foster fitting. Note how all of the machining is well done. Care was taken with the design, machining and assembly of this unit to look like this.Another angle looking towards the rear of the unit. You can clearly see the cooling lines – if someone needed to trouble shoot a fluid leak, it would be very easy to do.This is a view from the other side. The grease by the grease pot is my fault. I had removed the pot to look at it and made a bit of a mess. It wiped right off.Looking towards the front of the unit – those are the switches for the pump to the top left and the mast switch in the middle. You also get a pretty good look at the electric motor.
Summary
The design is well executed – everything is neatly assembled and the pump continues to work great. There are probably over 5-6 run time hours on it so far.
Here are the GX compressors from the CS4 down to the CS1
FastToBuy 30Mpa Oil Water Filter – Not a GX product but I recommend this filter and you need one between the compressor and your tank or PCP airgun. You will need an extra hose from it to your tank or airgun plus the proper fittings.
Note, I have to buy all of my parts – nothing here was paid for by sponsors, etc. I do make a small amount if you click on an ad and buy something but that is it. You’re getting my real opinion on stuff.
There should be a small pamphlet in with the CS4. Take a minute and read the instructions for use. Afterwards read the following.
Distilled Water or Antifreeze for Cooling?
So the pump gets its really long duty cycle in no small part due to the liquid cooling system. Liquid is a far, far more efficient conductor of heat than air is. You see, water is much more dense than air and depending on the article you read it is 9 to 13 times more efficient at carrying away heat – maybe even more.
In the automotive world, to lower the freezing point and raise the boiling point, various chemicals have been discovered and are often referred to generically as “antifreeze”. You look deeper though and there are tons of variations for different manufacturers and different specifications.
GX said to use either distilled water or a PH-neutral antifreeze. Well, I wasn’t sure how hot the pump would get so I was worried about using distilled water. The benefits of distilled water is that it is cheap and it is PH neutral being neither acidic nor alkaline so it’s not going to cause excessive corrosion. On the other hand, it can freeze or boil like any other water plus there aren’t any corrosion inhibitors or pump lubricating agents.
I was very keen to use an antifreeze for longer life plus I was worried about boiling. I didn’t plan to keep the pump outside so freezing wasn’t a worry. The problem began when I tried to find “PH-neutral” antifreeze. I could not find any antifreeze with a true PH of 7. I turns out that you will be hard pressed to find it – I found cutting fluids (coolants for doing metal cutting) with a PH of 7, brake line antifreeze that had a PH of 7 — it was almost pure methanol, but not a thermal transfer fluid that I could buy in small quantities (like 1-2 gallons).
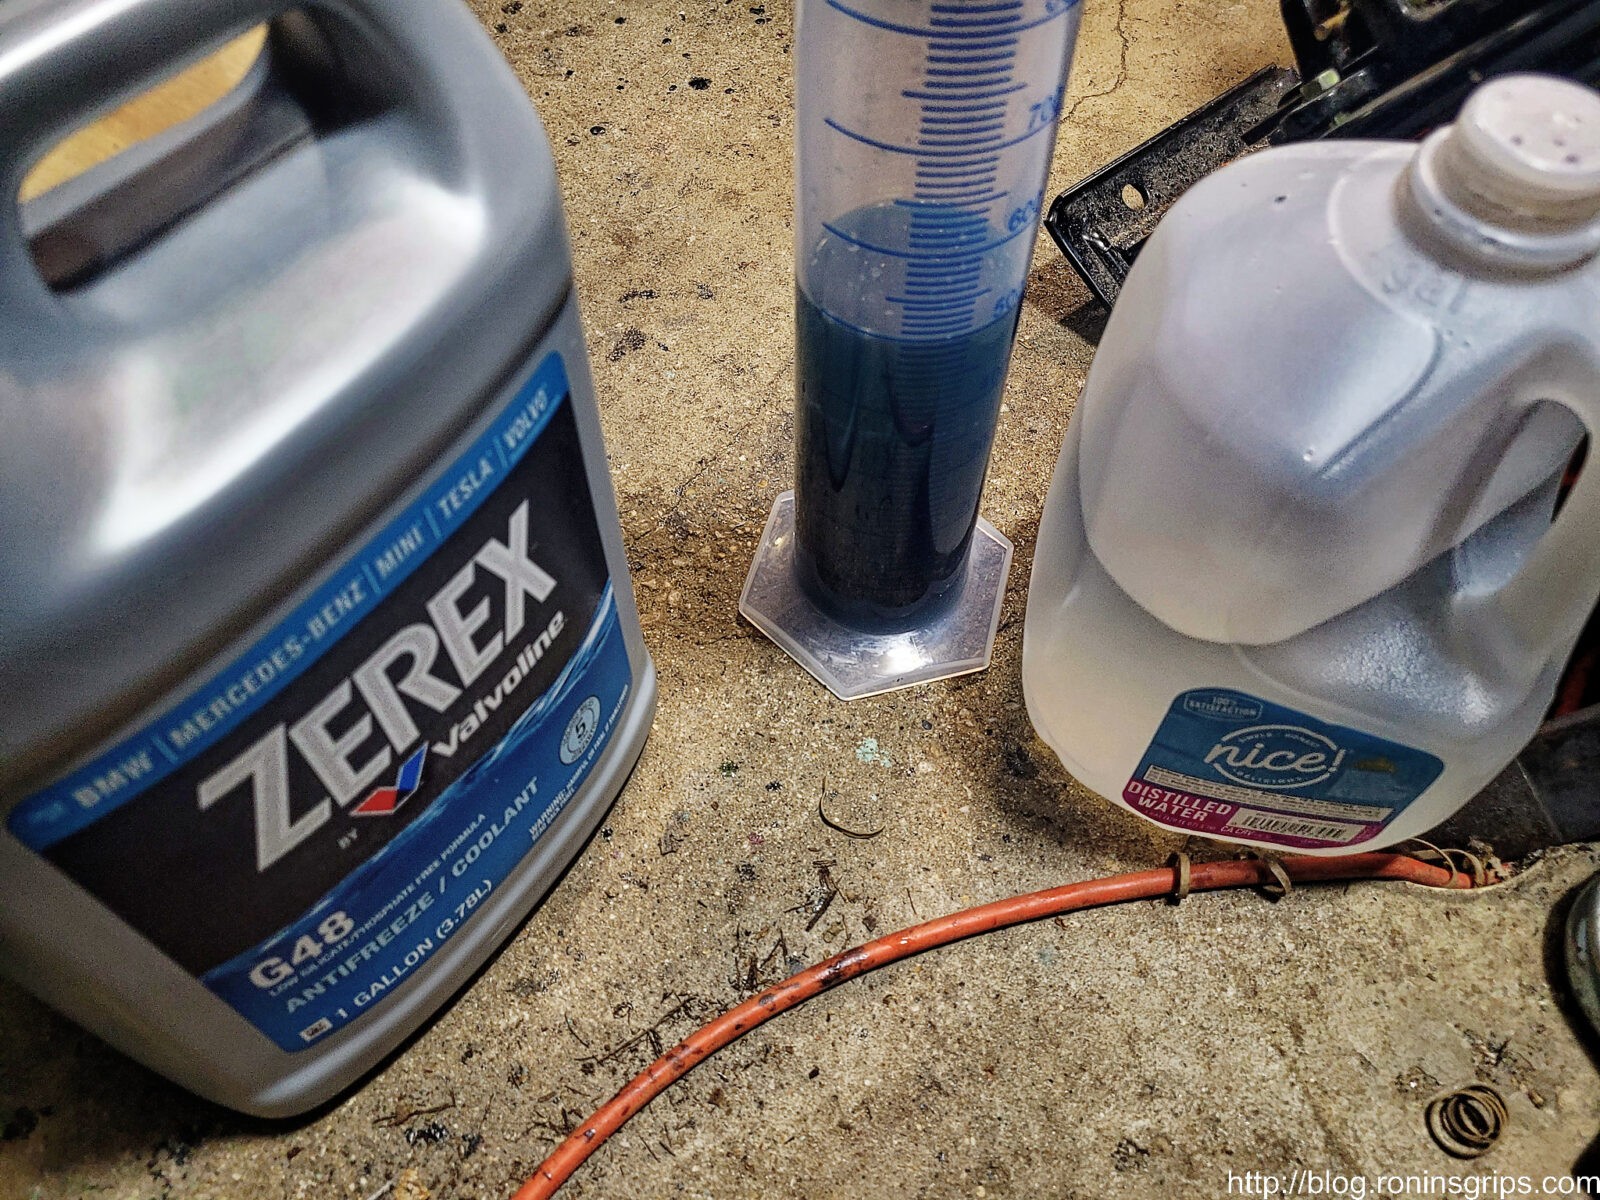
The more digging I did the more I realized that I could use an automotive antifreeze but needed to find one with a relatively low PH (7-9) and also that contained corrosion inhibitors and was aluminum and plastics & hose friendly. To make a long story short, this led me to Valvoline’s Zerex G48 coolant and I opted for a 70/30 mix of coolant to distilled water. My local Napa autoparts store was able to order in a gallon jug with same day in store delivery. It’s a fortune to mail order but only $14-17/gallon at a store.
Do not add it to the unit yet! You will need to test and flush the cooling system first
I thought I had it all figured out. I had premixed a 500ml 70/30 solution. That means 350ml was G48 and 150 was distilled water. I’ll explain why this didn’t work out the way I had hoped further down.
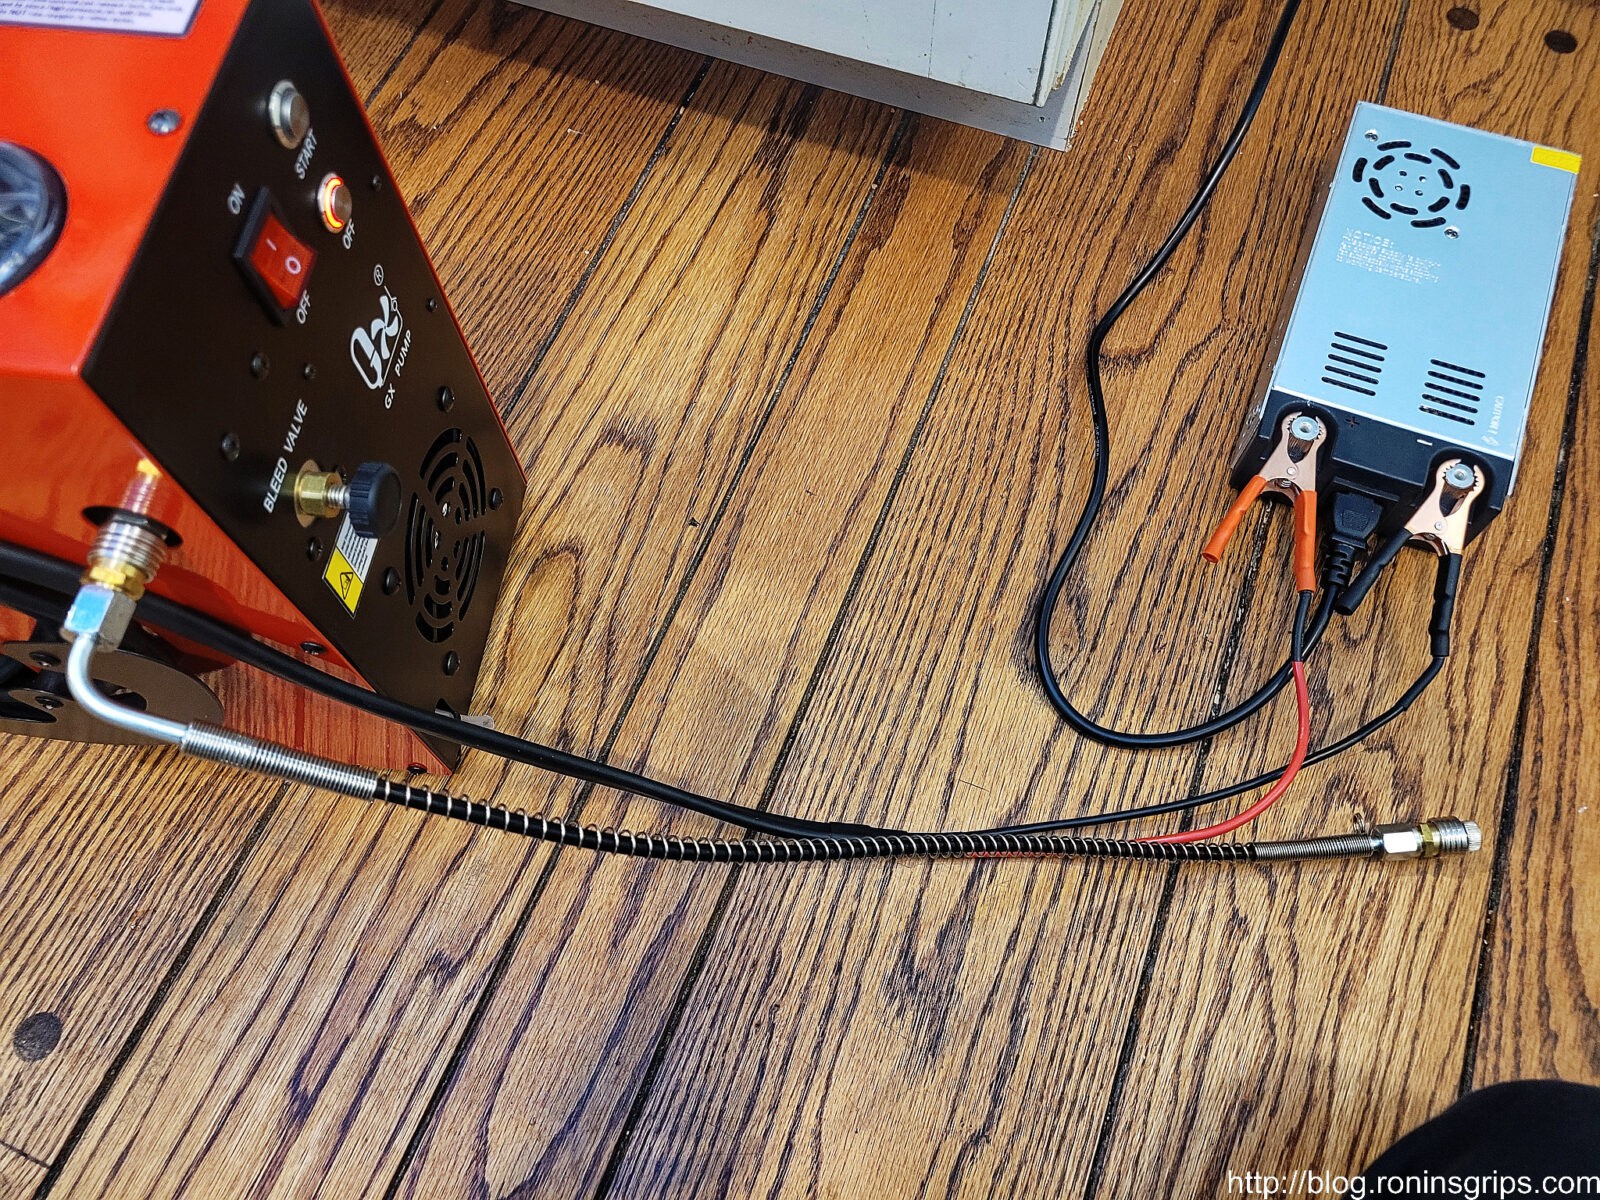
Powering It Up
Before you get to far, plug the AC-to-DC adapter in the wall. You should hear the cooling fan turn on — it definitely needs it so if you don’t hear the fan make sure there is AC power through the power cord to the adapter. There isn’t an on-off switch – the unit should turn on as soon as you plug it in.
Put a multimeter on the power supply terminals and you should see around 13 volts. My CS3 power supply is 13.16 volts and the CS4’s power supply which is the same model just newer measures 13.06 volts.
Make sure the CS4’s switches are off before you connect the compressor to the power supply.
Flushing the Liquid Cooling System
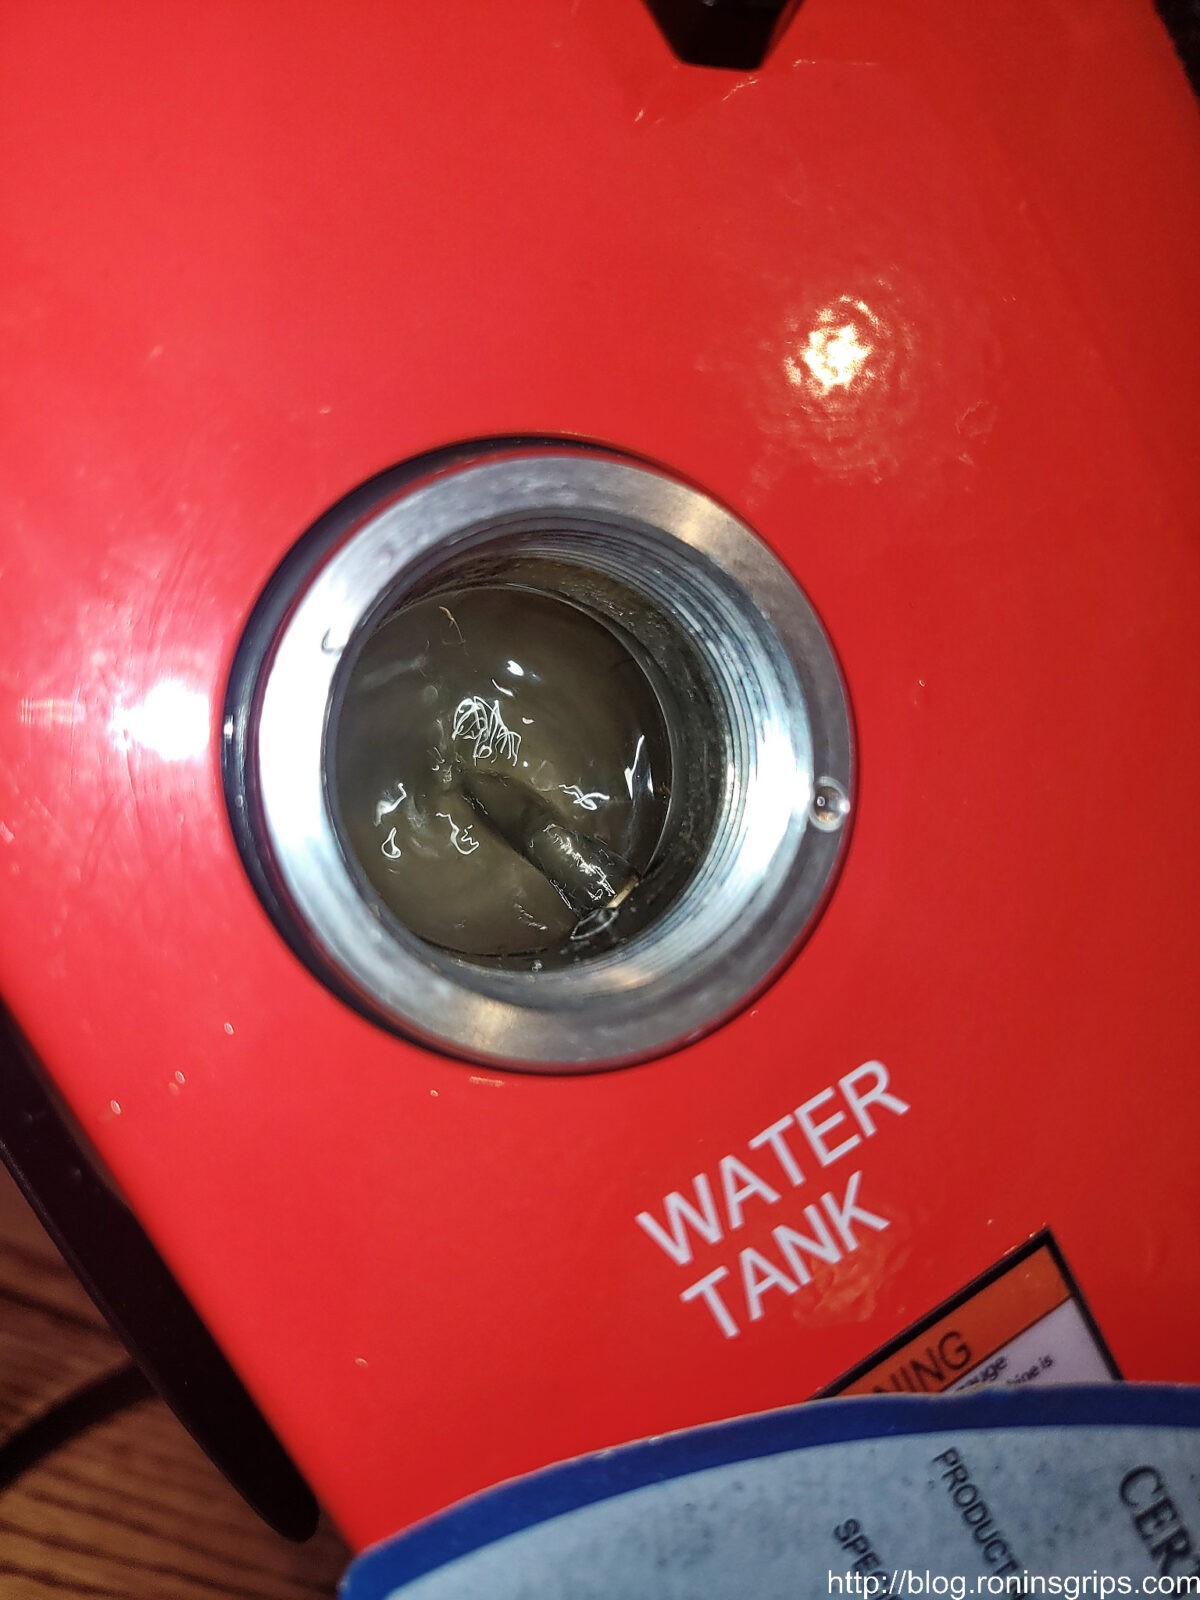
The nut with viewing glass that covers the water tank should just be on hand tight. If you must, use a wrench to remove it but just put it on hand tight when you re-install it going forward. The system is not pressurized – you can take the cap off while it is operating.
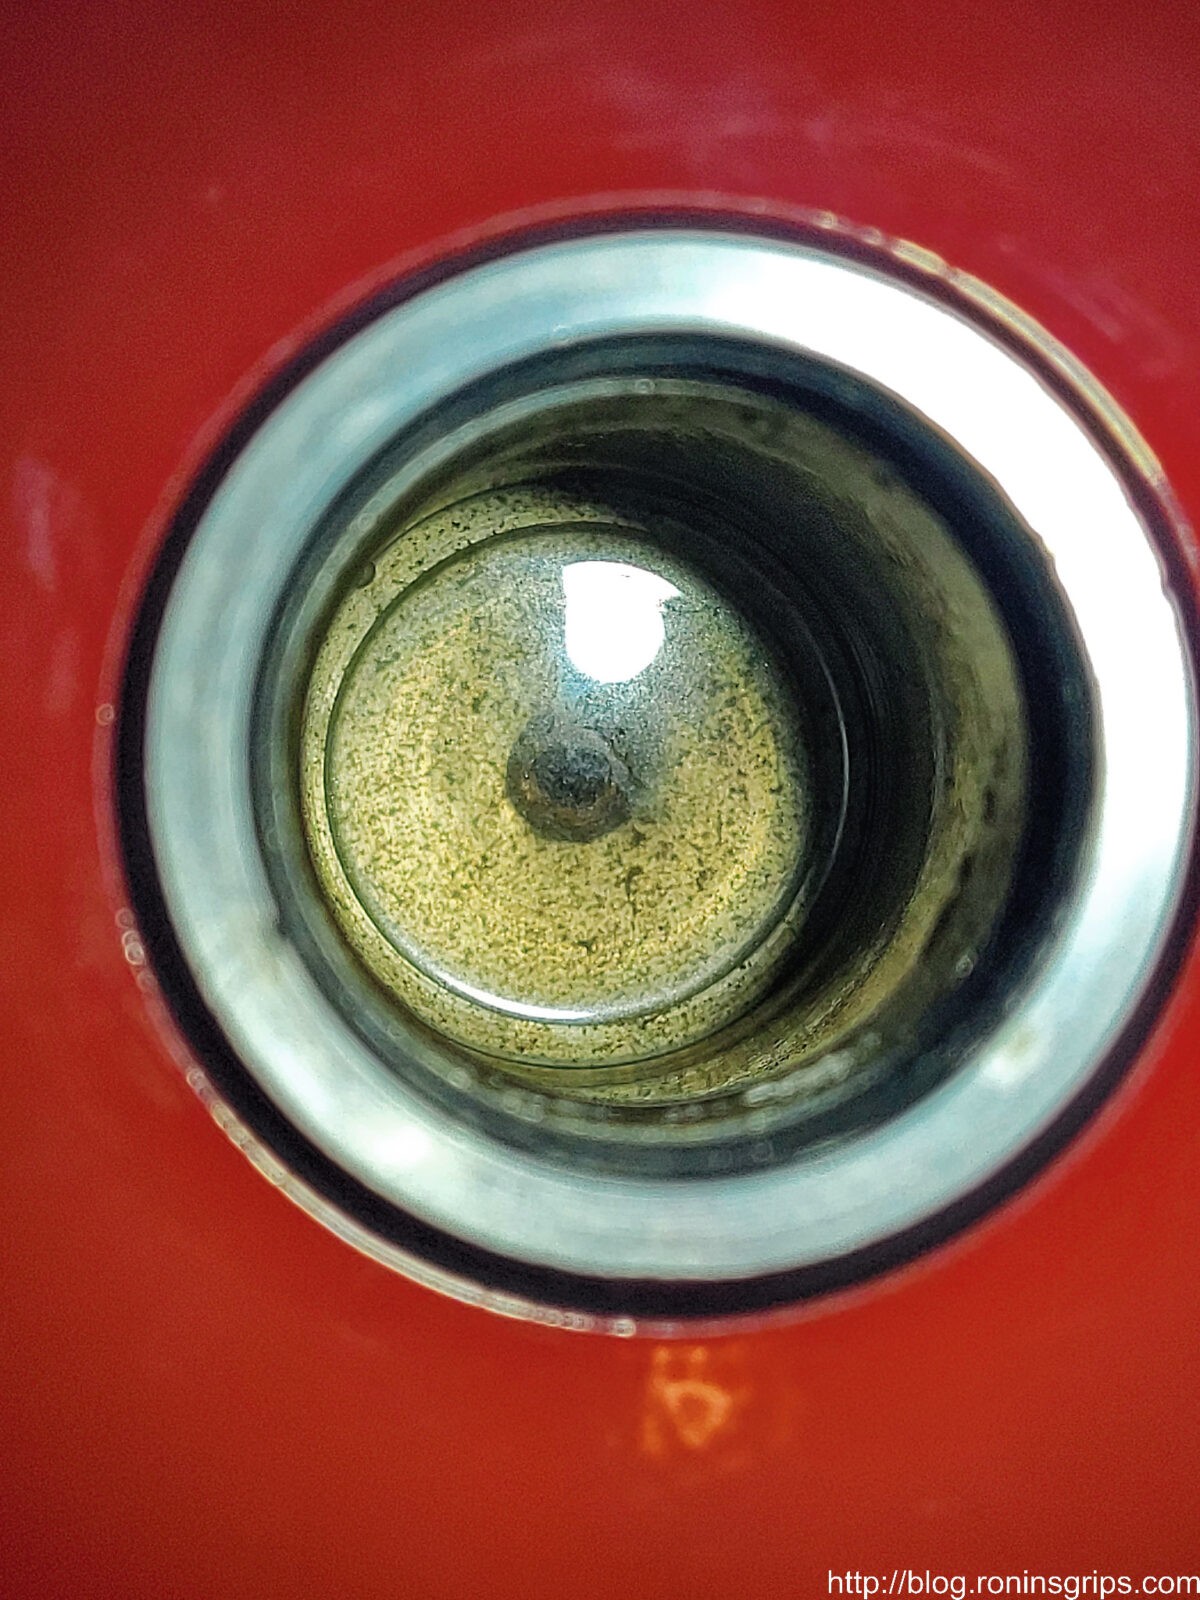
For some reason my CS4 shipped with a little bit of water in it – maybe from testing at the factory and there was also some kind of brownish sediment on the bottom of the “water tank”.
This is what I saw when I removed the cover to the water tank. It should be shiny silver so you can see there is some kind of brownish sediment.
The liquid had no smell and felt like water – I have to guess it was water so I just dumped it out. I then refilled the tank with clean distilled water and swirled it around. I did this four times until the water stayed nice and clean.
For testing and flushing the system, just use distilled water. It’s cheap and doesn’t make a huge mess if there is a problem or something spills. Been there, done that – use water – trust me. By the way, purified water may not be distilled – the purified water might just be filtered. Distilled water uses a process that not only purifies the water but has the minerals removed as well. You don’t want minerals to leave a scaly buildup so use distilled.
The fluid return is near the top and you fill the water or antifreeze to the bottom of it.
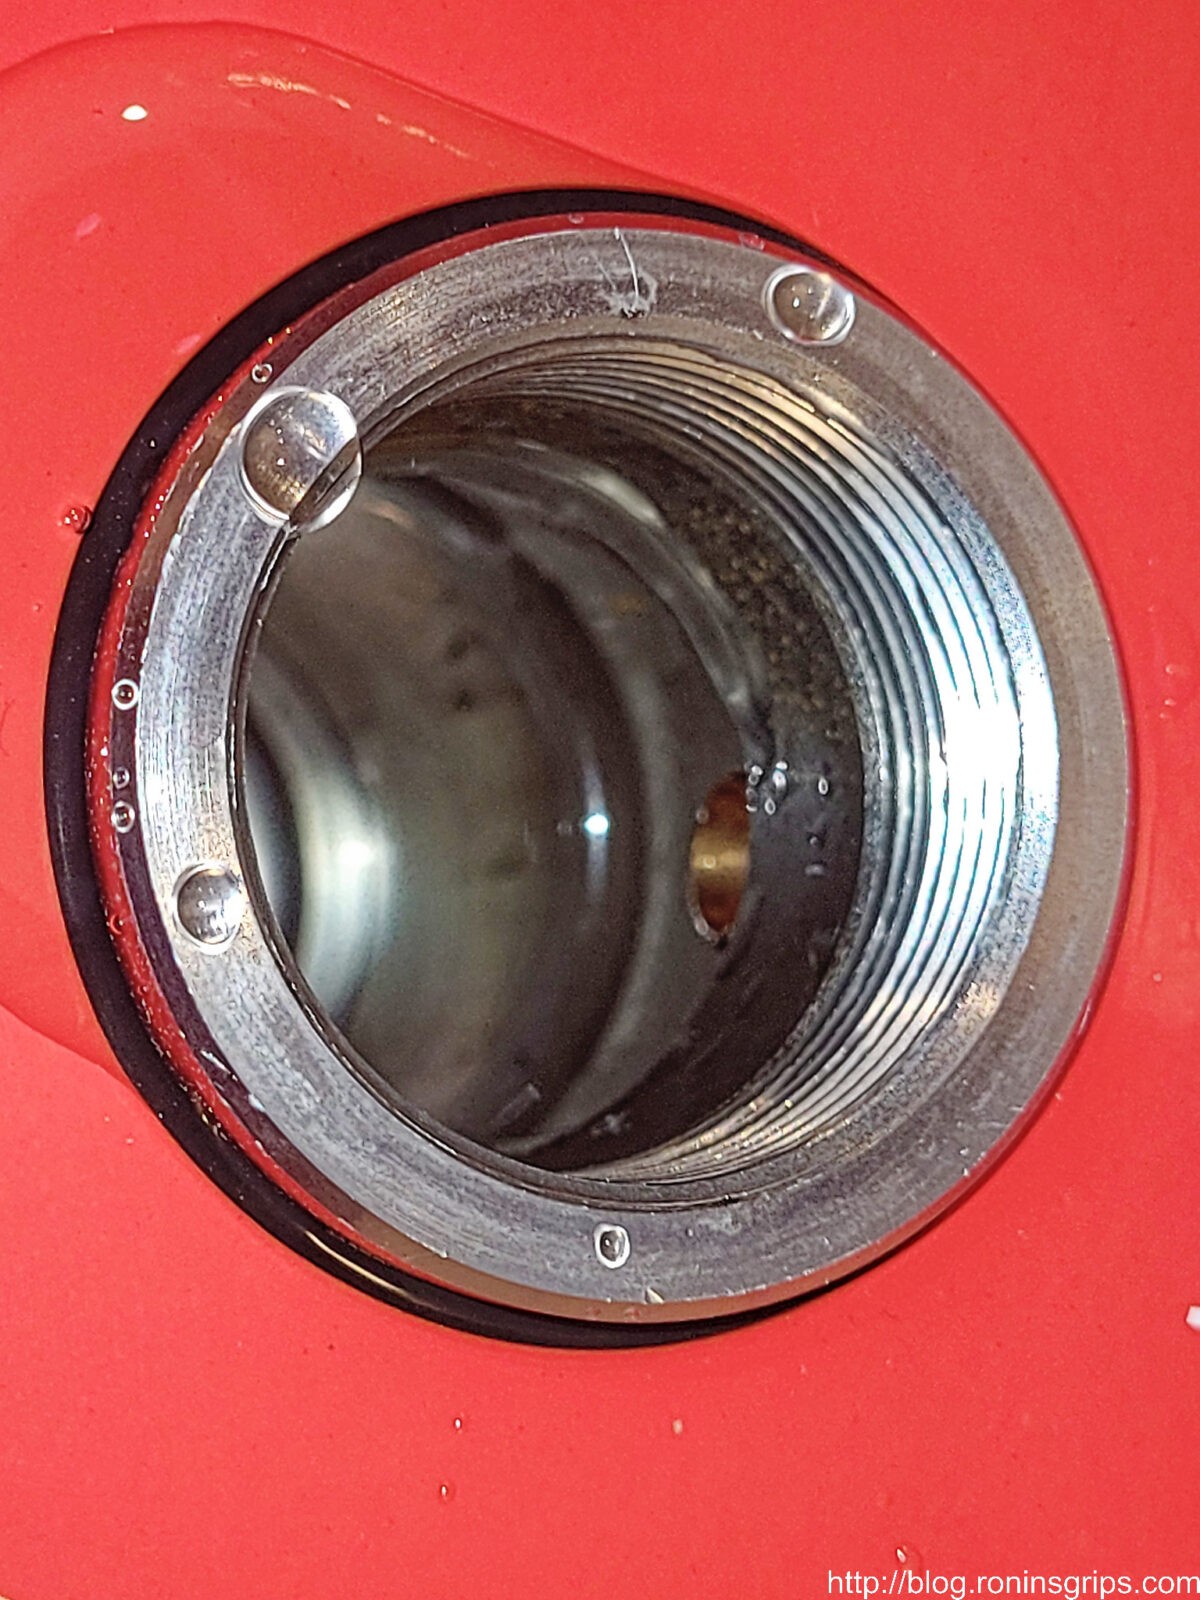
I then turned the unit on and watched the water – nothing happened. There is a water pump – the intake is in the center bottom of the tank and the return is on the side about 3/4ths of the way up – there was no water moving. Oh man … I started to get really worried that maybe the water had frozen and snapped the pump but everything was dry when I took it out of the box … but …. stuff happens.
The water intake is at the bottom. Now this is where I got nervous – notice there is no water movement. I knew from the diagram that there was a pump. I could hear the unit’s fan running but there was no way to hear or feel if the pump was. I started to wonder if the pump didn’t have power, had cracked or something else.
I started to take the case’s screws off to look inside. At one point, I leaned the unit part way over to get to a bottom screw and heard the familiar “glug glug glug” sound of water running into a void that previously had air in it. That was a very, very welcome sound because it dawned on me that the little water pump had lost its prime.
I looked at the water tank and the water level had definitely gone down. I turned on the pump’s main switch and the pump started moving the water! Lesson learned there – prime the pump.
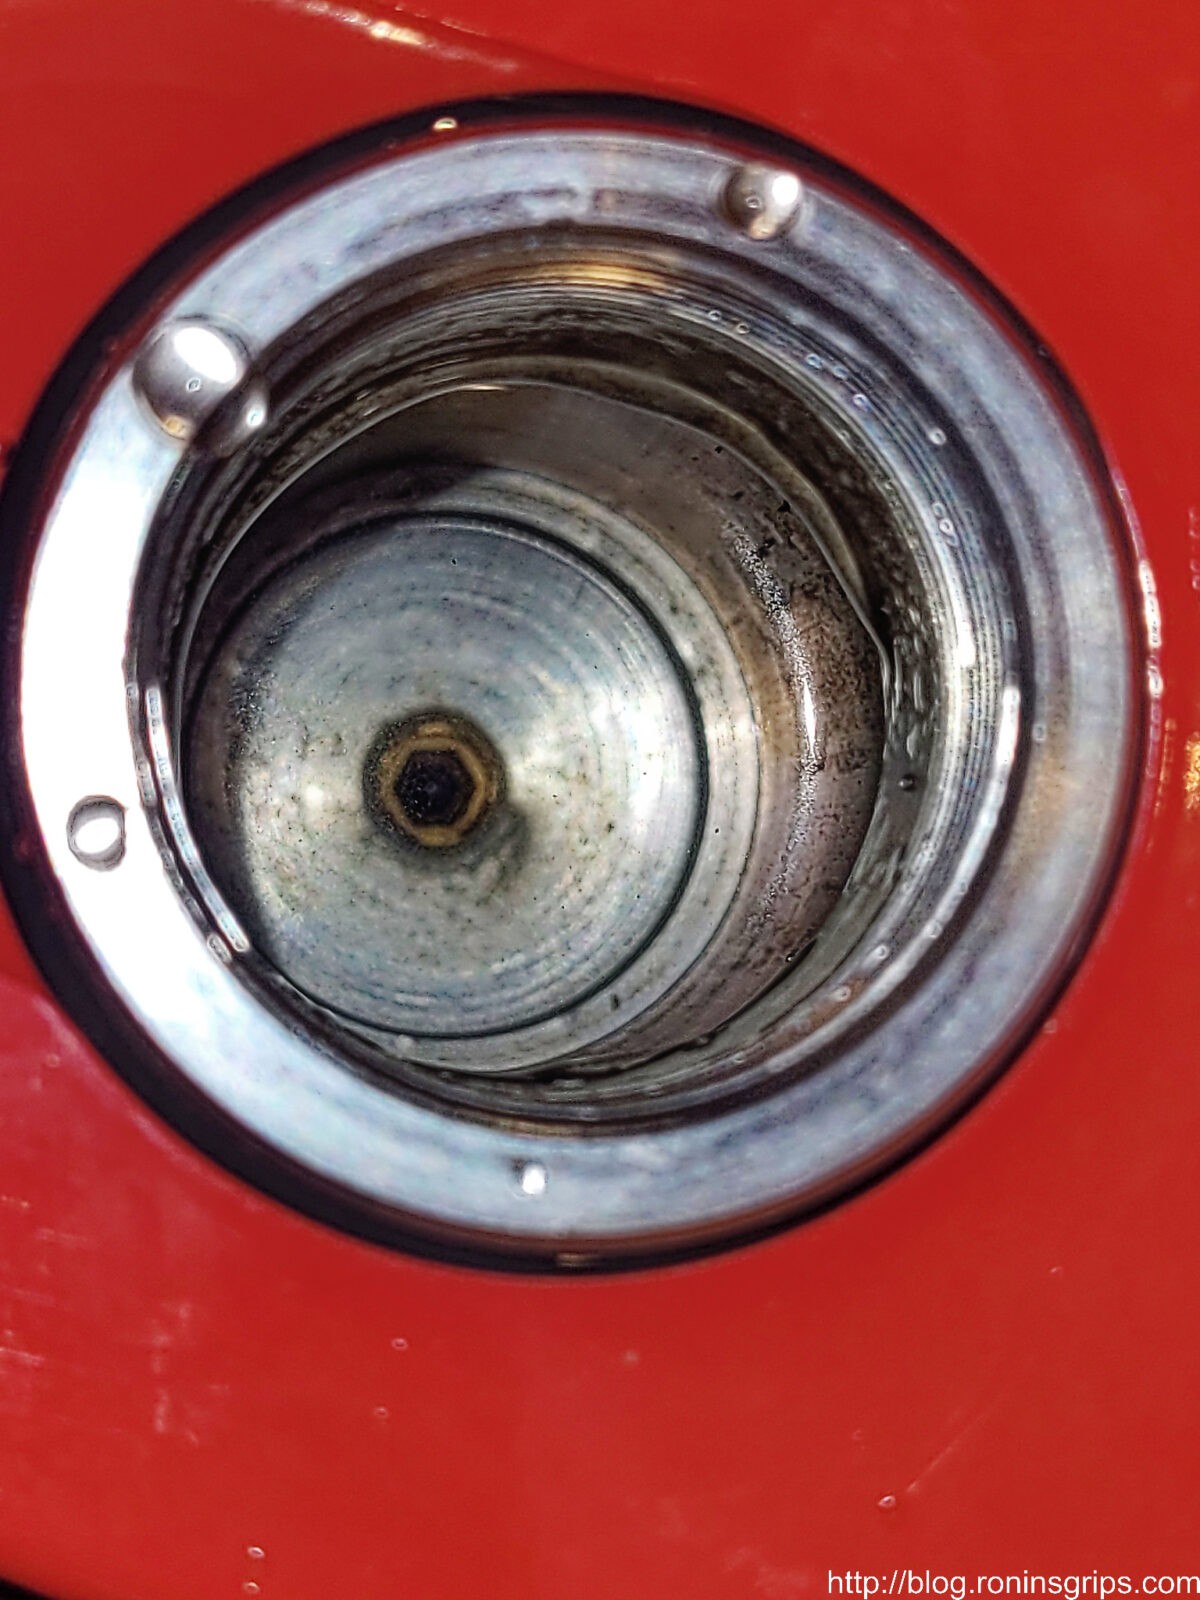
This is what it looks like when the pump is working. The sediment blew out of the lines too so then I realized I needed to flush the system again. I did this a number of times until the water was clear.
The next thing was that brown sediment was entering the tank as the lines blew out in the unit. I then dumped out the water and flushed the lines three more times until everything looked clear. Each time I would wiggle the compressor around leaning it slightly from side to side and front to back until the pump would prime. You fill the water tank to the bottom of the return line. This gives room for the coolant to expand and it also gives you a visual cue if the pump is working.
Now this told me something – there would be more water in the unit than just what was visible in the tank. In the instruction pamphlet they say you need to add 500ml of liquid to the unit. The unit came with some amount of water in it and each time when I drained the unit, I was only adding back in about 130 ml of water each time – I was using a 1000ml graduated cylinder for all of this. So, 500-130=370ml of trapped water in the system. Hmmm…. this was throwing my planned antifreeze ratios all off. 500ml of fluid at a 70/30 ratio would mean 350ml of antifreeze and 150ml of distilled water. I was going to be off and you need enough water in an antifreeze for the chemicals to move around properly.
In general, 100% pure antifreeze concentrate is a bad idea – there is a ratio you need to follow either based on the temperature range you need or what the vehicle manufacturer recommends. With G48, most vehicle makers recommend a 50/50 mix and there is actually a premixed formula with a typical PH of 8.1 (the range is 8-9). I was going for 70/30 to have as low of a PH as possible (pure G48 has a PH between 7.1-7.3) and to maximize corrosion protection.
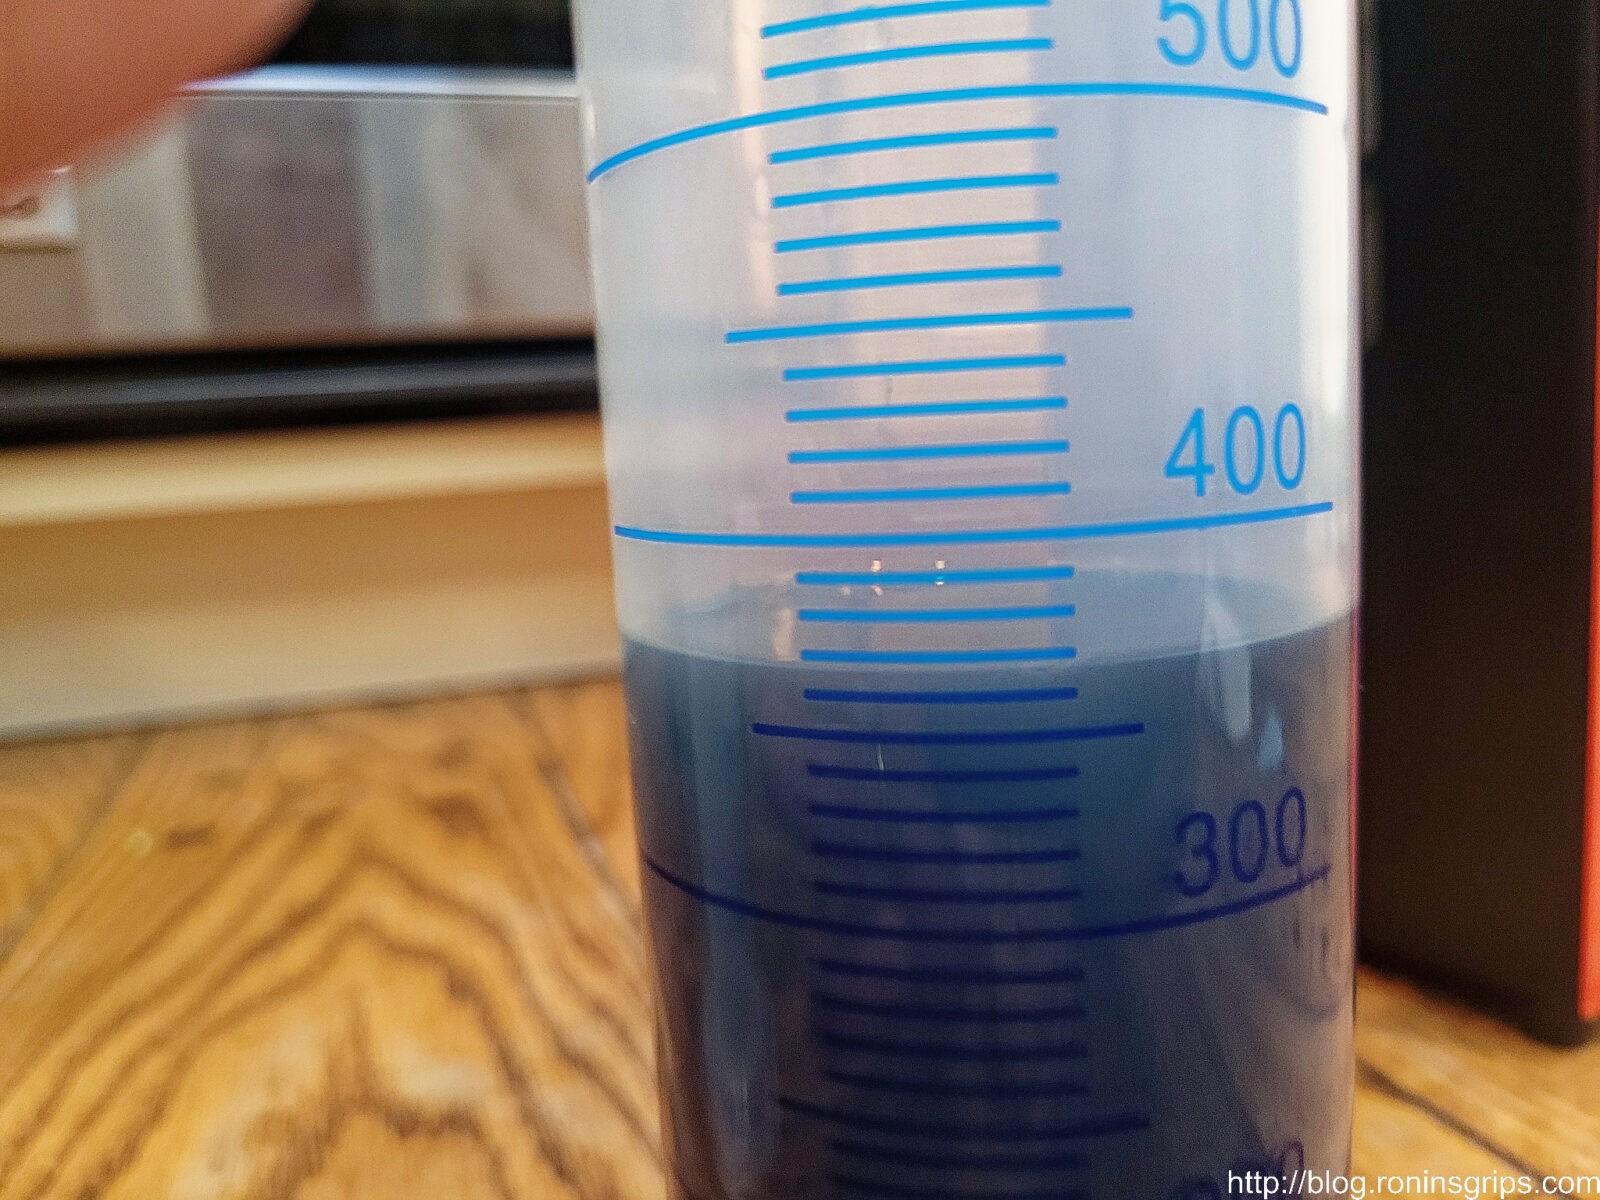
After dumping the final batch of distilled water out of the unit, I could only put in just over 130ml. This cylinder had 500ml of the 70/30 mix before pouring.
Well, the trapped water was throwing a wrench in my plans because I had already mixed the 70/30 not realizing I would have a bunch of extra water in the jacked and lines. Rather than drive myself nuts, I decided to go ahead and test the unit by draining out whatever water I could my tilting/moving the machine around while it was upside down and then refill with 70/30. After testing I will drain the tank get the antifreeze ratio closer to 70%.
I was not able to collect the final PH at this time. My test strips are absolutely useless with the dark blue of the G48 fluid. A friend has a calibrated digital tester that we will use some time in the future.
As I was writing this blog post, I was talking to my friend John, who is a master mechanic and has forgotten more than I will ever know, and told him about this. He didn’t even have to think about it – he said “pull a vacuum through the inlet or return and drain the system”. Duh. He was spot on – I sure hadn’t thought about doing that.
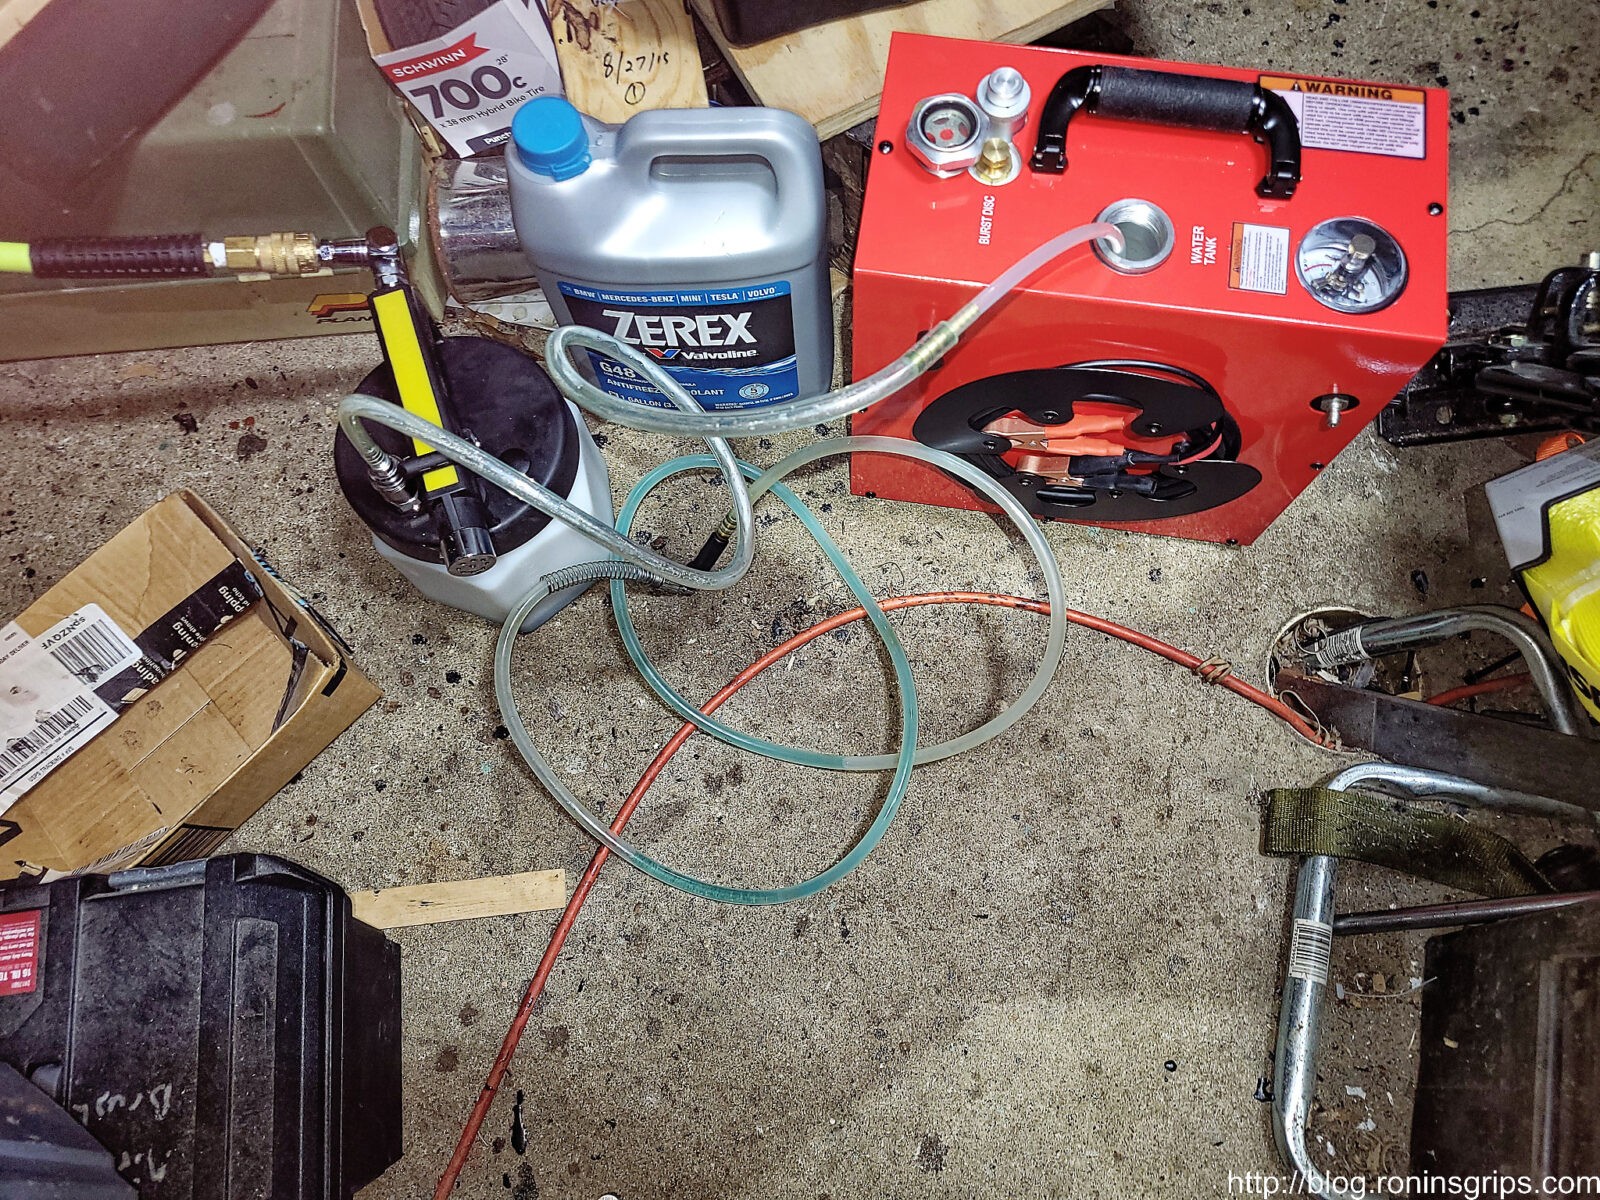
I used a MityVac MV-6830 brake line bleeder to suck all of the liquid out through the inlet. I put 70/30 in the tank and used a right angle adapter to pull all of the fluid that way. I then refilled the tank with 70/30 and pulled just enough vacuum to the point I saw fluid entering the hose and stopped – I did that last part to pull fluid into the pump.
The Mityvac MV6830 connects to an airline and uses the venturi-effect to create a vacuum. There are several lines that come with the kit – a straight siphon line that is shown above and a right angle rubber fitting for brake line fittings. Guess what? The .26-.27 outer diameter siphon line fits the inlet perfectly and I could suck all of the fluid out of the lines. I then used the right angle fitting to draw G48 through the outlet line.
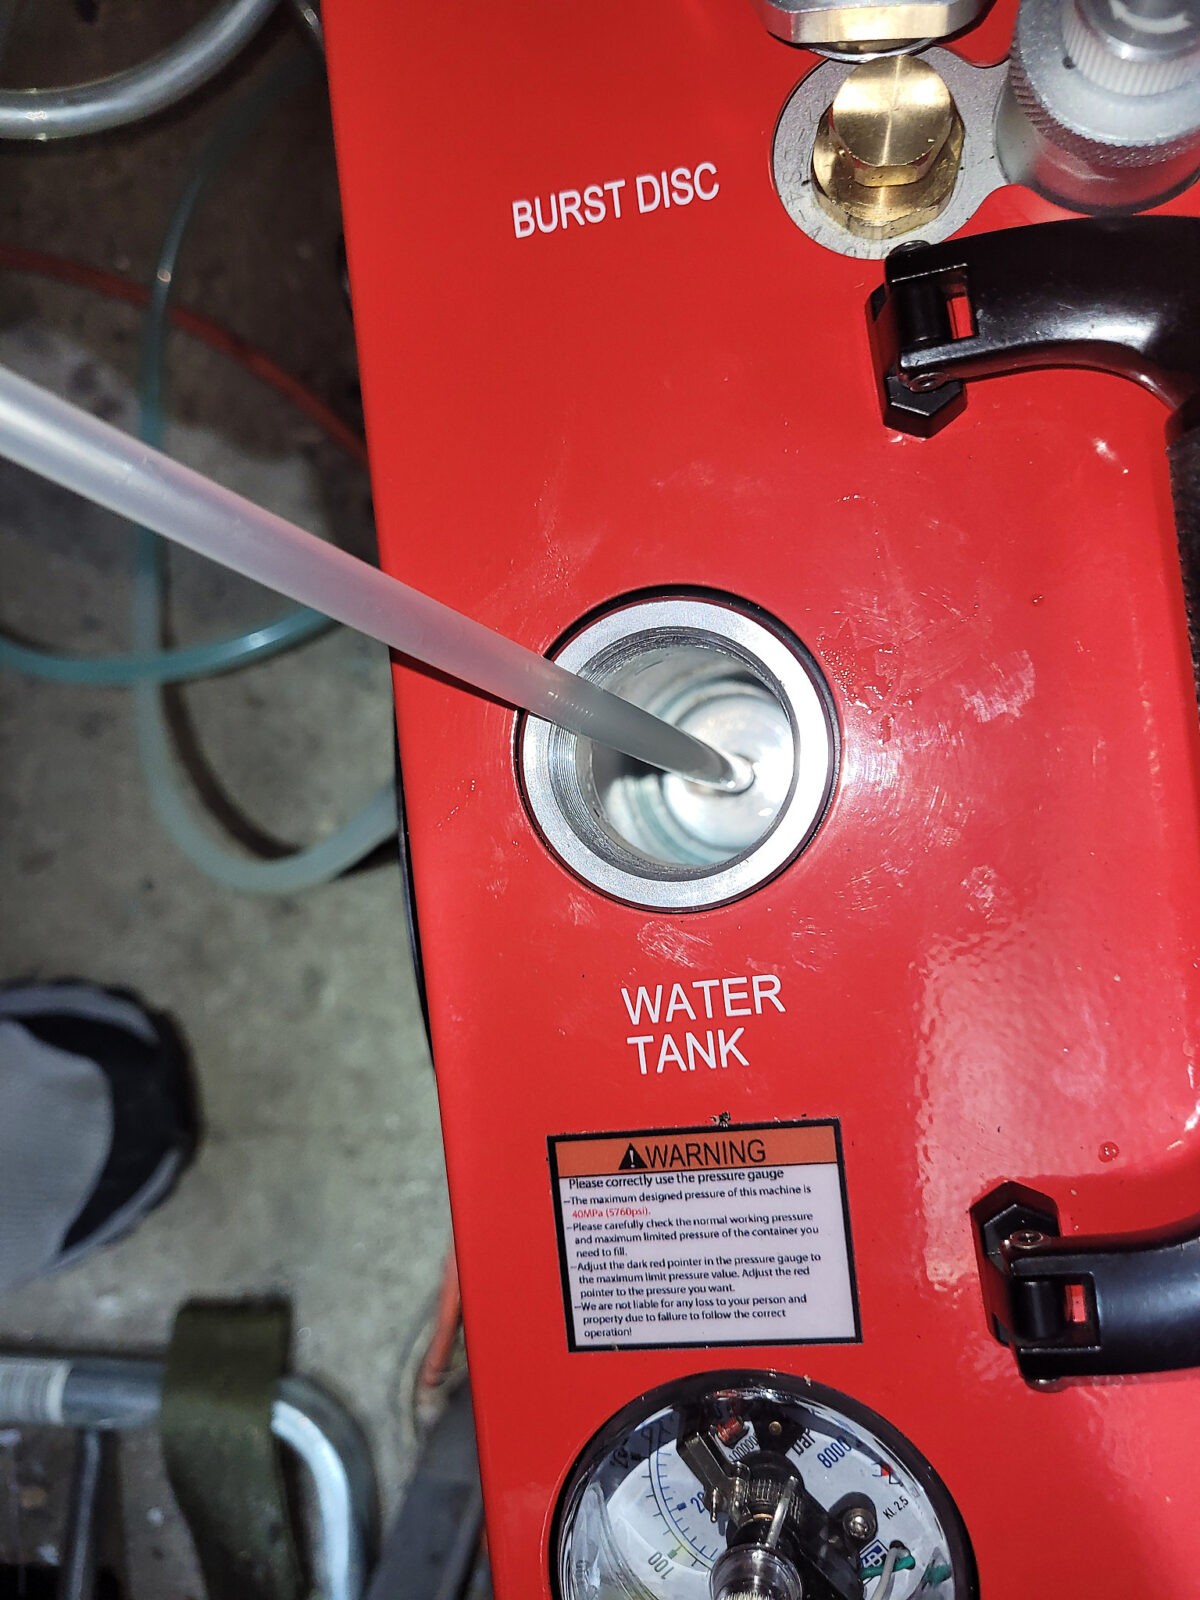
The 0.26-0.27 siphon line fits the inlet perfectly.
The right angle fitting can be pushed against the return outlet to suck fluid through. It’s a bit of a challenge and takes two hands. One to hold the adapter and a finger from the other hand to apply pressure so the fitting seals enough against the return. Note, the fluid level in the tank goes down fast.
I then turned on the master switch so the fan and water pump would start. Nice clean 70/30 G48 was coming out. I slowly added more mix to the tank until I got to the bottom of the return line. I had to top it off just a tad maybe 2-3x as fluid filled little pockets. I let the unit run for another five minutes and when the fluid level stayed the same, I put the cap back on – done. It helps to have smart friends.
Here’s my lessons learned that I want to share when it comes to the cooling system:
1. Flush the cooling system out using distilled water and then use a vacuum bleeder or siphon tool to more fully drain the system. I put put about 250-350ml of fluid to fill the system in the end. The important thing is to fill the tank to the bottom of the return.
2. If you don’t see the fluid moving, you most likely need to prime the pump either by moving the CS4 around to work fluid down into the pump or draw it into it using a vacuum bleeder.
3. Test the cooling system with water – not antifreeze or you will make a mess plus water is cheaper.
4. While you can use distilled water, I would recommend Zerex G48 at either 70/30 or 50/50. I went with 70/30 that I had to mix from the concentrate.
Testing the CS4
Now that the critical coolant discussion has been addressed and you have filled the unit accordingly, let’s switch gears and start actually testing the unit. After every test, drain the unit using the bleed valve. I will bring this up again later but do not attempt to start the compressor with pressure already in the line.
There will be some very high pressures involved. If a fitting does not want to come off, STOP. Many times a quick release collar will not move or a threaded fitting turn because the line is pressurized. Always make sure the line is depressurized before you work on it, remove a fitting, etc.
Each bold heading below is a test I would recommend that you perform and if it fails, stop and contact the Amazon seller – Ankul. I am not a representative – just a user. With that said, here are the tests:
Make sure the fluid pump is running
Before you start pressurizing the system, again, turn on the master red switch but not the pump. You should see the coolant circulating, If you do not, try moving the unit around to get the pump to prime
Turn the compressor on with nothing attached
With the airline off and just the male foster fitting exposed with nothing on it, turn on the pump by pushing the top silver button. You should hear the pump start and feel air blowing out from the end of of the foster fitting rhythmically – there is a piston so the air will come out as the piston pushes upwards – it is not a continuous flow. You should not hear any awful grinding noises or banging sounds. Slight squeaks as things start to lubricate and wear in are possible – you are listening for “OMG – what the hell is that?” sounds.
Let it run for a minute or two and if no scary sounds start then shut off the compressor.
Test with the supplied pressure hose only
To test high pressure air systems, always pressurize incrementally starting with the smallest thing first and work your way up to larger and larger volumes. In this case, start with just the air hose attached.
This is our first real test of the compressor under pressure plus we get to check the hose assembly. With that said, connect the air line and insert the test plug in the end. Make sure the plug is fully seated. Also, make sure the drain valve / pressure relief valve is closed – this is the black knob on the front of the unit. Clockwise closes the valve – it screws closed basically.
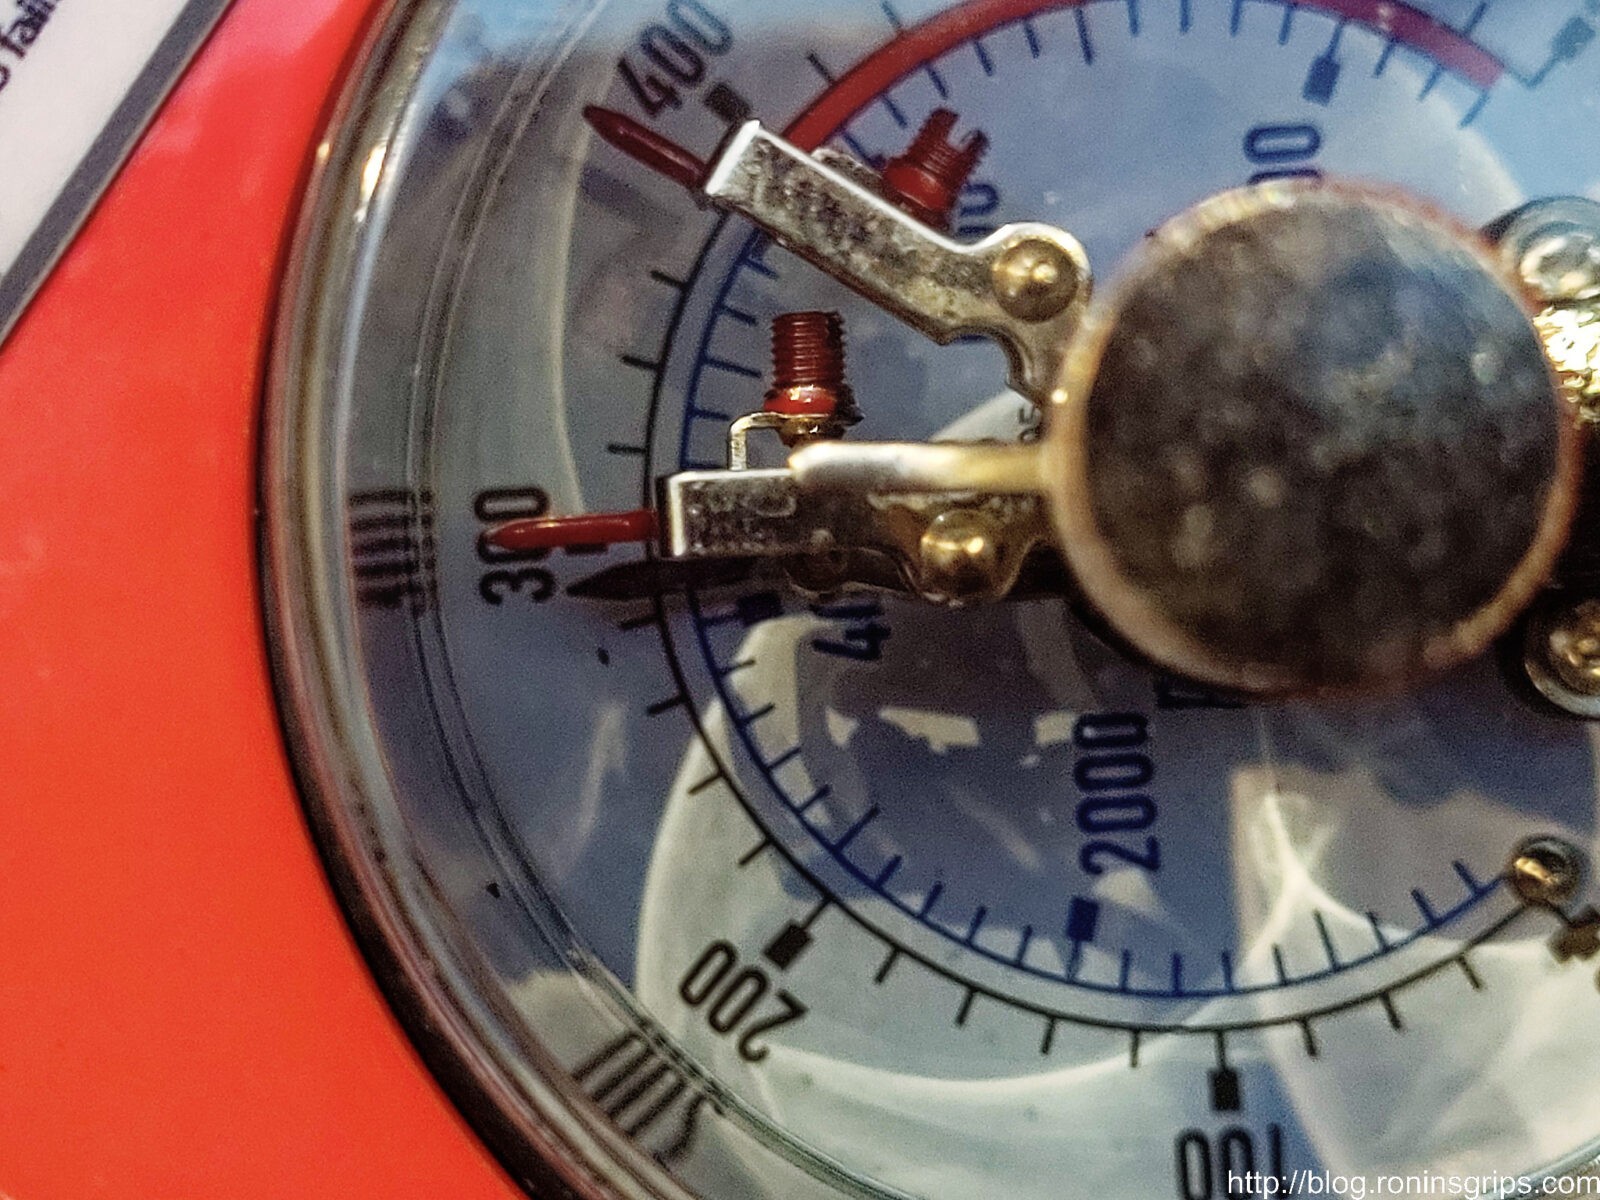
Set the limit switch / stop switch on the top to 300 bar. Put the secondary switch at 310/320 bar. I put my second switch just before 400bar but in hindsight, I would tell you to put it around 310/320.
Turn on the compressor by pushing the silver button. You should see the pressure build very quickly – the manual says it should reach the target 300 bar pressure in 38 seconds. I think mine was a bit faster than that.
The supplied pressure hose will fill quickly for testing and will only hold a small volume of air so if something fails it will be less of a problem
Now, don’t do a thing. Watch the pressure gauge. It should just sit there – if it is going down there is a leak. The most likely culprit is the drain valve isn’t fully closed. Wait until it leaks all the way down or open the bleed valve to speed things up. You don’t need to go crazy tightening the valve knob as you are liable to hurt something but it should be firmly closed. Make sure it is snug and try again. 90+% of the time that fixes the issue.
If it still leaks drain the system, remove the test plug and look in the female foster fitting – is the rubber o-ring still down in there? Same goes for the other end of the hose that plugs into the machine. It could be missing. So, if it is, insert an o-ring and try again. If the o-rings are there, sometimes just removing and reseating a quick connect fitting/plug can solve the issue. Make sure the bleed valve is closed and try again. If it will not build pressure, contact Ankul on Amazon.
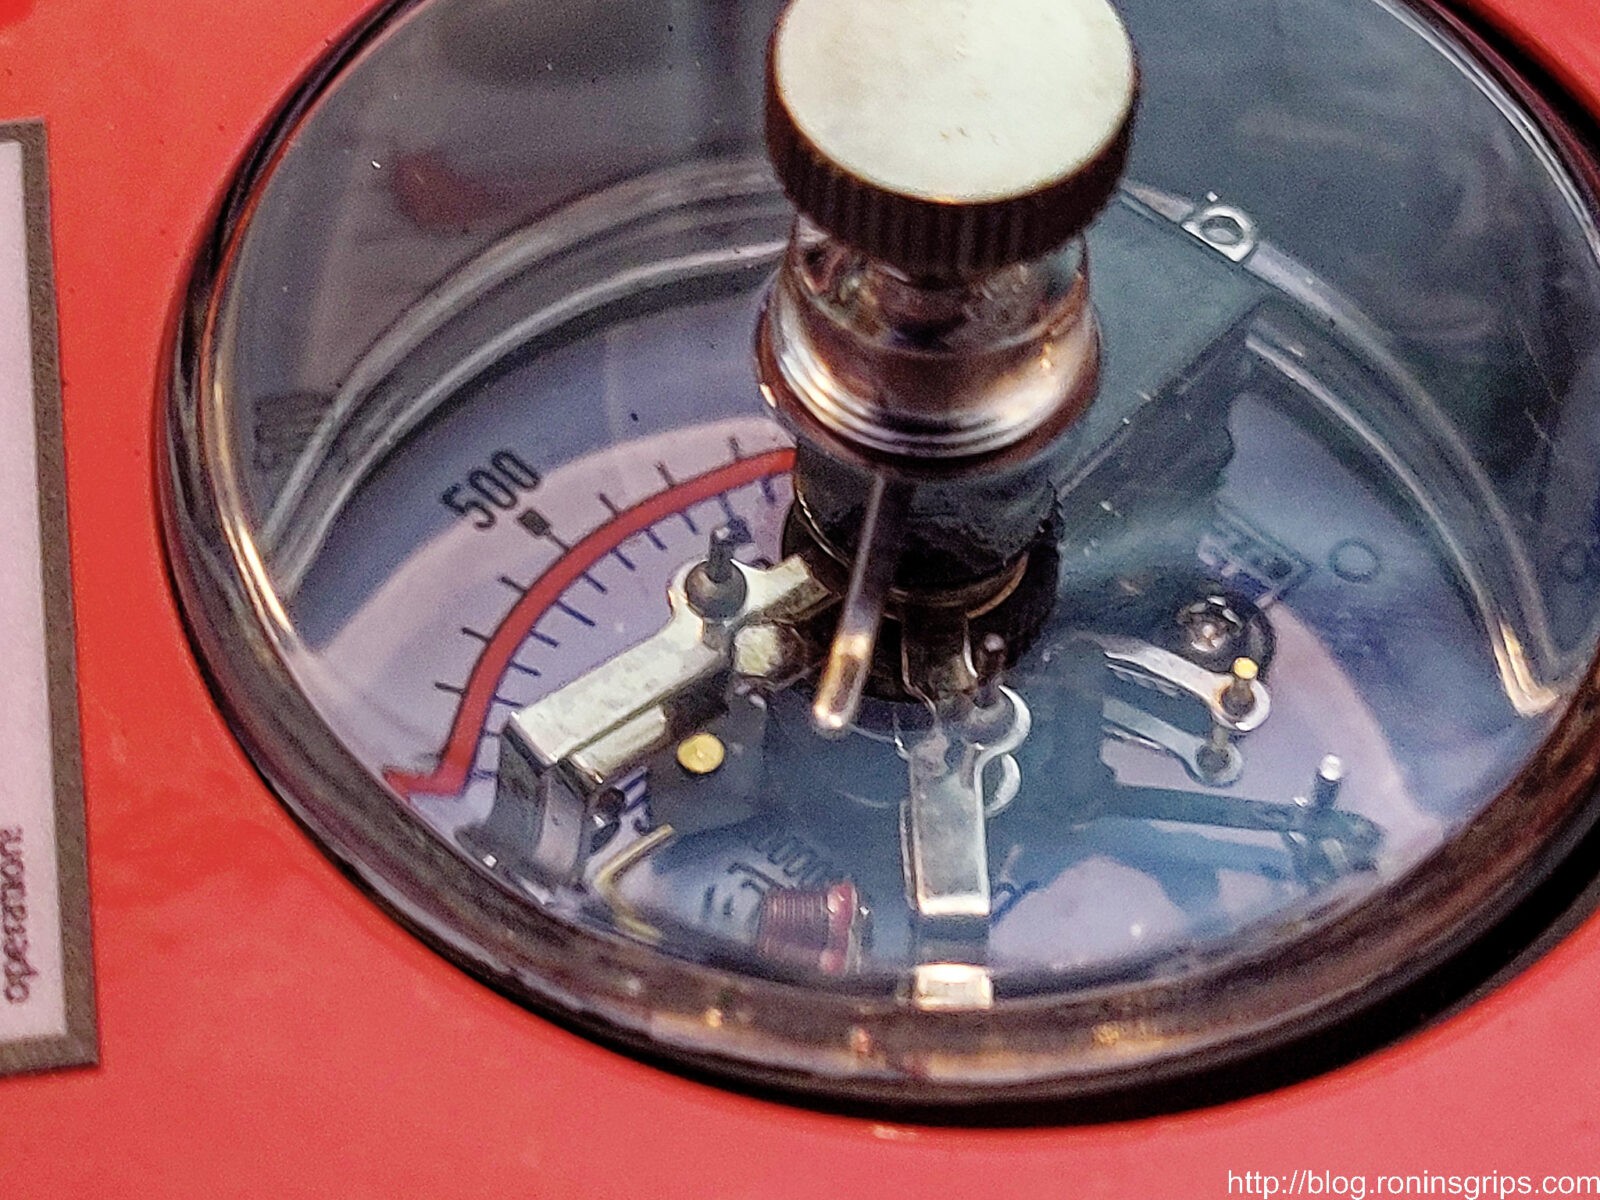
So the first limit switch at the 9 o’clock position was set to 300. The black needle is the actual pressure. Notice that the unit stops just short of the indicated pressure. The second limit switch which is the failsafe was set at about 390. In hindsight I would tell you to set that second switch just a tad higher than the first one. If I wanted the first switch to be at 300 then I would set the second one close to it at 310/320. You can’t put them right on top of each other.
Soapy water in a spray bottle can help you find where the leak is at. Do not run your hands right against the fittings or you risk air getting injected into your body and that is very bad.
By the way, I let mine sit for about 3-5 minutes before I decide. Usually a leak is really obvious in the first minute – the first few seconds even. Either it will not build pressure at all or it leaks down fast.
Bleed off any residual pressure. Opening the bleed valve also allows any trapped moisture to blow out of the drain line also. I doubt you will see it with this short of a test but you will sooner or later so don’t worry. It’s supposed to do that.
Test with the filter installed
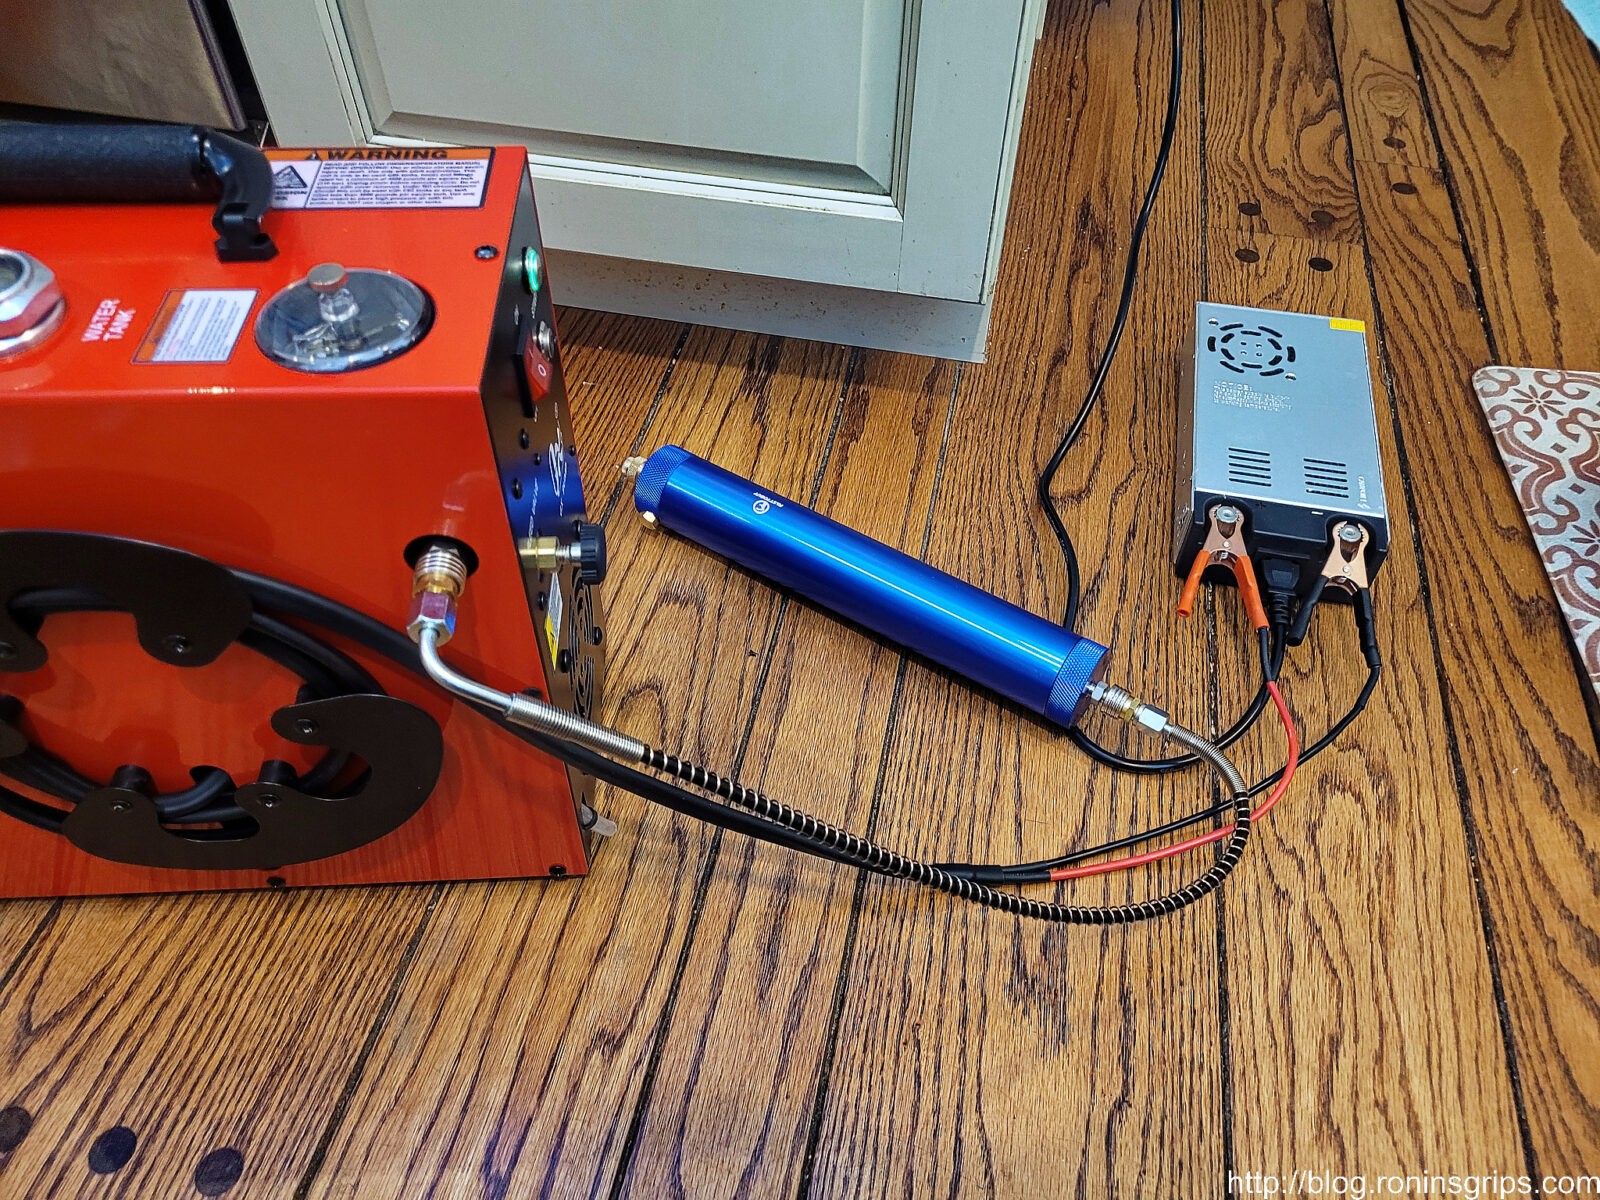
Assuming the pressure line passes testing, it’s time to up the volume game and pressurize the air line and whatever external filter you want to run. I am using a big 300mm long filter with a 50mm outside diameter sold by FastToBuy on Amazon. Yes, the CS4 has an internal filter – but I really want the air to be dry.
First, make sure the system is depressurized by opening the bleed valve. Then plug your filter into the air hose and this time put the test plug on the end of the filter. All of your fittings should fit together very nicely. If you find something doesn’t want to go together, stop. Buy a replacement fitting, I like Air Venturi brand but any reputable brand will do. I’ve had Chinese no-name filters, hoses and other items with out of spec fittings that will not go together. Last month, I had a brand name fitting whip off a Hatsan Jet II and hit me in the glasses so hard that the polycarbonate lens was gouged and my glasses were flattened against my face on one side – I had tried to push the fittings together and they didn’t mate properly. Moral of the story – fitting should go together easily without forcing.
Once the assembly is together, the bleed valve is closed, set the pressure limit switches to 300 and 310 bar then turn on the compressor. It may take it a minute or two for enough pressure to build up to show on the pump’s pressure gauge. It may take a few more minutes depending on how big the filter is before it reaches 300 bar. As before – stop and watch the pressure gauge, it should hold steady and not leak down. If it does, then check the bleed valve, o-rings, etc.
Testing the big inline filter. It is very nicely made and comes with a spare filter cartridge.
The absolute most common source of leaks is at the fittings – worn or missing o-rings or one fitting not really sealing well against another and you then need to decide which fitting to replace. Soapy water in a spray bottle can help you find where the leak is at. Do not run your hands right against the fittings or you risk air getting injected into your body and that is very bad. Notice the repeat on that safety comment.
If everything passes, open the bleed valve to dump the air in the filter and line.
Time to Fill The Tank
Part of my push for the new CS4 was to also fill my new 6.8L 4500 PSI Airmarksman tank. I really wanted to go with a new Omni or Patriot (US made Omnis) but the 6.8L model is hard to find so I went with Airmarksman because I really wanted two gauges – one with line pressure and the other with tank pressure. Standard single gauge units just show you line pressure.
It’s nice, the Air Marksman’s air hose attaches via a quick connect. I can go right from a female foster fitting on an airline right into the tank – no more little male-to-male quick connect fittings that are easy to lose.
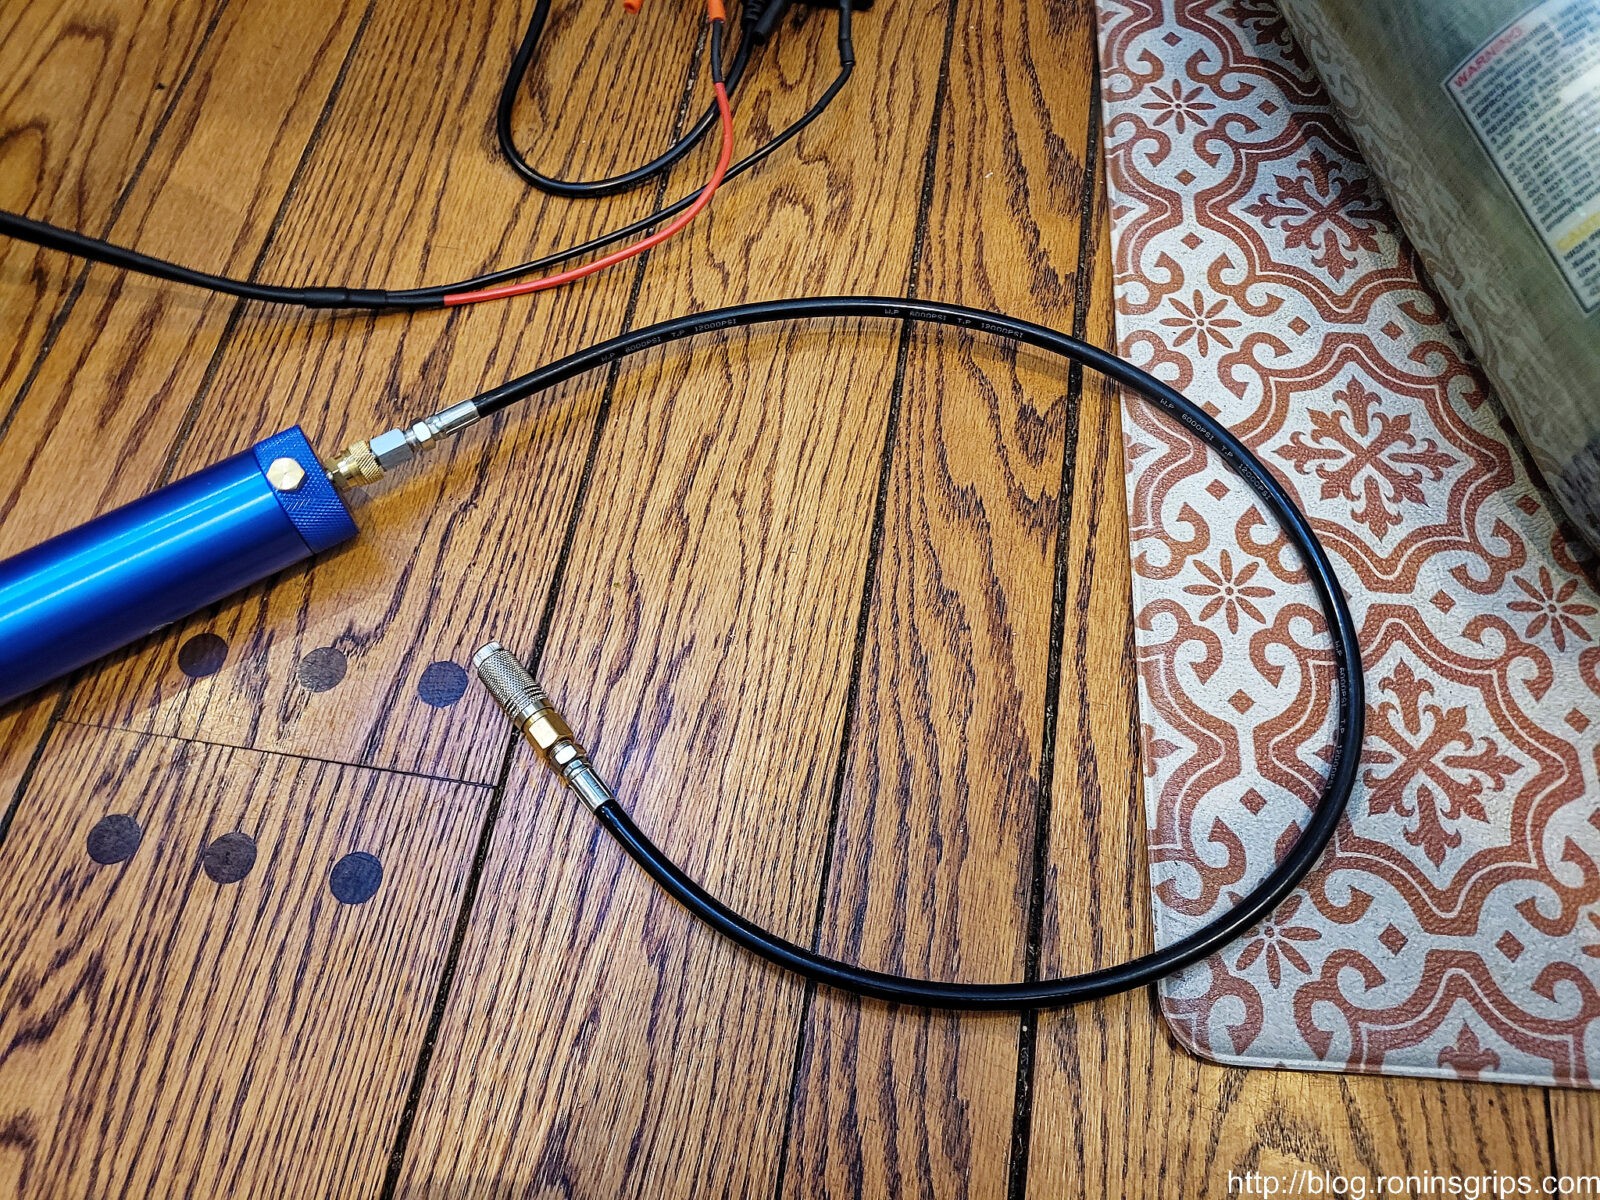
I also bought a really nice 3′ long Manloney air hose extension to go from the new filter to the tank. In general, I am not a fan of hanging a filter right on a fitting because you create a long lever arm that is too easy to snag and break. Instead, I prefer a hose to the filter and then a hose from the filter into the tank.
You know what this means right? I tested the Manloney hose extension by inserting the test plug, and doing everything we’ve talked about previously.
Tested the Manloney hose extension and everything was good.
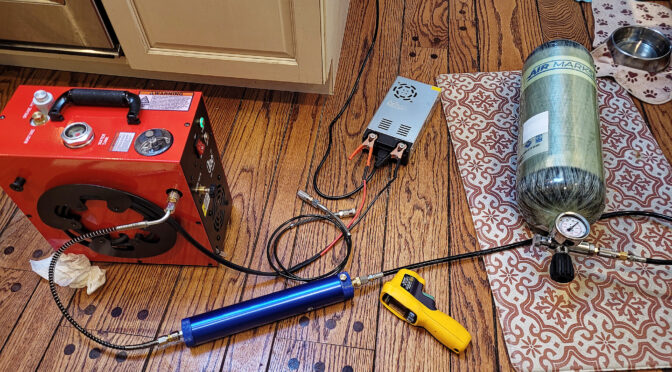
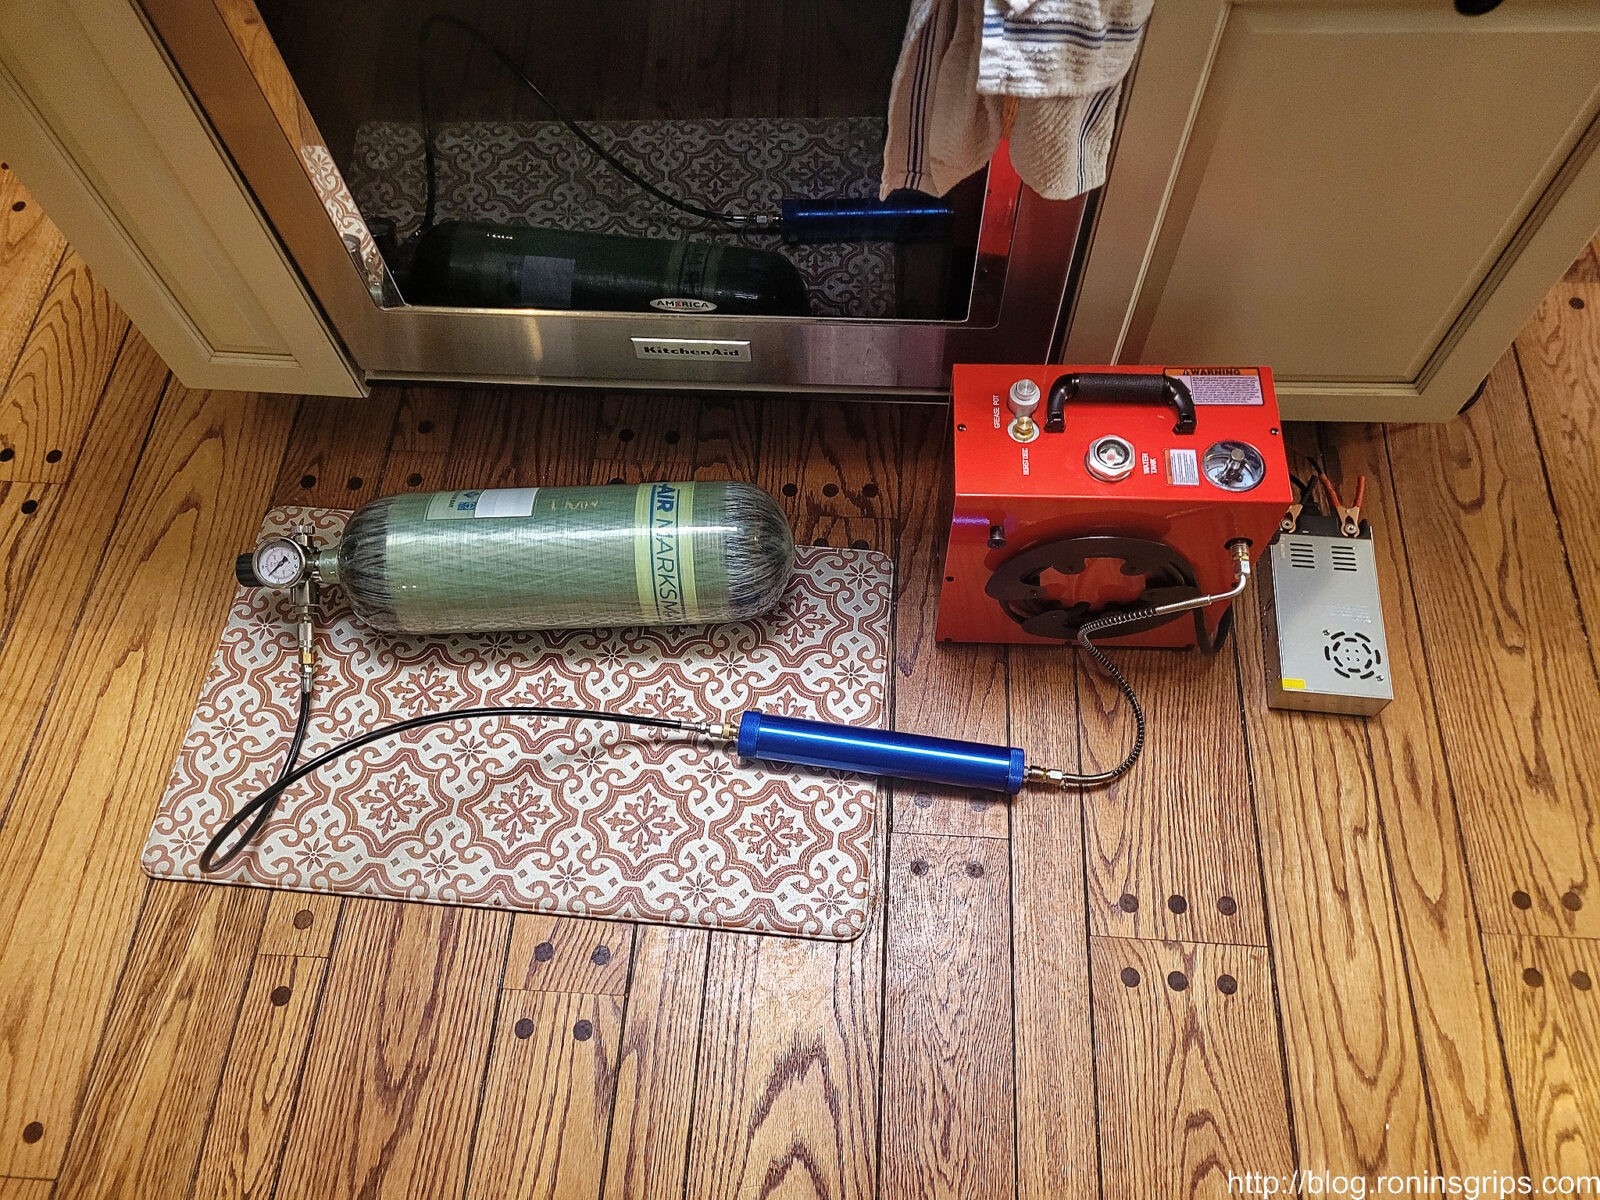
I then bled the air off and let the unit’s cooling system run until the exhaust temperature was the same as surrounding surfaces because it was time to get real. Filling the tank from empty to 300 bar would take at least 2.5 hours and I wanted to record times, pressures, temperatures and and decibel readings along the way.
Filling the tank. Note – do not put the power supply in front of the exhaust fan. I noticed it was getting quite warm and moved it to the side a while after this photo was taken.
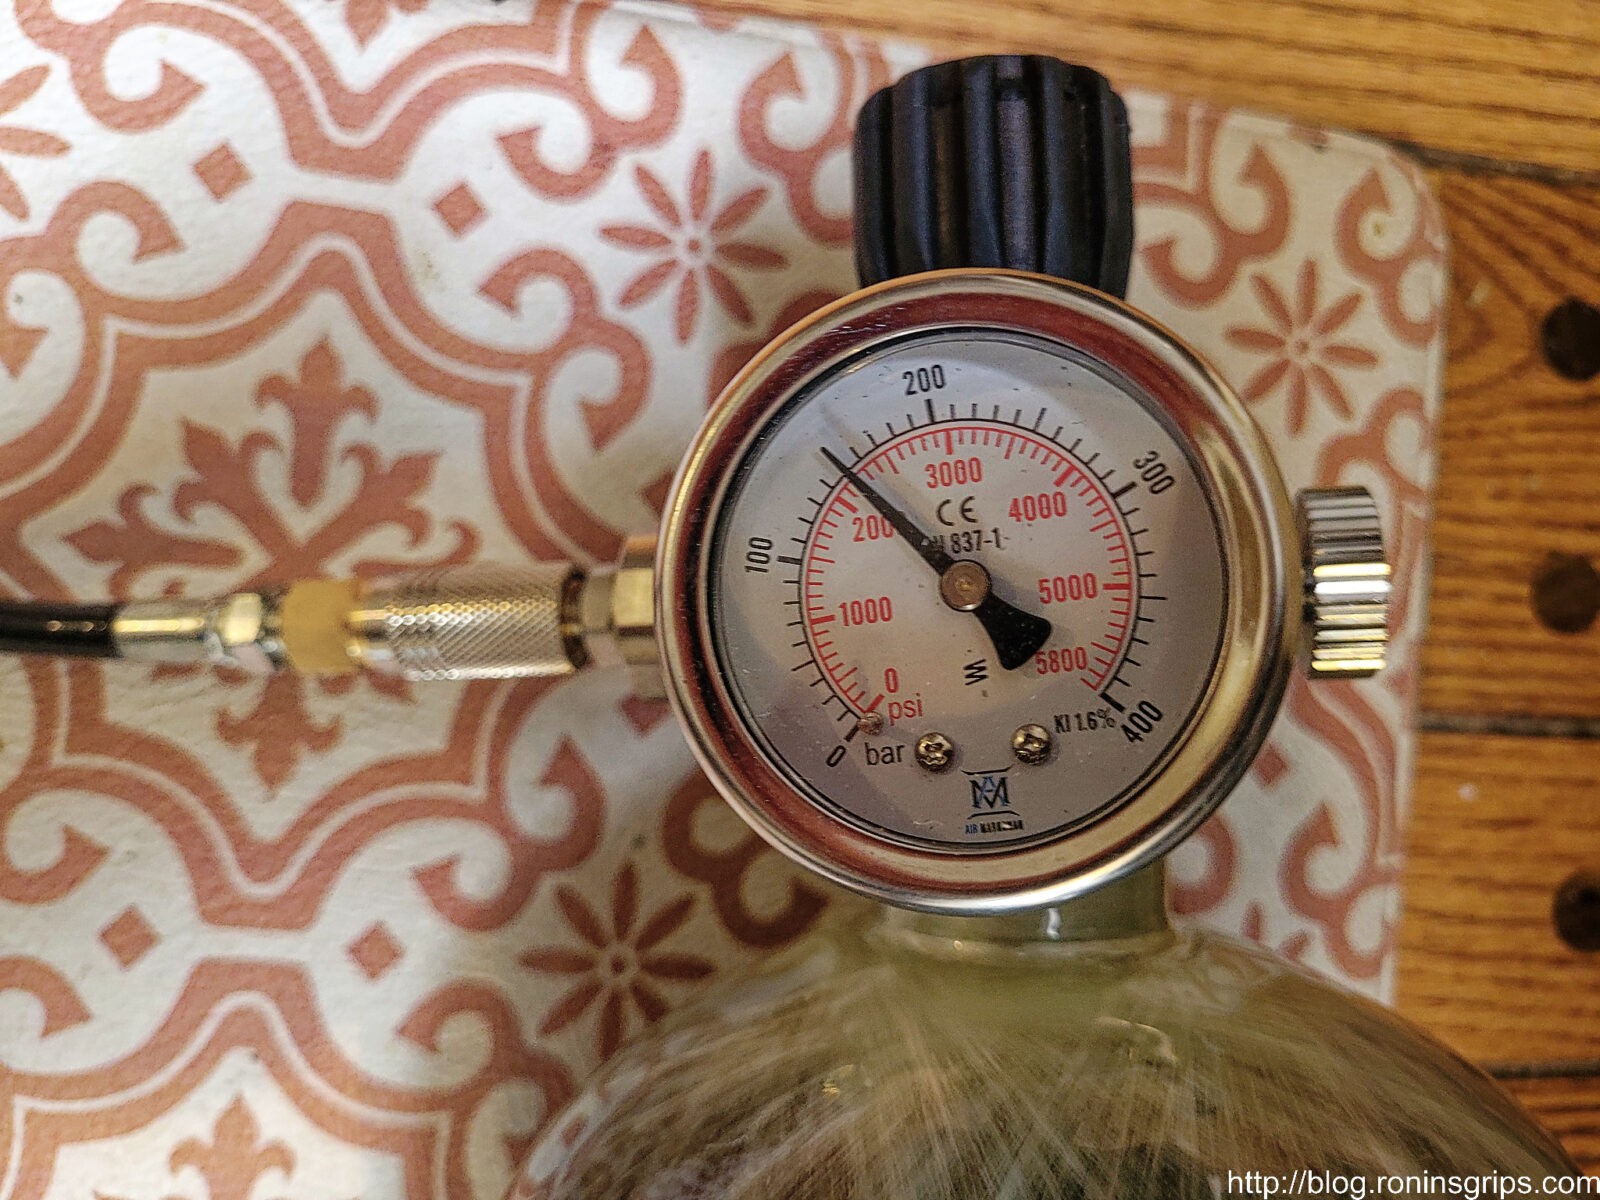
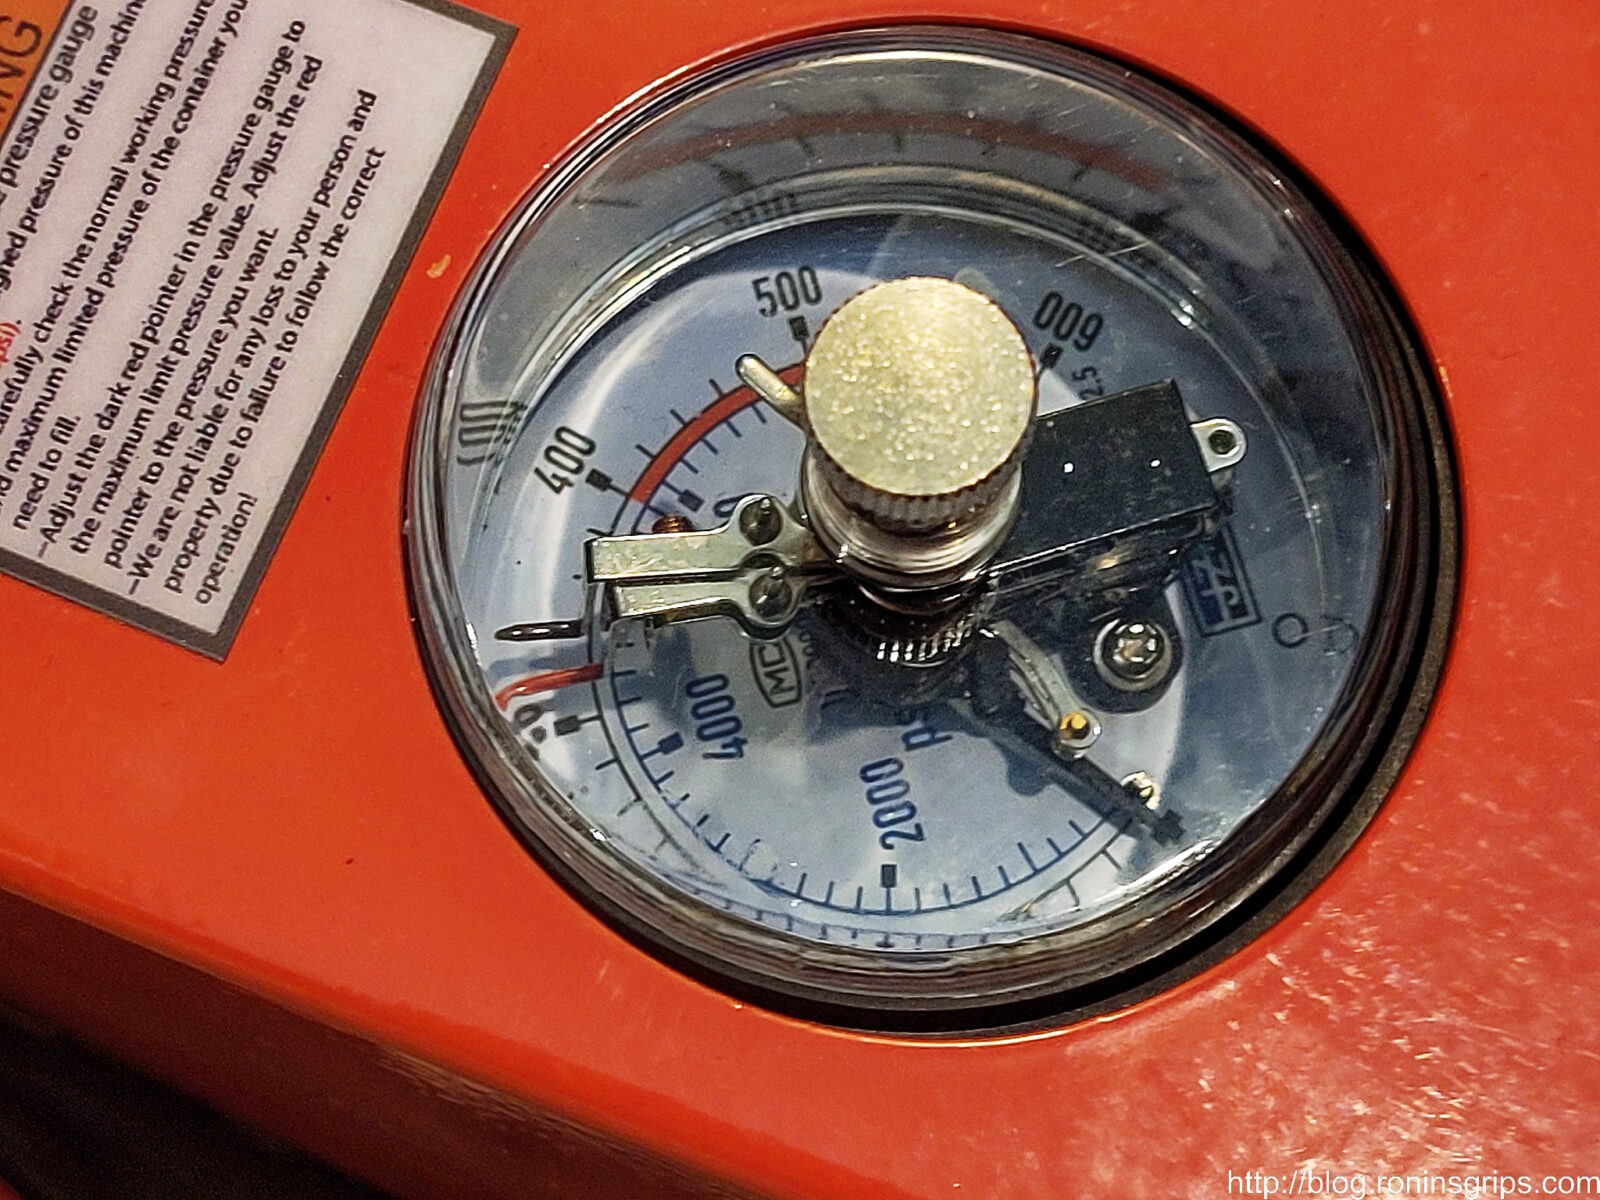
This is the pressure gauge on the tank. It read higher than the compressor so I followed it for safety’s sake. In other words, I did not want to exceed the rated 310 bar on the bottle – I actually only went to 300 bar – but if I had followed the gauge on the pump I would have gone higher. Which gauge was right / more accurate? No idea but I will always play it safe to not avoid a stated safety limit. By the way, the thank has another gauge on the back and they both agreed with one another.
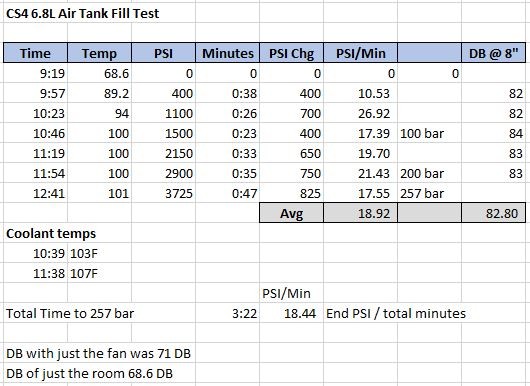
This table shows you what I noted during testing. I just did the fill one time.
I couldn’t just sit next to the compressor and tank for the 3 hours and 22 minutes the test was running. I set the shut off on the pump to 300 bar but what I found was the needle you are moving around to shut off the pump is not precise. For example, I wanted 300 bar but what I got was 257 bar of 3,725 PSI. I then ran the unit another 10 or 15 minutes to take it up to 300 bar even and then moved the limit switch / shut off needle slowly backward until it stopped. Now the first switch is set where I want it. The second need is just behind it by about 10-20 bar.
The temperature management is remarkable. I was using a very good Fluke infrared thermometer to measure the exhaust fan area’s temperature and once it got up to about 100 degrees it pretty much stayed there once the unit warmed up. The noted coolant temperatures were collected by me removing the lid of the water tank and using the Fluke infrared thermometer to get a reading.
Speaking of temperature – this ran far cooler than I thought it would. I actually thought the fluid would get hotter and risk boiling. I still like using antifreeze for the corrosion protection and lubrication of the pump but boiling is not a concern and I don’t foresee it ever being some place where it could freeze but I guess lowering the freezing point is a good idea just in case.
In terms of sound, the unit turned on with just the fan and coolant pump running is 71DB according my BAFX 3608 decibel meter. The sound level with the compressor running was in the 82-84DB range about 8-10 inches from the side of the unit – not bad at all. I thought it might get louder as the pressure increased but it didn’t.
Last comment – the unit ran for well over 3 hours and thirty minutes – probably more like 4-4.5 with all of the testing. There were no funny sounds, no unexplained leakages, etc. That amount of running gave me a real good impression of the unit. After all of that running, I did turn the grease pot one rotation.
Special Note: DO NOT Start or Re-start The Compressor Under Load!
GX stated in multiple places to not try and start the pump with the system pressurized. I imagine it puts too much strain on the electric motor and other parts to get spinning. When I did the top off fill mentioned above, I closed the tank’s valve and opened the bleed valve on the compressor to depressurize the line. Unsurprisingly, maybe a teaspoon or two of water came out as well. I then closed the bleed valve, started the compressor and after it came back up to speed only then did I re-open the tank valve and put the system back under load.
By the way, I am not surprised by this at all. With shop air systems, part of the pressure limit switch is to also open a bleed off valve to depressurize the pump. It’s fairly common for these switches and valves to wear out. If the air doesn’t bleed off then a breaker may trip given the increased load. So, giving the CS4 a chance to start without a load and come up to speed first makes sense to me.
Summary
I was really impressed by the smaller CS3 model that I have used since November 2020. I bought this new CS4 model because I had such a good experience in fact and now that I have run the CS4 over four hours, I’m pretty happy. The CS4 will fill the niche in the GX line-up for a medium-duty machine for 6.8 Liter and smaller bottles. The CS3 will continue to be sold for people filling 1.5L or smaller cylinders.
Wrapping up – I really like the unit so far and will definitely post updates as time goes on.
Here are the GX compressors from the CS4 down to the CS1
FastToBuy 30Mpa Oil Water Filter – Not a GX product but I recommend this filter and you need one between the compressor and your tank or PCP airgun. You will need an extra hose from it to your tank or airgun plus the proper fittings.
Note, I have to buy all of my parts – nothing here was paid for by sponsors, etc. I do make a small amount if you click on an ad and buy something but that is it. You’re getting my real opinion on stuff.
Life is a funny thing – I grew up with firearms. Yeah, my dad had these two old pump action Daisy airguns that were fun to shoot tin cans with but starting at a pretty early age I liked things that went “bang”! Sometime in the early 2000s, I got back into airguns to deal with pests. I started hearing about a class of airguns called “pre-charged pneumatics” (PCPs) that used 3,000 PSI high pressure air cylinders somewhere on the rifle to propel the pellet. They were reported to be accurate, reliable and capable of rapid repeating fire through through the use of a manually operated bolt and a magazine.
I thought that sounded so neat – especially the rapid follow up shots. What stopped me from buying one was that they had to be refilled from a SCUBA tank that was filled at a diving shop. Well, I eventually found out there were specialized hand pumps and you didn’t need to spend a fortune on a tank and hassles with going to the dive shop. I bought a Hill Mk.4 hand pump along with a .22 Hatsan Gladius Long that I used for a few years.
I wrote a post about buying it and also one about setting it up and testing it. I almost always used the CS3 to top off a really nice little Omni 18 cubic foot tank that I would then use to fill my growing number of PCP airguns. It really worked well – the tank was really convenient to pull out and top off an airgun and I would only occasionally need to bring out the CS3. Sure, I could have filled the airguns directly from the CS3 but I wanted to keep things simple.
Fast forward to January 2023 – I bought a .30 Umarex Gauntlet with a big cylinder and was planning to get one or two other high air consumption PCP rifles in 2023 so I started thinking about how to feed them. It was a total coincidence that GX unveiled their next generation CS4 compressor on Amazon. There were just a few four or five reviews at the time and I decided to gamble on the new pump and bought it on January 29, 2023. I took the leap because I had such a positive experience with the CS3 and I knew I could return it to Amazon if it turned out to be a problem child. [Yes, I bought this so you are getting my honest observations – click here for the Amazon CS4 product page.]
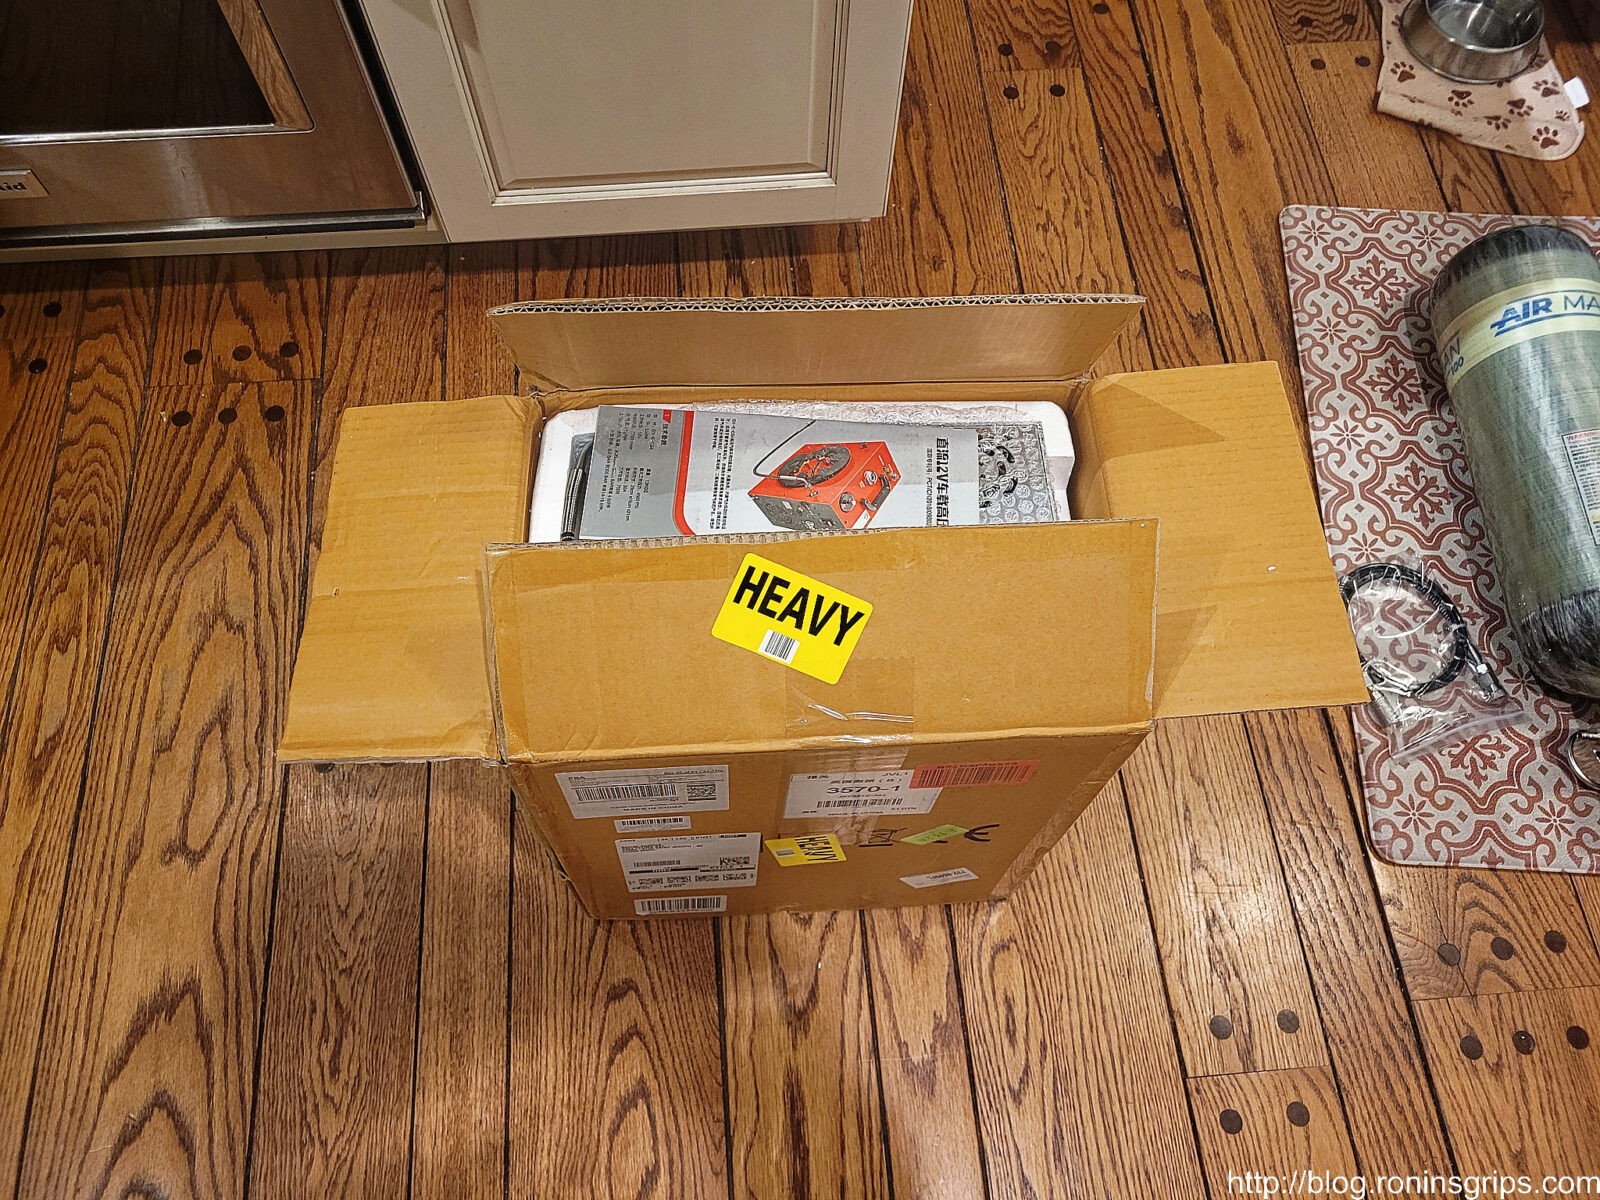
On January 31, 2023 the Amazon driver brought be a big heavy cardboard box with the GX CS4 and I started getting my stuff together to do some testing plus a time slot to fill a big 6.8L carbon fiber tank from empty to 300bar which would take 2-3 hours I figured.
Now, I’m going to tell you something – it is slick. It is really, really slick. I’m telling you this so you take the time to read more in this post plus one about setting it up and testing it.
What is the GX CS4?
The CS4 is an additional pump offering from GX for people wanting to fill larger cylinders than the CS3. It also reflects design advancements to the CS3 unit – here are the features that really caught my eye:
CS3
CS4
Working Pressure (Mfg supplied)
30MPa/300 bar (4,351 PSI)
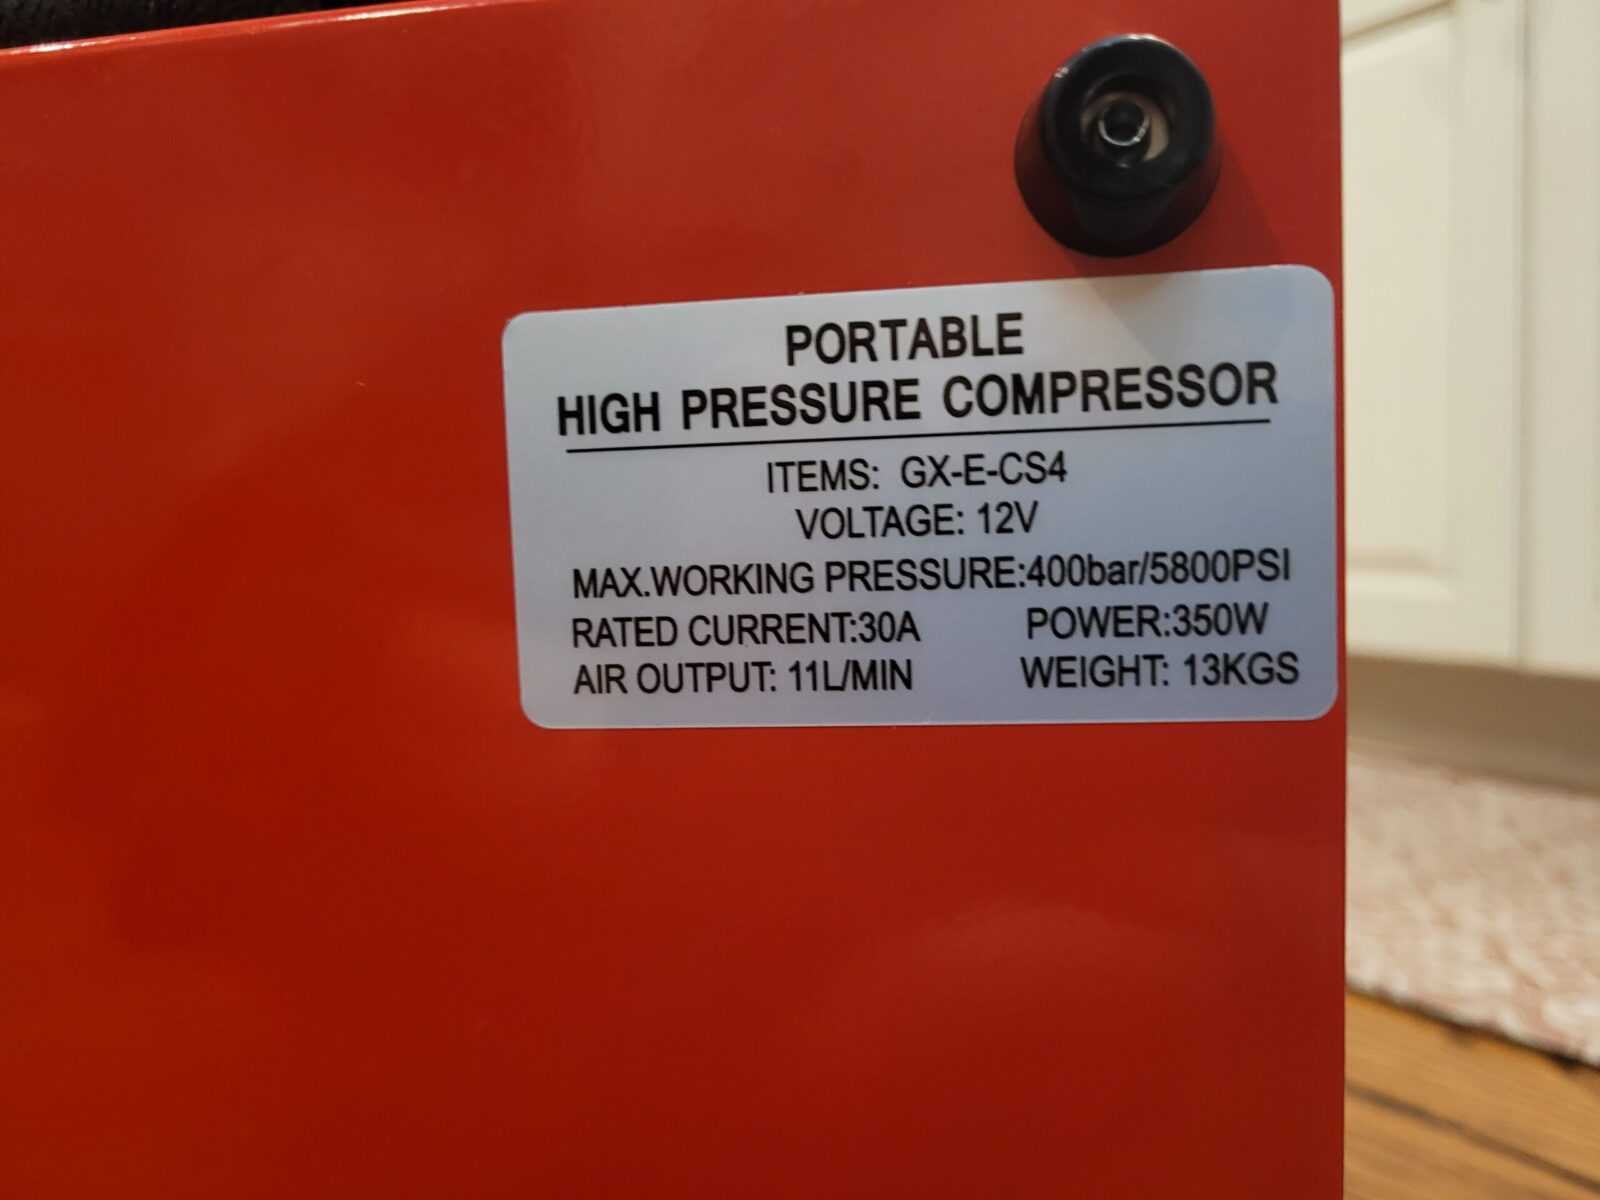
40MPa/400 bar (5,801 PSI) – 33% more pressure
Air volume (Mfg supplied)
7 liters/minute (0.247 cubic feet/min)
11 liters/min (0.388 cubic feet/min) – 57% more air volume output
Suggested Maximum Air Cylinder Size
2.5 Liters
6.8 Liters
Cooling
Air with fans
Coolant with radiator and fan
Power (Mfg supplied)
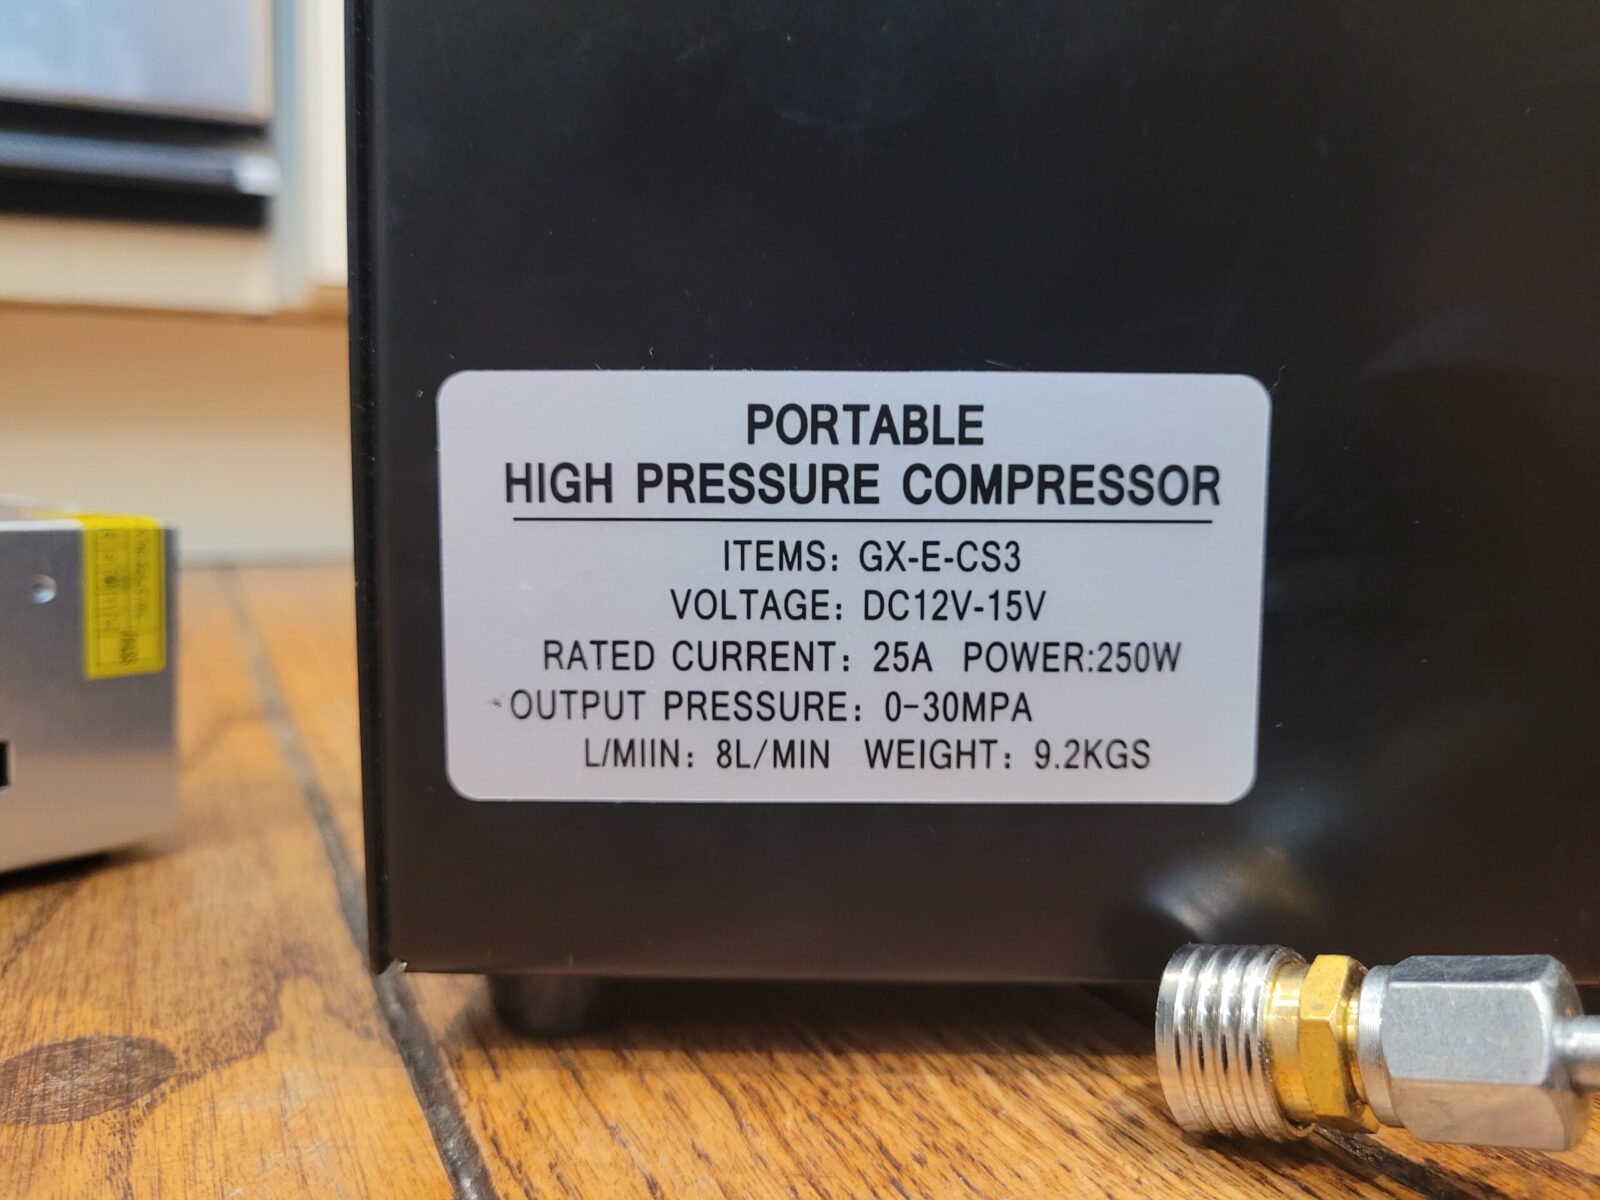
12V 250 Watts
12V 350 Watts – 40% more watts
Duty Cycle (Mfg supplied)
30 minutes working and 20 minutes cooling
5 hours continuously working. Manual says to let it run for 1-2 minutes after pumping is complete – 10x longer duty cycle.
Sound Level (Mfg supplied)
75db
70db
Pump lubrication
Not needed (until it slows down – mine hasn’t so far)
Has a grease pot to add grease every 4-6 hours of run time
Limit switch
Simple rotary dial limit switch
Protected twin pin design where you can set both the limit and failsafe limit
Hose
19.6″ permanently attached hose
19.6 hose that is removable via a quick connect foster fitting
Weight (my digital scale)
19.4 pounds
29 pounds with antifreeze – 55% heavier
Dimensions (me with a tape measure)
5-3/8″ wide (about 5-7/8″ wide including the wire spool on the side) x 9-1/2″ deep (10-1/4″ if you include the release valve) x 10-1/2 high at the top of the case (about 11-1/2 overall if you include the handle)
6″wide case (6-1/2″ wide with the wire spool) x 11-78 deep (12-3/4 if you include the release valve) x 12-1/2″ at the top of the case (about 13-1/2 at either the top of the grease pot or the folded handle) – about 62% larger overall
For me, the really long duty cycle is what I was looking for. The 57% increase in air output is a welcome enhancement to have over the CS3. Since I would fill my guns from my tank, I was never in a rush. Now that I have 6.8L tank, the fills will probably be less often but a lot more volume will be needed so it’s good to get that increase.
The increase in air pressure is overkill right now – there aren’t affordable 400 bar working pressure tanks as of yet – they are out there for specialty applications but are in the $1,500-2500 range. I’m sure the price will come down over time but most carbon fiber air tanks that PCP shooters are using are in the 300-310 bar working pressure range. If you see 400 bar, read the ad again because they may be talking about the test pressure and not the working pressure – you fill to the working pressure only – never to the test limit.
To be clear, the GX CS4 is not replacing the CS3. They have added the CS4 to fill larger tanks faster. They identify the 6.8 liter tanks as being the target max size for the CS4 and for me the duty cycle is the more important number. You can fill anything you want as long as you don’t bake the pump.
With the CS3 for example, the 20 minute duty cycle is what limits a convenient tank size. If I needed to fill my Omni 100 cu in (1.64 liter) tank from empty – I would let it run for 20 minutes and then I would stop the pump but let the fan run until it cooled down to room temp. I’d then close the cylinder valve, bleed the air out of the line, start the air pump again and as it came up to speed I would open the cylinder’s valve again. It took a while but it worked just fine. I tried to always be mindful of the duty cycle and give the unit a chance too cool down before I either shut it off or resume – I’m sure that’s one reason I’ve had zero problems with the CS3 since I bought it.
The CS4 was well packed. Amazon’s delivery group sometimes smashes delicate packaging so I was glad to see the unit was well protected in a plastic bag with styrofoam holding and protecting everything inside of the box.
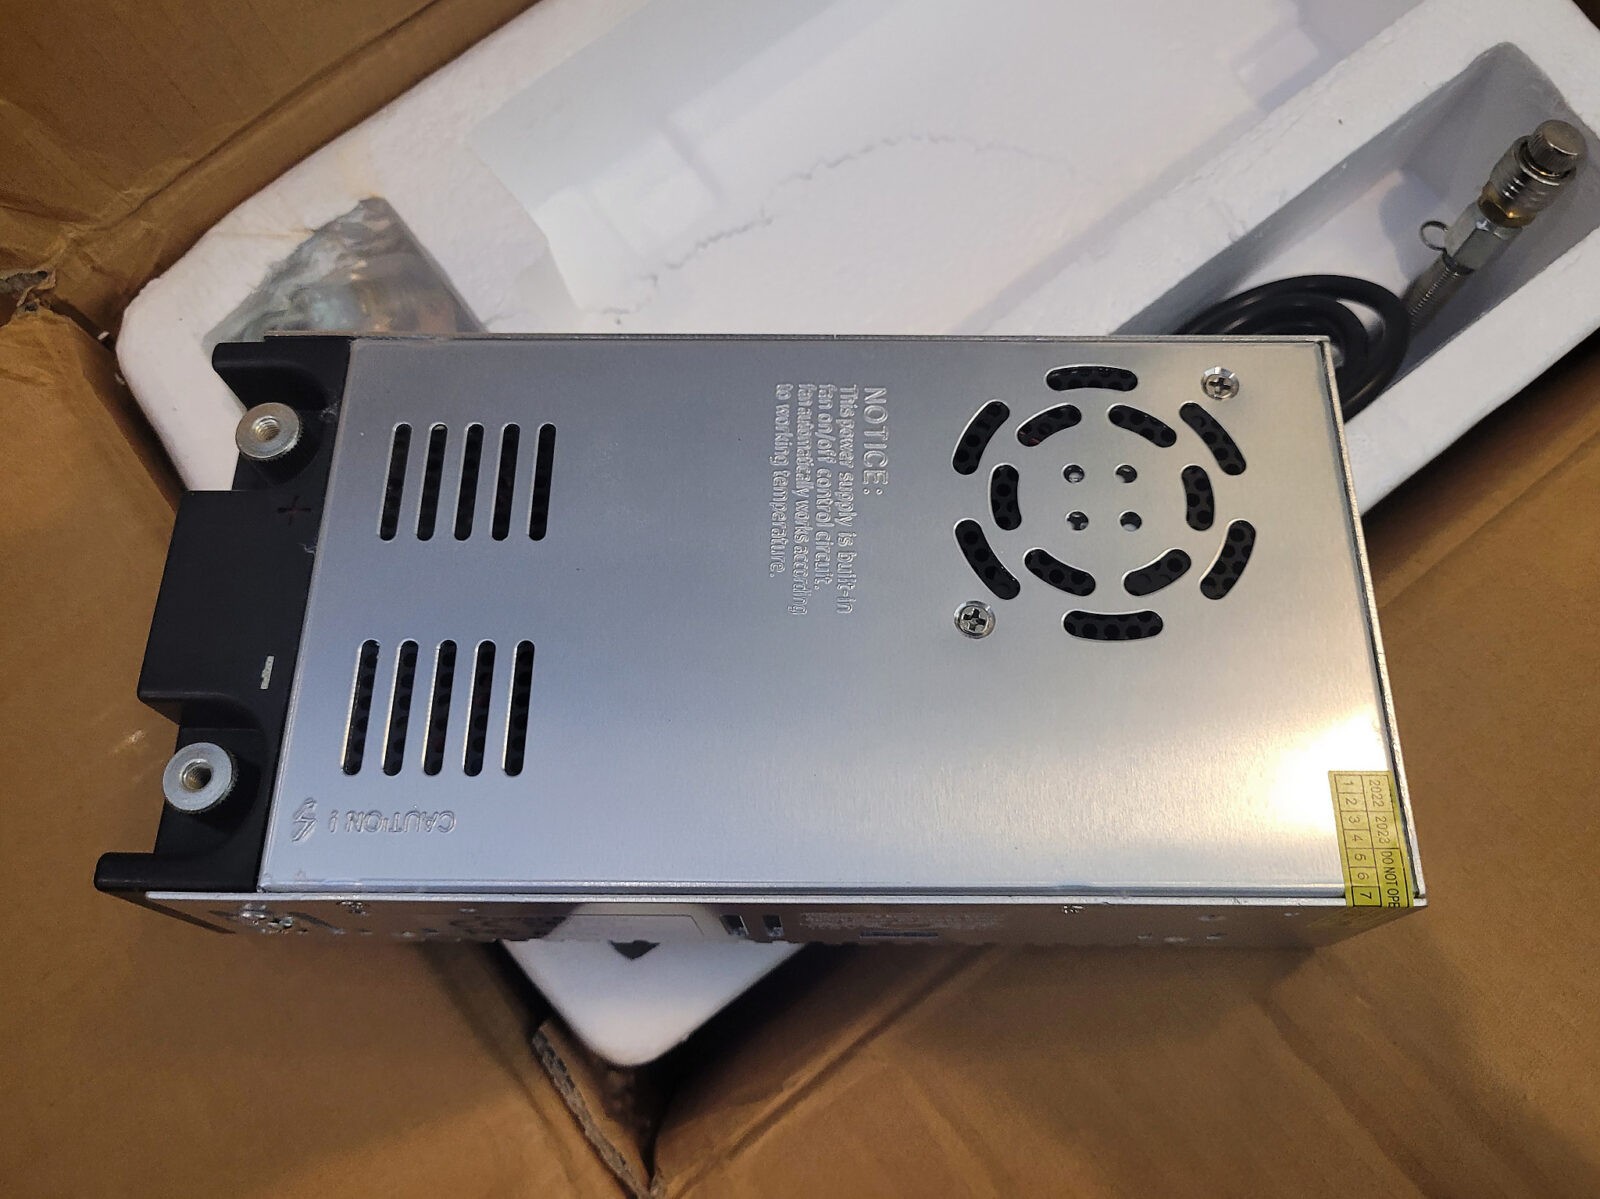
They are using the same 12 volt 46.2 amp power supply. This allows you to either power the pump with a car/truck battery or use this power supply to charge at home. You can see the removable air hose under it still sitting in the styrofoam.
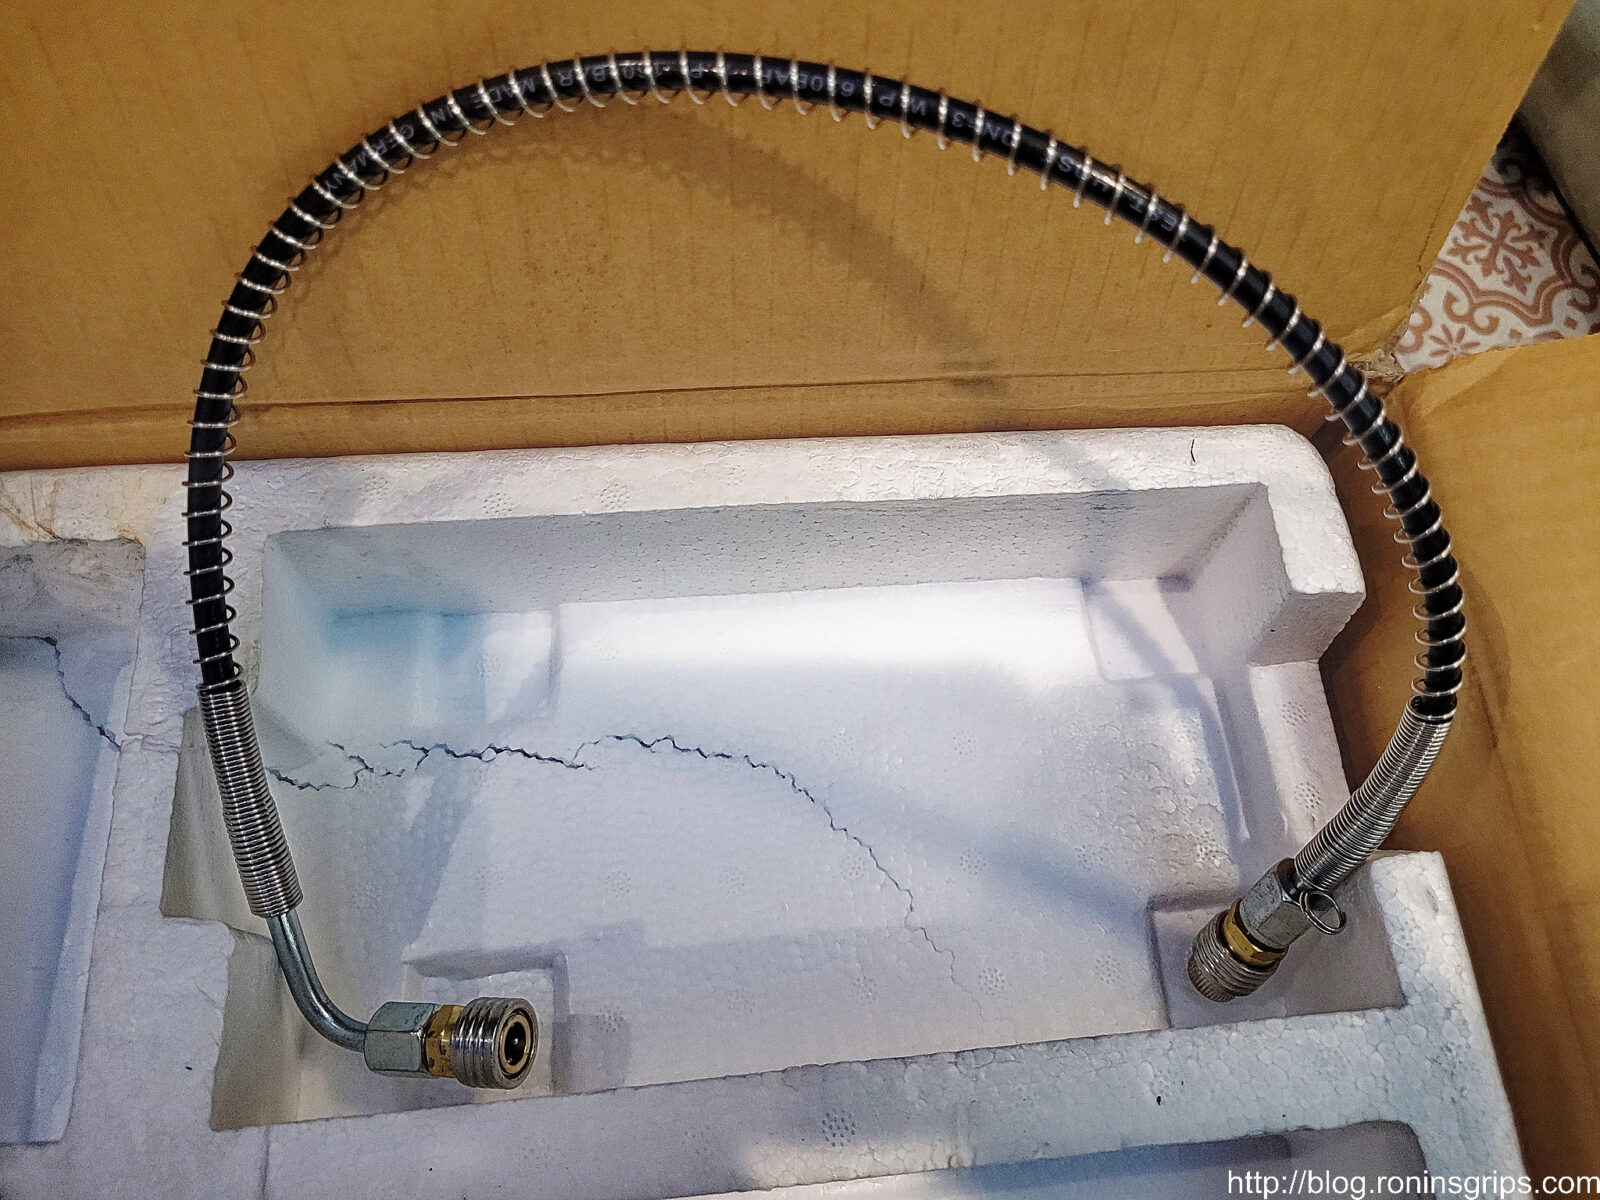
This is really nice. With the GX CS3, the air hose is bolted to the unit and gets in the way at times. With the GX CS4, there is a standard Foster quick connect. Notice the thought put into the hardline portion on the left side of those – this is the end that plugs into the pump and the metal line bends at an angle thus avoiding collapsing or weakening a flexible airline. It’s a well thought out change.
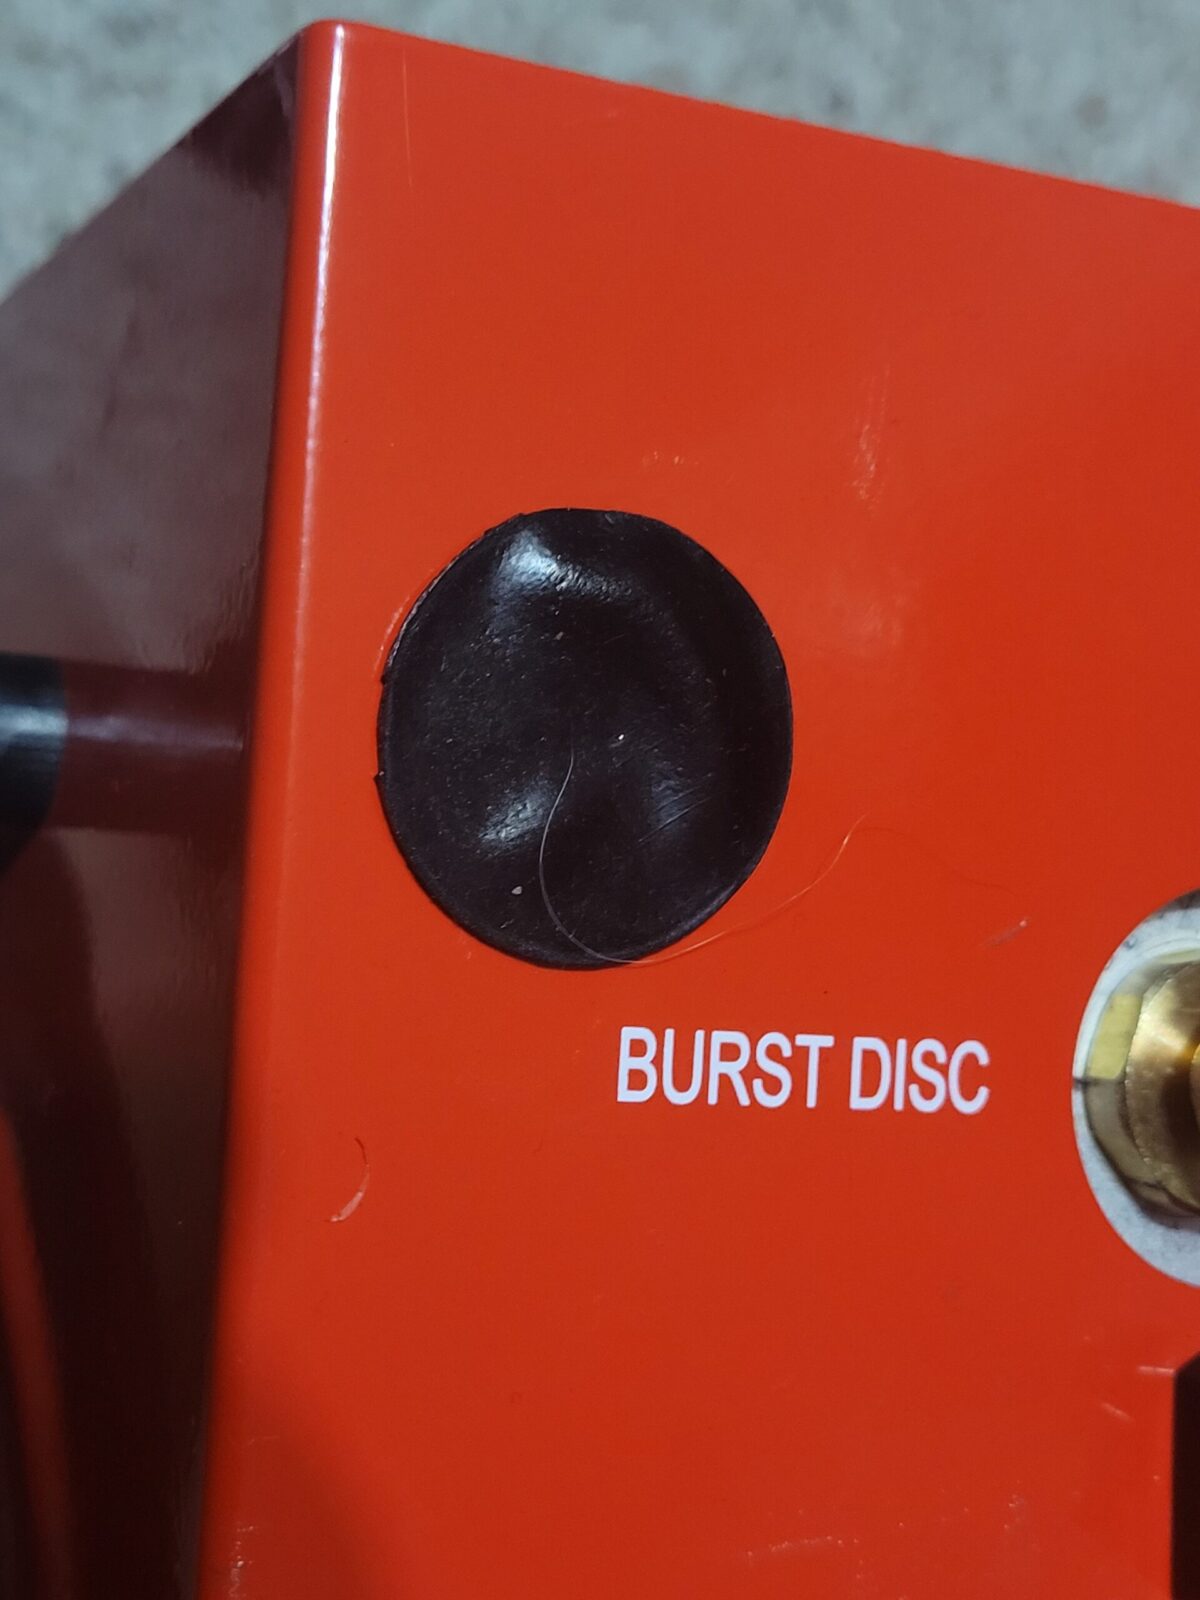
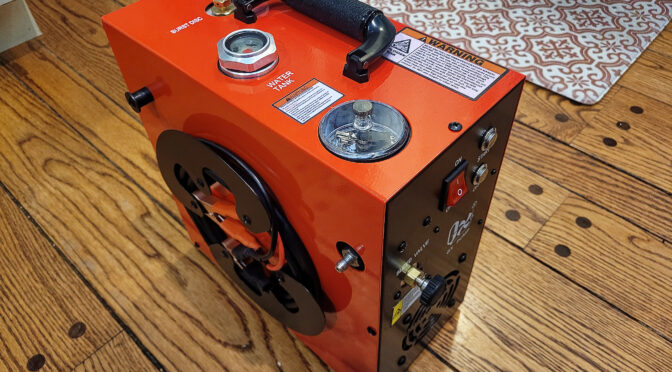
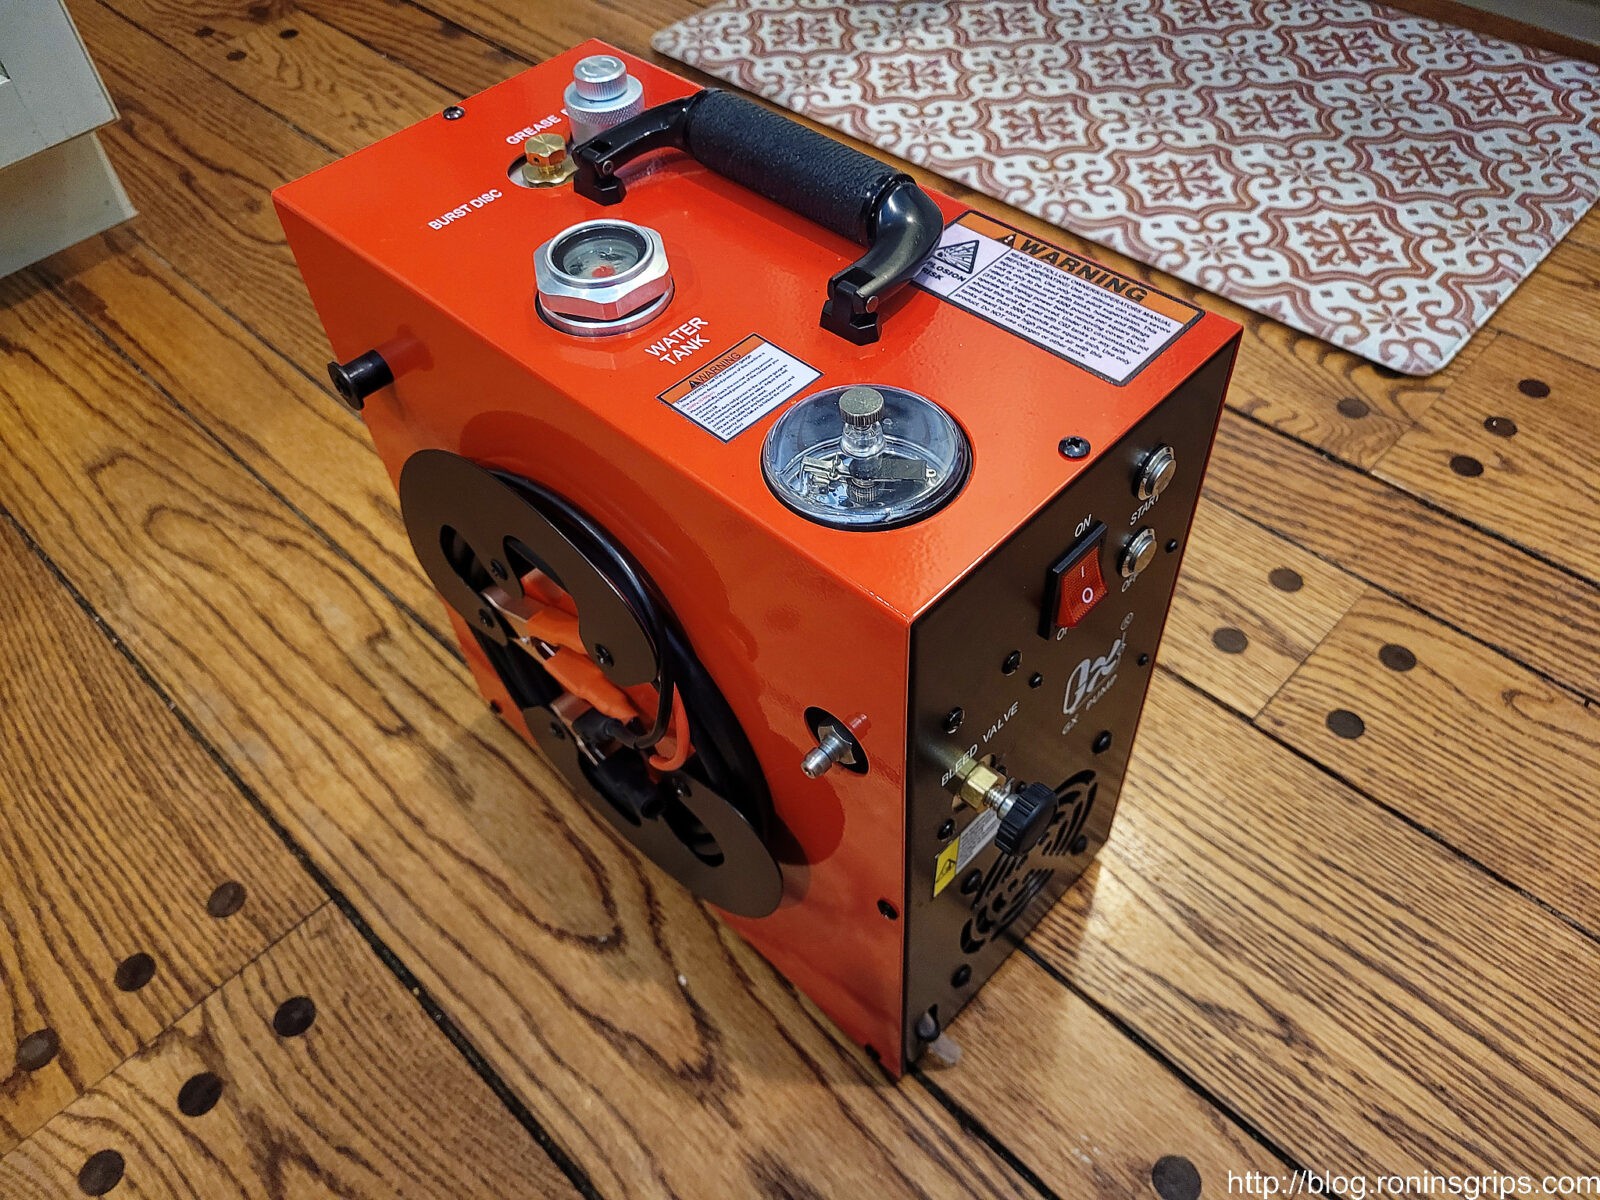
Starting from the top back – the silver cylinder is the grease pot that you use every 4-6 hours to introduce grease into the cylinder. The brass fitting is the safety burst disc. A burst disc plays an important safety role – it will blow out before an extreme pressure situation could cause a catastrophic failure of the pump. The clear circle has the pressure gauge and the two limit switches you can set. On the left is the power wire spool. The silver nozzle sticking out is the male foster fitting that the quick connect air hose goes to. On front side (colored black) – top right are the on/off switches for the pump itself. The red master switch turns the unit on and both the fan and coolant pump begin working. The black knob is the pressure release / bleed valve. Behind the circular slots sits the CS4’s radiator that has a fan cooling it – the antifreeze/distilled water flows through it to cool off.
The pressure gauge and limit switches surprised me. I went to rotate the switches by turning the silver knob and immediately felt a weird springy resistance. On the CS3 I always checked the pressure because if you bumped the knob the pressure limit changed. Well, now move the top silver “finger” around and push down to turn either limit switch. It’s less prone to being bumped and you have two limits – not just one. It’s not absolutely goof proof but I think it is a good next step from a safety perspective.
With high pressure systems, play it safe. My tank gauge vs. the pump’s gauge don’t match so I go with the higher of the two pressures. It’s called “conservativism” – go with the most conservative or safe number given the situation – don’t base your fill on the low-reading gauge, go with the one that says there is more air pressure just to be safe. In my shop’s air system I probably have a dozen pressure gauges and they all read slightly differently – I guess it is just the nature of the beast unless you want to spend a mint on calibrated accurate gauges.
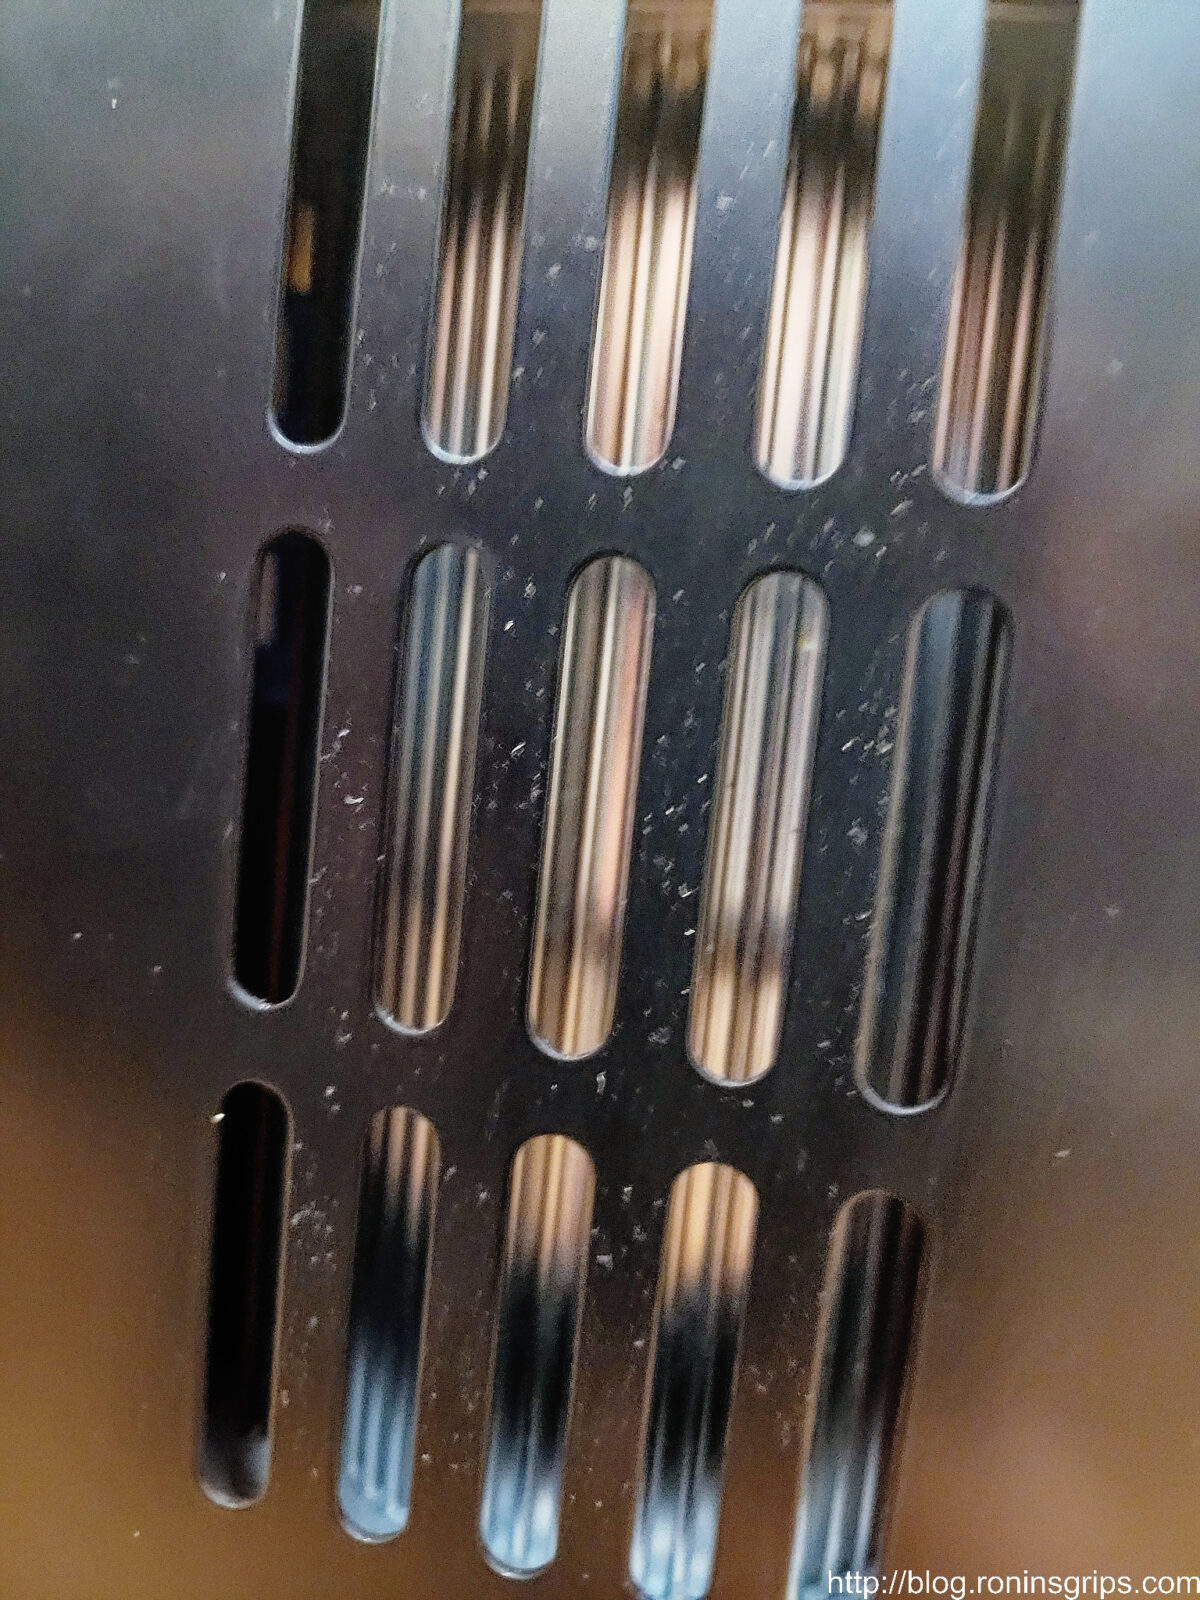
On the back of the unit are vertical slots and when you look in you can see the cooling fins of the first stage cylinder liner.
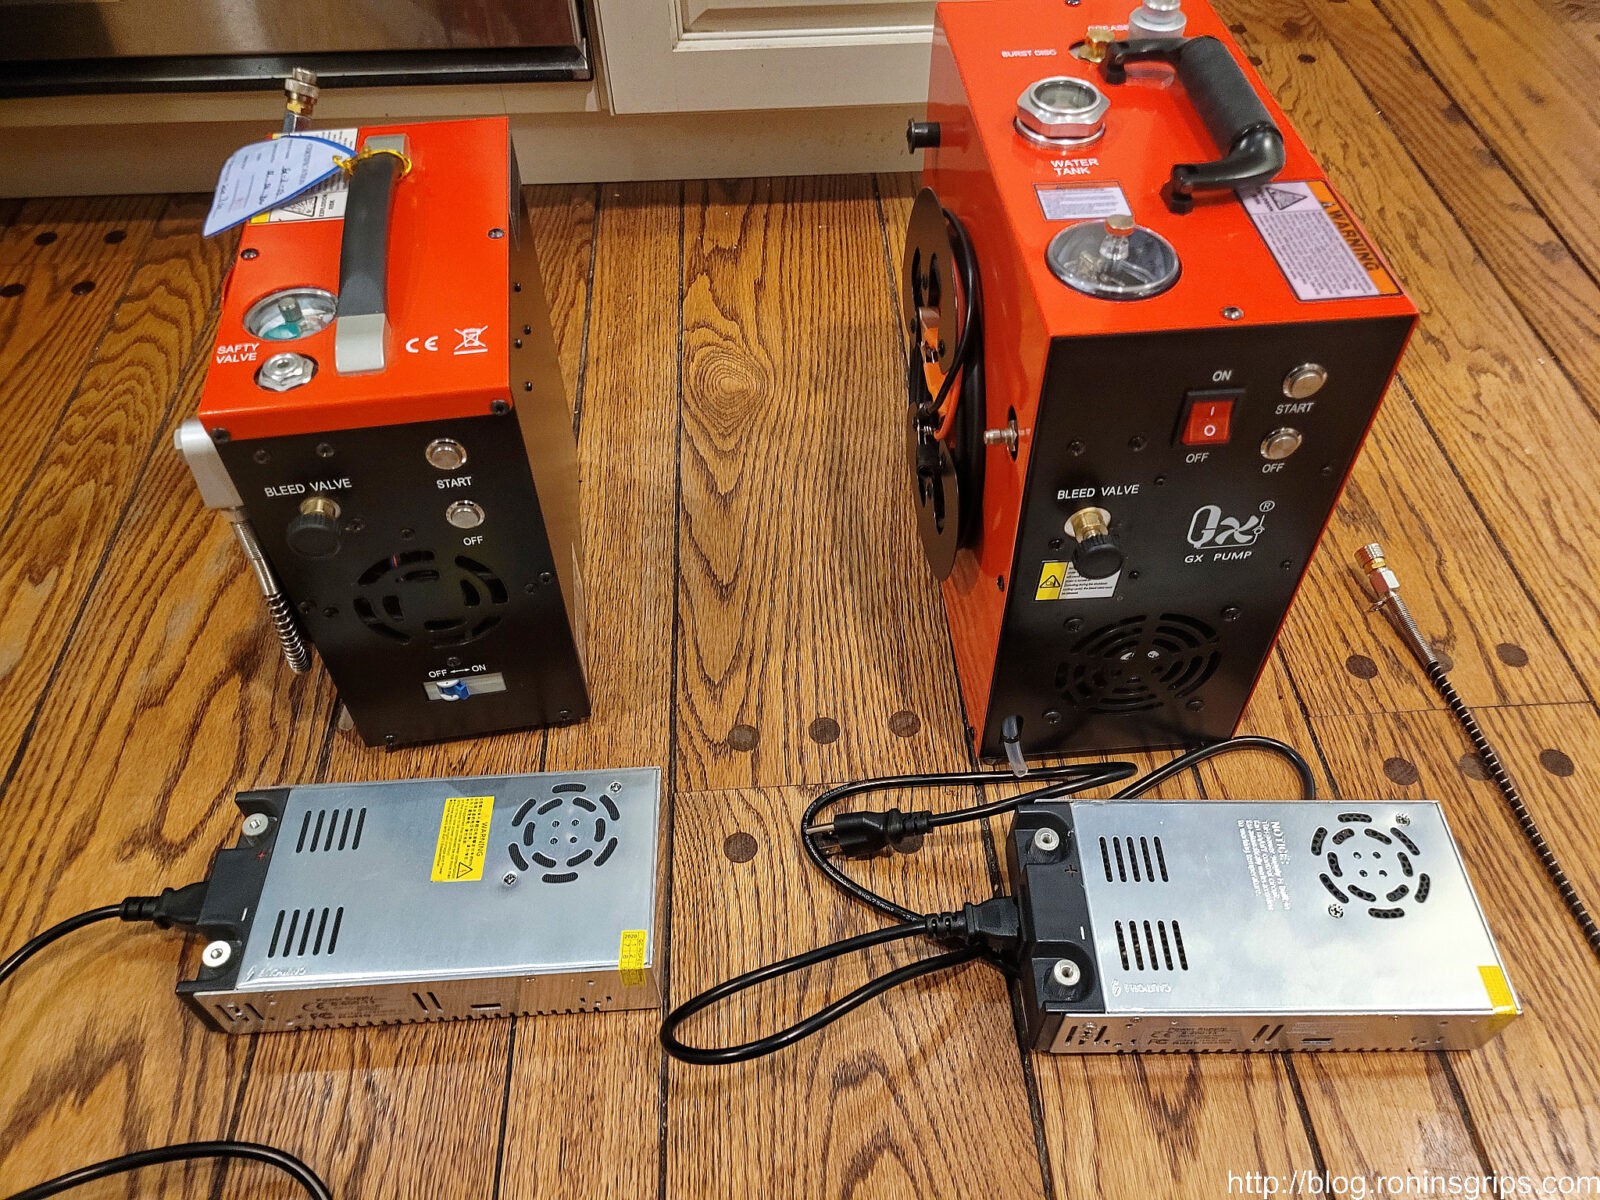
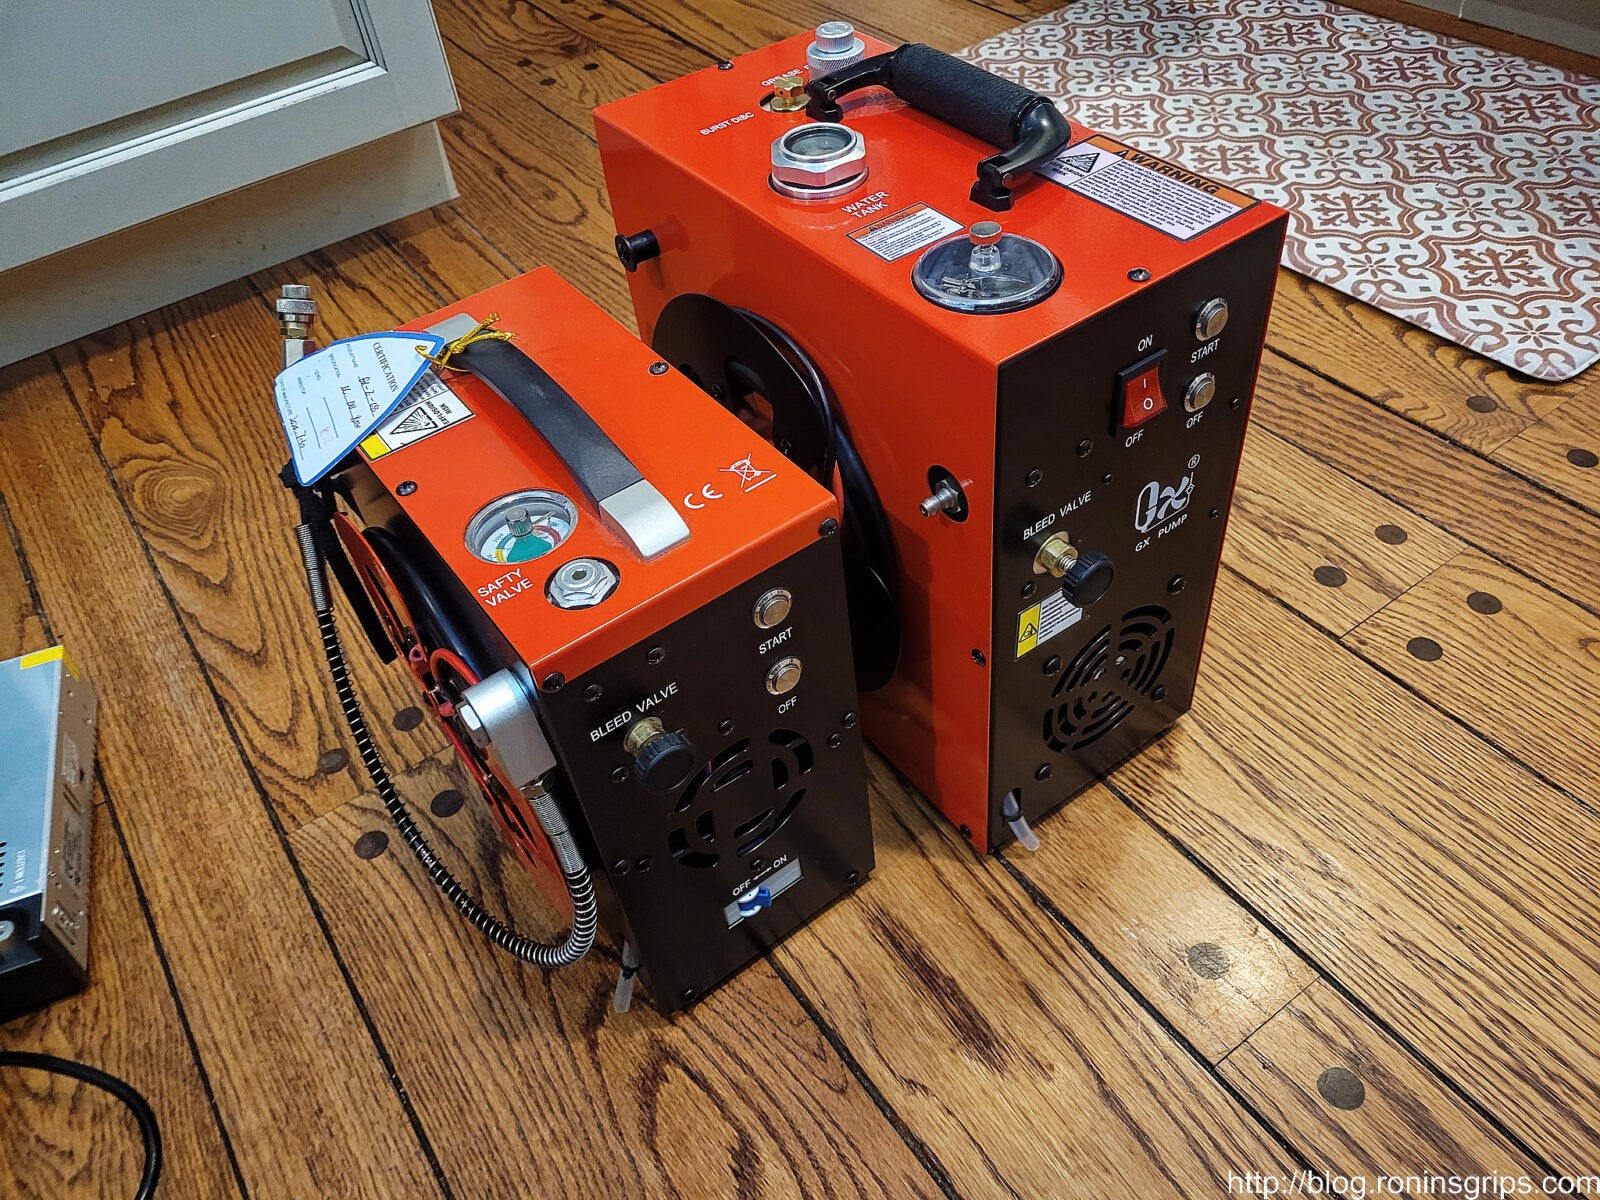
The larger CS4 is on the left and the CS3 is on the right. The CS4 is intended for filling up to 6.8L bottles and the CS3 is targeted for smaller bottles and/or airguns. Note: GX makes two versions of the CS3 now – one with the external 12 volt power supply like I have as well as one that just plugs directly into the wall and does not have a 12 volt supply.
CS3 on the left vs the CS4 on the right.
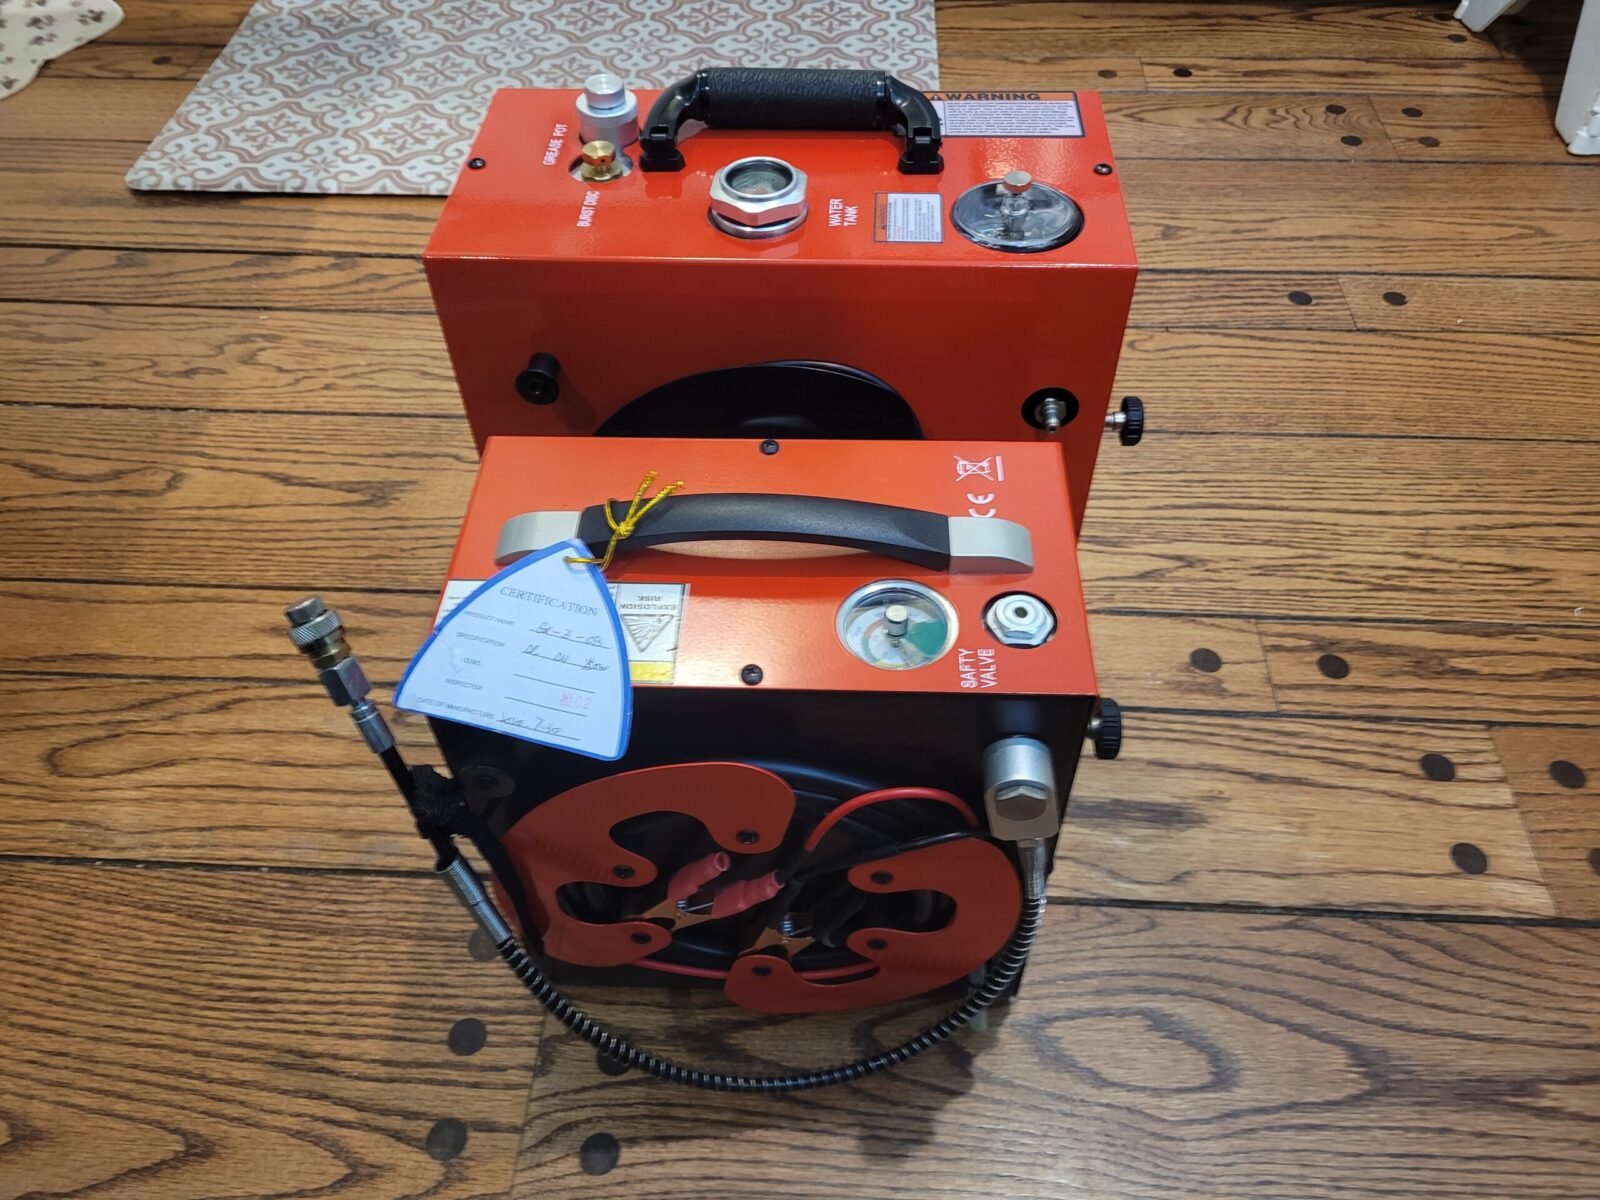
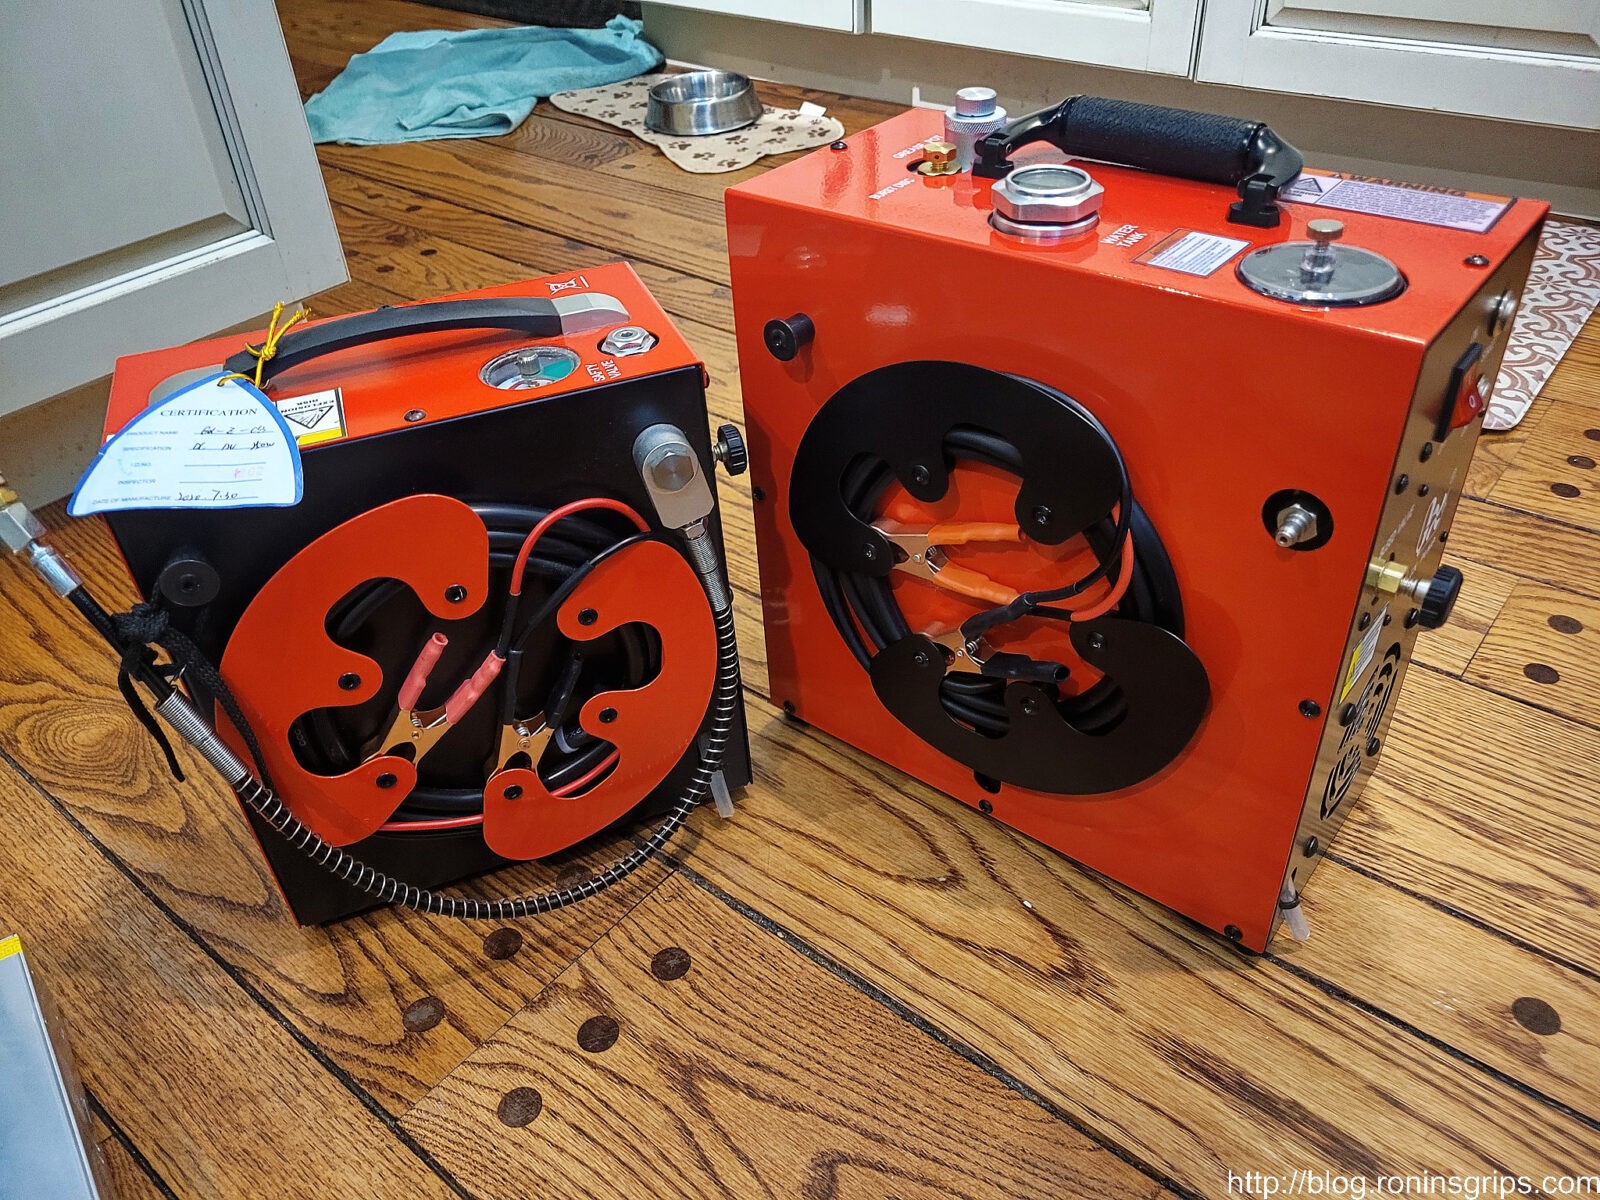
One last comparison photo – the CS3 is on the left, the CS4 is on the right and the dogs’ water bowl is in the back 🙂 See how the air hose just dangles on the CS3? Being able to remove it completely from the CS4 really cleans things up plus opens the door for future hoses should you need them.
Here are the GX compressors from the CS4 down to the CS1
FastToBuy 30Mpa Oil Water Filter – Not a GX product but I recommend this filter and you need one between the compressor and your tank or PCP airgun. You will need an extra hose from it to your tank or airgun plus the proper fittings.
1/28/24 Update: Had to fix Amazon links so they work in the list above the summary. I’m still using my CS4. No problems.
6/12/23 Update: Fixed the wording about being conservative. Thanks KG!
Note, I have to buy all of my parts – nothing here was paid for by sponsors, etc. I do make a small amount if you click on an ad and buy something but that is it. You’re getting my real opinion on stuff.