Tag Archives: Yugoslav

Yugoslavia’s AK Path: The Launch of the Zastava Family of Automatic Weapons and the M64

In the last post, we reviewed the political climate and how the USSR did not want to share their revolutionary AK-47 design with Yugoslavia. At this point, we need to look at the ambitious 1959 launch of the project “Familija Automatskog Oružja Zastava” (FAZ), or the Zastava Family of Automatic Weapons and how the Yugoslav’s worked around the Soviets to create their own version of the AK.

Forging Their Own Path: Yugoslavia’s Independent Rifle

In the fractured landscape of post-World War II Europe, the Socijalistička Federativna Republika Jugoslavija (Socialist Federal Republic of Yugoslavia – SFRJ) charted a uniquely independent course. Initially aligned with the Soviet Union, Yugoslavia’s relationship with Moscow ruptured dramatically following the Tito-Stalin split in 1948. This political schism cast Yugoslavia adrift from the burgeoning Eastern Bloc, leading to its refusal to join the Warsaw Pact and forcing it into a precarious non-aligned position during the Cold War.1 Wary of potential aggression from both NATO and the Soviet sphere, Belgrade recognized that national survival depended on military self-sufficiency.2

This drive for independence created a significant arms dilemma. The break with Moscow severed access to the latest Soviet military technology and, crucially, the licenses to produce advanced weaponry like Mikhail Kalashnikov’s revolutionary AK-47 assault rifle.1 While Yugoslavia remained a socialist state, its ideological divergence and independent streak meant Western powers were equally hesitant to provide significant military aid or technology transfers.2 The Jugoslovenska Narodna Armija (Yugoslav People’s Army – JNA), still largely equipped with World War II-era weapons including locally produced Mauser M48 bolt-action rifles, faced the challenge of modernization alone.2

Yugoslav planners understood the changing nature of warfare. As early as 1952, the defense industry began experimenting with automatic rifle designs, initially drawing inspiration from captured German StG 44 assault rifles, large numbers of which had fallen into Yugoslav Partisan hands during the war.1 This early research underscored the awareness within the JNA of the need for an intermediate-caliber automatic rifle, but the path to acquiring or developing such a weapon remained blocked by geopolitical realities. The quest for a domestic Kalashnikov variant, therefore, was not merely a technical undertaking; it was a direct manifestation of Yugoslavia’s defiant assertion of independence and its commitment to self-reliance in a world dominated by two opposing superpowers. The rifle project became intrinsically linked to the nation’s unique political identity under Marshal Josip Broz Tito.

Glimpses of the Future: Acquiring the Kalashnikov

The first crucial breakthrough came unexpectedly in 1959. Two Albanian border guards, armed with Soviet-made AK-47 rifles, defected across the border into Yugoslavia.1 This event provided the Yugoslav military establishment with its first tangible examples of the weapon they desperately sought to understand. The captured rifles, believed to be the milled-receiver Type 3 variant which was then standard Soviet issue, were promptly handed over to engineers at the renowned Zastava arms factory (then operating as Crvena Zastava, or Red Banner) located in the city of Kragujevac, Serbia.1

While this windfall was invaluable, the two rifles presented significant limitations. Engineers at Zastava meticulously studied the weapons, even making metal castings of components using sulfur to understand their form.2 However, two samples were simply insufficient to reverse-engineer the design effectively. Critical information regarding manufacturing tolerances, precise material specifications, and the intricacies of heat treatment remained elusive.1 Reproducing the rifle reliably based solely on these examples proved impossible. A technical impasse had been reached, threatening to stall the project before it truly began.

Overcoming this obstacle required intervention from the highest levels of the Yugoslav state. By the end of 1959, or shortly thereafter, the government managed to secure a much larger quantity of AK-47s.1 Accounts suggest that Marshal Tito himself played a direct role during a state visit to an unnamed non-aligned nation.2 This country, possibly Egypt, Indonesia, or India, was a recipient of Soviet military aid.3 Through discreet negotiations, Yugoslavia arranged the clandestine purchase of approximately 2,000 AK rifles from a batch supplied by the USSR.2 This covert acquisition, bypassing official channels and Soviet oversight, provided Zastava with the critical mass of samples needed for thorough analysis. The fact that such a significant acquisition required top-level political maneuvering underscores the project’s importance as a national priority, essential for breaking the technical deadlock and enabling the engineers to finally unlock the secrets of the Kalashnikov.

The question of which country they bought those 2,000 AKs from has never been formally answered but I have a real strong hunch and that will be the next blog post.

Unlocking the Kalashnikov: The Zastava Challenge

With a substantial number of Soviet AKs now available for study, the engineers at Crvena Zastava, which translates into English approximately as “Red Flag” works, in Kragujevac could finally begin the complex process of reverse engineering in earnest.1 This historic arms factory, the heart of Serbian and later Yugoslav weapons manufacturing, became the crucible for Yugoslavia’s Kalashnikov ambitions.2

In 1959, the effort was formalized under the project designation FAZFamilija automatskog oružja Zastava (Family of Automatic Weapons Zastava).2 This name itself revealed a strategic vision extending beyond merely cloning the AK-47. The goal was to develop an integrated family of infantry weapons tailored to the JNA’s needs, encompassing not only an assault rifle but also potentially a self-loading rifle and, significantly, a light machine gun (LMG).2 This mirrored the Soviet small arms doctrine (which featured the SKS carbine alongside the AK rifle and RPD/RPK machine guns) but aimed for entirely domestic design and production. This indicated a comprehensive, long-term strategy for infantry armament, rather than a simple stopgap measure.

The FAZ project was a collaborative effort, spearheaded by a team of talented Zastava engineers and designers. Key figures included Božidar Blagojević (who would later design the CZ99 pistol), Major Miloš Ostojić, Miodrag Lukovac, Milutin Milivojević, Stevan Tomašević, Predrag Mirčić, and Mika Mudrić, with engineer Milan Čirić leading the project.2 Their task was immense: to meticulously disassemble, measure, analyze materials, and create complete technical drawings for a weapon system they had no license or official documentation for.1 Every dimension, tolerance, and material property had to be painstakingly deduced through careful examination of the acquired Soviet rifles.

The First Yugoslavian AK: Enter the M64

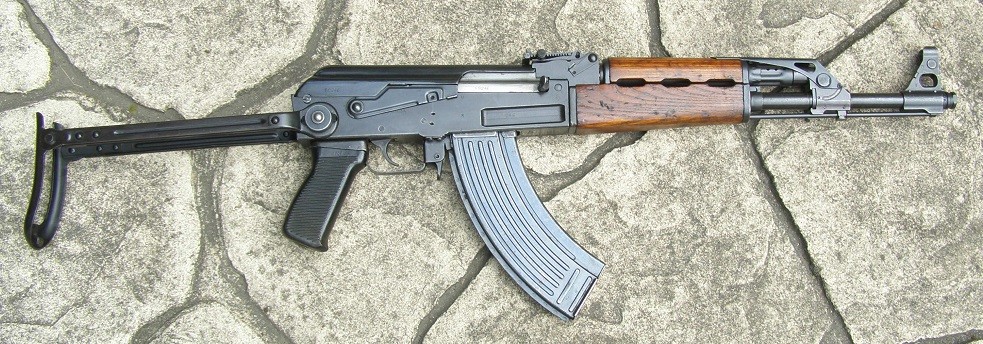
By 1964 and 1965, the intensive work at Zastava bore fruit. The first prototypes of a distinctly Yugoslavian Kalashnikov emerged, designated the M64A (featuring a fixed wooden stock) and M64B (equipped with an underfolding metal stock).1 Alongside these rifles, prototypes for a companion light machine gun, the M65A and M65B (featuring a quick-detach barrel), were also developed, though these LMGs would ultimately not see mass production.2

While based on the Soviet Type 3 AK-47, the M64 prototypes incorporated several unique features and modifications, reflecting both Yugoslav ingenuity and specific JNA requirements. This early design demonstrated that Zastava‘s engineers were not content with mere replication; they sought to adapt and potentially improve upon the Kalashnikov design. Key differences included:

  • Milled Receiver: Like its Soviet progenitor, the M64 utilized a robust milled steel receiver. However, the Yugoslav receiver had distinct geometry: the characteristic lightning cut above the magazine well was present only on the right side, while the left side featured a unique profile incorporating a visible pin intended to retain the bolt hold-open mechanism.5
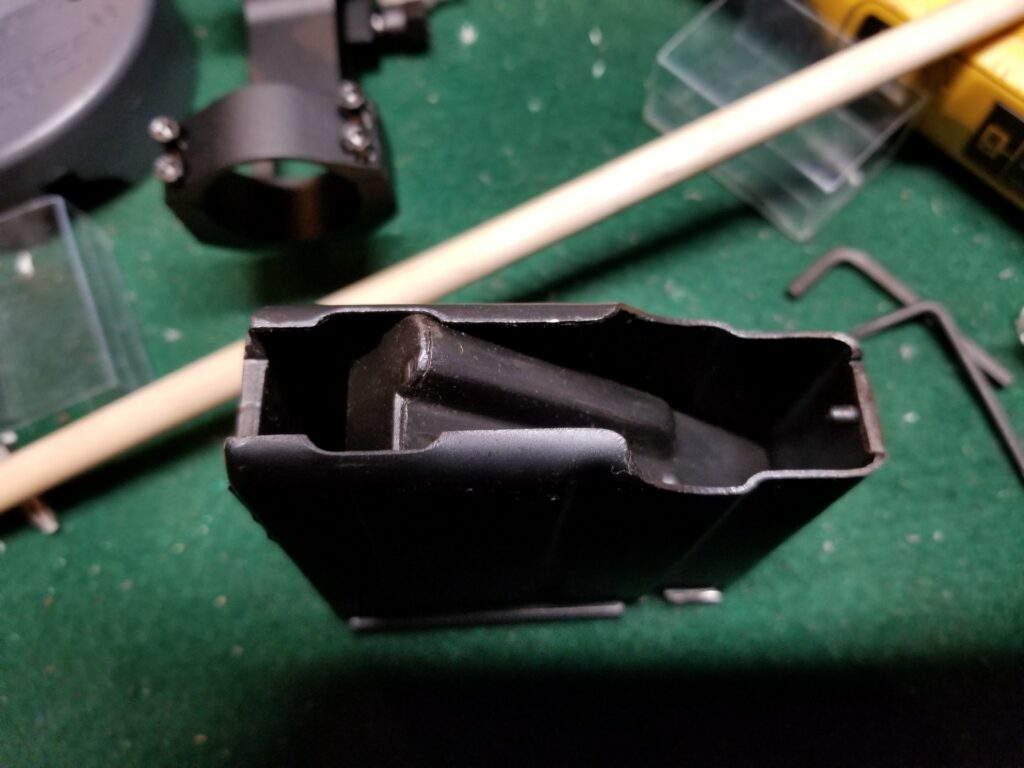
  • Bolt Hold-Open (BHO): Perhaps the most significant innovation was a fully functional bolt catch mechanism. This device locked the bolt to the rear after the last round was fired from the magazine, offering a potential tactical advantage by speeding up reloads and providing immediate visual confirmation of an empty weapon. However, this system required specially modified magazines featuring a unique cutout on the follower or feed lip.1
  • Integrated Grenade Launching Capability: Reflecting a strong emphasis in JNA doctrine, the M64 was designed from the outset to launch rifle grenades. It featured a built-in, flip-up grenade sight mounted on the gas block and incorporated a gas cut-off mechanism, allowing the rifle’s gas system to be shut off to safely propel grenades.2 This was a notable difference from standard Soviet AKs, where grenade launching often required separate attachments.
  • Distinct Furniture: The M64 sported longer wooden handguards compared to the Soviet AK, giving it a different profile. These handguards were not interchangeable with standard AK parts.1 The M64B underfolding stock was borrowed directly from the existing Yugoslav M56 submachine gun, showcasing resourcefulness in utilizing existing production lines.2
  • Modified Sights and Charging Handle: The rear sight was positioned further back on the receiver compared to the standard AK placement on the rear sight block (though some very early prototypes experimented with receiver cover mounting), providing a longer sight radius for potentially improved aiming accuracy.1 Additionally, engineers pragmatically adopted the hollow cylindrical charging handle design from the domestically produced M59 rifle (Yugoslavia’s licensed SKS variant, known colloquially as the Papovka), again leveraging existing manufacturing capabilities.2

These modifications highlight a design philosophy that blended adaptation to specific military needs (grenade launching), innovation (BHO), and practical resource management (reusing existing parts). The M64 was clearly shaping up to be more than just a copy; it was becoming a uniquely Yugoslavian interpretation of the Kalashnikov system.

Feature Comparison: Soviet AK-47 Type 3 vs. Zastava M64 Prototype

FeatureSoviet AK-47 (Type 3)Zastava M64A/B PrototypeSnippet Reference(s)
Receiver TypeMilledMilled (Yugoslav pattern)6
Bolt Hold-OpenNoYes (requires modified magazine)1
Grenade Sight/Gas Cut-offNo (added later/separate)Yes (integrated)2
HandguardsStandard lengthLonger, unique design1
Rear Sight LocationStandard (rear sight block)Further rearward on receiver1
Charging HandleStandard AKHollow cylindrical (from M59 SKS)2
Folding Stock (M64B)N/A (AKS was different)Underfolder (from M56 SMG)2

Towards a Standard: Trials, Tribulations, and Transition

Despite the successful development of the M64 prototypes and reportedly satisfactory performance during initial field trials 1, the path to mass adoption by the JNA was not immediate. A degree of conservatism existed within the military leadership; some senior officers remained skeptical about the utility and cost-effectiveness of equipping every infantry soldier with a fully automatic rifle, fearing it would lead to excessive ammunition expenditure.2 Yugoslavia had, after all, only recently standardized its licensed version of the semi-automatic SKS, the Zastava M59.8

This institutional hesitation was significantly challenged by external events. The Warsaw Pact invasion of Czechoslovakia in August 1968 served as a stark demonstration of modern Soviet military doctrine, where entire infantry units were equipped with Kalashnikov assault rifles. Witnessing the effectiveness of massed automatic fire likely swayed opinions within the JNA command structure, highlighting the urgent need for a comparable domestic capability.2 The geopolitical situation acted as a catalyst, pushing the JNA to overcome its previous reservations and accelerate the process of adopting a modern assault rifle. Interestingly, around this period, warming relations with Moscow led Yugoslavia to briefly enter negotiations to purchase Soviet AKs directly, primarily for special forces units.2 This development undoubtedly put pressure on Zastava and proponents of the domestic FAZ program to prove their rifle was ready.2

However, the M64 faced a critical technical hurdle on the path to standardization: its innovative bolt hold-open mechanism. While potentially useful, the BHO necessitated the use of proprietary magazines, incompatible with the standard AK magazines that were becoming increasingly common worldwide.6 From a logistical perspective, introducing a non-standard magazine for the army’s main service rifle presented significant challenges. The JNA leadership ultimately prioritized interoperability and logistical simplicity, deciding that the new standard rifle must be compatible with commonly available AK-pattern magazines.6 This pragmatic decision, favoring ease of supply and potential use of captured magazines over a unique but non-standard feature, sealed the fate of the M64’s BHO system.

As the design moved towards finalization for mass production, the Vojnotehnički institut Beograd (Military Technical Institute Belgrade – VTI) likely played an increasingly important role.10 While Zastava engineers had driven the initial design and prototyping of the M64 2, the VTI, as the JNA’s central research and development body, would have been involved in refining the technical requirements based on trial results, overseeing final testing protocols, and preparing the definitive technical documentation for the production rifle.2 This included incorporating the mandated changes, most notably the removal of the bolt hold-open feature, paving the way for the weapon that would become Yugoslavia’s standard assault rifle.

Conclusion: On the Brink of the M70

The journey from Yugoslavia’s post-war isolation to the verge of mass-producing its own Kalashnikov variant was a testament to national determination, engineering skill, and political will. Blocked from acquiring licensed Soviet technology due to the Tito-Stalin split, Yugoslavia embarked on a challenging path of independent development.1 The opportunistic acquisition of initial AK-47 samples via Albanian defectors in 1959 provided the crucial spark.1 Overcoming the limitations of these few examples required high-level political intervention to secure a larger batch of rifles through clandestine channels, enabling Zastava engineers to undertake a comprehensive, unlicensed reverse-engineering effort under the ambitious FAZ program.1

The resulting M64 prototypes were far more than simple copies. They represented an innovative adaptation of the Kalashnikov design, incorporating features tailored to JNA doctrine, such as integrated grenade-launching capabilities, alongside novel additions like the bolt hold-open mechanism and resourceful use of existing domestic components.1 However, trials, evolving military thought spurred by events like the 1968 Czechoslovakia invasion, and pragmatic logistical considerations—specifically the need for standard magazine compatibility—led to crucial design revisions.2

These are photos of M64 prototypes overlaid on a map of Yugoslavia
This is a photo of a Zastava M64B (B designating that it is an underfolder model) shared on Wikimedia by AZ2001

By 1970, the culmination of over a decade of effort was at hand. The lessons learned from the M64 program, the strategic decisions made by the JNA leadership, and the collaborative work between Zastava and the VTI had refined the design into a production-ready rifle. In that year, the Yugoslav government formally approved this modified design for serial production, designating it the Automatska Puška Model 1970 (Automatic Rifle Model 1970), or AP M70.1 The stage was set for the introduction of Yugoslavia’s first mass-produced Kalashnikov, a rifle born from political necessity and forged through ingenuity and perseverance. The detailed story of the M70 itself would be a new chapter, but its foundations were now firmly laid in the experiences chronicled here.

Image Source

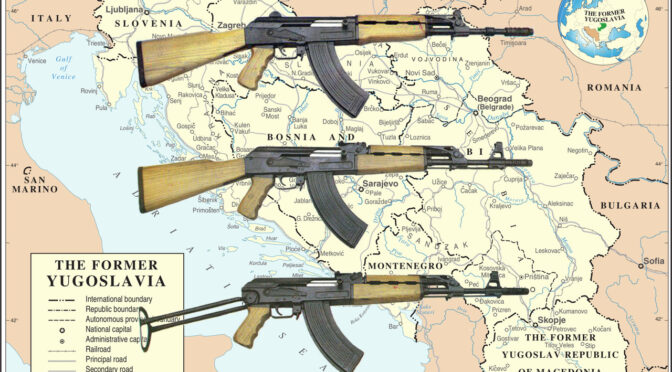
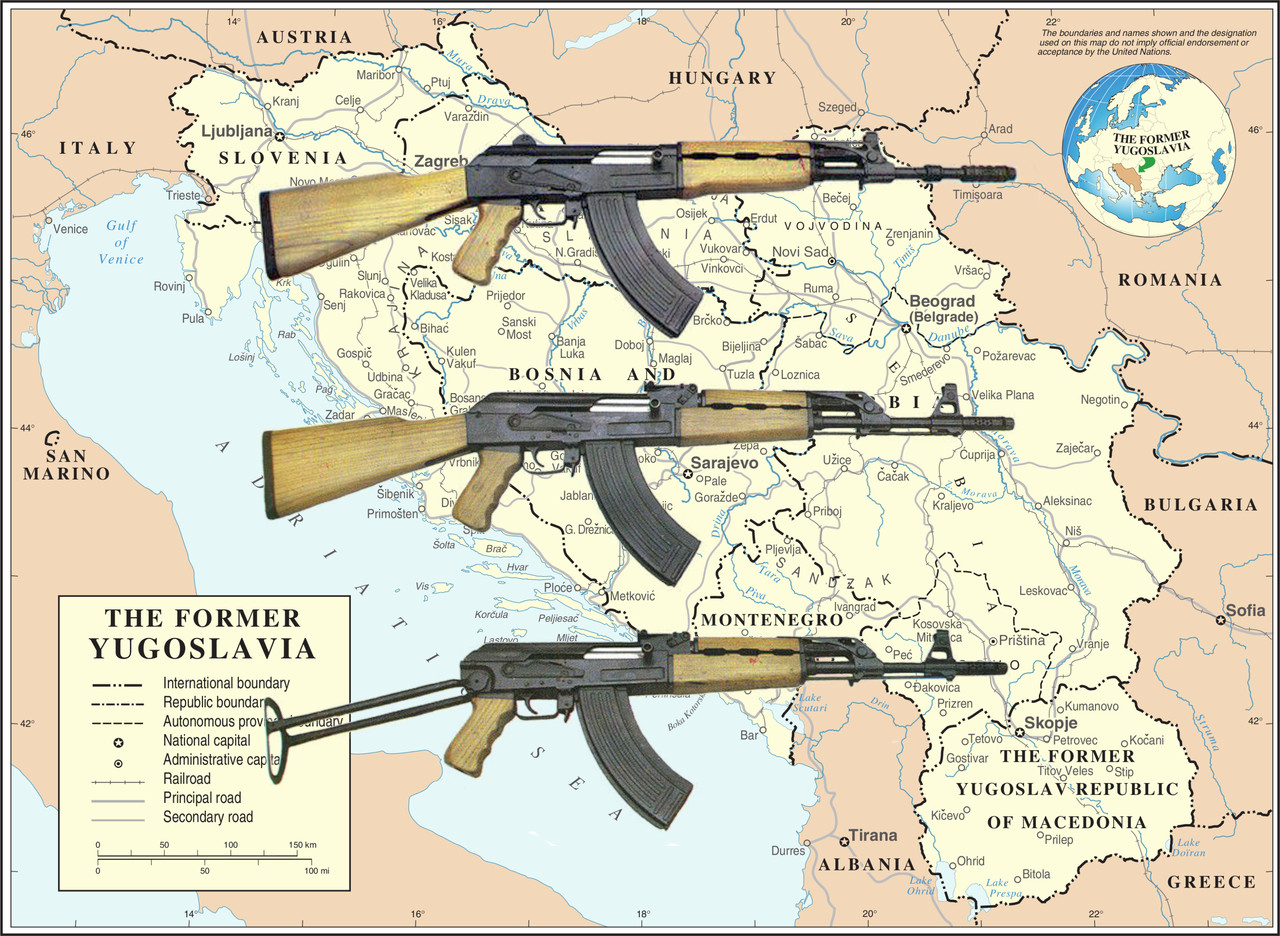
The rifles were uploaded to Wikimedia by TheLokov. And the Yugoslavian map is also from Wikimedia and was shared by the UN. The author created the combined image.
https://commons.wikimedia.org/wiki/File:Zastava_M-64_prototypes.png
https://commons.wikimedia.org/wiki/File:Former_Yugoslavia_Map.png

The M64B image is from Wikimedia also and was shared by AZ2001.
https://commons.wikimedia.org/wiki/File:ZastavaM64B.jpg

Works cited

  1. Zastava M70 assault rifle – Wikipedia, accessed May 12, 2025, https://en.wikipedia.org/wiki/Zastava_M70_assault_rifle
  2. Zastava M64. Part 1. The Unusual History of Yugoslavian AKs …, accessed May 12, 2025, https://www.thefirearmblog.com/blog/2024/05/07/zastava-m64-part-1-unusual-history-yugoslavian-aks/
  3. Zastava M70 (автомат) — Википедия, accessed May 12, 2025, https://ru.wikipedia.org/wiki/Zastava_M70_(%D0%B0%D0%B2%D1%82%D0%BE%D0%BC%D0%B0%D1%82)
  4. Is the Yugoslav, Zastava M-70, the best licensed built Ak-47 and maybe the best Ak-47 variant to this day? : r/ak47 – Reddit, accessed May 12, 2025, https://www.reddit.com/r/ak47/comments/10r4iq9/is_the_yugoslav_zastava_m70_the_best_licensed/
  5. Guns in Movies, TV and Video Games – Zastava M70 – Internet Movie Firearms Database, accessed May 12, 2025, https://www.imfdb.org/wiki/Zastava_M70
  6. Zastava AKs, Part 2. M70 – The First Mass-Produced Yugoslavian …, accessed May 12, 2025, https://www.thefirearmblog.com/blog/2024/05/14/zastava-aks-part-2-m70-first-mass-produced-yugoslavian-kalashnikov/
  7. How Does The Yugoslavian Zastava M70 Compare To Other Ak-47 Variants? – GunCreed, accessed May 12, 2025, https://guncreed.com/2024/08/17/how-does-the-yugoslavian-zastava-m70-compare-to-other-ak47-variants/
  8. My Complete Yugoslavian Smallarms Collection History (Zastava Trek VIII: Communist First Contact) – YouTube, accessed May 12, 2025, https://www.youtube.com/watch?v=kzJ5v_HREt0
  9. A country’s weapons can be a good indication of whether they wanted to be a Soviet puppet state : r/NonCredibleDefense – Reddit, accessed May 12, 2025, https://www.reddit.com/r/NonCredibleDefense/comments/17jukc7/a_countrys_weapons_can_be_a_good_indication_of/
  10. PROCEEDINGS, accessed May 12, 2025, https://scindeks-clanci.ceon.rs/data/pdf/proc-0018/OTEH_2024.pdf
  11. Војнотехнички институт — Википедија, accessed May 12, 2025, https://sr.wikipedia.org/wiki/%D0%92%D0%BE%D1%98%D0%BD%D0%BE%D1%82%D0%B5%D1%85%D0%BD%D0%B8%D1%87%D0%BA%D0%B8_%D0%B8%D0%BD%D1%81%D1%82%D0%B8%D1%82%D1%83%D1%82
  12. ПОЛИТИКА ОДБРАНЕ ЈУГОСЛАВИЈЕ (1945–1958): ИДЕЈЕ И ПРАКСА, accessed May 12, 2025, https://nardus.mpn.gov.rs/bitstream/id/143356/Disertacija_12293.pdf
  13. Zakon o Opasnim Materijama | PDF – Scribd, accessed May 12, 2025, https://www.scribd.com/document/395551284/Zakon-o-Opasnim-Materijama

If you find this post useful, please share the link on Facebook, with your friends, etc. Your support is much appreciated and if you have any feedback, please email me at in**@*********ps.com. Please note that for links to other websites, I may be paid via an affiliate program such as Avantlink, Impact, Amazon and eBay.


Changed my Yugo M76 Scope Mount To An American Defense AD-RECON-SL and It’s Rock Solid!!

When I was adding the big Vortex Hog Hunter scope to my M76 with RS Regulate side mount optics rail, all I had to prototype with were UTG rings. While the UTG rings aren’t too bad, I have stopped using them with centerfire rifles because they have a rounded screw that passes through the Picatinny rail rail slot. It’s rounded shape and only partially filling the slot risks damaging the rail and the zero shifting because the ring(s) can move.

These are the UTG low profile rings. Note how the screw is round and not rectangular? Also, after 30 rounds of 8mm Mauser firing, the rear flip lever rattled loose.

What is really needed is a quality ring or scope mount that uses a bar that properly fits into the Picatinny Rail slots and locks the optic securely and consistently into position. American Defense mounts are that way and they have an excellent locking lever.

I started using American Defense mounts for my Vortex Crossfire Red Dot optics a little over a year ago and was very satisfied with them and very impressed by their quick release lever design. So, when I needed a new mount for my M76 that was strong enough to hold the big Vortex Hog Hunter scope on my M76 and would clear rear sight block but also be close to the bore, the American Defense AD-RECON-SL immediately came to mind.

American Defense AD-RECON-SL

American Defense started with their QD Auto Lock System – the quick release lever system they developed. – and have branched into a variety of offerings from there including scope, bipod, light, laser and other mounts. In short, they are capitalizing on their really rugged QD levers.

So, the first thing I did was to measure the UTG mount from the top of the rail to the optic center, which I used the top of the lower half ring. That measure came to about 0.975″ and I knew any mount I bought had to be at least that or bigger. The front objective was all but touching the gas tube cover with those UTG low rings.

The AD Recon series has a variety of heights and offsets to select from and they publish specs for you to make an informed decision. In my case, because the RS!Regulate side mount already has front-to-back adjustment, I didn’t feel that I needed any offset but I did want to find as low of a scope mount as I could.

In looking at the specs, the AD-RECON-SL seemed to fit the bill. It had no offset and was their lowest mount with a 1.110″ center for scope with a 30mm tube. it was a tad higher but the slightly higher 0.135″ difference really didn’t worry me so I went ahead an ordered one.

Folks, the AD-RECON-SL did not disappoint. It is really a gorgeous piece of engineering. The fitment is excellent and is finished in a black hard coat. Here are some photos:

Here’s the side of the unit with the adjustment nuts. I love the flag on the side.
Here it is with their patented QD levers. The small lever you see in the middle of the bigger lever is the locking mechanism that keeps the unit secure. The moment you flip those rings you know your dealing with quality.
See how American Defense uses bars to lock the mount into the Picatinny rail? This is the way to go. It makes for a very secure and consistent engagement meaning your optic’s zero will not shift and the rail will not get damaged over time under heavy recoil with a simple round screw.
Yeah… that’s the American Defense unit on the left and the little UTG ring on the right. I would have no hesitation recommending the UTG rings for a rimfire or light recoil applications but not for something where there is significant recoil and a heavy optic combined.
Here’s another angle.

But Why Have QD Rings on a RS Regulate Mount?

I do need to explain this. I can bet that I will need to take the dust cover off for some reason and don’t want to rely on tools. If I am hunting, I may not have any tools with me and need to clear a jam or something. That means I need a way to remove the scope and rail to get access to the dust cover.

The RS Regulate’s lower rail does have a quick take down lever that solidly clamps on the M76 rail. That is not the issue and may make you wonder I need another quick release system. The challenge is that the Hog Hunter scope has a giant 56mm front objective for gathering as much light as possible in low-light situations such as dusk. It will hit the M76’s rear sight block if pulled straight back when mounted as low as I want. The solution is to use the AD-RECON-SL optic mount to enable me to lift the scope off the RS Regulate’s top rail and then I can slide the RS Regulate assembly off. The combination definitely works.

Installation

Taking the mount apart was easy – remove the four screws on each ring. I was pleasantly surprised that they used a precision pin to guide the rings into position and not just the screws. Again, this makes it stronger and more consistent.

Here’s a close up of the base. The middle hole is for the guide pin and the outer holes are for the screws.
Here you can see the four halves of the rings. The half to the top left with the guide pin. Its counterpart is already installed in the back.
An important design aspect to note is that the halves are not symmerical from top to bottom. The side with the pin is a no-brainer – that goes in the base. The other two halves without pins need to have the thinner section at the bottom for the pieces to mate up correctly. You can see in the top left half that the bottom part with the alignment pin is not as tall as the top. The lower-right is also a good angle for you to see the thinner bottom relative to the top.

There is an installation detail that you may not guess and they detail it in their installation instructions – you install the bottom screws first and tighten them down to the 20-25 in/lbs torque spec first. For folks not used to working with small fasteners, please note that is inch pounds and not foot pounds).

The bottom is torqued down first and then the top. There will be a small gap at the top. This method of bottom then top torquing centers the optic in their design. The only thread locker they will recommend is VC-3 Vibra-tite and the use of anything else will void the warranty. I’ve used a lot of Vibra-tite with Kydex holsters – it’s interesting in that you clean the fastener, apply the VC-3, let it dry and then assemble. It creates a rubbery surface that pretty much negates vibration. It also stays put when you unscrew and reinstall screws. It’s interesting stuff. They include a small packet of it with the mount but I also keep it around for working with Kydex fasteners and other situations where I expect there will be a need to uninstall and reinstall or adjust screws.

Here’s the M76 rifle with the American Defense mount installed. Note I used my Vortex torquing screwdriver to do the installation. It’s definitely a precision instrument and what I use for all optics work now. I take care to return it to zero after each use.
Here it is from another angle.
I changed cheek pieces to get a better cheek weld. This unit is nice and stable. I’m so-so about the cheek pad itself and wish it was a bit wider but it is better than the Voodoo cheek pad that was there. I’m still hunting for an even better cheek weld and have some options I want to try that I will report on at a later date after I have a chance to try them. To be clear- it is a solid cheek piece and the right height but personally I do not like the feel of that relatively narrow riser.

In Summary

The combination of the RS Regulate side mount system and the AD-RECON-SL optic mount is absolutely rock solid as in zero flex at all. even with the big and heavy Vortex Hog Hunter scope. I really think I have the ideal optic solution now for the rifle. The length of pull is better thanks to the installation of a SVL slip-on Limbsaver pad. I still need to find a better cheek piece to get my eye just the way I want it comfortably behind the scope and have some options to try. Last thing to report is that I did do some work on the firing pin but haven’t had time to test the rifle again.


If you find this post useful, please share the link on Facebook, with your friends, etc. Your support is much appreciated and if you have any feedback, please email me at in**@*********ps.com. Please note that for links to other websites, I may be paid via an affiliate program such as Avantlink, Impact, Amazon and eBay.


Add Length of Pull to a Yugo M70, M72 or M76 Wood Buttstock WIth A Limbsaver Recoil Pad

Normally, I like the length of the Yugo M70 and M72 buttstocks. They’re shorter than many Western fixed stock designs but I’ve just grown accustomed to the length of pull (LOP). Recently, I had Two Rivers Arms build me a M76 designated marksman’s rifle (DMR) and found the stock to be a tad shorter than what I wanted to get in position behind the big Vortex Hog Hunter scope I had bought for it.

Two Rivers Arms custom built Yugo M76 rifle with a RS!Regulate scope mount and Vortex Hog Hunter scope. The UTG rings have been replaced with an American Defense mount and the cheek piece will be replaced but you can get an idea that this is a big rifle and a big optic.

I realized that to make the LOP longer, I had two options. My normal route with an AK is to install a stock adapter and either go to some form of modular stock. In the case of the M76, I really wanted to stick with the original wood. The brought be to my second option – to add a recoil pad.

There are a ton of recoil pads on the market but as far as I know, nobody makes a direct replacement recoil pad for the Yugo military rifles other than me and my pad is a copy of the original. This gives you two options also – either cut the stock and install a “grind to fit” pad that would ruin the original stock or to go with a slip on pad.

Slip on recoil pads are designed to fit a certain range of buttstock sizes based on the height and width. They may not be the best looking of options but they get the job done and don’t require any modifications to the underlying stock — plus for folks who don’t like messing with tools – they can be slid on and off usually very easily.

End of Buttstock Size for Yugo M70B1, M72B1, and M76 Rifles

Zastava made the Yugo rifles but is now in Serbia and makes both commercial and military rifles. The dimensions I am about to give so you can get the proper pad only apply to he military rifles. If you have a Zastava N-PAP for example, your stock is much smaller and I don’t know the dimensions.

If you do have a military sized Yugo M70B1, M72B1 or M76 then the following should sizes should be approximately right:

  • Top to bottom of the buttstock overall: 4.48″ so just under 4-1/2″
  • Left to right at the widest point: 1.29″ so just under 1-1/3″

So that means a slip on buttpad needs to accomodate those dimensions and will slide right over the original recoil pad as well.

Limbsaver by Sims Vibration Labs

Years ago, I happened across Limbsaver recoil pads and started using them more than Pachmayr, which is another leading brand. I’ve had very good luck with Limbsaver so they were my go-to when it came to the M76.

They have a new Air-Tech series that adds 1″ to the LOP and is also remarkably spongy to absorb the recoil. The M76 really doesn’t have a ton of recoil so my decision was more based on the 1″ LOP.

The AirTech slip on pad comes in four sizes:

  • “Small” fits stocks measuring 4-1/2 x 1-1/2 inches to 4-13/16 x 1-5/8 inches
  • “Small/Medium” fits stocks measuring 4-5/8 x 1-9/16 inches to 5-1/8 x 1-3/4 inches
  • “Medium” fits stocks measuring 4-13/16 x 1-5/8 inches to 5-1/8″ x 1-3/4 inches
  • “Large” fits stocks measuring 5-1/8 x 1-3/4 inches to 5-3/8 x 1-7/8 inches

Given those dimensions, I opted to buy the “small” size and it fit beautifully. [Amazon has all four sizes – click here to see them]

The small-sized pad slid right on and fits nice and snug.

I actually wish they had a pad that added about 1/2-3/4″ of pull as that would be perfect. The end result is just a tad longer than what I would dial in with an adjustable Magpul PRS stock but it definitely feels better when I start lining up behind the scope. It’s staying on the rifle!


If you find this post useful, please share the link on Facebook, with your friends, etc. Your support is much appreciated and if you have any feedback, please email me at in**@*********ps.com. Please note that for links to other websites, I may be paid via an affiliate program such as Avantlink, Impact, Amazon and eBay.


Part 6: Two Rivers Arms Yugo M76 Rifle – The First Range Trip

I finally got a chance to take the Yugo M76 to the range and my youngest daughter went with me although now that she’s in college she’s gone a lot. I do have fun when she’s home as she loves shooting also and knows her way around a rifle.

Erika is getting the rifle situated. I forgot my good bench rest so we made do with a Caldwell bag rest I brought along just in case. The weather was great.

We set up at 100 yards and I did the initial test firing and sighting in of the rifle. Function-wise, it was great. We did not have a single failure to feed or eject the whole day.

By the way, my daughter is wearing MPOW 035 ear muff hearing protectors and she said they worked great. She wore them when we were shooting the M76, my .338 Lapua and 9mm Glocks. They are excellent not to mention a good deal. I have three sets of them now for her and others. I am still using my Howard Leight by Honeywell electronic ear muffs.7

Both of us were wearing NoCry safety glasses. I use ones that go over my prescription eye glasses and my daughter wears normal ones because she has contacts.

One thing the slowed me up a bit was that the laser bore sight didn’t really help me out much. I have a new one from Wheeler that works great on the actual muzzle end of rifles but it would appear the M76’s brake was not truly perpendicular to the bore. Normally it is pretty slick but at the range, I had to fire a number of rounds to even get them on the backing board first and then finally to the bullseye.

We were shooting S&B 196 grain SPCE ammo. My groups were about 1.5-2″. I’ll get back down to the range one of these days with my better rest so I can test the accuracy. I have some Hornady Vintage Match ammo too that has cool specs but since I didn’t have my bench rest with me, I largely saved it for next time and will explain why I said that in a moment.

Pierced Primers

The only problem we encountered was the firing pin piercing primers. We went through almost 40 rounds and about a third had pierced primers. This is a known issue with M76s and, yes, the rifle is headspaced properly.

At first I thought it might just be the S&B ammo so I tested it with five rounds of Hornady Vintage match also. I think two of the five Hornady rounds were pierced. At any rate, here are some photos of the S&B ammo.

Example pierced primer. It did this both on S&B and Hornady ammo.
At home, I grabbed some random brass and took this photo to show both pierced and cratered primers.

There are a lot of posts about the piercing and cratering of primers with the M76. I’m pretty busy right now but will read all that I can before I do anything.

First, I plan to confirm the pin protrudes between 1.42mm (.056″) minimum and 1.52mm (.060″) maximum.

Second, I want to compare how close the firing pin hole is to the firing pin on my other M76 bolt plus some of my AKs. I don’t think it looks unusually large but it should be investigated.

Third, I have a hypothesis – I think the firing pin needs more of a rounded radius. The current face of the firing pin is relatively flat. There were literally little punched pieces of primer laying on the firing bench that were flat and the primers that intact showed a very flat impact.

Those primer pieces, maybe they should be called chads, show a pretty flat firing pin face.

I’m not going to rush into anything. I do have a second complete bolt assembly that I can look at and scavenge from if need be. If you have suggestions, contact me – in**@*********ps.com.

Bottom line

We had a lot of fun. The rifle performed very well with no feed or ejection problems, no magazine problems and only the pierced primers were minor issue.

I do need to work on the cheek rest more so it stays in place better.

I definitely look forward to shooting this rifle with a better bench rest and also comparing it side by side with my .308 M77. Also, I’ll report back on what I try to correct the firing pin piercing or cratering primers at some point in the future. Until then, have a great day!


If you find this post useful, please share the link on Facebook, with your friends, etc. Your support is much appreciated and if you have any feedback, please email me at in**@*********ps.com. Please note that for links to other websites, I may be paid via an affiliate program such as Avantlink, Impact, Amazon and eBay.


Part 5: Two Rivers Arms Yugo M76 Rifle – How to Find the Correct Commercial Ammunition

I’m new to the Yugo M76 rifle and the world of the 8mm Mauser cartridge. When I searched on 8mm Mauser all kinds nomenclature (how it is named) popped up and I had to do some research to understand what to buy. To try and help others I decided to write a blog post to try and clarify what type of ammunition you need to look at for the M76.

IS, JS, IRS & JRS Cartridge Types

When I heard my M76 was almost done being built by Two River Arms, I started shopping for ammo and quickly got confused – I’m good at that. I really didn’t want to deal with old corrosive ammo so my focus was on current commercial offerings and not hunting down old surplus ammo, etc.

First off, you will notice that much of the 8mm Mauser has an “IS” or “JS” designator after the size such as 8×57 IS. The “I” comes from the German word “Infanterie” which means infantry and was mistaken by some to be a “J” so some groups refer to the round using a “JS” designator instead.

When the round was first officially adopted in 1888, it was for 0.318 bore rifles. The “S” dates back to 1903-1905 when “S Patrone” or S ball cartridge was developed for use in S-bore rifles that was larger at 0.323″.

The nomenclature of the rounds can vary because of this and other factors so you are looking for: 8mm Mauser, 8×57 IS, 8×57 JS, 8×57 and so forth. It will likely say IS or JS somewhere especially if it is European but American producers may just say “8mm Mauser”.

Do NOT buy 8×57 IRS or 8×57 JRS. These refer to a rimmed variant that was developed for use in break barrel sporting rifles – double rifles, drilling rifles and so forth. Once in a while you will see it for sale and it will NOT work in a M76. Just remember – if it ends in RS, your day is going to Really Suck 🙂

CIP and SAMMI Specs

The standards body for small arms ammunition in Europe is the Commission internationale permanente pour l’épreuve des armes à feu portatives (“Permanent International Commission for the Proof of Small Arms”. They refer to the 7.92×57 Mauser formally as 8×57 IS.

The US standards body is the Sporting Arms and Ammunition Manufactuers’ Insitute (SAAMI) and they refer to the round both 8mm Mauser and 8x57mm.

I also noticed one interesting detail – the CIP designated rounds are up to 390.00 MPa or 56,565 PSI. Rifles that use the round must be proof tested to 125% of this.

SAAMI is considerably lower at 241.3 MPa or 35,000 PSI and is done is for liability reasons. Among other things, they are concerned that someone may put a modern cartridge in an older narrower throat “I-Series” barrel.

What am I shooting?

I really like Sellier & Bellot from the Czech Republic and they have a number of rounds for the 8mm Mauser listed as 7.92x57JS. The only load I can seem to find from them in the US is the 196 grain Soft Point Cutting Edge (SPCE) cartridge. It functions great and is accurate in my M76. I’m getting about 1.5-2″ at 100 yards with it.

Here’s my S&B 196gr SPCE ammo. It has worked great so far and I am getting about 1.5-2″ groups at 100 yards shooting 5 round groups. I plan on taking my good bench rest the next time I go to the range and see if I can tighten up the groups.

I also have some of the Hornady Vintage Match but haven’t started using it yet. The specs Hornady publishes sure look good and I look forward to trying it.

Hornday Vintage Match 8x57JS. I just bought this and plan on trying this in the near future.
The unique looking top round is the 196 grain S&B Soft Point Cutting Edge (SPCE) round. This is supposed to be designed for medium game including boar, goats and deer. The bottom round is a Hornady Vintage Match cartridge and the bullet is a 196gr Boat Tail Hollow Point (BTHP) .

Where To Learn More

The following websites provide a lot of insight into the 8mm Mauser round for those of you who want to learn more.

Thank you for reading and I hope this helps you find ammo for your M76.


If you find this post useful, please share the link on Facebook, with your friends, etc. Your support is much appreciated and if you have any feedback, please email me at in**@*********ps.com. Please note that for links to other websites, I may be paid via an affiliate program such as Avantlink, Impact, Amazon and eBay.


Part 4: Two Rivers Arms Yugo M76 Rifle – Fixing The Magazines

The M76 is a pretty wicked designated marksman’s rifle capable of firing 1.5-2 minutes of angle with the hard hitting 8mm Mauser round. It does have a pretty bad weakness however – the magazines can jam so hard you need a tool to get the follower to come up. There’s a solution and that’s what this post is about.

So, What’s The Problem?

Zastava designed the M76 with a bolt hold open (BHO) follower. In other words, the follower has a big lobe that blocks the carrier from going forward and thus locks the action open. Sounds great, right? It would have been if they had closed the gap between the follower and the magazine body and/or made the skirt of the follower longer.

What happens way too frequently is that when the carrier cycles forward, it hits the bolt hold open lobe of the follower causing the follower’s nose to dive down and jam the follower. Literally, the end result most of the time is that it is a bear to open the action and get the magazine to release — I found I needed to fashion a dowel to hit the rear of the follower to free it up. Not good.

Some guys report more headaches than others and I can’t readily tell you why. Maybe Zastava realized the problem and corrected it or maybe there’s enough variation in the gap between the magazine body and follower that it does not always happen. I have about nine M76 magazines and they all nose dived when hit by the bolt carrier practically every time.

The bolt carrier slams the follower down so hard that it can be difficult getting the magazine out of the rifle as well as releasing the follower.
A 3/8″ dowel can be hit with a hammer to pop the follower back into position. Yeah, this sucks.

Cleaning The M76 Magazines

I should point out that I bought about a dozen M76 magazines – some from Apex and some from Ivan Drago on GunBroker. They all had a ton of old cosmoline on them and a lot if was on really thick. I pulled the old paper and junk off the eight you see below and left the rest in storage.

Eight cosmoline laden M76 magazines. Some were almost full of the stuff inside. Some had old newspaper stuck on them as well.
I keep a 5-gallon bucket about half full of Ed’s Red cleaner around that I use to remove cosmoline and what not. Click here for the recipe. I let the crusty magazines sit in there for a couple of days because I had other stuff I was working on and the solution needs time to soften everything up. When I am done, I put the lid back on. It’s great for freeing up rusty parts too.
After the soaking in Ed’s Red to soften and even dissolve some of the crud, I disassembled each magazine and wiped them out. What a mess. No photos of that part but here you can see ones that are done and sitting in a box waiting for next steps.

The Solution to M76 Magazines and Nosediving

Let’s start with two things that didn’t work just so you know. My first try was to simply polish all the edges. That did not work and neither did adding Dupont Teflon dry lube.

My second try was to use sand paper to round everything over underneath the lips of the body and the outside edge of the skirt. That did not work either – even with polishing and Dupont Teflon dry lube.

So, with those two failures, I did some searching on the WWW and found that AKblue posted how he welded a small tab of 20 gauge (0.039″) sheet metal to the back of the follower to close the gap. That did work wonderfully for me and let me walk you through the steps.I went to all the big box stores in the area and nobody had 20 gauge sheet metal. I miss 20 years ago when I could go to a local steel store but they are all gone now.

1. I went to OnlineMetals and bought a 12″x12″ sheet of cold roll mild steel – nothing fancy is needed. 12×12 turned out to be way more than I needed. Shipping is what kills you so I wanted to only buy one time even if some experimenting was needed.

Nothing more exciting than a photo of a 12×12″ piece of 20 gauge sheet metal.

2. I needed to figure out some basic template so I could cut out a bunch of tabs to to then try different shapes with by sanding them down. Now I have a big belt sander – you could use a file or whatever works for you.

That high quality rendering is from an ancient CAD application called pen and paper. The back of the follower was over 0.7055″ wide – I think I just measured the back bent portion and not the sides so take this as a starting point and not an absolute.. Plus wait until you see the fancy ultra precise cutting method (that’s a joke by the way)! In terms of height, I measured about 0.525″ from the lower shelf to the bottom and then added a 0.25″ to have metal to grind down to a shape that worked so the tabs I cut were about 0.71″ wide and about 0.75-.8″ tall.
So much for precision – I used these shears to do the cutting due to the depth of the sheet, I allowed for the thickness of the cutter and clamped a straight edge to guide me from the front to the back. In this photo, the stuff is just sitting there for the photo – I did not have it laid out properly yet. I told you it was high tech, Note, I cut the sheet for the approximate 0.775 dimension.
I scribed the line for the 0.7050 dimension and cut it with my bandsaw. I wasn’t kidding when I said the dimensions were ballparks. I had two criteria I wanted to honor – the tab should not protrude from the top or sides of the follower and I wanted enough material at the bottom to do some experimenting and shaping on.
I then used a Dremel to remove burs. I did not want anything to hang up inside the magazine.
I sanded the back of the follower and sprayed both it and the tab with brake cleaner before welding just to get rid of any contaminants. This is a Harbor Freight 120 volt spot welder and it has the tongs on it for welding in AK rails hence the unique shape of the lower tong if you are familiar with them. If you don’t have a spot welder then I would drill or punch a hole in the tab and shoot a weld with a MIG, etc. I really am not sure if epoxy would hold up with this use case and am recommending true welding for reliability
I didn’t have much room to move the tongs around. I could get two heavy spot welds. This photo shows part of a third attempt but I settled on just two for the rest.
Have you ever wondered about spot welders for casual use but thought they might be too expensive or too complicated? Actually, there are a lot of decent import models that will run on 120 volt household current. The thing you do is to buy one of the tong models, take a few scraps of sheet metal and get to know the sound and color when there is a good weld. First, do it and burn hole on purpose to see but don’t go longer than that or you will melt your copper spot welder tips. Next, back off the time and the amount the tons compress until you find a good weld that doesn’t pull apart easily. That’s it. Click here for a listing of tong spot welders on Amazon – be sure there are over 30 ratings and the higher the average score the better.
First off, the tab is way too long. I am maybe an 1/8-3/16″ at the base of that curve. You’ll also notice that I sanded the back so it would not drag on the magazine body. I polished all the parts using the little rubberized polishing bits in my Dremel.
I did apply a light coat of Super Lube grease to the back to help the parts get to know each other. After things wear in, I bet I will not need it.
You can see the tab. I made sure that the tab was below the lip of the follower. In other words, I did not want it protruding. I went around and polished all edges to make sure nothing would snag.
Here’s another angle – you can just barely see the tab.
Testing of the magazines was done with Realistic Snap Caps. These were great because they are just like the real 8mm Mauser rounds and I could confirm that feeding was okay.

Bottom Line

Welding in the tab did the trick. I think it works for two big reasons – it closed up a rather large gap at the rear that allowed the follower to tilt down to begin with plus by making the skirt of the follower a bit longer, it could not tip as much either. I don’t think the exact shape of the bottom of the tab matters a great deal but you definitely must debur and polish each By adding a bit of Super Lube grease to the back, everything slid very smoothly. I am assuming it will not be needed as parts wear in and time will tell.

Also, I bought way too much 20 gauge sheet metal. You could get by with a far, far smaller sheet. I thought I would have to experiment more and it turned out to be simpler than I thought.

When I went to range feeding was great and not one problem with the follower nosediving when the carrier returned on an empty mag. Problem solved.


If you find this post useful, please share the link on Facebook, with your friends, etc. Your support is much appreciated and if you have any feedback, please email me at in**@*********ps.com. Please note that for links to other websites, I may be paid via an affiliate program such as Avantlink, Impact, Amazon and eBay.


Part 3: Two Rivers Arms Yugo M76 Rifle – The Trigger

When I sent the M76 to Two Rivers Arms to build, I was still using Tapco G2 triggers in my AK builds. Since then, I have moved to ALG Defense’s AK Trigger Ultimate With Lightning Bow (AKT-UL) for anything I’ve built in the last two years. Folks, these are wicked triggers and absolutely hands down my favorite AK triggers.

The top trigger is the ALG AKT-UL. You can see the distinctive shape and the silver colored Nickel Boron finish. The bottom is the Tapco G2 I originally sent to Two Rivers to use. The AKT-UL comes with a new disconnector spring but uses the existing hammer spring. ALG does sell a heavy hammer spring separately if you want it. The extra spring is an auxiliary trigger spring for increasing the pull, which I don’t use. One small pin can be installed and filed down as needed if the safety doesn’t block the trigger sufficiently. I have not needed it so far on any of my rifles. I think the second pin is just a spare.

Not only does the AKT-UL give you three compliance parts as it includes the hammer, trigger and disconnector but the feel is amazing. Now if you know how to tune a G2 trigger, you are used to having a fairly decent AK trigger. The AKT-UL units step it up a notch for sure. ALG does have a shorter and more crisp pull for sure plus they will tell you the trigger has about a 3.5 pound pull which you can tweak a bit by bending the hammer spring.

I got out my Lyman digital trigger gauge and did 20 pulls. The average was 3 pounds 13 ounces and the nice wide trigger shoe makes it feel less.

This is a peek in the M76 receiver as it came from Two Rivers. You can see the Tapco G2 fire control group, orientation of the hammer spring and the pin retaining wire that I am not a huge fan of and replace with a plate. This layout is what you see in most AK rifles unless you get into specialized trigger systems on some of the more modern military designs. For a new person, note the orientation of both the hammer and its spring.

Installation Notes

Safety First Always – Make Sure Your Weapon Is Unloaded! Always assume a weapon is loaded until you confirm it is not. Keep ammo away from your work area and don’t test fit with live ammunition.

Second – read their instructions – they work and you have options. This is not one of those cases where the instructions suck – they are actually quite good. The come with the trigger plus ALG makes them available online – click here to read the instructions for both the Enhanced (EL) and Ultimate (UL) triggers.

I really don’t have any surprises to report. It installed the same as any other AK fire control group and I didn’t need to use any pins and I certainly didn’t want a heavier pull so I didn’t use the auxiliary trigger spring either:

1. Install the hammer with the ears to the rear and spring around the back of the hammer. If it fights you during installation and the little legs that sit on the trigger are facing down, odds are you have the spring installed right. I lubricated all pins with Super Lube Grease before installation. That stuff is my favorite grease now.

Here, the new hammer is installed. Note how the “ears” of the hammer are facing towards the back of the rifle. It’s a common mistake for people new to the AK family of weapons to think that is the part that hits the firing pin but it is not. Also, note how the spring is going around the hammer. You can’t see them but the legs of the hammer spring are facing down. I use needle nose pliers to lift them around out of the way to install the trigger and then set them on the back legs/bars of the trigger.

2. Here’s a tip you will not see in the instructions. A trick I was taught years ago is to use a slave pin that will allow you to assemble the trigger, disconnector and its spring outside of the rifle. This makes it sooooo much easier!! What you do is cut a spare fire control pin or a piece of 5mm stock (0.1969″ or 13/64″ – cheap drill bits work great) down so it fits just inside the trigger pin hole from left to right and slightly taper the ends using a file or sandpaper. Trust me, if you don’t take a few minutes to do this, it is a heck of a juggling act to get the trigger in place with the pin pushed through while keeping the disconnector and its spring in place (don’t forget the little disconnector spring!!).

Here, you can see the slave pin and how it is holding the disconnector nicely in place. I’m not sure why ALG added the window in the disconnector to see the spring but it sure is handy to confirm the spring is there. Perhaps that is why they did it.

3. The trigger is installed by lowering it into position, pushing a fire control pin through the receiver and into the trigger carefully pushing the slave pin out the other side where you can grab it. Note, you will need to wiggle the trigger around some and I just do that with my right hand as I feel the pin through with my left.

4. Next, I used one of our fire control group retaining plates to secure the pins in place instead of the retaining wire. The wire is fine and you can use it if you prefer – I simply don’t care for them. Unlike some plates on the market, our plate is approximately 1.186mm thick and completely fills the groove of the pins to keep them from walking left or right and potentially falling out of the receiver.

Top is our AK fire control group plate. Below it is the type of retaining wire you would see in a M76. AKMs are a bit different due to the differences for automatic fire.

You install the plate by inserting the nose groove into the hammer pin and then rotating the plate down so it secures the trigger pin as well. The rear hole of the plate, the only hole really,is where the selector/safety lever passes through and locks it into position.

This photo shows how the front of the plate engages the hammer pin and the middle groove secures the trigger pin.
Here. everything is installed except for the selector/safety lever so you can see the fire control group and the plate.

That’s it for the trigger. Next up was the need to fix the magazines so they would not nose dive when empty and hit by the bolt carrier. That will be my next post.


If you find this post useful, please share the link on Facebook, with your friends, etc. Your support is much appreciated and if you have any feedback, please email me at in**@*********ps.com. Please note that for links to other websites, I may be paid via an affiliate program such as Avantlink, Impact, Amazon and eBay.


Part 2: Two Rivers Arms Yugo M76 Rifle – Mounting the Optic

I let the cat out of the bag a bit with my first post – I don’t like the Communist offset scopes. Yes, they are traditionally correct but I prefer a scope mounted on the centerline of the rifle with better optics including variable magnification. I had a combination in mind right from the start – the RS!Regulate mounting system and a Vortex Hog Hunter scope – why? Because I actually want to use this rifle to hunt hogs.

RS Regulate Mount

Based on past projects, I knew that the best mounting system for my project would be the RS Regulate system. The reason I am so adamant about this is that the design allows for a ton of flexibility in terms of front to back movement as well as left to right. Specifically, I chose the AK-303M lower rail and the AKR upper.

You basically install the AK-303M lower on the side rail. You can adjust the screw under the lever to adjust how much tension is applied when the lever is locked down.

My next step was to install the AKR top section and located it about three slots back as a starting point. In my case, that worked just fine. I then eyeballed the left to right location over the centerline of the rifle and installed the screws. Note, I do not drill and install the pins until test firing just in case I decide to move the rail around.

Here is my M76 with the two parts of the mount. You can get a good look at the side rail on the receiver as well. Don’t get ripped off by cheap counterfeit products that don’t hold up – only buy your RS Regulate mounts either direct from them or a reputable dealer – not Amazon or eBay. There are links to the mounts at the bottom of this post.

This is the AK-303M lower rail section. You can see the shiny adjustment screw right under the “-30” part of the AK-303M product stamp.
This gives you a good view of the AKR unit and how the ingenious design allows you to basically use an upward facing Picatinny rail on the AK-303M to mate with the downward facing rail on the 303M. The slots are where the screws go and you can see how they enable the left to right movement. The circular holes are where you can drill and install pins *after* you finalize the layout – I would recommend doing this after test firing or even several range visits.

Vortex Crossfire II Hog Hunter Scope

Part of my design criteria for the rifle was to use it for hog hunting. That would entail using a scope that is pretty versatile in daylight as well as dusk. To accomplish this, you need a scope with a big objective to gather as much light as possible (50mm or better), a 30mm tube and good glass to aid in the transmission of the image.

In terms of the reticle, I really did not see a need for something really fancy with tons of MRAD or MOA markings for calculating distance, drop and windage. However, I did know that I would need some form of illumination for low light.

Lastly, in all candor, I knew I was putting an optic on a rifle that would likely shoot 1.5-2″ at 100 yards. I did not need to put a super-high end optic on the rifle – just one that was good enough and reliable.

After doing some reading, the ideal scope with the above design criteria and a very affordable price turned out to be the Vortex Optics Hog Hunter (SKU: CF2-31049). The specs are pretty good:

  • Magnification 3-12x
  • Reticle: V-Brite Illuminated (MOA) – The center 0.5 MOA Red Dot is illuminated and the subtensions are in MOA
  • Objective Lens Diameter 56 mm
  • Eye Relief 3.5 inches
  • Field of View 36.7-9.2 ft/100 yds
  • Tube Size 30 mm
  • Turret Style Capped
  • Adjustment Graduation 1/4 MOA
  • Travel Per Rotation 15 MOA
  • Max Elevation Adjustment 60 MOA
  • Max Windage Adjustment 60 MOA
  • Parallax Setting 10 yards to infinity
  • Length 14.3 inches
  • Weight 21.1 oz (just over 1.3 pounds)
This is the Vortex Hog Hunter 3-12x56mm scope. You can see the RS!Regulate mount on the rifle and also the UTG rings that I used for prototyping. Now you may be wondering why I am using quick release rings on a removable scope mount so let’s discuss that next.

Quick note on the lens caps. They are from Vortex but I am not super excited by that front one. They seem very well made but it is definitely a stretch to get the rubber over that huge front bell. I’m going to stick with them for now.

Figuring Out The Rings

In most cases, you want to mount the scope as close to the center of the bore as you can. This reduces the angle from the center of the scope to the center of the bore.

This is overly simplistic in that it ignores ballistics but it is trying to illustrate that all things being equal, a lower mounted scope will be closer to the centerline of the bore after the zero point and require less adjustment/correction than a higher mounted scope.

So here’s the tough part – any AK-type rifle has a big rear sight block (RSB) that is pinned to the barrel that not only holds the rear leaf sight but also holds the rear of the gas tube in position and the front of the dust cover is inserted into a slot — in short, it has to be here. Thus, any optic must clear the RSB somehow.

The RSB is pinned to the barrel and holds both the rear sight and secures the rear of the gas tube. Problematically, it extends above both the dust cover and the gas tube.

So this means we have two options – either the optic must slide into position and clear the RSB while doing so -or- we vertically lower the scope into position. To slide the scope in either means you go with tall enough rings and/or a small enough front objective that the front of the scope can clear.

The vertical option means we can use both a bigger objective and lower rings but begs the question – what do we do if we need to open the rifle up in the field? That is why I opt for quick release rings. Now, let me point out the photos show interim UTG rings that will not be on the rifle long term. I had them in storage from way back when and used them and some other models to do some “what if” scenarios.

The problem with this model of ring from UTG is that they use a round screw that goes through the Picatinny rail channel – they should be using square stock to securely and consistently secure the ring to the rail. While I do not expect a ton of recoil from the M76, I would rather the rings sit securely in the rail and not move around or place uneven stresses on the rails.

In the next few weeks, the UTG rings will be replaced by an American Defense AD-Recon-SL-30-STD one piece mount. American Defense makes top notch gear. The UTG rings definitely helped me prototype the layout and identify that I needed rings that measured from the base of the ring to the center line at least 0.915″. The AD-Recon-SL will hold to scope just a tad higher at 1.110″ and I am okay with that almost 0.195″ difference. It’s real tight right now as you can see:

Voodoo Cheek Pad

The one thing I quickly found out was that I needed a cheek piece to give me a better weld. I have used Voodoo Tactical cheekpieces a number of times in the past so I used one hear to give me about a 1/2″ lift to better line up behind the scope.

You can access that top soft cavity and add or remove material to give you whatever height and “feel” that you want.
I’m going to do some tailoring of the straps in the near future. While I am using the hook & loop (velcro) straps came with the Voodoo pad right now, I’ve been using this cool industrial hook & loop tape that is double sided with the hook on one side and the loop on the other that ought to really clean this up.

The Result

Right now, I’m happy. I need to get the ADM mount in and get to the range but everything is very promising so far. Everything has trade-offs. To get the extra light at dusk, the scope’s giant objective makes it sit higher. If I wanted the scope lower and didn’t need all the light collection, I would have used a scope with a smaller objective – such as a 44mm.

Okay, in the next post, I’ll tell you about the ALG trigger.


If you find this post useful, please share the link on Facebook, with your friends, etc. Your support is much appreciated and if you have any feedback, please email me at in**@*********ps.com. Please note that for links to other websites, I may be paid via an affiliate program such as Avantlink, Impact, Amazon and eBay.