Tag Archives: tools

How to Make An Affordable and Effective Heated Tank For Acid Etching – Part 1

I like to acid etch blades that I build using apple cider and/or ferric chloride. I also manganese park firearms and tools. Assuming the part is prepped properly, there are two common needs in all of the above – the part must be submerged and the solution heated. So you have two options, buy a stainless tank and heat source or build one using PVC pipe. These next couple of posts are going to dive into how you can build an affordable and very effective heated tank to finish you parts plus have some fun doing it.

PVC or CPVC?

We can use rigid PVC pipe as the container to hold the etching solution. It’s cheap, easy to find and easy to work with. I need to explain a few things first about what we can and can’t do with it.

In plumbing, rigid PVC pipe has an operating temperature of 140F degrees. The reason for this is that PVC is a thermoplastic and begins to soften with heat and will burst due to the pressurized water. We don’t have much pressure to worry about other than atmospheric pressure but you don’t want to push plain PVC towards 200F – it really isn’t designed for it.

If you want to do parkerizing at 190F, then you need to use CPVC pipe. CPVC rigid pipe has extra chlorination that allows it to withstand 200F while delivering water under normal household pressures. Fun trivia, CPVC was invented by Genova Products in Michigan.

If you are trying to figure out what you are looking at, if the pipe is white, it is probably PVC. If it is cream colored, it is probably CPVC. It ought to be labeled/printed on the side of the pipe also but be on guard for people putting stuff in the wrong bins at a store or clerks not knowing what is what.

In this post, I am working with regular PVC purchased from my local Ace Hardware because the tank is for acid etching knives and will the liquid will be 90-110F on average. If I ever build one for parkerizing, it would be in CPVC. The reason it’s an “if” is that I already have a big stainless steel parkerizing tank but it’s a headache to drag out and set up whenI need it.

The Parts List

Basically, we are going to build a tube with a cemented permanent cap on the bottom and a threaded cap at the top. You can go with any size you want. For most blades I work with, 3″ is plenty and I wanted it to be portable.

Let me give you a piece of advice – it’s aways better to be a little bigger than you think you need than to find that out later. When in doubt, make it wider and taller — within reason of course. Note, I knew a 3″ diameter and about 16″ tall would meet most of my needs but not all and I was fine with that. I’ll pull out my four foot stainless tank when I need to do something huge like a cleaver.

In terms of parts, you need the following:

  • A length of pipe of the diameter that is needed
  • A coupling for that size
  • A threaded adapter for that size – you cement it onto the end of the pipe and it gives you a national pipe thread on the other end
  • A threaded plug that fits into the adapter
  • An end cap of one type or another. If you use 3″ or 4″ pipe, you can use a toilet flange adapter to actually both plug the end and allow you to connect it to the wood if you aren’t making it very tall. I would be worried about torque on a tank with an overall length of 24″ or more. In those cases I would cement on a normal end cap and build up a crade around the pipe to support it.
  • You may want a drain for a big tank – I didn’t need one for this little unit because I can easily lift it even when it is full of the acid etching solution.
  • PVC cleaner and cement (note, PVC and CPVC use different cement)
  • Wood to form a base to keep the pipe from tipping over so it needs to be both wide and heavy enough. Really it’s up to you as to how you secure it to be vertical. I like a mobile base but you could tie it to something, etc.
  • A heating source and controller – we’ll get into more detail in the next post.

Weight Considerations and a Drain

Bear in mind that this tank can get pretty heavy if you plan on using really big piple (6″ or bigger). Water weighs 8.34 pounds per gallon. You will find that other liquids can weigh more. Apple cider vinegar may be around 8.6 pounds and ferric chloride might weigh 10-12 pounds per gallon depending on the concentration.

I bring the weight up because if you are thinking of building a big tank, the weight is going to add up and you may want to install a drain near the base. There are two big reasons you need to think about this – you may want to move the unit around plus you will need to change the solution as it ages and breaks down from use.

This is my 3″ tank I just built. The toilet flange us availab;e for 3″ and 4″ pipe and is handy for smaller tanks. I’d build a cradle/surrounding frame to support a bigger tank.

The pictured tank is about 16″ tall with 3″ pipe and has about a gallon of 70% ferric chloride and 30% apple cider vinegar in it. I can move it around very easily and portability was one of my design goals.

Assembling The Pipe

PVC is really easy to work with. You cut the pipe to the length you want or have the store do it for you. I use a big miter saw for stuff like this to get nice square ends and use an airline to blow all the loose plastic out (wear safety glasses).

To “glue” the pipe together, you first prime the surfaces and then apply the cement. Note, PVC and CPVC use the same primer but different cement. In this case,I use Oatey’s purple primer and clear cement. Read the directions on their box just to make sure. Bear in mind the solvent is really thin and is going to run everywhere – especially in cold weather.

I’m a creature of habit. I’ve had very good luck with Oatey products so I stick with them. There are other brands out there such as Ace’s own private labled stuff, but I stick with Oatey to avoid surprises. When following their directions and using their products, I’ve not had a joint fail/leak yet,

The Base

To make the tank stable, you need a big enough base both in terms of area and weight. I had some old 1×12 stock that I chopped into squares and stacked if four deep for weight. You can do whatever you want and your goal is stability, however you get it.
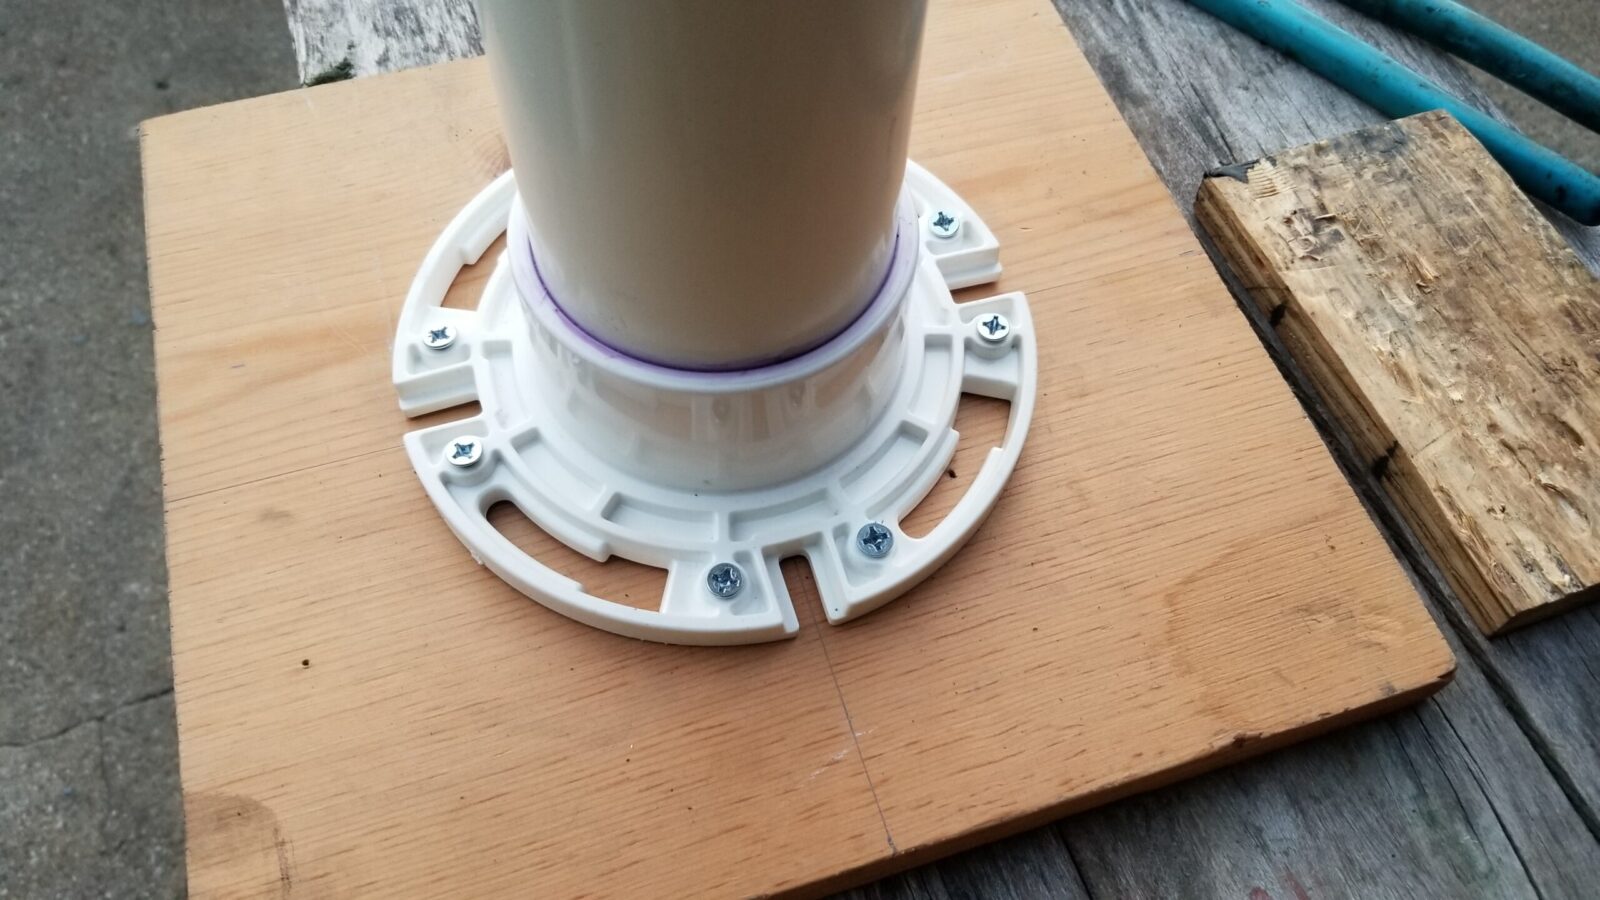
I centered the flange on the first board and screwed it in. I’m not sure I would trust the flange to handle the potential torque of a long pipe. For me, once I get around 24″ overall, I am going to build a cradle and not subject that flange to a ton of stress.
I then applied epoxy and clamped the layers together. I was kind of experimenting as I went. Just one piece of wood wasn’t heavy enough so I then added the additional layers after. I could have glued the base and then used longer screws to secure the flange had I known more up front. I wound up with four layers of wood in the end.

I have another tank that is full of a boiled linseed oil an turpentine mix that I use for hydrating wood handles in khukuris and cleavers that I restore. It has a rounded end bap on the bottom and the base is more like a heavy cradle made up fo 2×4 lumber that gives it weight and then goes up the sides to provide support.

This is a 4″ pipe with a wood scaffold base. It’s very stable. This is a tankI use for moisturizing and treating long wood hanndles.

Summary

That’s it for now. In the next post we are going to talk about heating the tank. This is where I did the most experimenting and can share some ideas with you.


If you find this post useful, please share the link on Facebook, with your friends, etc. Your support is much appreciated and if you have any feedback, please email me at in**@ro*********.com . Please note that for links to other websites, I may be paid via an affiliate program such as Avantlink, Impact, Amazon and eBay.

How to Make An Affordable and Effective Heated Tank For Acid Etching – Part 2

In the last post, I covered the basic construction of the tank. In this post I want to talk about heating the tank. Thanks to mass production of digital temperature switches, you can build a digitally controlled heated tank for a very reasonable price.

Why Does Heat Matter?

In case you are wondering, heating the solution does matter. Years ago, in 1889, a chemist by the name of Svante Arrhenius proposed an equation that would later bear his name. Basically, a chemical reaction increases as the level of activation energy increases. The reason temperature enters in as that you are raising the energy in the liquid, more energetic particles are bouncing around and increasing the volume of reactions which means that more successful reactions will occur as well. We can use a rule of thumb that for each 10C increase in temperature, the reaction rate will double and for each 10C drop, it will be cut in half. To sum it up, cold=bad for chemical reactions. As a side note, this is also why marginal batteries fail when cold weather hits.

So what this means to acid etching is that in my cold unheated shop in the Winter, reactions are going to be real, real slow. Thus, I must have a way to heat the chemical and the submerged part to improve the reaction.

The Heating Element For The Tank

The first thing I wanted to do was to keep the cost down and the second was that I didn’t want something that would get so hot that it would melt the PVC. I had a 30 foot length of roof heating tape from when we cleaned out my dad’s garage that I had been thinking about for a while. It always makes me feel good when I use something that was my dad’s. (There are tons of options on Amazon – click here.)

These roof heating cables use AC voltage to warm up and melt ice are readily availble and are designed not to get so hot that they melt the shingles but also are designed to be spread out and not right next to each other so I was going to need to test the design. I planned to wrap the tape from the bottom of the tank until I ran out cable with each coil right against the previous. I was counting on convection of move warmer fluid up and cooler fluid down but I wasn’t really sure how it would sort out.

Another nice things about these heating cables, or heating tapes, is that they do not use a lot of electricity. The 30 foot model my dad had was spec’d to draw only 150 watts at 12 volts. That makes for a nice portable unit that you can run off just about any extension cord.

So, step one, I applied the tape to the empty tank and secured it just with 3M 3340 aluminum HVAC tape. This is the tape made for higher temperatures with an aluminum foil backing – it’s not dcut tape. I then watched the temperature with my Fluke 62 Max IR thermometer. You need an accurate thermometer and the Fluke has served me very well – it’s proved itself to be accurate, reliable and durable – it’s been bounched around a lot in my shop.

So, the temperature slowly climbed but made it all the way up to 170F before I shut it down. The PVC still felt pretty good but it was way hotter than what I wanted. Just plugging the tape in and calling it done was not the answer. Sure it would heat the liquid up fast but I couldn’t safey leave it unattended. I needed something to control the temperature but use the heat tape.

Please note that there are pipe heaters that are a different creature. Some of them need to be submerged in water or wrapped around a steel pipe. Do not use those types of heaters. There are a ton of different names buy you are looking for the cable or tape that is put on roofs to melt ice dams, etc.

Solution – Use A Digital Temperature Controller

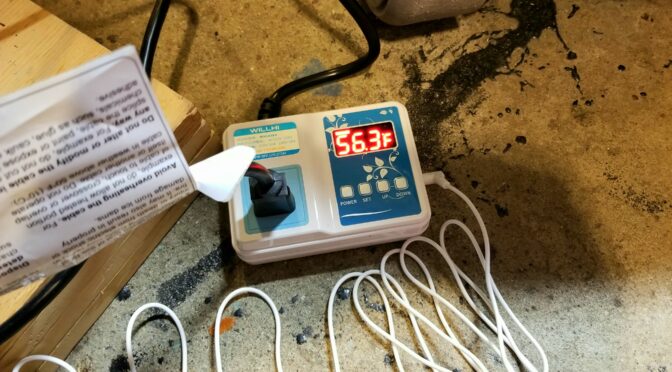
I thought I knew the switch I was going to buy until I did some further research. Some controllers are very easy to set up and others seem a bit more confusing. I opted for the WILLHI WH1436A Temperature Controller 110V Digital Thermostat Switch. All you do set set the temperature for ON and the temperature for OFF. That’s it. If you want them, there are some more advanced settings that you can explore if you want but this seemed like just what I needed.

I undid the top few coils of the heat tape and rewound them with the temperature probe wrapped in them. I then used aluminum HVAC tape to secure the top. I set ON to 90F and Off at 95F and plugged the roofing tape into the controller.

I inserted the temperature probe a few coils down and secured the top with 3M Aluminum HVACtape. Note the small cable clamp screwed into the wood base securing the bottom of the heater tape and preventing it from unwinding.

I started watching with the Fluke meter and since the temperature based on the probe was 40.2F, the controller turned on power to the switch and the tape heated. It did cut power around 95F but the tape continued to warm up even so by about 10F so the peak temperature was between 103-105F according to the Fluke. This was actually within my acceptable range. I was just ballparking 90F but even 105F was fine by me.

The digital controller works well. I’m going to leave it loose some I can move it around depending on what I am working on and were.

There was one minor hitch I noticed during experiments – the controlled heat took over an hour to warm up the fluid. If I unplugged the tape from the controller and plugged the tape straight into AC power, the fluid heated way faster and the pipe never felt soft – probably because the tape was heating part of it and the acid was cooling it. This was the fastest way but risky because if you forget, it’s going to get quite hot. I let the fluid get up to 160F during one run and decided that I would only do this if I was in a big rush and going to be there working the whole time. If I wanted to play it safe, letting the controller keep things safe was a better bet. I could have also sped things up by setting the OFF temperature higher, say at 110F and that’s something I will experiment more with.

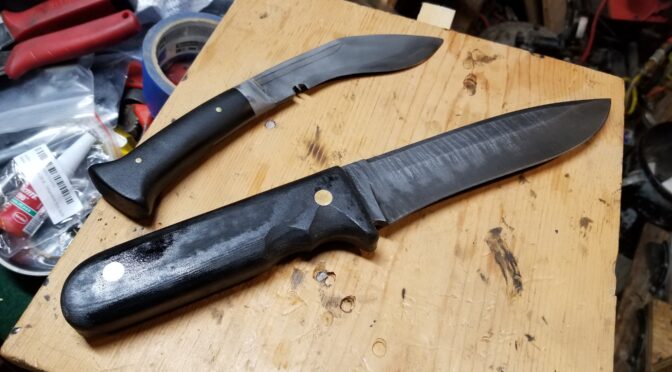
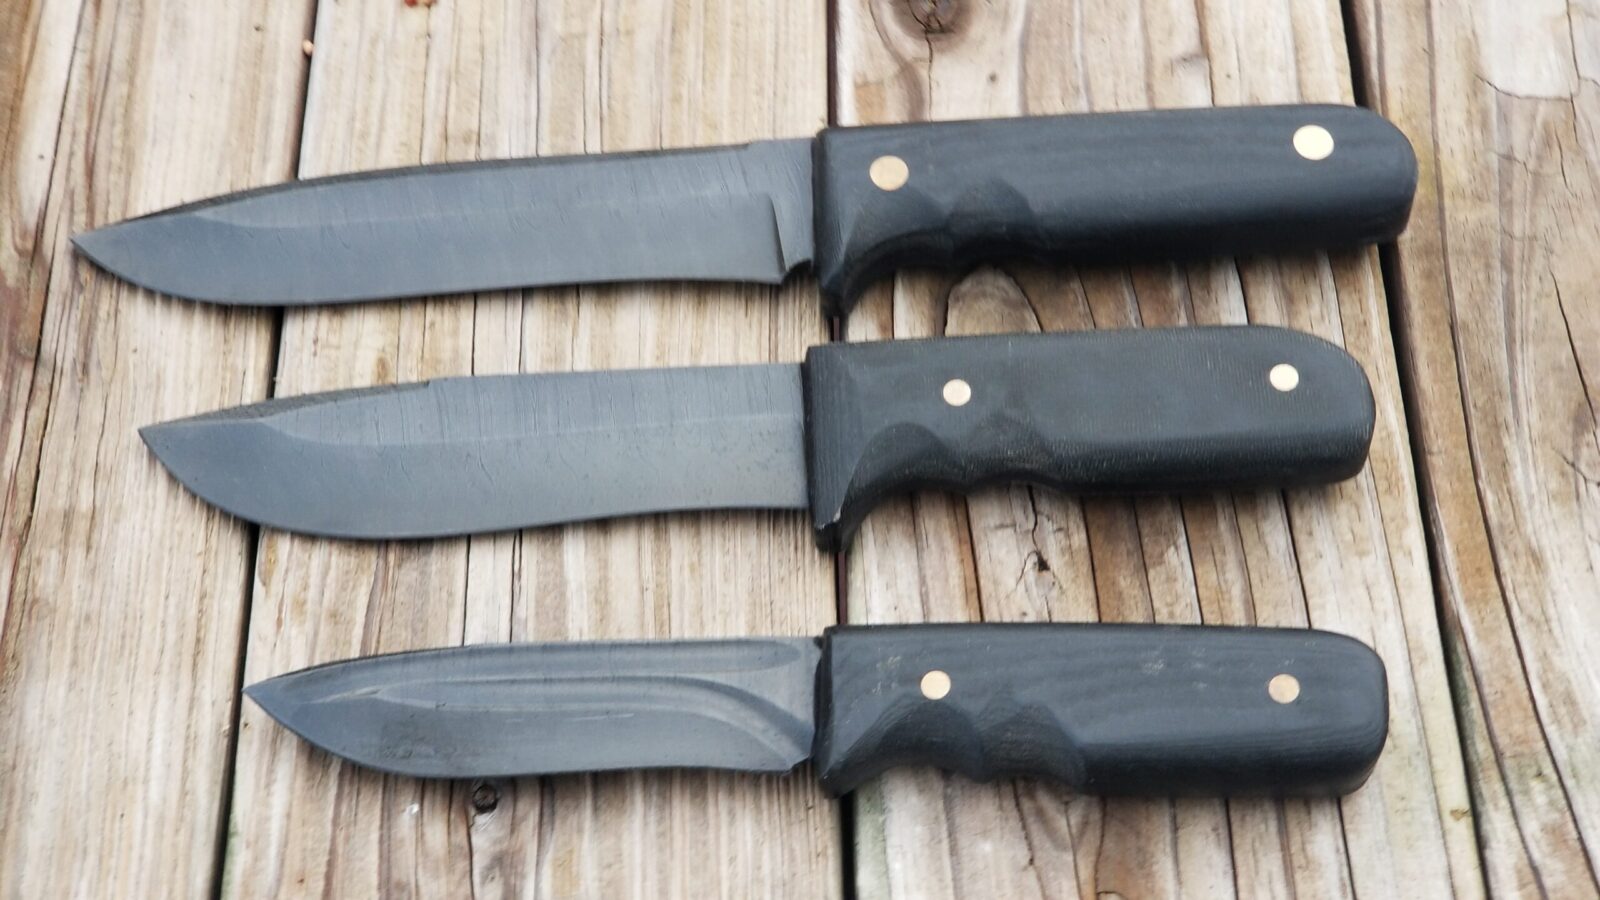
The temperature controlled tank worked out great on these high carbon steel damascus blades.

Operating Temperature Range

Do not heat ferric chloride past 131F. Remember that the heating element will still heat the chemical another 10 degrees or so past the upper limit you set as OFF.

The operating temperature range from MG Chemical is 95-131F. Based on my results, I don’t see a need to push the upper limit.

Click here both for their technical sheet and MSDS sheet,

Conclusion

I had about $30 in the PVC and fresh glue, nothing for the base, the controller was $29.99 and the roof heat tape was free but if you bought it, the price would be around $30. This definitely falls in the affordable category plus I turned out some really cool etched damasus blades using the controlled tank. If you want to know a bit more about the chemicals and my process, click here.

When I was done, I let the tank cool down, screwed on the lid, cleaned things up, coiled the cords up and stored the tank for the next use.

If you find this post useful, please share the link on Facebook, with your friends, etc. Your support is much appreciated and if you have any feedback, please email me at in**@ro*********.com . Please note that for links to other websites, I may be paid via an affiliate program such as Avantlink, Impact, Amazon and eBay.


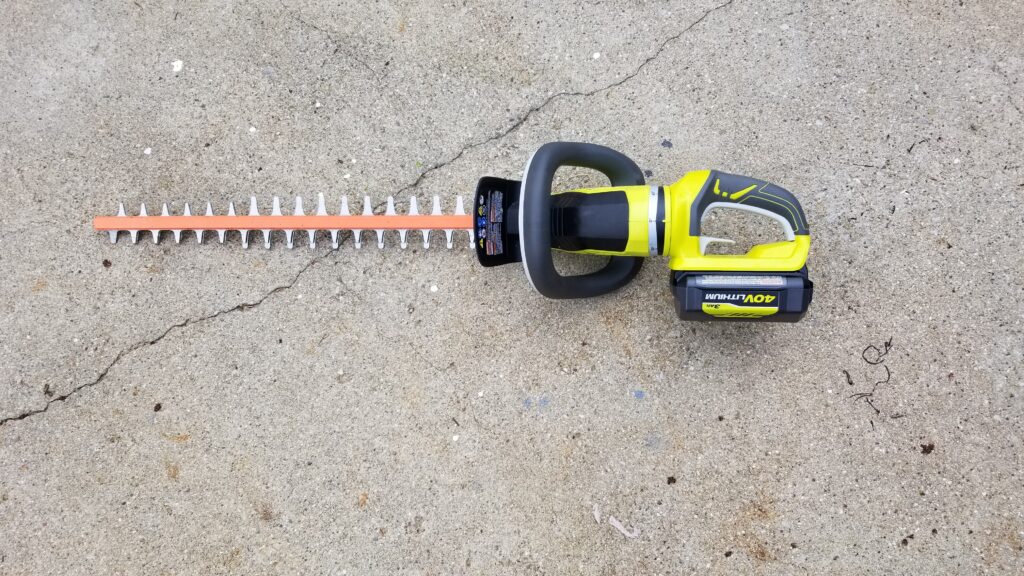
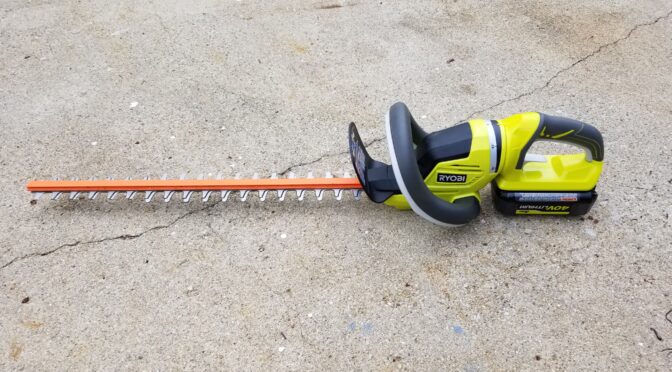
The Ryobi RY40620 24″ 40 Volt Hedge Trimmer Is Excellent – Seriously Portable Cutting Power

I told you about my very positive experiences so far with the Ryobi RY40230 String Trimmer in my last post. I bought a RY40620 24″ 40 volt hedge trimmer at the same time because it made a lot of sense to me to buy the whole hedge trimmer kit from Home Depot for $169 vs. spending $129-149 for a spare battery alone.

The box arrived beat up with the battery missing. The unit was undamaged and when I called Home Depot’s customer support number they shipped me a replacement battery right away. I don’t know what happened but I used the battery from the string trimmer and ran the unit without any problem. I was impressed by their customer service – they could have run me in circles but instead moved quickly to do what I asked of them which was to simply send me the correct battery that was missing. No hassle at all. I appreciated that.

I also bought the unit because we previously had a Black & Decker Hedge Hog that did a great job but required an extension cord to work and I wanted to get out to our hedge rows to trim them vs. just the bushes by our house. I also wanted plenty of power because a lot of the branches were 1/2-3/4″ thick.

My experience with the 40 volt Ryobi unit is very good. It came fully assembled and has a ton of power. It’s a tad heavier due to the battery but is well balanced. It will chew through 1″ and even slight larger branches no problem.

One feature is that it can rotate the battery relative to the blade 90 degrees either left or right. I have not needed that feature but it does give you some additional clearance.
I should have taken before and after photos. I am largely done here. The unit made very short work of this hedge. All of the branches were well under a 1/2″. When doing trimmer work, I have not drained a battery yet.
You can see part of the far hedge row. If I could get a branch into a 1″ cutter slot, the hedge trimmer would cut it. It was pretty amazing. I used to do this manually with pruning snips and it took forever. With the Ryobi, I walked along while swinging the unit up and down in arcs and quickly cut back a ton of brush.
This side too. You can’t tell all the brush I cut back here. This isn’t a traditional hedge – more like an overgrown part of our property between us and neighbors,

So, I’ve now used the unit probably 4-5 times to trim parts of the property and probably use it for about a 1/2 hour at a time. No problems – I do lubricate the bar with a spray dry Teflon lubricant just to help it out. Ryobi does not say this is required but I do it anyways.

I’m very impressed by this hedge trimmer and have no reservations recommending it.


If you find this post useful, please share the link on Facebook, with your friends, etc. Your support is much appreciated and if you have any feedback, please email me at in**@ro*********.com . Please note that for links to other websites, I may be paid via an affiliate program such as Avantlink, Impact, Amazon and eBay.


The EZRed MR34 Extendable 3/4″Socket Wrench is a Beast With Two Quick and Easy Tweaks

I have both SAE and Metric 3/4″ socket sets that come out once or twice a year when I am working on big bolts on cars and trucks. As you may know, the longer the wrench, the more torque you can apply. Back when I was younger would would slide a piece of pipe or heavy wall tube over a ratchet or breaker bar to get even more mechanical advantage. We definitely snapped some socket wrenches while doing this as we exceeeded their design specs.

You see, a ratcheting socket wrench has limits as to how much torque the mechanism can handle before something either bends or breaks. Quite often, the rathchet pawl would bend/crumple and no longer be able to engage the teeth of the gear. When that happens, we’d toss the cheap wrench.

This is why breaker bars were made by the way – they have no ratcheting mechanism and, thus, can handle more torque. There’s one problem though, there are times where you can’t get the breaker bar into position because you can’t turn the handle relative to the socket. So, what is a person to do when they need a ton of torque and a ratchet mechanism?

The short answer is to get a wrench with a long handle that is designed to handle a ton of torque. A ton of companies make socket wrenches with longer handles. I have a couple of these but what I find really handy are wrenches with extending/telescoping handles. When you are working in a relatively tight space, you may not have room for the fully extended handle or you have need to work it into position before you can open the handle.

The EZRed MR34 Wrench

So, when I need a ton of torque and mechanical advantage to help me get there (I’m at the age where I need to work smarter because my body doesn’t support harder any longer 🙂 – I break out the wrench I affectionately call “The Beast”. It is a beautifully made and chromed giant 3/4″ ratchet wrench.

The wrench is sold in the US by a firm called “EZRed” with a lifetime warranty and, like many things, is actually made in Taiwan. When you do some digging around, there are a lot of guys using this wrench for heavy equipment, farm equipment, trucks, steam pipes and more. After reading about the real world experiences with the wrench, I ordered one in.

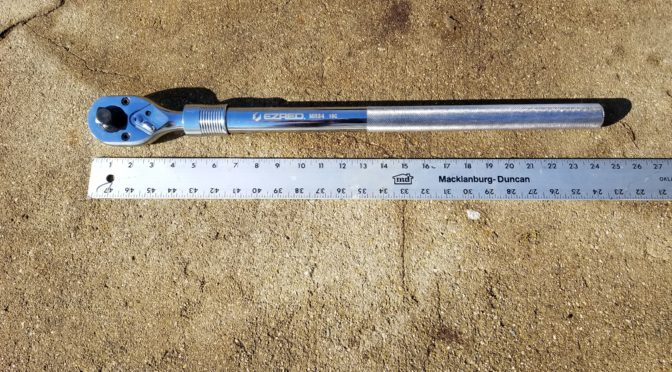
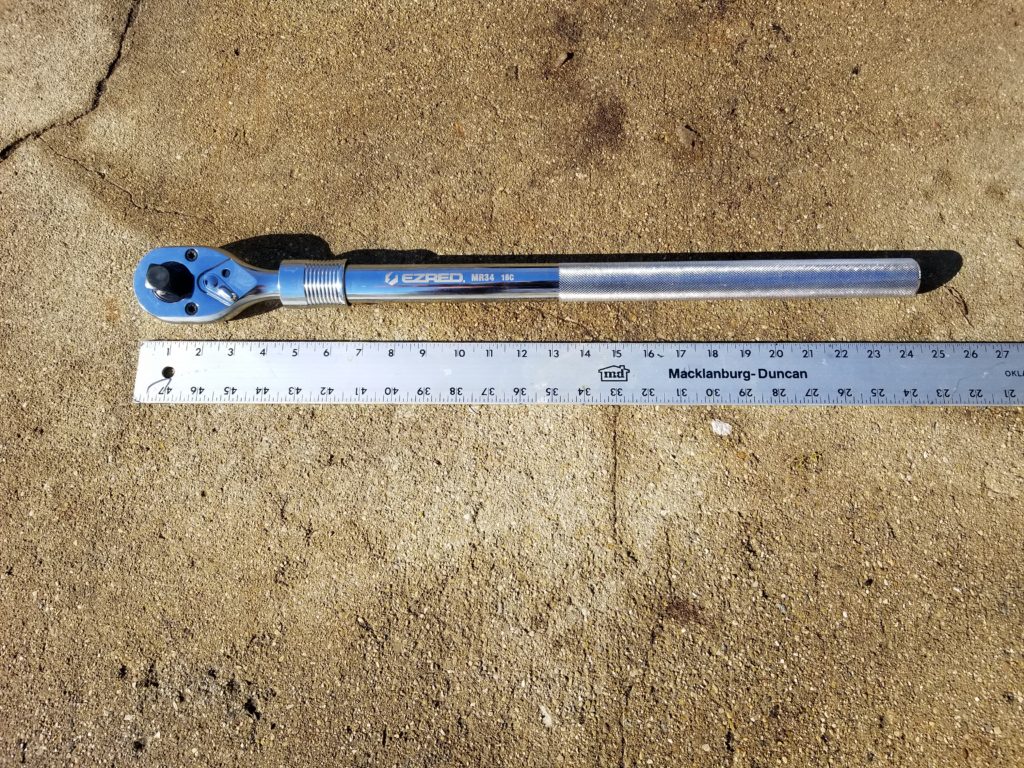
Here is the wrench closed and you can see it is about 24″ overall.
Here is the MR34 fully open and about 40″ long overall.

The first things I noticed was that it’s a big wrench even without the handle extended. Next, it’s a heavy wrench and weighs in at about 8.5 pounds. I have to be honest, I don’t usually pay much attention to looks but the chrome finish is gorgeous.

Pull the collar down and a detent is released that allows the handle to telescope out. The handle then locks into position in the next available hole. The locking feature is definitely nice.

I use this for 3/4″ sockets and also have a SunEx 3/4 to 1/2″ reducer for those times I want to apply a ton of torque to a smaller bolt.

Here’s the wrench with a SunEx 3/4 to 1/2″ adapter.

So far, I am very happy with the wrench. As you can tell, I haven’t used it a ton yet but for the few quick jobs so far, it worked great.

Two Big Tips

A fellow recommended apply Blue Loctite to the head screws and grease the wrench while it was open. He was spot on – the screws were surprisingly lose. Even though they have blue thread locker on them from the factory something seems odd and guys have reported losing the screws. I really think if Ihad not followed the fellow’s advice I would have already lost mine as well – they are that loose.

The screws come out and then the head is very serviceable. You can see the two pawls and their springs plus the selector in the middle. What you don’t see is any lubricant! I must say I am a bit surprised.
You can see the faceplate and the 24 tooth geared head.

So, I used a brush and lightly applied SuperLube grease to everything, reassembled the wrench and put Blue Loctite on the two head screws before tightening them down. The whole thing took maybe 10 minutes start to stop including taking the photos.

If you ever need it, the EZRed sells a rebuild kit – part number RK34.

Summary

I really like the wrench. It’s worked great so far but I really haven’t done anything super stressfulso far – just breaking some very rusty 1/2″ diameter carriagle bolts free off my plow. It’ll definitely get used this upcoming summer a lot more.


If you find this post useful, please share the link on Facebook, with your friends, etc. Your support is much appreciated and if you have any feedback, please email me at in**@ro*********.com . Please note that for links to other websites, I may be paid via an affiliate program such as Avantlink, Impact, Amazon and eBay.


Tips on Finding Decent Gunsmithing Tools on eBay

One of the challenges when starting out working on guns is building your tool collection.  It’s hard to find cost effective tools so you wind up making do with stuff, creating tools ad hoc, etc.  Interestingly enough, this is where eBay just might help.  While I’m not happy with their anti-gun position, there are a lot of tools that pop up there – ranging from low-end Chinese stuff all the way to some beautiful vintage tools.

So, I want to show some example searches with 20 live feeds from each section:

Gunsmith and Gunsmithing Tools

The trick is in the searching.  For example, here are the top 20 matches for gunsmith tools or gunsmithing tools and you will probably see a mix:

[ebayfeedsforwordpress feed=”https://www.auctionrequest.com/arfeed.php?uid=inf5efd3d98495c&keyword=%28gunsmith+tools%2Cgunsmithing+tools%29&sortOrder=BestMatch&programid=1&campaignid=5338063879&toolid=10039&listingType1=All&feedType=rss&lgeo=1″ items=”20″]

Of course there are brands I will steer away from such as NCStar and others that I will look closer at such as Brownells, Lyman, Tipton, Weaver, etc.  I also read the ratings of the seller.  If a seller has a good rating and more than 30 sales, that’s a good sign.  Less than that and you are taking a gamble.

Vintage Gunsmith Tools

“Vintage” seems to be a popular term for “used”.  You tend to find a lot of unique stuff that was made by a gunsmith to fit a special need as well as high-quality tools that were made with care vs. mass produced.  Be careful though.  I’ll zoom into the photos as much as I can plus look at the seller’s description and the rating of the seller to try and decide if the tools are in good shape or beat to death.

[ebayfeedsforwordpress feed=”https://www.auctionrequest.com/arfeed.php?uid=inf5efd3d98495c&keyword=vintage+gunsmith+tools&sortOrder=BestMatch&programid=1&campaignid=5338063879&toolid=10039&listingType1=All&feedType=rss&lgeo=1″ items=”30″]

Used Gunsmith Tools

“Used” is still a popular term and is worth checking also.  Bear in mind the cautions I gave under vintage.

[ebayfeedsforwordpress feed=”https://www.auctionrequest.com/arfeed.php?uid=inf5efd3d98495c&keyword=used+gunsmith+tools&sortOrder=BestMatch&programid=1&campaignid=5338063879&toolid=10039&listingType1=All&feedType=rss&lgeo=1″ items=”30″]

Brownells Gunsmith Tools

Brownells has been around a long time — they were founded in 1939 and have always been known for their quality tools, parts and supplies to gunsmiths.  Because they have been around for so long, you tend to see a fair amount of Brownells stuff hit eBay by name so that is worth searching.  Still look at the photos closely and the seller’s rating to play it safe.  By the way, if you have never read their Gunsmith Kinks books – be sure to pick them up.

[ebayfeedsforwordpress feed=”https://www.auctionrequest.com/arfeed.php?uid=inf5efd3d98495c&keyword=%28Brownells+gunsmith%2Cbrownells+tools%29&sortOrder=BestMatch&programid=1&campaignid=5338063879&toolid=10039&listingType1=All&feedType=rss&lgeo=1″ items=”30″]

Antique Tools

What is “antique” really is up to the seller.  You’ll see stuff that ranges from a few years to over 50 years old.

[ebayfeedsforwordpress feed=”https://www.auctionrequest.com/arfeed.php?uid=inf5efd3d98495c&keyword=antique+gunsmith+-%28ratchet%2Cair%29&sortOrder=BestMatch&programid=1&campaignid=5338063879&toolid=10039&listingType1=All&feedType=rss&lgeo=1″ items=”20″]

I hope this helps you out!  There is a ton of stuff out there if you experiment with the search terms some.


If you find this post useful, please share the link on Facebook, with your friends, etc. Your support is much appreciated and if you have any feedback, please email me at in**@ro*********.com . Please note that for links to other websites, I may be paid via an affiliate program such as Avantlink, Impact, Amazon and eBay.


The EWK Vacuum Fluid Extractor is Darned Handy to Drain Engine Oil and ATF Through the Dipstick Tube!!

Folks who know me also know that I am always tinkering with something – cars, trucks, tractors, firearms, you name it.  A few years ago a guy showed me how he could change fluids in his car using a vacuum siphon and I was intrigued but let it slide.

I recently went through all our old Toyotas and changed the transmission fluid to Valvoline Max Life and it dawned on me that it would be real nice to have a way to more precisely get the fluid right where I wanted it in the transmissions because I had slightly overfilled one car.  Then I remembered the vacuum siphon and hopped on Amazon.

The EWK 6.5 liter (1.71 gallon) pneumatic or manual fluid extractor looked like just the tool for the job.  I always pay close attention to reviews and this unit really had good ones – 277 reviews and a score of 4.4 out of 5 stars.  That’s pretty good statistically – I like to get well past 30 reviews and the more the better.

At any rate, thanks to Amazon prime, I ordered it and the unit arrived two days later.  I must say that I was impressed.  The plastics are all well done and it worked like a charm.

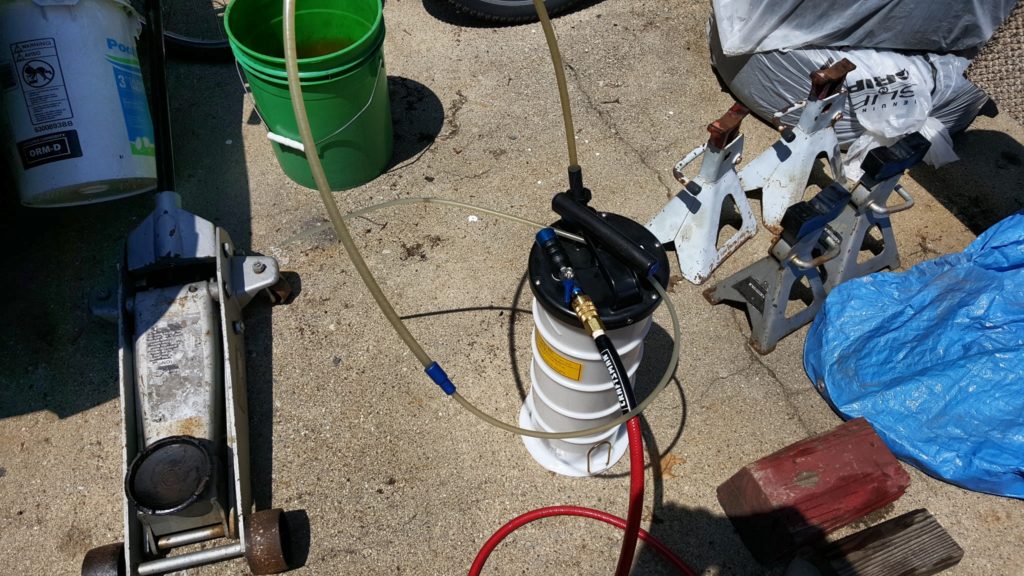
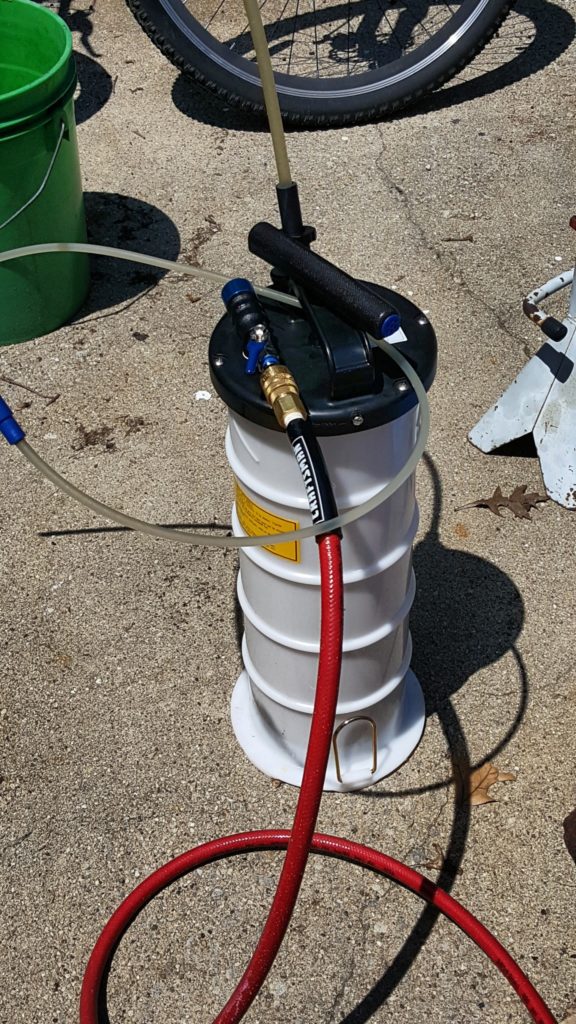
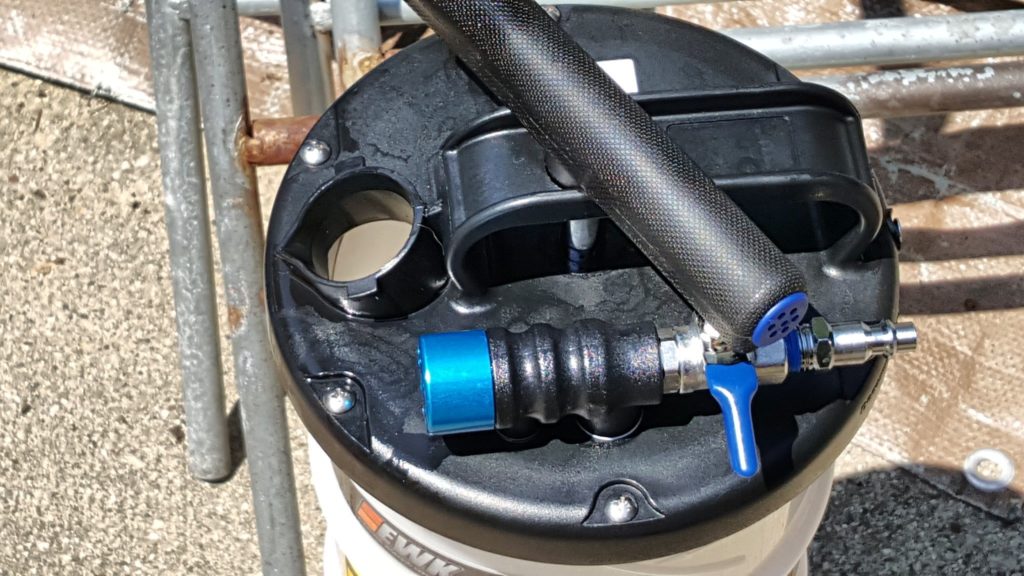
In this next photo you can see the little adapter and hose extension that comes with the unit.  They say three in the ad and the first hose is attached to the cap with a strain relief.  The hose is about  .39/.31 (OD/ID) and 39.3″ long.  The other two hoses are basically extensions via a soft rubber connector.  I am using the medium extension that is .26/.21 OD/ID) and also 39.3″ long.  That diameter has worked fine for Toyota T-IV ATF, Valvoline Max Life ATF  and also 10W30 engine oil.  When I say it can suck, that is a compliment in this case 🙂

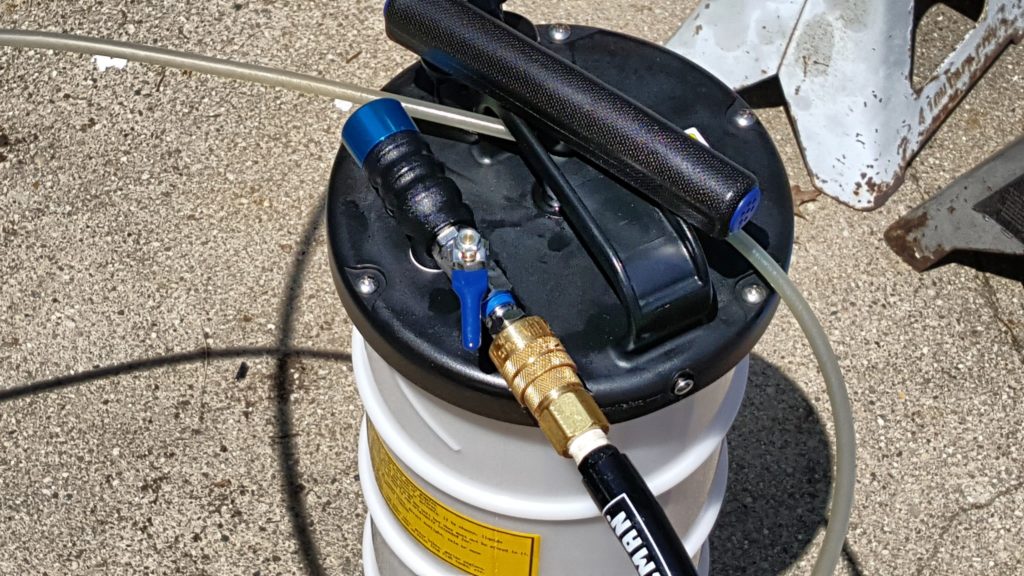
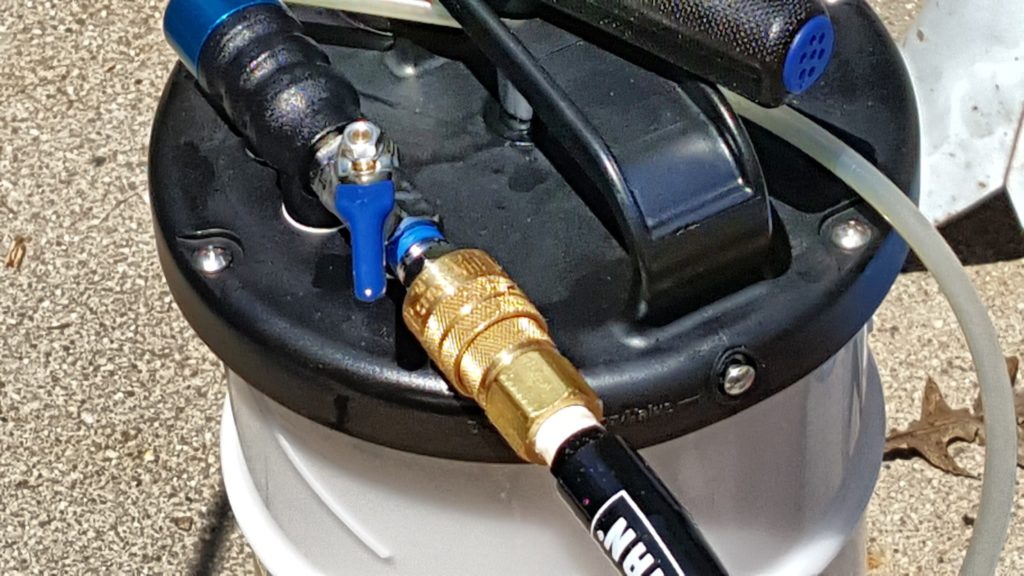
The next photo shows the pump handle and also the venturi vacuum generator.  I have that air line on my dryer system and is running 90PSI off a 60 gallon IR two stage compressor.  It really didn’t use too much air.  No vacuum generator will win awards for air use but you don’t need to run it for very long – just while you are pumping the fluid out and that will probably be about 2-3 minutes for most engines and transmissions.

The first time I used it, I did so with an air line (it can use compressed air to create a venturi vacuum) .  It actually pumped way faster than I realized and I had over a quart out of the car before I realized it.  You can definitely reduce the air flow to reduce the vacuum – it was just faster than I thought it would be, which is good news.

I was so impressed that I used the extractor to remove all the ATF from a 94 Corolla in very short order.  I let it pump until nothing else came out — no problem.

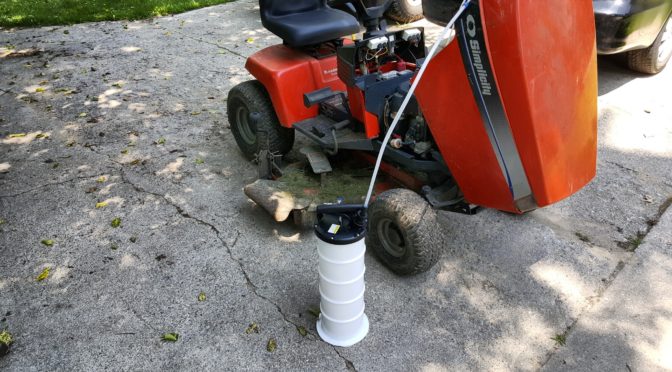
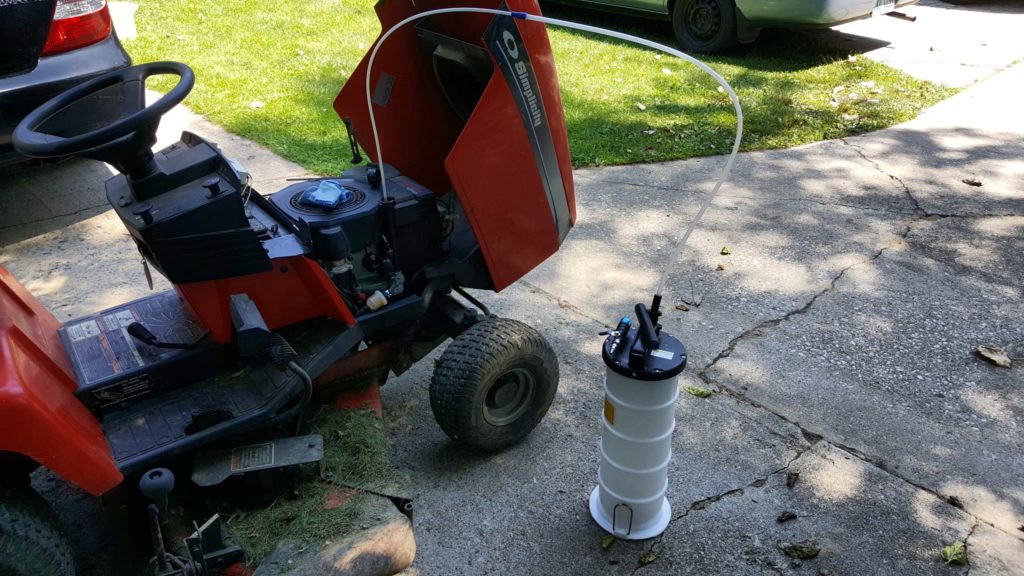
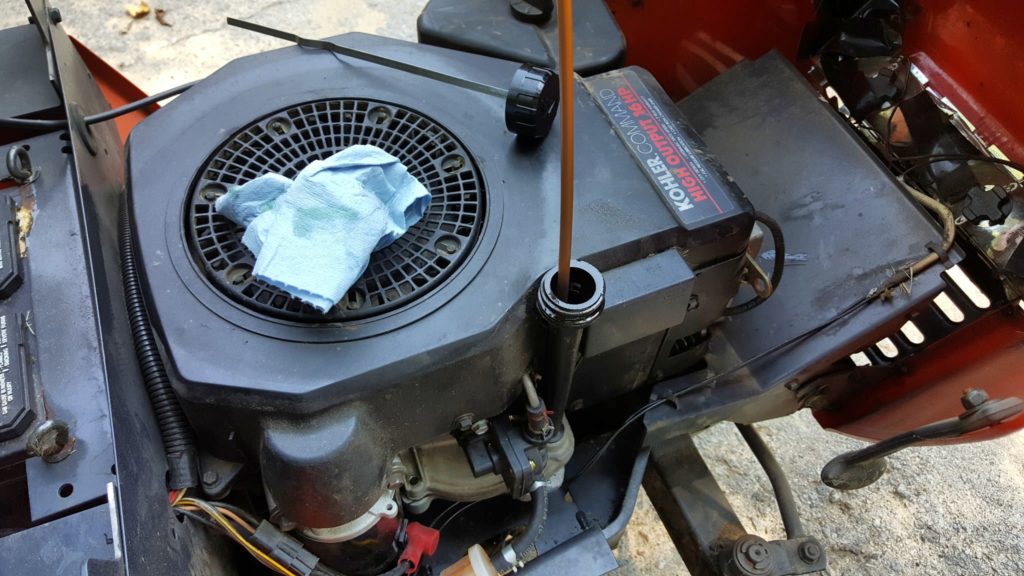
I recently needed to change the oil in my tractor – again, used the siphon and it drained it very quickly.  This is noteworthy as I used the hand pump to create the vacuum and it really was effortless.  This was also when it dawned on me I better take some photos 🙂  You can see it pulling out the 10W30 no problem at all.

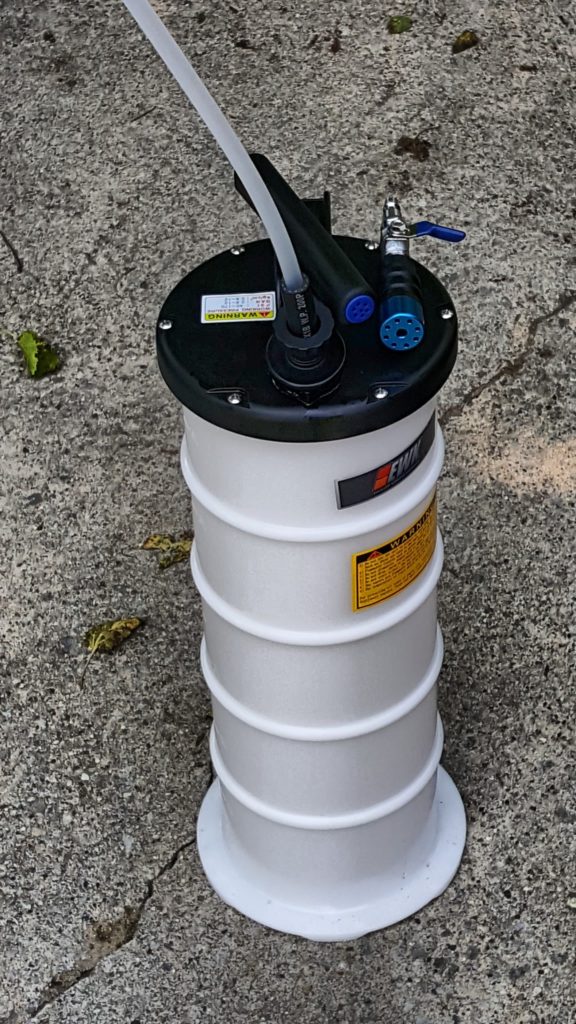
In this next photo, you can see the unit with the hose cap off – it just twists off – and this is the pour spout to empty the unit also.

I’m still on my first set of hoses but they do have a variety of replacement hoses on Amazon in case you want just one hose or a set.

In summary, it’s a great unit.  I’ve not had any problems at all and recommend it. Here’s the link one more time:

7/18/2023 Update: Still working just fine – it’s a lot dirtier from use but is still doing the job. A fellow did ask me if they have other sizes and the answer is “Yes”. Click here for the EWK store on Amazon.

6/28/2022 Update:  Still working great.  I’ve used this on cars, trucks, tractors and even to suck the hydraulic fluid completely out of my snow plow’s hydraulic fluid reservoir.


If you find this post useful, please share the link on Facebook, with your friends, etc. Your support is much appreciated and if you have any feedback, please email me at in**@ro*********.com . Please note that for links to other websites, I may be paid via an affiliate program such as Avantlink, Impact, Amazon and eBay.


Getting Unstuck With Traction Mats

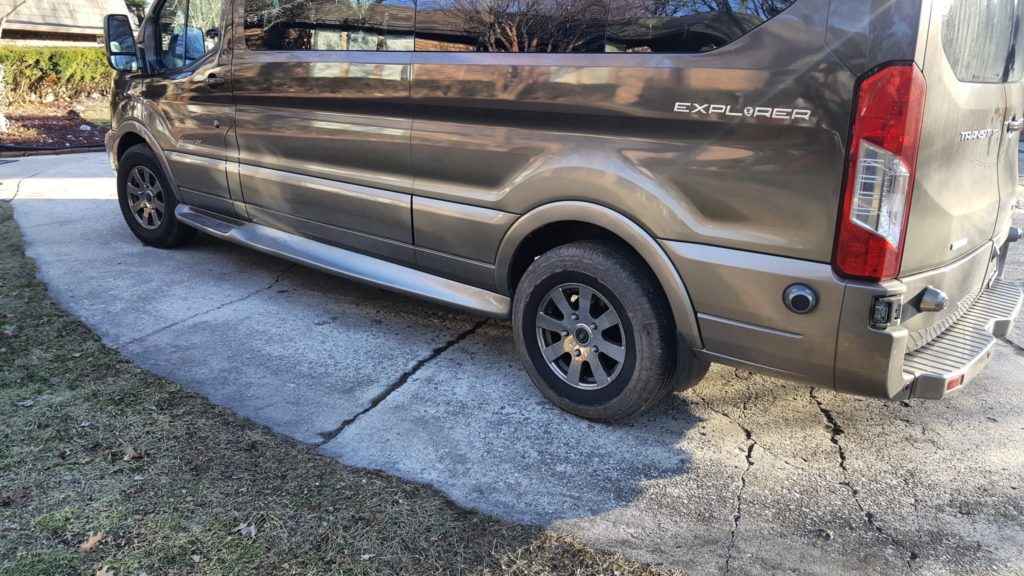
Well, I parked our full size Ford Transit van at the end of the driveway on the grass to get it out of the way.  Of course, given the recent snow melt the ground turned out to be too muddy and soft to support the van’s weight – but I didn’t notice that because it took a while to slowly sink.  Yeah, I didn’t notice anything – my wife did we she went to use it!  Oh crud.  So she called my cell phone and was none too happy.  I didn’t really worry about it because my truck could pull it out – or so I thought.
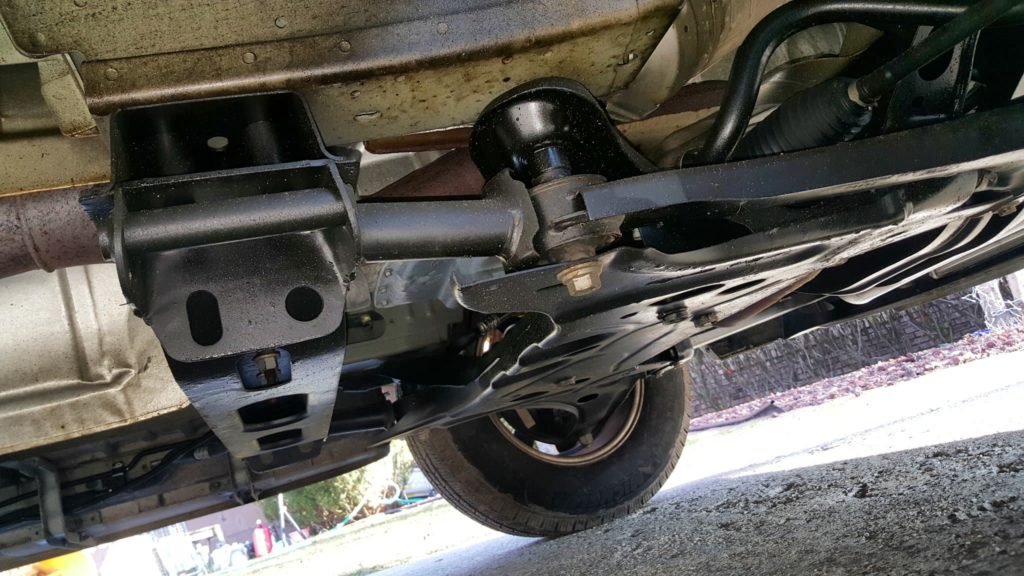
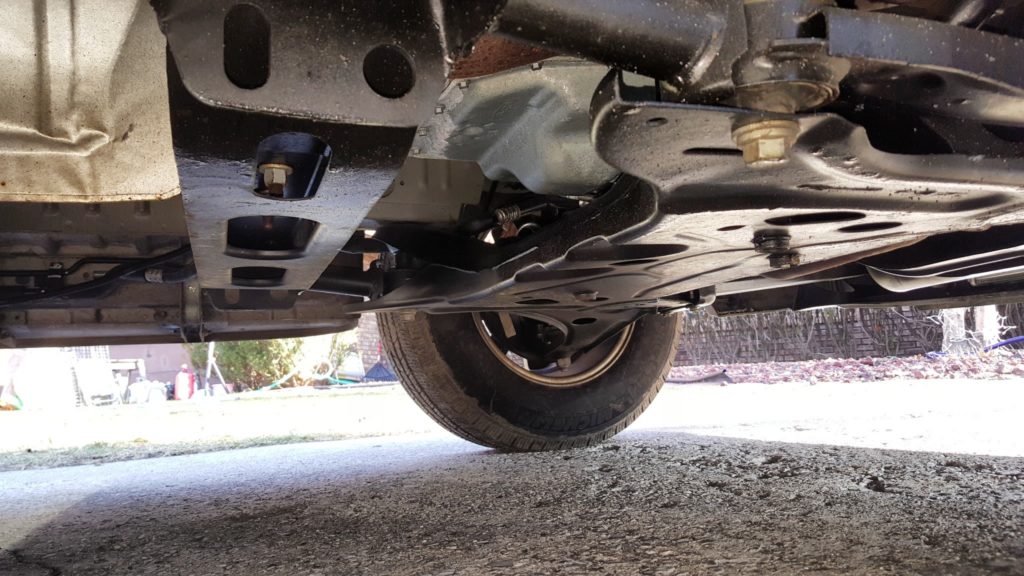
I drove to the house, cockily pulled my trusty old 96 Landcruiser up in front of the van and got out one of my big tow straps and walked up to the van.   Should have been easy, right?  Wrong.  Nothing, nada to hook on to.  Ford, in their infinite wisdom does not put a tow hook, eye or anything up near the bumper!  Crap, crap, crap.  [Note, near the bottom of this blog post I added in what I found after researching how to recover a full size Transit.  I’m still irked at Ford.]

Did I mention my wife was standing their fuming?  Yeah, she was.  I should have known better than to park the heavy full size van on soft ground.  Point taken – I didn’t realize it was that soft.

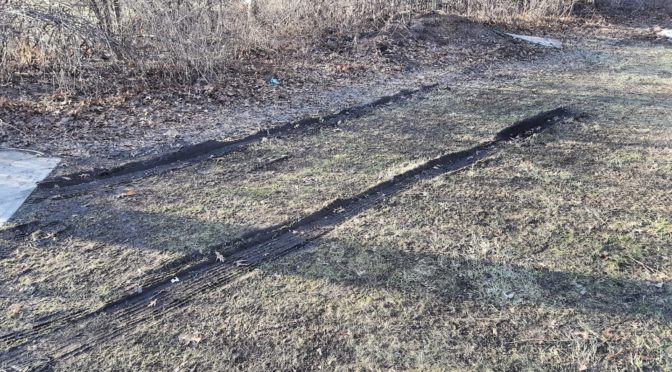
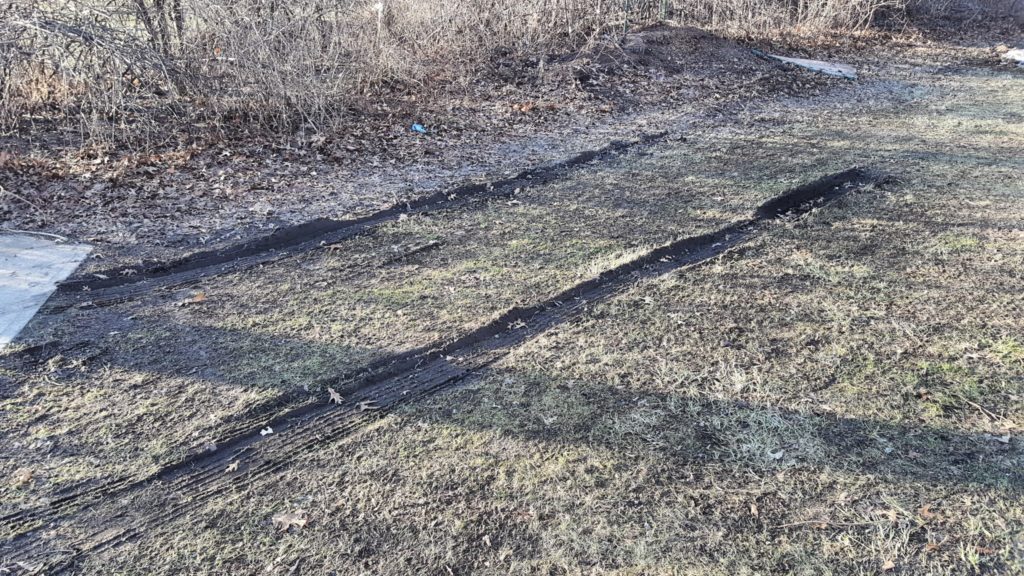
At any rate, I went back and looked at the 5″ deep rut the driver’s side rear tire had dug for itself.  By the way, these photos are after removal.

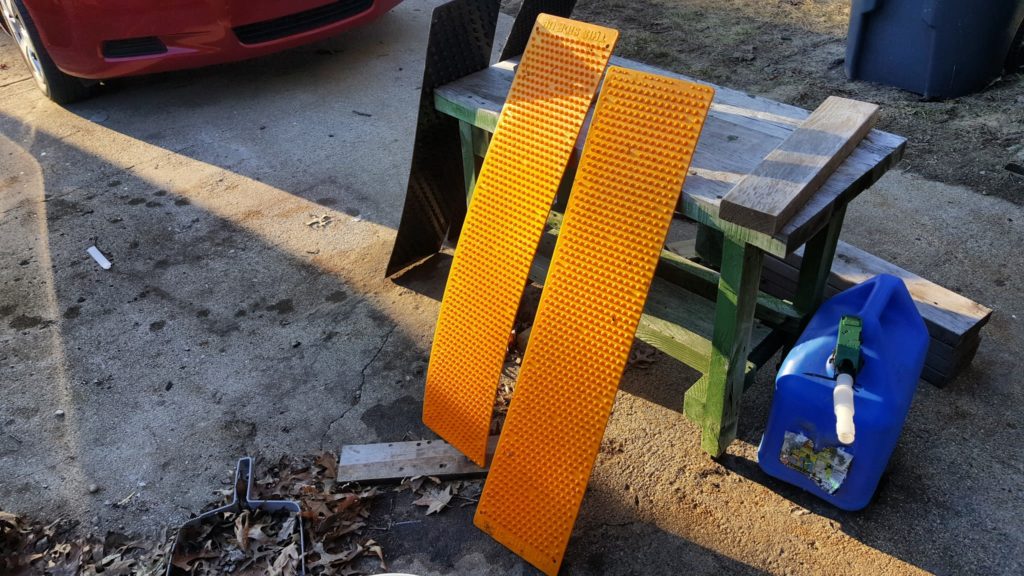
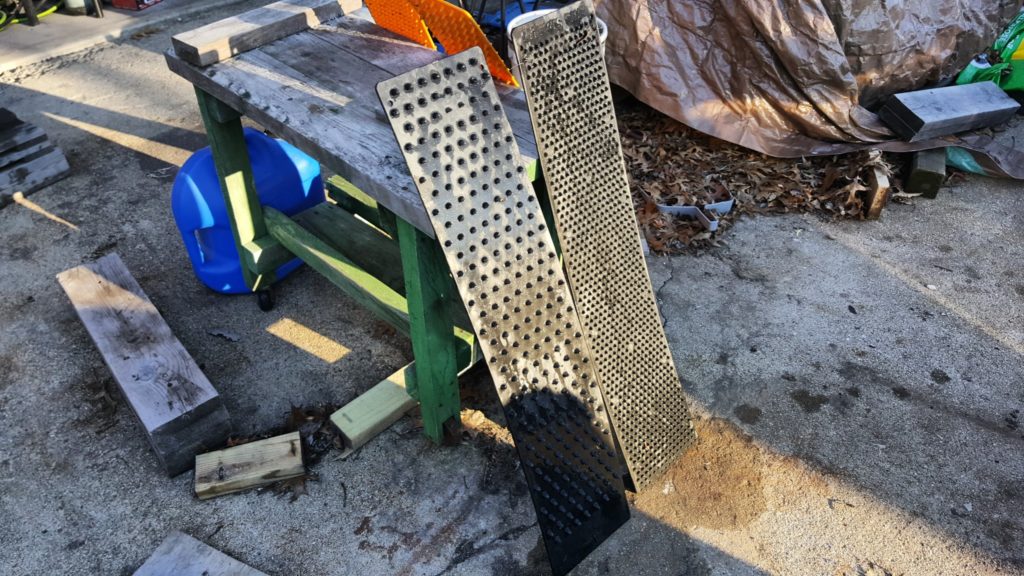
I needed something long to fill the ruts and give traction.  Luckily, back in 2010 and then in 2014 I bought these things called “traction mats” from a company called OTW Enterprises who touted them as portable tow trucks.  In 2010 I bought the black ones after getting my truck stuck on ice with the plow blade buried in a snow mound.  In 2014. I bought an orange set to put in my wife’s car in case she got stuck.  Here they are after I hosed all the mud off.

Well, they bounced around in the trunks for a while and did bail me out a couple of times over the years but were actually leaning on the outside wall of my shop.  They don’t fold and while they fit in the trunk you have the little plastic spikes catching stuff so I tool them out at some point and leaned them against the wall of the shop.  At any rate,  I walked over and they were exactly what I needed.  Each mat measures 36″ long and 8″ wide.  Since I had four, I butted on up against the front of each tire and placed a second one in front of it to help the tire get up and out of the rut.  The sides are labeled by the way – the relative few long spikes go down and the side with many spikes goes up.

I got in and rolled the the van back a bit and then forward to get up on the mats.  I then slowly gave it more gas (not much) and the van up and forward onto the mat and got out of ditch and I kept moving forward onto the pavement.  I don’t have any action photos – things were stressful at the time and I really wasn’t thinking about a blog post 🙂

Well, I was pretty pleased with the outcome.  Wreckers charge at least $65 to come out to our house so avoiding that charge is always a good thing.  My wife was relatively happy but gave me a hard time for causing the problem in the first place.

Are these mats perfect?  No.  They will fly out from under your car if you don’t go slow and make sure you have the correct side down.  Even then they sometimes do so I would never have someone stand behind the car.  My recommendation is to go slow – avoid your spinning tires and rock the vehicle onto the mat if need be – don’t spin your tires onto them.

My wife is so impressed she wants them back in the cars.  I just wish they had a carry case but I do recommend them as another tool to keep in your bag of tricks.

I hope this helps you out.


Comment about Ford and Their Oversight on Towing

By the way, I looked up the tow/winch location up for future reference  so if you are surfing the web trying to figure out how to tow a full size 2016 Ford Transit, here is the reference link at Ford – click here.

Look just behind the tires at the frame and you’ll see the eye rings that are part of the frame.  You can’t make this stuff up — Thanks Ford.  It drives me nuts when you look at decisions made in ivory engineering towers vs. real world needs.  Sure, let’s bury it under the van, make it hard to get to and pretty much ensure damage will occur if you actually use this to pull the van for whatever reason.

Now look how their factory winch attachment point lines right up with hitting the front radiator.  If you pull this at just about any angle where the recovery vehicle is higher than the van then the cable/strap is going to cut right into the aluminum radiator at the front.   In the next photo, you can see the silver aluminum radiator just above the lip of the bumper molding.

If you wanted to protect that radiator, you’d actually need a harness with something to push the attached cable lower to the ground – or fabricate another attachment method.   Maybe my 4″ drop hitch in my rear class IV receiver would be low enough to tie onto vs. my truck’s winch or front recovery hooks.  … Something for another day.  I didn’t buy a new van to have to worry about something people in rural areas need regularly in the winter.   They should have been in the front.


2/11/2018 Update:  The traction mats bailed me out again when I got the van stuck on ice in our yard while turning around.  I’ve come to realize the van does a fair job on the road but the tires are damn near useless on uneven icy surface,  With this van, it’s really handy to have four.  With only two handy, I could move the van forward and then get stuck, move the mats, move forward again, get stuck, etc.  I had to do the cycle about three times.  I think if I had all four handy it would have done the trick in one shot because I could have built up some forward momentum.  I now have all four stored together,  We’re nearing the end of Winter finally and I think I will keep all four in the van next year and need to find some kind of carrier bag to store them in.

Review: TEKTON Gunsmithing 18-Piece Punch Set #66564 is Pretty Nice

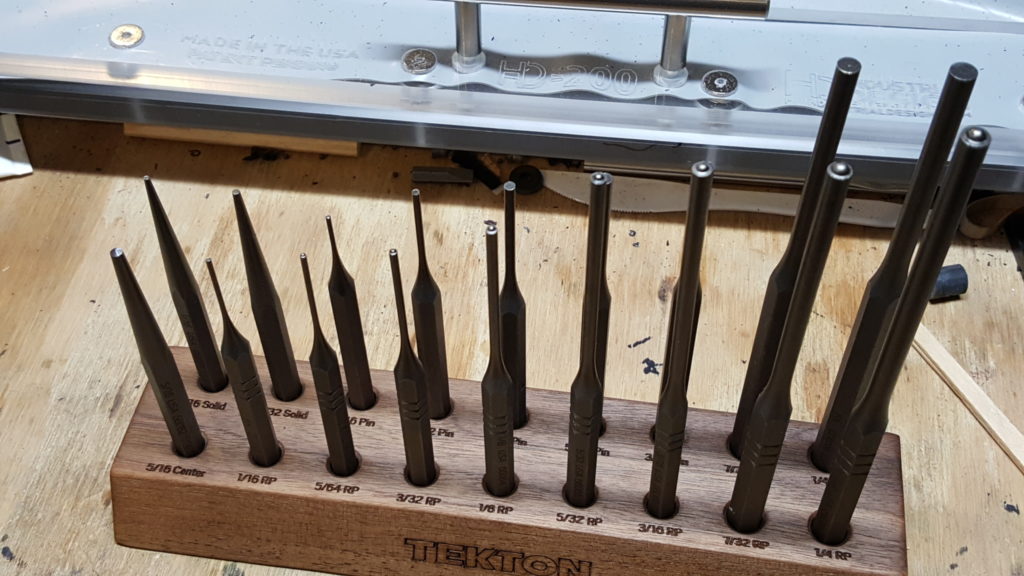
I have a lot of fun experimenting with stuff.  I tend to need punches fairly regularly and what I had was a mishmash of sizes and models from Craftsman, Astro, Harbor Freight and who knows what else.  I was working the other day and had stuff laying everywhere and thought to myself that there must be a more organized approach plus some of my punches were looking pretty abused (I’ve bent the crap out of some of the real small ones trying to start pins) so I started digging on Amazon.  Interestingly enough, TEKTON makes an 18-piece gunsmith punch set that gets very good reviews on Amazon – 4.6 stars with 181 reviews is pretty remarkable.  So, I ordered it and was pleasantly surprised at what arrived – it was very well done.


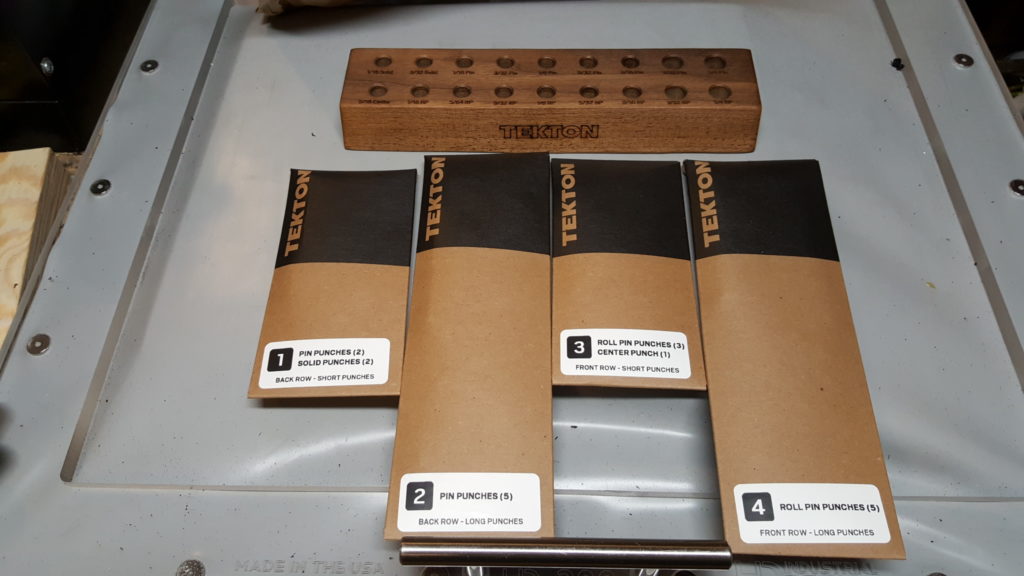
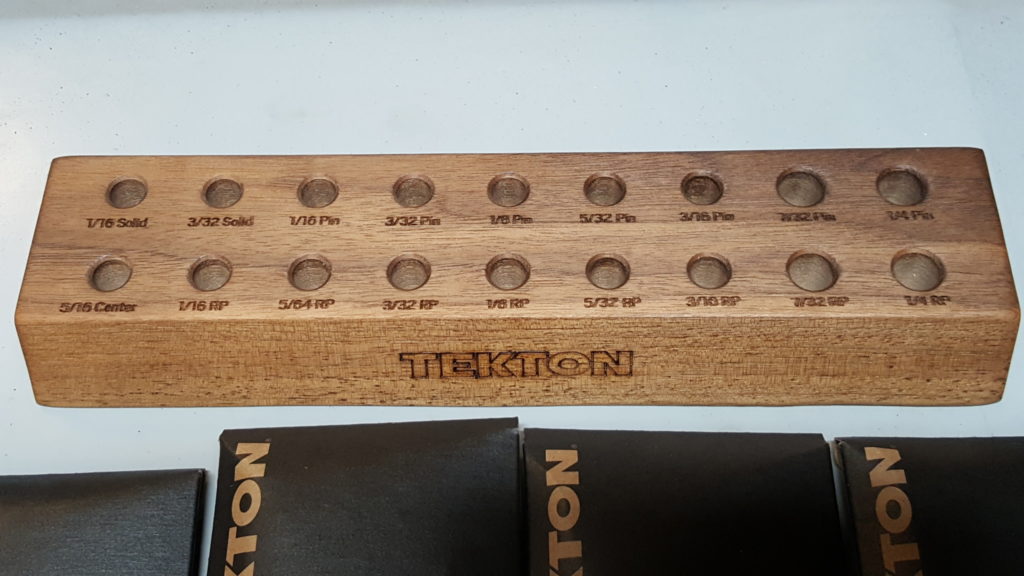
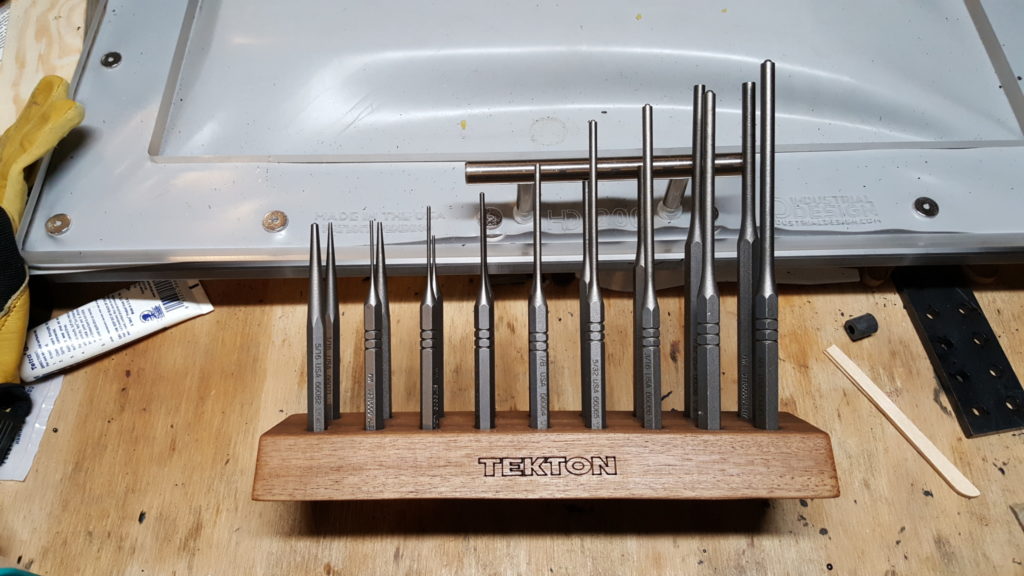
The set was well packed and includes a walnut bench block that is laser etched with what punch is to go in what hole.  Now for a slob like me, that is a God-send.

The punches have a nice heft, feel good, are well finished and have worked fine so far.  TEKTON claims they are high carbon heat treated steel and seem to be holding up just fine.

The set includes the following punches:

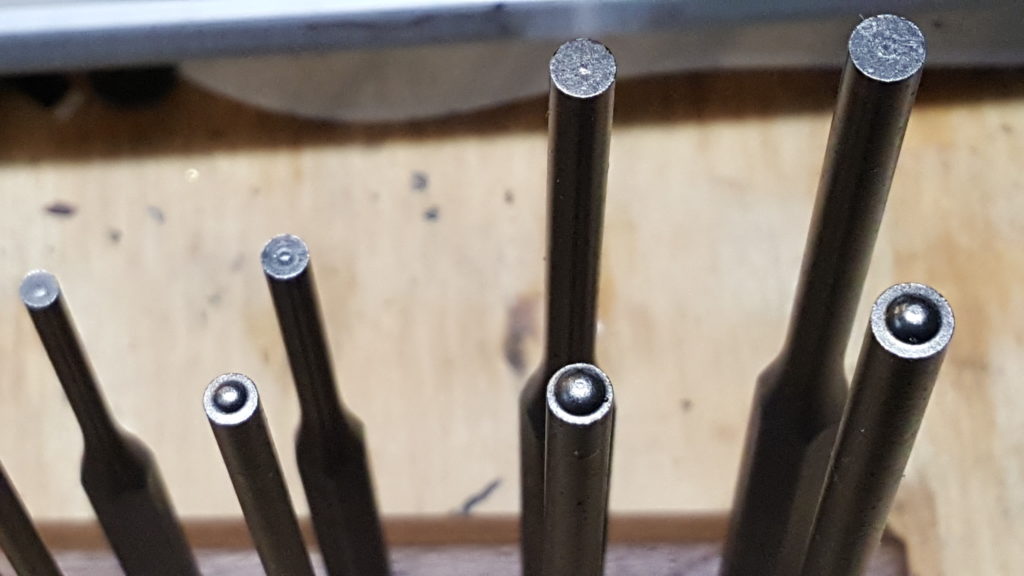
  • (7) pin punches: 1/16, 3/32, 1/8, 5/32, 3/16, 7/32, 1/4 inch
  • (8) roll pin punches: 1/16, 5/64, 3/32, 1/8, 5/32, 3/16, 7/32, 1/4 inch
  • (2) solid punches: 1/16, 3/32 inch
  • (1) center punch: 5/16 inch

I have it sitting to the side of my bench and now I can move the whole set right to where I need it vs. digging for whatever punch I need.

So if you are shopping for punches with a stand, take a look at this set.  It is a great deal when you look at the cost relative to the quality you get.

2/27/20 Update:  I’ve beat the heck out of mine and most punches are still holding up.  I’ve bent a few of the smaller ones but I have really beat the hell out of them trying to free stuck pins so I am not surprised.  Guess what I did, I bought a second Tekton set for spares.  I’m still happy with it.  All the sizes let me grab one for use as a slave pin as well like what you really need to align all the components with Glock hammer pins.


If you find this post useful, please share the link on Facebook, with your friends, etc. Your support is much appreciated and if you have any feedback, please email me at in**@ro*********.com . Please note that for links to other websites, I may be paid via an affiliate program such as Avantlink, Impact, Amazon and eBay.