Tag Archives: Build

Top Four PSA AR-15 Kits

Hi folks. I like building AR rifles and sometimes I just want a kit with all of the parts. Sometimes I will then swap stuff out and the original parts go in a bin but they are nice to have as spares and sometimes I will build the kit with the included parts – it just depends on my mood and budget to be perfectly honest. For years now, my main source for kits has been Palmetto State Armory (PSA) headquartered in Columbia, SC.

I almost always get my stuff off their website but they do have some very cool retail stores scattered around South Carolina. I had an opportunity to go to one a couple years back and it was very cool. Unfortunately, I lacked funds at the time and just picked up a couple of items. A person could put a serious dent in their credit card by going in one of their stores … or their website for that matter 🙂

People used to complain that they were slow to ship and to respond. First off, I always knew they were trying to keep costs low – they always shipped and they did respond – just not right away. For over a year now, I have noticed they are far faster at shipping – sometimes even the same day – and they are also faster at responding. So, if you hear bad stuff about this, I wouldn’t worry about it.

I’ve also heard people question their quality. Folks, if you want a tier one rifle, go buy a tier one rifle or the parts from them. Palmetto gives you a decent combination of quality and price. For folks planning on hunting and target shooting with their friends, I have no reservation to recommend them. If you are shooting in competition or planning to use this rifle in some kind if law enforcement situation or somewhere that requires high reliability, I think you probably need to look at the higher end ARs that are designed to handle tens of thousands of rounds. Look, I’m just being candid – the PSA AR rifles and pistols are solid but they have a different intended audience. There are reasons besides “coolness” where certain buyers must move to suppliers like Daniel Defense, BCM, Knights, LMT, H&K, LWRC, etc.

At any rate, back in April of this year (2021), I asked what their top four complete kits were (meaning everything except the lower receiver) and they had a list! If you like building AR kits like I do, I thought you might find this interesting in terms of what is included:

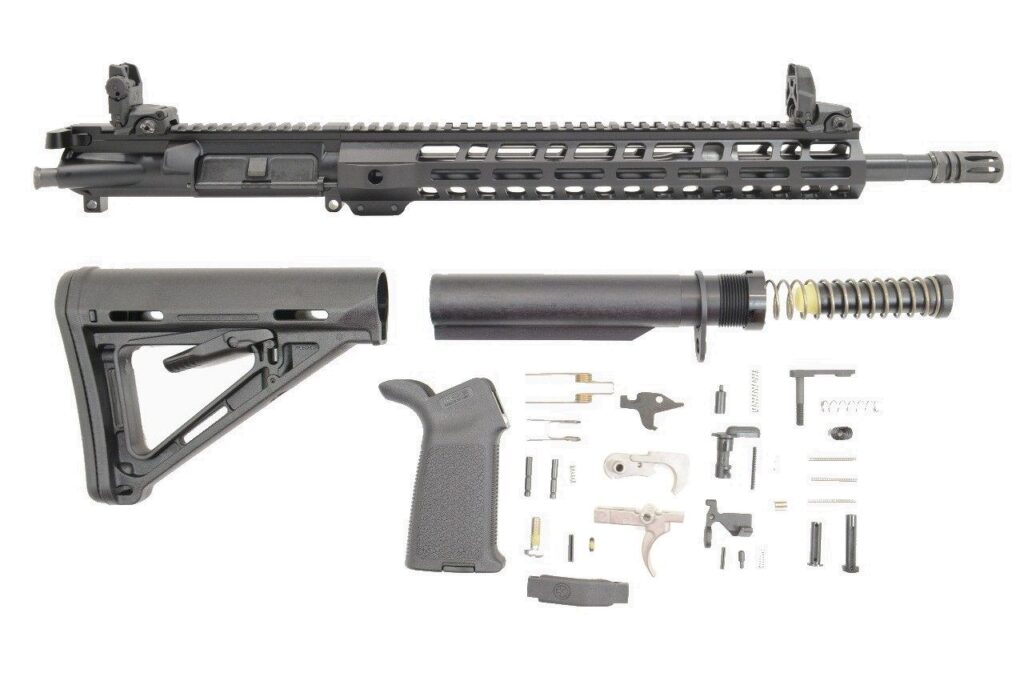
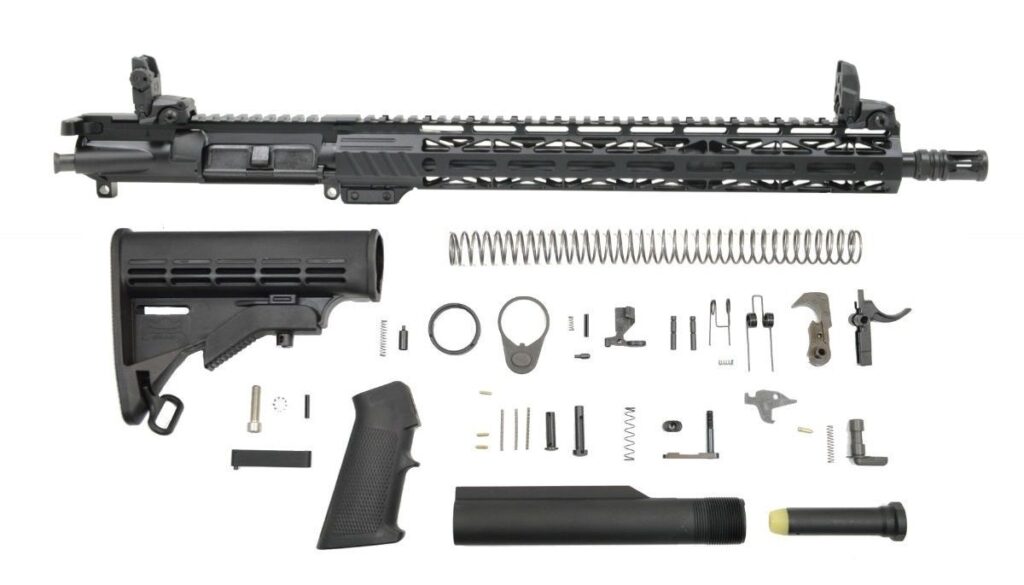
PSA 16″ 5.56 NATO 1:7 MIDLENGTH NITRIDE 13.5″ LIGHTWEIGHT M-LOK MOE EPT RIFLE KIT W/ MBUS SIGHT SET (Model 516446780)

Noteworthy here is the entry level Magpul MOE buttstock and grip plus Magpul MBUS flip up sights. They are also including a PSA EPT fire control group – this means that the trigger and hammer have nickel boron finish causing them to move easier because friction is reduced.

It has one of the PSA 13.5″ long handguards set for M-Lok attachments. Everything else is typically found in any of their AR kits with a collapsible stock. They make and restock these kits all the time.

The price as of this writing is $669.

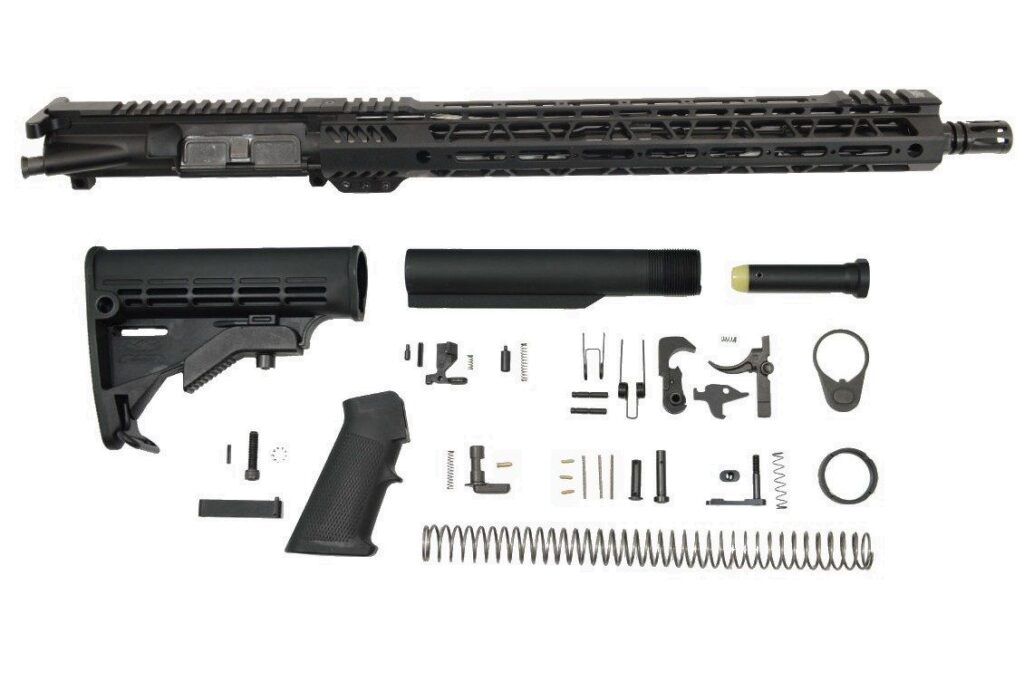
PSA 16″ M4 CARBINE-LENGTH 5.56 NATO 1:7 NITRIDE 15″ LIGHTWEIGHT M-LOK FREEDOM RIFLE KIT (Model 51655106915)

PSA Model 51655106915

Despite a cool looking 15″ handguard, this is a basic AR and you can replace the grip and buttstock later if you want. It’s selling so well that PSA is out of stock right now but you can be notified when it is back in stock. They tend to make and restock these kits all the time.

The price isn’t listed right now since they are out of stock but I would expect it to be slightly less than the first kit – unless they are charging a premium for that handguard.

PSA 16″ M4 CARBINE-LENGTH 5.56 NATO 1:7 NITRIDE 15″ LIGHTWEIGHT M-LOK FREEDOM RIFLE KIT (Model 5165450384)

Definitely a basic 15″ railed rifle kit. Everything looks entry level but you can always customize it down the road if you want.

Again, no price as they are out of stock. I’d expect it to be cheaper than the two kits above. You can sign up to be notified when they do get it in stock if you want. They tend to make and restock these kits all the time.

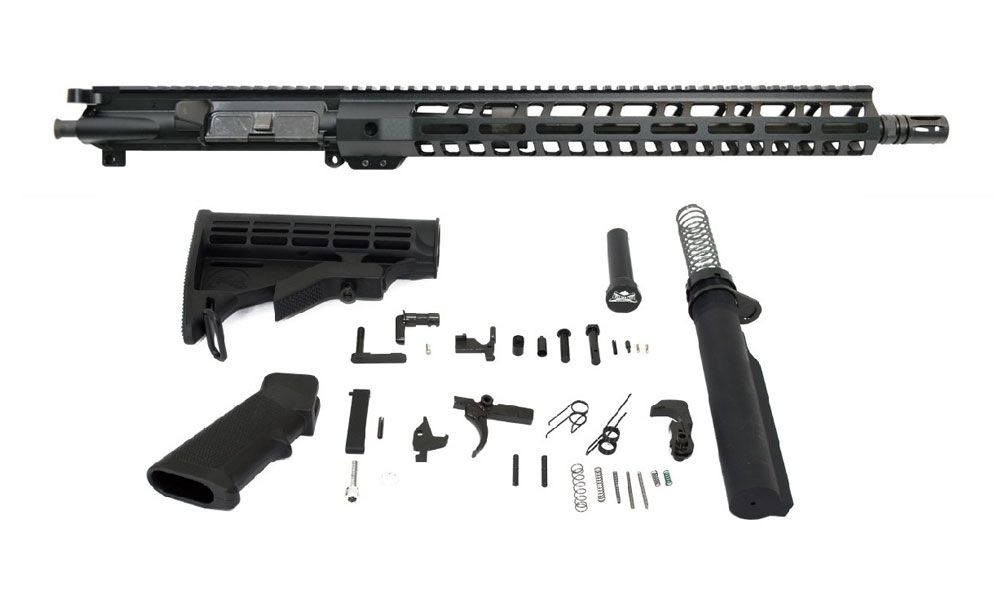
PSA 16″ MID-LENGTH 5.56 NATO 1:7 NITRIDE 15″ LIGHTWEIGHT M-LOK CLASSIC RIFLE KIT WITH MBUS SIGHT SET (Model 5165491598)

This one has the Magpul BUS sights, an interesting looking handguard … and that’s about it. Everything else is what you tend to see in any of their basic AR rifle kits with collapsing stocks.

The price as of today s $649.99

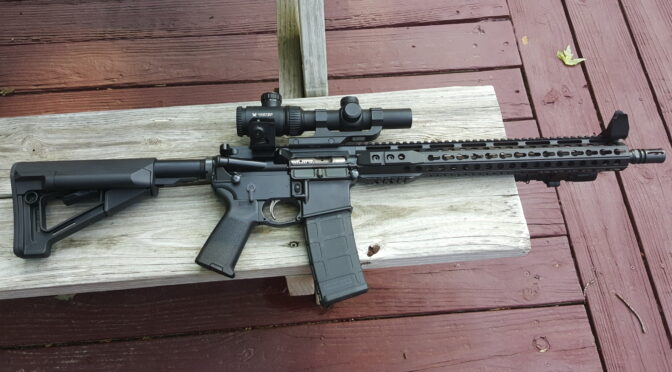
What rifle is in the top photo?

It started out as a PSA 16″ kit. It had an Anderson lower, WMD bolt, and a Magpul ACS-L stock – I like those because they lock in place and don’t rattle. It had a BMC Mod 3 charging handle, Vortex 1-6x scope on a Vortex 2″ offset mount, YHM extended push pins and a PSA ambidextrous selector lever. The fire control group is one of the PSA EPT sets – I do like them for basic triggers. I like Geissele SSA-E triggers the most though. I honestly don’t recall who made the offset sights.

Conclusion

If you’re looking to build a decent entry-level rifle from a kit with all of the parts you need other than the lower receiver, the above should work great for you. At a minimum, they will all give you a foundation to start with.


Note, I have to buy all of my parts – nothing here was paid for by sponsors, etc. I do make a small amount if you click on an ad and buy something but that is it. You’re getting my real opinion on stuff.

If you find this post useful, please share the link on Facebook, with your friends, etc. Your support is much appreciated and if you have any feedback, please email me at in**@ro*********.com . Please note that for links to other websites, I may be paid via an affiliate program such as Avantlink, Impact, Amazon and eBay.


Photos of Rick’s Polish AKM-Beryl Transitional Rifle

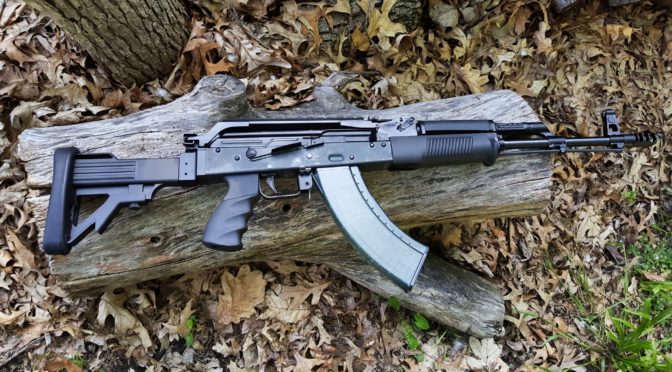
Rick sent me these cool photos of his new build and I had to share them. He also gave me some details as well.

The rifle has a “Polish FB Radom barrel, trunion, and optic rail. Childers polish cg1 receiver. To stay with the polish theme, I found an unissued polish soviet era laminate stock. I was originally going to use a bakelite grip. But, since this is a hard use rifle. I wanted something more robust. But correct for the polish theme. Your grip delivered and then some. So here are some pictures of my polish AKM-Beryl transitional rifle. At least I call it that for lack of a better term. “

Yes sir Rick – that is definitely one slick build!


If you find this post useful, please share the link on Facebook, with your friends, etc. Your support is much appreciated and if you have any feedback, please email me at in**@ro*********.com . Please note that for links to other websites, I may be paid via an affiliate program such as Avantlink, Impact, Amazon and eBay.


What To Do When Your AK’s Barrel Is Too Big For Your Front Trunnion?

A few years ago, I bought a 1969 Polish Radom Circle 11 AKM kit from Arms of America. It has laminate furniture, matching parts and they populated a new Polish Chrome Hammer Forged (CHF) barrel with the front, gas and rear sight blocks. Furthermore, it was headspaced. I double checked that before I pushed out the barrel pin and then the barrel – that’s where things got interesting.

Pressing Out The Barrel

I have a 30 ton H-style hydraulic press with a 20 ton air-over-hydraulic bottle. The thing is a brute and have used it many, many times over the years on gun and car projects. There are a few things you learn over the years – 20 tons is 40,000 pounds and is a serious amount of pressure – steel parts can bend, break or even shatter under those loads. You learn to go slow, watch carefully feel the pump and listen. I also learned long ago to use the air to move the ram quickly but always do the real work by hand for those very reasons – I’ve bent the crap out of stuff in years past because you can’t tell what is going on.

I wear a full face shield when working with a press. I’m not joking when I say things can go bad fast when there is a lot of pressure. When you push out a barrel, you just don’t expect a ton of pressure from a new kit – at least I don’t. I’ve had some real hairy barrel pins and barrels in years past when dealing with surplus… but not on a new kit with a populated barrel … not until now.

Pressing Out the Barrel

As you can guess, the barrel did not press out easily. I had to apply a boatload pressure – way more than average. So much that I put a 3/4″ piece of plywood between me and the trunnion/barrel assembly. I was also checking and double-checking that my barrel press tool squarely on just the barrel and not a part of the trunnion – guys I was nervous.
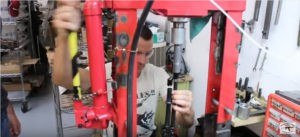
I reached the point where I knew I was squarely on the barrel and something had to give. I was whacking on the press trying to shock the barrel out and I kept upping the pressure – pump, whack, pump, whack… Finally the barrel came free like a gun shot. Guys- do you remember the old Romy kits where the pins and barrels sometimes felt like you were taking your life into your own hands? That’s what this felt like.

I actually inspected the front trunnion very carefully looking for cracks. I then inspected the chamber end of the barrel – nice and smooth – remarkably smooth. No signs of galling. Ditto on the inside of the trunnion. I suspect that someone was using some kind of press system that included a barrel support and slammed that new barrel in using a level of force I couldn’t do without damaging parts. I noted to myself that reassembly was probably going to be just as colorful.

Building The Kit

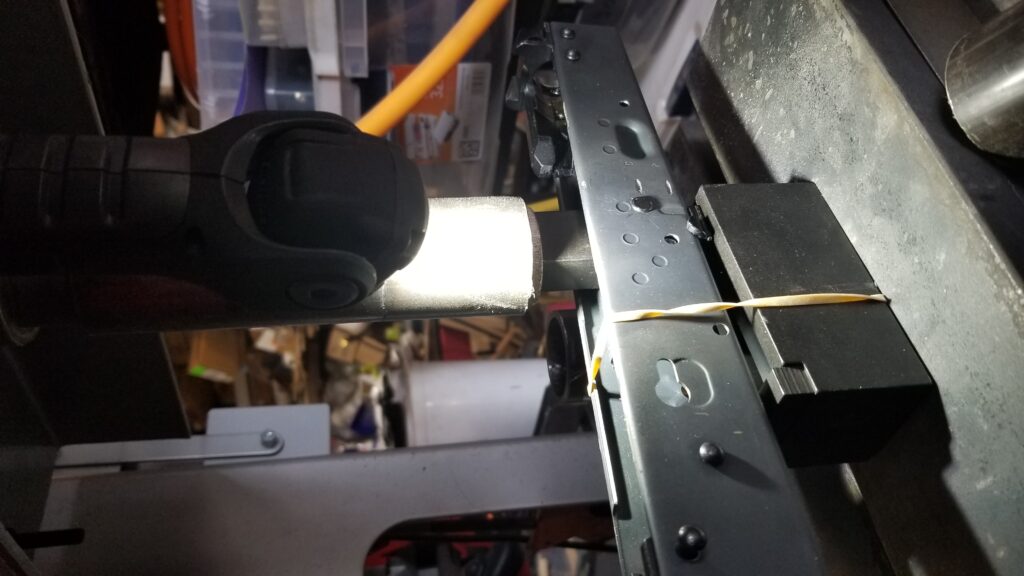
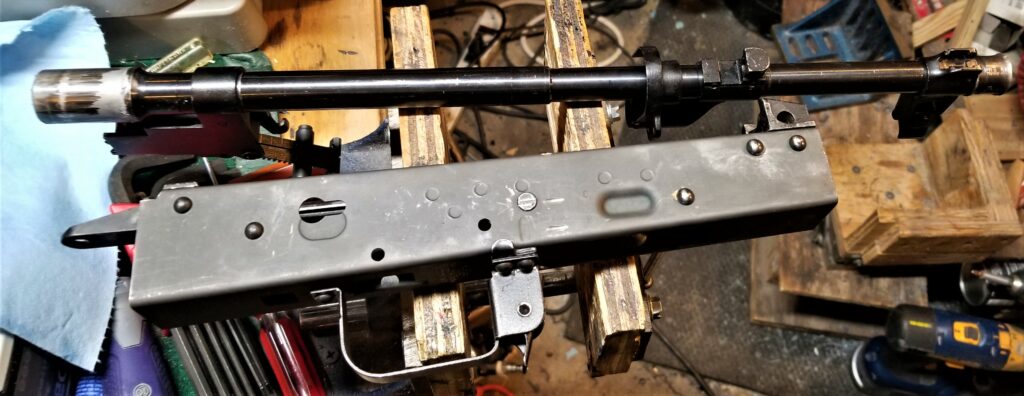
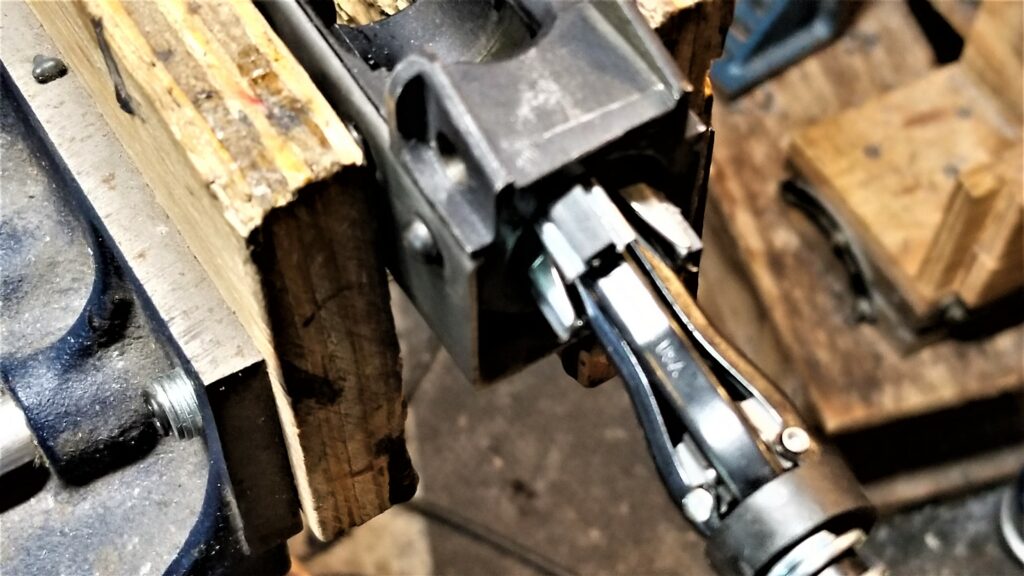
Nothing new about building the kit – I had fun. In the below photo, the front trunnion and rivets are just sitting there. I was mocking things up and they are not actually set. I installed the trigger guard taking care to orient the selector stop properly and using a rubber band to keep the assembly together as I used my press and an AK-Builder trigger guard rivet jig to do the job.

The rubber band keeps the receiver down on the trigger guard jig so the rivet, selector stop and trigger guard all stay in place while you move around. The AK-Builder jig really does a nice job.
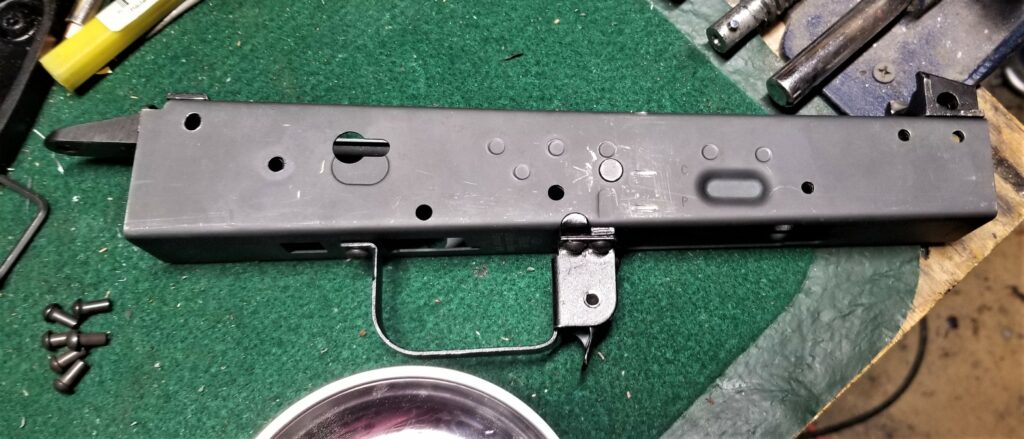
Here, everything is drilled and seems good to go.

So let’s get back to the main point of this blog post and why you are probably reading this – what do you do when the interference fit is too tight and the barrel will not go into the trunnion all the way.

Life Got Colorful Trying to Press The Barrel Back In

Yeah, that tight fit came back to haunt me. I tried polishing the trunnion and applying non-seize. Usually this works for me but when I went to press the barrel back in, it would not go. I saw the barrel begin to deflect in the press and immediately stopped. Let me explain what I mean by deflect – a material will bend so much and spring back into place. When I saw the barrel begin to deflect, I immediately stopped – it was taking way too much pressure and I was risking bending the barrel permanently. It was time to press the barrel back out and rethink the situation.

Here’s my barrel and my receiver. I double-checked the barrel to make sure I did not bend it – I got lucky. I always get worried if I see the barrel start to deflect/bend — they don’t always return to true.

So, what this confirmed for me was the someone slammed this thing together – hard. An AK barrel is press fit into the trunnion. To do this, the barrel is a tad bigger than the hole made for it in the trunnion by about 0.0010-.0026″ (0 .025-0.065mm) according to Robert Forbus who is a true machinist and has shared a ton with the AK community – click here for his page). At the tighter end (around 0.002″) it is getting hard, if not outright impossible, for someone to press the barrel into the front trunnion without the proper specialized barrel press equipment that supports the barrel. I have a big press but nothing to properly support the barrel in these high-pressure situations. It would likely warp like a wet noodle if I just kept adding pressure.

I don’t own a machine shop but I am a redneck with a shop. I needed to open up the barrel channel in the trunnion and opted to use an OEM brand brake hone. Why? Because I’ve used these small bore hones in the past for other things and was pretty sure it would work for this too.

There are tons of brake hones on Amazon. Click here to open a tab and see them.

I also need to point out that I have no way to accurately measure the barrel or the trunnion so I figured I would remove a bit and try to install the barrel, remove a bit and try, over and over until it went in. The next picture shows my OEM hone (and the Lisle is virtually identical):

Take a look at the above picture – by tightening the knurled nut at the base of the spring, you can apply more and more pressure to the 220-grit stones at the end of the arms. (The Lisle tool’s stones are 240 grit purely FYI – not a big difference.) I just used the basic pressure and did not increase it. Life lesson for me years ago – it’s easier to take more material off than it is to put it back on.

I applied cutting oil to the trunnion liberally and then slid the hone in and out with my drill on slow speed. I would do this for a bit, clean stuff, and then tested how far the barrel goes into the trunnion by hand and then keep removing more. This is not the time or place to get impatient.

By the way, OEM makes fine 400 grit stones that you can swap into place and use to polish the interior further if you . I got the job done with the 220 grit stones and silver Permatex anti-seize compound. If I had the 400 grit stones handy at the time, I would have done so but I did not. Also, be sure to clean out the grit/dust before you try to reinsert your barrel.

My one action photo and it was blurry! You get the idea. Keep it lubed with the cutting oil and keep moving the unit in and out so you are polishing the whole barrel channel.

This is a down and dirty “git ‘er done” approach and will make machinists cringe. I go slow and test — I would push the barrel in, test and the press it back out if need be. [Click here to see how to make a barrel backout tool].
*IF* you see a bur or squished rivet protruding in the trunnion, then carefully grind that down with a Dremel and polish with the hone. Don’t try to do it all with the hone or you will be removing material elsewhere that you may need – the arms are spring loaded and independent so they will go where ever they can. This is a pro and con.

After a couple of tries, the barrel went all the way in with the press. To be safe, I confirmed the head space using real Manson brand 7.62×39 gages (use real gages folks and treat them well – don’t go cheap). The barrel headspaced just fine so I pressed in the pin and finished the rifle up.

Bottom line, a brake hone can help you carefully remove steel from the front trunnion and get a tight fitting barrel to go in. It worked wonders on this 1969 cold warrior that is now ready to go to the range.

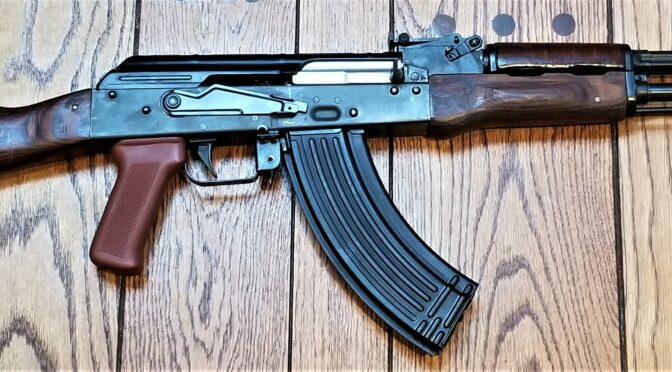
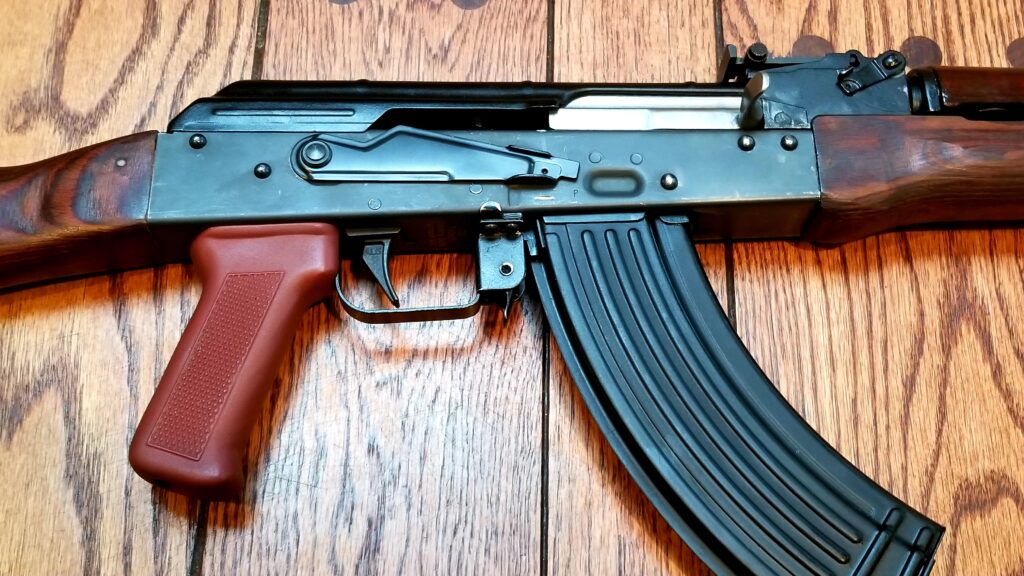
The 1969 Polish AKM rebuilt and ready for the range!
The rifle is wearing one of our Polish Tantal/AKM grips as a 922r compliance part – we make them by hand here in Michigan from a glass fiber reinforced polymer.

Click here to learn more and order one of our Polish Tantal/AKM grips.


One of our fire control group retaining plates. that fits all AKMs and rifles that use standard AKM fire control groups.

It also has an ALG fire control group – they are awesome triggers – and one of our fire control group retaining plates. Click here for our fire control group retaining plates.


If you find this post useful, please share the link on Facebook, with your friends, etc. Your support is much appreciated and if you have any feedback, please email me at in**@ro*********.com . Please note that for links to other websites, I may be paid via an affiliate program such as Avantlink, Impact, Amazon and eBay.


Wheeler Tool Makes AR Trigger Guard Installation or Removal a Breeze

I was asked how I install AR trigger guards to minimize scratching up the receiver or even risking snapping an “ear” off.  On one hand, you can use a solid backing block to support the ear and then use a roll pin punch to drive in the pin.  That’s what I used to do but it’s a headache to be honest.  As some of you may know, I have a tremor that makes fine motor stuff a headache so finding methods that are simpler really helps me get work done.

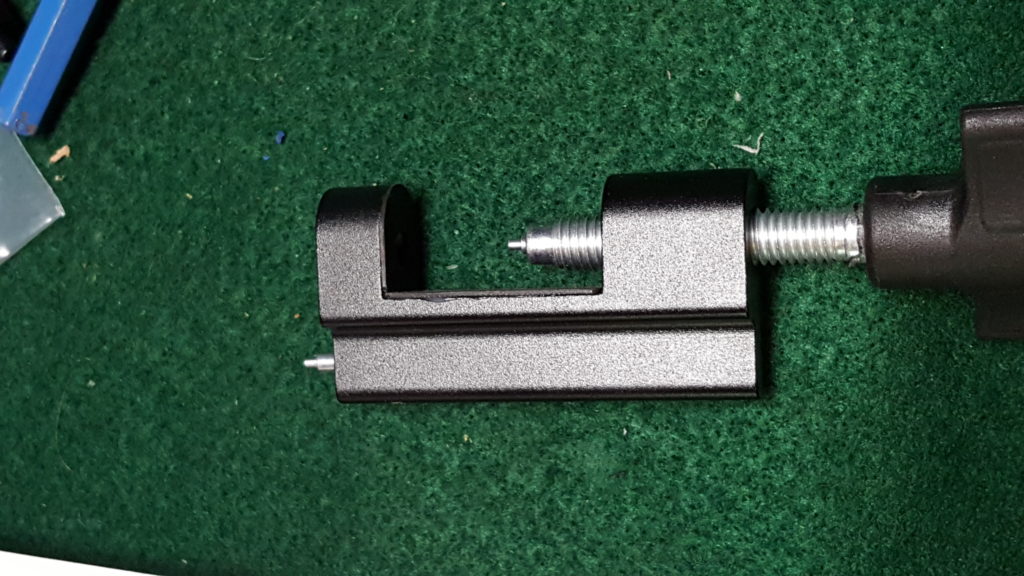
This is a Brownells Billet 7075 aluminum trigger guard (078-101-164) and it has a bulge to accomodate gloves.  The set screw goes in the end with a blind hole.  The roll pin goes through the end that is drilled all the way through.

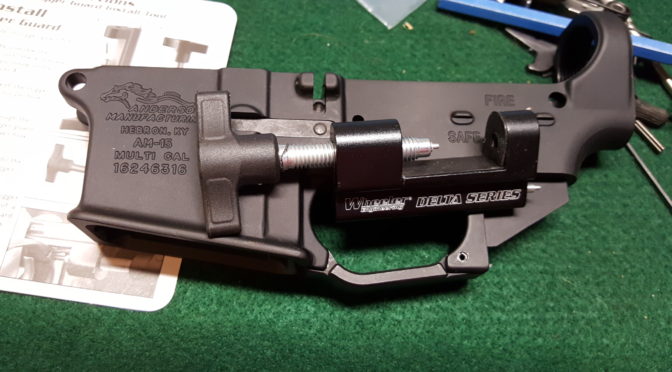
A few years ago I started using the Wheeler trigger guard tool and it works great.  Click here to see it on Amazon.

This is how I use it:

  1.  Install the end of the triggerguard that uses the set screw.  That’s the end with the blind hole – the roll pin goes in the end where a hole goes all the way through.
  2. I lightly oil the pin to make things easy and tap it with a small hammer just to get it started.
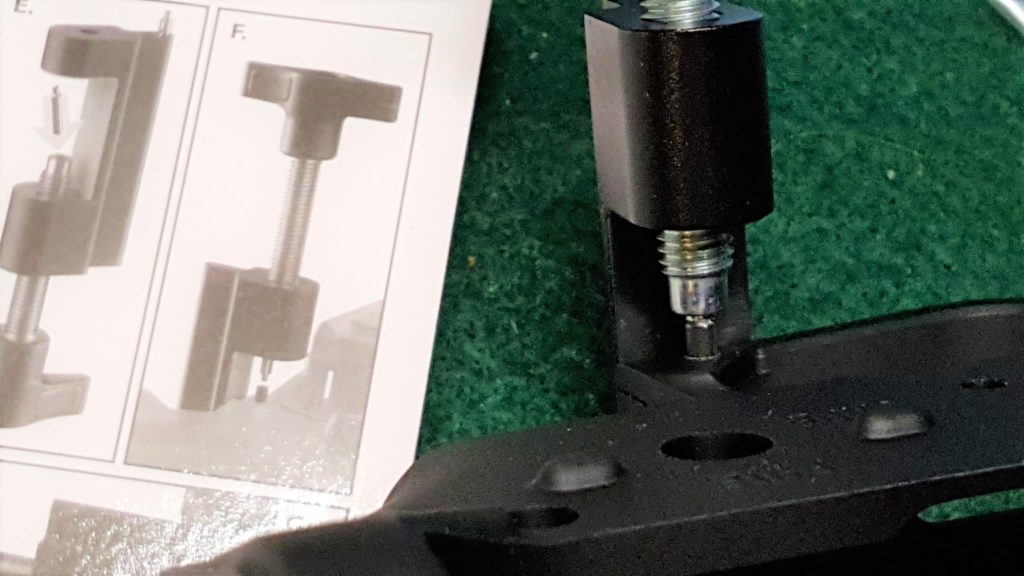
  3. I then use the Wheeler tool with the shorter starter pin.  The starter pin has a nipple that centers it on the roll pin.
  4. Keep the parts aligned and turn the knob to drive the pin in.
  5. Stop when you have inserted the pin – it’s that easy.

Note, Scott Igert of Modern Antique Firearms recommends you put a business card or something between the frame and your receiver to protect it from scratching.

It has two tips – here you can see one installed and one stored in the frame of the tool.  The short one is for installing and the long one is for pushing a roll pin out.
Simply stop once the pin is flush.

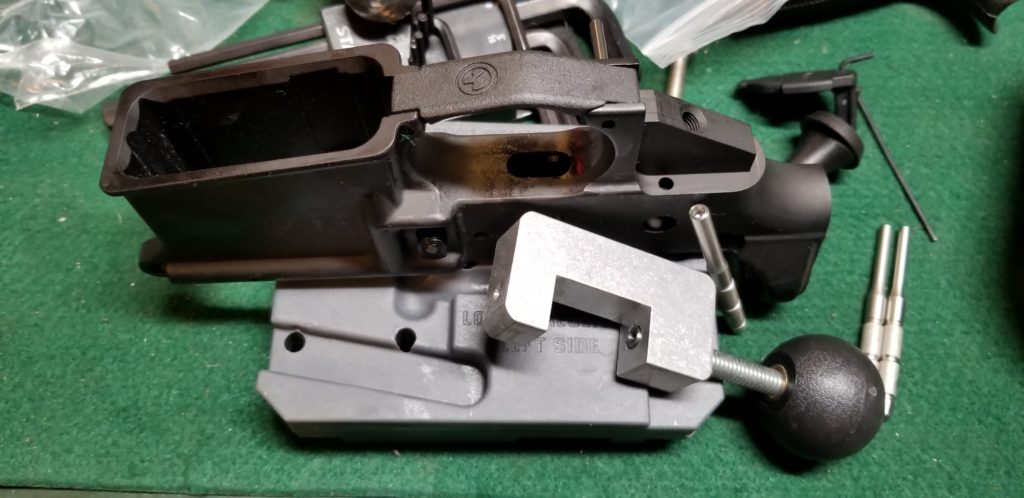
Note, I actually have one from another maker also.    I’m holding it in my hand.  It does the same conceptually but is heavier made.  I’ve built probably 4-6 ARs with the Wheeler unit and it seems to be holding up fine.  The other is a Little Crow unit from Brownells for about $39.99 + S&H and its built like a tank but you do pay more for it.

Little Crow Trigger Guard Pin Pusher

I hope this helps you out.  


If you find this post useful, please share the link on Facebook, with your friends, etc. Your support is much appreciated and if you have any feedback, please email me at in**@ro*********.com . Please note that for links to other websites, I may be paid via an affiliate program such as Avantlink, Impact, Amazon and eBay.


Assembling a Beryl-ish AK From a WBP Kit – Part 1

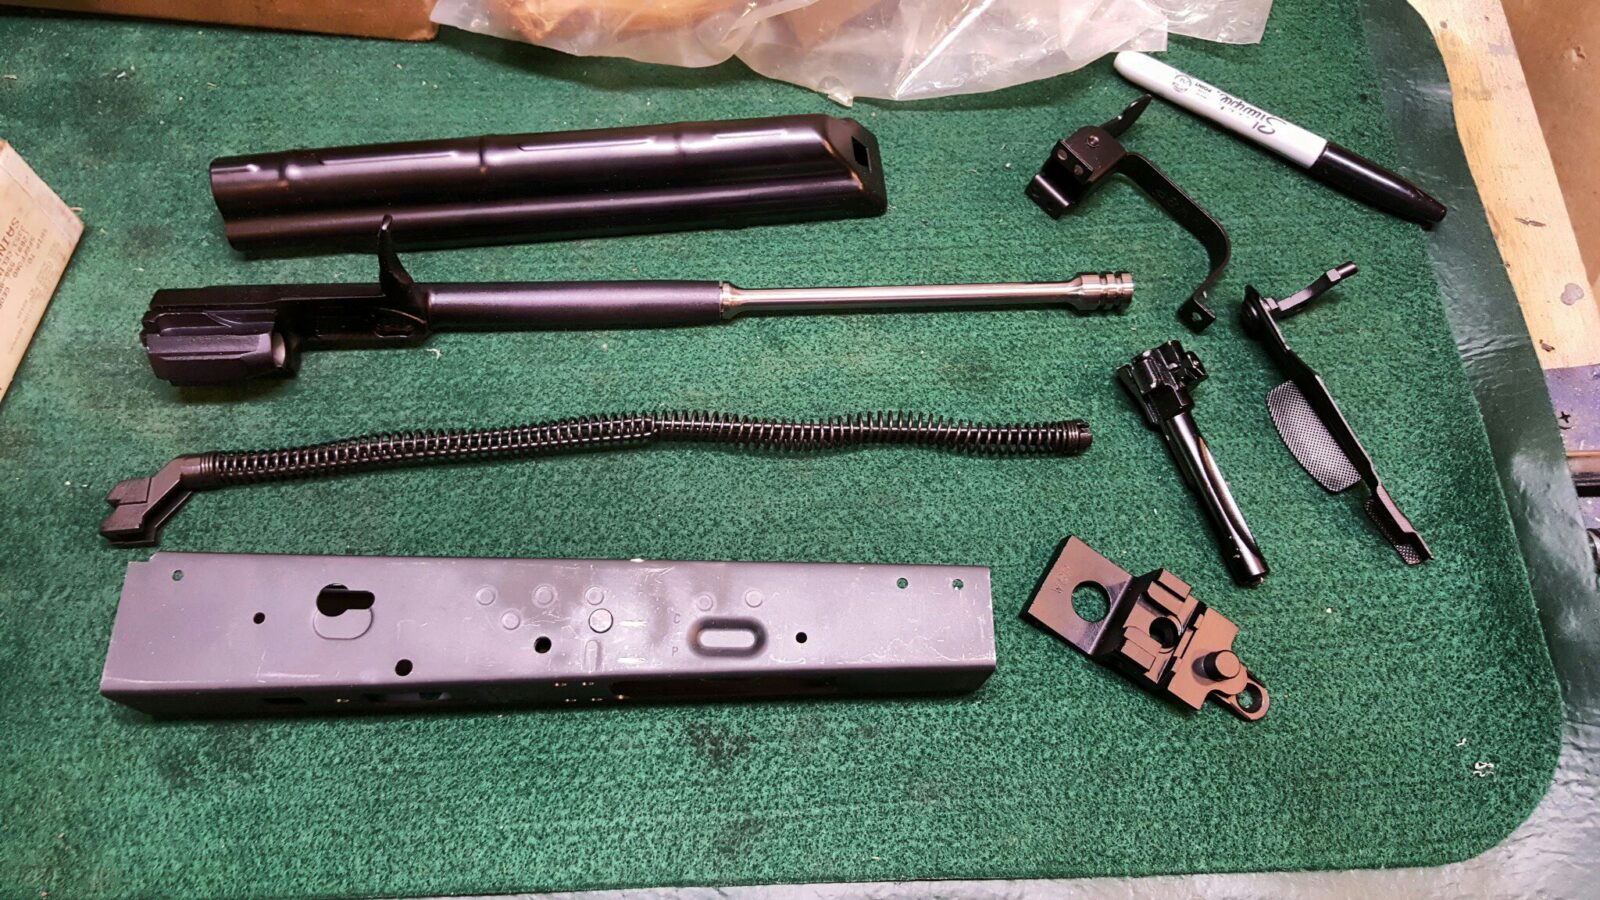
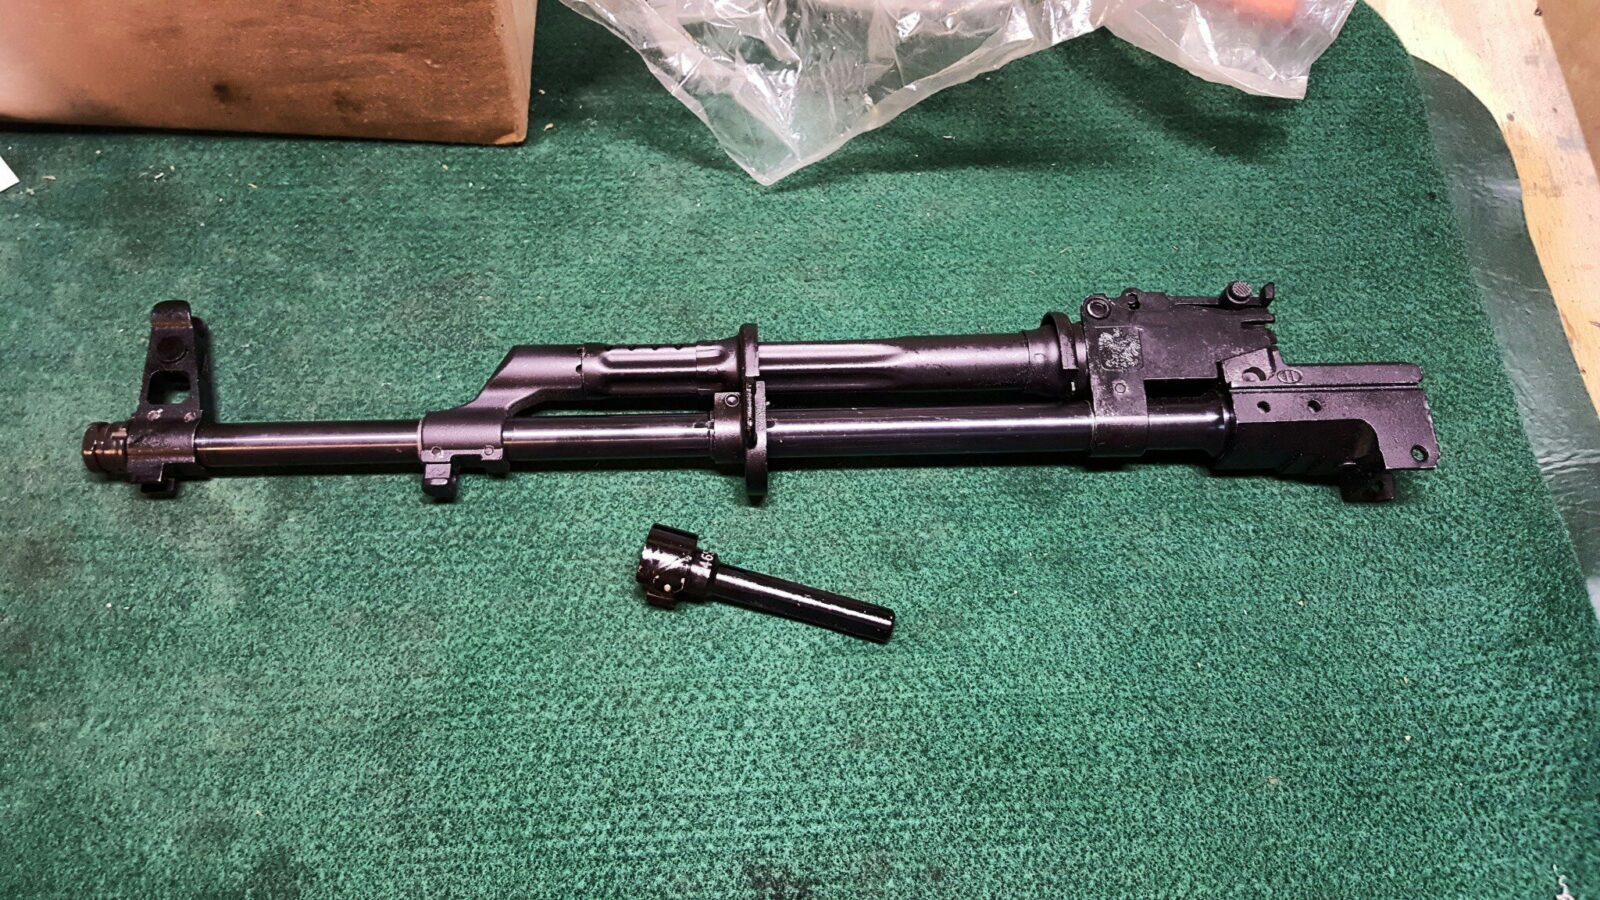
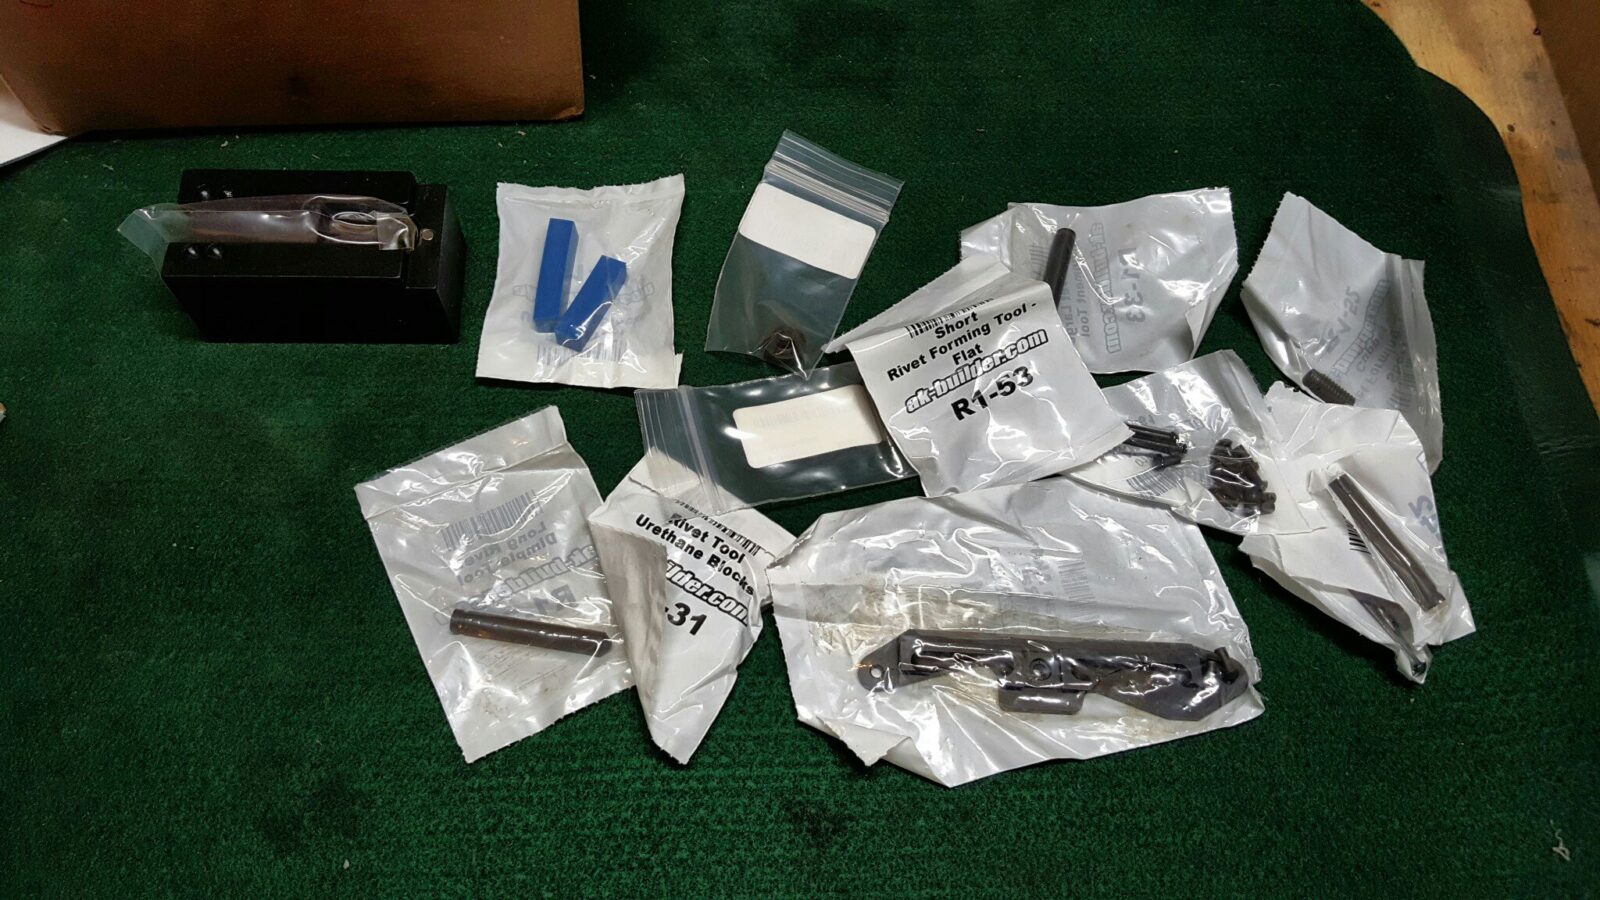
It’s been a couple of years since I last had time to build an AK and definitely felt the need to catch up. Contrary to what some may think, the majority of guys who like building guns aren’t trying to bypass laws – they genuinely enjoy it. Think of it as being similar to building a model but this one can go “bang” 🙂

I think I got bit by the AK builder bug in 2006 after reading an article in Shotgun News by Steven Matthews about building AKs. The rest, as they say, is history. At the time, you could buy a kit for $50 if you shopped around then after the barrel ban went into effect, the prices just went up and up. Now, with the advent of US and foreign barrels plus businesses that are selling kits with headspaced barrel assemblies, prices are relatively affordable. They are still far higher than years ago, but you can build your own entry level AK for about $500 and then the prices just go up and up.

At this point I have to answer the question “Why do it when you can buy a complete AK rifle for the same amount or less?” In short, you get to control as much of the quality as you want is the answer. Like anything, someone can always figure out how to make an AK cheaper but that doesn’t mean better. Frankly, some of the US-made AKs are total pieces of shit if you will pardon my French and complete honesty. The internet abounds with stories of busted US made parts and hack assembly jobs. Really, the only AKs I would recommend are going to come from custom or semi-custom shops like Two Rivers Arms, Jim Fuller’s Rifle Dynamics, Jim Roberts, Krebs and so forth.

Certainly there are good foreign made AKs but even they can have quality control moments. Zastava can make excellent AKs if they choose to is one example. Russian Molots are my all time favorite but they are banned from further import though there seems to be a ton of them still for sale and prices haven’t gone up much. Bulgarian AKs can be good and that is one reason K-Var can charge what they do. One country with a long AK history that not all American’s know about is Poland. It would be cool if they start selling more models into the US- market but at least Arms of America is bringing in a wide variety of kits right now.

So that brings me full circle. Why do I want to build vs. buy? Because I like building them and I can make an AK do just about anything I want it to at this point. I’ve done rivet, screw and weld builds. I’ve built Romanian, Hungarian, Polish and Yugoslavian AKs and RPKs. I’ve done traditional looking builds and over-the-top “tacticool mall ninja this thing is way too heavy” builds. Seriously, I kind of went nuts with a Hungarian AMD-65 about 10 years ago and put on a quad rail with a red dot, laser, light vertical fore grip and bipod. The thing was so heavy that it literally taught me that just because you can add something on does not mean you should – it takes time and energy to bring something that heavy up into position and also to stop it once on target.

I’m not saying I know everything. I’m just saying I know my way around the AK platform well enough to build what I want. The hardest thing for me is finding the time between my day job, family and Ronin’s Grips. So, an interesting opportunity presented itself because I had Polish Beryl furniture, Childers Guns sells Polish receivers and Arms of America (AoA) had a cool kit for sale. It was a WBP 7.62×39 kit with a Polish chrome-lined Cold Hammer Forged (CHF) barrel that is arguably, and it will start arguments, one of the best AKM-style barrels you can buy right now. The kit included a solid-steel Bery-style optics rail that goes over the dust cover and for about $670. This appealed to me because I already owned the Beryl handguards, was getting ready to release our version of the modern Beryl grip and, separately, AofA was selling a collapsing Beryl stock that is a unique looking beast for sure.

So, I got the wheels in motion and ordered the kit stock plus some translucent WBP mags from AoA, a RRD-4C brake from JMac customs, an ALG trigger and a Vortex Crossfire Red Dot. I ordered a completed 100% receiver from Childers Guns and had it sent to my FFL and good friend, Scott Igert, of Modern Antique Firearms.

Once it all arrived, it was time to start.


If you find this post useful, please share the link on Facebook, with your friends, etc. Your support is much appreciated and if you have any feedback, please email me at in**@ro*********.com . Please note that for links to other websites, I may be paid via an affiliate program such as Avantlink, Impact, Amazon and eBay.


Video: Building an AK-47 (AKM) with Definitive Arms by AK Operators Union, Local 47-74


Back in 2015, Rob Ski went to Definitive Arms to build an AK.  In this video, they really get into the details of building an AK and anyone regardless of experience level is bound to learn something.  You can watch in this 36:13 video as Rob builds his AK under the expert tutelage of the guys at Definitive Arms.

There are some great tips in here for riveting, getting the barrel blocks on square, etc.  Definitely worth your time.  After watching all these build videos, I really wish I had the time to build another.


If you find this post useful, please share the link on Facebook, with your friends, etc. Your support is much appreciated and if you have any feedback, please email me at in**@ro*********.com . Please note that for links to other websites, I may be paid via an affiliate program such as Avantlink, Impact, Amazon and eBay.


Video: How to build an AK47 from scratch part 6 (the last part) by usmcdoc14

This is his last video in the six part series.  He recaps what he did and shares with you some of his tips for sandblasting such as putting foam earplugs in the chamber.

Here are the links to each segment – when you click on them they will open in a new tab:


If you find this post useful, please share the link on Facebook, with your friends, etc. Your support is much appreciated and if you have any feedback, please email me at in**@ro*********.com . Please note that for links to other websites, I may be paid via an affiliate program such as Avantlink, Impact, Amazon and eBay.


Video: How to build an AK47 from scratch part 4 by usmcdoc14

In this fourth installment, you can see usmcdoc14’s welding results and he discusses how to trim the top rails.  Note, a lot of flats and receivers now have pre-cut top rails so you only need to trim them if they look like what you see in the video – big, wide and straight.

Here are the links to each segment – when you click on them they will open in a new tab:


If you find this post useful, please share the link on Facebook, with your friends, etc. Your support is much appreciated and if you have any feedback, please email me at in**@ro*********.com . Please note that for links to other websites, I may be paid via an affiliate program such as Avantlink, Impact, Amazon and eBay.