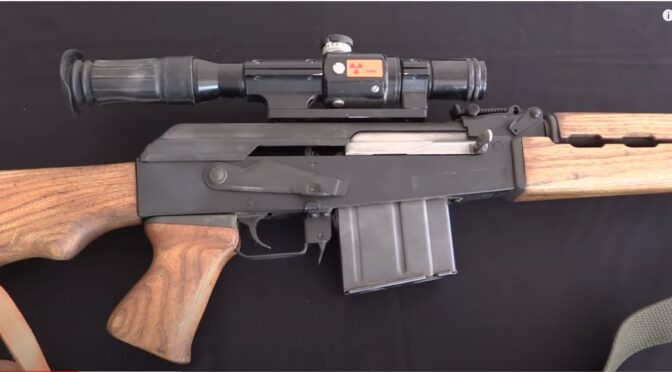
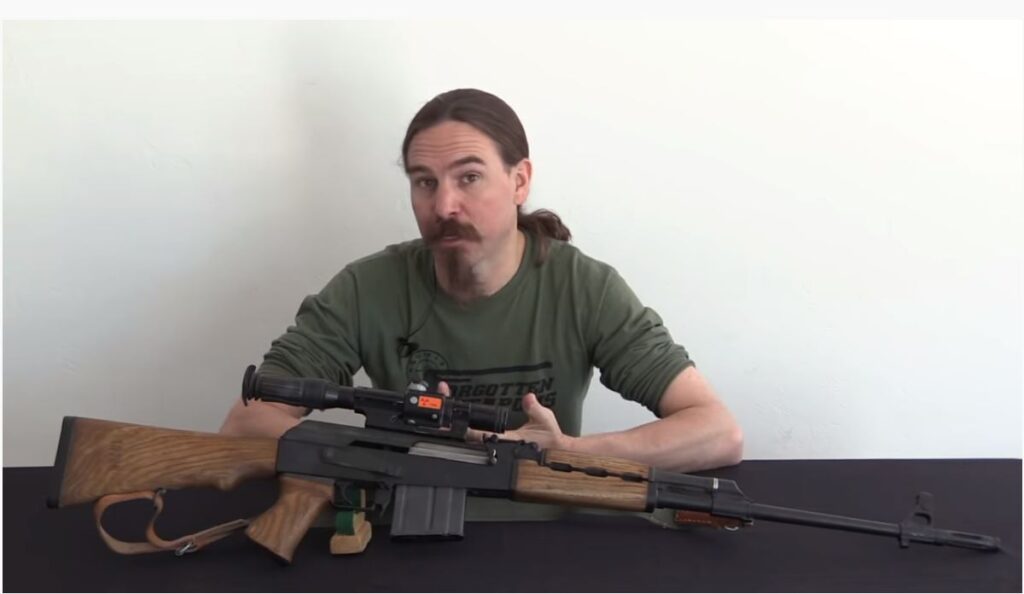
Ian McCollum, of Forgotten Weapons fame, just did a review of a Yugo M76 designated marksman’s rife (DMR). I like the M76 and own one built for me by Two Rivers Arms so I was listening intently.
Ian’s M76 was built by Century Arms from a kit and he’s happy with it.
Two things I picked up that I didn’t know was that the odd looking muzzle brake’s ribs at the pack are actually threads for a suppressor, Huh… that’s interesting.
Those are interrupted threads at the back of the flash hider for mounting a suppressor.
Second off, I’d heard about the ATF mixup wherein they approved 2,000 M76s to be imported with the full-auto sears installed because the rifle used it as a safety and was never full-auto so it stands to reason it was never a machinegun. Well, the ATF decided later on that these rifles were indeed machineguns because they included the evil full-auto sear and mandated that all rifles had to be collected. What I didn’t realize was that they chopped up the receivers and created all the parts kits that we see today. Ahhhhh,,,, now I know.
Please note that all images were extracted from the video and are the property of their respective owner.
If you find this post useful, please share the link on Facebook, with your friends, etc. Your support is much appreciated and if you have any feedback, please email me at in**@*********ps.com. Please note that for links to other websites, we are only paid if there is an affiliate program such as Avantlink, Impact, Amazon and eBay and only if you purchase something. If you’d like to directly contribute towards our continued reporting, please visit our funding page.
Interest in the Beowulf round is growing as people buy the low cost 12.7×42 chambered pistols, rifles and kits. 12.7×42 is the metric designation for the Beowulf and is being used by groups wanting to avoid a trademark problem with Alexander Arms.
The Beowulf is one heck of a thumper delivering massive kinetic energy on target from the base AR-15 platform. That’s the remarkable part – it uses a standard AR lower! To give you an idea of the size of the round take a look at this photo. From top to bottom: .50 Beowulf 350gr XTP, 5.56×45 55gr FMJ , 7.62×39 123gr FMJ and a loose 9mm 124gr Hornady HST. The Beowulf sure dwarfs the little 5.56×45 round!
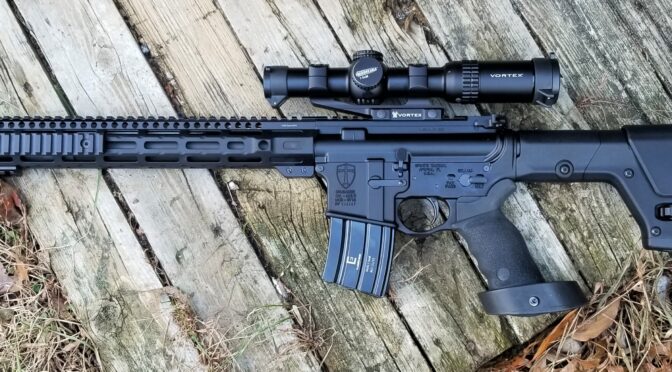
I’ve owned two .50 Beowulf’s and my current one was built using an Alexander Arms DIY kit that allows you to add the handguard and brake that you want. They are built on standard AR lowers so if you have an AR today, it’s just a matter of adding an upper in this caliber or you can do a whole new dedicated build – it’s up to you. I’ve also done a number of posts about my builds in case you want to learn more – click here to see a list.
A Beowulf upper can mate to any in-spec AR lower. This is a Spike’s lower with an Ergo group, Magpul PRS III and Geissele trigger.
This is the 16″ DIY kit. Alexander Arms has done all the fitting for you. It comes with one magazine as well. In terms of the upper kit, I found the machining and parts fitment to be excellent.This is the Timber Creek Heart Breaker and it does a remarkable job of reducing the recoil. It has three heart shaped ports on each side that redirect the blast backwards to propel the rifle forward and reduce recoil. The three circular ports on the top help reduce climb. Seriously, this is a solid brake.
For ammo, there is an increasing variety out there – Alexander Arms makes their own with a variety of loads plus there are other sellers out there with their own offerings. I’ve found the Alexander Arms 350 grain Hornady XTP ammo to be accurate and the XTPs really open up on impact.
The is older packaging. In 2019 I noticed Alexander was using an eye catching color scheme of navy, black and white – same ammo just a different box. The Alexander Arms .50 Beowulfl 350gr XTP ammo is packed 20 rounds to a box and Primary Arms has it in stock.Here’s the whole Beowulf.
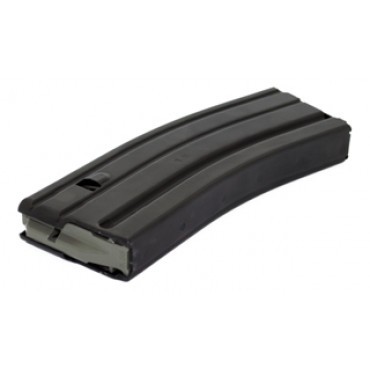
This is one of the 30 round D&H 5.56 magazines that you can use to hold up to 10 Beowulf rounds.
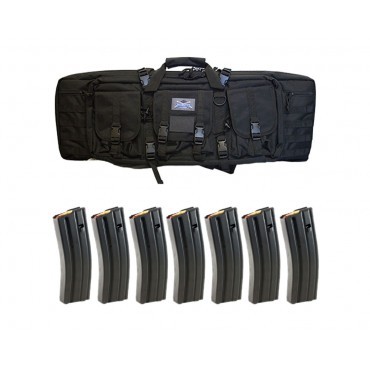
This is the very well made 36″ PSA rifle case deal that includes 7 D&H mags.
Conclusion
That’s it for now. I hope you found this helpful and have fun building and shooting a .50 Beowulf.
If you find this post useful, please share the link on Facebook, with your friends, etc. Your support is much appreciated and if you have any feedback, please email me at in**@*********ps.com. Please note that for links to other websites, we are only paid if there is an affiliate program such as Avantlink, Impact, Amazon and eBay and only if you purchase something. If you’d like to directly contribute towards our continued reporting, please visit our funding page.
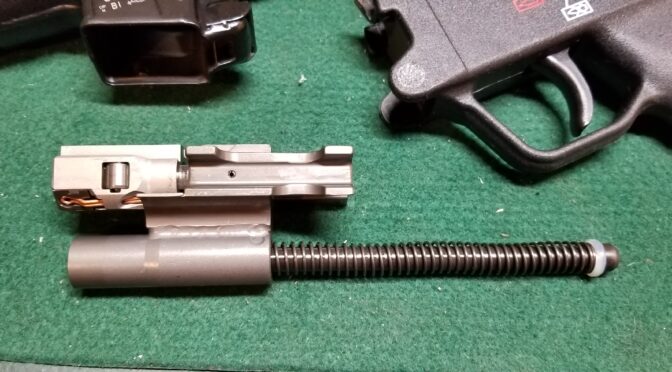
I’m a fan of the Roller Delayed Blow Back firearms for a while and have had opportunities to own and shoot ones from HK, POF, and PTR. I knew the rollers were locking the bolt head in place but never really understood the details of the action. I’ve tracked down two great videos to help show you what is going on.
This is a PTR PDWR in .308 – basically a cut down HK-91 style pistol with a SB Tactical SOB Brace and a Vortex Optic.
Forgotten Weapons
In this short video, Ian @ Forgotten Weapons does a great job explaining just how this system works.
MouseGunner
This is one of MouseGunner’s cool x-ray renderings where he shows the MP5’s action at work. He’s done this for other weapons as well and watching the weapon operate really helps.
If you find this post useful, please share the link on Facebook, with your friends, etc. Your support is much appreciated and if you have any feedback, please email me at in**@*********ps.com. Please note that for links to other websites, we are only paid if there is an affiliate program such as Avantlink, Impact, Amazon and eBay and only if you purchase something. If you’d like to directly contribute towards our continued reporting, please visit our funding page.
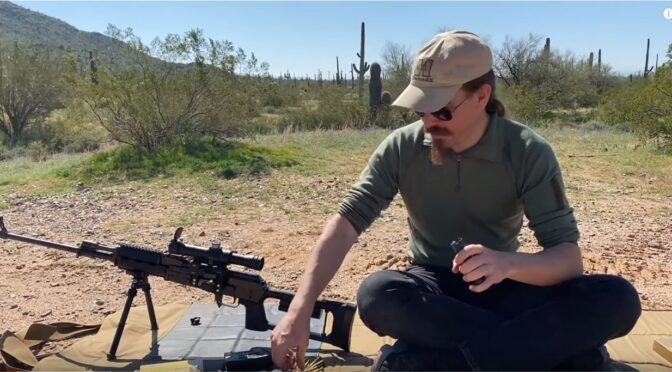
In the previous video, Ian at Forgotten Weapons does his bench top review. In this one, we get to see the rifle perform at the range. Ian was at 100 yards and he’s firing PPU match 182 gr 7.62x54r ammo and the group opened up as the barrel warmed up.
Group one – relatively cool barrelGroup 2 opened up a lot – Ian did not the barrel was hotGroup 3 – disappointing. Ian wonders if the scope had problems.
The Range Video
My Conclusion
It really does come across as a Serb copy of the PSL and not worth the fortune it is selling for unless you are a true collector. Whether it was the rifle or the scope, the results are not impressive. Personally, I thought about buying one and decided to pass. when they first came out and this cements it.
Please note that all images were extracted from the video and are the property of their respective owner.
If you find this post useful, please share the link on Facebook, with your friends, etc. Your support is much appreciated and if you have any feedback, please email me at in**@*********ps.com. Please note that for links to other websites, we are only paid if there is an affiliate program such as Avantlink, Impact, Amazon and eBay and only if you purchase something. If you’d like to directly contribute towards our continued reporting, please visit our funding page.
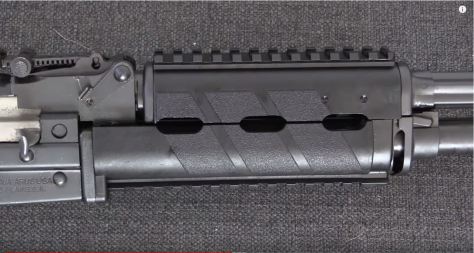
Ian, over at Forgotten Weapons, did a review of the new Zastava M91. In the end, you do wind up with a over-sized 7.62x54r AK variant filling a designated marksman role (DMR). As always, Ian does a provides a great commentary as he looks at and then disassembles the M91.
Stamped receiver with a unique extension at the rear to accommodate the longer cartridge. Note the POSP 4×24 optic.The M91’s unique handguardSkeleton stockA quick look down in the receiver – you can see the extension is riveted in place.
Please note that all images were extracted from the video and are the property of their respective owner.
If you find this post useful, please share the link on Facebook, with your friends, etc. Your support is much appreciated and if you have any feedback, please email me at in**@*********ps.com. Please note that for links to other websites, we are only paid if there is an affiliate program such as Avantlink, Impact, Amazon and eBay and only if you purchase something. If you’d like to directly contribute towards our continued reporting, please visit our funding page.
Paul sent me in a photo of his custom M72 carbine with our handguards. It sure turned out cool. Here’s the info he shared about it:
M72 Unissued mint kit
AK Builder 16″ barrel
POSP 4×24 scope on AKM rail
4.5mm rear folder
JMac customs RRD 4C brake
Built by Mod Outfitters
If you find this post useful, please share the link on Facebook, with your friends, etc. Your support is much appreciated and if you have any feedback, please email me at in**@*********ps.com. Please note that for links to other websites, we are only paid if there is an affiliate program such as Avantlink, Impact, Amazon and eBay and only if you purchase something. If you’d like to directly contribute towards our continued reporting, please visit our funding page.
I recently posted a video that shows the amazing paint job the Czechs did to one of their Mi-35 Hind-D attack helicopters. Little did I know that there was a “behind the scenes” short documentary about the decision making that went into that paint job and that they won an award for it.
They had a number of conventional ideas that didn’t really wow anybody until they thought of a guy who specialized in the bio-mechanical look.They do have some footage of the fellow doing the work. It was he, his brother and a few technicians who spent about 200 hours doing the paint job. I wish they had more footage of it and at a higher resolution.
The Documentary Video
Again, if you haven’t seen it already, check out the other post with a ton of footage of this awesome Hind. I hope you enjoyed these!
If you find this post useful, please share the link on Facebook, with your friends, etc. Your support is much appreciated and if you have any feedback, please email me at in**@*********ps.com. Please note that for links to other websites, we are only paid if there is an affiliate program such as Avantlink, Impact, Amazon and eBay and only if you purchase something. If you’d like to directly contribute towards our continued reporting, please visit our funding page.
Back in 1987, a damaged Libyan Mi-25 Hind D attack helicopter was captured by French and Chadian troops. The US wanted to inspect the helicopter and negotiated with the government of Chad to retrieve it.
Libyan MI-24 Hind D captured by Chadian forces at Wadi Doum, Chad . Source: Wikipedia
On June 10, 1988, Operation Mount Hope III commenced to retrieve the Hind. The famous NightStakers (the 160th Special Operations Regiment) flew almost 500 miles at night with two MH-47 Chinooks to successfully retrieve the Hind and load it on a C-5.
On 21 June 1988, the captured Mi-25 arrived in N’Djamena where it was loaded into a USAF C-5 Source: Wikipedia
Videos
There are a couple of cool videos on Youtube that can give you some good background. The first one is very informative but please note the Hind D is not the fastest helicopter currently.
The next video has the same cover photo but is different:
Please note that the still photos are from the Wikipedia page listed above.
If you find this post useful, please share the link on Facebook, with your friends, etc. Your support is much appreciated and if you have any feedback, please email me at in**@*********ps.com. Please note that for links to other websites, we are only paid if there is an affiliate program such as Avantlink, Impact, Amazon and eBay and only if you purchase something. If you’d like to directly contribute towards our continued reporting, please visit our funding page.