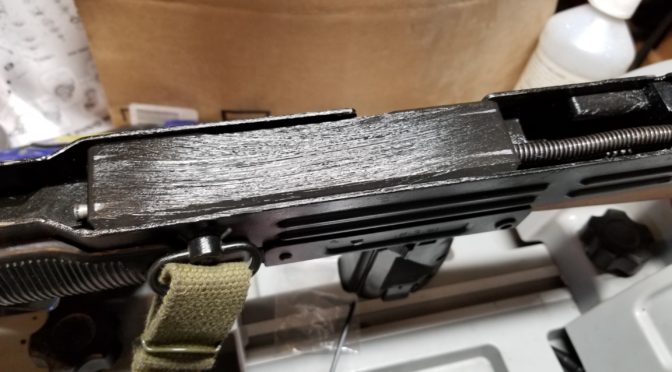
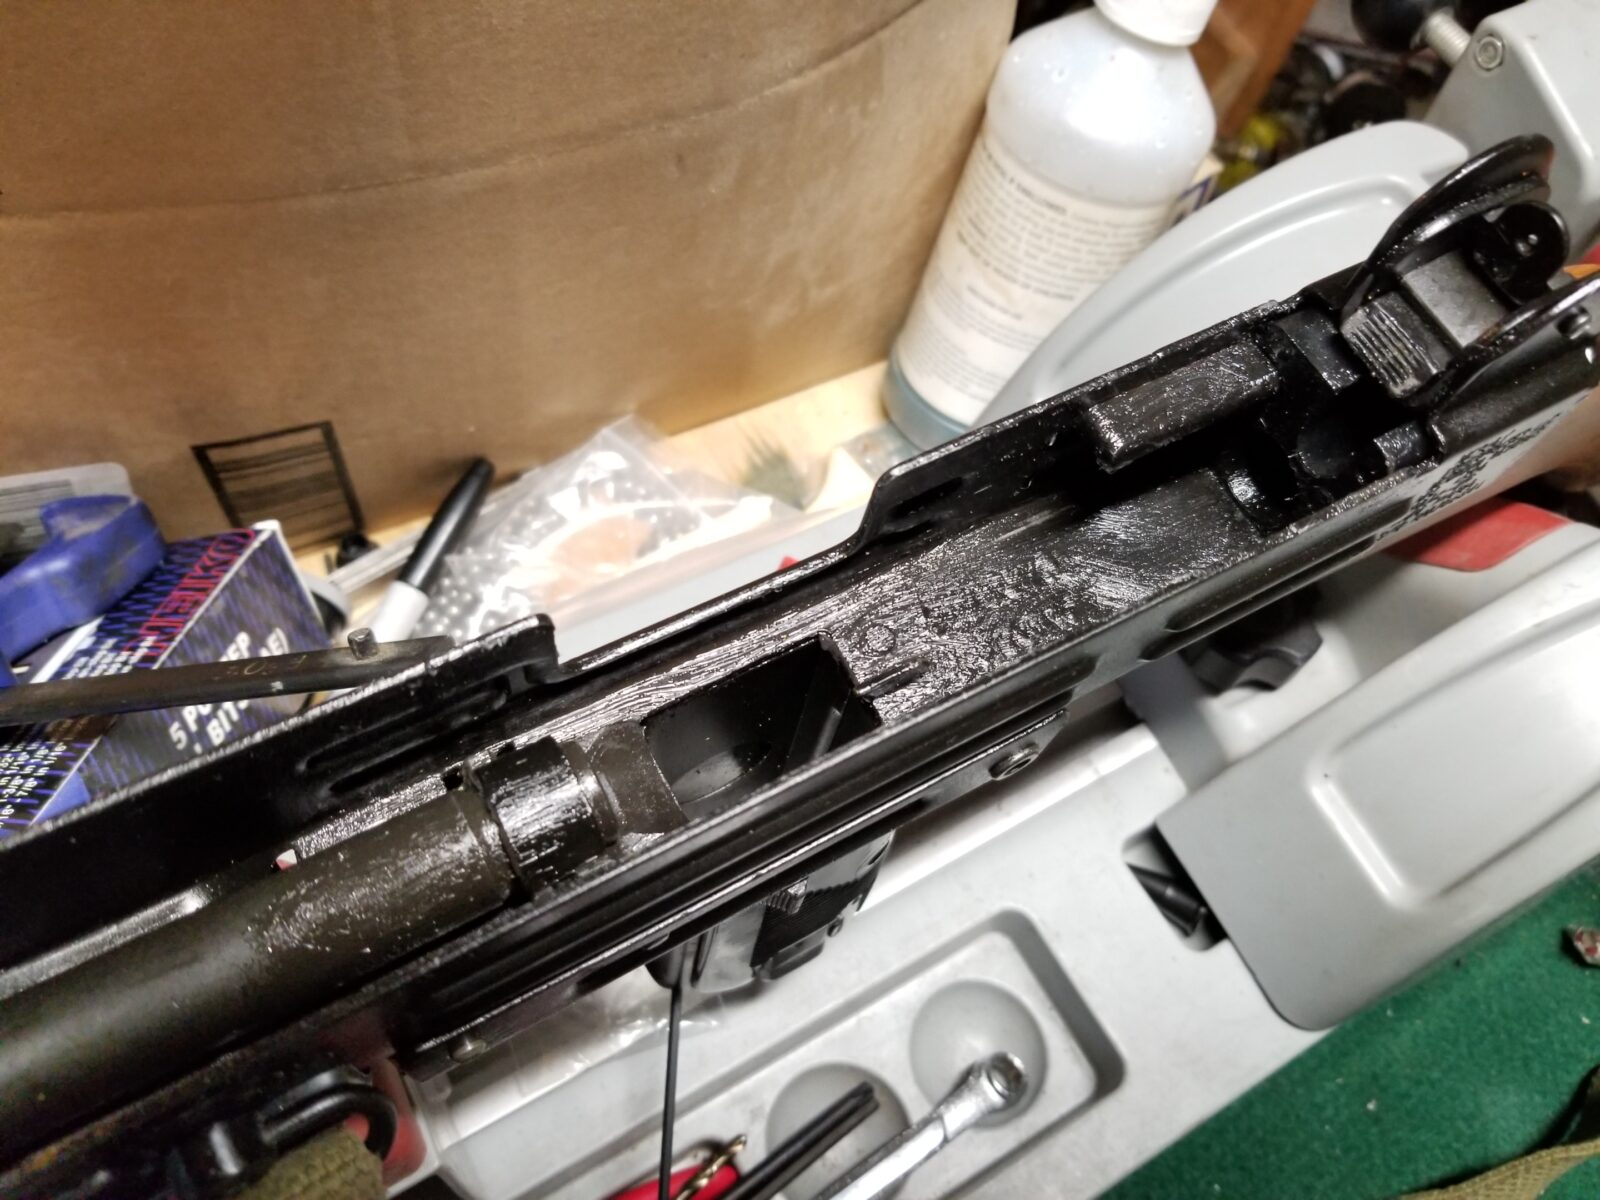
To legally build a semi-auto Uzi, you need to run a closed bolt system vs. the original open bolt. Now the open bolt design was the picture of simplicity albeit with a pretty big bolt. The closed bolt system uses a striker, and while a little more complex, it has a lot of moving surfaces that are parkerized. This means they are relatively rough and need to wear in plus they need serious lubrication during this period.
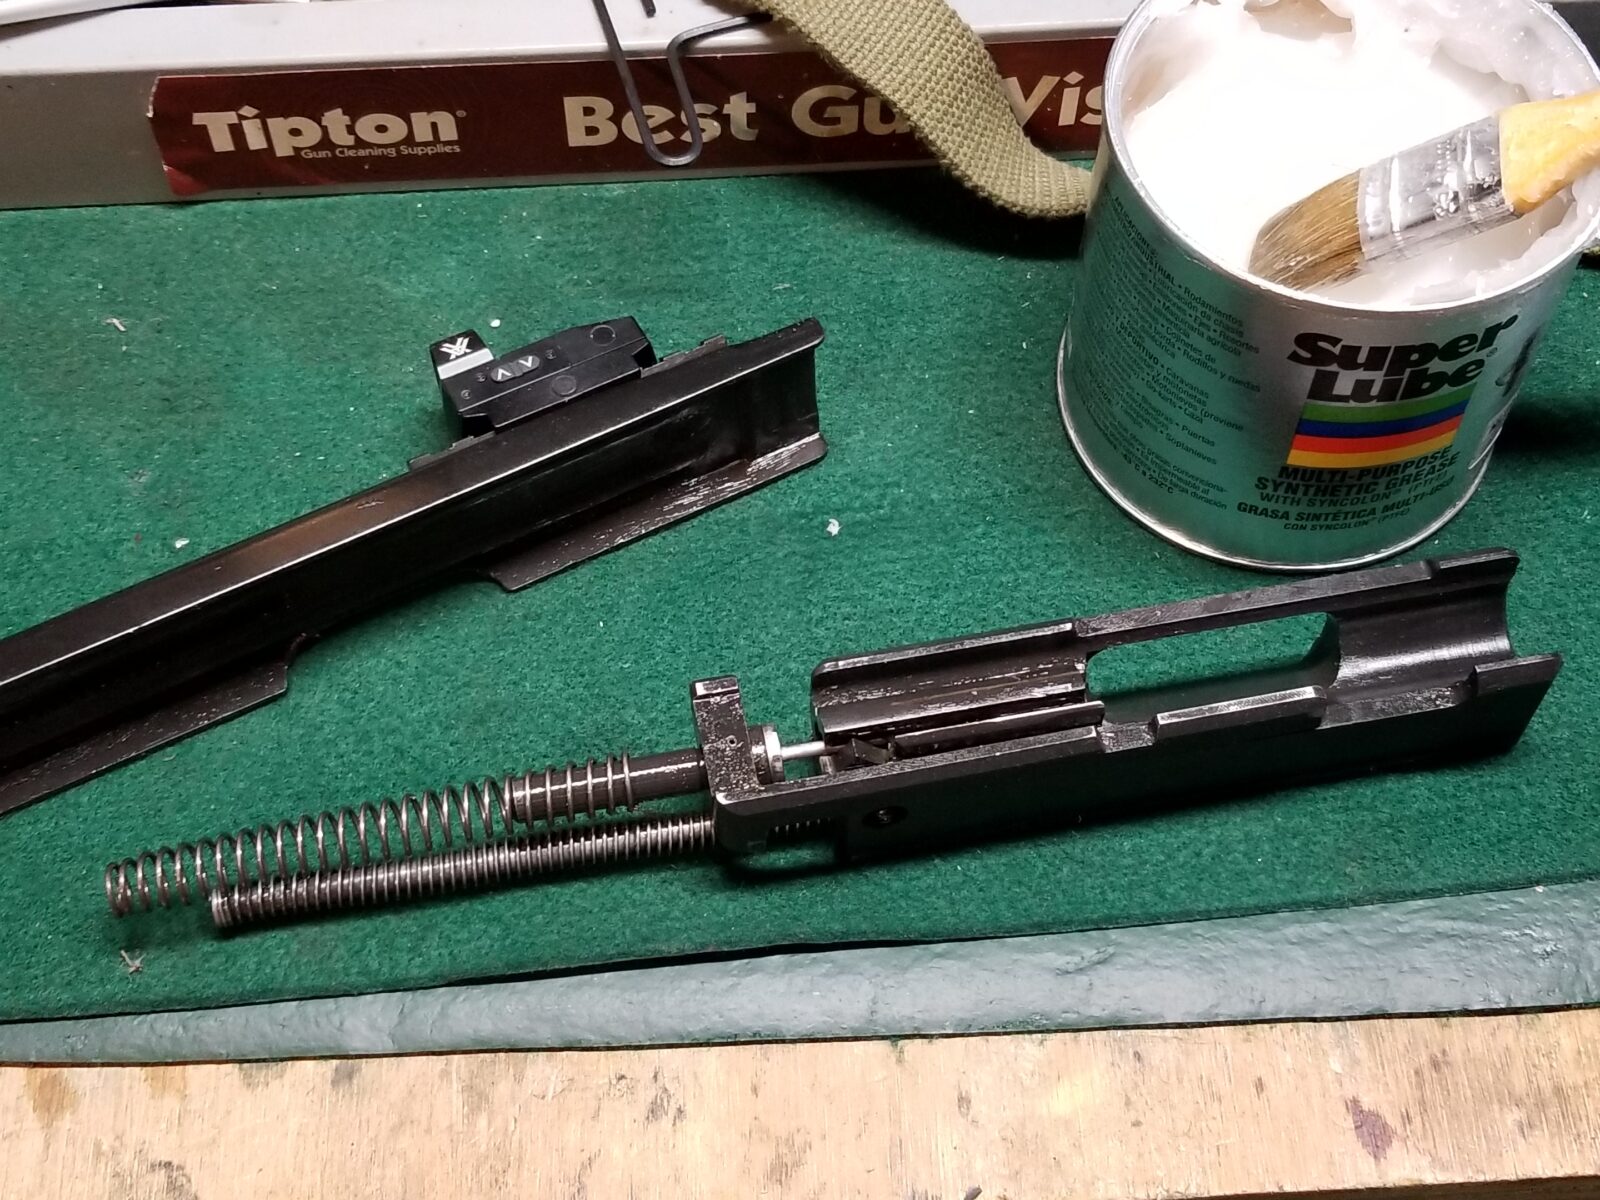
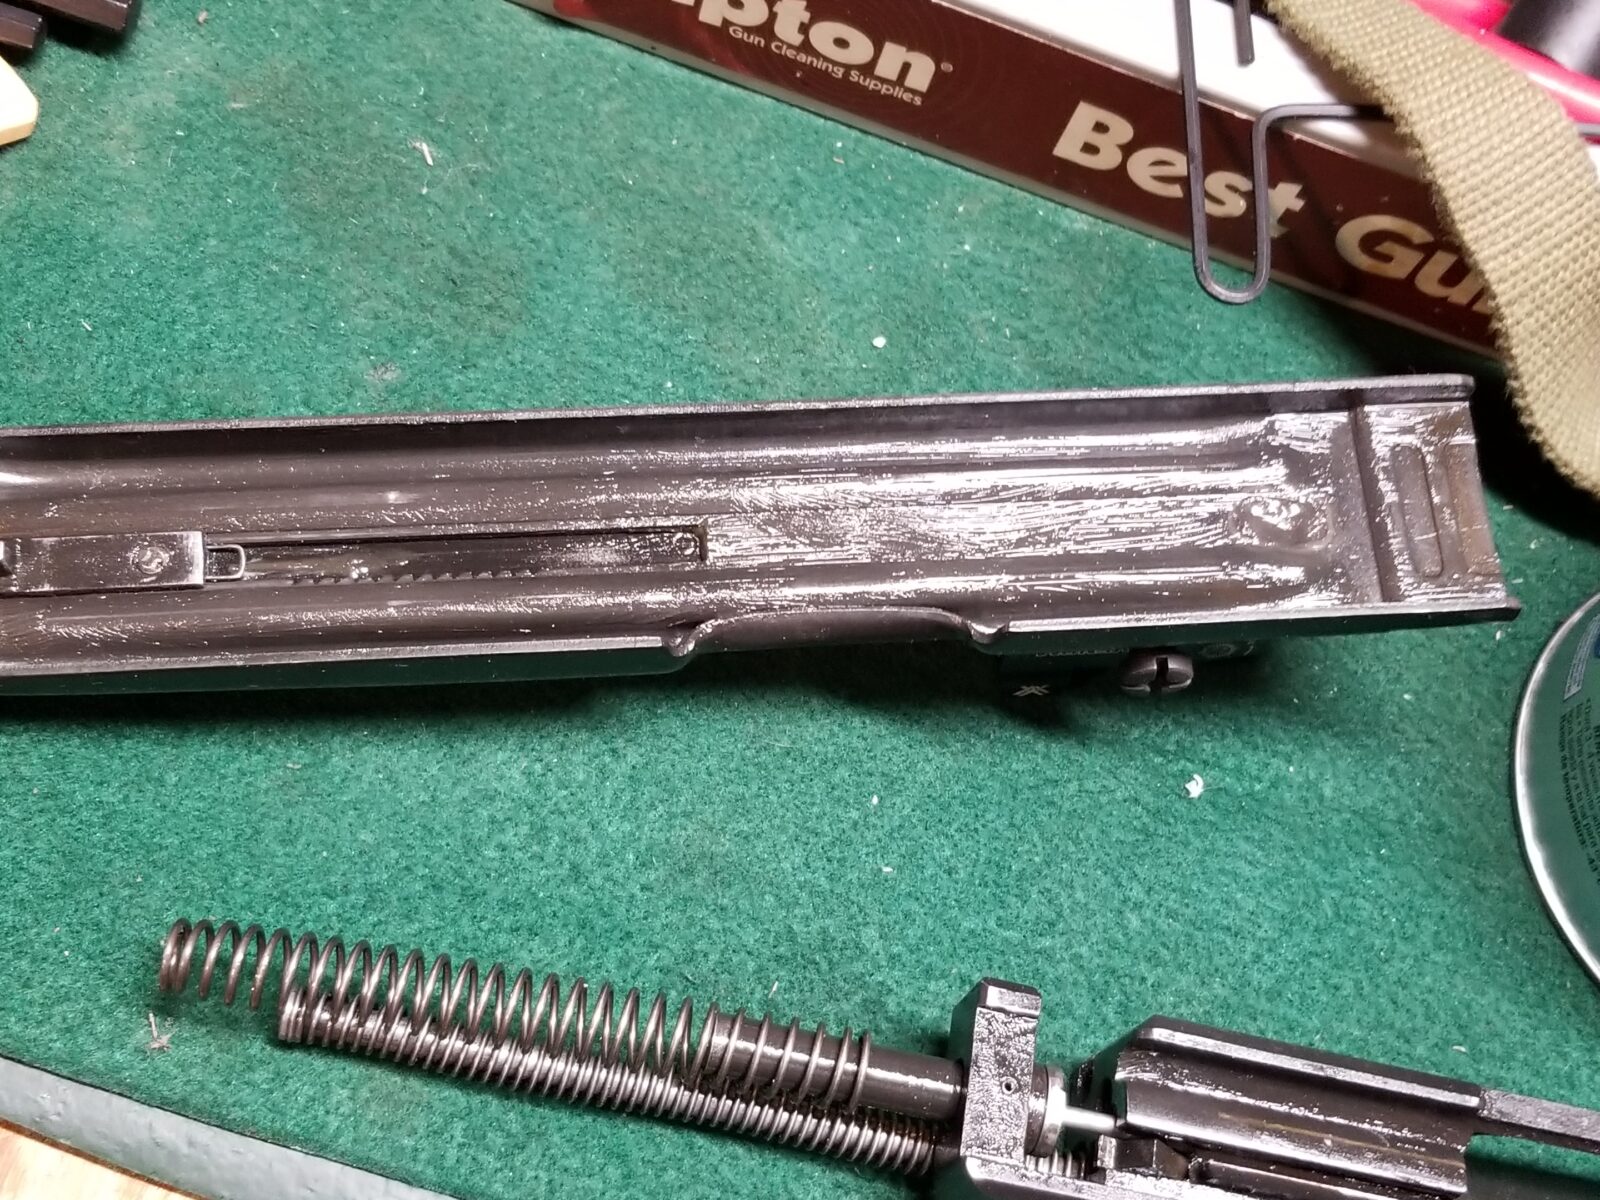
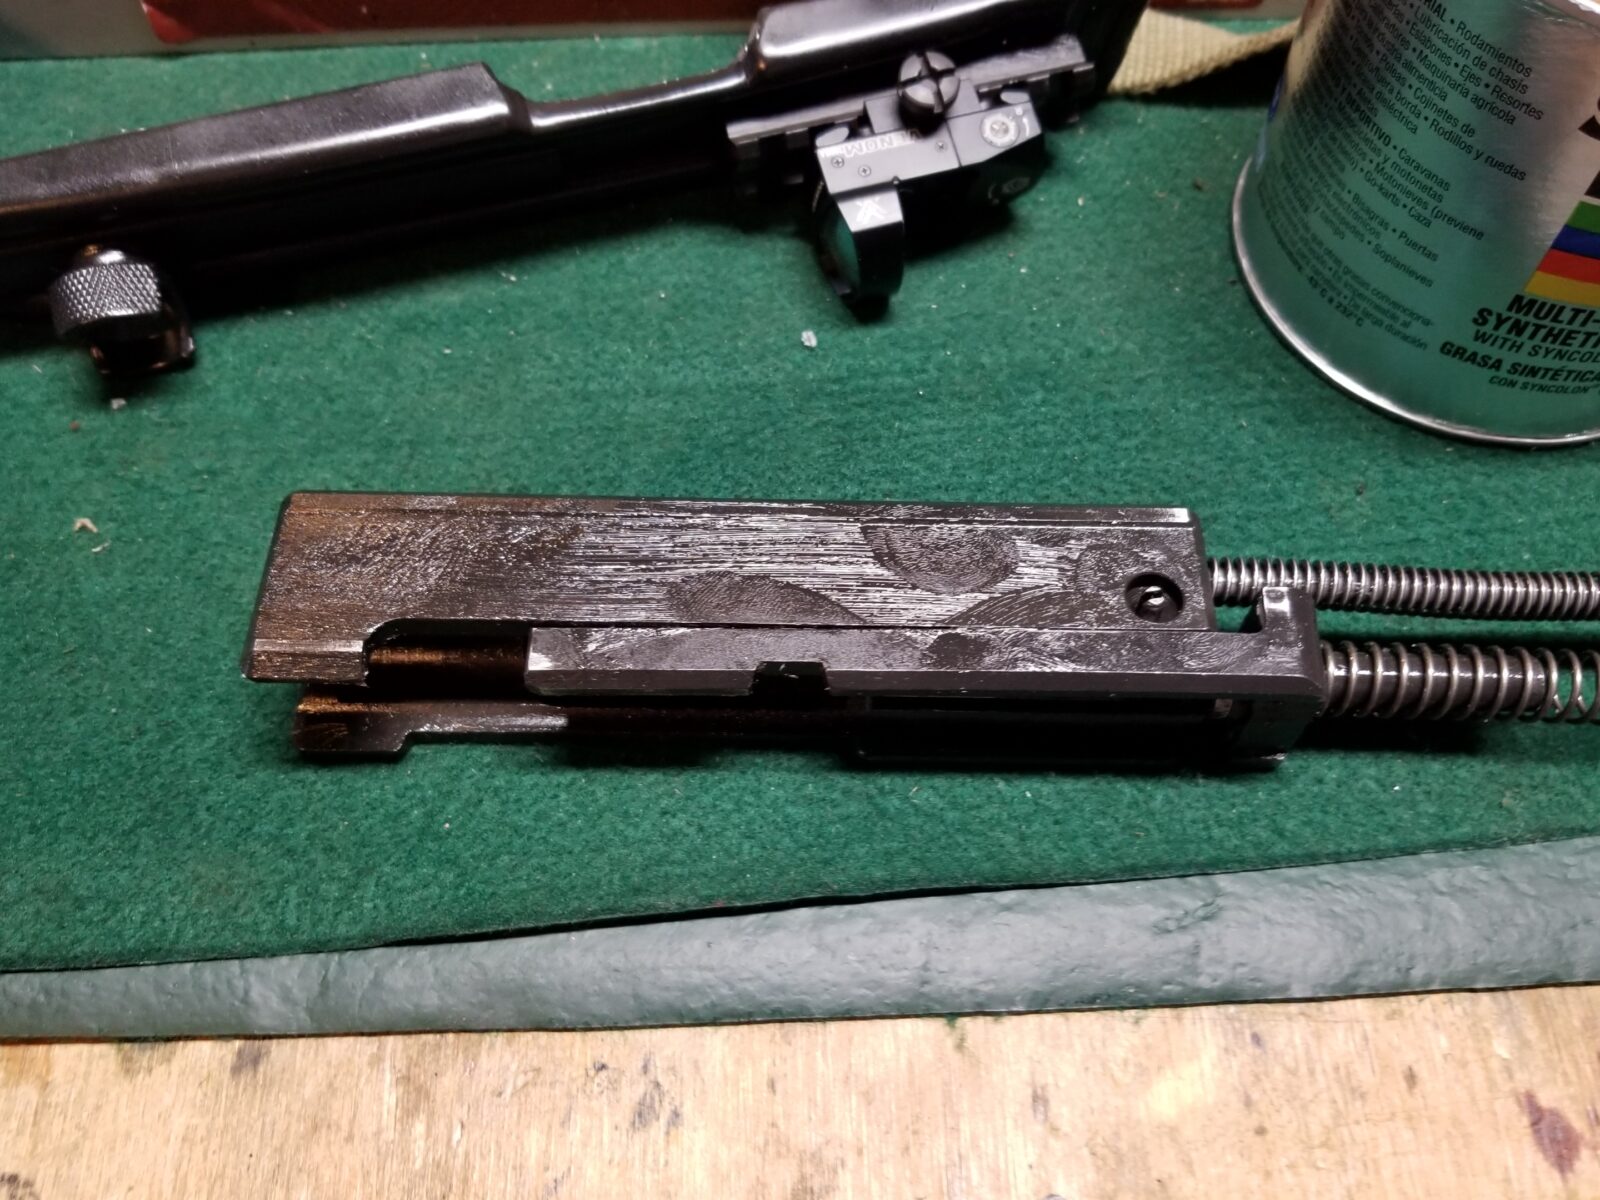
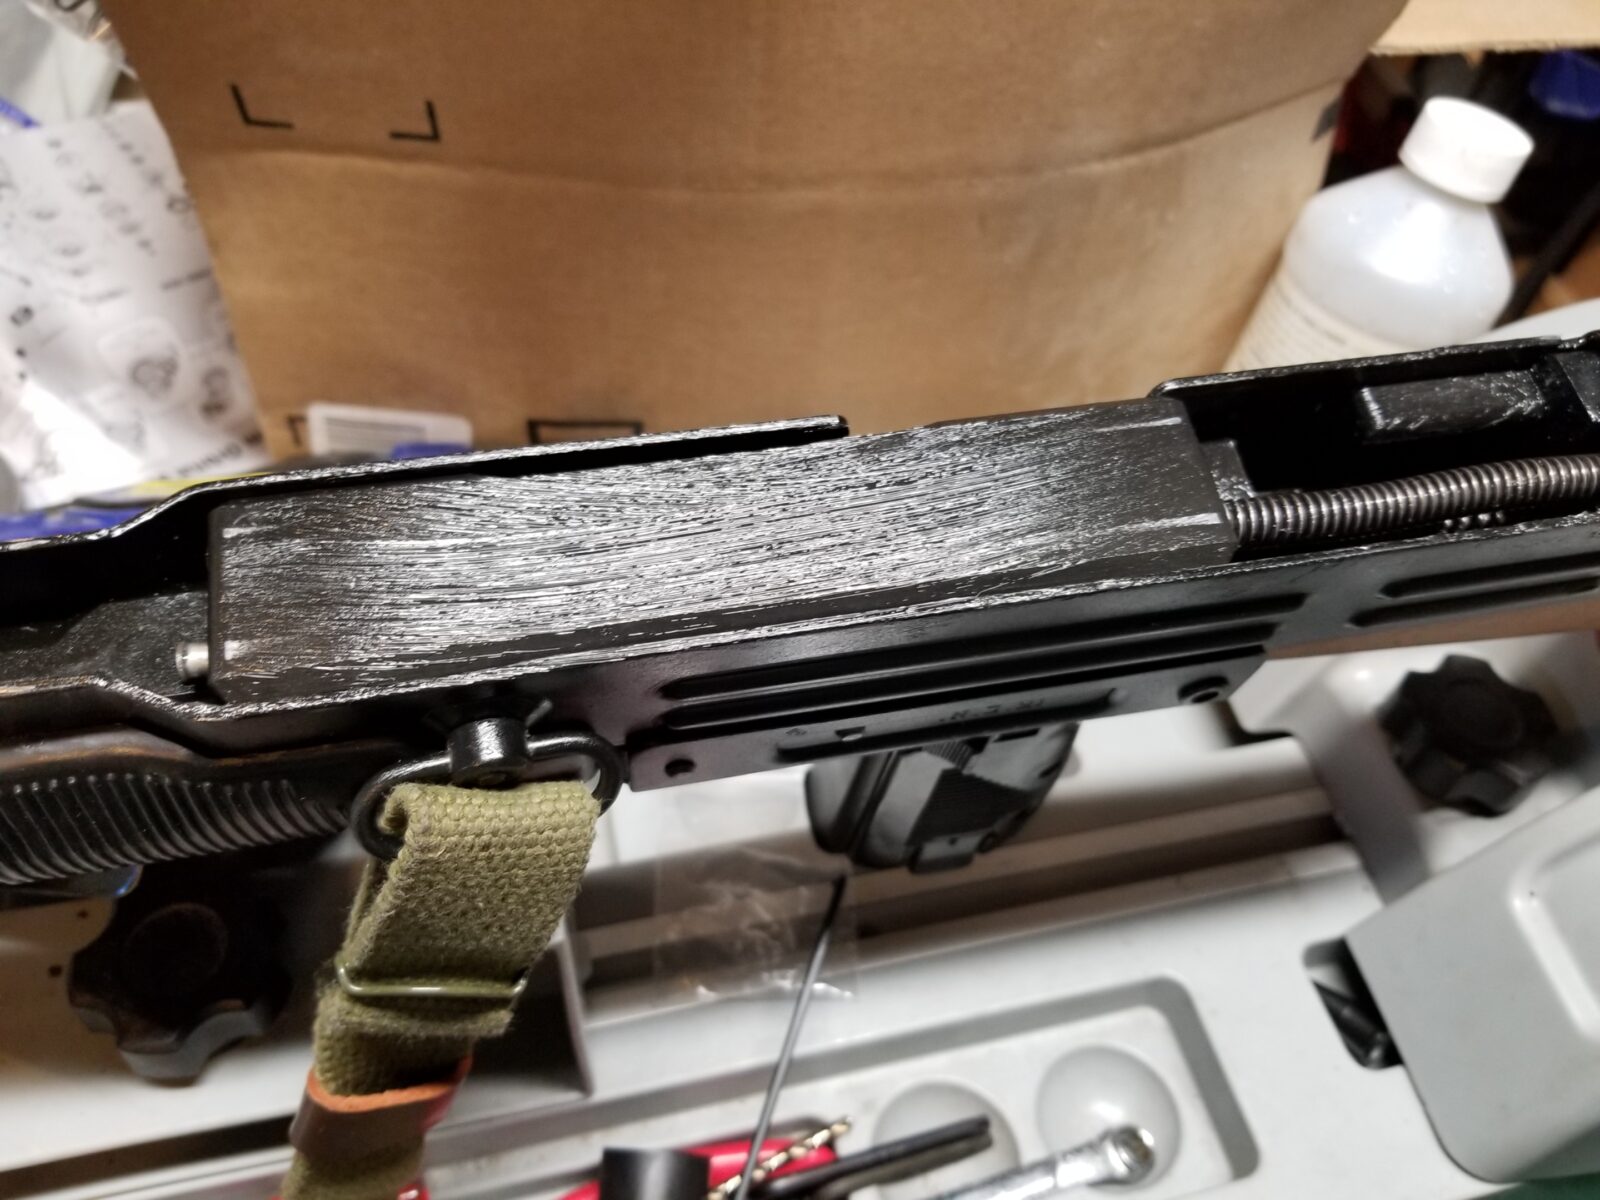
My experience with my Uzi was that oil alone didn’t cut it. Once I moved to using a 1″ chip brush and applying a light layer of Super Lube all over the bolt, striker and insides of the receiver and top cover, the reliability sky rocketed. At this point, it has worn in fairly well and the action cycles very easily.
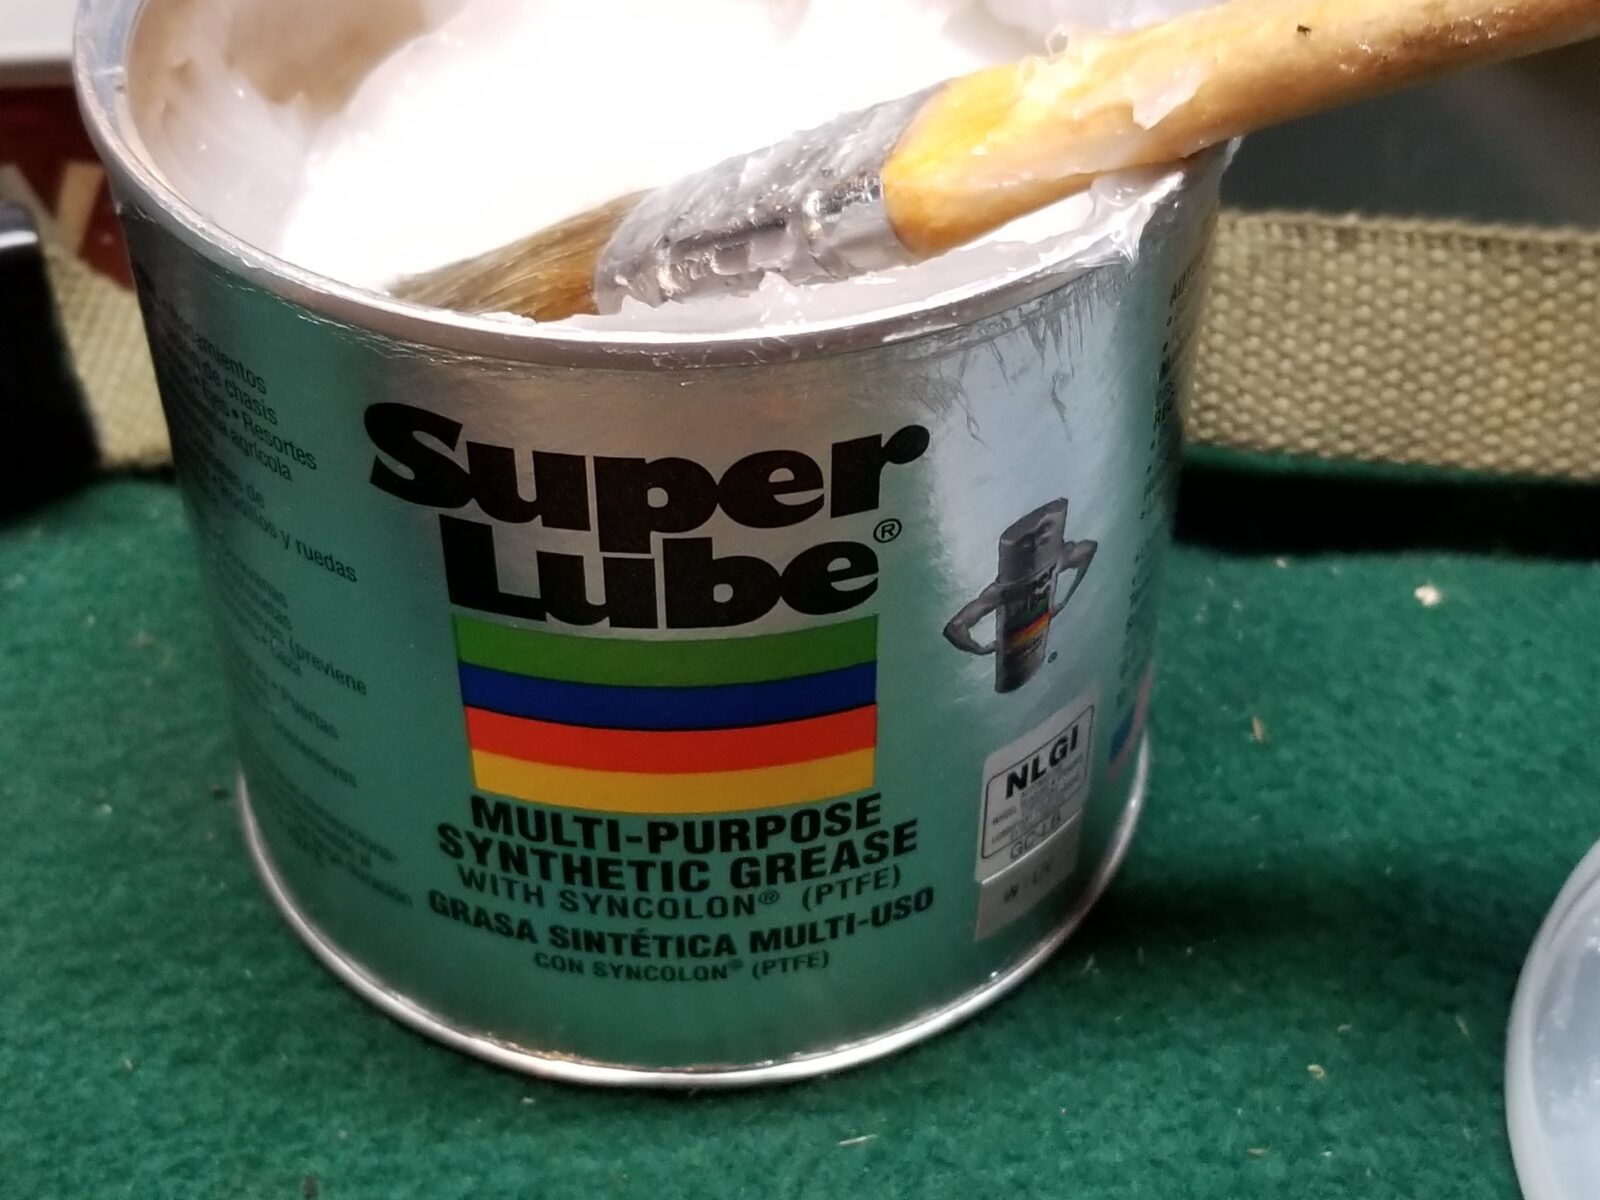
My recommendation to anyone building a semi-auto Uzi is to use Super Lube Multi-Purpose grease both during break in and for ongoing lubrication of the bolt and striker system. I use regular oil on the fire control group.
I hope this helps you out. It made a world of difference with my Uzi.
If you find this post useful, please share the link on Facebook, with your friends, etc. Your support is much appreciated and if you have any feedback, please email me at in**@*********ps.com. Please note that for links to other websites, we are only paid if there is an affiliate program such as Avantlink, Impact, Amazon and eBay and only if you purchase something. If you’d like to directly contribute towards our continued reporting, please visit our funding page.
I’m always searching for better lubricants. Many of the so-called specialty weapons lubes are just marketing hype with some bulk lubricant poured into their container. In terms of greases, I’ve used quite a few over the years including wheel bearing grease and Tetra Gun Grease. I wanted to find something effective, non-toxic and less expensive.
A name popped up when surfing – Super Lube. To be honest, the first few times I totally dismissed the name because it sounds like some overly-hyped wonder lube that is sold in infomercials. However, the name did keep popping up so I actually started reading up on it.
Super Lube products are made by Synco Chemical Corporation of Bohemia, NU, that was founded in 1980. Their specialization is in the space of synthetic food grade lubricants and hold a number of patents.
There are a number of interesting characteristics about their grease that should be noted:
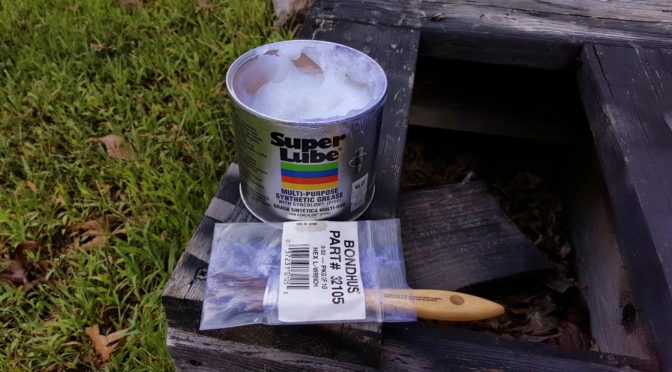
To apply it, I use either a chip brush that I store in a zip loc bag to keep from getting dirty (as shown in the featured photo above) or a small flux / resin brush that I also keep in a baggy.
So, for the last few months I have been testing it. When I cleaned one of my rifles or pistols, I would replace whatever I had been using as grease with the Super Lube Multi-Purpose grease.
I go by the old saying that if it rotates, oil it. If it slides, grease it. That is my rule of thumb so it goes on AK rails, bolt carriers, where the trigger hook grabs the hammer, etc.
It works great! The weapons feel well lubricated after cleaning and they function great. When I take them apart again for cleaning, the Super Lube shows no sign of breaking down, drying out, becoming gummy, etc.
If you are looking for an excellent affordable grease, check out Super Lube. I’m definitely very happy with it.
If you find this post useful, please share the link on Facebook, with your friends, etc. Your support is much appreciated and if you have any feedback, please email me at in**@*********ps.com. Please note that for links to other websites, we are only paid if there is an affiliate program such as Avantlink, Impact, Amazon and eBay and only if you purchase something. If you’d like to directly contribute towards our continued reporting, please visit our funding page.
When Bill Alexander decided to make the .50 Beowulf round, he really got me excited 🙂 The idea of a heavy thumper round in an AR platform really appealed to me so I bought one and one issue that popped up was where to find magazines that were not really expensive.
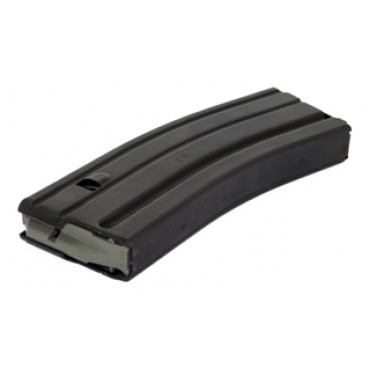
D&H 5.56 30 RD Aluminum Magazines are perfect for this.
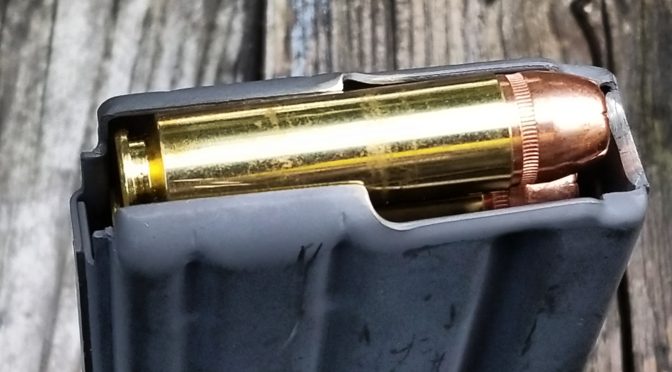
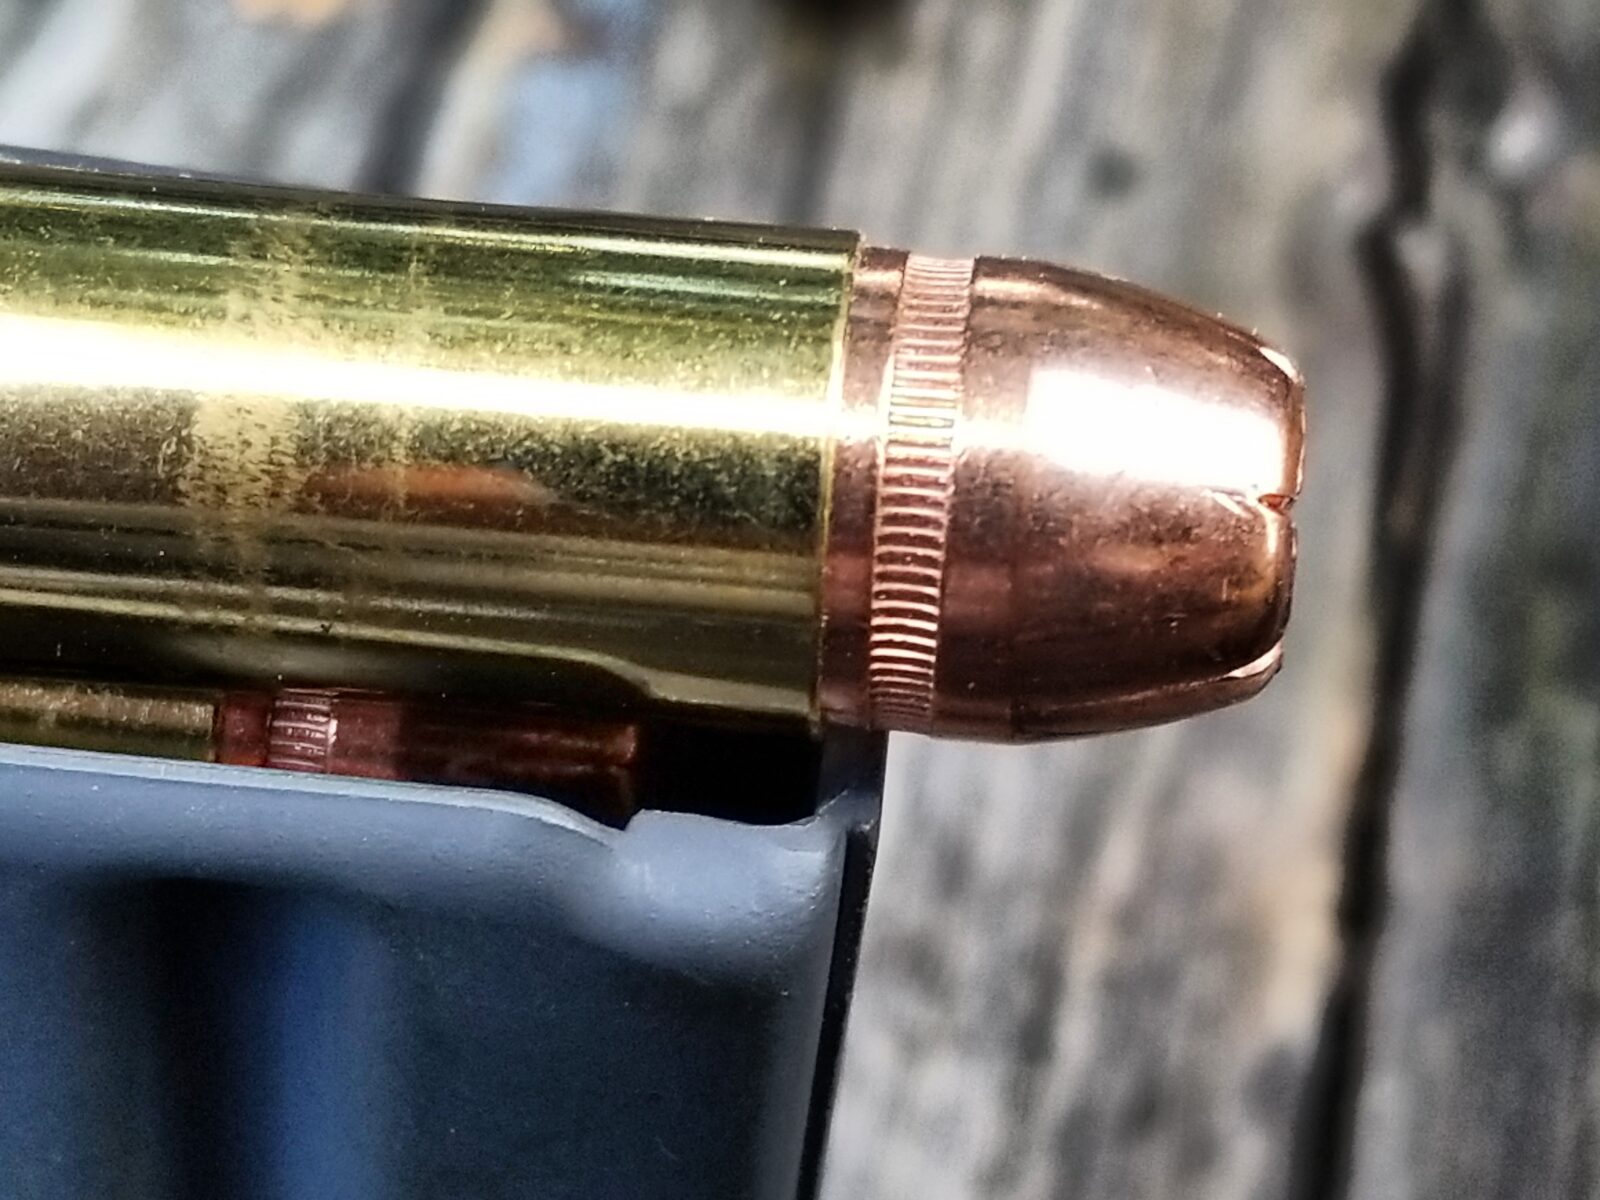
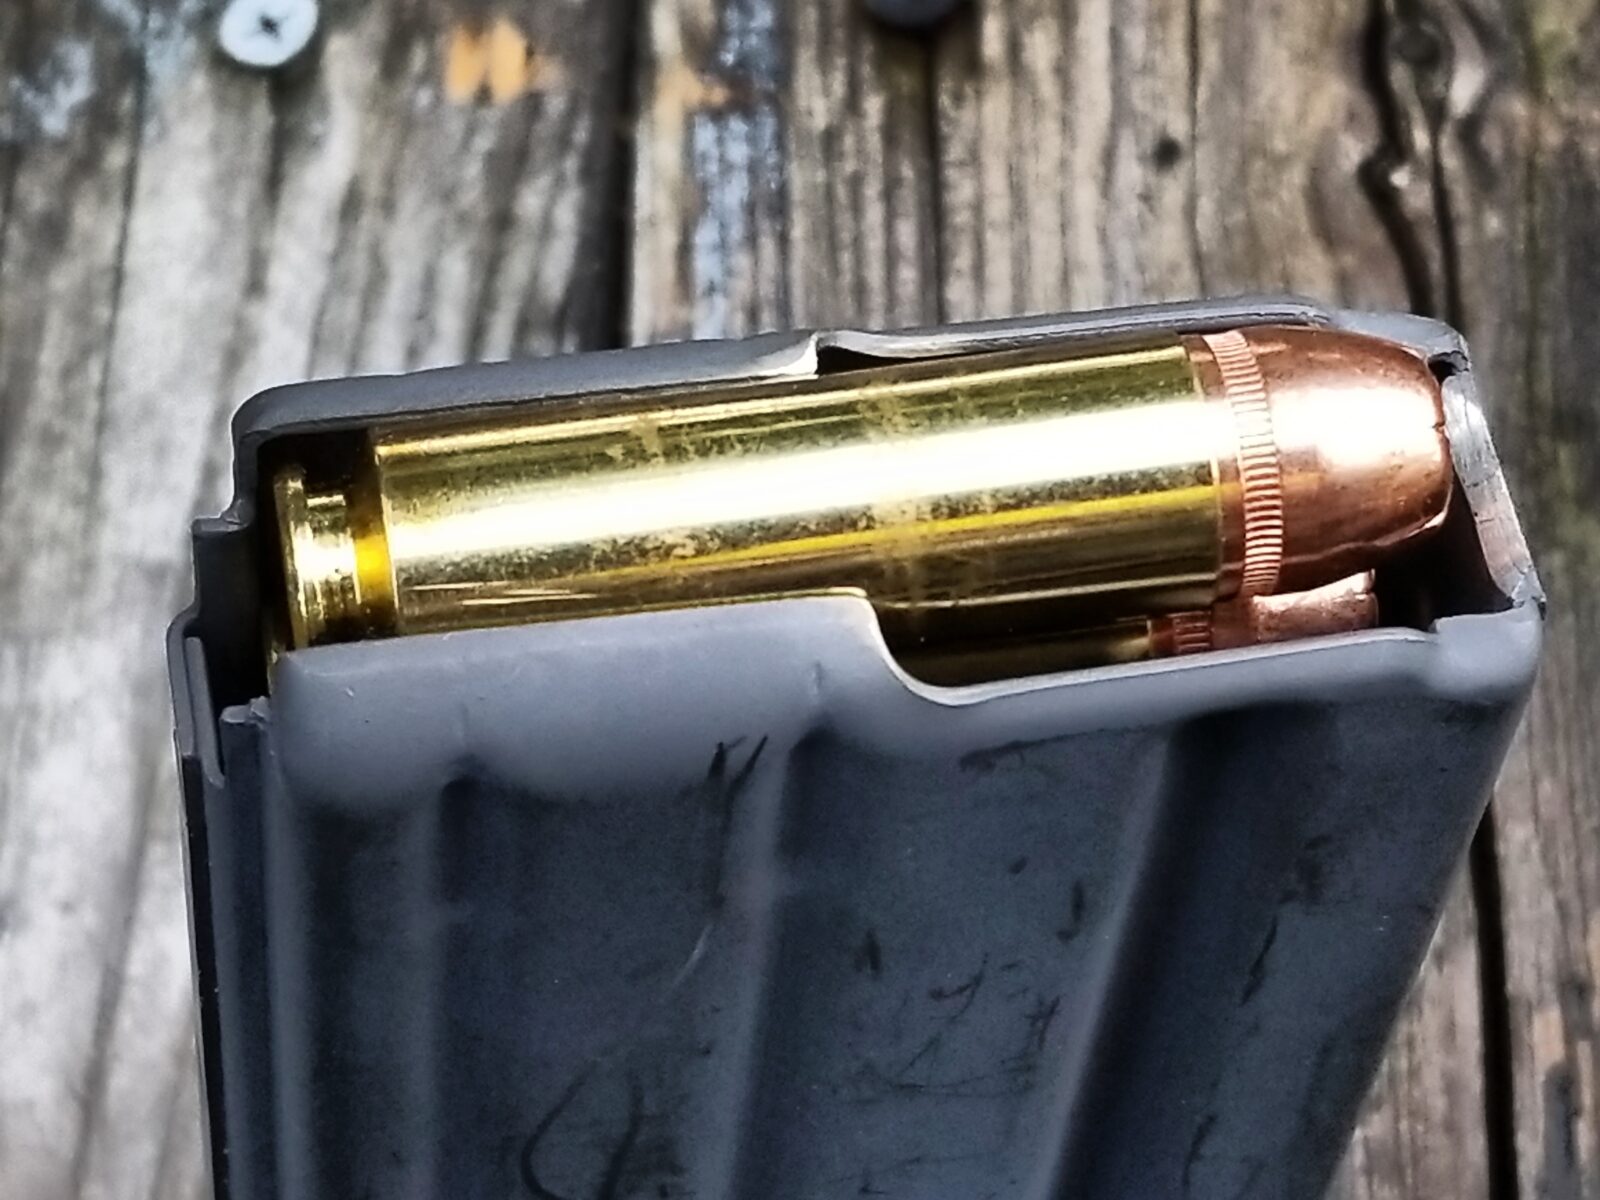
Once in a while the answer is really straight forward and this is one of those times. You do not need to change the feed lips or the follower on a standard 5.56/.223 magazine, you just need to bevel the front lip at about 45 degrees (the exact angle doesn’t seem to be a big deal) so the giant .50 Beowulf bullet goes up and, this is the key part, the leading lip of the brass case hits the little ramp and goes up it vs. hanging. In this next photo – see how the lip of the case will catch? It may catch sometimes or all the time – for me it was practically all the time.
The magazines I convert are D&H 5.56/.223 magazines that Palmetto State Armory sells. They are reliable and well made plus they are very affordable with sales prices starting around $8.99 and normal price around $12.99 for buyers in a rush. They also have regular combo deals such as a case and seven mags for $89.99. You have to love PSA’s deals. Click here to see what they have.
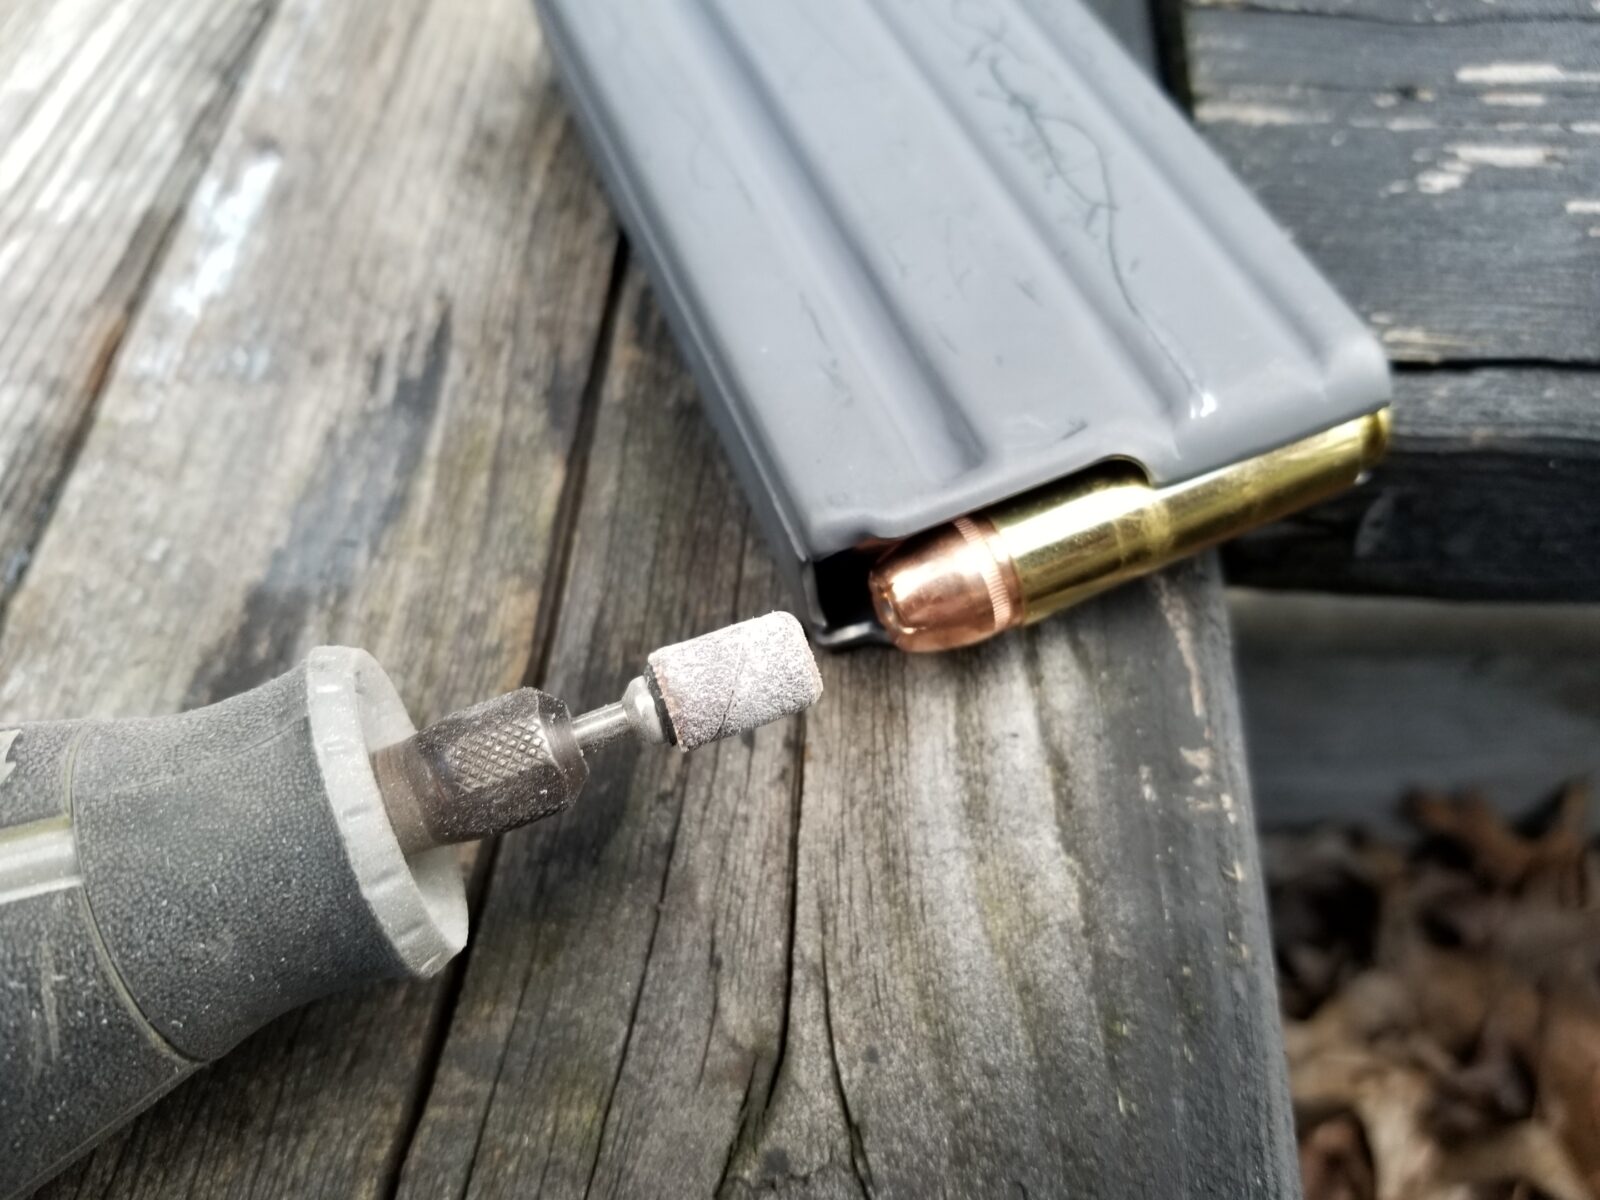
All I did was use a medium grit little sanding drum in my Dremel to bevel the magazine’s front lip – you are basically making an ad hoc feed ramp so the case doesn’t catch. The round you see has the big 350 grain XTP bullet – they hit like a freight train.
Note this is just to show the drum. The magazine is empty when I do the sanding.
This is a really quick operation and you don’t need to take a ton off. I do it with the magazine empty of course, insert a round into the magazine and test then do a bit more. I’d repeat the removal and testing until the round went right up into the chamber. After the first few magazines, I had it down pat.
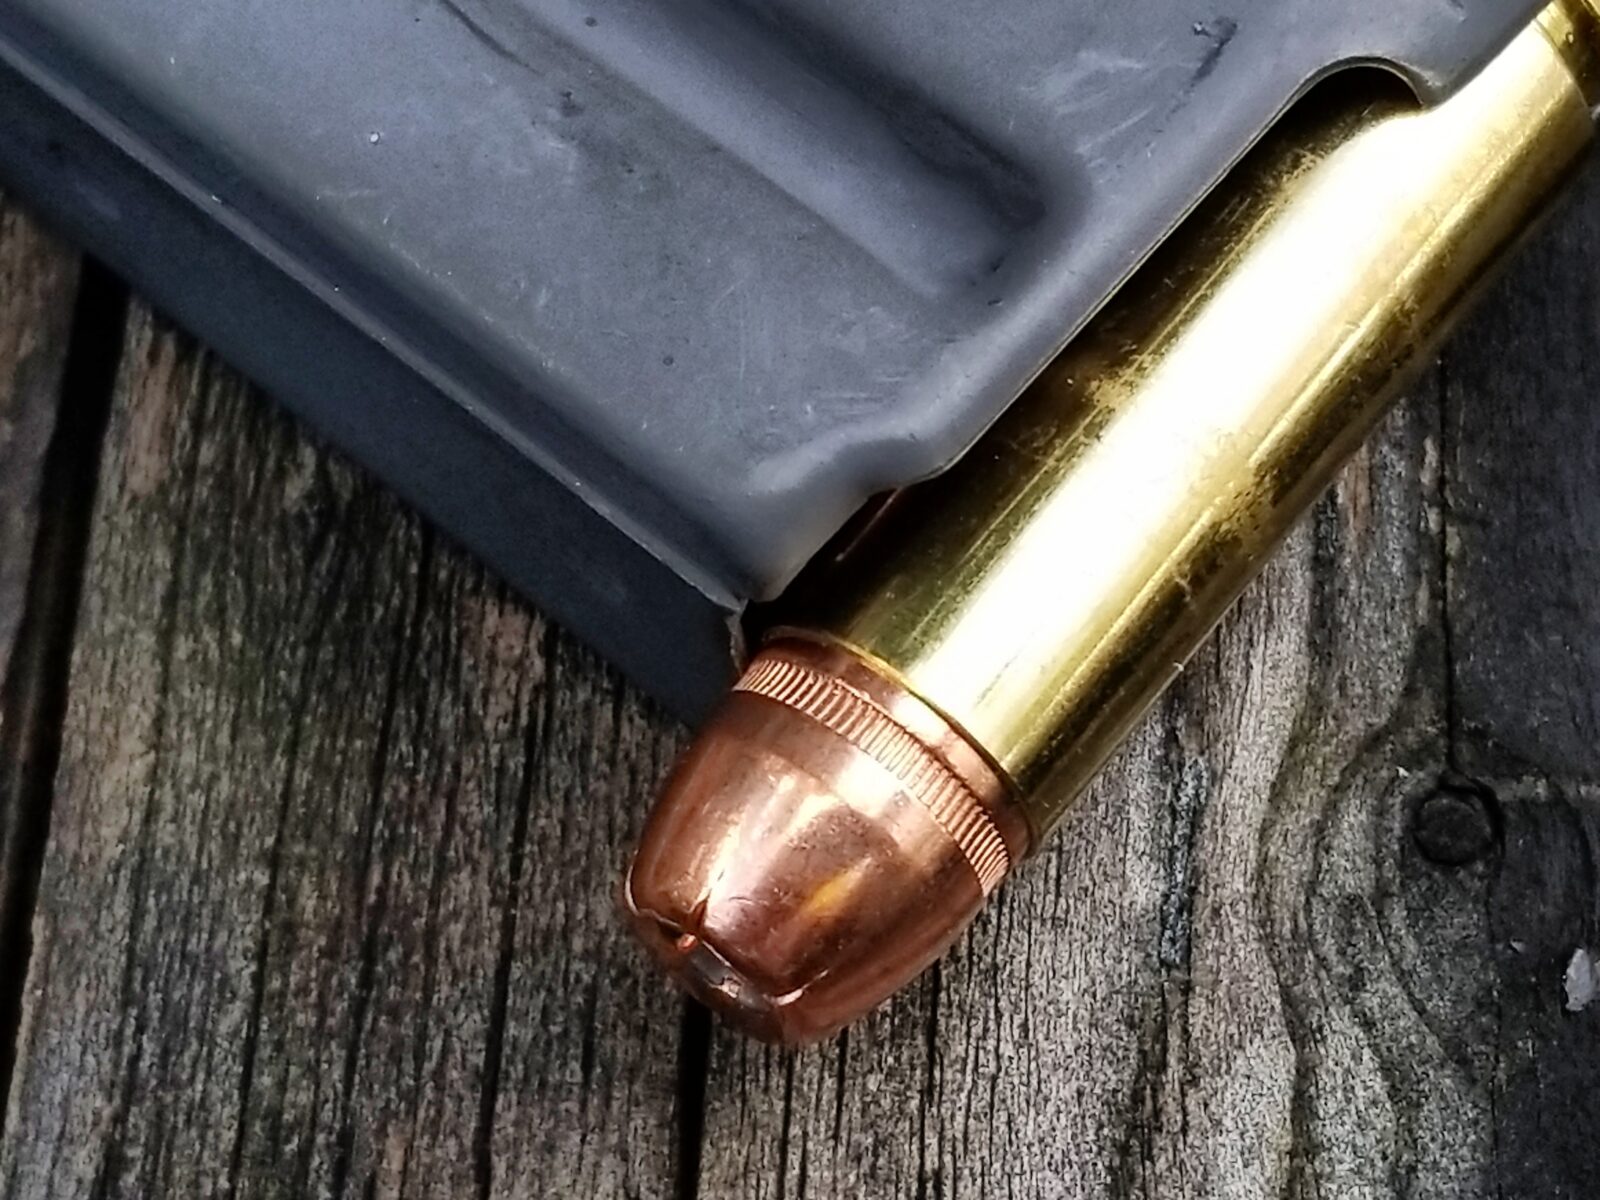
In this next photo, see the shiny little ramp?
That’s all there is to it. I just used quality aluminum magazines and did the tweaking. Polymer mags, such as MagPul take more work and I simply didn’t feel like bothering with them. I did use quality magazines and avoided cheap stuff and I also used the anti-tilt followers – just regular 5.56 followers – nothing special.
In a standard 20 round aluminum 5.56/.223 magazine, you can fit up to seven Beowulf rounds. In a 30 round magazines, you can fit up to 10. I never tried any of the higher capacity magazines so I can’t speak to them at all.
This approach worked great for me and I hope it helps you as well.
I came up with an even faster way to convert the magazines that I wrote about in December of 2019 – click here to read it.
If you find this post useful, please share the link on Facebook, with your friends, etc. Your support is much appreciated and if you have any feedback, please email me at in**@*********ps.com. Please note that for links to other websites, we are only paid if there is an affiliate program such as Avantlink, Impact, Amazon and eBay and only if you purchase something. If you’d like to directly contribute towards our continued reporting, please visit our funding page.
It’s funny how a person’s views can change over time. When my dad I first started going to gun shows back in the early 1980s, my idea of a gun case was a naugahyde bag that was long enough with straps that I could close on the rifle. Then again, my budget was about $10-20 for the case and usually about $100-150 for the firearm. Times change.
I’ve heard it said that the difference between men and boys is the price of their toys and that just may be true. Now when I buy and tune a rifle and put a big optic on it, I want it protected – well protected. When I first started buying hard cases I would get the kind with the egg crate style foam that could generically hold anything with no modification. The downside with the egg crate cases is that they don’t hold things very securely – if you drop the case hard enough, the contents will move including the weapon and any accessories or ammo you have stored in the main compartment As a result, I shifted away from these cases some years ago for my bigger and heavier rifles.
To make a hard case that is tailored to what you want to store in it, you have two routes. The best in my opinion are cases with hard foam that you cut to exactly fit what you want. These cases hold your contents very securely. The con is taking the time to cut out the foam. It’s not a huge overhead but they also tend to cost a bit more for a good case such as a Pelican.
Option two is to still use a hardcase but one with pluckable foam. This means the the foam has been pre-cut into little vertical rectangular columns that are partially connected to one another but can be pulled apart or “plucked” out.
Now the pros are that these cases can be affordable and are easy to work with. The con is that the foam is very flimsy an I stay away from really fine details a single piece tends to break way from the other pieces very easily. In short, I can’t fit the foam more closely to the contents *but* it still works and protects the contents better than an all eggshell hard case.
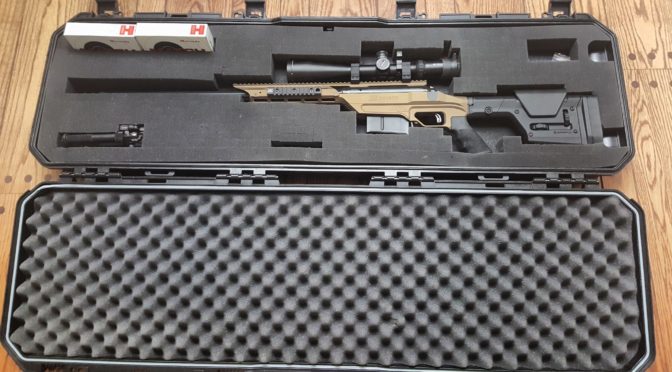
So, let me tell you about a Plano case I bought recently from Amazon. I have used a lot of these tough Plano hard cases with pluckable foam over the last few years but now they have a model out that I really like due to the construction. It’s the Plano “All Weather Series” and I bought the 52″ model to hold a Savage Stealth Evolution in .338 Lapua that is 48″ overall.
To get this case, make sure your item description contains “AW2” – I assume this means it is the second generation of the All Weather case and I like the handles way better than the previous version.
When you open the lid, you see the usual placard and keys but if you zoom in you can faintly see the border of non-scored foam that runs around the perimeter.
In the next photo, note that the middle pluckable portion pulls right out.
In the next photo, note that the latches are now four in the front and none on the ends. Some models have a latch inside the end handle and I find myself fumbling with it to get it to open. I’m happy to see them just on the front.
My preferred way of mounting a scoped rifle is to have the scope “up” towards the carry handle on the side and the muzzle towards the carry handle on the end which means the butt stock is down by the wheels. The reason for this is to protect the muzzle and the scope as much as possible. A jarring force when someone drops the case – especially when carrying it with the side handle and dropping it – will be absorbed by a non-critical end … in theory. You can never plan for everything and these cases are strong but not impenetrable. For example, I received a case once where a fork truck tine had skewered it. Amazon, as always, gave great customer service and shipped a replacement immediately.
Take the firearm and any accessories and lay them out on the back / the mirror side of the case. You are going to mark with permanent marker where stuff goes and you don’t want that showing up later. Now some folks will use chalk and blow it off. Others will pin paper outlines – whatever works for you. I use a Sharpie and try to remember that I need to flip the foam while keeping in mind the orientation of the weapon so you will note I have the rifle in the case scope down because I will just flip the foam afterwards.
Out comes the old Sharpie marker and I trace everything. I traced the magazine in the rifle as well as a slot for the spare. Not I have the ammo boxes sitting on their side edge. I may trim the bottom foam out as it is a tight fit but I decided to run with that layout for now as the cartridges are very long and use a lot of real estate. I wound up turning the Atlas bipod on its side also after the above photo was taken so the profile changed.
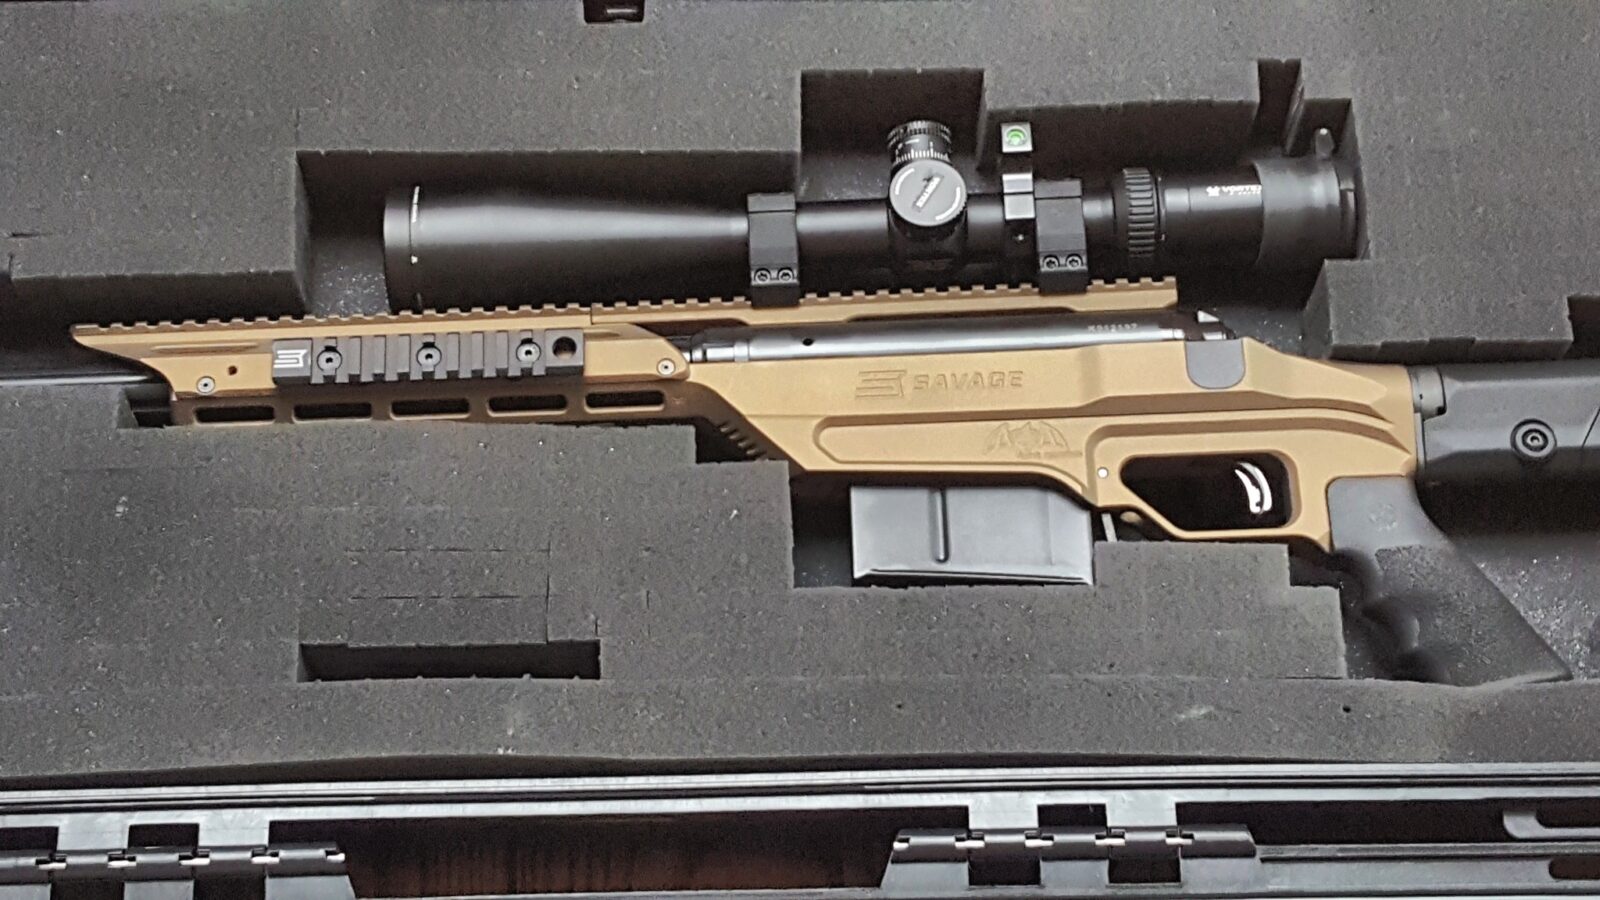
In the next photo, note how the big recoil pad is coming right down to the wheel housing. The .338 Lapua Stealth Evolution is 48″ long so it is a tight fit in this case. I figured the rubber recoil pad would protect the rifle and literally have it right by the housing. The top of the scope and the bottom of the grip are right to the border of the pluckable area.
Now it is time to pluck! I stay within the lines and figure I can always remove more later. I do try to balance too close and will come apart later vs. too far away to protect the rifle. I pluck and test, pluck and test until I get it the way I want. Note how I have now reversed the foam – you don’t see any marker lines and the rifle is now oriented the way I want.
The next step is to take the insert outside and spray and adhesive on it to glue it in place. You need to do this and apply it relatively heavily or it will pull out of position and flop around. I use the 3M Super 77 spray adhesive and only spray the pluckable insert.
The end result is stronger if you apply the adhesive to both surfaces but it is very messy to deal with. If you really want to do this, one trick is to save the foam you plucked out, cut it in half lengthwise and glue it in to the bottom. Some guys like this as the firearm and accessories aren’t as deep in the foam. In this case, I am just doing the one side so I applied it thick. Make sure you do the right side … yeah, I’ve made that mistake too.
Let it sit for about 5 minutes so it gets tacky and then put it back on the lower piece. Move quickly before it sets up and make sure everything is straight. If you get the adhesive on stuff you don’t mean to, it can be readily cleaned up with turpentine while still wet. I always have stuff I have to clean up.
Once you have the insert glued in place, be sure to let it dry for 6-8 hours. I’ve had problems in the past if stuff sticking to firearms so I let it sit a good long time just to play it safe. The warmer it is, the faster it will dry and cure.
Here’s the finished case. You can see how the rifle completely fills it. I wish I had a bit more buffer for protection but it is pretty good. I will definitely do some more tuning on the ammo section.
I really like the case and think it’s going to do a good enough job for me. I don’t plan on using it for anything incredibly rough – mainly range trips and it’ll handle those just fine. I’d definitely recommend this case to someone who wants a very good mix of affordability and quality.
If you find this post useful, please share the link on Facebook, with your friends, etc. Your support is much appreciated and if you have any feedback, please email me at in**@*********ps.com. Please note that for links to other websites, we are only paid if there is an affiliate program such as Avantlink, Impact, Amazon and eBay and only if you purchase something. If you’d like to directly contribute towards our continued reporting, please visit our funding page.
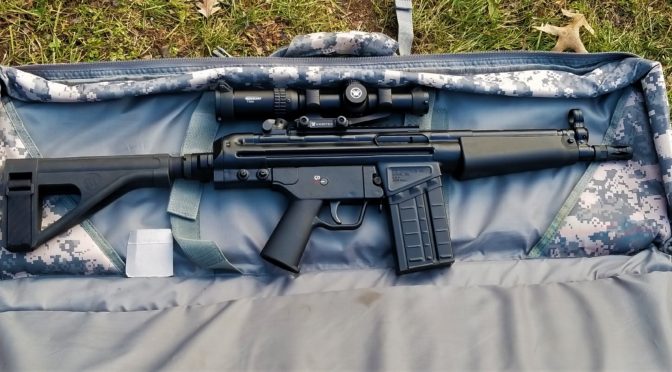
Plain and simple, it ran like a top. We did not have one single problem of any kind. We were running surplus aluminum mags from Robert RTG. The ammo was Prvi Partizan (PPU) .308 M80 145gr FMJ. I’ve had great luck with PPU ammo over the years and have run a variety of their calibers and loads. This .308 ammo comes in a heavy plastic sealed “battle pack” that SGAmmo sells. If you don’t know SG Ammo, they are a great ammo supplier that is a family run business. I buy most of my ammo from them and have nothing but good things to say about them.
We sighted the Vortex 1-6×24 Strike Eagle scope in at at about 25 yards and then just had fun. We weren’t shooting for accuracy but were having fun shooting “zombies” as we called them with the big Splatterburst 18×24 silhouette targets that I really like.
This time out, I was using my new Howard Leight electronic ear muffs. These are cool because they have directional sound amplification for normal sounds – like talking with your friends. When you shoot, they immediately cut the sound off and protect your ears. This is a real nice feature for me as I can’t hear a thing when I wear ear muffs due to my hearing loss and have to take them off to talk to someone. At any rate, these Howard Leights have a great reputation and I must say that I am very happy with them.
One of my brother-in-laws was wearing my new MPOW headphones and thought they did a really good job on cutting down the sound. These are a bargain price at Amazon and work way better than my old cheap Silencios in terms of hearing protection.
Now we did have a funny lesson learned – see how short the barrel is relative to the Caldwell front bag? Yeah, if you get the muzzle brake over that bag and fire, it will rain some kind of brown pebbles (corncob media maybe?) down on you as the muzzle blast shreds the top of the bag 🙂 I have to confess, I am the one who did it and had to use duct tape to seal the top up so we could use it the rest of the day.
The whole point of the range visit was for me any my two brother-in-laws to have fun and function test the PDWR. It performed admirably – neither of them are shooters and, for Jamie, this was his first time shooting anything – I think he did great.
Not one single problem – no feed issues, no ejection issues – it just performed great through about 200 rounds.
At any rate, I did learn a few things:
It upheld the good opinion I have of PTR firearms.
The SOB brace can handle .308 recoil just fine and lines the eye up for the scope great.
As expected, the Vortex scope was great.
The weight of the PDWR absorbs quite a bit of recoil making it a pleasant shooter but there is still recoil that moves you off target with any kind of rapid fire.
The muzzle brake does an okay job but I am going to check into alternatives to cut the recoil down further. The bird cage design is okay but there are definitely better designs out there. The PDWR has a 5/8″-24 TPI threading so there are definitely options.
The PDWR handguard moves forward and backward more than I care for. I am going to experiment on tightening it up or either moving to a DTAC handguard or back to the original PTR handguard. Note – the PDWR uses a MP5-style handguard.
Bottom line, I am very happy with the PDWR and plan to work with it some more on the above plus see how it does as I work my way back to 100 yards. Everything in this sessions was at 25 yards or less and I am curious how it performs as the distance grows. I would recommend the PDWR to anyone looking for a short HK91/G3-type roller lock for short distance use.
If you find this post useful, please share the link on Facebook, with your friends, etc. Your support is much appreciated and if you have any feedback, please email me at in**@*********ps.com. Please note that for links to other websites, we are only paid if there is an affiliate program such as Avantlink, Impact, Amazon and eBay and only if you purchase something. If you’d like to directly contribute towards our continued reporting, please visit our funding page.
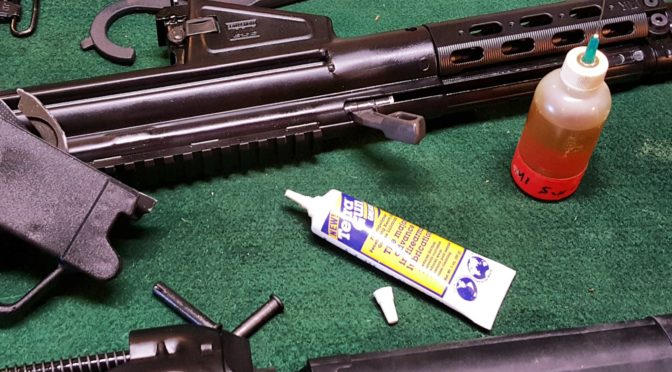
The last step in preparation for my first trip to the range was to clean and lubricate the PTR PDWR. One thing I learned with my for PTR was that proper lubrication makes a world of difference and I could tell in working the PDWR that it definitely need lubricating so here’s what I did.
Also, if you need any parts diagrams or more detailed questions, be sure to read the HK G3 Armorer’s Manual.
In general, you know you need to lubricate all moving parts of the firearm such as the trigger and bolt. So let’s start with the trigger.
Lubricating the Trigger Pack:
I employ a very old rule of thumb – If it slides, grease it. If it rotates, oil it. That simple rule has helped me take care of a ton of rifles and pistols over the years and can help you too. [Click here for more on lubricating a firearm in general]
I used a small squeeze bottle filled with Mobil 1 Full Synthetic 5W-30 to reach in and lubricate all places where a part rotated on a pin. I then worked the various parts of the trigger pack to make sure the oil go to where it needed to go.I used Tetra Gun Grease to liberally coat the top of the hammer.
Lubricating the Bolt Assembly:
Now the HK bolt assembly is involved and the following is a diagram from the HK G3 Armorer’s Manual:
In short, I oiled all of the internals but did not fully disassemble the bolt. I put the assembly into a non-marring vise, twisted the bolt head off and then reached in with the squeeze bottle to lubricate the rollers, locking piece, firing pin, etc.
After that I applied a thin coat of Tetra Grease to the bolt carrier body and put more on the bottom and sides of the bolt where it would be making contact with the receiver and riding over the hammer.
Cleaned the Barrel:
One thing I always do before heading to the range is to clean the barrel. If you look down in most, you will see varying levels of crud ranging from oil to dust to stuff left over from machining. In the case of the PDWR, the barrel looked pretty good but I still wanted to clean it.
Over the years I have tried all kinds of different approaches to cleaning barrels. The fast and easy one I use now on non-precision firearms that just need a touch up is a bore snake. These things are caliber specific and give you everything you need in an “all in one approach”. I spray CLP on the snake and down the barrel then I drop the weighted cord down the barrel and pull the snake on through. I repeat this until the bore is shiny bright.
Note, there are a ton of brands including cheap generic imports. I’ve used Hoppes and Sage & Braker brands with no problems at all.
At this point the PDWR was ready for the range. The action felt and sounded good.
If you find this post useful, please share the link on Facebook, with your friends, etc. Your support is much appreciated and if you have any feedback, please email me at in**@*********ps.com. Please note that for links to other websites, we are only paid if there is an affiliate program such as Avantlink, Impact, Amazon and eBay and only if you purchase something. If you’d like to directly contribute towards our continued reporting, please visit our funding page.
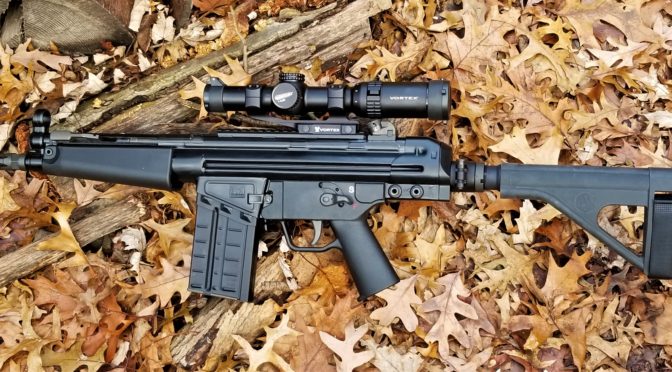
As you know, I really like AK firearms but I also like firearms based on the HK roller lock design. Maybe 3-4 years ago I owned a PTR-KMF4R and it was very accurate and I also learned a lot in terms of maintenance, tuning, etc. Of course, I had to mess with it and add a PRS stock, new trigger, and scope but it really was very accurate. As my interests changed, that rifle was sold to fund other projects but I was impressed.
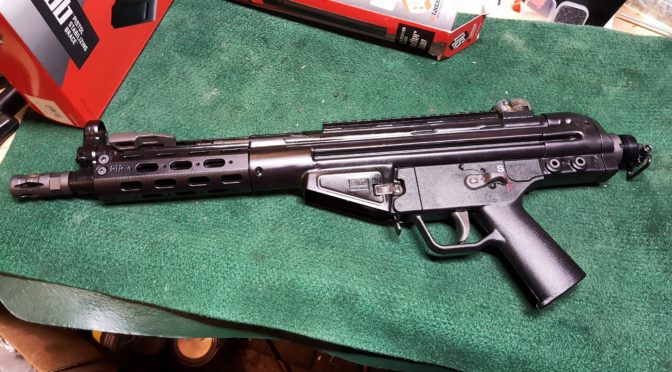
With the reversal of the ATF position on arm braces, I again found myself looking at heavy big pistols that needed braces. I really like the maneuverability of these weapons. While looking at options for my next project, I ran across the PTR-105, also known as the “PDWR“. This thing’s specs rock and I figured out quickly this was my next project.
8.5″ heavy bull barrel with a 5/8×24 thread and 1/10 twist
23.5″ overall length
8.1 pounds empty
Milled aluminum handguard that uses proprietary removable rails. Note, the PDWR actually uses MP5 handguards so you have a ton of options if you want to try different models.
It has both button and paddle mag releases
The trigger is a lawyer friendly 9-10 pounds
7.5″ welded top rail for optics, which means no additional optic rail is needed as you typically do with non-PTR firearms.
It has a swivel cap on the end that is actually a short tube that is the same diameter and pitch as an M4 buffer tube – which means putting on a buffer tube for a brace would be easy plus not come loose.
To this, I should add that you are basically looking at a cut down semi-automatic HK G3/91. This means you have tons and tons of options for magazines and parts not to mention know how. I buy my HK-related parts from either HKParts.net or RobertRTG.
Also, for those of you unfamiliar with PTR – they have been around for a while now. They are currently made in Aynor, South Carolina with their original tooling and designs coming from an HK G3 licensed factory in Portugal that they bought in 2003. This helped them really get started and they have been refining their products ever since.
So, I did some shopping around and ran into Kelley Enterprises via Gunbroker. They had great reviews there so I also visited their website and met Chuck, the owner.
Chuck is one of those guys who really knows guns, likes his job and likes to talk with folks. I called him once to talk about MP5 clones and had a great experience with that (which is a blog series for another time) and then when I wanted to find out about this PDWR, he gave me a great price.
Folks, how often do you run into somebody who does exactly what he says, follows up and even sends texts with all the tracking info? I have nothing but good things to say about Chuck and have now ordered two roller locks from him (this PDWR and a POF-5). You can either visit his website, email or call him at (305) 923-6560.
Chuck shipped the rifle to my FFL – Scott Igert of Michigan Gun Exchange. Another man of integrity and deep knowledge that I profoundly respect and recommend to anyone who is looking for an FFL in the Southwest Michigan or Northwest Indiana area or is considering buying one of the many unique firearms that passes through his shop in Benton Harbor, MI.
So, I ordered early in the week, Scott had it by Friday and I was there on Sunday to pick it up. The two first things I noticed were the weight and the big magazine for holding the .308 (7.62×51) rounds.
I’ll tell you what I did to the pistol in the next post but I will say this – it ran like a top. Not one single problem after almost 200 rounds but that is a story for another day.
If you find this post useful, please share the link on Facebook, with your friends, etc. Your support is much appreciated and if you have any feedback, please email me at in**@*********ps.com. Please note that for links to other websites, we are only paid if there is an affiliate program such as Avantlink, Impact, Amazon and eBay and only if you purchase something. If you’d like to directly contribute towards our continued reporting, please visit our funding page.
I’ve been experimenting with different lubricants for a year now because a lot of the firearm “oils” are 99% marketing and 1% oil at a premium price. You’ll notice that how to lube a firearm is a religious argument for many and I’m not going to get into that.
After doing a lot of digging, I bought two different types of automatic transmission fluid (ATF) (Dexron III and ATF+4) and Mobile 1 Full Synthetic 5W-30 engine oil. I then loaded up a bunch of squeeze bottles that have needle dispensers on them, labeled each and proceeded to try them out.
Here’s the big secret – they all work. Of the three, I like the Mobil 1 mainly because it doesn’t have a red color or the smell of transmission fluid.
I’ve now used it to lubricate my AKs, RPK, Uzi, POF-5/MP5 and PTR PDW and am very happy with the results. It works just fine and a quart will last you forever.
I still prefer Tetra Grease where sliding parts are involved. As the old saying goes, “if it rotates then oil it. If it slides, then grease it” has always worked for me though I do admit to reading armorer manuals to see their recommended lube points.
The Right Dispensers Make a Huge Difference!
Regardless of the oil you use, having the right dispenser really helps. Growing up, we used engine oil out of the tried and true cans with the finger squeeze pumps. I really don’t use that type of dispenser on firearms but do when I work on cars and what not where a large volume is needed.
With firearms, you’ll notice that you often need to get the right lube to the right place. In the shop, I use the squeeze bottles. The dispenser pens are something I take in the field as they don’t leak and will not make a huge mess if crushed — let me assure you the bottles will do just that so that is why they stay in the shop.
You can get both of these dispensers very easily off Amazon. Be sure to read reviews as some brands leak and others don’t. The ones I am listing next are what I currently use. I use the 25 gauge needle especially for reaching down into fire control groups and lubricating pins and their attached parts such as triggers, hammers, selectors, etc.
The refillable precision oiler pens are Titan 15200 units – click here for them.
There are a number of brands of oiler pens – some come filled with oil already and are not refillable but also ones that are – on Amazon if you are interested click here.
I hope this helps you out.
Note, I have to buy all of my parts – nothing here was paid for by sponsors, etc. I do make a small amount if you click on an ad and buy something but that is it. You’re getting my real opinion on stuff.
If you find this post useful, please share the link on Facebook, with your friends, etc. Your support is much appreciated and if you have any feedback, please email me at in**@*********ps.com. Please note that for links to other websites, we are only paid if there is an affiliate program such as Avantlink, Impact, Amazon and eBay and only if you purchase something. If you’d like to directly contribute towards our continued reporting, please visit our funding page.