My youngest daughter told me her favorite winter boots were leaking. She’s long since grown and on her own so I told her to bring them the next time she visited and I would see what I could do.
She showed up a few weeks later with some nice winter boots made by Columbia that were a year or two old. As a kid growinmg up in Michigan in the 70s, we’d call this style “snow mobile” boots – but they were a rubber bottom, fabric upper and then had a felt liner that you could pull out that seemed to always wear our first.
These new Columbia boots were far nicer with modern materials but they were leaking. My daughter said the bottoms of her feet would get wet. I took a quick look and the rubber bottoms were in very good shape and so were the uppers. This left the most likely culprit to be the stitching where the uppers are sewed to the rubber lowers.
I actually like working on boots. Don’t ask me why – it’s just one of my thousands of personality quirks. I used to take my dad’s old leather work boots, remove the leather thongs, clean then and then make them soft and water proof using mink oil. For a while we had this cool stuff called “bear grease” that was wax and some oil that worked pretty well. At any rate, rather than drying out and cracking, not to mention leaking real bad, you could really streatch the life of your boots out.
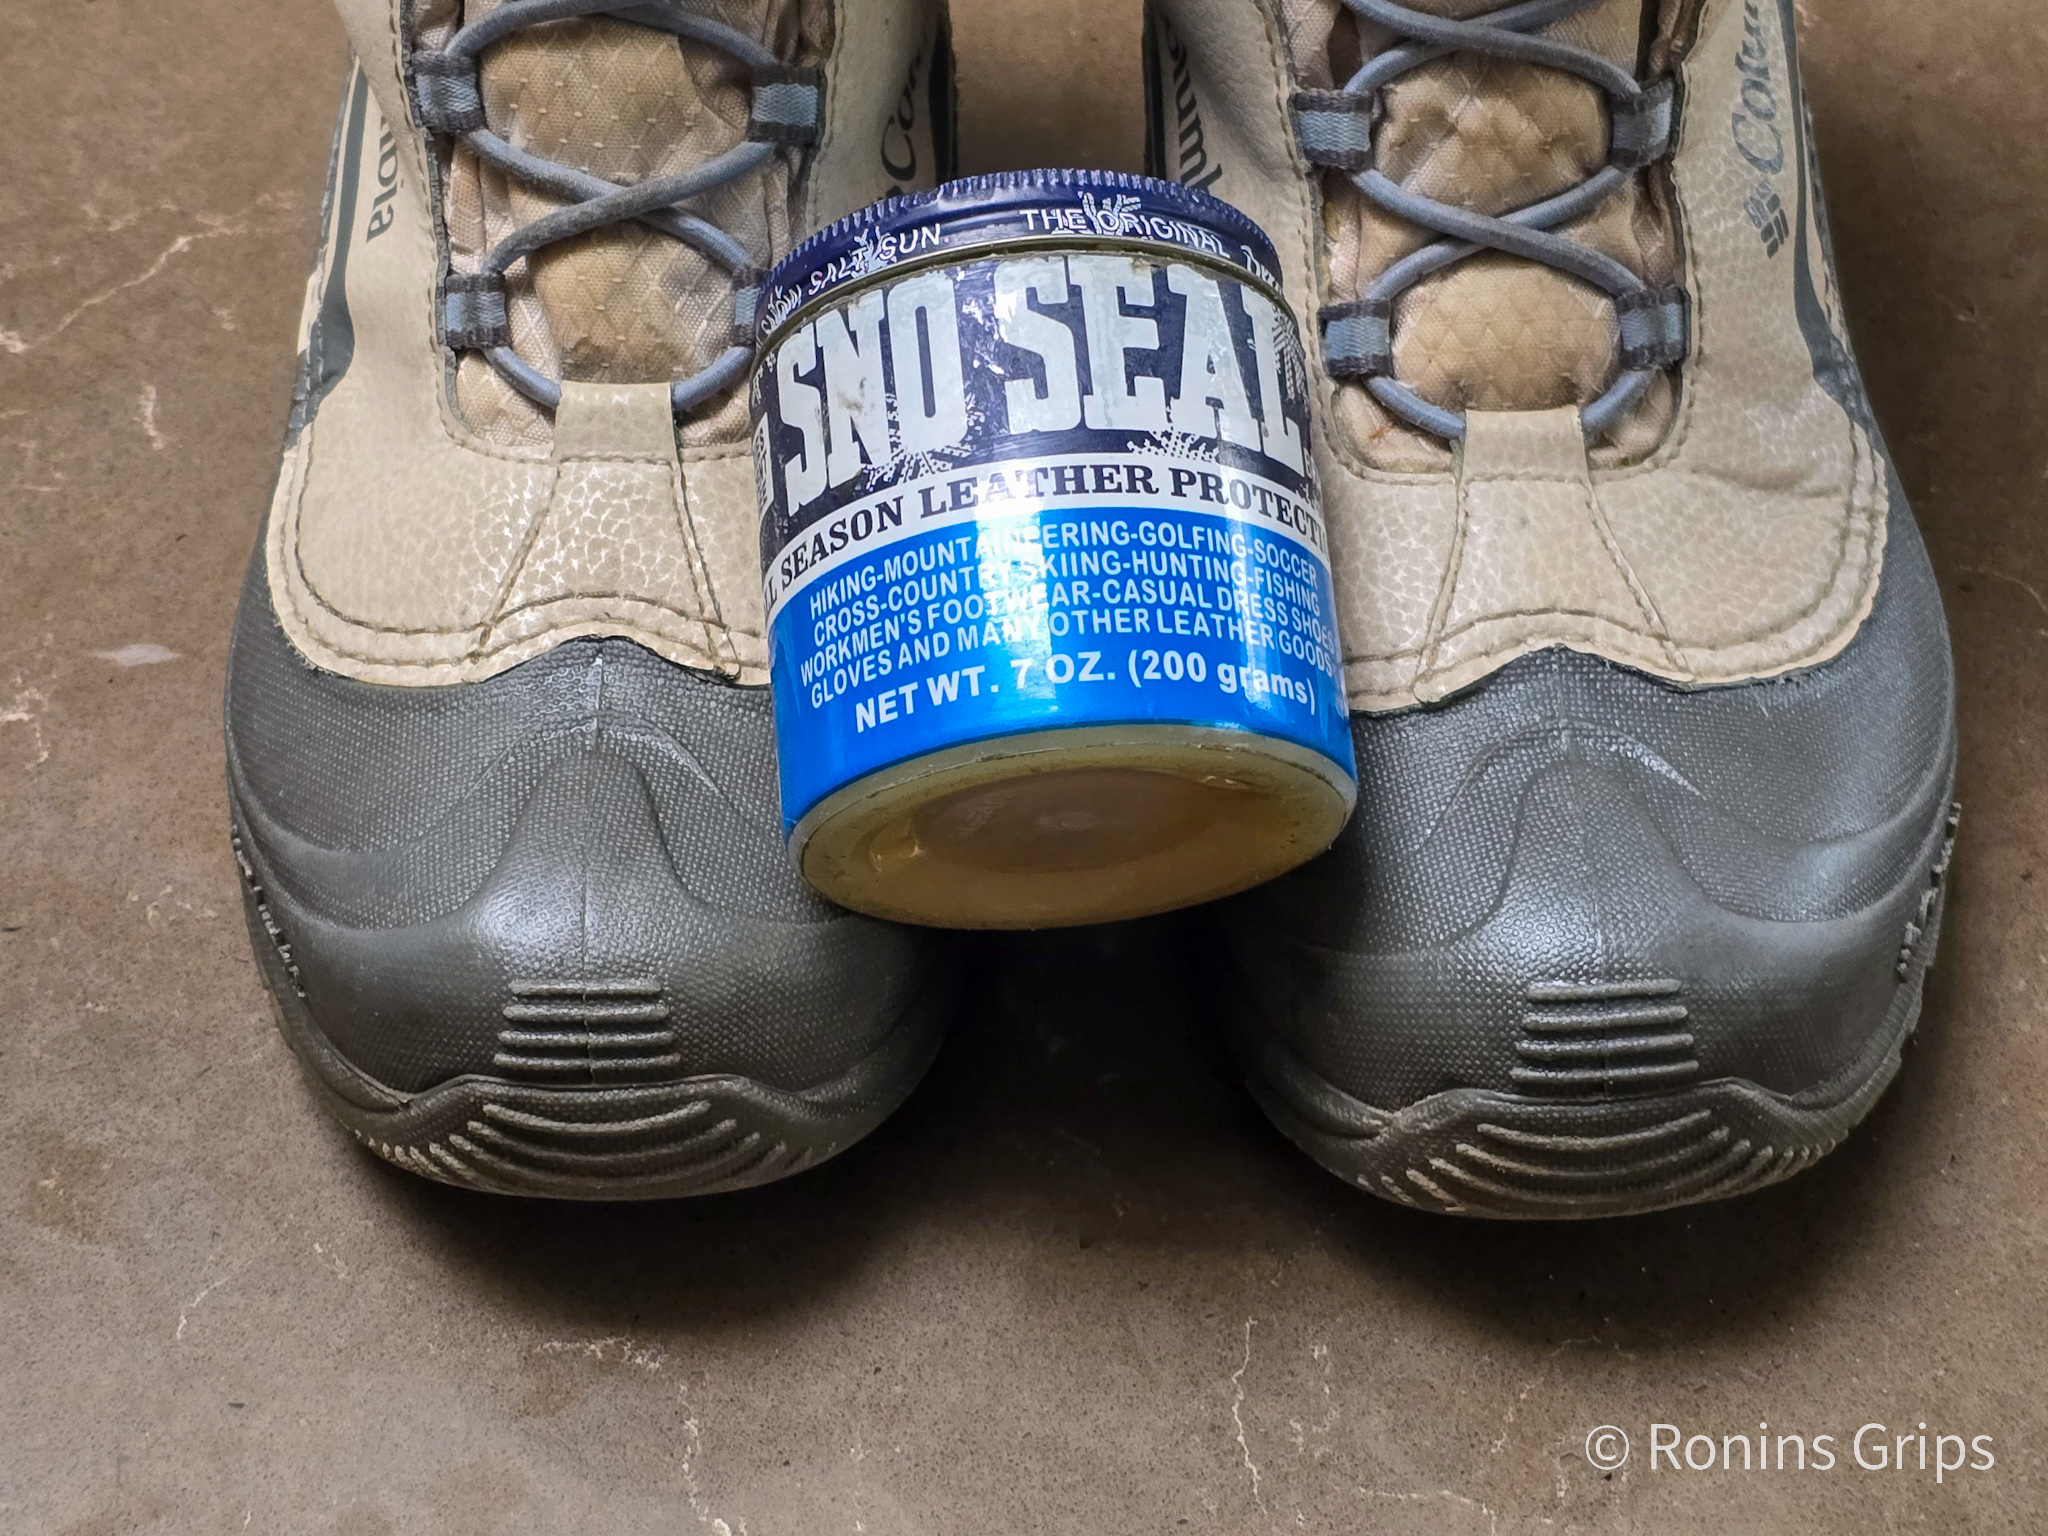
Many years ago, and I do mean “a lot” of years ago and any number would be a guess so maybe 20+ years ago, I heard about Atsko Sno-Seal. It’s basically beeswax and needs heat to really soak in. I’ve used it on more boot, tools and other uses than I can count. [Click here to buy it on Amazon]
To seal my daughter’s boots, I first warmed up the oven to 135F. That is the lowest setting of our oven and I didn’t want to harm her boots my getting the synthetics too hot. Once the oven was warm, I turned it off because otherwise the tops of the boots would be close to the heating elements and risk damage.
I then inserted her boots for about five minutes so they would get nice and warm. I pulled them out and pushed/rubbed a thick amount of wax into the seams. To be clear, I just did this on the seams – the uppers are synthetic and I didn’t want to risk discoloring them. I then put the boots back in the oven and let the wax melt and I would then rub in another thick batch of wax into the seams.
I repeated this three times. I wanted to make sure that any little openings, or “voids” in the seams were packed with wax. After the final heating, I removed the boots and wiped off the extra wax with a paper towel.
For the fabric parts of the upper and the tongue (the part under the laces in the front), I applied two coats of Scotch Guard Outdoor formula spray. I doubted the water was leaking in from these two places because of my daughter’s description that it was the bottom of her feet getting wet. However, since I had the boots, I figured I would do them also.
Note, ScotchGuard is a spray and is really easy to work with. I’d recommend you read their instructions first. I basically spray on a coat and let it dry then I do a second coat and let it dry. My wife hates the smell so I let them dry in my shop – so just bear that in mind if your spouse doesnt like chemical smells.
Applying Sno-seal to the seams took about 30 minutes. The ScotchGuard spray can be applied in less than a minute but the drying time depends on many factors – including temperature and if there is airflow from a fan. I usually let them sit and do other things.
Let me make one last comment – sealing boots isn’t a “do it one time and you’re set forever” activity. You might get a season or two and then you’ll probably need to do it again. Some guys treat it as part of their routine “getting ready for winter work” and some guys like me do it as needed or before some big outting like hunting, hiking, etc. Bottom line is that it works but needs to be maintained sooner or later.
If you do this and ever find yourself in a rush and don’t have Sno-Seal handy, you can try heating the seam up with a hair dryer and seeing if the remaining wax will seal the leak. This is a real gamble though as it depends on the amount of wax left. You could ideally seal the leak temporarily until you have time to do it right but you might also either accomplish nothing or even make the leak worse as the reamining wax moves and enlarges holes. So, it’s iffy and there’s no guarantee it will work.
Summary
The boots were sealed and my daughter was happy. I recommend Atsko Sno-Seal for a great many applications including sealing boot seams. The ScotchGuard Outdoor waterproofer works very well also.
I hope this helps you out.
Note, I have to buy all of my parts – nothing here was paid for by sponsors, etc. I do make a small amount if you click on an ad and buy something but that is it. You’re getting my real opinion on stuff.
If you find this post useful, please share the link on Facebook, with your friends, etc. Your support is much appreciated and if you have any feedback, please email me at in**@*********ps.com. Please note that for links to other websites, we are only paid if there is an affiliate program such as Avantlink, Impact, Amazon and eBay and only if you purchase something. If you’d like to directly contribute towards our continued reporting, please visit our funding page.
I have a Harbor Freight 44991 Mini Mill that I bought in 2006 or there abouts. My use of it has been off-and-on depending on what projects I had. Lately, I’ve been using it a lot and happened across a blog post talking about the benefits of upgrading from the gear drive to a belt drive using a mini mill belt drive conversion kit from LittleMachineShop.
There were two benefits that really caught my attention. First, I’d read that one of the key gears was nylon and could break. It hadn’t happened yet but given my machine is around 18 years old, it was concerning. Second, it could take care of the annoying loud whirring gear sound. I’d lived with it but I knew exactly what the author meant.
A company name Sieg in Shanghai actually makes these mini mills and they are sold under many different brands so if you have a Mini Mill from Harbor Freight, Grizzly, Micro Mark, Norther Tool, Sieg, Travers Tiiks, Wen and more, this ought to work. They tell you to confirm that the rear shaft is 9mm with a 3mm key and the front pulley that will go on the spindle has a 30mm bore and a 5mm key.
LittleMachineShop is my goto source for parts for my little mill and I aways had good luck with them. Overall, folks spoke highly of it so I ordered direct from them so I could get faster shipping. You can also buy it from Amazon if you prefer also [click here].
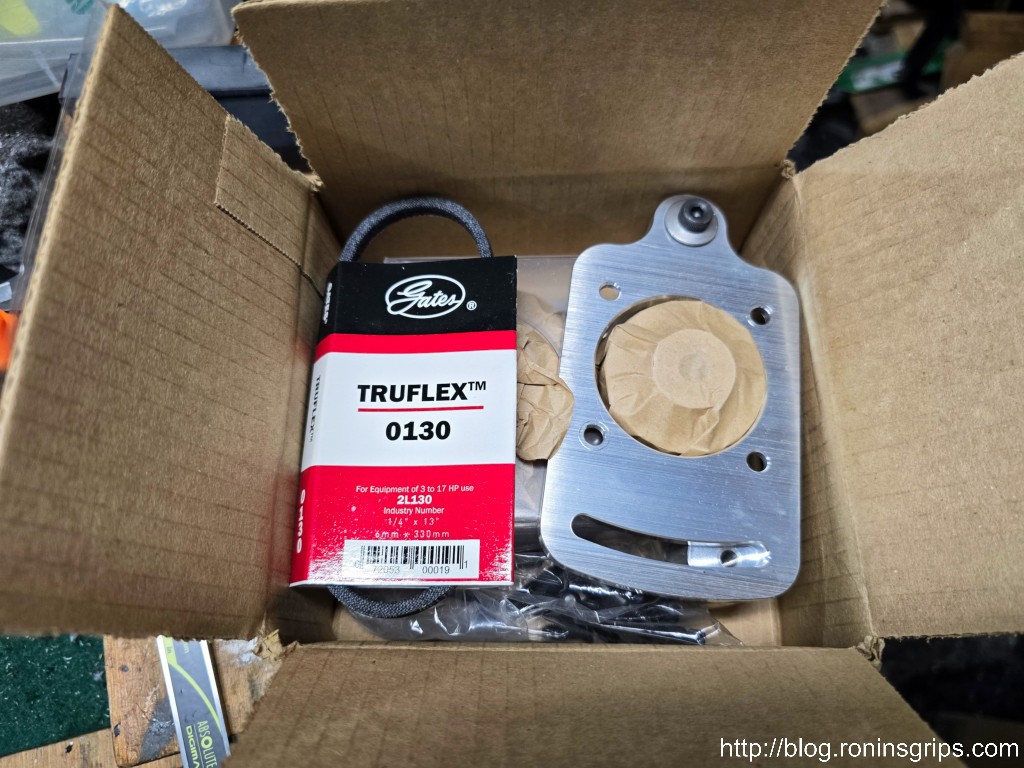
What arrived was a neatly done little kit with all the parts you need. A few people left comments on Amazon that they didn’t like the maching but what arrived for me was just fine.
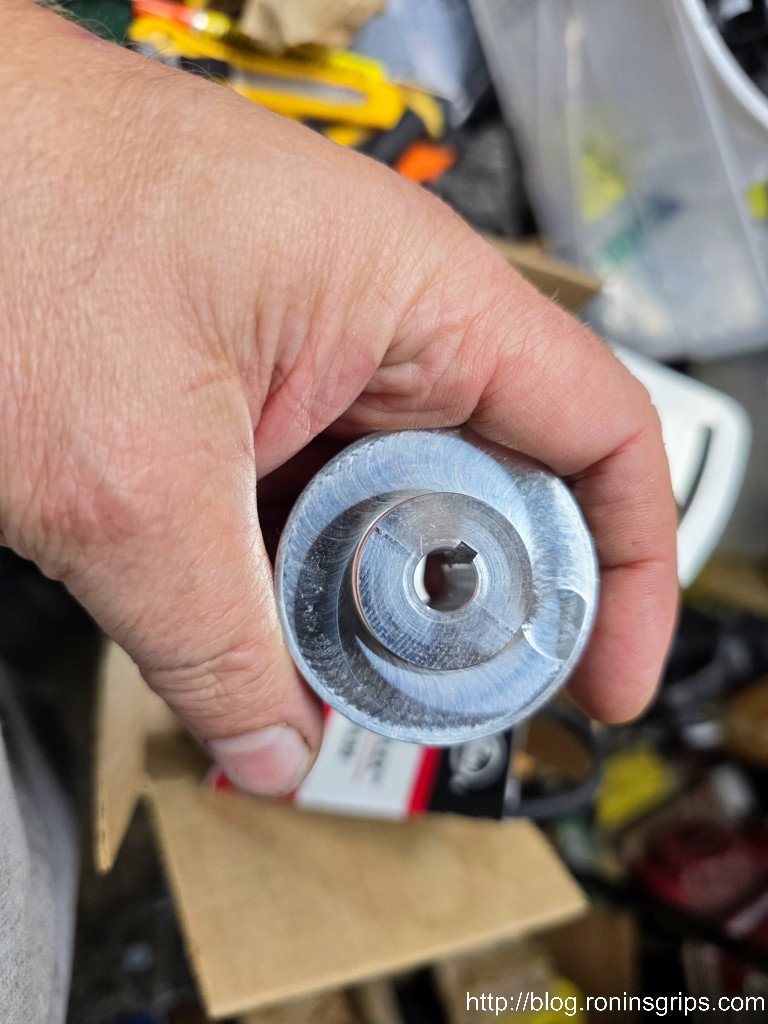
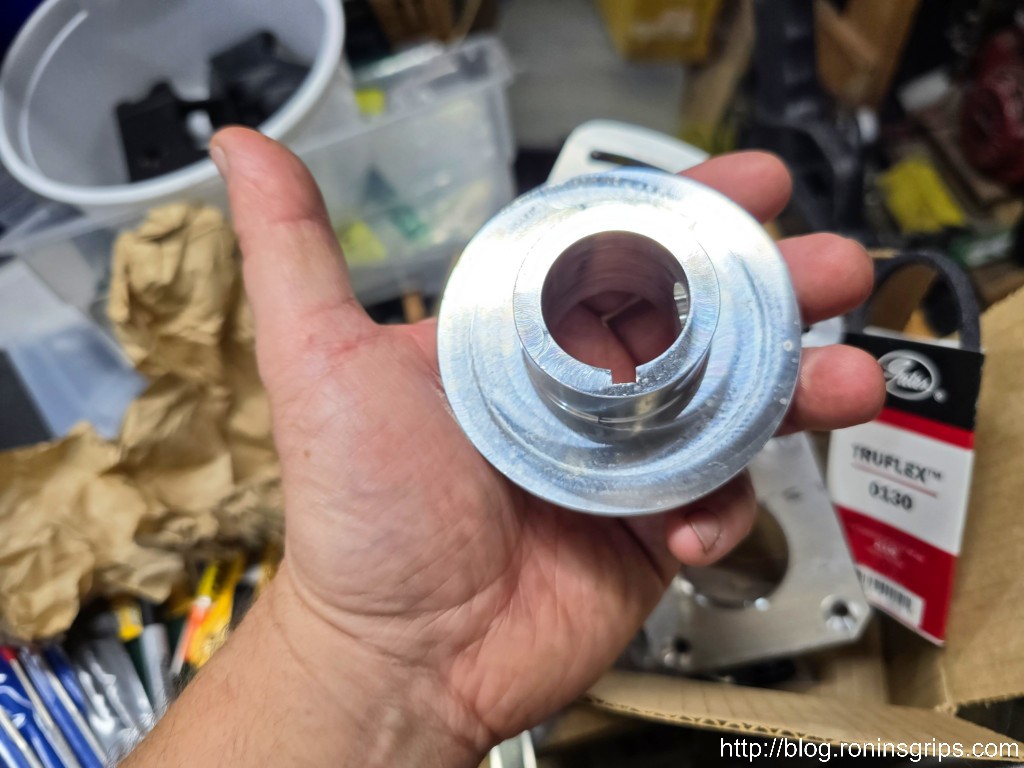
This box was in another box – everything was packed very well. Note the small drive belt they include in case you ever need another. Gates 0130 or 2L130.This is the pully for the motor.This pully will go on the spindle.
Now, before you do anything read the instructions from their website. They also come with the kit and were on the bottom of the box. I through them one by one and found them to be detailed and accurate. There are a number of steps so I am going to post photos only of some of them – follow their instructions and you can do this.
They tell you this can be done in 15-20 minutes. It took me just over an hour as I had to fight to get the pinion gear off the motor because I couldn’t find any of my bearing/gear pullers so I blew time trying to find them and then making do with what I had.
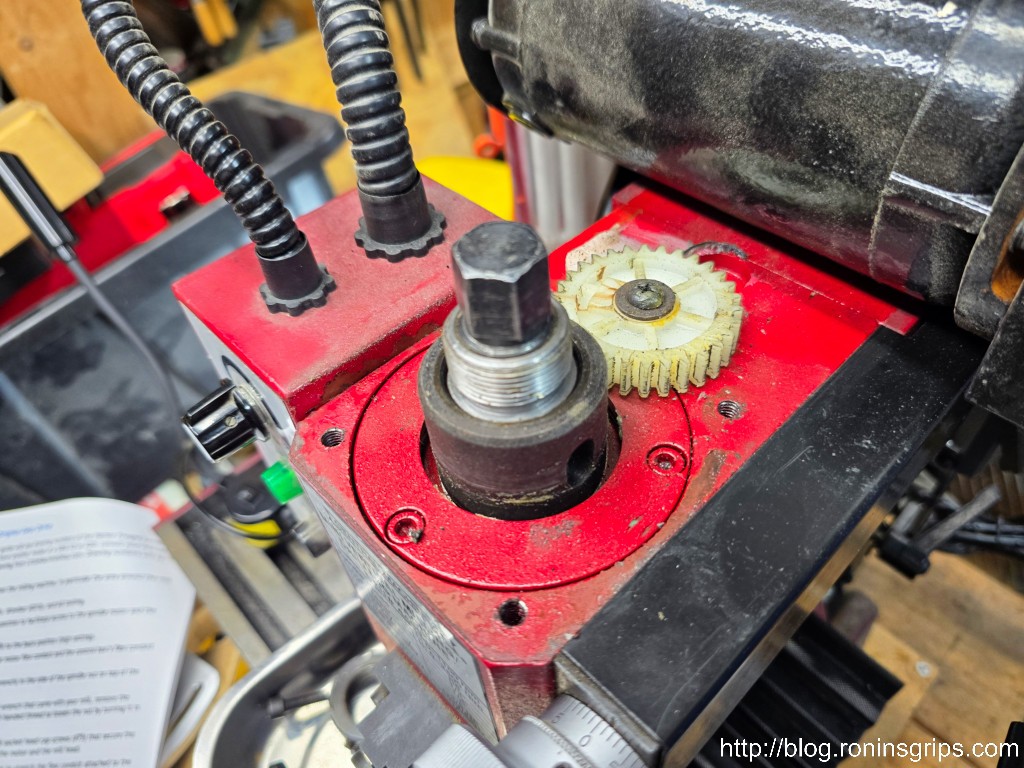
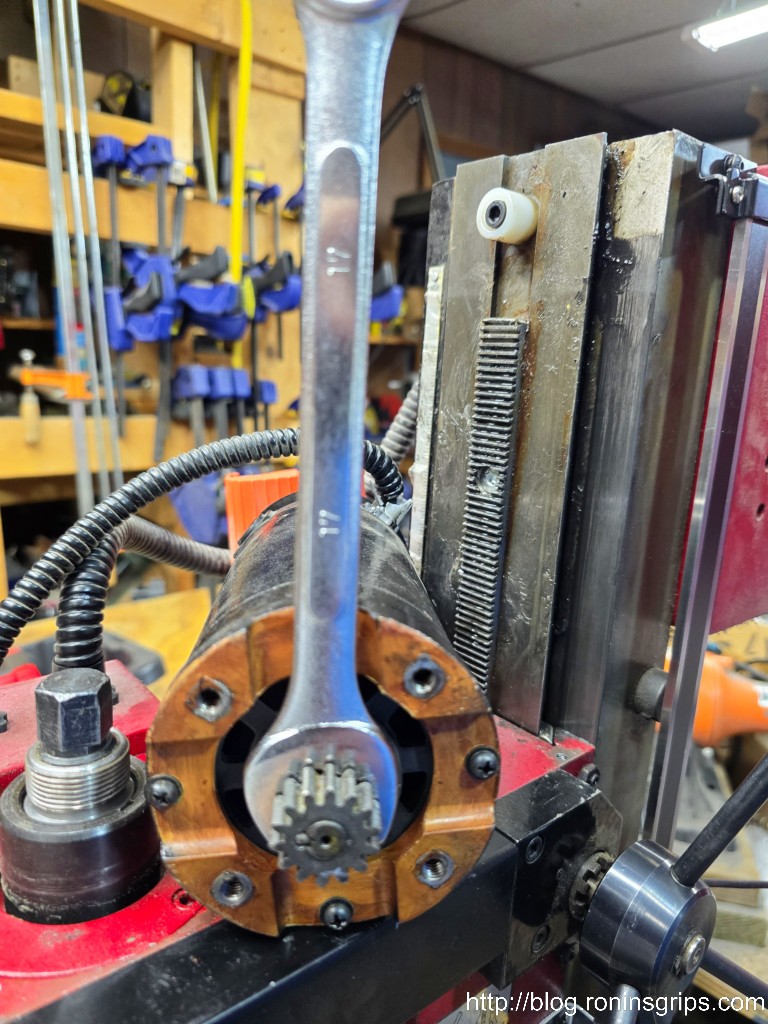
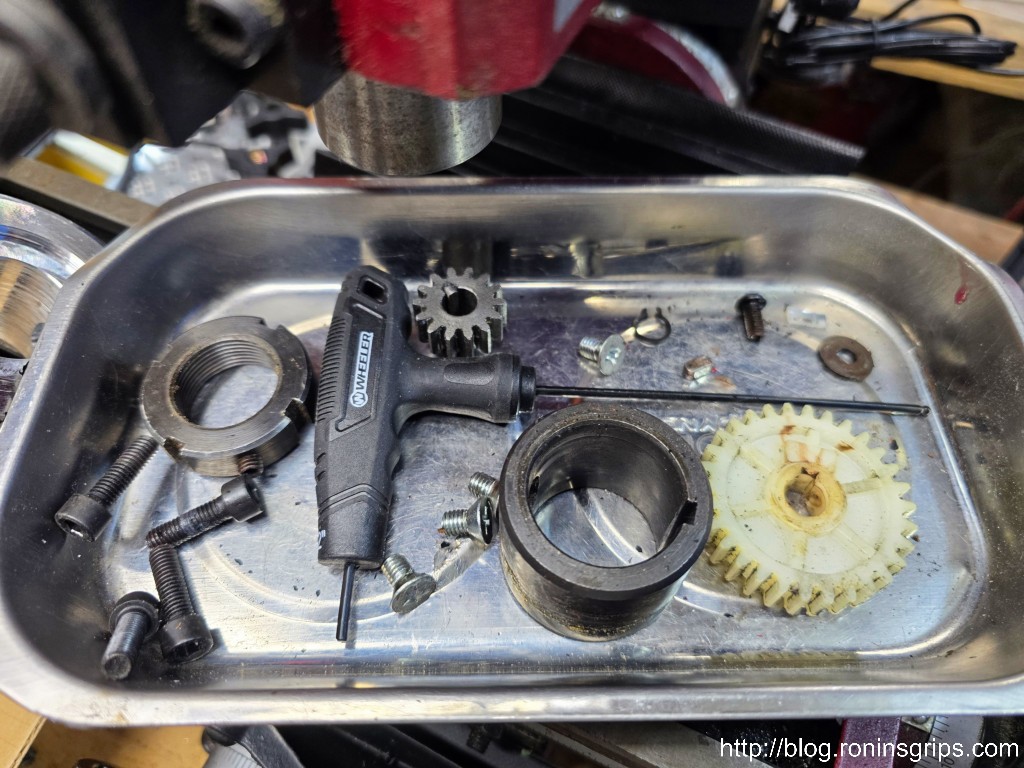
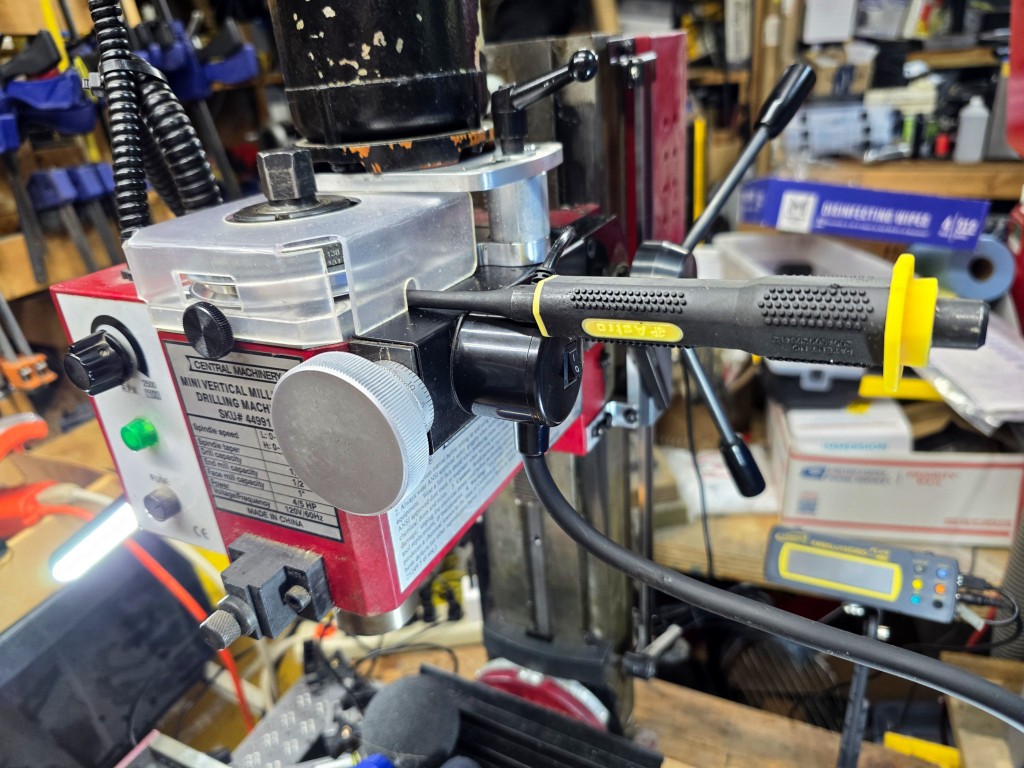
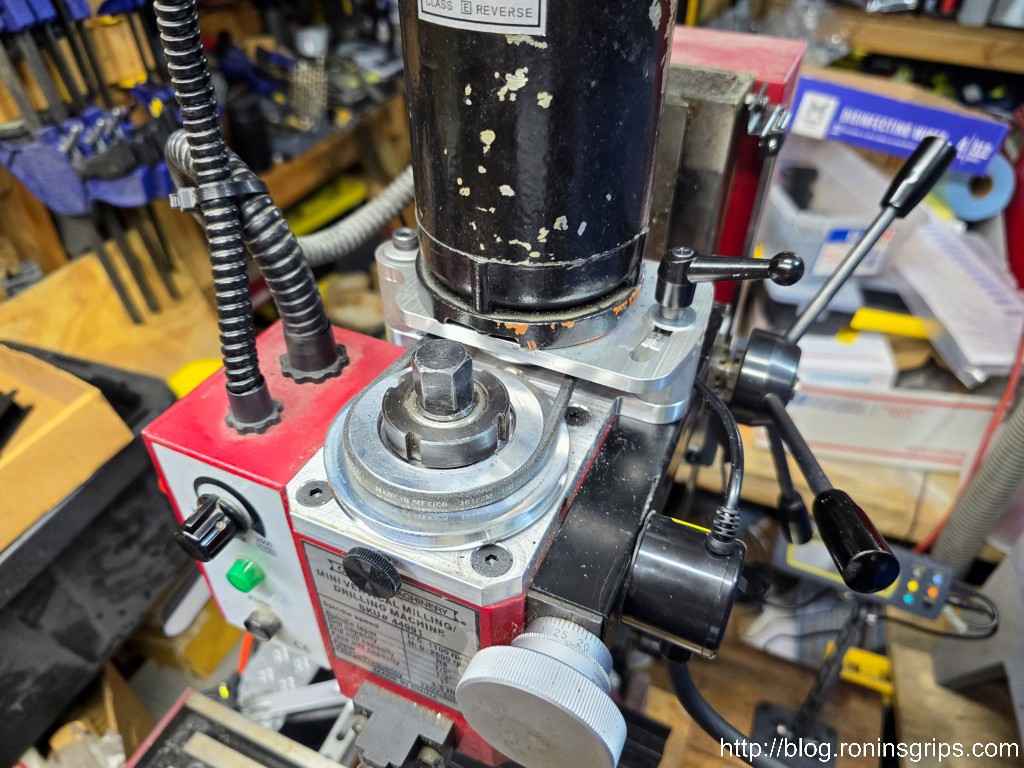
So that’s the nylon gear everyone talks about. It connects to a steel gear on the motor (what could possibly go wrong). The nylon gear spins and sends power down to the Hi/Lo gear. The mill speed is set to high, you remove that gear and a snug fitting piece of clear tubing is put in its place just to keep the now-gearless shaft from falling. I found disassembly very easy until I got to this gear. The instructions say it may be tight. Well, it’s definitely a tight interference fit. Every fastener came off surprisingly easily but that gear is a pain.What would have made quick work of this would have been a bearing/pinion gear puller. Guess who couldn’t find his …. anywhere! So, I got a 17mm box end behind and levered it out part way and then used a big flat head screwdriver where the head was bevelled. I’d lightly tap the screwdriver down and as the wedge-shaped head moved down, the gear moved out. I just had to be careful not to lose the Woodruf key that holds the gear in place relative to the shaft. I was able to slowly work it out. The only causualty was knocking paint off the motor as it moved around.My pile of parts grew. I like using a magnetic tray to hold everything. I scooted everything left over into a heavy ZipLoc type bag and stored it in my mill’s toolbox.
I kept following the instructions and everything went together real easily. I’m actually impressed that they were clearly described and complete.
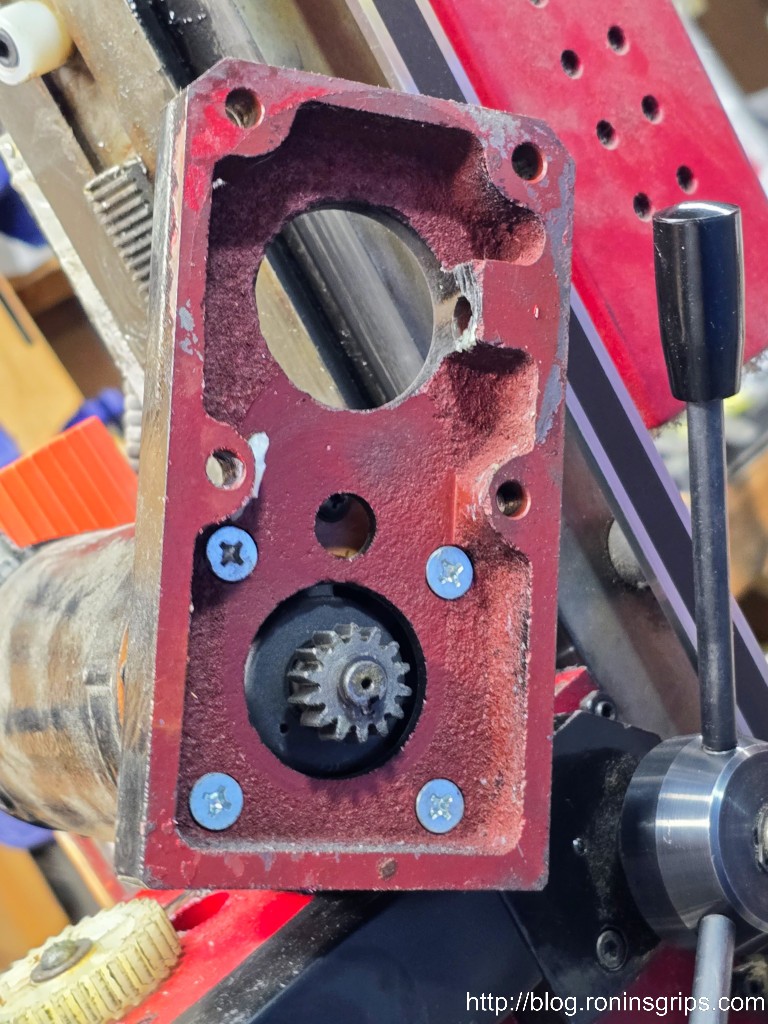
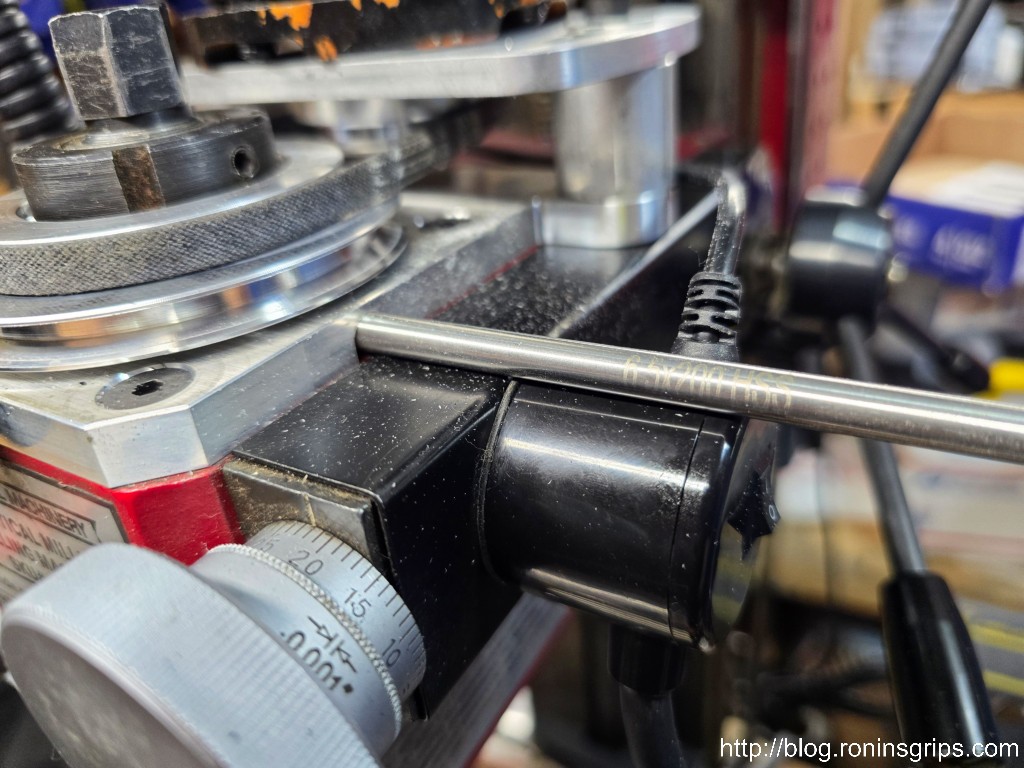
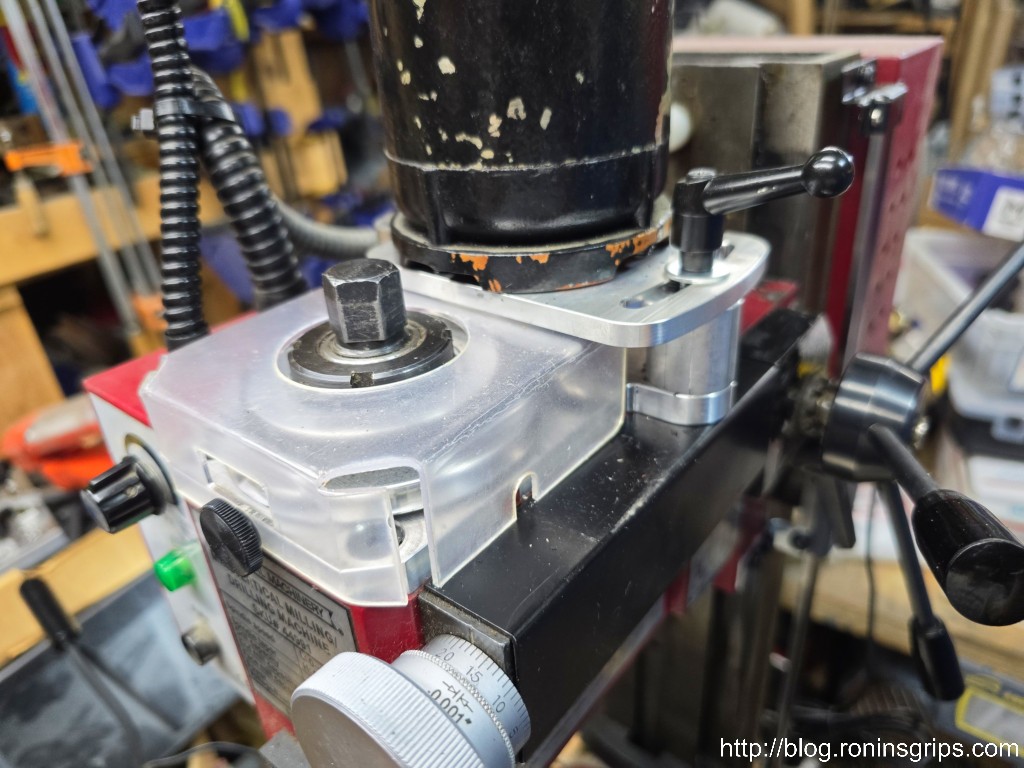
Now there was one catch – they told me to use my old spindle lock pin when I was putting the spindle nut back on. Maybe there’s been a design change in the 18 years since I bought mine but my original spindle lock was 7.865mm and far too big to go in the new top plate’s hole. I found I could get a handy roll pin punch (6.42mm) to fit albeit with a little slop in the locked spindle. My original spindle stop pin had a diameter of 7.865mm according to my Mitutoyo micrometer. I used some drill bit shafts to get an idea of the size rod I needed. 6.5mm fits through the hole and is about as large as I can go. I toyed with filing the hole open larger to fit a bigger pin but think this will hold up ok. It doesn’t have to withstand a lot of torque.Here’s a side view. Note the paint scuffed off the black motor from my hear removal shenanigans. Note hole for the locking pin.Looking down at it a bit.With the cover.
Summary
I can’t say that the sound level went down much but it did change. More of a whirring sound instead of the gears meshing. Running at max speed on the low speed pulley, my sound meter is reading 90-92db while sitting on the table right below the spindle.
For me, the most important thing is that I don’t have to worry about one of the gears breaking. I’m pleased with it because that was what I really cared about.
If you want to upgrade your mini mill so you don’t have to worry about the gears, The LittleMachineShop belt drive conversion kit is pretty slick.
I hope this helps you out.
Note, I have to buy all of my parts – nothing here was paid for by sponsors, etc. I do make a small amount if you click on an ad and buy something but that is it. You’re getting my real opinion on stuff.
If you find this post useful, please share the link on Facebook, with your friends, etc. Your support is much appreciated and if you have any feedback, please email me at in**@*********ps.com. Please note that for links to other websites, we are only paid if there is an affiliate program such as Avantlink, Impact, Amazon and eBay and only if you purchase something. If you’d like to directly contribute towards our continued reporting, please visit our funding page.
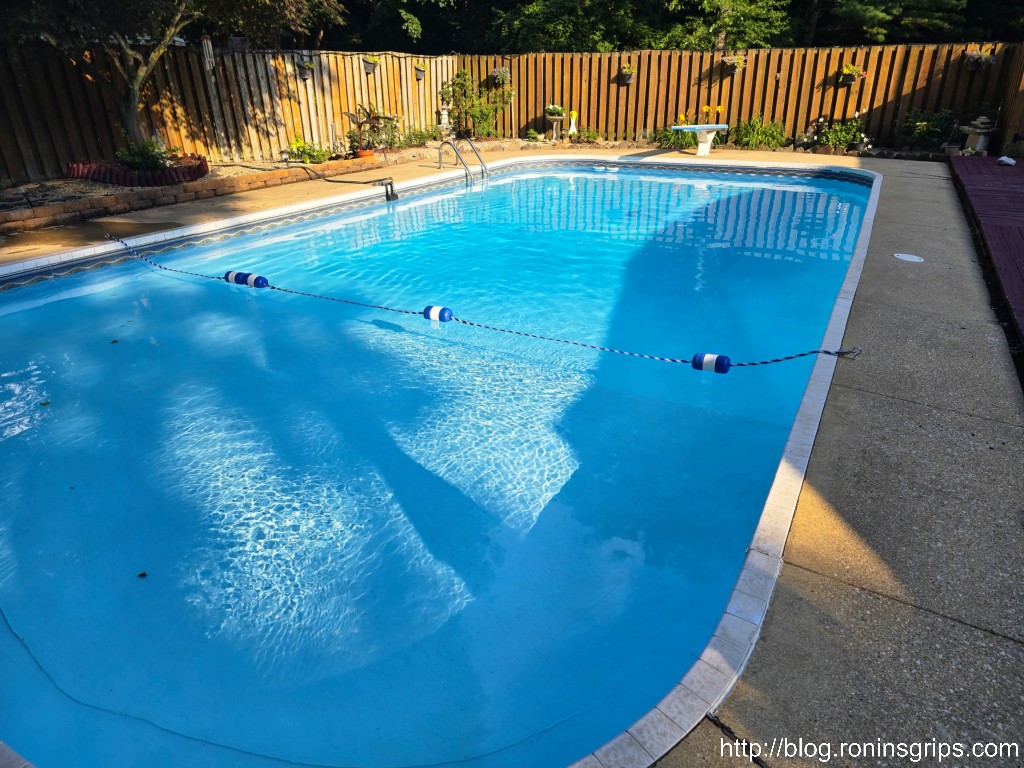
We bought our home in 1998 and it came with a 20×40 in-ground pool. Here we are 26 years later and I will tell you that a pool is way more maintenance than you think if you’ve never had a pool. We have tons of great memories of the kids growing up, pool parties with them and family visits that have made it worth it. These days, the hardest thing for me is the routine cleaning of the pool because it takes so long. It could take anywhere from 30 minutes to two hours depending on how dirty it was because I didn’t have time to keep it clean continually. I have to balance a day job, my own business and family — that doesn’t leave time for pool cleaning.
This past spring (May 2024), before we even opened the pool, my wife I are started wondering if a pool robot might be worth it because I just do not have the time any more to do it. We’d dismissed this in past years due to the cost. Well, it was time to revisit that.
Prices had dropped a lot and there were tons and tons of options on Amazon. There are pool robots out there with all kinds of price points and we paid close attention to the size pool the manufacturer said they could handle and what angles. The last part mattered because our pool has a 3-4′ shallow end and then about a 9′ deep end with an angle at the transition between the two and angles near the bottom of the deep end. We also wanted it to be battery operated.
After reading a many, many reviews and visiting websites, we decided to buy the 2024 edition of the Seauto Crab [click on this link to open the listing at Amazon in a new tab]. At the time, with a coupon applied and taxes added in, the total was $423.99. It may seem like a lot of money, and it is, but there are far more expensive robots out there and we had to do something. In checking the pricing now, it’s $359.99 before tax with free shipping.
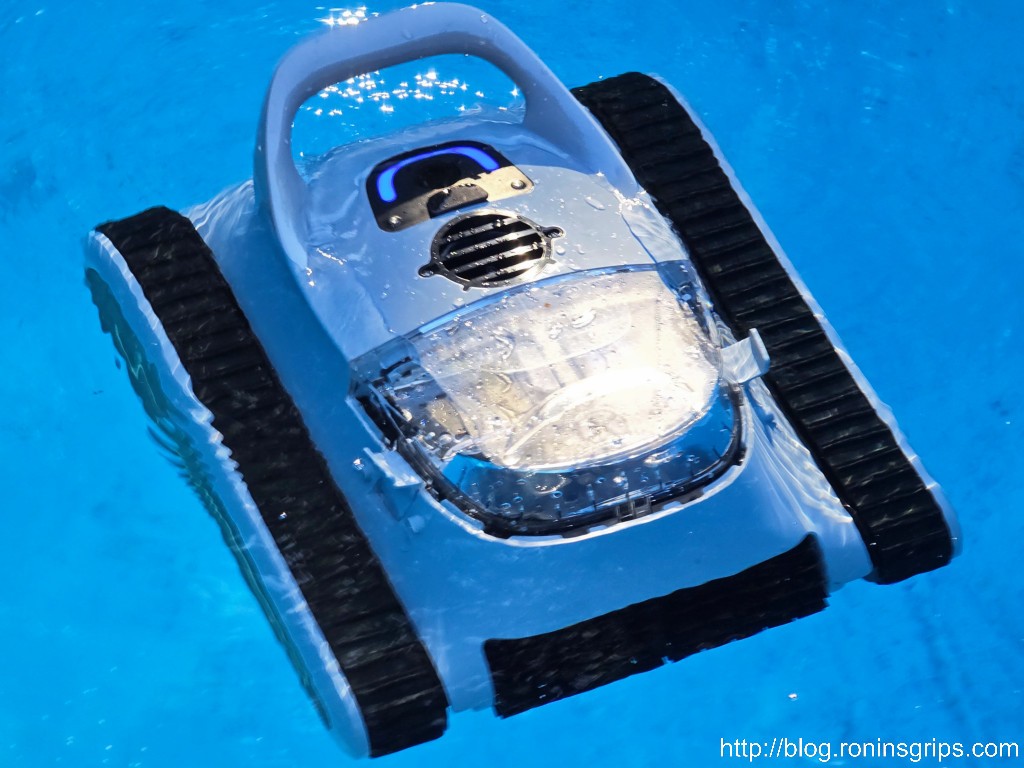
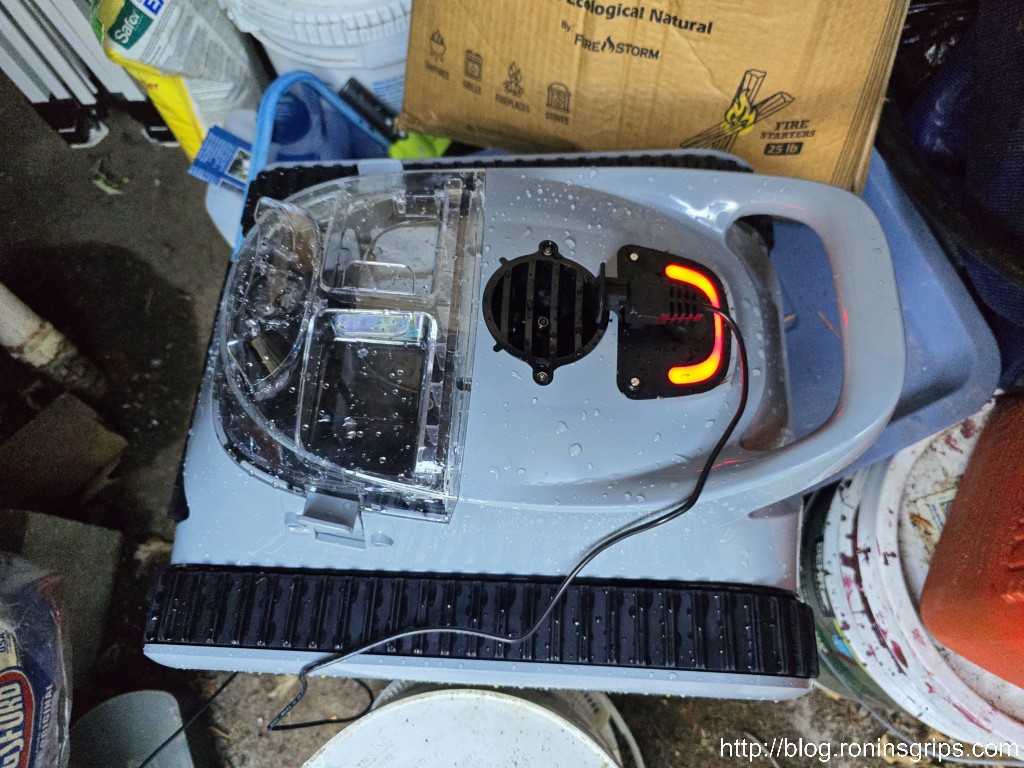
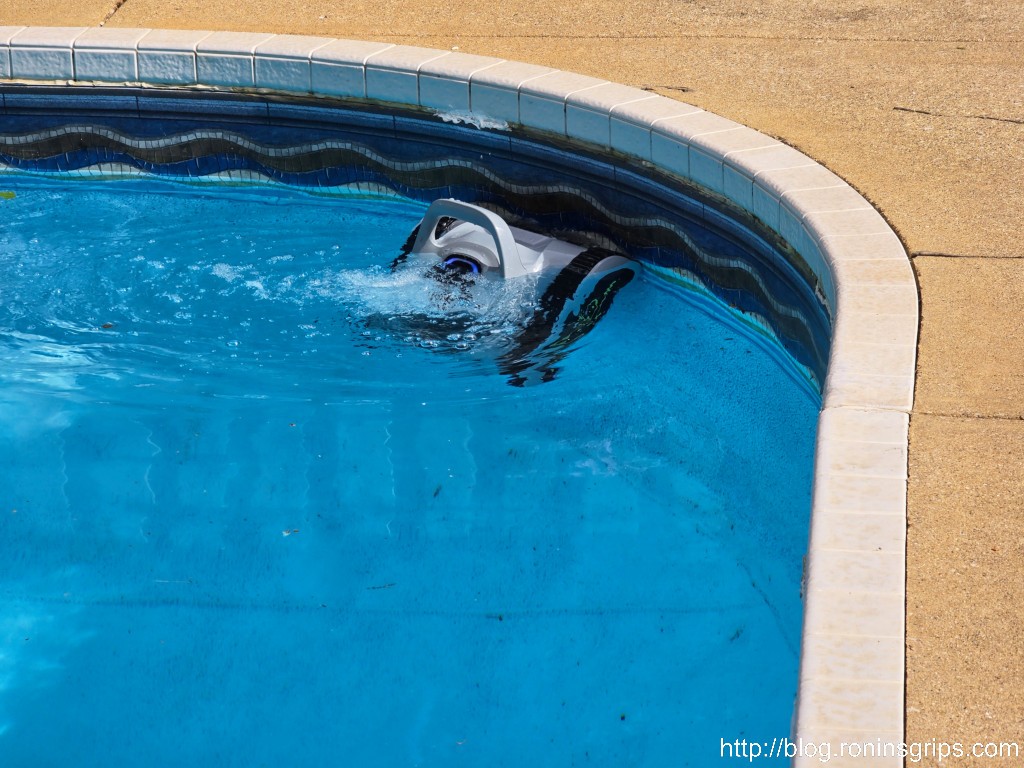
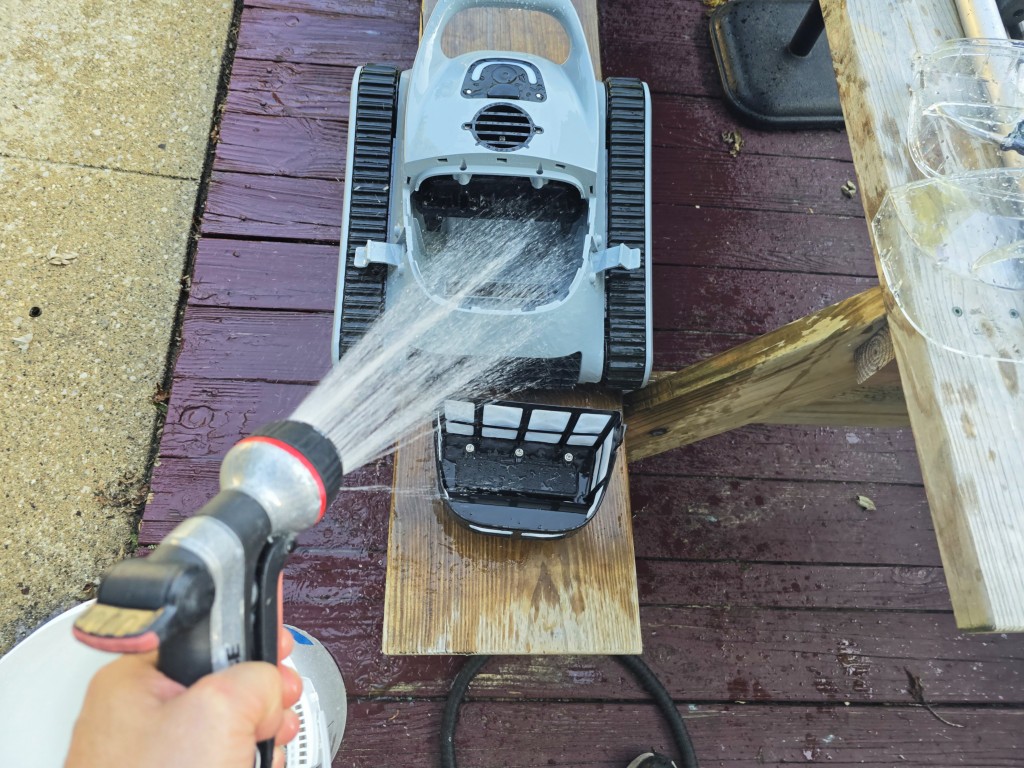
This photo was from June 24th – I just put the robot in the pool. The treads on the left and right of the unit move it. There are black rubber wheels with flaps on them both front and rear that do the cleaning and push debris towards the inlet. The blue LED shows it is on and charged. My best guess is that the two silver “dots” just below the blue inverted “U” are sensors that tell the unit if it is submerged or not. It will not turn its electric motors on unless it is underwater and also tell it when its out of the water when cleaning the side walls of the pool.
Now, most robots get very mixed reviews and the Crab was no different. My strategy was to order it, put it to immediate use and rely on the Amazon warranty. If you have an electronic device, the odds that it will fail are the greatest within the first 30 days statistically so use the heck out of it and find out. Absolutely do not let it sit in the box – put it to immediate use. Amazon will back you up if there is a problem in those first 30 days.
I timed the purchase so we would get it, charge it and drop it in the pool. There was a few day delay when UPS accidentally routed the box to Texas and then set it back to Michigan but it was delivered on June 17th and was first dropped in the water on the 18th.
We had just opened our pool and did the initial vacuuming but it was still pretty messy. I was charging and deploying the Crab 2-3 times per day for the first week. It tapered off to the point where I now do it daily – by the way, I am writing this on August 9, 2024.
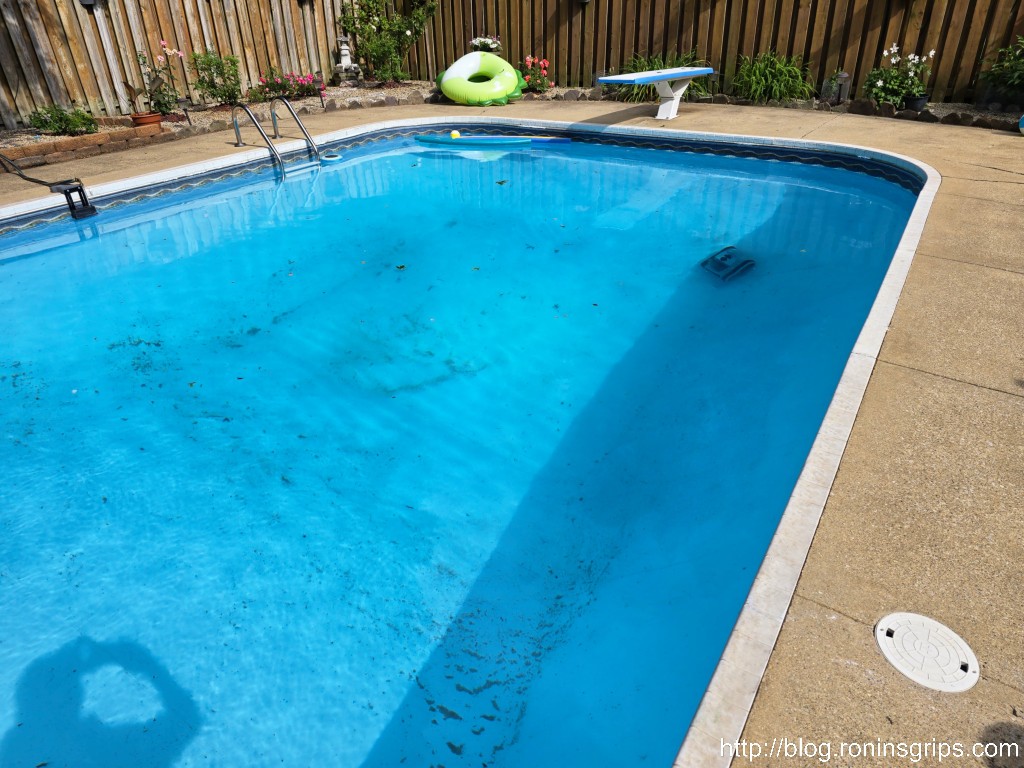
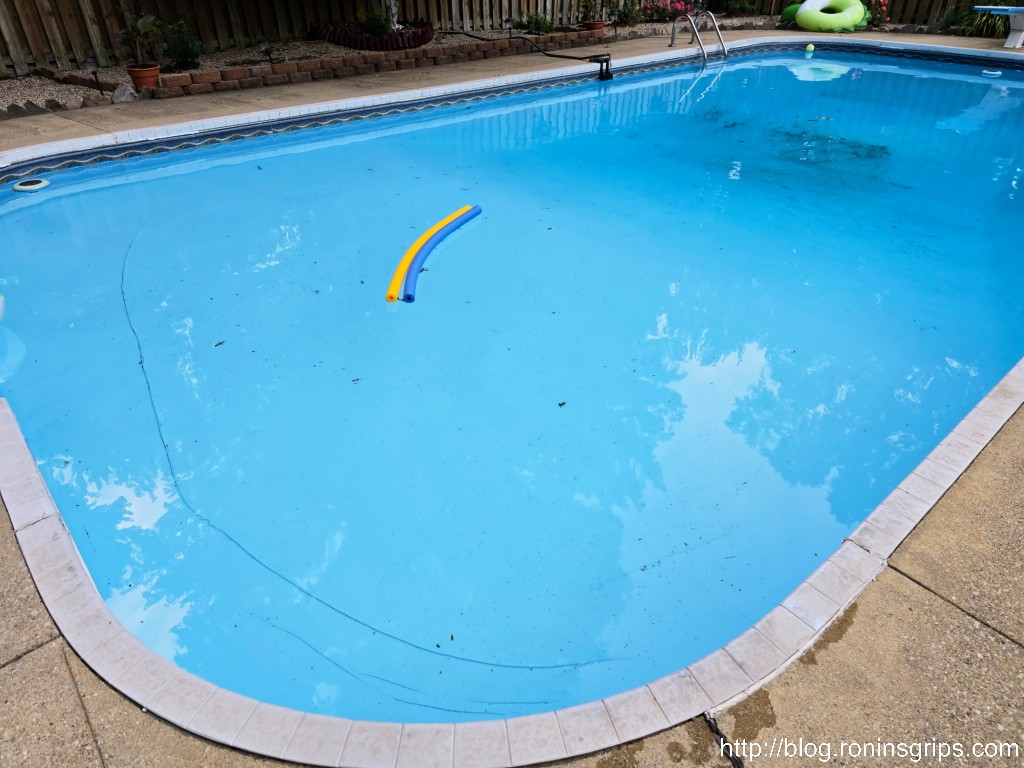
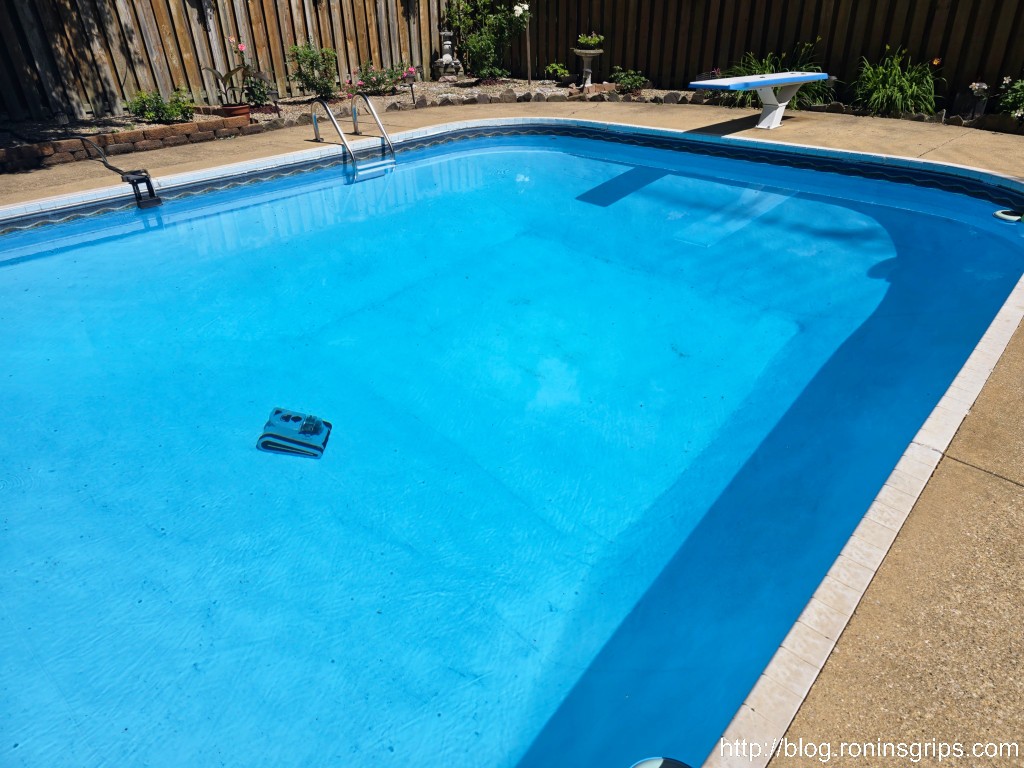
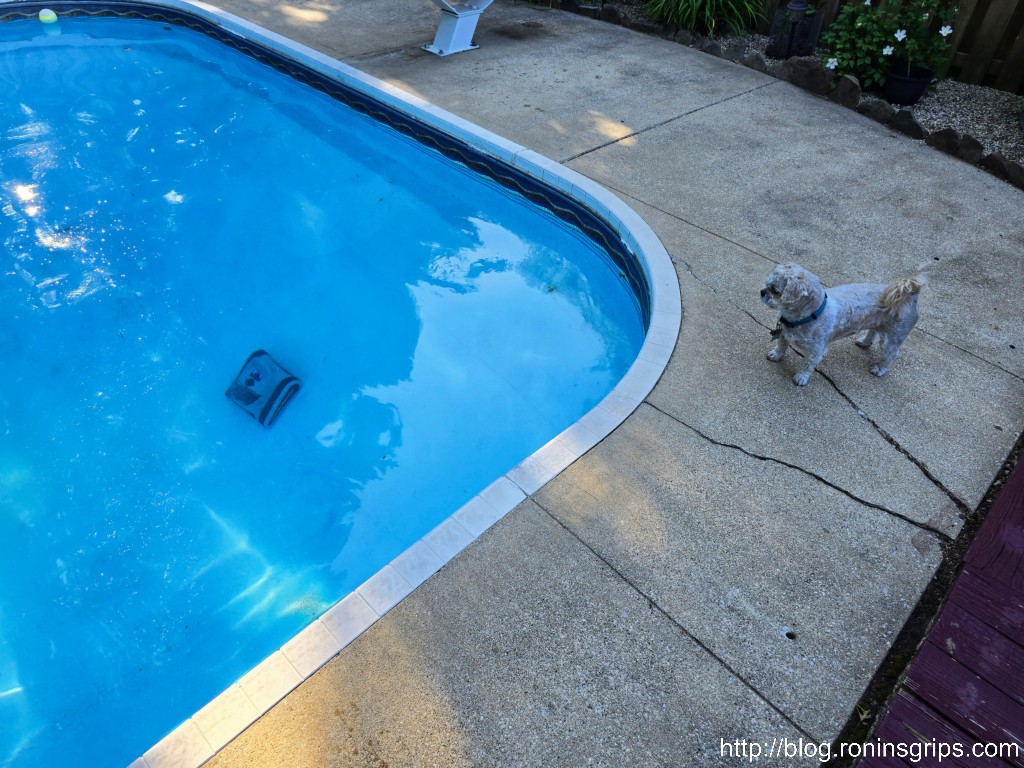
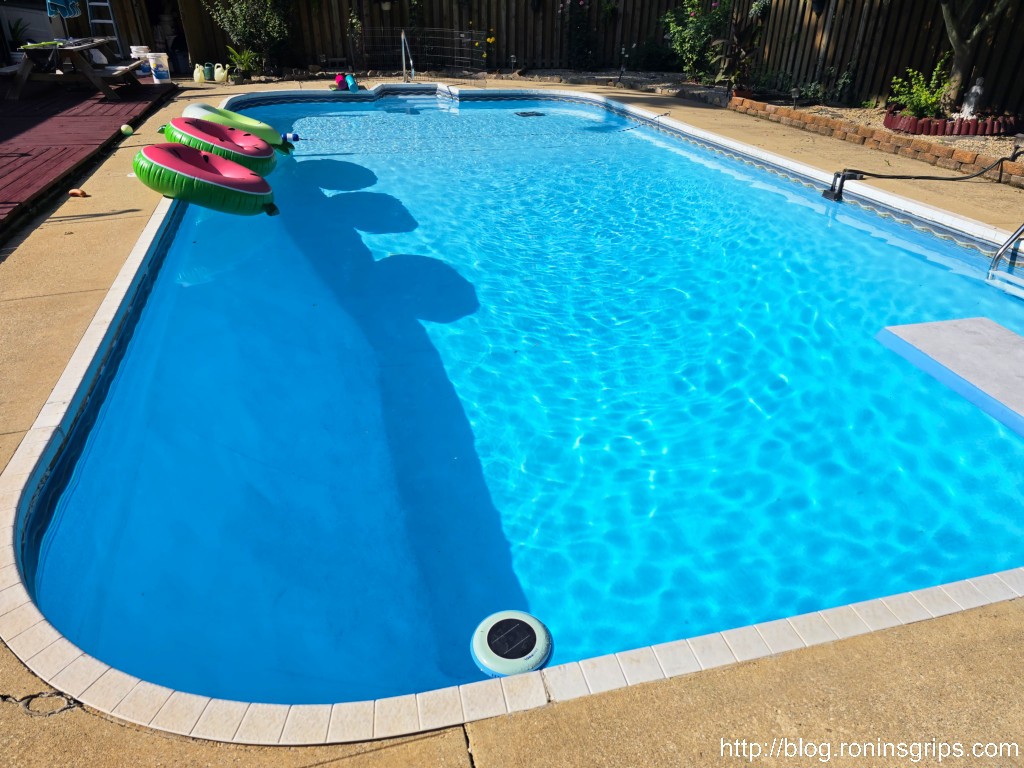
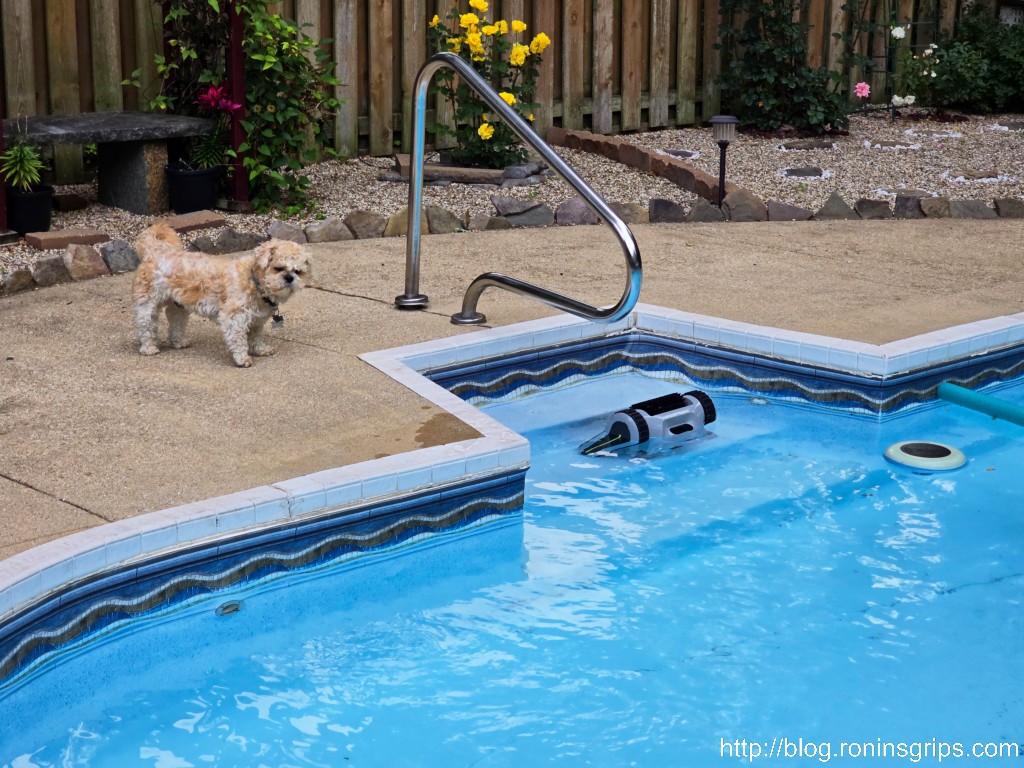
The pool was definitely a mess. I’d drop in the crab, let it run until it shut down, charge and do it again. This photo was taken on June 18th at 5:24pm.This is on June 19th at 7:28am. It was just getting ready to drop it in the pool. It had probably run 1-2 cycles at this point.June 20th at 12:27pm. Probably 4-6 cycles at this point.June 26th at 3:52pm. Most of the debris was gone. Some of what you see were patterns on our pool liner. I did not do any vacuuming or use of a leaf bag. This was all the robot. In fact, I have not vacuumed the pool since we bought the robot. I did occasionally use a leaf bag use for small branches or to clean maple leafs off the surface. I also have brushed algae of spots on the wall twice but nothing like the old days.June 15th at 6:50pm. The pool was in amazing shape. We have a big maple tree nearby and leaves drop in the pool. Eventually they sink and the crab picks them up.June 24th – one of the funniest things during the first couple of weeks was watching one our dogs watch the robot. This is Hercules – he ignores it now but he just couldn’t figure out what it was. It sure startled him the first time it came up out of the water doing a wall 🙂
I did some math and we’ve used it 53 days now and well over that many times so maybe 75 times on average let’s say. As I am writing this blog post, it’s out there doing its job cleaning the pool and our pool has never been this clean.
The pool is amazingly clean. The bottom has never been this clean – ever. I’m very impressed.
Let’s Get Into Some Details
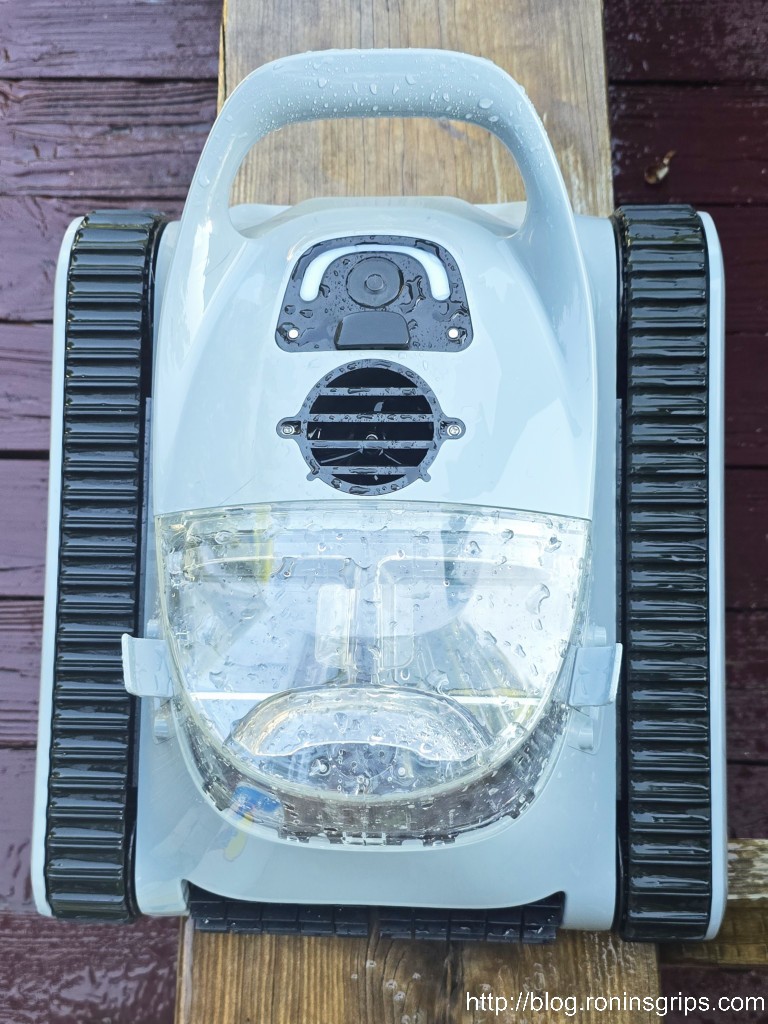
The unit arrived fully assembled and consists of the Seauto Crab unit, a charger and a retrieval hook that goes on your pool pole – assuming you have a standard full size pool pole. All you need to do is charge the unit for the first time. The top LED will turn blue when charged and then turn off after a few minutes.
The manual is a quick read – no huge insights but it does help you learn more about the unit and what the color codes of the top LED mean.
When you plug in the charger, a light on the unit turns red and goes out when it is done. The unit will run about 2-2.5 hours on a charge. The overwhelming majority of the time at least, it gets near a wall and shuts itself off. I don’t know if it’s by luck or design but I can only think of one time out of 75+ cycles where it was towards the middle of the pool. It makes retrieval with the pool pole and hook very easy.
This is how I find it most of the time when I go out and check after a few hours. The LED on top has changed from blue (charged) to red (discharged) and it usually stops by a wall. I have to think this behavior is programmed as it almost always stops by a wall – not the same spot but by a wall somewhere in the pool.I’ll find it in the pool with the red light on. I’ll pull it out, spray it off, clean the filter basked and then hook it up to charge in our pool shed.
There is an app for it and it let’s you set the speed of the robot and whether it just does the floor, walls or both (All cover mode). When we first started cleaning the pool, it was pretty dirty on the bottom so I set it to slow and floor only with the app each time – it doesn’t recall the setting.
The app connects to the robot via Bluetooth and it doesn’t take very much water to block the signal so I would set it before I put it in the pool. Now, I just drop it in the pool in all cover mode.
I should point out a reason you need the app – once or twice it has automatically downloaded and installed a firmware update to the Crab. Obviously there’s some type of computer in there.
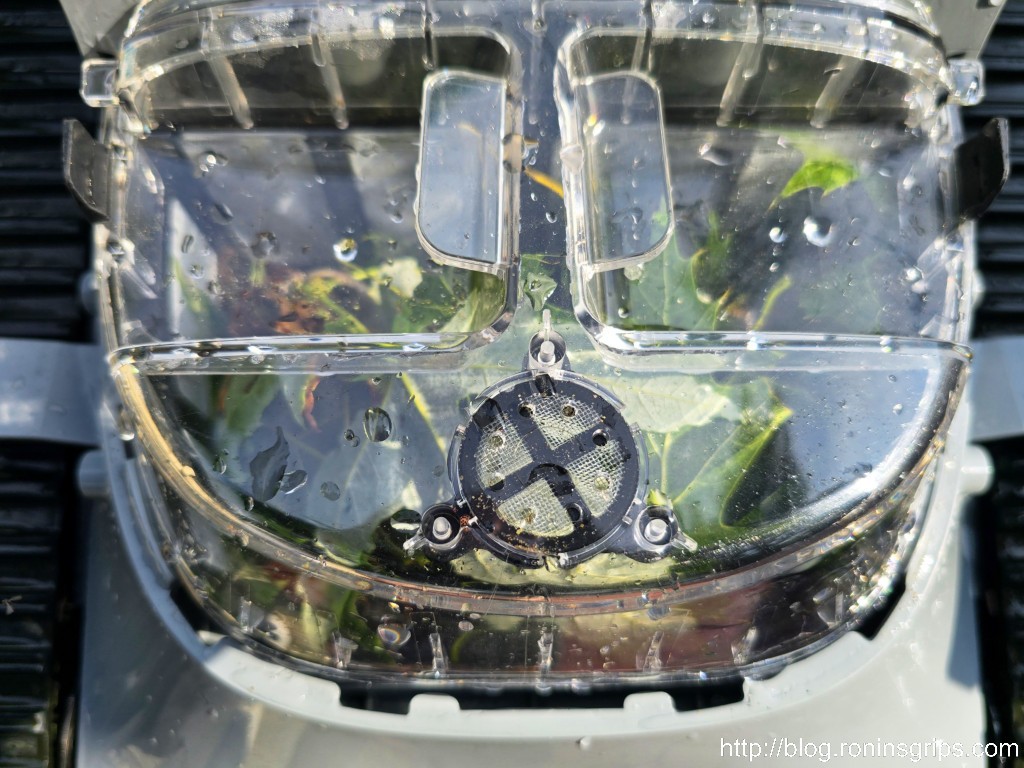
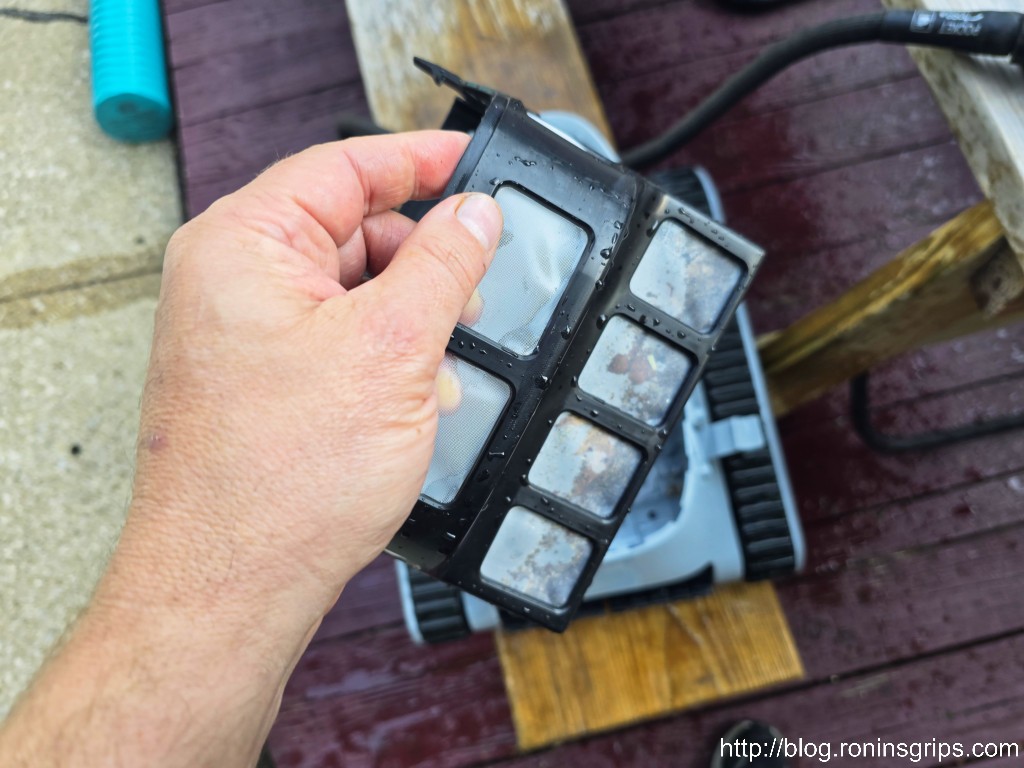
It actually does a really good job cleaning. Debris is sucked into the bottom and filtered through a very fine mesh basket. If there is something that will not fit in the bottom slot, it’s not going to be able to pick it up but that thing vacuums up all kinds of stuff. If the baskets gets plugged up, I imagine it would no longer be able to clean but I didn’t encounter that – maybe at the start but not that I can recall.
I honestly did not know what to expect. Did it have sensors? Would it move in a grid? Did it know where it had gone? Well, it does its job through random motions. It can’t do our entire pool and the walls in one charge. When the pool was really dirty, I could see it was making progress each time. Now, it is maintaining everything.
It’s fascinating how it does walls. It has a thruster (enclosed propellor) on the top. It turns on, the Crab engages it’s tracks and it goes right up the pool wall. There are sensors on the top that tell it when it has gone out of water and it goes back down. When it first did it, one of our dogs just did not know what to make of it and stood on the edge of the pool a few feet away just watching it.
The robot is using its thruster and going up the wall while scrubbing it. Another perk of all this activity is that it really keeps the water moving around and we have fewer spots of warm vs cold water plus the chlorine gets around better. It seems like we have less algae than in the past. I had to solar copper ionizers last year also. The only difference is the robot. I still have to put a brush on the pole but it happens a lot less – maybe only twice so far this season have I needed to brush off algae starting in some spot.
Somehow, the thing remains upright. I carry it by the handle and place it in the water. It sinks down and engages its thruster – maybe its orienting itself I am not sure. If it is clipping right along and goes down the decline into the deep end, it actually pops a wheelie with the front of the crab lifting up slightly as the unit propels itself downward with the rear tracks and flap wheel.
I will set it down in the water and it slowly sinks evenly to the bottom. Once there, it kicks on its thruster – maybe as a test or something – and off it goes. I have never found it upside down in all the cycles that I have run it.June 19th – the crab only had this happen once. It was cleaning the steps and got stuck. It you notice, the top is pointing at a back and downward angle. I want to say the app downloaded and applied two firmware updates since we bought it – definitely one for sure – and this has never happened again. All I can guess is that either Seauto discovered this situation and fixed it themselves or they got feedback from customers. It still regularly does the stairs so it’s not avoiding them – it just seems to be able to navigate them correctly now. Hercules, our dog who was the most curious about what was going on, had no idea what to make of the robot.
I should point our locomotion is via a rubber track/tread (like a bulldozer or tank) on each side. There are flap wheels in the front and back that are cleaning the surface and funneling debris towards the inlet where the filter basket is at.
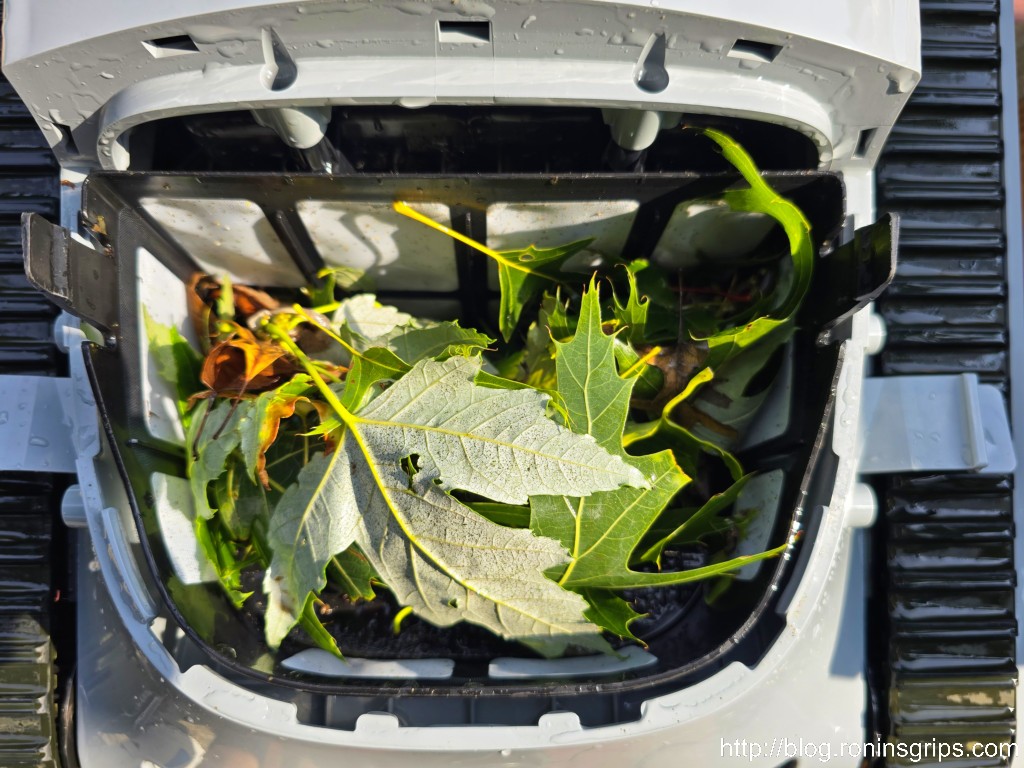
Like I said earlier, it runs until power gets low, seems to almost always stop by a side and I fish it out. You take the clear top cover off and then the cover of the filter basket. I use a hose and water to clean the mesh filtering basket and spray the debris into a bucket. I then toss the water and debris into a corner of the yard. It takes less than five minutes to clean everything. I do like to rinse the unit off so the chlorine contact is lessened. Chlorine is an oxidizer and it will take its toll on plastics and rubbers over time.
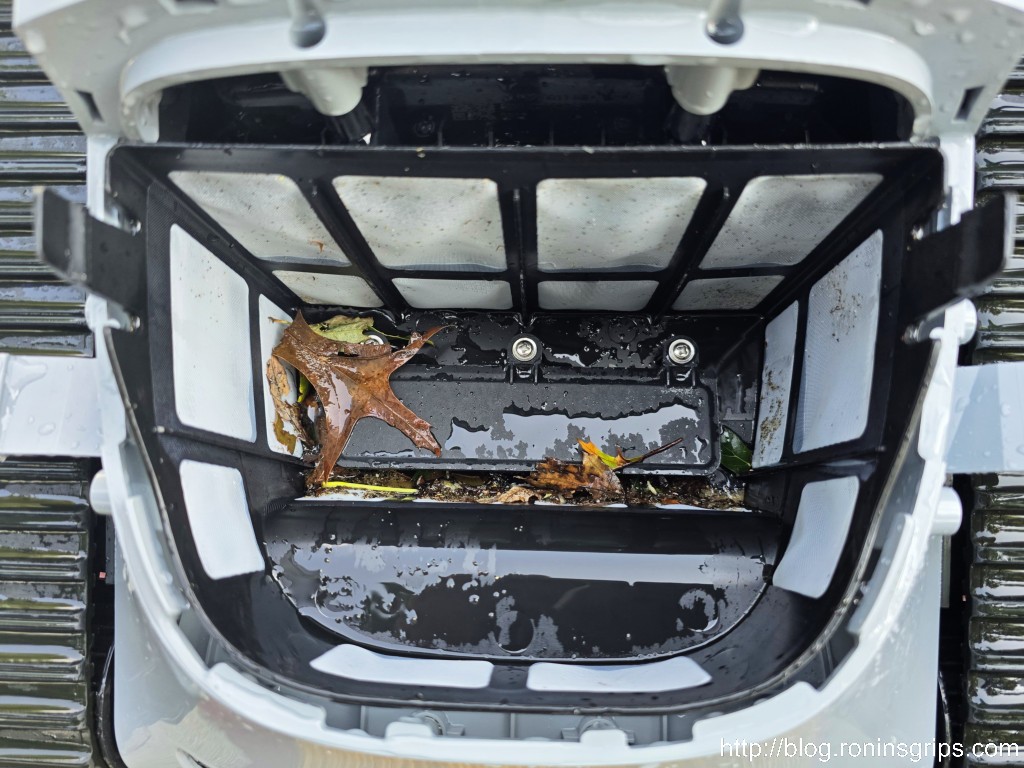
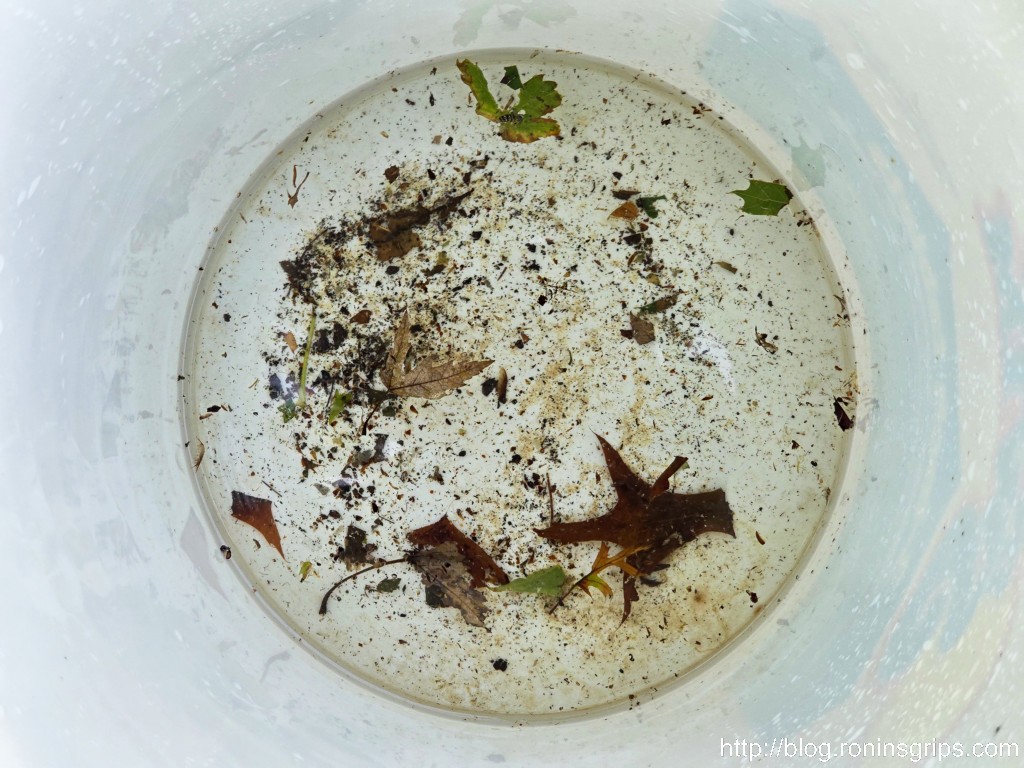
These next photos may make it look like it takes a lot to dump the filter and clean the crab but I can pull it out, clean it and start it charging in less than five minutes. The first thing you do is flip out and down the grey tabs on each side of the clear outside housing. By the way, these next photos are from a few different cleanings taken at different times so there are different amounts of debris in them.Next you are looking at the actual clear cover of the filter. Yes – two covers – the outer one and the filter one. To remove this, lightly press on the black tabs on the left and right that are sticking up and lift up. Sometimes I have fine sand sitting in the depressed areas on top of this cover and I just hose the cover off. Actually, I always hose the unit off during each step of disassembly to both get rid of any debris and to get the chlorine off the plastic.This was on July 16th. We had quite a storm and there were a lot of leaves that had fallen in the pool and sunk to the bottom. The unit can scoop up quite a bit assuming the debris can fit in the intake slot on the bottom.This is from a cleaning on July 15th. I wanted to point out the rubber flap on the bottom. Water and debris are pushed up and the rubber flap bends open to let them in. When it stops, the rubber flap closes trapping the debris inside. There have been a few times, not a lot, where something had prevented the flap from fully seating so when I pulled the unit out of the water I could see some debris sinking down as the water drained from the unit.The filter basket is a fine mesh. It even traps sand.I rinse the filter basket out and have the water and debris drop into an old chlorine bucket. It doesn’t take much to get it all out. I cleaned the bucket before cleaning and then after so you could see the sizes of various debris it picks up. I’ve had a few times where a small end of a branch with leaves on it falls in and the unit can’t pick that up but it’s the exception thankfully.Some fine sand gets caught inside and I just rinse it out while I rinse off the unit overall. The yellow you see on the burgundy deck stain is sand from prior cleanings.
I did find one small issue – the clear top outer cover doesn’t readily just go into place on our unit. You never want to force or whack plastic into place because eventually it will snap. I found a workaround – If I put the cover on and stop just short of all the way down and lightly pull the left side outwards, it goes right on without forcing. It might just be our unit that has that issue but that’s the only “trick” I can think to pass along.
I then put the unit in our pool shed on a plastic bin that just happens to be there and plug the unit in to charge. I think it charges in about three to four hours – I’ve never stopped to really time it.
That’s it. I’m perfectly happy with it and so is my wife. She’s actually given it a pet name of “Flounder”. I usually call it the pool robot still but she and the kids now call it Flounder … ok, whatever works 🙂
In looking at reviews on Amazon, I’d take them with a grain of salt. I never expected artificial intelligence, a miracle worker or a $400 robot compared against a $2,500 robot. I also knew that I needed to put it to immediate use and that it might fail – it didn’t. If it had, I would have worked directly with Amazon to get a refund. I didn’t need to.
How long will it last? I honestly don’t know. I will rinse it down and store it indoors when Winter comes and we’ll see next Spring. We still have until late-September when we close the pool for the season. If something changes, I’ll update this post.
Would I recommend the unit based on experience? Yes, I definitely would. You have to understand something – our pool has never ever been this consistently clean. I still have to add chlorine, keep the water chemistry in check, clean the copper ionizers and the skimmer but my time vacuuming has gone away – I haven’t vacuumed once since we bought the crab. I have used a leaf bag on the pool pole a few times but boy did I free up time and get a clean pool.
I use it once a day now to maintain the pool and the results are amazing. I’m so busy that if I do anything it comes at the expense of something else. I can make the time to put it in the pool (2-3 minutes) and then pull it out, clean it and hook it up to the charger (less than five minutes) for results like this.
Summary
Our experience with the Seauto Crab 2024 edition has been great. I would even use the word “amazing” to describe the unit. If you want to cover yourself, buy it off Amazon (I did), run the heck out of it and if there is a defect, it will probably happen in the first 30 days while Amazon’s warranty coverage is still active.
If you’re looking for a $350-400 price point pool robot, it’s doing a great job for us. Hopefully you will have the same experience as us.
I hope this post helps you out. To be clear, I wasn’t paid to write this and have no affiliation with Seauto. I’m sharing our experience with the crab and if you want to buy it from one of the Amazon links on this page then great – I’ll get a small commission and want to be clear that I wouldn’t write this if it was a disappointment.
Note, I have to buy all of my parts – nothing here was paid for by sponsors, etc. I do make a small amount if you click on an ad and buy something but that is it. You’re getting my real opinion on stuff.
If you find this post useful, please share the link on Facebook, with your friends, etc. Your support is much appreciated and if you have any feedback, please email me at in**@*********ps.com. Please note that for links to other websites, we are only paid if there is an affiliate program such as Avantlink, Impact, Amazon and eBay and only if you purchase something. If you’d like to directly contribute towards our continued reporting, please visit our funding page.
I have a Harbor Freight 44991 mini mill that I bought it in 2006 if I recall right – it’s been so long that I don’t actually remember at this point. It’s served me well but like anything, stuff happens with age. In this case, the mini mill way covers were breaking down due to oxidation and repeated flexing.
I’ve replaced the way covers a few times over the years but this time had a challenge finding any in stock. In general, my goto spot for mini mill parts is LittleMachineShop.com and I recommend them to anyone with a mini mill or lathe. They’ve been out of stock for a while now and I wanted a solution sooner instead of later. I was adjusting my mill, cleaning it up in general and wanted to get the covers on so the ways would stay clean.
If you are new to machining, way covers aren’t just cosmetic. They keep debris off the ways (the machined surfaces that move on the X-Y table). If you don’t keep the ways clean you run the risk of something getting under the table and throwing it off or even just making cranking the handles harder.
So, I needed to find another source but where? I had to figure out an alternative. Way covers have a diameter and length – how hard can it be if I searched using the measures and adapted whatever I found? The answer is that making your own is surprisingly easy. The way covers for the 44991 mini mill, and the two dozen or so brands that are actually the same machine made by Sieg in Shanghai, are 200mm wide and that’s the key – looking for millimeters vs. inches.
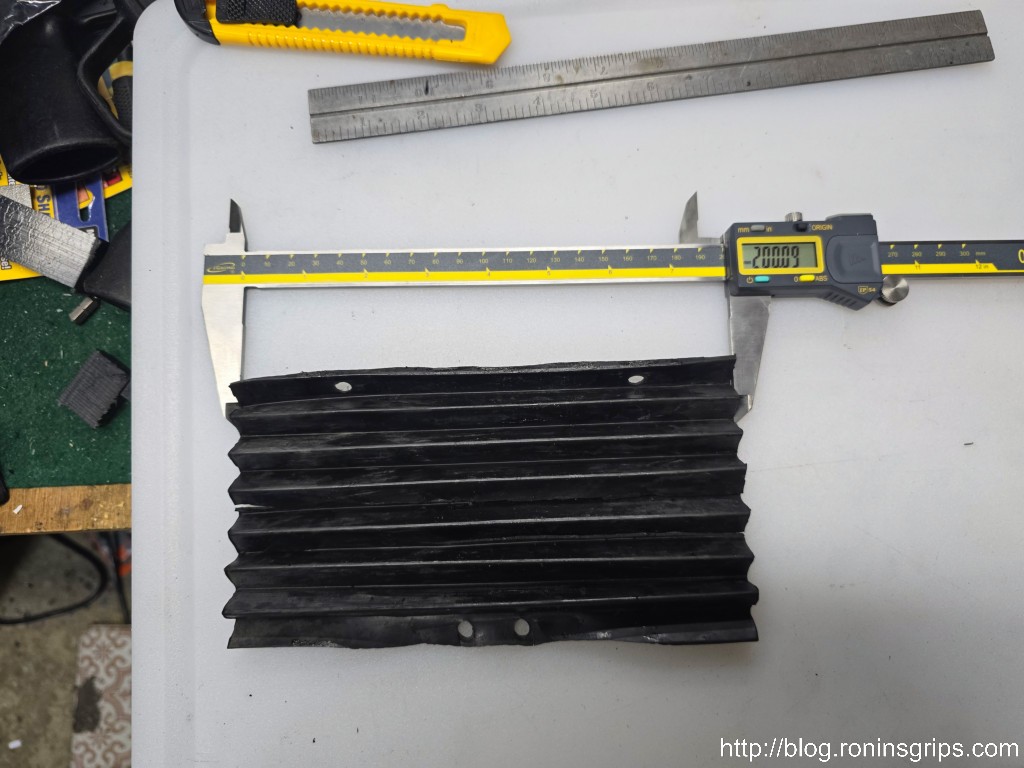
My initial mistake was to try and find a cover with a width between 7.75 and 8 inches. Then it dawned on me that the machine’s parts are actually metric and the width was 200mm. I figured if I could find a long enough length I would just cut it down and that strategy worked. By the way, that’s a 12″ IGaging Absolute Origin caliper. It’s a rare job where I need to measure something bigger than my 6″ Mitutoyo caliper can handle. For those rare occasions, the IGaging caliper has been good enough for me.
Armed with that, I immediately found way covers on Amazon. They are really long but you can cut them down with a plain sharp knife and straight edge no problem. Click here for the listing. At the time of purchase, they had one review. I was in a rush and figured I would gamble $10.19 not including a 5% off coupon. It was shipped from China and took about two weeks to arrive.
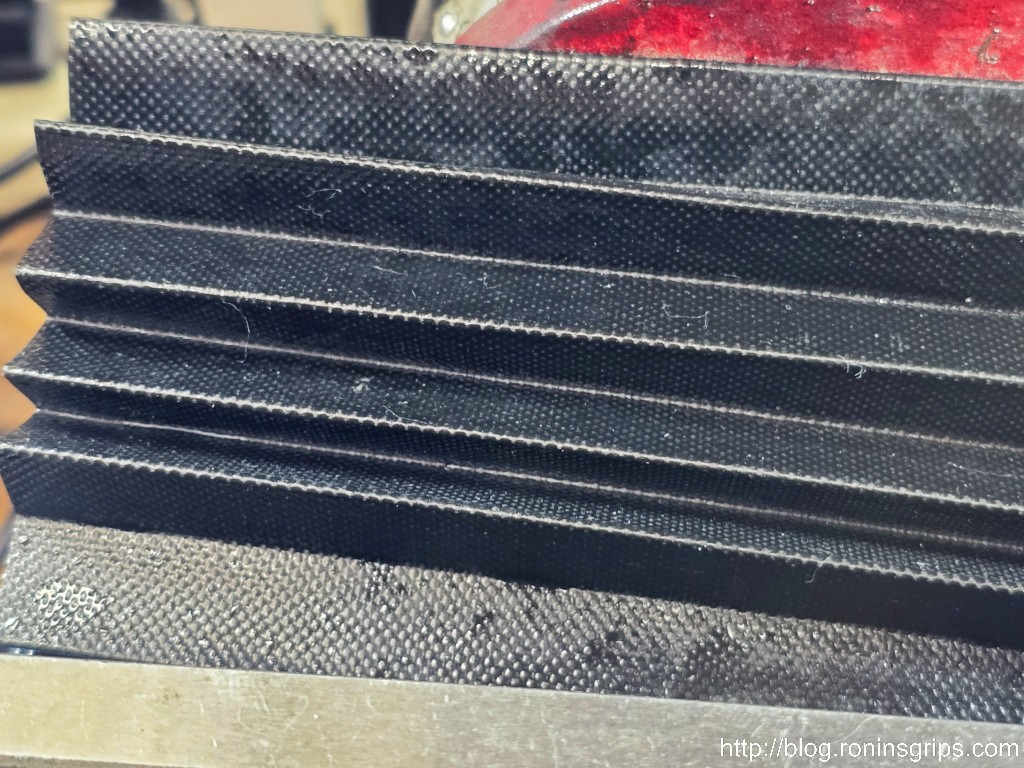
Guess what? They are actually really decent. Instead of rubber, these way covers are some kind of rubberised fabric. I’m not even sure rubber is the correct term and cutting them down to fit is fast and easy with plenty left over for a few more replacements (I stored the remainder in a heavy ziploc industrial bag and actually purged it with nitrogen. Yeah, I work with plastics so I have access to that stuff. Just sealing it in a good ziploc-type bag and keeping it safe would probably work too.
Let’s Step Through The Process
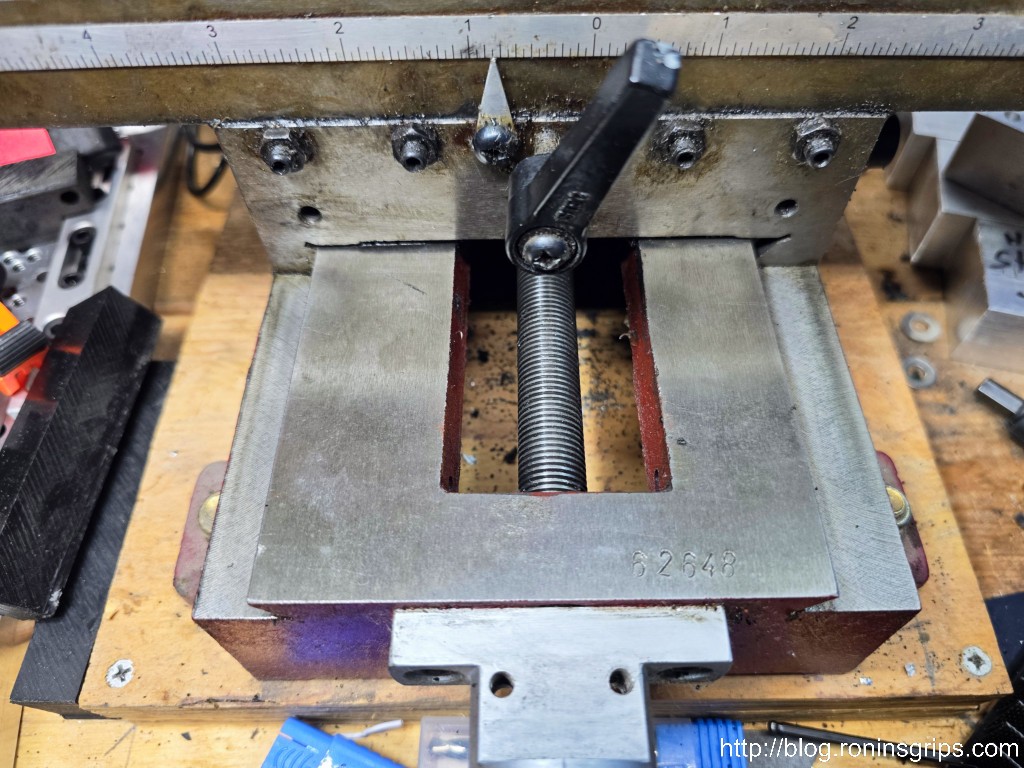
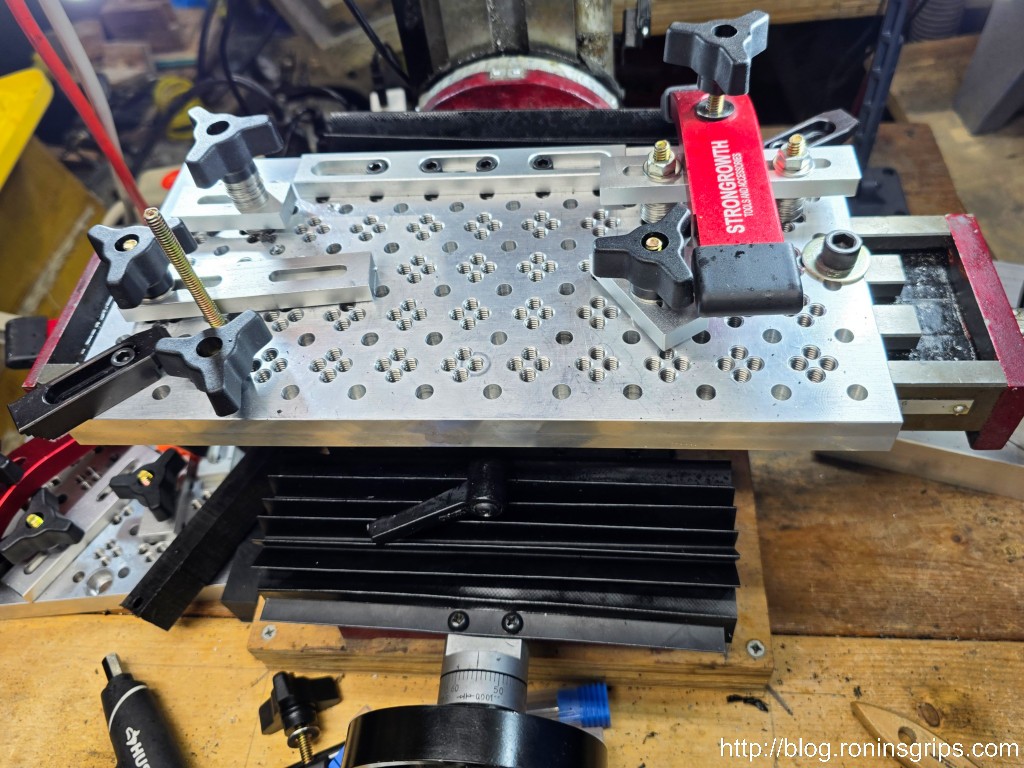
I did my covers one at a time starting with the front. The cover is held in place by a bracket on each end. Each bracket is held in place by two Phillips round head screws. Remove the brackets and the covers. Note the front cover has two sizes of screws when you go to reassemble it.
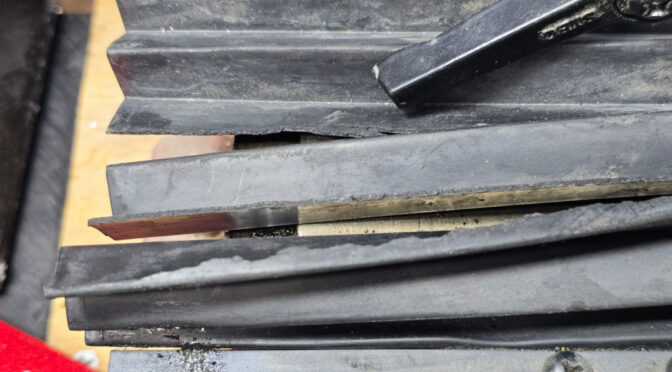
Each way cover is held in place by a metal strip and two Phillips round head metric screws. Note, on the front way the front and back screws are two different sizes so pay attention what goes where (the larger diameter screws are to the back if I recall correctly). This is either my second or third set of rubber way covers. They slowly break down with time and use.
With the cover off, I cleaned and lubed the ways and also the threaded rod. I then moved on to make the cover.
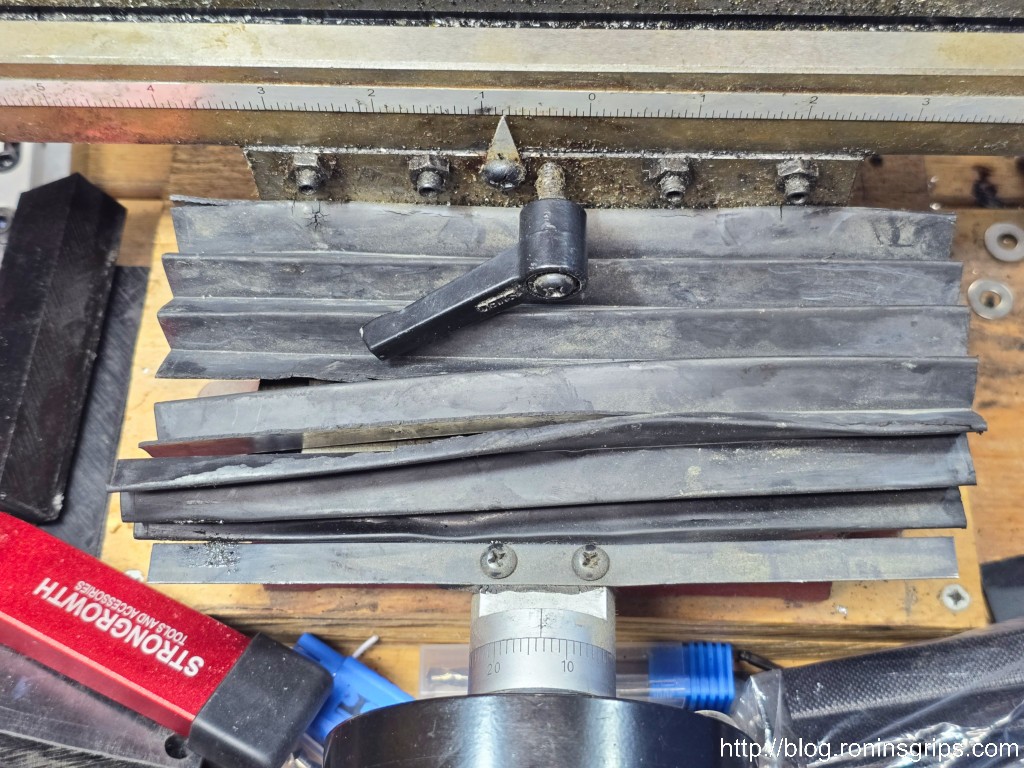
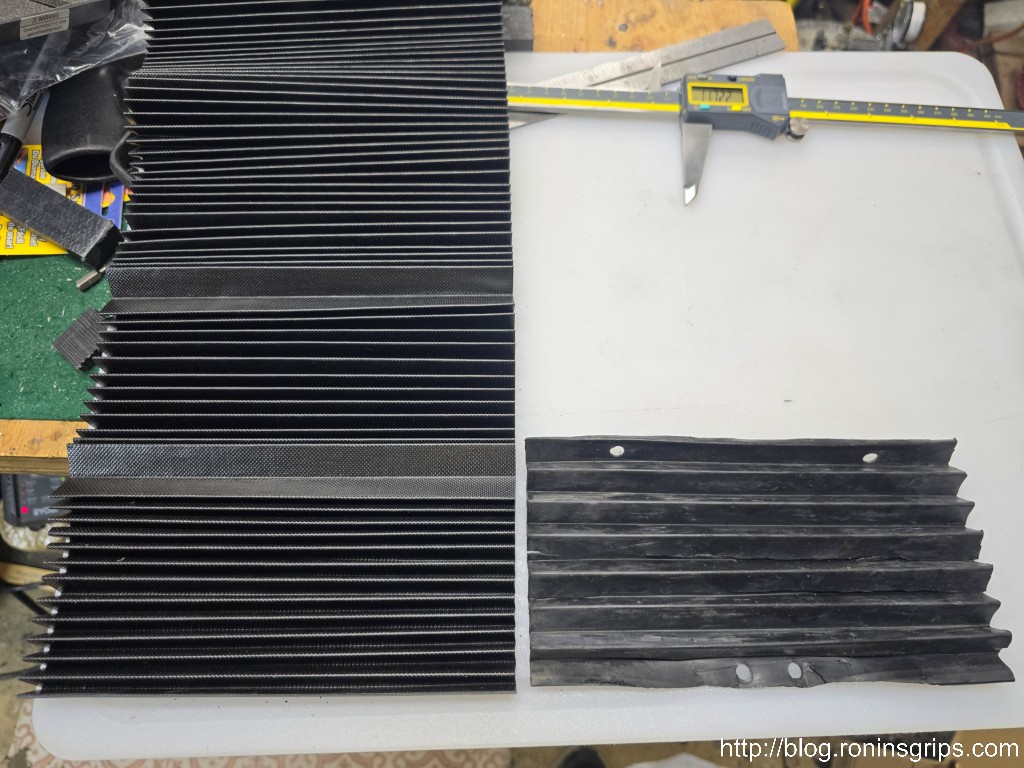
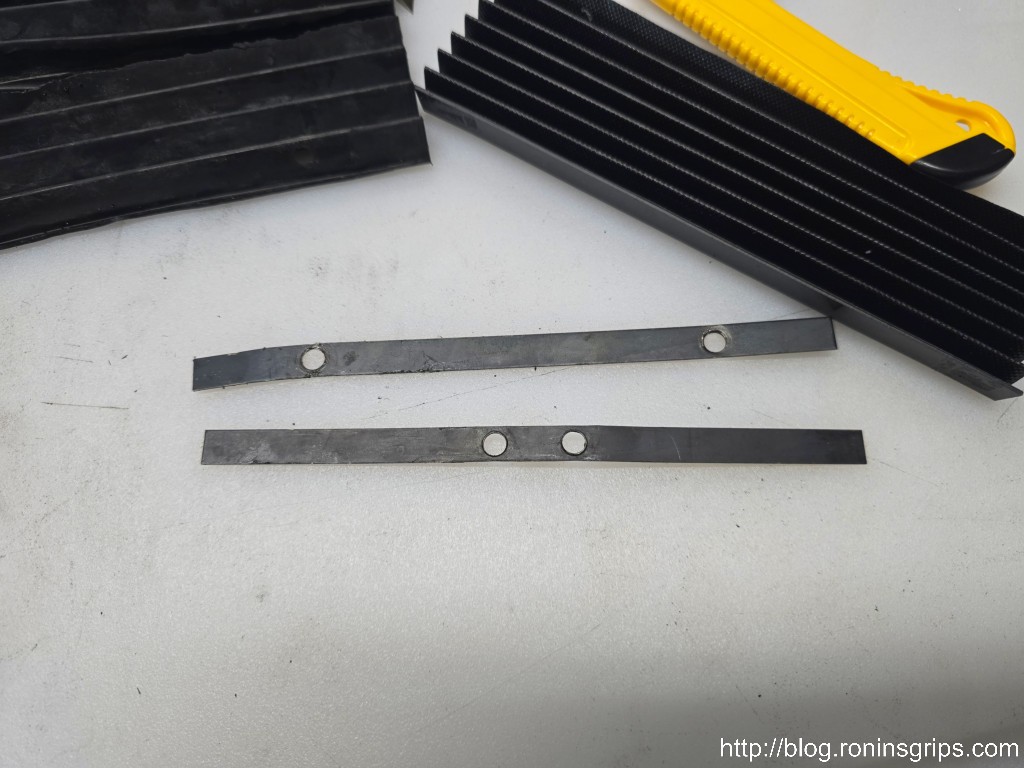
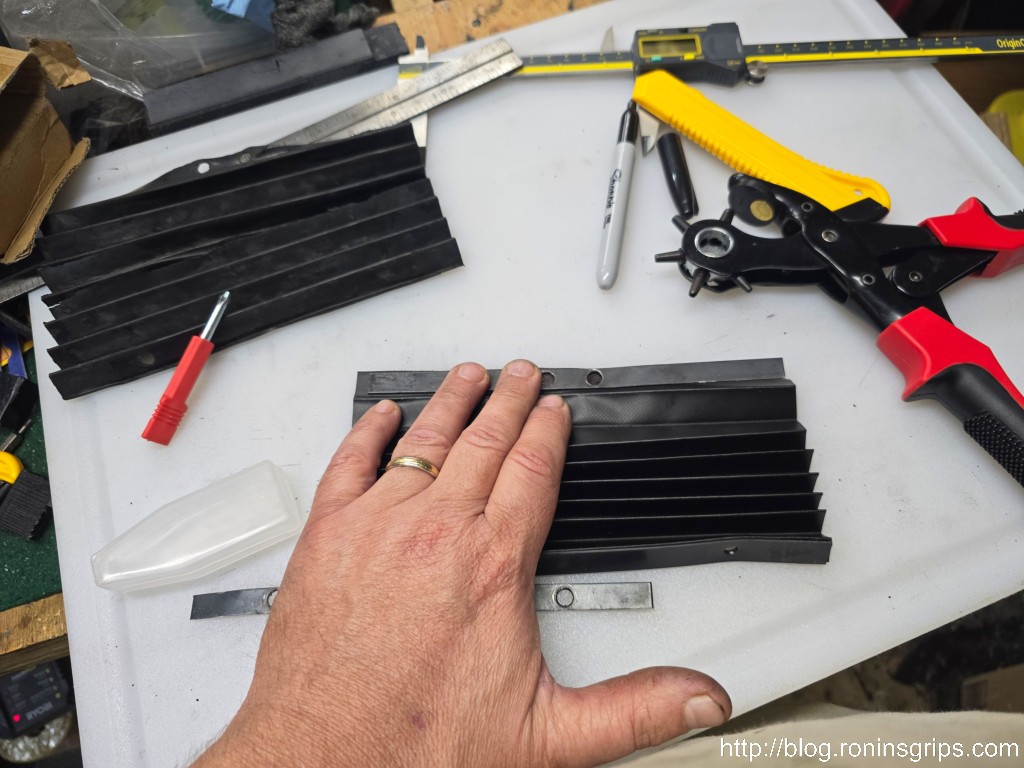
I removed the front cover and took the time to clean and lube the ways and threaded rod.The old way cover is to the right. The 200mm x 1500mm new way cover is to the left. It turns out the folds are 1.5cm on both so I just counted the peaks and made my cut. If the fold height didn’t match then I would have fit it based on the smoothed out length.I cut the length of new cover I needed and then used the old brackets to mark the hole locations.I marked the holes and then used a revolving hole punch plier to approximate the openings. I actually own a hole punch set but I don’t know where I put it – that would have been more elegant than my nibbling around the circle with the pliers but I got the job done.
I then did the same for the back and installed the way covers on the mini mill. The next time I do them, I may glue a plastic strip on each end to make it a tad more secure at each end but what I have is working great.
Looks much, much better and the ways are once again protected. It’s a tad floppy at the ends and next time I will add either a small steel or plastic strip the full width of the cover, scuff both sides for a good grip and join them with Starbond black super glue. The cover is perfectly serviceable as-is for now but am keeping that in mind for the future. By the way, that is a Dayton CNC 12″ workholding plate. I have two of them and they’re great. Here’s the link and the wait time is about 2-4 weeks. The positioning strips are from a vendor called Bulk Man 3D on AliExpress. All the holes and fasteners are 1/4-20 and the metric strips can accomodate 1/4-20 socket head screws in case you are wondering.I’m not sure what this material is but have a suspicion it will hold up better than the rubber. Time, use and exposure to lubricants will tell though. I’ve only had them on for over a week but cutting oil and penetrating oil don’t appear to have affected the material thus far.
Summary
The new way covers are working great. You can make your own and have plenty left over for the next time plus it is cheaper regardless. I have no problem recommending you buy this way cover and cut it to fit. I do suspect it will hold up better than rubber given it is fabric reinforced and not just plain rubber and we’ll see if that proves to be true.
I hope this helps you out.
Note, I have to buy all of my parts – nothing here was paid for by sponsors, etc. I do make a small amount if you click on an ad and buy something but that is it. You’re getting my real opinion on stuff.
If you find this post useful, please share the link on Facebook, with your friends, etc. Your support is much appreciated and if you have any feedback, please email me at in**@*********ps.com. Please note that for links to other websites, we are only paid if there is an affiliate program such as Avantlink, Impact, Amazon and eBay and only if you purchase something. If you’d like to directly contribute towards our continued reporting, please visit our funding page.
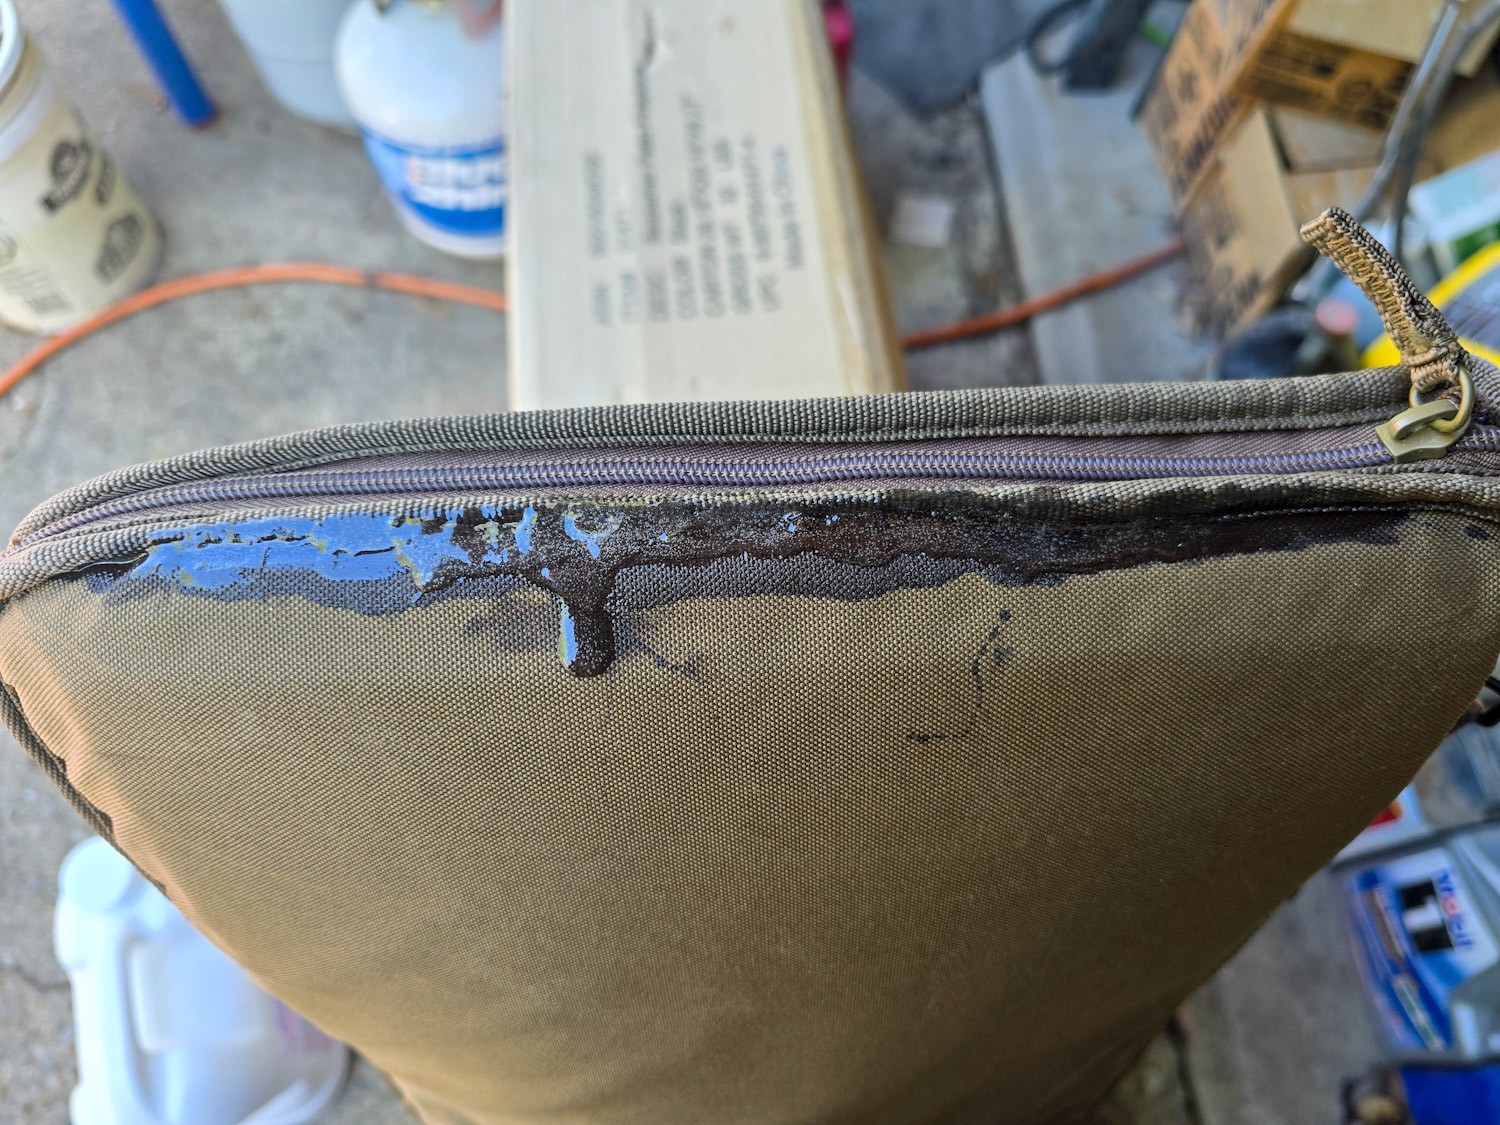
Have you ever needed to use a nylon soft-sided rifle or pistol case only to find a seam is pulling apart? Yeah, that happened to me again the other day figured it would be a good time to share a trick with you.
I re-use my cases and went to use a flat dark earth colored Midway rifle case only to find that a seam along an edge was pulling apart. Nylon is tricky – on one hand it is pretty strong and rot resistant but on the other, if you don’t pay close attention to what you are sewing and get to close to the edge or lack proper reinforcement, it can pull apart.
I bought two of these cases many, many years ago when Midway had a sale. How many years ago? So many that I have absolutely no idea how many – that’s the best I can tell you. Maybe 8-10+ years ago. The warranty was history long ago so I needed to fix the case. What I have found is that gluing the seam works wonders. The earlier you catch it the less obvious it is.
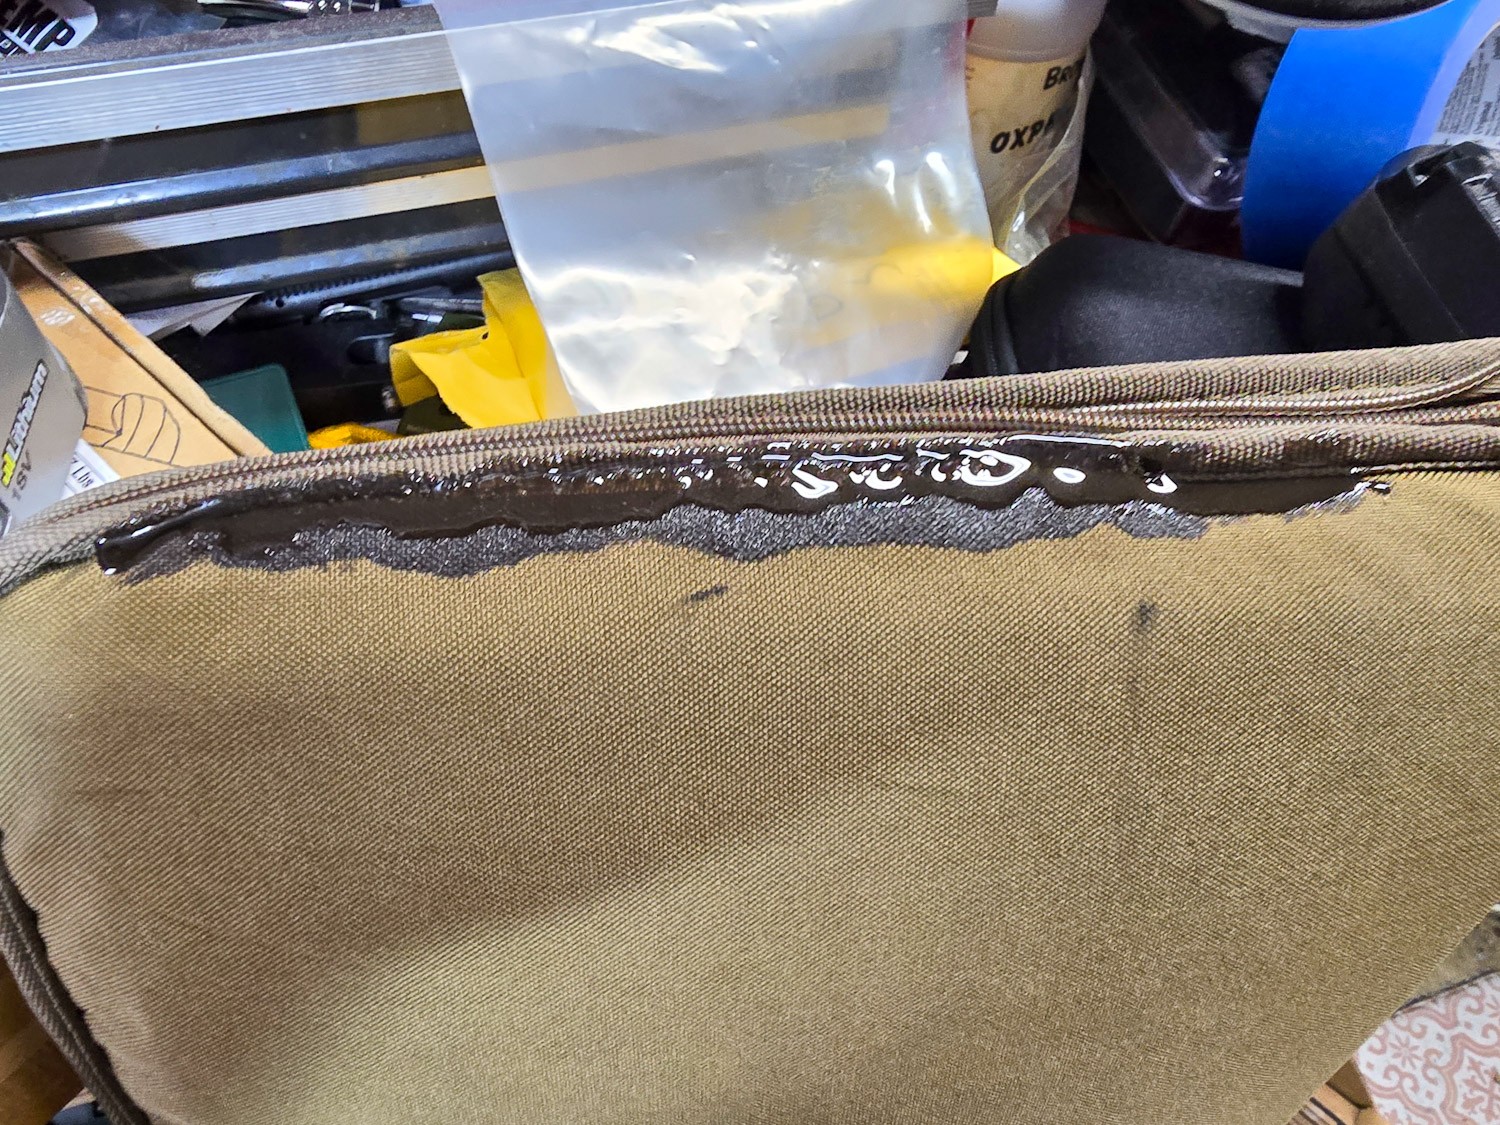
I didn’t think to take photos until part way into the repair. You need a glue that can bend and flex without snapping so any glue that dries, cures and is rigid will not work. I used Gear Aid’s Seam Grip WP have have also had very good luck with ShoeGoo. I am very impressed by Seam Grip and that is what I use the most. I’ll use the ShoeGoo too – don’t get me wrong and it works – it’s just that Seam Grip has become my go-to over the years. The one perk of Shoe Goo is that they have a black colored formulation.
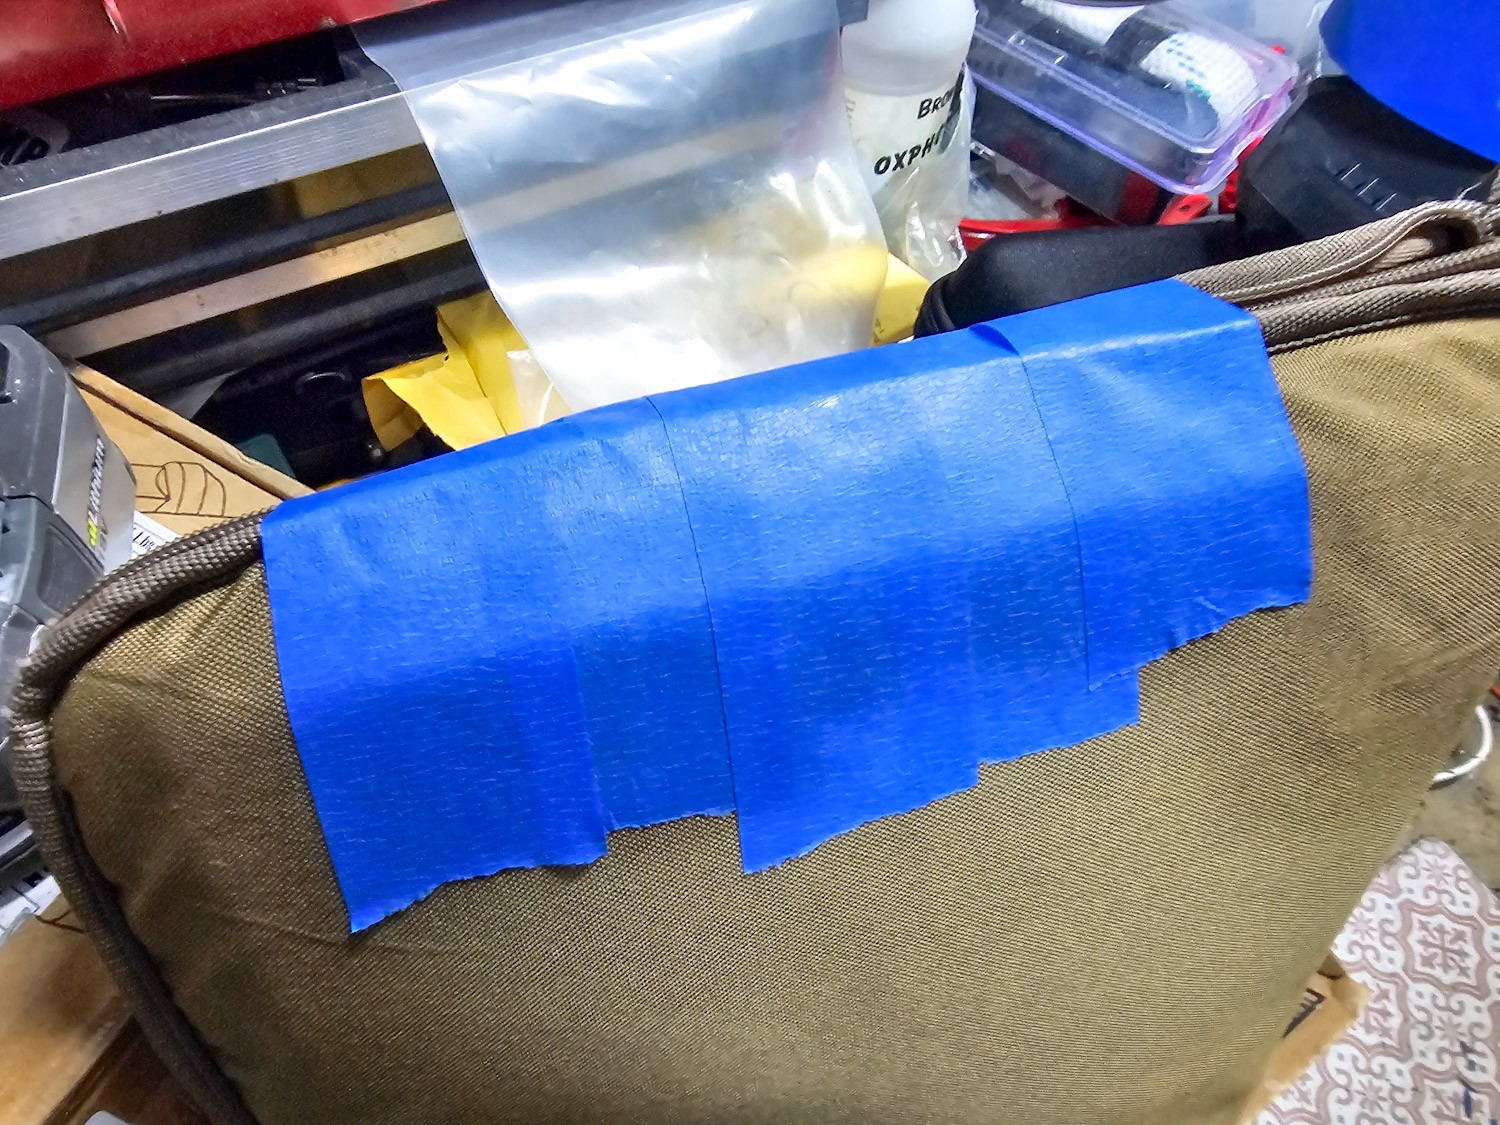
I find that doing 2-3 passes with the glue to work best. I work the first one in try to secure the nylon the way I want or at least get it close. When you do the repair, go a bit further in all directions to make sure the adhesive has a good solid hold.Use something to secure everything while the glue cures. I use blue painter’s tape here. I’ve also used clamps, rubber bands, you name it to hold things in position.Not all repairs go quite the way I planned. This was the third layer of the seam glue and I put it on thick to fill up a bit of a gap and it ran on me overnight. It may not look great but it’s good to go.
Summary
Using glue to repair a seam absolutely works, I’ve done it many times and never had it let go provided I get 2-3 good coats on it and overlap the hole. Follow the directions on whatever glue you do use as this repair will take 2-3 days to do as each coat cures. If you rush it, you risk not having a strong bond.
If you find this post useful, please share the link on Facebook, with your friends, etc. Your support is much appreciated and if you have any feedback, please email me at in**@*********ps.com. Please note that for links to other websites, we are only paid if there is an affiliate program such as Avantlink, Impact, Amazon and eBay and only if you purchase something. If you’d like to directly contribute towards our continued reporting, please visit our funding page.
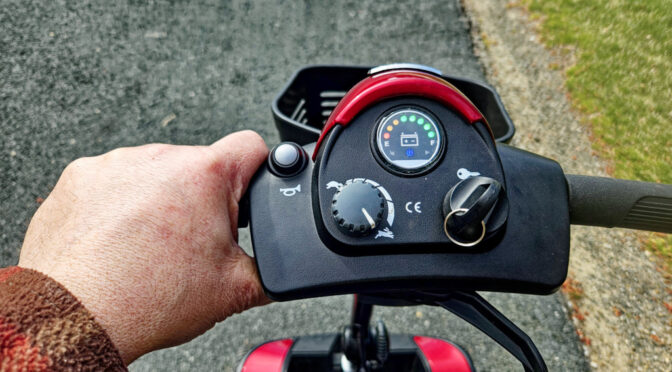
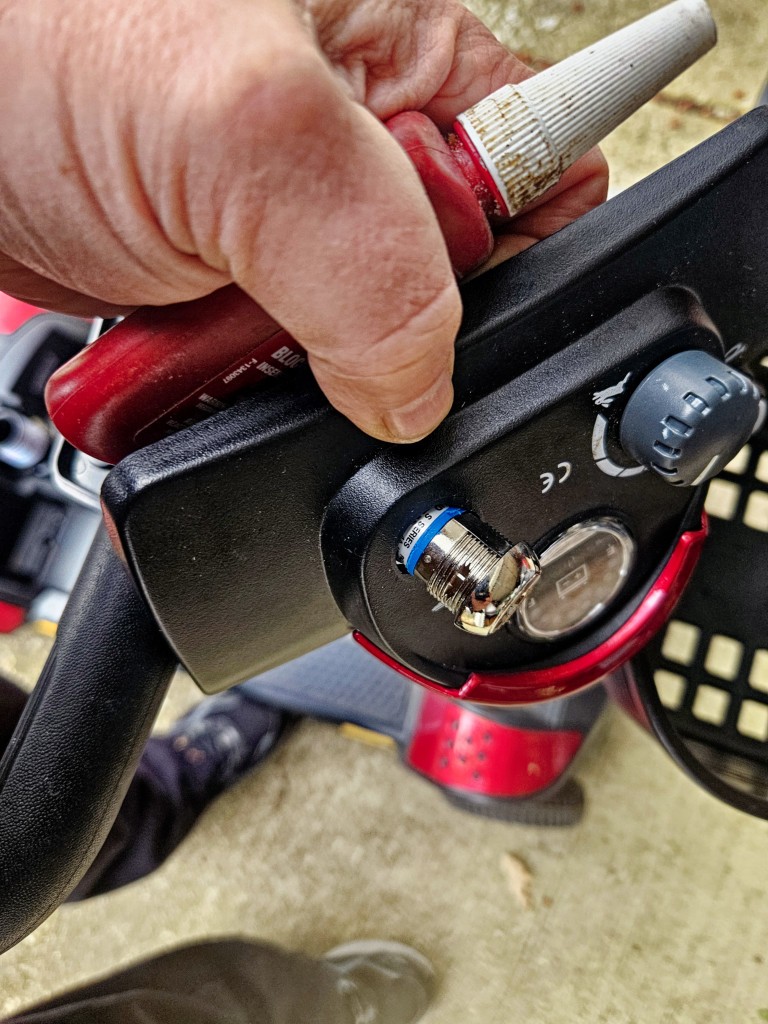
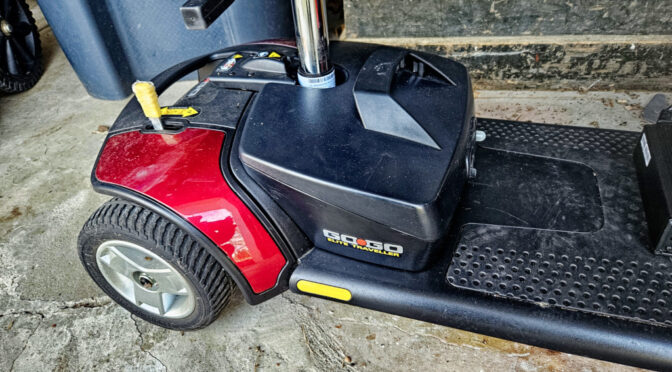
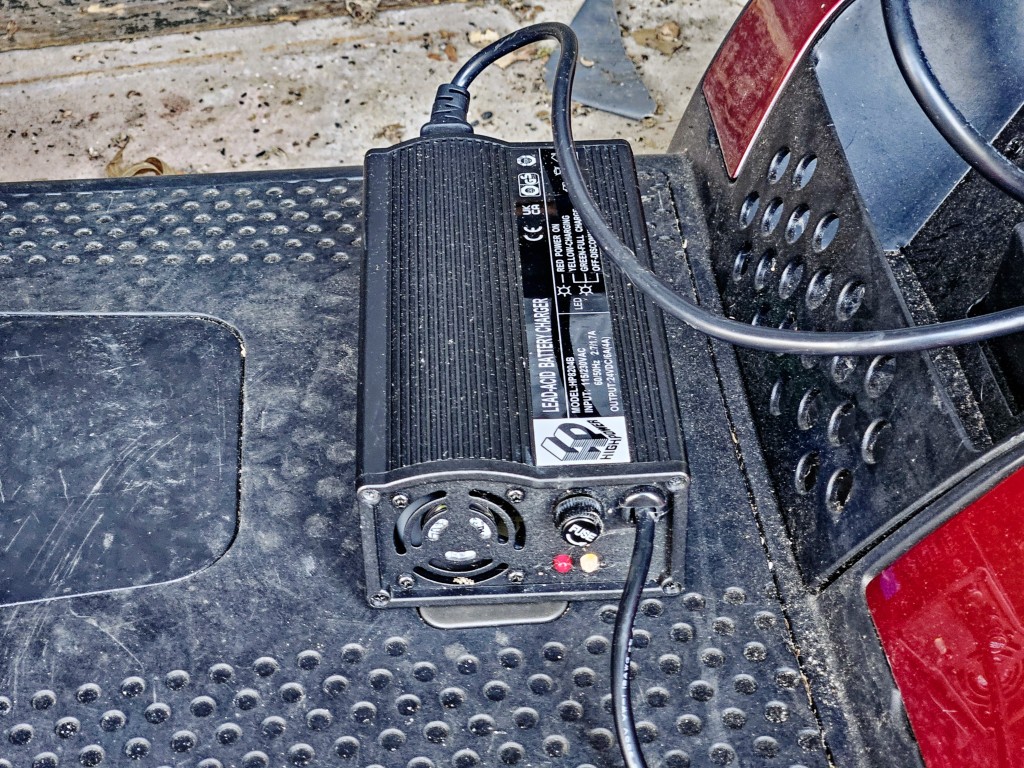
It was our last outing with the Scooter that I noticed the ignition switch, if we can call it that, was floating on my mother-in-law’s Pride Mobility GoGo Eliter Traveller Scooter. I was surprised that it happened given how well it had performed up to that point. From what I could tell, the backing nut had slowly vibrated loose until it literally fell off the back of the switch. Everything worked – all the parts were there but I had to put it back together. I figured a blog post would help anyone needing to tighten the switch or even replace it.
To work on the scooter, I removed the chair, its mast and the battery pack. I also removed the forward and reverse control lever that is held in by two screws. In hindsight, I am not sure I needed to do that. By the way, removing the battery compartment also reduces the risk of sparks/shorts by disconnecting the power from the system.
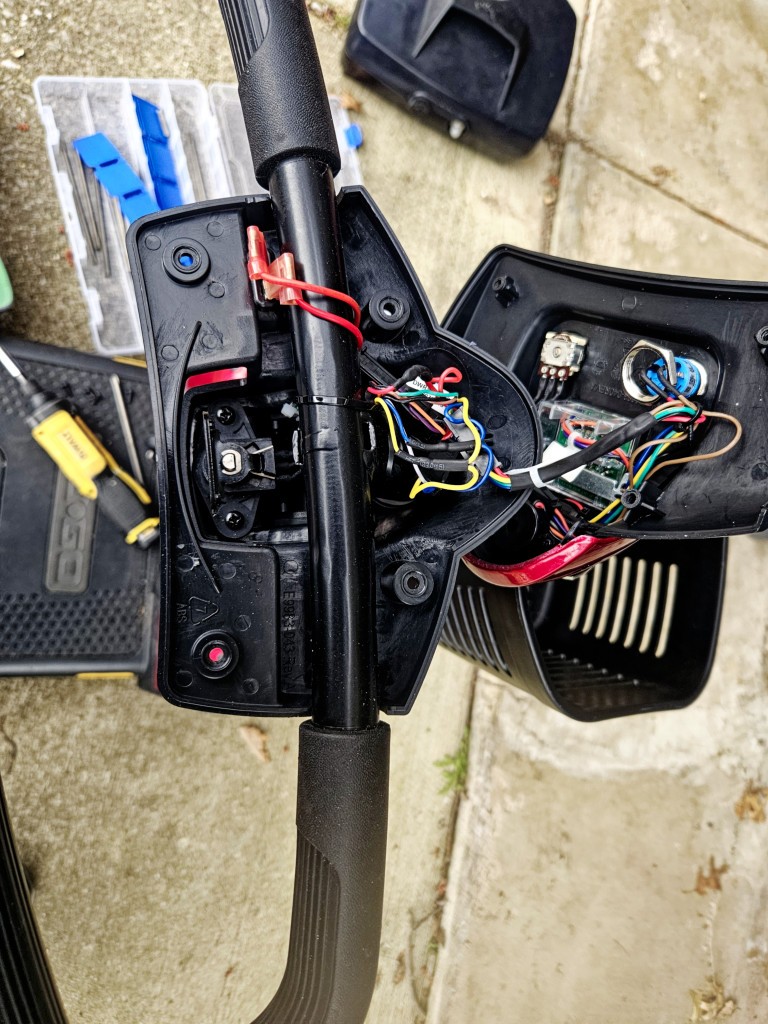
To get inside the center console, you need to remove four screws – the two closest to the operator and the two furthest forward. The ones in the middle hold the lower half to the handlebar and do not need to come out.
One small detail, I had to push the top cover slightly towards the back towards the seat to get it to lift off once the screws were gone. Reinstalling the top recover also meant I had to slide it forward slightly before reinstalling the screws.
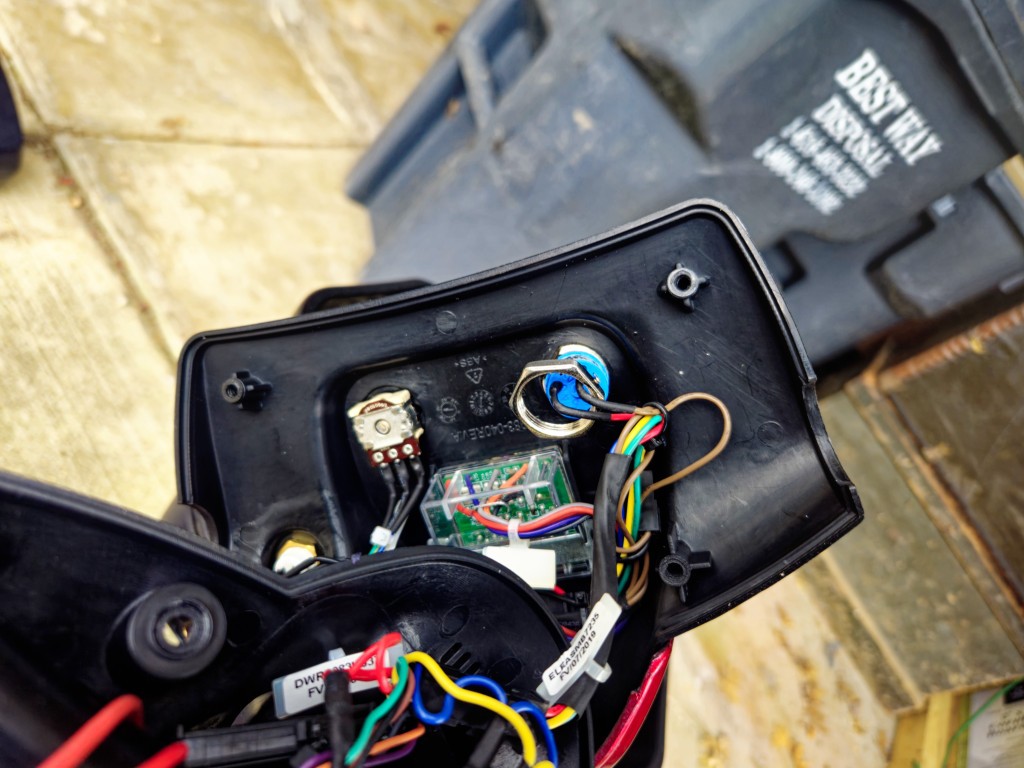
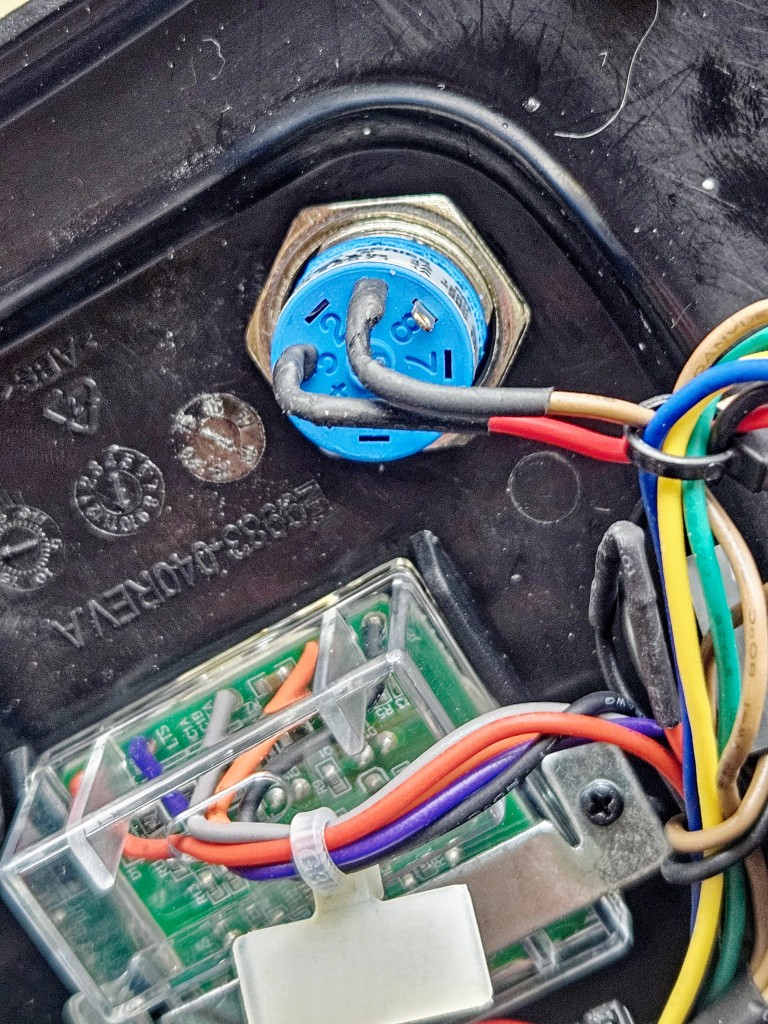
It dawned on me after starting that I had better take some pictures. The operator is to the left and the forward is to the right in this photo. You can see the four empty screw holes that need to come off. On the top cover you can see the loose locking nut.Another view of the switch and loose nut.If you were replacing the ignition switch, you’d unplug the two wires, loosen the nut and push the ignition switch assembly out through the top and insert a new one. That is Loc-tite blue medium strength thread locker. I put that on the switch with the body out so the nut will not rattle loose again.The nut is down snug. I thought a photo might help if someone needs to know what wires go to what terminal numbers. There are only two wires but three terminals on this model.
From there, I slid the top back on and reinstalled the screws and put the rest of the stuff back on.
Works great now.
Bought Spare Keys Too
One last note, mama only had one key for the scooter. Turns out they are generic and not keyed to a specific scooter. I bought a spare pair off Amazon that works great. This way she can have a key and I can have one on a trip.
Summary
Her key switch is good to go and no we have some spare keys too. I hope this helps you out.
Note, I have to buy all of my parts – nothing here was paid for by sponsors, etc. I do make a small amount if you click on an ad and buy something but that is it. You’re getting my real opinion on stuff.
If you find this post useful, please share the link on Facebook, with your friends, etc. Your support is much appreciated and if you have any feedback, please email me at in**@*********ps.com. Please note that for links to other websites, we are only paid if there is an affiliate program such as Avantlink, Impact, Amazon and eBay and only if you purchase something. If you’d like to directly contribute towards our continued reporting, please visit our funding page.
Back in 2022, we bought a used Pride Mobility GoGo Elite Traveller scooter for my mother-in-law. I wrote a blog post about replacing the battery charger and the original batteries were still good though I knew that if the scooter was made in 2019, they probably only had a year or two left. Guess what? They quit charging in the Fall of 2023, pretty right on schedule. Living in Michigan, my mother-in-law wouldn’t be using it in the Winter as she doesn’t go out much so we decided to wait until the Spring of 2024 to deal with it. Well, that gives me two things to tell you about in this post.
First – Dead batteries freeze and I made an avoidable mess
Ok, the decision to put the battery replacement off made sense monetarily. Why spend the money just to have it sit. Well, we store her scooter in her attached but unheated garage, we had plenty of days well below freezing – some even in the single digits – and her batteries froze and busted their cases.
In the back of my head I knew dead batteries pretty much froze just like water at 32 degrees Farenheit but it never crossed my mind as part of the decisionmaking. If we had taken the battery compartment indoors, it would not have been an issue.
For giggles, I looked it up. Fully charged batteries with fresh electrolyte will not feeze until around -40F and websites give a ton of different answers on that with two saying that number is -76F. I saw mention that If the charge is around 40% the freezing level rises to around -16F but another website said -20F at 80% so go figure. Where they all agree is that if the battery is dead, meaning 0% charged, then it is the same as water at 32F. Why? The electrolyte is 25% sulferic acid and 75% water and the charge is what lowers the freezing point.
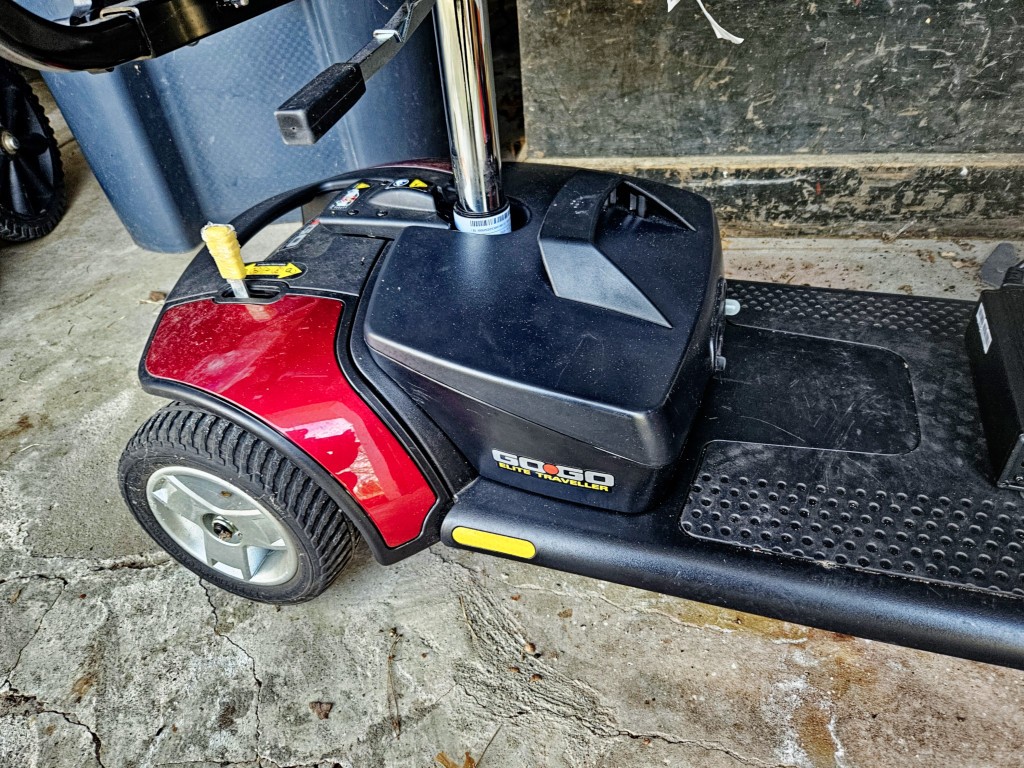
How did I find out? Well, we needed mama’s scooter for an upcoming trip so I lifted the housing off the scooter and brought it home. By the way, if you have never removed your battery pack below the seat on the floorboard – lift straight up firmly. There is a very strong velcro-like material on the bottom that does its job and doesn’t want to let go but will if you lift straight up. Technically, what they are using is Dual Lock or a clone of it that is stronger than traditional Velcro hook-and-loop fasteners.
I brought the compartment home, flipped it over on my bench to remove the 8 screws and what looked like water dripped on bench. Also, electrolyte has a unique smell so I knew I was in for a mess and moved it all onto the concrete floor so I could take it apart.
Safety note: You are working with a solution that has a relatively small amount of sulferic acid in it (3 parts water + 1 part acid). Wear nitrile gloves, protective eye wear and have good ventilation. I’ve found some people are very sensitive and others are not. I’m lucky and it doesn’t really bother me but I’ve worked with people that would get chemical burns real easy. So, if this is your first time and you have no idea, play it safe.
The batteries were stuck in the compartment. I suspected they used something to secure the batteries because they did NOT want to come loose. I thought they had really gone wild with Dual Lock fastener strips so I pulled hard with my fingers – nothing. I tried lifting with a little pry bar and didn’t get anywhere. Finally, I F-bombed it, got some Vise Grip pliers, got a real good hold of a terminal and lifted with all the strength I could muster — then I heard the tearing sound of velcro, saw the battery starting to rise up and kept pulling until the battery lifted out. Did not expect that!
Yes, there was a regular hook-and-loop type velcro on the end of each battery and the bottom of the compartment. What had happened was the adhesive they put on the strips on the bottom of the case and slowly oozed around and glued the batteries down as well. Sheesh. I was just glad the plastic of the compartment did not snap.
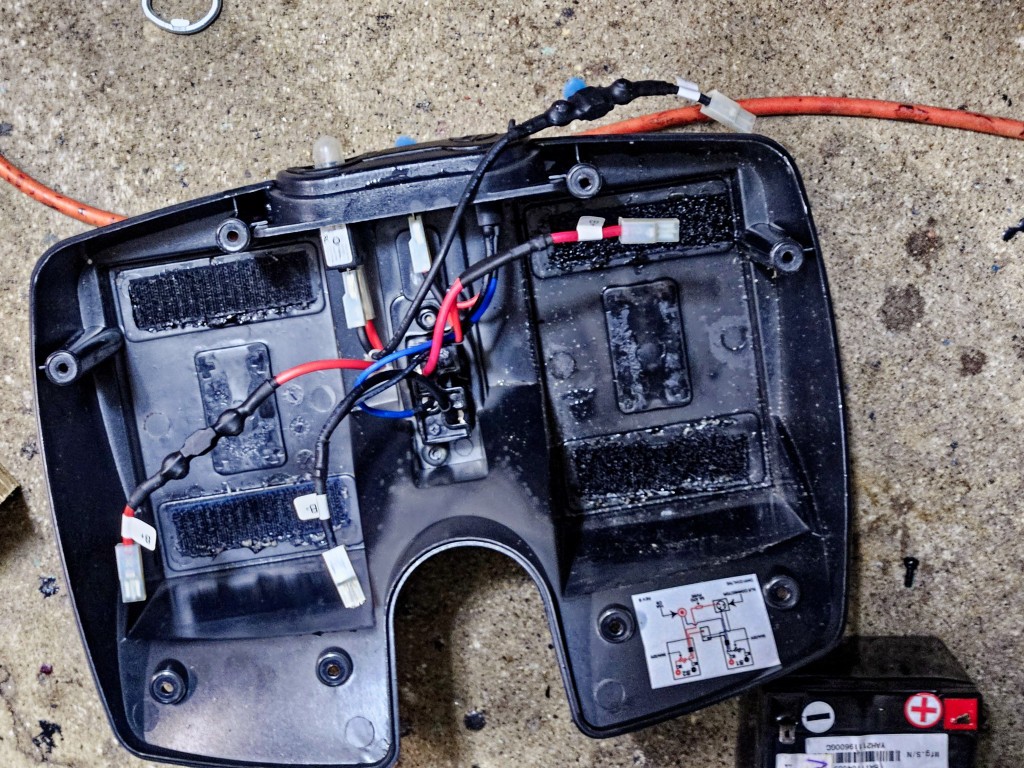
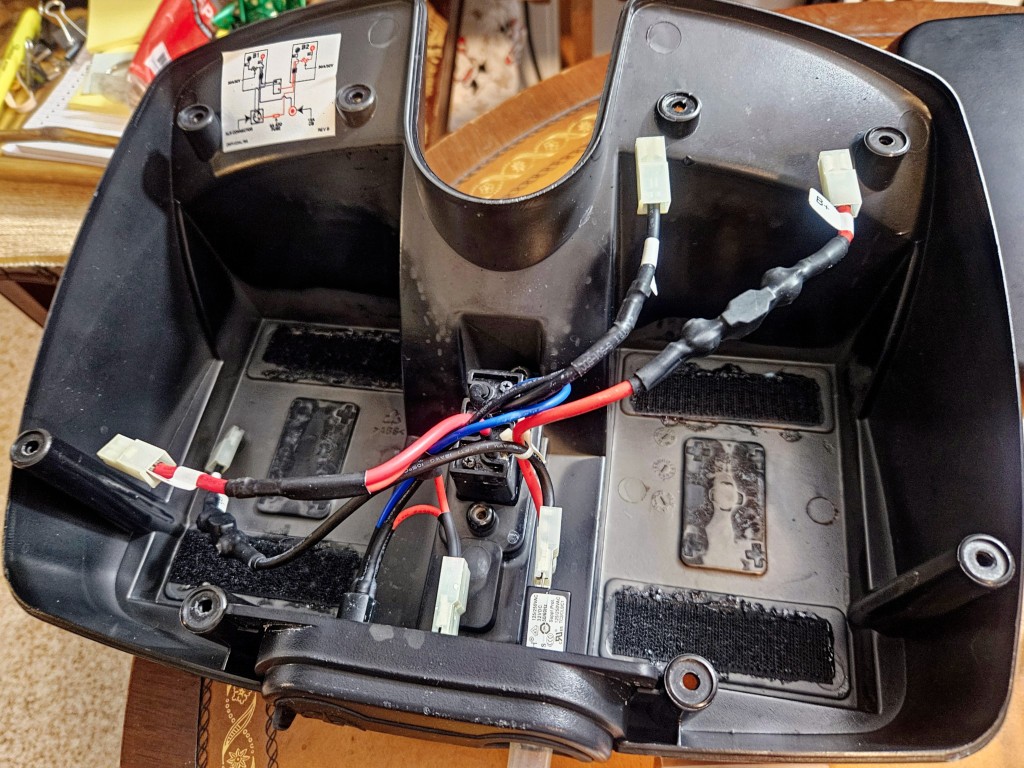
This is what the inside of the battery compartment looks like. The shiny black stuff around the velcro is the adhesive that oozed out and “glued” the batteries in place.Both sealed batteries had their cases deform and crack open when their electrolyte froze.
With the batteries removed, I poured some water with baking soda in it to neutralize the acid in the velcro, the ends of the wires that were floppng around and the compartment. I did not dunk everything because there is a circuit breaker that I did not want to get water in.
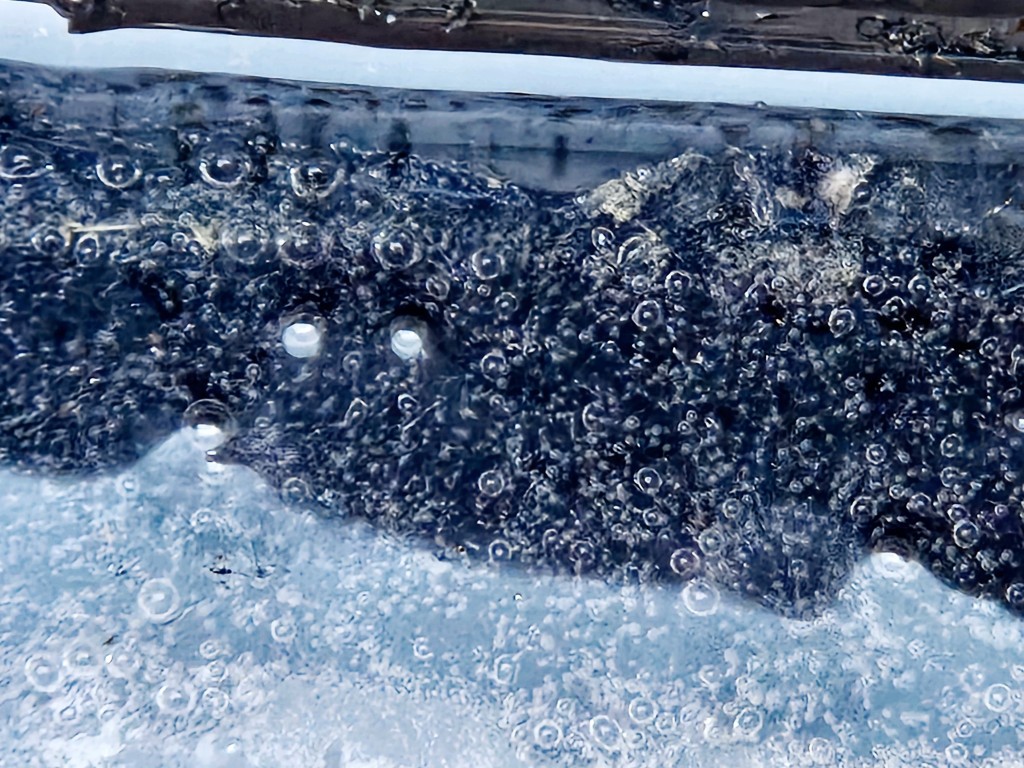
I’m amazed at how this photo I snapped in a rush turned out. The bubbles are the chemical reaction bretween acid residue and the baking soda and water solution. Stir the baking soda and water around to make sure there is plenty of it to neutralize the acid. When all of the acid has been neutralized, the bubbles will stop and you can rinse it off.
I then carefully rinsed out the water, dried it with a towel and put it front a fan overnight to completely dry out. I did this to the top and bottom of the compartment and the screws that hold the compartment together.
When everything was dry, I applied Silicode spray and wiped it off.
It looked great once we cleaned it up. Note, getting rid of acid residue is something you always want to do. Otherwise, vapors can cause parts to oxidize.
Moral of the story – take the battery compartment in for the winter and avoid the risk of it freezing. I blew an hour cleaning up an avoidable mess.
Second – Actually replacing the batteries is pretty easy!
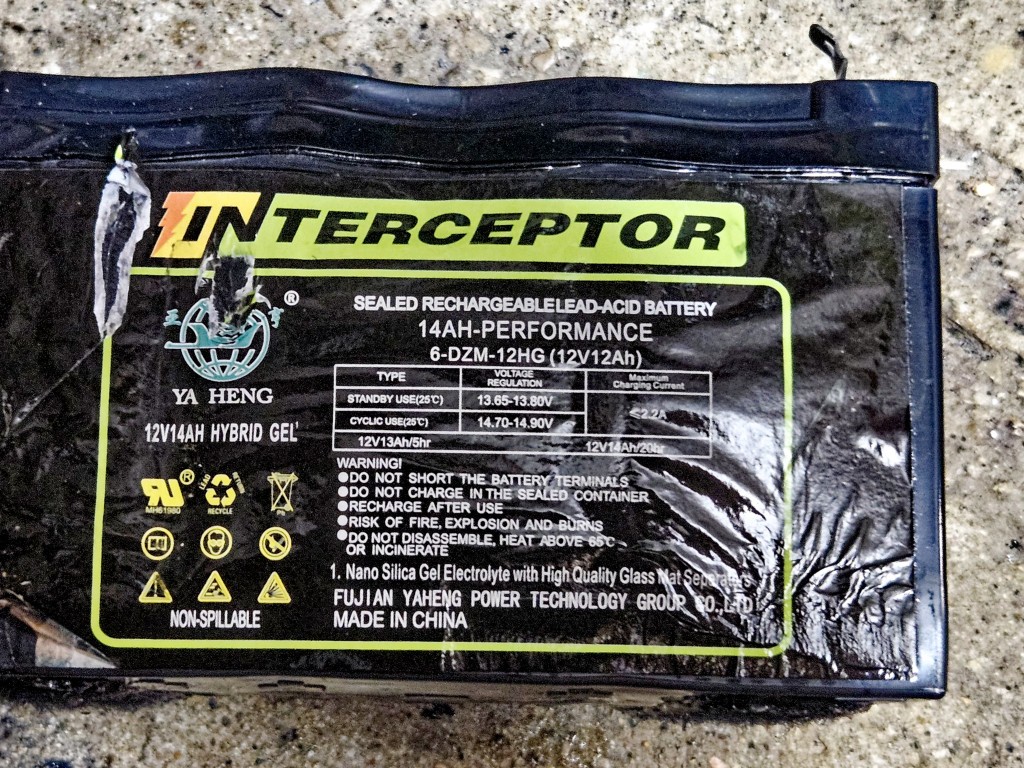
Okay, actually replacing the batteries is straight forward – although you may have to fight the velcro’s adhesive like I did. I could not find Interceptor brank 6-DZM-12HG batteries and different firms claimed compatibility but had different sizes so I decided to confirm the details by looking at the now-very dead originals.
The scooter uses two identical batteries. This one froze and that’s why the case and label look so bad.
Volts: 12
Capacity: 14 AH
Size: 3.9 x 3.9 x 5.9 using my calipers. Including the F-type tabs, the total height was about 4 inches
By the way, the dimensions are really important because Pride Mobility sold both standard and extended range battery systems. The latter has batteries far bigger than what will fit in the standard model’s case.
With the above, I was ready to dig on Amazon for batteries. Lots of sellers claimed their batteries were compatibile with the GoGo Elite Traveller but some only had 12AH of capacity which means those batteries would not last as long / go as far.
I also pay attention to reviews and want more than 30 reviews – the newer the better – to get an idea. Actually read the reviews. Some sellers will change the product for sale so you see reviews for one product but they are selling another.
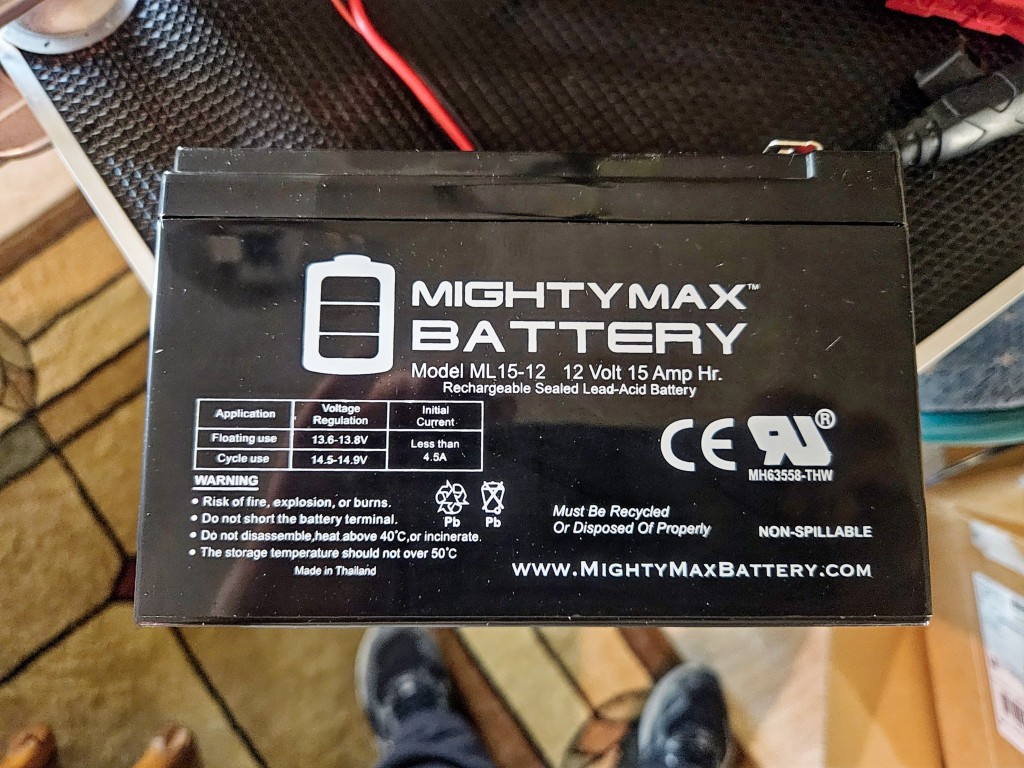
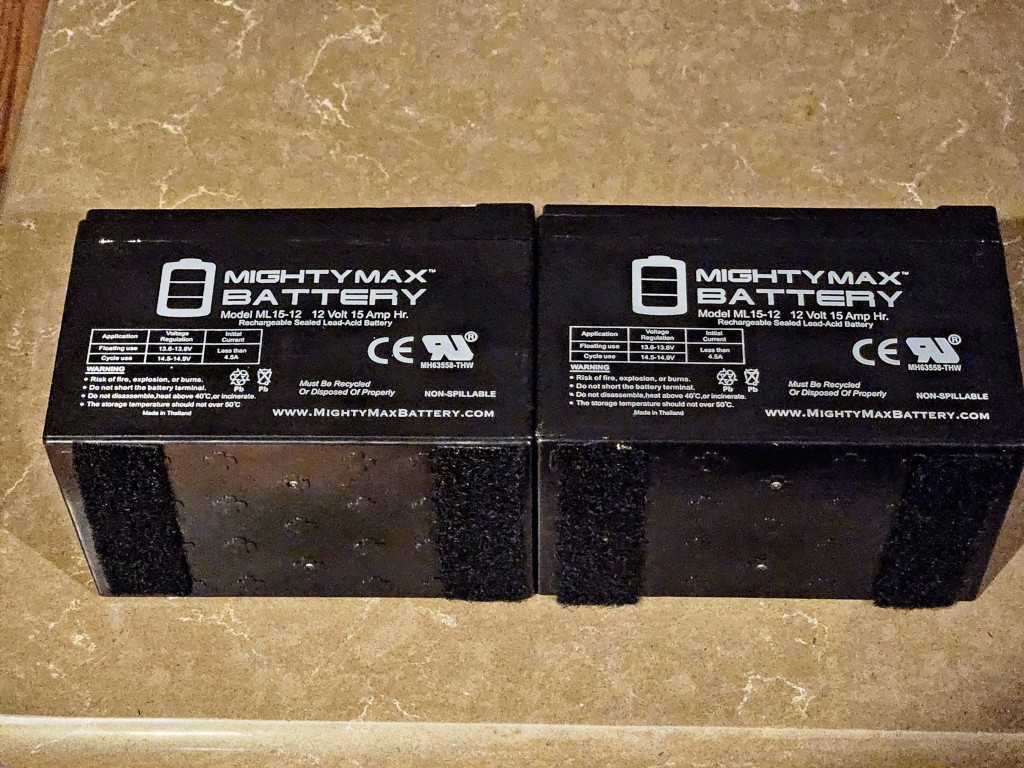
One listing really jumped out at me – Mighty Max 12V 15AH batteries with 330 reviews and a 4.6 star rating so I took a closer look. The reported 15AH capacity puts them slightly ahead of the original 14AH batteries. The reported size was 5.94×3.86×3.86 – which would work with mine – the 5th photo in the listing shows specifications including the dimensions. That’s what I went with – Mighty Max model ML15-12. They arrived a few days later direct from the seller and seemed to be everything they said they would be.
I wrote the date on the batteries with a paint pen and applied industrial velcro to the end of each battery and let them sit overnight for the adhesive to bond. I really didn’t want to deal with the batteries sticking again so I sprayed the bottom of the battery and the bottom of the compartments with mold release compound (which I have handy due to my casting business). You could get the same effect by buffing the bottom of the battery with light shoe/boot wax.
I put two strips of industrial velcro on each battery and then set them on the table with the weight of each battery pushing the velcro’s adhesive into place. In general, self-adhesive velcro needs to sit at least overnight to get a good bond otherwise it will pull right off. Also, clean the bottom of the battery with alcohol to make sure it is clean and doesn’t have any release agent left on it from when they were made.
I didn’t bother bringing mama’s 24 volt charger home and instead just topped off each 12 volt battery before I installed them. It took my Noco 12 volt 5 amp charger maybe 3-5 minutes to top off each.
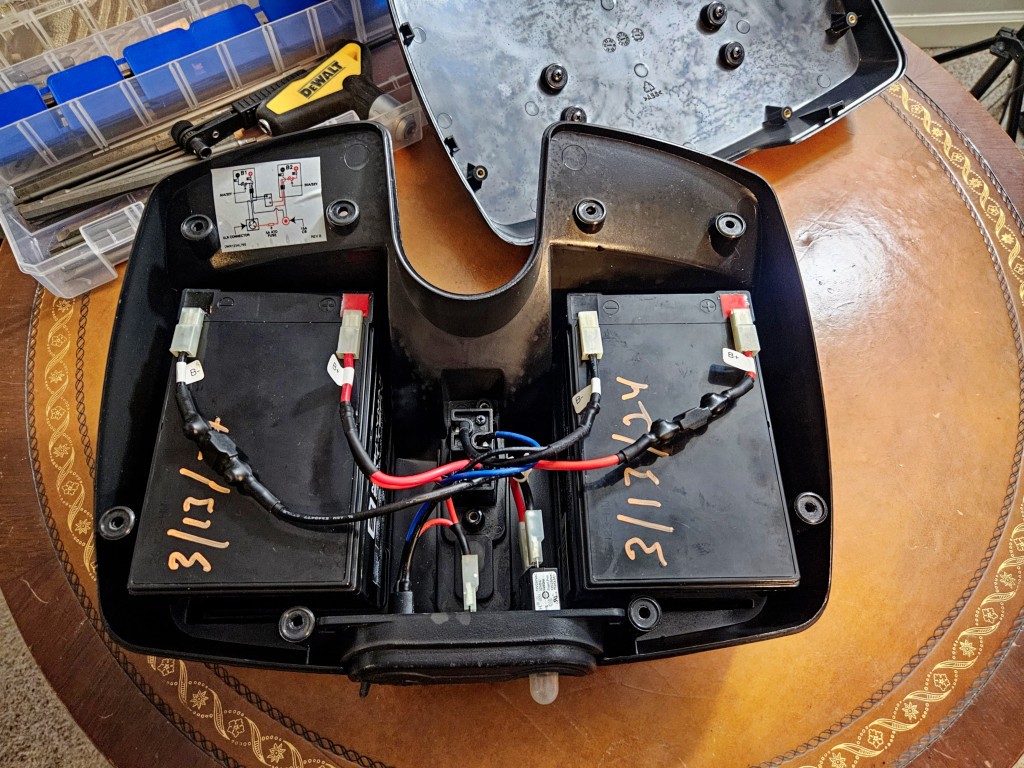
Wiring is easy red goes to postive and black goes to the negative. Then you put on the cover and reinstall the screws.
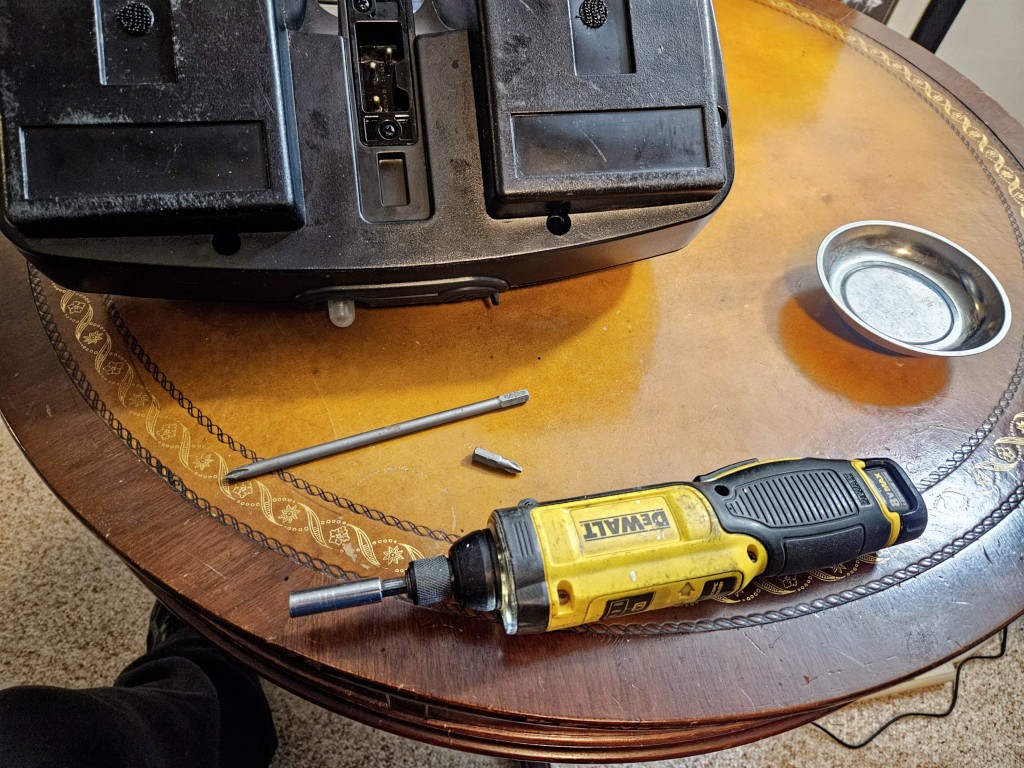
Wires are re-attached – note the color coding. Red to red and black to black. If I ever need to know, I can see the day I installed them also thanks to the orange paint pen.I use a Dewalt cordless screwdriver a great deal due to my having Carpal Tunnel problems. The regular length Philips bit and extended length are Dewalt also. I’ve used a ton of cheap import bits and find that they wear out too fast with the Philips bit edges rounding over and not getting a good bite. You can definitely use your favoite Philips screw driver as well of course.Installed and ready to go.
The batteries worked great. I weigh probably about 240 pounds with my jacket and I drove mama’s scooter about a half mile with no drop in the charge indicator and that was good enough for me. I am sure I weigh twice what she does,
The scooter was almost ready for our trip other than fixing a loose ignition switch which I will cover in another post.
I still think the Pride Mobility GoGo Elite Traveller scooter is very well made. Mama enjoys getting her freedom back and will sometimes joke and head off ahead of us during a walk.
Two big takeaways I want you to have from this blog – Don’t forget batteries can freeze . Second – you can definitely change the batteries yourself. You do not need to buy a whole new cabinet and battery assembly unless you really want to.
I hope this helps.
Note, I have to buy all of my parts – nothing here was paid for by sponsors, etc. I do make a small amount if you click on an ad and buy something but that is it. You’re getting my real opinion on stuff.
If you find this post useful, please share the link on Facebook, with your friends, etc. Your support is much appreciated and if you have any feedback, please email me at in**@*********ps.com. Please note that for links to other websites, we are only paid if there is an affiliate program such as Avantlink, Impact, Amazon and eBay and only if you purchase something. If you’d like to directly contribute towards our continued reporting, please visit our funding page.
In 2014 we visited Greece, and on December 30th, we were in Delphi staying at a small quaint hotel whose elevator put the fear of God in us. The vibrant town was quiet and subdued – the summer tourists weren’t there and the arrivals for New Years Eve handn’t arrived so we had the town more or less to ourselves and some locals.
We walked by a shop and they invited us in. They had tons and tons of bowls, plates, spoons and what have you made from olive wood. There are huge ancient groves of olive trees tended by families for generations surrounding Delphi so there was an ample supply of olive wood to draw from.
Olive wood is simply gorgeous when sanded and finished bears all kinds of browns, tans and wavy grain structure. It’s strong, dense and does great indoors – especially when oiled but doesn’t do as well outdoors or with insects as it lacks natural oils.
At any rate, the products were all made in and around Delphi. We opted for some nice kitchen spoons and a juicer given the striking look of the wood. Before we knew it, the trip was over and we headed home.
December 2023
I was trying to think of something to do as a surprise for my wife and happened across the spoons and juicer from Delphi – they were looking pretty tough. The wood was faded and you could just barely see what they looked like 9 years prior so I decided to clean them up.
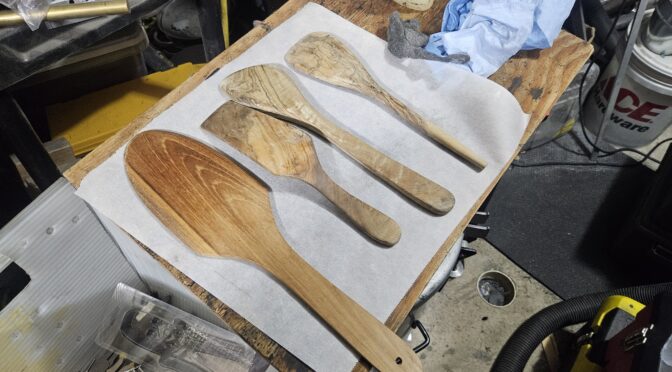
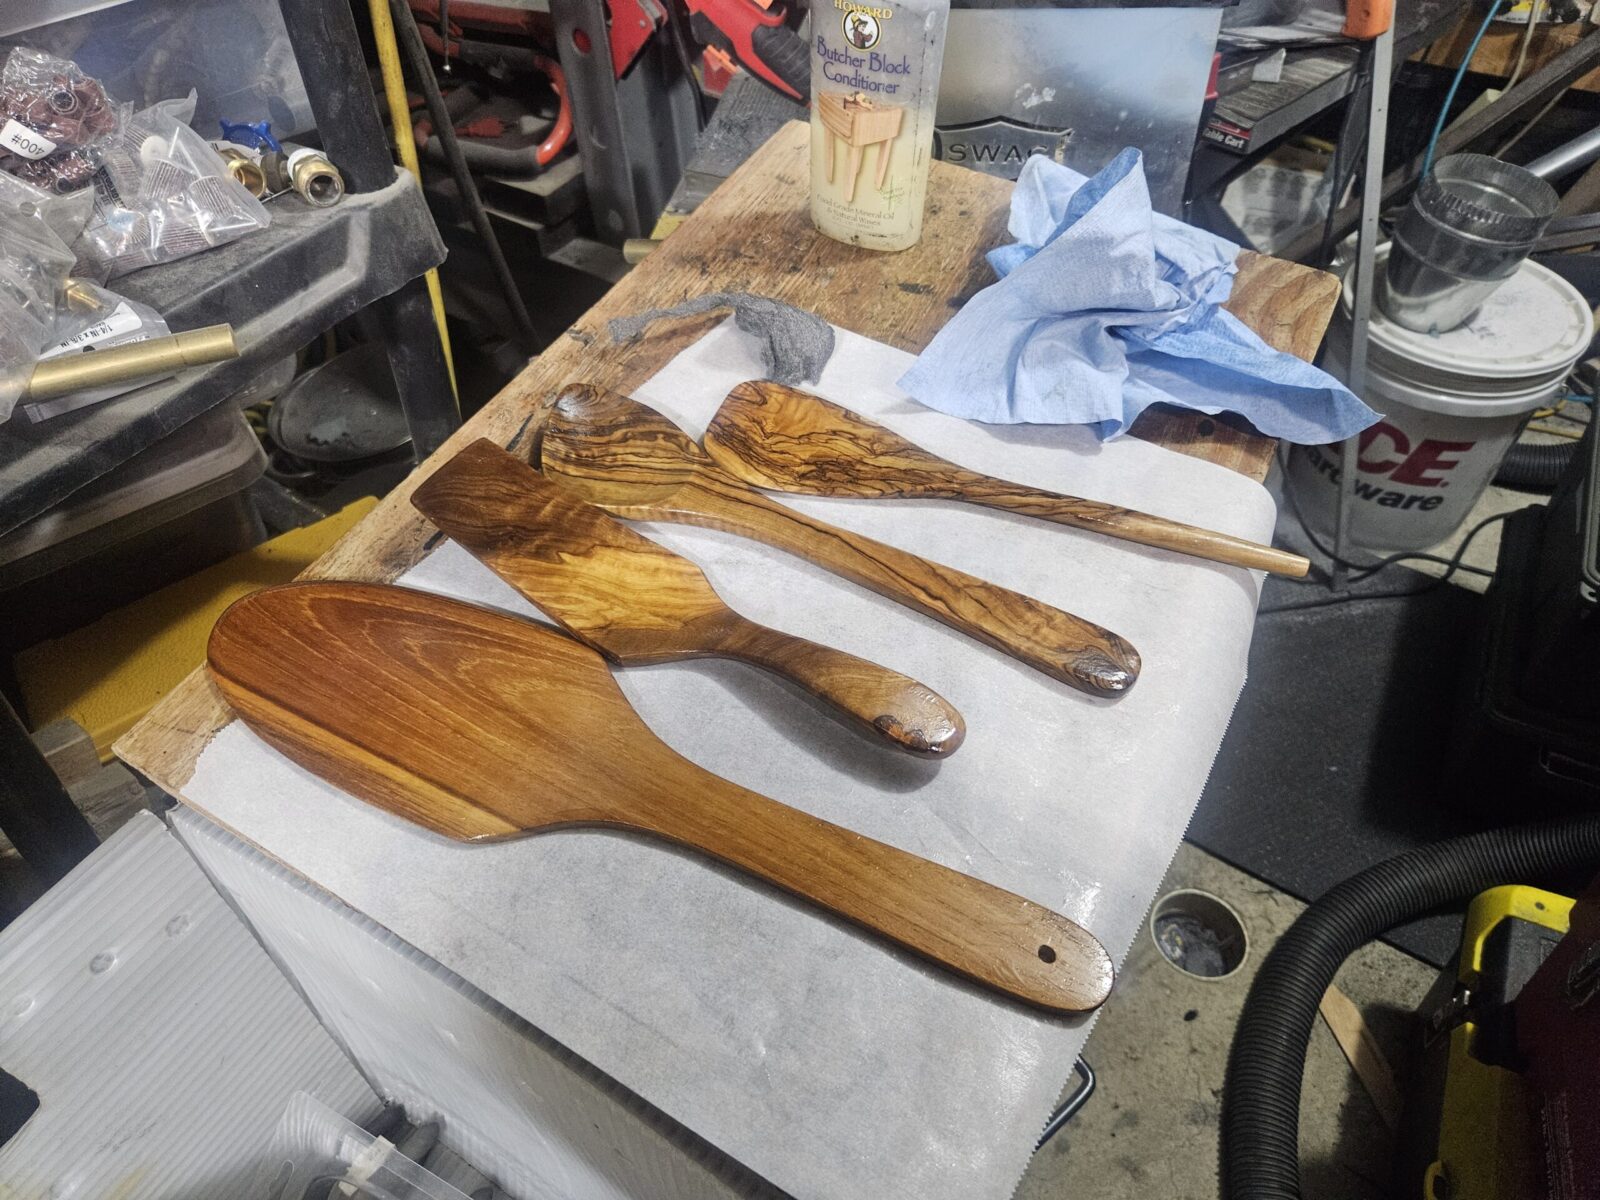
The three utensils from the left are mmade from Olive Wood and were showing their age. The flat tool on the far left was a different wood but I am not sure what is – I just decided to try and touch it up at the same time.
The first thing I did was to run over the spoons with a 220 grit sanding mop in a small drill press that I have dedicated for that purpose. I use sanding mops to finish grips so the station sees a lot of use.
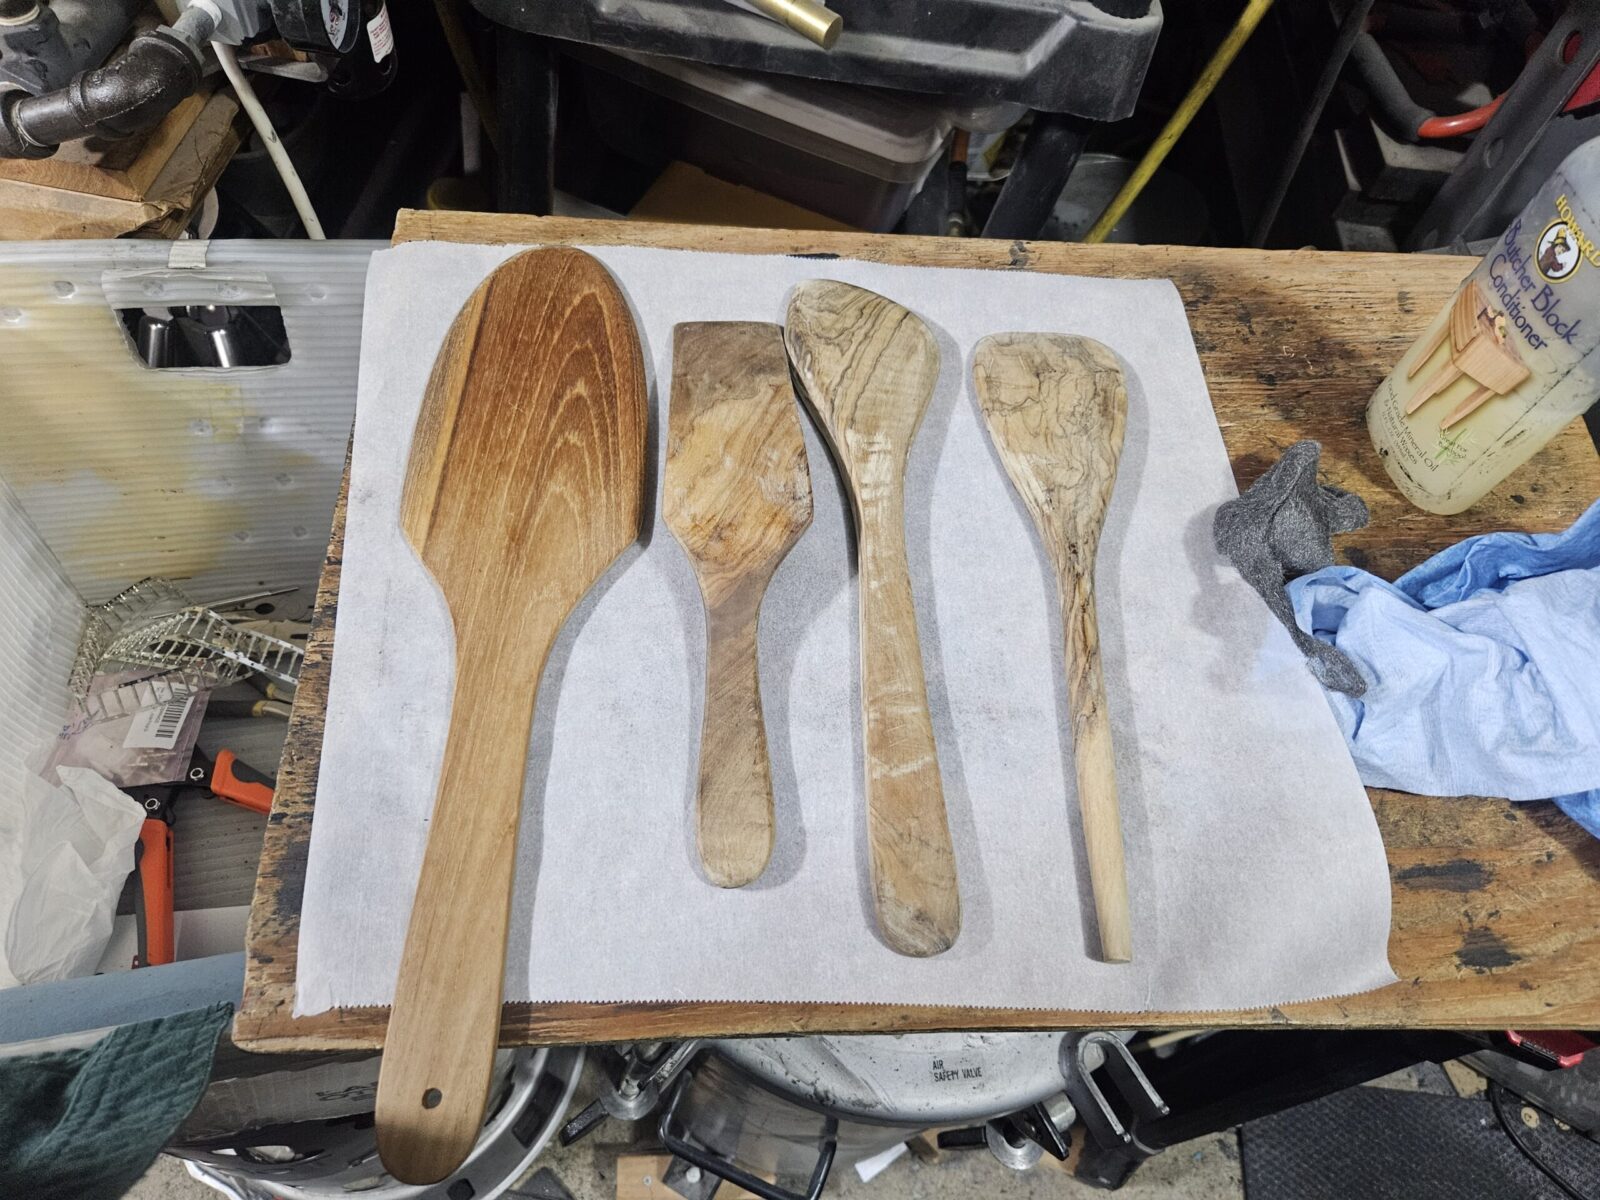
The next thing I did was to use butcher block conditioner to revitalize and protect the olive wood. In general, the conditioners are some combination of food safe mineral oil and waxes that penetrate a wood surface to help protect it. I’ve used a few brands over the years and my favorite is the butcher block conditioner from Howard Products.
There is a bit of a trick I do with restoring a wood finish like this. First off, I rub it in with 0000 steel wool to knock down any stray wood fibers. In case you aren’t familiar with steel wool – “0000” is a very fine grade meant for final finishing. You put the conditioner on thick and let it set for 4-8 hours. You’ll be surprised how much gets absorbed by the wood.
I then wipe it off with a rag and apply it thick again by hand – I don’t use steel wool after the first application. Again, let it sit and absorbe for 4-8 hours, wipe off the residue and repeat.
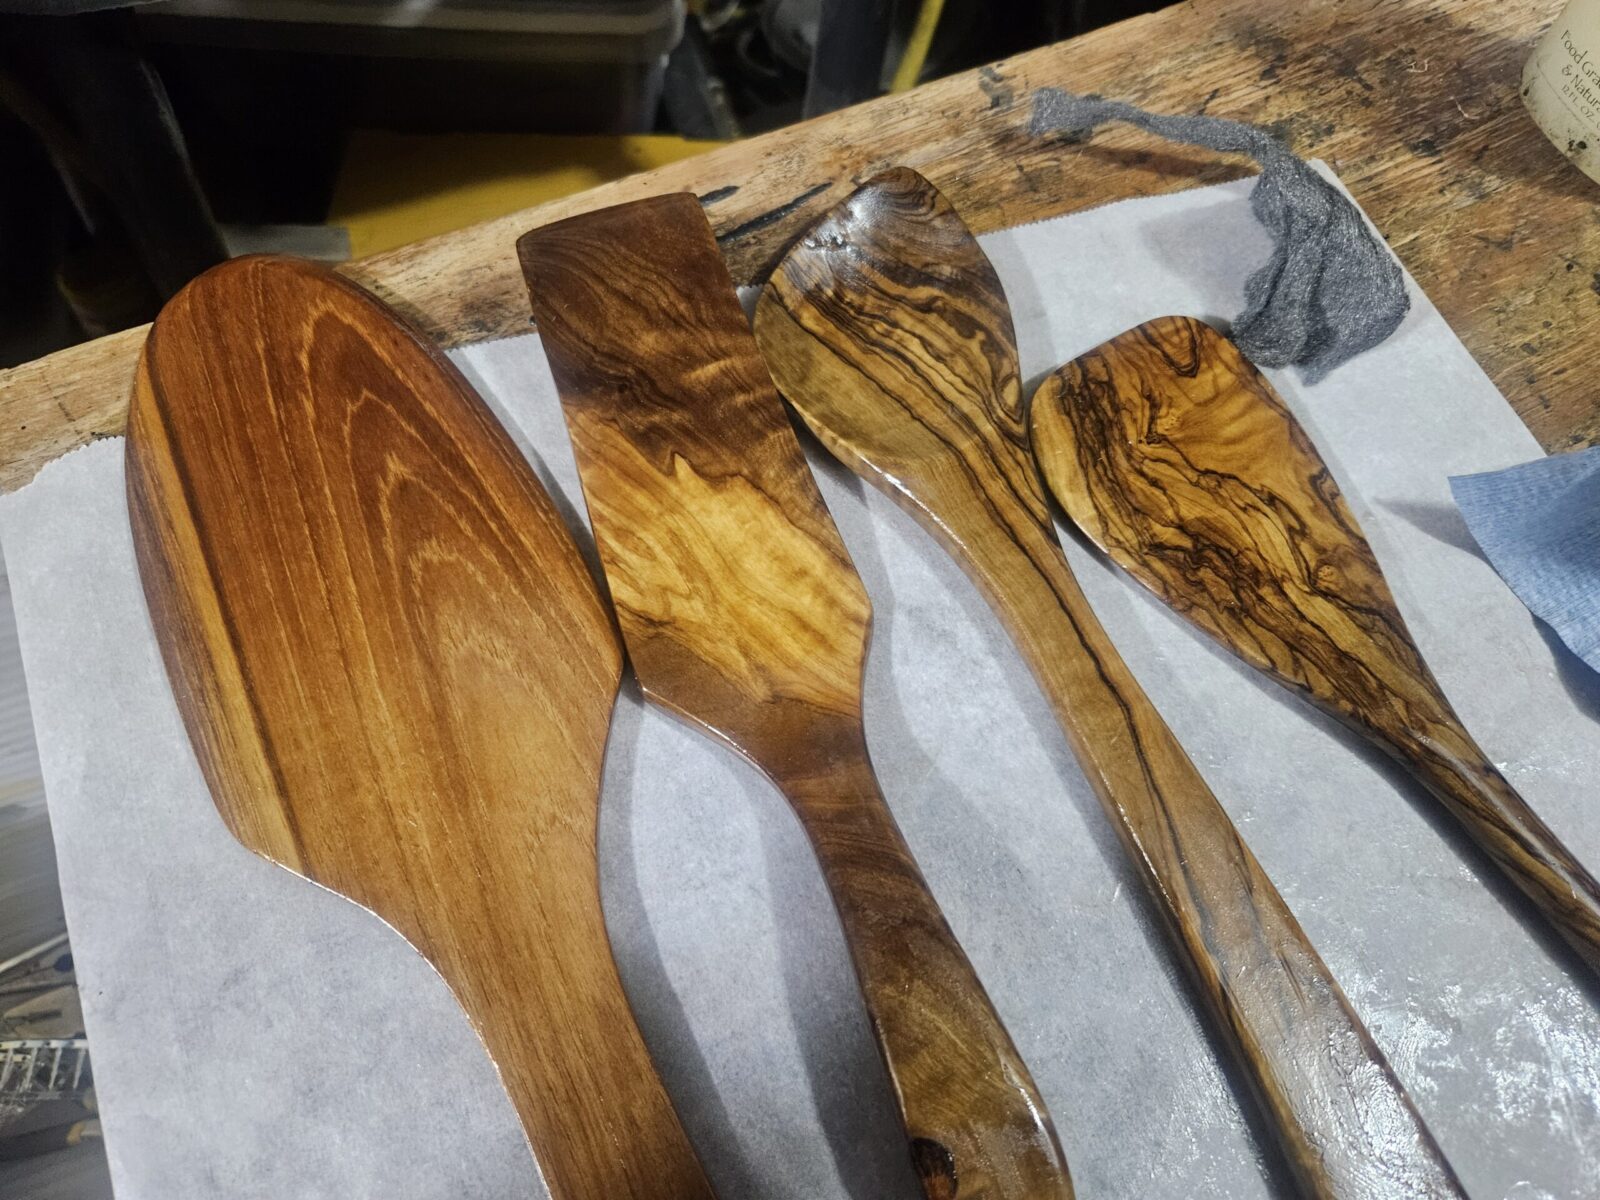
This was after three rounds. You can see the 0000 steel wool and the Howards Butcher Block Conditioner. I’m pretty sure I did another coat after this photo was taken.
You’ll notice with the third or fourth application that less and less is being absorbed so stop where you want and buff the piece with a rag or shop towel.
You may still see or feel a hint of oil but it will disappear in a day or so as it finally gets absorbed. You really can’t go wrong with this finish – just apply, let it sit, rub it off, and repeat until you get the look you want.
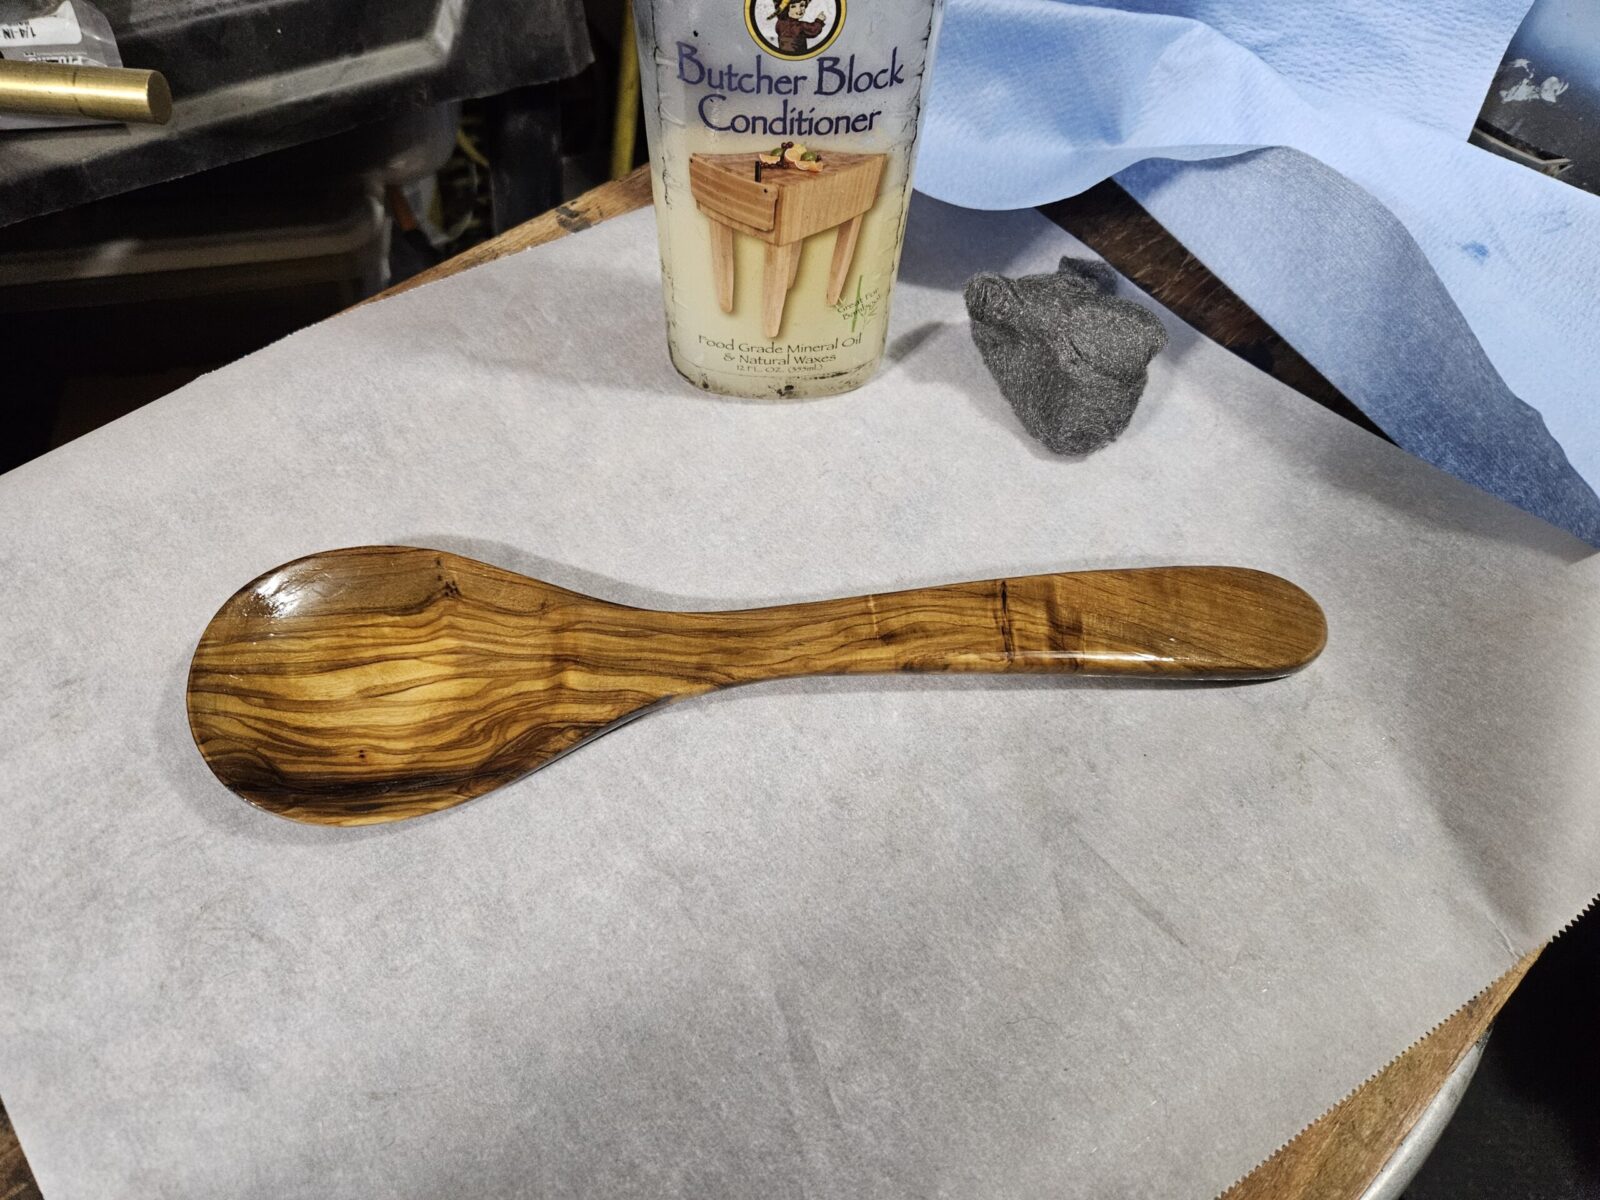
They looked so much better!
I love the patterns and colors of olive wood.
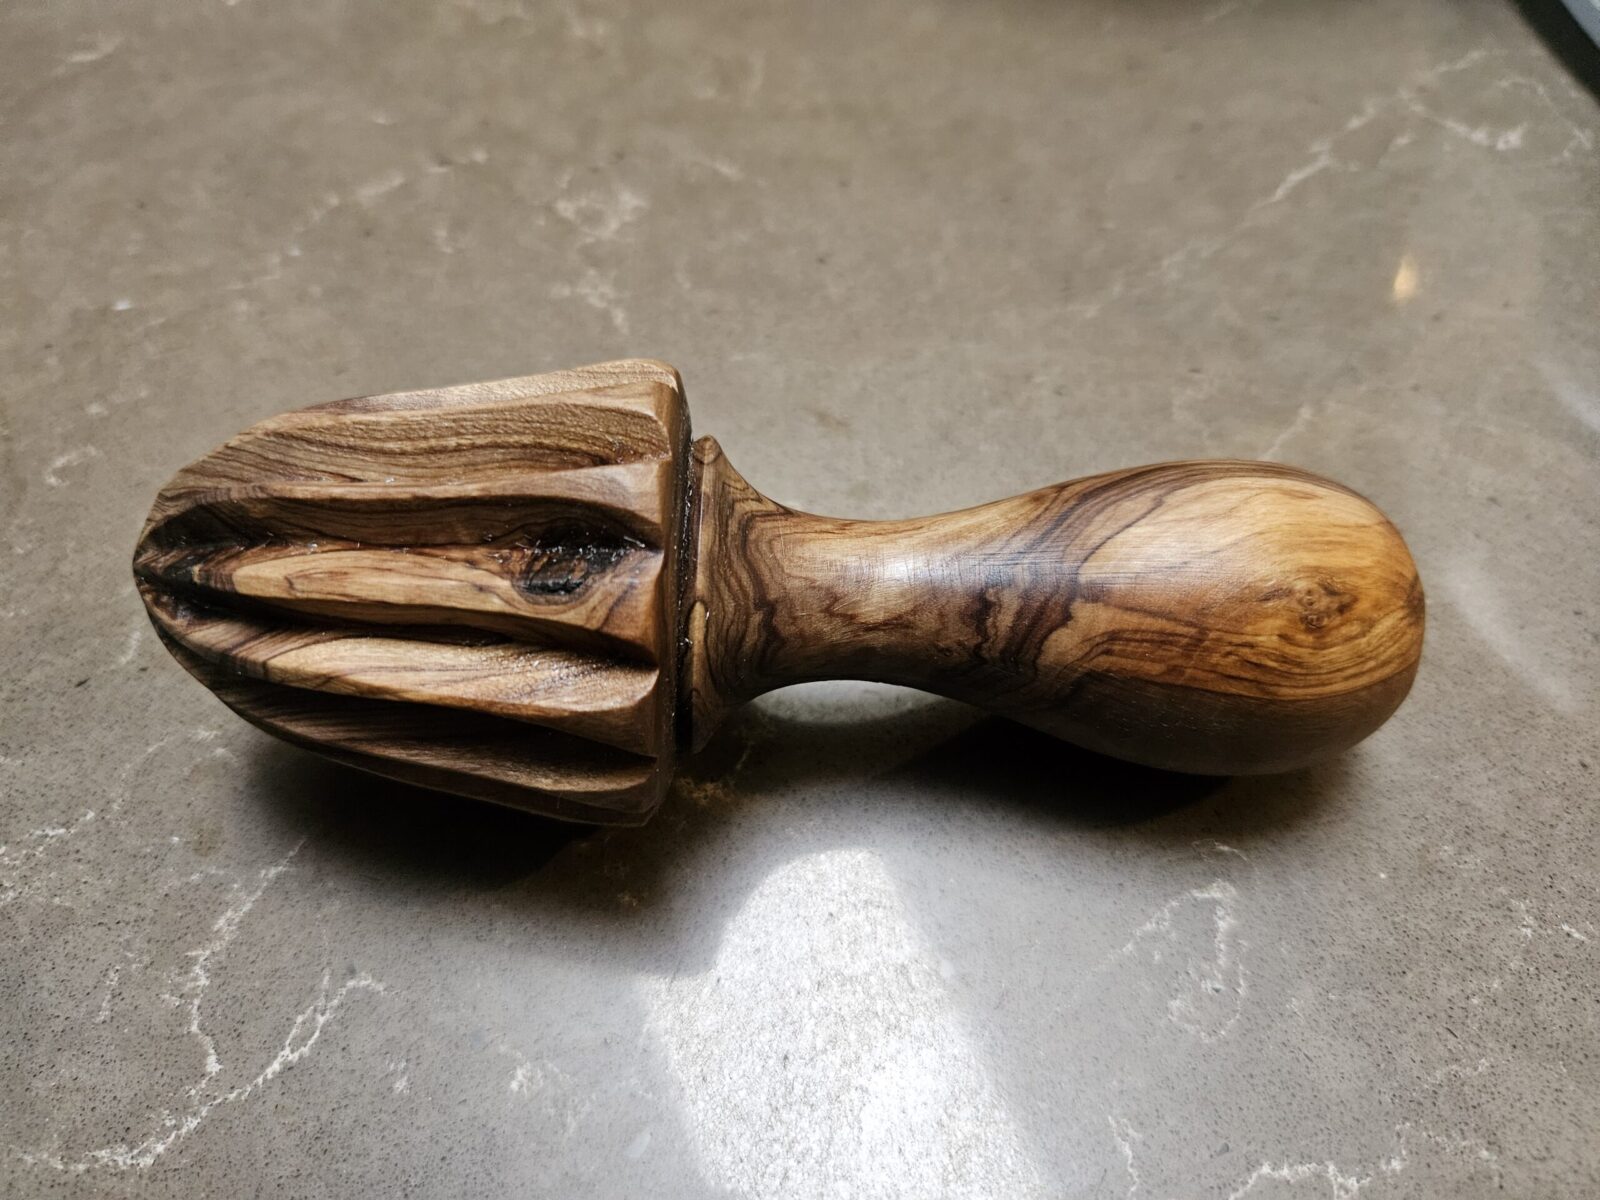
This is the juicer. I ddin’t get a “before” photo but it looked the same as the others. Due to all of the angles, I just used the steel wool to remove stray wood fibers but didn’t sand it. It has 3-4 coats of conditioner on it at the point this photo was taken.
Summary
The utensils from Greece turned out really nice – like new really. My wife is very happy and I shouldn’t wait so long to do it again in the future. It’s amazing how fast time flies by.
Howard Butcher Block Conditioner is my go-to finishing product for breathing life into any wood that comes into contact with food – cutting blocks, wood bowels, utensils, etc. I pretty much follow the above process on all of them.
I hope this helps you out.
If you find this post useful, please share the link on Facebook, with your friends, etc. Your support is much appreciated and if you have any feedback, please email me at in**@*********ps.com. Please note that for links to other websites, we are only paid if there is an affiliate program such as Avantlink, Impact, Amazon and eBay and only if you purchase something. If you’d like to directly contribute towards our continued reporting, please visit our funding page.