Category Archives: POF

We Now Have Contour, Navy SEF and Magpul SL Grips For HK MP5K Weapons and Clones

It’s taken a while to work out the processes and tooling but now we have a variety of grips converted for HK MP5K weapons and their clones including:

  • Century / MKE AP5-P and AP5-M pistols
  • HK MP5K, SP5K – for the SP5K, slight trimming of the front locking plate on the grip will be required
  • POF 5PK
  • PTR 9KT
  • Zenith ZF5-P, ZF5-T, and ZF5-K

There are three required features for these to fit:

  1. It must be an MP5K pattern weapon and not an MP5 or other variety of roller lock.
  2. It must have an HK MP5K patterned top rear hole.
  3. It must have a front shelf that the grip’s front locking plate rests on.

Technically, our Contract Contour and Navy SEF grips do support the front lower pin that some MP5Ks use. However, our converted Magpul SL grip does not have a front lower pin and does not need it because it is pushed forward against the weapon’s shelf and can’t slide out of position.

How They Are Made

Interestingly enough HK33, HK91/G3, HK93, HK94, MP5, and MP5K grips all have the same size polymer core grip albeit with different metal “tails” sticking out of the rear to accomodate whatever weapon they are meant for. Now there may be other models out there as well – but those are the ones that I know of so far.
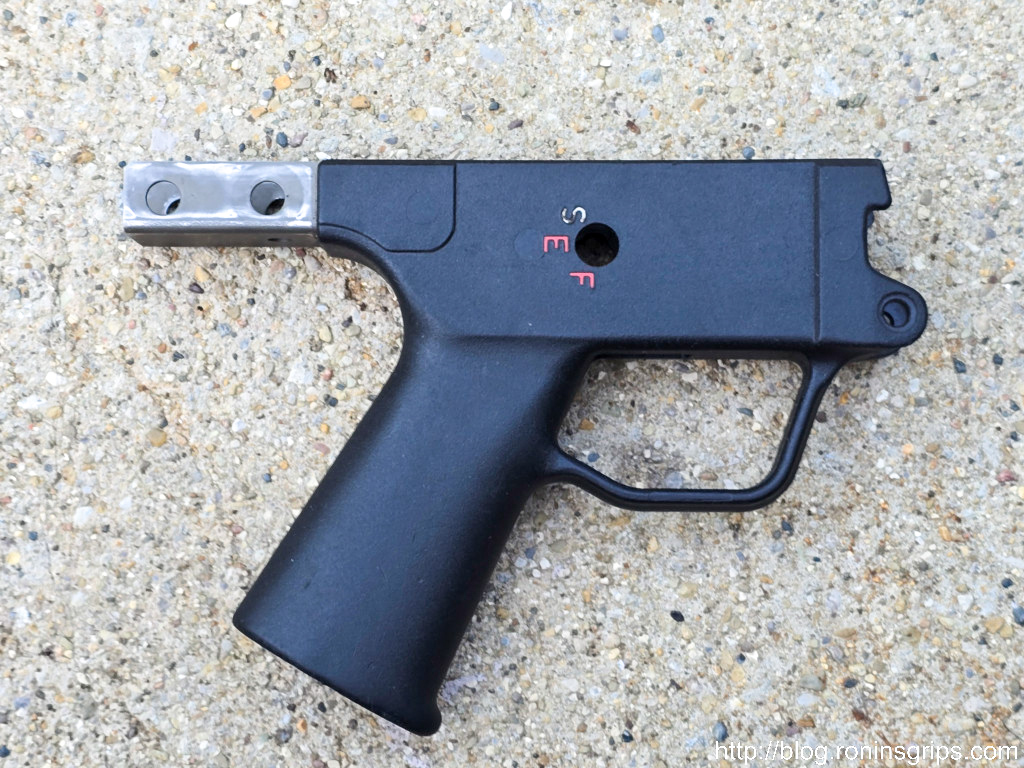
This is a used HK G3/91 Navy SEF grip. The core black polymer shape is the same size as what we need for an MP5K.

The first step if you have one of these model grips is to removed the “tail” so the length will be correct for a MP5K, I would recommend cutting off the tail and then deburring it. Do not remove any polymer so you can get a firm fit when you install whatever stock, brace or end cap you plan to use.
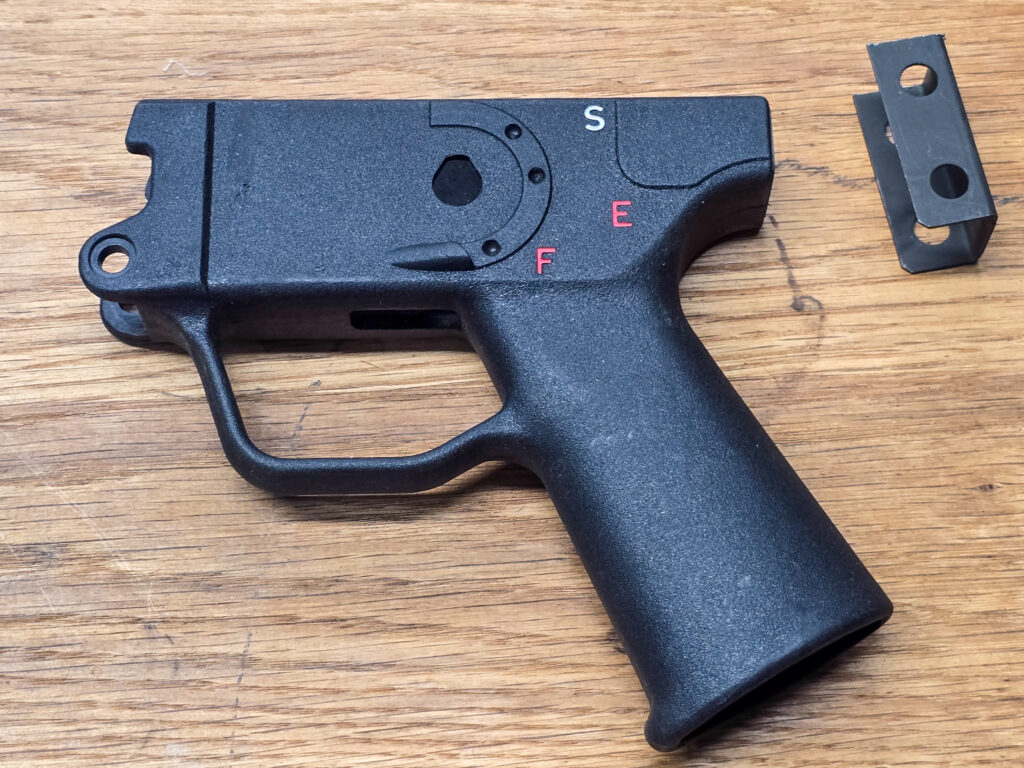
This is a new HK 91/G3 Navy SEF grip with the tail cut off. I use a bandsaw to cut them with a fine tooth blade.

Measure the Existing Rear Hole Centers and Countersink Depths

To cut the rear holes is a bit more involved. First, you need to locate the centers of your existing MP5K grip’s rear holes. I’d recommend using quality calipers but you can do whatever you are comfortable with as long as the method is relatively accurate.

I would also recommend you measure from the front of the steel plate inside the front of the grip back to the center of the hole on your existing grip. That gives you the horizontal distance. To get the vertical distance, measure down from the top.
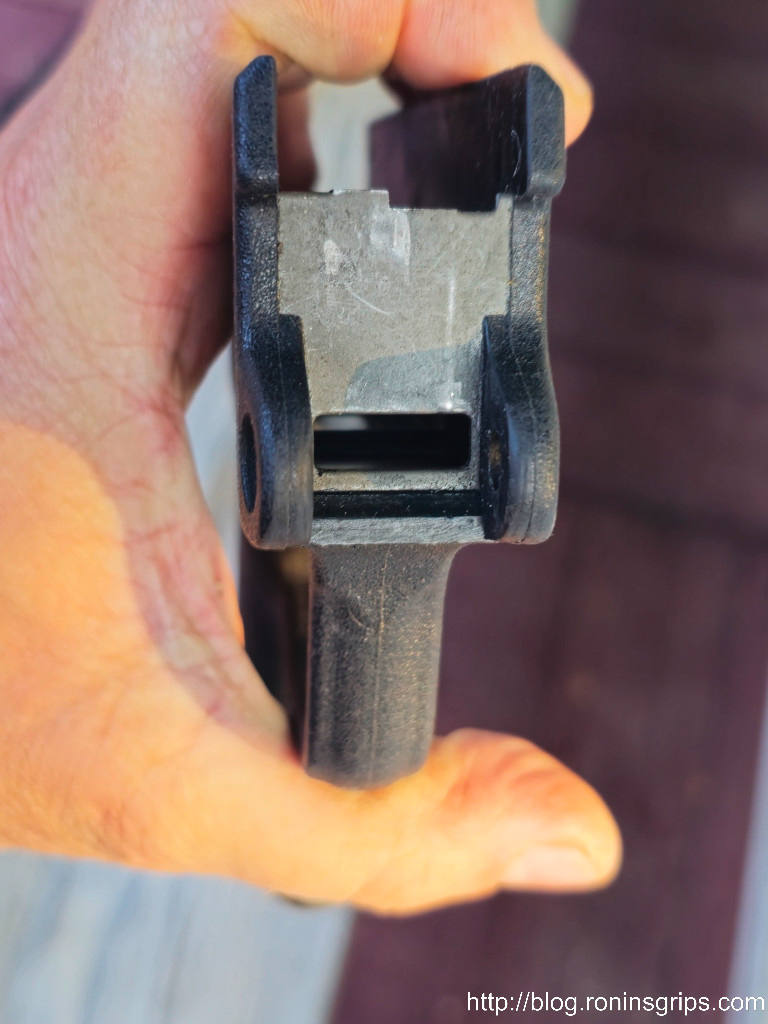
Measure from the front of this plate (the surface facing you in this photo) back to the center of the hole.

You should measure this on both sides of the grip. You may find they are not exactly the same. Regardless, double and triple check the horizontal and vertical measures on both sides.

The other measurement you need to find out is how deep to drill the countersink hole – the recession in the grip where the head sits on the left side (looking down) and the end with the wire retainer protrudes on the right. You may well find that the two measures are different again.

What you need to ensure is that the rear takedown pin’s working distance can span from the left side to the right side. The working distance of a takedown pin is the measured length from just under the head to just before the retaining wire comes out of it. The pin that sticks out of the other end of your calpers is for measuring depth. There are also far more accurate tools purpose-built for measuring depth also.

When you do you plan your countersinks, you need the distance the pin spans to look something like this:

Minimum depth of countersink = outside grip dimension – takedown pin working length

Now how you make that happen is up to you. For example, if you need to remove 3mm and want to split it to 1.5-1.6mm per side – that’s fine. Ideally, you want the pin to stick out far enough on the right side so the wire retainer can pop up and help hold the pin in place.

Milling the Countersink & Pin Holes

These operations require end mills that can make plunge cuts – meaning the end mil has cutting surfaces at the bottom and not just the sides. These are sometimes called “center cutting” end mills also. I would also recommend four flutes for a smooth finish.

The actual countersink diameter is 9.5mm but if you don’t have access to that, a 10mm end mill will work also. The takedown pin hole is 6mm. How much you want to spend on the quality of the mills is up to you. The polymer will not wear the 9.5-10mm bit much but the 6mm bit will need to keep its edge long enought to cut through the steel reinforcement on both sides. I’d recommend the6mm be either cobalt or carbide and not just high speed steel – or at least not cheap high speed steel.
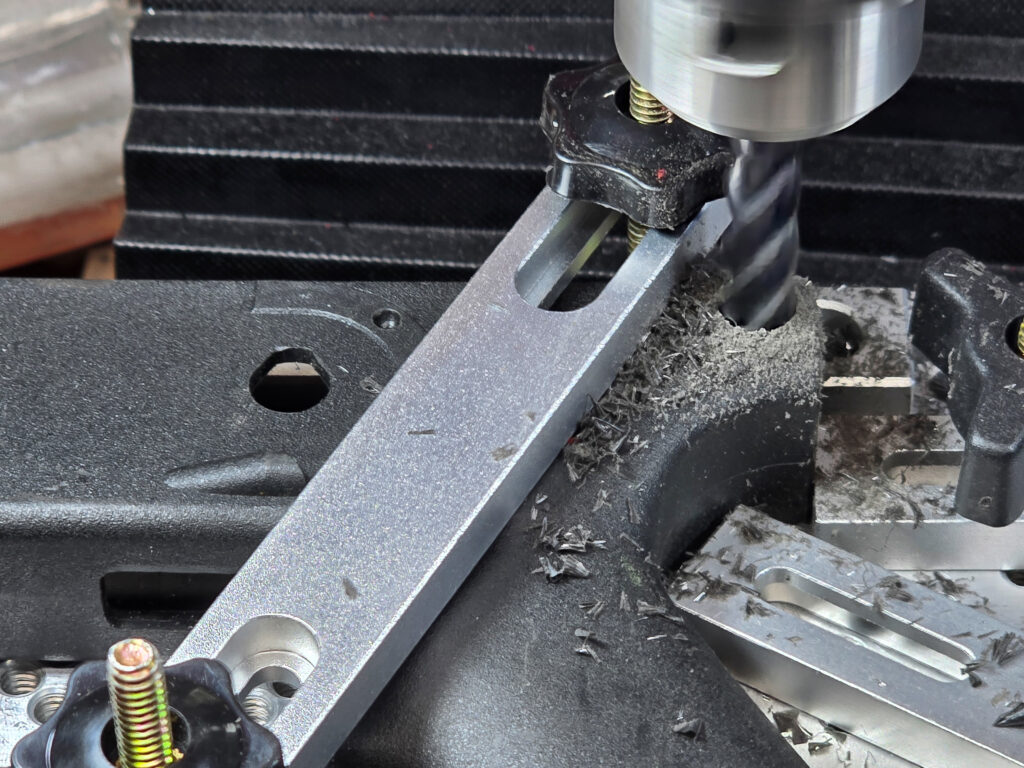
Milling the 10mm countersink. My mill has a Digital Read Out (DRO) so I know how deep to go.

If you are wondering why not use a 6mm drill bit, it is because you will likely encounter a hole in the reinforcing plate that was cast into the grip during injection molding. A drill bit will hit that hole and want to yank the workpiece upwards as the edge of the opened hole rides up the flute and makes a mess. An end mill doing a plunge cut will not have this problem as it will cut off the open circle’s ends.
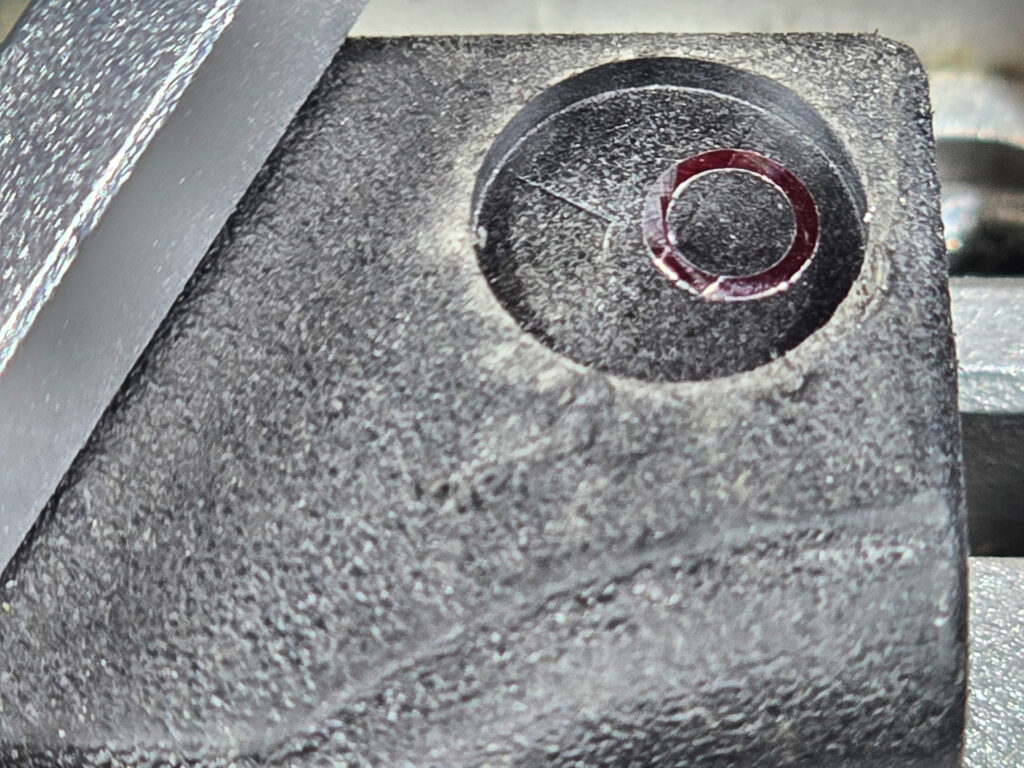
That slightly offset circle is exposed when you do the countersink. A drill bit will cut open the circle and then the grip will want to ridge the bit up.

So, yes, you can use a drill press but what is incredibly important is that you have the workpiece held firmly so you need to clamp it down.

Make a wood or plastic insert that you can put in the top of the grip to keep it from deforming when clamped and then milledd/drilled. If the grip moves at all, your new grip will be ruined.

Honestly, 99% of my challenge was figuring out how to securely hold the grips so they wouldn’t move and also not introduce angles/canting, etc. I’m still working on improving this as the overwhelming amount of my defects are caused by unintended workpiece movement.

You need to locate your new hole centers and then set up your milling machine or drill press to do the cuts. You need to figure out what works best for you. If you have digital read outs (DROs) then you probably didn’t need to read this blog post. If you are new to this, locate the hole center and mark the hole with a very fine point then use either a small drill bit or hole finder to center your machine on the hole.

To get the depth you need on the countersink, either use the features of your machine if it has some form of depth indicator or wrap a piece of tape at whatever limit you need and stop when you reach it.

I would highly recommend you do the countersink cut and then the hole cut on each side before you move on to the next. In other words, do a side at a time before you move the workpiece.

If you are wondering why I am not mentioning how to locate and cut the front pin holes, it’s because you don’t really need them if your weapon uses a shelf, which most current HK grips do. For example, the Magpul SL grip does not have the front holes. The way the polymer is formed, you would likely need a longer pin and it’s not going to give you a better connection. The front plate of the grip is shoved against the shelf by whatever you have on the end of the weapon and the top rear pin keeps the grip from swinging down – that’s really all that you need.
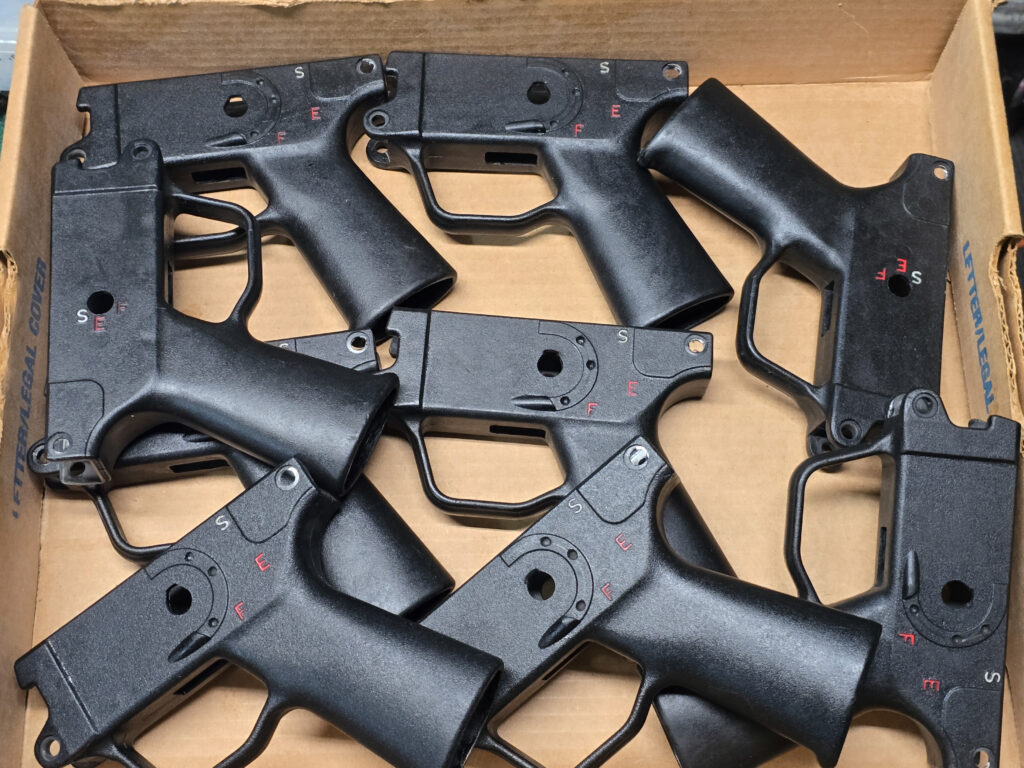
Here is a batch of converted “good condition” real HK Navy SEF grips getting ready to go to their new owners. We do repair any minor gouges and apply a restorative finish to make them look good. That’s the original HK paint by the way. Click here if you are interested.

Summary

You can do the conversion or buy our ready to go grips. You may need to do some final fitting but we’ve done the hard parts. If you’re interested, click here to go to our HK Grips page.
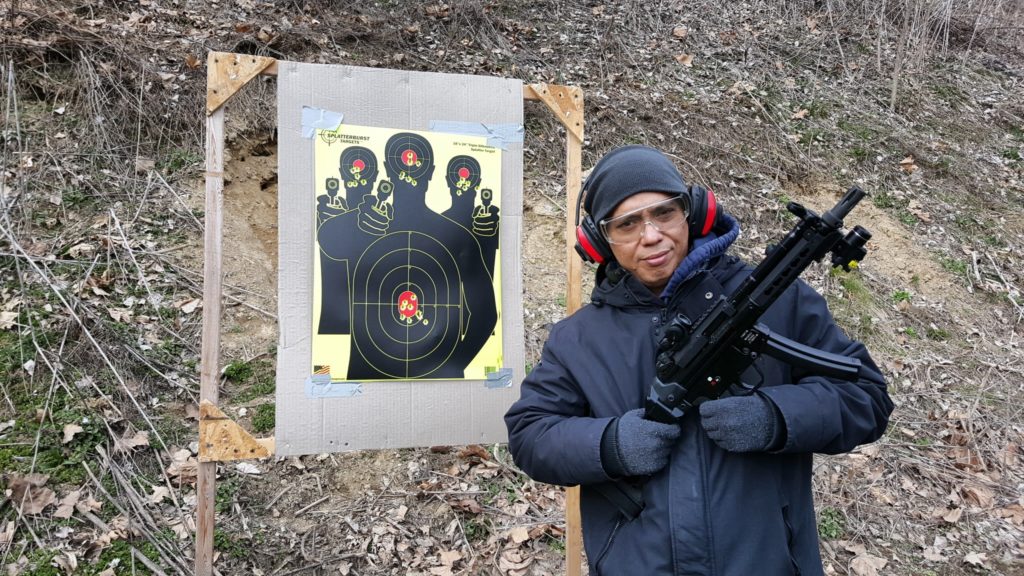
I hope this helps you out,


If you find this post useful, please share the link on Facebook, with your friends, etc. Your support is much appreciated and if you have any feedback, please email me at in**@ro*********.com . Please note that for links to other websites, I may be paid via an affiliate program such as Avantlink, Impact, Amazon and eBay.


Two Great Videos Explaining How Roller Delayed Blow Back Actions Work

I’m a fan of the Roller Delayed Blow Back firearms for a while and have had opportunities to own and shoot ones from HK, POF, and PTR. I knew the rollers were locking the bolt head in place but never really understood the details of the action. I’ve tracked down two great videos to help show you what is going on.

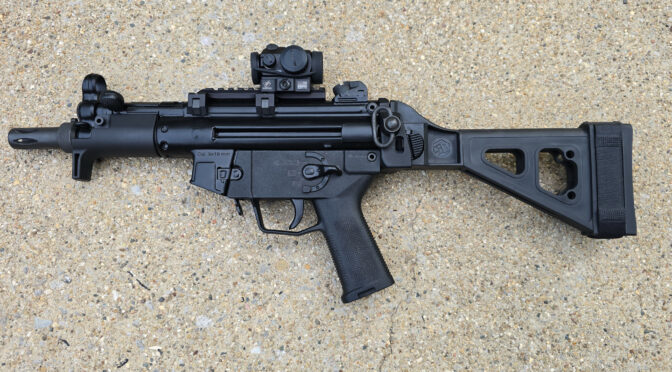
This is a PTR PDWR in .308 – basically a cut down HK-91 style pistol with a SB Tactical SOB Brace and a Vortex Optic.

Forgotten Weapons

In this short video, Ian @ Forgotten Weapons does a great job explaining just how this system works.

MouseGunner

This is one of MouseGunner’s cool x-ray renderings where he shows the MP5’s action at work. He’s done this for other weapons as well and watching the weapon operate really helps.


I hope this helps you out. Be sure to subscribe to both guys’ channels – Forgotten Weapons and MouseGunner.


If you find this post useful, please share the link on Facebook, with your friends, etc. Your support is much appreciated and if you have any feedback, please email me at in**@ro*********.com . Please note that for links to other websites, I may be paid via an affiliate program such as Avantlink, Impact, Amazon and eBay.


Great Deals On Pistol Braces and Pistols With Braces At PSA

When the ATF reversed the ruling about braces and enabled folks to use them however they saw fit, the demand and supply of pistol braces went into orbit. I have carpal tunnel and a hereditary tremor so for me, using a brace is the only way I can wield a heavy pistol – such as one based on an AR, AK or MP5 type of action.

Examples of Braced Pistols

SB Tactical’s PDW brace is great on AR pistols
IWI Galil Ace in 7.62×51 with a SB Tactical SBA4 adjustable brace
PTR PDWR .308 pistol with a SB Tactical folding mechanism and SB Tactical SOB brace

Palmetto State Armory (PSA)

PSA has come a long way. I’ve used them as my go-to AR parts supplier for years and now they have great deals on parts, kits, receivers, and firearms. They also offer some great deals on braces – by themselves as parts, as part of a kit offering or even on firearms.


If you find this post useful, please share the link on Facebook, with your friends, etc. Your support is much appreciated and if you have any feedback, please email me at in**@ro*********.com . Please note that for links to other websites, I may be paid via an affiliate program such as Avantlink, Impact, Amazon and eBay.


Tips on Finding Decent Gunsmithing Tools on eBay

One of the challenges when starting out working on guns is building your tool collection.  It’s hard to find cost effective tools so you wind up making do with stuff, creating tools ad hoc, etc.  Interestingly enough, this is where eBay just might help.  While I’m not happy with their anti-gun position, there are a lot of tools that pop up there – ranging from low-end Chinese stuff all the way to some beautiful vintage tools.

So, I want to show some example searches with 20 live feeds from each section:

Gunsmith and Gunsmithing Tools

The trick is in the searching.  For example, here are the top 20 matches for gunsmith tools or gunsmithing tools and you will probably see a mix:

[ebayfeedsforwordpress feed=”https://www.auctionrequest.com/arfeed.php?uid=inf5efd3d98495c&keyword=%28gunsmith+tools%2Cgunsmithing+tools%29&sortOrder=BestMatch&programid=1&campaignid=5338063879&toolid=10039&listingType1=All&feedType=rss&lgeo=1″ items=”20″]

Of course there are brands I will steer away from such as NCStar and others that I will look closer at such as Brownells, Lyman, Tipton, Weaver, etc.  I also read the ratings of the seller.  If a seller has a good rating and more than 30 sales, that’s a good sign.  Less than that and you are taking a gamble.

Vintage Gunsmith Tools

“Vintage” seems to be a popular term for “used”.  You tend to find a lot of unique stuff that was made by a gunsmith to fit a special need as well as high-quality tools that were made with care vs. mass produced.  Be careful though.  I’ll zoom into the photos as much as I can plus look at the seller’s description and the rating of the seller to try and decide if the tools are in good shape or beat to death.

[ebayfeedsforwordpress feed=”https://www.auctionrequest.com/arfeed.php?uid=inf5efd3d98495c&keyword=vintage+gunsmith+tools&sortOrder=BestMatch&programid=1&campaignid=5338063879&toolid=10039&listingType1=All&feedType=rss&lgeo=1″ items=”30″]

Used Gunsmith Tools

“Used” is still a popular term and is worth checking also.  Bear in mind the cautions I gave under vintage.

[ebayfeedsforwordpress feed=”https://www.auctionrequest.com/arfeed.php?uid=inf5efd3d98495c&keyword=used+gunsmith+tools&sortOrder=BestMatch&programid=1&campaignid=5338063879&toolid=10039&listingType1=All&feedType=rss&lgeo=1″ items=”30″]

Brownells Gunsmith Tools

Brownells has been around a long time — they were founded in 1939 and have always been known for their quality tools, parts and supplies to gunsmiths.  Because they have been around for so long, you tend to see a fair amount of Brownells stuff hit eBay by name so that is worth searching.  Still look at the photos closely and the seller’s rating to play it safe.  By the way, if you have never read their Gunsmith Kinks books – be sure to pick them up.

[ebayfeedsforwordpress feed=”https://www.auctionrequest.com/arfeed.php?uid=inf5efd3d98495c&keyword=%28Brownells+gunsmith%2Cbrownells+tools%29&sortOrder=BestMatch&programid=1&campaignid=5338063879&toolid=10039&listingType1=All&feedType=rss&lgeo=1″ items=”30″]

Antique Tools

What is “antique” really is up to the seller.  You’ll see stuff that ranges from a few years to over 50 years old.

[ebayfeedsforwordpress feed=”https://www.auctionrequest.com/arfeed.php?uid=inf5efd3d98495c&keyword=antique+gunsmith+-%28ratchet%2Cair%29&sortOrder=BestMatch&programid=1&campaignid=5338063879&toolid=10039&listingType1=All&feedType=rss&lgeo=1″ items=”20″]

I hope this helps you out!  There is a ton of stuff out there if you experiment with the search terms some.


If you find this post useful, please share the link on Facebook, with your friends, etc. Your support is much appreciated and if you have any feedback, please email me at in**@ro*********.com . Please note that for links to other websites, I may be paid via an affiliate program such as Avantlink, Impact, Amazon and eBay.


Switched to Super Lube Multi-Purpose Synthetic Grease For All of My Firearms

I’m always searching for better lubricants.  Many of the so-called specialty weapons lubes are just marketing hype with some bulk lubricant poured into their container.  In terms of greases, I’ve used quite a few over the years including wheel bearing grease and Tetra Gun Grease.  I wanted to find something effective, non-toxic and less expensive.

A name popped up when surfing – Super Lube.  To be honest, the first few times I totally dismissed the name because it sounds like some overly-hyped wonder lube that is sold in infomercials.  However, the name did keep popping up so I actually started reading up on it.

Super Lube products are made by Synco Chemical Corporation of Bohemia, NU, that was founded in 1980.  Their specialization is in the space of synthetic food grade lubricants and hold a number of patents.

There are a number of interesting characteristics about their grease that should be noted:

  1. It is designed to disperse very finely ground micron-sized PTFE (Polytetrafluoroethylene) which is a non-stick coating and lubricant.  You probably know it by the brand name of Teflon.  The approach they developed is one of their patents.
  2. It does not contain silicone
  3. It will work in a wide range of temperatures from -45 to +450 Farenheit
  4. It’s thickness is NLGI class 2, which means it’s about the same as vaseline or peanut butter.
  5. It’s non-toxic and food safe – here is the MSDS/SDS
  6. It will not melt or separate
  7. It will not dry out or get gummy
  8. It is waterproof
  9. It does not stain and is odorless – for you folks who do concealed carry or shoot a lot in uniform, you might want to take note of that.

Their website has a ton of information on Super Lube and also on lubrication in general if you want to spend some time reading.

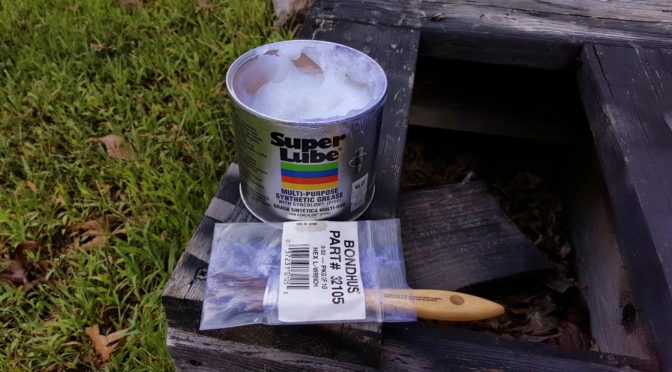
I bought a 14.1oz tub of the Super Lube Multi-Purpose grease off Amazon – very affordable to say the least – clicking on this will open a list on Amazon.

To apply it, I use either a chip brush that I store in a zip loc bag to keep from getting dirty (as shown in the featured photo above) or a small flux / resin brush that I also keep in a baggy.

So, for the last few months I have been testing it.  When I cleaned one of my rifles or pistols, I would replace whatever I had been using as grease with the Super Lube Multi-Purpose grease.

I go by the old saying that if it rotates, oil it.  If it slides, grease it.  That is my rule of thumb so it goes on AK rails, bolt carriers, where the trigger hook grabs the hammer, etc.

It works great!  The weapons feel well lubricated after cleaning and they function great.  When I take them apart again for cleaning, the Super Lube shows no sign of breaking down, drying out, becoming gummy, etc.

If you are looking for an excellent affordable grease, check out Super Lube.  I’m definitely very happy with it.


If you find this post useful, please share the link on Facebook, with your friends, etc. Your support is much appreciated and if you have any feedback, please email me at in**@ro*********.com . Please note that for links to other websites, I may be paid via an affiliate program such as Avantlink, Impact, Amazon and eBay.


Customizing and Shooting the Pakistani Ordnance Factory POF-5 Pistol

Having watched one too many TV shows and movies with H&K’s MP5 submachine gun over the years, the sub gun has been on my “I want to have one list” for years but way out of my price range.  While surfing, I read about how Pakistani Ordnance Factory (POF) licensed the design and tooling necessary from H&K Germany to make roller locked weapons including MP5 clones.  In reading about the various Mp5 clones,  it became apparent that the POF-5 units are actually well regarded.  What really tipped the scales was a great post by T. Mark Graham at Arizona Response Systems who really knows his way around MP5s saying they were good to go with details of his analysis provided.

This led me to calling up Chuck at Kelly Enterprises and talking about whether to buy a Zenith (my first choice) or a POF.  Chuck is a very straight forward guy and tells it the way it is.  The Zenith would be hard to get and he had POF-5 pistols in stock plus he gave me a great deal so I ordered one and had it sent to my friend and FFL, Scott Igert, at Modern Antique Firearms.  Chuck sent me all the tracking info and just a few days later, the POF-5 was with Scott waiting for me to pick it up.

On inspection you could tell the receiver paint was a bit glossier than the more satin finish of an HK but other than the action feeling dry and new (that gritty not worn in feeling), it looked good to go.

Now, I have two personality quirks.  First, I can’t hit the broad side of a barn with a pistol let alone one this big and heavy.  Second, I can’t help but customize any gun I buy and this wasn’t any different.

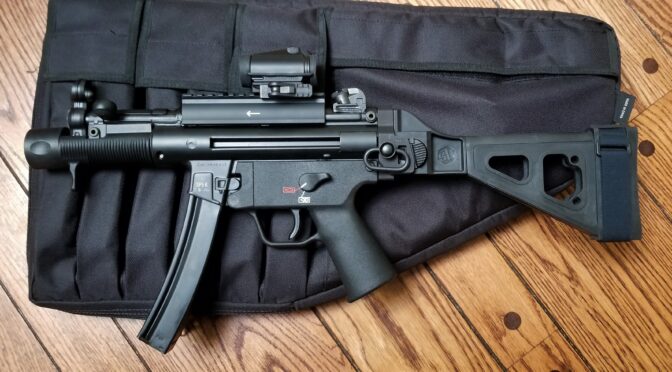
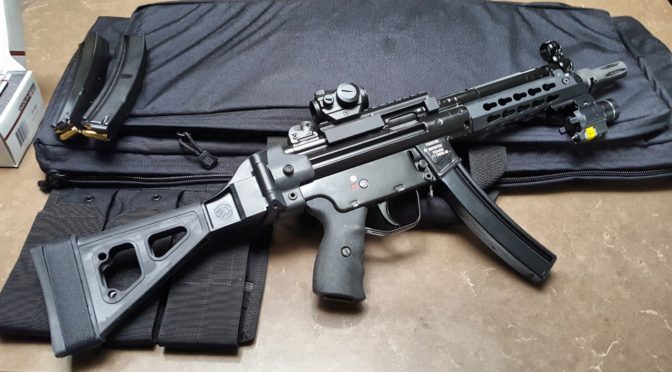
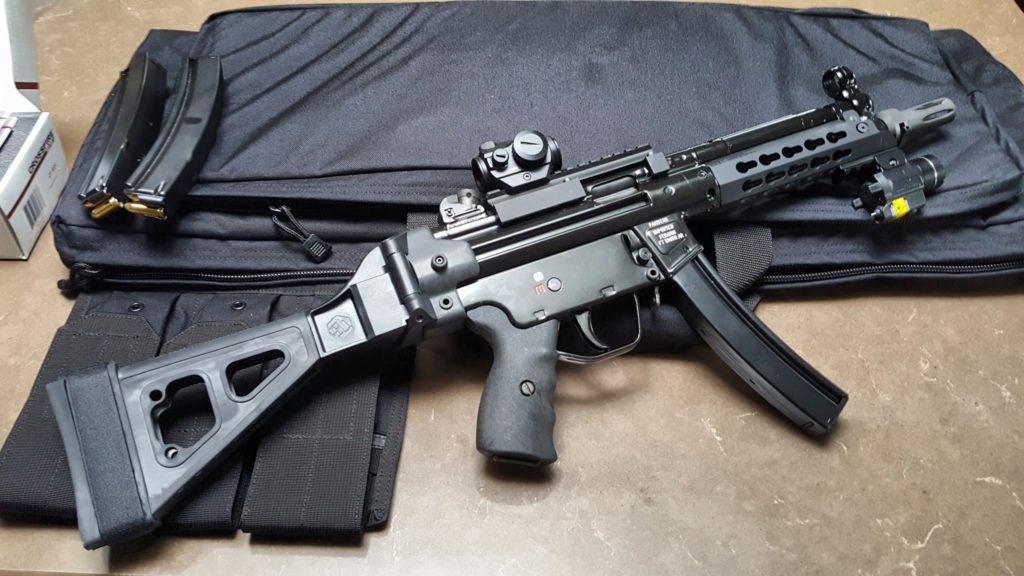
I did a ton of reading and decided to go with a cool S&B brace, a B&T scope mount, Dakota Tactical handguard, a B&T muzzle brake and ordered a bunch of POF MP5 magazines.  You can buy the brace at PSA and Brownells. By the way, Brownells has a ton of replacement parts and aftermarket parts for the MP5 reflecting it’s long-time use by law enforcement no doubt – click here to see them.

Installing the brace was easy – like any HK, you push out the rear pin, pull off the cap and put on the brace.  I bought one all ready to go.

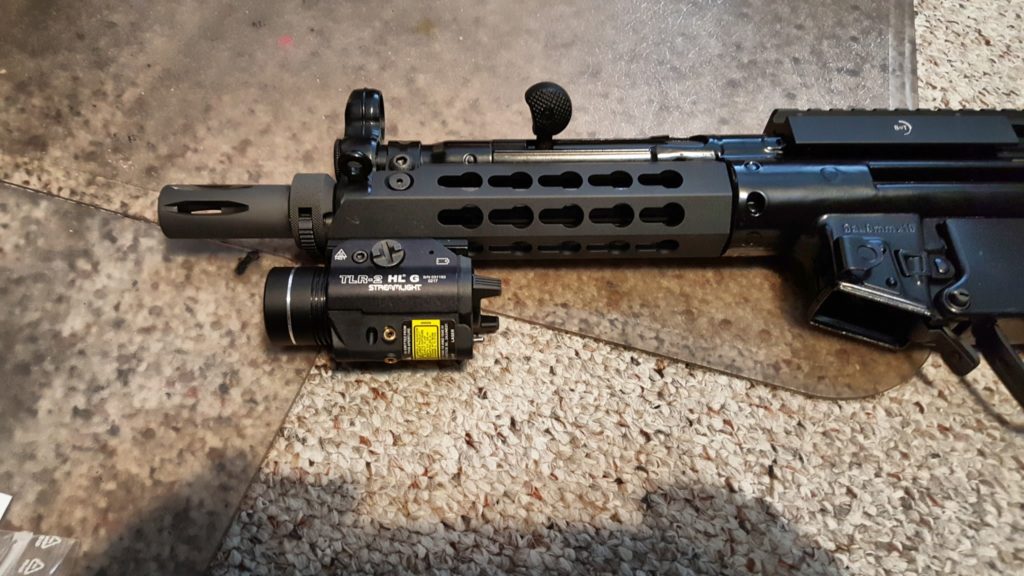
The handguard is a keymod unit from Dakota Tactical and they use a screw instead of a front pin to hold the unit in place.  It really locks up nice and I like the feel of it.  The rail section holding the Streamlight in the below photo is made by Monoki.

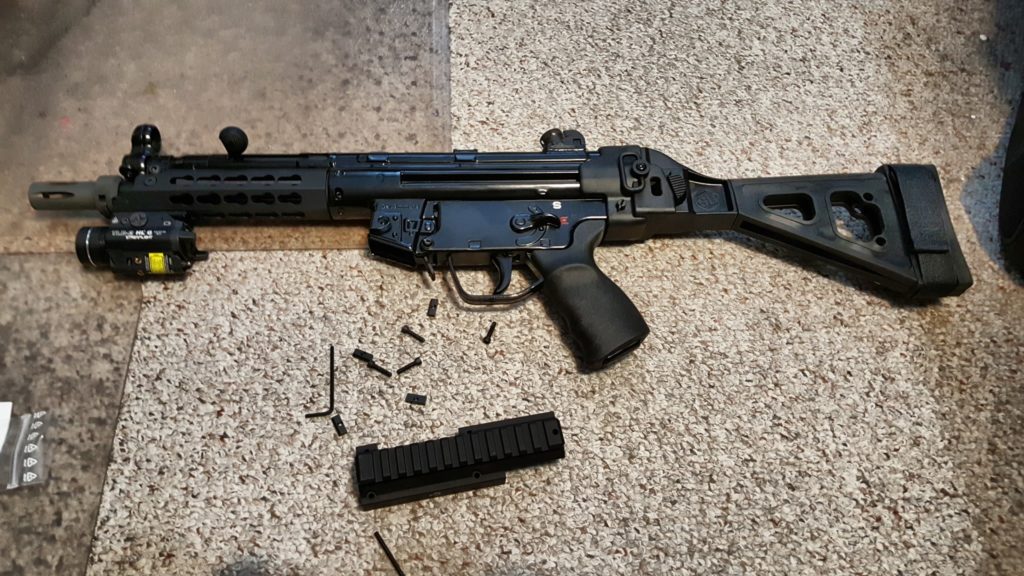
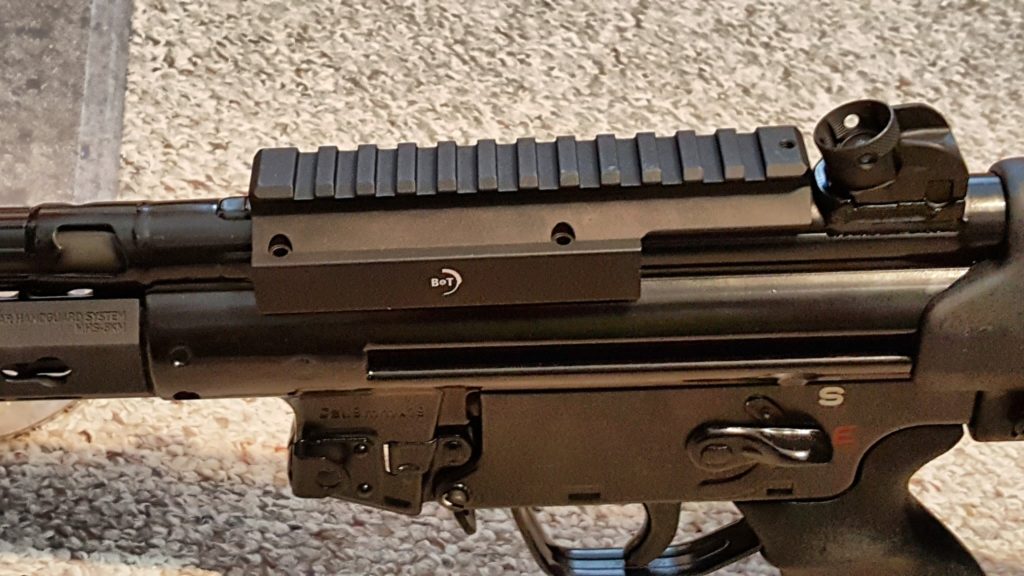
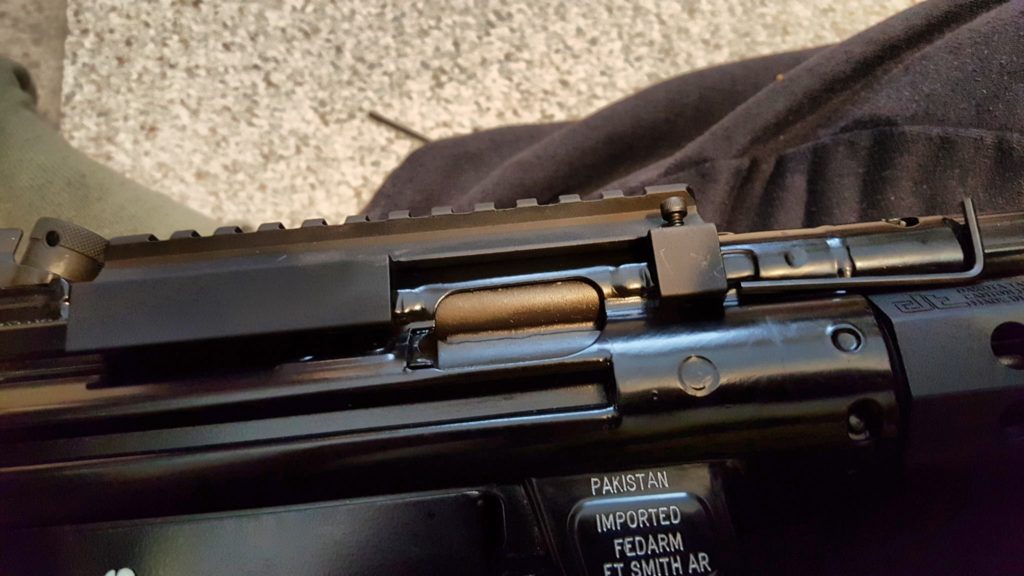
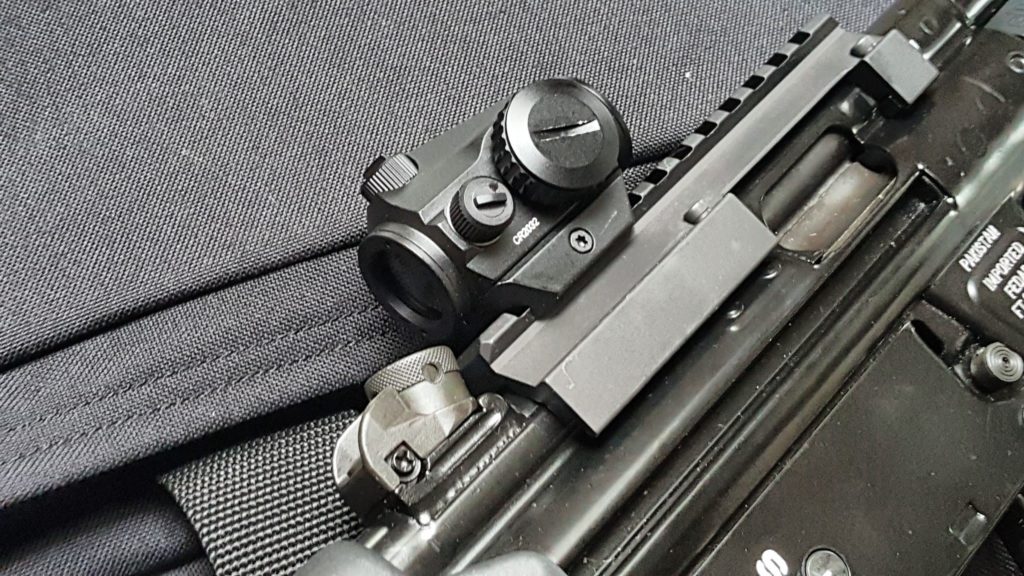
Now the scope mount is the standard B&T universal rail, the BT-21262-1.  I would caution against you buying a cheap optics mount for an HK-type weapon.  There are tons of stories of cheap ones falling off, not seating properly, etc.  The B&T unit is a mil-grade unit.  You slide it on and then work the little claws or feet into position and then secure them with the supplied screws.

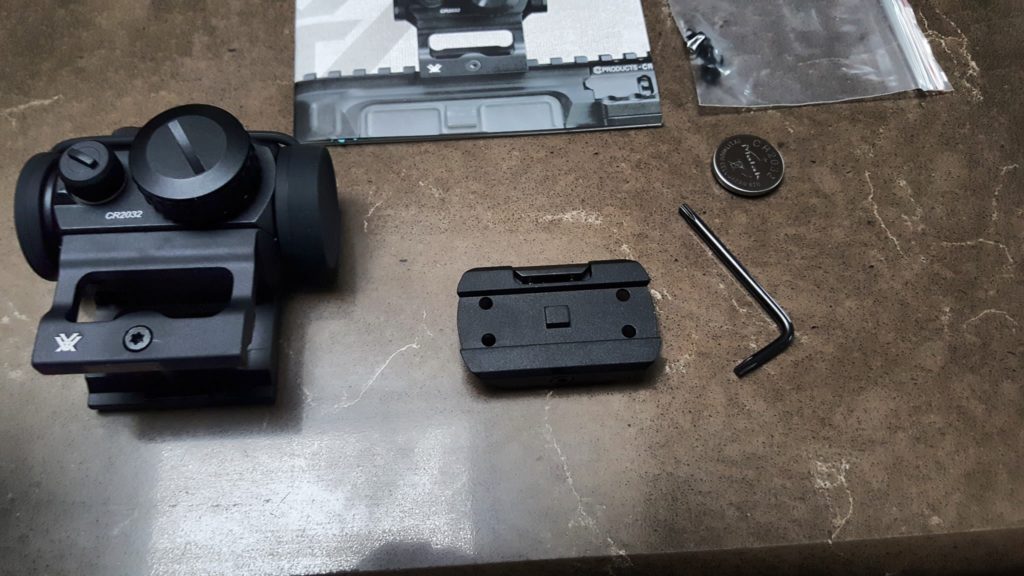
Next up  was to install the Vortex Crossfire Red Dot optic.  These are the latest red dots from Vortex and come with both low and high mounting options.

Out of the box it has the high mount installed for the AR enthusiasts but includes the low plate as well.

As you can see, with the default high riser on it, the optic is way too high.  I prefer optics as low as possible where I can get a good cheek weld.

It’s real easy to change – there are just four screws that need to be removed on the bottom.  I used a bit from my Weaver driver set vs. the supplied key which would work but is slow compared to a driver.

I have the Weaver Deluxe Tool Kit and use the drivers all the time.  I use the block and hammer some but not a great deal.

Notice that Loc-Tite Blue (the medium strength formula) is used to secure the screws.

Here’s the end result.  Note, I will install a quick release mount at a later date.

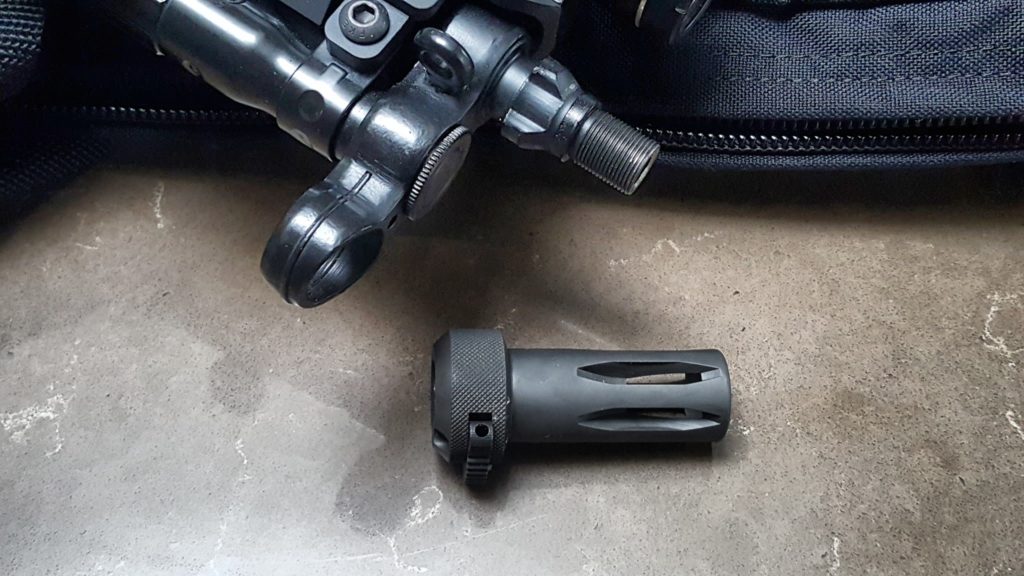
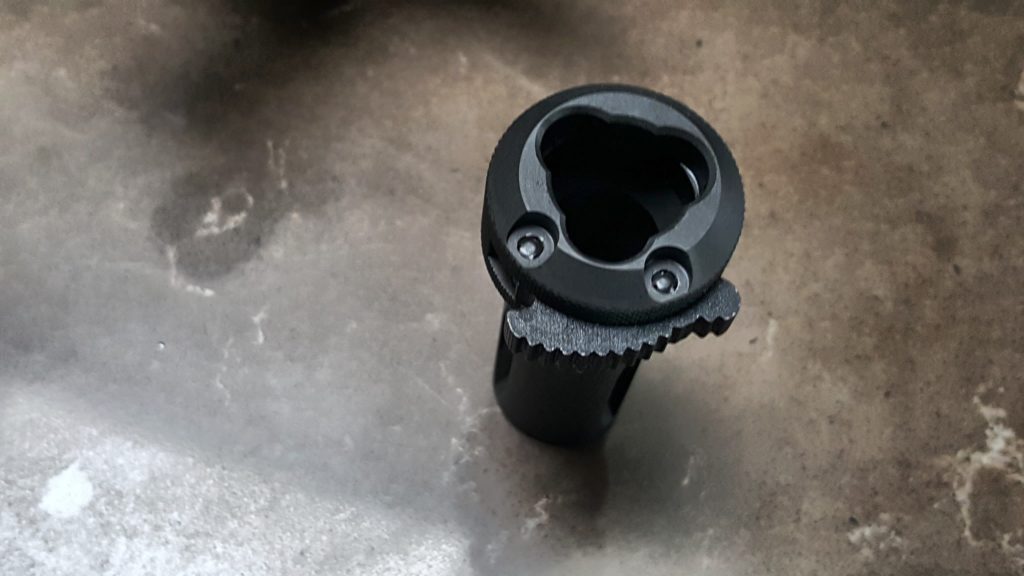
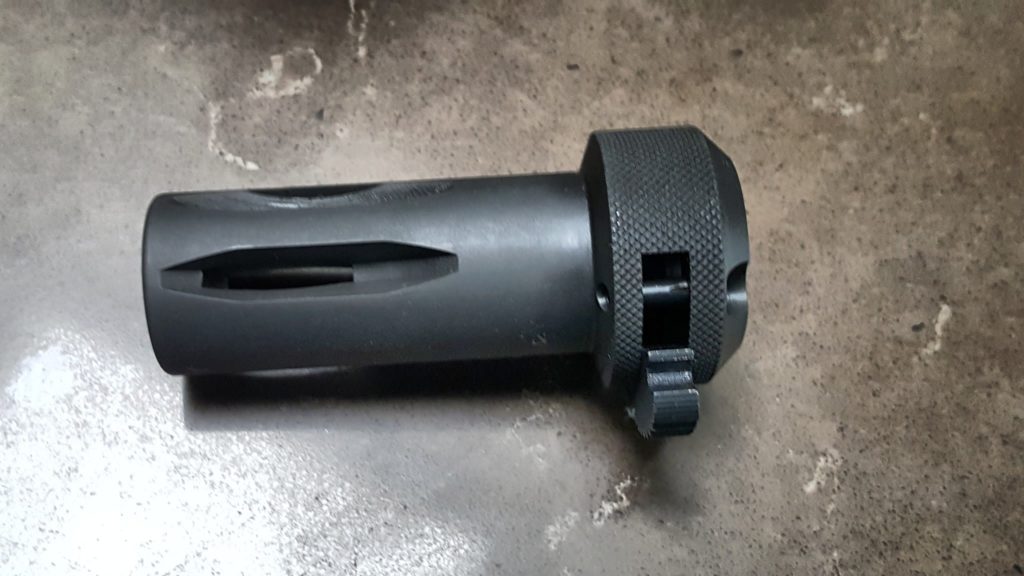
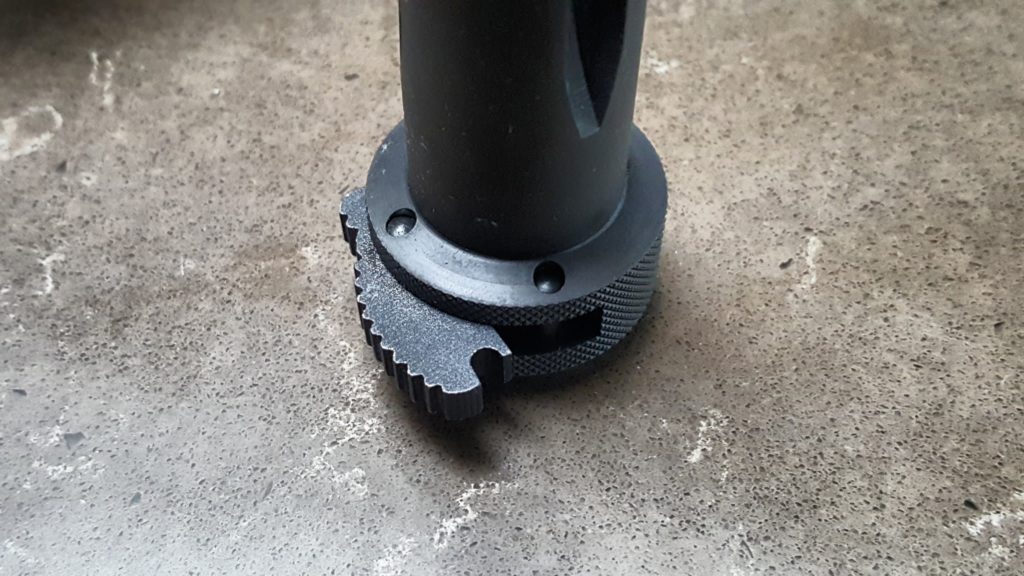
One side comment – you may find it funny that the thing that puzzled me most was the B&T brake.  It installs on the tri-lobe fitting on the muzzle. There is a quick release lever that baffled me until I carefully inspected it and saw that one end is open and a cross pin is retaining it.  I then pushed the other way and lever lifted right up.  Duh!  I’d never seen one before!  It is solid and I like it.

The case you see is a 32″ Blackhawk Homeland Security Weapons Carry Case.  It comes with one internal mag carrier and I added a second pouch.  They are sized for 30 round AR mags and you can get two 30-round MP5 magazines in each pouch pocket.

Next up, I cleaned the bore and lubricated the weapon – especially the bolt head and trigger pack.  Past experience taught me to go through and make sure it was ready.

Two of my brother-in-laws and I took it to the range.  We used 124 grain S&B FMJ ammo and it functioned great and was accurate.  We had a blast at 15-25 yards shooting it despite it being a brisk day.  I really like how this combination worked out.  We didn’t use the light but the green laser was nice and bright when we tried it out.

We put probably about 200 rounds through it.  You can now feel the action has really smoothed out and I wouldn’t hesitate using this for home defense if I needed – which is why I put the light on it.

All in all, I’m very pleased and would recommend the POF-5 to anyone looking for a semi-auto MP5-type pistol.

Update 10/6/2018:  We put almost 500 rounds through this pistol this summer without one single failure to feed or eject.  We mainly shot the 124 grain FMJ S&B ammo except for one time, as a test, I shot about 20 rounds of Hornady 135gr Critical Duty ammo with no problem.  All of the magazines used (and I have 10 of them) are POF magazines.  Honestly, this thing is awesome.  I’ve only cleaned and re-lubed it once so far but it is on the to-do list.


12/12/18 Update:  I recently bought an HK SP5K and am documenting my journey with it.  Click here for the first post.


If you find this post useful, please share the link on Facebook, with your friends, etc. Your support is much appreciated and if you have any feedback, please email me at in**@ro*********.com . Please note that for links to other websites, I may be paid via an affiliate program such as Avantlink, Impact, Amazon and eBay.