I was always so impressed by all the firearm articles where someone used this mysterious tool called a “chronograph” to report the speeds of bullets. They’d then use formulas, bullet weights, ballistics coefficients and what not to determine an approximated trajectory with velocity and energy along the way. I even bought one once and instantly hated the hassle – I had to set it up, shoot between the wires, don’t let the light mess with the readings, etc. I always wanted someone to come out with an affordable, easy-to-use, radar chronograph. When Garmin released the Xero C1 and reviews came pouring in, I knew I had to buy one.
Features
Uses 24Ghz microwave radar
Measures projectile speeds from 100 to 5,000 FPS with a +/-0.1% error margin
Needs at least 20 yards to measure rifle bullets, less for slower pistol rounds. Arrows can be measure in about 7 yards
I haven’t read a maximum range though I am sure there is one. The minimums are stated above plus it is recommended the units be 5-15″ from the muzzle
Lithium-Ion Rechargeable battery – recharges via USB and is good for 2,000 shots or up to 6 hours
Shotview App runs on your phone to collect data
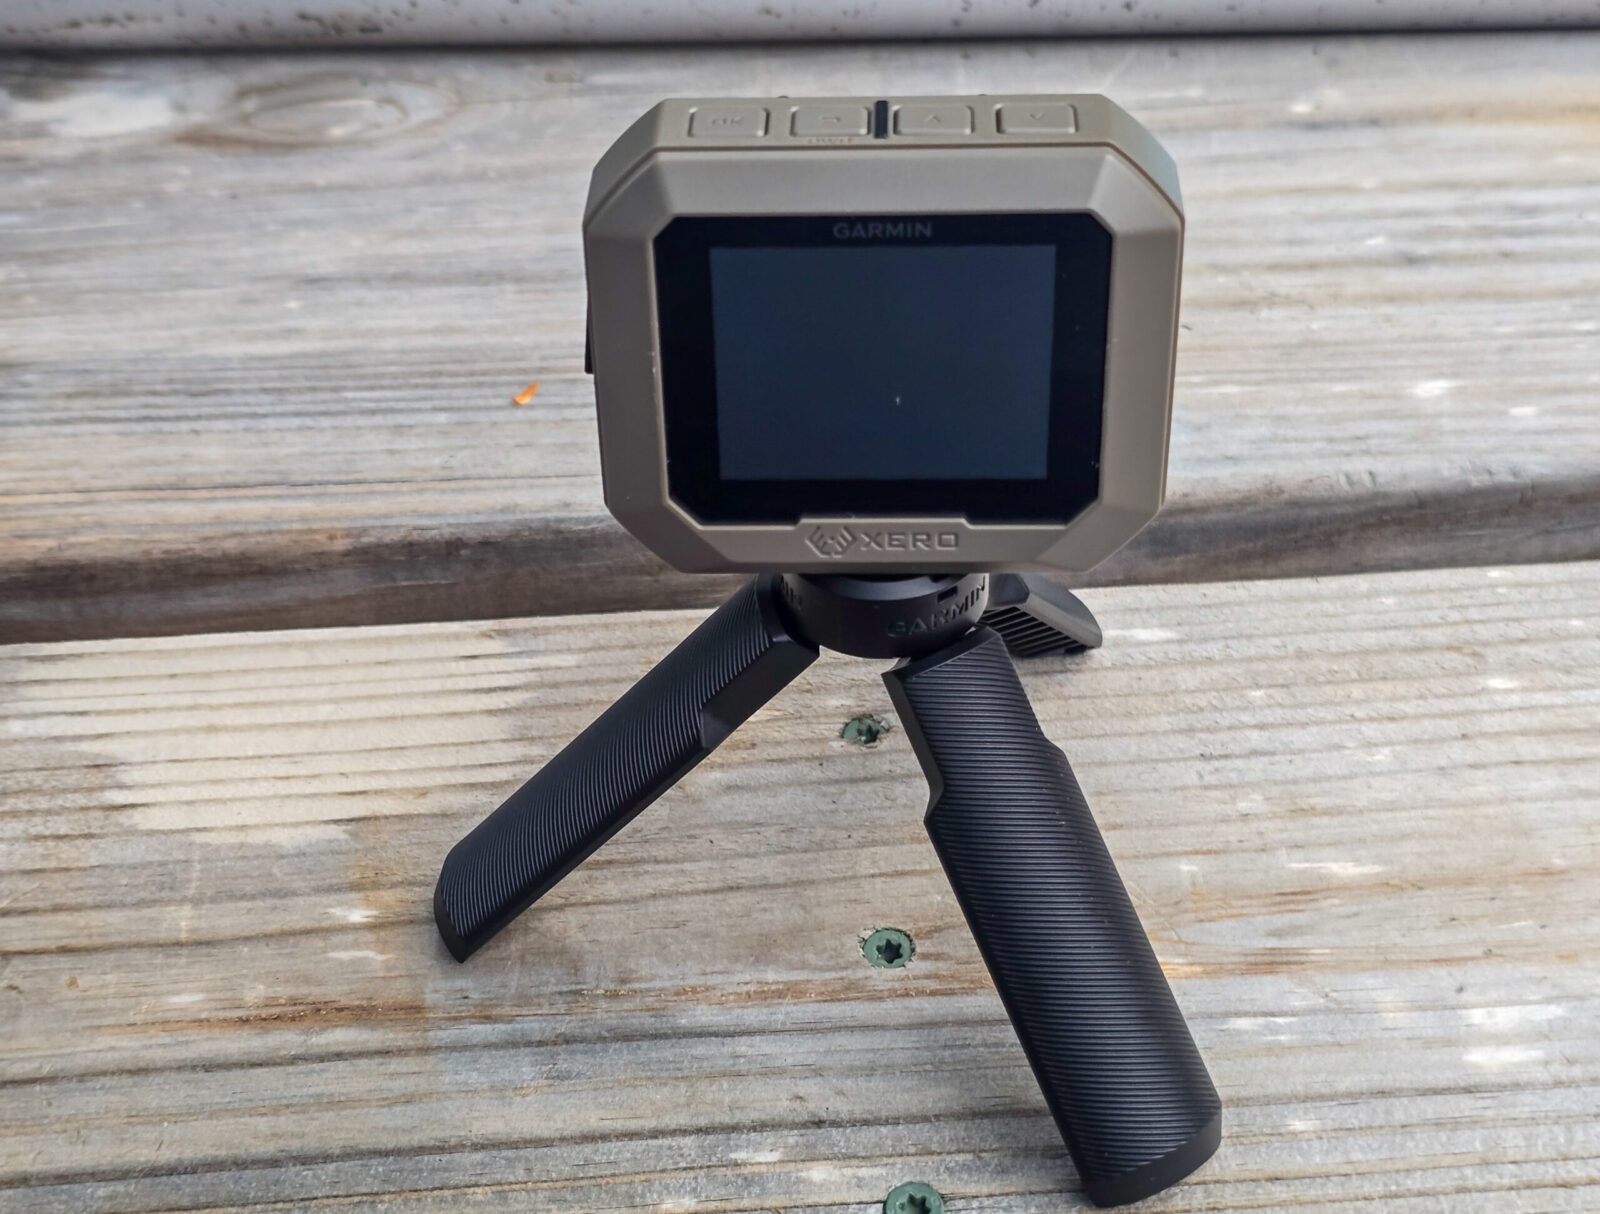
It’s small and portable – 3″x2.4″x1.36″ without the tripod that detaches
Weight is only 0.23 pounds without the tripod or 0.35pounds with it
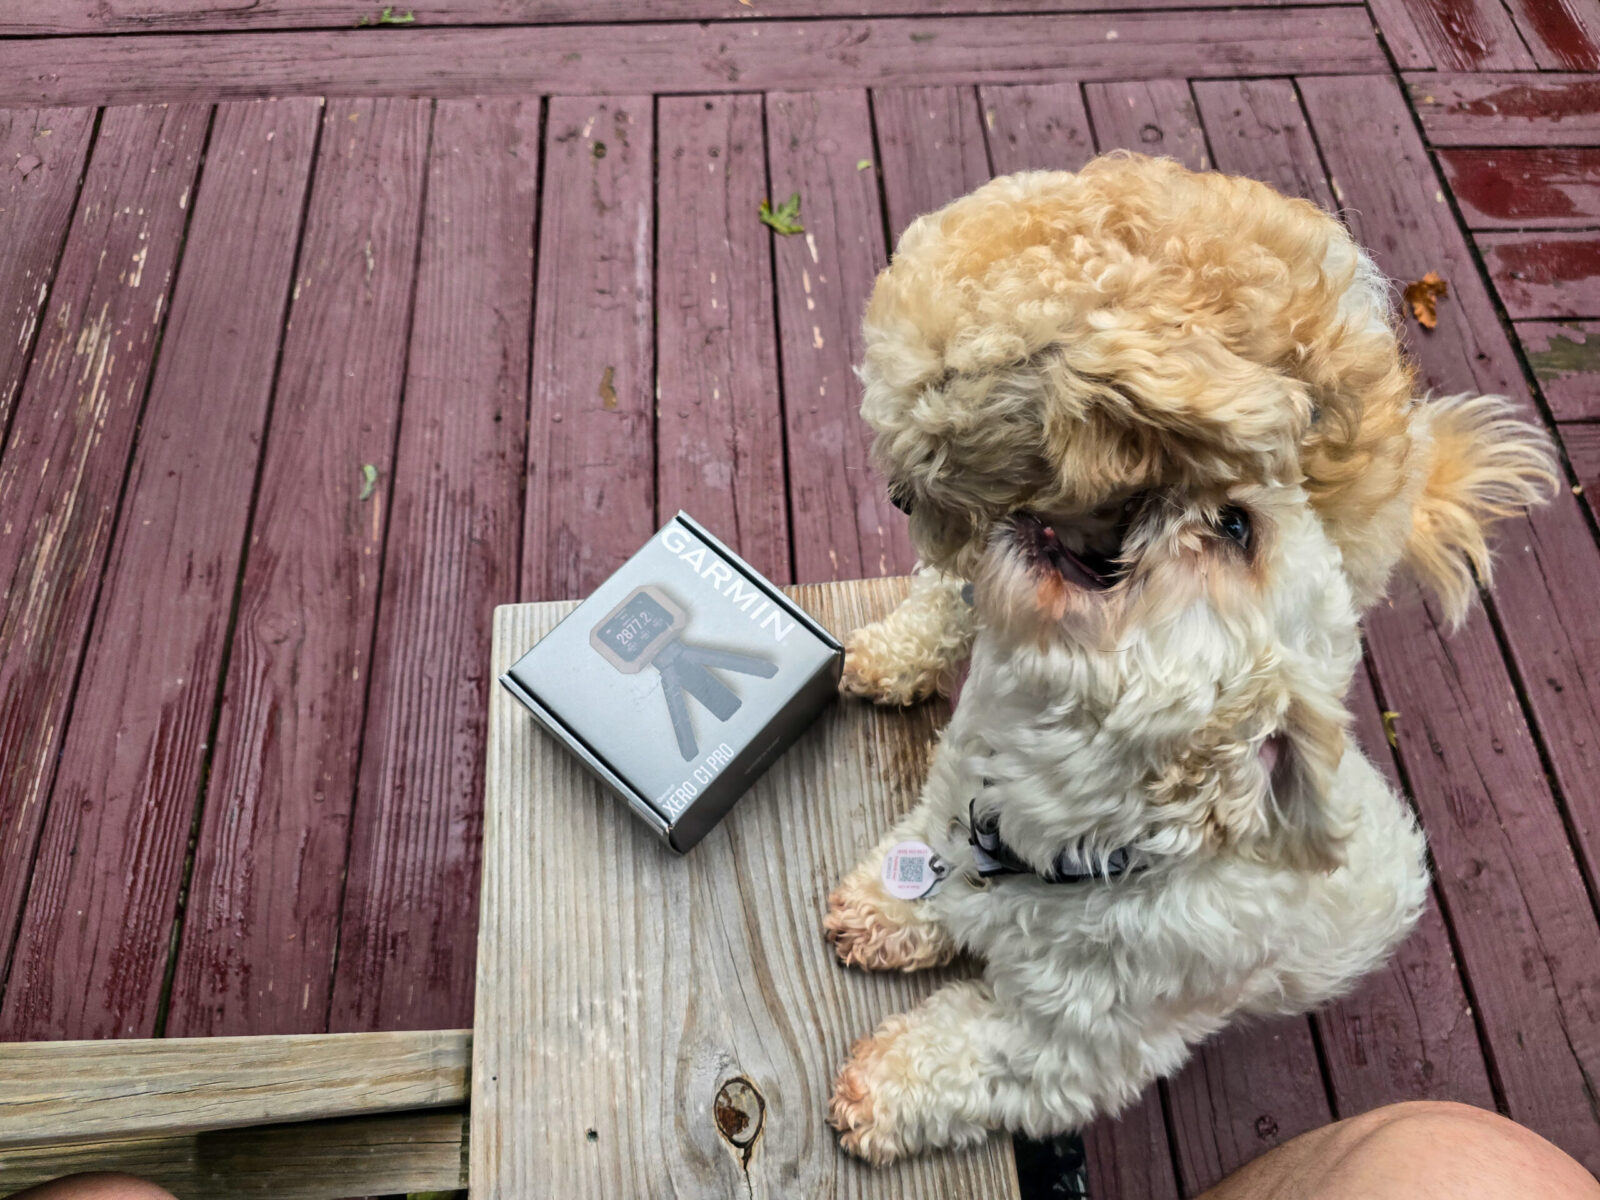
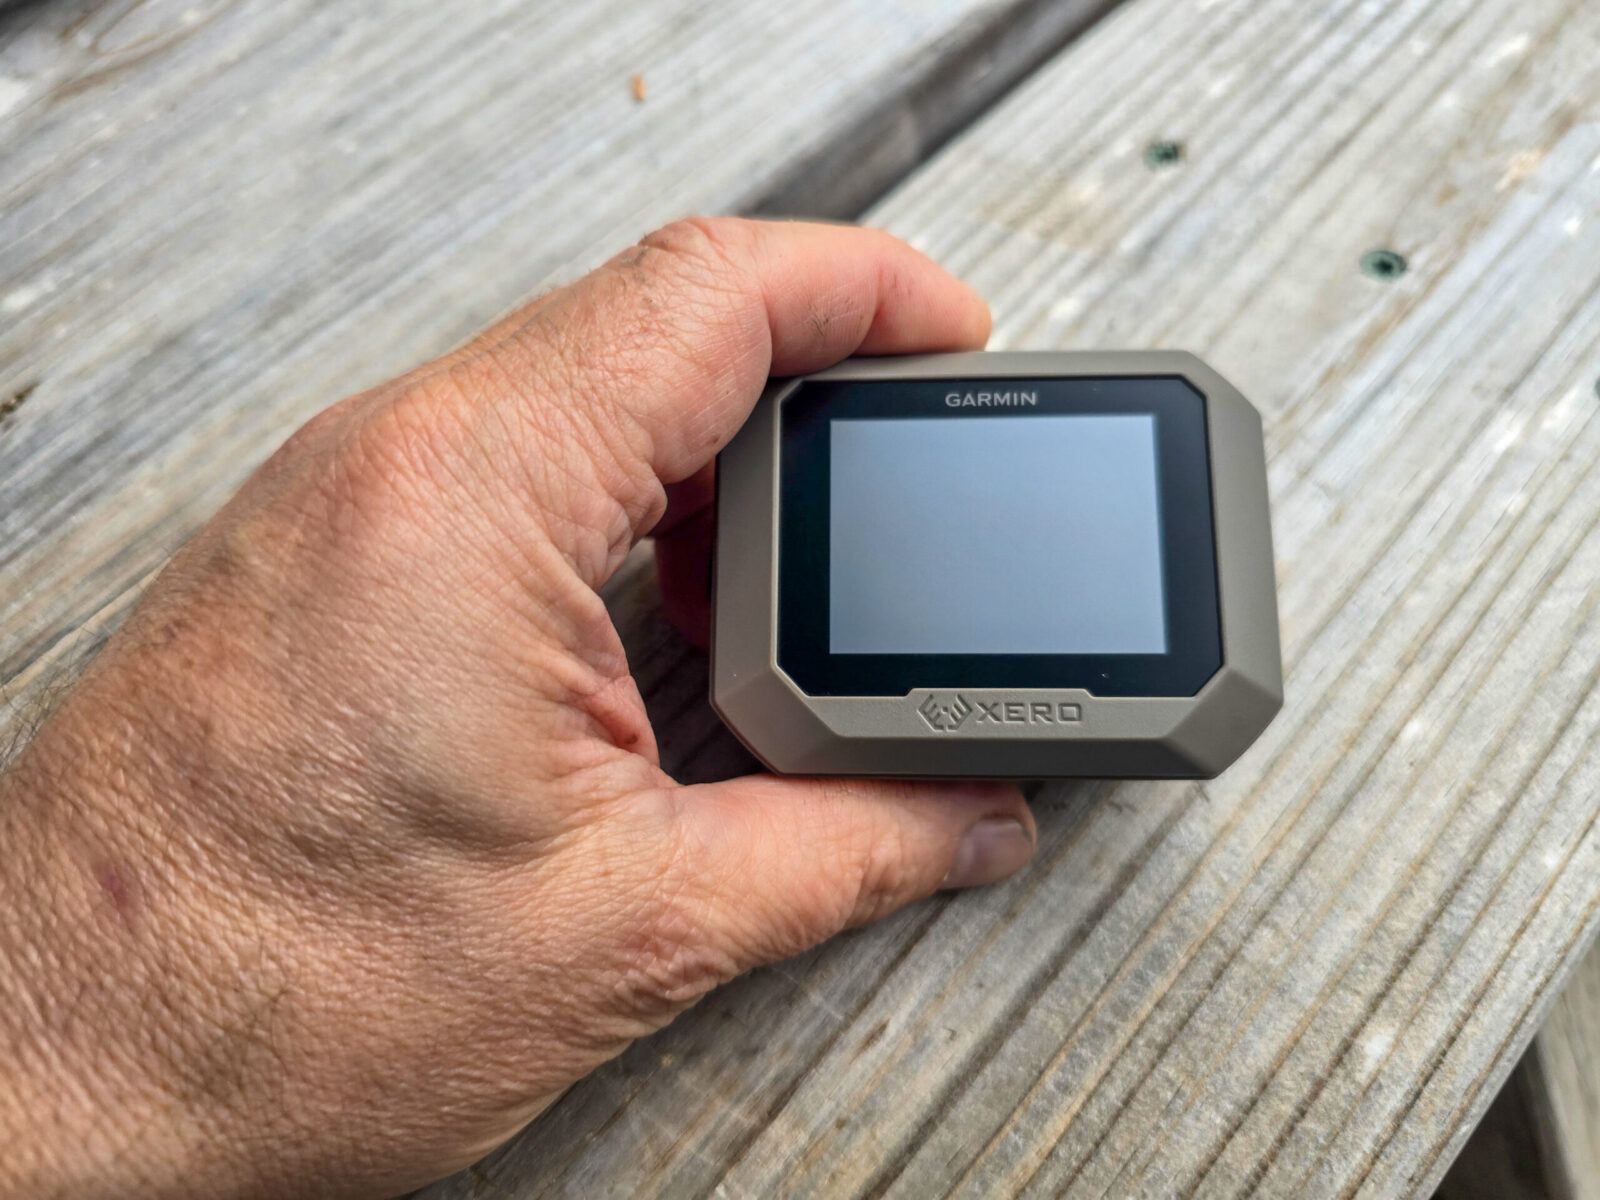
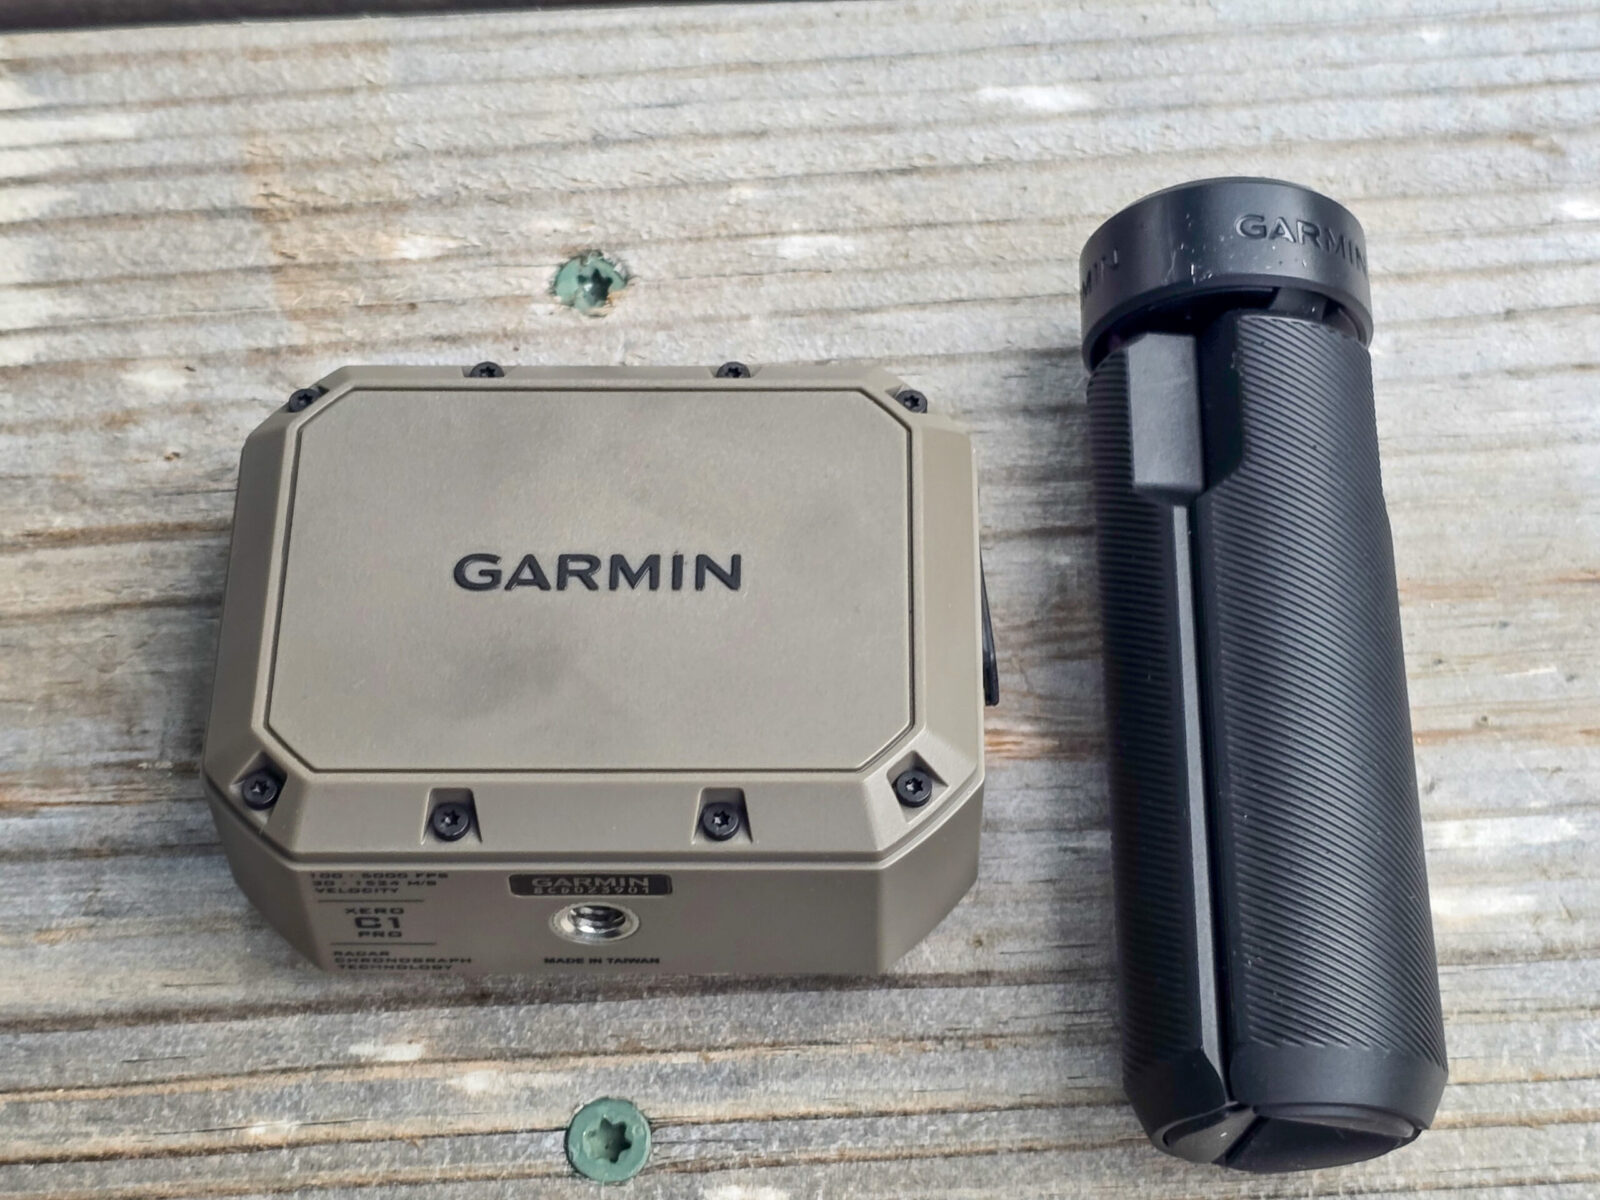
Two of my curious meat head dogs wanted to see what was going on and take part. Well, I figured I’d include them in the photo.The unit itself is surprisingly tiny. I wear XL sized gloves to put the 3.03″ x 2.38″ x 1.36″ dimensions in perspective.This is the microwave emitter side of the unit plus the small included bipod. The unit on the bottom is threaded for the standard 1/4-20 UNC thread.Here it is assembled. It’s about 5.1″x4.5″x5.5″.
Setup
No more juggling batteries, hauling crap around, etc. You plug this thing in and let it charge. Download the Shotview app to your phone and install it. Once the Xero C1 is charged, follow the instructions for pairing the Bluetooth to your phone. That’s it and that’s also assuming you want to use the app.
Getting ready to actually use the Xero C1 takes less than a minute after you turn it on and follow the on-screen prompts.
Range Visit
Wow is it fast and easy to set up. Open the case, thread on the tripod and open it. Turn it on, answer the questions on the screen and it’s running.
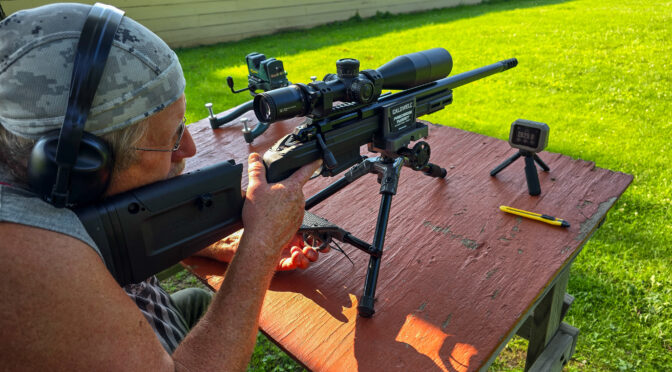
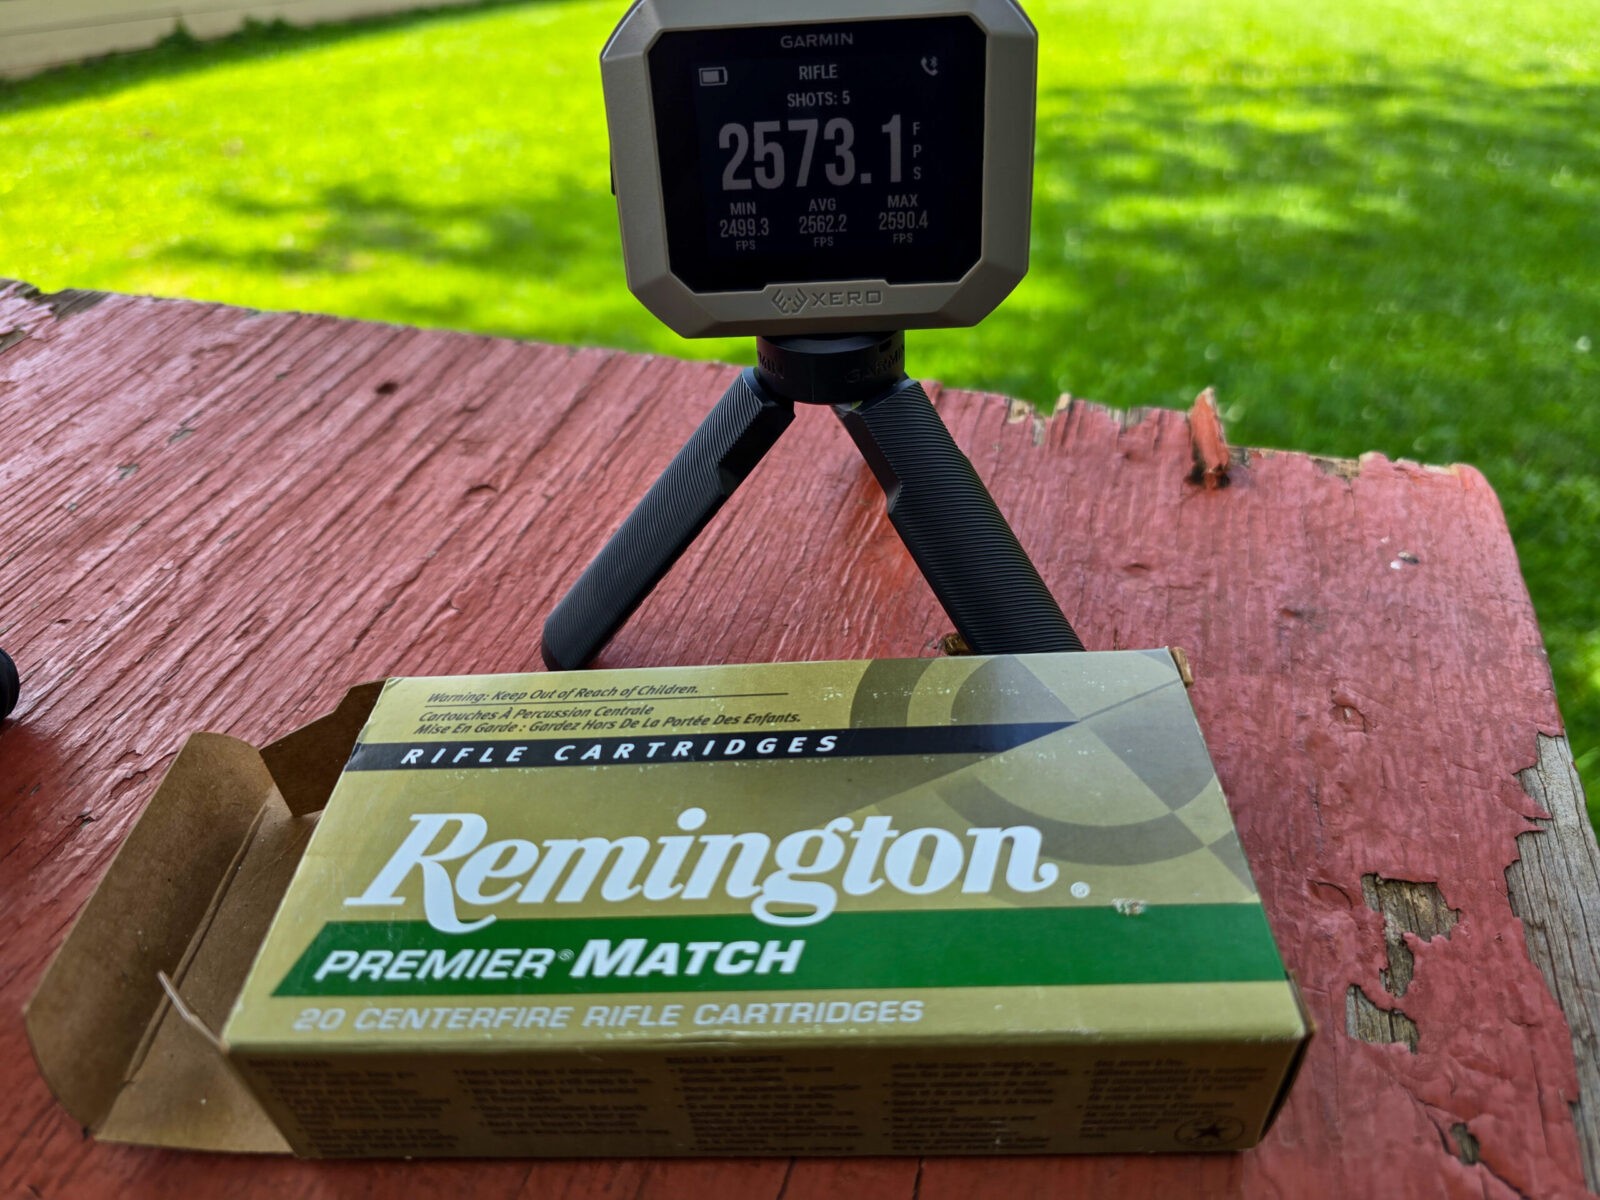
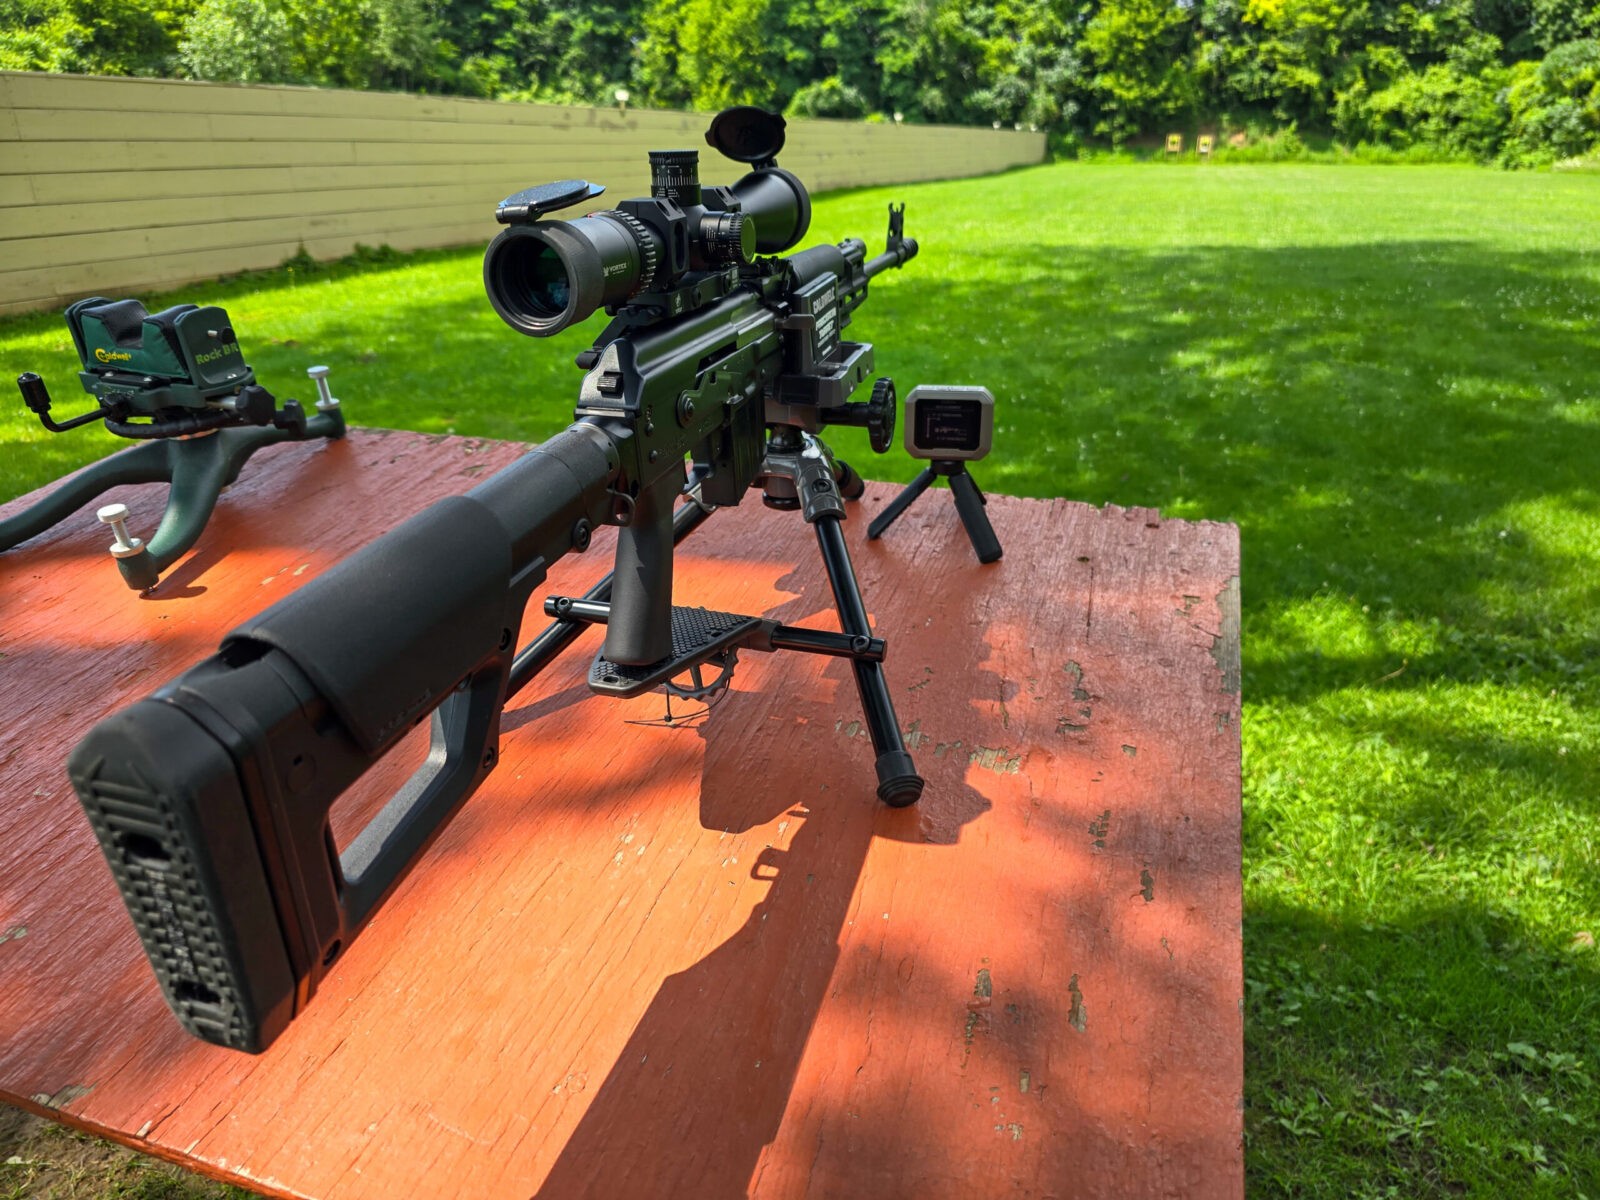
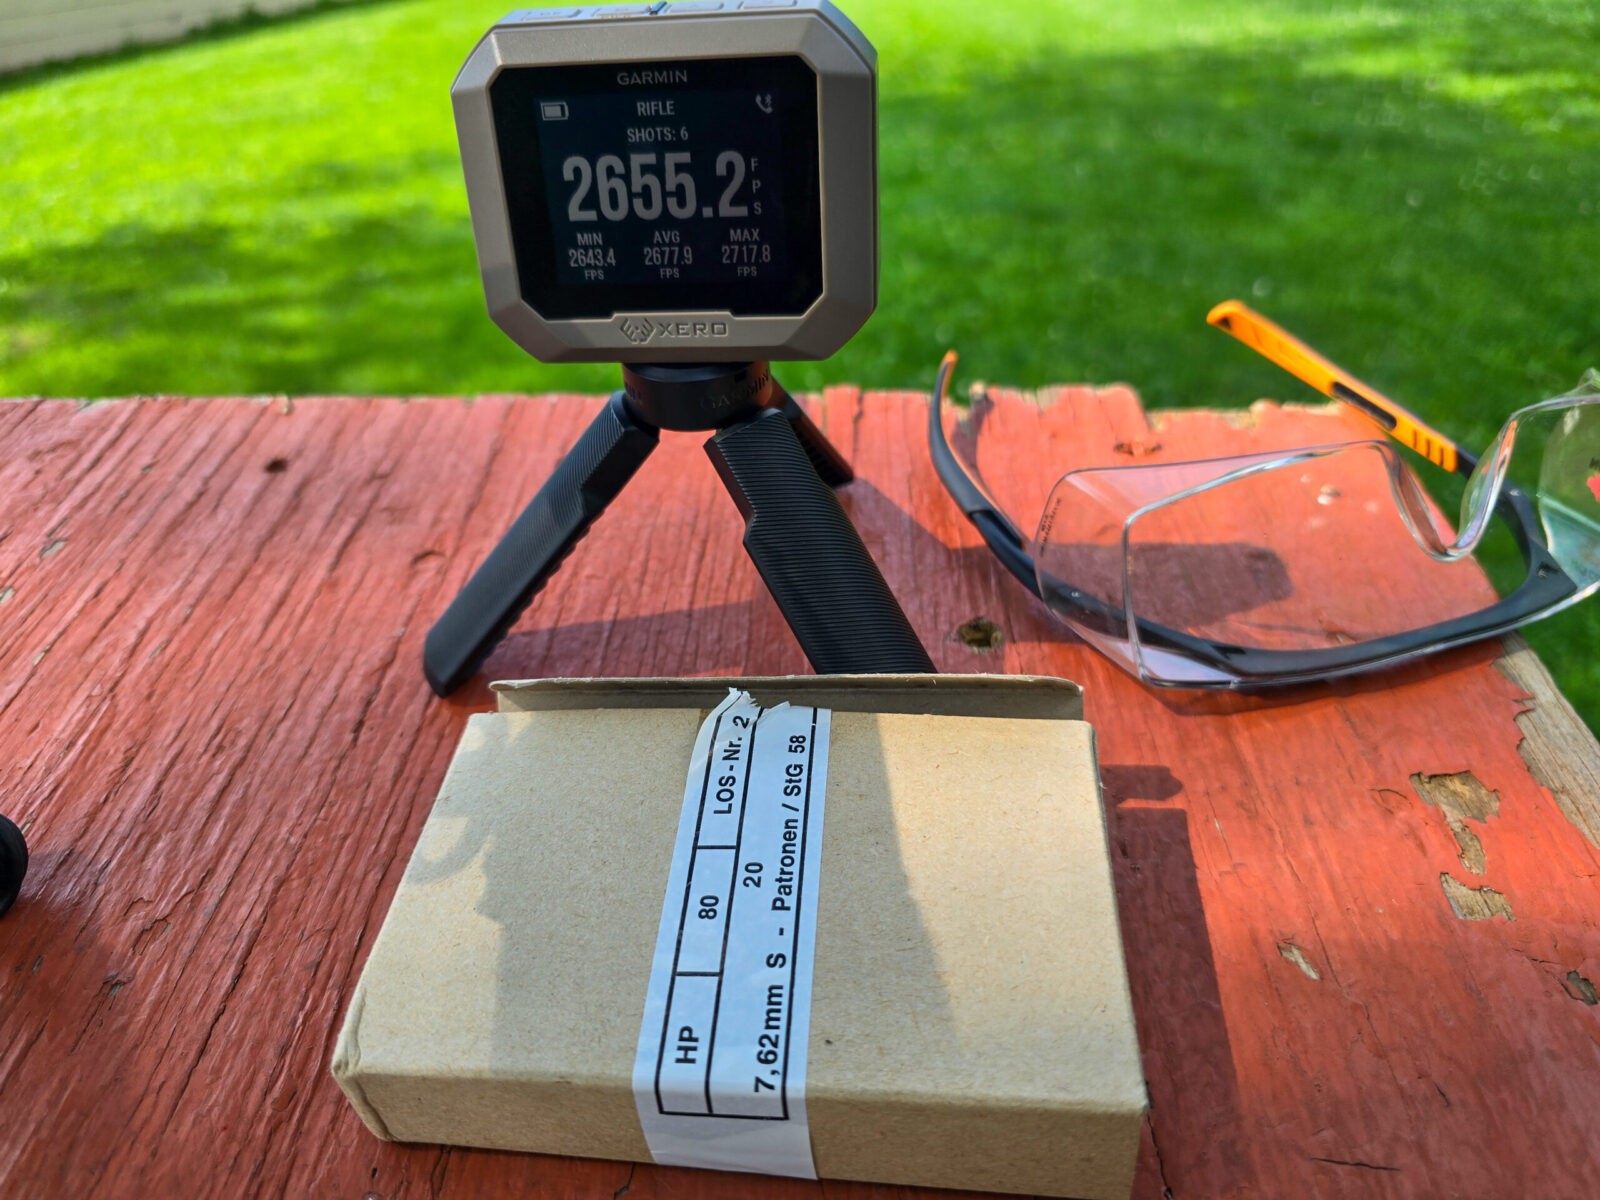
Five shots from my Zastava M77 using old Remington 168gr match ammo that I wanted to use up. You can see the Minimum, Maximum and Average for the session as well as the velocity of the last bullet fired in big numbers. We were shooting all of the .308s at 100 yards and nothing seemed to phase the little Xero C1. No error messages or wildly different velocities. It was a bright sunny day and the temperature was around 75-80F.German Hirtenberger StG 58 7.62mm ammo fired from a .308 IWI Galil Ace.
With the app you can record sessions and see the various velocities bullet by bullet if you want. You can also user the Xero C1 standalone if you want to do your own thing.
Summary
All I can say is “WOW!”. I don’t even know where my old chronograph went but when I find it, I’ll donate it. The Xero C1 is amazing and at this price point, they knocked the socks off everyone in the industry. I heartily recommend this.
Note, I have to buy all of my parts – nothing here was paid for by sponsors, etc. I do make a small amount if you click on an ad and buy something but that is it. You’re getting my real opinion on stuff.
If you find this post useful, please share the link on Facebook, with your friends, etc. Your support is much appreciated and if you have any feedback, please email me at in**@*********ps.com. Please note that for links to other websites, I may be paid via an affiliate program such as Avantlink, Impact, Amazon and eBay.
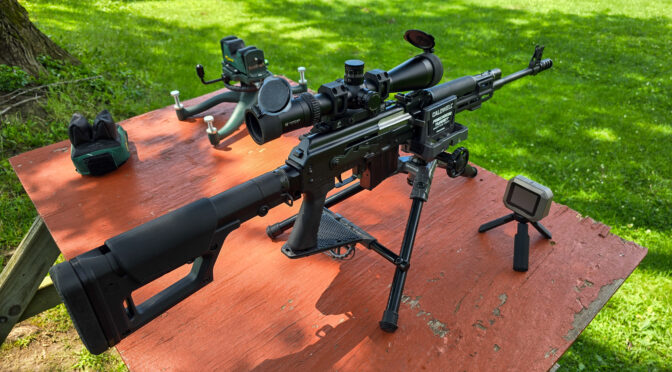
I like target shooting but have a tremor – that’s not a great combination. I am always on the hunt for better rifle rests when shooting from a bench. I owned the Caldwell Rock BR for a couple of years and it is a darned good rest in its own right. I wanted to see the Caldwell Precision Turret Rest was better.
The reason I bought the new Precision Turret was that I planned to do some test firing of four different .308 rifles and wanted to see if I could improve my own accuracy by using a better rest. Thus, I did some digging and went with the Precision Turret due to a combination of reviews, features and price.
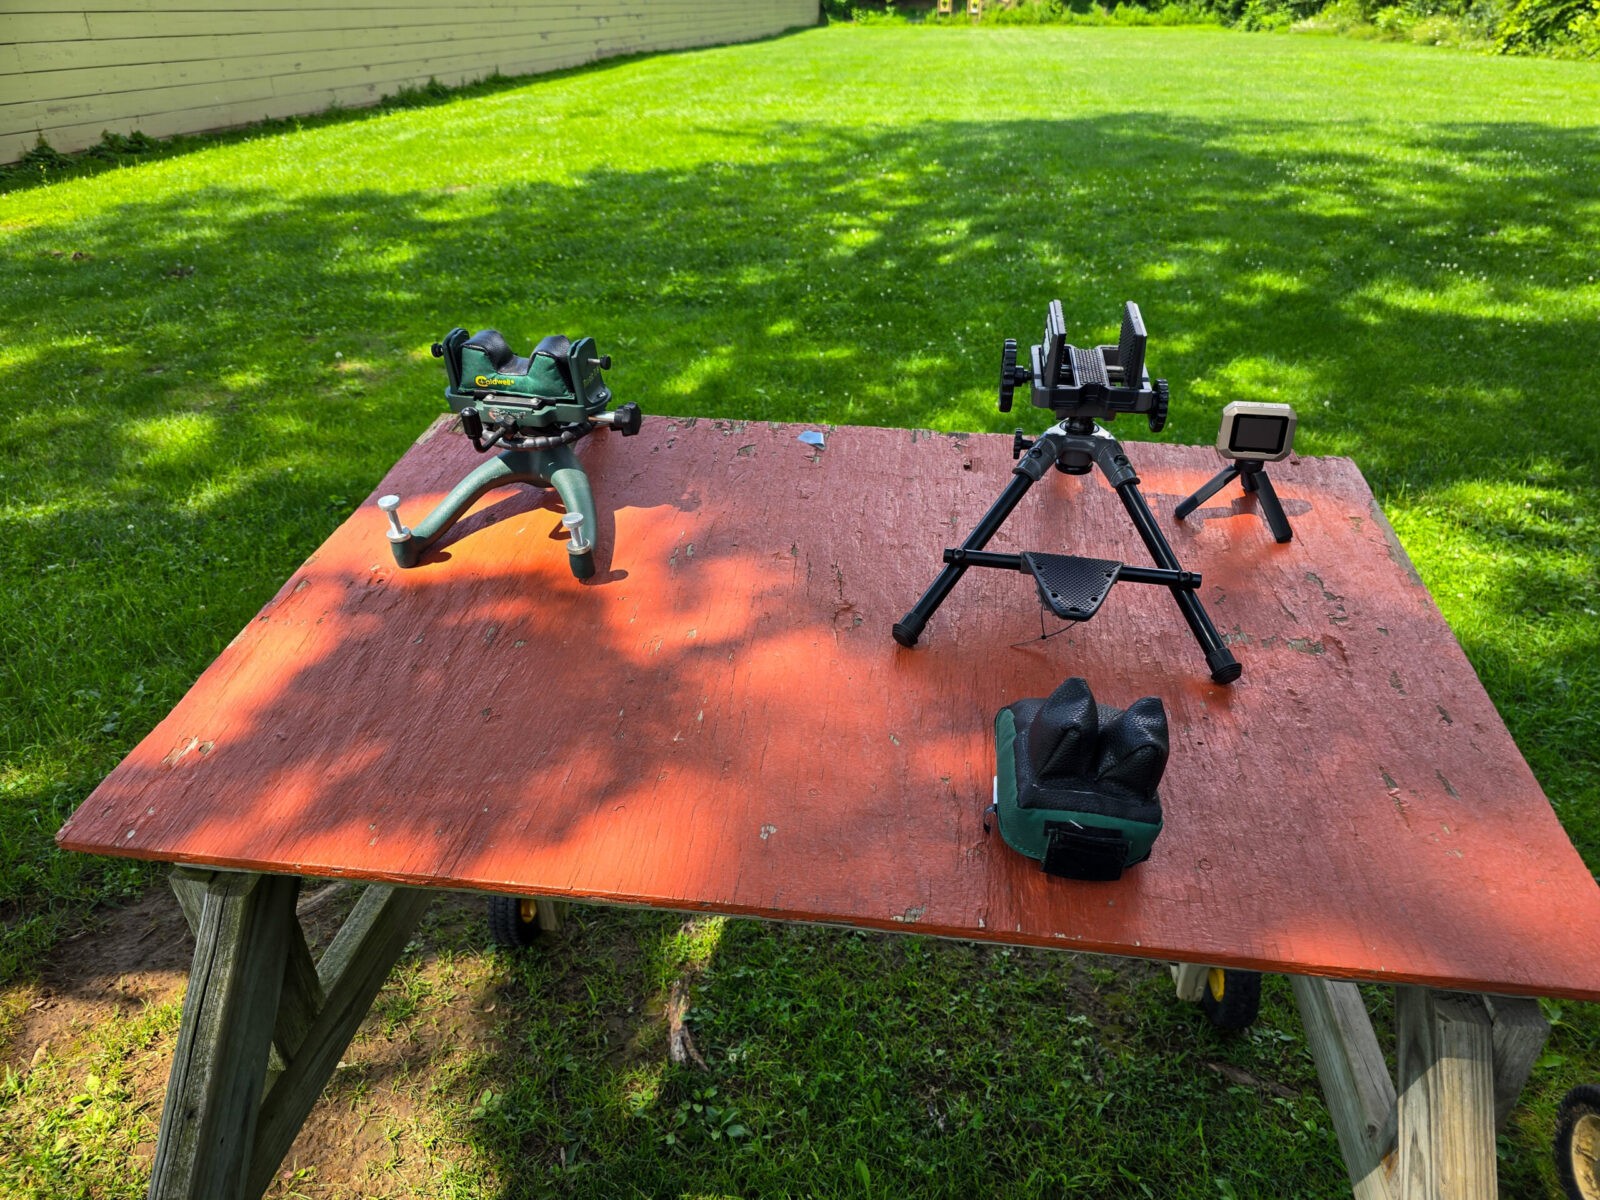
Here are the two rests next to each other. On the left is the Caldwell Precision Turret Rest and on the right is the far lower Rock BR.We were setting up when I snapped this photo. The rear bag goes with the Rock rest – it’s too low for use with the Precision Turret.
The Rock BR has some real nice features
The foot spikes really get a good grip on our wood range tables. There are rubber pads you can optionally buy that prevent the spikes from damaging a surface if you need it.
At 13 pounds and very beefy, it doesn’t move – especially if the spiked feet are dug in
It has a great elevation ring that allows you to precisely adjust the height
That ring is on bearings so raising or lowering the saddle is very smooth
The saddle is adjustable to better fit the forearm of your rifle
It can get really low to the table or go as high as 11.5″
You will either need to shoulder the rifle or use a bag, and Caldwell sells many varieties, for the rear/shoulder portion of the stock.
Assembly was quick and easy.
Cool features of the Precision Turret
The feet are tipped with rubber and will not damage surfaces
The legs are solid steel and it weighs 10.6 pounds
The front non-marring saddle clamps the forearm in position
The legs are adjustable for height and can be set differently if you need to level the rest up to 6″.
The elevation and tilt are controlled through a ball connection that allows the saddle to move and you lock it in place.
Fine elevation control is done via the pistol grip platform. This works great if your firearm has a grip that can reach the platform and most of mine do.
Assembly was quick and easy.
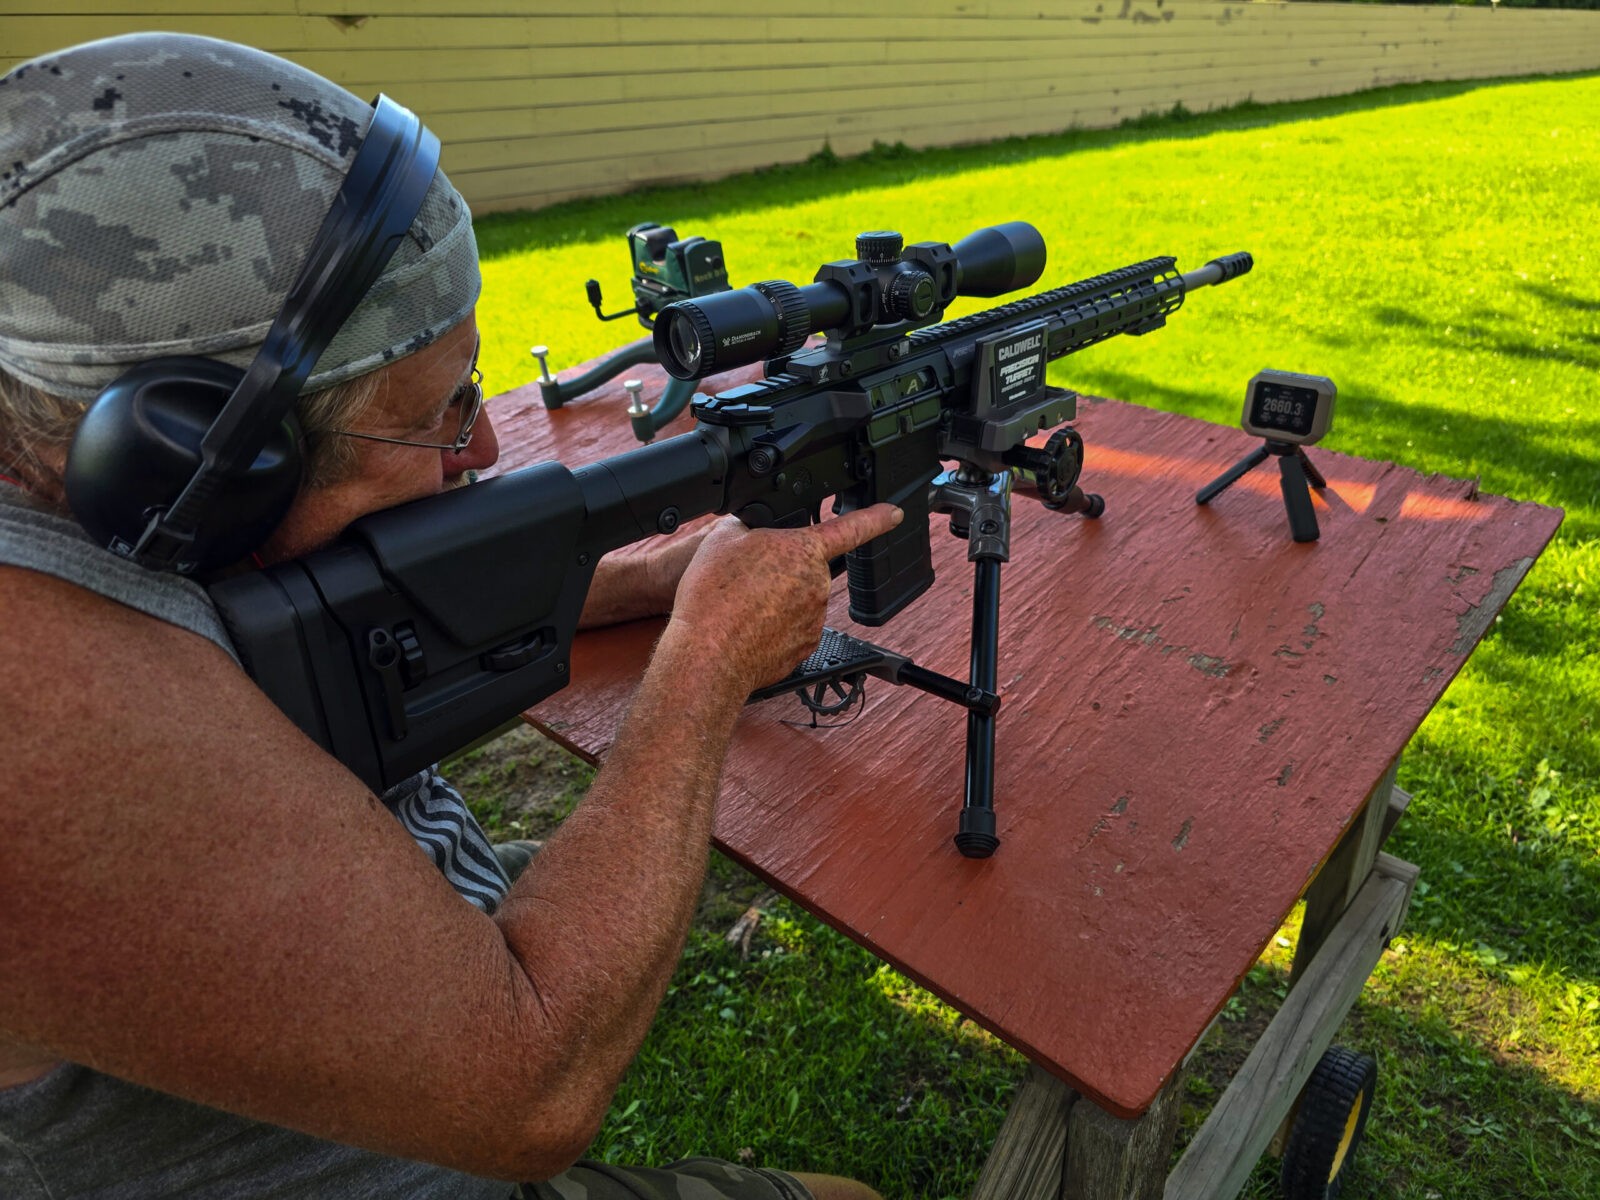
This the Precision Turret holding a .308 Aero M5 with a 20 round magazine. John was holding the grip and using the grip platform to get him in the ballpark. The .308s did move the Precision Turret around a bit but not a lot. The Rock BR is a solid precision rifle rest. I dont have photos of me using it with my Aero Solus — I forgot to ask John to take some photos when we were at the range with both rests.
The Differences
The Rock can go lower to the table and the Precision Turret is higher and can better accomodate rifles with larger magazines
I feel the vertical adjustment in the Rock is smoother and doesn’t need a pistol grip
The Precision Turret really needs a rifle with a pistol grip to handle vertical adjustment.
The Rock has zero flex but the Precision Target is sensitive to how much pressure you apply to the pistol grip platform
The Rock either needs you to shoulder the rifle or use a rear bag. The Precision Target’s clamp and pistol grip platform hold the rifle in place — if there is a pistol grip – let me stress that.
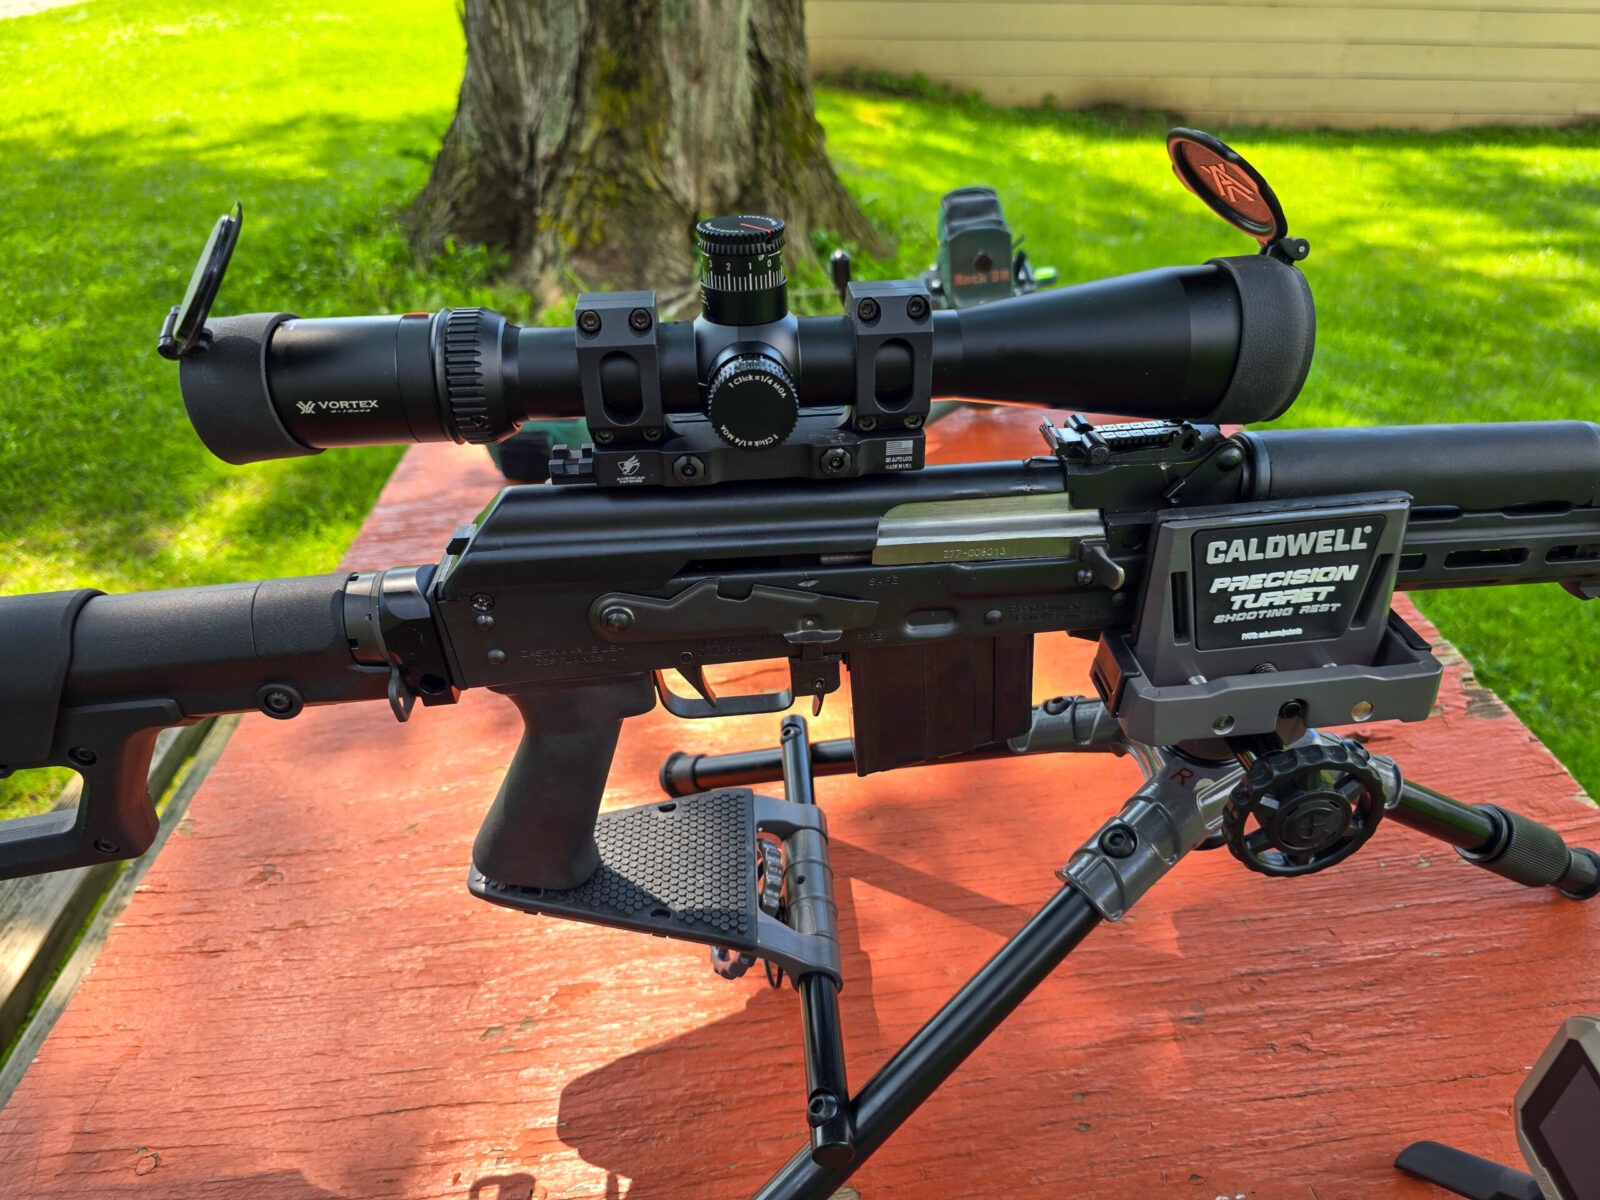
Here you can see the pistol grip of the M77 resting on the pistol grip platform. The wheel to the front of the rest tilts the platform up or down thus changing the elevation of the barrel. Unfortunately that platform is not rigid and if you change the amount of pressure on the platform then the point of impact will shift.
The Verdict
They really are rests for two different use cases:
The Rock is really a precision rifle rest – hence having Bench Rest (BR) in the name. It is low to the table, heavy, rigid and excels at providing a solid front platform. I’d use the Rock rather than the Precision Turret for those situations.
The Precision Turret works best with rifles that have a pistol grip and a magazine that needs height for clearance. It is not as rigid as the Rock but I found I could figure out the loading to work the way I wanted it to. At any rate, if I plan to shoot a designated marksman rifle (DMR) with a pistol grip and magazine, I’d use the Precision target.
In Summary
I am keeping both rests because of the two different use cases. I have not had any problems with either one and recommend both. In case you are wondering – I bought both off Amazon and Caldwell didn’t pay or compensate me in any way.
I hope this helps you out.
Note, I have to buy all of my parts – nothing here was paid for by sponsors, etc. I do make a small amount if you click on an ad and buy something but that is it. You’re getting my real opinion on stuff.
If you find this post useful, please share the link on Facebook, with your friends, etc. Your support is much appreciated and if you have any feedback, please email me at in**@*********ps.com. Please note that for links to other websites, I may be paid via an affiliate program such as Avantlink, Impact, Amazon and eBay.
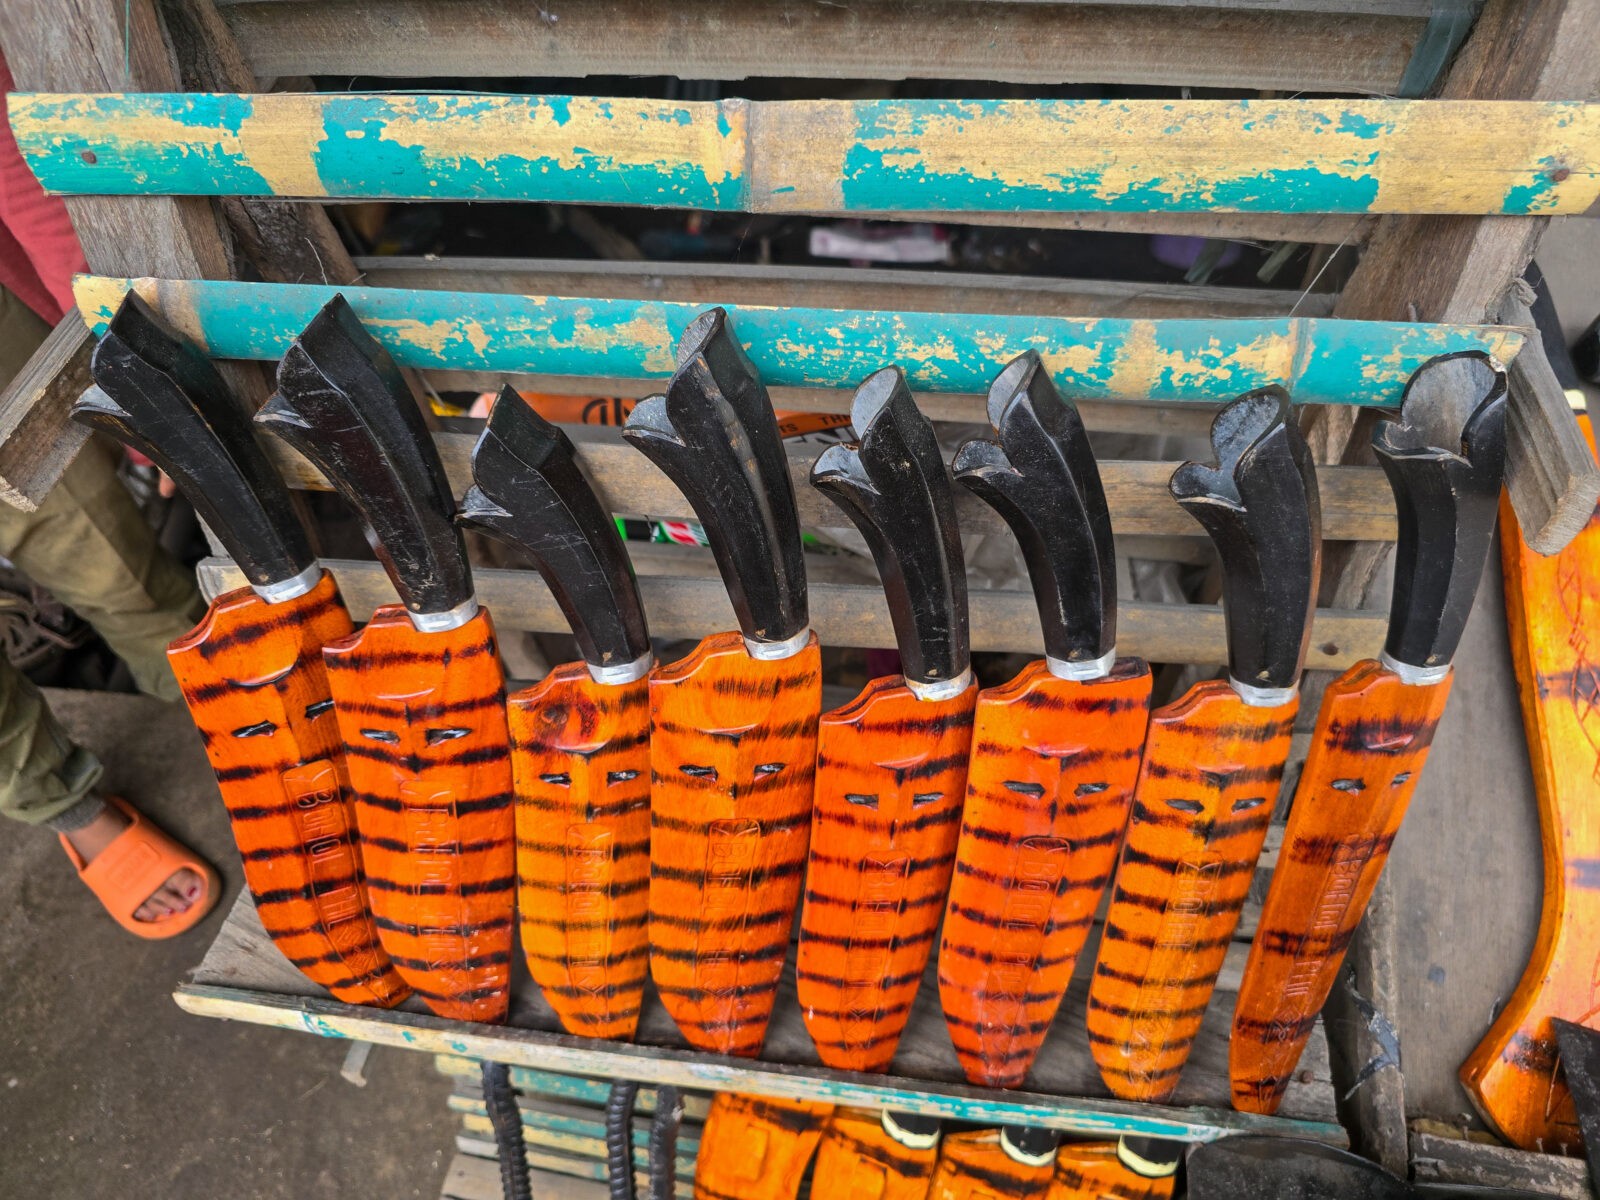
During a recent trip to the Philippines, we visited the island of Bohol. We happened to drive through the village of Loay and saw a shop by the road with an enormous number of blades of all sizes and shapes for sale so we stopped.
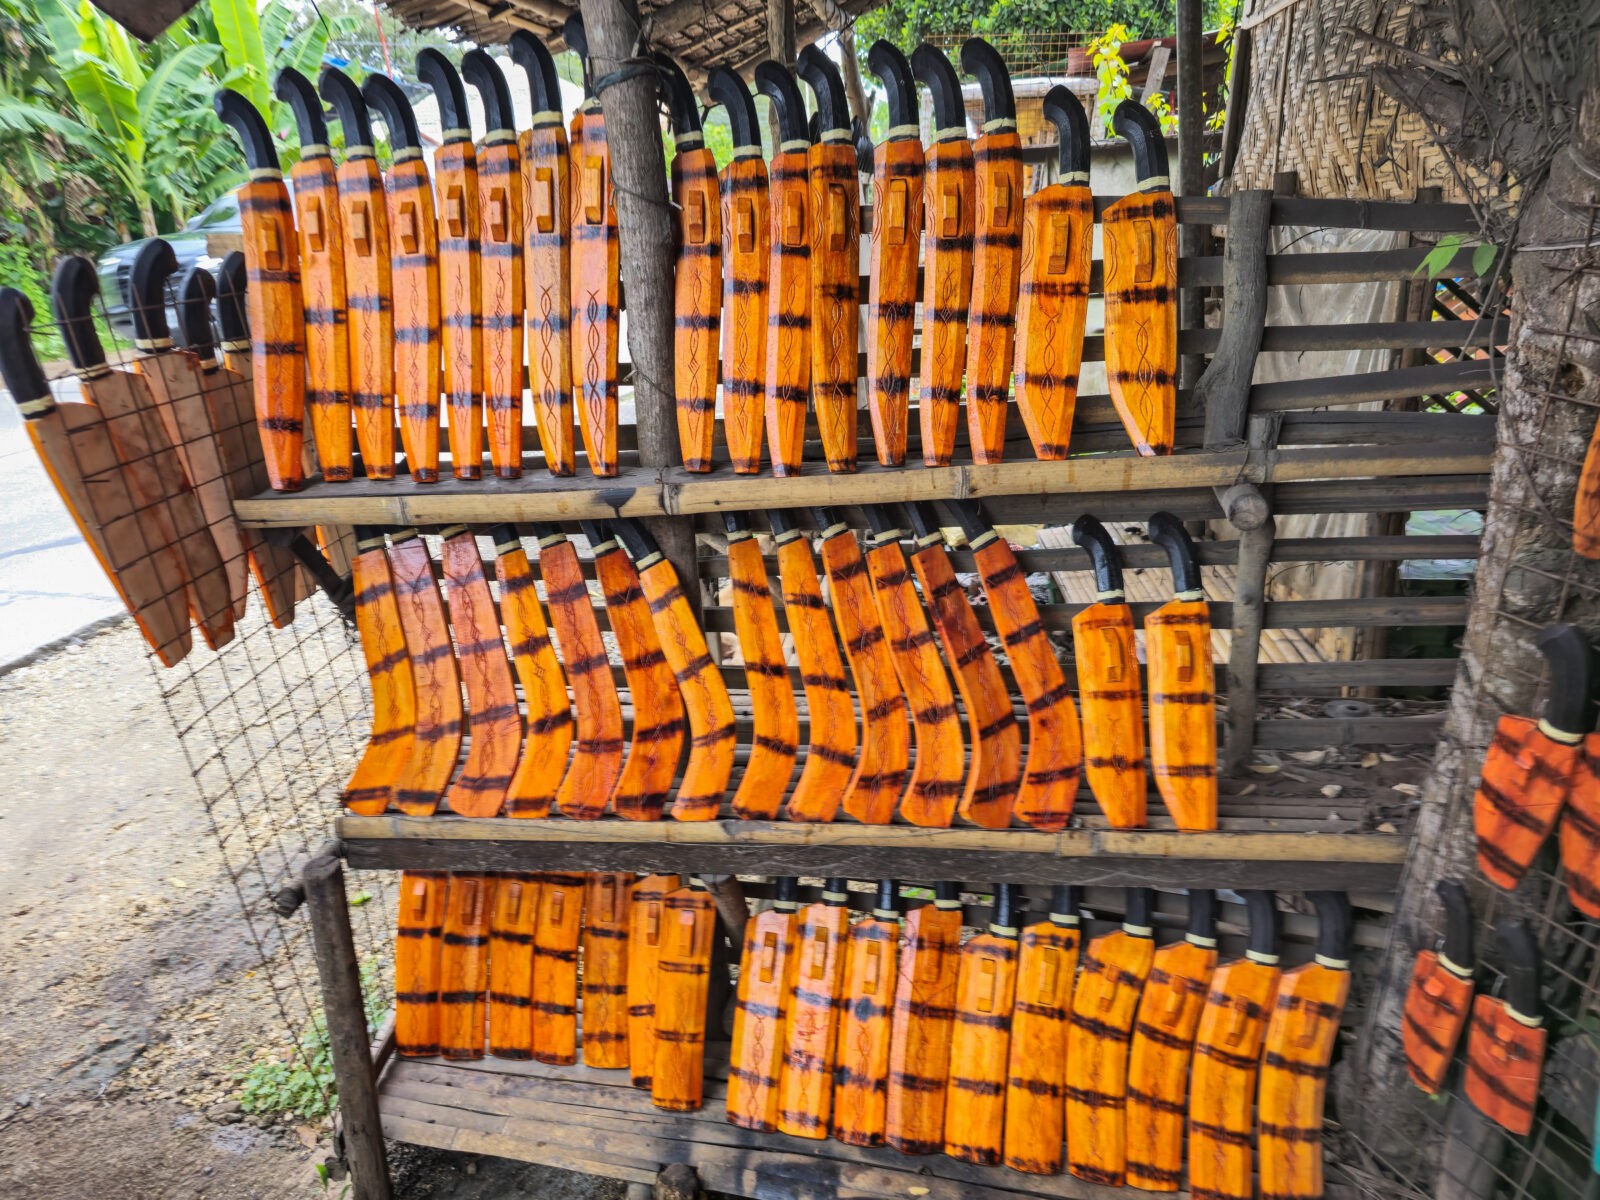
This was the “Bulaklak Blacksmith” shop and at J233+QFH, in Loay. The maker was busy at a grinder and I can only assume it was his wife showing us his wares. Bohol has a booming tourist industry with beautiful beaches and I am sure this stand was trying to capitalize on this. We were visiting at the beginning of September which is when the tourist season is drawing to a close.
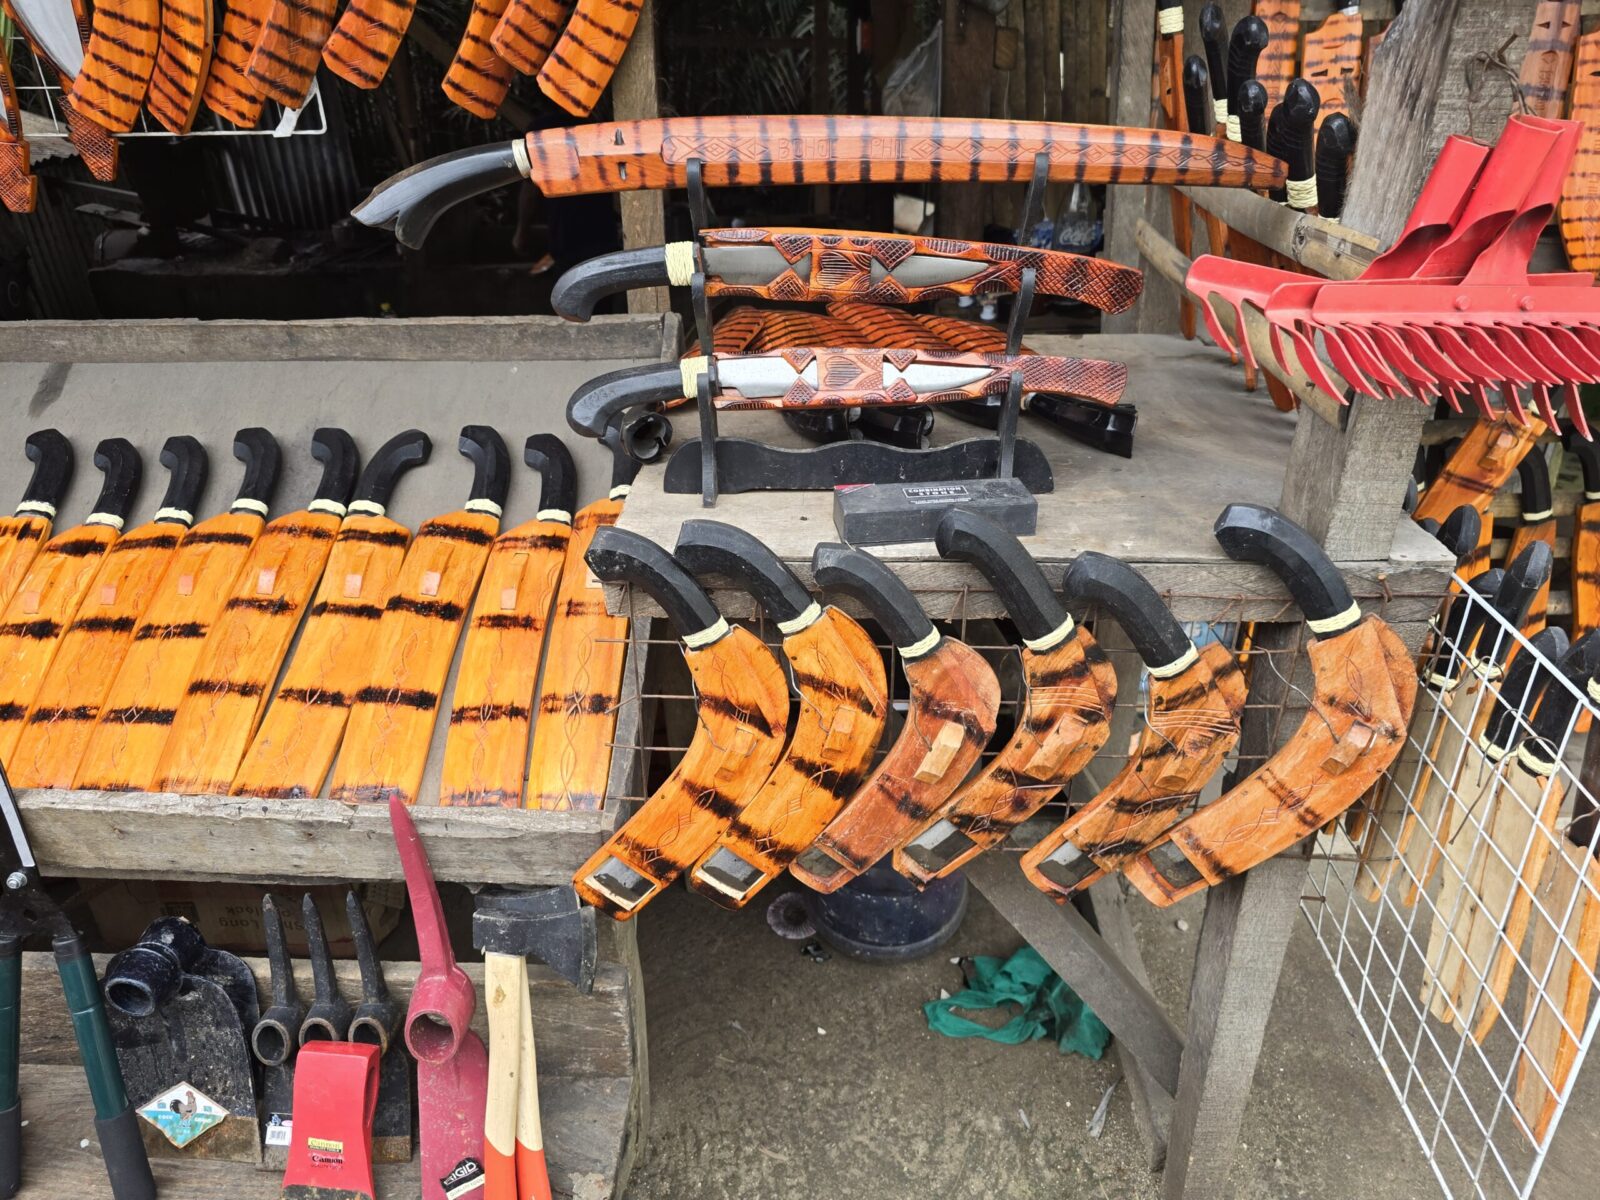
He had produced a huge number of machetes and various knifes of all shapes and sizes. We also saw various types of implements such as steel rake heads, steel poles with heavy cutting heads and more.
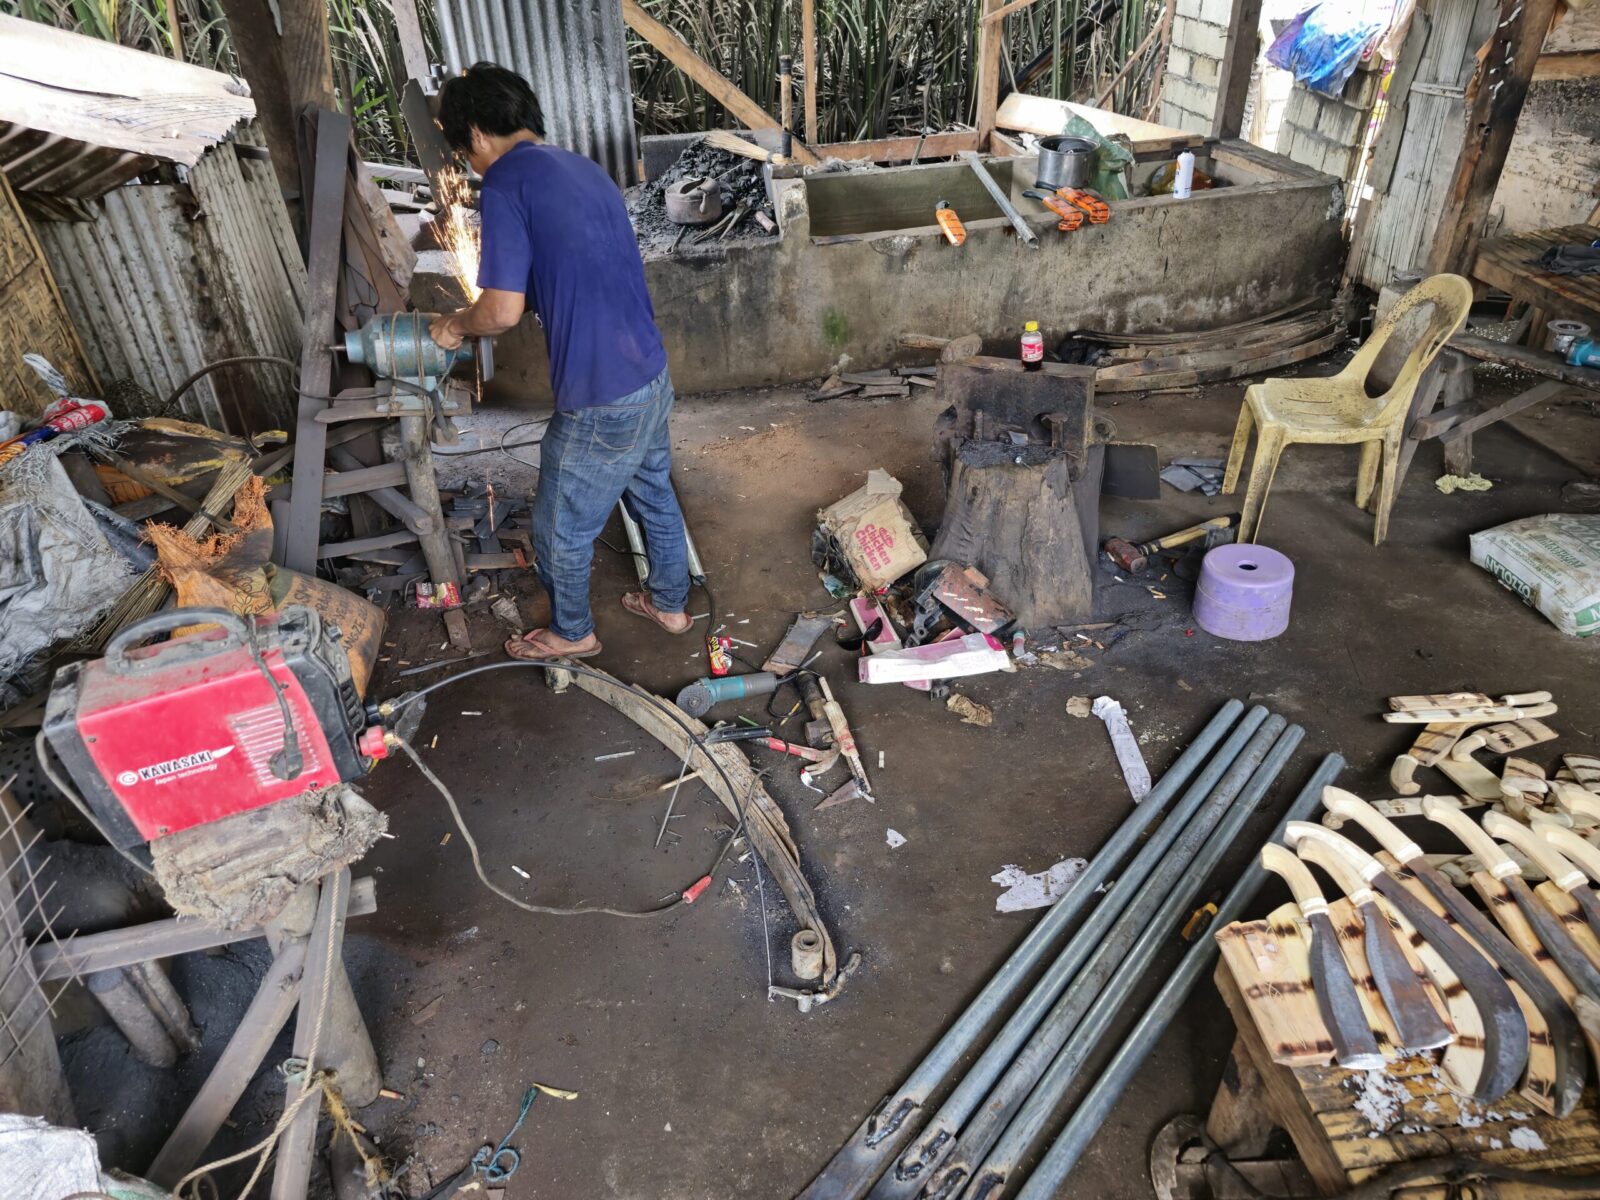
What struck me was his shop. There he was with very basic equipment – a forge, anvil, hand tools, a stick welder, grinder, and so forth cranking out his wares.
If you are ever on the island of Bohol, the store and shop make for an interesting stop.
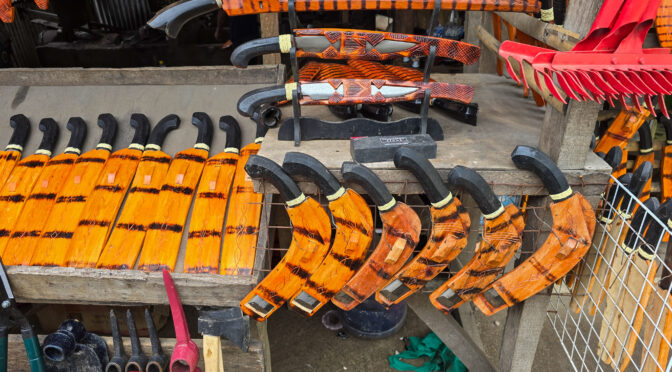
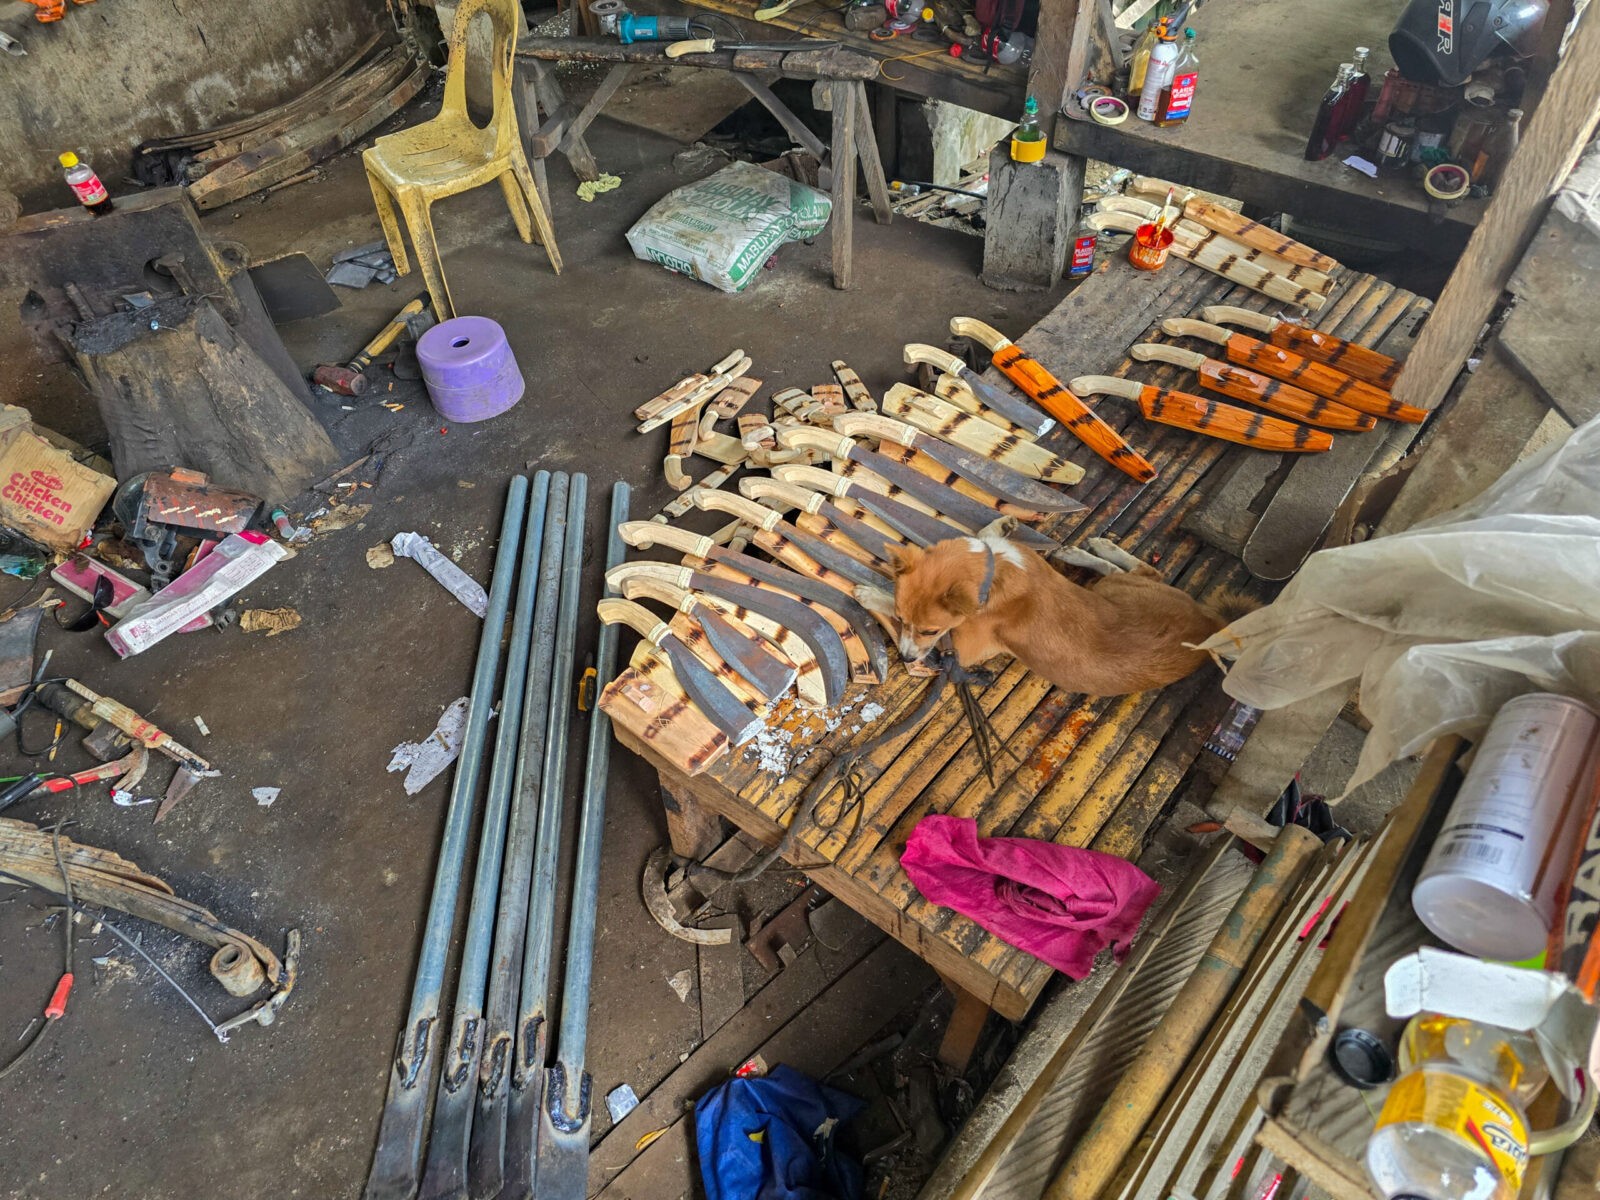
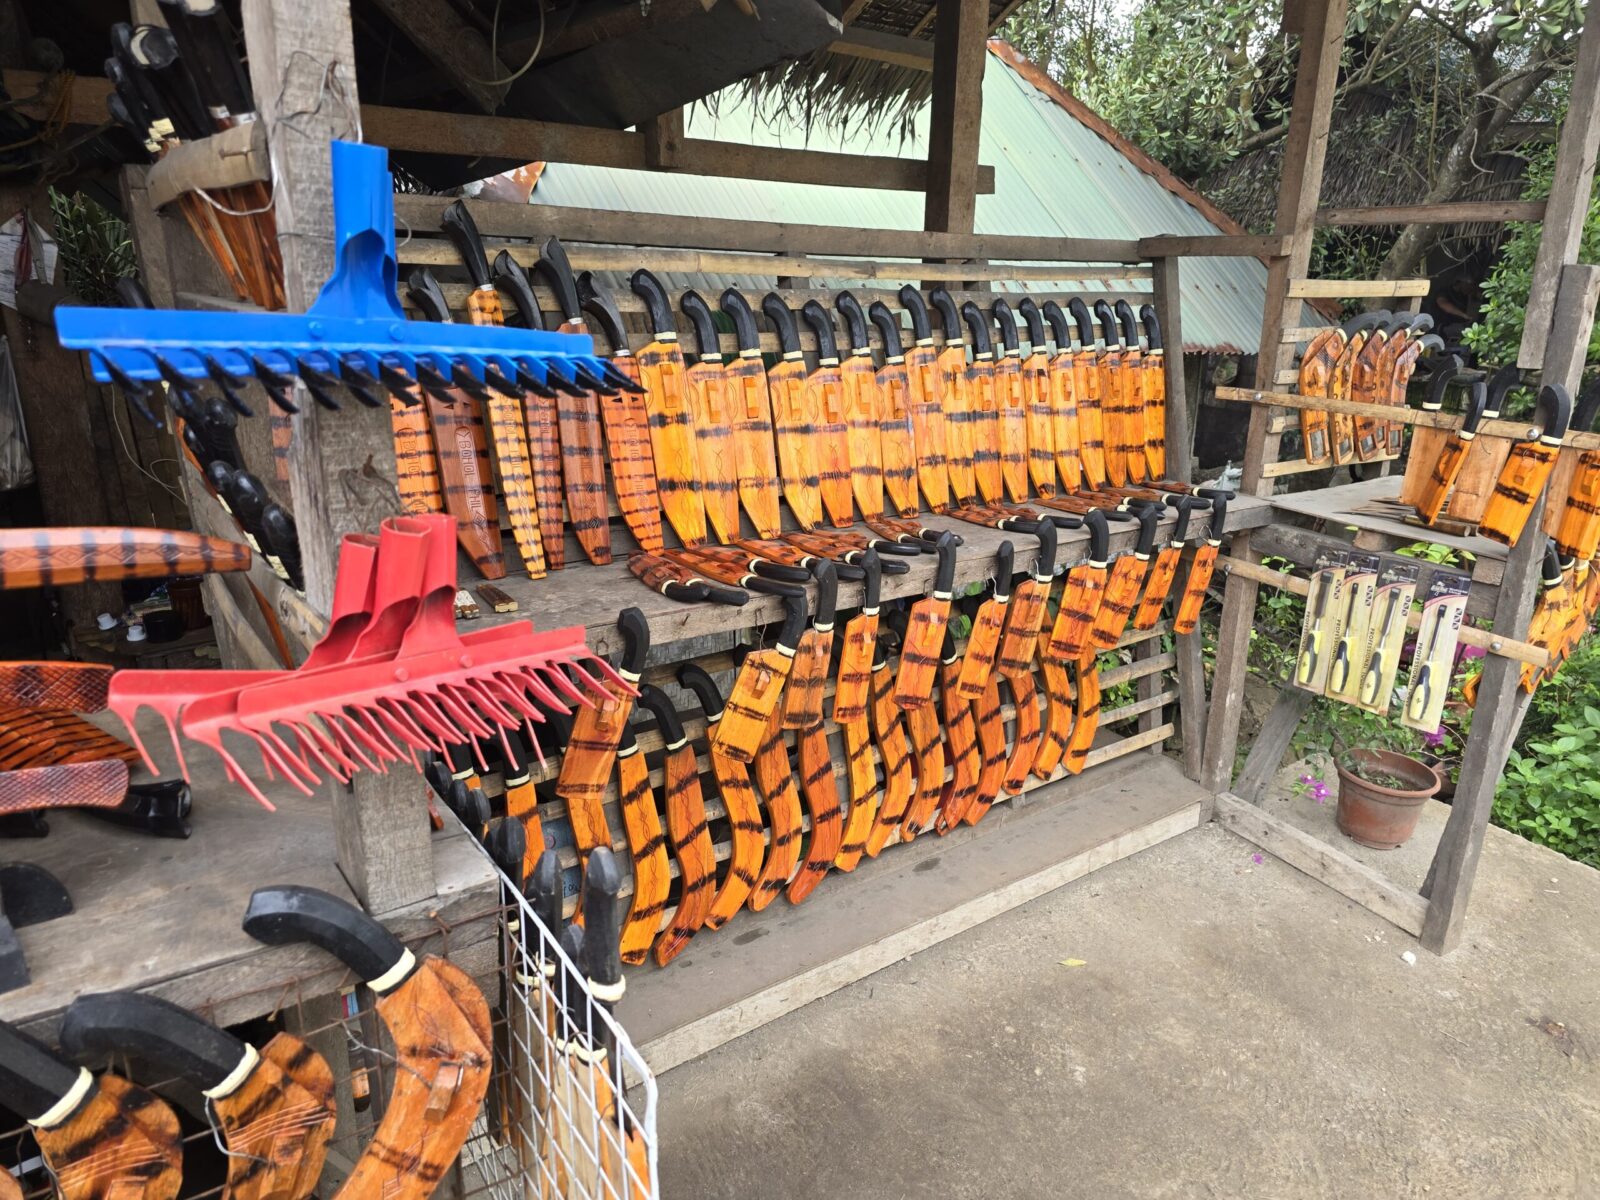
With his finished wares outside facing the road, he was inside cranking out the work. He was grinding the whole time I was there. Note it was 83F with a ton of humidity and there he is on a dirt floor getting work done. Also note the truck leaf springs. The knife makers of Nepal, known as kamis, also get leaf springs to make knives – the alloy works great for them. You can see the poles with cutters on the end – I can guess they are for digging holes or some kind of clearing activity. On the table are various machetes in the works.Here’s a better view of the work in process and his furry helper who woke up just long enough to look at me and then went back to sleep. The machetes I saw were averaging about 3-4mm in thickness.This was maybe a fourth of the knives he had done and ready for sale. Handles were either wood or hollow buffalo horn. The scabbards are of a died wood. The ferrule on the handles is actually a tightly braided twine. Noote the steel rake heads.Here are some large general purppose knives. The handles are all hollow water buffalo horn.Not only was he prolific but there were all kinds of styles from small hunting knives to machetes to swords. Traditional Filipino styles as well as Nepalese kukris and Japanese natas.The majority of the knife blades were of a “villager” style without a lot of finishing and polishing work. By the way, I am very fond of villager-style blades as they really have character. In some cases, such as the sword and blades in the top center, he could turn out more refined work.
I didn’t think to ask if he sells any blades for locals. I would have really liked to see them. However, we had a schedule to keep as we were going on to see the Tarsiers and Chocolate Hills so we had to get going.
If you have ever wanted to visit and very affordable tropical resort, we stayed at the Bellevue Resort and it was beatiful. Great staff, facility and food.
This was the view from our balcony. You can see one wing of the hotel portion on the left and the thatched roof is the restaurant.Looking back at the restaurant and our wing of the hotel. Again, great place to stay.
If you find yourself in Bohol, check out the Bulaklak blacksmith’s shop and if you are looking for a resort, check out the Bellevue. By the way, we were visiting family and I don’t have a habit of jetsetting 🙂
I hope this helps you out.
If you find this post useful, please share the link on Facebook, with your friends, etc. Your support is much appreciated and if you have any feedback, please email me at in**@*********ps.com. Please note that for links to other websites, I may be paid via an affiliate program such as Avantlink, Impact, Amazon and eBay.
I posted about the modifications to the SP10A3 as well as magazine loaders and now it is time to talk about how it performed. One of my brother-in-laws and nephews were in town and ready to help me try it out. First off, we had a lot of fun and second, the 10mm Stribog ran stunningly well.
Preparing For the Range
When the Stribog arrived, I field stripped, cleaned and lubricated it. This is always a good idea because you never know what all will be in a firearm – preservatives, dirt or even dry with no lubricant.
The manual is well written so read it. The sections on field stripping, cleaning, and oiling are worth your time. I would also recommend hand cycling the action a few hundred times to accelerate your parts getting to know each other – also known as wearing in.
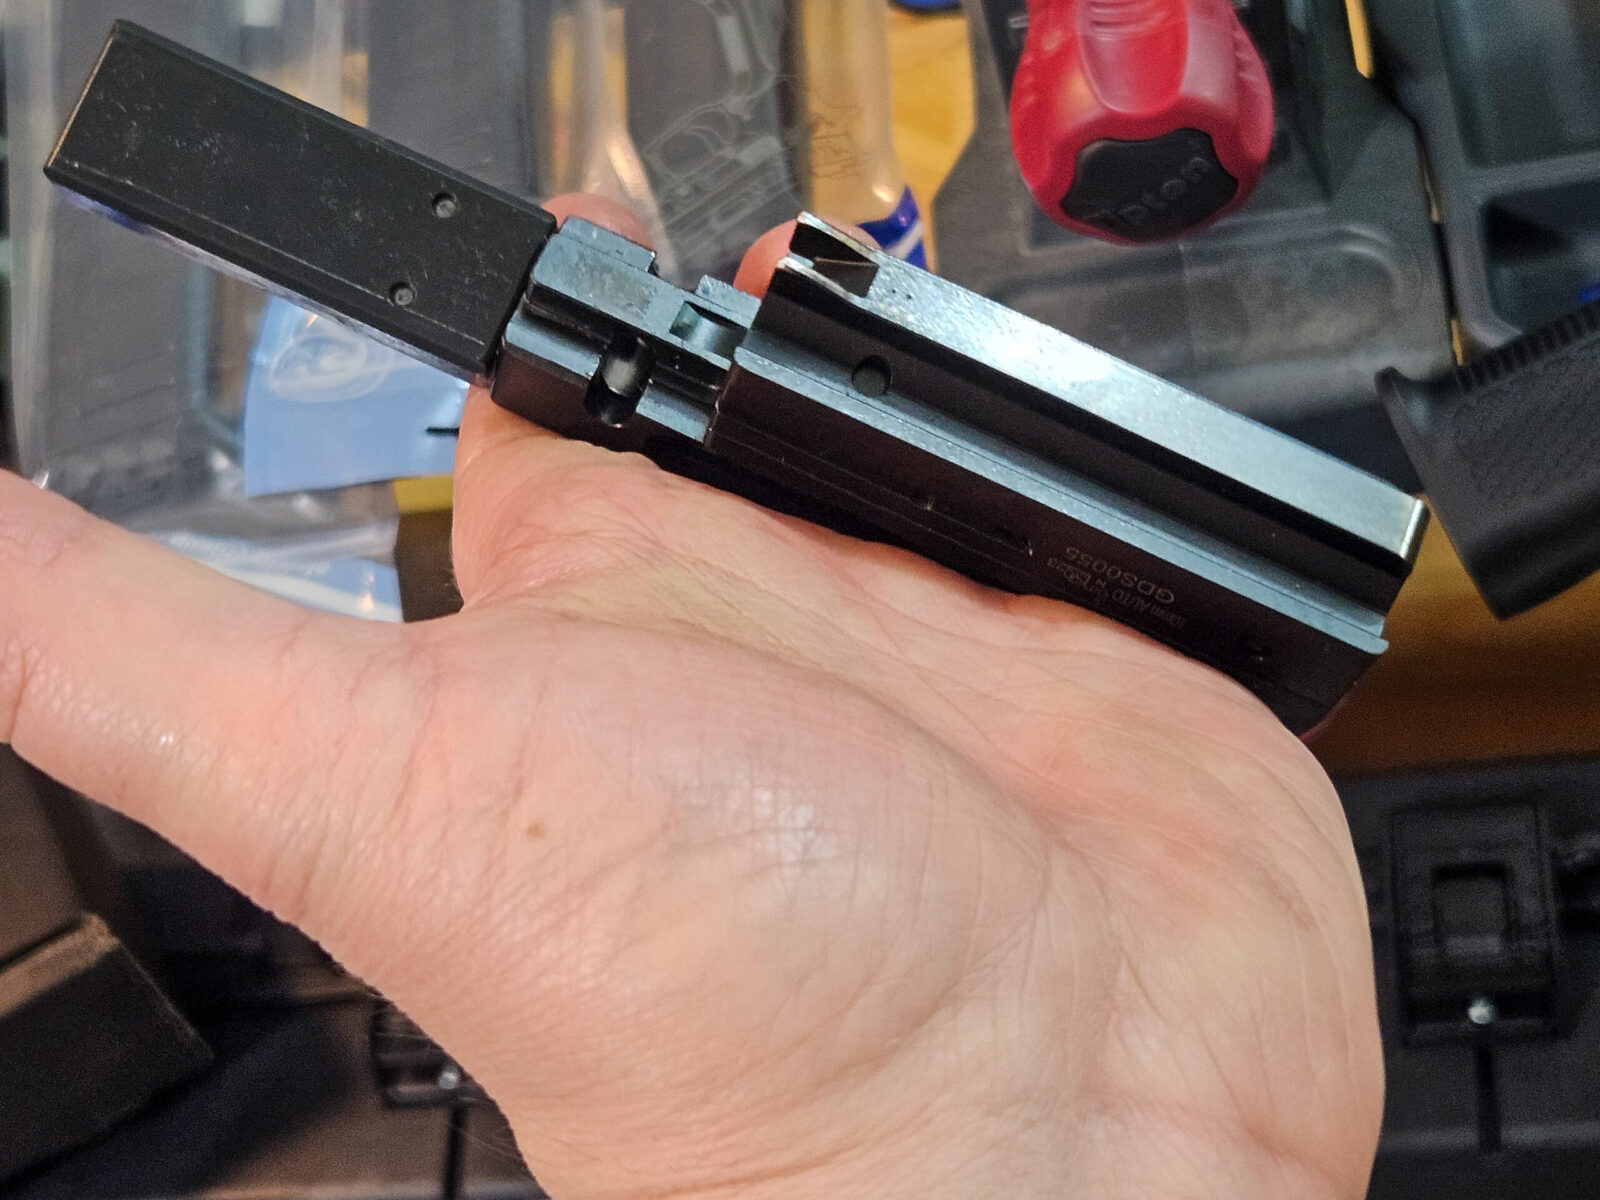
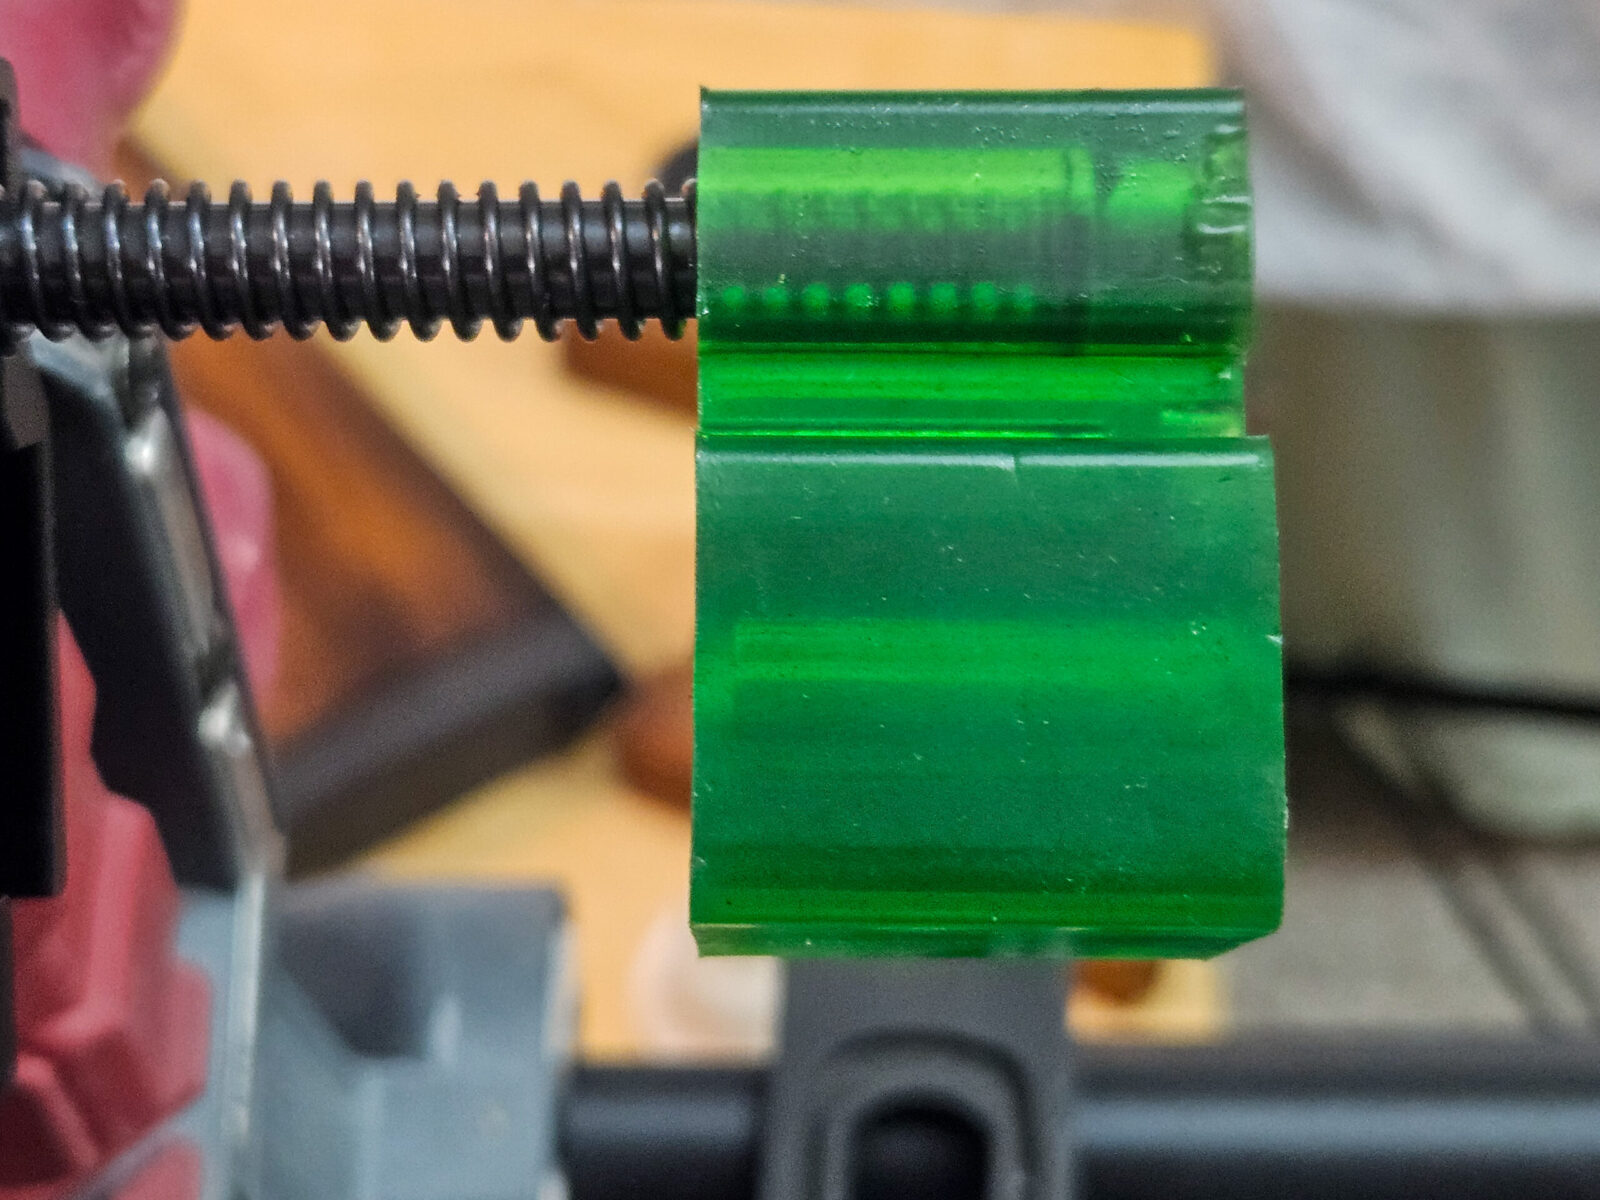
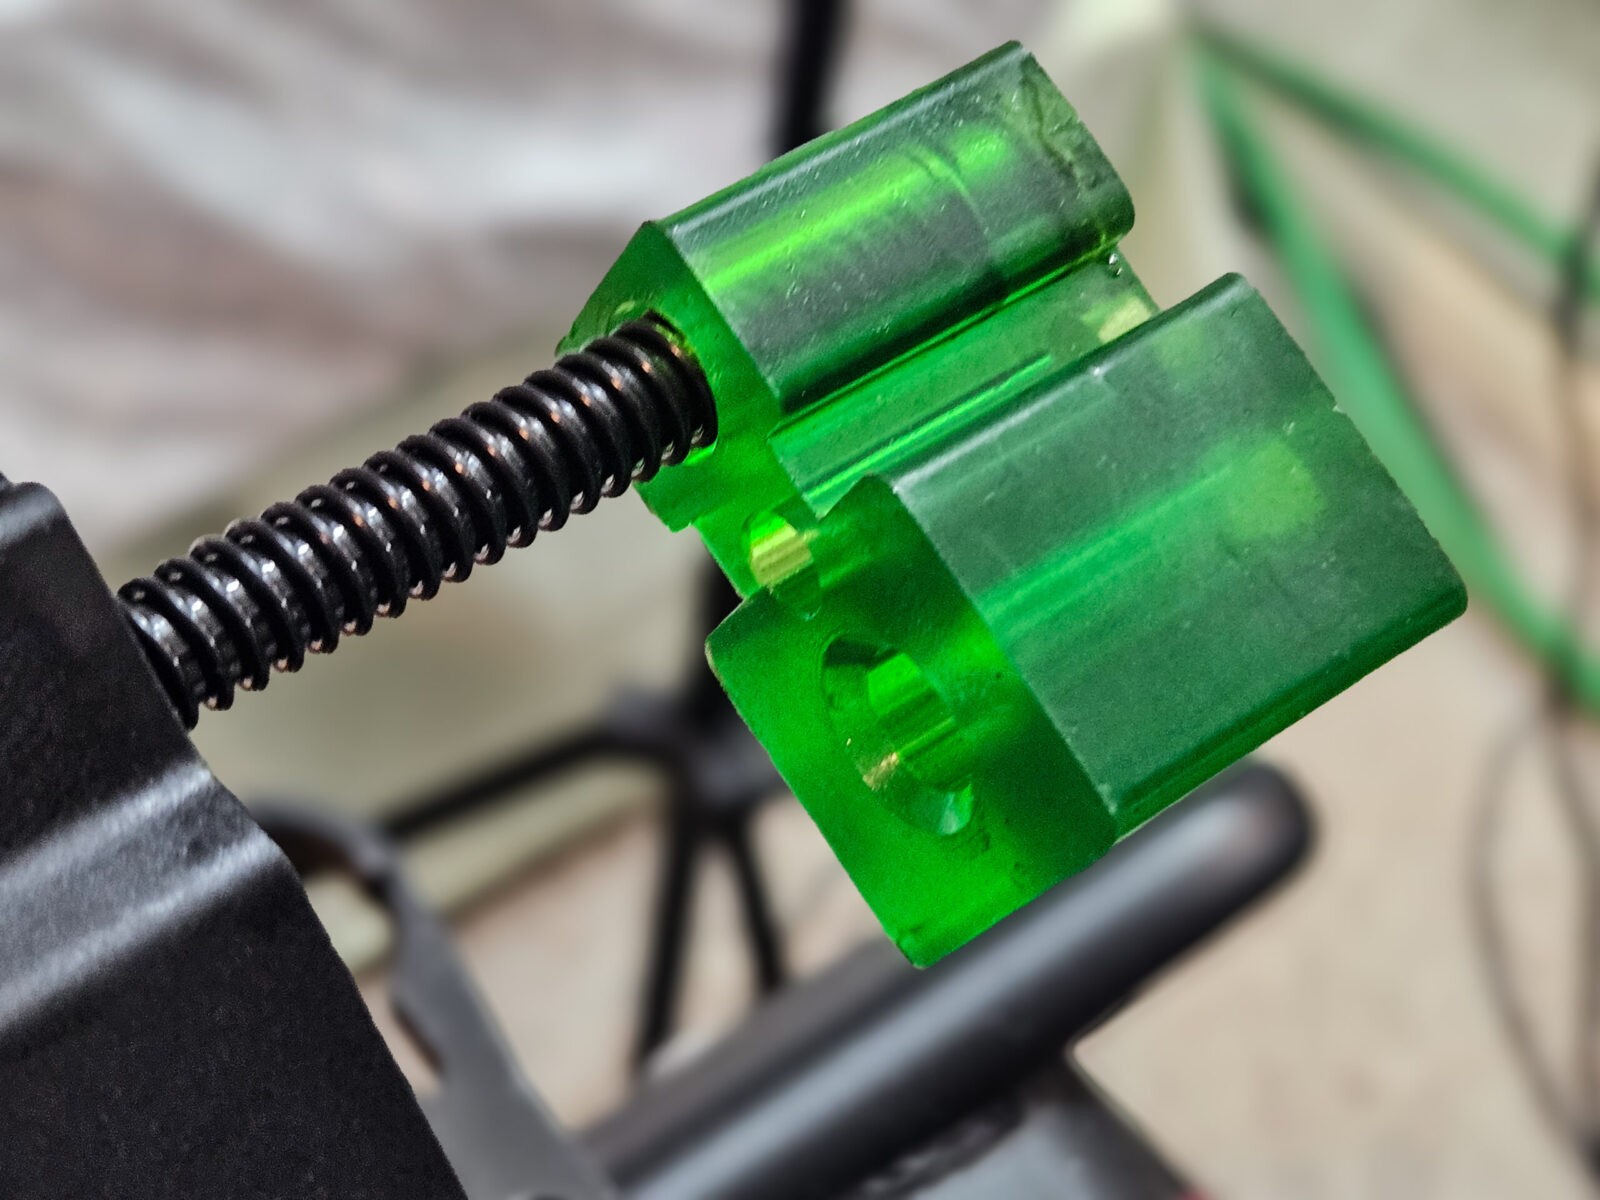
The bolt assembly made up of the large carrier to the rear (right) and the bolt head in front (left), is enormous. A lot of the 10mm recoil is eaten up by inertia, the recoil spring and then a giant buffer block. It’s no wonder the recoil is incredibly mild. Also, when you have something this big, there can be a ton of friction so you need to lubricate it.This giant rubbery green thing is the recoil buffer. I honestly don’t recall ever seeing one this big – every. If the inertia of the bolt and recoil spring leave enough energy to drive the bolt carrier into this buffer, it can handle it without a doubt.
Visiting the Range
My brother-in-law, Banduy, and nephew, Julian, headed to the range to have some fun and break in the Stribog. It was a great day as we unloaded and set up the targets, moved the bench into place and got ready.
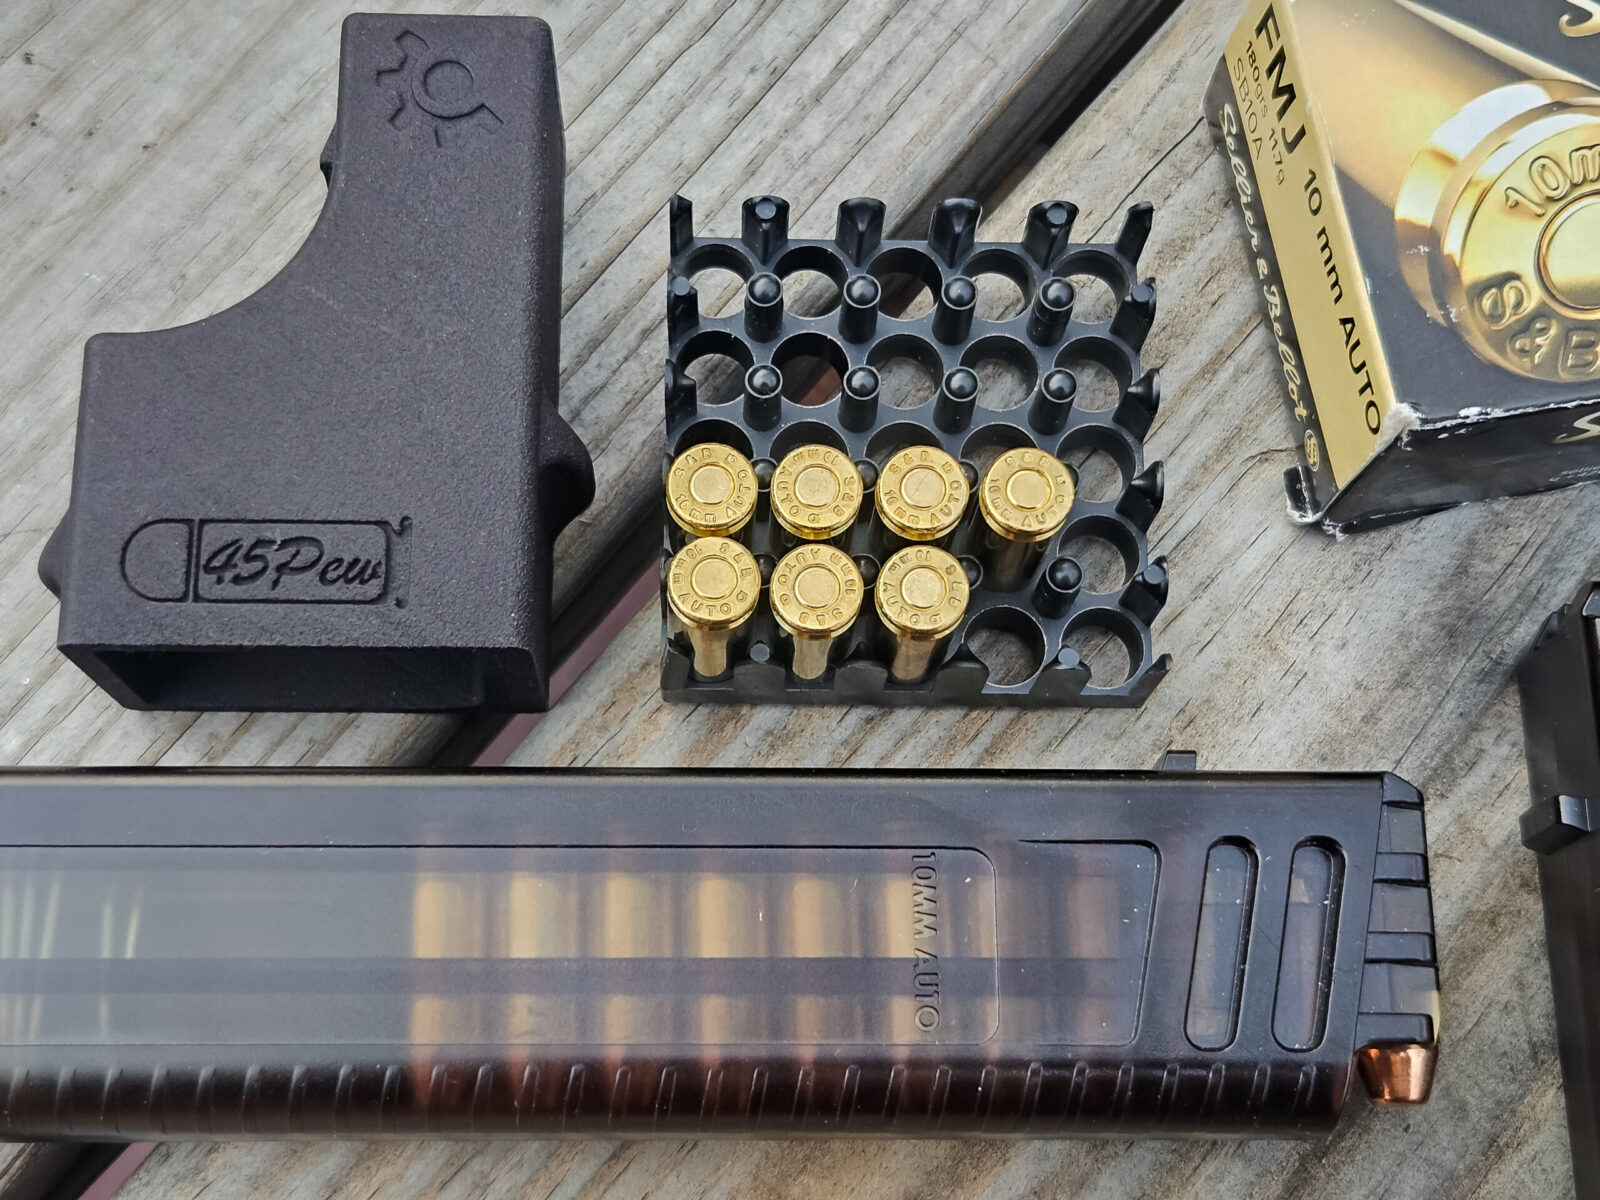
We used the Custom Smith .45 UMP loader to fill up four 20 round magazines with S&B 180gr FMJ. Folks, I have shot cases of this stuff and it’s fantastic range ammo in all of my 10mm pistols and now the Stribog.
I shot the first magazine and was very impressed. The action was smooth with very little felt recoil. I did need to dial in the UH-1 a bit as the laser boresight allowed me to get the UH-1 in the vacinity if the round impacts on the paper.
By the way, I initially had a quick connect sling loop on the A3 Stribog adapter just about the top rear of the grip. It was really annoying and I got rid of it very quickly. Maybe someone with smaller hands wouldn’t notice it but I sure did.
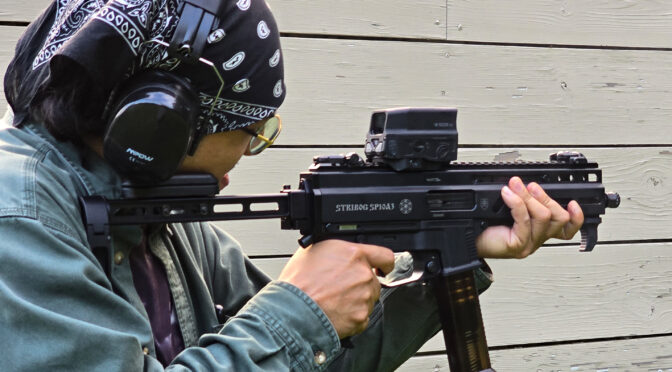
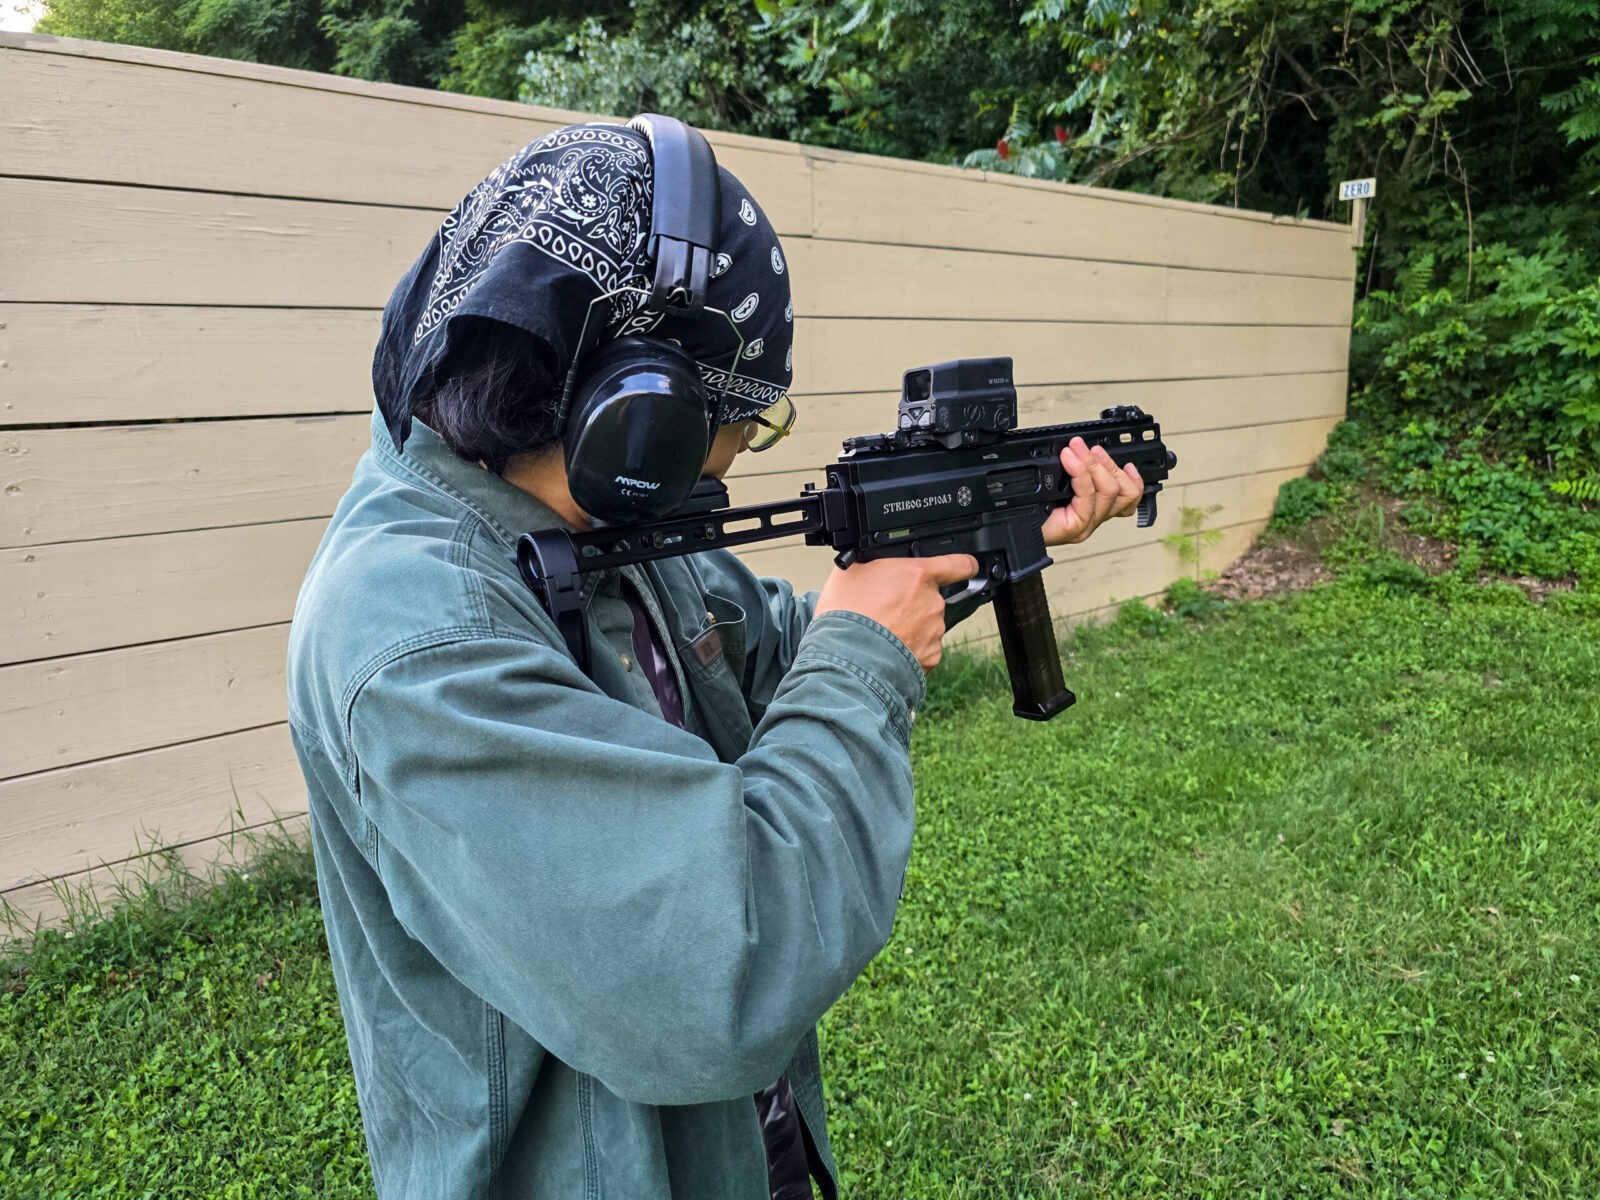
Julian has been shooting with me for almost 20 years now. Time flies by. He was next up and with practiced skill did a steady 20 round set standing freehand with no problems at all.This was his first 20 round set as he got used to the Stribog. He was about 25-40 feet back getting started.His dad was up next and did a good run. I haven’t done a comparison of felt recoil with the micro compensator and without. I can tell you that it is incredibly smooth with it on.We had a lot of fun. The Stribog just rocked it, No failures of any kind through 200 rounds of ammo. The one thing I realized after the outing was that I could shoot through a case of 10mm pretty quick with the SP10A3.
Summary
We shot the Strbog freehand back to about 25 yards and found it to be a delight to shoot. It definitely filled my desire for a 10mm carbine vs. my various 10mm pistols and would highly recommend it. GrandPower did another great job with the SP10A3.
I’ve since had it out a couple of more times and it’s run great everytime. Yes, I did have to buy more S&B 180gr ammo because of it 🙂
I hope this helps you out.
Note, I have to buy all of my parts – nothing here was paid for by sponsors, etc. I do make a small amount if you click on an ad and buy something but that is it. You’re getting my real opinion on stuff.
If you find this post useful, please share the link on Facebook, with your friends, etc. Your support is much appreciated and if you have any feedback, please email me at in**@*********ps.com. Please note that for links to other websites, I may be paid via an affiliate program such as Avantlink, Impact, Amazon and eBay.
Back in 2022, I bought a Stribog SP9A1 and really liked it. Then the ATF brace fiasco rolled around and I decided to sell it. It was a darned nice 9mm pistol caliber carbine (PCC) with the brace and I have since regretted selling it. Once the brace ruling was shot down, it went back on my “I need to get another one some day list”. Before I decided to buy te SP9A3, Grand Power decided to release a 10mm version – the SP10A3. Two weeks later I had one.
Why did I jump on the 10mm? In general, I like to let new designs settle down and get the bugs worked out. In this case, Grand Power was taking a very proven design and upscaling it. The second reason is that 10mm is God’s Pistol Cartridge in my mind. Sure, the 9mm has thousands of loads and can do the job but 10mm was designed by Colonel Cooper to fill a gap he saw for pistols reaching out to 50 yards. It was souped up from the get go.
At any rate, I have a number of 10mm pistols right now, have always liked the 10mm round including for back woods bear defense. I wasn’t adding a caliber but extending the situations wherein I could use it. I’m honestly not accurate with a pistol beyond 25 yards due to my tremor and have wanted a 10mm pistol caliber carbine (PCC) for quite some time. I have always been far more accurate with a carbine than a rifle. The problem has always been a lack of affordable 10mm PCC options on the market. So, when I read the first blog post about a 10mm Stribog being released, I moved fast.
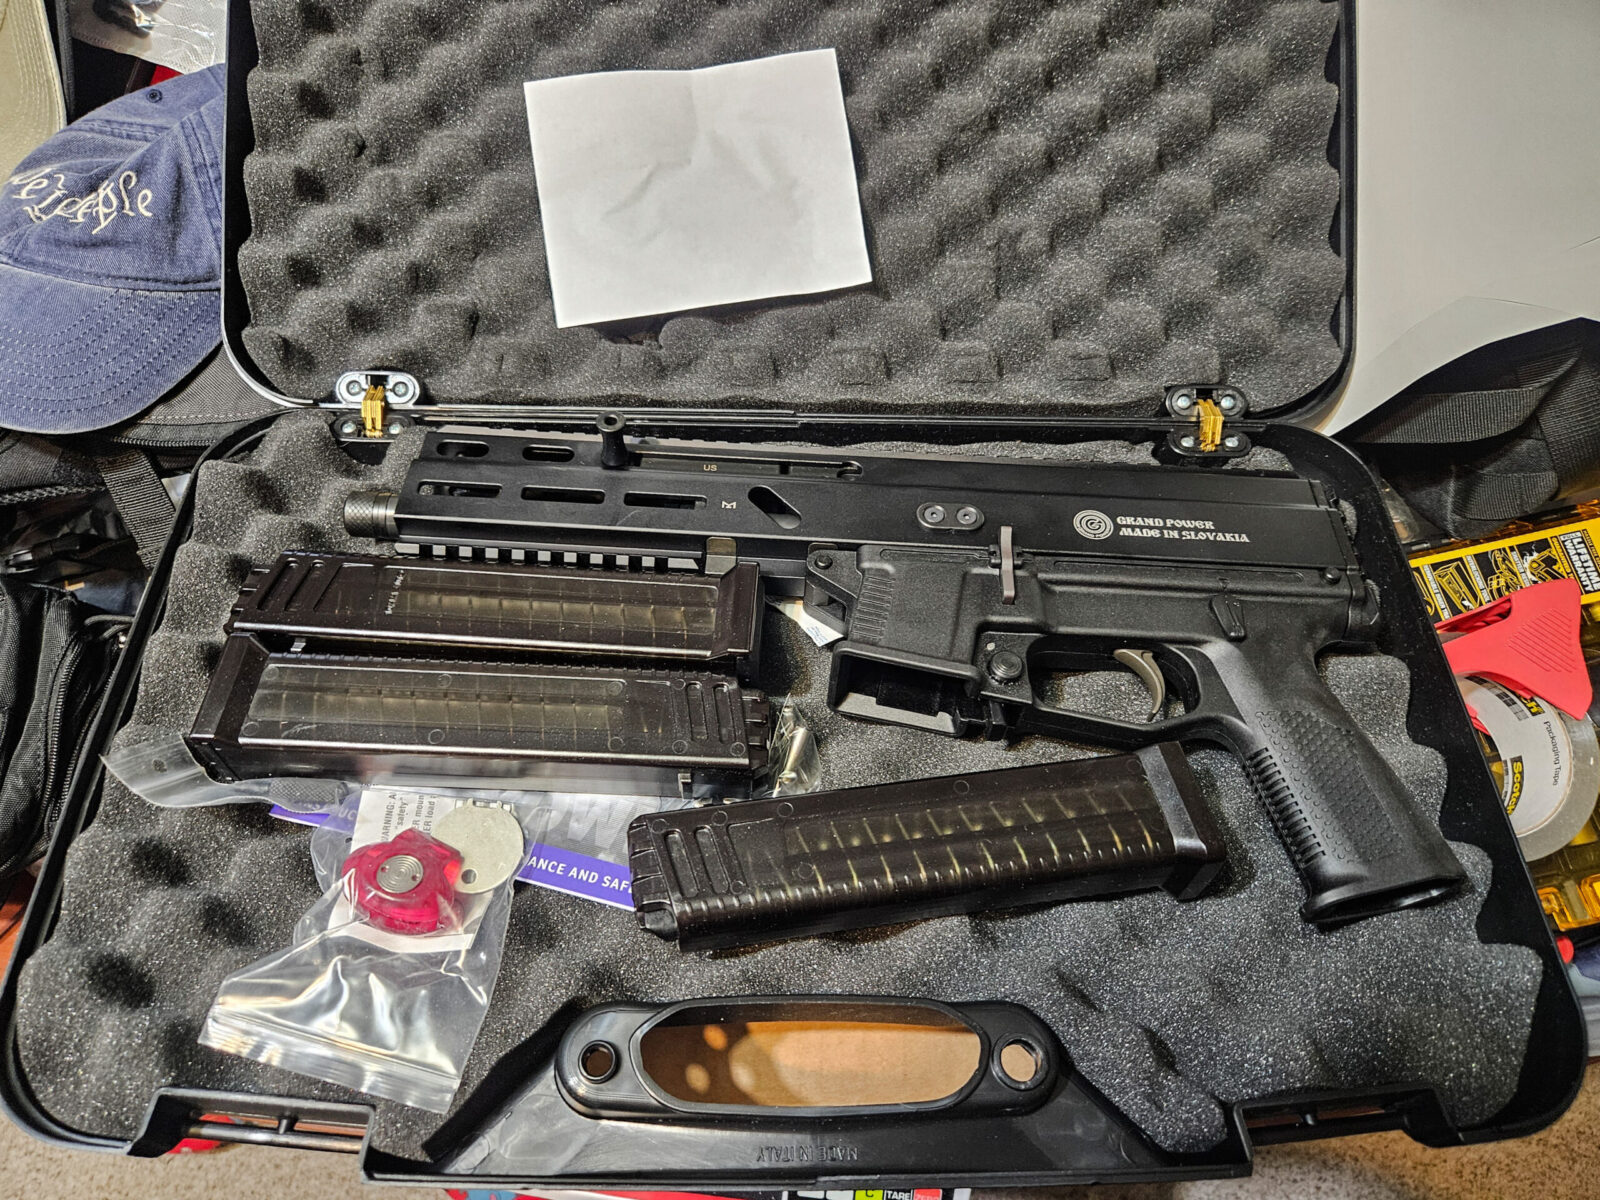
The Stribog SP10A3 showed up in a very nice hardcase with three of it’s magazines. It was time to get creative.
Making the Mods
I knew the base Stribog SP10A3 would be too heavy for me to shoot as a pistol so I started researching what all I was going to do in terms of the brace, compensator, optic and handstop.
The Brace
For the brace, my first choice was the F5 modular brace but they were sold out because they really hadn’t kicked back into gear after the brace ruling was repealed. I knew I wanted a folder so I went with an A3 Tactical Modular Folding Brace – which has adapter, folder and aluminum struts. For the actual brace portion, I like the aluminum Tailhook Mod 1 braces – they have great machining and don’t flex at all. I also opted for a Xeno cheekpiece that attaches to the strut.
By the way, the SP10A3 can use the same braces as the SP9A1 and SP9A3 series weapons. It comes with a polymer rear cap that has an integral 1913 Picatinny rail on it so you can use one of the many options out there – notably the various options from JMAC Customs that pioneered the concept.
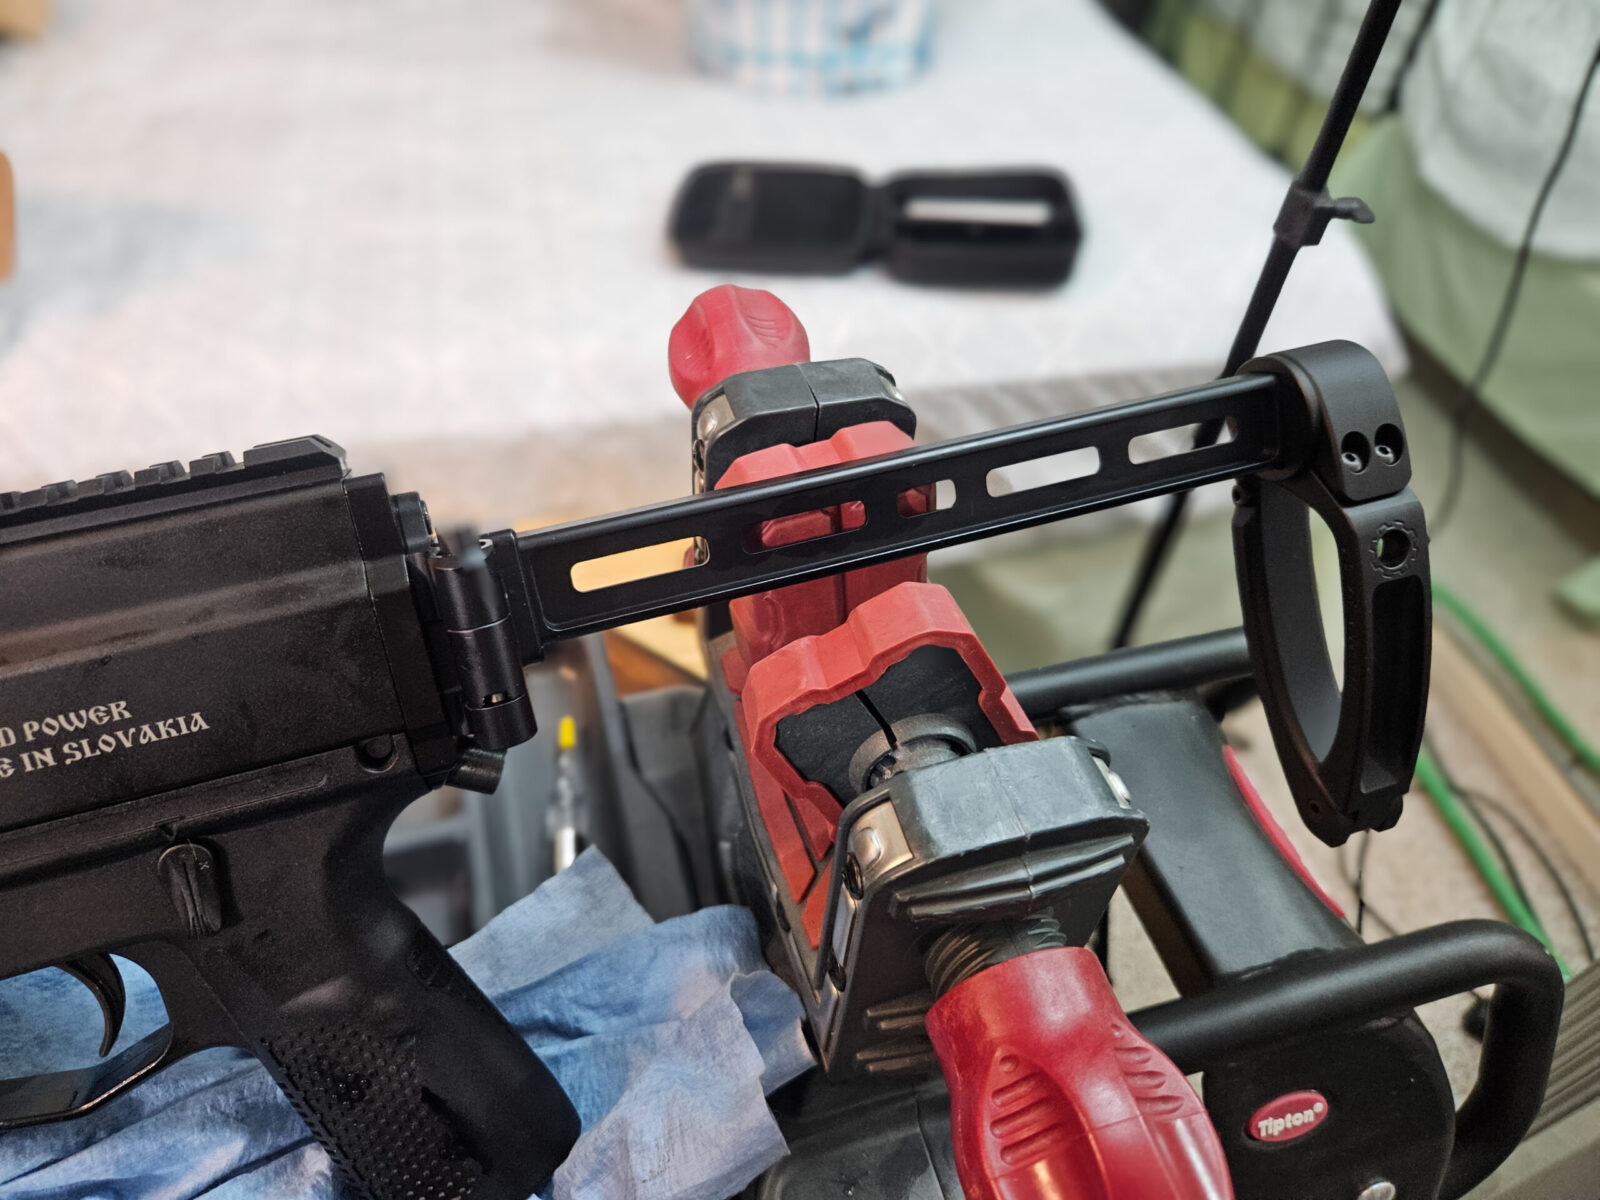
This is the A3 modular brace comprised of the Stribog adapter, folding mechanism, straight aluminum strut and a Mod 1 Tailhook brace. Note, The SP10A3 uses the same braces as the SP9A1 and A3.This is a close up of the Tailhook Mod 1 brace. You push a button on the other side and it opens up to provide support under your arm for more stable one-handed shooting.
The Compensator
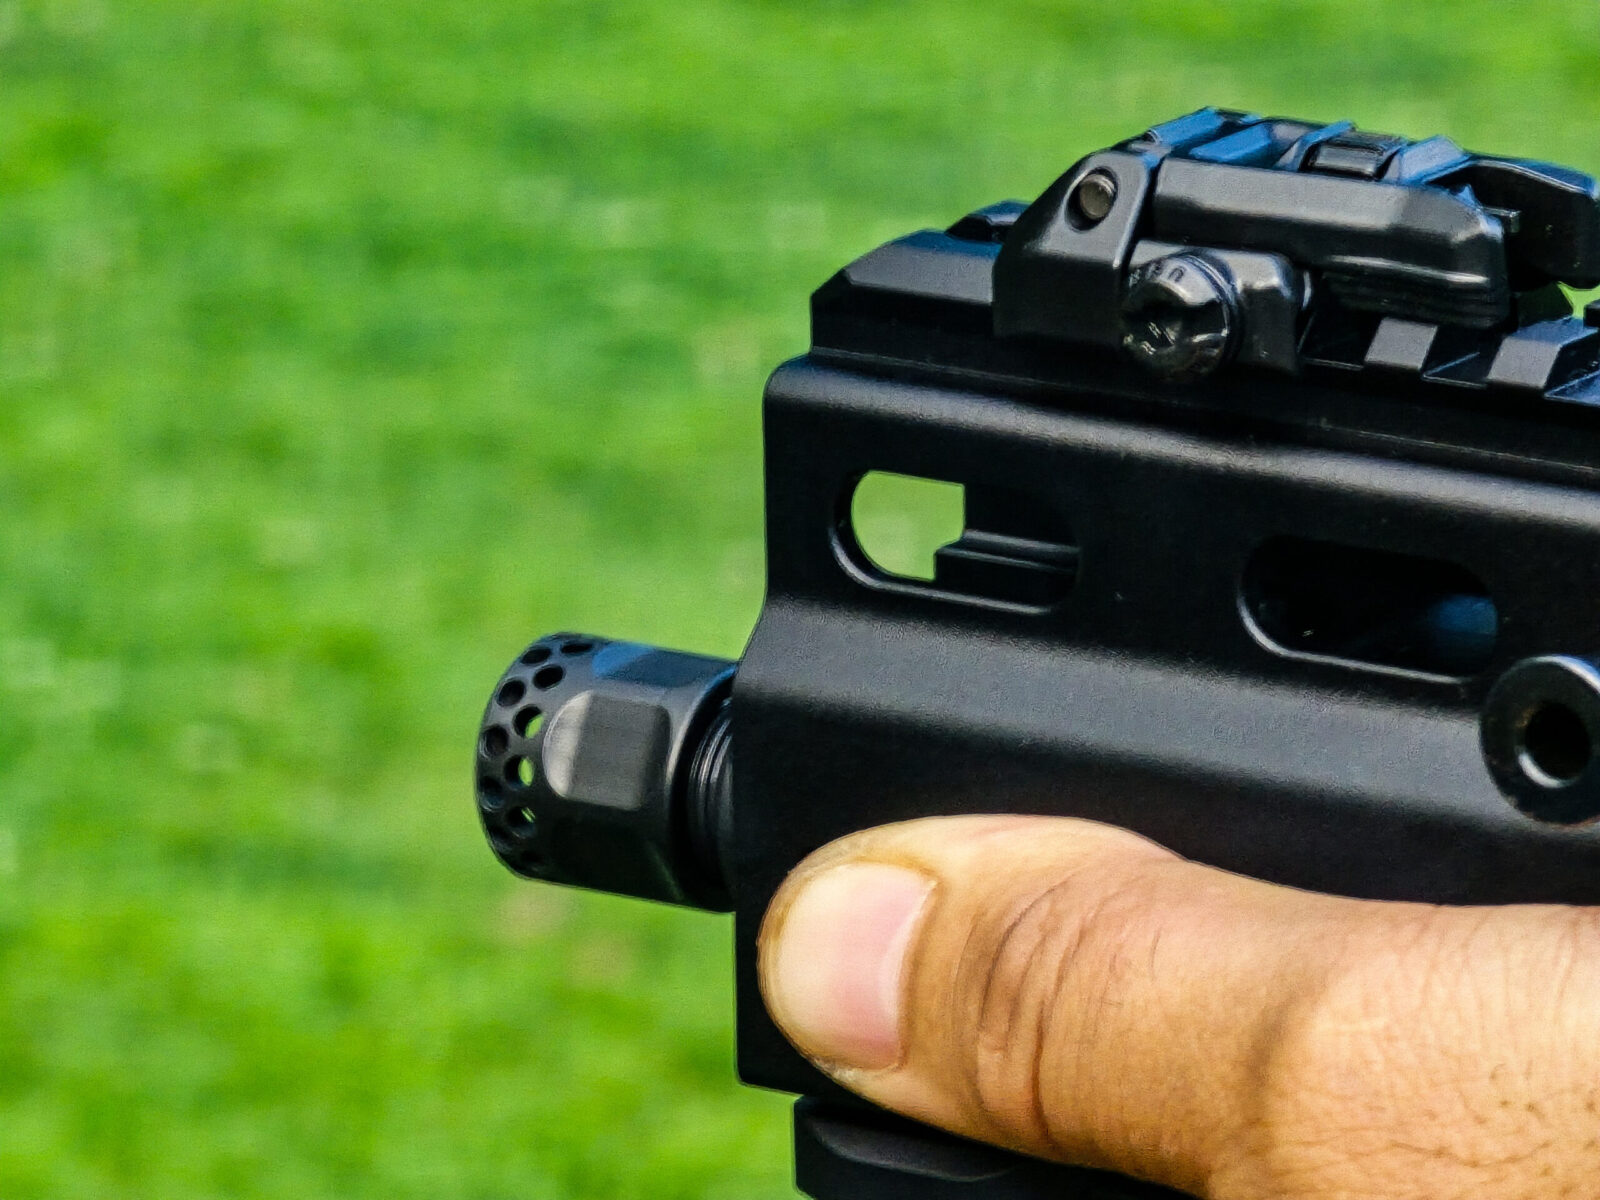
Now this part might have been overkill. The Stribog SP10A3 is a chunky boy but not in a bad way. I expected it to manage the 10mm cartridge’s recoil just fine all on its own but it had a 9/16-24 threaded barrel that needed something stuck on it! Take that thread size and a 10mm/.40 S&W caliber and you enter the land of limited choices. Hint – search for the .40 and you’ll get more results.
First, I detest aluminum muzzle brakes. When you shoot a lot, the erode quickly due to the heat and particles of the muzzle blast. I’ve also seen aluminum brakes and fake cans droop/sag when the aluminum gets so hot it starts to melt. So, I wanted steel.
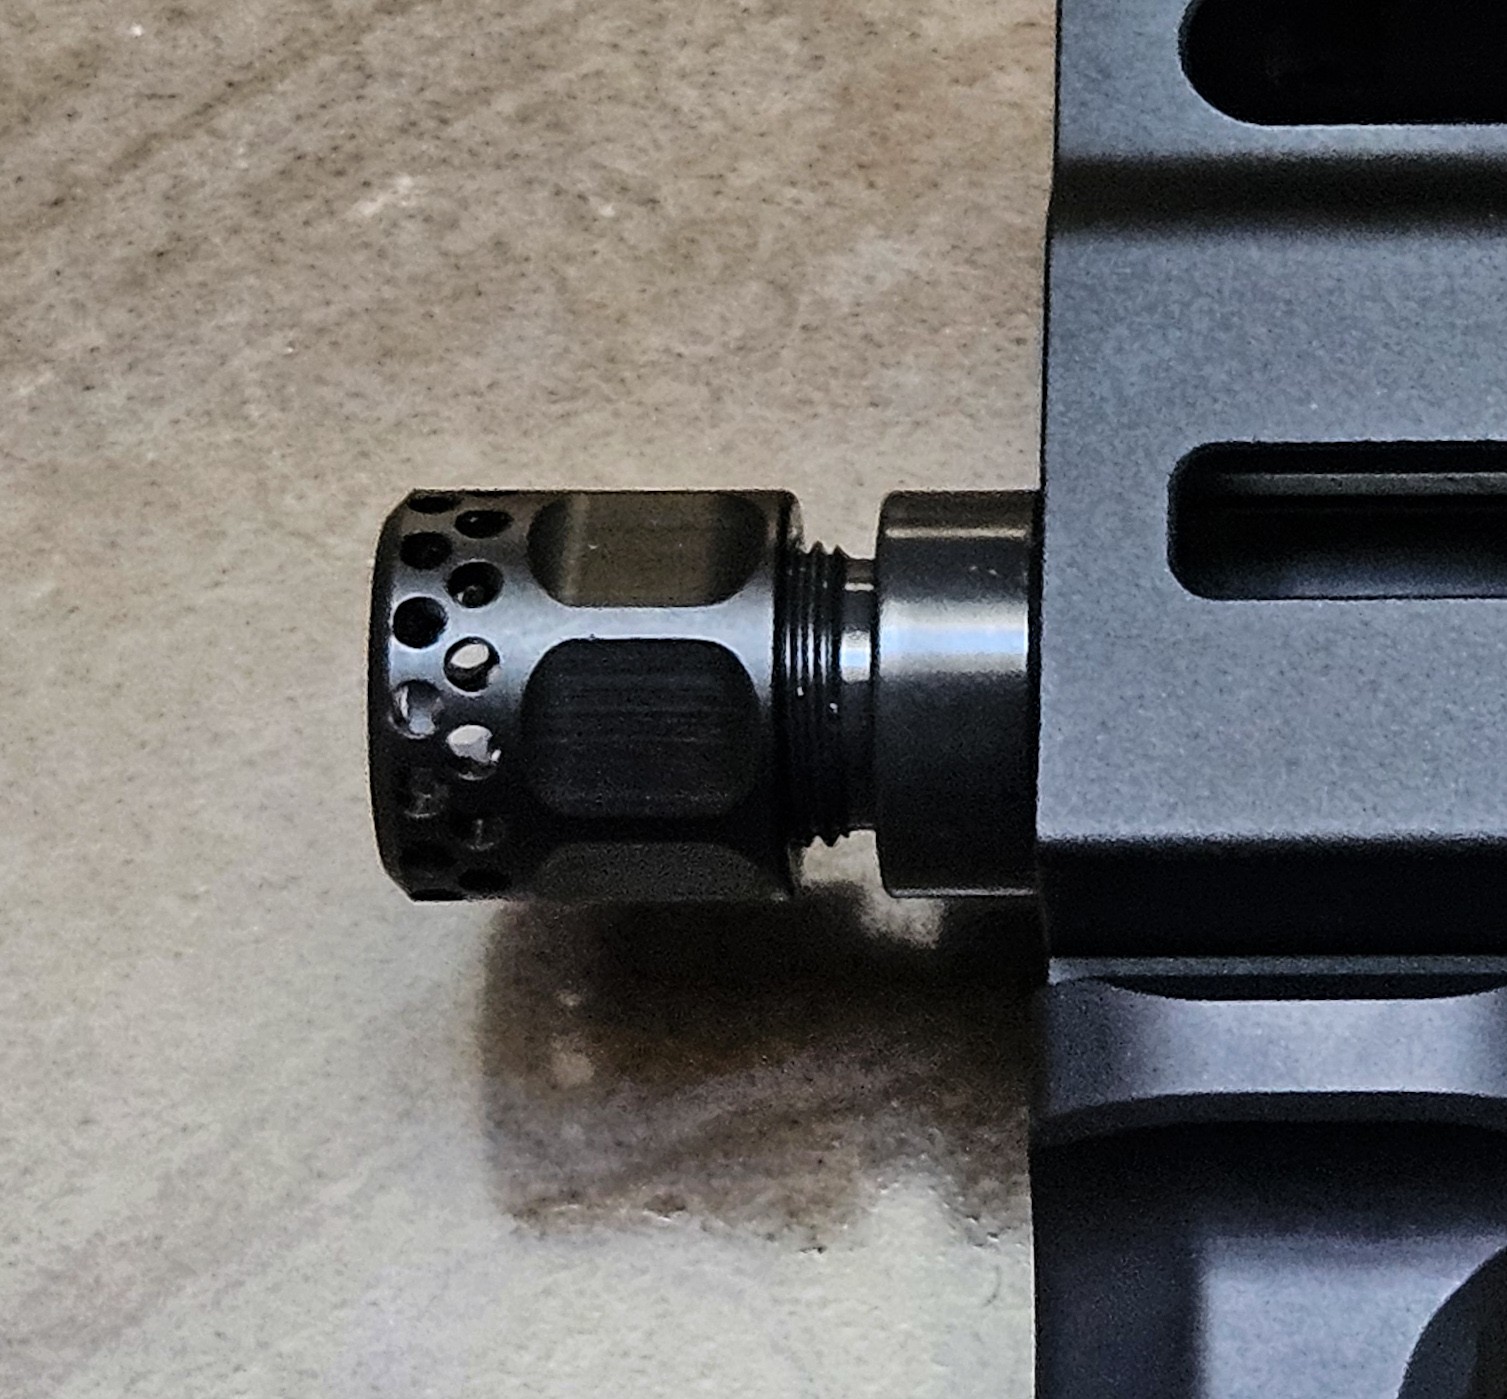
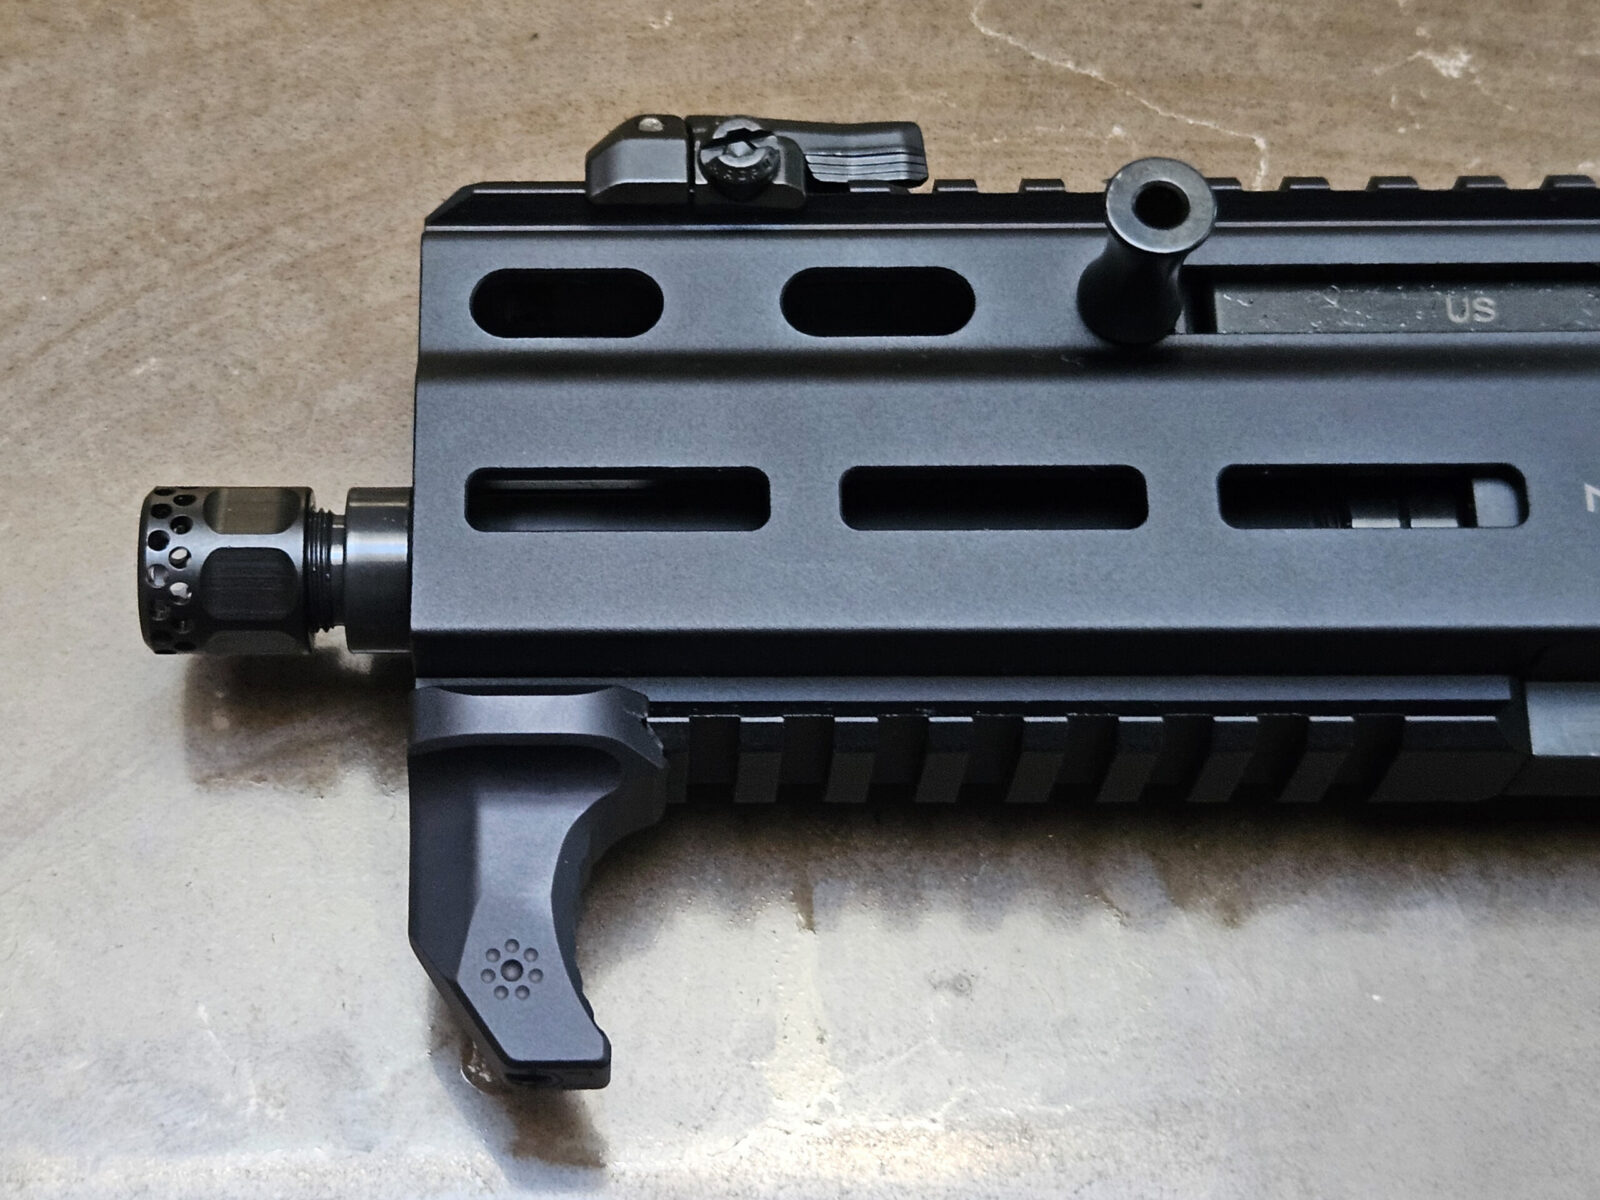
After some digging, I went with an HK Parts Micro Comp. It’s ordnance grade steel, nitride finished, very small and they have two models – one with slotted ports and one with numerous circular port holes. I went with the latter just because I’ve used the circular port style in the past with good luck.
That huge green chunk of rubber is the recoil buffer of the Stribog SP10A3. As I wrote this, I was trying to think of all the SciFi movies that had some substance made up of this green color. Well, I’ll let you ponder that but I can tell you it does the job of soaking uip some of the remaining recoil remarkably well.This is the HK Parts Micro Comp – 9/16-24 for .40 caliber.
The Optic and BUIS
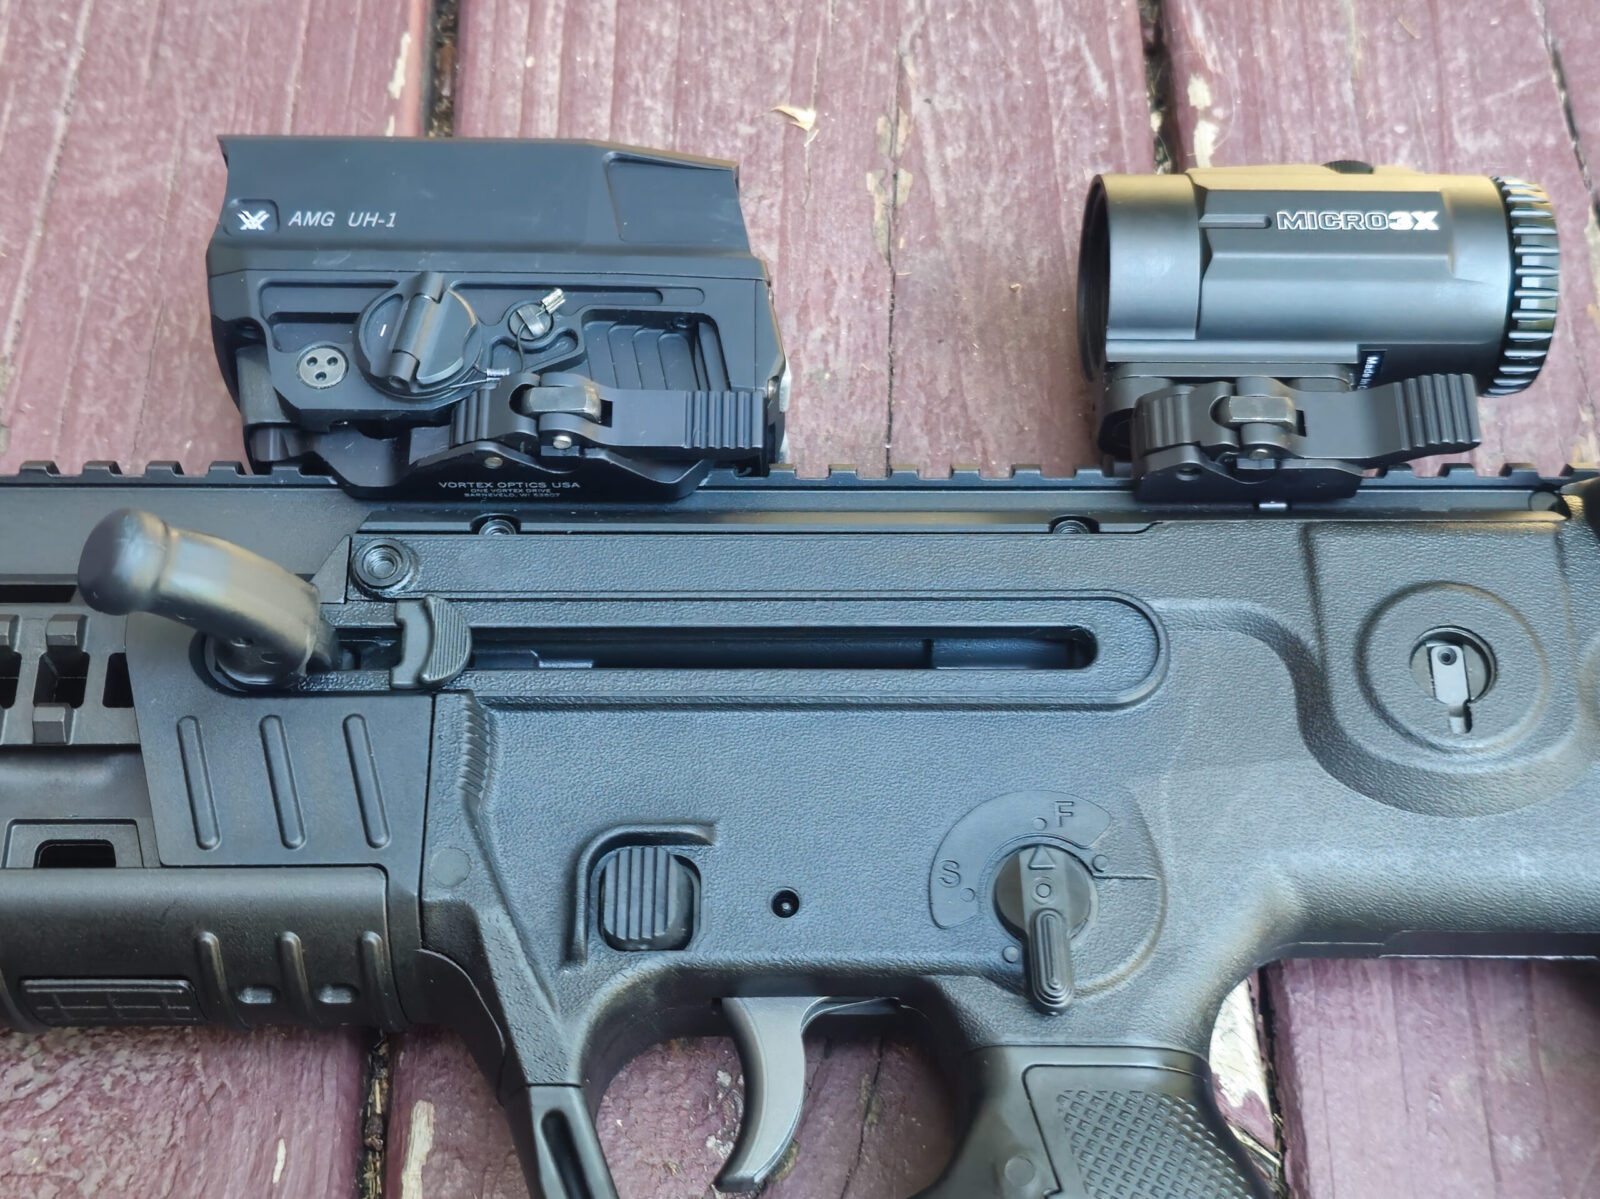
I wanted a fast optic sight for target acquisition within 100 yards. The Vortex AMG UH-1 is a perfect fit for this situation. Being a holographic sight, it is parallax free, has unlimited eye relief and appears to the eye as being on the same plane as the target. Moreover, the laser projected EBR-CQB reticle has a one minute of angle (MOA) red dot surrounded by a 65 MOA target acquisition ring.
People ask me why I am so pro-Vortex and the reasoning is simple – the optics have excellent engineering, work as claimed, are very durable and are backed up by a no-hassle warranty. To save money, I could have opted for the Vortex Crossfire red dot but the UH-1 is such a step up with its bigger window and reticle that I went with it.
By the way, unless a weapon will only be used at ranges, always factor in backup iron sights (BUIS). In the case of pairing BUIS with the UH-1, I used Magpul Pro Sights. The Pro series sights are made from steel vs. their polymer counterparts and I have slowly drifted towards them over the years because I find them robust and reliable.
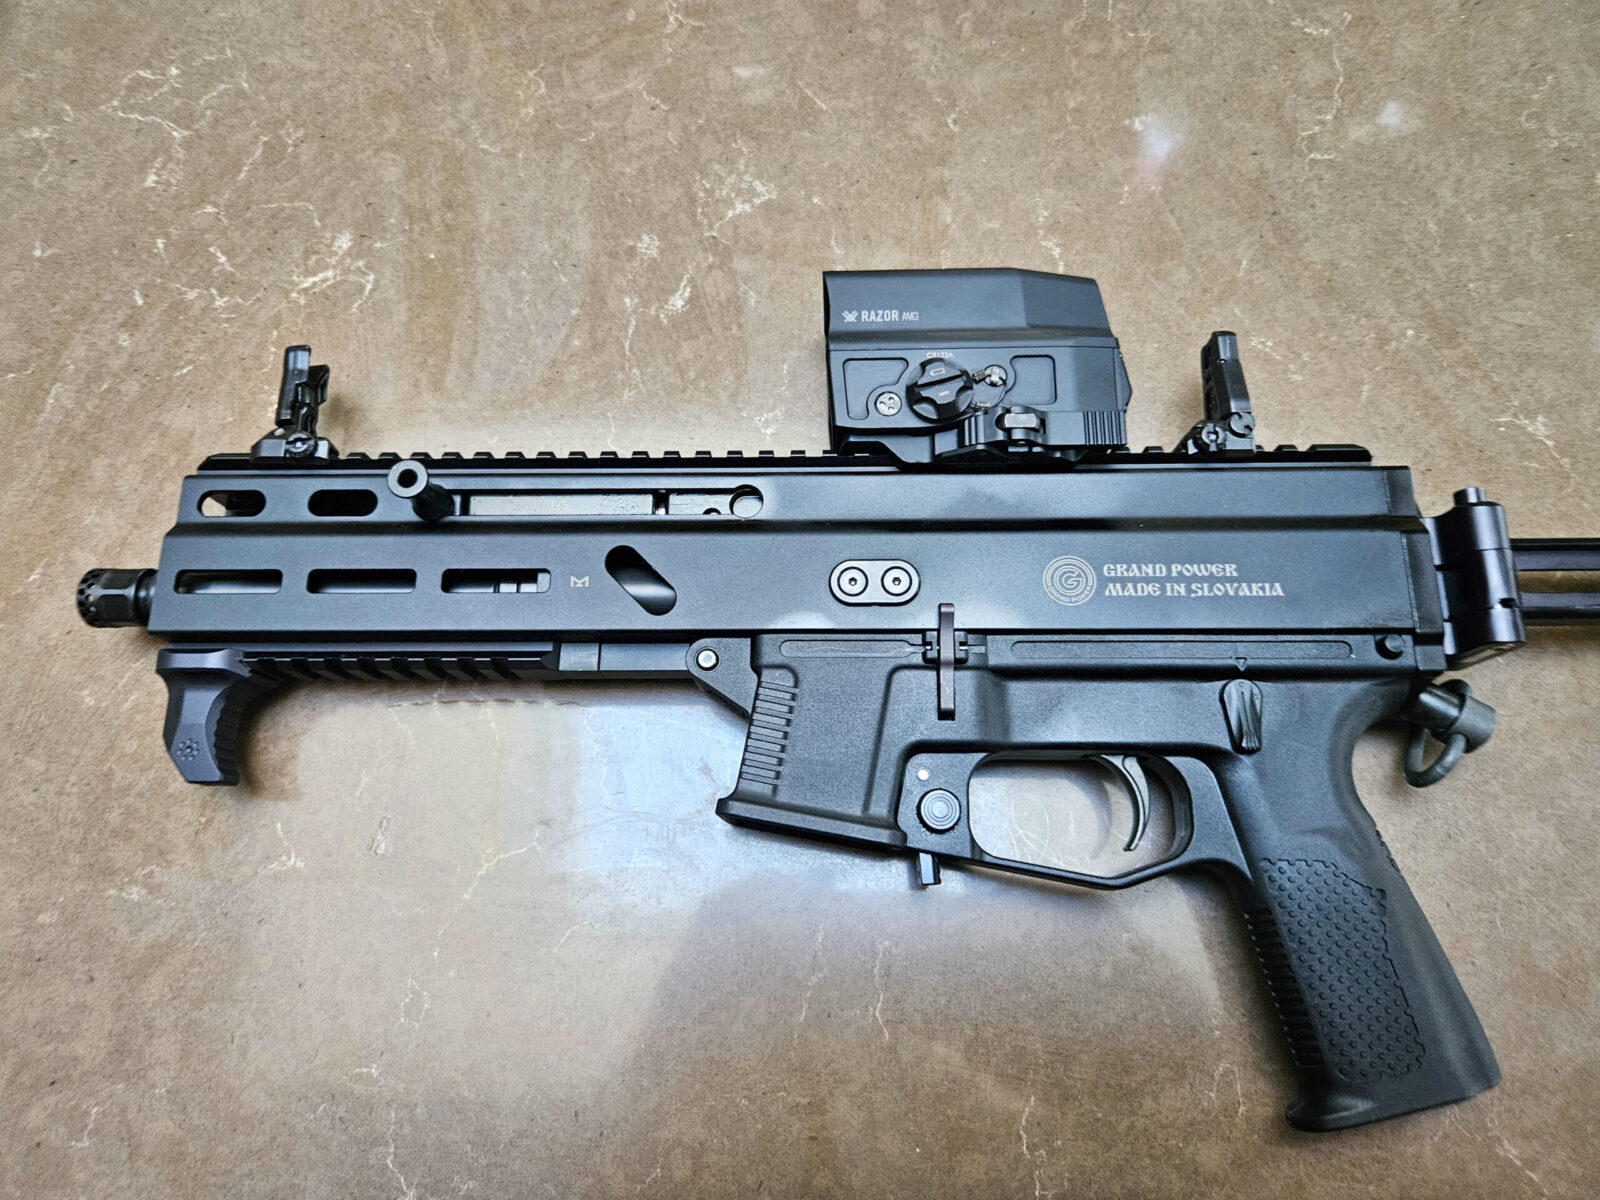
Here is the Vortex AMG UH-1 optic and the front and rear Magpul Pro Sights. I tend to run the BUIS folded down until I need them. They are in the deployed/up position right now for the photo.
The Handdguard and Handstop
One design difference that I appreciate is that the SP10A3 has a long handguard right out of the box. With the SP9 series you either had a lot of barrel exposed or you added something like the Dragon Snout. So, no changes there.
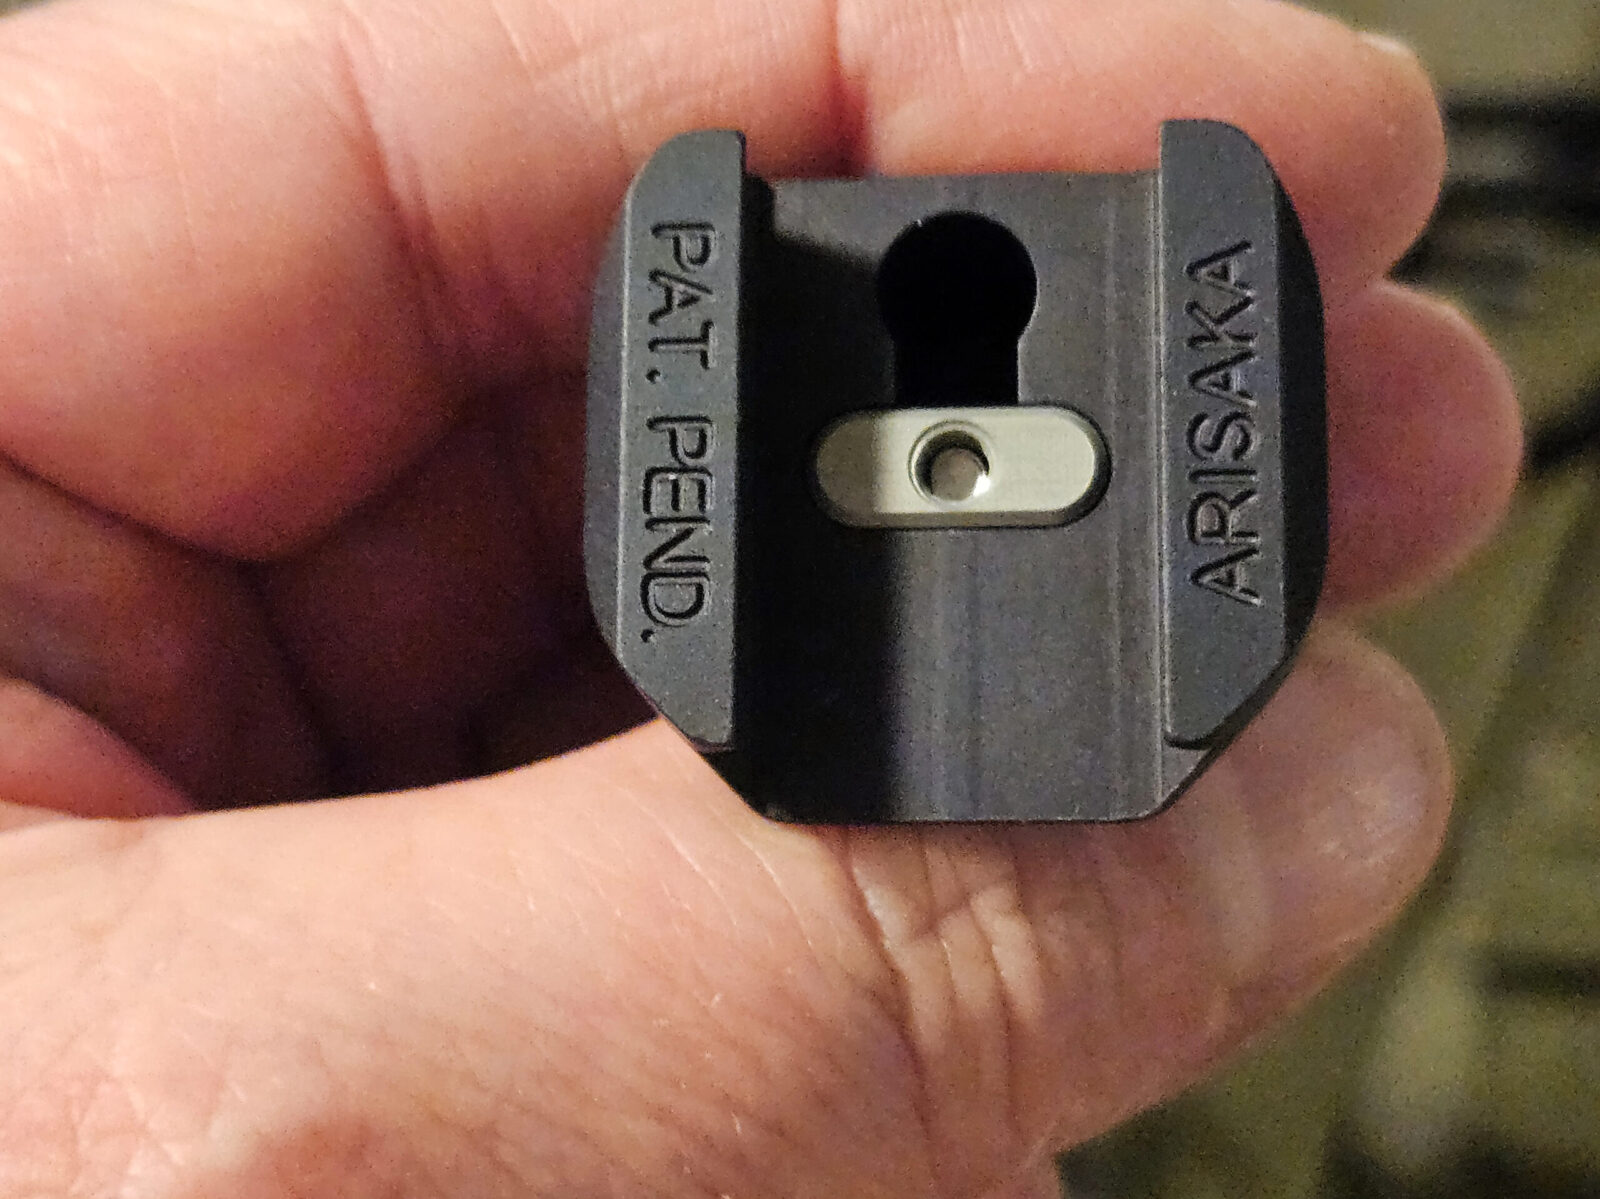
The one thing I did add was an Arisaka HS-P hand stop. Call me paranoid but I want something at the end of the handguard that stops my hand from sliding off the end. The Arisaka is a simple rugged hand stop that has a really novel way of locking itself onto your Picatinny rail vs. unsightly exposed screws.
You slide the HS-P on your rail to the location you want. You then use a hex head wrench to deploy the silver lug shown above between the elevated Picatinny segments and it locks in place. It’s such an elegant design and rock solid.Here is a photo of the Arisaka HS-P in position. It works great and feels great — I seriously like this little hand stop!
I Haven’t Changed The Trigger Yet
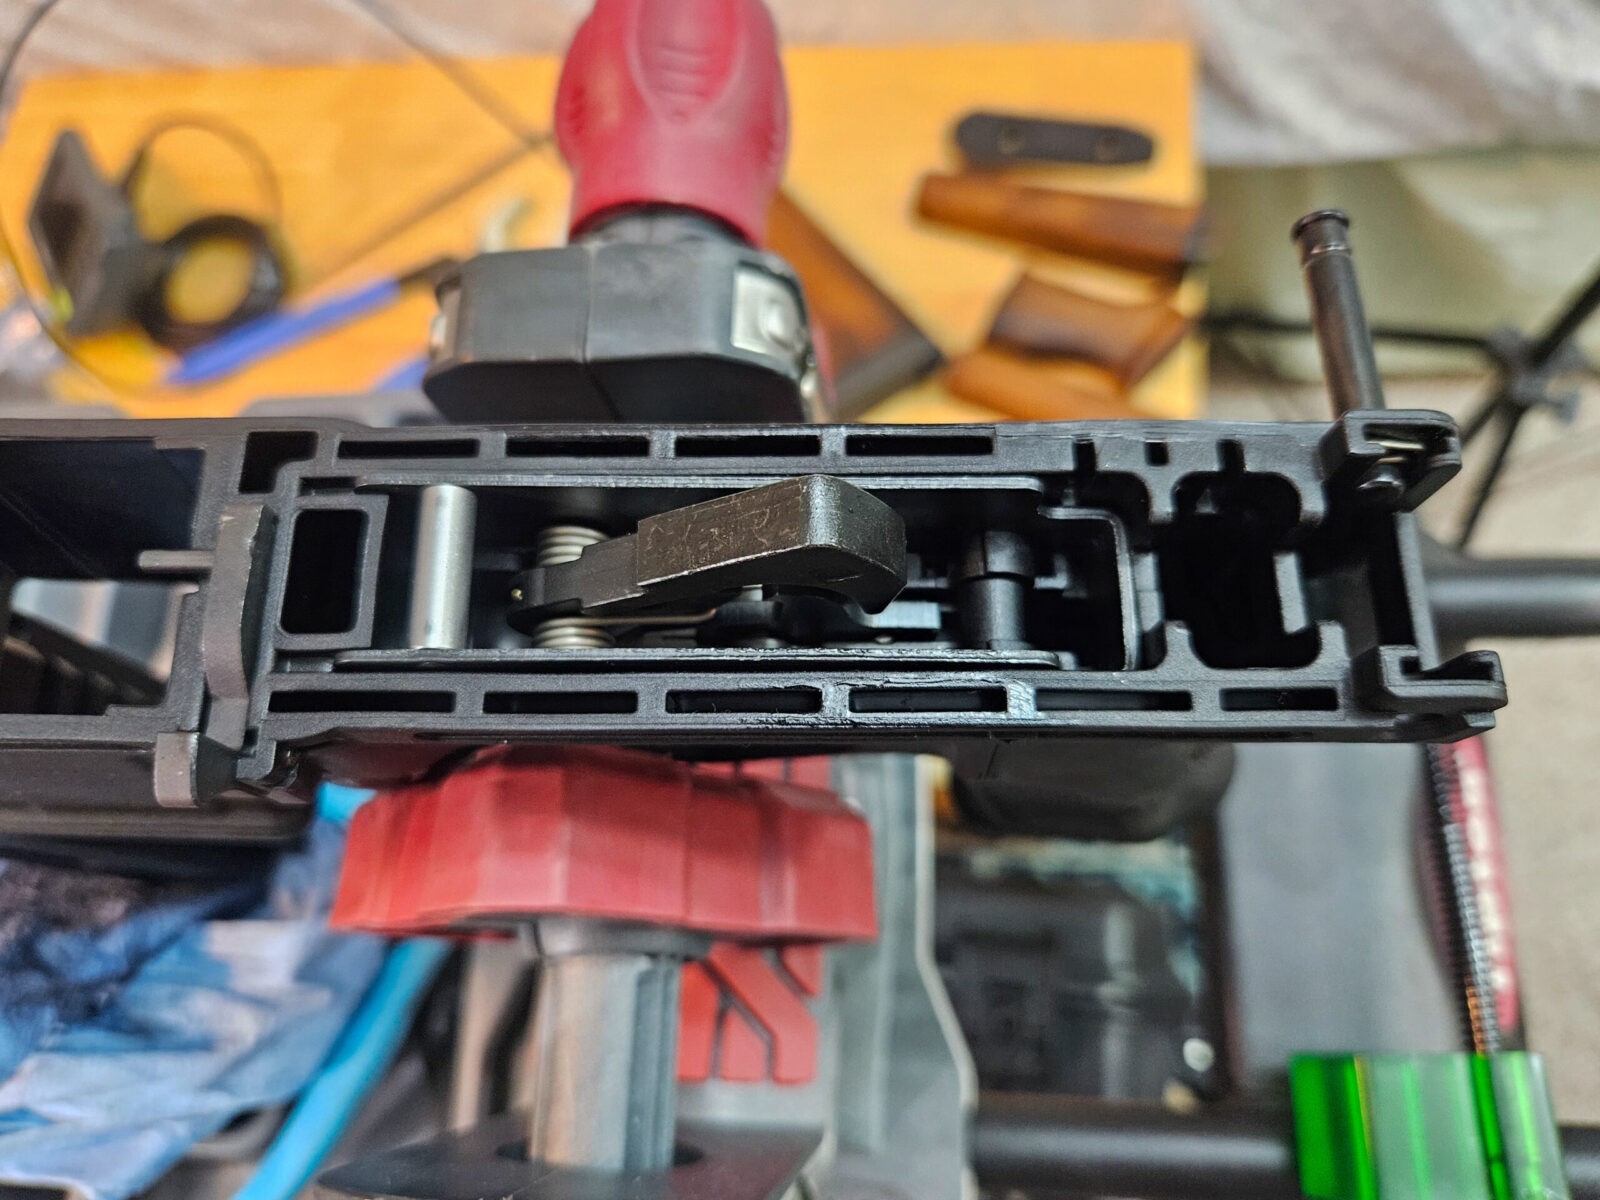
One thing I did notice was the trigger. The SP9A1 Stribog I owned had a surprisingly good trigger. What was in my SP10A3 was a “meh” trigger. Not great but not horrible either. Guess what? It turns out it is an AR fire control group. You can go to whatever AR trigger you want although I am doubtful cartridge triggers will work. I may change it out for a Geiselle in the future or even just polish it but left it alone for now.
I was surprised to find out from Grand Power USA that the Stribog SP10A3 uses an AR fire control group. I never asked about my SP9A1 because it was remarkably decent straight from the factory. Looking at the finish on the hammer, it could use some polishing or just to get worn in — in other words, shoot it a bunch, let the parts get to know each other ane a lot of the roughness will smooth itself out as imperfections get worn down.
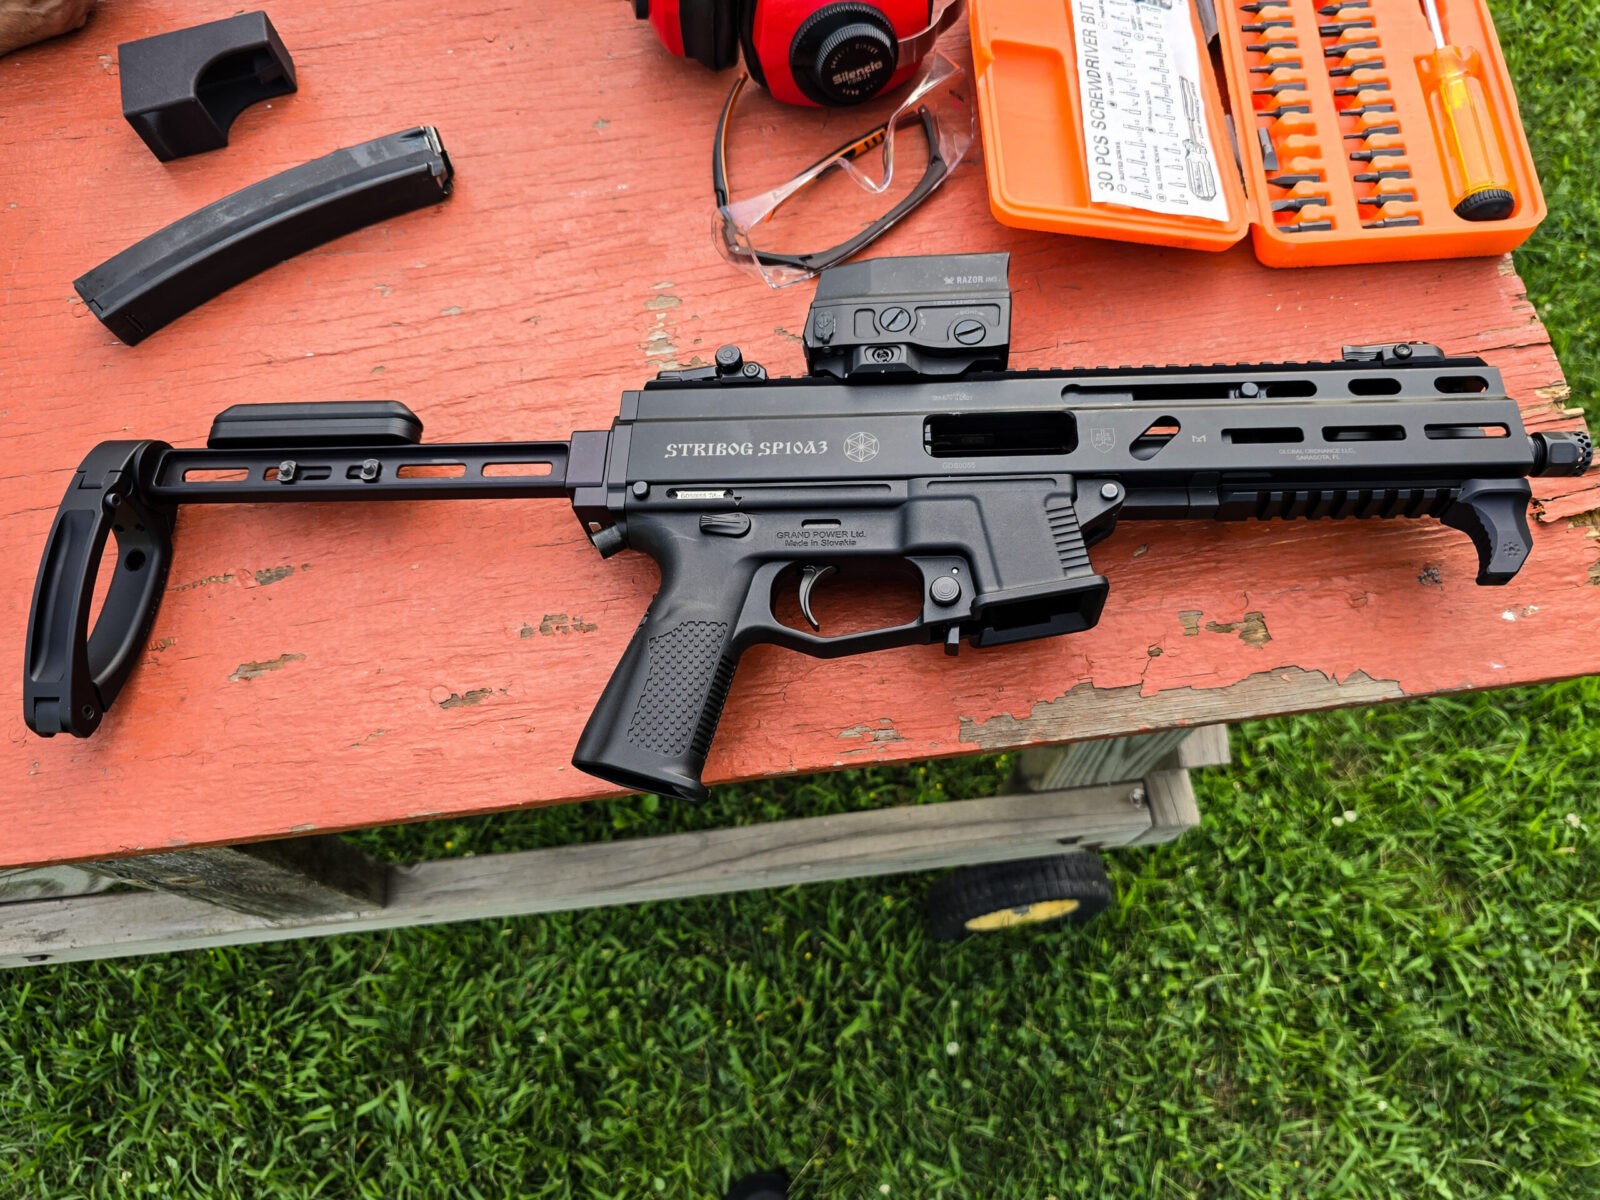
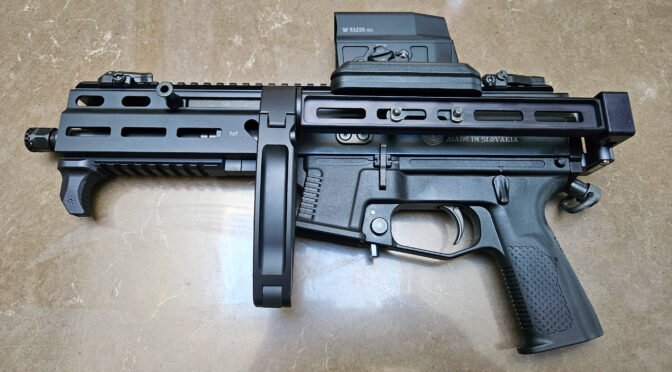
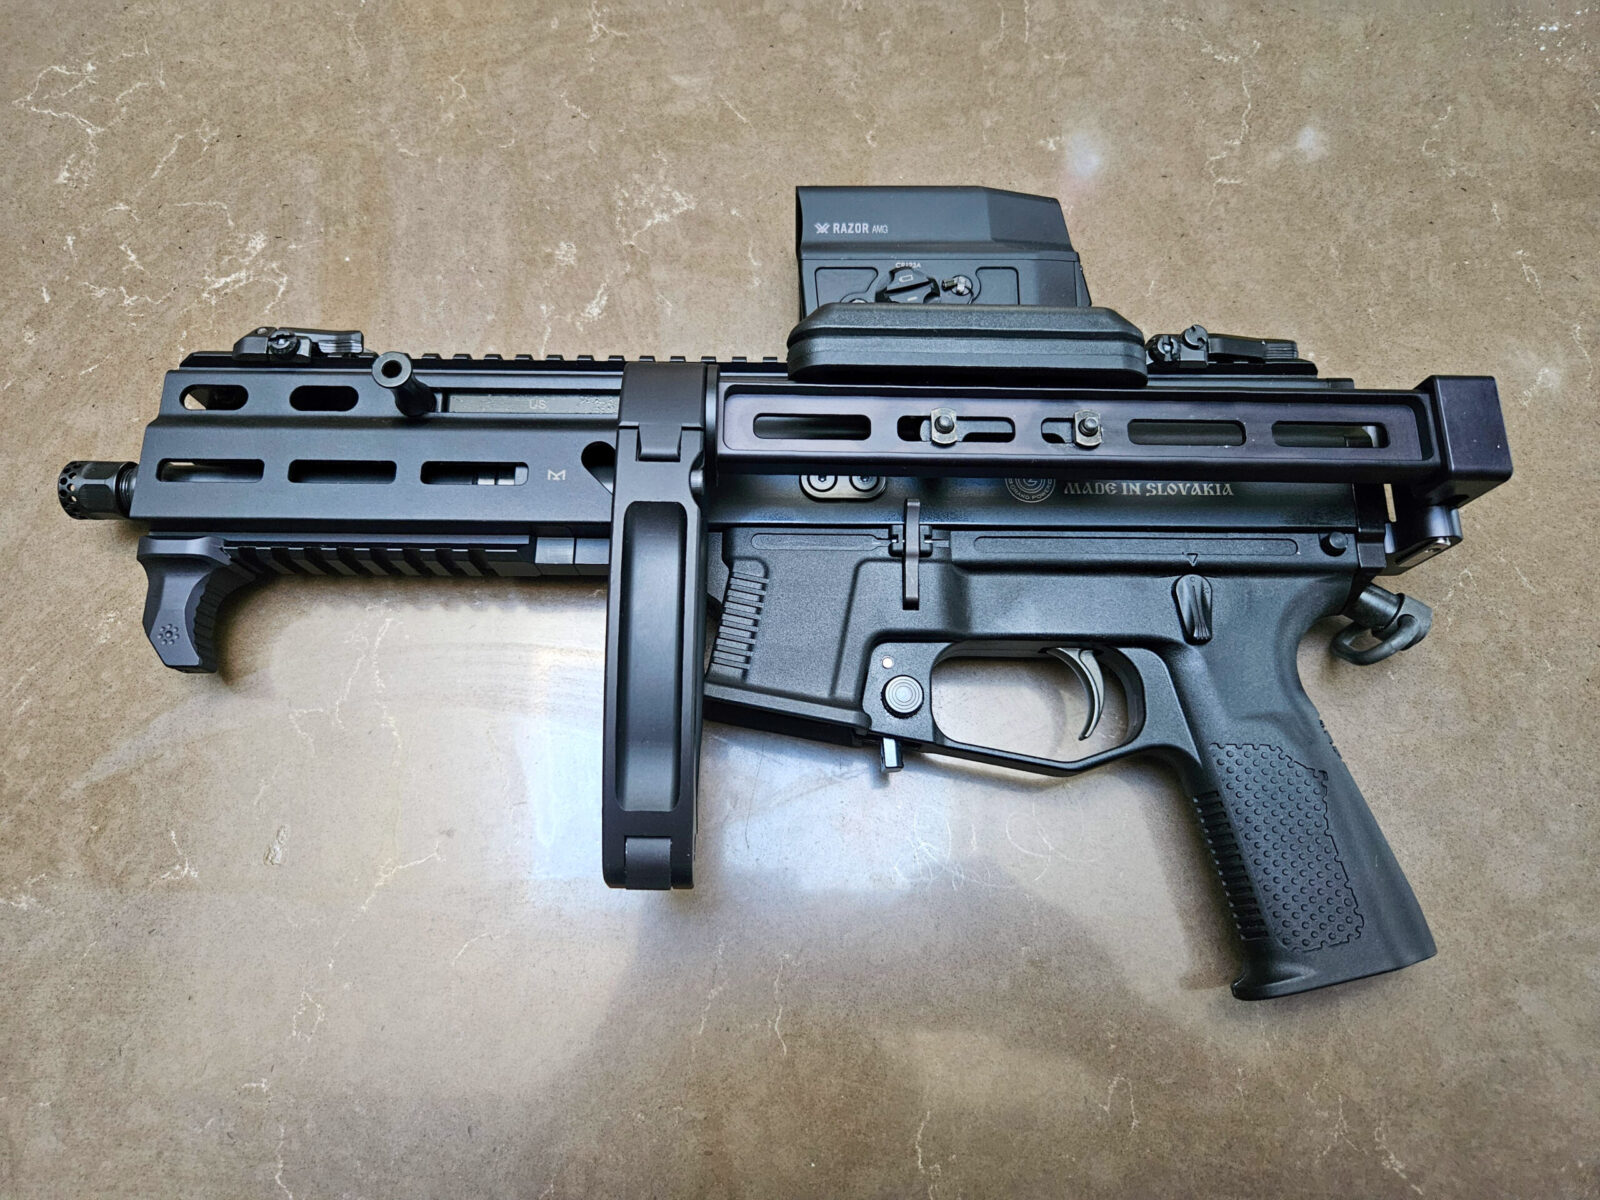
End Result
The Stribog turned out slick. The only thing I have ditched so far is the quick disconnect sling swivel you see just above the pitol grip. While it seemed like a great idea, it annoyingly interefered with the web of my hand between my thumb and index finger.
Summary
I was genuinely excited. The SP9A1 I had impressed me so much that I ordered this SP10A3, planned and installed some modifications. Next up was to take it to the range and just to spoil the next post a bit – it ran stunningly well with S&B 180gr 10mm FMJ ammo.
Note, I have to buy all of my parts – nothing here was paid for by sponsors, etc. I do make a small amount if you click on an ad and buy something but that is it. You’re getting my real opinion on stuff.
If you find this post useful, please share the link on Facebook, with your friends, etc. Your support is much appreciated and if you have any feedback, please email me at in**@*********ps.com. Please note that for links to other websites, I may be paid via an affiliate program such as Avantlink, Impact, Amazon and eBay.
It’s really rare that I hold on to a firearm for more than a year. I bought my Tavor X95 in August of 2021. It’s now August of 2024 and it’s still here and probably not going anywhere soon. Why? Because I like it – how’s that for a reason?
There Is A Learning Curve
I’ll start with the one negative – you definitely need to learn how to operate the Tavor. I guess I have spent too much time on AK and AR platforms of various types because I always fumble around with the controls when I get to take it to the range – which only a few times per year.
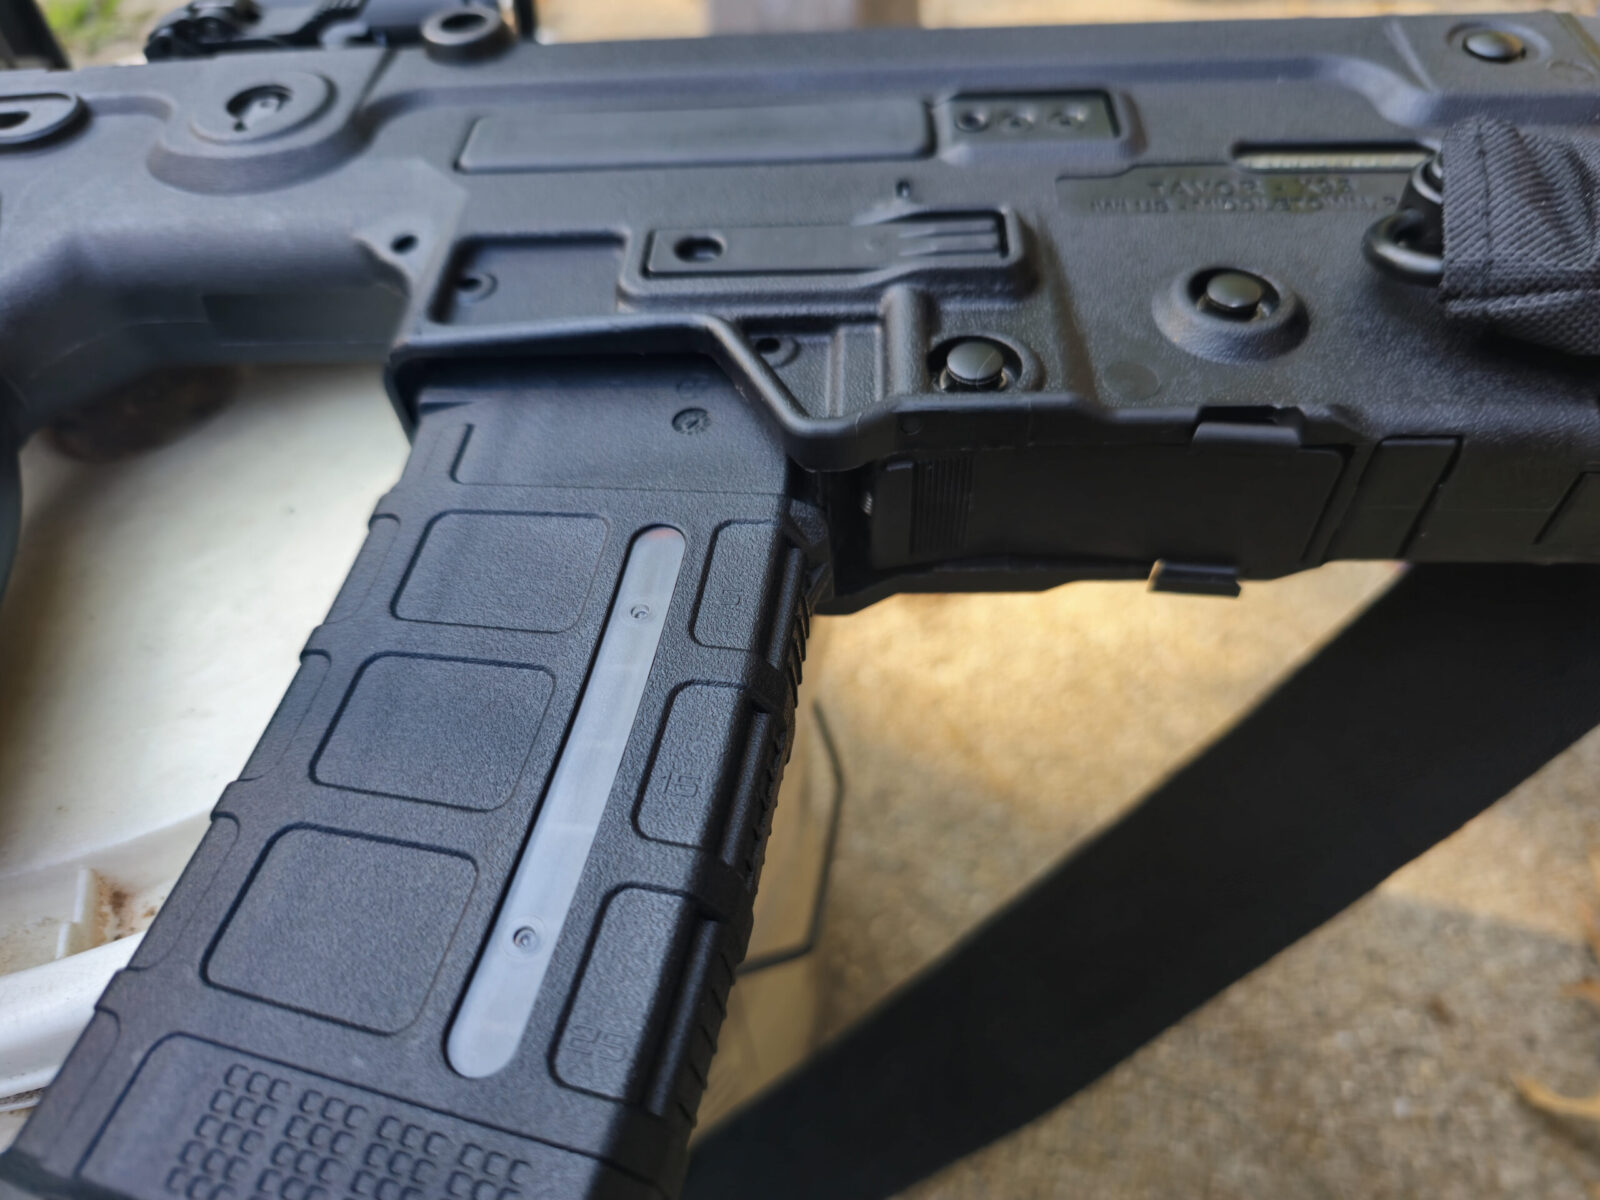
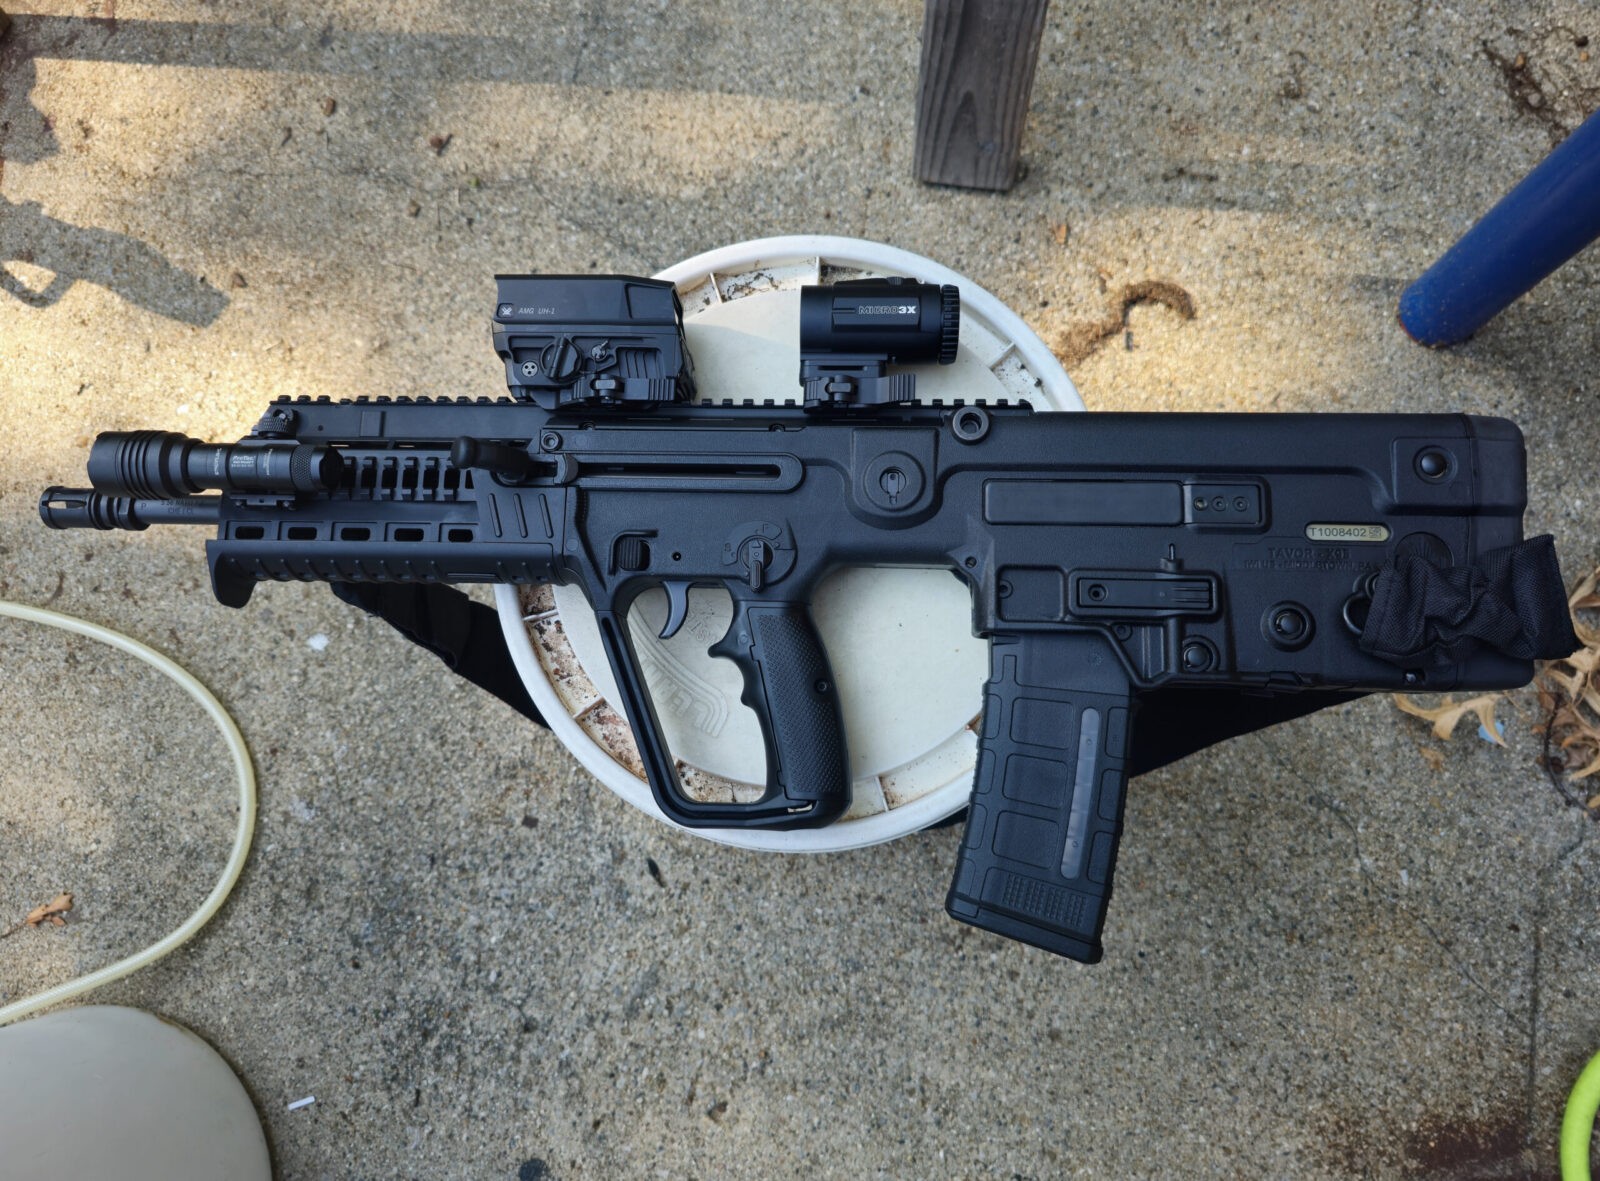
It has a left side charging handle. To the right and rear of that is the mag releaser button and further to the right of that is the safety selector.The Tavor uses STANAG MagPul magazines. To the right of the magazine on the undersideis the bolt release. The two domed pins retain the trigger pack.
What’s interesting to me is that the Israelis are phasing the Tavor out. The Israeli military has always been pragmatic and has decided there are too many negatives with continued use of the Tavor. They are actually moving back to the M4 platform with local companies producing the rifles plus a new firing mechanism.
Compact With Full Power
With that said, the Tavor’s bullpup design does allow for a compact weapon that has a surprisingly long barrel. The X95’s barrel is 16.5″ long allowing for higher velocities to be achieved and thus a longer range.
There is a 16.5″ barrel in there!
Reliable
IWI designed the Tavor to be reliable in their harsh conditions. I must say I have never had a failure to feed or failure to eject with the Tavor. Now my round count is probably around 1,000 or just over. So, not thousands and in Michigan vs. the sandbox but I’ve enjoyed shooting it.
By the way, I use bulk M855 ammo. We had the Tavor out just a few weeks ago and experienced one round in the Tavor that was a dud. I recall we were shooting, my niece pulled the trigger and nothing happened. We waited a minute, kept the rifle safely pointing down and ejected the round. There was a good primer strike but probably a bad primer. Our range has a misfires tube that goes down to a bucket buried a few feet down and I dropped it in there.
I’ve found both Magpul and Lancer mags to work just fine with the Tavor. I prefer windowed mags or the translucent Lancers so I can see how many rounds remain.
Trigger
Bullpup triggers are a cludgy affair at best. You have the trigger in the middle of the rifle that is then connected to a linkage that then transmits the pull back to the hidden trigger mechanism in the action at the rear of the rifle. As a result, you tend to get rather wierd triggers – long relativey heavy pulls with spongy breaks in mass produced rifles.
The Tavor’s original trigger was so-so. I looked back in my notes and did not write down the details in terms of pull weight. I installed a Timney trigger with a 4# 9.7oz average pull but it broke – note, Timney has sinced revised their design to address the problem I had with a pin moving out of position and jamming the trigger pack.
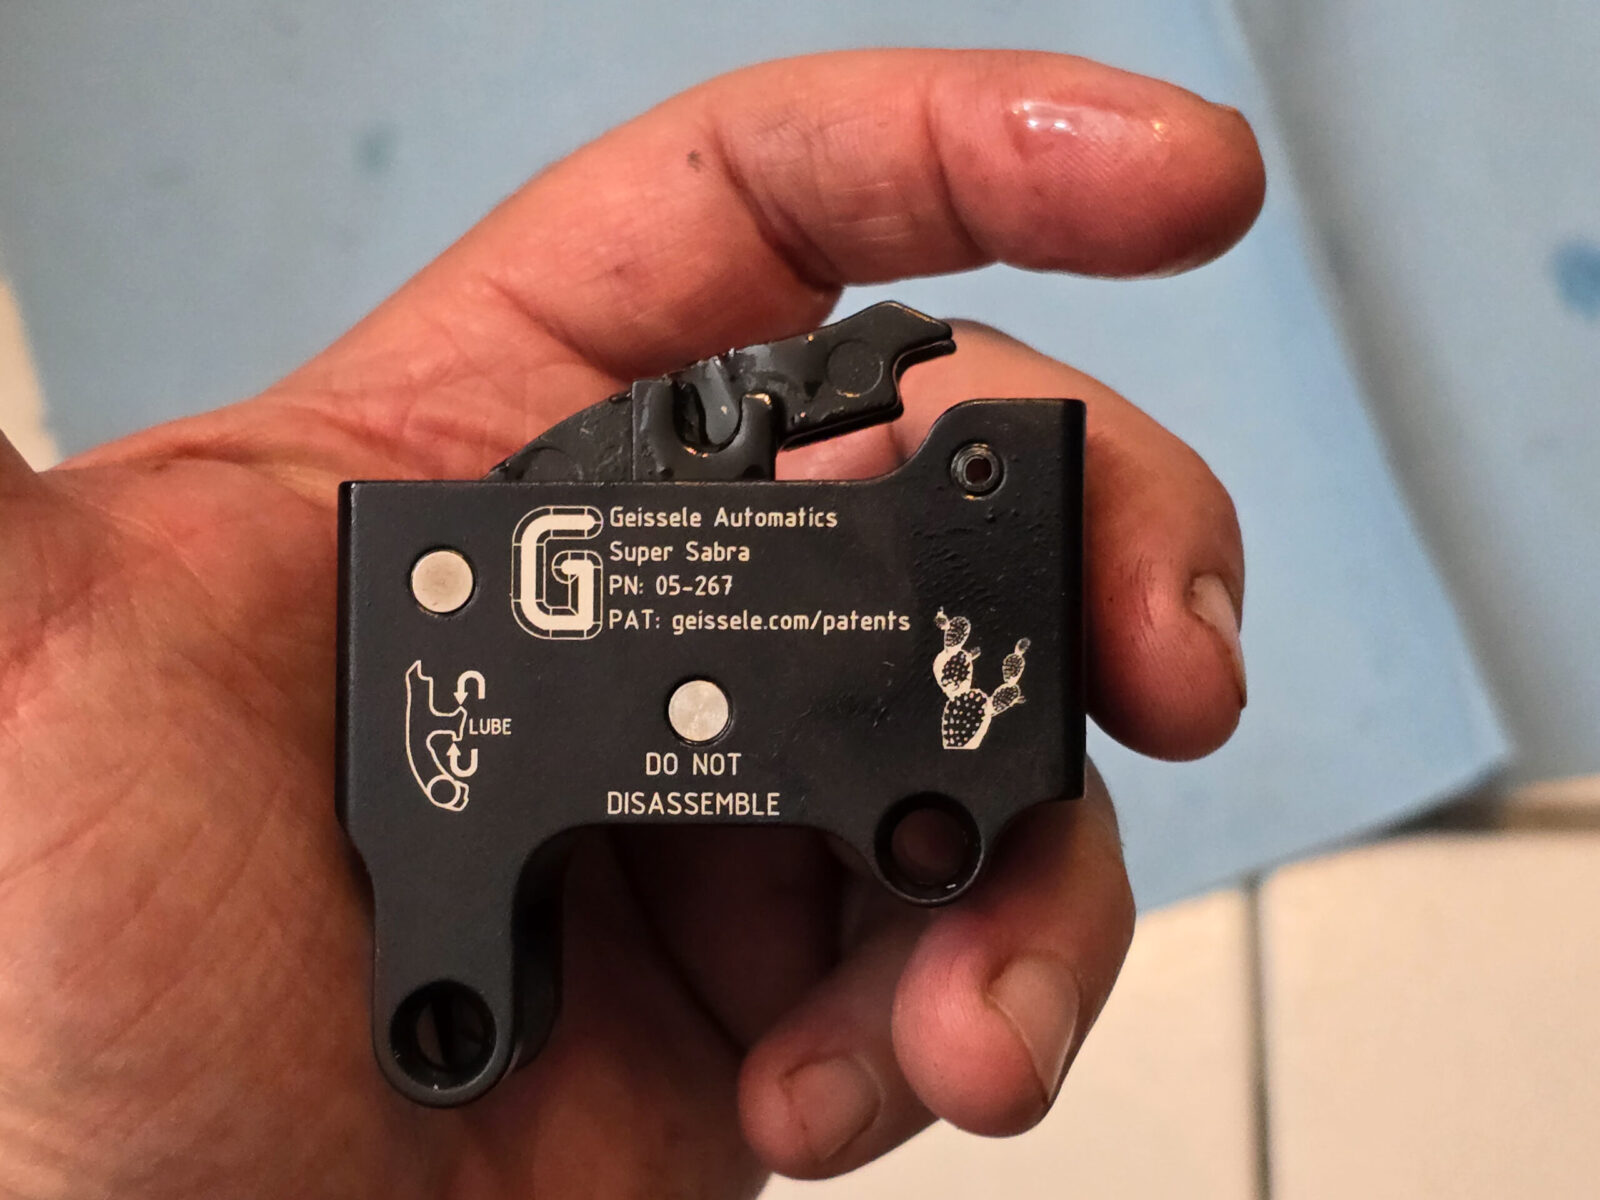
The Tavor now has a Geissele Super Sabra that has run just fine. I reported the pull as 4# 12oz from five test pulls when I first did the swap back in February 2023. I did it again now out of curiosity. I did 10 careful pulls and came up with 4# 9oz. It also breaks quite cleanly.
I’m very happy with the Geissele Super Sabra trigger. It gives the Tavor a nice clean 4# 9oz trigger. Note, I just installed the Super Sabra trigger pack. I did not buy their optional Lightning Bow Trigger. It’s supposed to make the Tavor feel even better but I liked what I had and didnt see the need to buy it.
Accurate
I feel the Tavor X95 is just fine. I had no problem keeping bulk M855 ammo in a 2-3″ group at 100 yards with the combination of the Vortex AMG UH-1 holographic sight and Vortex Micro 3x magnifier. My intent with the Tavor was always for relatively close range shooting – within 100 yards most of the time and maybe out to 200 max.
Like the Optics Combination
I really like the flexibility of the Vortex AMG UH-1 optic and magnifier. There are a few pros and cons though. Swing the magnifier out of the way and you have a wide field of view and the benefits of a holographic sight. Swing the Vortex Micro 3x magnifier in place and you have a little bit better view of further targets. The cons are the weight of the two separate components and a reticle that is meant for speed vs. precision – the sheer size of the dot covers up quite a bit of the target at 100 yards so you are in the ballpark with repeat shots.
Now, I bought the rifle for relatively short ranges as mentioned above. I wanted speed, flexibility and good enough precision. I truly feel I got exactly what I wanted. I now have two of the Vortex AMG UH-1 sights. The second is sitting on my 10mm Stribog.
The combination of a Vortex AMG UH-1 and Vortex Micro 3x magnifier allows for a wide field of view and fast target acquisition. If you want the 3x magnification, you can flip the magnifier down into place. I also recommend the Streamlight ProTac light – you can use it with a thumb activated switch like I have or wire a pressure pad into the Tavor’s Picatinny rails that are hidden under covers. You can see the rail behind the light for example.
The Wow Factor
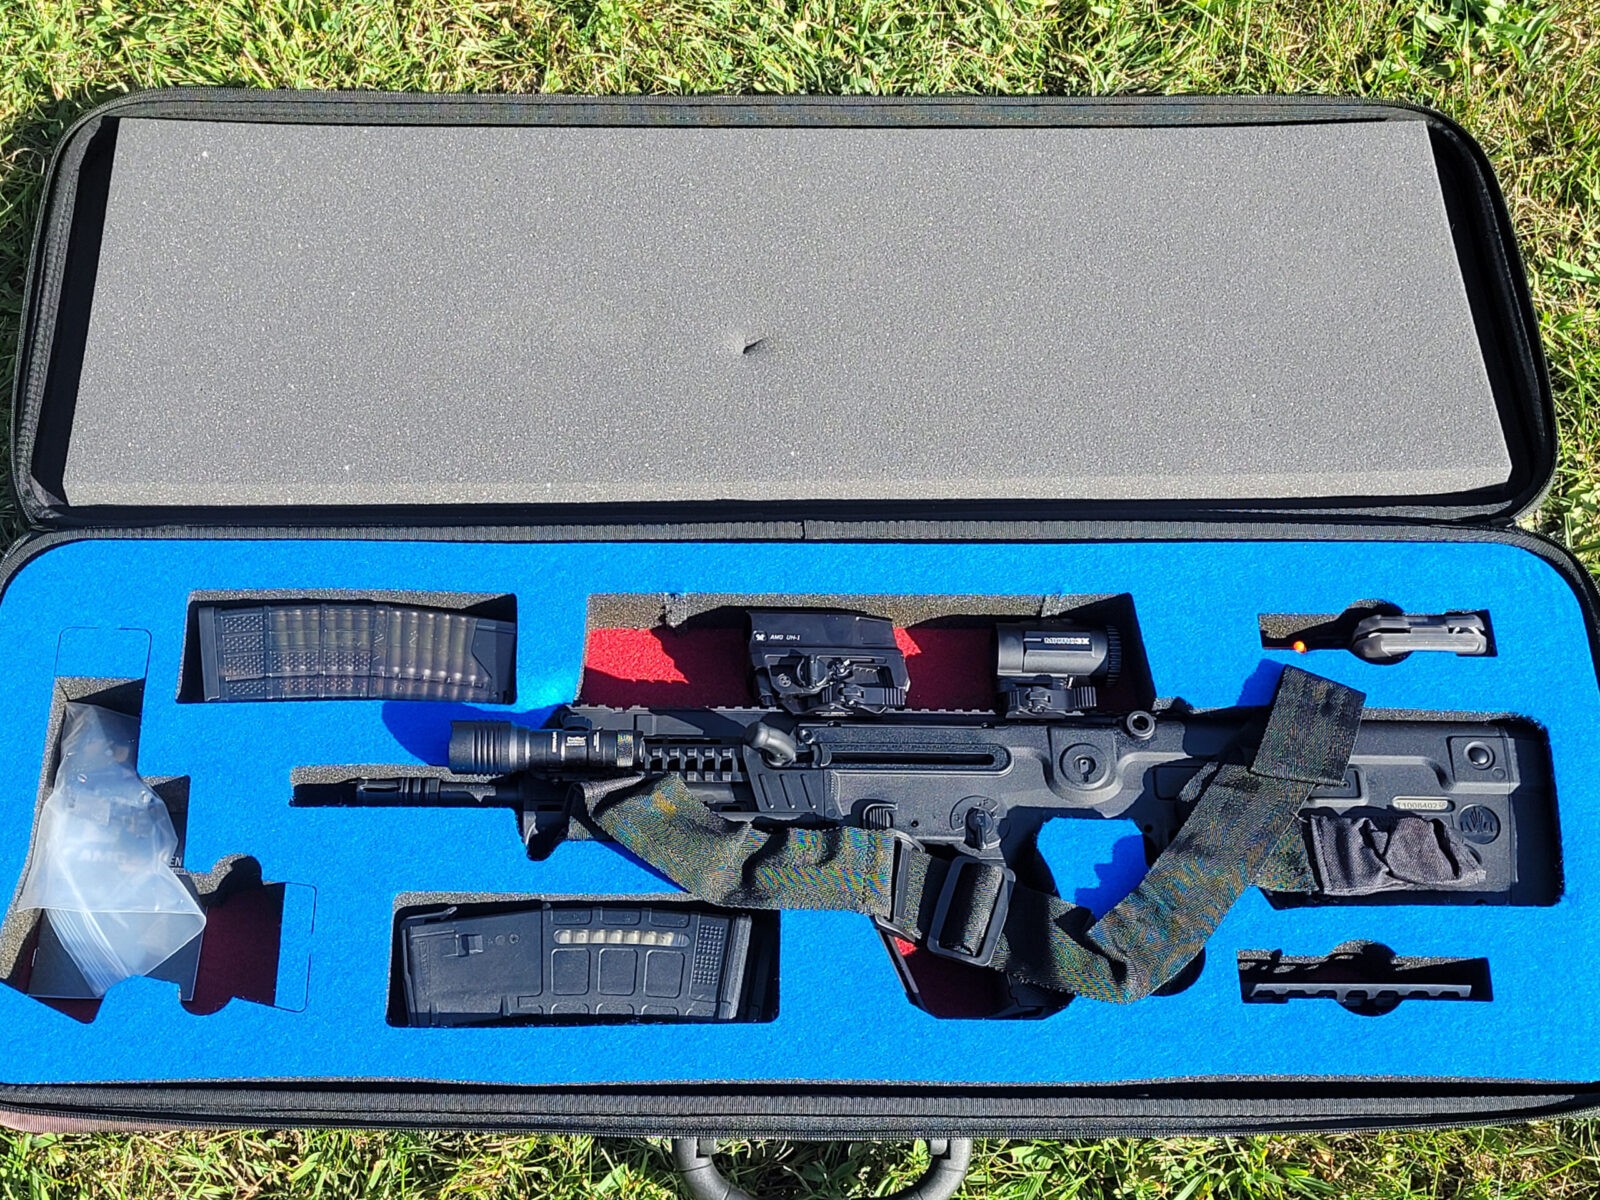
From the moment I open the fitted Peak case, there is a decided “wow” factor from whomever I am shooting with. It turns heads with its looks. The Tavor X95 looks like it stepped out of a Sci-Fi movie with its unique lines and modern look.
The rifle always grabs attention as soon as I open the fitted Peak case. I have it full of loaded mags and spare batteries for the UH-1 and Streamlight ProTac weapons light. The top translucent mags are Lancers and the bottom mags are Magpul windowed units. Note, the original Tavor trigger pack is in the big plastic bag. I kept it in there just in case but haven’t needed it.
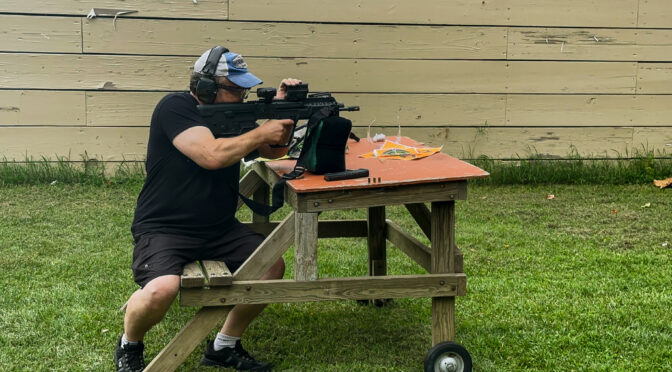
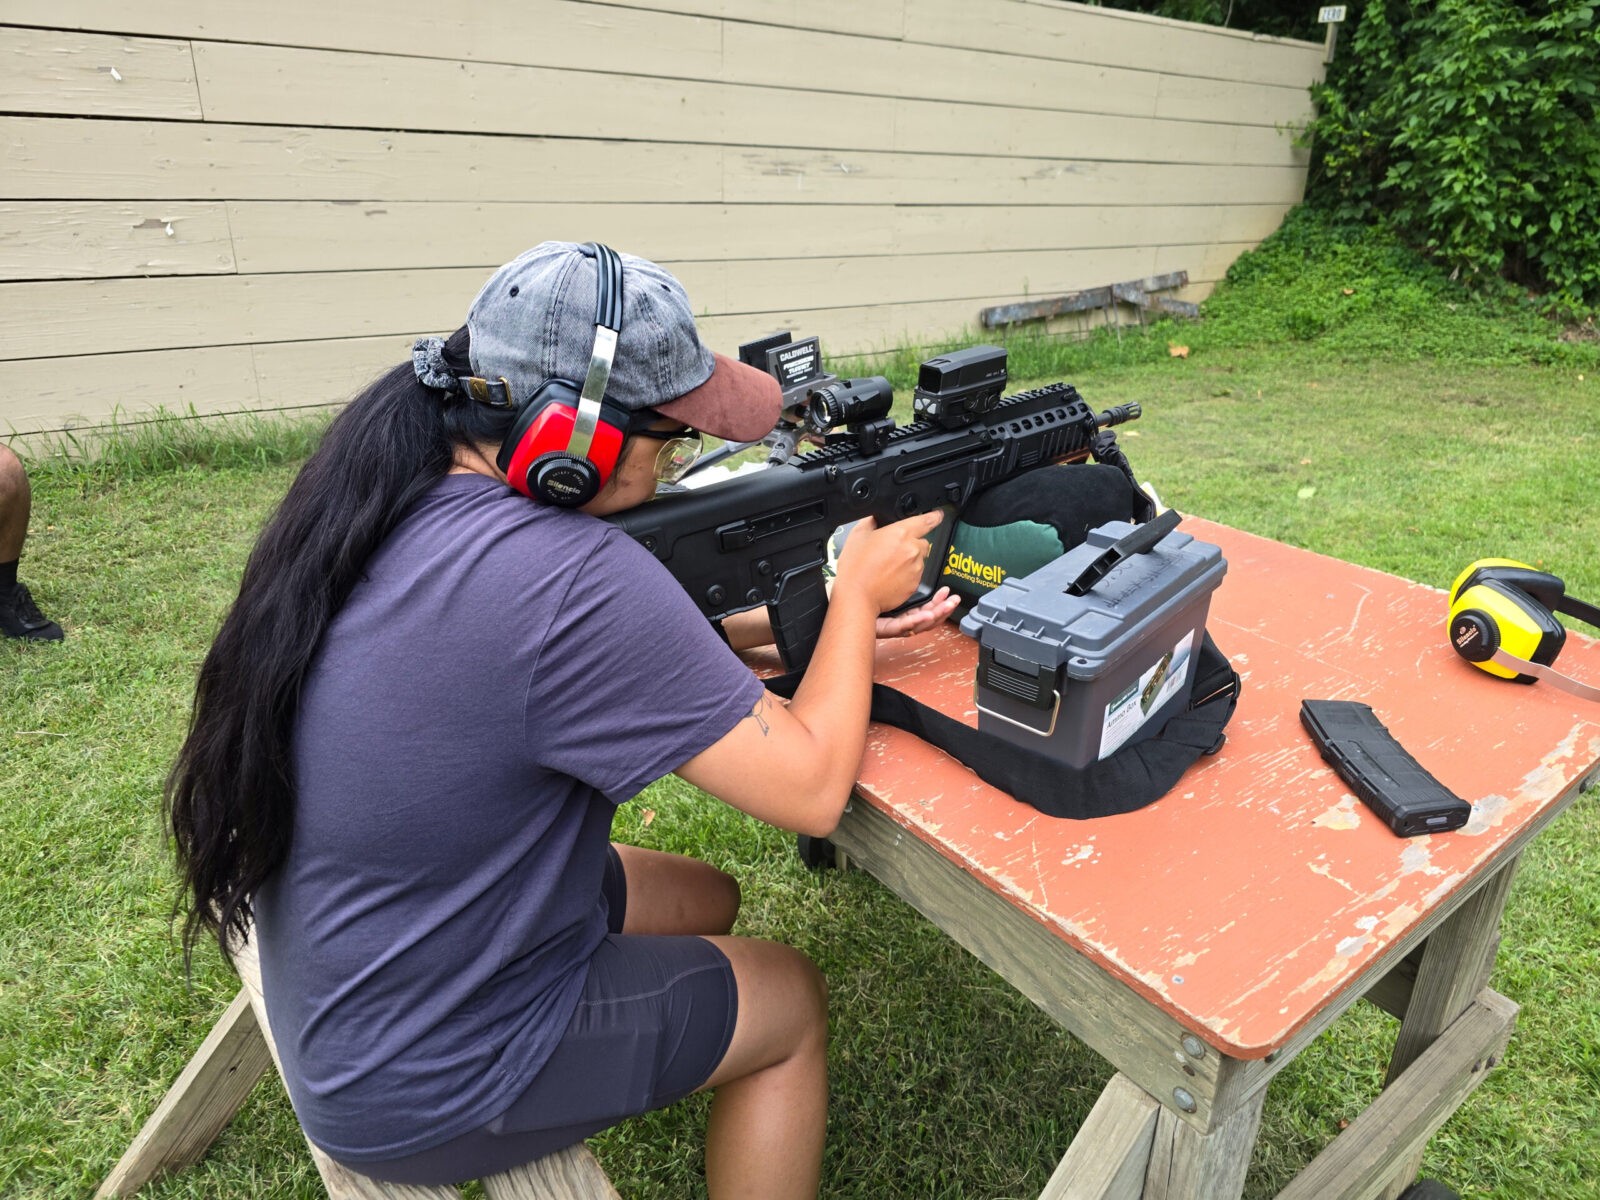
I’ve also found it is great with new shooters because of its weight further absorbing the already light recoil of the 5.56 round. The new shooters always want to get a photo with it.
So, It’s Still Here
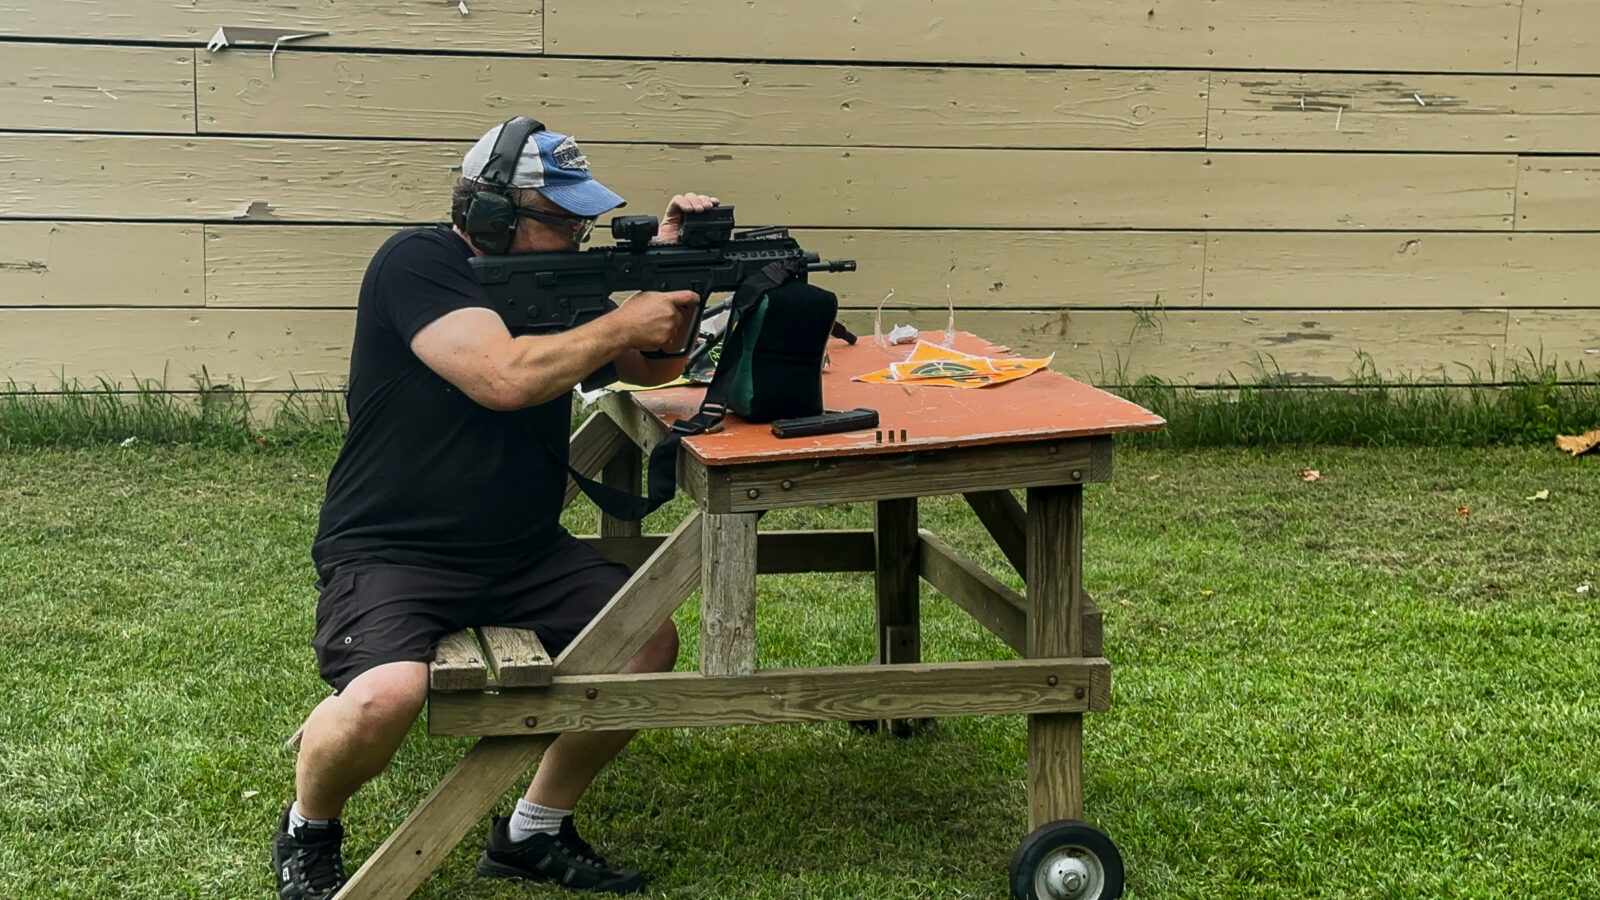
Yep – I still have it. I tend to buy firearms, take them apart, maybe modify them, go to the range once or twice and then sell them. The Tavor X95 has been the exception so far. I bought it in 2021 and I’m writing this in August 2024. It was just on an outing with some family members that were new shooters from Canada and they all had fun with it.
We had a recent family get together and of course they wanted to go to the range. Here, one of my nieces is shooting the Tavor.Yours truly putting some lead down range.
Summary
I’d say the Tavor X95 bullpup is primarily a close in weapon if you want to move up past 9mm but it also has the legs to reach out further. It has a steep learning curve and you can’t do a c-clamp grip. As the Israelis found – you might well be better off with an AR with whatever barrel length you prefer. Always assess your needs before you buy.
Would I recommend the Tavor X95 to people? Yes and mainly because of the unique design’s “wow” factor. I still tell people to think about how they want to use a firearm – the use case – and then buy accordingly. Without a doubt though, the Tavor X95 is cool, reliable and accurate.
I hope this helps you out.
Note, I have to buy all of my parts – nothing here was paid for by sponsors, etc. I do make a small amount if you click on an ad and buy something but that is it. You’re getting my real opinion on stuff.
If you find this post useful, please share the link on Facebook, with your friends, etc. Your support is much appreciated and if you have any feedback, please email me at in**@*********ps.com. Please note that for links to other websites, I may be paid via an affiliate program such as Avantlink, Impact, Amazon and eBay.
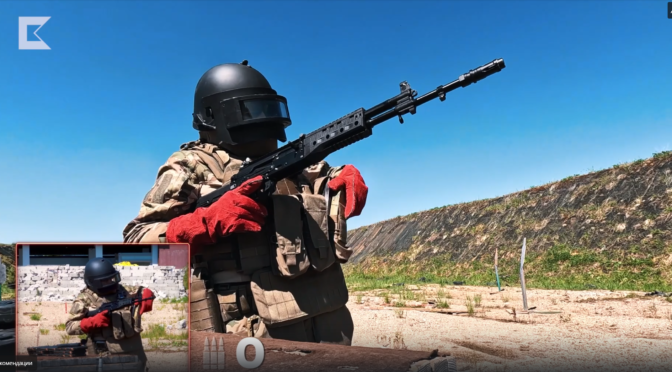
Okay, in 2018, Gunbusters tested an AK-12. Since then, Klashnikov Concern has done a number of enhancement so they decided to torture one again. Watch as an up-armored Gregory Gubich puts the 2023 model through his testing.
Have to love the welding gloves and K6-3 Altyn Helmet. I’d want protection too!
Here’s a cool video (with the host speaking in Russian) for you to check out:
I hope you enjoyed this.
Note – any photos extracted from the video remain the property of their owner.
If you find this post useful, please share the link on Facebook, with your friends, etc. Your support is much appreciated and if you have any feedback, please email me at in**@*********ps.com. Please note that for links to other websites, I may be paid via an affiliate program such as Avantlink, Impact, Amazon and eBay.
I have a Harbor Freight 44991 Mini Mill that I bought in 2006 or there abouts. My use of it has been off-and-on depending on what projects I had. Lately, I’ve been using it a lot and happened across a blog post talking about the benefits of upgrading from the gear drive to a belt drive using a mini mill belt drive conversion kit from LittleMachineShop.
There were two benefits that really caught my attention. First, I’d read that one of the key gears was nylon and could break. It hadn’t happened yet but given my machine is around 18 years old, it was concerning. Second, it could take care of the annoying loud whirring gear sound. I’d lived with it but I knew exactly what the author meant.
A company name Sieg in Shanghai actually makes these mini mills and they are sold under many different brands so if you have a Mini Mill from Harbor Freight, Grizzly, Micro Mark, Norther Tool, Sieg, Travers Tiiks, Wen and more, this ought to work. They tell you to confirm that the rear shaft is 9mm with a 3mm key and the front pulley that will go on the spindle has a 30mm bore and a 5mm key.
LittleMachineShop is my goto source for parts for my little mill and I aways had good luck with them. Overall, folks spoke highly of it so I ordered direct from them so I could get faster shipping. You can also buy it from Amazon if you prefer also [click here].
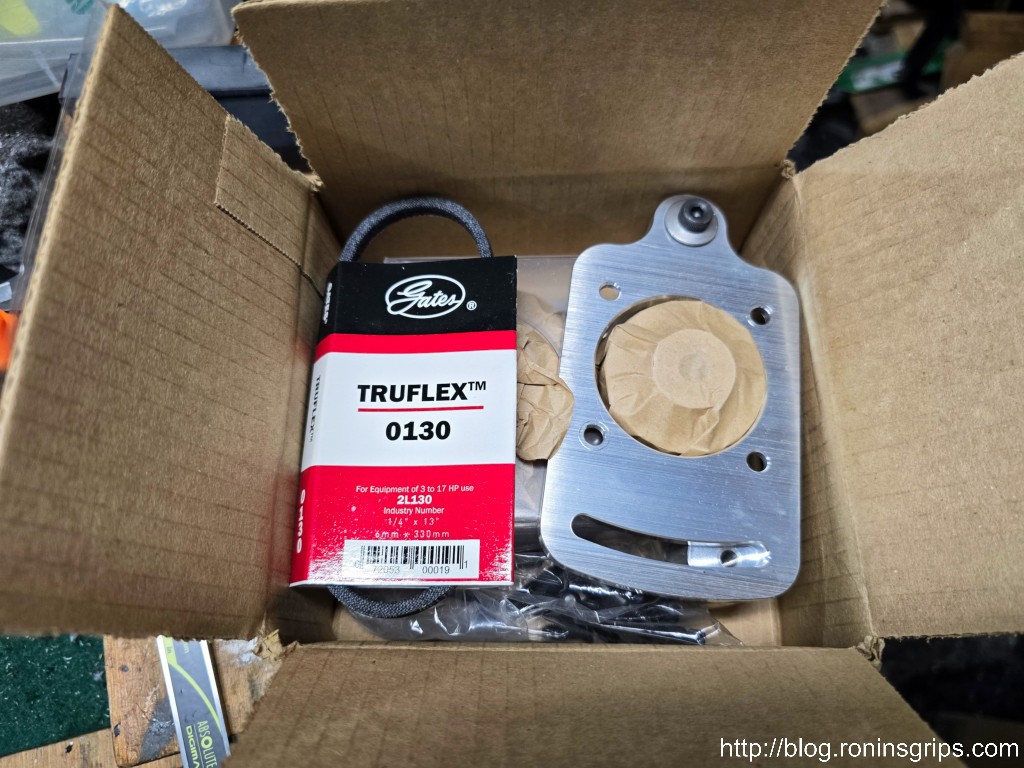
What arrived was a neatly done little kit with all the parts you need. A few people left comments on Amazon that they didn’t like the maching but what arrived for me was just fine.
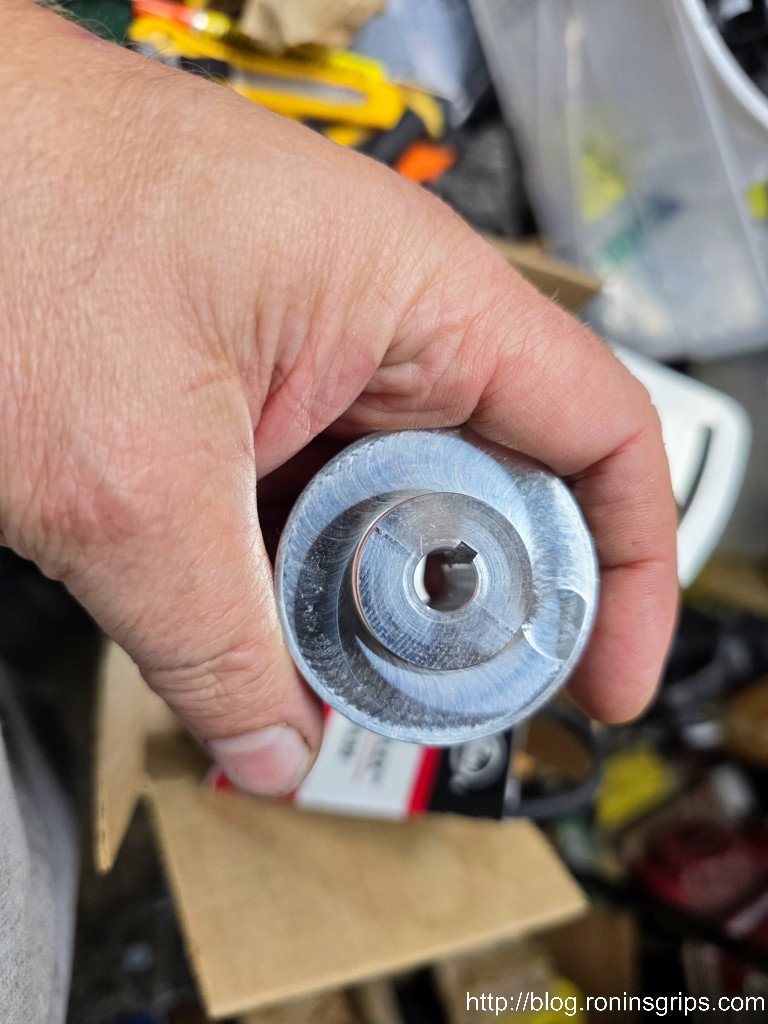
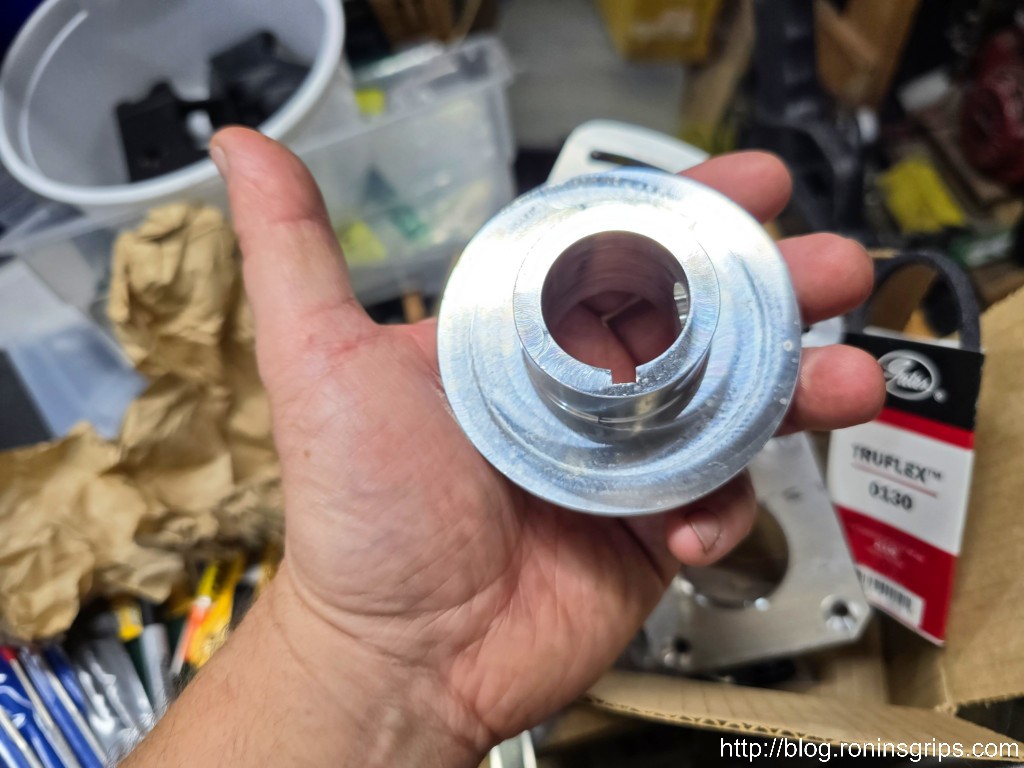
This box was in another box – everything was packed very well. Note the small drive belt they include in case you ever need another. Gates 0130 or 2L130.This is the pully for the motor.This pully will go on the spindle.
Now, before you do anything read the instructions from their website. They also come with the kit and were on the bottom of the box. I through them one by one and found them to be detailed and accurate. There are a number of steps so I am going to post photos only of some of them – follow their instructions and you can do this.
They tell you this can be done in 15-20 minutes. It took me just over an hour as I had to fight to get the pinion gear off the motor because I couldn’t find any of my bearing/gear pullers so I blew time trying to find them and then making do with what I had.
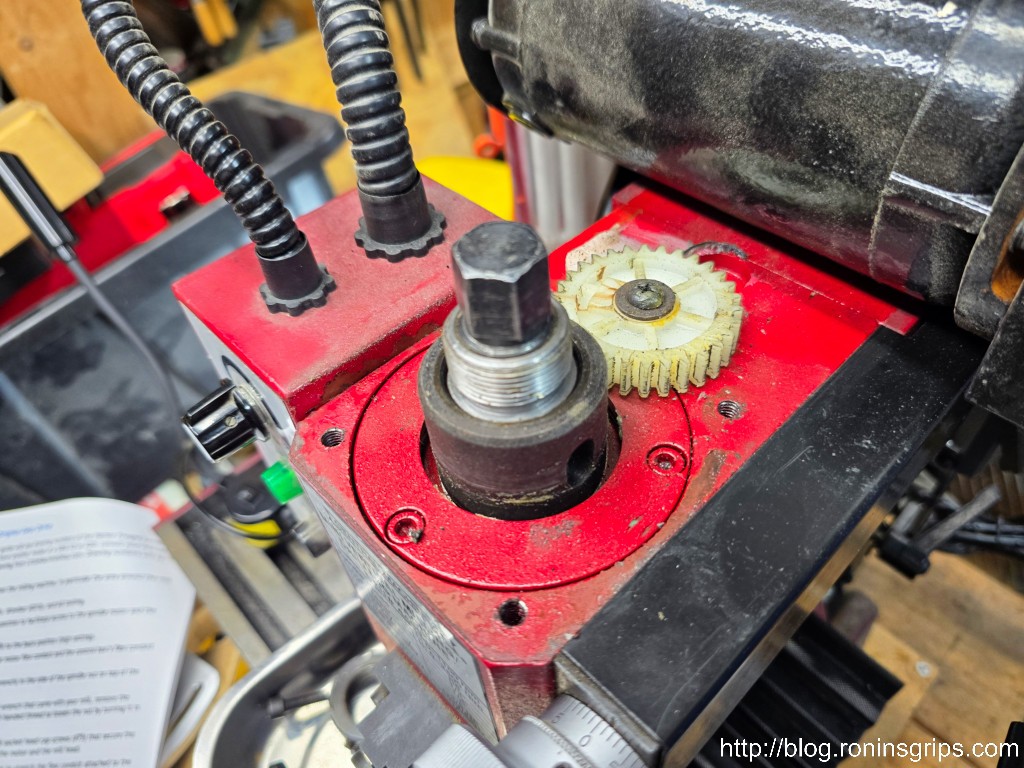
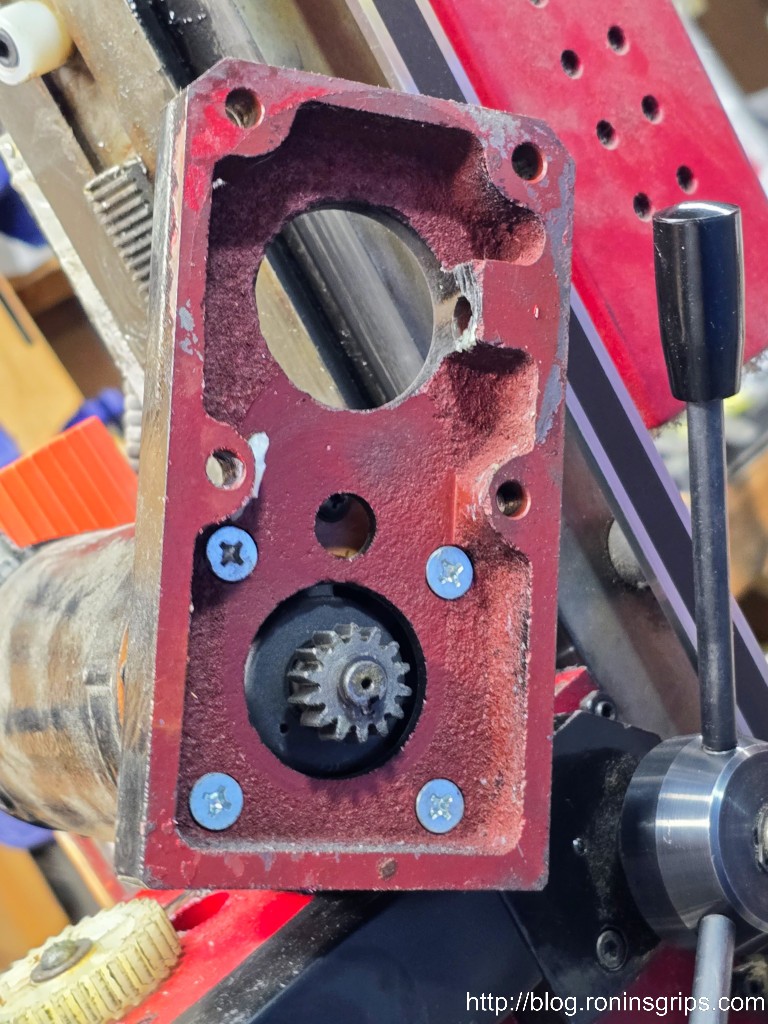
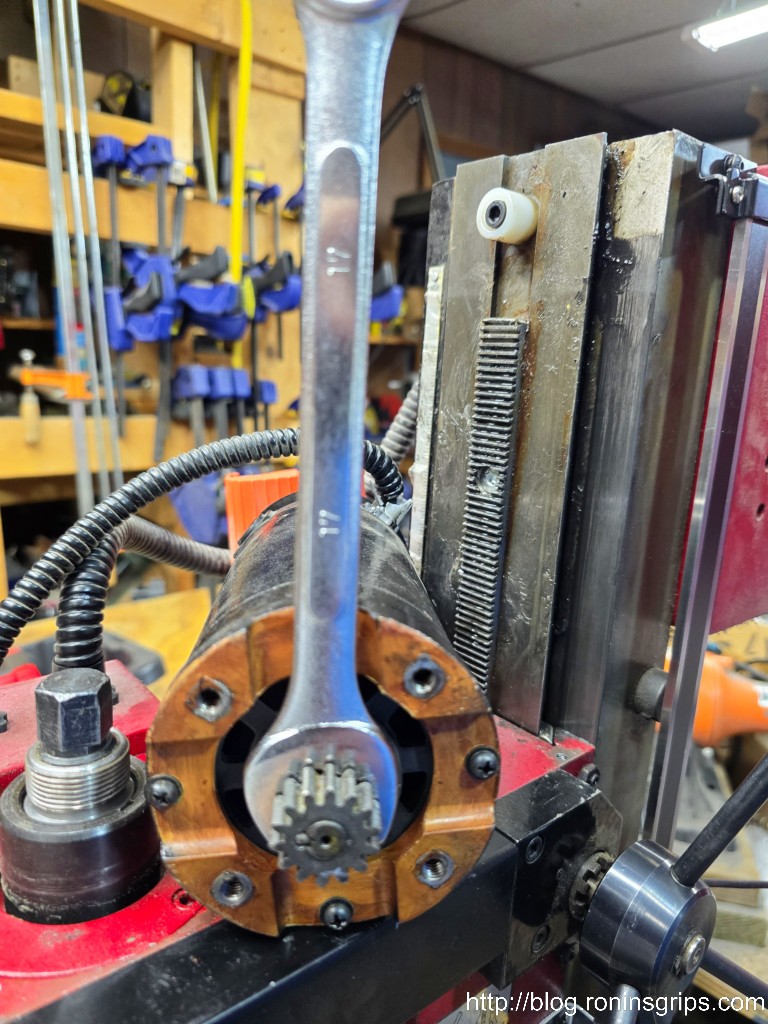
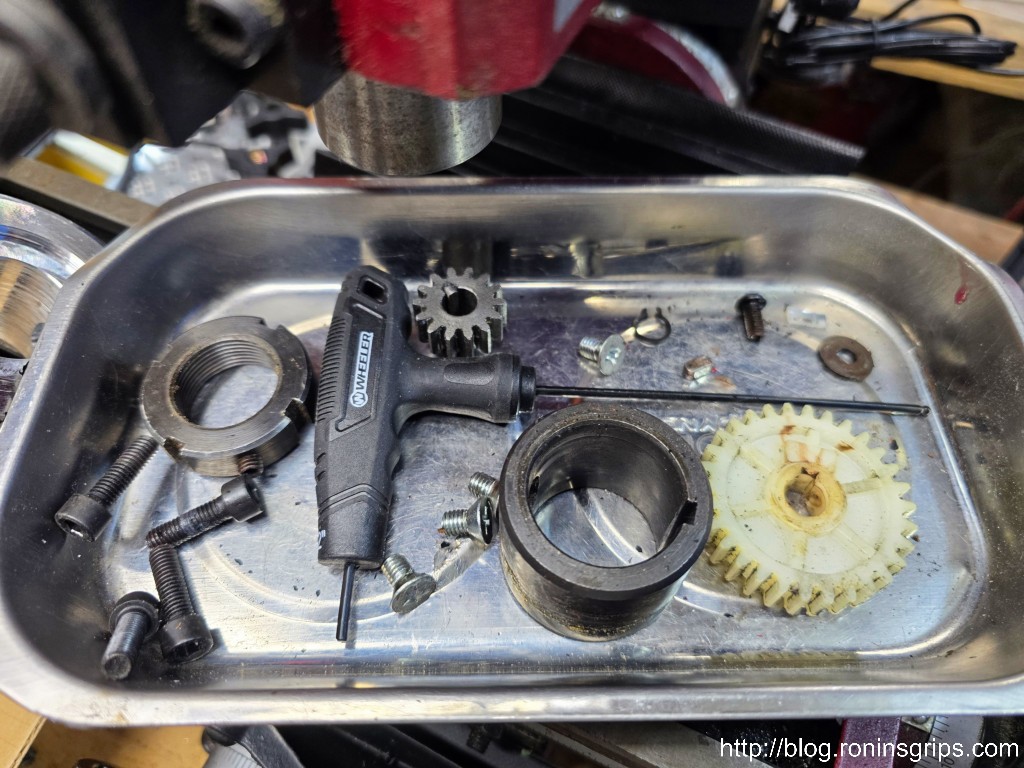
So that’s the nylon gear everyone talks about. It connects to a steel gear on the motor (what could possibly go wrong). The nylon gear spins and sends power down to the Hi/Lo gear. The mill speed is set to high, you remove that gear and a snug fitting piece of clear tubing is put in its place just to keep the now-gearless shaft from falling. I found disassembly very easy until I got to this gear. The instructions say it may be tight. Well, it’s definitely a tight interference fit. Every fastener came off surprisingly easily but that gear is a pain.What would have made quick work of this would have been a bearing/pinion gear puller. Guess who couldn’t find his …. anywhere! So, I got a 17mm box end behind and levered it out part way and then used a big flat head screwdriver where the head was bevelled. I’d lightly tap the screwdriver down and as the wedge-shaped head moved down, the gear moved out. I just had to be careful not to lose the Woodruf key that holds the gear in place relative to the shaft. I was able to slowly work it out. The only causualty was knocking paint off the motor as it moved around.My pile of parts grew. I like using a magnetic tray to hold everything. I scooted everything left over into a heavy ZipLoc type bag and stored it in my mill’s toolbox.
I kept following the instructions and everything went together real easily. I’m actually impressed that they were clearly described and complete.
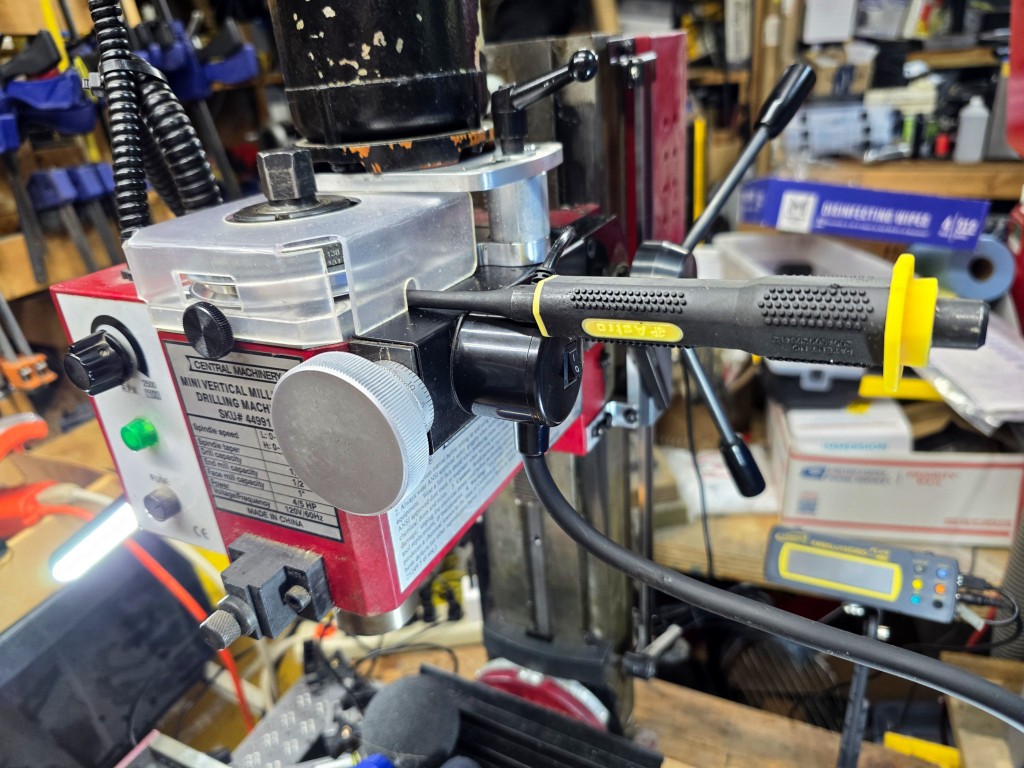
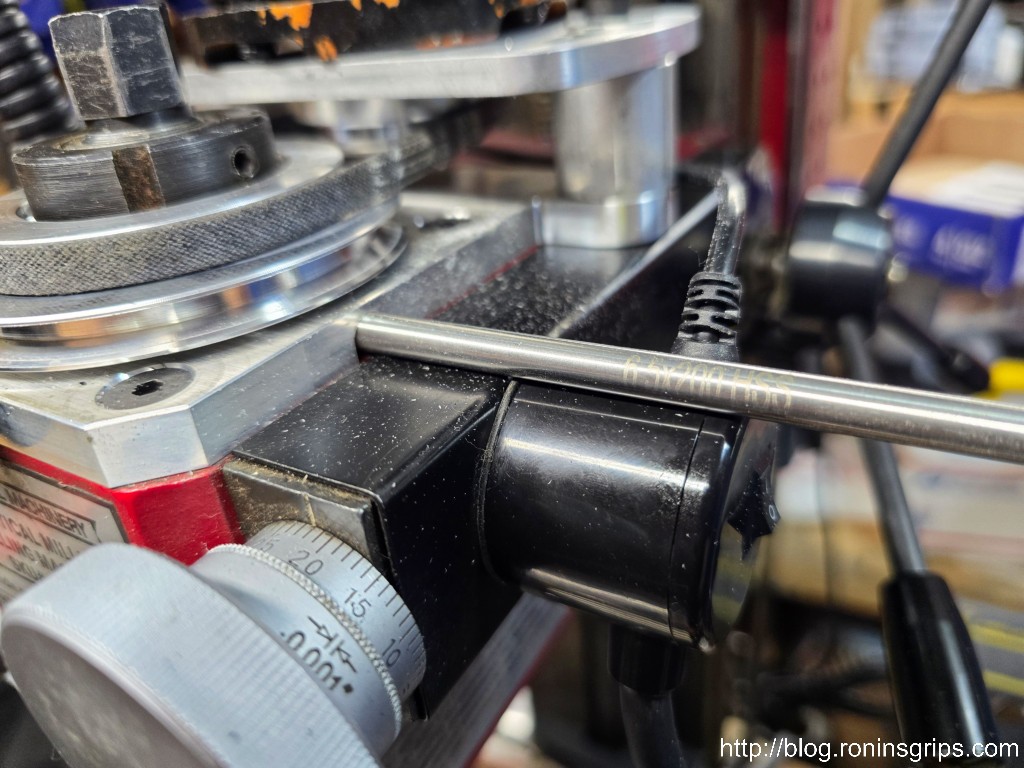
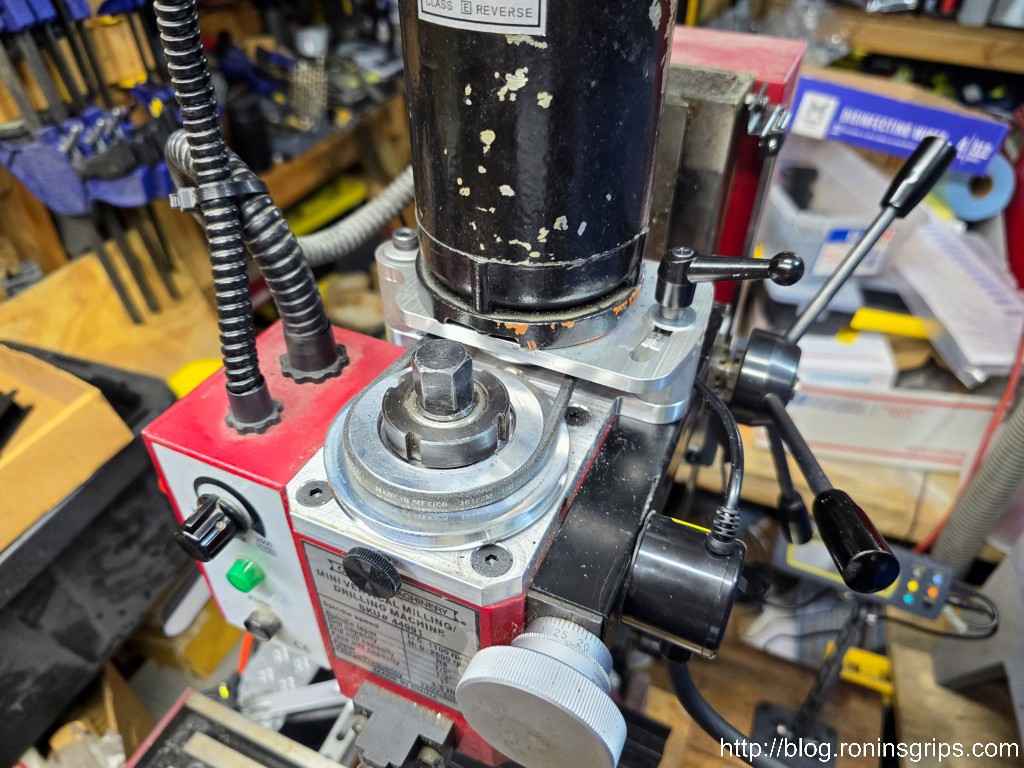
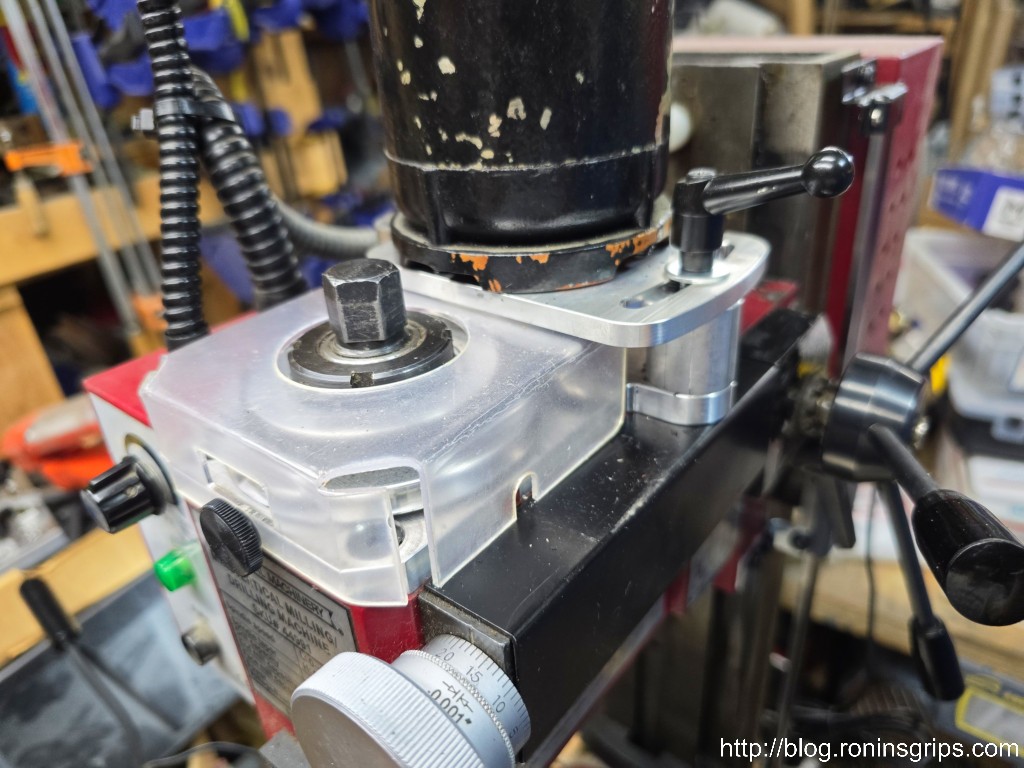
Now there was one catch – they told me to use my old spindle lock pin when I was putting the spindle nut back on. Maybe there’s been a design change in the 18 years since I bought mine but my original spindle lock was 7.865mm and far too big to go in the new top plate’s hole. I found I could get a handy roll pin punch (6.42mm) to fit albeit with a little slop in the locked spindle. My original spindle stop pin had a diameter of 7.865mm according to my Mitutoyo micrometer. I used some drill bit shafts to get an idea of the size rod I needed. 6.5mm fits through the hole and is about as large as I can go. I toyed with filing the hole open larger to fit a bigger pin but think this will hold up ok. It doesn’t have to withstand a lot of torque.Here’s a side view. Note the paint scuffed off the black motor from my hear removal shenanigans. Note hole for the locking pin.Looking down at it a bit.With the cover.
Summary
I can’t say that the sound level went down much but it did change. More of a whirring sound instead of the gears meshing. Running at max speed on the low speed pulley, my sound meter is reading 90-92db while sitting on the table right below the spindle.
For me, the most important thing is that I don’t have to worry about one of the gears breaking. I’m pleased with it because that was what I really cared about.
If you want to upgrade your mini mill so you don’t have to worry about the gears, The LittleMachineShop belt drive conversion kit is pretty slick.
I hope this helps you out.
Note, I have to buy all of my parts – nothing here was paid for by sponsors, etc. I do make a small amount if you click on an ad and buy something but that is it. You’re getting my real opinion on stuff.
If you find this post useful, please share the link on Facebook, with your friends, etc. Your support is much appreciated and if you have any feedback, please email me at in**@*********ps.com. Please note that for links to other websites, I may be paid via an affiliate program such as Avantlink, Impact, Amazon and eBay.