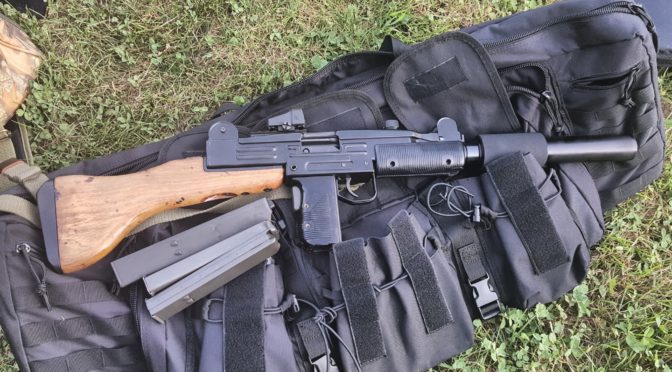
I built an Uzi a few months back and had trouble with it firing. A challenge a person has in the firearms industry is finding time to enjoy shooting! At any rate, I took it out the first time and had really light primer strikes with the firing pin – I’m talking you could barely see there was contact. So with the Uzi refusing to go bang, I had to do some digging.
I got into Uzis because of all the movies and TV shows in the 1980s. I decided to finally make one during the Winter of 2017/2018 and chronicled my efforts. The first time to the range resulted in a lot of good natured ribbing from my brother-in-laws as we could not get it to fire. We could hear the striker hitting real hard but no bang. Luckily I had other guns for us to shoot so I put the Uzi back in the bag and took it home where it then sat for a couple of months.
I did some digging and process of elimination and got it down to a few possibilities that in some cases I had already addressed. The following is my journey and what I did to sort matters out.
Lubrication
The Uzi closed bolt system is a huge chunk of metal and moving parts. When brand new, these parts still have their porous surface finishes on them, rough spots from machining and what not. You need to make sure everything is lubricated. Remember the old saying of it slides, use grease. If it rotates, use oil. I used Tetra gun grease on all sliding parts. I definitely wanted the big bolt body to slide easily. I also did put a light coat of Mobil 1 Full Synthetic 10W30 on the firing pin but really nothing rotates in there. In the trigger group, I used the oil also on all pivot points.
For me, I heard the need for this when I assembled the carbine for the first time. There was a very dry slow-moving sound and grating feel when I first ran the action during assembly. After lubrication it made a world of difference. I could feel and hear the striker hitting far harder. The important point is to lube your weapon. This definitely helped but it did not solve my problem in this case but I could tell it would definitely impact the operation of an Uzi.
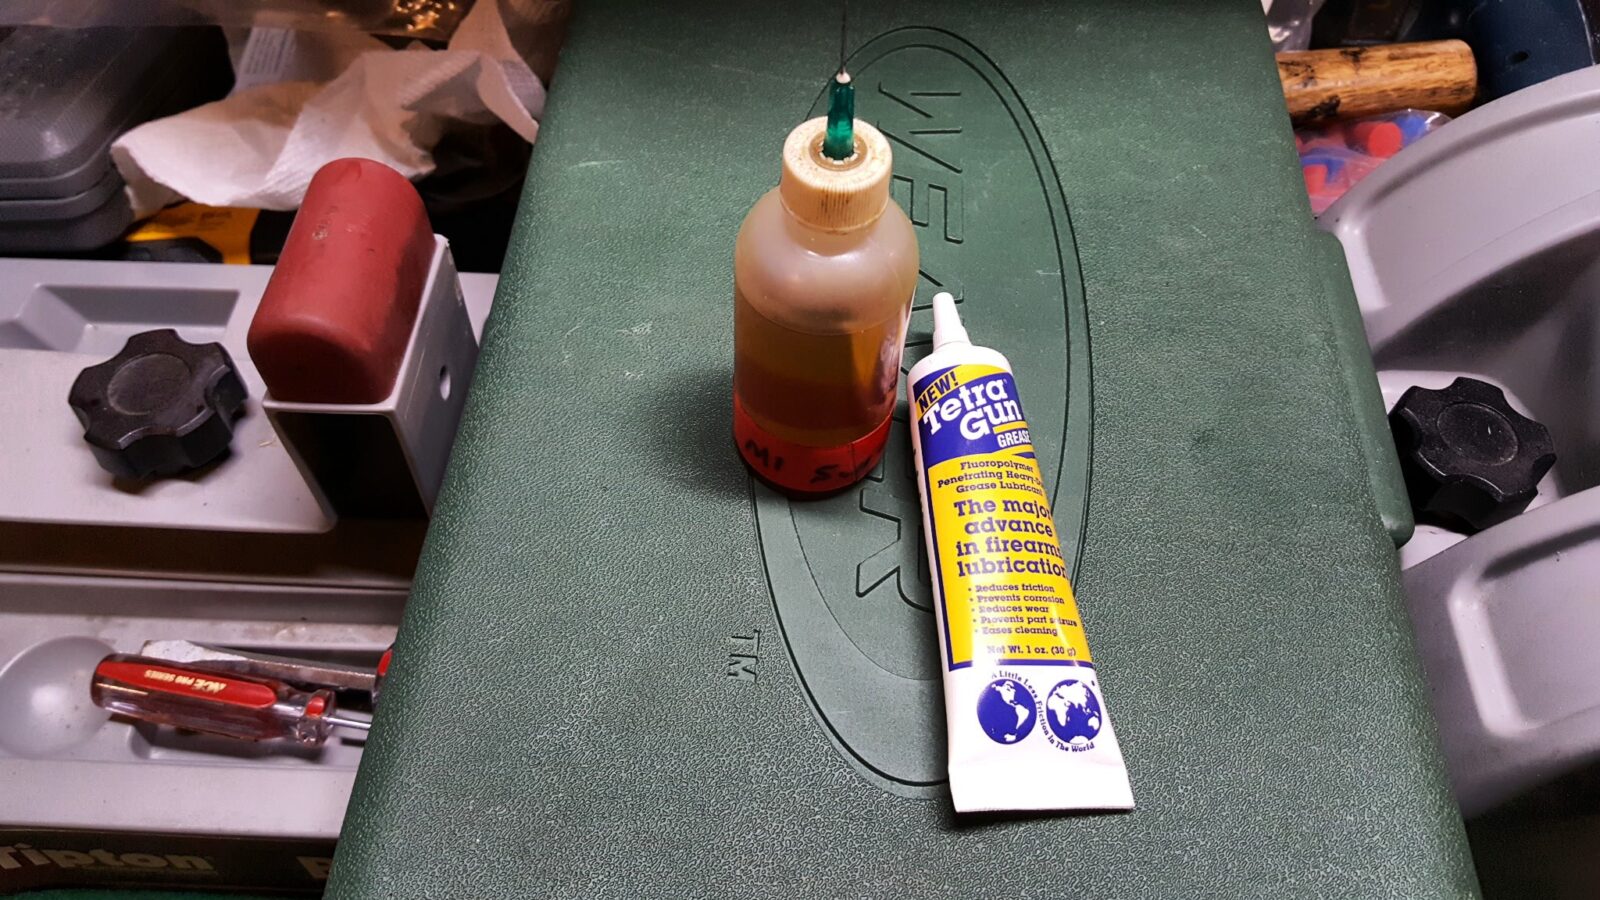
Note: When I wrote this I was using Tetra Grease but I am now using Super Lube and it works fantastic on my Uzi. Click here for the write up.
Top Cover Bent
To be honest, I thought for sure this was going to be my problem after a fellow at McKay suggested I check it. I always thought the cover seated hard and I could not release the latch without a tool. As soon as the fellow suggested it I put one and one together – I bet it warped when the third party welded on the Picatinny rail section.
So, I did some digging on the web to figure out what to do. It turns out that you should be able to insert a 0.005″ feeler gauge between the bolt and the cover at the ejection port. Guess what? It wouldn’t go in – the first rib was tight and the far rib was impassable.

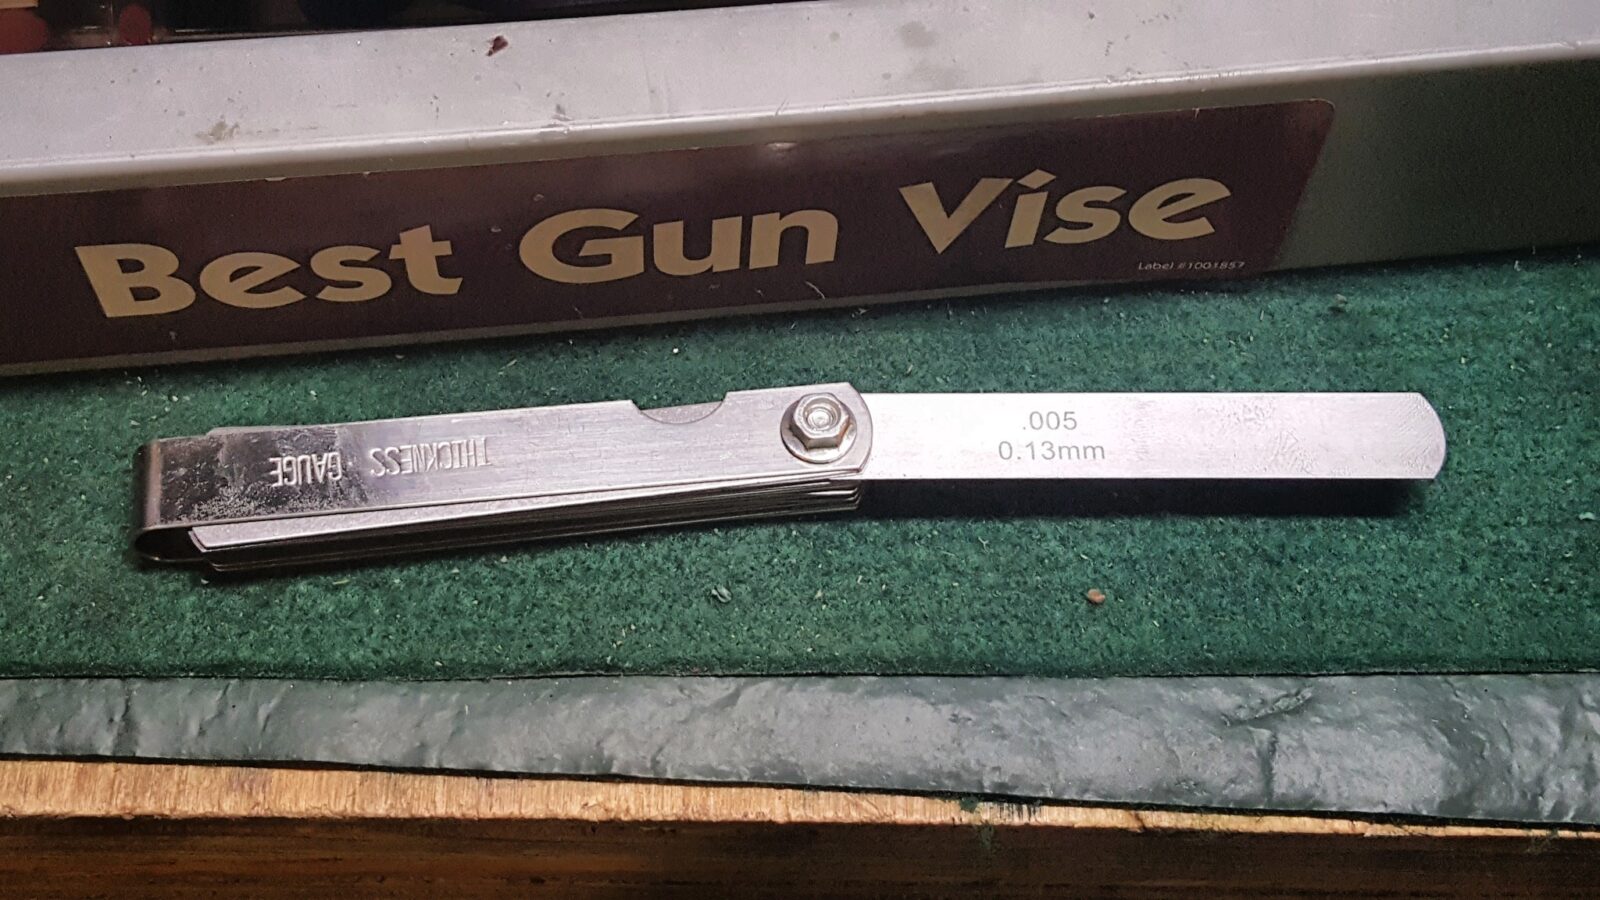
Before I go further – one quick comment on feeler gauges. Not all are equal. I have a few in my toolbox but the one I use the most is is this ABN unit shown above. It is accurate enough and it has a ton of gauges. I point this out because not all of these gauge sets are complete. For example, several of my gauge sets jump as the manufacturer just included the blades needed for their equipment. I’d recommend getting a set with a lot of SAE and metric blades so you have flexibility. For the Uzi dust cover, you need the 0.005 and 0.015 gauges.
Next was to take some plywood stock I had lying around and make a jig. Basically you want two pieces of wood (any wood to avoid marring) that are the same height. The top cover will be suspended between them so you can adjust the cover either up or down.
I then made two little punches. One is made by gluing and brad nailing two pieces of 1/2″ plywood together so I could hit both ribs of the top cover at once. I also made a punch out of a single piece of plywood to adjust just one rib. I then got out one BFH (big frickin’ hammer) to whack with.


If there’s one thing I have learned – don’t go crazy hitting stuff. I put the jig right on the floor for good support and then the dust cover on it. Note that on the front part, I pushed the wood block back until it was supporting a thicker part and not just the thin neck.
So, I gave it a tap – not a very hard one with the thick piece on both ribs and took it over to test. It sure went on the receiver easier. Wow – it overshot the mark. I could now very easily insert the 0.015″ feeler gauge too. My understanding is that you don’t want it that loose or you risk the bolt jumping the sear and resulting in an uncontrolled mag dump. No joke – I don’t need that in my life ever.


I took the cover off the Uzi and flipped it with top now facing up and I tapped down even lighter. It really is surprising how easy the dust cover bends. I thought given the thickness of the sheet metal and the two ribs it would be much stronger but no.
I then took it back and installed it on the Uzi. It was starting to fit better. I definitely noticed that the ribs were different in terms of their gap so I switched to the smaller 1/2″ plywood punch and focused on one rib at a time. Tap and test, tap and test. If I went too far one way, I would flip the cover and tap it the other way.
After about 15 minutes I had it dialed in. The 0.005″ gauge would slide in and the 0.015 gauge met just a bit of resistance.

In working the action you could both feel and see the improvement. As always, there was a nice firm thud of the striker. Problem solved? No – it wasn’t. Argh. It was a definite improvement in operation but did not solve the problem.
The Uzi Bolt Blocking Latch
The web is a wonderful thing. I continued to surf around and read more about peoples’ experiences with Uzis not firing. Finally I read one that caught my eye – the striker has a particular orientation that must be followed to clear the bolt blocking latch. Wow. I knew I didn’t know about that when I installed it because the light strikes definitely indicated the striker wasn’t reaching the primer and this would explain a lot.

Okay, #31 in the above diagram is the bolt blocking latch and #30 is the spring. The bolt blocking latch’s purpose is to reduce (not eliminate) the chance of an out of battery firing. It does this by blocking the striker’s base. In normal operation, it is depressed and the notch in the base clears the latch as it travels forward to touch off the primer. Now there are three key things here and I’ll tell you what I messed up.
- The spring must be installed correctly.
- The latch must move freely
- The striker must be rotated such that the notch is in the right place- you can install it 180 degrees opposite.
So, your’s truly bombed the last one. I did not realize there was an orientation issue. The model B striker’s base is a half circle. The notch must be at the bottom to clear the latch. In this next photo, you can see I have it installed backward:

The following photo shows the installed Uzi bolt blocking latch. See how the bottom part sticks out? That is what will need to clear the notch when it is depressed during normal operation.


Note, I was working on a full size Uzi with a McKay semi-auto receiver and bolt group. Your bolt group may look a bit different.
When installed correctly, the striker sits in its seat and the seat sits in the striker guide like so:

You can see in the above photo how my latch was chewing on the improperly installed striker. As a visual reference for the correct orientation, see how the striker’s base is facing the part of the guide that has a depression in it. When installed, it will look like this:

You can see an immediate difference because when you depress the latch, the striker can fully travel forward and sticks out of the bolt face ever so slightly. That’s what we want!

Verdict – problem solved and fun was had at the range yesterday. The Uzi is still wearing in and smoothing out. We put about 100 rounds of 124 grain S&B FMJ through it.
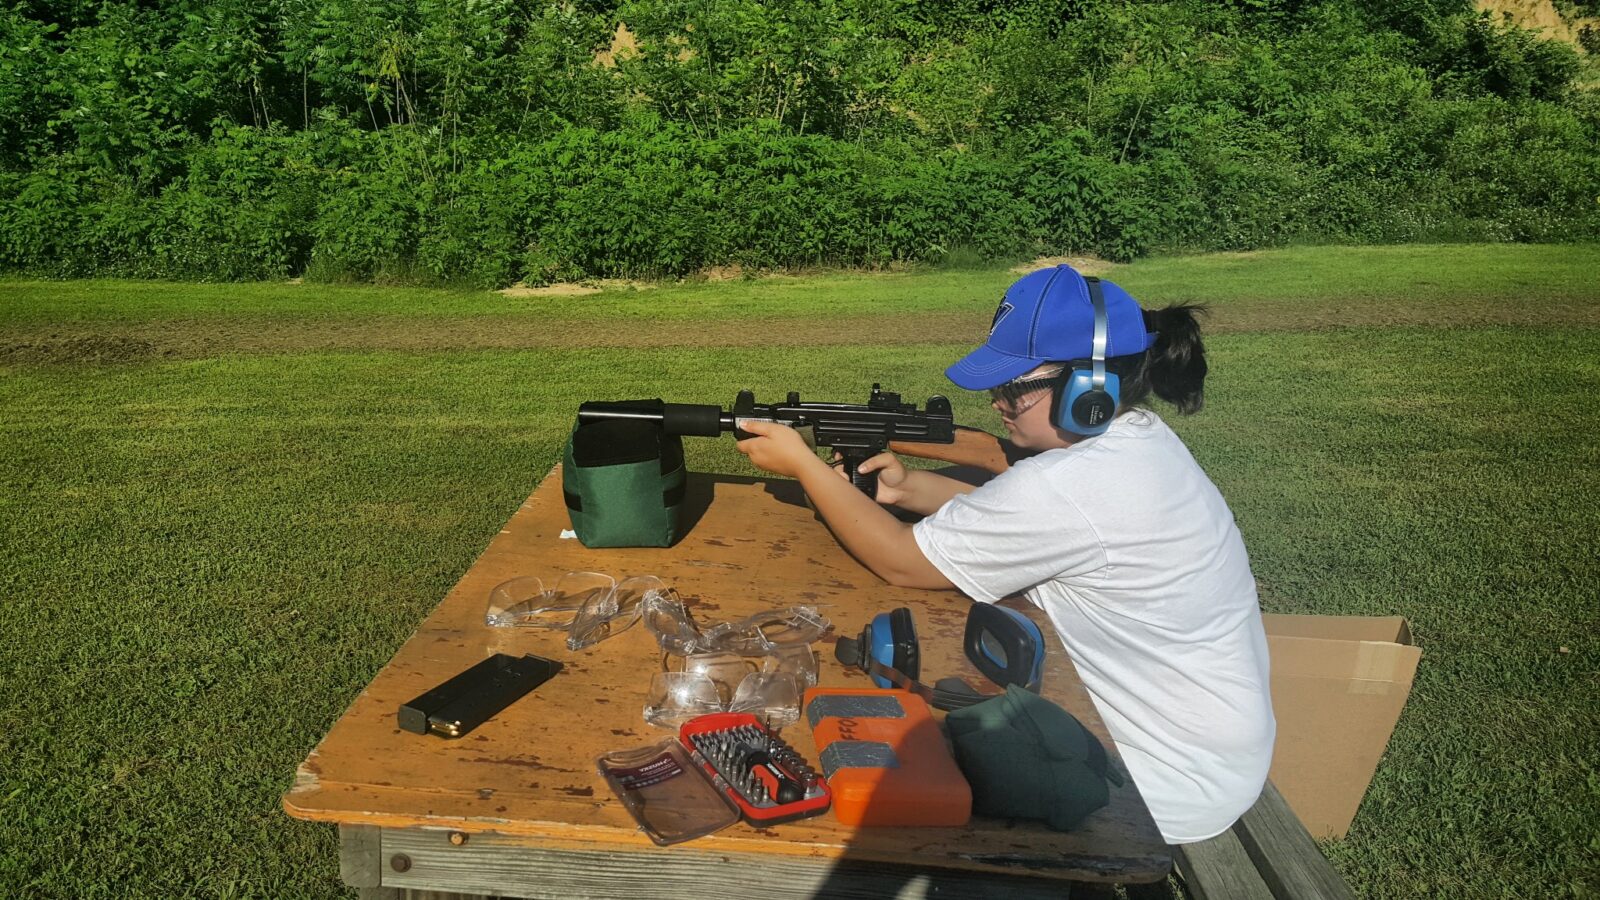


The carbine was accurate and a lot of fun. If you didn’t read my other posts, there is a rifle length 16″ barrel hidden under the fake can. The weight of the carbine made it really soft to shoot so the girls and I had a lot of fun.
I am going to find a bit bigger optic for it – probably the Vortex Crossfire like I am running on my POF-5.
Regardless, I hope this helps you out!
If you find this post useful, please share the link on Facebook, with your friends, etc. Your support is much appreciated and if you have any feedback, please email me at in**@*********ps.com. Please note that for links to other websites, I may be paid via an affiliate program such as Avantlink, Impact, Amazon and eBay.