At a tradeshow, a representative gives a brief overview of the RPK-16 light machine gun in 5.45×39. He highlights design features including the adjustable buttstock, full length Picatinny rail, 4 kilogram light weight, 96 round drum, ability to use AK magazines, free floating handguard, different barrel lengths and that the barrels can be changed in the field.
The RPK-16 builds on the innovations developed for the AK-12.The RPK-16 in 5.45×39 can use a 96-round drum or standard AK magazines.
Here’s The Video
If you find this post useful, please share the link on Facebook, with your friends, etc. Your support is much appreciated and if you have any feedback, please email me at in**@*********ps.com. Please note that for links to other websites, I may be paid via an affiliate program such as Avantlink, Impact, Amazon and eBay.
Please note that all images are extracts from the video and remain the property of their respective owner(s).
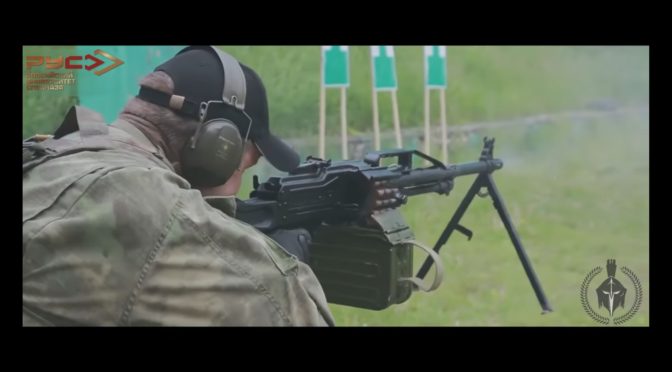
Here you have a number of videos assembled to show a ton of shooting of the venerable 7.62x54R PKM machine gun by Spetsnaz operators.
You get to see the drills and they wrap up with some SVD and RPG action. Pretty cool.
Hand operated belt loader.
Here’s the Video
If you find this post useful, please share the link on Facebook, with your friends, etc. Your support is much appreciated and if you have any feedback, please email me at in**@*********ps.com. Please note that for links to other websites, I may be paid via an affiliate program such as Avantlink, Impact, Amazon and eBay.
Folks, if you do much work on cars, trucks or fire arms, you are going to need a good enough torque wrench. This Tekton 1/2″ unit is pretty decent. There are over 2,300 reviews on Amazon with an average score of 4.4. You can only get this kind of score if you have a good product.
This wrench is affordable, has a decent degree of accuracy (+/-4%) and a very nice wide range of 10-150 foot pounds of torque.
It’s a “clicker” style meaning you dial the torque setting and the wrench will “click” audibly, plus you can usually feel it as well, when you reach the specified torque.
There is one thing you need to remember with any “clicker” style troque wrench – be sure to reset the dial to zero torque before you put it away. If you don’t do this, the spring will relax over time and not be as accurate.
If you find this post useful, please share the link on Facebook, with your friends, etc. Your support is much appreciated and if you have any feedback, please email me at in**@*********ps.com. Please note that for links to other websites, I may be paid via an affiliate program such as Avantlink, Impact, Amazon and eBay.
If you like working on AR-type rifles and plan to replace a muzzle device or change a barrel nut to install a free-floating handguard or to swap barrels, you are going to need to apply a lot of torque. Torque and aluminum are not friends and this is certainly the case with the upper receiver for AR rifles and pistols.
What not to do?
I actually want to take a minute and tell you two things not to do. First, do not simply clamp your lower in a vise and go cranking on whatever on the upper. Remember that the upper is connected to the lower by two steel pins going through relatively soft aluminim. Not a good combination.
Number two, there are work fixtures that look like a rectangle that allow you to remove the upper from the lower and then pin the upper to this block that is then held by a vise. I’m not fond of this either because then your two aluminum connection points on the receiver take up all the stress and they weren’t designed to do so.
Please do not do either of those or you may regret it. The odds are that you will regret it. I word it this way because you may get by once or twice but these methods are risky so don’t do them.
So what do I recommend?
I use a Magpul Barrel Extension Vise (BEV) block. It’s a very well designed block that engages via the barrel extension with its own steel lugs that are designed for strength but also to not harm the extension.
This is the top of the BEV block. You can see the front engagement lugs, the rear protrusion is for the bolt carrier and I would recommend keeping that O-ring oiled. The hole just under the front lugs is for a cross pin to secure it to the upper.
The BEV block uses a bolt carrier with the bolt removed to further secure it in the upper. You could remove the bolt from the bolt you normally use. I have a bolt carrier body that I keep in my toolbox for just this purpose.
The following photo shows it partially inserted in the upper.
This next photo shows it fully forward with the bolt carrier assembly installed. It does not have a cross pin installed at that point. Even without the pin it can handle the rotation stress. The pin just keeps it all in position and is not load bearing.
At this point you are good to go to change muzzle devices, barrel nuts or whatever else you may need to do without risking damage caused by torque. It’s a solid tool and I highly recommend it.
If you find this post useful, please share the link on Facebook, with your friends, etc. Your support is much appreciated and if you have any feedback, please email me at in**@*********ps.com. Please note that for links to other websites, I may be paid via an affiliate program such as Avantlink, Impact, Amazon and eBay.
Military Arms Channel (MAC) visited the Beretta USA facility in 2015. To be honest, I really didn’t expect anything surprising because three years had passed and Beretta really hasn’t done anything of interest to me for years and years. Well, that changed in this video at the 10:12 mark but let’s not jump ahead.
MAC got a good tour with tons of photos of the M9 service pistol, notably the M9A3 with its Picatinny rail and other updates. You get a chance to see some automation but also considerable handwork. When I watched the video on Beretta’s Gordonne, Val Trompia,Italy, facility, there seemed to be much more automation.
Regardless, it was interesting to watch purely from a manufacturing perspective. Nothing really noteworthy to be completely honest – just another factory … and then the video kept going on and knocked my socks off…
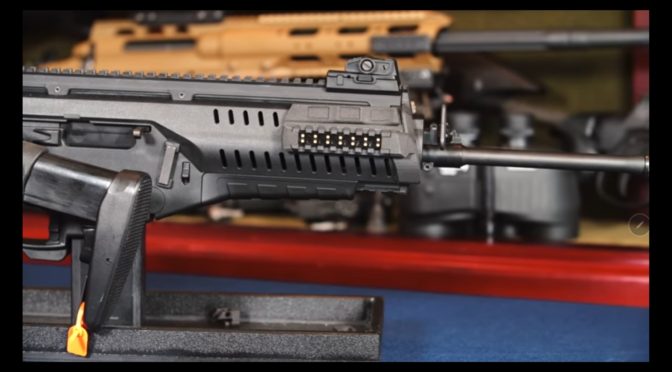
The Picatinny Rail as a Platform
Now this is where I need to point out that my jaw dropped starting at about the 10:12 mark. If you have been around weapons in recent years, you are probably very used to seeing the Picatinny rails on weapons for mounting accessories. Historically, firms would have proprietary means for adding accessories and this would limit your ability to find devices that could be mounted and your ability to move them from weapon to weapon.
MIL-STD-1913 was published by the Picatinny Arsenal in 1995 and finally created a standardized solution. This enabled all the different light, lasers, optics, mounting points and more to have a standard way to connect to the weapon.
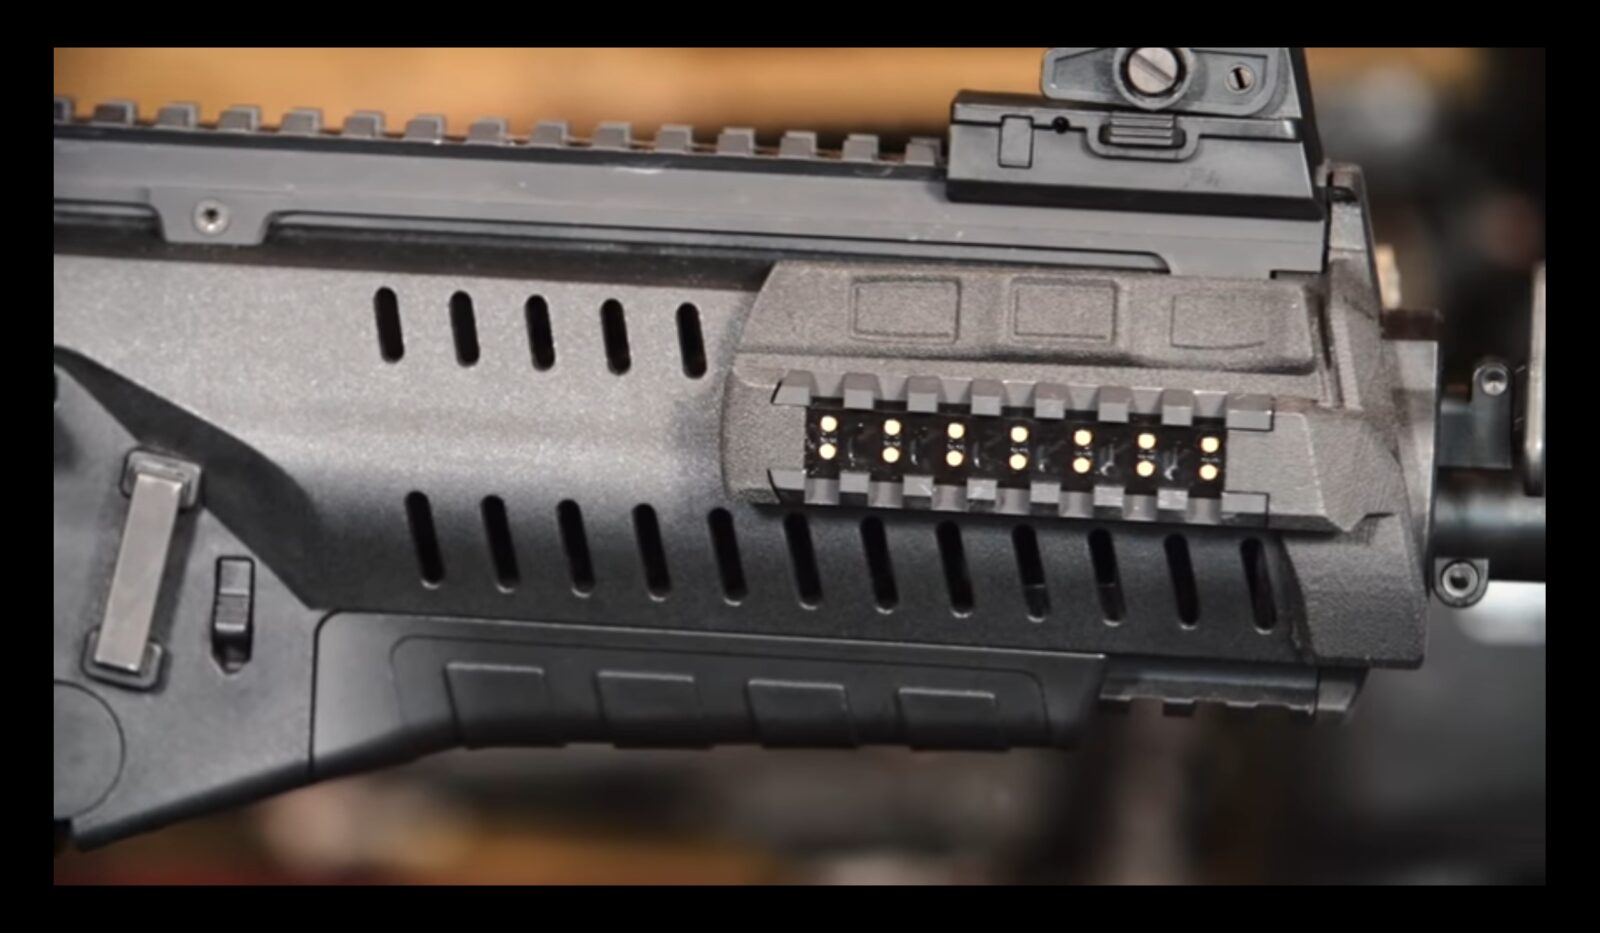
So, let’s come back to the video. Beretta realized that the rail can be far more than a dumb mounting point. It can be a backplane that enables both shared power and data. I really had a “holy cow that makes so much sense moment.”
No more different battery types or some full and some not. You can attach to the rail and the device taps in via exposed connectors for power and data services. Beyond the battery, you could, for example, have a laser designator and range finder providing data to an optic and uplink all modularly.
Note the gold colored contacts nestled inside the top of the rail. Modularr CR123A modular battery pack.Good photo of contacts on the side rail.Another view of the top rail.
I like the idea of a hard wired connection vs wireless that can be compromised or outright blocked. As more and more electronics show up on small arms, engineers will need to figure out how to make them both reliable, resistant to electromagnetic pulses (EMPs) and secure and that last part I am referring to information security.
Bottom line, kudo to Beretta. They thought of this over three years ago!! I think we are seeing a future direction for the industry here if it can leap frog from Beretta and get some other big players behind it notably Magpul and other DoD suppliers.
Here’s the Video
If you find this post useful, please share the link on Facebook, with your friends, etc. Your support is much appreciated and if you have any feedback, please email me at in**@*********ps.com. Please note that for links to other websites, I may be paid via an affiliate program such as Avantlink, Impact, Amazon and eBay.
Please note that all images were extracted from the video and remain the property of their respective owner(s).
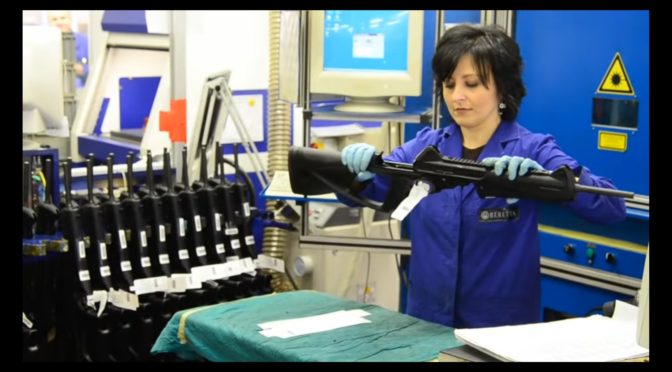
This brief video provides an overview of Beretta’s facility in Gardone, Val Trompia,Italy. They have a long history of making firearms there and can produce up to 1,500 per day.
Hammer forged barrel machine.Beretta makes a lot of hammer forged barrels and some broach cut barrels for pistols.
The factory is an interesting blend of very automated manufacturing with a lot of robotics and then also old school hand fitting in the assembly area.
Here’s the Video
If you find this post useful, please share the link on Facebook, with your friends, etc. Your support is much appreciated and if you have any feedback, please email me at in**@*********ps.com. Please note that for links to other websites, I may be paid via an affiliate program such as Avantlink, Impact, Amazon and eBay.
Please note that all photos were extracted from the video and remain the property of their owner(s).
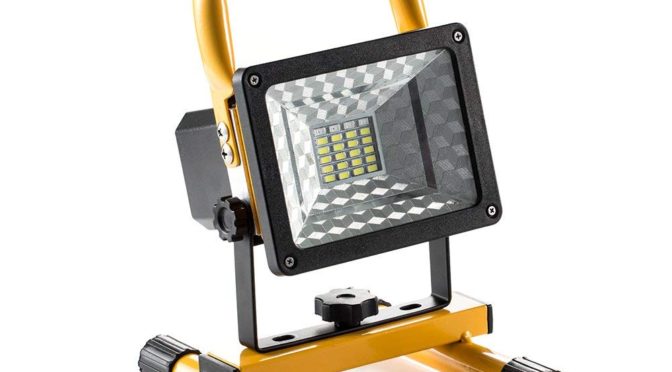
This is a pretty slick little light. It’s compact, doesn’t weigh much and can kick out quite a bit of light for at least eight hours. Because it LED, you don’t need to worry about the bulbs burning out plus it runs cool vs. the scorching hot halogen worklights.
It does have one weird feature that I would tell you not to use – it has a red and blue light emergency situation flasher. In Michigan anyways, red is fine but the blue light is reserved for police. I didn’t buy this light for that feature and simply will not use it.
As small rechargeable worklights go, this is a great deal. I bought mine because over 1,100 reviewers on Amazon gave this 4.3 out of 5 stars. You can’t have a rating like that unless your product is solid.
If you find this post useful, please share the link on Facebook, with your friends, etc. Your support is much appreciated and if you have any feedback, please email me at in**@*********ps.com. Please note that for links to other websites, I may be paid via an affiliate program such as Avantlink, Impact, Amazon and eBay.
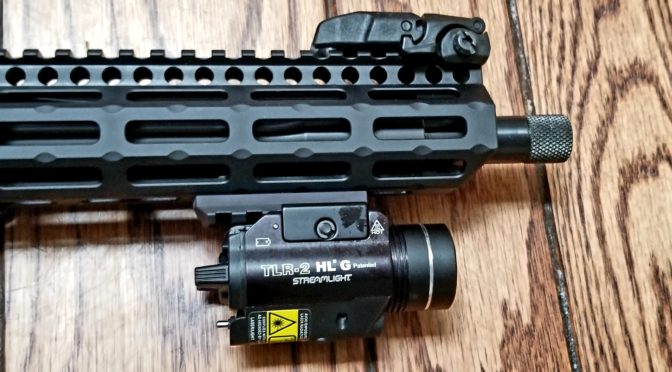
It’s very common to have pistols and rifles with threaded muzzles. A very common thread pattern for .22, .204, .223/5.56 and even some 9mms is 1/2×28. This means the thread is 1/2″ wide and has 28 threads per inch (TPI). This is the most common pattern for AR rifles for example as .223/5.56 rifles tend to follow the original military specification thread pattern. There are many patterns out there so you always want to confirm.
For a variety of reasons, you may not want to install a muzzle device. If this is the case, I would recommend installing a thread protector, sometimes called a “muzzle nut” to protect the threads.
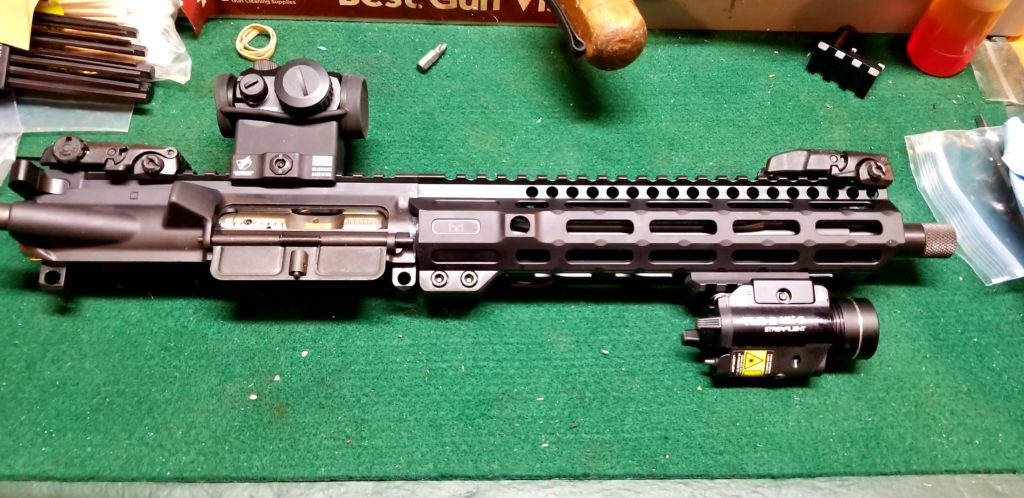
For example, here is a 10.5″ AR pistol upper receiver assembly. You can see the 1/2×28 thread and I did not plan on installing a muzzle device.
Thread protectors simply screw onto the end of the barrel. The only thing I do is to apply some Blue-Loctite to reduce the odds of the nut rattling off. Yes, the heat of the barrel will soften the Loctite but the “gummy” nature of it will do the job. If you plan on taking the thread protector off and putting it back on a lot, then don’t use a thread locker.
I hope this helps you out. The Amazon listing is the product I used on the above build and really like.
If you find this post useful, please share the link on Facebook, with your friends, etc. Your support is much appreciated and if you have any feedback, please email me at in**@*********ps.com. Please note that for links to other websites, I may be paid via an affiliate program such as Avantlink, Impact, Amazon and eBay.