Section 1: The Imperative for Change: From Milled Block to Stamped Steel
The story of the AKM’s front and rear trunnions is inseparable from the larger narrative of the Kalashnikov rifle’s evolution. This evolution was driven less by a desire for radical redesign and more by the dogged pursuit of a manufacturing concept that was ahead of its time. The AKM, introduced in 1959, was not so much a new rifle as it was the successful fulfillment of Mikhail Kalashnikov’s original, unrealized vision: a lightweight, inexpensive, and utterly reliable assault rifle built for unprecedented mass production. The trunnions were the key engineering solution that finally made this vision a reality.
1.1 The Original Vision: The Stamped Type 1 AK (1947-1949)
From its inception, the Kalashnikov rifle was designed to be simple, cheap, and producible on a massive scale using the most advanced methods available to the post-war Soviet Union [1]. The earliest production models, now known to collectors as the “Type 1,” featured a receiver fabricated from a stamped sheet of steel. This receiver body was then joined to a machined front barrel trunnion and a rear buttstock insert [1, 2]. This approach, in theory, offered immense advantages in speed and material efficiency over traditional machining.
However, the design encountered a critical and ultimately fatal obstacle: the state of Soviet welding technology in the late 1940s [1]. The process of attaching the critical internal guide rails and the ejector to the thin, 1.3mm stamped receiver shell proved exceptionally difficult [1, 3]. The available welding techniques of the era could not consistently produce strong, reliable joints without warping the receiver or creating metallurgical weaknesses. This resulted in unacceptably high rejection rates on the production lines, creating a severe bottleneck that threatened the entire program [1, 4]. This was not a flaw in the rifle’s mechanical design, but a failure of the manufacturing technology to keep pace with the design’s ambition. Key industrial welding processes, such as CO2 shielded arc welding and electroslag welding, were only just being invented or put into production in the Soviet Union during the 1950s, a decade after the Type 1’s initial run [5, 6, 7].
1.2 The Pragmatic Retreat: The Milled Receiver AK-47 (Type 2 & Type 3, 1951-1959)
Faced with the inability to mass-produce the stamped receiver, Soviet planners made a pragmatic but costly decision: they substituted a heavy, machined receiver for the stamped body [1, 4, 8]. This was a technological retreat, but a necessary one to get a functional rifle into the hands of the Red Army. This pivot allowed the Soviet arms industry to leverage its vast experience and existing tooling from the production of older weapons like the Mosin-Nagant bolt-action rifle, which were also built around machined receivers [8, 9, 10].
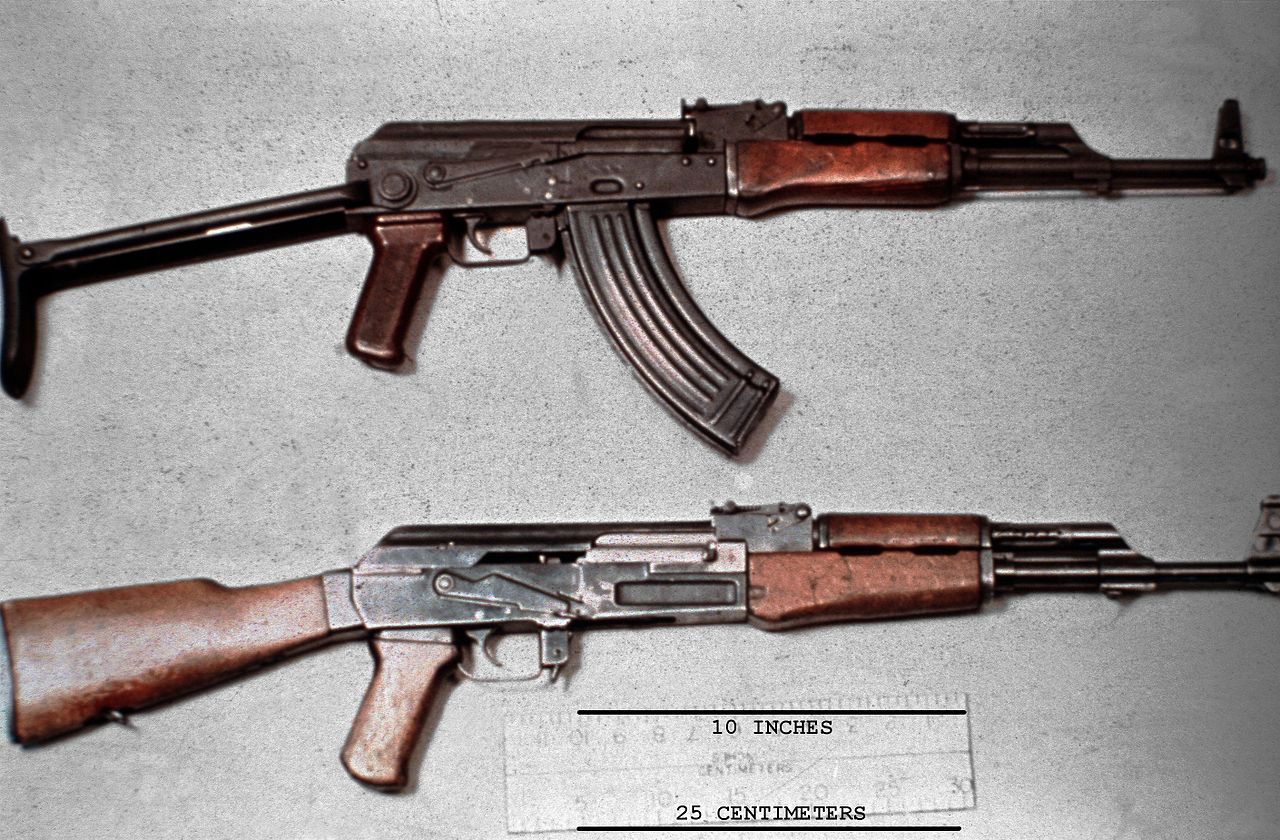
These milled-receiver rifles, known as the Type 2 (1951-1957) and the improved Type 3 (1955-1959), were fundamentally different in their construction. Instead of separate components joined together, the receiver was carved from a single, solid block of forged steel [2, 4, 11]. In this design, the features of the front and rear trunnions—the barrel socket, the bolt locking lugs, the stock attachment points—were not separate parts but were integral to the receiver itself, machined directly into the steel block [2, 11]. This entirely bypassed the problematic welding step. However, the process was incredibly slow, labor-intensive, and generated a tremendous amount of wasted steel, making the rifles significantly heavier and more expensive to produce [11, 12]. The Type 3 was an iterative refinement of the Type 2, featuring different lightening cuts and furniture mounting to reduce weight slightly, but it still adhered to the same costly manufacturing philosophy [1, 2].
1.3 The Vision Realized: The AKM (1959)
By the late 1950s, a decade of focused industrial development had equipped Soviet factories with the technology needed to finally execute the original stamped-receiver concept. The result was the Avtomat Kalashnikova Modernizirovanniy (AKM), or “Modernized Kalashnikov Automatic Rifle,” which entered production in 1959 [1, 13].
Designated the “Type 4” receiver, the AKM successfully returned to a lightweight body stamped from a 1.0mm sheet of steel [14, 15]. The crucial innovation that made this possible was the abandonment of structural welding in favor of a new assembly method centered on separate front and rear trunnions. These robust, machined blocks were inserted into the stamped receiver shell and permanently fixed in place with a series of high-strength rivets [14]. This system provided the necessary strength for the barrel and stock mounting points while allowing the rest of the receiver to remain light and thin. The trunnion-and-rivet system was the engineering breakthrough that solved the manufacturing puzzle of the Type 1. This new approach was so successful that it resulted in a rifle approximately 1 kg (2.2 lbs) lighter than its milled predecessor, a significant reduction that improved soldier mobility and handling [1, 14, 15]. The milled AK-47, while iconic, was ultimately an expensive and heavy detour from the intended path; the AKM, with its trunnion-based construction, was the rifle the Type 1 was always meant to be.
Table 1: Evolution of the Kalashnikov Receiver (1947-1959)
| Model/Type | Years of Production | Receiver Material | Manufacturing Process | Key Identifying Feature | Trunnion Design | Approx. Weight |
| Type 1 AK | 1948–1949 | 1.3mm Stamped Steel | Stamping, Welding, Riveting | Stamped receiver with milled trunnion insert | Separate front trunnion, threaded barrel [1, 3] | ~4.65 kg (10.26 lb) [3] |
| Type 2 AK-47 | 1951–1957 | Forged Steel | Forging, Machining | Milled receiver with “boot” stock socket [1, 2] | Integral to receiver, screwed-in barrel [2] | ~4.2 kg (9.3 lb) |
| Type 3 AK-47 | 1955–1959 | Forged Steel | Forging, Machining | Milled receiver, direct stock mount [2, 8] | Integral to receiver, screwed-in barrel [2] | 3.47 kg (7.7 lb) [1] |
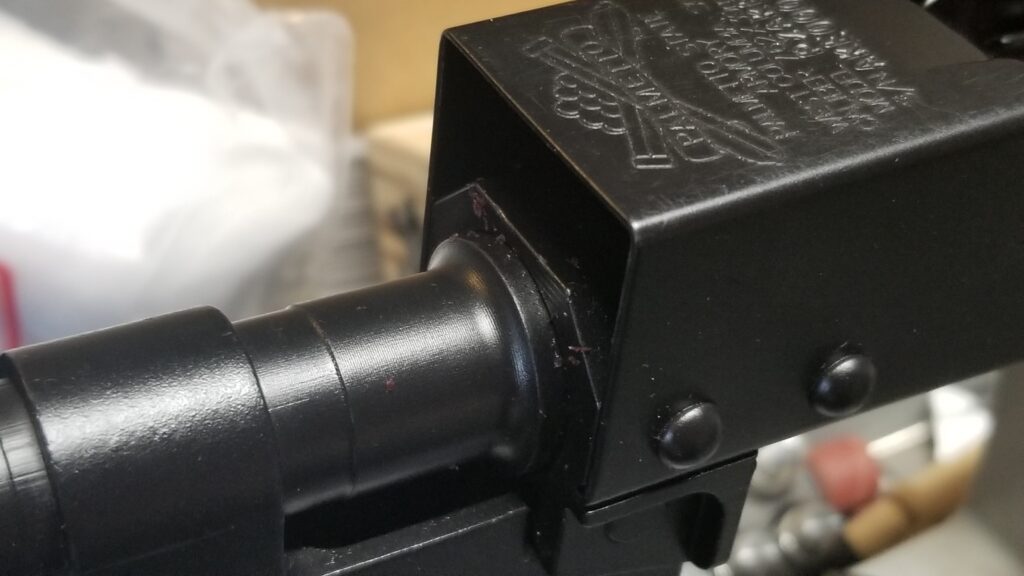
| Type 4 AKM | 1959–Present | 1.0mm Stamped Steel | Stamping, Riveting, Spot Welding | Stamped receiver with small dimple [1, 4] | Separate front/rear trunnions, pinned barrel [14] | 3.1 kg (6.8 lb) [1] |
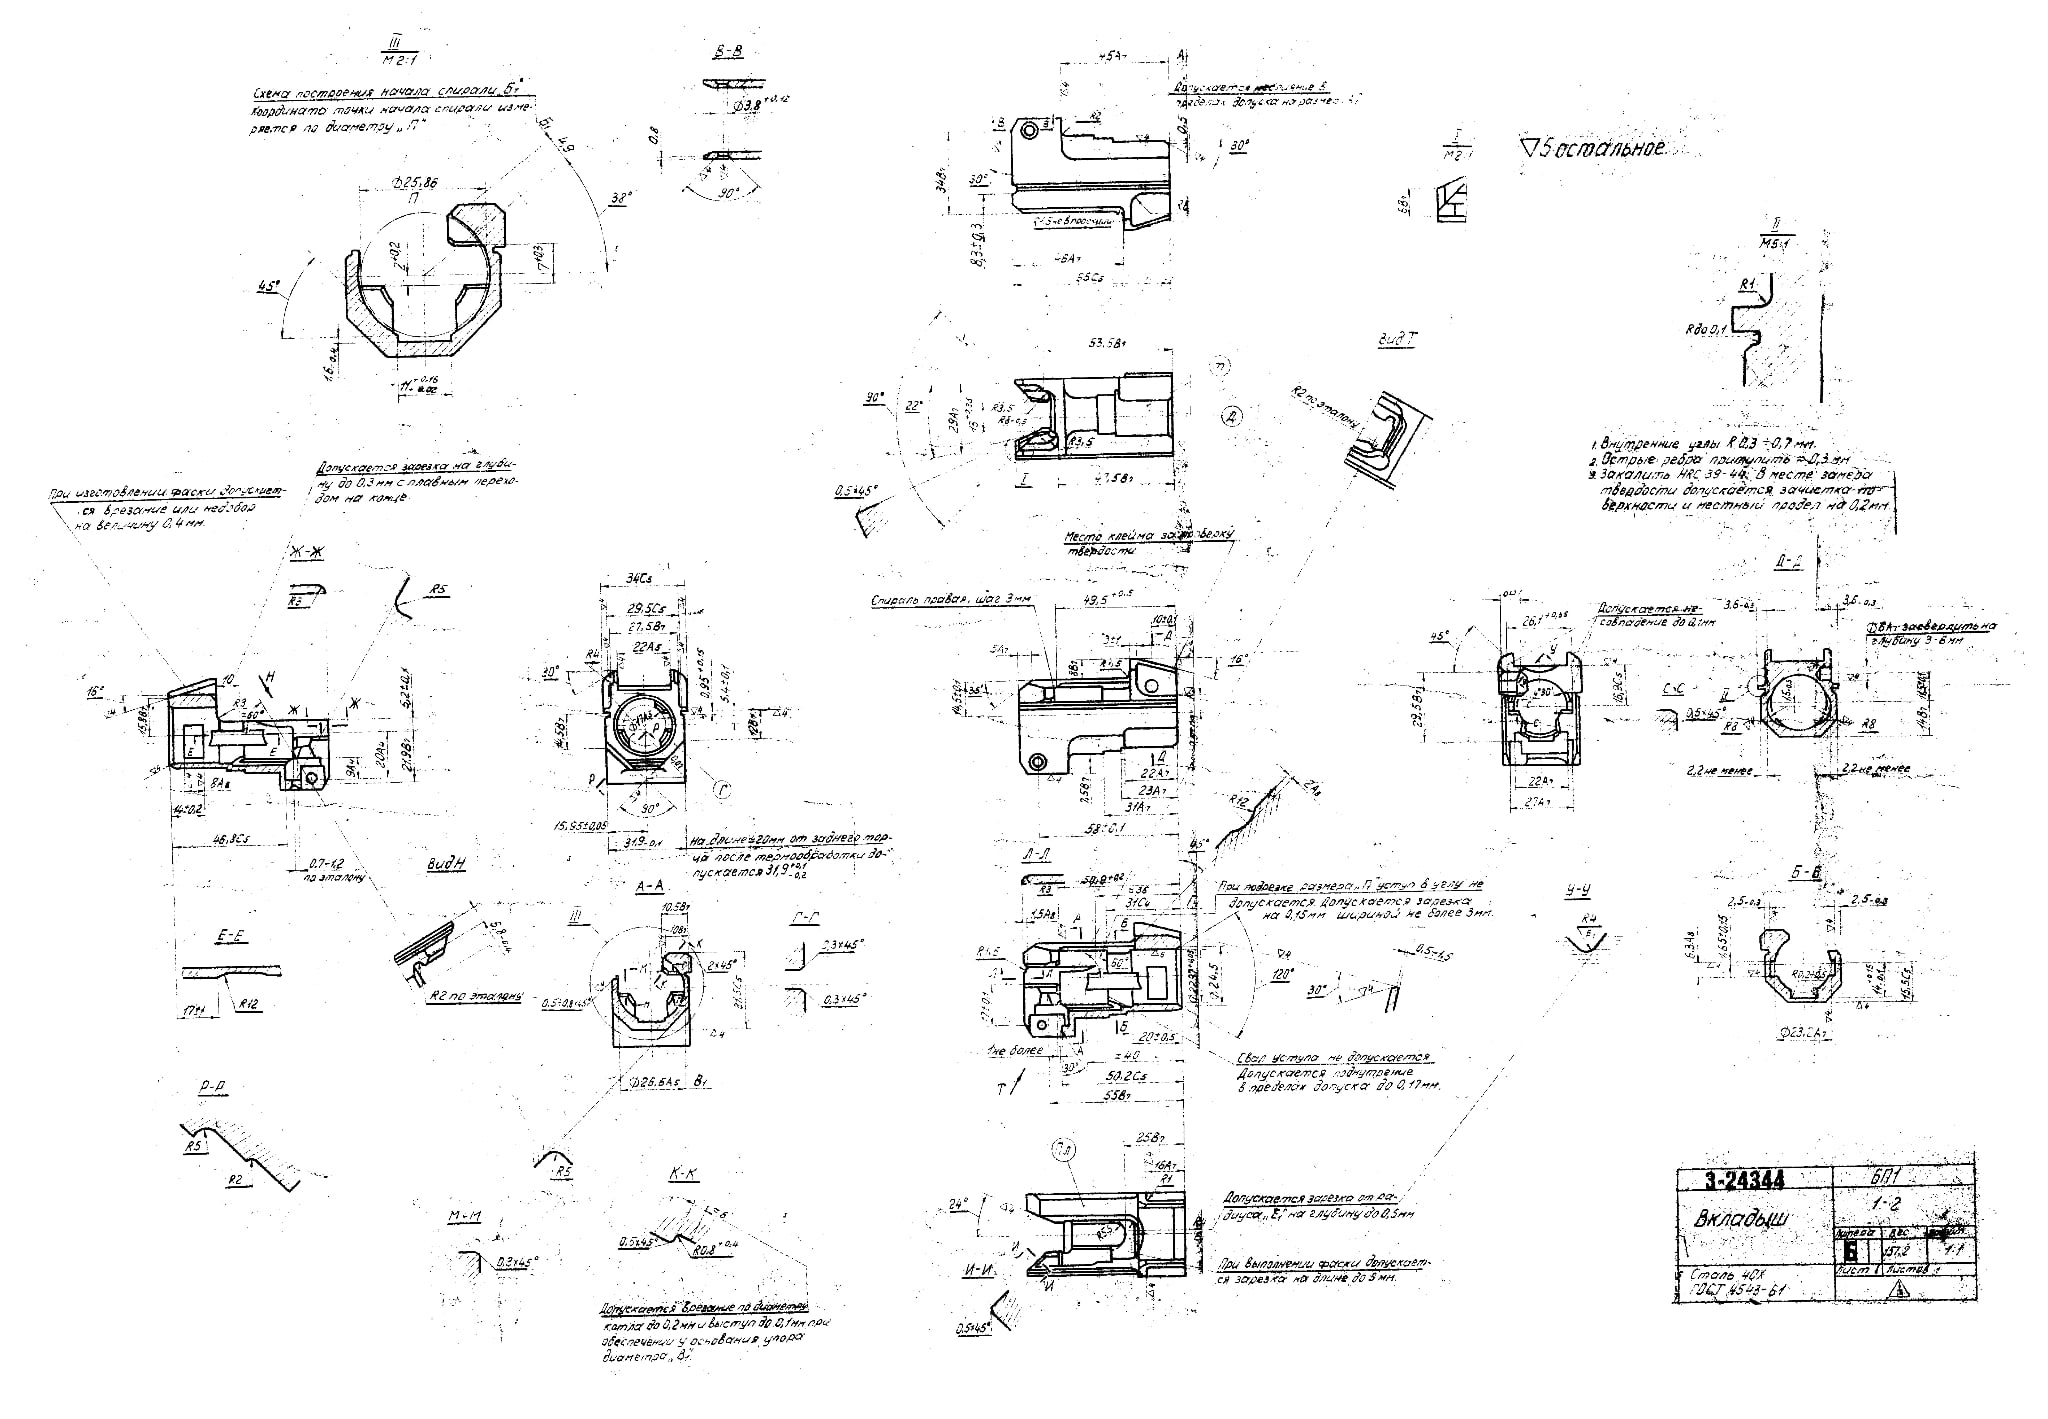
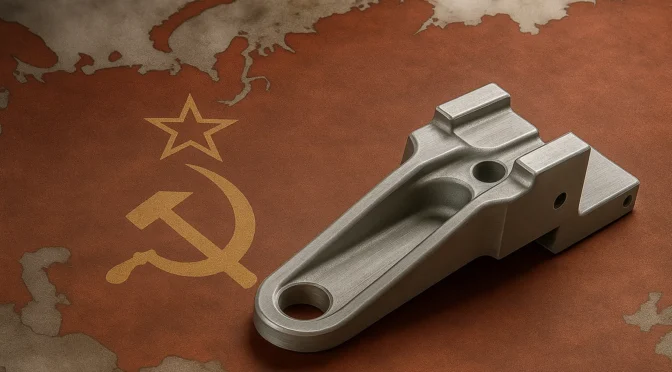
This next image is a blueprint of the rear trunnion:
Section 2: The AKM Rear Trunnion: Context and Manufacturing Doctrine
2.1. Functional Imperatives of the Rear Trunnion in a Stamped-Receiver Design
To comprehend the specific metallurgical requirements for the rear trunnion of the Avtomat Kalashnikova Modernizirovannyj (AKM), one must first appreciate the fundamental design shift it represents from its predecessor, the AK-47. The early production AK-47 (specifically the Type 2 and Type 3 variants) was characterized by a receiver machined from a solid billet of steel.1 This method, while producing an exceptionally robust and durable frame, was labor-intensive, time-consuming, and resulted in significant material wastage. The milled receiver was, in essence, a single, monolithic structure where the critical features—such as the guide rails for the bolt carrier and the anchoring points for the barrel and stock—were integral to the main body of the firearm.
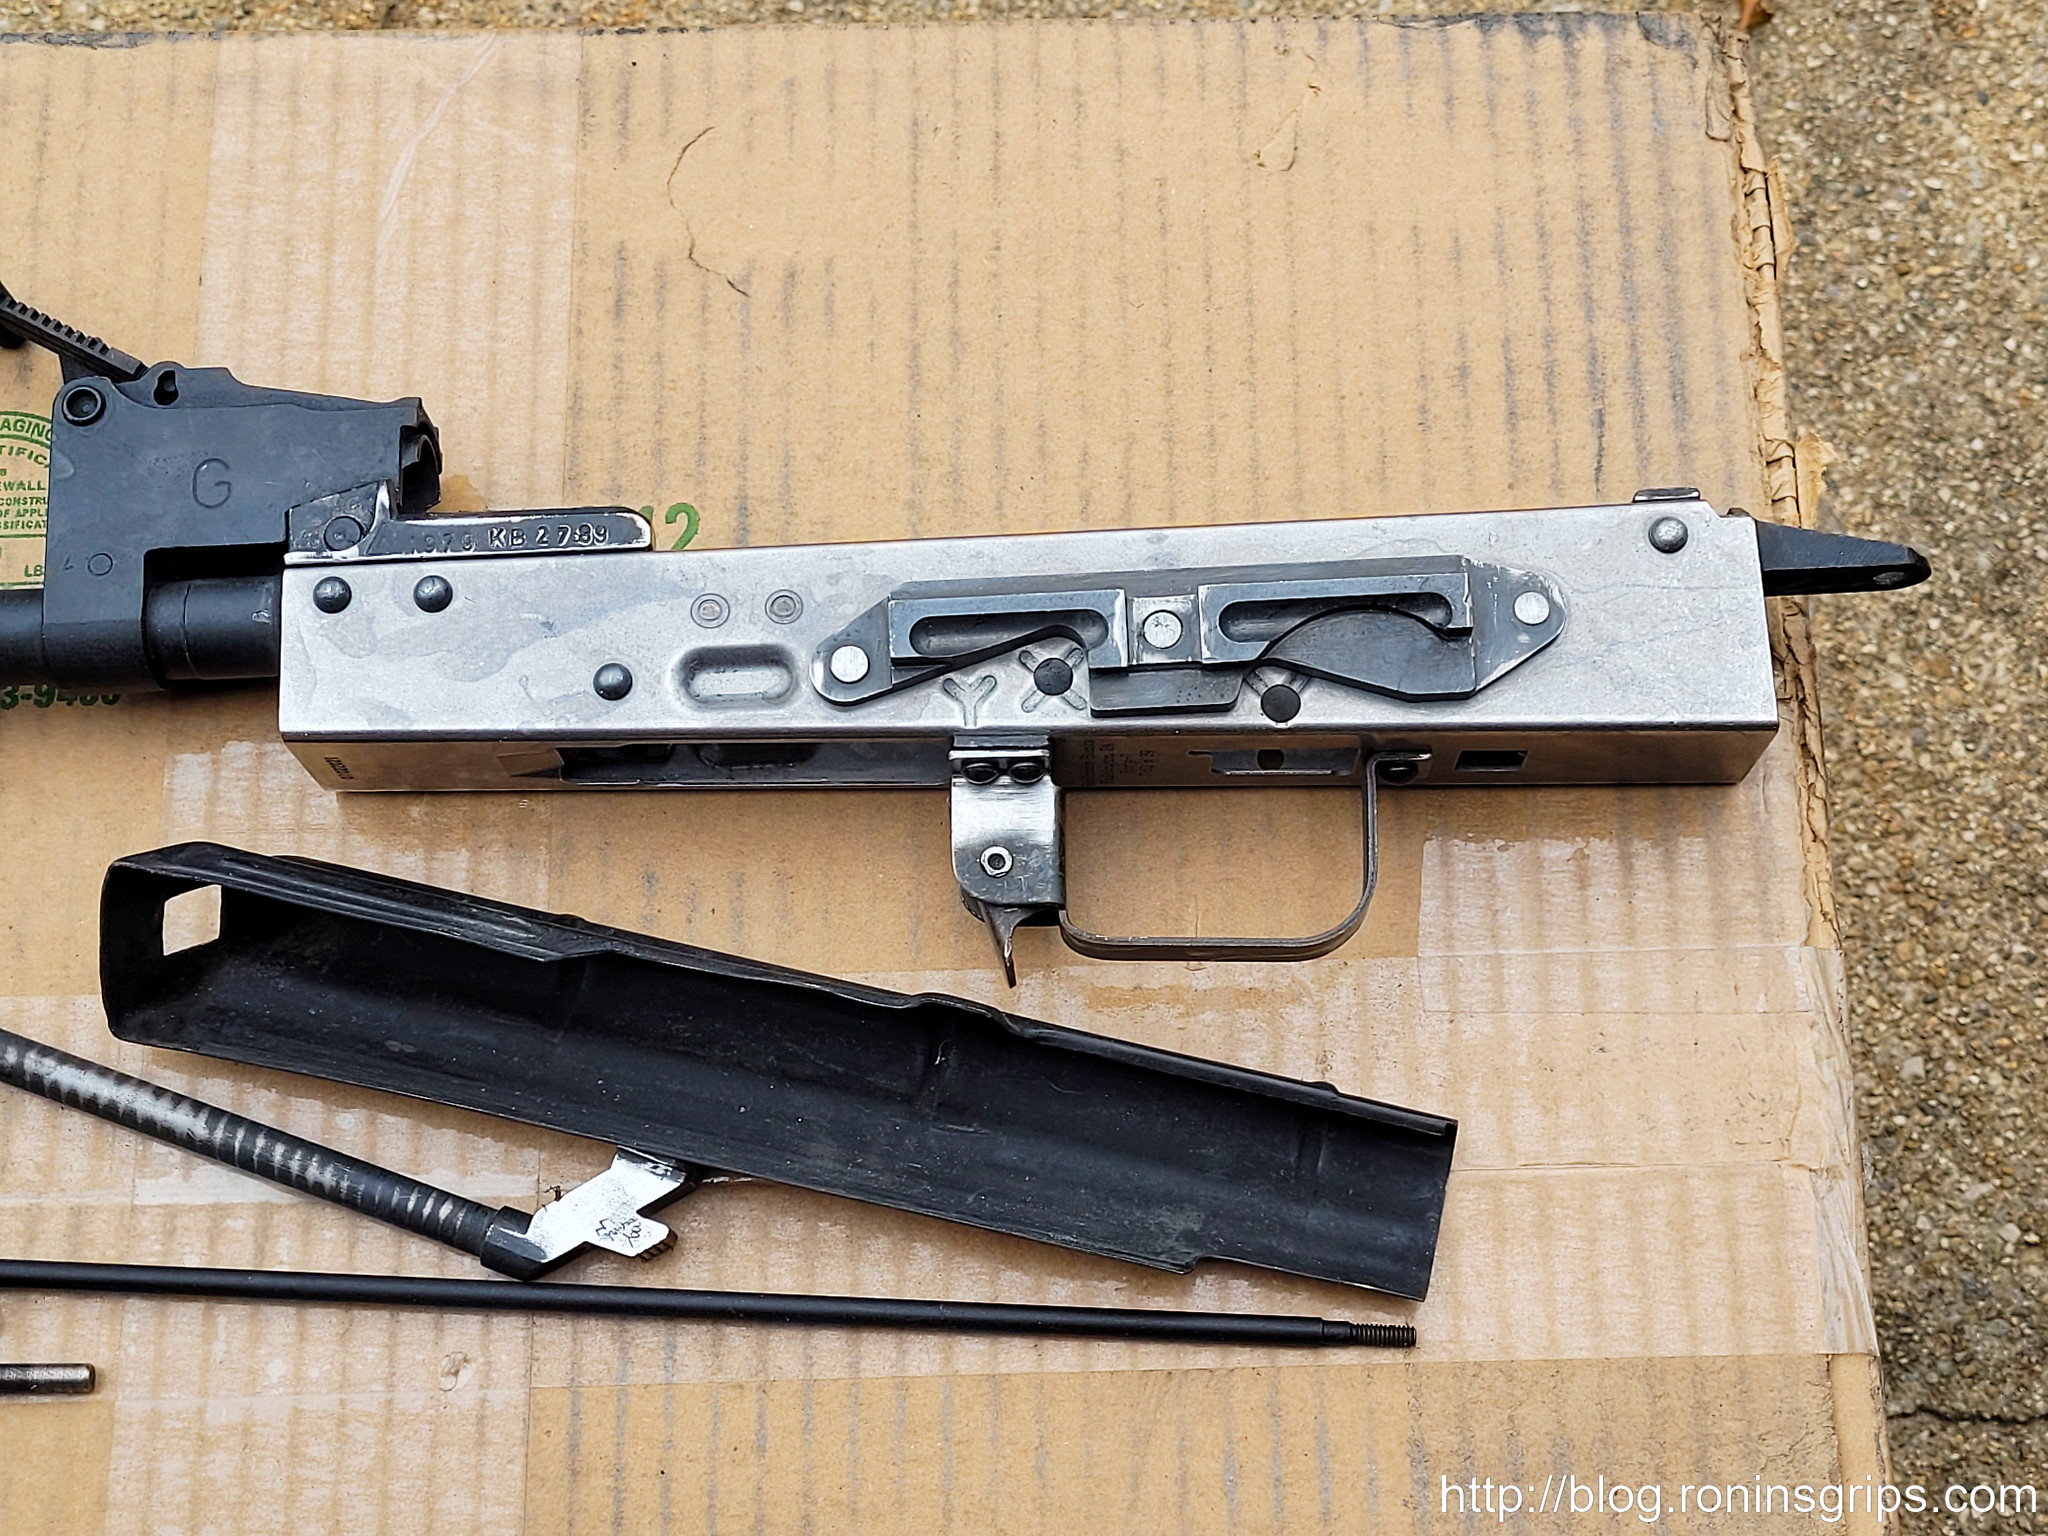
The defining innovation of the AKM, introduced in 1959, was the transition to a receiver fabricated from a stamped 1.0 mm sheet of steel.2 This change was a triumph of Soviet mass-production philosophy, dramatically reducing manufacturing time, cost, and the overall weight of the rifle by approximately 1 kg.3 However, this new design paradigm created a significant engineering challenge. The thin, stamped sheet metal receiver shell, while reinforced with ribs and folds for rigidity, lacked the inherent strength to contain the violent forces generated during the firing cycle or to securely anchor the primary components of the rifle.2
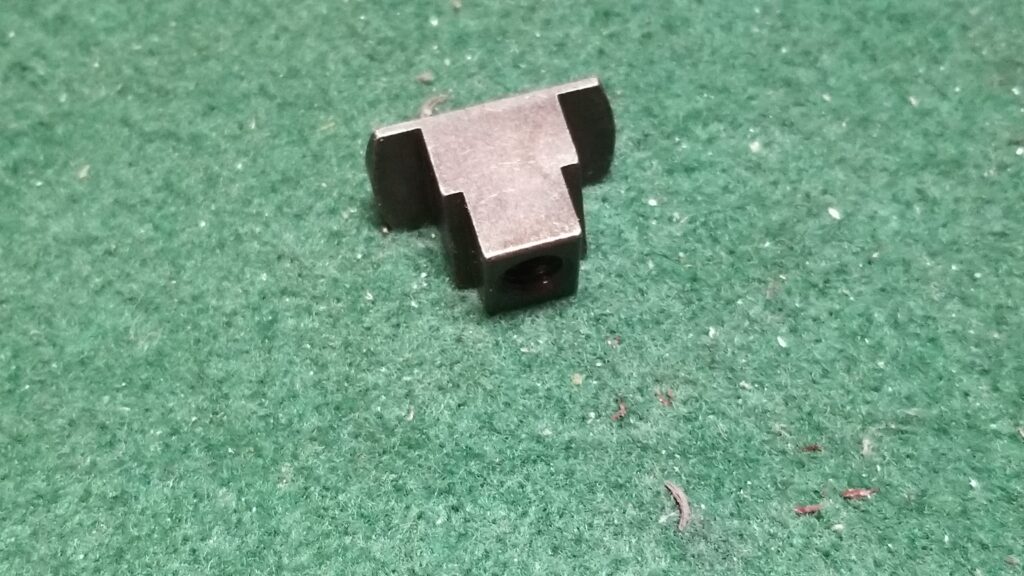
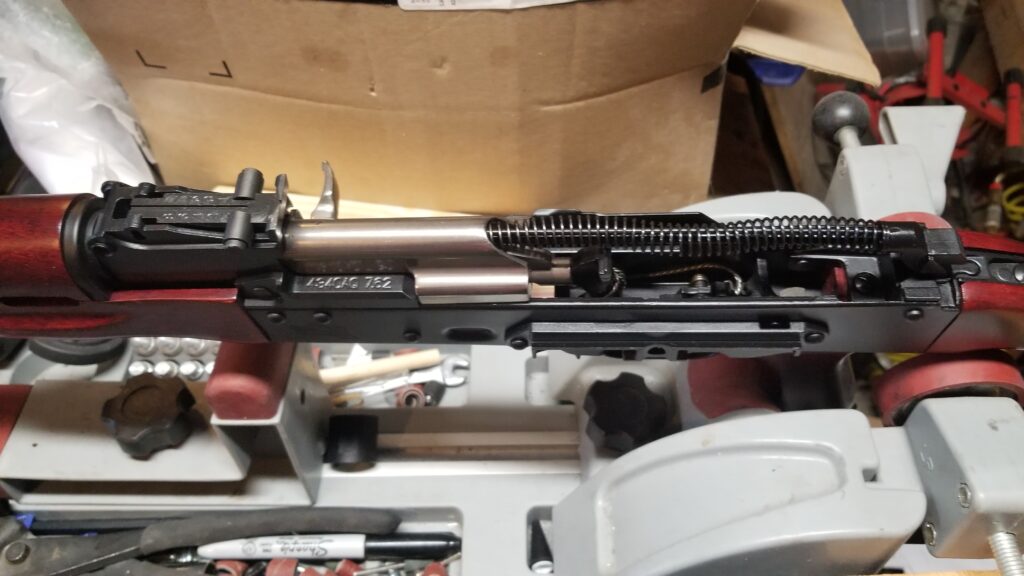
This is where the front and rear trunnions become the absolute linchpins of the design. They are not merely components; they are the structural keystones upon which the integrity of the entire stamped-receiver system rests. The rear trunnion, the focus of this analysis, serves three critical functions that demand a material of exceptional strength, toughness, and fatigue resistance.
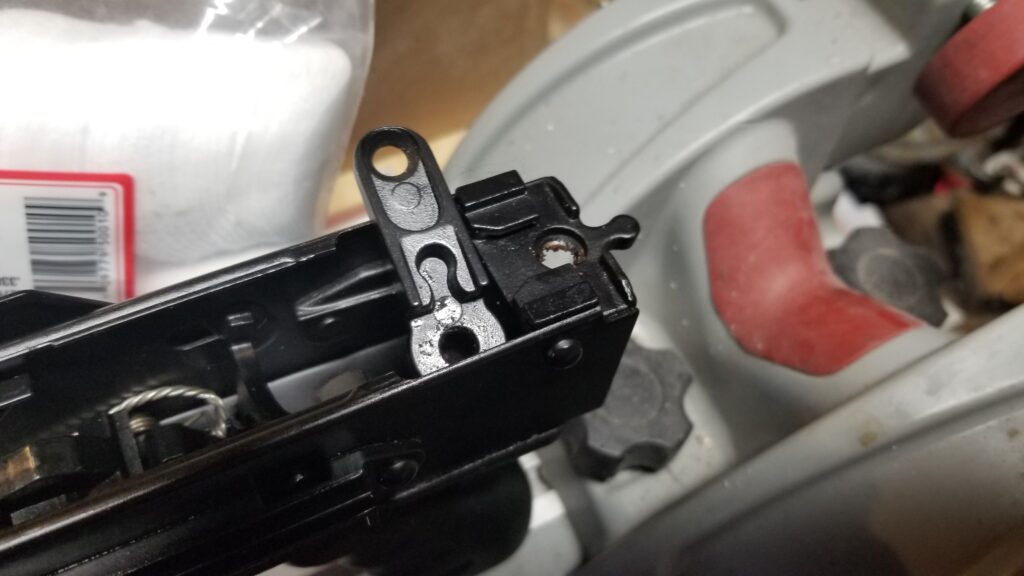
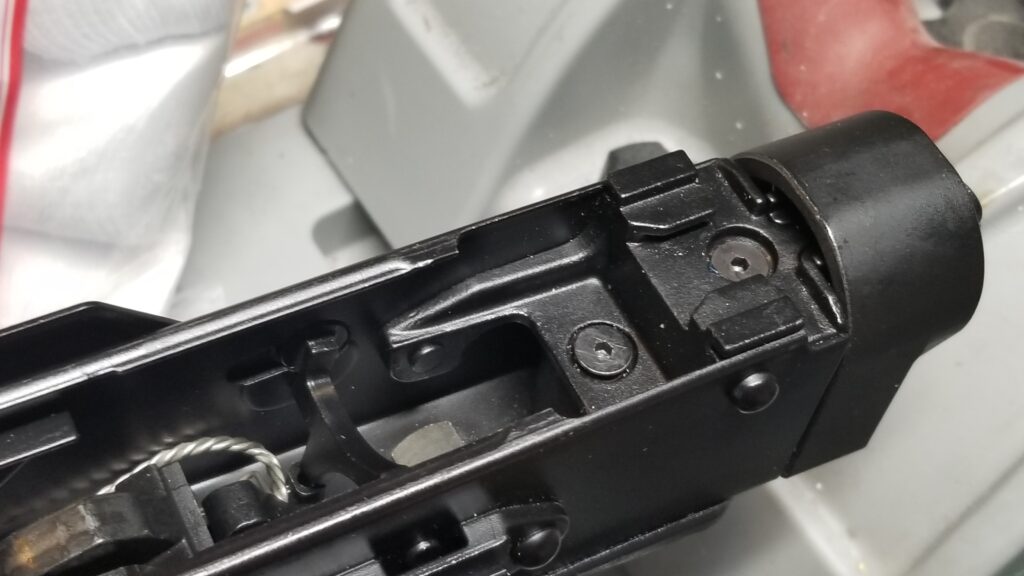
First, it is the rearmost point of impact for the bolt carrier assembly. During the firing cycle, the bolt carrier group travels rearward at high velocity, driven by expanding propellant gases. Its travel is arrested by the front face of the rear trunnion. This repeated, high-energy impact subjects the trunnion to immense compressive stress and shock loading. The material must be hard enough to resist deformation or peening from these impacts over tens of thousands of cycles, yet tough enough to absorb the shock without becoming brittle and fracturing.
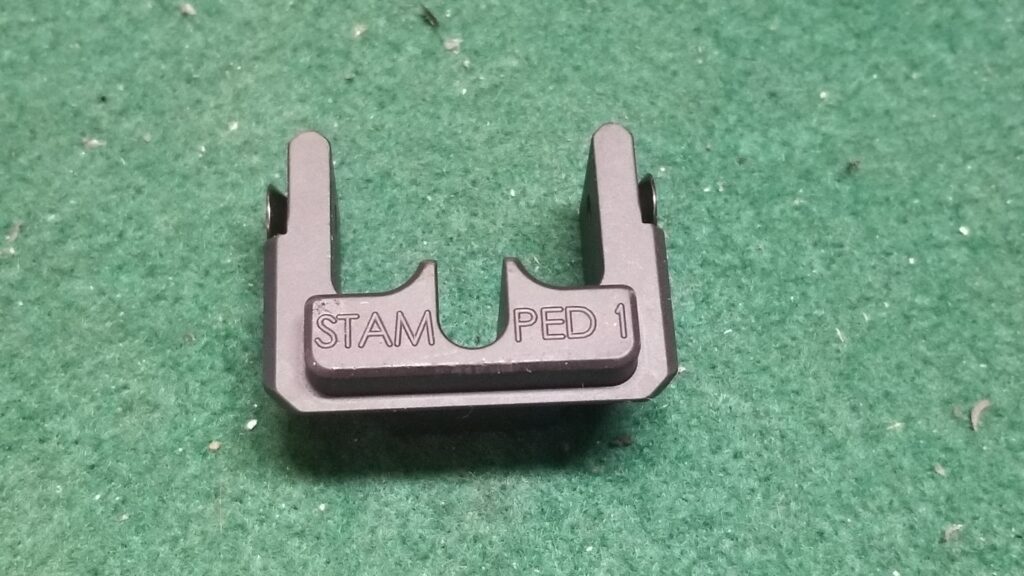
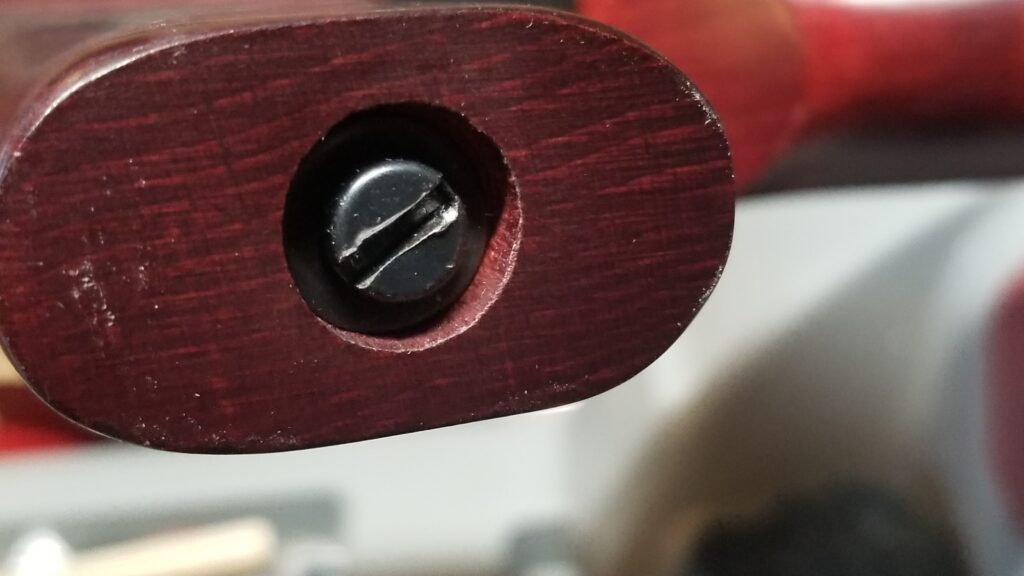
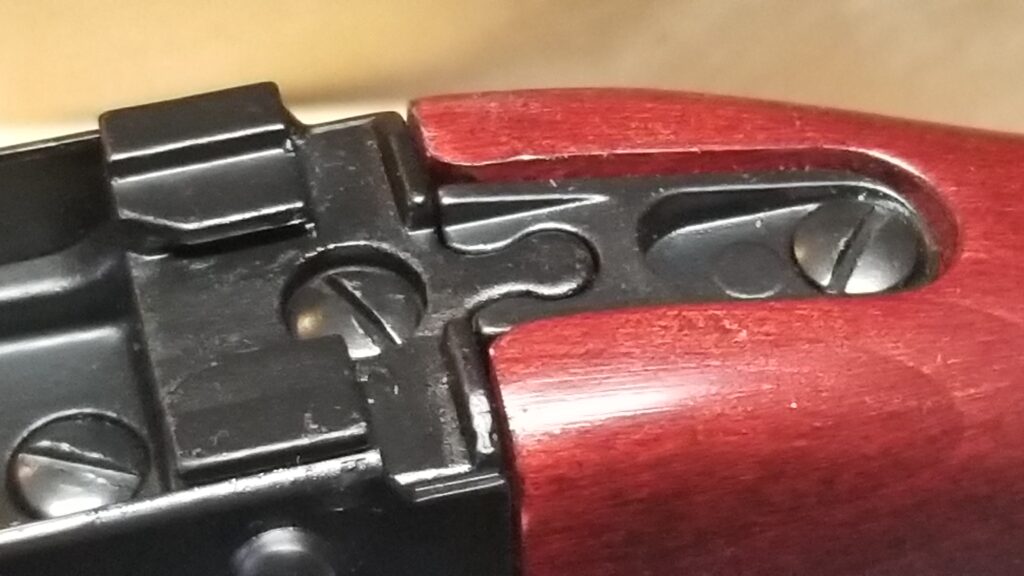
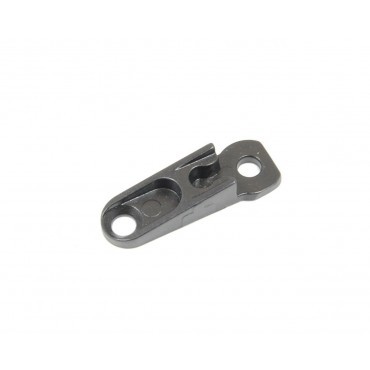
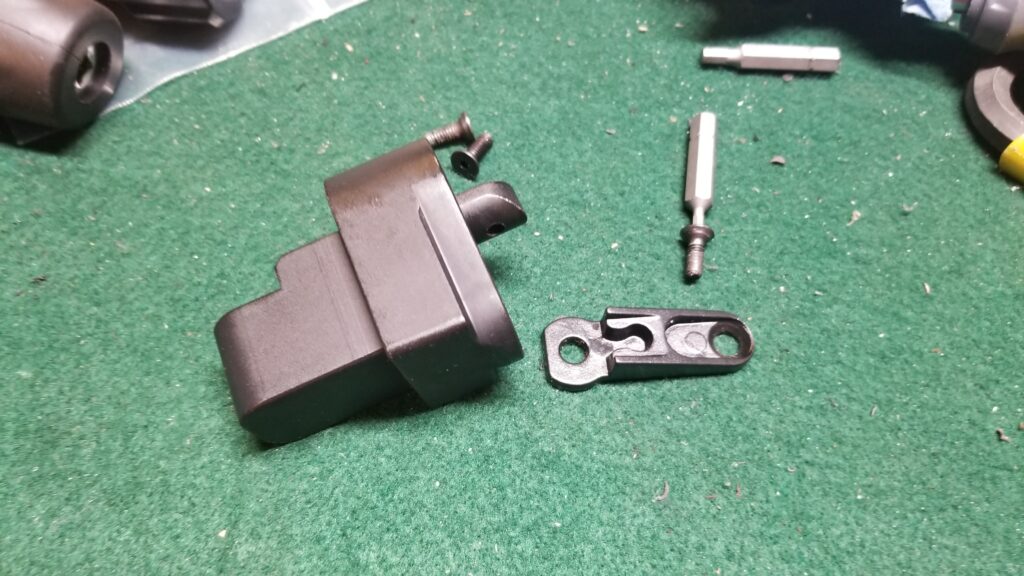
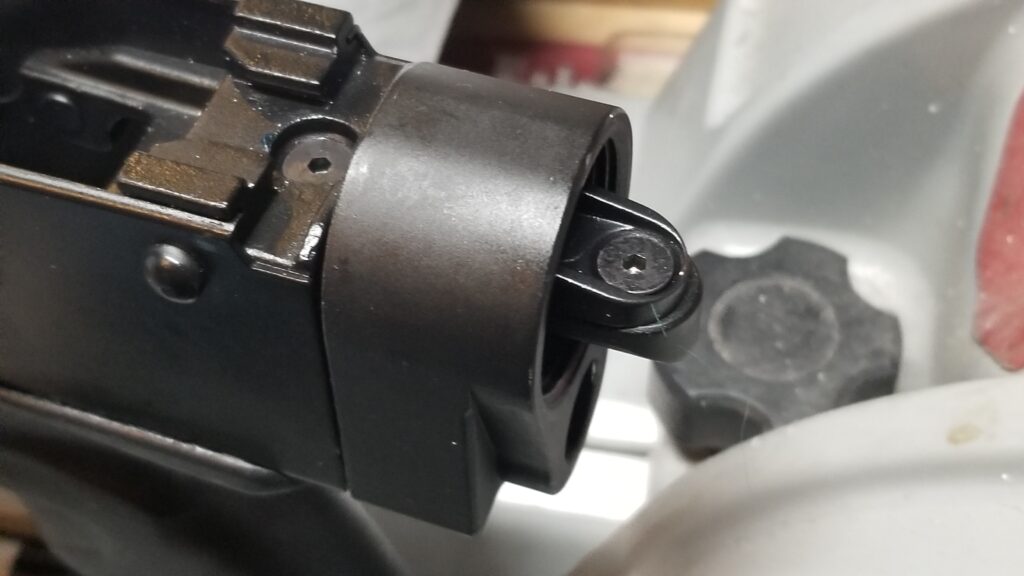
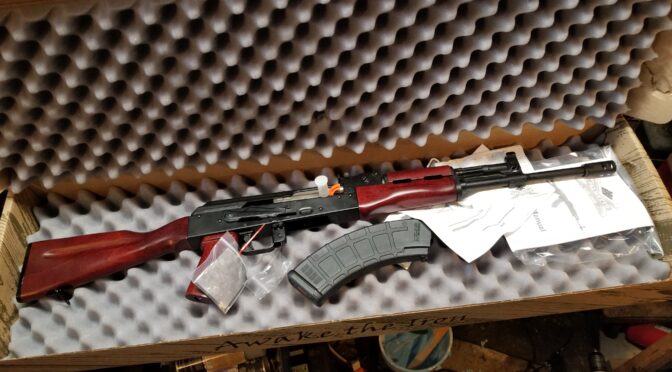
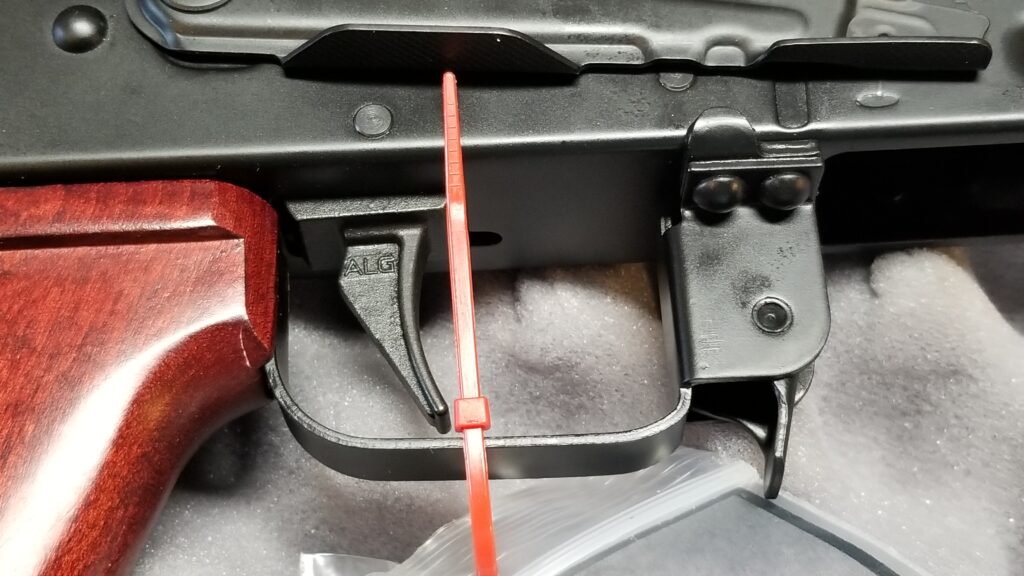
Second, the rear trunnion serves as the primary interface and anchor for the buttstock. All forces exerted on the stock—the pressure of the shooter’s shoulder, impacts from using the rifle as a brace or in hand-to-hand combat, and the general stresses of field use—are transferred through the trunnion and into the receiver body. For the fixed-stock AKM, the trunnion features a tang that extends rearward, into which the wooden stock is secured.1 This tang must withstand significant bending and torsional moments without failing.
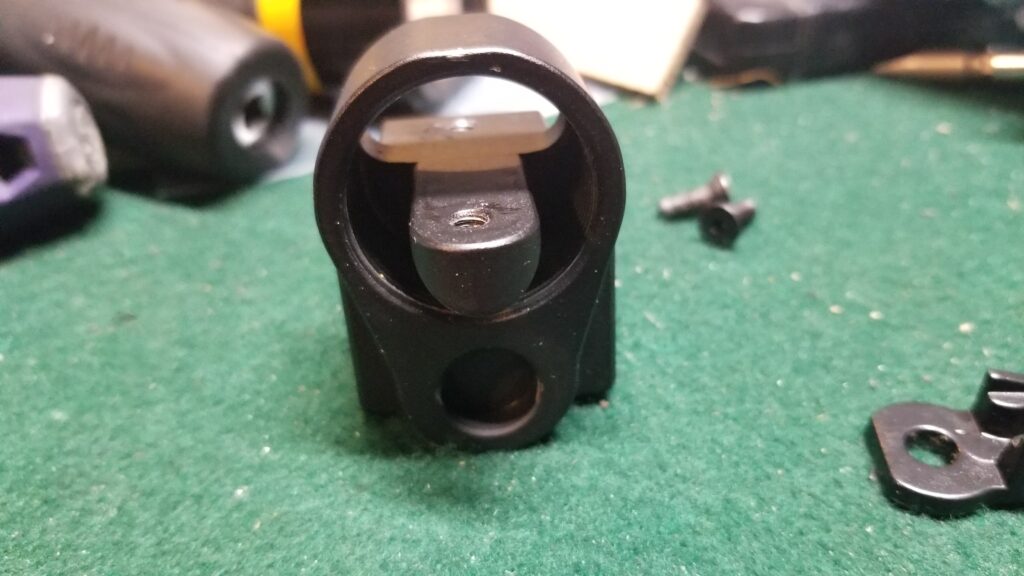
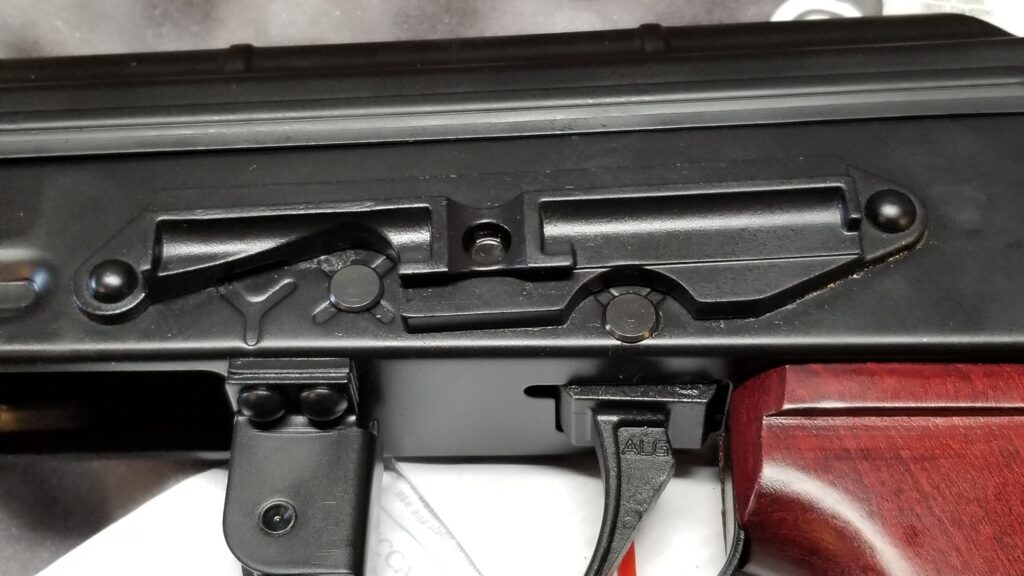
Third, and perhaps most critically, the rear trunnion distributes these concentrated loads into the comparatively fragile 1.0 mm receiver shell. The trunnion is secured in place by several large rivets that pass through it and the sheet metal.1 The steel of the trunnion must be strong enough to provide a rigid, unyielding foundation for these rivets. If the trunnion material were to deform or the rivet holes were to elongate under stress, the rivets would loosen, leading to a catastrophic failure of the receiver’s structural integrity. The trunnion, therefore, acts as a force-distribution block, taking the pinpoint stress of the bolt carrier’s impact and the leverage of the buttstock and spreading that load across a wider area of the receiver sheet metal via the rivet pattern.
Given these functional demands, the selection of steel for the AKM rear trunnion was not a trivial matter. It required a material that could be hardened to resist impact and wear, possess sufficient ductility and toughness to prevent fracture under shock loading, and maintain its dimensional stability over a long service life in the harshest imaginable conditions. The success of the lighter, cheaper, and more mobile AKM platform was directly dependent on the metallurgical quality of this single, critical component.
2.2. Soviet Production Philosophy: The Primacy of Forging (Поковка/Штамповка)
The material selection for the AKM rear trunnion cannot be separated from the Soviet Union’s overarching military-industrial doctrine, which prioritized extreme durability, reliability under adverse conditions, and suitability for massive-scale production.5 This philosophy dictated not only the
type of steel used but, just as importantly, the method by which it was formed. For a critical, high-stress component like a trunnion, the manufacturing process of choice was unequivocally die-forging, known in Russian as поковка (pokovka) or штамповка (shtampovka).
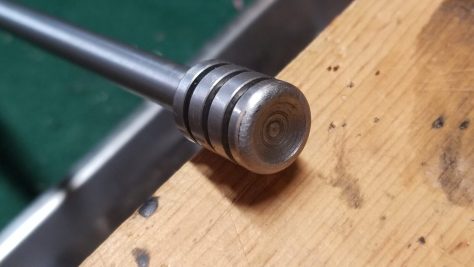
Direct inquiries with contacts at the original Soviet-era manufacturing plants, specifically the Kalashnikov Izhmash plant and the Molot factory, have confirmed that their trunnions were produced by die-forging a steel billet into a near-net shape, which was then machined to its final, precise dimensions.6 This information is further corroborated by a Russian technical manual on AK production printed in 2001, which explicitly specifies “forging” for the trunnion.6
The decision to forge these components was a deliberate engineering choice rooted in the principles of metallurgy. Forging is a process where metal is heated and shaped by compressive forces, typically using a hammer or a press. Unlike casting, where molten metal is poured into a mold, or simple machining from bar stock, forging fundamentally alters the internal grain structure of the steel. The process forces the steel’s crystalline grains to align with the flow of the metal as it fills the die cavity, conforming to the shape of the part. This continuous, aligned grain structure results in a component with dramatically superior mechanical properties compared to other manufacturing methods.
Specifically, a forged trunnion exhibits:
- Increased Strength and Toughness: The aligned grain flow eliminates the random, potentially weak grain boundaries found in castings and provides strength in the directions where it is most needed. This makes the part highly resistant to both impact and fatigue.
- Elimination of Porosity: The immense pressure of the forging process closes any internal voids or gas pockets that can occur in cast parts, which act as stress concentrators and potential points of failure.
- Structural Integrity: Compared to a part machined from bar stock, which has a unidirectional grain flow, a forged part’s grain structure follows its contours. This is particularly important for a component like a trunnion with its complex geometry of holes, bosses, and tangs, ensuring strength is maintained throughout the part.
This doctrinal adherence to forging was not unique to the Soviet Union. High-quality AK-pattern rifles produced by other Warsaw Pact nations under Soviet license followed the same principle. For example, modern Polish WBP trunnions, noted for their high quality, are advertised as being “100% machined from forged steel like the originals”.7 Similarly, military surplus Romanian trunnions are described as being made from “hammer forged carbon steel”.8 This consistency across different national arsenals demonstrates that the use of forged steel for critical components was a core tenet of the original Soviet technical data package supplied to its allies.
Therefore, the fact that the AKM rear trunnion was forged is not a minor manufacturing detail. It is a direct manifestation of a military doctrine that demanded unparalleled ruggedness. The choice of forging ensured that this keystone component could withstand the rigors of combat and abuse far better than a cheaper, cast alternative or a potentially weaker machined part. Any analysis of the specific steel alloy used must be viewed through this lens: the Soviets required a steel that was not only strong but also eminently suitable for the forging process on an industrial scale.
Section 3: Identifying the Soviet Steel Specification (GOST)
3.1. Navigating the GOST Standards: A Process of Deductive Analysis
Pinpointing the exact steel used for the Soviet AKM rear trunnion requires a forensic metallurgical investigation, as no single available document, blueprint, or manual explicitly states, “The AKM rear trunnion is made from steel grade X.” The original technical specifications are closely held state secrets or have been lost to time. Therefore, the identification process must be one of deductive reasoning, systematically analyzing available data from Russian GOST (Государственный стандарт, or State Standard) documents, technical websites, and historical sources to eliminate incorrect candidates and build an evidence-based case for the most probable alloy.
The methodology employed in this report follows three logical steps:
- Identify and Eliminate False Leads: The first step is to address and authoritatively debunk common misconceptions or “red herrings” that arise from superficial keyword searches in Russian technical databases. This prevents the analysis from proceeding down an incorrect path.
- Determine the Correct Class of Steel: Based on the known functional requirements and manufacturing methods (forging, heat treatment, high-stress application), the next step is to identify the appropriate category of steel within the GOST system. This narrows the field from thousands of potential alloys to a manageable family of materials.
- Isolate the Specific Grade: Within the correct class of steel, the final step is to examine the properties and designated applications of individual grades to find the one whose characteristics and intended uses align perfectly with those of a high-strength, forged, critical firearm component like a trunnion.
This process moves from the general to the specific, using the known physical and doctrinal constraints of the AKM’s design to filter the vast landscape of Soviet-era metallurgy down to a single, highly probable specification.
3.2. A Critical Clarification: The “АКМ” Aluminum Alloy Red Herring
A significant potential pitfall in the investigation of the AKM’s materials is the existence of a Soviet-era alloy designated “АКМ” under GOST 1131-76. A direct search for terms like “состав стали АКМ” (composition of steel AKM) often leads directly to technical data sheets for this material, creating the false impression that the rifle and the alloy share a name and are therefore related.9 This is a critical point of confusion that must be clarified and dismissed.
The material designated АКМ under GOST 1131-76 is not a steel alloy. It is a деформируемый алюминиевый сплав (deformable aluminum alloy).12 The full title of the standard itself confirms this: “Сплавы алюминиевые деформируемые в чушках. Технические условия,” which translates to “Strained aluminium alloys in pigs. Technical requirements”.14 The standard’s scope is for aluminum alloys intended for manufacturing ingots or for use in alloying other aluminum products.12
The chemical composition of this АКМ alloy, consisting primarily of aluminum with alloying elements such as silicon, copper, and magnesium, renders it completely unsuitable for a firearm trunnion.9 Aluminum alloys, while lightweight and corrosion-resistant, lack the hardness, shear strength, and high-temperature stability required to withstand the impact of a steel bolt carrier and contain the pressures of the 7.62x39mm cartridge. While aluminum has been used in firearm construction for less-stressed components—such as some early Soviet “waffle” pattern magazines or modern aftermarket stock adapters—its use for a primary, load-bearing component like a trunnion in a military rifle of this era is a mechanical impossibility.16
The shared “АКМ” designation is purely coincidental. The acronym for the rifle stands for Avtomat Kalashnikova Modernizirovannyj, while the designation for the alloy likely derives from its constituent elements or an internal industrial code. Recognizing this distinction is a crucial exercise in expert vetting. A non-expert relying solely on keyword matching would likely fall into this trap, leading to a fundamentally incorrect conclusion. By examining the GOST standard itself and applying basic engineering principles, this aluminum alloy can be confidently dismissed as a red herring, allowing the investigation to focus correctly on ferrous alloys.
3.3. The Prime Candidate: Сталь 40Х (Steel 40Kh) per GOST 4543
With the aluminum alloy red herring dismissed and the requirement for a forged, hardenable steel established, the investigation can focus on the appropriate GOST standards for ferrous alloys. The most relevant standard is GOST 4543, which covers “Стали легированные конструкционные” (Alloyed Structural Steels).19 This class of materials is designed specifically for manufacturing high-strength, load-bearing parts for machinery, vehicles, and, critically, weaponry. Within this standard, one particular grade emerges as the prime candidate for the AKM rear trunnion:
Сталь 40Х (Steel 40Kh).
The evidence supporting 40Х as the correct specification is multi-faceted and compelling:
Designated Application: The most direct piece of evidence comes from a source detailing the applications of various Soviet steels. It explicitly lists “Производство оружия” (Production of weapons) as a primary use for 40Х steel. The source further specifies its suitability for “стволов, клинков и других критических компонентов оружия” (barrels, blades, and other critical weapon components) precisely because of its high strength and hardness after heat treatment.21 This provides a direct and authoritative link between this specific steel grade and the manufacturing of critical firearm parts in the Soviet industrial ecosystem. Its other listed applications—such as axles, high-strength bolts, gears, and shafts—are all components that, like a trunnion, are subjected to high torsional, compressive, and impact stresses, further reinforcing its suitability.22
Material Class and Properties: Steel 40Х is classified as an “улучшаемые стали,” a term that translates to “improvable steel” but is better understood as a quench-and-temper or hardenable steel.19 This means its mechanical properties can be significantly enhanced through heat treatment, a process known to be a key step in trunnion manufacturing. It possesses an excellent balance of strength and plasticity, meaning it can be made very hard to resist wear and impact while retaining enough ductility to prevent it from being brittle.19 Furthermore, it is described as “трудносвариваемая” (difficult to weld), which is entirely consistent with a component designed to be forged and riveted into place, not welded.24
Manufacturing Compatibility: As a structural alloy steel, 40Х is well-suited for pressure-based forming methods, including the die-forging process established as the Soviet standard for trunnions.6 Its chemical composition allows for consistent results in large-scale forging operations, a key requirement for the massive production numbers of the AKM.
The designation “40Х” itself provides insight into its basic composition. In the Soviet/Russian nomenclature, the “40” indicates a nominal carbon content of 0.40%, and the “Х” (the Cyrillic letter Kha, corresponding to “Kh” or “H” in Latin script) signifies that the primary alloying element is Chromium (Хром). This simple, robust chromium steel formulation aligns perfectly with the Soviet preference for effective, non-exotic, and cost-efficient materials.
The specific chemical and mechanical properties, detailed in the tables below, confirm its status as the ideal candidate material.
Table 2: Chemical Composition of Soviet Сталь 40Х (GOST 4543-71)
This table provides the specified elemental composition for Steel 40Х according to the relevant Soviet-era state standard. This chemical fingerprint is the basis for all further comparative analysis.
| Element | Symbol | Mass Fraction (%) | Source(s) |
| Carbon | C | 0.36 – 0.44 | 19 |
| Chromium | Cr | 0.80 – 1.10 | 19 |
| Manganese | Mn | 0.50 – 0.80 | 19 |
| Silicon | Si | 0.17 – 0.37 | 19 |
| Nickel | Ni | ≤0.30 | 19 |
| Copper | Cu | ≤0.30 | 19 |
| Sulfur | S | ≤0.035 | 19 |
| Phosphorus | P | ≤0.035 | 19 |
Table 3: Key Mechanical and Physical Properties of Soviet Сталь 40Х
This table outlines the performance characteristics of Steel 40Х, demonstrating its suitability for the high-stress environment of a firearm’s action. Properties are state-dependent (e.g., annealed vs. hardened).
| Property | Value | Condition / Notes | Source(s) |
| Tensile Strength | 980 MPa (minimum) | For a 25mm bar, quenched and tempered. | 24 |
| Yield Strength | 785 MPa (minimum) | For a 25mm bar, quenched and tempered. | 24 |
| Hardness, Brinell | ≤217 HB | Annealed (softened for machining). | 24 |
| Density | ≈7820−7850 kg/m³ | 19 | |
| Critical Point (Ac1) | ≈743 °C | Temperature at which austenite begins to form during heating. | 24 |
| Critical Point (Ac3) | ≈782−815 °C | Temperature at which transformation to austenite is complete. | 24 |
| Spheroidize Annealing | 820 – 840 °C | Heat treatment to prepare the steel for machining. | 19 |
| Quenching Temperature | 840 – 860 °C | Hardening temperature, followed by oil quench. | 19 |
The sum of this evidence—the direct link to weapons production, the perfect match in material class and properties, and the compatibility with Soviet manufacturing doctrine—builds an overwhelmingly strong case. The analysis concludes with a high degree of confidence that the steel specified for the original Soviet AKM rear trunnion was Сталь 40Х (Steel 40Kh), manufactured in accordance with GOST 4543.
Section 4: Comparative Analysis and Modern Equivalents
4.1. A Survey of Modern Reproduction and Aftermarket Materials
Understanding the original Soviet specification is only half of the equation for a modern historian, gunsmith, or builder. It is equally important to understand how this historical standard compares to the materials used in the production of contemporary AK-pattern rifles and standalone components, particularly those available in the Western, and specifically the U.S., market. A survey of these modern materials reveals a range of different alloys being used, driven by factors such as domestic availability, cost, and established manufacturing practices.
One of the most frequently cited materials, especially in the context of home-building and receiver flats, is 4130 steel. This is a chromium-molybdenum (“chromoly”) alloy known for its good strength-to-weight ratio and weldability. Several U.S. vendors offer receiver blanks and flats made from 4130 steel, typically in an annealed (softened) state that requires the builder to perform the final heat treatment after the receiver is bent and assembled.28 Some aftermarket trunnions are also advertised as being made from 4130.30
A more common and generally higher-grade material used for modern, commercially produced trunnions is 4140 steel. This is also a chromoly steel but with a higher carbon content than 4130, allowing it to achieve greater hardness and strength after heat treatment. Numerous U.S. manufacturers, such as Occam Defense and Century Arms (for their BFT47 model), explicitly state that their trunnions are milled from solid blocks of 4140 steel.31 This alloy is a popular choice for high-strength machinery parts and is widely available in the U.S. industrial supply chain.
For even more demanding applications, 4150 steel is sometimes used. This alloy has a still higher carbon content and is often specified for barrels due to its excellent wear resistance and strength. At least one U.S. vendor offers a front trunnion machined from a 4150 steel forging, positioning it as a premium component.33
Another high-quality alloy seen in the U.S. market is 4340AQ (Aircraft Quality) steel. This is a nickel-chromium-molybdenum alloy known for its exceptional toughness and fatigue resistance. Prominent component manufacturers like Toolcraft and Palmetto State Armory use forged 4340AQ steel for their front trunnions, indicating its status as a top-tier material for this application.34
It is also noteworthy that many of the highest-quality European-made components, such as those from WBP in Poland, often emphasize the manufacturing process over the specific alloy designation. They are described as being “machined from forged steel” or “made to original Military specifications,” with the understanding that the combination of quality forging and proper heat treatment is what guarantees performance, echoing the original Soviet doctrine.7 This focus on process highlights that the specific alloy name is only one part of the quality equation.
This survey demonstrates that while a variety of high-quality alloy steels are used in modern AK production, there is no single standard. The most common choices in the U.S. market appear to be 4140 and 4130, with premium options like 4150 and 4340 also available. The next logical step is to determine which, if any, of these common modern steels is the true equivalent to the original Soviet 40Х.
4.2. Establishing the True Equivalent: 40Х vs. AISI/SAE Grades
The prevalence of 4130 and 4140 steels in the American AK building community has led to a widespread, albeit often implicit, assumption that one of these alloys is the correct modern substitute for the original Soviet steel. However, a direct, element-for-element comparison of the material chemistries reveals a different and more precise conclusion. While 4140 is a functionally excellent substitute, the closest chemical equivalent to Soviet Сталь 40Х is, in fact, AISI 5140 steel.
This conclusion becomes clear when the official specifications are placed side-by-side. The defining characteristic of Soviet 40Х is that it is a simple chromium-alloy steel. Its primary alloying element, beyond carbon, is chromium, which is added to increase hardness, strength, and wear resistance.19
Let us examine the American counterparts:
- AISI 41xx series (e.g., 4130, 4140): These are chromium-molybdenum steels. The “41” designation in the AISI/SAE system indicates the presence of both chromium and molybdenum. Molybdenum is a powerful alloying agent that significantly increases a steel’s hardenability (the depth to which it can be hardened), high-temperature strength, and toughness. While this makes 4140 an outstanding material for a trunnion, the presence of molybdenum makes it chemically distinct from the simpler Soviet 40Х alloy.
- AISI 51xx series (e.g., 5140): These are chromium steels. The “51” designation indicates that chromium is the principal alloying element. AISI 5140 steel was specifically developed to provide deep hardening and high strength through a simple chromium addition, without the need for other strategic elements like molybdenum or nickel.
The table below provides a direct comparison of the chemical compositions, making the equivalence undeniable.
Table 2: Comparative Analysis of Chemical Compositions: Soviet 40Х vs. Common AISI Grades
This table juxtaposes the elemental makeup of the identified Soviet steel with its potential American equivalents. The data clearly illustrates the near-identical formulation of 40Х and 5140, and the distinct addition of molybdenum in the 41xx series steels.
| Element | Soviet Сталь 40Х (GOST 4543-71) | AISI 5140 (The True Equivalent) | AISI 4140 (The Common Substitute) | AISI 4130 (Another Common Substitute) | ||
| Carbon (C) | 0.36 – 0.44% | 0.38 – 0.43% | 0.38 – 0.43% | 0.28 – 0.33% | ||
| Chromium (Cr) | 0.80 – 1.10% | 0.70 – 0.90% | 0.80 – 1.10% | 0.80 – 1.10% | ||
| Manganese (Mn) | 0.50 – 0.80% | 0.70 – 0.90% | 0.75 – 1.00% | 0.40 – 0.60% | ||
| Silicon (Si) | 0.17 – 0.37% | 0.15 – 0.35% | 0.15 – 0.35% | 0.15 – 0.35% | ||
| Molybdenum (Mo) | Not specified | Not specified | 0.15 – 0.25% | 0.15 – 0.25% | ||
| Phosphorus (P) | ≤0.035% | ≤0.035% | ≤0.035% | ≤0.035% | ||
| Sulfur (S) | ≤0.035% | ≤0.040% | ≤0.040% | ≤0.040% | ||
| 19 |
As the table demonstrates, the composition of 40Х and 5140 are nearly identical across all major elements. Both are medium-carbon (around 0.40% C) steels alloyed with a similar percentage of chromium (around 0.8-1.0% Cr) and manganese. In stark contrast, both 4140 and 4130 contain a significant and deliberate addition of molybdenum, placing them in a different metallurgical family.
The reason for the prevalence of 4140 in the U.S. market is not one of historical fidelity but of industrial practicality. AISI 4140 is one of the most common and widely available through-hardening alloy steels in North America. It is a known quantity for machine shops and manufacturers, with well-understood heat treatment protocols. AISI 5140, while chemically simpler, is less common in the general supply chain. Therefore, manufacturers choose 4140 because it is a cost-effective, readily available material that meets or exceeds all the functional requirements of an AKM trunnion.
This distinction is crucial. For a builder or historian seeking the highest degree of authenticity in a reproduction, AISI 5140 is the technically correct choice as it most faithfully replicates the chemistry of the original Soviet steel. For a practical, functional build, a high-quality trunnion made from forged 4140 is an excellent, robust, and entirely appropriate option. The key is to understand that the common use of 4140 is a modern adaptation based on logistics, not a direct continuation of the original Soviet specification.
Section 5: Conclusion and Recommendations
5.1. Definitive Specification
The comprehensive analysis of Soviet-era state standards (GOST), manufacturing doctrines, and comparative metallurgy leads to a definitive conclusion. The investigation successfully navigated and dismissed a significant red herring related to a similarly named but materially inappropriate aluminum alloy (АКМ per GOST 1131-76). By focusing on the correct class of alloyed structural steels and cross-referencing their designated applications and properties with the known functional demands of the component, this report identifies the material used for the original, Soviet-produced AKM fixed-stock rear trunnion with a high degree of confidence.
The specified material was Сталь 40Х (Steel 40Kh), manufactured in accordance with GOST 4543. This is a medium-carbon, chromium-alloyed structural steel. Furthermore, the component was not machined from simple bar stock but was die-forged to create a superior grain structure, then machined to final dimensions and heat-treated to achieve the required hardness and toughness. This combination of a specific, robust alloy and a strength-enhancing manufacturing process was fundamental to the success and legendary durability of the AKM platform. All available credible evidence points to this specification, and no substantive evidence supports any other.
5.2. Guidance for Historians, Gunsmiths, and Collectors
Based on these findings, the following guidance is offered to individuals engaged in the study, construction, or restoration of AKM-pattern rifles. The choice of material should be dictated by the ultimate goal of the project, whether it be absolute historical accuracy or modern functional performance.
For Historical Accuracy:
For projects where the primary objective is to create a clone, restoration, or museum-quality reproduction that is as faithful as possible to the original Soviet design, the material of choice for the rear trunnion should be forged AISI 5140 steel. As demonstrated by the comparative chemical analysis (Table 3), AISI 5140 is the closest and most direct modern equivalent to the Soviet Сталь 40Х. It replicates the simple, effective chromium-alloy chemistry of the original material without the addition of other alloying elements like molybdenum. Sourcing a trunnion specifically made from forged 5140 and ensuring it is properly heat-treated will result in a component that is metallurgically almost identical to one produced in the Izhmash or Tula arsenals during the Cold War.
For Practical Application and Modern Builds:
For a functional rifle intended for regular use, where absolute historical accuracy is secondary to performance and availability, a high-quality trunnion made from forged and properly heat-treated AISI 4140 or 4340AQ steel is an excellent and entirely suitable choice. These chromium-molybdenum (4140) and nickel-chromium-molybdenum (4340) alloys are staples of the modern U.S. firearms industry for good reason.32 They offer outstanding strength, toughness, and hardenability that meet, and in some cases may exceed, the performance characteristics of the original 40Х steel. The prevalence of these alloys is a function of modern supply chain logistics and cost-effectiveness in the North American market. A builder can be confident that a trunnion from a reputable manufacturer using these materials will provide a safe, durable, and long-lasting foundation for their rifle.
The Importance of Manufacturing Method:
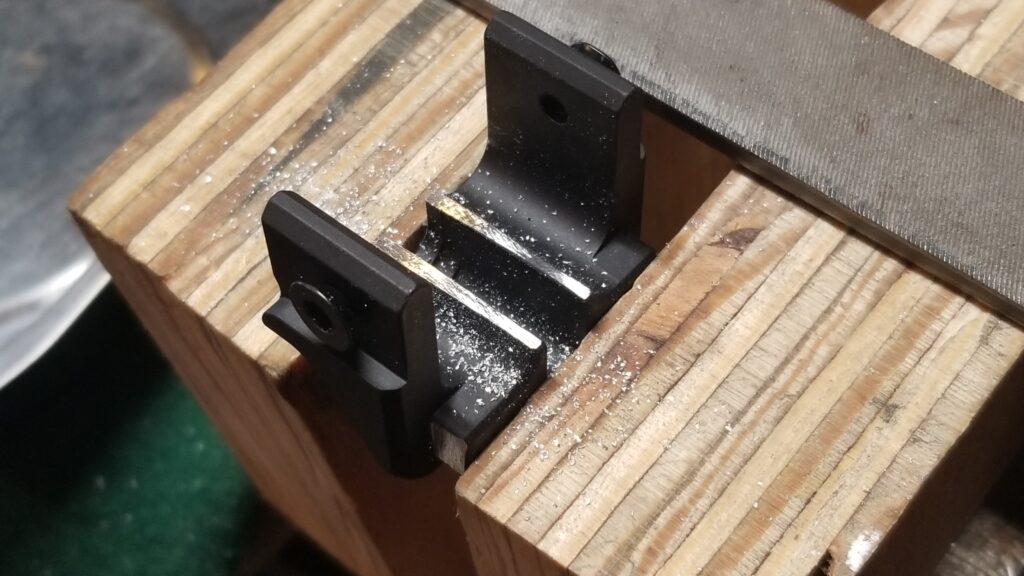
Finally, it must be reiterated that regardless of the specific alloy chosen, the manufacturing method remains a critical factor in the component’s quality. A forged trunnion will always be structurally superior to a cast component for this high-stress application. The forging process, a cornerstone of the original Soviet design philosophy, imparts a level of strength and fatigue resistance that cannot be replicated by casting.6 Therefore, when selecting a rear trunnion, priority should be given to those that are explicitly described as being machined from a forging, as this adheres most closely to the design intent and proven reliability of the Kalashnikov system.
Works cited
- Beginners Guide To AK-47 Parts And Function, accessed July 14, 2025, https://blog.primaryarms.com/guide/guide-to-ak47-parts/
- AKM – Wikipedia, accessed July 14, 2025, https://en.wikipedia.org/wiki/AKM
- AKM Russian 7.62mm Automatic Assault Rifle – ODIN, accessed July 14, 2025, https://odin.tradoc.army.mil/WEG/Asset/81938b91ee77ceadcef64a66bf7c3f23
- AKM – I Like to Hear Myself Talk History, accessed July 14, 2025, https://www.hearmyselftalkhistory.com/featured-firearm/akm
- AK-47 – Wikipedia, accessed July 14, 2025, https://en.wikipedia.org/wiki/AK-47
- Kalashnikov and Molot made AK trunnions – AK Operators Union …, accessed July 14, 2025, https://www.akoperatorsunionlocal4774.com/2017/03/kalashnikov-made-ak-trunnions/
- 7.62×39 WBP Polish AK47 Forged Front Barrel Trunnion – Arms of America, accessed July 14, 2025, https://armsofamerica.com/wbp-front-trunnion-762/
- Surplus Romanian Oversized Front Trunnion – Rifle Dynamics, accessed July 14, 2025, https://rifledynamics.com/surplus-romanian-oversized-front-trunnion/
- Сталь АКМ: характеристики, расшифровка, химический состав, accessed July 14, 2025, https://metal.place/ru/wiki/akm/337149/
- Сплав алюминиевый АКМ – Aloro, accessed July 14, 2025, https://aloro.org/grades/su/gr-akm
- Сплав АКМ — расшифровка, хим. состав – Алюминий – Scraptraffic, accessed July 14, 2025, https://scraptraffic.com/splav/akm
- АКМ – Алюминиевый деформируемый сплав Марочник стали и …, accessed July 14, 2025, http://www.splav-kharkov.com/mat_start.php?name_id=1613
- AKM / АКМ Aluminium wrought alloys, accessed July 14, 2025, http://www.splav-kharkov.com/en/e_mat_start.php?name_id=1613
- ГОСТ 1131-76 Сплавы алюминиевые деформируемые в чушках. Технические условия (с Изменениями N 1, 2) – docs.cntd.ru, accessed July 14, 2025, https://docs.cntd.ru/document/1200009669
- ГОСТ 1131-76. Сплавы алюминиевые деформируемые в чушках. Технические условия, accessed July 14, 2025, https://internet-law.ru/gosts/gost/34261/
- Identifying & Collecting the 7.62×39 AK-47/AKM Magazine – Small Arms Defense Journal, accessed July 14, 2025, https://sadefensejournal.com/identifying-collecting-the-7-62×39-ak-47akm-magazine/
- SAMSON MANUFACTURING CORP REAR TRUNNION FOLDING STOCK ADAPTER FOR AK-47 – Brownells, accessed July 14, 2025, https://www.brownells.com/gun-parts/rifle-parts/rifle-stocks-parts/rear-trunnion-folding-stock-adapter-for-ak-47/
- AK-47 1913 Rear Trunnion Folding Stock Adapter – Samson Manufacturing, accessed July 14, 2025, https://www.samson-mfg.com/ak-47-1913-rear-trunnion.html
- Сталь 40Х ГОСТ 4543-2018 характеристики полный обзор, accessed July 14, 2025, https://xn--50-6kct5aad3c.xn--p1ai/stal-40x/
- Сталь 40Х: расшифровка, характеристики и механические, accessed July 14, 2025, https://m-investspb.ru/poleznaya-informatsiya/stal-40kh
- Купить сталь 40Х калиброванную – Металлопрокат Ярославцев, accessed July 14, 2025, https://yametalloprokat.ru/steel-40h
- Сталь марки 40Х в России – характеристики, аналоги, свойства, accessed July 14, 2025, https://metatorg.ru/marki-stali-i-splavy/stal_konstruktcionnaya/stal_konstruktsionnaya_legirovannaya/stal_konstruktsionnaya_legirovannaya_40kh/
- расшифровка и характеристики | гост и применение марки стали 40Х – ТД «Ареал, accessed July 14, 2025, https://areal-metal.ru/spravka/marka-stali-40h
- 40Х – Сталь конструкционная легированная Марочник стали и сплавов, accessed July 14, 2025, http://www.splav-kharkov.com/mat_start.php?name_id=32
- Сталь марки 40Х – Центральный металлический портал, accessed July 14, 2025, https://metallicheckiy-portal.ru/marki_metallov/stk/40X
- Сталь 40х: характеристики, применение, таблица с маркировкой и расшифровкой, accessed July 14, 2025, https://www.atissteel.ru/stal-40h-harakteristiki
- Прокат калиброванный ст. 40Х ГОСТ 4543-71 характеристики, accessed July 14, 2025, https://metizorel.ru/calibr4543.html
- AK47 7.62 Flat With Trunnion Holes – AK-Builder.com, accessed July 14, 2025, https://ak-builder.com/index1.php?dispatch=products.view&product_id=29823
- AK-Builder Non FFL Prebent US AKM 7.62×39 Receiver Blank With Trunnion Holes, accessed July 14, 2025, https://ak-builder.com/index1.php?dispatch=products.view&product_id=31296
- AK47 Fixed Stock Rear Trunnion – Carolina Shooters Supply, accessed July 14, 2025, https://www.carolinashooterssupply.com/AK47-Fixed-Stock-Rear-Trunnion-p/css-ak47-rear-trunnion.htm
- 1913 Rear Trunnion – Occam Defense Solutions, accessed July 14, 2025, https://occamdefense.com/1913-rear-trunnion/
- BFT47 – Century Arms, accessed July 14, 2025, https://www.centuryarms.com/bft47-ri4317-n.html
- AK47 AKM Front Trunnion – Carolina Shooters Supply, accessed July 14, 2025, https://www.carolinashooterssupply.com/AK47-AKM-Front-Trunnion-p/css-ak47-front-trunnion.htm
- Trunnions | Builders Parts | Parts & Accessories | AK-47 – Palmetto State Armory, accessed July 14, 2025, https://palmettostatearmory.com/ak-47/ak-parts/ak-builders-parts/ak-trunnions.html
- Grade 5140 Steel Coil – SAE & AISI 5140 Steel | Siegal Steel Company, accessed July 14, 2025, https://www.siegalsteel.com/steel-grades/special-order-products/alloys/grade-5140
- AISI 5140 | 41Cr4 | DIN1.7035 steel round bars-Fuhong steel, accessed July 14, 2025, https://www.fuhongforge.com/aisi-5140-alloy-steel/
If you find this post useful, please share the link on Facebook, with your friends, etc. Your support is much appreciated and if you have any feedback, please email me at in**@*********ps.com. Please note that for links to other websites, I may be paid via an affiliate program such as Avantlink, Impact, Amazon and eBay.